


SLK/R171: SPYDER Headlights

Thread Starter
Junior Member
Joined: Mar 2011
Posts: 17
Likes: 0
From: San Diego, CA
2006 SLK350
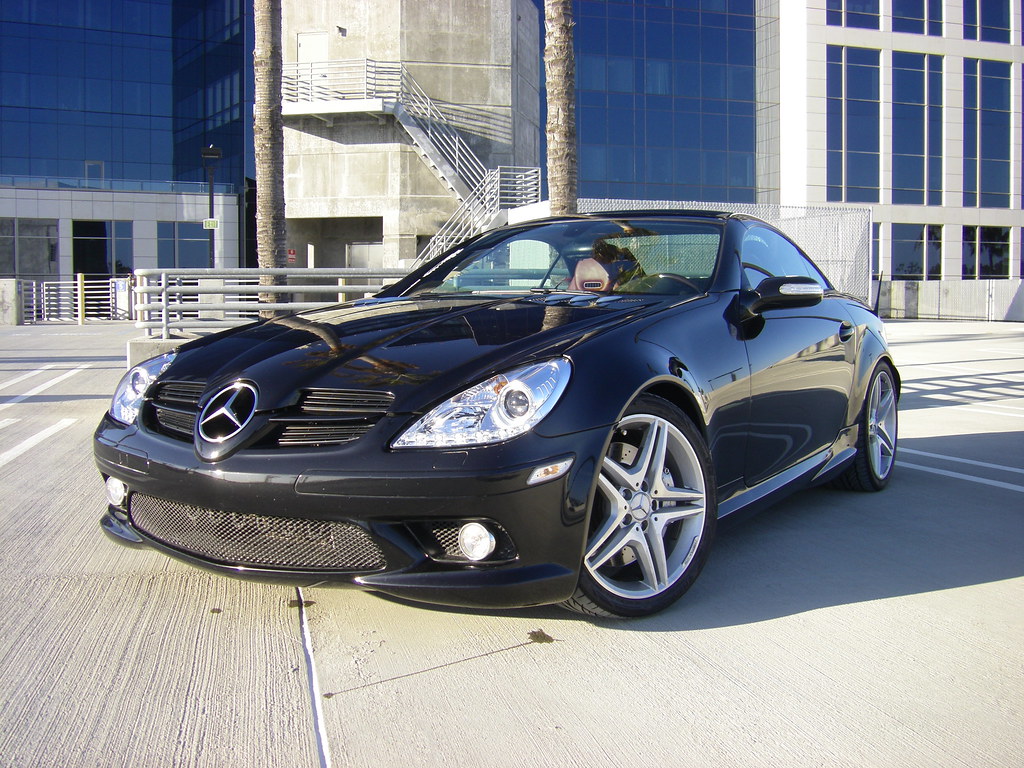
SPYDER Headlights
As some of you may know, SPYDER are currently testing out several new headlight units for different Mercedes models. I was hit up by the guy who offered his C-Class for the test install to SPYDER to see if they could use my SLK to test their new R171 offering.
We installed it last Wednesday at their facility in Industry (in the greater Los Angeles area) and I will be testing these lights for the next several weeks for them.
The lights replace an older version which is still listed on their website. This is a new and improved version specifically for the North American market. The lights are still in the R&D phase and they are taking suggestions from people with respect to styling etc. They are also still getting improved versions from their supplier and I will actually be going back in the first week of April to get my set swapped out for a new one that is supposed to have better light output.
As such I was asked not to post any "garage door" style pictures of the overall shape of the light output yet, as it will change in the next iteration. I can say that like the OEM lights for SLK these lights have an asymmetric shape to their light pattern which improves street sign readability.
In keeping with the topics discussed by AZN Optics in his C-Class post I will kind of go over some of the major points.
Fitment: I feel there is a slightly larger gap between the lights and the hood on the insides but it is tough to say for sure because I didn't have the opportunity to see the old and new lights installed one on each side. It is not apparent unless you know what to look for and it is definitely not an issue. Very good for aftermarket lights.
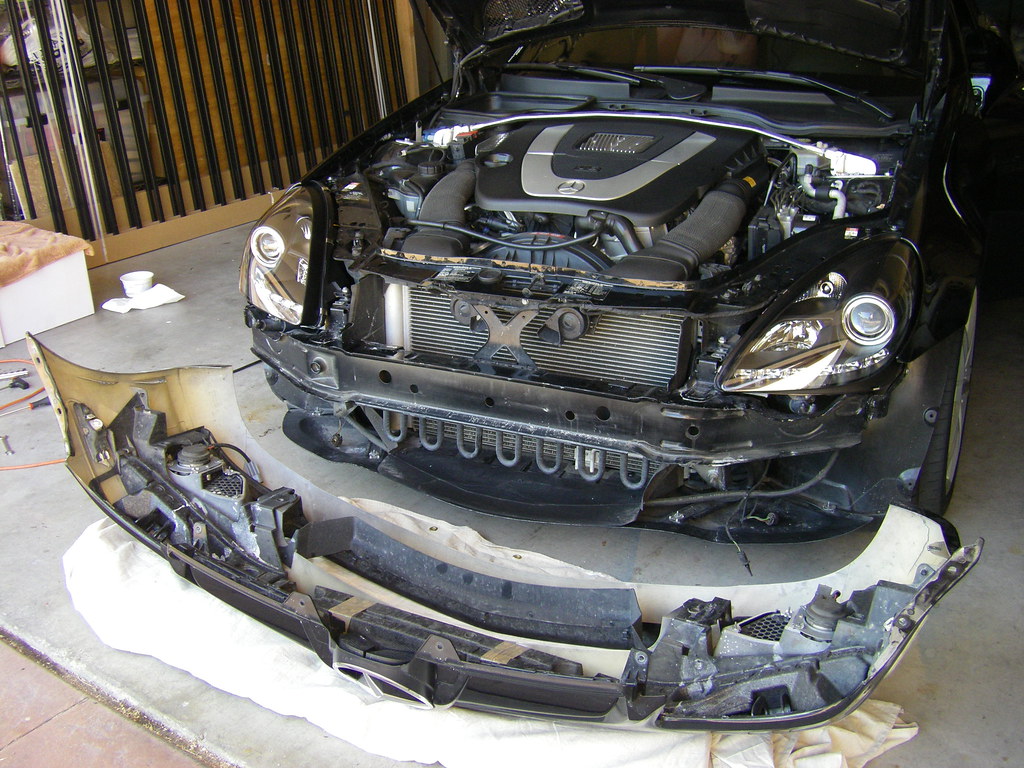
Installation: (EDIT: Rewrote this section because I got installation video link from SPYDER) I was not present during the installation (liability issues on their end I guess). Installation requires the bumper to come off which is probably the majority of the work. Once that's done it's a matter of a bunch of screws and some electrical connectors. You need to move over the low-beam, ballasts and headlight washers from the OEM to the new lights. After that it's a matter of putting the whole thing back together again. I would say you should be able to do it in a few hours. Here's the video showing the entire process. This might be useful in general for people needing to take their bumper off!
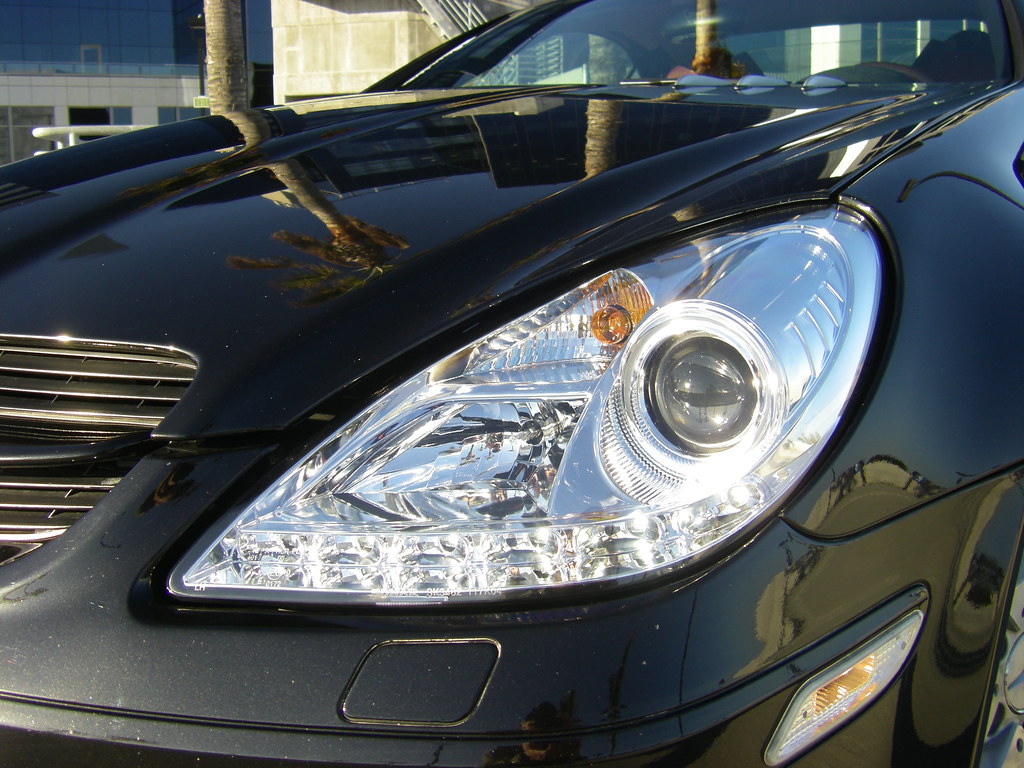
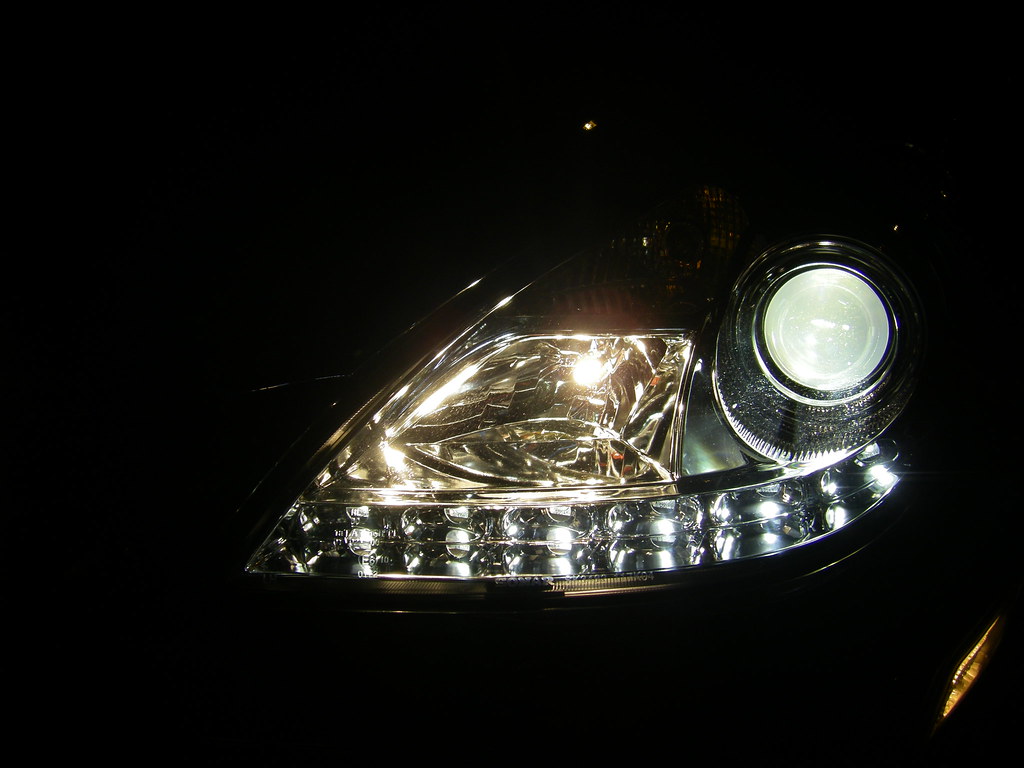
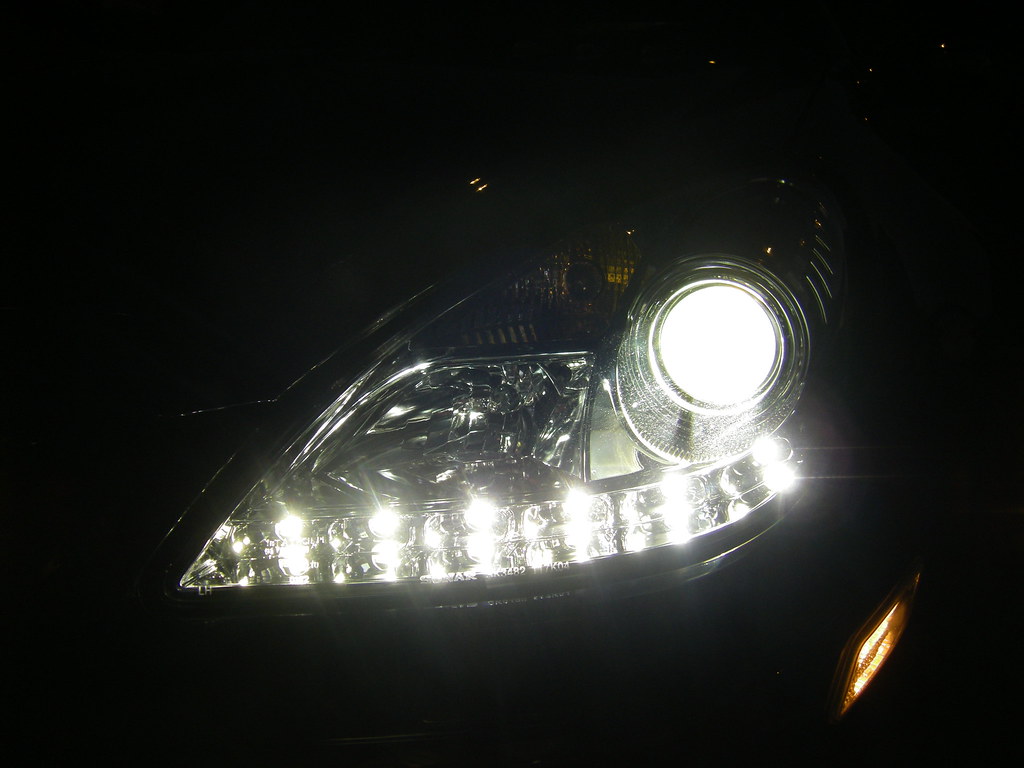
Bulbs: The OEM headlights have 4 bulbs: low-beam, high-beam, parking and blinker. The SPYDER lights have low-beam, high-beam, blinker and a strip of 6 LEDs that take the place of the parking light. The unit comes in two versions (actually 4 if you count colors), one is for non-Xenon and the other is for the Xenon version. I had the latter and during the install they only transferred over the low-beam bulb, the other 3 bulbs are replaced with lamps and LEDs that come with the unit. I am not clear on what the specs are on the bulbs since I haven't had a chance to open up my wheel-well and take them out. I will update this thread once I get more information. The stock configuration comes with an amber turn-signal bulb which I will be replacing with a stealth bulb as soon as I figure out the correct type. I suspect that besides the low-beam which transfers over, none of the other bulbs are the same type as stock. As you can tell from my pictures, the Xenon low-beams are practically the same color as the LED strip which looks very good. The OEM fogs are much more yellow and now that I've seen the combination of everything I'm itching to replace the fogs with some kind of LED contraption. Something to research.
Color: They offer two color variations of the housing unit (which together with Xenon/Non-Xenon makes for 4 different types total). The one I have is chrome but they also have a black version. Over on slkworld, user jameslk350 has the black version of the existing line so you can look at his pictures for comparison. Note that these are not the new line yet so the styling may change compared to what James has. One thing you notice on the black version is that they are not all-black, but have reflective areas behind the turn signals and the high-beams. This is to be in compliance with DOT regulation and unlikely to change just because we asked them . The OEM headlights are a silver, brushed-metal look on the inside, and post-facelift they have a colors bottom section. Initially I found the chrome on these SPYDERs a bit jarring, but I very quickly got used to it. I have received a lot of positive comments on the lights in the week since I've had them and everyone really seems to like the color. I personally wouldn't mind if they came out with a silver/brushed version as well but perhaps that would mean too many SKUs, raising the price.
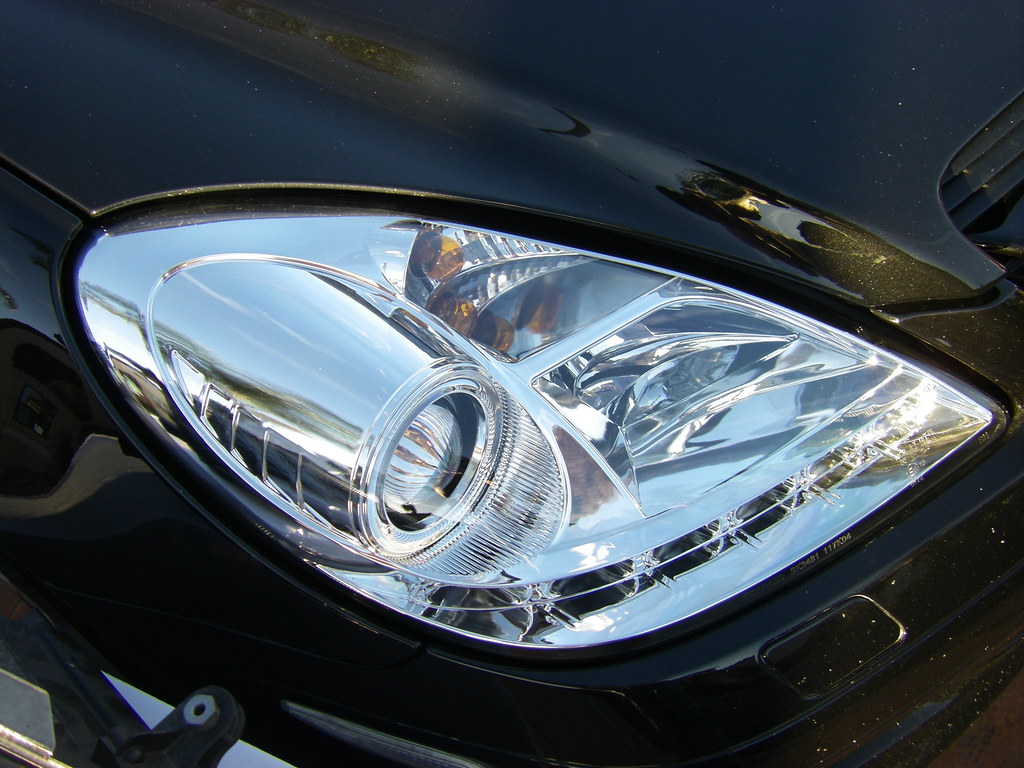
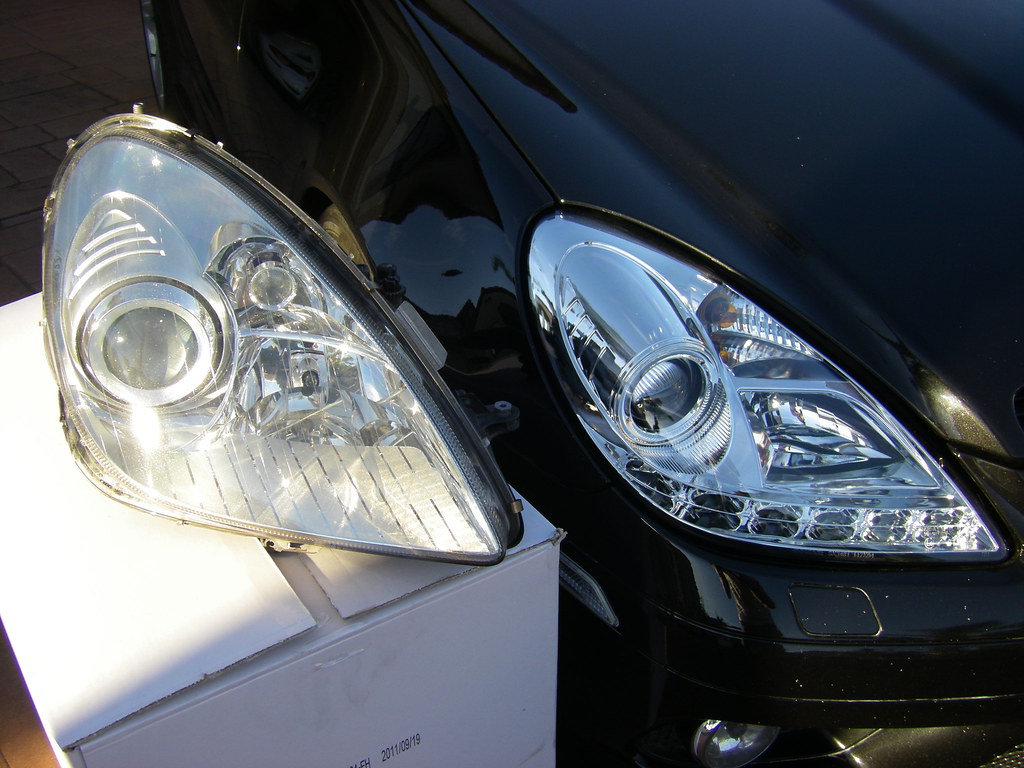
Style: I have put some side-by-sides for quick comparison with the original OEM lights. The OEMs are more of an "empty" light. They have a large "floor" with nothing going on except the slightly raised non-shiny area. The SPYDERs have the LED strip going on at the bottom, but the other sections of the light are also protruding more forward than the OEMs so they look quite "full" inside the housing. They do not have an eyelid (unlike the C-Class version) and this prevents them from looking too busy. I'm curious if people would actually like to have an eyelid at the top of the lights to give it more of an R172 look. I'm not really sure on this one.
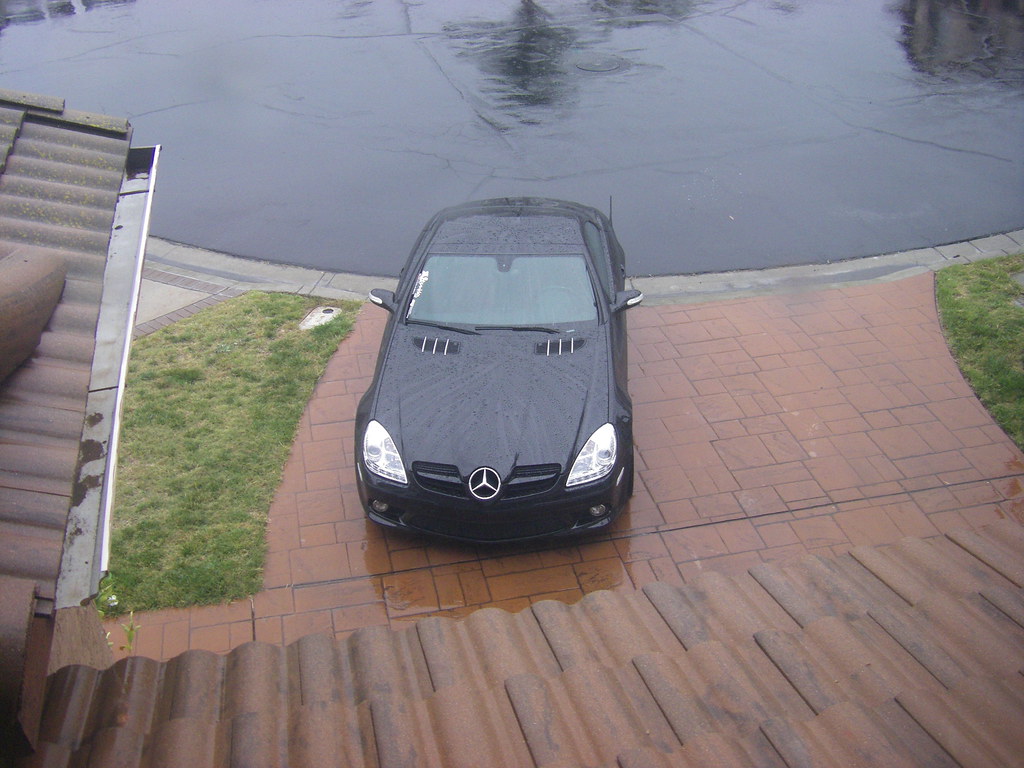
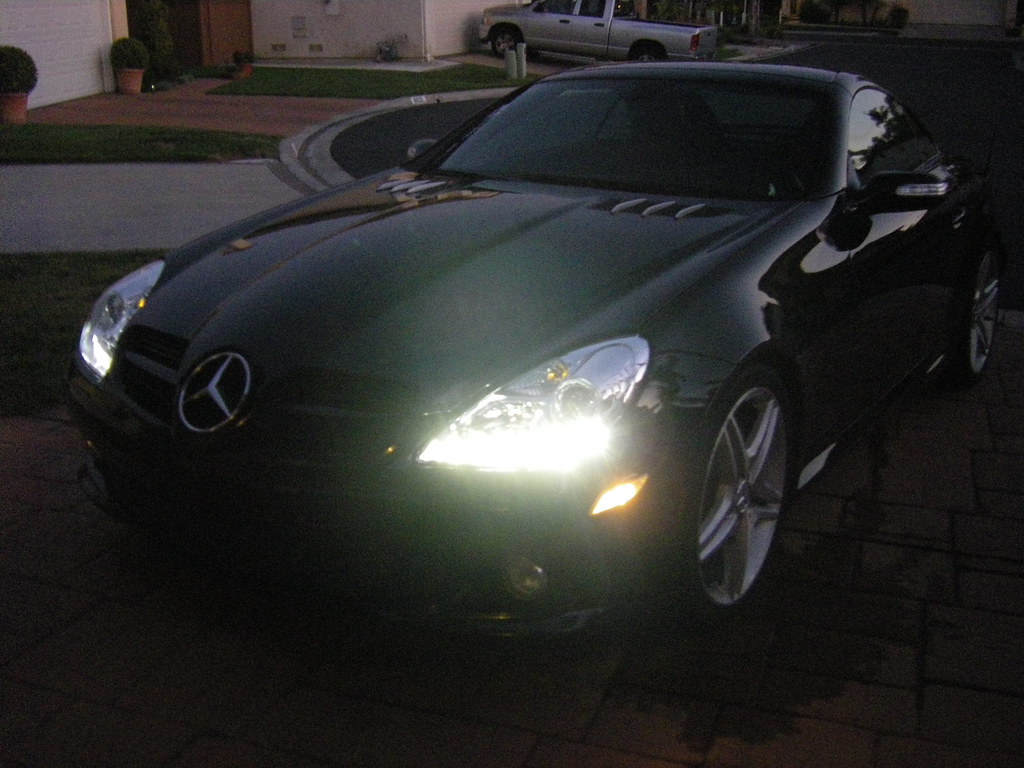
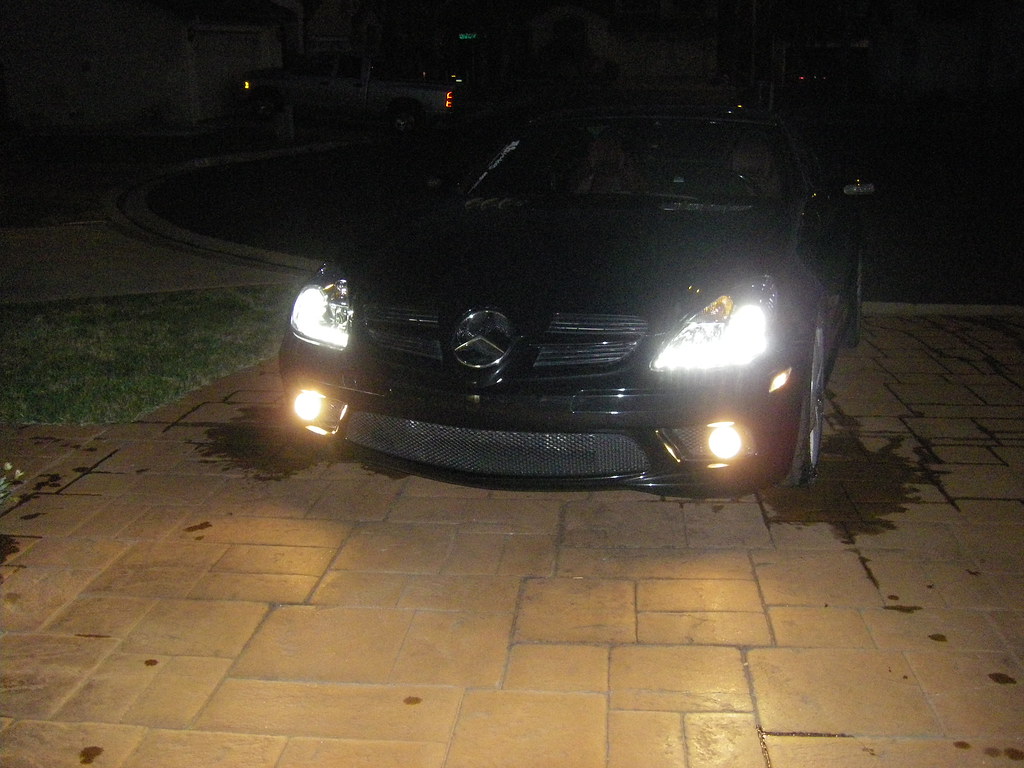
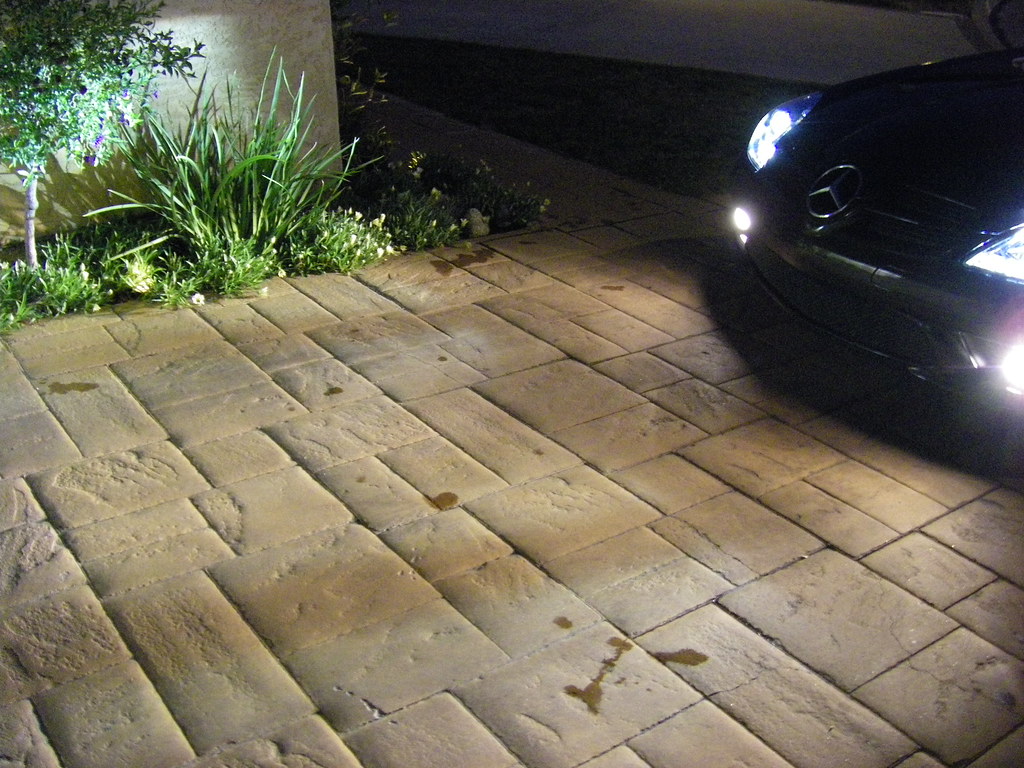
That's about all for now. You can see from the pictures that I purposely left the car outside in the (fierce) rain all day Saturday to test water tightness. The lights passed this test with flying colors. The last picture shows that the lights project a small darker area in front of each of the lights. This is not an issue but just an interesting thing to note. In general these lights give vastly more useful light output than the OEMs do. Not sure if this is because they are more reflective because of the chrome, but the difference is quite impressive.
What SPYDER wants to see is feedback from the community. What do you think of these and how would you like to see them improved.

Old vs. New.
Rain test.
Lighting them up.
We installed it last Wednesday at their facility in Industry (in the greater Los Angeles area) and I will be testing these lights for the next several weeks for them.
The lights replace an older version which is still listed on their website. This is a new and improved version specifically for the North American market. The lights are still in the R&D phase and they are taking suggestions from people with respect to styling etc. They are also still getting improved versions from their supplier and I will actually be going back in the first week of April to get my set swapped out for a new one that is supposed to have better light output.
As such I was asked not to post any "garage door" style pictures of the overall shape of the light output yet, as it will change in the next iteration. I can say that like the OEM lights for SLK these lights have an asymmetric shape to their light pattern which improves street sign readability.
In keeping with the topics discussed by AZN Optics in his C-Class post I will kind of go over some of the major points.
Fitment: I feel there is a slightly larger gap between the lights and the hood on the insides but it is tough to say for sure because I didn't have the opportunity to see the old and new lights installed one on each side. It is not apparent unless you know what to look for and it is definitely not an issue. Very good for aftermarket lights.
Installation: (EDIT: Rewrote this section because I got installation video link from SPYDER) I was not present during the installation (liability issues on their end I guess). Installation requires the bumper to come off which is probably the majority of the work. Once that's done it's a matter of a bunch of screws and some electrical connectors. You need to move over the low-beam, ballasts and headlight washers from the OEM to the new lights. After that it's a matter of putting the whole thing back together again. I would say you should be able to do it in a few hours. Here's the video showing the entire process. This might be useful in general for people needing to take their bumper off!
Bulbs: The OEM headlights have 4 bulbs: low-beam, high-beam, parking and blinker. The SPYDER lights have low-beam, high-beam, blinker and a strip of 6 LEDs that take the place of the parking light. The unit comes in two versions (actually 4 if you count colors), one is for non-Xenon and the other is for the Xenon version. I had the latter and during the install they only transferred over the low-beam bulb, the other 3 bulbs are replaced with lamps and LEDs that come with the unit. I am not clear on what the specs are on the bulbs since I haven't had a chance to open up my wheel-well and take them out. I will update this thread once I get more information. The stock configuration comes with an amber turn-signal bulb which I will be replacing with a stealth bulb as soon as I figure out the correct type. I suspect that besides the low-beam which transfers over, none of the other bulbs are the same type as stock. As you can tell from my pictures, the Xenon low-beams are practically the same color as the LED strip which looks very good. The OEM fogs are much more yellow and now that I've seen the combination of everything I'm itching to replace the fogs with some kind of LED contraption. Something to research.
Color: They offer two color variations of the housing unit (which together with Xenon/Non-Xenon makes for 4 different types total). The one I have is chrome but they also have a black version. Over on slkworld, user jameslk350 has the black version of the existing line so you can look at his pictures for comparison. Note that these are not the new line yet so the styling may change compared to what James has. One thing you notice on the black version is that they are not all-black, but have reflective areas behind the turn signals and the high-beams. This is to be in compliance with DOT regulation and unlikely to change just because we asked them
. The OEM headlights are a silver, brushed-metal look on the inside, and post-facelift they have a colors bottom section. Initially I found the chrome on these SPYDERs a bit jarring, but I very quickly got used to it. I have received a lot of positive comments on the lights in the week since I've had them and everyone really seems to like the color. I personally wouldn't mind if they came out with a silver/brushed version as well but perhaps that would mean too many SKUs, raising the price. Style: I have put some side-by-sides for quick comparison with the original OEM lights. The OEMs are more of an "empty" light. They have a large "floor" with nothing going on except the slightly raised non-shiny area. The SPYDERs have the LED strip going on at the bottom, but the other sections of the light are also protruding more forward than the OEMs so they look quite "full" inside the housing. They do not have an eyelid (unlike the C-Class version) and this prevents them from looking too busy. I'm curious if people would actually like to have an eyelid at the top of the lights to give it more of an R172 look. I'm not really sure on this one.
That's about all for now. You can see from the pictures that I purposely left the car outside in the (fierce) rain all day Saturday to test water tightness. The lights passed this test with flying colors. The last picture shows that the lights project a small darker area in front of each of the lights. This is not an issue but just an interesting thing to note. In general these lights give vastly more useful light output than the OEMs do. Not sure if this is because they are more reflective because of the chrome, but the difference is quite impressive.
What SPYDER wants to see is feedback from the community. What do you think of these and how would you like to see them improved.
Old vs. New.
Rain test.
Lighting them up.
Last edited by Durkatlon; Mar 22, 2012 at 01:40 PM. Reason: Added installation video

SPONSOR/MBworld Guru
Joined: Jul 2010
Posts: 6,936
Likes: 215
From: California
MB W204/W212, BMW E66, Porsche 958, VW MK6 TDI, Maserati Ghibli SQ4
I actually really like it! As you mentioned, unlike mine with the eyebrows, yours looks cleaner and less busy. I'm hoping SPYDER takes up my suggestion of deleting the eyebrows. Looking forward to checking it out at MMM 

Newbie
Joined: Aug 2011
Posts: 2
Likes: 0
From: Indy
2003 SL500
Spyder experience
Bought a set for my VW Passat and they looked good, for the first couple of weeks. Then after some rain, they fogged up and it will not go away. Sending back for an exchange. I've read that this has always been an issue.
Thread Starter
Junior Member
Joined: Mar 2011
Posts: 17
Likes: 0
From: San Diego, CA
2006 SLK350
I edited the original posting to include a 15 minute installation video that SPYDER has put up on youtube.
Thread Starter
Junior Member
Joined: Mar 2011
Posts: 17
Likes: 0
From: San Diego, CA
2006 SLK350
I just took the turn-signal bulbs out to see what kind they were. I decided not to mess with the high-beam bulbs because there is not a lot of room to work there. They are hard to get to, and it's not like I plan to replace them.
So as suspected the turn-signal bulbs are PY21W (bayonet fitting with 5 o'clock pins). I've included a picture of an OEM front turn-signal and the one I extracted from the SPYDER light. The second picture shows the position of the bayonet pins at 12 and 5 o'clock.
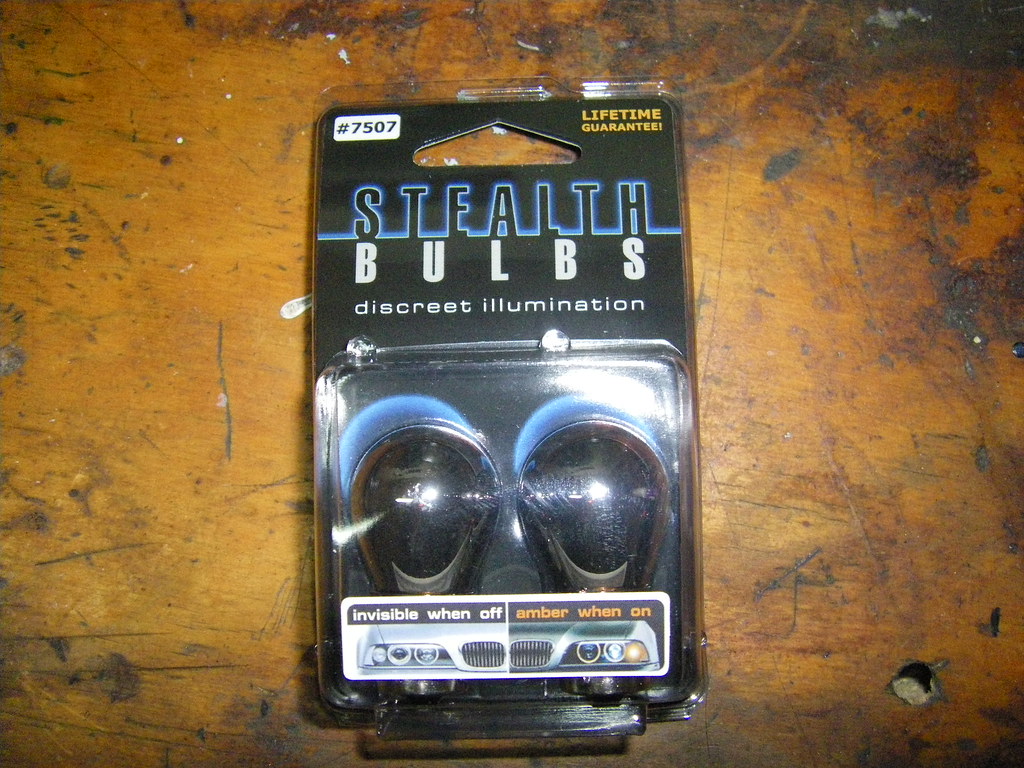
I just ordered a chromed set from stealthauto.com. They call these 7507A. If you order these just by selecting the make/model/year of the car, be sure to say they are for the rear, not the front, otherwise you'll get the funky OEM socketed ones.
When these come in I'll post some pics of the new chromed bulbs in the light units. I think they will look very nice.

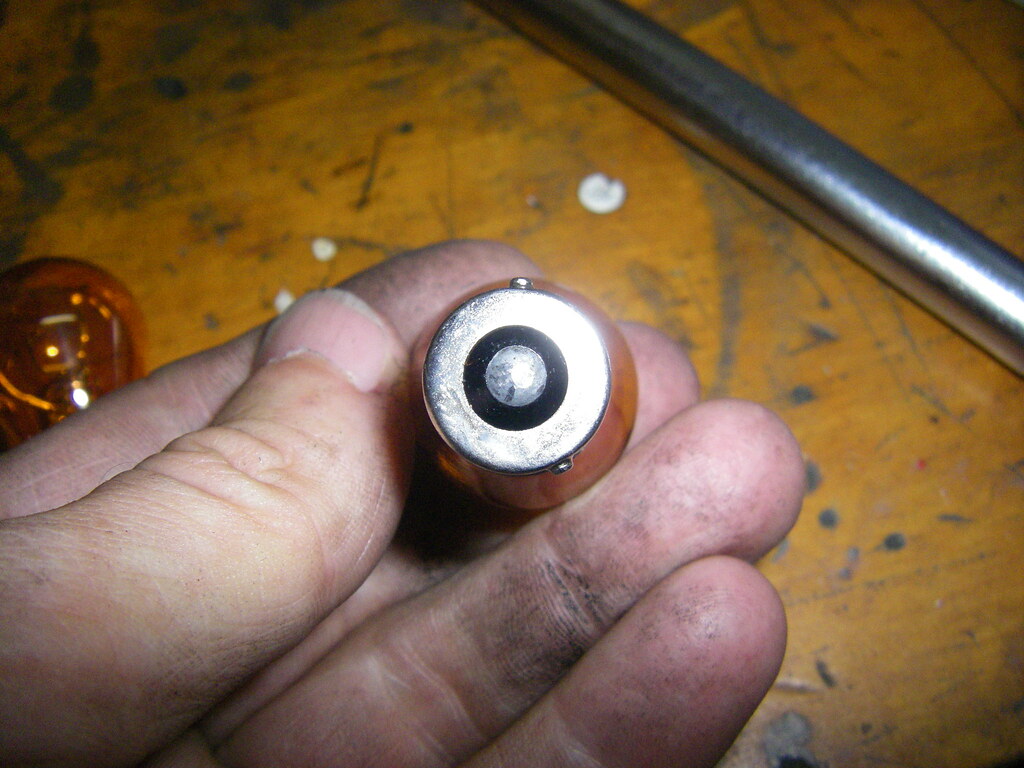
So as suspected the turn-signal bulbs are PY21W (bayonet fitting with 5 o'clock pins). I've included a picture of an OEM front turn-signal and the one I extracted from the SPYDER light. The second picture shows the position of the bayonet pins at 12 and 5 o'clock.
I just ordered a chromed set from stealthauto.com. They call these 7507A. If you order these just by selecting the make/model/year of the car, be sure to say they are for the rear, not the front, otherwise you'll get the funky OEM socketed ones.
When these come in I'll post some pics of the new chromed bulbs in the light units. I think they will look very nice.
Thread Starter
Junior Member
Joined: Mar 2011
Posts: 17
Likes: 0
From: San Diego, CA
2006 SLK350
OK, I got a chance to install the chromed bulbs from stealthauto.com last night and took some pix then and this morning on the roof of the parking structure at work for direct comparison.
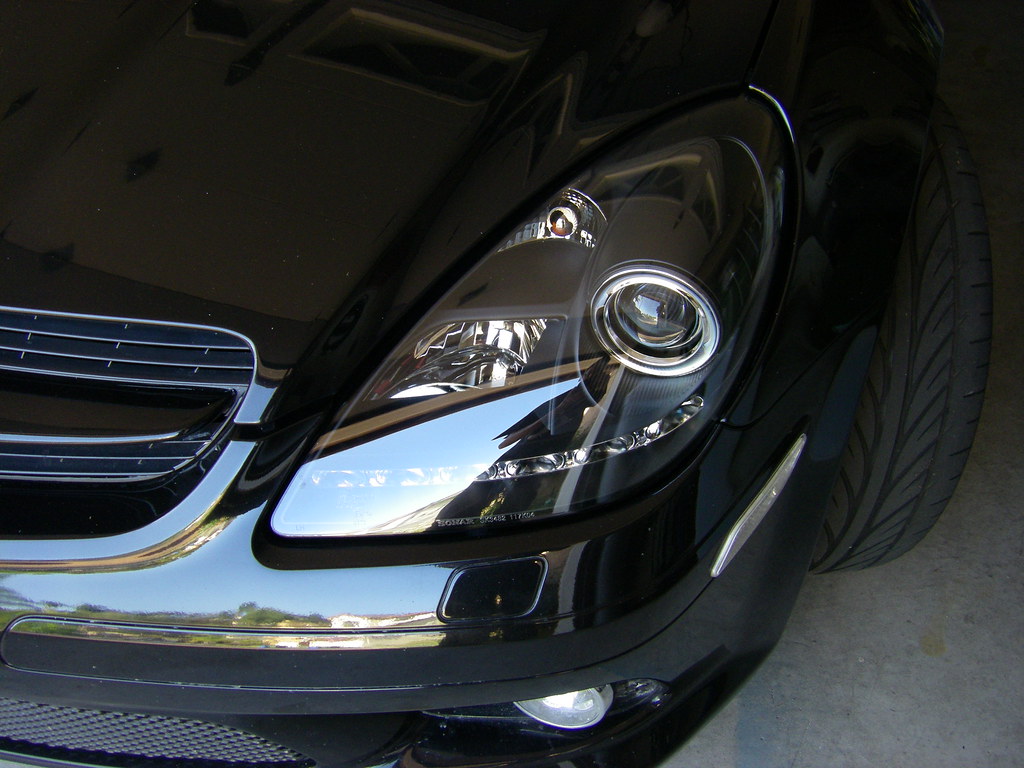
The first pic shows the original light as it comes from SPYDER (I also posted this one in the original post of this thread).
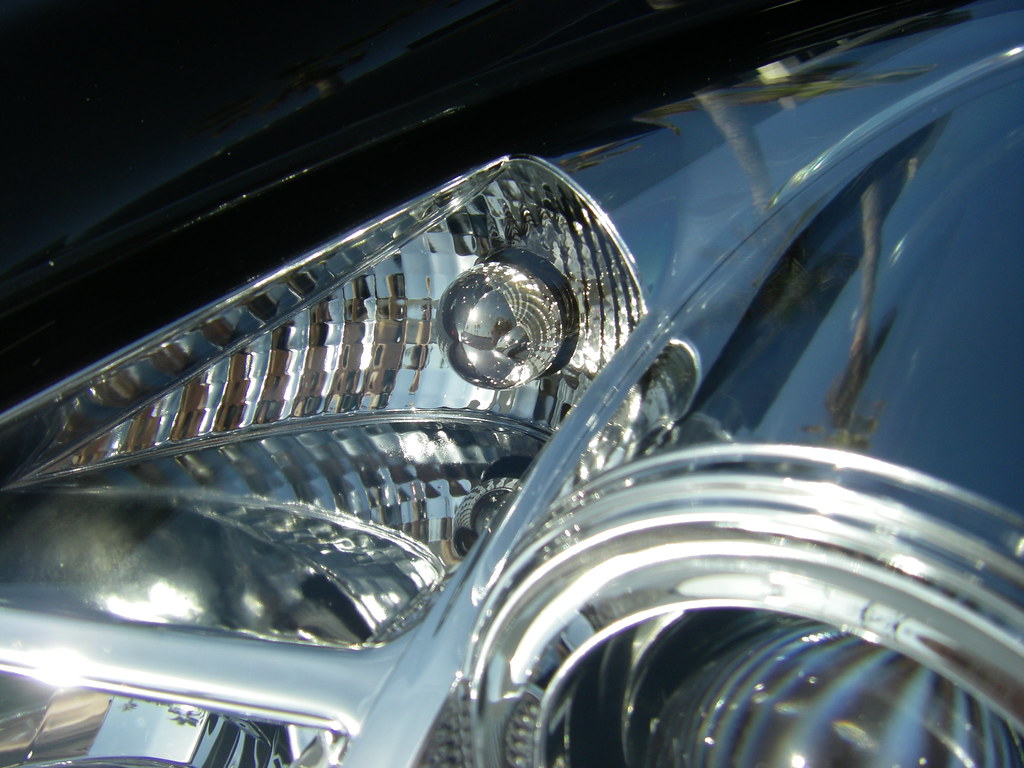
The bulbs: packaged, installed (chrome) and blinking (orange!).

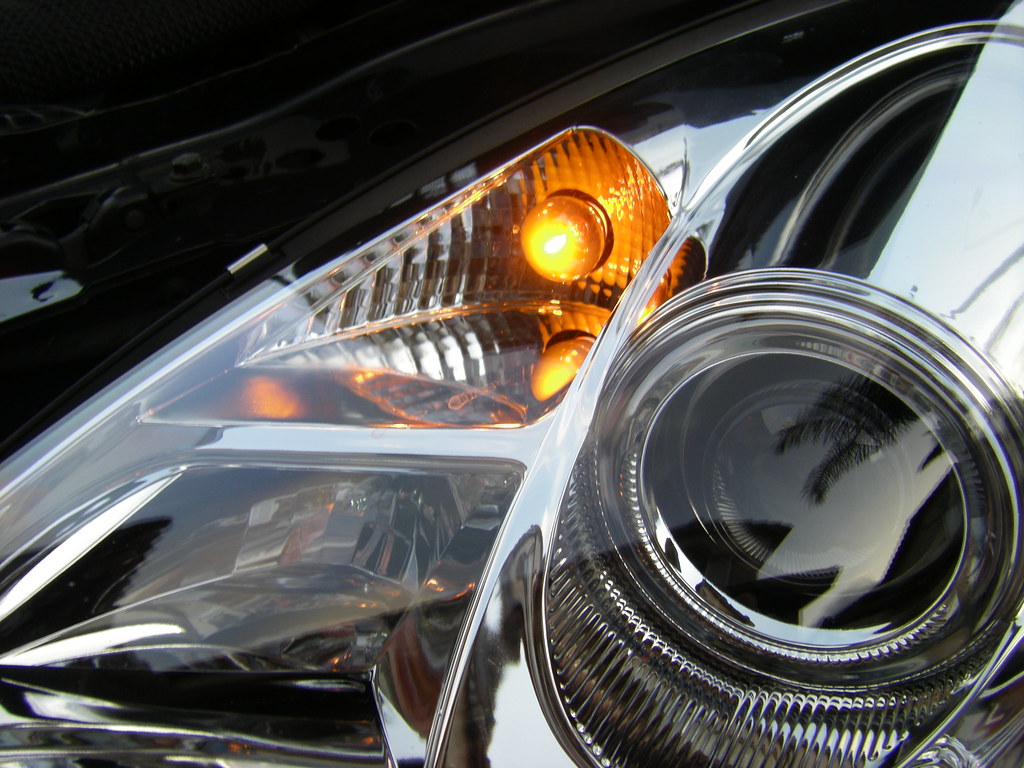
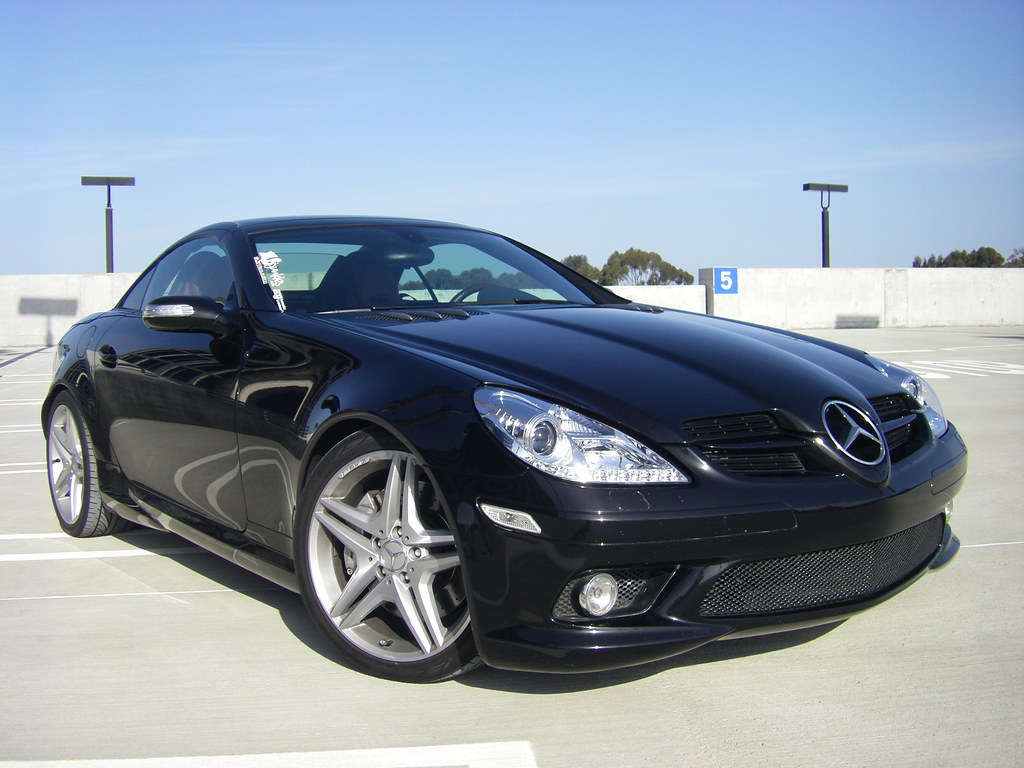
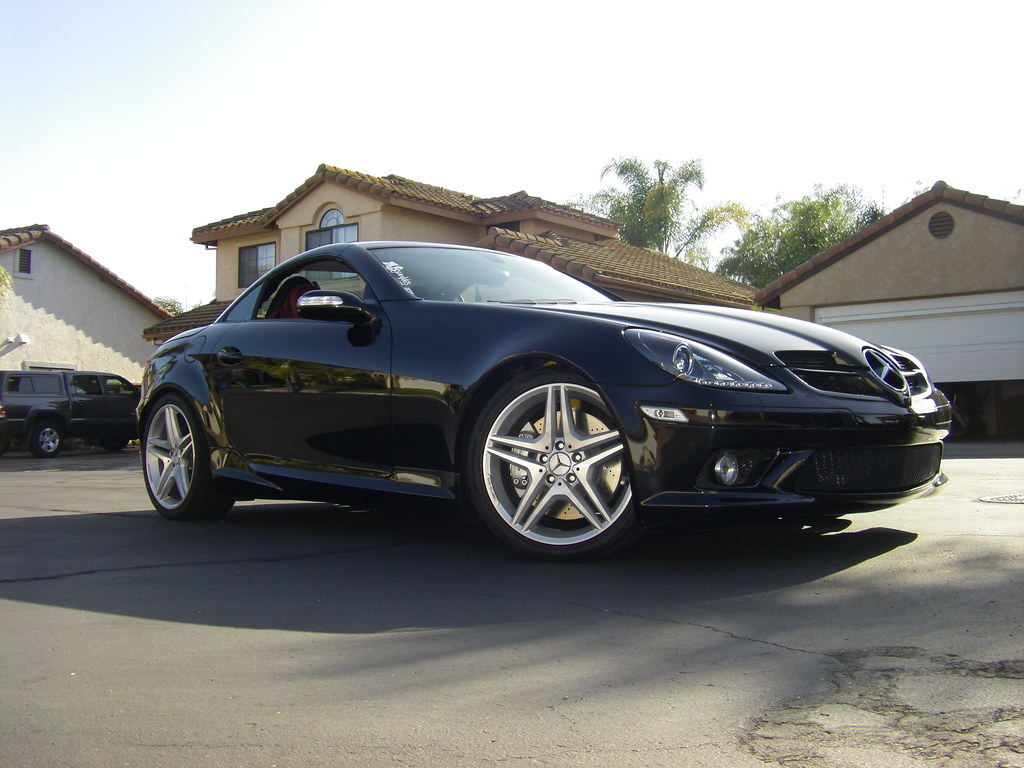
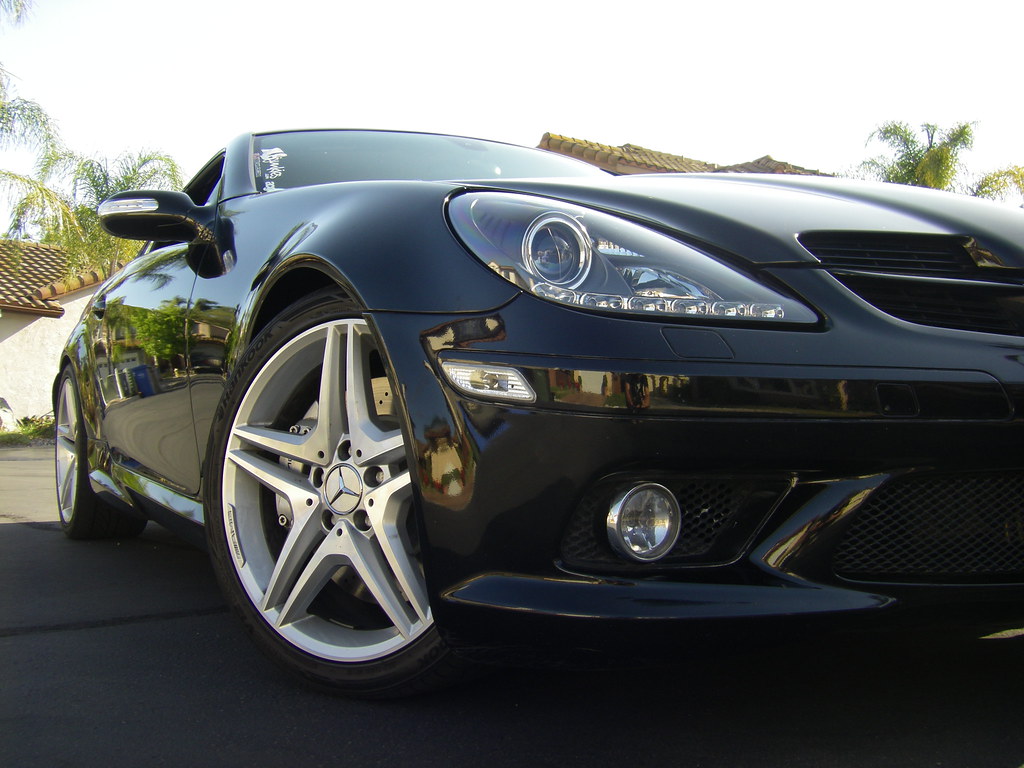
Some daylight pix. I really like these builds!! Much improved without the giant orange reflection of the stock bulbs. Sorry about the dirty wheels.

The first pic shows the original light as it comes from SPYDER (I also posted this one in the original post of this thread).
The bulbs: packaged, installed (chrome) and blinking (orange!).
Some daylight pix. I really like these builds!! Much improved without the giant orange reflection of the stock bulbs. Sorry about the dirty wheels
.
Trending Topics

Banned
Joined: May 2011
Posts: 182
Likes: 0
2010 SLK350
Wow.
These look incredible.
What's the "eyebrow" that was mentioned? Was it a feature that was deleted?
What kind of projector is used?
How sharp is the cut-off line and z-step? How is the spread/pattern?
The LED strip really does an excellent job of updating the look, as someone else mentioned. Not that it needed updating IMO - but a modern and classy touch for sure. Here's to hoping none of those LEDs ever go out like some aftermarket chinese-built LEDs are known to. Are the LEDs individually or as a whole-entirely replaceable if that were to happen?
I love your car regardless. Great choice of wheel.
I especially like the windshield sticker
MB World Stories
The Best of Mercedes & AMG

Dubai Tuner Gives the Mercedes G-Class An Entirely New Look
Verdad Gallardo
Six Gift Ideas Your AMG Loving Dad or Grad Will Cherish

7 Craziest Things AMG Gas Ever Built
Verdad Gallardo
New Electric Mercedes-AMG GT 4-Door Coupe Unveiled: 10 Things You Need to Know
Verdad Gallardo
6 Mercedes Models That Did NOT Age Well (But Are Somehow Still Cool)
Verdad Gallardo
Manual Mercedes? 6 Times Sindelfingen Let Drivers Have All The Fun
Verdad Gallardo
Mercedes SLR McLaren 722 S Is Extremely Rare Example Modified by McLaren
Verdad Gallardo
8 Classic Boxy Mercedes Designs That Have Aged Like Fine Wine
Verdad Gallardo
Flawlessly Restored Mercedes 190E Evo II Heads to Auction
Verdad Gallardo
Thread Starter
Junior Member
Joined: Mar 2011
Posts: 17
Likes: 0
From: San Diego, CA
2006 SLK350
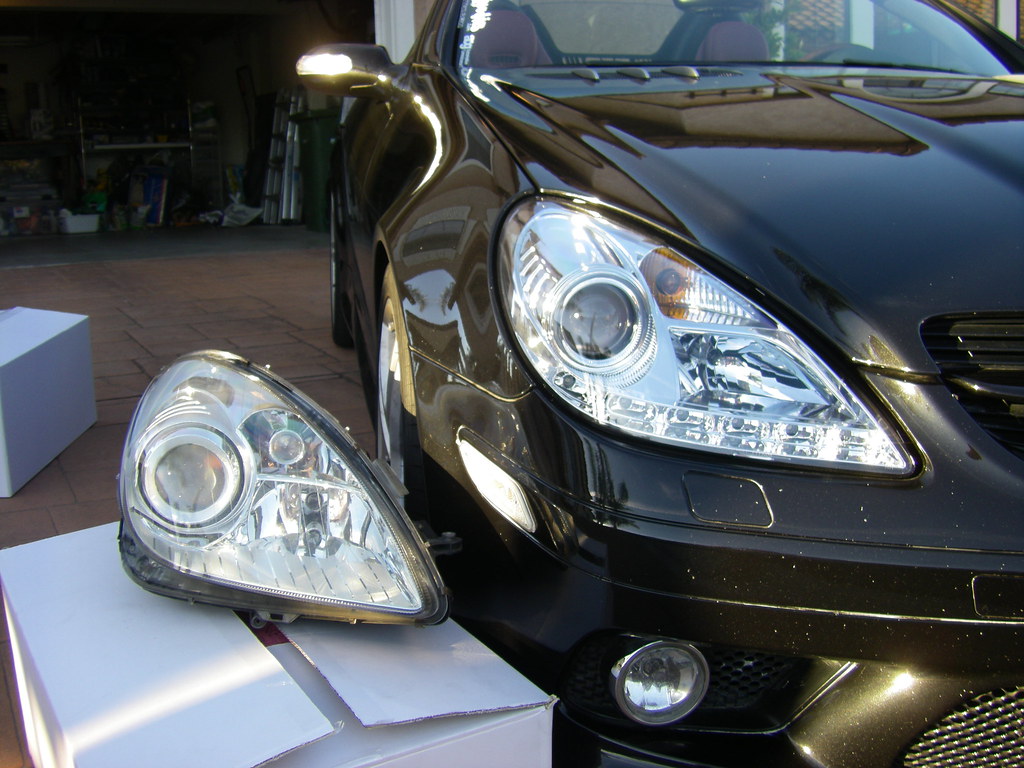
Well, a major update to my original post. I have now changed out the SPYDER chrome lights to the black version. I did the new install myself in my garage. As a result of looking at the entire process a lot more closely, I have also resolved the gap problem.
First of all, the 3 different headlights. From left to right, OEM, black SPYDER (with amber turn-signal), and chrome SPYDER (installed on the car, with stealth turn-signal).

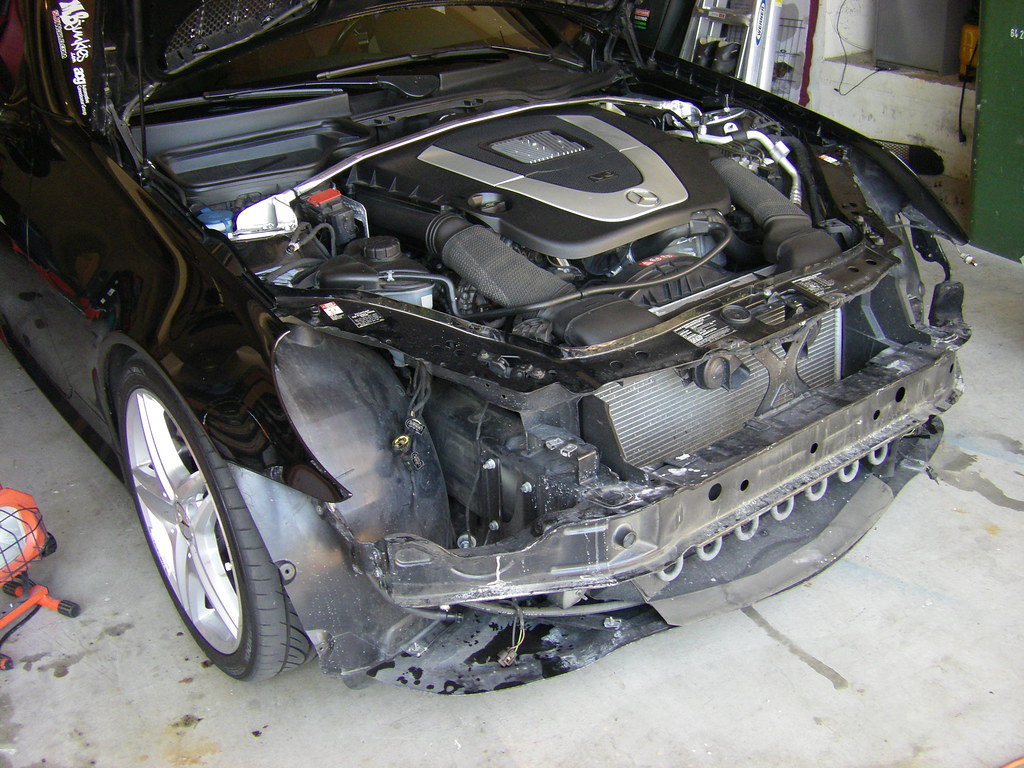
The "what have I done" moment:
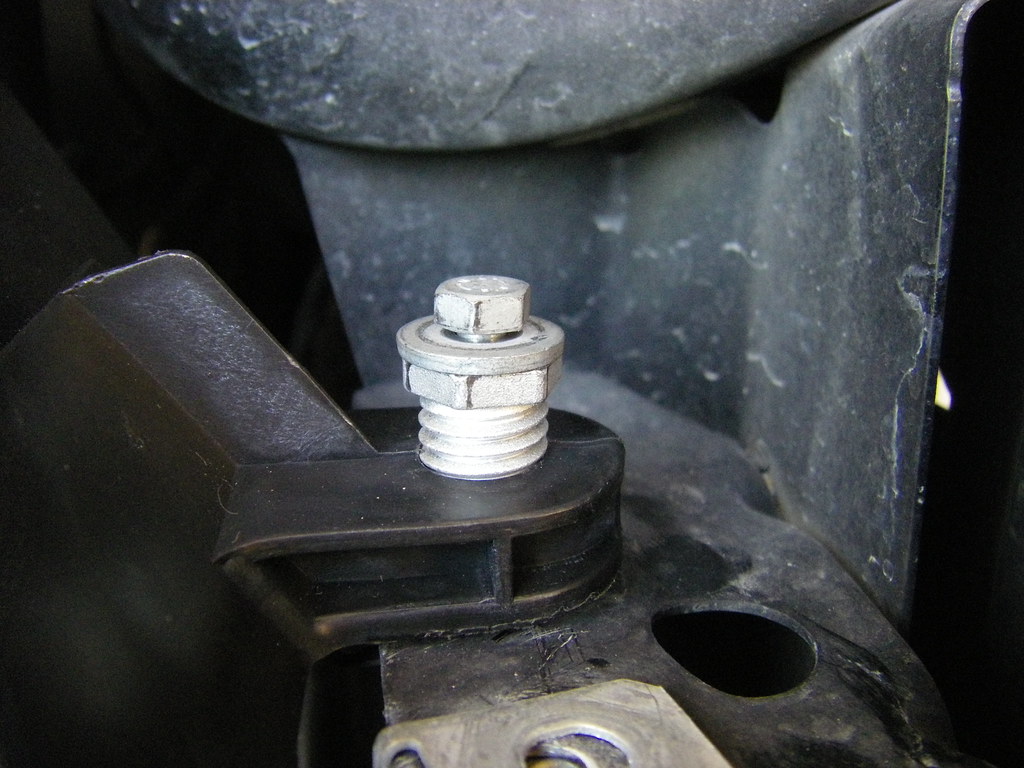
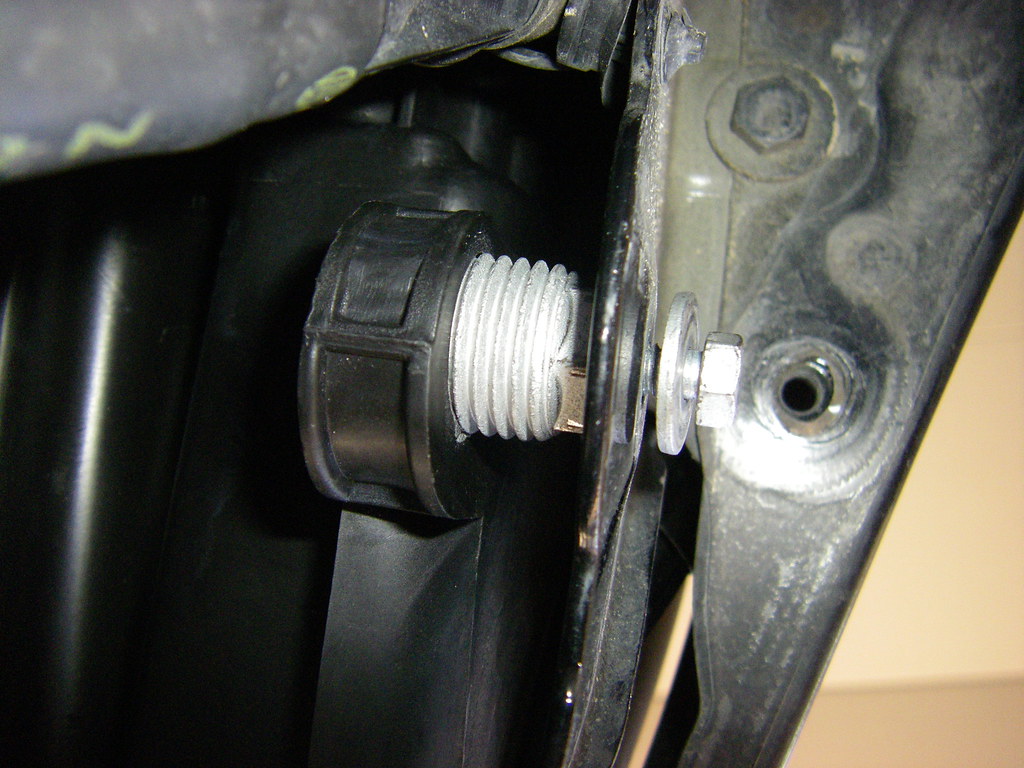
The solution to the gap problem. It turns out that the SPYDER lights actually have an up/down adjustment screw and a left/right adjustment screw. It appears that the installers at SPYDER that did my chrome lights never bothered playing with these to get the lights properly seated.
Here's a picture of both of the adjustments. The 8mm bolt holds the light unit in place. The threaded bus with 13mm hex end can be adjusted separately to change the offset of the light unit. This essentially accomplishes what people were already suggesting earlier in the thread, which was to shim the light with washers. This is a much more graceful solution of course.
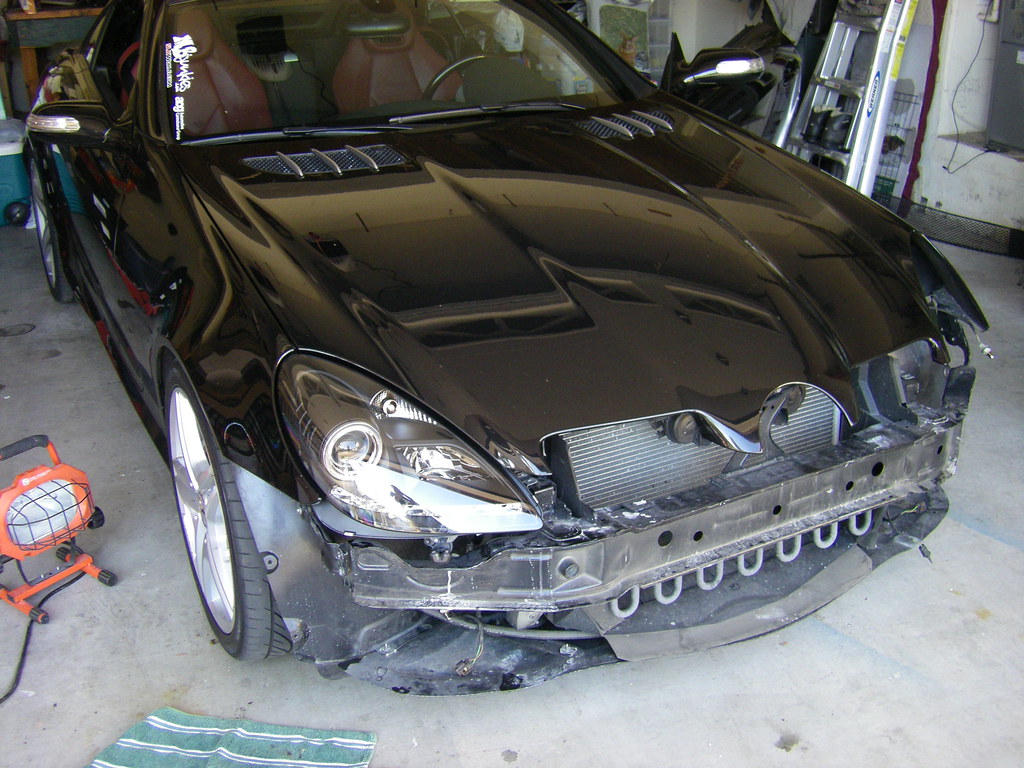
And the result: a gapless light!!!
My least favorite part of the job: moving the Xenon bulb and controller over from the old to the new light. This is a nerve wracking process because you're dealing with over $400 in components that are very fragile and have very tight tolerances. In addition to the Xenon bits, you have to move over the ballasts, headlight washer bits, and in my case the stealth turn-signal bulb.

Both lights are in, time to remount the bumper.
A shot of the gapless driver-side light:
Some outside glamour shots of the finished product! Love these!!!! Much less blingy than the chrome version.
First of all, the 3 different headlights. From left to right, OEM, black SPYDER (with amber turn-signal), and chrome SPYDER (installed on the car, with stealth turn-signal).
The "what have I done" moment:
The solution to the gap problem. It turns out that the SPYDER lights actually have an up/down adjustment screw and a left/right adjustment screw. It appears that the installers at SPYDER that did my chrome lights never bothered playing with these to get the lights properly seated.
Here's a picture of both of the adjustments. The 8mm bolt holds the light unit in place. The threaded bus with 13mm hex end can be adjusted separately to change the offset of the light unit. This essentially accomplishes what people were already suggesting earlier in the thread, which was to shim the light with washers. This is a much more graceful solution of course.
And the result: a gapless light!!!
My least favorite part of the job: moving the Xenon bulb and controller over from the old to the new light. This is a nerve wracking process because you're dealing with over $400 in components that are very fragile and have very tight tolerances. In addition to the Xenon bits, you have to move over the ballasts, headlight washer bits, and in my case the stealth turn-signal bulb.
Both lights are in, time to remount the bumper.
A shot of the gapless driver-side light:
Some outside glamour shots of the finished product! Love these!!!! Much less blingy than the chrome version.


Newbie
Joined: Jul 2013
Posts: 6
Likes: 0
From: Charleston, SC
2005 Mercedes Benz 350 SLK, 1999 Acura 2.3 CL, 2005 Dodge Durango
Got a question for ya. I have seen these kind of lights sold with the HID version and the non HID version. I would assume if your SLK comes with Xenon headlights stock you would obviously go for the HID version, and if your SLK does not come with Xenon headlights but rather the Halogen headlights you would go for the non HID version. Is this correct? Also if you have the stock Halogen headlights on your SLK can you get them converted to Xenon headlights in order to get the HID version of these Spyder headlights? Thank you for any input as I am looking into buying some of these lights fairly soon hopefully.

Newbie
Joined: Feb 2013
Posts: 4
Likes: 0
SLK 280 (R171 MAY 2008)
Got a question for ya. I have seen these kind of lights sold with the HID version and the non HID version. I would assume if your SLK comes with Xenon headlights stock you would obviously go for the HID version, and if your SLK does not come with Xenon headlights but rather the Halogen headlights you would go for the non HID version. Is this correct? Also if you have the stock Halogen headlights on your SLK can you get them converted to Xenon headlights in order to get the HID version of these Spyder headlights? Thank you for any input as I am looking into buying some of these lights fairly soon hopefully.
Yeh old threat I know!


