Photo DIY: Power Steering Pump Overhaul
 07-11-2010, 01:40 AM
#1
MBWorld Fanatic!
Thread Starter
Join Date: Mar 2007
Location: Houston, TX
Posts: 1,948
Likes: 0
Received 3 Likes
on
2 Posts
C32/C55 AMG
Photo DIY: Power Steering Pump Overhaul
My power steering pump has been leaking for the past few months, but it would work as long as I refilled my fluid. So I did some research and with the help of gt4awd I was able to get my hands on his pump and experiment with it.
We found this thread on another forum which had a DIY for rebuilding the power steering pump for a 99 S420 W140. http://www.benzworld.org/forums/w140...-overhaul.html
I had all the same problems as the guy in the thread and I could not find an pertinent info as to what to use or if the gasket kit would work for my pump. I didn't want to be stuck with out a car and experiment on my pump. Thanks again gt4awd for letting me use yours.
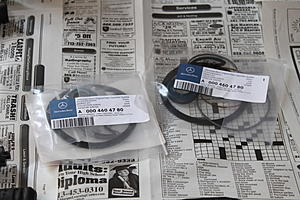
He found a BMW part number and bought the seal kit for it. The kit came out costing around $12, the thing was that it had an MB part number on it and I used that part number to buy the kit from parts.com. The part number was 000 460 47 80 and it came out to be $11.21.
I had all the same problems as the guy in the thread and I could not find any pertinent info as to what to use or if the gasket kit would work for my pump. I didn't want to be stuck with out a car and experiment on my pump. Thanks again gt4awd for letting me use your old one.
So this is a tentative DIY because I'm not sure if it works yet, I still need to put it on my car and try it out, but I'll post the pics of the DIY any ways, I'm pretty sure it has to work because there really was nothing to the rebuild and the DIY from the w140 was nearly identical to what I have.
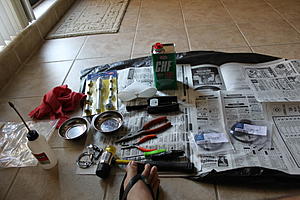
The parts and tools that you will need are as follows:
MB Gasket kit 000 460 47 80
Small mallet
Pulley puller with a center portion that expands
Pick
A tap that is similar to the size of the main seal
Alcohol to clean the pump
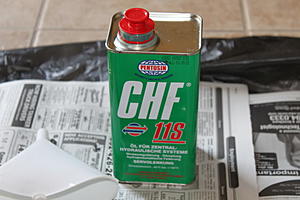
Power Steering Fluid Pentosin
Rags and paper
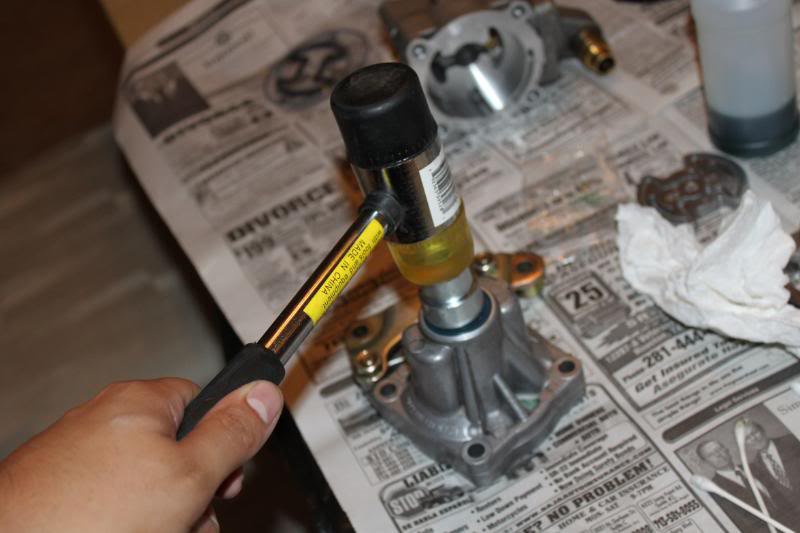
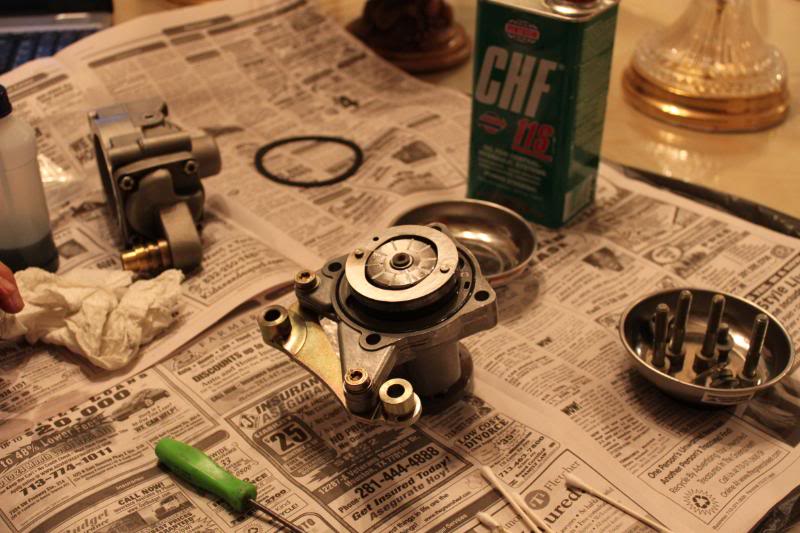
Here is the power Steering fluid I used:
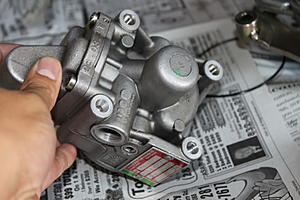
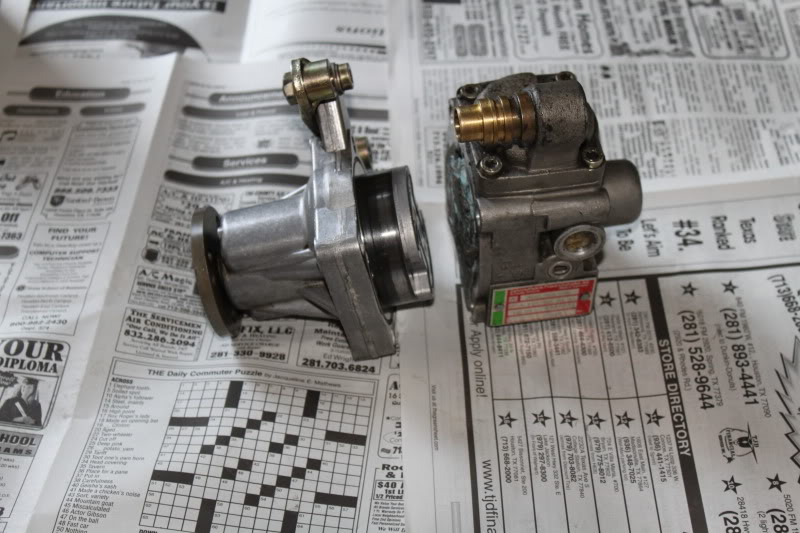
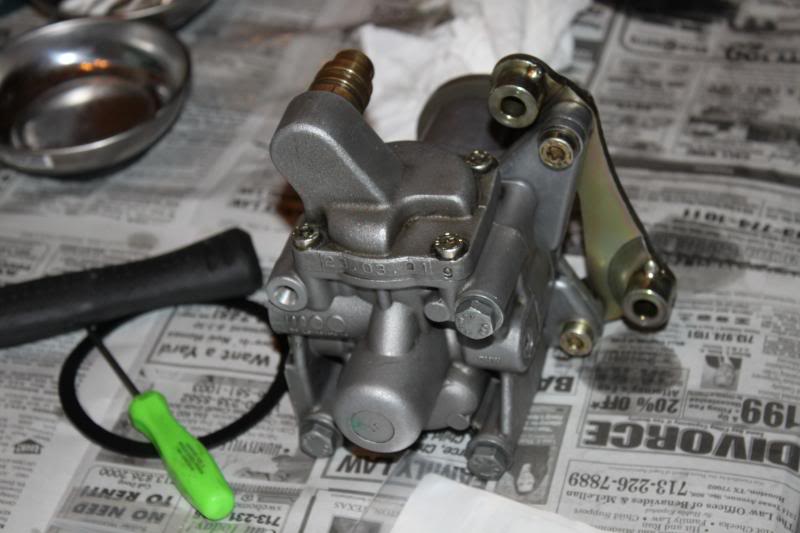
Here are my tools and my work area prepped:
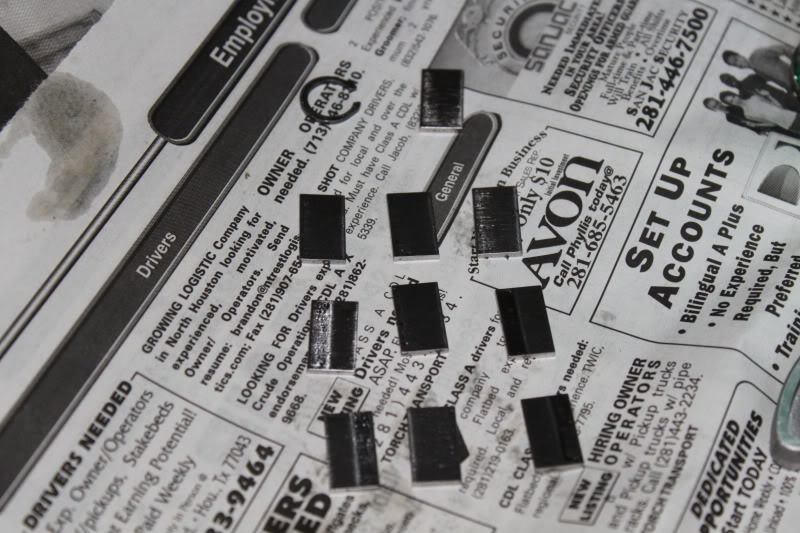
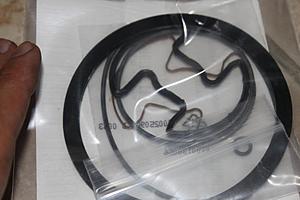
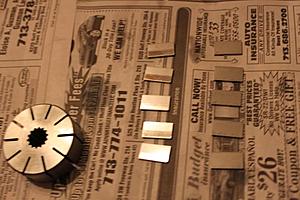
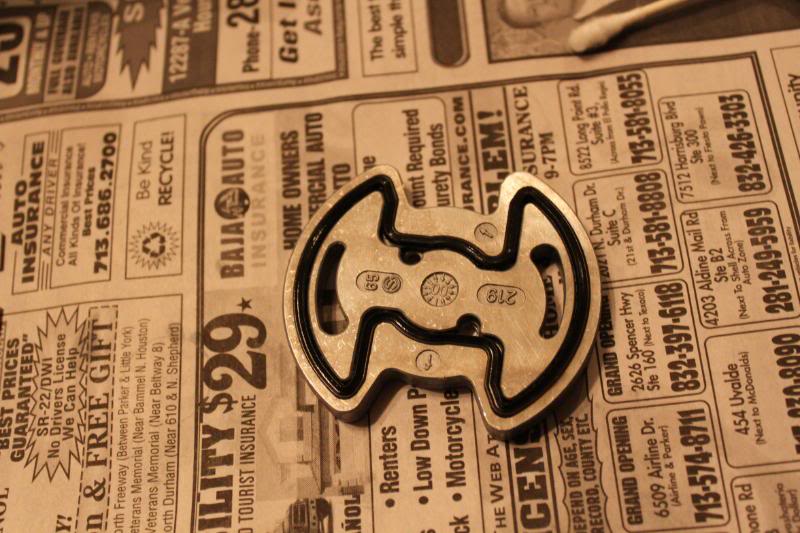
MB Gasket kit:
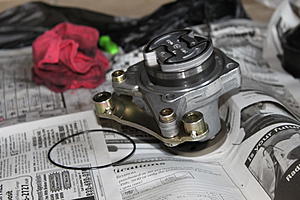
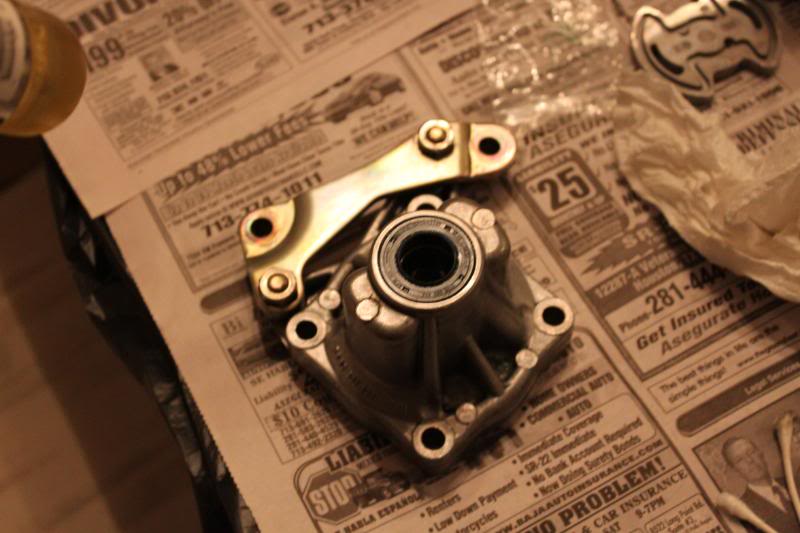
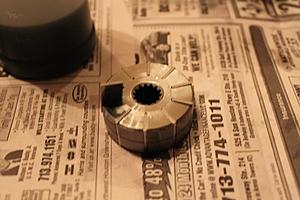
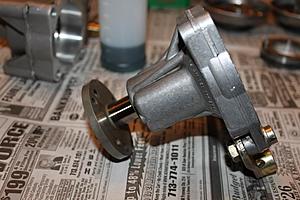
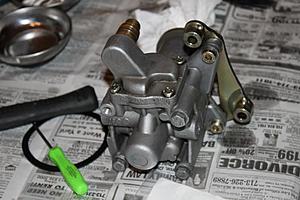
Pump held together with 4 bolts separated:
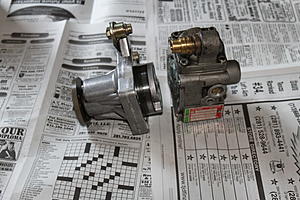
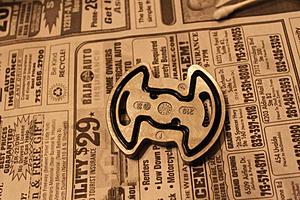
Pulley portion of pump with pulley removed held together with 3 bolts:
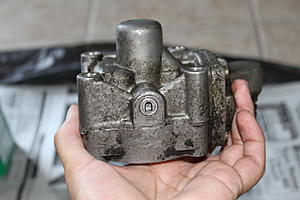
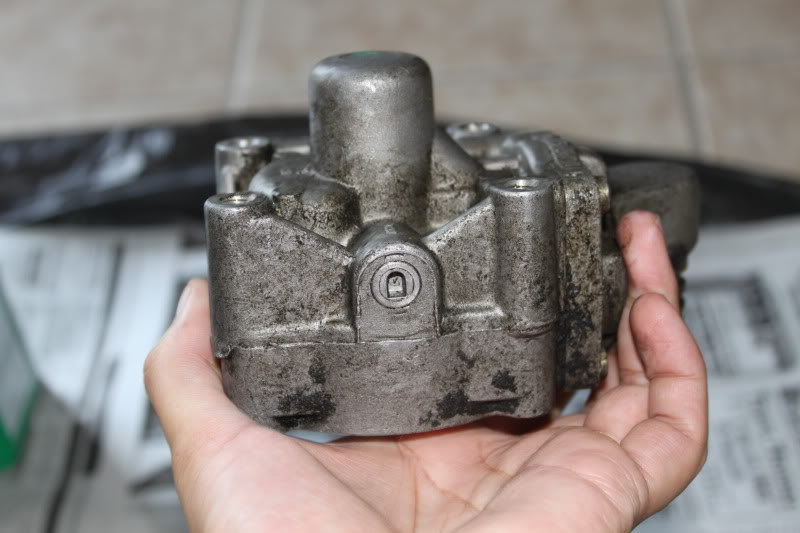
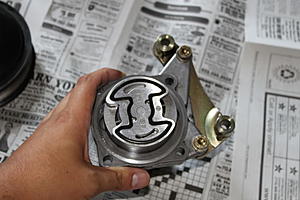
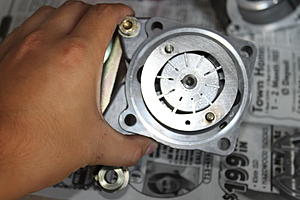
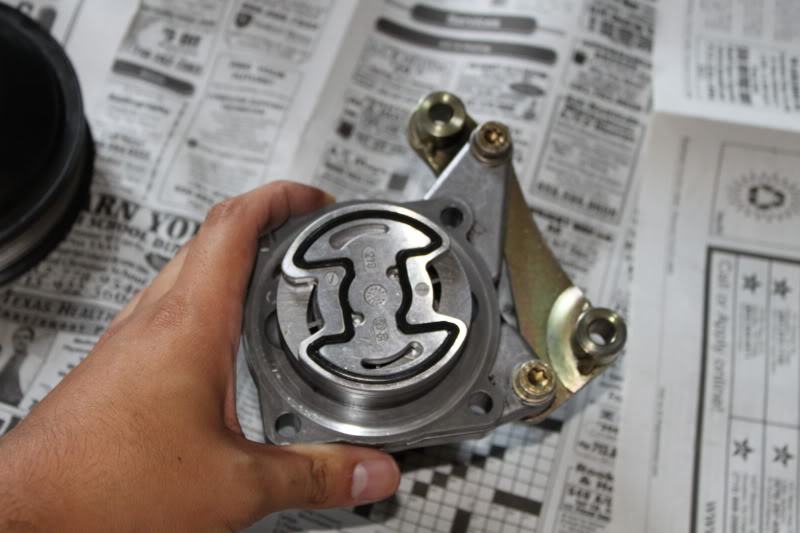
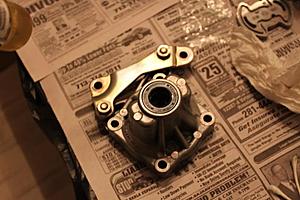
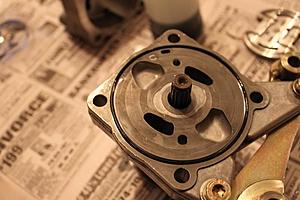
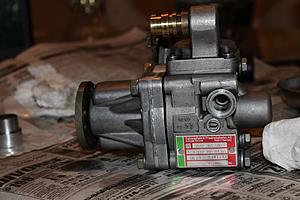
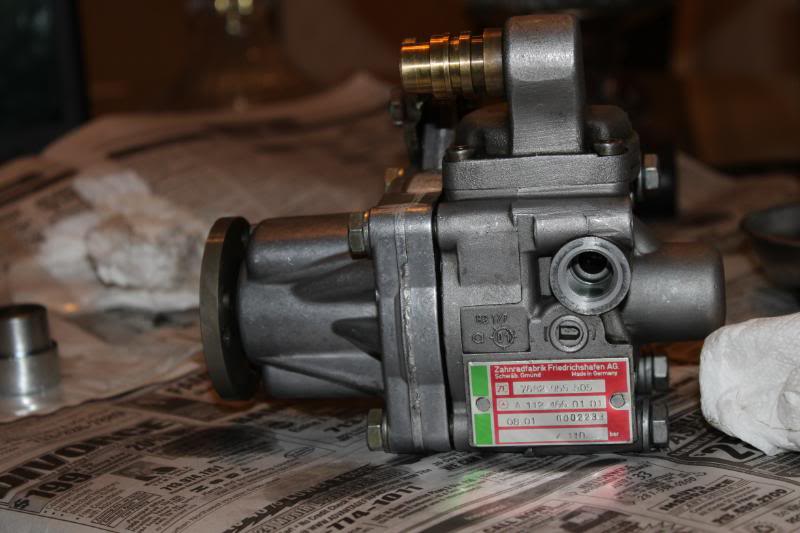
Here is a shot of the pump closer up, it arrived with a lot of oil build up:
I made sure to clean with with alcohol in order not to contaminate the internals of the pump during the rebuild. Most time consuming portion.
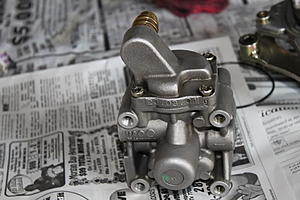
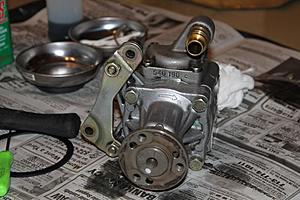
After clean up:

We found this thread on another forum which had a DIY for rebuilding the power steering pump for a 99 S420 W140. http://www.benzworld.org/forums/w140...-overhaul.html
I had all the same problems as the guy in the thread and I could not find an pertinent info as to what to use or if the gasket kit would work for my pump. I didn't want to be stuck with out a car and experiment on my pump. Thanks again gt4awd for letting me use yours.
He found a BMW part number and bought the seal kit for it. The kit came out costing around $12, the thing was that it had an MB part number on it and I used that part number to buy the kit from parts.com. The part number was 000 460 47 80 and it came out to be $11.21.
I had all the same problems as the guy in the thread and I could not find any pertinent info as to what to use or if the gasket kit would work for my pump. I didn't want to be stuck with out a car and experiment on my pump. Thanks again gt4awd for letting me use your old one.
So this is a tentative DIY because I'm not sure if it works yet, I still need to put it on my car and try it out, but I'll post the pics of the DIY any ways, I'm pretty sure it has to work because there really was nothing to the rebuild and the DIY from the w140 was nearly identical to what I have.
The parts and tools that you will need are as follows:
MB Gasket kit 000 460 47 80
Small mallet
Pulley puller with a center portion that expands
Pick
A tap that is similar to the size of the main seal
Alcohol to clean the pump
Power Steering Fluid Pentosin
Rags and paper
Here is the power Steering fluid I used:

Here are my tools and my work area prepped:

MB Gasket kit:

Pump held together with 4 bolts separated:
Pulley portion of pump with pulley removed held together with 3 bolts:

Here is a shot of the pump closer up, it arrived with a lot of oil build up:
I made sure to clean with with alcohol in order not to contaminate the internals of the pump during the rebuild. Most time consuming portion.
After clean up:


Last edited by loudandheard; 07-11-2010 at 01:42 AM.
 07-11-2010, 02:04 AM
#2
MBWorld Fanatic!
Thread Starter
Join Date: Mar 2007
Location: Houston, TX
Posts: 1,948
Likes: 0
Received 3 Likes
on
2 Posts
C32/C55 AMG
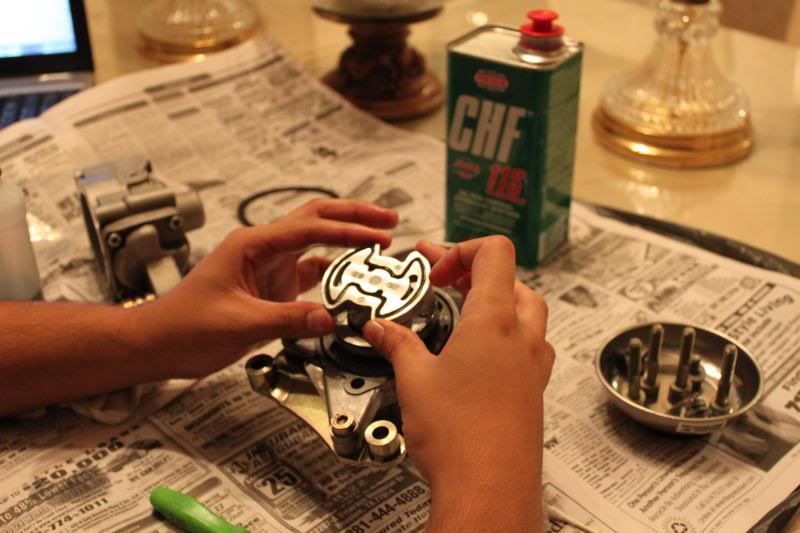
Here is where I started to take a part the pump, every thing just slides out at this point. I began by taking out the gaskets, this is where a pointed pic comes in handy. You'll notice that there are groves that allow you to get to the gaskets easier:
The top portion with odd shaped gasket comes off. I was able to pry it up by using the pick, again there are opening around that part that allows it to come off easier. Try to remember the position of this piece, not sure if it's important, but I figure you should keep it the same.
Here is the piece removed, front and back:

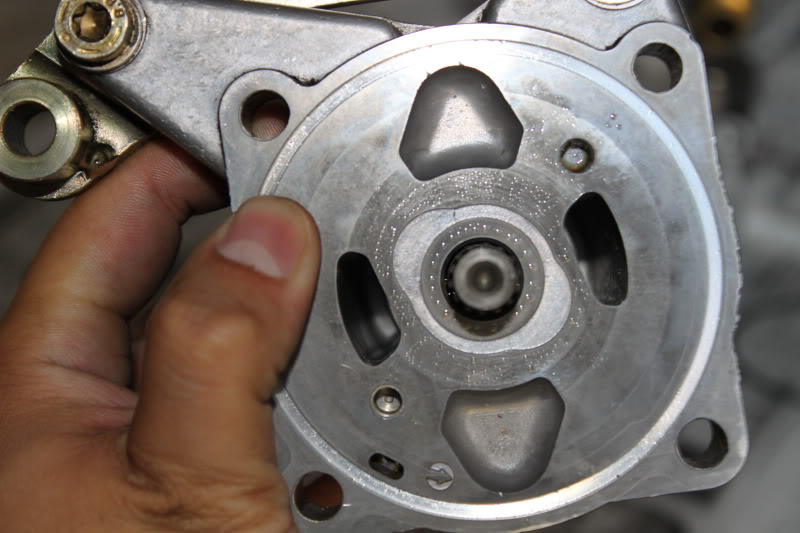
Here is the portion of the pump with that piece above removed:

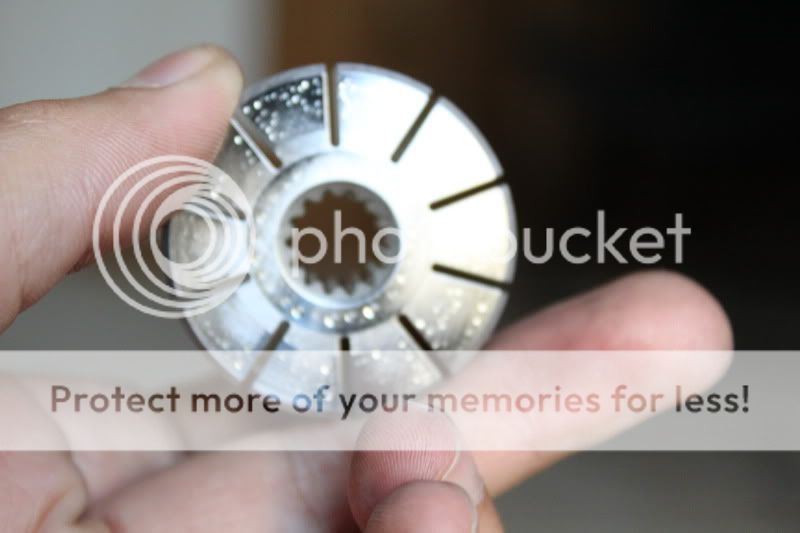
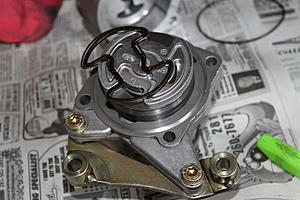
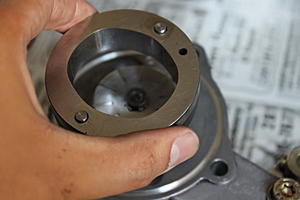
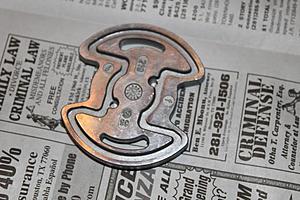
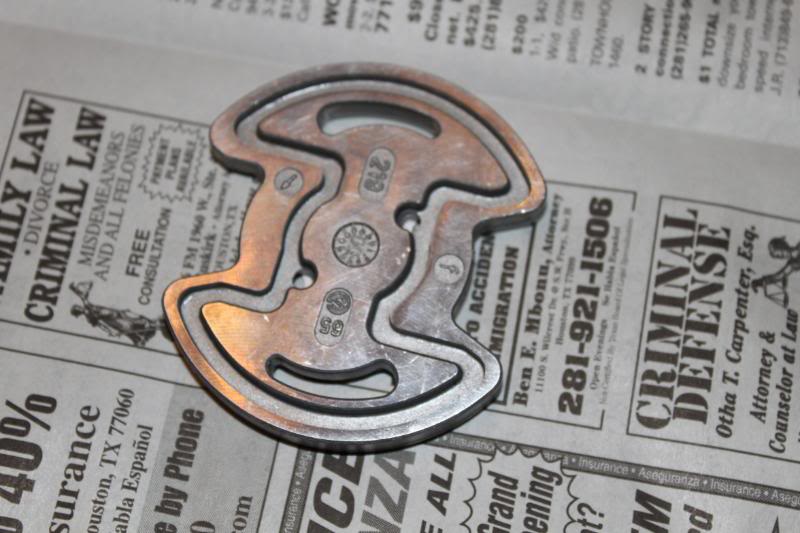
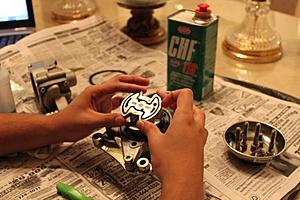
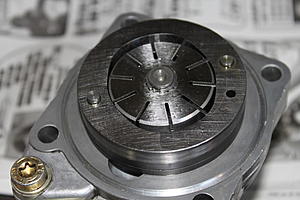
Next you can remove the round portion that surrounds what I believe to be the impeller, got that word from the thread I linked above. Make sure to note the direction that it comes out in order to reinstall in the same order. I was able to pry this portion up also with my trusty pick. Again there are grooves below the piece that allow you to get a little leverage. The little bolt like pieces come right off after you take it off, so make sure not to lose them :
Pic of the ring removed:
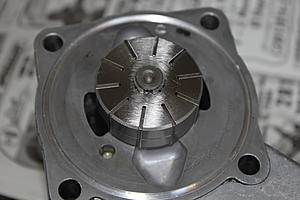
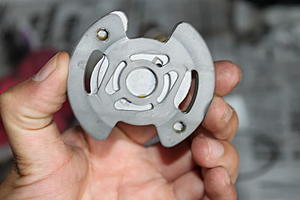
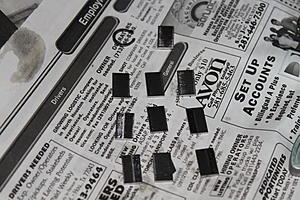
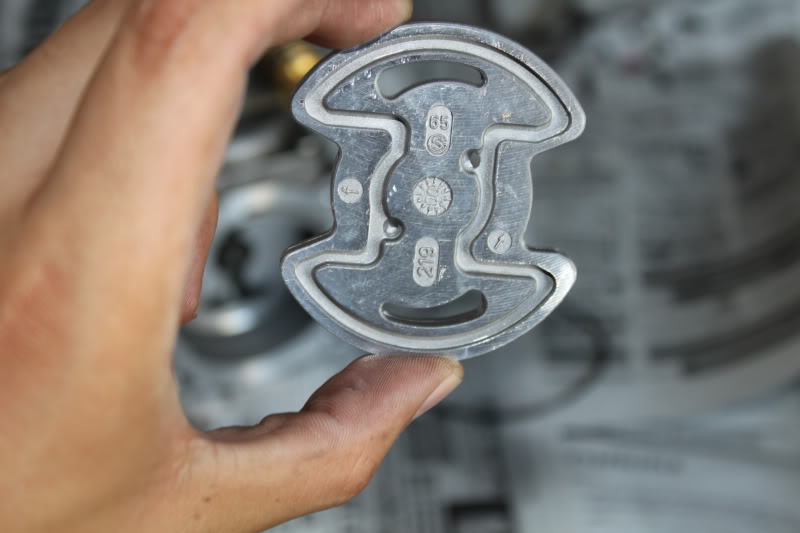
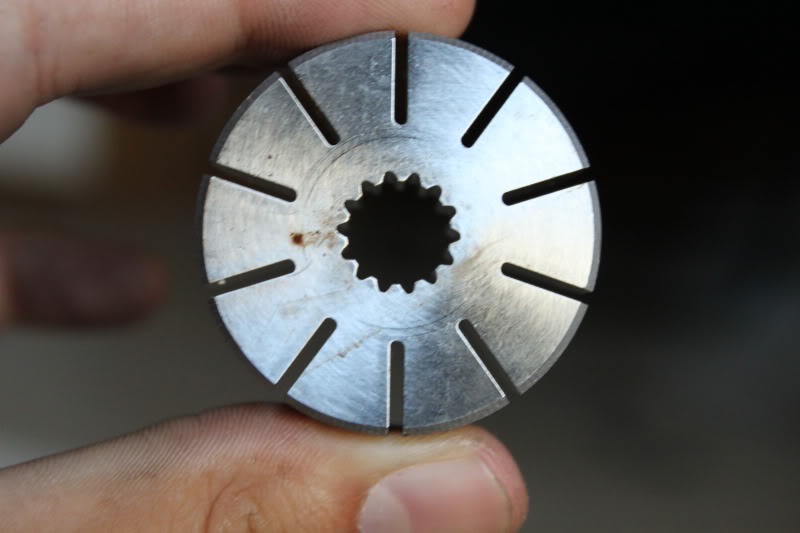
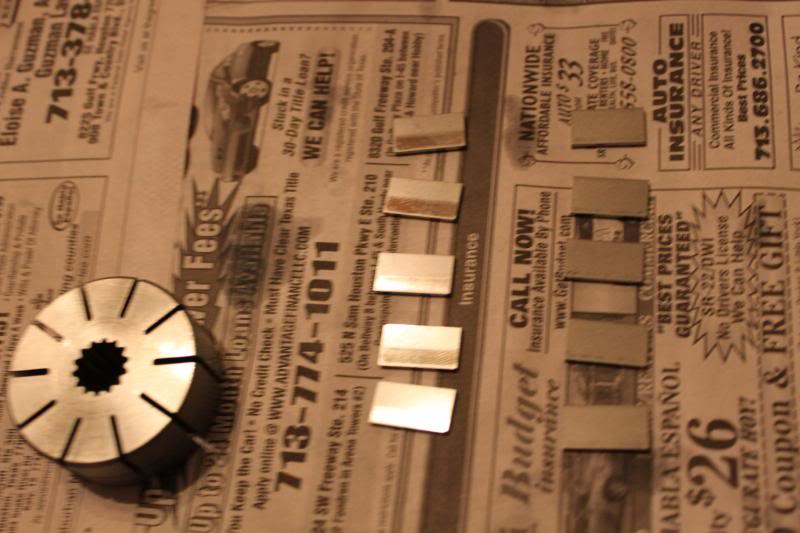
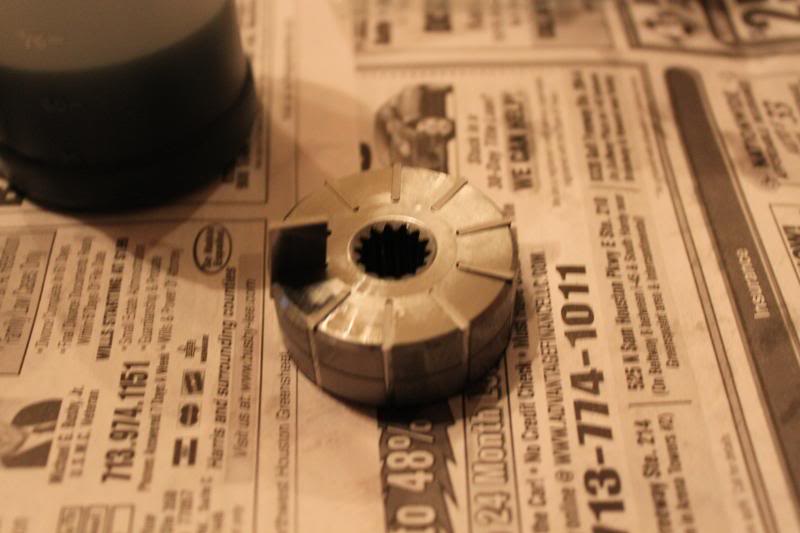
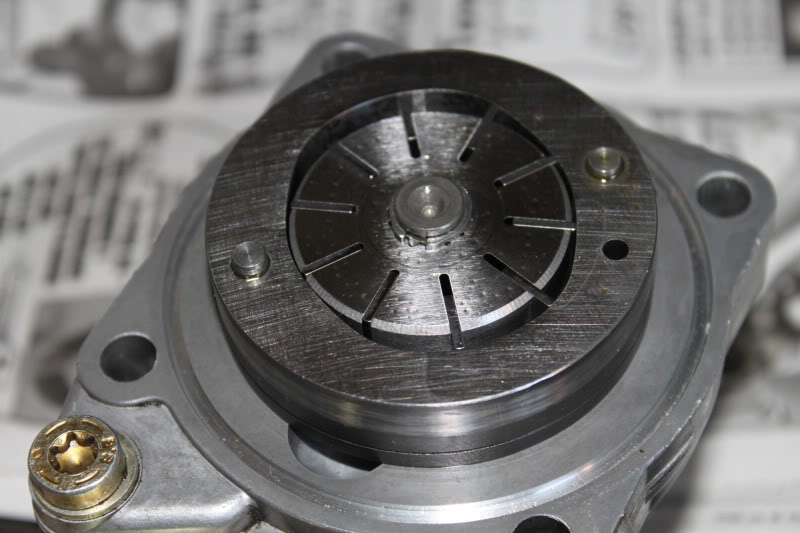
Next I removed the small blades in the impeller, there should be ten, so try not to lose any and remember the way they came out in order to keep every thing the same:
This is where the fun begins, you will notice a tiny retainer clip that holds every thing in at this point.
I spent a lot of time trying to remove it, but with a little elbow grease and ingenuity it can be done. Some one actually did it for me, lol. We were able to push it up a bit and wedge razor blades underneath the clip in order to get it up. Not safe, but it will get the job done. I will be doing this again because I think I installed certain portions the wrong way I should have looked at the pics as my reference point, I did but I wasn't paying attention
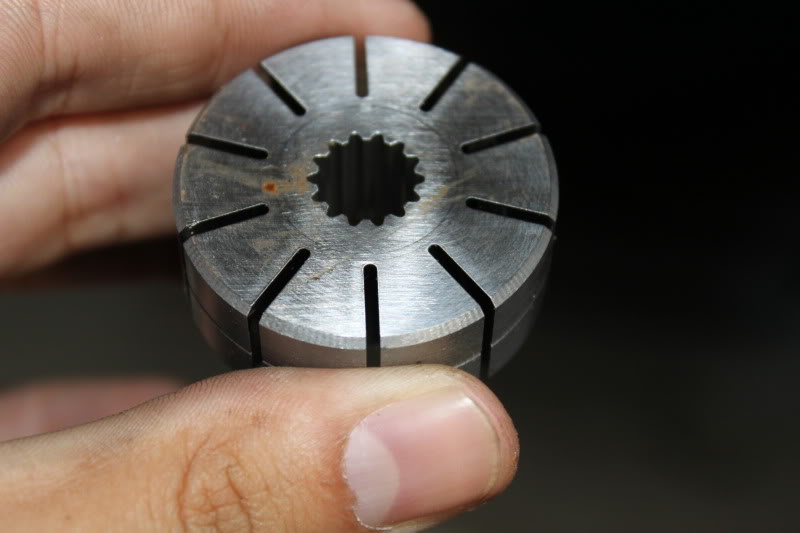
Once the clip is removed the impeller comes right out and the pulley portion with the shaft will slide right off
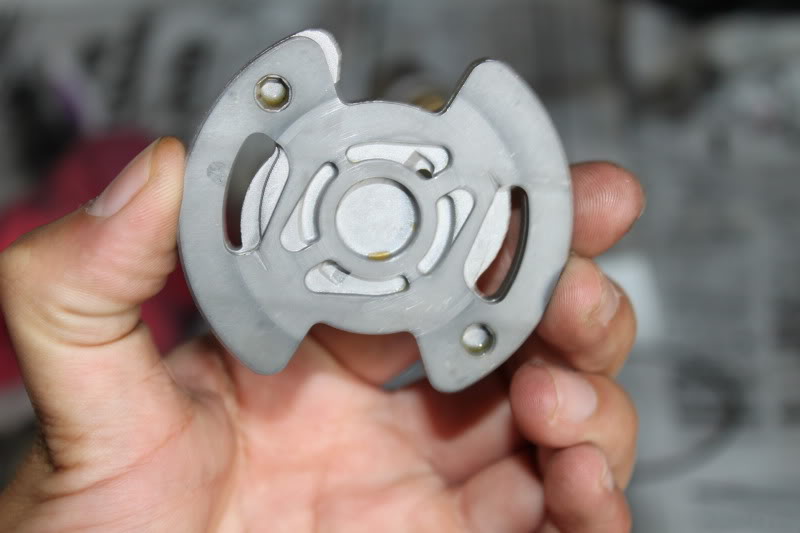
Notice the differences in the front and back side of the impeller piece:


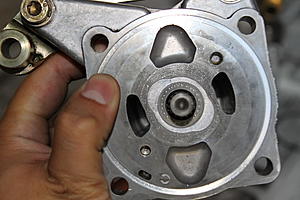
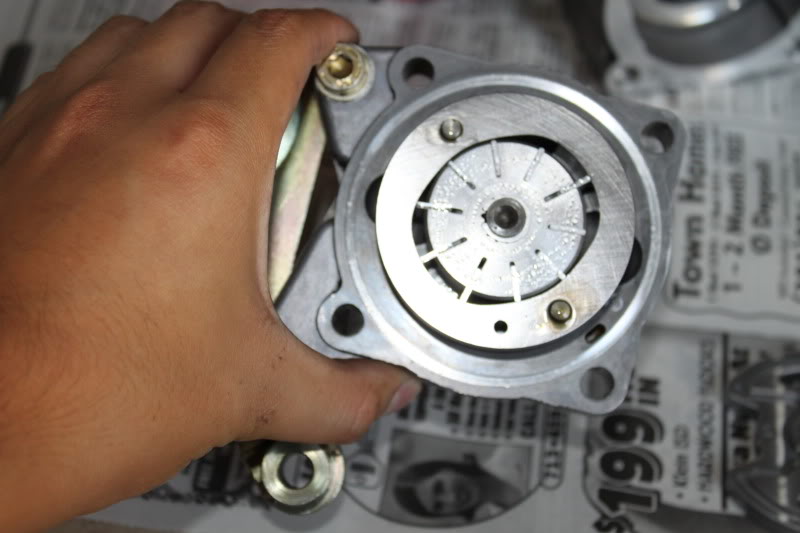
Here is a pic of the pump with the piece removed:
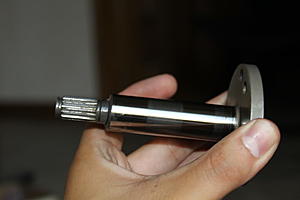
Here is a pic of the pulley portion and shaft removed:


The top portion with odd shaped gasket comes off. I was able to pry it up by using the pick, again there are opening around that part that allows it to come off easier. Try to remember the position of this piece, not sure if it's important, but I figure you should keep it the same.
Here is the piece removed, front and back:
Here is the portion of the pump with that piece above removed:

Next you can remove the round portion that surrounds what I believe to be the impeller, got that word from the thread I linked above. Make sure to note the direction that it comes out in order to reinstall in the same order. I was able to pry this portion up also with my trusty pick. Again there are grooves below the piece that allow you to get a little leverage. The little bolt like pieces come right off after you take it off, so make sure not to lose them :

Pic of the ring removed:

Next I removed the small blades in the impeller, there should be ten, so try not to lose any and remember the way they came out in order to keep every thing the same:

This is where the fun begins, you will notice a tiny retainer clip that holds every thing in at this point.
I spent a lot of time trying to remove it, but with a little elbow grease and ingenuity it can be done. Some one actually did it for me, lol. We were able to push it up a bit and wedge razor blades underneath the clip in order to get it up. Not safe, but it will get the job done. I will be doing this again because I think I installed certain portions the wrong way
I should have looked at the pics as my reference point, I did but I wasn't paying attention Once the clip is removed the impeller comes right out and the pulley portion with the shaft will slide right off
Notice the differences in the front and back side of the impeller piece:

Here is a pic of the pump with the piece removed:

Here is a pic of the pulley portion and shaft removed:
 07-11-2010, 02:41 AM
#3
MBWorld Fanatic!
Thread Starter
Join Date: Mar 2007
Location: Houston, TX
Posts: 1,948
Likes: 0
Received 3 Likes
on
2 Posts
C32/C55 AMG
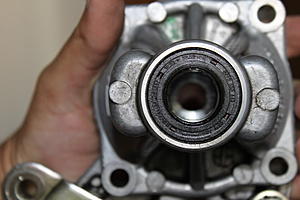
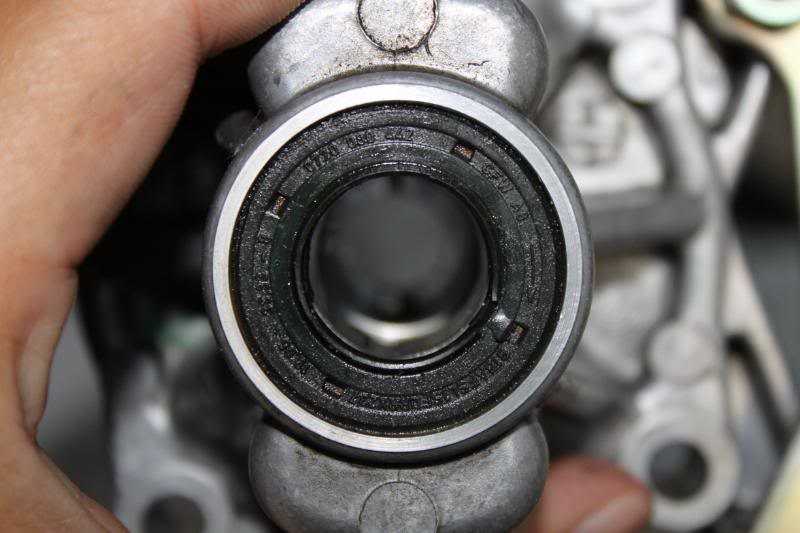
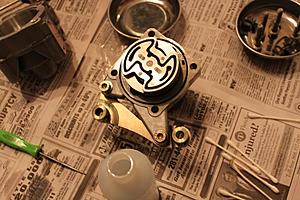
Here is a pic of the main seal which is most likely the cause of the leaking:

This seal was a pain to remove as well, bought the wrong tool. Apparently you can use a puller that expands in the middle in order to take off the seal. I had to go about it the old fashioned way and pry it out. This needs to be done carefully because if you scar this area, it will leak even with a new seal. This is probably the most important step.
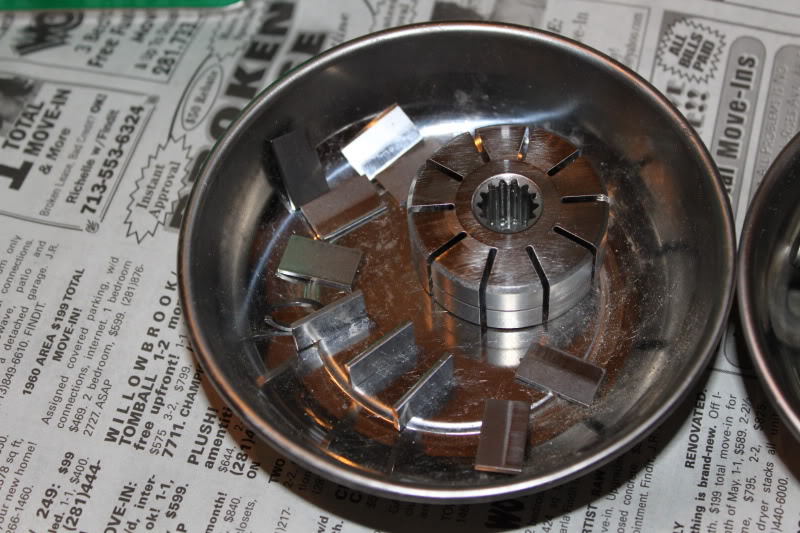
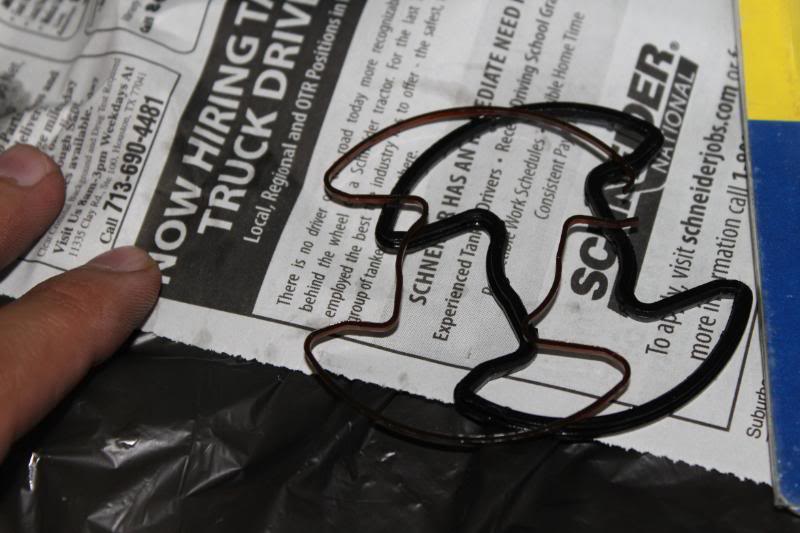
Here is a pic of one the seals I removed from the top plate:

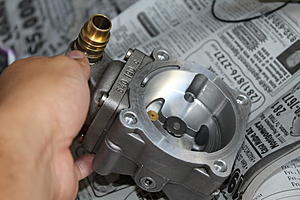
Close up of the kit with the new seal:
I made sure to thoroughly clean all the parts once I had all the pieces removed. I even bathed the internals of the pump with alcohol in order to get all the grime out. I then made sure to blow the pump out with compressed air and then let it dry. made sure to run a bit of p/s fluid through the various openings of the pump

This seal was a pain to remove as well, bought the wrong tool. Apparently you can use a puller that expands in the middle in order to take off the seal. I had to go about it the old fashioned way and pry it out. This needs to be done carefully because if you scar this area, it will leak even with a new seal. This is probably the most important step.
Here is a pic of one the seals I removed from the top plate:
Close up of the kit with the new seal:

I made sure to thoroughly clean all the parts once I had all the pieces removed. I even bathed the internals of the pump with alcohol in order to get all the grime out. I then made sure to blow the pump out with compressed air and then let it dry. made sure to run a bit of p/s fluid through the various openings of the pump
07-11-2010, 02:42 AM
#4
MBWorld Fanatic!
Thread Starter
Join Date: Mar 2007
Location: Houston, TX
Posts: 1,948
Likes: 0
Received 3 Likes
on
2 Posts
C32/C55 AMG
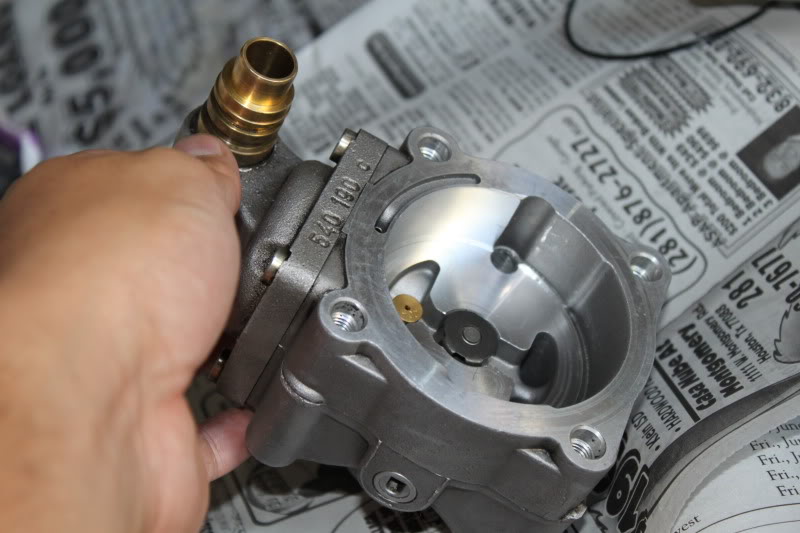
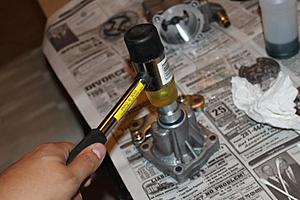
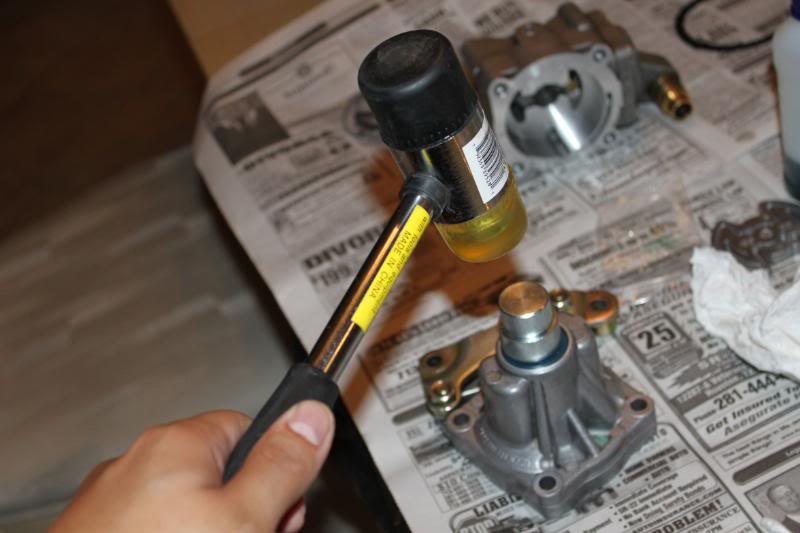
The first thing I did once every thing was dry was to lube the main seal and then tap it in:

Next I installed the large gasket on the pump, put a bit of P/S fluid on it as well:
I installed the odd shaped gasket with the retainer clip:
I then reassembled the impeller p/s fluid added to it here as well:
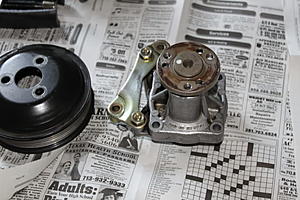
I put the pulley portion back on to the pump:
This is where I messed up and installed the impeller backwards. You will notice in the previous pics that the smooth side should go up while the indented portion should go down. From looking at the pics, I installed the portion that goes around impeller the wrong way. I don't think it will affect the way it works, I just want to put it back the way it was:

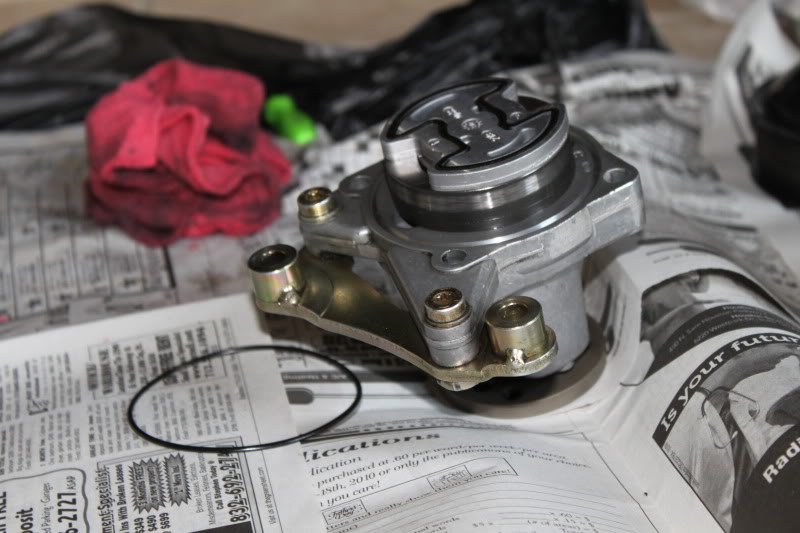
Here is a pic of the plate that goes on the top of the whole assembly:
I forgot to mention that the only thing that holds every thing together is the retainer clip, so make sure to have the pump resting on some thing when reassembling it. All you have to do is install the clip now and that's a pain too, but easier than the removal.
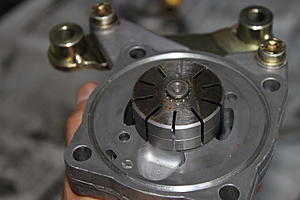
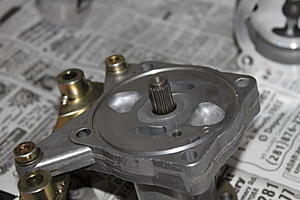
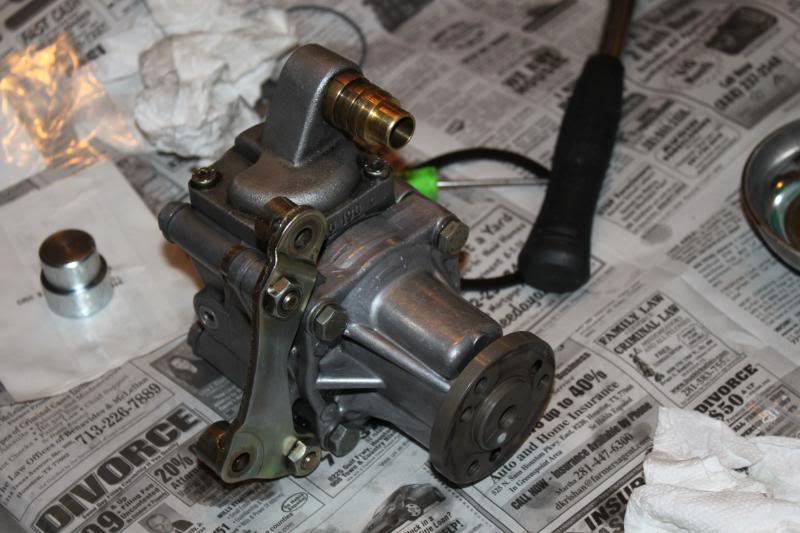
Here is the pump fully assembled, all I did was hand tightened the 4 bolts in order to hold it all together:
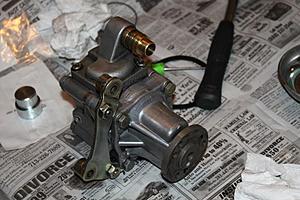
The pump is very basic and there really is not much to it. There are just some thing I would like to redo in order to make sure that every thing is perfect.
The next portion of the thread will deal with the removal and installation of the pump. What you will notice is that I have not fully tightened the bolts on the assembly of the pump, the reason being is so that I can torque it correctly while it is mounted on the engine. Would be tough with some one holding.
Until tomorrow.
Next I installed the large gasket on the pump, put a bit of P/S fluid on it as well:

I installed the odd shaped gasket with the retainer clip:
I then reassembled the impeller p/s fluid added to it here as well:
I put the pulley portion back on to the pump:

This is where I messed up and installed the impeller backwards. You will notice in the previous pics that the smooth side should go up while the indented portion should go down. From looking at the pics, I installed the portion that goes around impeller the wrong way. I don't think it will affect the way it works, I just want to put it back the way it was:
Here is a pic of the plate that goes on the top of the whole assembly:
I forgot to mention that the only thing that holds every thing together is the retainer clip, so make sure to have the pump resting on some thing when reassembling it. All you have to do is install the clip now and that's a pain too, but easier than the removal.
Here is the pump fully assembled, all I did was hand tightened the 4 bolts in order to hold it all together:

The pump is very basic and there really is not much to it. There are just some thing I would like to redo in order to make sure that every thing is perfect.
The next portion of the thread will deal with the removal and installation of the pump. What you will notice is that I have not fully tightened the bolts on the assembly of the pump, the reason being is so that I can torque it correctly while it is mounted on the engine. Would be tough with some one holding.
Until tomorrow.
The following users liked this post:
thirteendog (08-30-2021)
07-11-2010, 02:58 AM
#5
MBWorld Fanatic!

Nice write up! My old pump looks brand new... Glad everything went good without any issues. Can't wait until you get it installed. I'm sure it'll be just like new. Remember my issue was PS whine with foaming reservoir. 
07-11-2010, 03:12 AM
#6
MBWorld Fanatic!
Thread Starter
Join Date: Mar 2007
Location: Houston, TX
Posts: 1,948
Likes: 0
Received 3 Likes
on
2 Posts
C32/C55 AMG
There's a total of 7 large parts and 16 small parts including gaskets and clips.
There's nothing that could go bad, the only thing I can think of that could have been causing the bubbling, is that you were getting air in to the system.
I remember you saying that you may still have a problem with your pump, but maybe it could be the steering rack. Next step will be to do a DIY for that next, lol.
07-11-2010, 03:15 AM
#7
MBWorld Fanatic!
Thread Starter
Join Date: Mar 2007
Location: Houston, TX
Posts: 1,948
Likes: 0
Received 3 Likes
on
2 Posts
C32/C55 AMG
I also noticed that all the pumps are basically the same, the only thing that's been changed is the top portion for the reservoir and an added bracket to fit our cars. I really think we could buy what ever pump and use our parts to make it work on our car.
Trending Topics
07-11-2010, 03:20 AM
#8
MBWorld Fanatic!
I have a weird pulsating sound that seems to be originating from the power steering pump area. Could possibly be the A/C compressor... I've had my fair share of power steering rack issues too. First my pump went. Replaced. Then power steering line was cut by 185MM. Repaired. Power steering rack o-rings shot. Leaking from rack. Wasn't happy with repaired line. Bought new one. Replaced return line to rack o-ring. No more leaks. One thing I'll mention is how to bleed the lines and rack of air bubbles. You need to lift the front, and turn steering wheel (engine off) lock to lock at least 30 times.
07-11-2010, 03:29 AM
#9
MBWorld Fanatic!
Thread Starter
Join Date: Mar 2007
Location: Houston, TX
Posts: 1,948
Likes: 0
Received 3 Likes
on
2 Posts
C32/C55 AMG
I have a weird pulsating sound that seems to be originating from the power steering pump area. Could possibly be the A/C compressor... I've had my fair share of power steering rack issues too. First my pump went. Replaced. Then power steering line was cut by 185MM. Repaired. Power steering rack o-rings shot. Leaking from rack. Wasn't happy with repaired line. Bought new one. Replaced return line to rack o-ring. No more leaks. One thing I'll mention is how to bleed the lines and rack of air bubbles. You need to lift the front, and turn steering wheel (engine off) lock to lock at least 30 times.
I noticed that the part number stamped on to the pump is almost identical to that of the 99 S class in the other thread. The only difference is N6 and N7. I guess ours is updated some how, but the internals are identical. Can't tell to much on the external portion of the pump, but I bet they are just about identical.
 07-11-2010, 10:28 AM
#12
MBWorld Fanatic!
Thread Starter
Join Date: Mar 2007
Location: Houston, TX
Posts: 1,948
Likes: 0
Received 3 Likes
on
2 Posts
C32/C55 AMG
I started the job around 4pm and finished around 9pm. I would say I spent almost two hours or more cleaning every thing on the unit. Then I spent about 2 hours going back and forth trying to figure out how to take out the retainer clip and then how to take out the main seal. Plus all the time taking pics. I would say the rebuild alone will take about 2-3 hours with the right tools and even less if I had some sort of dip to clean the unit. On a scale of 1-5 with 5 being the most difficult, I would say this job is probably a 2. The only thing that is difficult is taking out the small clip and then having the right tool to take out the main seal.
 07-11-2010, 10:23 PM
#16
MBWorld Fanatic!
Thread Starter
Join Date: Mar 2007
Location: Houston, TX
Posts: 1,948
Likes: 0
Received 3 Likes
on
2 Posts
C32/C55 AMG
Never got a chance to install the pump on the car because I was watching the World cup and I probably do not have enough power steering fluid to do the job well. Updates will come next week.
07-11-2010, 10:50 PM
#17
Member
Nice write up. It also looks like you have cavitation issues on the discharge side of the vane pump rotor and ports. This is caused by entrained air or foaming issues. The implosions are very destructive as they remove metal and cause pitting.
Last edited by AMG DUDE; 07-13-2010 at 07:54 PM.
07-11-2010, 11:27 PM
#18
MBWorld Fanatic!
Thread Starter
Join Date: Mar 2007
Location: Houston, TX
Posts: 1,948
Likes: 0
Received 3 Likes
on
2 Posts
C32/C55 AMG
I don't mean to sound uneducated, but I didn't really understand what you said. I'm assuming it has to do with the discoloration of the ring that goes around what I assume is the impeller. I was not sure what could have caused it, but it does feel smooth and I was unable to feel any grooves or some thing that would concern me.
Last edited by loudandheard; 07-11-2010 at 11:32 PM.
 07-12-2010, 10:23 AM
#21
MBWorld Fanatic!
Thread Starter
Join Date: Mar 2007
Location: Houston, TX
Posts: 1,948
Likes: 0
Received 3 Likes
on
2 Posts
C32/C55 AMG
I thought he was talking about the ring around that part. You can see that it looks two tone, shiny and dark metal.

Crazy how he just looked at the pics and could tell that your fluid was bubbling. Now we have to see what he says. Hopefully he'll say it's fine?

Crazy how he just looked at the pics and could tell that your fluid was bubbling. Now we have to see what he says. Hopefully he'll say it's fine?