How I did spark plugs, leads and intake
 08-18-2012, 03:05 AM
#1
MBWorld Fanatic!
Thread Starter
How I did spark plugs, leads and intake
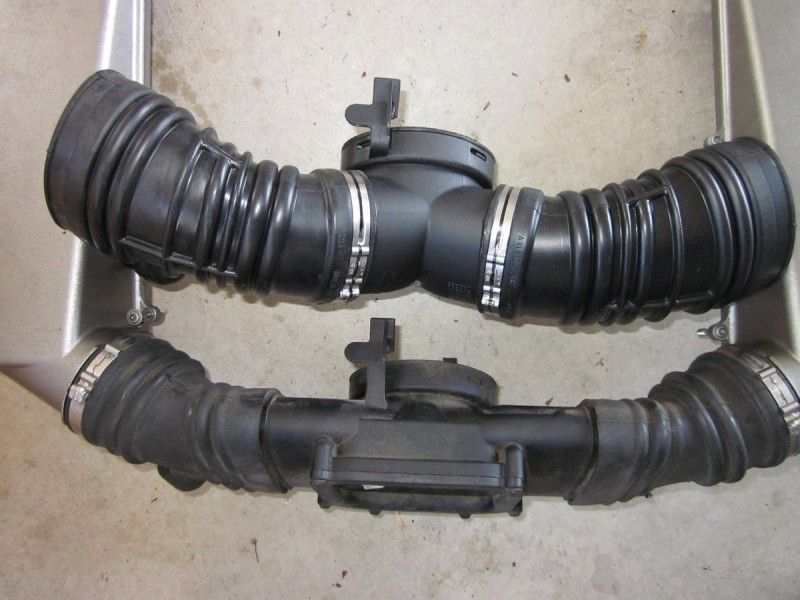
Just wanted to share some experience that might help others. I have been meaning to do this for a while. I got some stock heat range NGK iridiums from needswings (thanks rob), magnecor leads from macbryanie (thanks) and parts for the intake from all over the place. I got my spectre filters from http://www.ebay.com/itm/3-line-Air-B...item564a91d21b after I asked if she could get hold of them. I highy recommend the seller. Summit racing is cheaper but did not have very good international shipping options. All the other parts are best picked up locally. The 55 series Y-pipe can be purchased from parts.com in the US.
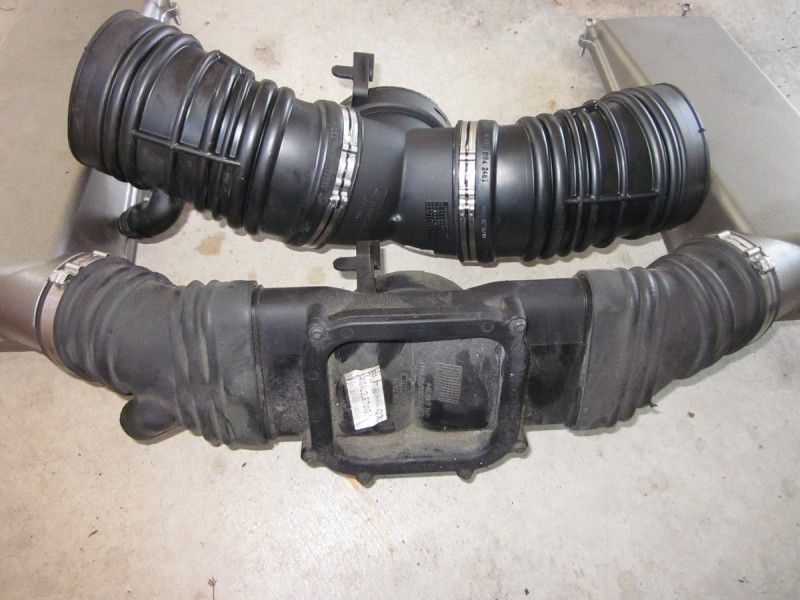
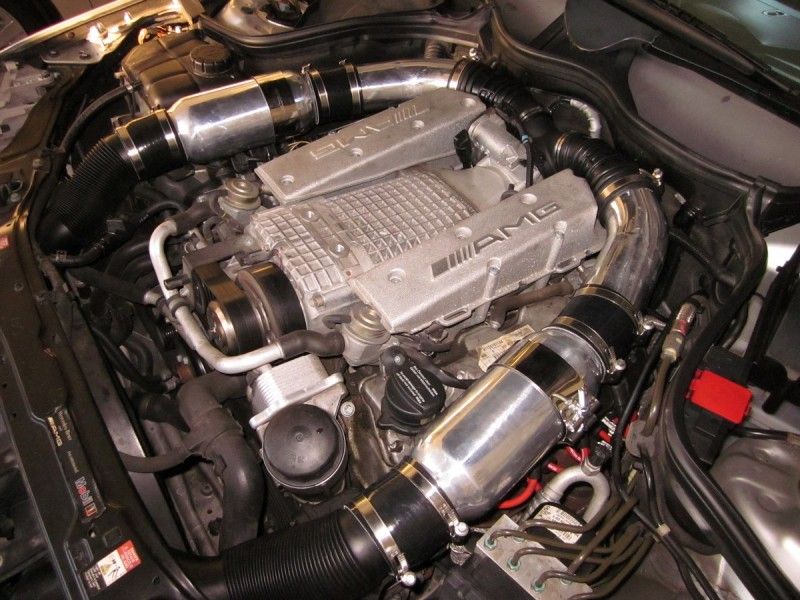
Remove the intake and coil packs to get the leads. Each filter housing has two clips, one front, one back that pull directly upwards. There are two clips on the Y-pipe that hold it to the throttle body, one top, one bottom. The whole thing comes out as one unit. I found it easiest to remove the coil packs one at a time as I went from the front to back.
The spark plugs leads are moderate to very difficult to get off. The easiest way is to use a 17mm spanner to lever against the valve cover to push them off. This won't work if it is all you do since it is forcing them down as well. Push up on the metal portion of the lead from underneath when you lever against it with the spanner. If you push up intermittently while you lever you can remove the front 5 in a few seconds each once you get the hang of it. The back two are ******g ****s to put it nicely. I could only get the spanner on one of them and it took a lot of levering with screwdrivers from all different angles to finally get them loose, took about 10 mins each for these two.
Nice....
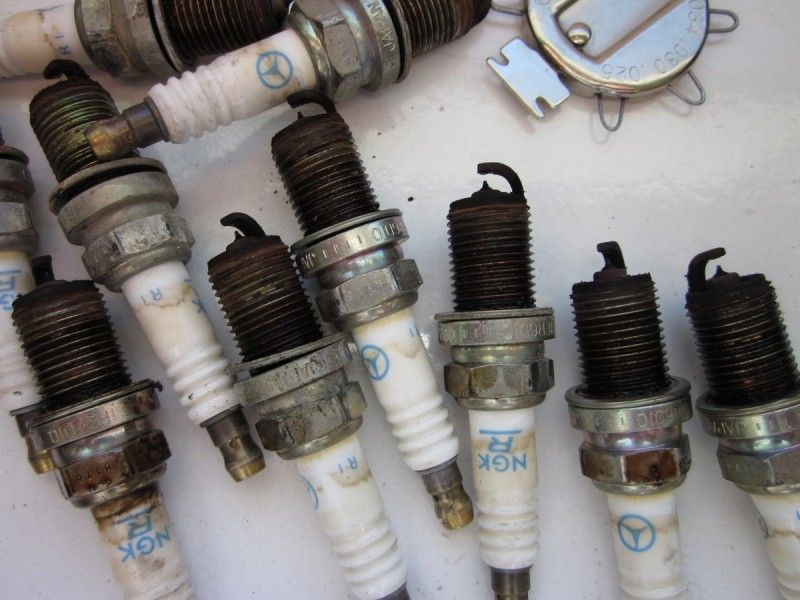
The gap had increased to about 0.045".
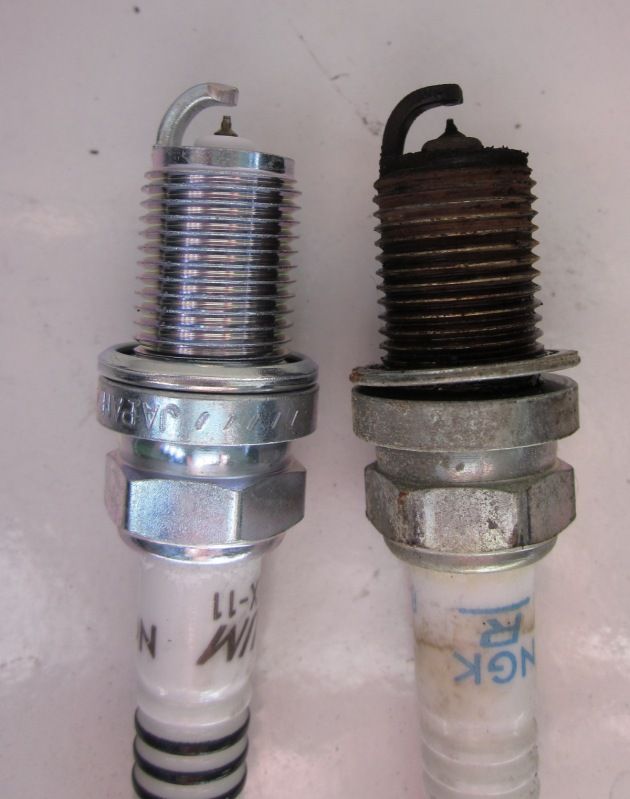
Iridiums are fine to gap just don't use a slide tool or any other which places stress on the fine tip.
Plugs are easy to remove unless they are seized into the head. A combination of 1/2" and 3/8" socket sets with adapter should provide enough extensions etc to get the correct lengths.
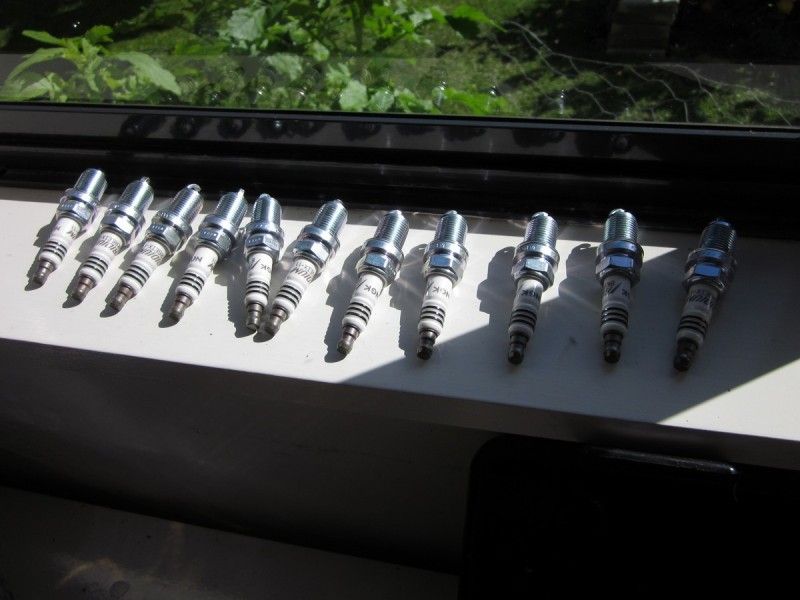
I got a torque wrench onto all 12 plugs and tighened to 20Nm with no anti-seize or grease.
I removed the ignition leads from the head first and then took the leads off the coils outside of the car. They are almost impossible to pull straight off the coil packs. But they come off very easily simply by twisting the rubber boot.
The magnecors seem fine. They do not hold onto the spark plug quite as tightly as the stock leads but they have a characteristic click you can feel so you know they are on the plug properly. If they come off you can slightly crush the end of the lead through the long rubber boot to make it tighter.
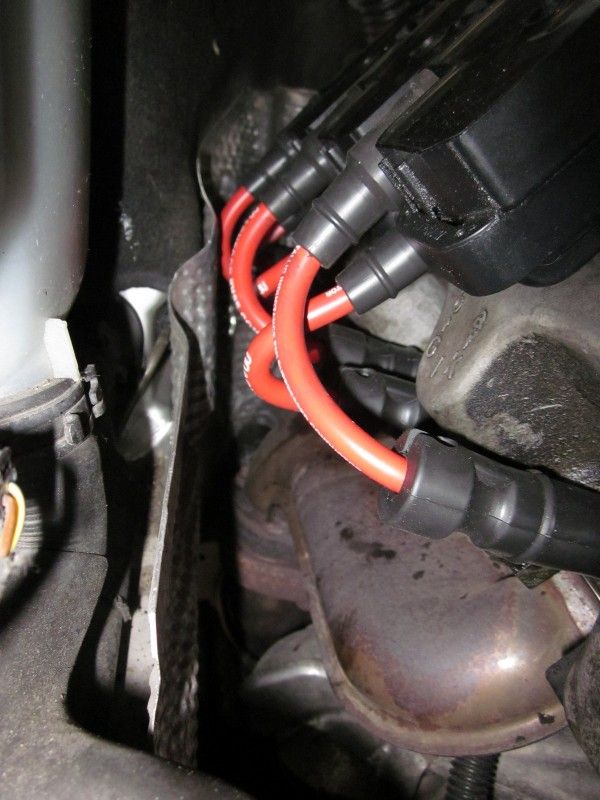
You can see the markings on the head for leads A and B for each coil pack. They are marked on the coils in two places as well so you don't need to keep track of what you remove from where.

Its not surprising the 55 y-pipe makes such a difference.
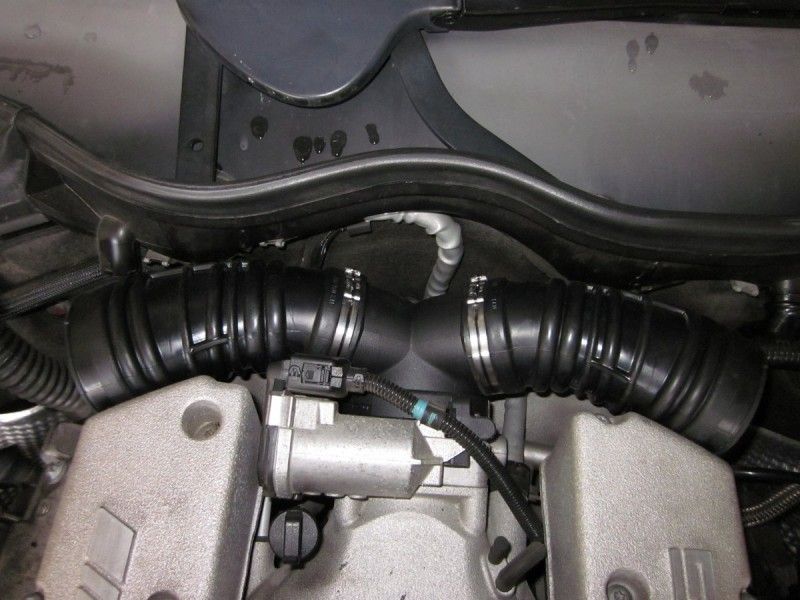
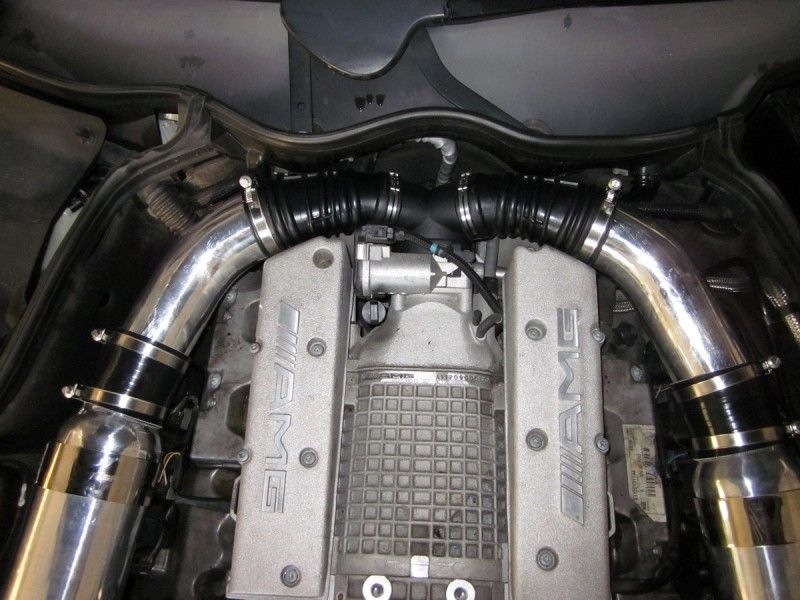
It is quite difficult to get it stuffed in there but as long as the bottom clip isn't caught on anything (to break off) you can push it down with some force. I recommend removing the screw from above the hood seal and taking the metal clip out where it will rub on the pipe. There are 4 clips but only 1 seems to be a problem. You can see the two on the left and only one on the far right since I removed the inner one already.
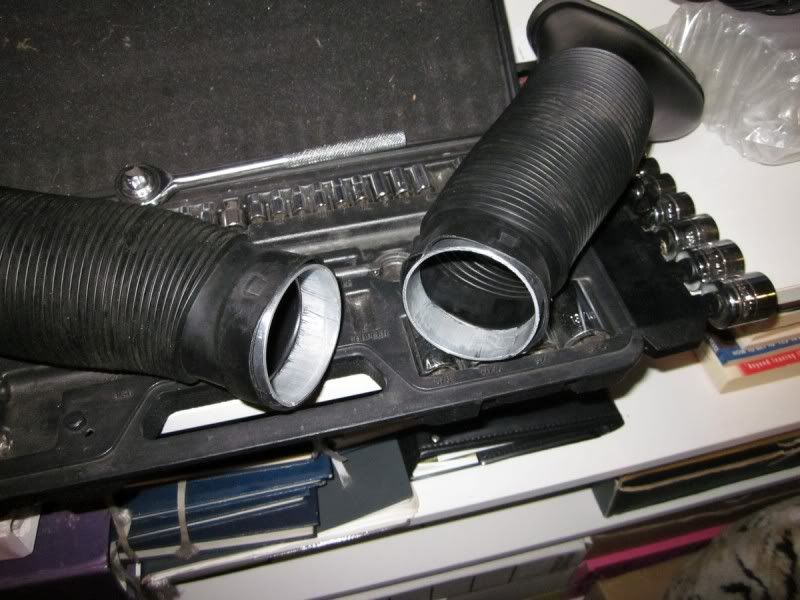
I am not really proud of this install. I would have preferred it to be a lot neater and fit better but I just wanted it done in the end. I used 2x 45 degree 3" pipes to make it. 90 degrees seems likely slightly too much and 45 I can tell you is not quite enough of a bend. The couplers are on angles and the stock scoops at the front are bent quite a long way to take up the extra bend. I might go back and make new pipes some other time or at least polish these ones up.
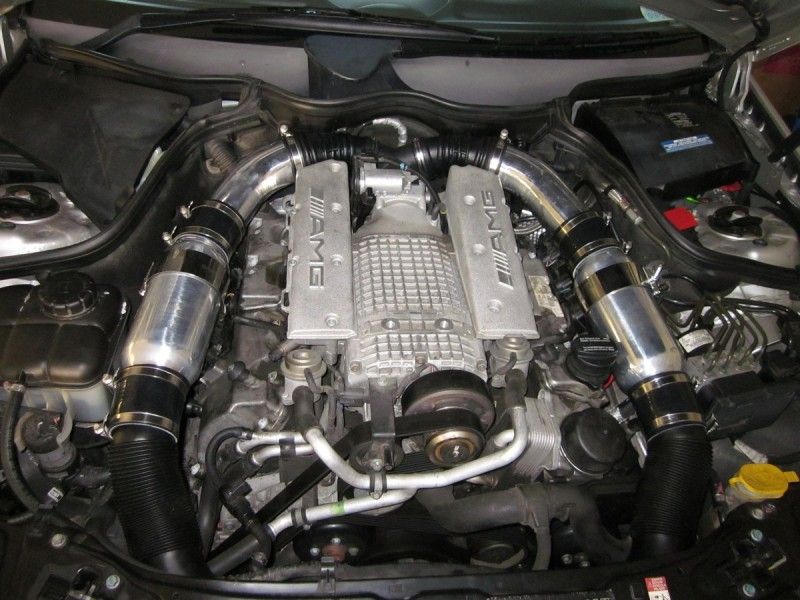
Anyone doing this will need 10x hose clamps 70-90mm, 4x 3" couplers, 2x bends in 3" aluminum probably with 90 degree bends and a hacksaw. I am not sure how everyone else has connected the plastic front scoops to the intake. I simply put the ends into the coupler and tightened a hose clamp down gently onto it. They are almost 3" in diameter despite being an annoying triangular shape.

The supercharger sound is a lot louder but nothing excessive at all. I seem to have more torque but I was mainly focusing on the magnecors not coming off on my test drive since this has been a problem on the forums. Now to wait for the supercharger pulley and ecu tune to arrive
Remove the intake and coil packs to get the leads. Each filter housing has two clips, one front, one back that pull directly upwards. There are two clips on the Y-pipe that hold it to the throttle body, one top, one bottom. The whole thing comes out as one unit. I found it easiest to remove the coil packs one at a time as I went from the front to back.
The spark plugs leads are moderate to very difficult to get off. The easiest way is to use a 17mm spanner to lever against the valve cover to push them off. This won't work if it is all you do since it is forcing them down as well. Push up on the metal portion of the lead from underneath when you lever against it with the spanner. If you push up intermittently while you lever you can remove the front 5 in a few seconds each once you get the hang of it. The back two are ******g ****s to put it nicely. I could only get the spanner on one of them and it took a lot of levering with screwdrivers from all different angles to finally get them loose, took about 10 mins each for these two.
Nice....
The gap had increased to about 0.045".
Iridiums are fine to gap just don't use a slide tool or any other which places stress on the fine tip.
Plugs are easy to remove unless they are seized into the head. A combination of 1/2" and 3/8" socket sets with adapter should provide enough extensions etc to get the correct lengths.
I got a torque wrench onto all 12 plugs and tighened to 20Nm with no anti-seize or grease.
I removed the ignition leads from the head first and then took the leads off the coils outside of the car. They are almost impossible to pull straight off the coil packs. But they come off very easily simply by twisting the rubber boot.
The magnecors seem fine. They do not hold onto the spark plug quite as tightly as the stock leads but they have a characteristic click you can feel so you know they are on the plug properly. If they come off you can slightly crush the end of the lead through the long rubber boot to make it tighter.
You can see the markings on the head for leads A and B for each coil pack. They are marked on the coils in two places as well so you don't need to keep track of what you remove from where.
Its not surprising the 55 y-pipe makes such a difference.
It is quite difficult to get it stuffed in there but as long as the bottom clip isn't caught on anything (to break off) you can push it down with some force. I recommend removing the screw from above the hood seal and taking the metal clip out where it will rub on the pipe. There are 4 clips but only 1 seems to be a problem. You can see the two on the left and only one on the far right since I removed the inner one already.
I am not really proud of this install. I would have preferred it to be a lot neater and fit better but I just wanted it done in the end. I used 2x 45 degree 3" pipes to make it. 90 degrees seems likely slightly too much and 45 I can tell you is not quite enough of a bend. The couplers are on angles and the stock scoops at the front are bent quite a long way to take up the extra bend. I might go back and make new pipes some other time or at least polish these ones up.
Anyone doing this will need 10x hose clamps 70-90mm, 4x 3" couplers, 2x bends in 3" aluminum probably with 90 degree bends and a hacksaw. I am not sure how everyone else has connected the plastic front scoops to the intake. I simply put the ends into the coupler and tightened a hose clamp down gently onto it. They are almost 3" in diameter despite being an annoying triangular shape.
The supercharger sound is a lot louder but nothing excessive at all. I seem to have more torque but I was mainly focusing on the magnecors not coming off on my test drive since this has been a problem on the forums. Now to wait for the supercharger pulley and ecu tune to arrive


 I cut a thick 3" rubber coupler in half and all is good.
08-18-2012, 08:15 PM
I cut a thick 3" rubber coupler in half and all is good.
08-18-2012, 08:15 PM
#6
MBWorld Fanatic!
Thread Starter
Thanks for the comments. Bryan how did you get the half coupler to stay there. Did you simply wedge the two halves between the firewall and the y-pipe where it touches on each side? Or is it ziptied around the y-pipe?
Which one wears through? the firewall or the y-pipe?
I don't like how the filters sit on the coil packs but it looks like everyone has it like this. If it stands the test of time I might get the aluminum anodized, maybe a deep tan colour or dark gray.
Which one wears through? the firewall or the y-pipe?
I don't like how the filters sit on the coil packs but it looks like everyone has it like this. If it stands the test of time I might get the aluminum anodized, maybe a deep tan colour or dark gray.
08-18-2012, 10:25 PM
#7
Super Member

Join Date: Jun 2011
Location: I liva at da land down under
Posts: 601
Likes: 0
Received 4 Likes
on
4 Posts
Porsche 2004 911

Trending Topics
08-20-2012, 02:30 AM
#8
MBWorld Fanatic!
Thread Starter
Is it the flat horizontal metal part of the firewall that damages the y-pipe?
Economy is significantly better to and from work today, feels like more torque as well. Definitely well worth doing.
Economy is significantly better to and from work today, feels like more torque as well. Definitely well worth doing.
08-20-2012, 07:19 AM
#9
MBWorld Fanatic!

Join Date: Mar 2004
Location: North NJ
Posts: 2,073
Likes: 0
Received 27 Likes
on
25 Posts
2002 C32 AMG, 2013 GLK 350/4, 2015 E63S AMG Wagon
And yes, my MPG did go up also.
08-20-2012, 09:01 AM
#10
Super Member
Join Date: Jun 2011
Location: I liva at da land down under
Posts: 601
Likes: 0
Received 4 Likes
on
4 Posts
Porsche 2004 911
Arrh a cowl I was wondering what you call it. It was the drivers side one that was wearing for me. I didnt have it on for long (3 days) until I noticed it being destroyed
I was wondering what you call it. It was the drivers side one that was wearing for me. I didnt have it on for long (3 days) until I noticed it being destroyed
 08-20-2012, 07:23 PM
#12
MBWorld Fanatic!
or you could coat the aluminum pipes with heat reflecting paint to keep the intake air cooler
08-22-2012, 11:32 AM
#13
Just wanted to share some experience that might help others. I have been meaning to do this for a while. I got some stock heat range NGK iridiums from needswings (thanks rob), magnecor leads from macbryanie (thanks) and parts for the intake from all over the place. I got my spectre filters from http://www.ebay.com/itm/3-line-Air-B...item564a91d21b after I asked if she could get hold of them. I highy recommend the seller. Summit racing is cheaper but did not have very good international shipping options. All the other parts are best picked up locally. The 55 series Y-pipe can be purchased from parts.com in the US.
Remove the intake and coil packs to get the leads. Each filter housing has two clips, one front, one back that pull directly upwards. There are two clips on the Y-pipe that hold it to the throttle body, one top, one bottom. The whole thing comes out as one unit. I found it easiest to remove the coil packs one at a time as I went from the front to back.
The spark plugs leads are moderate to very difficult to get off. The easiest way is to use a 17mm spanner to lever against the valve cover to push them off. This won't work if it is all you do since it is forcing them down as well. Push up on the metal portion of the lead from underneath when you lever against it with the spanner. If you push up intermittently while you lever you can remove the front 5 in a few seconds each once you get the hang of it. The back two are ******g ****s to put it nicely. I could only get the spanner on one of them and it took a lot of levering with screwdrivers from all different angles to finally get them loose, took about 10 mins each for these two.
Nice....
The gap had increased to about 0.045".
Iridiums are fine to gap just don't use a slide tool or any other which places stress on the fine tip.
Plugs are easy to remove unless they are seized into the head. A combination of 1/2" and 3/8" socket sets with adapter should provide enough extensions etc to get the correct lengths.
I got a torque wrench onto all 12 plugs and tighened to 20Nm with no anti-seize or grease.
I removed the ignition leads from the head first and then took the leads off the coils outside of the car. They are almost impossible to pull straight off the coil packs. But they come off very easily simply by twisting the rubber boot.
The magnecors seem fine. They do not hold onto the spark plug quite as tightly as the stock leads but they have a characteristic click you can feel so you know they are on the plug properly. If they come off you can slightly crush the end of the lead through the long rubber boot to make it tighter.
You can see the markings on the head for leads A and B for each coil pack. They are marked on the coils in two places as well so you don't need to keep track of what you remove from where.
Its not surprising the 55 y-pipe makes such a difference.
It is quite difficult to get it stuffed in there but as long as the bottom clip isn't caught on anything (to break off) you can push it down with some force. I recommend removing the screw from above the hood seal and taking the metal clip out where it will rub on the pipe. There are 4 clips but only 1 seems to be a problem. You can see the two on the left and only one on the far right since I removed the inner one already.
I am not really proud of this install. I would have preferred it to be a lot neater and fit better but I just wanted it done in the end. I used 2x 45 degree 3" pipes to make it. 90 degrees seems likely slightly too much and 45 I can tell you is not quite enough of a bend. The couplers are on angles and the stock scoops at the front are bent quite a long way to take up the extra bend. I might go back and make new pipes some other time or at least polish these ones up.
Anyone doing this will need 10x hose clamps 70-90mm, 4x 3" couplers, 2x bends in 3" aluminum probably with 90 degree bends and a hacksaw. I am not sure how everyone else has connected the plastic front scoops to the intake. I simply put the ends into the coupler and tightened a hose clamp down gently onto it. They are almost 3" in diameter despite being an annoying triangular shape.
The supercharger sound is a lot louder but nothing excessive at all. I seem to have more torque but I was mainly focusing on the magnecors not coming off on my test drive since this has been a problem on the forums. Now to wait for the supercharger pulley and ecu tune to arrive
08-22-2012, 12:07 PM
#14
MBWorld Fanatic!
oh how i love when people quote posts that have buttloads of pics embedded over and over again so you end up scrolling for an hour! lol
08-23-2012, 03:35 AM
#15
MBWorld Fanatic!
Thread Starter
Yes the aesthetics are a slight downside to this mod. An upside is that you can see and actually touch some stuff without having to remove the intake each time.
08-23-2012, 10:11 AM
#16
MBWorld Fanatic!
ya you've got a point...but I think you should paint them with some engine high temp paint!
09-15-2012, 11:13 PM
#17
MBWorld Fanatic!
Thread Starter
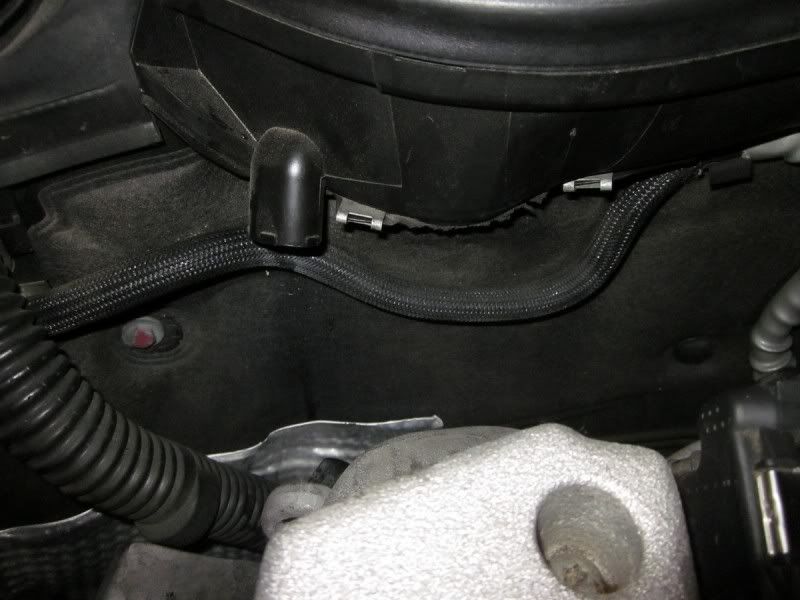
So after a few weeks I can see where the Y-pipe rubs on the firewall. It is particlarly on the left side of the engine bay where the metal piece sticks out. It also rubs on the other side but there is no metal there or at least it is not sticking out.
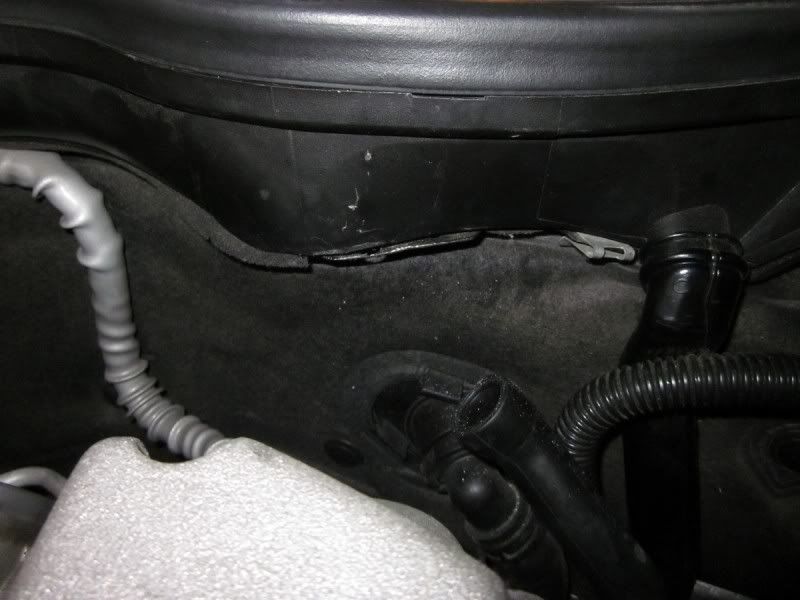
Here is what happens to the right side of the pipe.
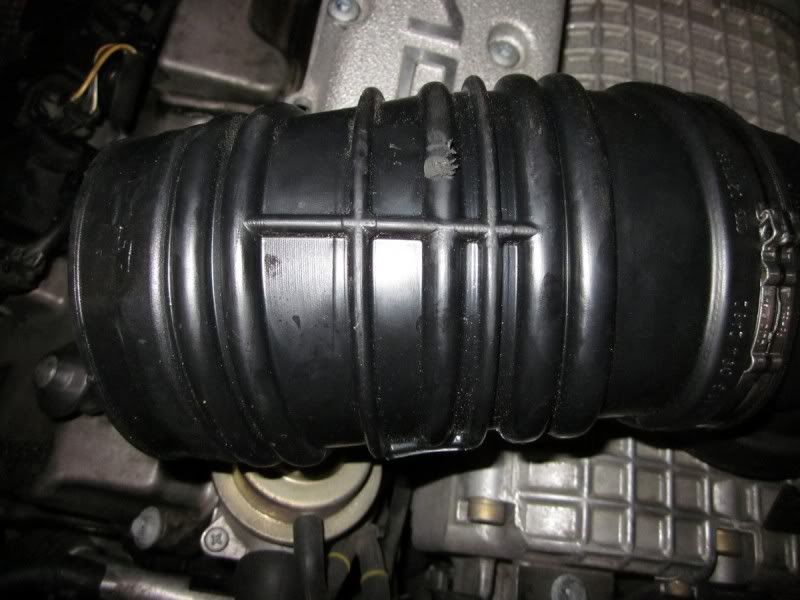
This is the left side of the pipe that is constantly being attacked by the piece of metal.

This is the piece of metal.
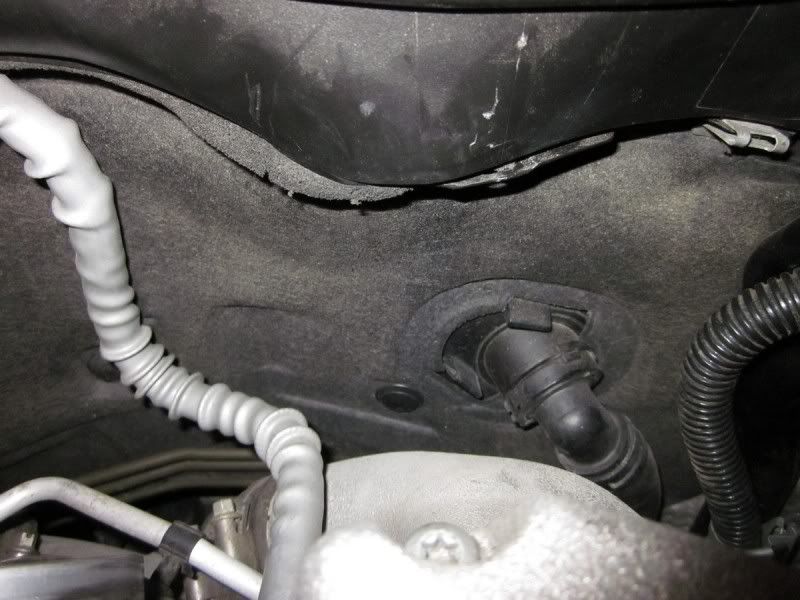
This is the plastic that is wearing out the other side very slowly. Those two clips do not contact the pipe.
So I ground down the metal.
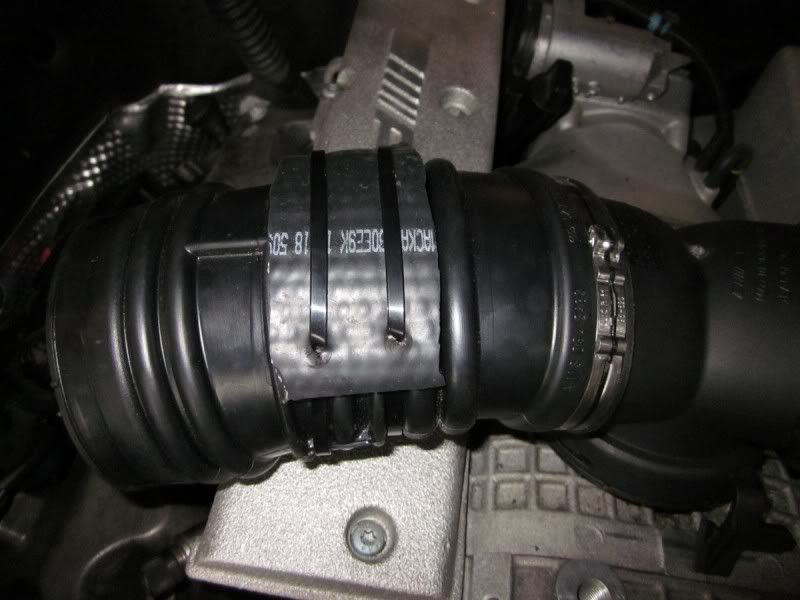
Then I cut up some new radiator hose I had lying around and zip tied it to the back of the pipe to protect it. Maybe a bit ghetto but you can hardly see it when it is installed.
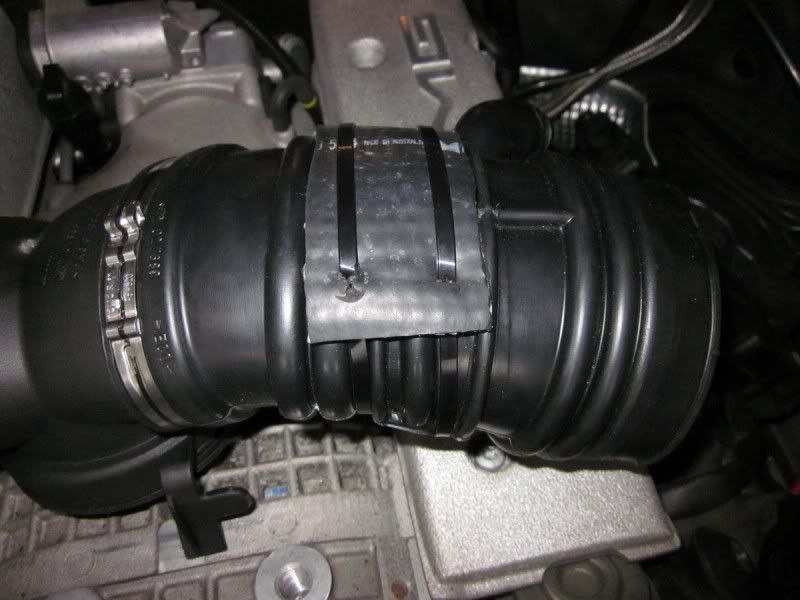
Hope this helps someone. It would have been easier to know this before I installed the y-pipe. Installation the first time went great. Removal was difficult, I broke the lower plastic tab off almost straight away. Installation the second time was very hard.
Here is what happens to the right side of the pipe.
This is the left side of the pipe that is constantly being attacked by the piece of metal.
This is the piece of metal.
This is the plastic that is wearing out the other side very slowly. Those two clips do not contact the pipe.
So I ground down the metal.
Then I cut up some new radiator hose I had lying around and zip tied it to the back of the pipe to protect it. Maybe a bit ghetto but you can hardly see it when it is installed.
Hope this helps someone. It would have been easier to know this before I installed the y-pipe. Installation the first time went great. Removal was difficult, I broke the lower plastic tab off almost straight away. Installation the second time was very hard.
Last edited by tw2; 09-15-2012 at 11:15 PM.
09-16-2012, 06:47 AM
#18
Super Member
Join Date: Jun 2011
Location: I liva at da land down under
Posts: 601
Likes: 0
Received 4 Likes
on
4 Posts
Porsche 2004 911
Then 3 days later I had a leak and it completely freaked me out till I worked out what it was. Car's idle was all over the place. A big hose ring clamp is braced by the bridge of the broken plastic clip screwed up tight and ypipe is going nowhere.
10-16-2012, 07:51 PM
#19
MBWorld Fanatic!
Thread Starter
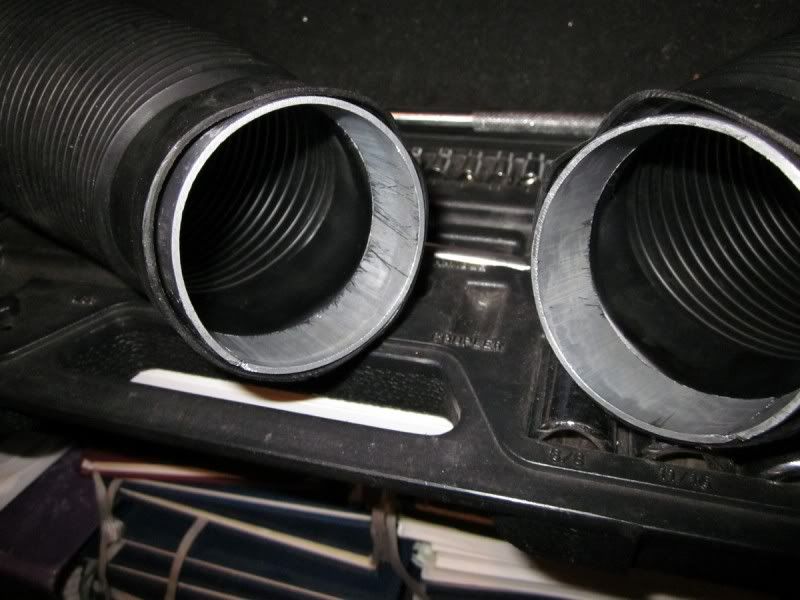
I found then I did the hose clamps up over the first join it crushed the plastic pipe. If I didn't do it up tight enough it would fall apart and too tight causes the ends to fold in on themselves. I ended up cutting some 3" aluminium pipe into 1" wide sections, then cutting through the middle and removing 15-20mm to make it fit nicely inside the ends so it doesn't crush.
 12-15-2012, 04:10 PM
#21
MBWorld Fanatic!
Thread Starter
03-31-2015, 05:27 AM
#22
Member
Join Date: Dec 2014
Location: Sofia. BG
Posts: 125
Likes: 0
Received 0 Likes
on
0 Posts
2003 CLK240
What sort of improvement did this setup give you? Do you know maybe roughly in numbers?
Sorry but I'm somewhat new here and still absorbing info from where I can.
Sorry but I'm somewhat new here and still absorbing info from where I can.
03-31-2015, 07:25 PM
#23
MBWorld Fanatic!
Thread Starter
Sorry no dyno numbers. The intake will be similar to the needswings one and definitely makes a noticeable difference during normal driving.
Plugs and leads made no difference just normal maintenance.
Plugs and leads made no difference just normal maintenance.
04-22-2015, 03:35 PM
#24
Member

Join Date: Apr 2015
Location: North Central PA
Posts: 95
Likes: 0
Received 0 Likes
on
0 Posts
2003 c32
LOLZ


