HOW TO: Remove your ECU
 11-30-2016, 07:31 PM
#1
Junior Member
Thread Starter

HOW TO: Remove your ECU
Due to the internet having woeful content on how to remove your ECU for C55 AMG im going to write a thread.
Firstly, you can do this with minimal technical knowledge and tools, but if you are unsure please engage a professional to do this as a replacement ECU wont be cheap.
You will need a flathead screwdriver or two, a torx t8 or t10 screwdriver, a small mirror and a torch.
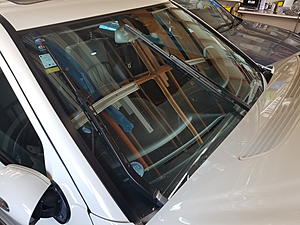
Firstly you need to IGN on to set your wipers to vertical, this comes into play later, turn on your wiper, as it reaches vertical on your windscreen turn your key off and remove it from the ignition. (your bonnet must be closed for this)
Your wipers now look like this:
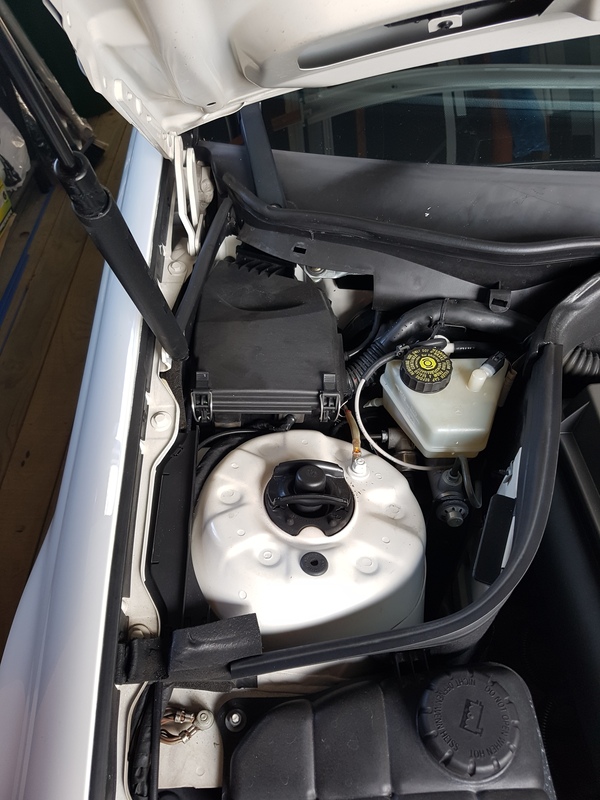
Next open the bonnet and look for your ECU, hint, it is under a cover near your bonnet hinges, if you are standing in front of the car it will be the left side (RHD car, LHD it may swap sides).
Two little twisty things that release the cover and a wiggle later you will see another cover, this one to be precise:

This is another obvious one, the two clips at the front unclip and you slide it towards the front of the car to get this cover off.
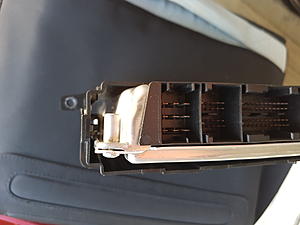
And here we have some relay, fuses and our ECU:
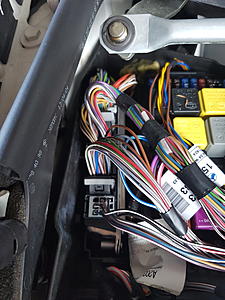
Unplug the ecu one plug at a time, front to back, the first connector has a clip on the side you squeeze in and pull it up and out. The next has a little grey lever, pull the lever and it will rotate foward and down pulling the plug out slightly for you, you can do the rest.
Three lever type plugs and two side clip type and you have an ECU ready to come out. Notice the big silver bar top of pic, this is the wiper arm when your wipers are sitting down, but we smartly solved this one earlier (except for me......)
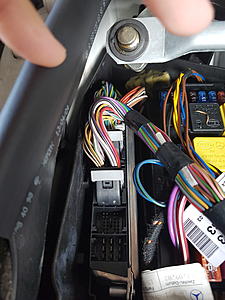
Now, the ECU is held in a plastic container by two clips, one at the front one at the rear, i worked this out after removing the plastic container via the two torx t8 or t10 screws holding it in, one, the front one is easy to see and get to, but the rear one requires a torch, a mirror and a long torx driver. They are the two silver screws on the ends of the container.

The clips are hard to see down the sides here:
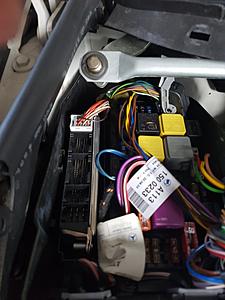
But easier to see here:
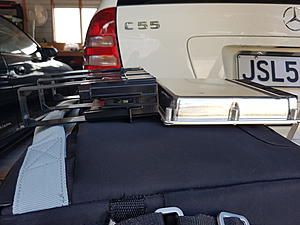
Now your ECU is out, ready to be reparied, tuned, replaced, whatever.
Firstly, you can do this with minimal technical knowledge and tools, but if you are unsure please engage a professional to do this as a replacement ECU wont be cheap.
You will need a flathead screwdriver or two, a torx t8 or t10 screwdriver, a small mirror and a torch.
Firstly you need to IGN on to set your wipers to vertical, this comes into play later, turn on your wiper, as it reaches vertical on your windscreen turn your key off and remove it from the ignition. (your bonnet must be closed for this)
Your wipers now look like this:

Next open the bonnet and look for your ECU, hint, it is under a cover near your bonnet hinges, if you are standing in front of the car it will be the left side (RHD car, LHD it may swap sides).
Two little twisty things that release the cover and a wiggle later you will see another cover, this one to be precise:
This is another obvious one, the two clips at the front unclip and you slide it towards the front of the car to get this cover off.
And here we have some relay, fuses and our ECU:

Unplug the ecu one plug at a time, front to back, the first connector has a clip on the side you squeeze in and pull it up and out. The next has a little grey lever, pull the lever and it will rotate foward and down pulling the plug out slightly for you, you can do the rest.

Three lever type plugs and two side clip type and you have an ECU ready to come out. Notice the big silver bar top of pic, this is the wiper arm when your wipers are sitting down, but we smartly solved this one earlier (except for me......)

Now, the ECU is held in a plastic container by two clips, one at the front one at the rear, i worked this out after removing the plastic container via the two torx t8 or t10 screws holding it in, one, the front one is easy to see and get to, but the rear one requires a torch, a mirror and a long torx driver. They are the two silver screws on the ends of the container.

The clips are hard to see down the sides here:

But easier to see here:

Now your ECU is out, ready to be reparied, tuned, replaced, whatever.

The following 3 users liked this post by daynger:
12-09-2016, 06:46 PM
#2
Junior Member
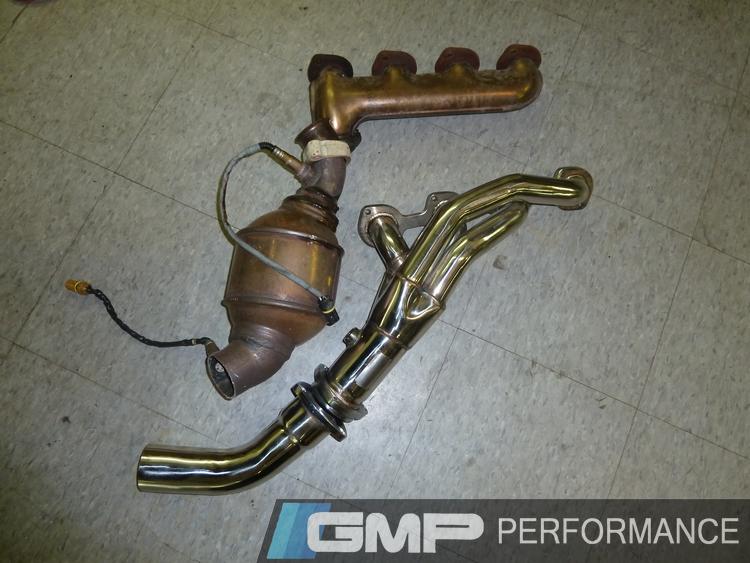
Thanks for the pictures. I'm actually thinking about taking out my ECU next summer and sending it to Eurocharge to get it reflashed. I reflashed the ECU for my Yamaha R1 sportbike a few years ago and it was the best modification that I have done to it. I'm thinking about getting a Kleeman or Eurocharge header, eliminate the scondary catalytic converters and resonator with an x-pipe.
Kleeman vs. Stock Headers and Primary Catalytic Converter

Stock exhaust system:
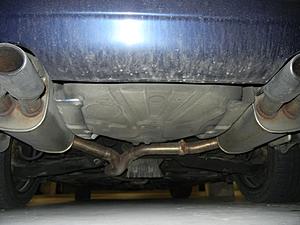
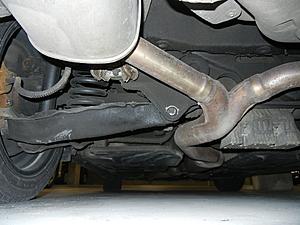
Resonator
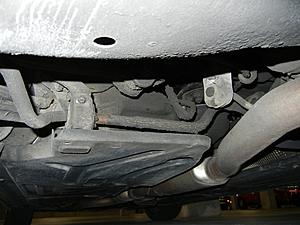
Secondary Catalytic Converters and Resonator
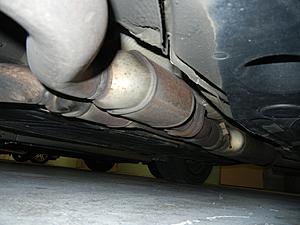
Stock Header and Space Around it
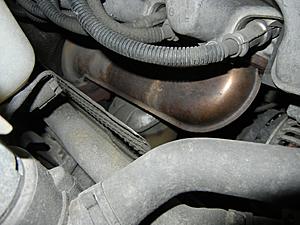
Kleeman vs. Stock Headers and Primary Catalytic Converter
Stock exhaust system:


Resonator

Secondary Catalytic Converters and Resonator

Stock Header and Space Around it
 01-05-2017, 05:39 AM
#3
Super Member
Great write up BUT you missed one valuable point. Disconnect the battery. I would think that an important step when working with or around electrical/electronic components.
See you have a wagon. Nice
See you have a wagon. Nice
01-06-2017, 07:30 PM
#4
Junior Member
Thread Starter
All of the ECU plugs are made in such a way they wont short against the chassis anyway and they are inside a plastic enclosure so the battery disconnect isnt necessary, although it wouldnt harm anything to do it.


