Carbon Fibre Wrapping Project - C63 AMG Interior
 02-28-2011, 01:53 AM
#1
Newbie
Thread Starter

Hey guys;
Just finished wrapping a complete interior for a buddies 2010 C63 AMG in black carbon fiber. This is not DiNoc vinyl; it's real carbon fiber cloth wrapped to the OE parts to ensure fitment is perfect and to maintain the original lines Mercedes desgined for these beautiful rides!!
Here's a few pictures of the original parts in his car:


When they first arrived (quite a number of little pieces in this set):

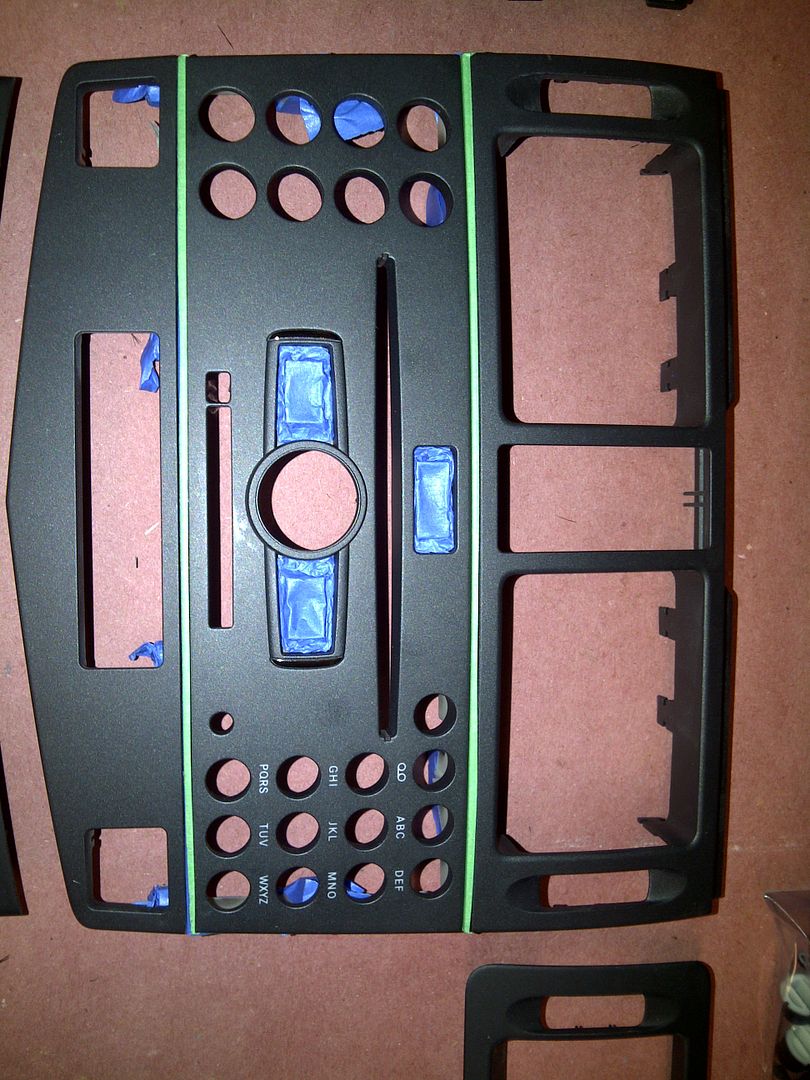
Stripped radio controls:
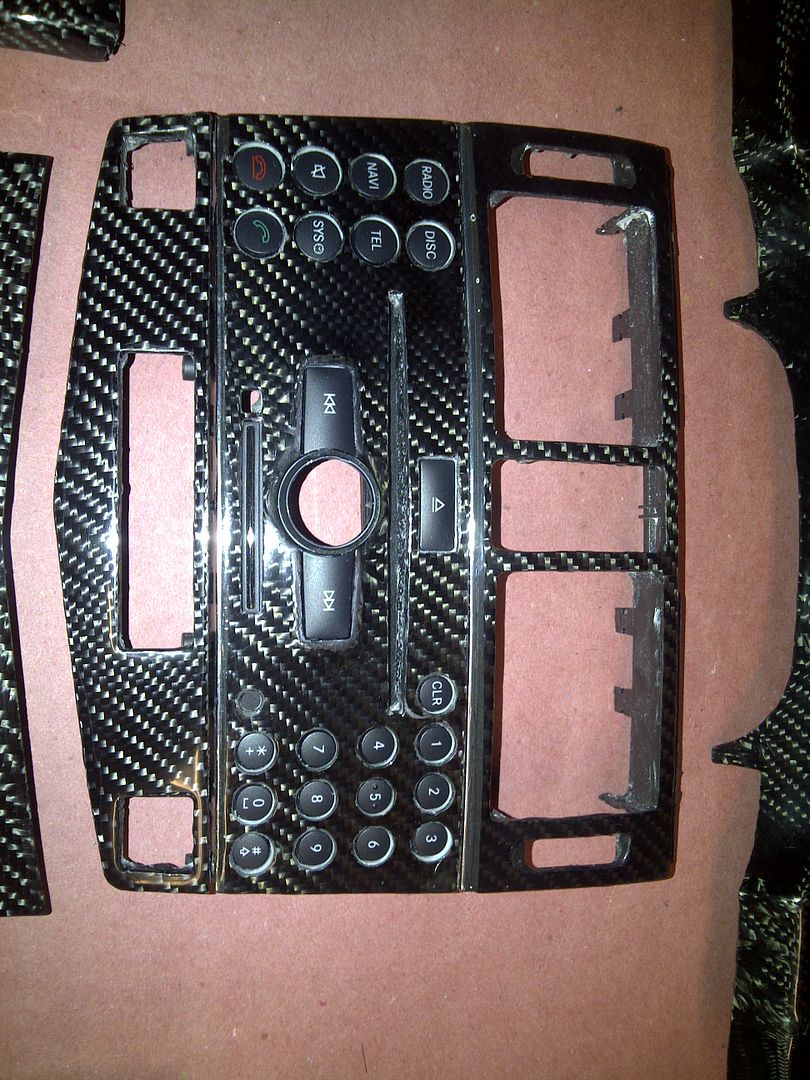
Thought it would be cool to wrap the entire centre control module from a single piece of cloth so the weave is continuous through all 3 pieces:


After several coats of resin and trimming they are starting to take shape:


After Clear Coat:


Finished Parts - Clear coated, buffed and polished.
So happens he was in town this weekend and just picked them up. Has promised installed pictures once back in US.


That radio control piece was a total PITA, but it came out real nice and so much better than having the pieces above and below in CF and radio control piece left factory.......
Installed pictures in about 1 week.....
Just finished wrapping a complete interior for a buddies 2010 C63 AMG in black carbon fiber. This is not DiNoc vinyl; it's real carbon fiber cloth wrapped to the OE parts to ensure fitment is perfect and to maintain the original lines Mercedes desgined for these beautiful rides!!
Here's a few pictures of the original parts in his car:
When they first arrived (quite a number of little pieces in this set):
Stripped radio controls:
Thought it would be cool to wrap the entire centre control module from a single piece of cloth so the weave is continuous through all 3 pieces:
After several coats of resin and trimming they are starting to take shape:
After Clear Coat:
Finished Parts - Clear coated, buffed and polished.
So happens he was in town this weekend and just picked them up. Has promised installed pictures once back in US.
That radio control piece was a total PITA, but it came out real nice and so much better than having the pieces above and below in CF and radio control piece left factory.......
Installed pictures in about 1 week.....


Trending Topics
02-28-2011, 09:00 AM
#8
Newbie
Thread Starter
Thanks! Was a lot of fun to wrap, while being a royal PITA as well. All those small parts were a ***** to wrap and especially buff. Bufer pad is larger than the pieces... LOL
Thanks! BASF 3-part claer coat. Same as used by Mercedes and BMW dealerships!
Haven't totalled the hours yet, but it was around 20 hours between wrapping, resin, sanding and particularly the buffing.
Your wishes are mt COMMAND... LOL PM me 

It was, but worth the end result
Thanks! BASF 3-part claer coat. Same as used by Mercedes and BMW dealerships!
Haven't totalled the hours yet, but it was around 20 hours between wrapping, resin, sanding and particularly the buffing.
It was, but worth the end result
02-28-2011, 10:55 AM
#11
MBWorld Fanatic!
Awesome work. Do you sand the last resin coat completely flat and smooth prior to the clear coat application? How do you keep the bubbles away during resin mixing and application?
02-28-2011, 07:43 PM
#12
Newbie
Thread Starter
Thanks! PM me with what you want wrapped!!!
Thanks as well!
Absolutely! Resin sanded, 220, 400 and then 800 before clear coating otherwise it would never be flat! I use a special marine resin which inherently produces few bubbles, but slow mixing is the trick. Rapind mixing creates a ton of bubbles... Secondly, I remove all excess resin after application. Use a resin roller cut into quarters to remove excess resin and only allow it to build in the low areas (that's why it takes 4-5 coats of resin to cover before considering wet sanding to prep for clear coat). Your goal is to fill in the low areas and reduce build-up on high spots......
PM me with what you want wrapped!!! Thanks as well!
Absolutely! Resin sanded, 220, 400 and then 800 before clear coating otherwise it would never be flat! I use a special marine resin which inherently produces few bubbles, but slow mixing is the trick. Rapind mixing creates a ton of bubbles... Secondly, I remove all excess resin after application. Use a resin roller cut into quarters to remove excess resin and only allow it to build in the low areas (that's why it takes 4-5 coats of resin to cover before considering wet sanding to prep for clear coat). Your goal is to fill in the low areas and reduce build-up on high spots......
03-01-2011, 12:43 AM
#13
MBWorld Fanatic!
Absolutely! Resin sanded, 220, 400 and then 800 before clear coating otherwise it would never be flat! I use a special marine resin which inherently produces few bubbles, but slow mixing is the trick. Rapind mixing creates a ton of bubbles... Secondly, I remove all excess resin after application. Use a resin roller cut into quarters to remove excess resin and only allow it to build in the low areas (that's why it takes 4-5 coats of resin to cover before considering wet sanding to prep for clear coat). Your goal is to fill in the low areas and reduce build-up on high spots......
03-01-2011, 08:01 AM
#14
Newbie
Thread Starter
Ah, my friend; that's the issue!!! Marine resin's are specially formulated to resist moisture, typically have slower hardening time, and typically have a "blueish" tinge. West Systems make the 105 resin, but I use the 208 Special Clear Hardener which has a pot life of 20 min and a working time of 90 - 110. The slower cure time, allows time to properly work the fabric on more complex parts and the 208 is specifically designed to be ultra clear, has UV protection and is chemically resistant.
03-01-2011, 04:24 PM
#16
MBWorld Fanatic!
Ah, my friend; that's the issue!!! Marine resin's are specially formulated to resist moisture, typically have slower hardening time, and typically have a "blueish" tinge. West Systems make the 105 resin, but I use the 208 Special Clear Hardener which has a pot life of 20 min and a working time of 90 - 110. The slower cure time, allows time to properly work the fabric on more complex parts and the 208 is specifically designed to be ultra clear, has UV protection and is chemically resistant.
 03-01-2011, 04:27 PM
#17
Can not wait to get these parts installed tomorrow! I have an appointment for tomorrow morning to get everything installed! I will post pictures of the parts installed as soon as I get it. The center conosol is just a work of art! As is everything that nachos23(Bill) does, I highly recommended his work.
 03-02-2011, 08:44 AM
#20
Newbie
Thread Starter
03-02-2011, 10:53 AM
#23
MBWorld Fanatic!
03-02-2011, 10:57 AM
#24
Newbie
Thread Starter
03-02-2011, 11:22 AM
#25
Newbie
Thread Starter


