When you click on links to various merchants on this site and make a purchase, this can result in this site earning a commission. Affiliate programs and affiliations include, but are not limited to, the eBay Partner Network.
I decided to mount my iPhone in my car, and I wanted to route the connector wire from under the dash, along the trim, and then up into the bottom of the iPhone as usual. I have the 518 option with the Multi Media interface. The current cable will not charge newer generation iPhones or iPods so I ordered a new cable. While waiting I decided to remove the glove box to get clear access to the area behind.
I had tried to do this when I hard-wired my radar detector and could never figure out how to remove the entire assembly. This time I decided to figure out how it all comes apart and then goes back together. The difference here as compared to other forum threads, is that I was able to figure out how to remove the cabin filter cover, the door by itself, and finally the box shell. It is very difficult to remove and replace the box without first removing the door.
To start, remove the three screws way underneath that hold the cabin filter area cover in place. The cover pulls straight down and then you need to remove the connector for the floor light.
Next pop-off the right hand trim panel adjacent to the A-pillar. There are just two friction clips holding the the panel near the front of the dash. Carefully pull/pry the panel toward the outside of the car, and the panel will pop loose. Work it out and toward the back of the car to release the right angle clips that keep the panel tight against the box.
Door Removal:
Open the door. On the lower right of the box, there is a toothed bar that runs thru a round device that regulates the speed at which the door drops. There is an open slot on the end that attaches to a pin on the door. Simply pop it up so that it's no longer connected to the pin. On either side of the carcass there is a small clip (see photos) that one would never know is not part of the molded assembly. With a small screwdriver pop out the clip on the right and remove completely. Do the same on the left. This one is harder to get to, but still pretty easy. The door will now drop down further and is being held in by its back edge resting against the box. Simply reach inside the box and flex the wall slightly, allowing the door to rotate down and out. With the door out of the way the box screws are all readily accessible.
Box Removal:
There are seven Torx T-20 screws holding up the carcass. Four are along the top inside lip, two on the left of the box, and one down underneath on the right. Remove them all, and the box will drop down and rotate away from you due to two large hooks the support to back of the box.
Disconnect the small connector for the box light. Next comes the connector for the cigarette lighter. After much searching for a release tab, I found there isn't one. The connector is a right angle type and pulls off toward the right side of the car. Use a small screwdriver to pry it loose (see photo). Depending on options, there also may be a connector at the top of the box for the media cable. To remove, use a screwdriver and apply pressure to the friction clip on the left side of the connector while pushing the whole connector down into the box. You can then rotate the connector a pop it up thru the box.
Re installation:
Reverse the above steps making sure to:
1. hook the large black hooks on the back of the box into their respective slots
2. hook the small toothed arm back onto the door pin.
3. replace both special clips that stop the door drop.
Hope this helps anyone that wants to remove the box. If anyone needs any help beyond the write-up and photos, please let me know.
I've been searching for pics like this that are the same as my glove box for ages.
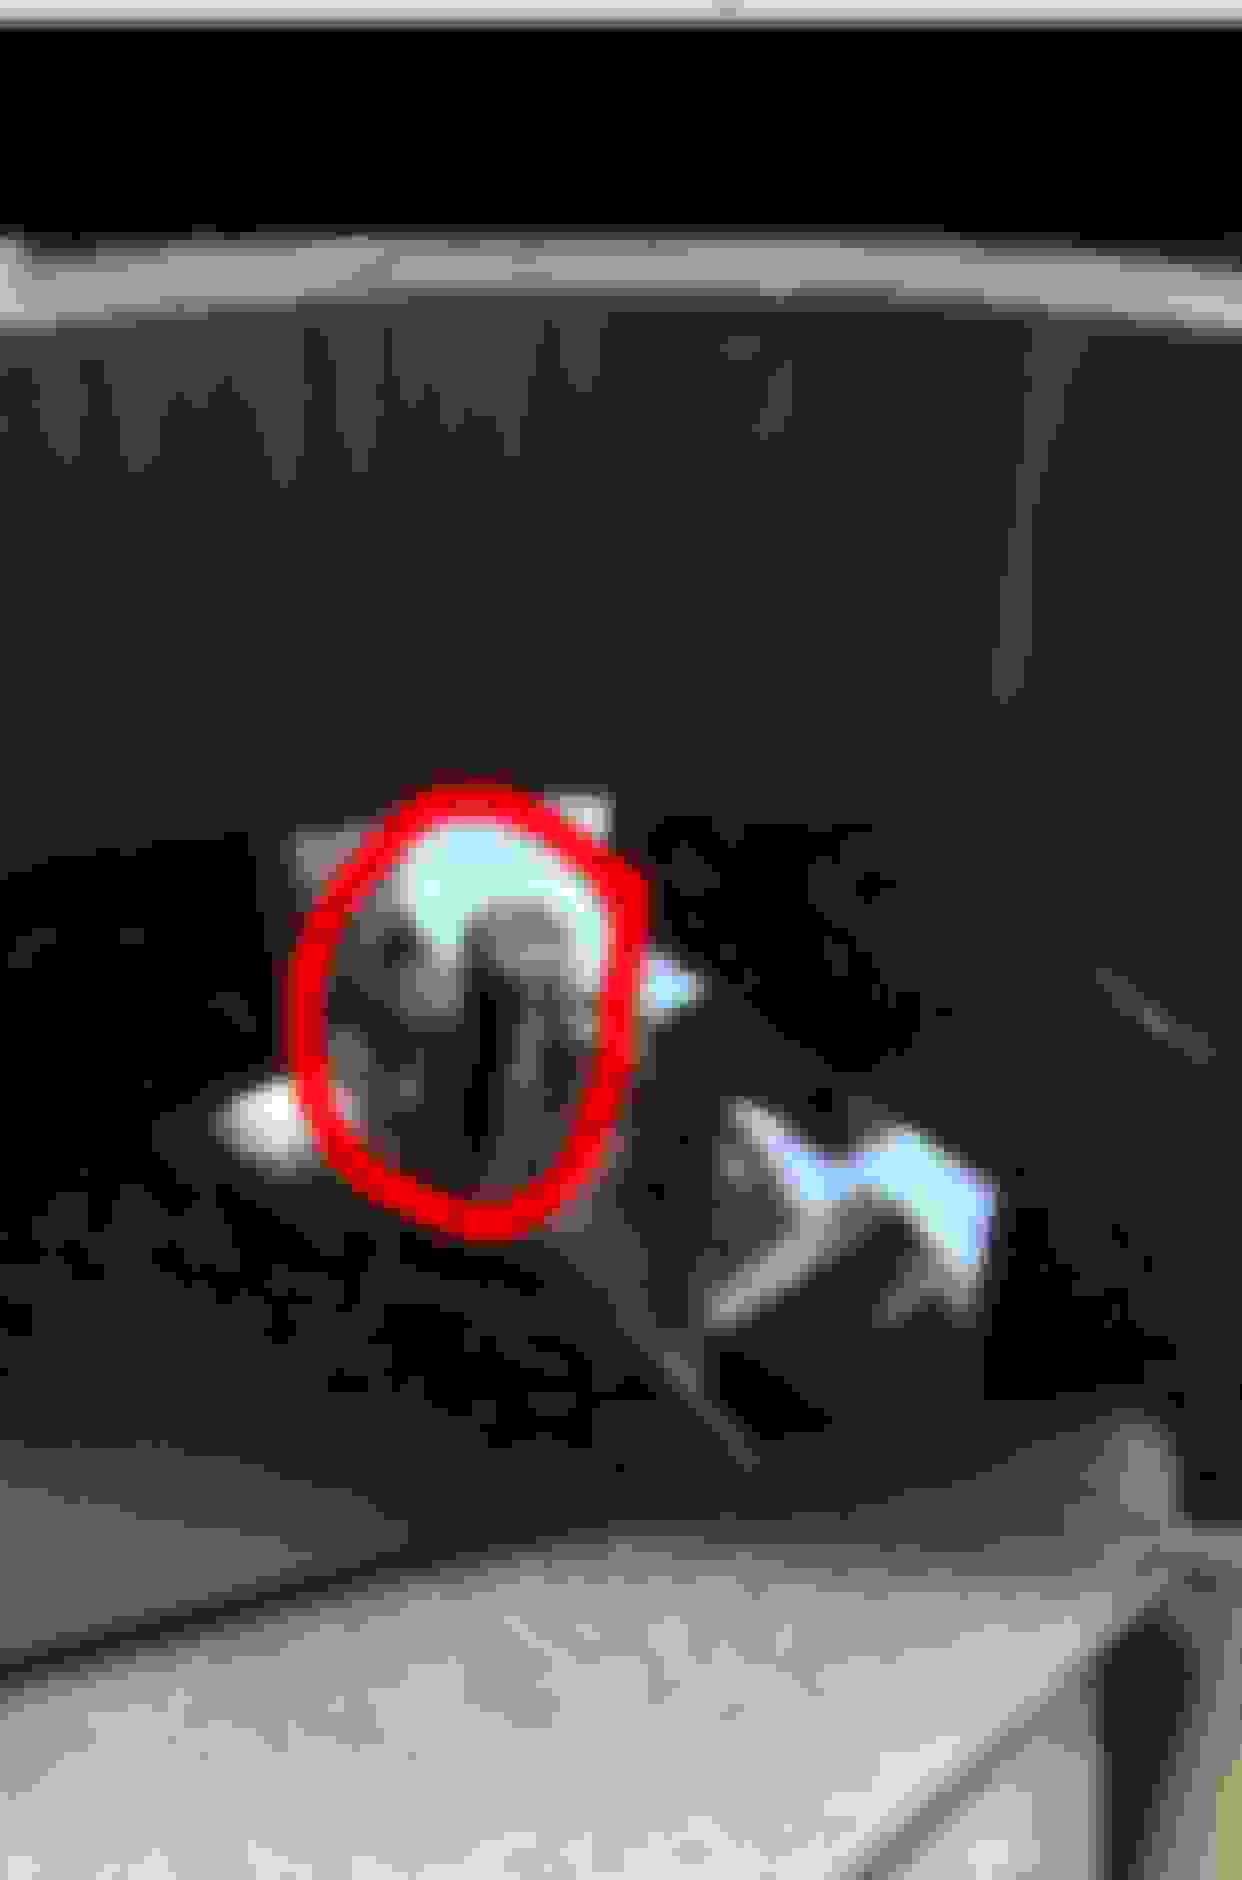
Does the hook part click on to where I've circled in red? Is that what makes the glove box open slowly?
also does anyone know what the clips are called. Mine have broken so trying to buy some.
If you can't find the clips, just buy a used glovebox off eBay. I got one for around $50 and it took like 15 minutes to take off the old one and put the new one on.
I decided to mount my iPhone in my car, and I wanted to route the connector wire from under the dash, along the trim, and then up into the bottom of the iPhone as usual. I have the 518 option with the Multi Media interface. The current cable will not charge newer generation iPhones or iPods so I ordered a new cable. While waiting I decided to remove the glove box to get clear access to the area behind.
I had tried to do this when I hard-wired my radar detector and could never figure out how to remove the entire assembly. This time I decided to figure out how it all comes apart and then goes back together. The difference here as compared to other forum threads, is that I was able to figure out how to remove the cabin filter cover, the door by itself, and finally the box shell. It is very difficult to remove and replace the box without first removing the door.
To start, remove the three screws way underneath that hold the cabin filter area cover in place. The cover pulls straight down and then you need to remove the connector for the floor light.
Next pop-off the right hand trim panel adjacent to the A-pillar. There are just two friction clips holding the the panel near the front of the dash. Carefully pull/pry the panel toward the outside of the car, and the panel will pop loose. Work it out and toward the back of the car to release the right angle clips that keep the panel tight against the box.
Door Removal:
Open the door. On the lower right of the box, there is a toothed bar that runs thru a round device that regulates the speed at which the door drops. There is an open slot on the end that attaches to a pin on the door. Simply pop it up so that it's no longer connected to the pin. On either side of the carcass there is a small clip (see photos) that one would never know is not part of the molded assembly. With a small screwdriver pop out the clip on the right and remove completely. Do the same on the left. This one is harder to get to, but still pretty easy. The door will now drop down further and is being held in by its back edge resting against the box. Simply reach inside the box and flex the wall slightly, allowing the door to rotate down and out. With the door out of the way the box screws are all readily accessible.
Box Removal:
There are seven Torx T-20 screws holding up the carcass. Four are along the top inside lip, two on the left of the box, and one down underneath on the right. Remove them all, and the box will drop down and rotate away from you due to two large hooks the support to back of the box.
Disconnect the small connector for the box light. Next comes the connector for the cigarette lighter. After much searching for a release tab, I found there isn't one. The connector is a right angle type and pulls off toward the right side of the car. Use a small screwdriver to pry it loose (see photo). Depending on options, there also may be a connector at the top of the box for the media cable. To remove, use a screwdriver and apply pressure to the friction clip on the left side of the connector while pushing the whole connector down into the box. You can then rotate the connector a pop it up thru the box.
Re installation:
Reverse the above steps making sure to:
1. hook the large black hooks on the back of the box into their respective slots
2. hook the small toothed arm back onto the door pin.
3. replace both special clips that stop the door drop.
Hope this helps anyone that wants to remove the box. If anyone needs any help beyond the write-up and photos, please let me know.
Regards,
Joe
Excellent write up Joe. I filed it.
That said I have a question.
On my R170 first gen SLK cell phones were bricks and the chargers not much better and for sure there was nothing in that car to charge one, to use the phone hands free or play music off it.
There are cassettes that go in the slot that work as a pick up so I pulled the head unit removed the cover, inserted the cassette treaded the wire through the back. I fished the wire down into the foot well. I threaded it under the console edge and up into the arm rest storage compartment.
For power I used a USB plug in the lighter initially but eventually spliced into the hard unit power source and installed the equivalent of the lighter again behind the head unit well insulated of course. I ran that cable to the same point in the arm rest storage.
A long way to the question. Could you have pulled the head unit and worked with a fish to get the cables to where you wanted them without all that disassembly?
Just curious.
Good question. Perhaps it was possible, but I didn't feel I could route the wire the desired way.
 12-03-2011, 07:59 PM