DIY - DEPO Projector Install
 03-24-2015, 09:09 PM
#1
Senior Member
Thread Starter
Join Date: Jul 2014
Location: So Cal
Posts: 417
Received 60 Likes
on
44 Posts
86 Targa, 91 560SEL, 06 E55 Estate, 13 C2S, 21 MACAN GTS, 05 R6 Track, 15 R3 RACE BIKE
DIY - DEPO Projector Install
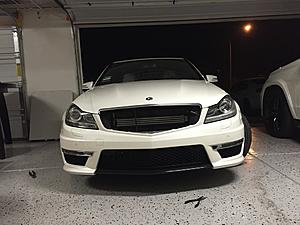
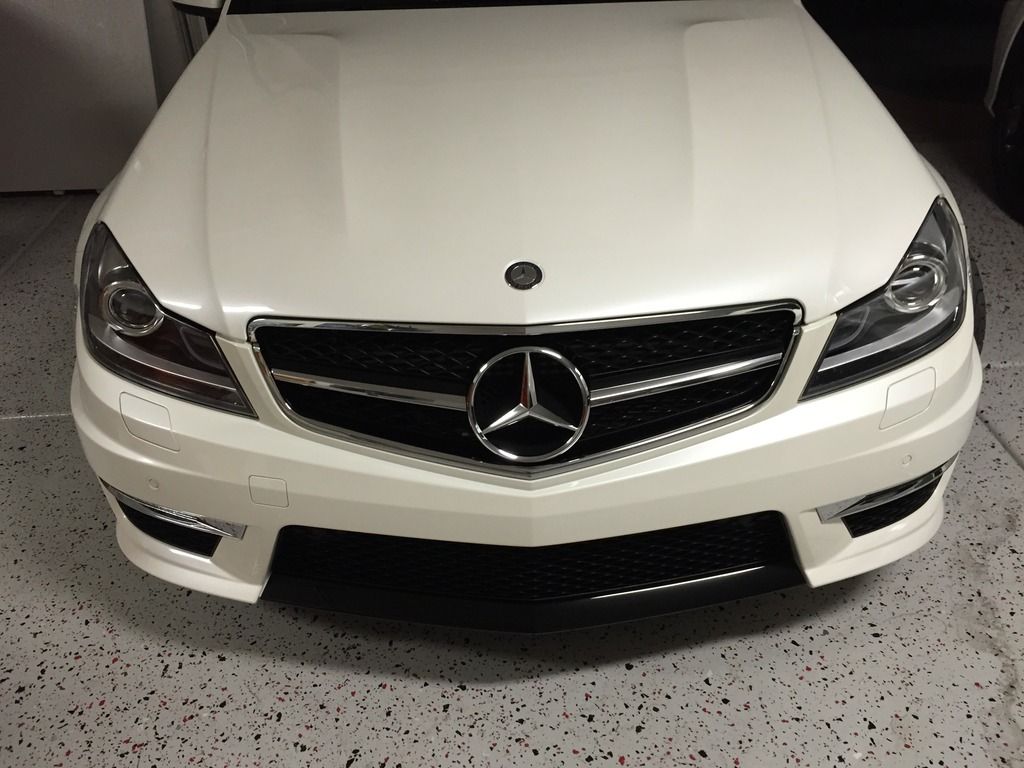
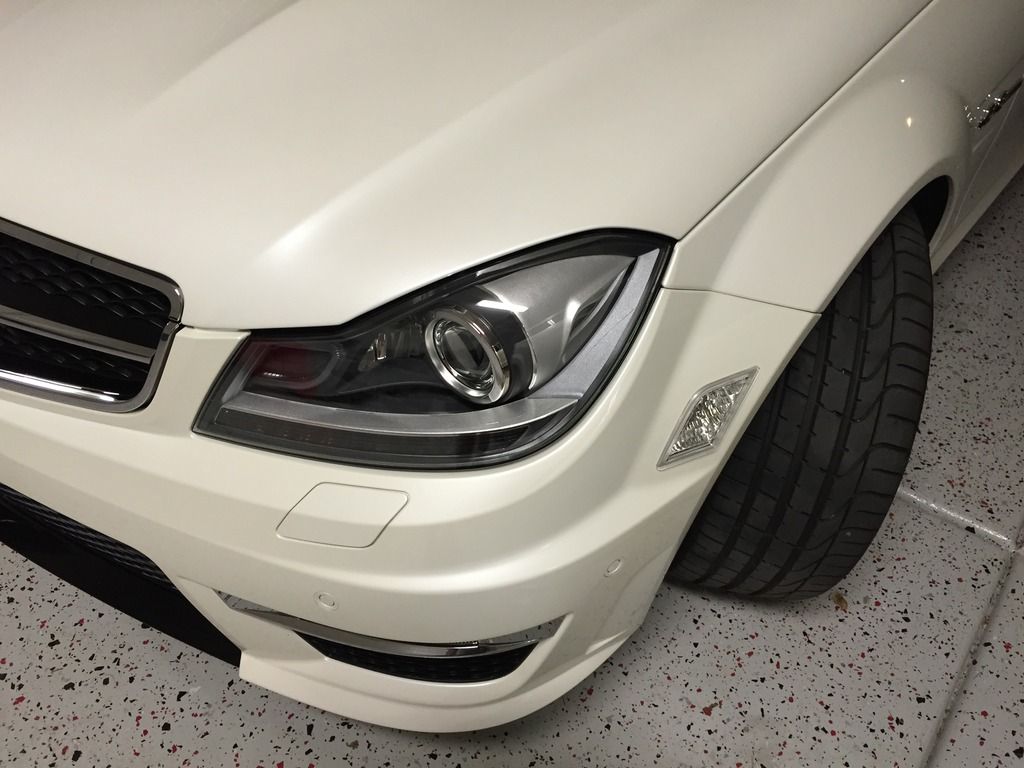
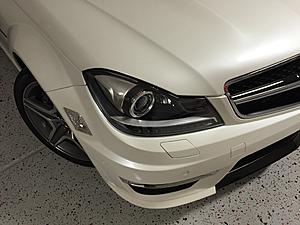
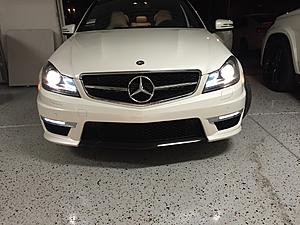
So you just purchased a beautiful C63. She is perfect in almost every way except for those lame halogen lamps up front. What are you to do? DEPO!
I have owned mine for just under a month and cannot stand looking at those lights any more.
Before I get into the install, I want to give a big shout out to the folks at DEPO. They are local to me, so I was able to go pick them up and get a cash discount. The guy I dealt with was Christian. Super standup guy. Very helpful and gave me some good tips.
These are full plug and play, no splicing, or cutting required.
OK on to the install.
Tools
8mm socket � drive
� drive ratchet + 3� extension
10mm socket 3/8 drive
3/8 drive ratchet 3� and/or 6� extensions
Flat head
Philips head
Light
Rags
Effort - I work on my own cars, and bikes, so this job is lower on my difficulty scale. It may be harder for others. The write up assumes you know how to or have experience working with car body parts. I skipped some small details, but there are some videos out there that can answer many questions.
Step 1 - Marking current lighting positions
1. Park your car in your garage or on a relatively flat surface with a wall or garage door a few feet from the front.
2. Start the car, turn on the lights, and mark the wall/door with tape where the lights hit. I used blue painters tape, but any will do.
3. Mark the center of the light beam with a vertical strip, and the height with a horizontal strip. You should have to �+� when done.
4. I also marked the floor where by front wheels were so I could park in the same spot once I am ready to adjust the new lights to match the old light�s positions. This will get you close, then you can fine tune the beams.
Step 2 (hydrate = Beer)
Step 3 � Test new lights before you take everything apart. This is super easy, and will save you a ton of work if one of the lights is bad. To do this, simply remove the connector from the OE light, and plug it into the new light. Have a helper who can look at the light while you try all the functions.
Step 3.1 - IMPORTANT! Install the dust cover on the rear of the light housing. It is shipped with a plastic brace zip tied in place and the dust cover loose in the box. Cut the zip ties, remove and discard the plastic brace. Warning, its a super tight fit. Took me 5+ minutes and an azz load of cussing to get the covers on.
Step 4 � Disassemble Johnny 5! I have worked on many cars, but never an MB so I went slow, and thought out each step before starting. She is basically new, so I wanted to make sure she goes back together and looks OE.
1. Remove ram air intake tubes by gently pulling the tube from behind the accordion section toward you, then roll up and pull off the front from the grill area.
2. Remove the radiator cover
3. Remove the grill
4. Set all aside.
Moving to the front fascia
1. Turn the wheels all the way left
2. Start on the passenger side removing 3 plastic pop rivets in the front wheel well.
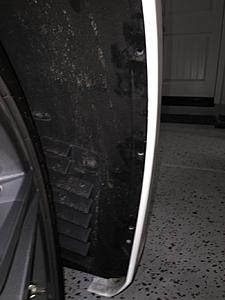
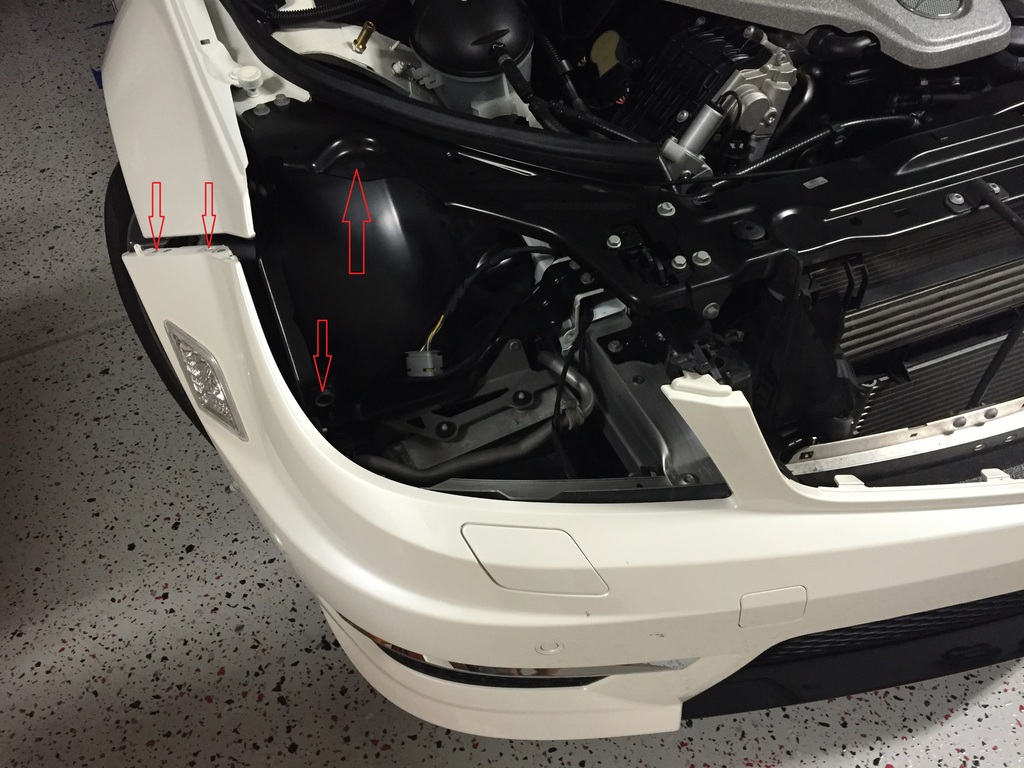
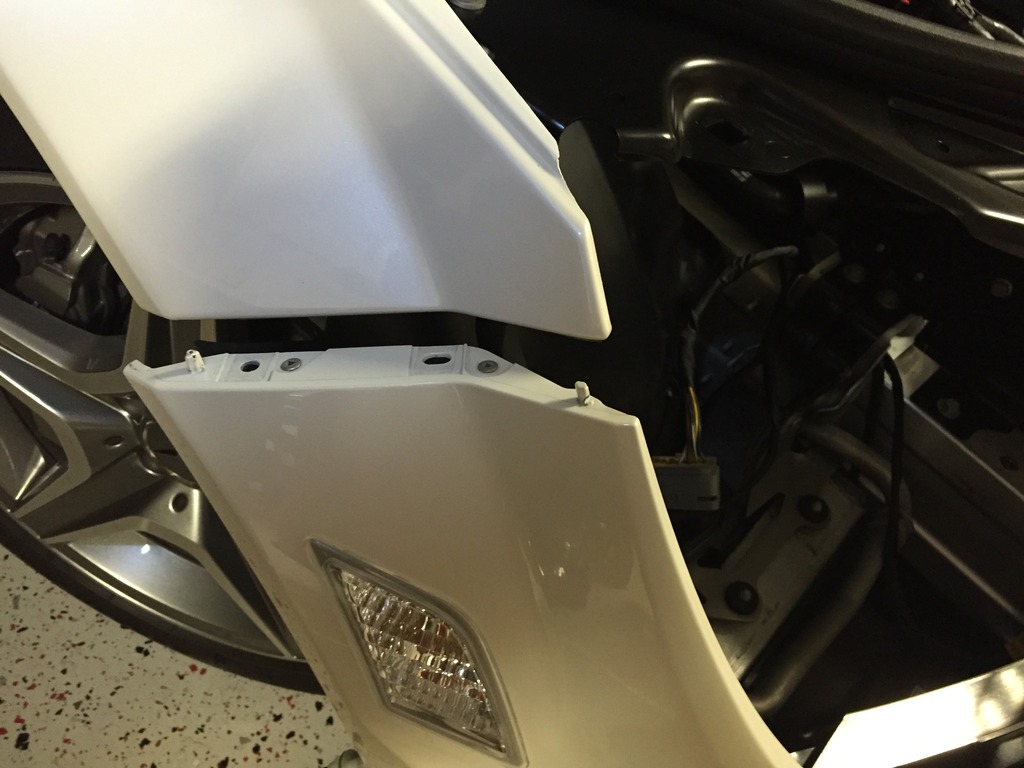
3. Gently pull back the wheel well cover to see the rear of the headlight, and access the two 10MM bolts holding the fascia to the body panel.
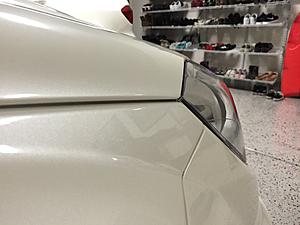
a. I removed the side marker light from the housing to have a little more room for my hands and to make sure I didn�t break the light or housing. It�s a tight fit in there!@
(I took pictures after the light was removed to get a good view of bolt holes you need to locate from the back of the light)
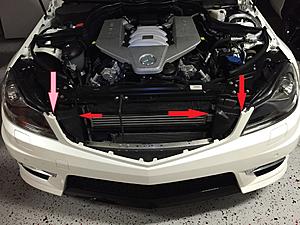
4. Remove the headlight bolt with 8MM socket. (small lower down arrow)
5. Remove two 10MM bolts holding fascia (two small vertical down arrows)

6. Remove the two 10MM bolts on either side of the front grill (vertical arrows)
7. Turn wheels all the way to the right, and repeat the same steps you did on the right side to the left (driver) side.
Step 4 � Loosen Front Fascia
1. Gently and I mean gently, loosen the fascia from the body panels. Be careful not to break the two weak a$$ tabs on each side of the fascia. Work each side down and out. Making sure to clear the tabs from the body panel before you pull the fascia out

Step 5 � Remove the 4 remaining 8MM bolts from each head
1. Each light has a bolt next to the radiator. (fold back the rubber cowling horizontal arrows.)
2. Each light has a single top bolt that is located under the steel cross brace where the top of the light housing is resting. (this was is a pain on the driver side.)(vertical arrow pointing up)
Step 6 � Replace each light.
1. Before you install the light, set the level adjustment screws to match where your OE lights were set.
2. I highly recommend a helper to gently pull back the fascia while you maneuver the old light out and while you install the new light. It�s a tight fit, but can be done, just be patient, and don�t force it. When you get it right, the light will slide into place.
3. Once the light is in and still loose, connect the connector.
Step 7 � Reassemble Johnny 5! - Reverse the steps for reassembly.
A few tips
1. Don�t tighten everything up. Finger tight will do as you will need to move the lights and adjust their position to get all the lines to match up.
2. Realign your car (if moved) back to the spot where you marked the light beams. (remove all tools from engine bay before you start the car)
3. Adjust the vertical positions to be the same height as your horizontal tape lines.
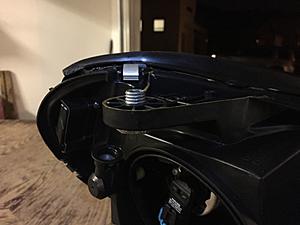
a. There are basically three mounting points for each light. The front and top points have adjustment cylinders. I set mine to the same as OE as a starting point.
b. Once the height is adjusted, close the hood and check the gaps between the lights and each body section. This part took the longest. Open hood adjust, close hood check, open��.recheck light positions.
c. Each light has a surprising amount of adjustment movement front to back, left to right. Be patient, work each light to the correct location, always checking the beam height. Tighten down the 8MM bolts once you get it where you want it.
Here you can see the light needs to slide back a bit to even up the gap.

The passenger side is perfect!!
4. Don�t worry about left right alignment until you get everything buttoned up.
Step 8 � Adjust beam to match your �+�
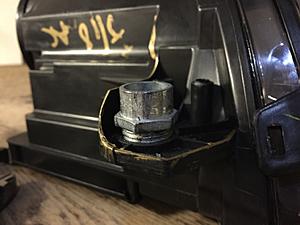
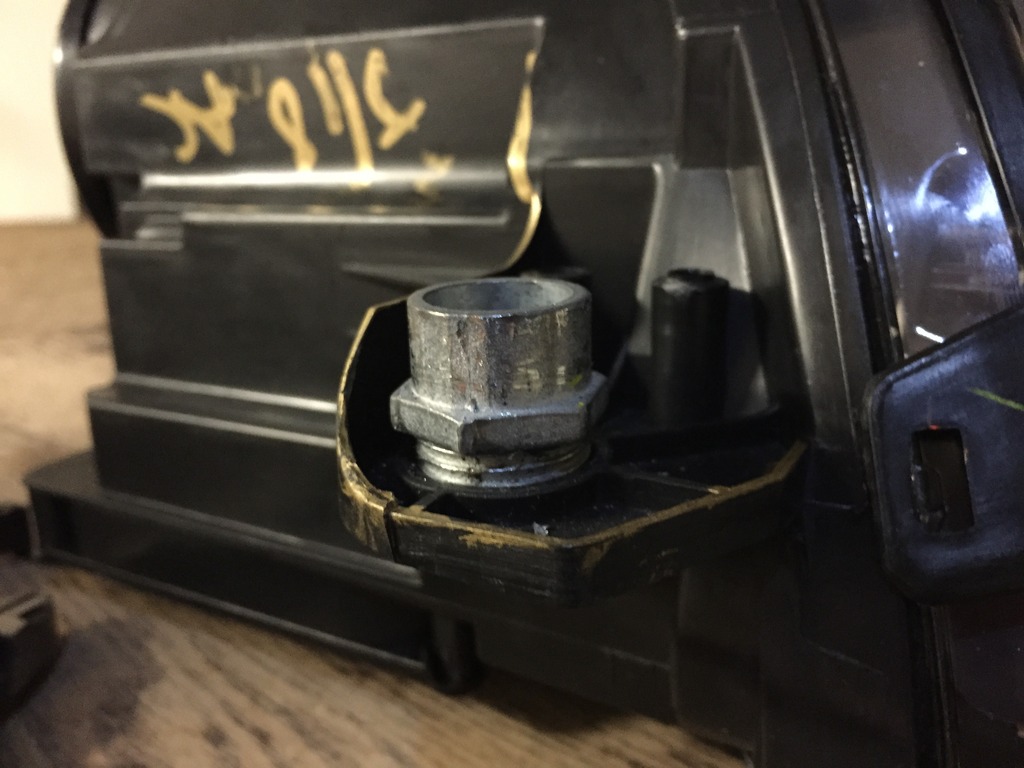
1. Each light has a phillips adjuster located to the far outside of the back of the light.
2. Use a large phillips to turn the adjuster and watch which way the beam moves.
(Picture of the left right adjuster)
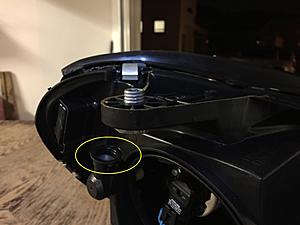
3. Turn until you get the middle of the �beam step� to line up with your vertical tape
4. If you hit the end of the adjustment and still need more, you will have to open the hood, and loosen the 8MM mounting bolts to shift the light. Then recheck gaps and height.
Step 9 � Go for a drive at night to check beam adjustment. Make necessary adjustments.
CHEERS!
I have owned mine for just under a month and cannot stand looking at those lights any more.
Before I get into the install, I want to give a big shout out to the folks at DEPO. They are local to me, so I was able to go pick them up and get a cash discount.
The guy I dealt with was Christian. Super standup guy. Very helpful and gave me some good tips. These are full plug and play, no splicing, or cutting required.
OK on to the install.
Tools
8mm socket � drive
� drive ratchet + 3� extension
10mm socket 3/8 drive
3/8 drive ratchet 3� and/or 6� extensions
Flat head
Philips head
Light
Rags
Effort - I work on my own cars, and bikes, so this job is lower on my difficulty scale. It may be harder for others. The write up assumes you know how to or have experience working with car body parts. I skipped some small details, but there are some videos out there that can answer many questions.
Step 1 - Marking current lighting positions
1. Park your car in your garage or on a relatively flat surface with a wall or garage door a few feet from the front.
2. Start the car, turn on the lights, and mark the wall/door with tape where the lights hit. I used blue painters tape, but any will do.
3. Mark the center of the light beam with a vertical strip, and the height with a horizontal strip. You should have to �+� when done.
4. I also marked the floor where by front wheels were so I could park in the same spot once I am ready to adjust the new lights to match the old light�s positions. This will get you close, then you can fine tune the beams.
Step 2 (hydrate = Beer)
Step 3 � Test new lights before you take everything apart. This is super easy, and will save you a ton of work if one of the lights is bad. To do this, simply remove the connector from the OE light, and plug it into the new light. Have a helper who can look at the light while you try all the functions.
Step 3.1 - IMPORTANT! Install the dust cover on the rear of the light housing. It is shipped with a plastic brace zip tied in place and the dust cover loose in the box. Cut the zip ties, remove and discard the plastic brace. Warning, its a super tight fit. Took me 5+ minutes and an azz load of cussing to get the covers on.
Step 4 � Disassemble Johnny 5! I have worked on many cars, but never an MB so I went slow, and thought out each step before starting. She is basically new, so I wanted to make sure she goes back together and looks OE.
1. Remove ram air intake tubes by gently pulling the tube from behind the accordion section toward you, then roll up and pull off the front from the grill area.
2. Remove the radiator cover
3. Remove the grill
4. Set all aside.
Moving to the front fascia
1. Turn the wheels all the way left
2. Start on the passenger side removing 3 plastic pop rivets in the front wheel well.

3. Gently pull back the wheel well cover to see the rear of the headlight, and access the two 10MM bolts holding the fascia to the body panel.
a. I removed the side marker light from the housing to have a little more room for my hands and to make sure I didn�t break the light or housing. It�s a tight fit in there!@
(I took pictures after the light was removed to get a good view of bolt holes you need to locate from the back of the light)
4. Remove the headlight bolt with 8MM socket. (small lower down arrow)
5. Remove two 10MM bolts holding fascia (two small vertical down arrows)
6. Remove the two 10MM bolts on either side of the front grill (vertical arrows)

7. Turn wheels all the way to the right, and repeat the same steps you did on the right side to the left (driver) side.
Step 4 � Loosen Front Fascia
1. Gently and I mean gently, loosen the fascia from the body panels. Be careful not to break the two weak a$$ tabs on each side of the fascia. Work each side down and out. Making sure to clear the tabs from the body panel before you pull the fascia out
Step 5 � Remove the 4 remaining 8MM bolts from each head
1. Each light has a bolt next to the radiator. (fold back the rubber cowling horizontal arrows.)
2. Each light has a single top bolt that is located under the steel cross brace where the top of the light housing is resting. (this was is a pain on the driver side.)(vertical arrow pointing up)
Step 6 � Replace each light.
1. Before you install the light, set the level adjustment screws to match where your OE lights were set.

2. I highly recommend a helper to gently pull back the fascia while you maneuver the old light out and while you install the new light. It�s a tight fit, but can be done, just be patient, and don�t force it. When you get it right, the light will slide into place.
3. Once the light is in and still loose, connect the connector.
Step 7 � Reassemble Johnny 5! - Reverse the steps for reassembly.
A few tips
1. Don�t tighten everything up. Finger tight will do as you will need to move the lights and adjust their position to get all the lines to match up.
2. Realign your car (if moved) back to the spot where you marked the light beams. (remove all tools from engine bay before you start the car)
3. Adjust the vertical positions to be the same height as your horizontal tape lines.
a. There are basically three mounting points for each light. The front and top points have adjustment cylinders. I set mine to the same as OE as a starting point.
b. Once the height is adjusted, close the hood and check the gaps between the lights and each body section. This part took the longest. Open hood adjust, close hood check, open��.recheck light positions.
c. Each light has a surprising amount of adjustment movement front to back, left to right. Be patient, work each light to the correct location, always checking the beam height. Tighten down the 8MM bolts once you get it where you want it.
Here you can see the light needs to slide back a bit to even up the gap.

The passenger side is perfect!!


4. Don�t worry about left right alignment until you get everything buttoned up.
Step 8 � Adjust beam to match your �+�
1. Each light has a phillips adjuster located to the far outside of the back of the light.
2. Use a large phillips to turn the adjuster and watch which way the beam moves.
(Picture of the left right adjuster)

3. Turn until you get the middle of the �beam step� to line up with your vertical tape
4. If you hit the end of the adjustment and still need more, you will have to open the hood, and loosen the 8MM mounting bolts to shift the light. Then recheck gaps and height.
Step 9 � Go for a drive at night to check beam adjustment. Make necessary adjustments.


CHEERS!


 04-03-2015, 07:41 PM
#5
Member

Join Date: Mar 2015
Location: Texas
Posts: 173
Received 0 Likes
on
0 Posts
2013 C63 AMG and 2002 Ford Explorer Sport
On my car the long lights at the bottom of the bumper, which I assume are the daylight running lights don't come on at all unless DRL are enabled. So I assume this means that is the ONLY time they ever come on. However in your images Silversun262 they are on with the new headlamp assemblies installed. Is that normal now?
P.S. I have contacted Fishcake on ebay about these, however he says he only has one set left, but I don't know if he is getting more in later. I am awaiting a response about that now. So the connections are identical and nothing needs to be added to these? Just making sure. Thanks again.
Howie
P.S. I have contacted Fishcake on ebay about these, however he says he only has one set left, but I don't know if he is getting more in later. I am awaiting a response about that now. So the connections are identical and nothing needs to be added to these? Just making sure. Thanks again.
Howie
04-03-2015, 07:51 PM
#6
Senior Member
Thread Starter
Join Date: Jul 2014
Location: So Cal
Posts: 417
Received 60 Likes
on
44 Posts
86 Targa, 91 560SEL, 06 E55 Estate, 13 C2S, 21 MACAN GTS, 05 R6 Track, 15 R3 RACE BIKE
What I have found about DRL's
Daytime
Lighst on Auto = DRL only
Lights on manual = Projector and "C" light no DRL
LIghts on auto + push lamp button to left of light selector = Projector and "C" light no DRL
Night time
Lights on Auto = DRL + Projector & "C" light
LIghts on auto + push lamp button to left of light selector = Projector and "C" light no DRL
I figured this out while waiting on my wife sitting in front of a store where I could see the lights reflected in the glass.
On my car the long lights at the bottom of the bumper, which I assume are the daylight running lights don't come on at all unless DRL are enabled. So I assume this means that is the ONLY time they ever come on. However in your images Silversun262 they are on with the new headlamp assemblies installed. Is that normal now?
P.S. I have contacted Fishcake on ebay about these, however he says he only has one set left, but I don't know if he is getting more in later. I am awaiting a response about that now. So the connections are identical and nothing needs to be added to these? Just making sure. Thanks again.
Howie
P.S. I have contacted Fishcake on ebay about these, however he says he only has one set left, but I don't know if he is getting more in later. I am awaiting a response about that now. So the connections are identical and nothing needs to be added to these? Just making sure. Thanks again.
Howie
04-03-2015, 09:11 PM
#7
Member
Join Date: Mar 2015
Location: Texas
Posts: 173
Received 0 Likes
on
0 Posts
2013 C63 AMG and 2002 Ford Explorer Sport
That's funny. I placed with the lights yesterday in front of a store, but I didn't get the same results as you describe. Sooooooooo, I just went outside since it is after 8pm and the lights on this bugger seem to work differently. I also figured out the car has to be running to get all of the lights to work. And they DID work as you described, so it seems all is well.
Now I need to make the decision to drop the duckets. Thanks for the assist Mr. Silversun262.
Now I need to make the decision to drop the duckets. Thanks for the assist Mr. Silversun262.
Trending Topics
04-03-2015, 09:32 PM
#8
Senior Member
Thread Starter
Join Date: Jul 2014
Location: So Cal
Posts: 417
Received 60 Likes
on
44 Posts
86 Targa, 91 560SEL, 06 E55 Estate, 13 C2S, 21 MACAN GTS, 05 R6 Track, 15 R3 RACE BIKE
Happy to be of assistance! Good luck!
That's funny. I placed with the lights yesterday in front of a store, but I didn't get the same results as you describe. Sooooooooo, I just went outside since it is after 8pm and the lights on this bugger seem to work differently. I also figured out the car has to be running to get all of the lights to work. And they DID work as you described, so it seems all is well.
Now I need to make the decision to drop the duckets. Thanks for the assist Mr. Silversun262.
Now I need to make the decision to drop the duckets. Thanks for the assist Mr. Silversun262.
09-16-2015, 04:44 PM
#9
Senior Member
Thread Starter
Join Date: Jul 2014
Location: So Cal
Posts: 417
Received 60 Likes
on
44 Posts
86 Targa, 91 560SEL, 06 E55 Estate, 13 C2S, 21 MACAN GTS, 05 R6 Track, 15 R3 RACE BIKE
Update! So it has been about 5 months since the install. Up to about a month ago everything was splendid. Now I have noticed to problems.
1. I get a "check front passenger side parking like" message almost everyday. When I can I park, get out to check, and it is the "c" light not working. I then cycle the lights on and off a few times and it comes back on. Tried un hooking them and hooking them back up with a bit of electrical grease, but still get the error.
2. The high beam shutter (not sure if that is the right term) but the driver side will get stuck in "high" sometimes. I have to cycle from high to low beams a few times to get the driver side to go back to low.
Aside from these two very annoying issues, the lights are good. If they continue I will see if I can them replaced. If anyone has had a similar issue, I would love to know if you fixed it or just replaced the lights.
Cheers!
08-28-2018, 05:05 AM
#11
Newbie

Join Date: Aug 2018
Posts: 6
Likes: 0
Received 0 Likes
on
0 Posts
W204 facelift
Did anyone try to swap projector with something better?
This Depo projectors have very narrow width and because there is no cornering lights, I have a lot problems with smaller spaces (parking lots) at night when doing 90� turn
This Depo projectors have very narrow width and because there is no cornering lights, I have a lot problems with smaller spaces (parking lots) at night when doing 90� turn
11-18-2018, 04:31 AM
#12
Newbie
Join Date: Apr 2013
Location: Athens GR
Posts: 6
Likes: 0
Received 0 Likes
on
0 Posts
slk171,w204 f/l.cl203

Update! So it has been about 5 months since the install. Up to about a month ago everything was splendid. Now I have noticed to problems.
1. I get a "check front passenger side parking like" message almost everyday. When I can I park, get out to check, and it is the "c" light not working. I then cycle the lights on and off a few times and it comes back on. Tried un hooking them and hooking them back up with a bit of electrical grease, but still get the error.
2. The high beam shutter (not sure if that is the right term) but the driver side will get stuck in "high" sometimes. I have to cycle from high to low beams a few times to get the driver side to go back to low.
Aside from these two very annoying issues, the lights are good. If they continue I will see if I can them replaced. If anyone has had a similar issue, I would love to know if you fixed it or just replaced the lights.
Cheers!
1. I get a "check front passenger side parking like" message almost everyday. When I can I park, get out to check, and it is the "c" light not working. I then cycle the lights on and off a few times and it comes back on. Tried un hooking them and hooking them back up with a bit of electrical grease, but still get the error.
2. The high beam shutter (not sure if that is the right term) but the driver side will get stuck in "high" sometimes. I have to cycle from high to low beams a few times to get the driver side to go back to low.
Aside from these two very annoying issues, the lights are good. If they continue I will see if I can them replaced. If anyone has had a similar issue, I would love to know if you fixed it or just replaced the lights.
Cheers!
driver side is off,
contact depo head quarters and depo Europe many times but didn't find me solution
Last edited by theog60; 11-18-2018 at 04:35 AM. Reason: Add photo
 04-21-2019, 08:18 AM
#14
MBWorld Fanatic!

This is unrelated, but please be aware of what photobucket choices have been in the past, if you have your pictures hosted by them.
Their quest for profit destroyed more than just one car enthusiast's work. Countless dyi and pictorials were destroyed.
Not only this, but once enthusiasts wanted to re-host, Photobucket made it almost impossible for them to retreive their pictures from servers.
And in the very end, if one became really upset with Photobucket and once the picture transfer was done, one wanted to remove the stored pictures from photobucket, that took weeks.


