Attempted to restore my headlights.. Pics included.
 05-28-2013, 01:47 AM
#1
Junior Member
Thread Starter

Join Date: Apr 2013
Posts: 61
Likes: 0
Received 0 Likes
on
0 Posts
W210 E320 4MATIC
Attempted to restore my headlights.. Pics included.
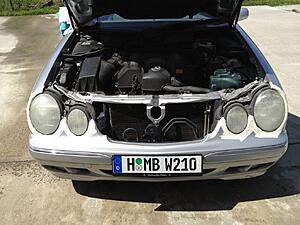
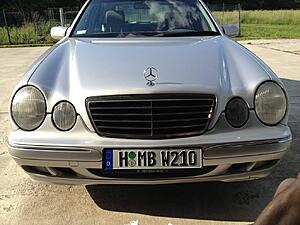
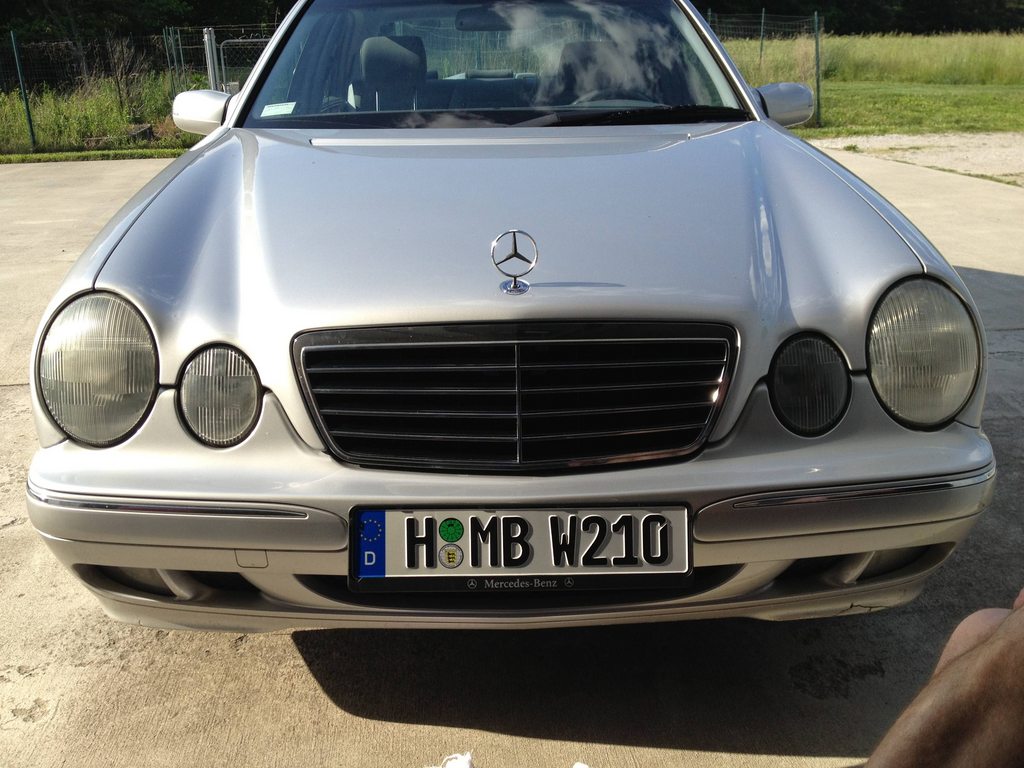
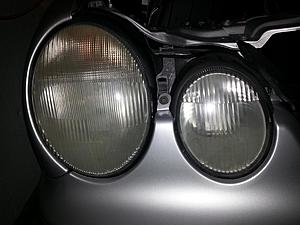
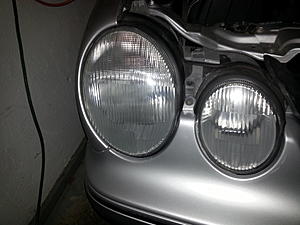
I used a product that I bought at auto zone, manufactured by 'turtle' to try and clear up my headlights. It worked alright, but I need to do more work to get what I want because it goes so deep. Hoping to go to my buddies house next weekend and use a buffering machine.
Thought some might be interested, I know that cleaner lights makes the car look so much more modern and clean. There was definitely a little improvement, sorry about the light condition.
Love my W210!
Thought some might be interested, I know that cleaner lights makes the car look so much more modern and clean. There was definitely a little improvement, sorry about the light condition.
Love my W210!

 05-28-2013, 02:41 PM
#4
Out Of Control!!


 05-28-2013, 10:01 PM
#7
Member

Join Date: Jun 2011
Location: Corpus Christi, TX
Posts: 75
Likes: 0
Received 0 Likes
on
0 Posts
1998 E320 4-Matic Wagon
Mine were very hazed and yellow when I bought the car. I did wet sand them and then used a commercial (Mothers?) product to polish them. They looked pretty good but not anything like new. At least they are not yellow now. More wet sanding might have helped a little bit. I have to polish them with auto polish about once a month to maintain what I have. My poor wagon is never garaged, so it probably needs more attention than others.
Trending Topics

 05-30-2013, 05:05 PM
#10

I wet sanded mine to remove all the yellow degraded plastic. On one side I wiped on a few coats of acrylic floor polish. I polished the other side with polishing compound. They looked about the same initially, but a couple years later the floor polished side looks best. The car is garaged so it no longer gets the sun it once did, but it gets daily use. Maybe the floor polish has some protective characteristics. I may experiment further.
06-05-2013, 12:12 PM
#11
Newbie

Join Date: Mar 2013
Posts: 10
Likes: 0
Received 0 Likes
on
0 Posts
1998 Mercedes Benz E320
LOL!!!! I have some Pics of when I first got the car. Did the Sanding by hand first with a 30 dollar kit. And then later, week or two, found out there was a drill toolkit, and so did that too. Makes a world's difference. There is a 3M Toolkit in AutoZone and Advance Autoparts that will do you wonders. Believe me.
06-05-2013, 08:04 PM
#12
Member

Join Date: Feb 2013
Location: Seattle
Posts: 130
Likes: 0
Received 3 Likes
on
1 Post
1999 MB E430 1998 SL500
Toenail fungus on 210's
Nothing degrades the 210 more than cloudy front lenses. Wet sanding helps a great deal and then some swirl remover plus car polish has mine looking like real glass.
 09-30-2013, 09:48 PM
#15
Junior Member
Thread Starter
Join Date: Apr 2013
Posts: 61
Likes: 0
Received 0 Likes
on
0 Posts
W210 E320 4MATIC
Turtle kit was horrible. Look at my previous post where I have before and after pics. 1 month after doing it by hand with the kit, the headlights were WORSE. The only way to do this right is with a drill sander kit or to let walmart drill sand it for $40. Request them to use extra sealant.
01-24-2015, 09:58 PM
#16
Junior Member

I just used the 3M drill-attachment kit on my 2001 headlights. Total time was :
- 2 hours reading and re-reading forum for advice
- 30 minutes watching 3M youtube video over and over again
- 6 days ordering from Amazon (initial order and then deciding I needed a refill kit)
- 4 elapsed hours (including breaks) hood-up to hood closed.
I did not need refill kit. Shrug.
- Drill jumped more than I expected.
- I did not use all marking tape. Big mistake as I scratched the bumper when the drill jumped more than I expected.
- it was a little awkward getting to the edges of the lamps with the drill pad.
- did not use 3M micro-fiber pad (as that is optional accessory) and just used cotton rags and regular micro-fiber pads.
- I wasn't sure what to expect but the result was not as clear as I could imagine. Big improvement however. I would use more sandpaper next time. Like all that came with the kit.
I am surprised pics don't show magnitude of change. I suspect flash makes before picture look less opaque than it really was.

 01-24-2015, 10:45 PM
#17
Out Of Control!!
Join Date: Jun 2004
Posts: 11,406
Received 1,885 Likes
on
1,322 Posts
2014 E63S; AMS 100 octane ecu tune; edok tcu tune; BB intakes; dyno tuned
I've done the w210 as well... Need to sand more than u think as the oxidation layer is deep
Additionally it helps during the wet sanding phase to have someone continuously spray cold water on the field
Additionally it helps during the wet sanding phase to have someone continuously spray cold water on the field
01-26-2015, 02:02 PM
#18
MBWorld Fanatic!
Used the 3M kit.
I agree. The rough sanding phase should be the longest. I feel the better you coarse sand, the easier the rest of the steps. I found the oxidation was hard and took time to penetrate although mine was lighter than yours 997.2. I dusted off the sand paper often by using a plastic bristle brush and lightly swiped the the grit until it was more orange than white. I used all of the sanding discs this way.
With the wet sanding, the suggestion of keeping the surface wet either by spray bottle or water hose mist is best especially with another set of hands. Also as in the above, keep the wet sand clean. It will be milky and clog the wet sand paper. I rinsed off mine periodically.
I double layered the tape off with wider painters tape I had instead of the 1" in the kit. As the tape gets wet it may want to peel especially if you hit it a little with the spinning pads. The wider tape has better coverage.
Because of my OCD, I taped around my side mirror blinker and rear tail lights and only used the polishing compound and pad. My tail lights looked brand new.
With patience, you will have near crystal clear lenses. After about a year my head lights are starting to yellow haze so I bought replacement pads from the parts store and will re polish with the plastic polish. If not perfect, Ill get the kit again or just buy wet sand and go from there.
Repolishing once a year is not all that bad IMO to have a younger looking front end.
01-26-2015, 04:41 PM
#19
If you wipe on a coating of floor polish like Future or Mop and Glow, the coating will polish and help protect the headlight from the UV light that causes it to yellow. I have found that if you wet sand with 600 grit you can just wipe on a couple coats of the floor polish on the hazy sanded lights and get instant polished lights, like they do on the Wipe New commercial.
01-27-2015, 09:38 PM
#21
Member
I did it with the 3M kit as well. My tips.....cover the car and engine bay with an old sheet...splatter will go everywhere...ask me how I know. Also, be sure to use a corded-drill, not a cordless. You need high RPM's and a long time running the drill. When you think you've polished/sanded long enough, do more.It really takes a lot of polishing, but the results are well worth the effort.
01-27-2015, 10:09 PM
#22
Out Of Control!!
Join Date: Jun 2004
Posts: 11,406
Received 1,885 Likes
on
1,322 Posts
2014 E63S; AMS 100 octane ecu tune; edok tcu tune; BB intakes; dyno tuned
I did it with the 3M kit as well. My tips.....cover the car and engine bay with an old sheet...splatter will go everywhere...ask me how I know. Also, be sure to use a corded-drill, not a cordless. You need high RPM's and a long time running the drill. When you think you've polished/sanded long enough, do more.It really takes a lot of polishing, but the results are well worth the effort.
01-28-2015, 07:25 AM
#23
Junior Member
Actually, I used a cordless drill. It has a "high-RPM" vs "high-torque" setting. I tried both settings and found that "high-torque" worked better for me. Interesting. Wonder about the corded drill instead
BTW I actually have 2 cordless drills which is really really unnecessary!
BTW I actually have 2 cordless drills which is really really unnecessary!
01-28-2015, 09:56 AM
#24
MBWorld Fanatic!
Join Date: Jan 2014
Location: Republic of Texas
Posts: 3,221
Received 929 Likes
on
721 Posts
'99 and '05 E55 AMG
Purchase replacement lenses off of Ebay and replace the lenses with new ones. Takes approximately 2 hours per side if you also R&R the headlight adjustment stepper motors (if your car has them). Otherwise, maybe 1 1/2 hrs each.
Be sure to get the correct lenses for your car. Halogen and Xenon are very different.
https://mbworld.org/forums/mercedes-...ml#post6281436
Be sure to get the correct lenses for your car. Halogen and Xenon are very different.
https://mbworld.org/forums/mercedes-...ml#post6281436


