Spring Perch replacement DIY
 01-03-2014, 08:32 PM
#1
Newbie
Thread Starter

Join Date: Dec 2013
Posts: 12
Likes: 0
Received 0 Likes
on
0 Posts
1999 E320
Spring Perch replacement DIY
Hey everyone,
So I took my car to get inspected the other day at a local foreign cars shop. They couldn't pass it due to the condition of the spring perches on the front suspension. Both are very rusted and are pulling away from the body of the car. There is a picture of the driver side which is the worse of the two sides.
I've already found just about all the information I could on the DIY repair. I've ordered parts and plan to do the repair in about a week when I have the time.
I was wondering if any of you had done this and had any additional advice to add.
The perches are in very bad shape so I have ordered new perches. I also ordered new spring seats and spring boots. I don't really think I need them but they were not very expensive and I would rather have them incase I do.
I ordered a mercedes spring compressor. I have a regular coil spring compressor but it seemed like the MB one was the way to go. I ordered one from ebay, made by Baum.
Here's my plan to fix it. Let me know if you have any suggestions.
1. Jack the car by the jack point behind the front wheel and remove wheel
2. Use spring compressor to compress and remove spring (Is there anything I need to do before removing the spring?)
3. Use grinder to take off old perch and clean up surface until only clean metal is left.
4. If needed (Most likely will need to do on drivers side) mig weld in reinforcement plate.
5. mig weld in new perch
6. Cover everything in sight in rustoleum or something similar
7. replace spring boot/seat and place spring.
8. repeat on other side of car
Any advice would be appreciated. I feel confident about the welding. I am more nervous about compressing the spring. I have done it before but not on a mercedes and I have read the mercedes spring are particularly a pain.
I'll try to take some pictures and post them here after.
 01-06-2014, 12:15 PM
#2

Wow. Good thing you know your way around a welder because if you had to take your car to a body shop for the work it would be expensive. I've never done this repair. However, I would suggest using POR-15 to cover the area when you're done.

 02-28-2014, 08:49 PM
#5
Looking forward to your results. There's not enough specific repair info or photos floating around the internet yet about this serious issue. I'm interested in coming up with a reinforcement for mine and would share the procedure.
03-02-2014, 02:30 PM
#6
Member

Join Date: Feb 2013
Location: South Africa
Posts: 97
Received 0 Likes
on
0 Posts
clk320 and sl320 V6
 03-06-2014, 04:49 PM
#7
Junior Member

Join Date: Aug 2007
Location: Colorado
Posts: 45
Likes: 0
Received 0 Likes
on
0 Posts
E55, 2001 Silver.
Note that riveting the new spring mount is part of MB repair procedures - I had this done to my E430. The other thing to watch for is alignment, if the perch is "off" even a little bit, the handling may be noticeably different. The shop that did this for me used an alignment jig when putting this on.
More at this thread along with a copy of the MB repair procedures
https://mbworld.org/forums/e-class-w...fterwards.html
Good luck
More at this thread along with a copy of the MB repair procedures
https://mbworld.org/forums/e-class-w...fterwards.html
Good luck
Trending Topics
03-17-2014, 10:58 PM
#8
Newbie

Join Date: Mar 2014
Location: cleveland ohio
Posts: 7
Likes: 0
Received 0 Likes
on
0 Posts
e300 w210
I agree the geometry or allingment of perch for factory specs but us diy ers make it happen...Rustoleum and por-15 have failed me to many times on frame welding repairs years later I would now try plasti-dip and then any rubberized spray
03-19-2014, 01:40 PM
#9
Former Vendor of MBWorld

Join Date: Dec 2013
Location: Wadsworth, Ohio
Posts: 3,044
Likes: 0
Received 4 Likes
on
4 Posts
2012 SLS AMG
The front spring support failure is very common to the 210 Chassis E-Class, as well as the 202 Chassis C-Class.
Since this is such a common issue, we offer genuine Mercedes-Benz replacement front spring supports, and at a lower cost than most dealerships will sell them for. The spring support for the 210 Chassis E-Class can be found on our website HERE, or by clicking on any of the images of the spring support below.
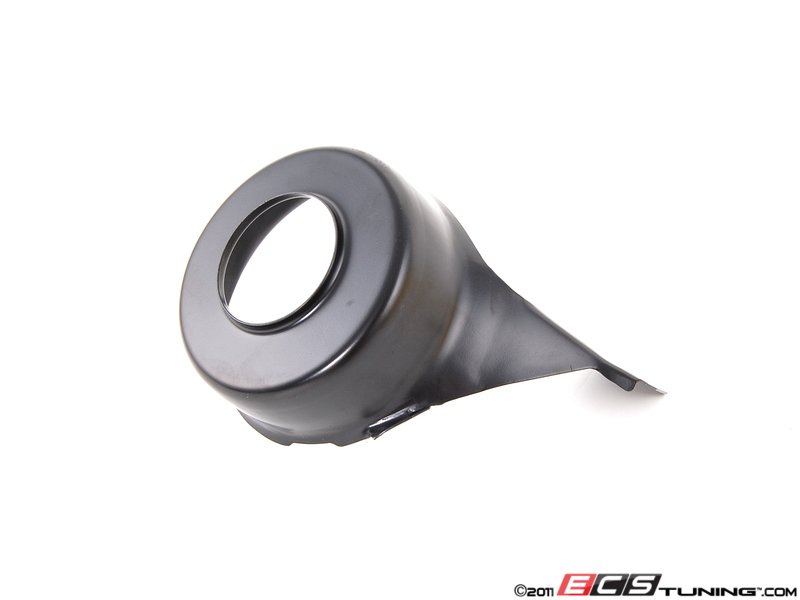
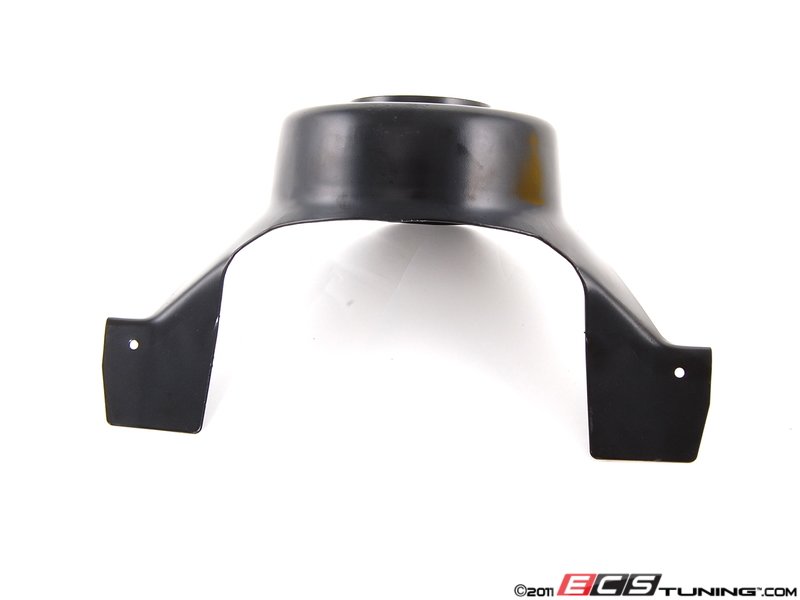
If anyone needs any more information about this, please feel free to post or send a PM!
Since this is such a common issue, we offer genuine Mercedes-Benz replacement front spring supports, and at a lower cost than most dealerships will sell them for. The spring support for the 210 Chassis E-Class can be found on our website HERE, or by clicking on any of the images of the spring support below.
If anyone needs any more information about this, please feel free to post or send a PM!
 10-22-2014, 10:52 AM
#11
Former Vendor of MBWorld
Join Date: Dec 2013
Location: Wadsworth, Ohio
Posts: 3,044
Likes: 0
Received 4 Likes
on
4 Posts
2012 SLS AMG
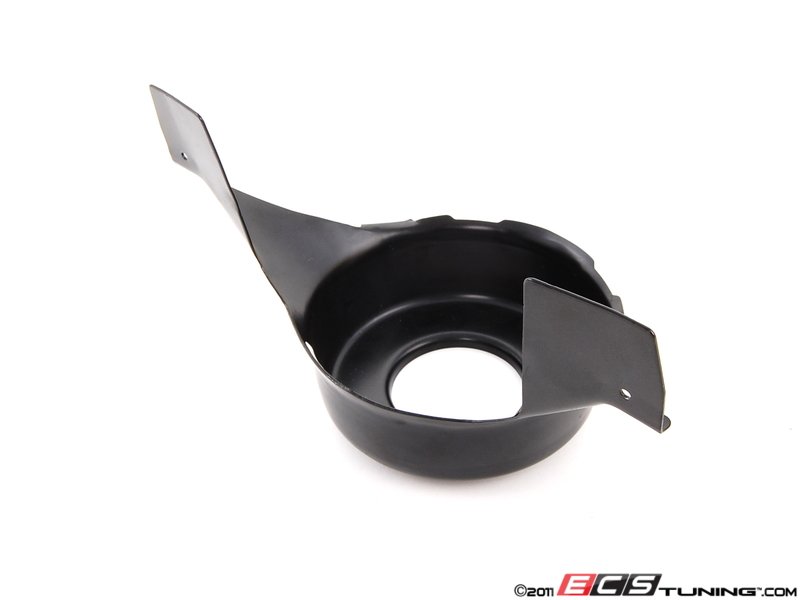
The spring perch for your vehicle are different than the ones listed above.
The correct upper spring supports can be found on our website HERE, or by clicking the image below.
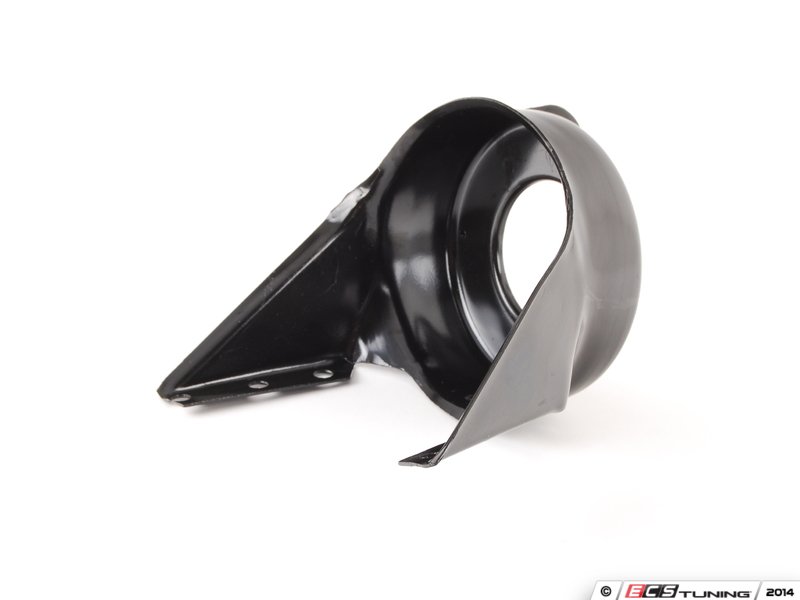
If there is anything else I can assist you with please let me know.
David
 11-10-2014, 08:20 PM
#14
Junior Member
A few things about this since I've repaired both sides myself. I got both parts for less than $80 at Mercedes dealer in Greenwich, Ct. $175 is not what one of these go for.
Don't even think about doing this job yourself without renting/buying the special spring compressor made just for this setup that goes up through the center. There is a youtube video where the mechanic tries to use the c-clamp compressor and the thing lets go and send some parts flying. He and his helper are very lucky neither got seriously injured. There is an extreme amount of tension when these are compressed down and you want to make sure you have the two correct plates staggered in such a way that they are holding all of that pressure evenly. The instructions show how to do that.
You are going to be shocked at how thin-walled the replacement part is. I think MB make a production error when pressing this out on the die cutter. Make sure you try hard to outline and line up the bottom tabs, even leave the old ones there after you cut/grind off the old top part of the perch. Line up new tabs with old tabs, drill 1/8" alignment hole through, then grind off the old tabs. This way, you can align the hole in the new part with hole you just drilled into the frame rail, screw it on to hold it and you are ready to weld.
Eastwood makes a seam sealer that I recommend using once you have everything welded, ground up nice and purdy and primed. I found some spray paint close to my color and used that over the seam sealer and primer. Then I spray-undercoated the whole inner wheel well lightly in that Eastwood black undercoating.
[Disclaimer: I do not work for Eastwood in any capacity and am only a customer. :>)]
My photos of some of the repair is here: http://s1222.photobucket.com/user/je...?sort=9&page=1
11-11-2014, 10:14 AM
#15
Former Vendor of MBWorld
Join Date: Dec 2013
Location: Wadsworth, Ohio
Posts: 3,044
Likes: 0
Received 4 Likes
on
4 Posts
2012 SLS AMG
A few things about this since I've repaired both sides myself. I got both parts for less than $80 at Mercedes dealer in Greenwich, Ct. $175 is not what one of these go for.
Don't even think about doing this job yourself without renting/buying the special spring compressor made just for this setup that goes up through the center. There is a youtube video where the mechanic tries to use the c-clamp compressor and the thing lets go and send some parts flying. He and his helper are very lucky neither got seriously injured. There is an extreme amount of tension when these are compressed down and you want to make sure you have the two correct plates staggered in such a way that they are holding all of that pressure evenly. The instructions show how to do that.
You are going to be shocked at how thin-walled the replacement part is. I think MB make a production error when pressing this out on the die cutter. Make sure you try hard to outline and line up the bottom tabs, even leave the old ones there after you cut/grind off the old top part of the perch. Line up new tabs with old tabs, drill 1/8" alignment hole through, then grind off the old tabs. This way, you can align the hole in the new part with hole you just drilled into the frame rail, screw it on to hold it and you are ready to weld.
Eastwood makes a seam sealer that I recommend using once you have everything welded, ground up nice and purdy and primed. I found some spray paint close to my color and used that over the seam sealer and primer. Then I spray-undercoated the whole inner wheel well lightly in that Eastwood black undercoating.
[Disclaimer: I do not work for Eastwood in any capacity and am only a customer. :>)]
My photos of some of the repair is here: http://s1222.photobucket.com/user/je...?sort=9&page=1
Don't even think about doing this job yourself without renting/buying the special spring compressor made just for this setup that goes up through the center. There is a youtube video where the mechanic tries to use the c-clamp compressor and the thing lets go and send some parts flying. He and his helper are very lucky neither got seriously injured. There is an extreme amount of tension when these are compressed down and you want to make sure you have the two correct plates staggered in such a way that they are holding all of that pressure evenly. The instructions show how to do that.
You are going to be shocked at how thin-walled the replacement part is. I think MB make a production error when pressing this out on the die cutter. Make sure you try hard to outline and line up the bottom tabs, even leave the old ones there after you cut/grind off the old top part of the perch. Line up new tabs with old tabs, drill 1/8" alignment hole through, then grind off the old tabs. This way, you can align the hole in the new part with hole you just drilled into the frame rail, screw it on to hold it and you are ready to weld.
Eastwood makes a seam sealer that I recommend using once you have everything welded, ground up nice and purdy and primed. I found some spray paint close to my color and used that over the seam sealer and primer. Then I spray-undercoated the whole inner wheel well lightly in that Eastwood black undercoating.
[Disclaimer: I do not work for Eastwood in any capacity and am only a customer. :>)]
My photos of some of the repair is here: http://s1222.photobucket.com/user/je...?sort=9&page=1
You are correct, the spring perches for the W210 are currently on our site for $36.73/ea. The W210 perches can be found HERE. The W124 spring perches do have a large price difference, not really sure what makes them special, but they are currently $175.96/ea. The W124 perches can be found HERE.
Really nice points you brought up for anyone attempting to do this job!

David
11-12-2014, 12:13 PM
#16
Junior Member
Join Date: Oct 2014
Posts: 43
Likes: 0
Received 0 Likes
on
0 Posts
99 E300
My car has lived its whole life in CA and is very rust-free everywhere, however, I still have thought about going down there when I do my suspension and reinforcing these things, and then doing a much better job of corrosion-proofing the whole area for when I move back to CO.
 05-06-2015, 04:24 PM
#18
Junior Member
Jesse
05-06-2015, 04:48 PM
#20
Junior Member
Too bad you're out in Wisconsin. Having the right tools are the key. Maybe you could find someone near you on one of the forums if not here.
05-07-2015, 02:17 PM
#21
SPONSOR
Check out our parts catalog to help you with pricing on the part for replacement as well as our Tech Articles that should help you with how long it'll take/cost. This should help give you an idea of what the job can be done for. Good luck!
-Luccia
-Luccia
06-09-2015, 09:13 PM
#22
Junior Member

Join Date: Sep 2011
Location: Winchester VA, USA
Posts: 51
Likes: 0
Received 0 Likes
on
0 Posts
wdbjf55fxtj020203
I have the best answer.
I had this spring rusting issue on my car, I was driving home (450 miles) and stopped to get a bite ,, and I noticed the front was very stiff, anyway I found out the spring cup is about to fall off, I managed to make it home (I know I have guts) start to look around and see who can do the job right, got several estimates between $750 and $1500.
Not sure which one will do the job right and if it will last, To make the long story short I found the best welder around and he is a real pro, he did the job for me for about $400 all I did was to bring him the new pearch that I ordered on line for about $40.00
I think this is a great deal,, if anyone having this rust problem and want it to fix it for reasonable price bring it to WINCHESTER VA ,
Good luck to you all
11-21-2019, 05:13 PM
#23

Man, I feel for you guys after reading this.
I accidentally bent up the inner circle ring just a little (about 8mm) on the very edge where no contact is made by the pad in one spot messing with the spring compressor :/ felt like I totaled my car...
as mentioned, even the stock metal is quite delicate, I was able to hammer it back into place, from what I see it should hopefully be mainly cosmetic.
grateful to be rust free
cheers


