When you click on links to various merchants on this site and make a purchase, this can result in this site earning a commission. Affiliate programs and affiliations include, but are not limited to, the eBay Partner Network.
Here is a video I made of how to fix the infamous w211 suspension squeak coming from the lower ball joints, I change the lower ball joints and the control arms in this video.
Can someone give me a link to a ball joint separator for a 2003 E320? The ones i'm finding on ebay, according to the seller, are not working for my car.
Can someone give me a link to a ball joint separator for a 2003 E320? The ones i'm finding on ebay, according to the seller, are not working for my car.
Thanks..
Separator or ball joint press two different tools?
MB shop had quoted me $990 (Labor Only) for R/L lower control arms and ball joint replacement. This is my next project. DIYs in this forum saving me all kinds of money. Thank you for this great info.
I've done a couple sets of these now and they get easier each time, you still have to wrestle with the breaker bar to force the joints.
One tip that really helped me out was to turn the streeing wheel either inward to either the right for the right side or to left if working on the left side to get you more room when removing the ball joint. When you need to pull the ball joint clear of the steering knuckle first straighten the steering wheel, this made pulling the joint under and out to the side so much easier and just reverse this process when you need to put the ball joint back.
I still haven't got used to noise and shattering of when you break those joints, they really do sound like something exploded.
MB shop had quoted me $990 (Labor Only) for R/L lower control arms and ball joint replacement. This is my next project. DIYs in this forum saving me all kinds of money. Thank you for this great info.
I replaced both upper and lower ball joints and other suspension components. Took it in for an alignment and everything was within limits. Not saying everyone's will be like this.
I find that the OEM/ Lemforder ball joints aren't that great to begin with. If you do a lot of city driving with pot holes and such they're barely making it to 50k which is pathetic in my opinion. Same goes for the upper ball joints and lower control arm with the ball joint. I use to work for an independent shop and would see this regularly between w211s and Chrysler LX chassis cars (300, charger, magnum)
I got sick of using these parts that don't last long enough and replaced my lower ball joints with Moog greasable ball joints from a Chrysler 300c. The Chrysler LX chassis is based off the w211's so there is a lot of similarities in parts. The ball joints from the 300c are a bit of a heavier build. The upper ball joint and lower control arm are different on the Chrysler LX so I got new Lemforder upper ball joints and lower control arms and drilled them both out and added grease fittings and made a tiny hole in the dust boots by heating up a needle to release any extra grease so the boot doesn't tear.
Now I just grease them every oil change and haven't had a problem in the last 40k I've had them on. No play, no squeaks and no torn dust boots yet.
I replaced both upper and lower ball joints and other suspension components. Took it in for an alignment and everything was within limits. Not saying everyone's will be like this.
John
Thanks John,
Good to know after you did all that and everything was still in limits.
Thanks! This was a great write up. I just did my ball joints and used the rental ball joint tool from O'Reilly Auto and it worked perfect. The part number is 67045 for anyone who might need it.
Just finished this job. Used the oreilly loaner set #67045
important: use the medium sized ring for removing old ball joint. It will seem too big but that�s intentional as it supposed to allow the ball joint to fit through it as the ball joint gets pushed upward out of the hub .
Use the smaller of the three rings to press the new one in as it pushes its force against the top side of the lip of the ball joint.
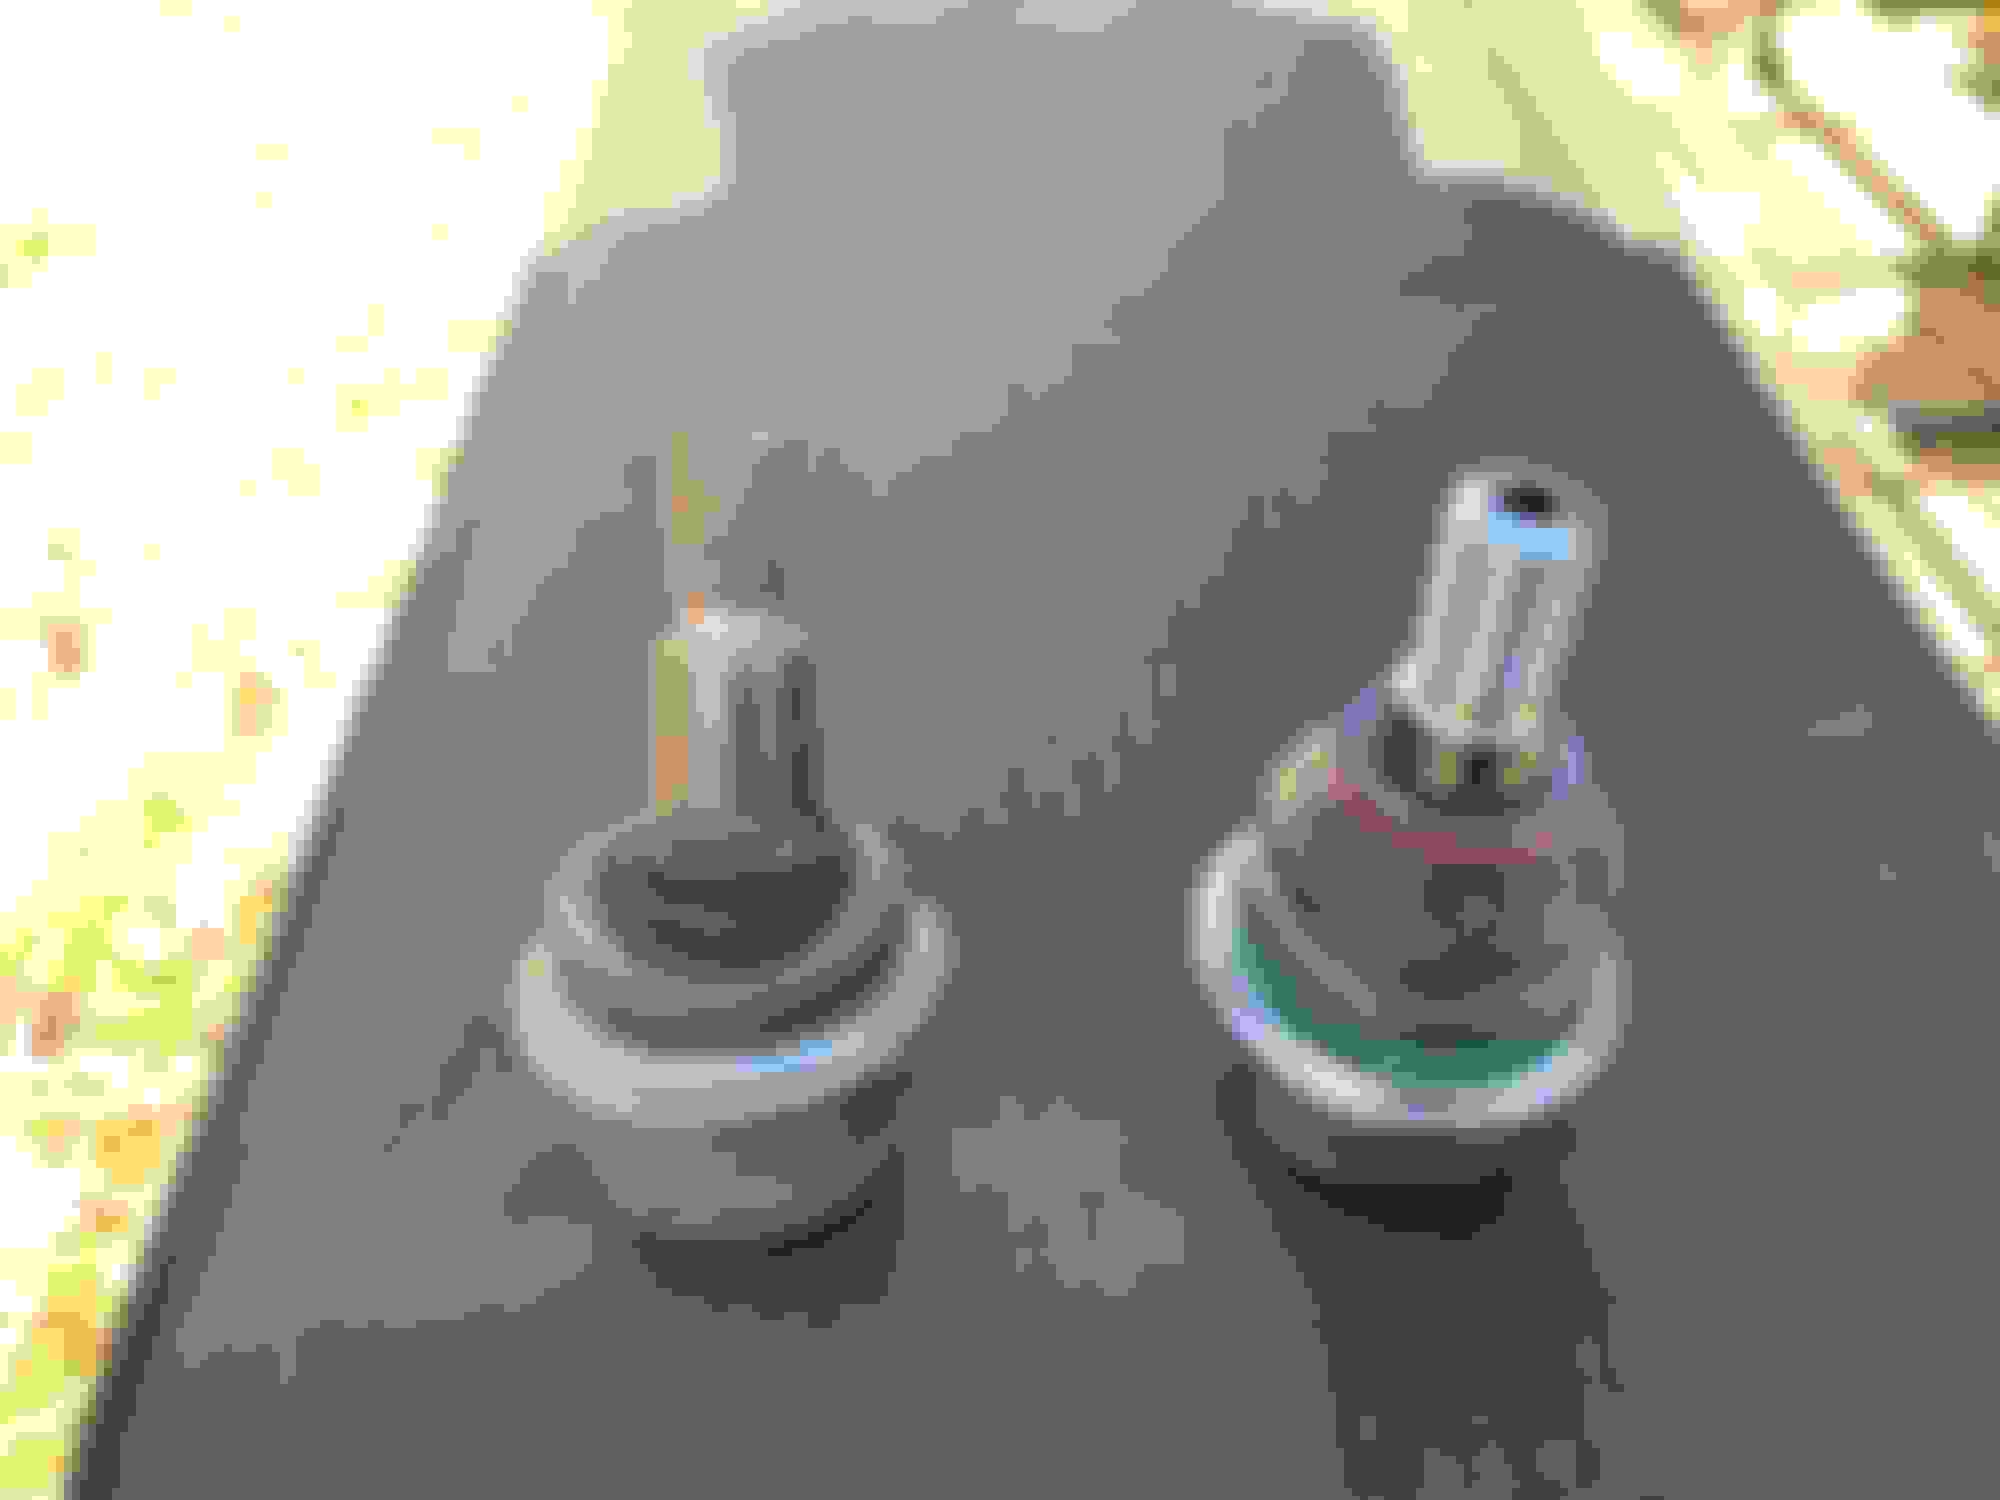
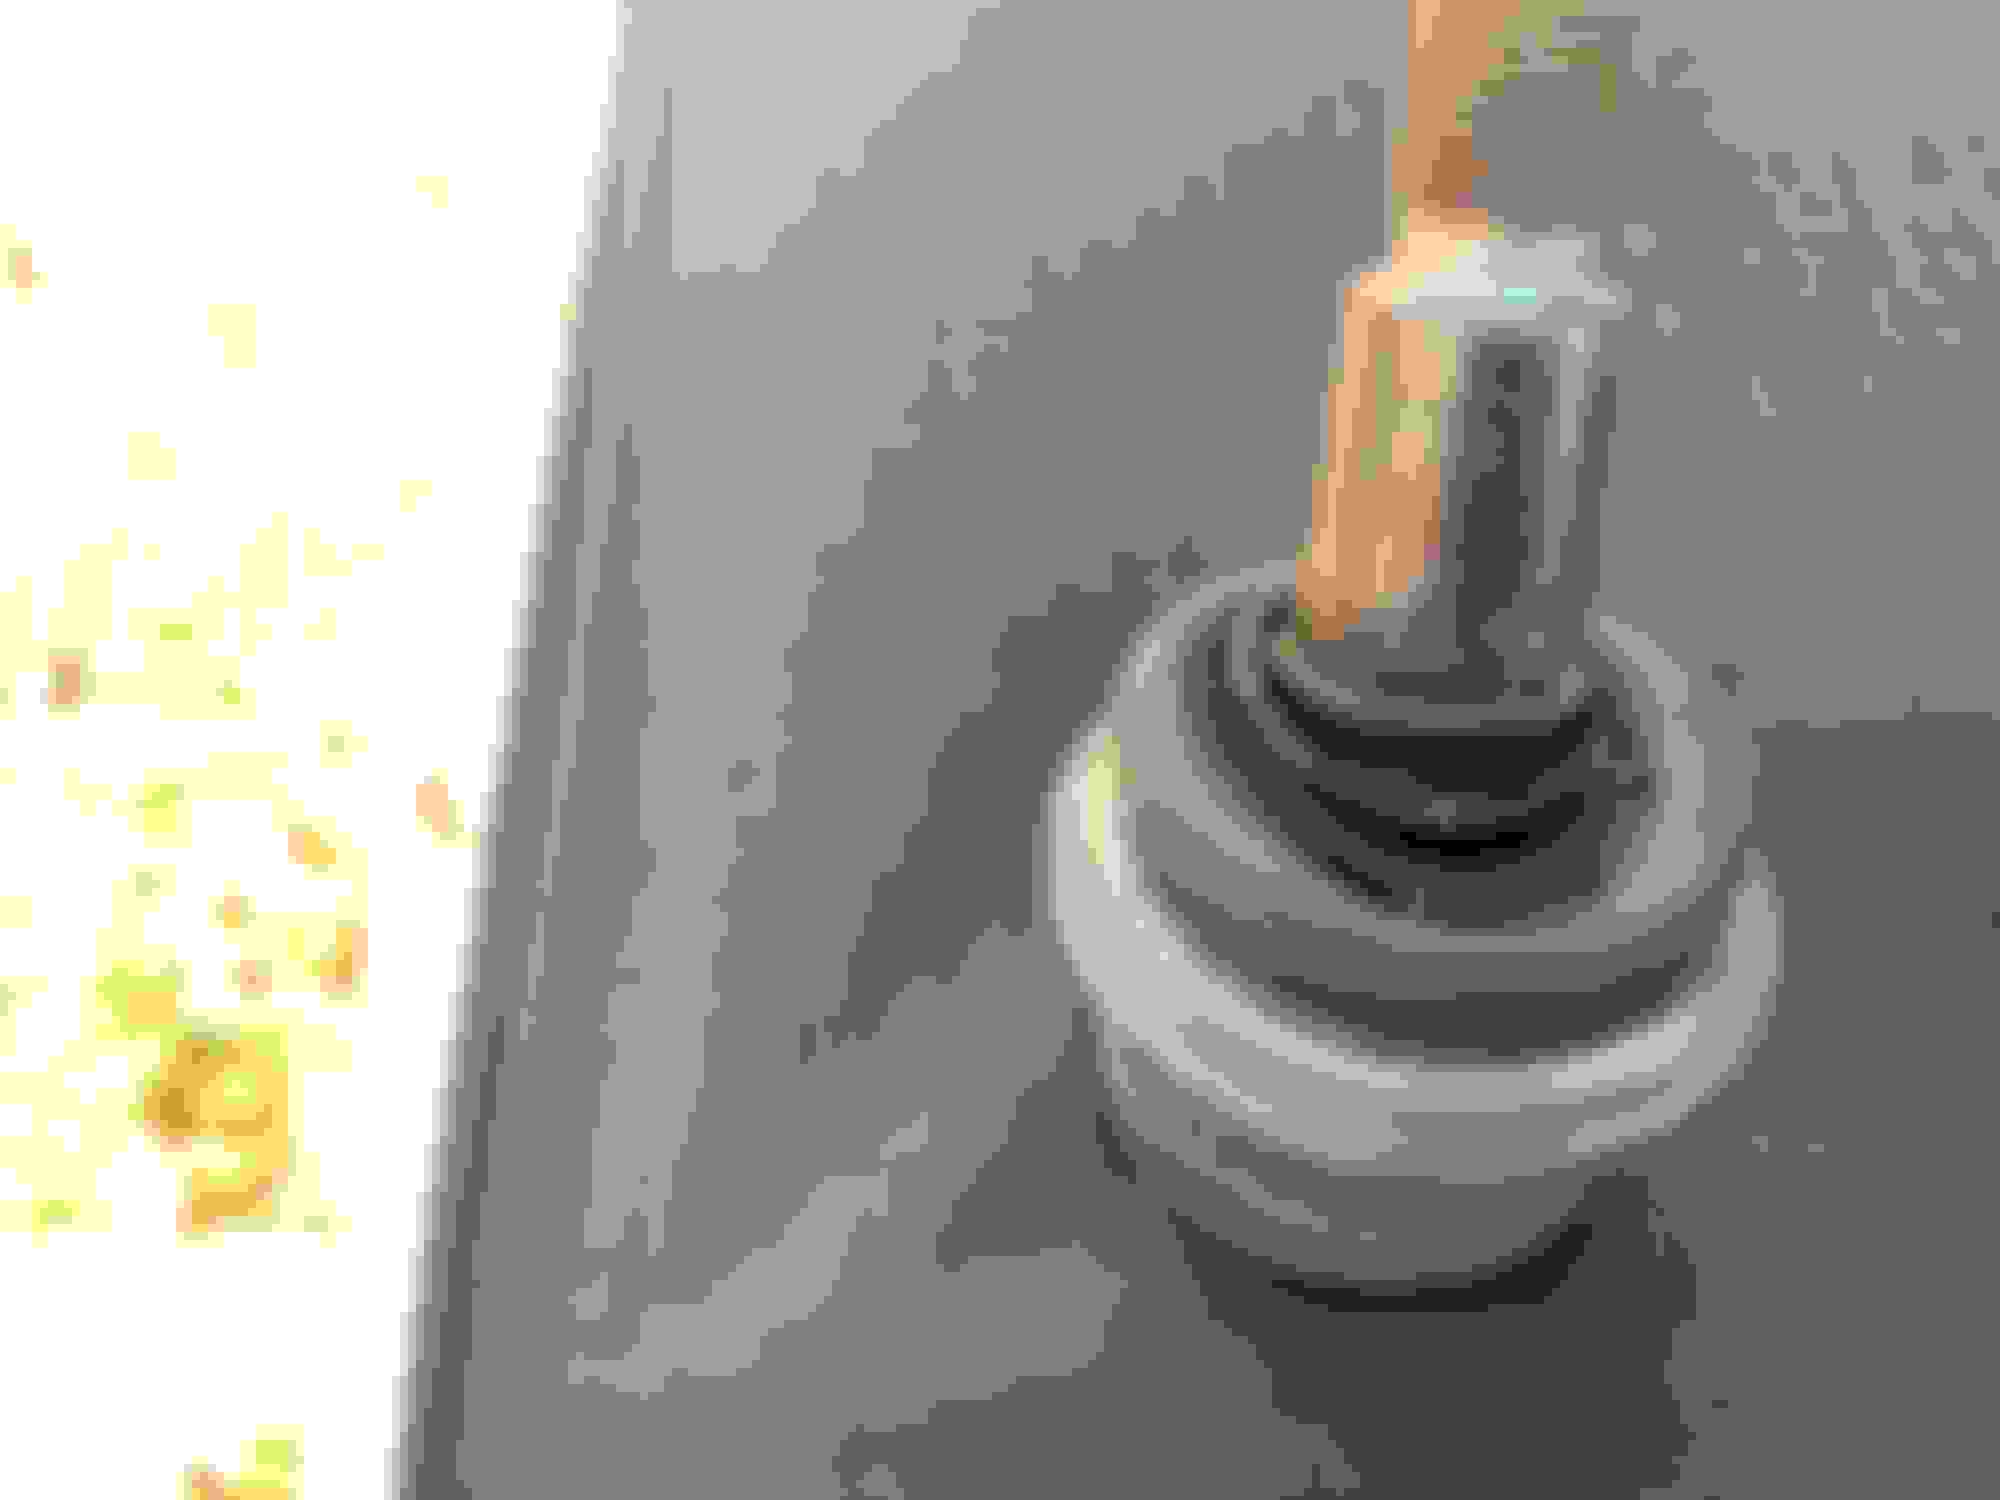
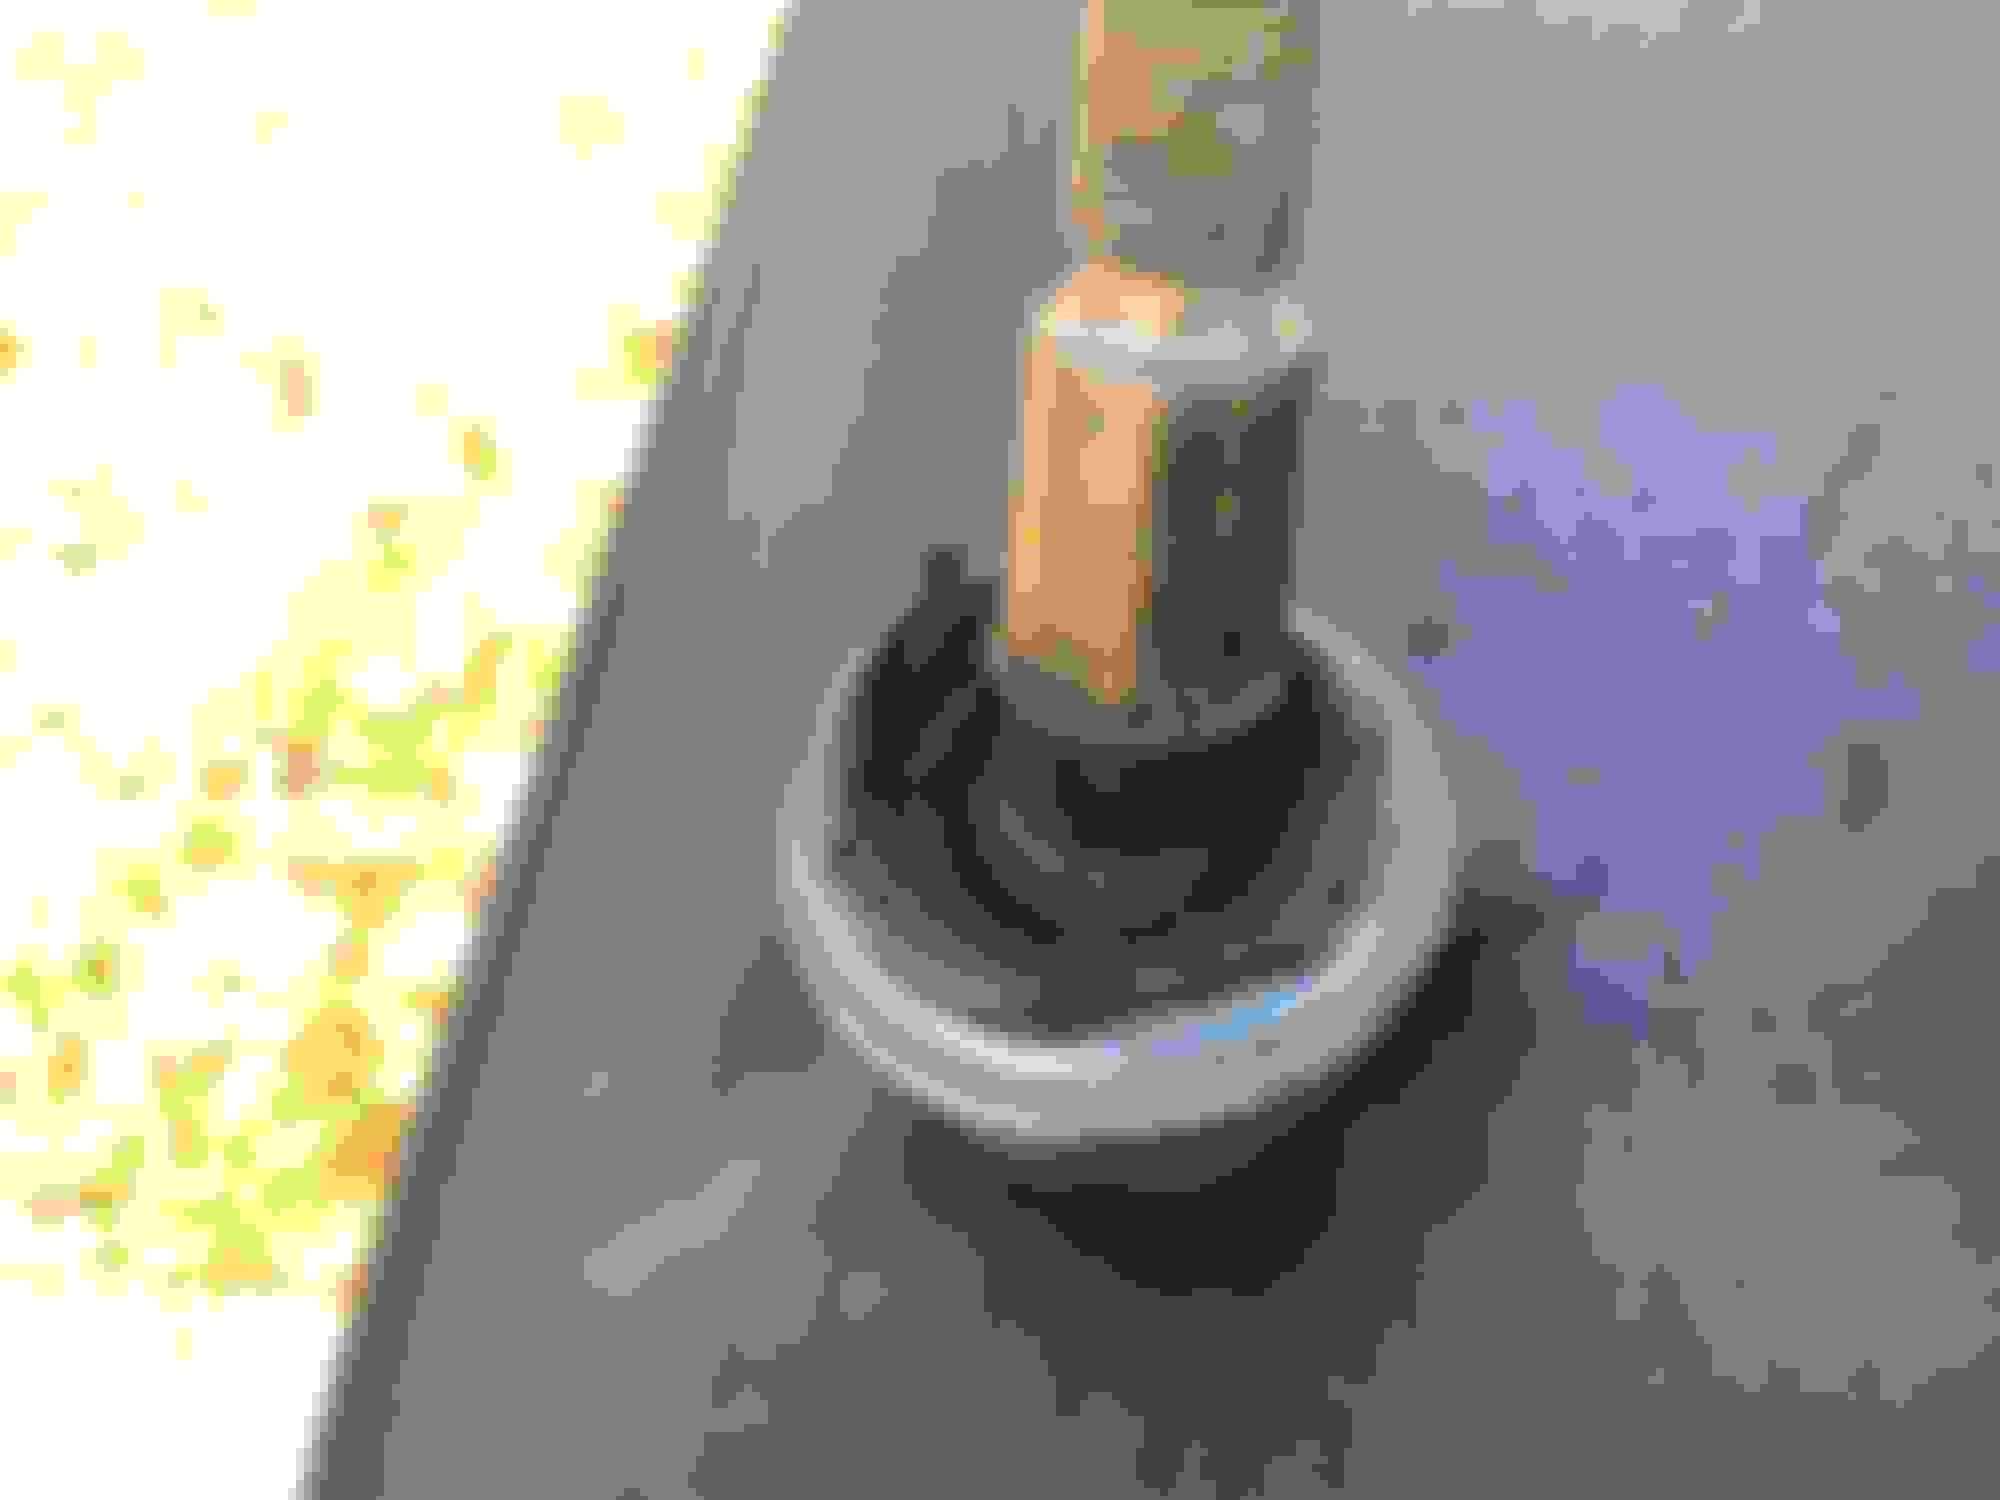
i did remove the wheel sensor and sensor cover to get a bit of room but other than the wheel, that was all I removed and even then it was more of a precaution. . Left all other suspension pieces and brake system fully intact. Once you break loose the old ball joint and pull it down from the control arm , you simply need to use some notable effort to pull the hub assembly outward and away from the car in order to get enough room to put the tool over the old ball joint. Attached are what my original ball joints looked like after 13 years and 110,000 miles. (One photo is after I cut the boot off to look inside)The boot themselves fully intact but as you can see the grease had simply dried out after all these years and miles. Ironically they were making no noise and were actually still functional. Old vs new Old Cut the boot off to see what it looked like inside New installed but not torqued down yet
Great, detailed write-up - thank you!
I am going to attempt this next weekend on my W211 - I have already bought ball joint press and ball joint splitter from ebay.
However, 5 hours for your first go - and 3 hours if you had to do it again - and I was planning on doing both sides - sounds like it will take me at least a full day. (Maybe even just for 1 corner! - I am not an experienced DIY-er :-( )
When you had cogirued out exactly what you needed to be doing - which bits were most time-consuming? - Pressing ball joint out & in? - Should I try to borrow an impact wrench / rattle gun to make this quicker & easier?
Thanks,
P
Impact for sure. When trying to get the ball joint to release from the knuckle, it takes a lot of force. Without an impact, you will most likely need a long breaker bar.

 06-24-2015, 02:03 PM