Modding a W211 on a budget...
 08-01-2013, 05:08 AM
#26
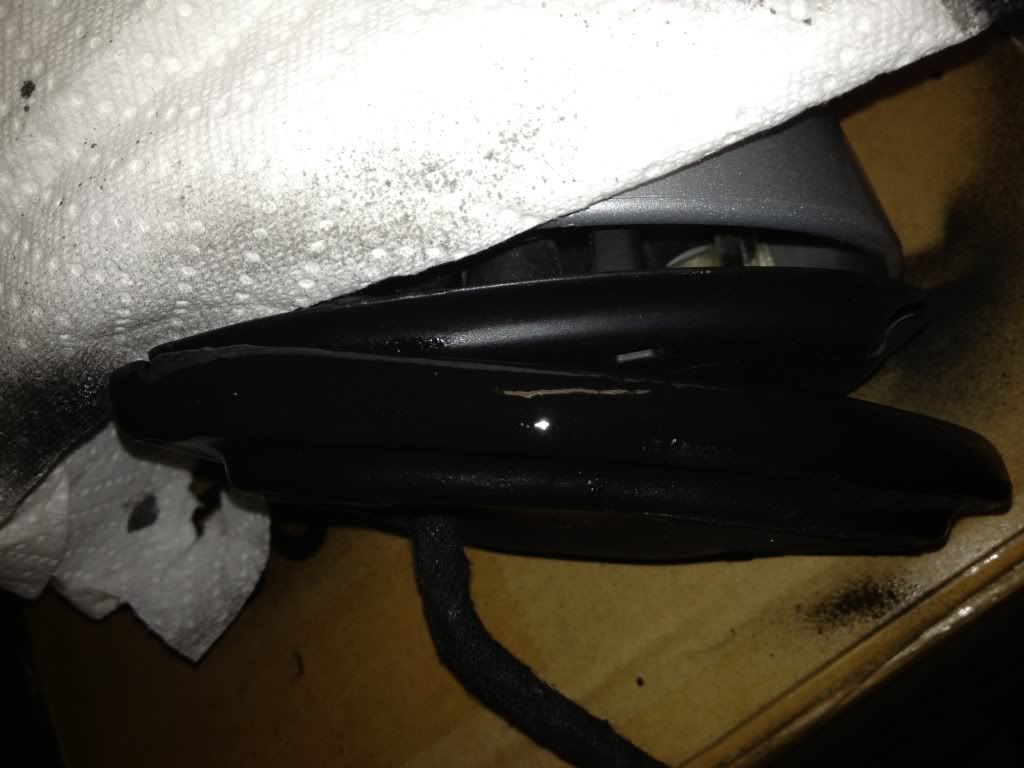
Thanks for that info. It strengthens my suspicion that those two extra prongs are meant for the folding function. When I look at my mirror internals I have a heated mirror set up as well. I need to get my hands on a wiring diagram. That'll make certain of each prong and it's purpose.

 08-01-2013, 06:01 PM
#27
MBWorld Fanatic!
Join Date: Jul 2013
Location: Down Unda
Posts: 3,133
Received 134 Likes
on
124 Posts
W204 C63 AMG, W212 E250 CGI, C207 E250 CGI
Just make sure you got all the wirings sorted out. I took a couple o photos for you. Theyre not as good and as you can see, its a well lit garage but you can still see the light on the floor from the puddle light. So it would serve its purpose especially on a dark place.
08-01-2013, 06:57 PM
#29
Just make sure you got all the wirings sorted out. I took a couple o photos for you. Theyre not as good and as you can see, its a well lit garage but you can still see the light on the floor from the puddle light. So it would serve its purpose especially on a dark place.
I played with the harness last night and connected the # 3 & 4 wires to a 9V battery and the puddle light lit up. I will check the rest of the functions with it plugged in before I do the full swap. Another thing to note, the cracked boot on my spare wing mirrors is looking much better after 10 coats of Plasti Dip. I'll be applying another 10 layers tonight then the following days I'll do the same for the underside. Hopefully the cracked pieces will be total enclosed with the magical rubbery compound. The boot was only partially cracked when I received the mirrors, but that darn internal mirror spring is so hard to stretch and I forgot to pull the boot off before applying extreme amounts of man power to wedge a socket in there to hold it open just to release the spring clip.
 08-01-2013, 07:11 PM
#30
MBWorld Fanatic!
Join Date: Jul 2013
Location: Down Unda
Posts: 3,133
Received 134 Likes
on
124 Posts
W204 C63 AMG, W212 E250 CGI, C207 E250 CGI
No worries, that was easy.
Good to know that the plastidip is working fine for your problem.
That LED for the puddle is something that im contemplating on. Let me know if your gonna pull the trigger on that.
Good to know that the plastidip is working fine for your problem.
That LED for the puddle is something that im contemplating on. Let me know if your gonna pull the trigger on that.
08-01-2013, 09:54 PM
#31
When I get a chance I'll take some photos of replacing the standard filament bulb with an led one. I'll measure the led bulb I use that'll fit as well. Then I'll mock it up by wiring it to a new 9V and take some night shots. That'll give you an idea of what improvement you can achieve going led. I'll be sure to do some before shots with the filament bulb for better side by side comparison.


 08-02-2013, 12:19 AM
#33
MBWorld Fanatic!
Join Date: Jul 2013
Location: Down Unda
Posts: 3,133
Received 134 Likes
on
124 Posts
W204 C63 AMG, W212 E250 CGI, C207 E250 CGI
That sounds good! Do i have to remove the whole wing mirror just to replace the bulb or can i do a straight up job? Ill go check as well as soon as i go down the garage.
08-02-2013, 02:22 AM
#34
http://forums.mercedesclub.org.uk/sh...ad.php?t=53910
08-02-2013, 02:42 AM
#35
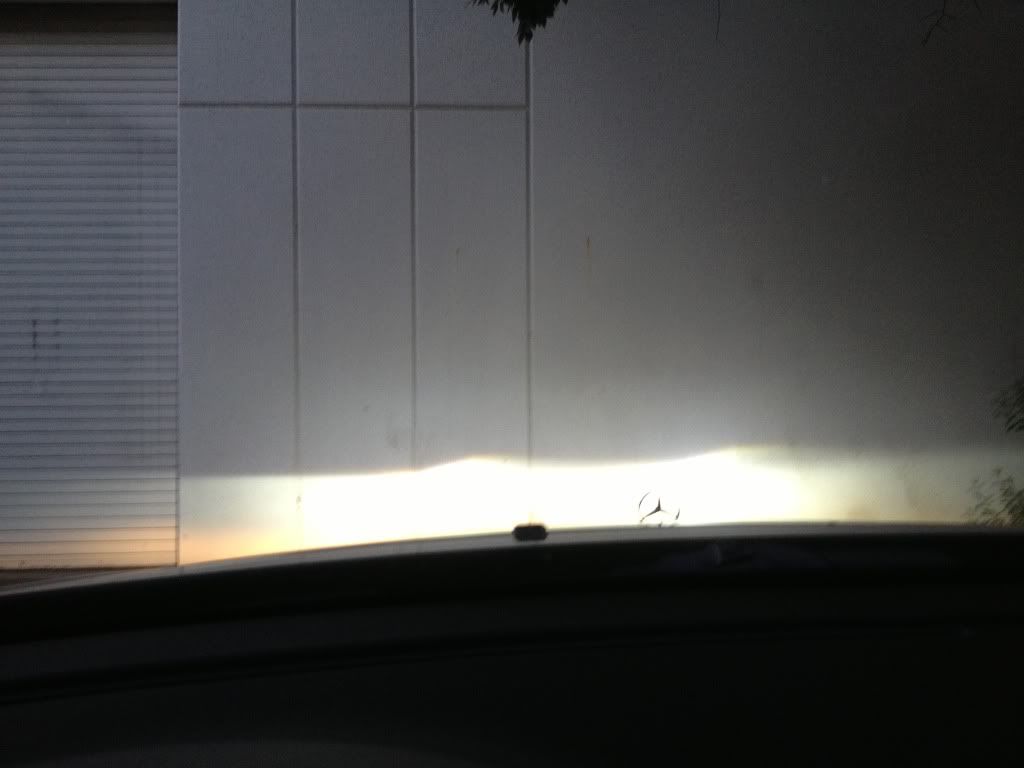
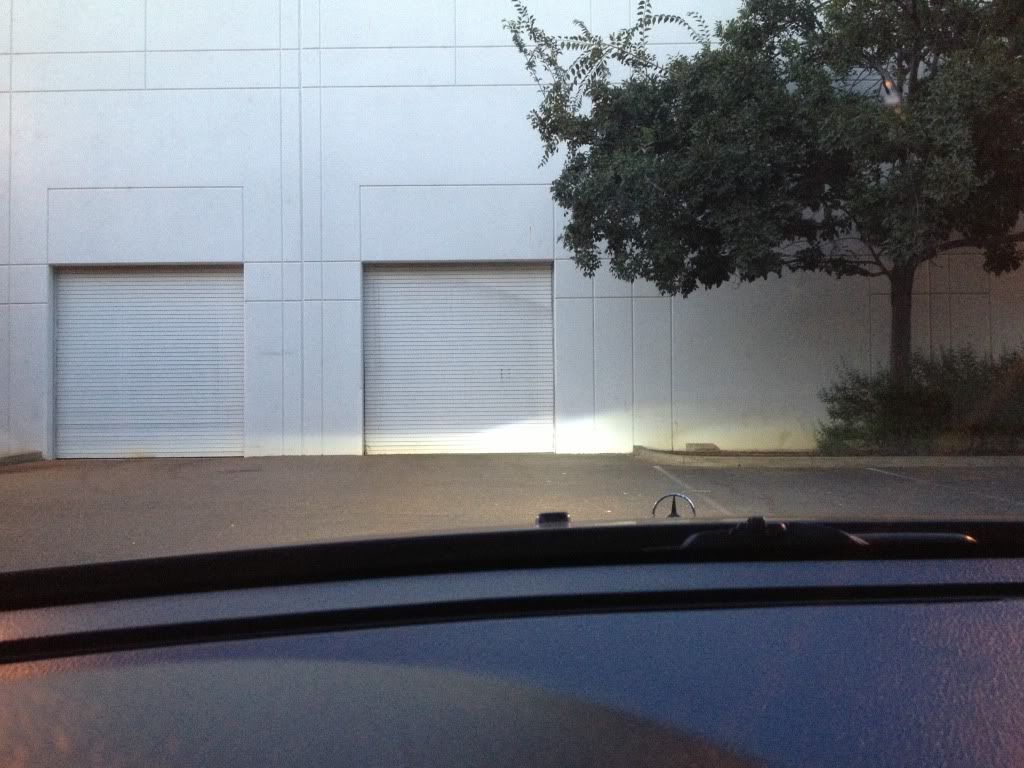
Some random cutoff pics with 5000k HIDs using 35w ballast. Shoulda waited for nightfall but the wall was just right.
Also got a shot of my license plate led light panel mod. Note had to remove torx screws from the plastic trim on the trunk where the locking mechanism is, panel clips on the carpeted trunk lining, plastic cover on the trunk hinge arms and three hex nuts two on the ends of the license plate panel and one hidden behind the license plate itself. The license plate panel is finally left with push fasteners so all you have to do is pull away from the trunk at the top parting line. Once those are removed you should have access to remove the two light housings and swap in the led panel housings. If you are just replacing the bulb you don't need to do this. There are two screws per housing on the outside that hold the clear lens on. Remove those then pull out and the bulb is actually attached to those clear lenses.
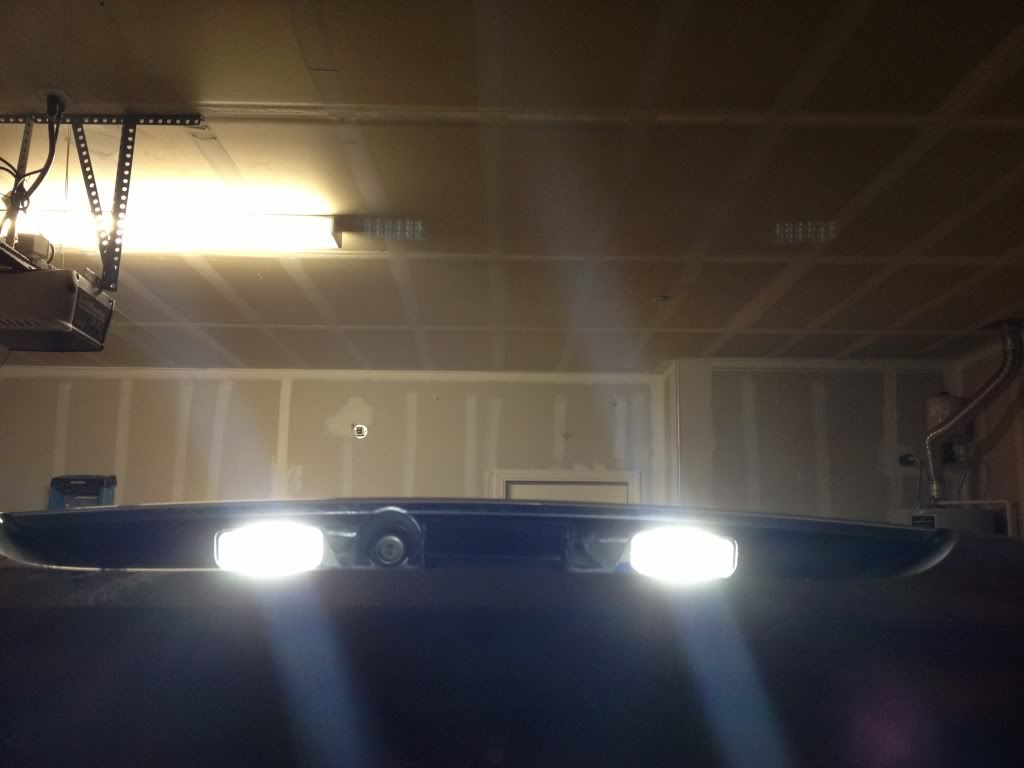
I preferred the housing led panel replacement because it has much more light output which is much more functional for the "surround lighting" system.
Also got a shot of my license plate led light panel mod. Note had to remove torx screws from the plastic trim on the trunk where the locking mechanism is, panel clips on the carpeted trunk lining, plastic cover on the trunk hinge arms and three hex nuts two on the ends of the license plate panel and one hidden behind the license plate itself. The license plate panel is finally left with push fasteners so all you have to do is pull away from the trunk at the top parting line. Once those are removed you should have access to remove the two light housings and swap in the led panel housings. If you are just replacing the bulb you don't need to do this. There are two screws per housing on the outside that hold the clear lens on. Remove those then pull out and the bulb is actually attached to those clear lenses.
I preferred the housing led panel replacement because it has much more light output which is much more functional for the "surround lighting" system.
08-02-2013, 02:48 AM
#36
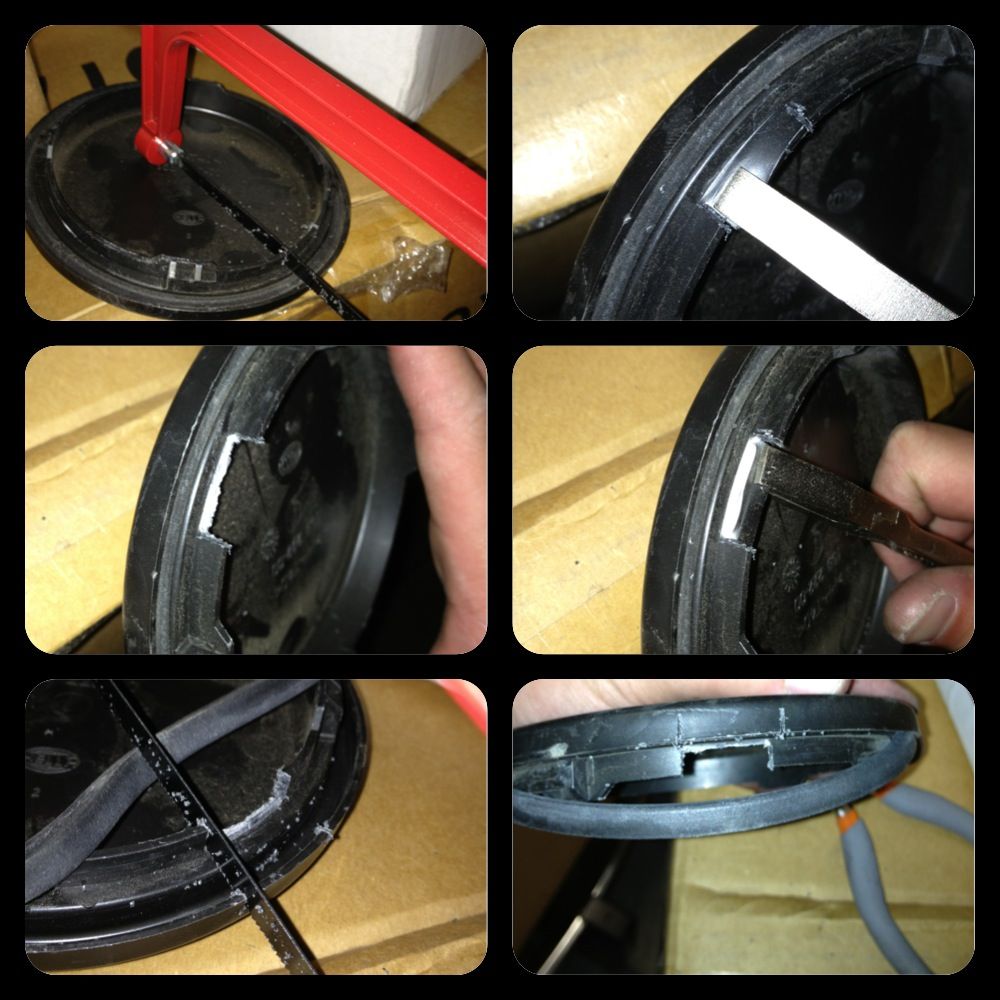
For those with cracked wing mirror rubber boots. As long as the material is still attached meaning you aren't missing a gap full of rubber, you can do a repair using plasti dip. I'm currently doing that to my secondary wing mirrors that were damaged. Here are a few pics of the progress so far. Note there's probably 10 coats already. Just tryin to fatten up the rubber is all.

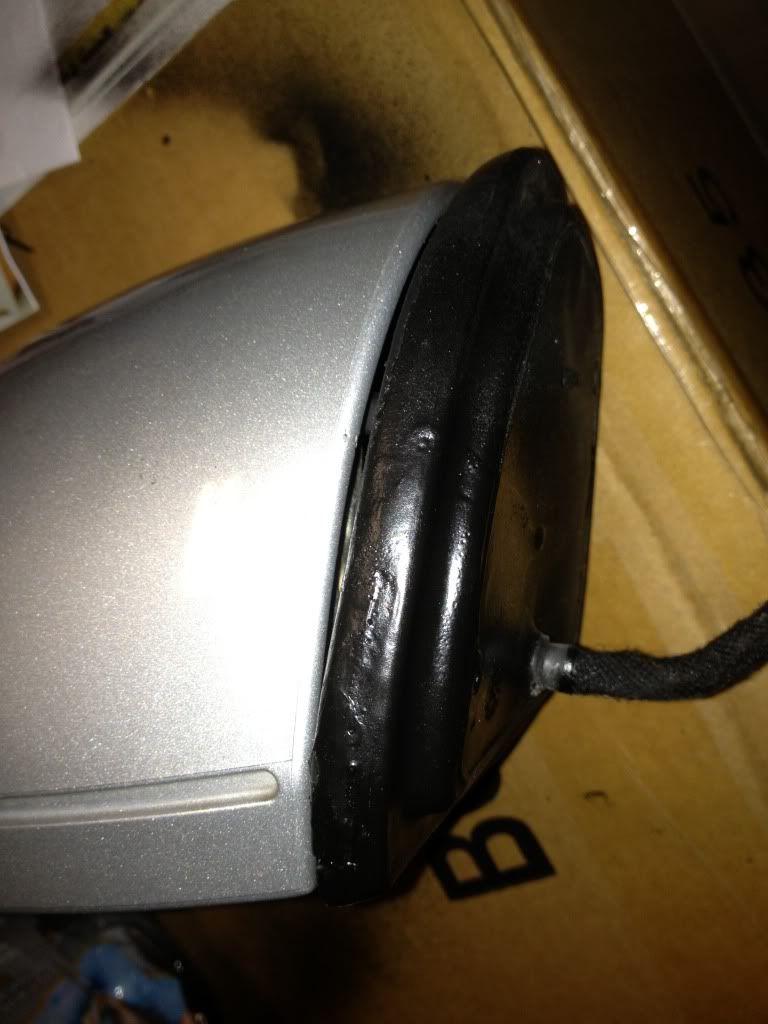
And a fresh coat to dry overnight...
And a fresh coat to dry overnight...
08-02-2013, 02:56 AM
#37
Dunno who's W211 this is, but gives me a great image of what an e55 bumper looks like on a non amg model (meaning no aggressive side skirts or rear bumper) Digging the wheels too which I believe are stock with an upgraded option. Anywho if I go this route I will have no regrets.
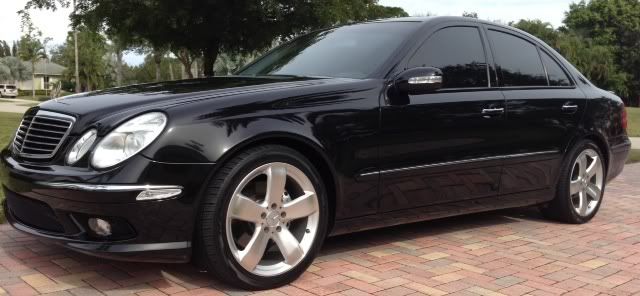
On second note, looks a lot like its a debadged e55. Still due to the image quality and color of the car it's the best illustration of what a non amg would look like with an e55 front end.
On second note, looks a lot like its a debadged e55. Still due to the image quality and color of the car it's the best illustration of what a non amg would look like with an e55 front end.
Last edited by Drag0na5h; 08-02-2013 at 03:56 AM. Reason: Bad image quality...
08-02-2013, 03:48 AM
#38
MBWorld Fanatic!
Join Date: Jul 2013
Location: Down Unda
Posts: 3,133
Received 134 Likes
on
124 Posts
W204 C63 AMG, W212 E250 CGI, C207 E250 CGI
Sweet! Thanks for that info! Will see if i can do it over the weekend so i can order the specific LED. You mentioned youre using 35W ballast? Any errors on the dash? Or are you using cancellers?
08-02-2013, 03:49 AM
#39
Installing PIP HID kit tips:
To give yourself extra room on the driverside, remove the intake tube. Mine just popped right off.
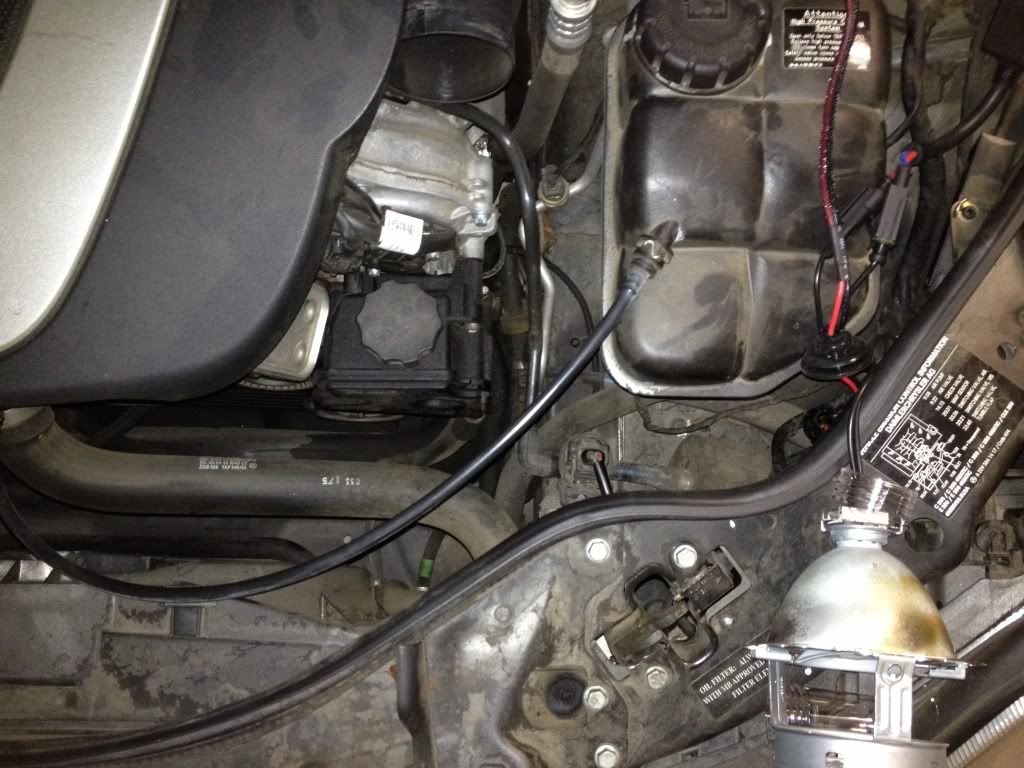
To keep the back headlamp cap functioning to keep out debris, trim two 3/4" slots off of the raised plastic edges. This will allow you to run 4 wires into the housing and utilize the rubber ring gasket to sandwich the wires and create a decent seal.
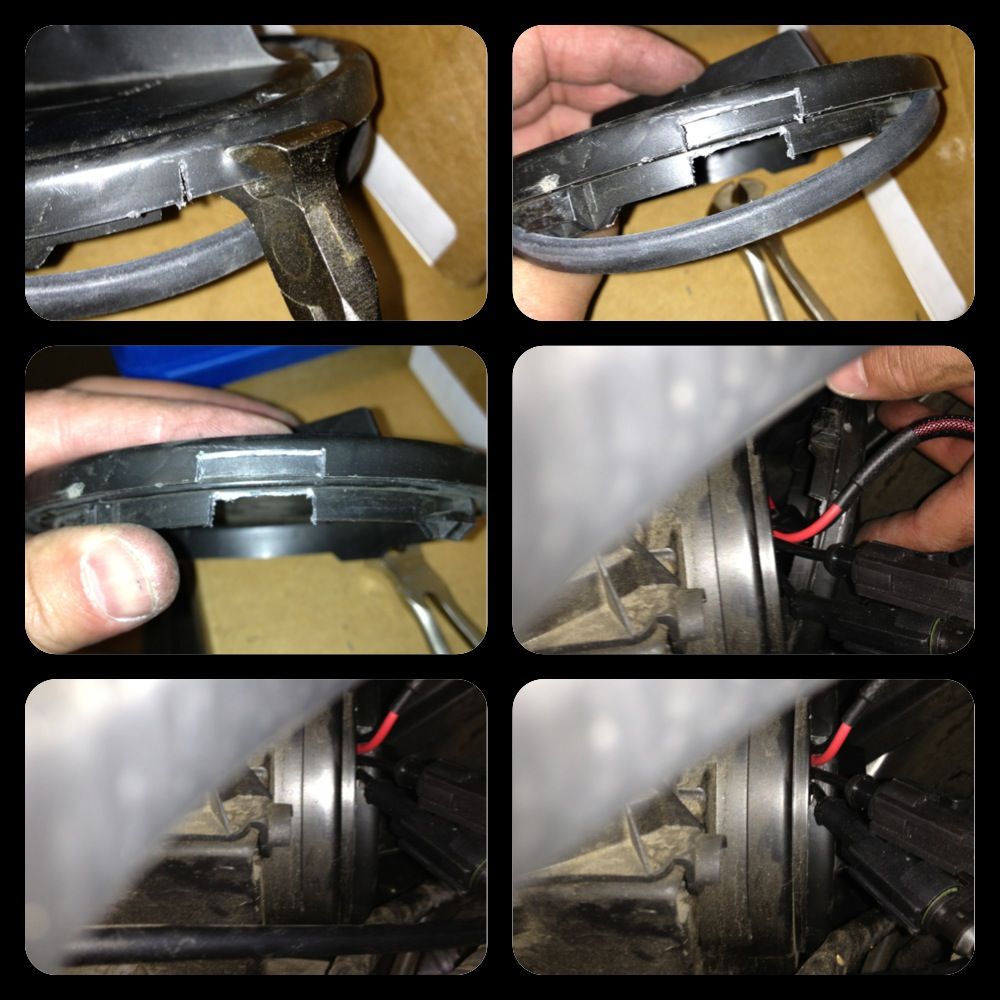
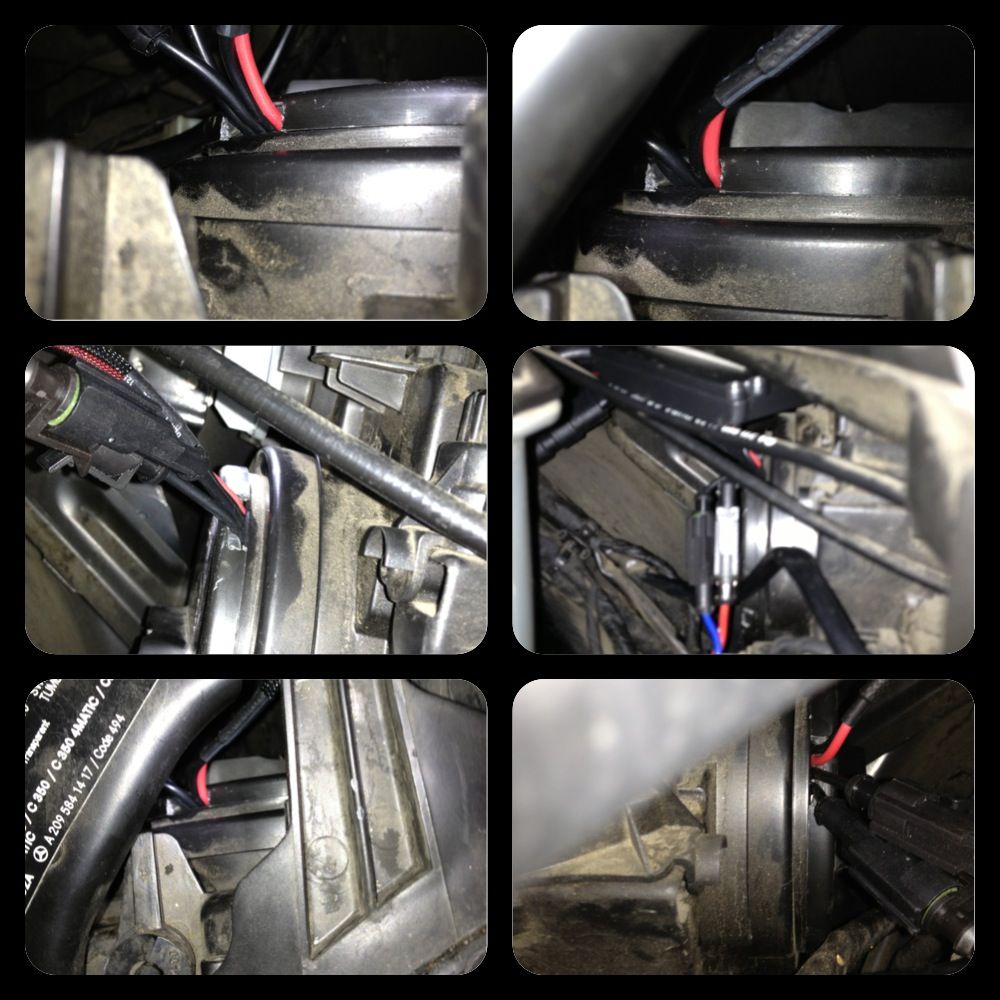
A great place to mount the ballast is on the underside of the upper most support beam that the headlight housing brackets off of. Do this via two layers of double sided 3M tape to fill in any contour surfaces. There are two clearance holes perfectly spaced out to strap a ziptie to further secure the ballast.
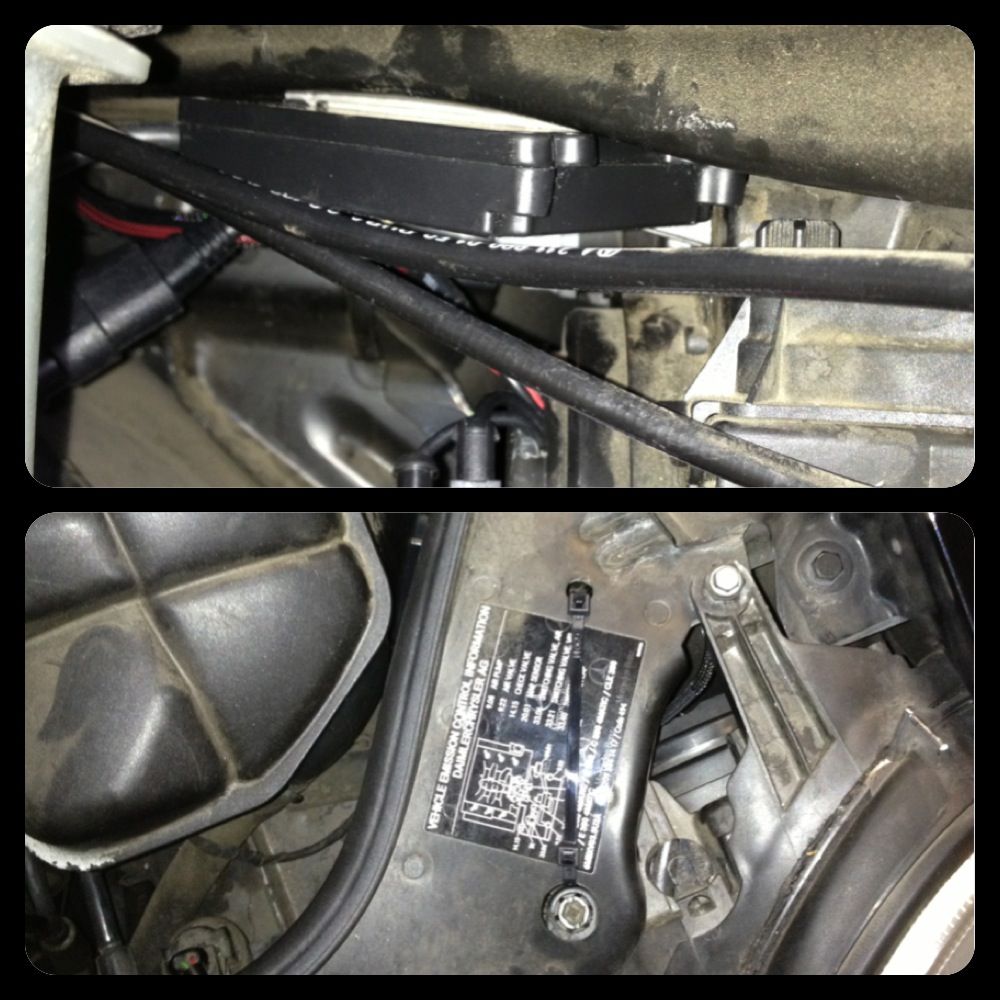
Hopefully those tips help expedite your install and make the task less daunting.
To give yourself extra room on the driverside, remove the intake tube. Mine just popped right off.
To keep the back headlamp cap functioning to keep out debris, trim two 3/4" slots off of the raised plastic edges. This will allow you to run 4 wires into the housing and utilize the rubber ring gasket to sandwich the wires and create a decent seal.
A great place to mount the ballast is on the underside of the upper most support beam that the headlight housing brackets off of. Do this via two layers of double sided 3M tape to fill in any contour surfaces. There are two clearance holes perfectly spaced out to strap a ziptie to further secure the ballast.
Hopefully those tips help expedite your install and make the task less daunting.
08-02-2013, 04:16 AM
#40
http://www.aznoptics.com/index.php?m...&products_id=8
Find one similar in shape and size or you can order from this same site. However at $19 for two shipped you can spend that on eBay and get a lot more from you guessed it, CHINA. The key is getting led bulbs that are canbus. The china ones I can't speak for yet but I just bought some from a member and waiting for them to arrive. He said they're error free but never used them so ill be the one testing that sales pitch. I'm using the DDM 35 watt kit with error cancellers. Works great no errors on the dash, but my passenger side light flickers once in a blue moon. Not sure if its a ballast issue or the canceller malfunctioning. Still no error on the dash so leads me to believe a possible faulty ballast. I read that ddm 35 watt ballast these days are known for going bad. Their 55 watt ones I read are still reliable. I have a tuner shop down the street so I can buy a replacement if need be.
08-02-2013, 11:03 AM
#42
Yeah I'm gonna run by the shop and see how much their kit runs. If its on par with online I'll pick up a set and grab some 4300k bulbs for when I need maximum visible light. I know 5000k is close but still has a bluish hue. How's the visibility with 12000k? Isn't that like really purple in color?
08-02-2013, 01:51 PM
#43
MBWorld God!

Join Date: Jul 2010
Location: 39.515509, -111.549668
Posts: 30,567
Received 3,351 Likes
on
2,807 Posts
2012 CLS63
nice work Dragon, and continue with the passion to do it yourself; top marks
08-02-2013, 06:37 PM
#44
08-02-2013, 08:08 PM
#45
MBWorld Fanatic!
Join Date: Jul 2013
Location: Down Unda
Posts: 3,133
Received 134 Likes
on
124 Posts
W204 C63 AMG, W212 E250 CGI, C207 E250 CGI
I know 12000K should be a bit purple, i just wanted to try it since i was running on 8000K before i ordered it, but i was happy with the result. Its more bluish than purple. They probably got the packaging wrong ir something. 
08-02-2013, 08:30 PM
#46
Possible you have 35W bulbs on your 55W ballast? I've also read that it's possible for 55W ballast to wash out color. i.e. 10000k bulb looks like 8000k. Maybe that's what could be happening with your set up? I can't really compare because my old retrofit was running 55W 6000K and now I'm running 35W 5000K... maybe if I try some 6000k on my car now I can confirm since I drove with that 55W 6000k combo for like 3 years on my old car.
 08-05-2013, 06:28 AM
#48
Newbie
Join Date: Jun 2013
Posts: 13
Likes: 0
Received 0 Likes
on
0 Posts
2006 Mercedes C 280
Those are quite some cosmetic mods on a shoestring budget! Don’t get me wrong, but that is really tastefully done. Hope to see a couple of engine mods thrown in soon, since my cousin had modded his M3 (which was a used one) with aftermarket and dismantler parts, beginning with engine tweaking and then cosmetic!
08-05-2013, 01:23 PM
#49
Thanks for the compliments. Actually you answered it in your post, unlike an M3 this particular E350 will not be built for performance. Maybe when it craps out I can look into performance modding a true E55 or E63 since I have really come to a liking of this chassis. Plus this vehicle is being used to haul around clients so I gotta keep it modest. Good looking out tho.
Those are quite some cosmetic mods on a shoestring budget! Don�t get me wrong, but that is really tastefully done. Hope to see a couple of engine mods thrown in soon, since my cousin had modded his M3 (which was a used one) with aftermarket and dismantler parts, beginning with engine tweaking and then cosmetic!
08-06-2013, 03:09 AM
#50
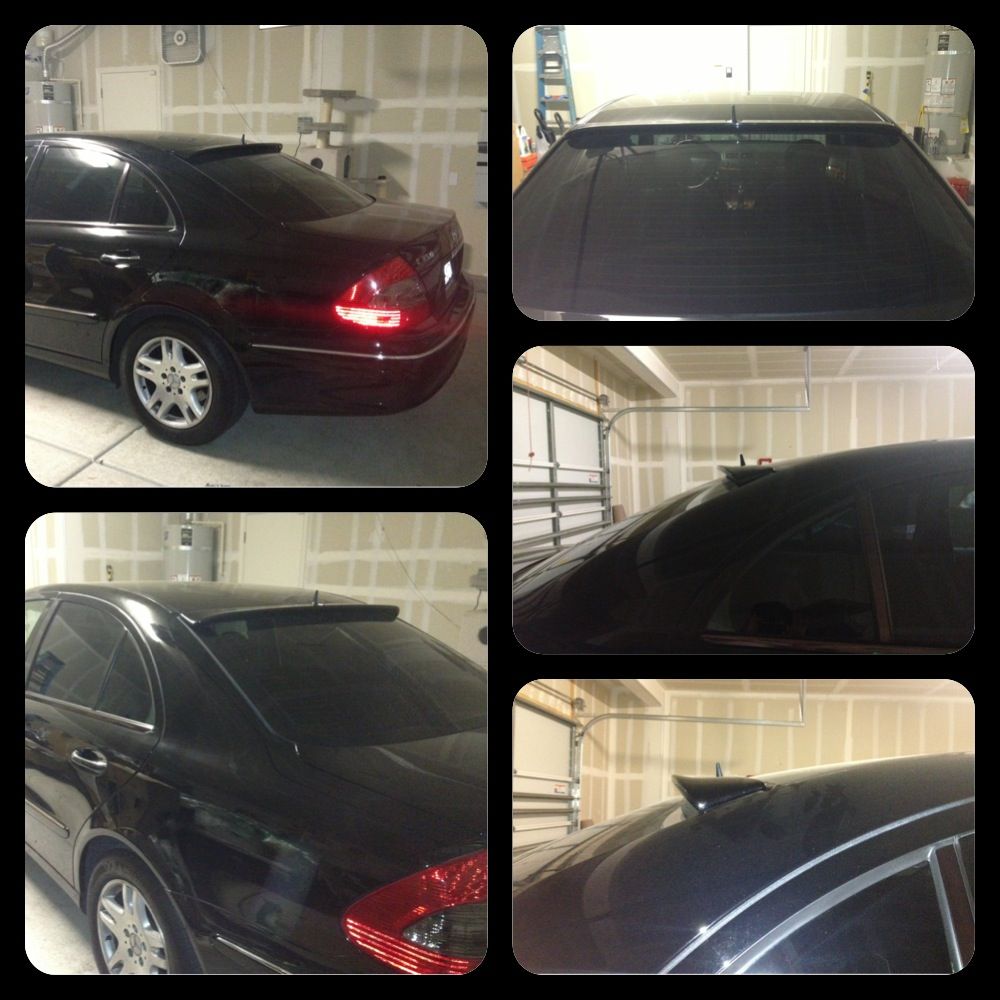
Test mounted the roof spoiler. Fitment is good and the part is symmetrical. No complaints here except I need to use a heat gun to soften up the old double sided tape for removal. The part is extremely lightweight in case anyone is contemplating on getting one. I feel as small a part that it is, it really gives a whole different dimension to the look and feel of the vehicle.
I just realized I also replaced the rear tail lamps with some Depo reps of the 07+ model year. $200 eBay


