Modding a W211 on a budget...
 07-21-2014, 11:19 PM
#101
Honestly I was skeptical about whether or not that folding switch would work without any programming and it did in my case. Big relief knowing the wiring was already in place. However unlike my old Honda, this switch still maintains the same number of wires, 3! When I retrofitted folding mirrors in the Honda it was tricky in that I had like 6 extra wires I had to run myself directly to the mirrors. Knowing what those 6 wires did was the tricky part. Are you contemplating w212 "style" mirror covers to replace yours + motor assemblies or getting whole new assemblies that fold and have the w212 style, which I haven't seen myself yet?
 07-21-2014, 11:46 PM
#102
Super Member
Join Date: Sep 2013
Location: Bay Area
Posts: 865
Likes: 0
Received 59 Likes
on
45 Posts
14 550 sedan
A while ago I was thinking either just expensive motor + current or w212 mirrors but now I've come to wonder if it's possible use the cheaper motor for the 03-06 along with the w212 style mirrors. I was quoted 700 Euros which is around $950 USD just for the motors so I never really gave it a serious thought.
07-22-2014, 12:10 AM
#103
A while ago I was thinking either just expensive motor + current or w212 mirrors but now I've come to wonder if it's possible use the cheaper motor for the 03-06 along with the w212 style mirrors. I was quoted 700 Euros which is around $950 USD just for the motors so I never really gave it a serious thought.
Last edited by Drag0na5h; 07-22-2014 at 12:16 AM.
 07-22-2014, 03:11 AM
#106
MBWorld Fanatic!
Join Date: Jul 2013
Location: Down Unda
Posts: 3,133
Received 134 Likes
on
124 Posts
W204 C63 AMG, W212 E250 CGI, C207 E250 CGI
Sweet! So you bought it off ebay unpainted and used your existing mirror cover is that right? What about the base of the mirror? The facelift looks really tempting for the same price! Ill ask how much it would cost to paint it. Thanks again mate! When will this end?!!!! 
07-22-2014, 03:35 AM
#108
07-22-2014, 03:49 AM
#109
Sweet! So you bought it off ebay unpainted and used your existing mirror cover is that right? What about the base of the mirror? The facelift looks really tempting for the same price! Ill ask how much it would cost to paint it. Thanks again mate! When will this end?!!!!
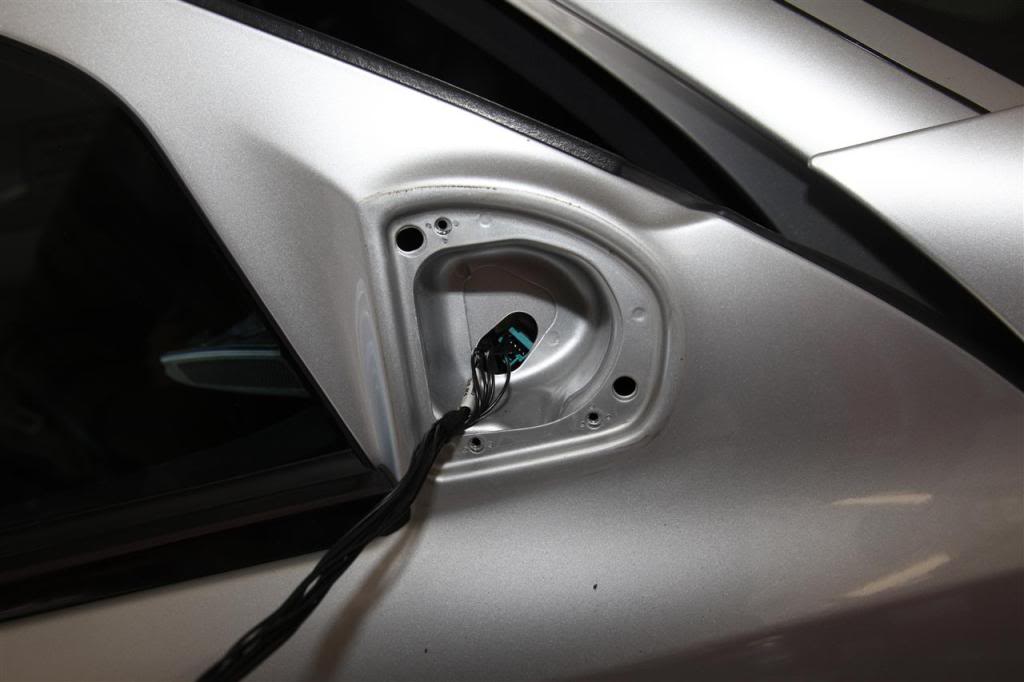
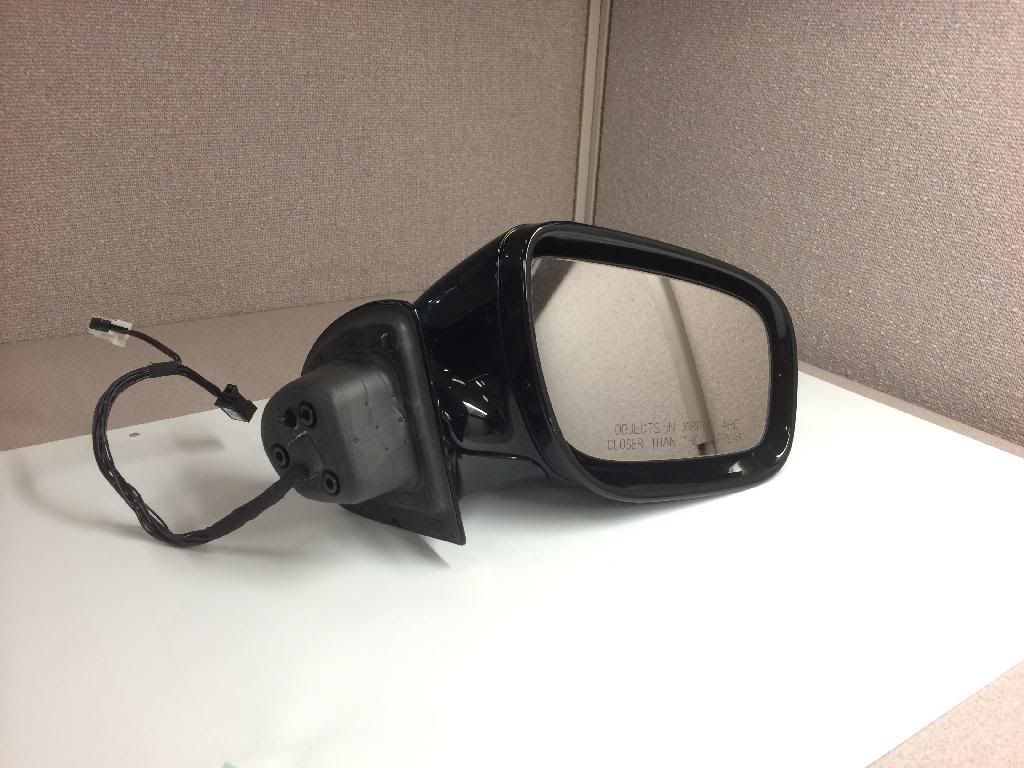
This is what you'll see when you take off your mirrors. You see the plane with the cut out for the wire harness? That's the plane you need to drill three clearance holes to mount the new facelift mirrors. Here's a picture of the facelift mirrors threaded mounting holes.

Also it's a pain removing the security Torx screws with the mirror tensioner spring still attached. Would be helpful of you had someone holding back the mirror (folded) while you unscrewed the bolts. Again I didn't ever intend to reinstall the stock ones so I unhooked the tensioner spring inside the assembly and it made it 1000x's easier to remove let alone SAFER!
07-22-2014, 04:18 AM
#111
MBWorld Fanatic!
Join Date: Jul 2013
Location: Down Unda
Posts: 3,133
Received 134 Likes
on
124 Posts
W204 C63 AMG, W212 E250 CGI, C207 E250 CGI
Yep the whole mirror assembly comes with a spare mirror cover that's primed and ready for paint. But you can take it off and swap your stock one. The mirror assembly has an integrated base with the rubber gasket attached. Mine was really dried and cracked into pieces so this resolved that issue and gave me folding ability for cheap. I was tempted to do the facelift ones because they look so damn sweet, but I didn't want to spend more for paint... Not yet at least haha! But the only thing is you'll need to drill three clearance holes on the inner part of the door that the mirror mounts too. The facelift mirrors don't utilize the existing tapped holes that are flush with the mounting base plane.

This is what you'll see when you take off your mirrors. You see the plane with the cut out for the wire harness? That's the plane you need to drill three clearance holes to mount the new facelift mirrors. Here's a picture of the facelift mirrors threaded mounting holes.
Also it's a pain removing the security Torx screws with the mirror tensioner spring still attached. Would be helpful of you had someone holding back the mirror (folded) while you unscrewed the bolts. Again I didn't ever intend to reinstall the stock ones so I unhooked the tensioner spring inside the assembly and it made it 1000x's easier to remove let alone SAFER!

This is what you'll see when you take off your mirrors. You see the plane with the cut out for the wire harness? That's the plane you need to drill three clearance holes to mount the new facelift mirrors. Here's a picture of the facelift mirrors threaded mounting holes.

Also it's a pain removing the security Torx screws with the mirror tensioner spring still attached. Would be helpful of you had someone holding back the mirror (folded) while you unscrewed the bolts. Again I didn't ever intend to reinstall the stock ones so I unhooked the tensioner spring inside the assembly and it made it 1000x's easier to remove let alone SAFER!
really cool!
07-22-2014, 04:24 PM
#112
I actually had a pair of facelift mirrors for a while and took that photo. Decided not to use them because modding them with the OEM internal power folding motor would have made that project over $1000 (savings came from the fact that they were already painted black). The motors themselves are like $900 for the pair. Decided to part ways with them and go a cheaper route for now. Haha, I love power folding mirrors. I've always envied cars in Asia that had them, but they were cheap econobox's worth less than my midsize sedan here in the States. Anytime I have a car now that's the 1 MAJOR requirement. The second is HIDs or LED equivalent headlamps, but that's easily achieved with a retrofit. Folding mirrors isn't as universal of a mod as others. But hey, atleast the video is POV. You can pretend you're in the driverseat the WHOLE time they fold!
07-23-2014, 10:21 PM
#113
A while ago I was thinking either just expensive motor + current or w212 mirrors but now I've come to wonder if it's possible use the cheaper motor for the 03-06 along with the w212 style mirrors. I was quoted 700 Euros which is around $950 USD just for the motors so I never really gave it a serious thought.
http://www.ebay.com/itm/Mercedes-w211-07-09-Door-Mirror-Motor-Kit-RIGHT-OEM-/271411137341?pt=Motors_Car_Truck_Parts_Accessories&hash=item3f315d4b3d&vxp=mtr
http://www.ebay.com/itm/Mercedes-w211-07-09-Door-Mirror-Motor-Kit-LEFT-OEM-/351009829636?pt=Motors_Car_Truck_Parts_Accessories&hash=item51b9d0f304&vxp=mtr
+ The switch I have linked in above post.
 07-24-2014, 02:54 AM
#115
Looks to be manufactured by a secondary source. R&S? Plus the part number is broken up so it's not a true OEM part, but with a 1 year warranty it beats having a Taiwan imported part. Wish I kept my stock facelift mirrors :/
07-25-2014, 07:46 PM
#116
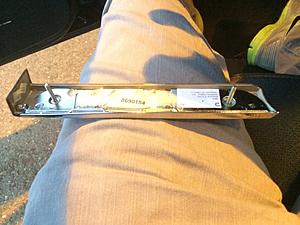
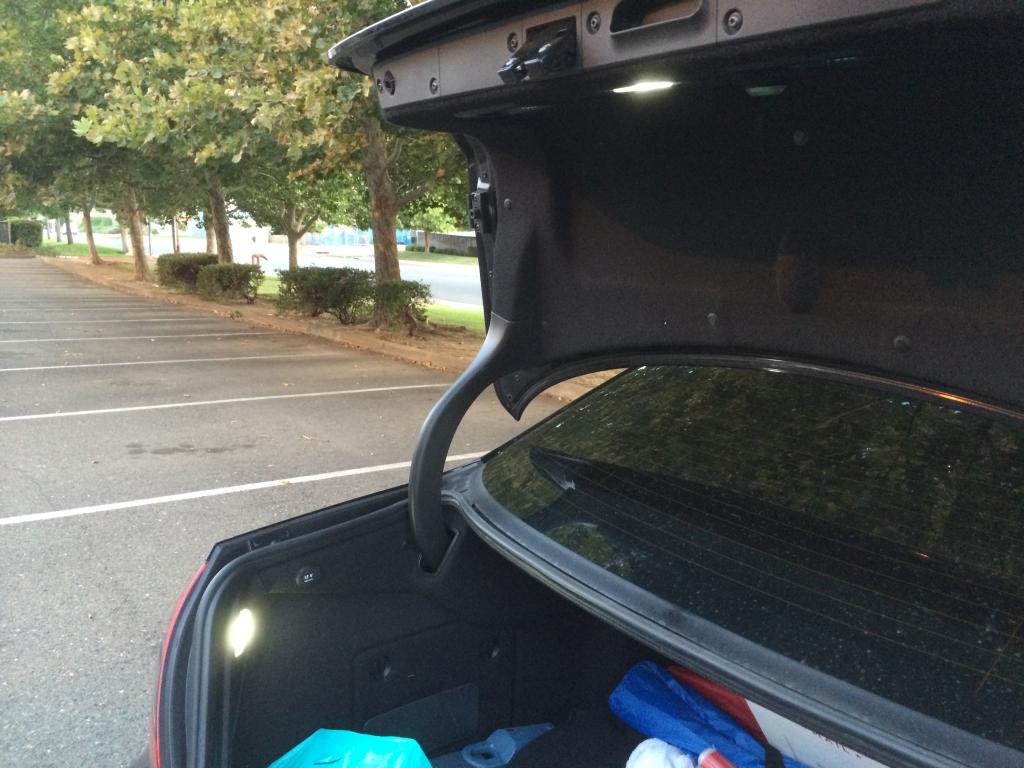
So something I've noticed in my trunk lighting, only 2 of the 3 lights are working. The third light comes on intermittently for about 15 seconds then never comes back on. I've tried both a halogen bulb and LED bulb, same results. Here are a few pics:
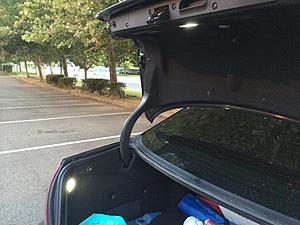
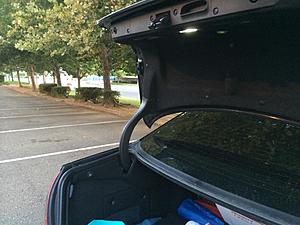
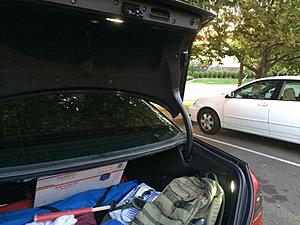
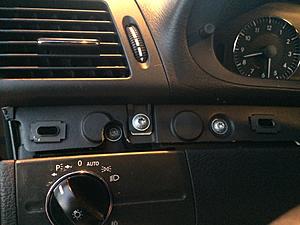
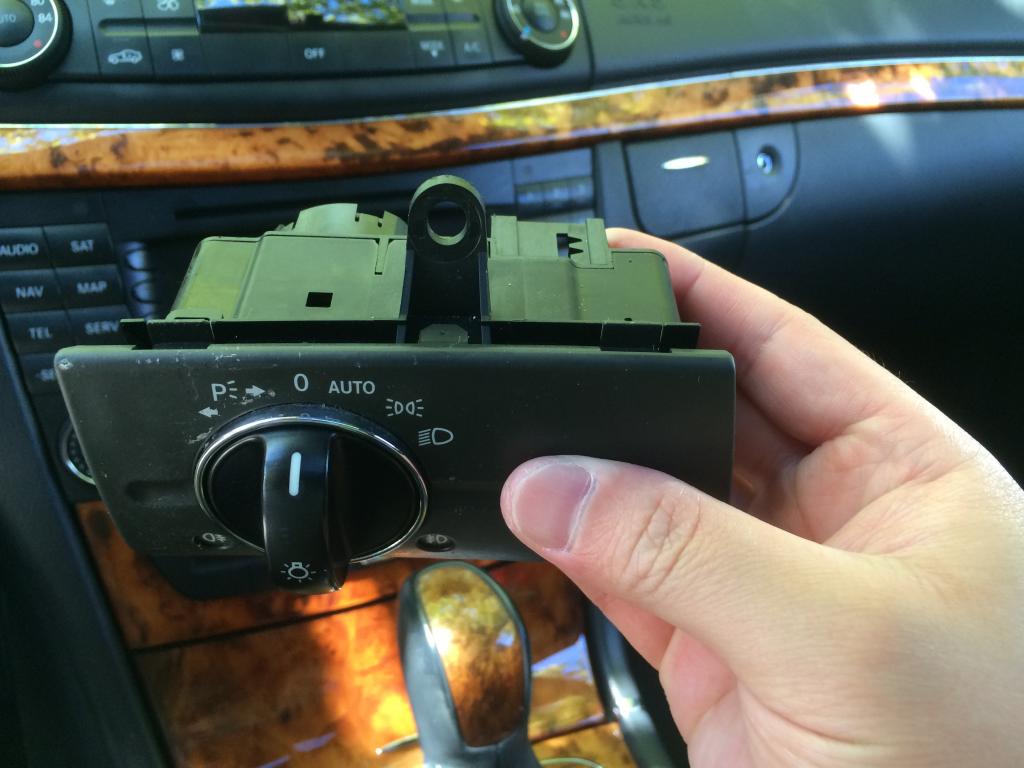
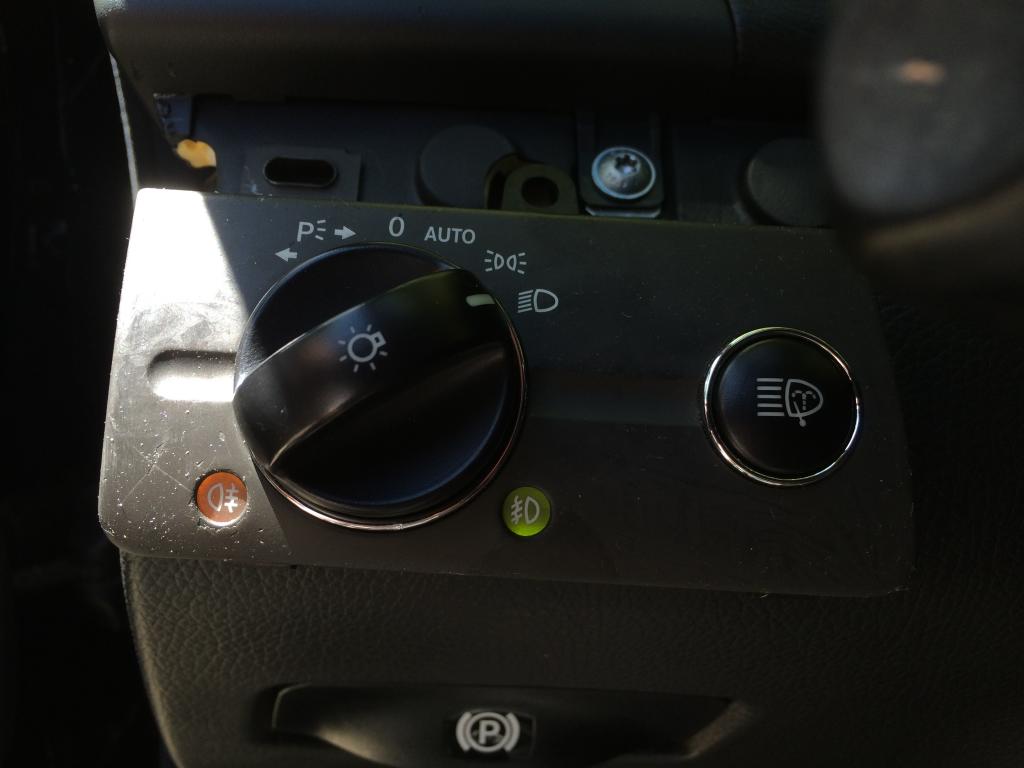
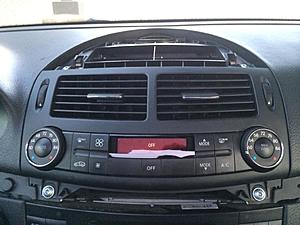
Also, I got a replacement light switch. If you recall the fog light indicator on my stock one wasn't lighting up. Finally I have one that does.
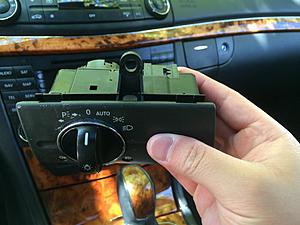
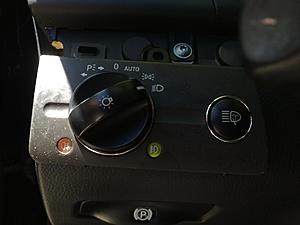


Also, I got a replacement light switch. If you recall the fog light indicator on my stock one wasn't lighting up. Finally I have one that does.


 07-25-2014, 08:32 PM
#117
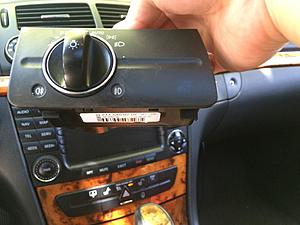
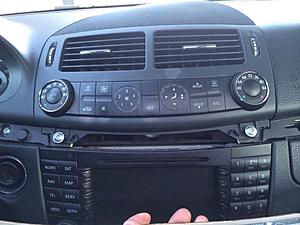
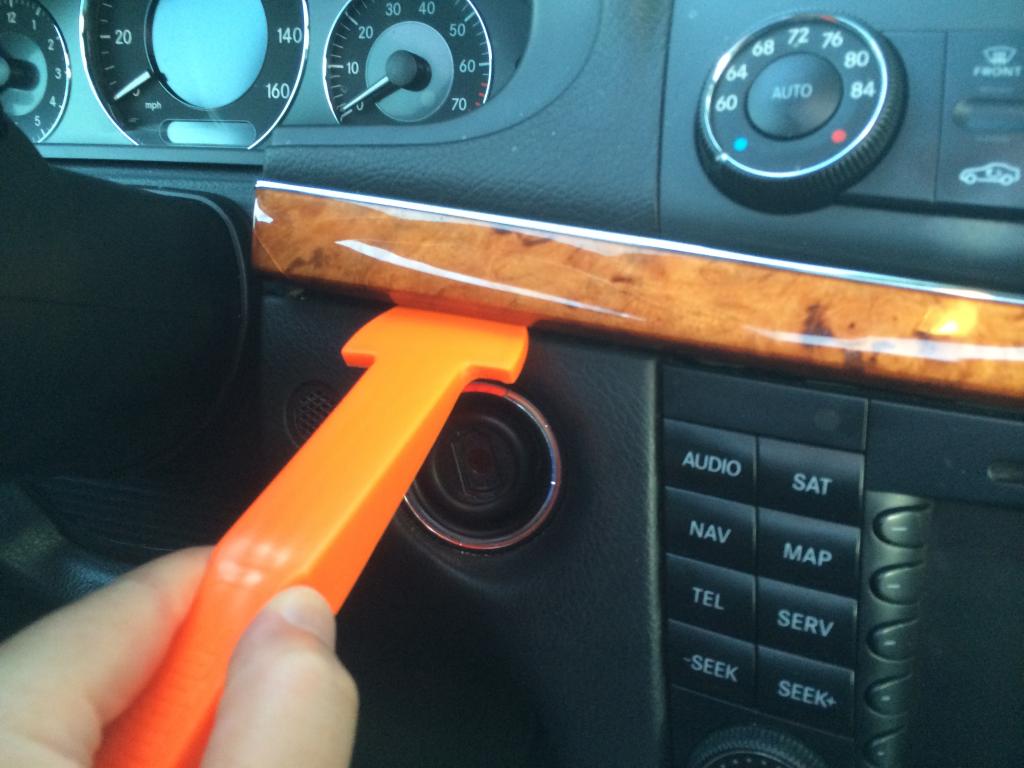
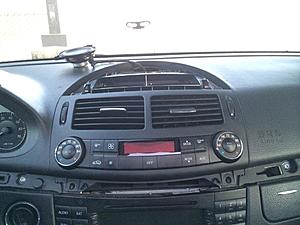
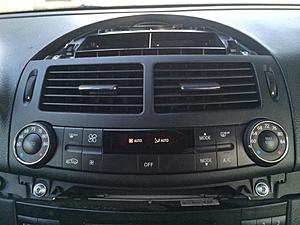
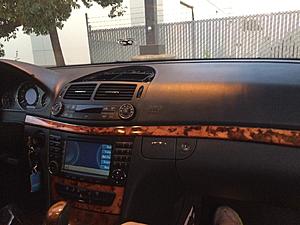
Alright as promised, here is a pictoral DIY of how to remove the HVAC controls on a 2006 and up dash. These are the ones with a mesh center panel. If you have the fin type, there are special tabs you need to access through the fins to unlock the center panel. Anywho lets get started. First off you want to open your passenger door to the point it won't close on itself (esp. on a windy day or incline).
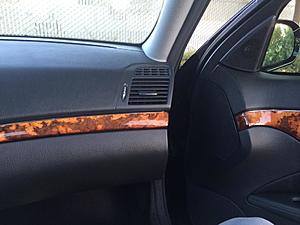
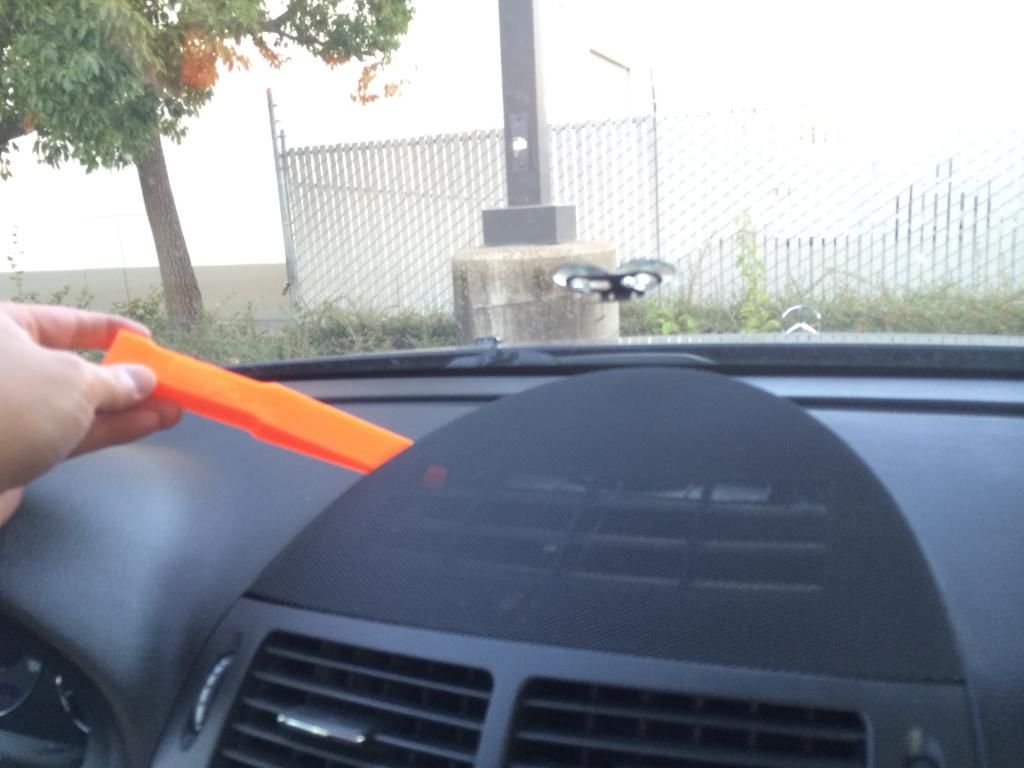
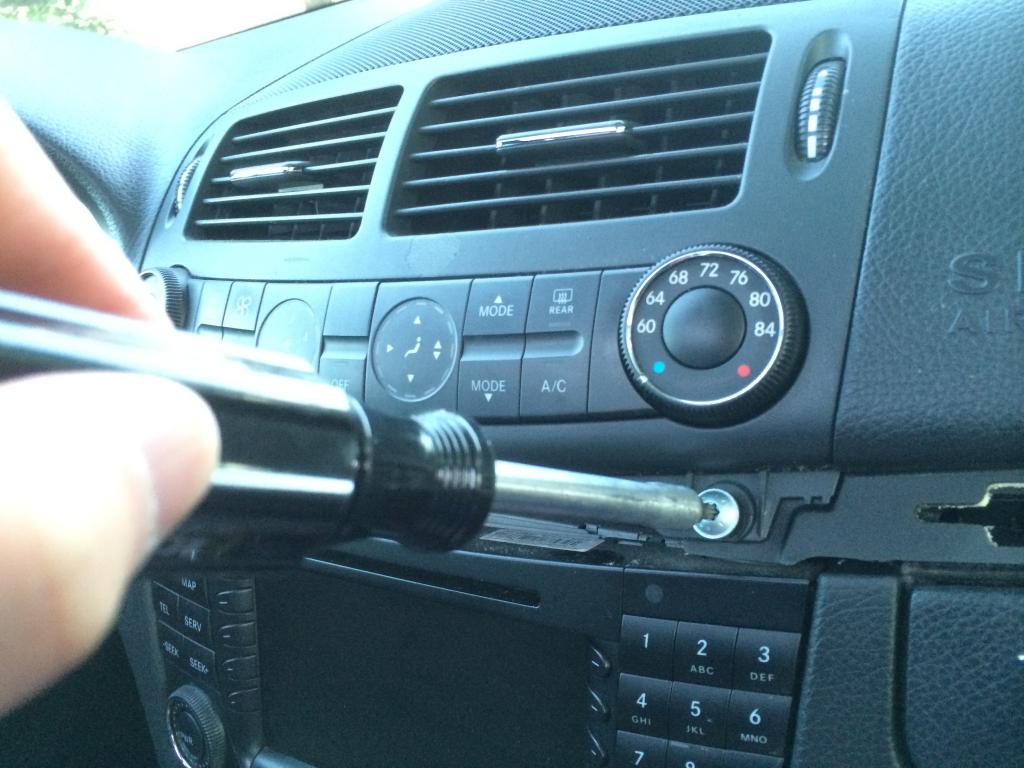
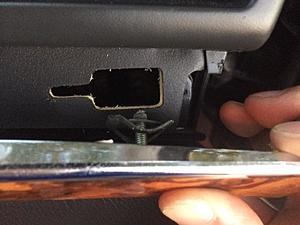
Next use plastic panel removing tools to pry the far left side of the wood trim just above the ignition.

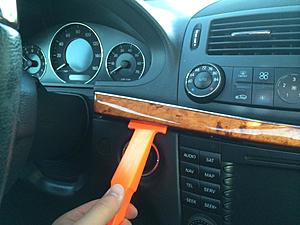
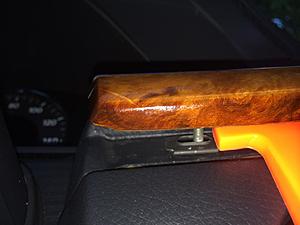
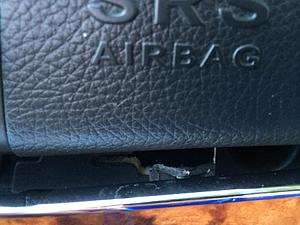
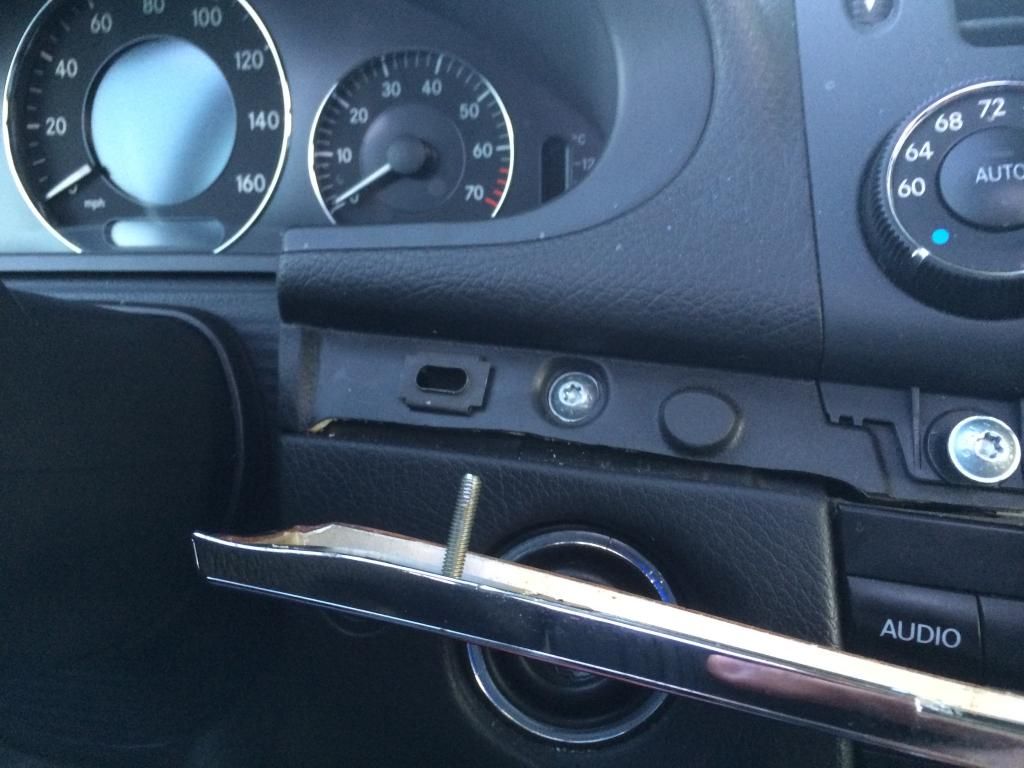
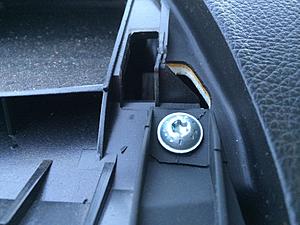
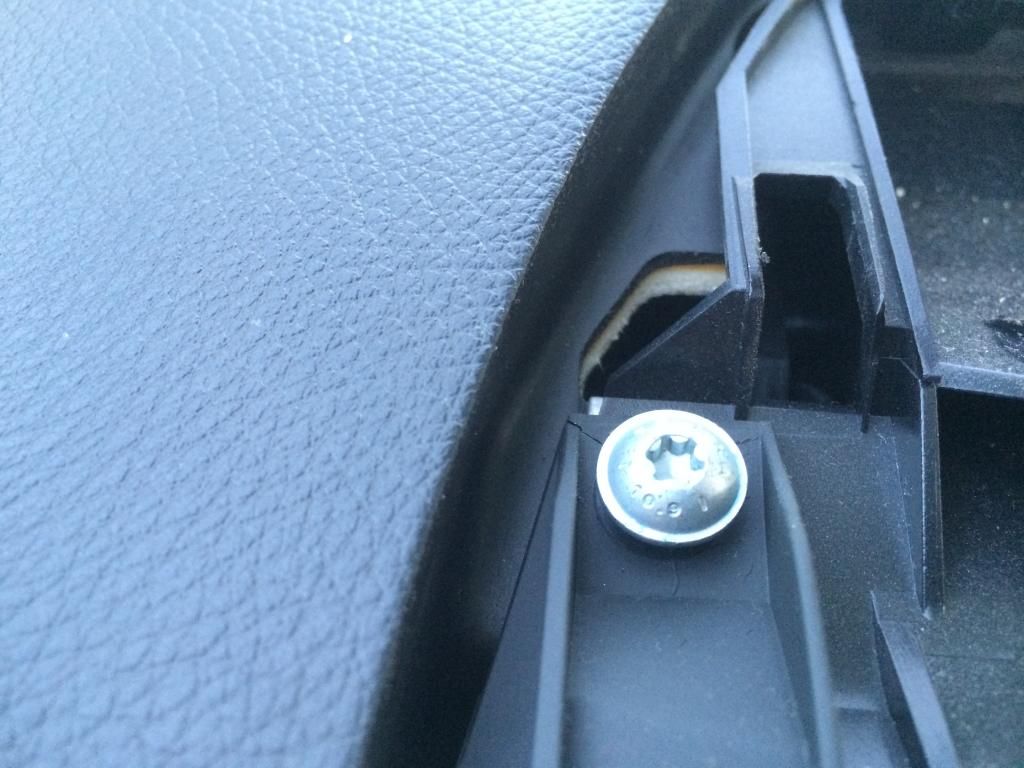
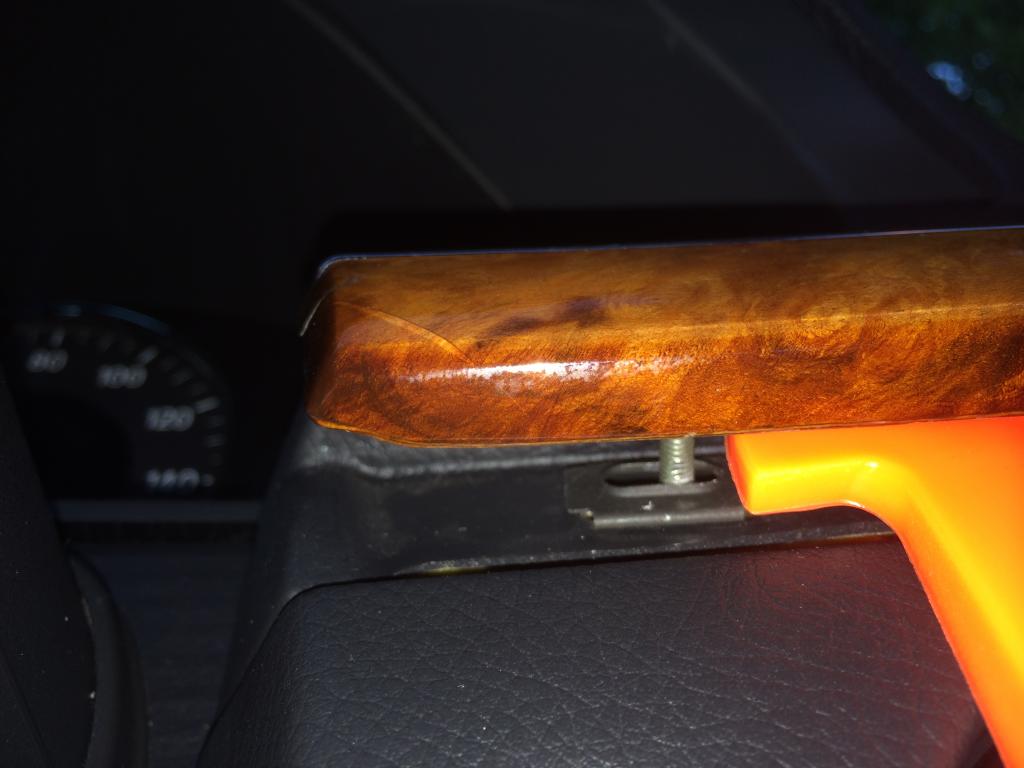
You should hear it pop (possibly more than once) and this is why. Take a look at the threaded end and the black clip it slides into. It is held in place rather well, but easily pulled out with the right tools and angle of lift.
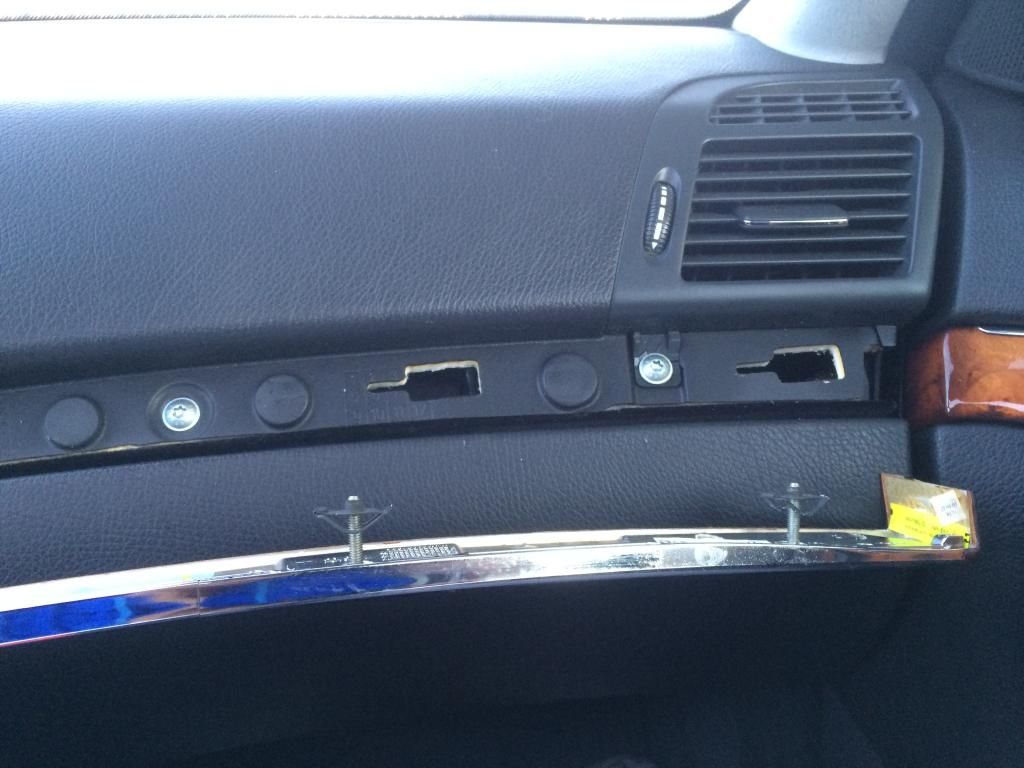
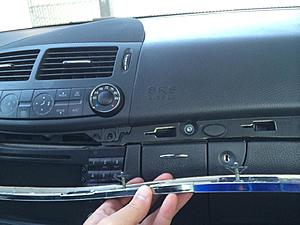
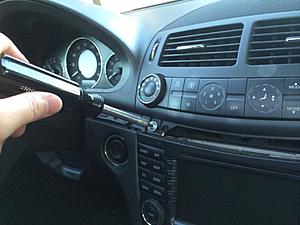
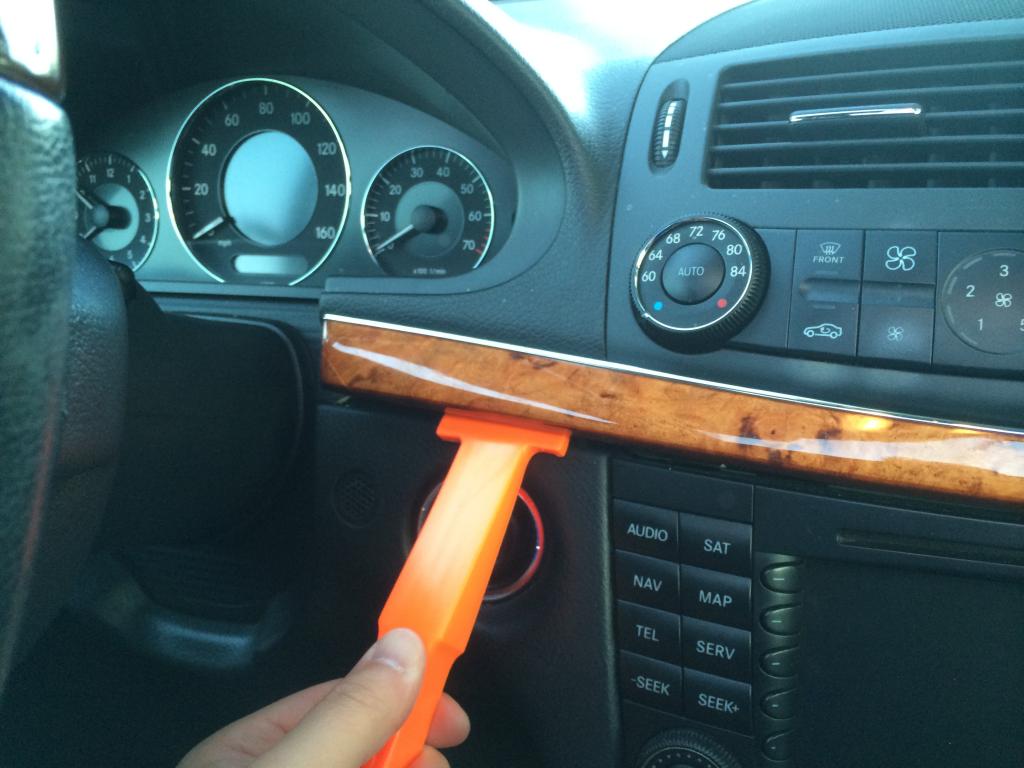
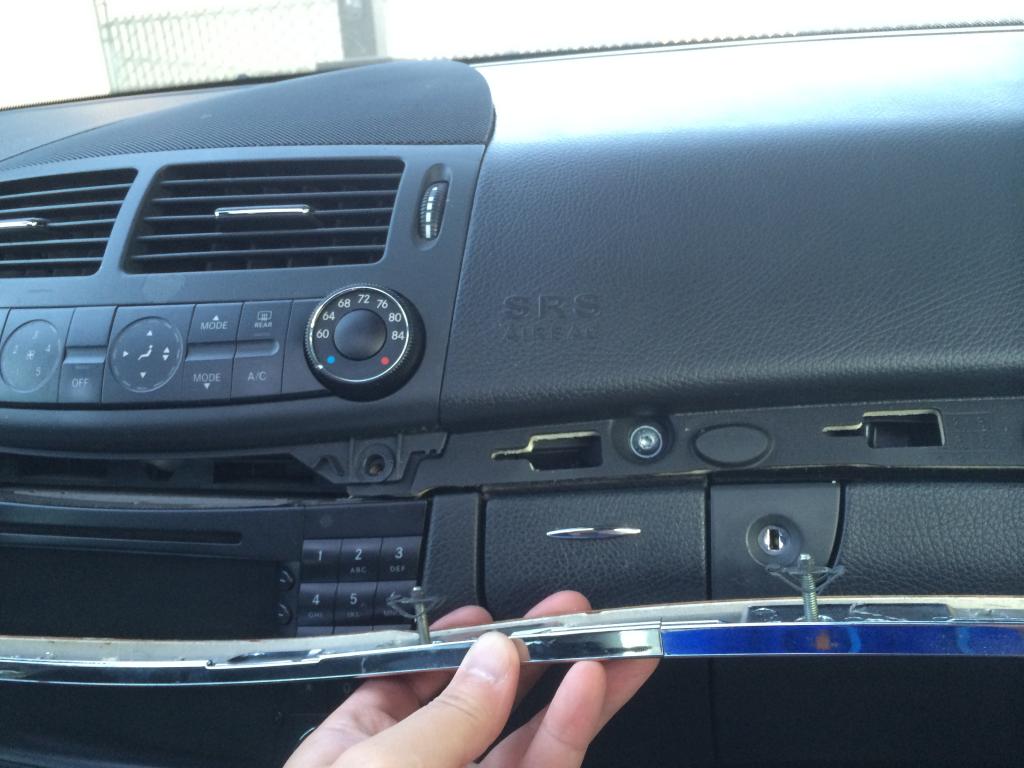
Next while you pull on this end slighty away from the dash, you want to pull the whole trim towards the passenger side. The remaining clips are designed to slide lock into place. Pulling them towards the passenger door unlocks them and allows for removal.

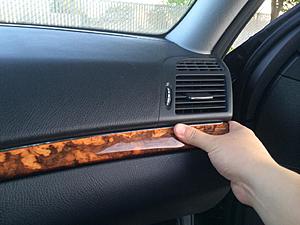
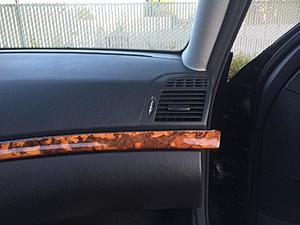
This is how far it should have been pulled out.
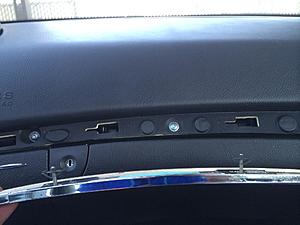
Here's a close up of one of the slide locking clips.
Here they are as a whole.
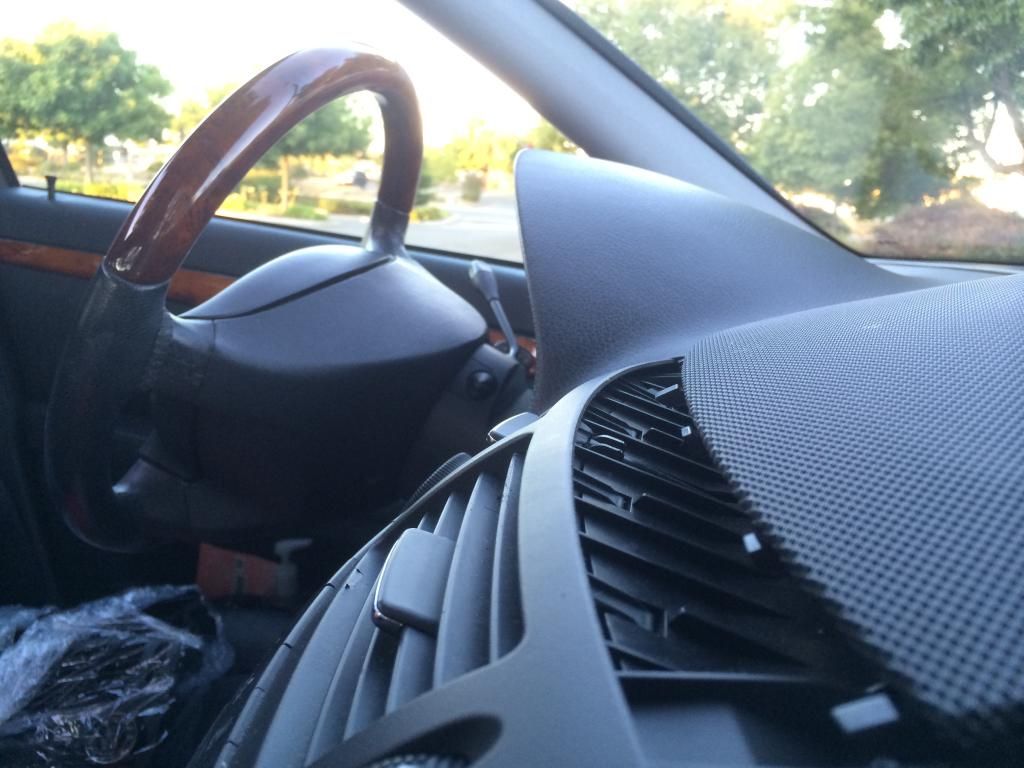
Now store the wood trim somewhere safe where it won't get damaged. Next using a T20 screw driver remove the two torx screws on the front end of the assembly.

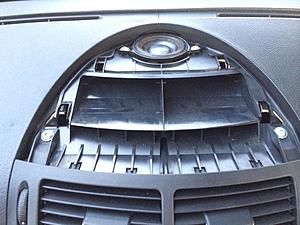
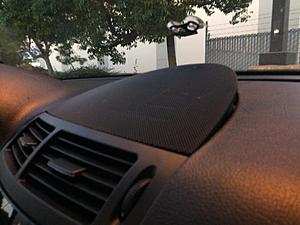
Next using a pry tool, you want to pry from the back right corners of the rounded mesh panel. Absolutely do not pry from the front end where it meets the vent. From the pictures you will see that the mesh panel actually slips underneath that mating line prior to snapping down into place.
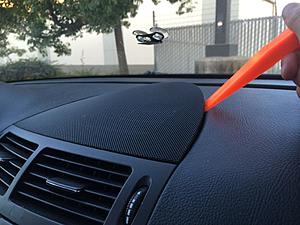

Here is the underside of the mesh panel so you can understand how it's held into place via 4 press lock pins and a series of tabs that slip underneath the vent panel.
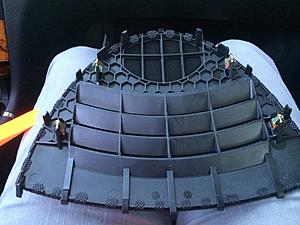
And now we see the dreaded center speaker that always makes listening to music annoying...


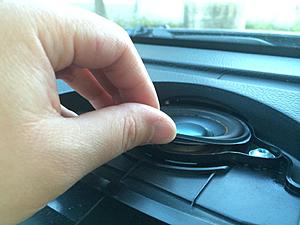
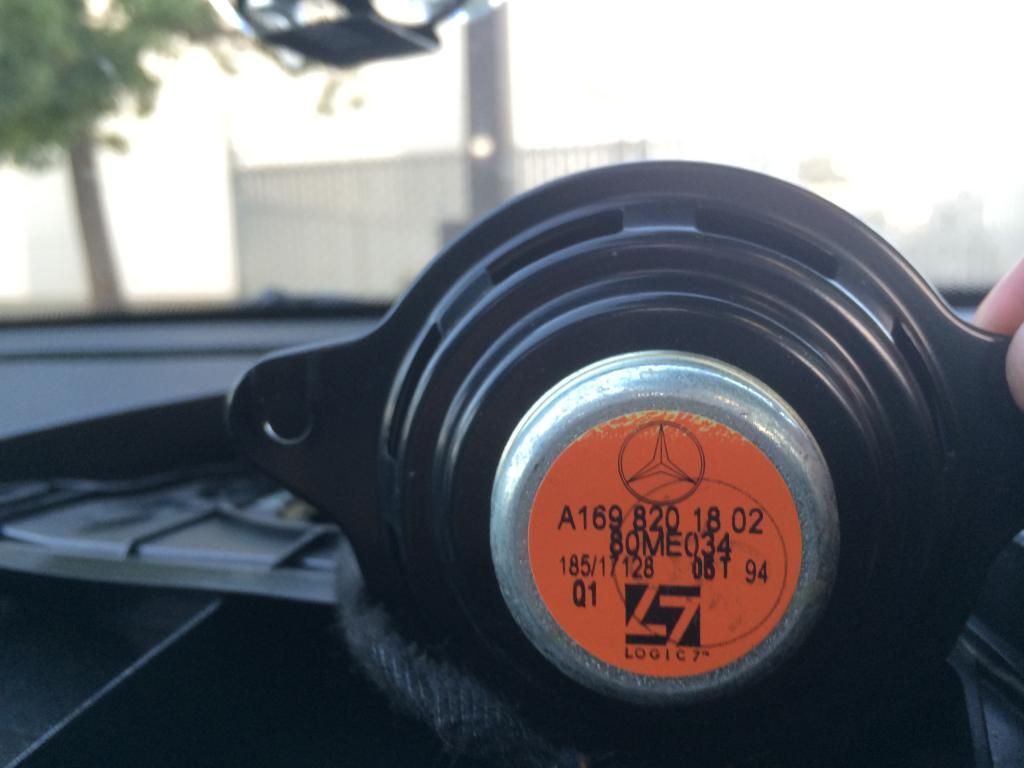
Dried and falling apart...
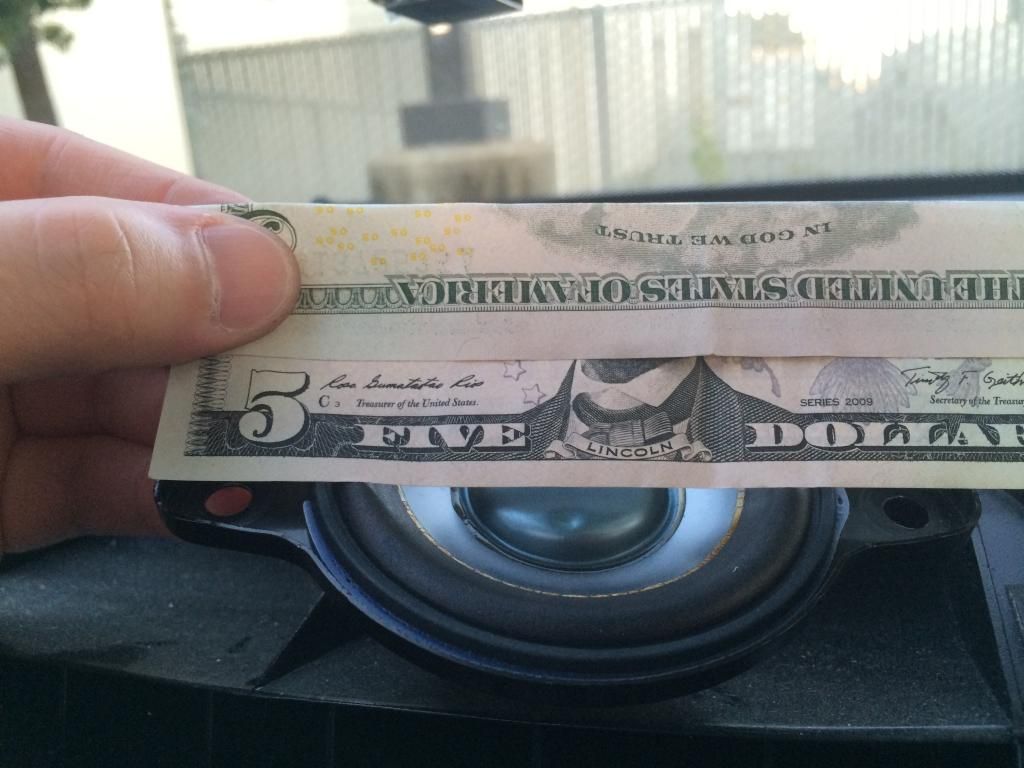
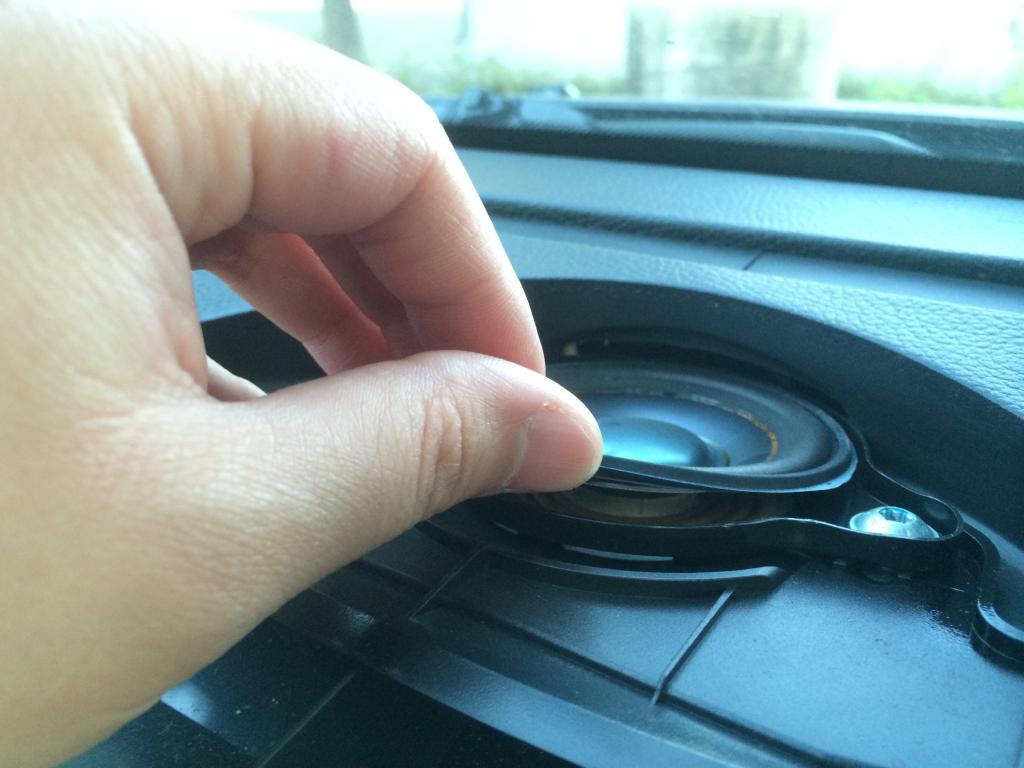
Sorry, didn't have a scale so I used a $5 bill to show you the size of the speaker incase you wanted to find a replacement...
Going back to the original shot, you want to remove the 4 T20 screws on the top. Two holding the speaker down and the other two that probably have cracked ends...
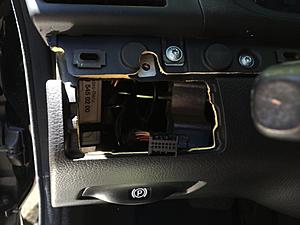
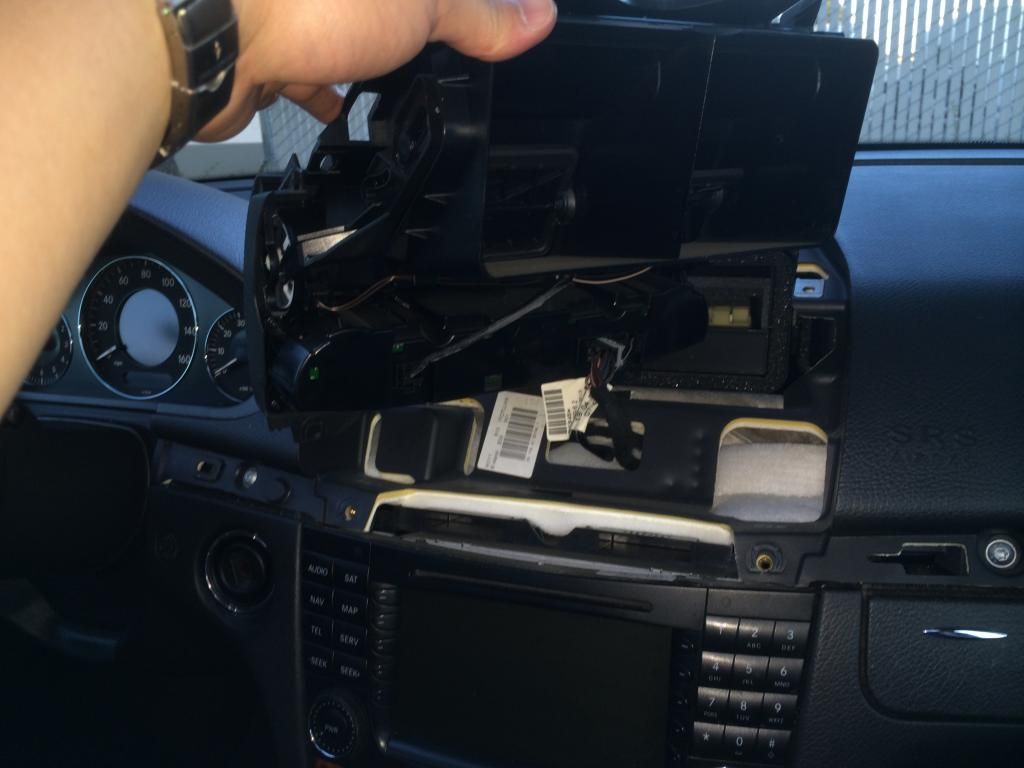
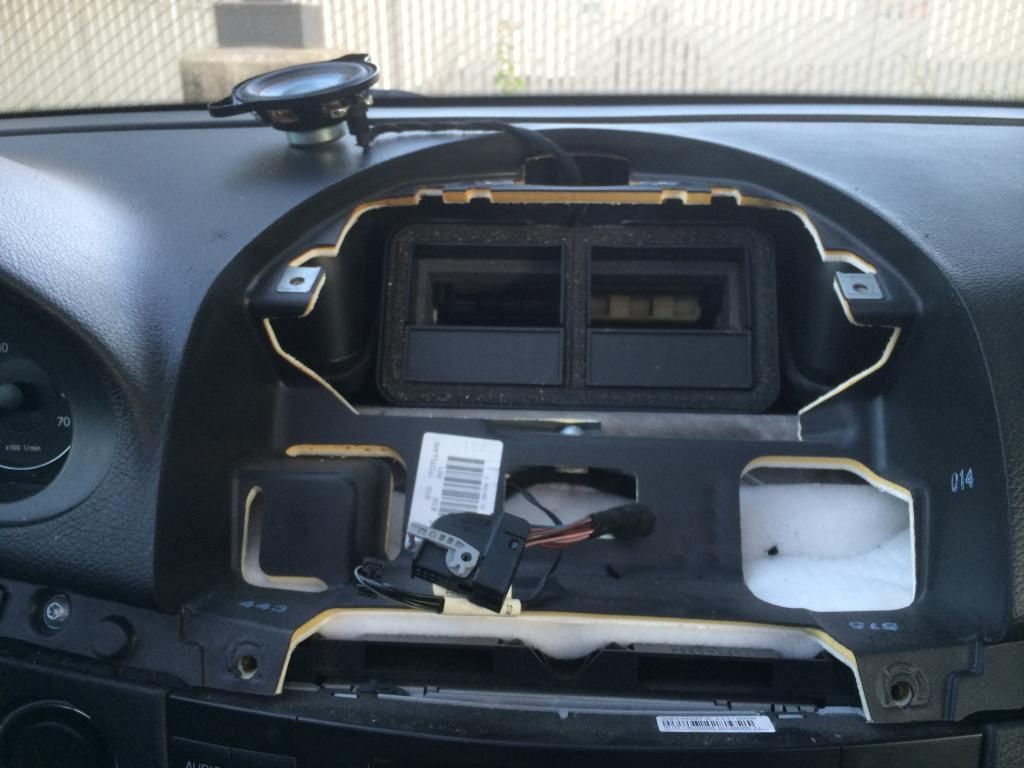
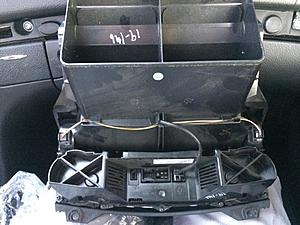
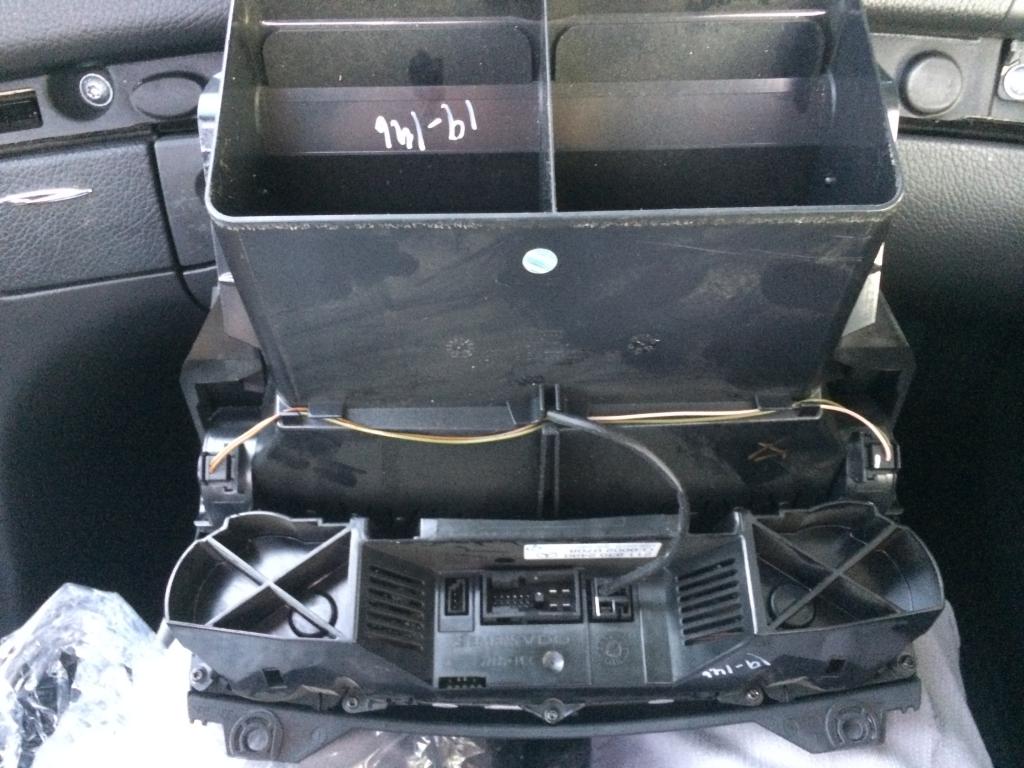
Alright now you can pull the center assembly out.

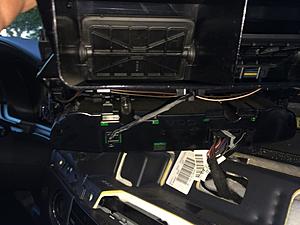
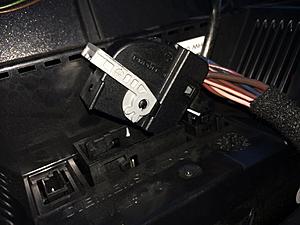
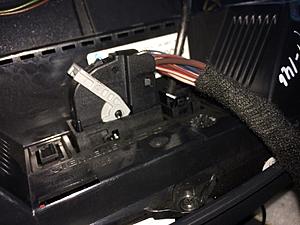
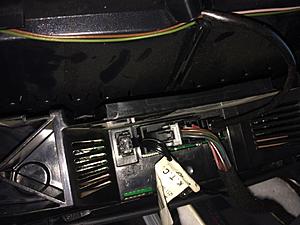
Mine had two plugs leading into the dash. Remove those before yanking the thing outta there!
ENHANCE..........!!!!
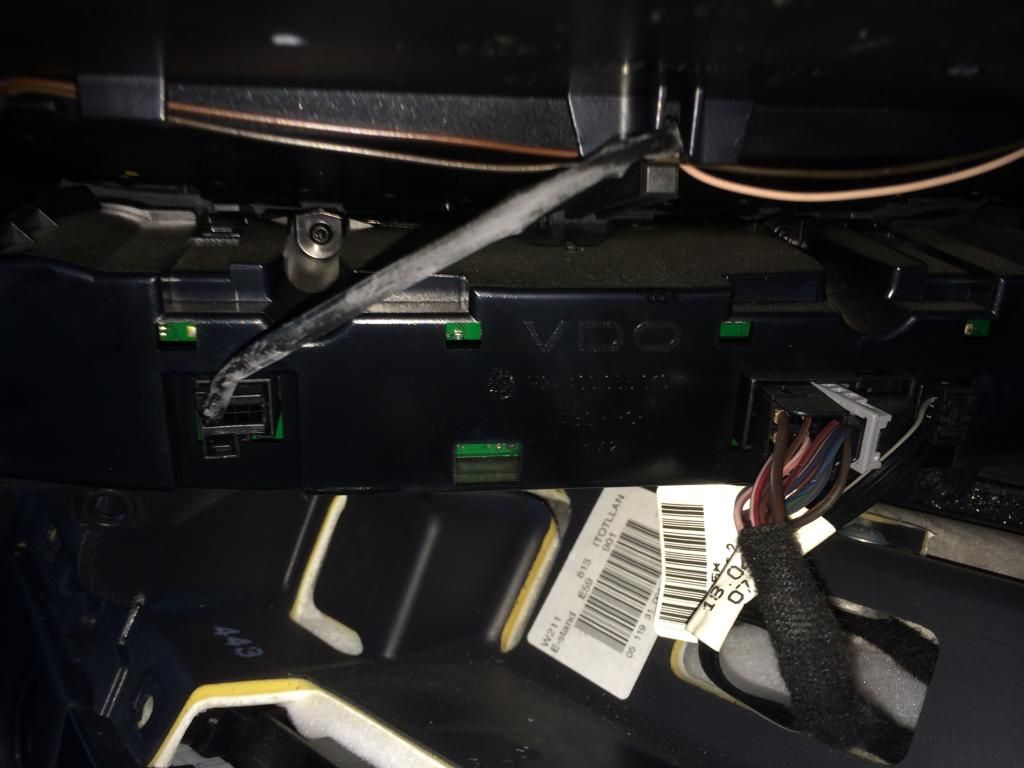
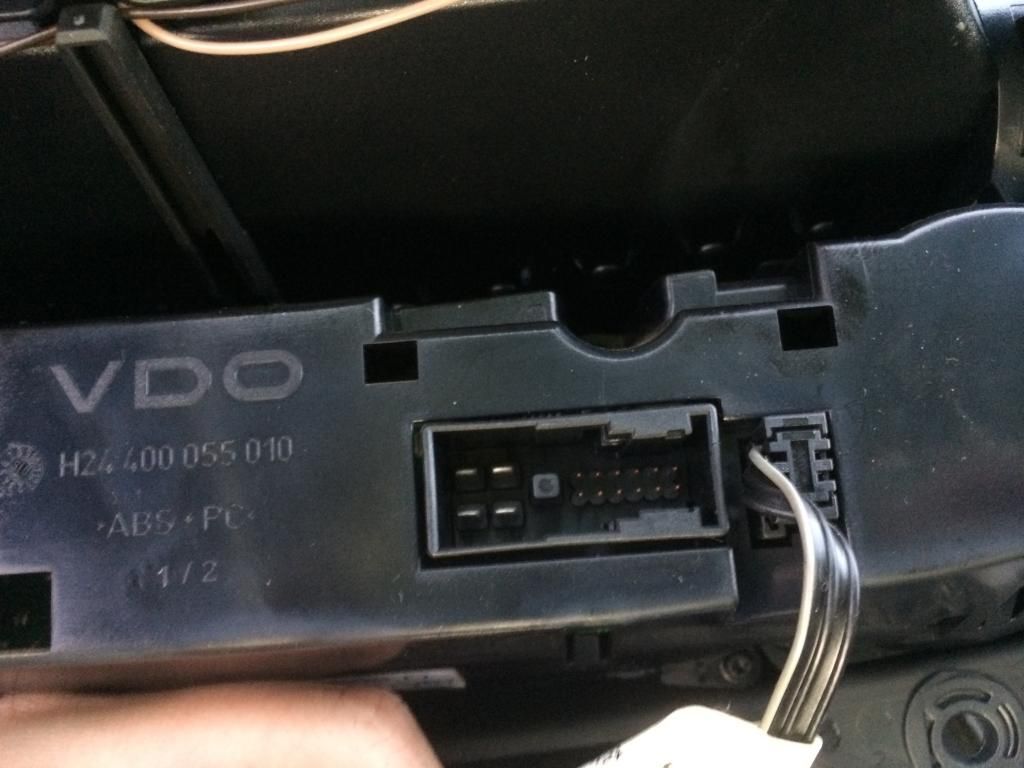
Here's one of them
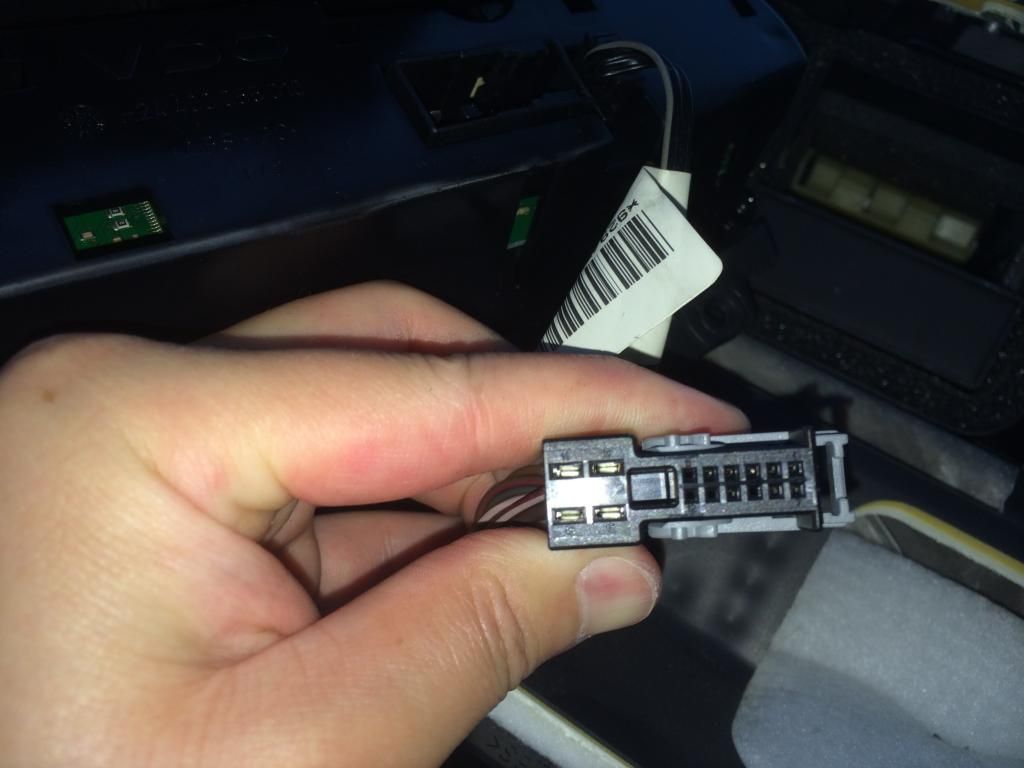
Theres the other adjacent to it.
Both plugs removed, now my stock part rest on my lap for one last photo op.
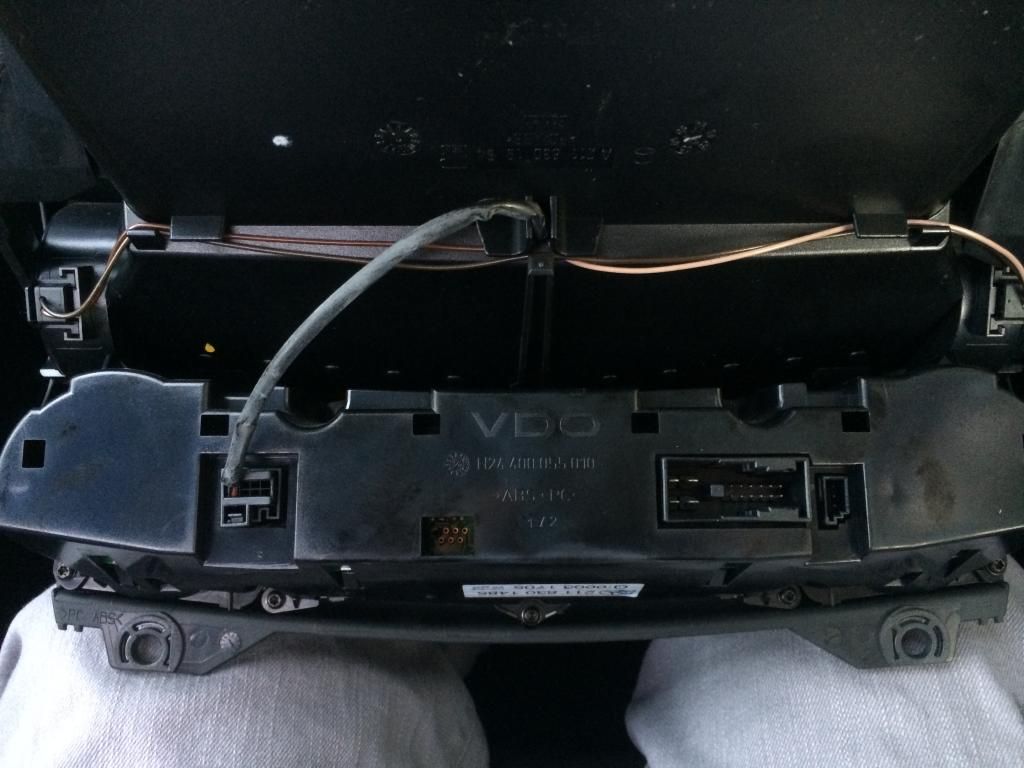
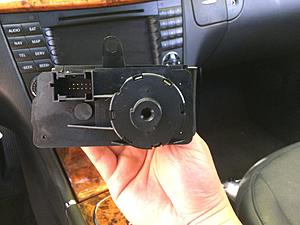
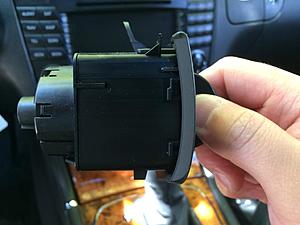
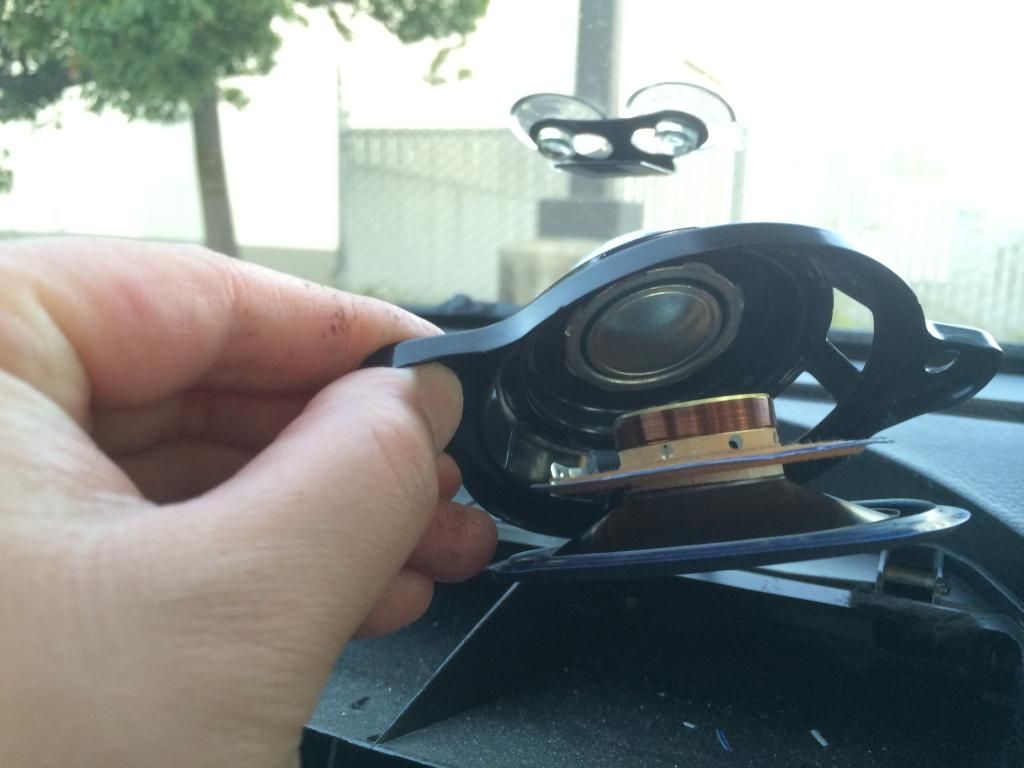
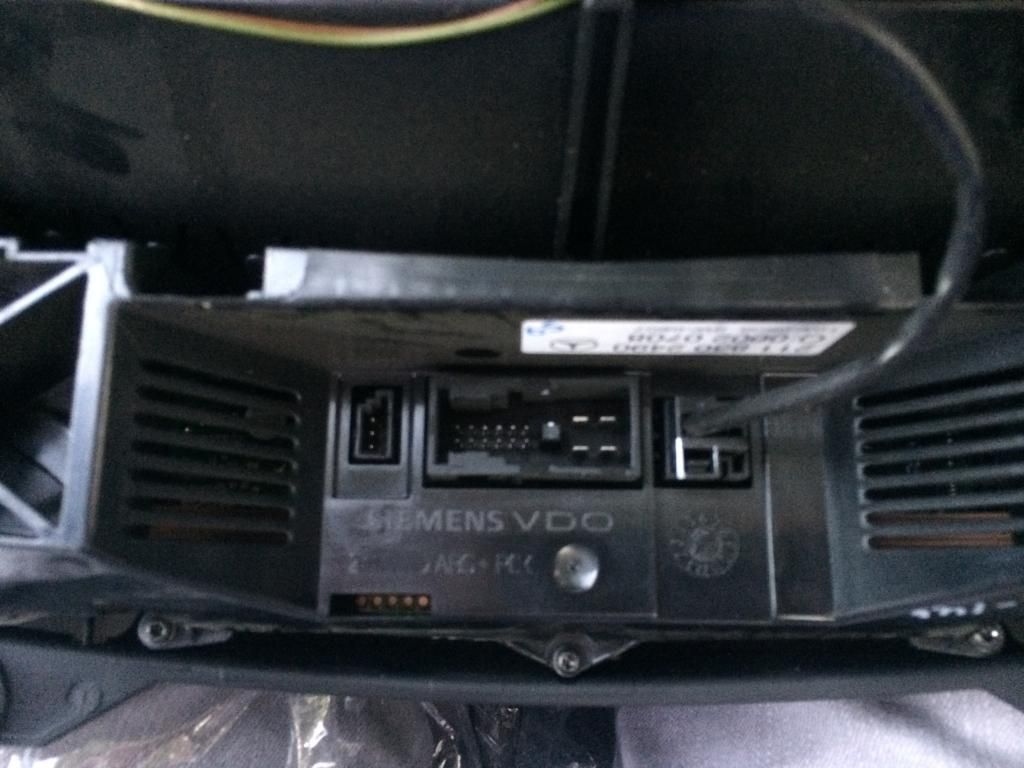
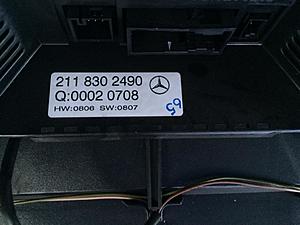
The guts...

Next use plastic panel removing tools to pry the far left side of the wood trim just above the ignition.
You should hear it pop (possibly more than once) and this is why. Take a look at the threaded end and the black clip it slides into. It is held in place rather well, but easily pulled out with the right tools and angle of lift.
Next while you pull on this end slighty away from the dash, you want to pull the whole trim towards the passenger side. The remaining clips are designed to slide lock into place. Pulling them towards the passenger door unlocks them and allows for removal.


This is how far it should have been pulled out.

Here's a close up of one of the slide locking clips.

Here they are as a whole.


Now store the wood trim somewhere safe where it won't get damaged. Next using a T20 screw driver remove the two torx screws on the front end of the assembly.

Next using a pry tool, you want to pry from the back right corners of the rounded mesh panel. Absolutely do not pry from the front end where it meets the vent. From the pictures you will see that the mesh panel actually slips underneath that mating line prior to snapping down into place.


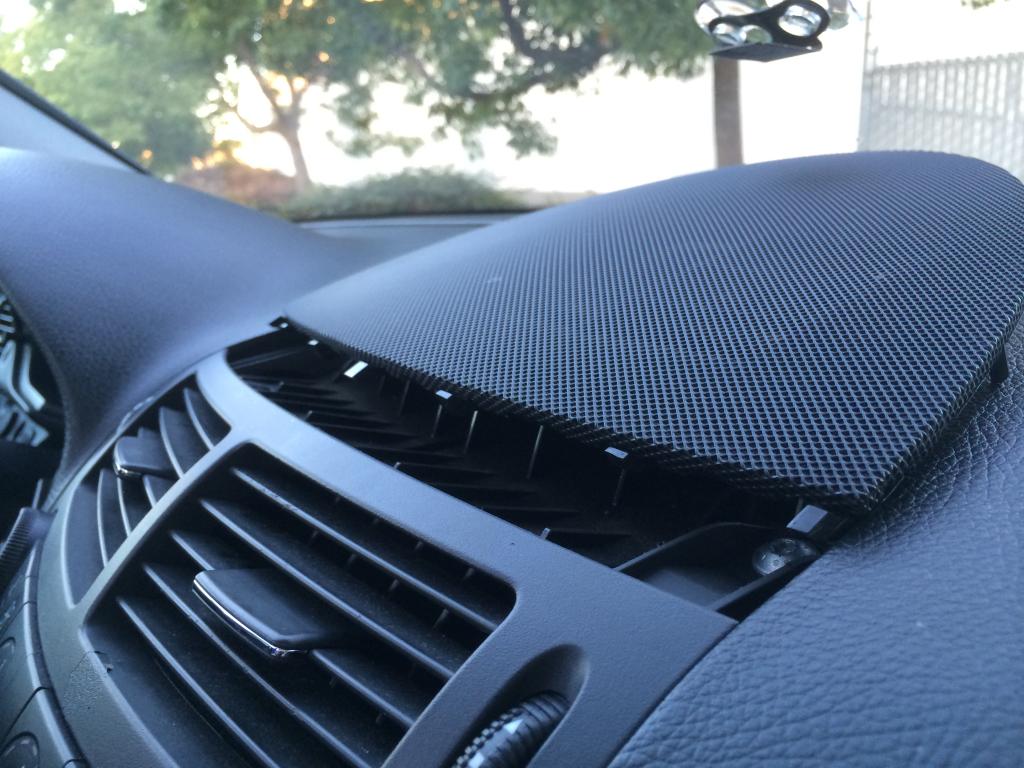

Here is the underside of the mesh panel so you can understand how it's held into place via 4 press lock pins and a series of tabs that slip underneath the vent panel.

And now we see the dreaded center speaker that always makes listening to music annoying...
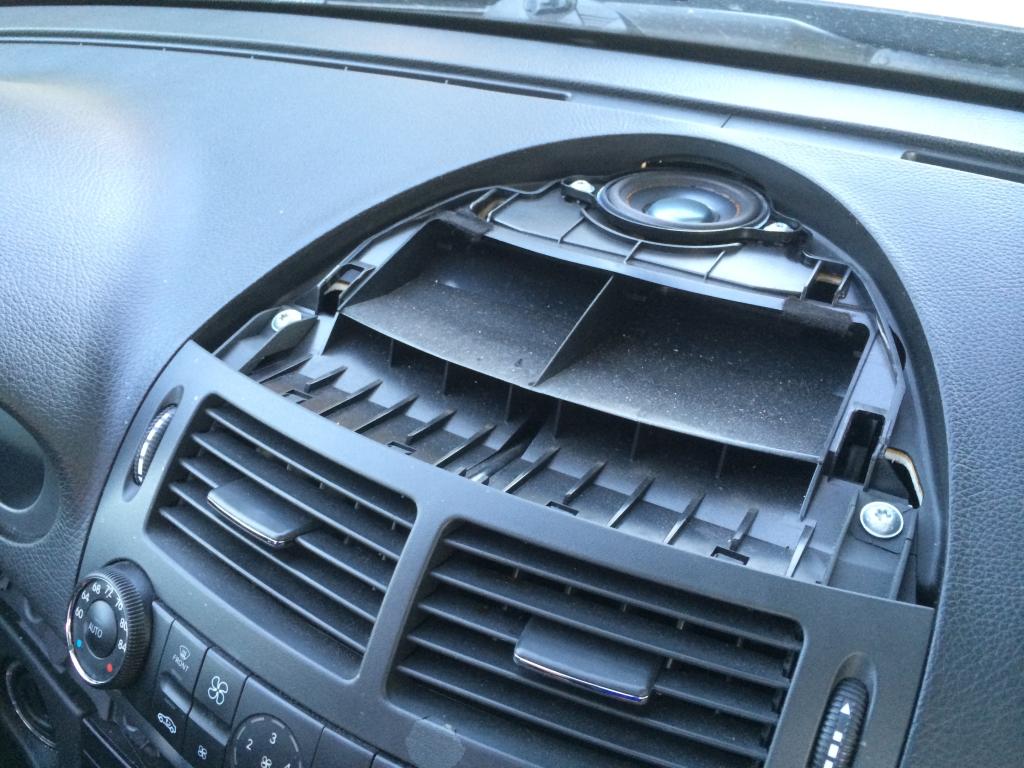
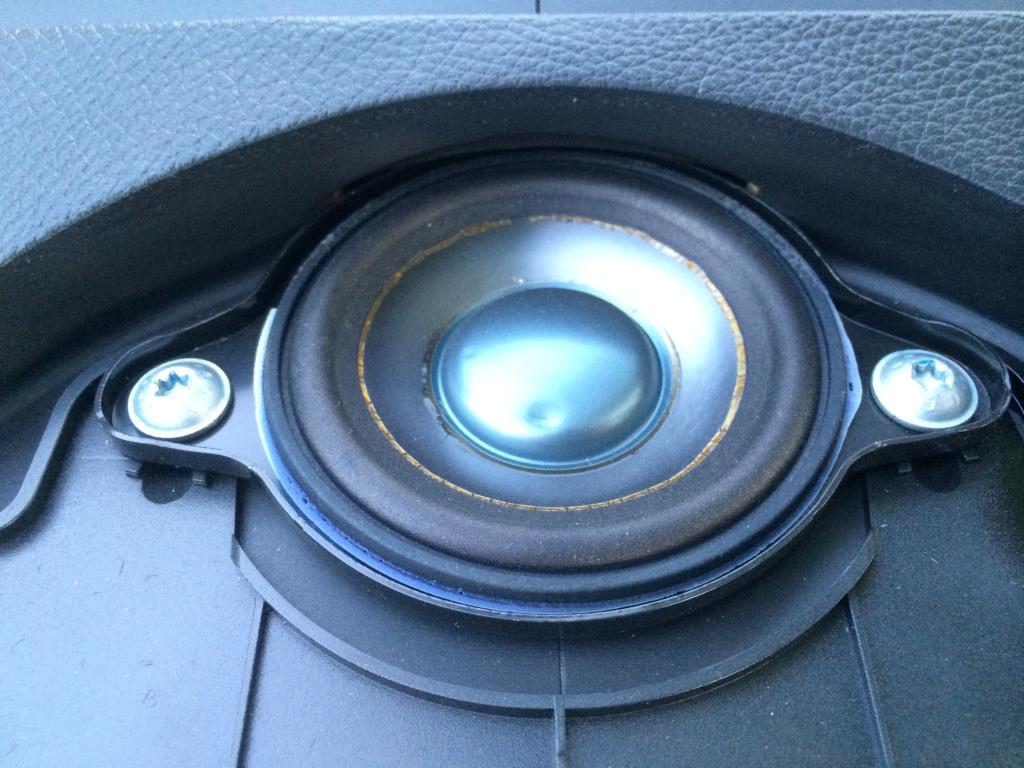

Dried and falling apart...

Sorry, didn't have a scale so I used a $5 bill to show you the size of the speaker incase you wanted to find a replacement...

Going back to the original shot, you want to remove the 4 T20 screws on the top. Two holding the speaker down and the other two that probably have cracked ends...


Alright now you can pull the center assembly out.

Mine had two plugs leading into the dash. Remove those before yanking the thing outta there!

ENHANCE..........!!!!


Here's one of them

Theres the other adjacent to it.

Both plugs removed, now my stock part rest on my lap for one last photo op.


The guts...
 07-25-2014, 08:32 PM
#118
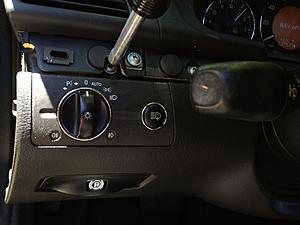
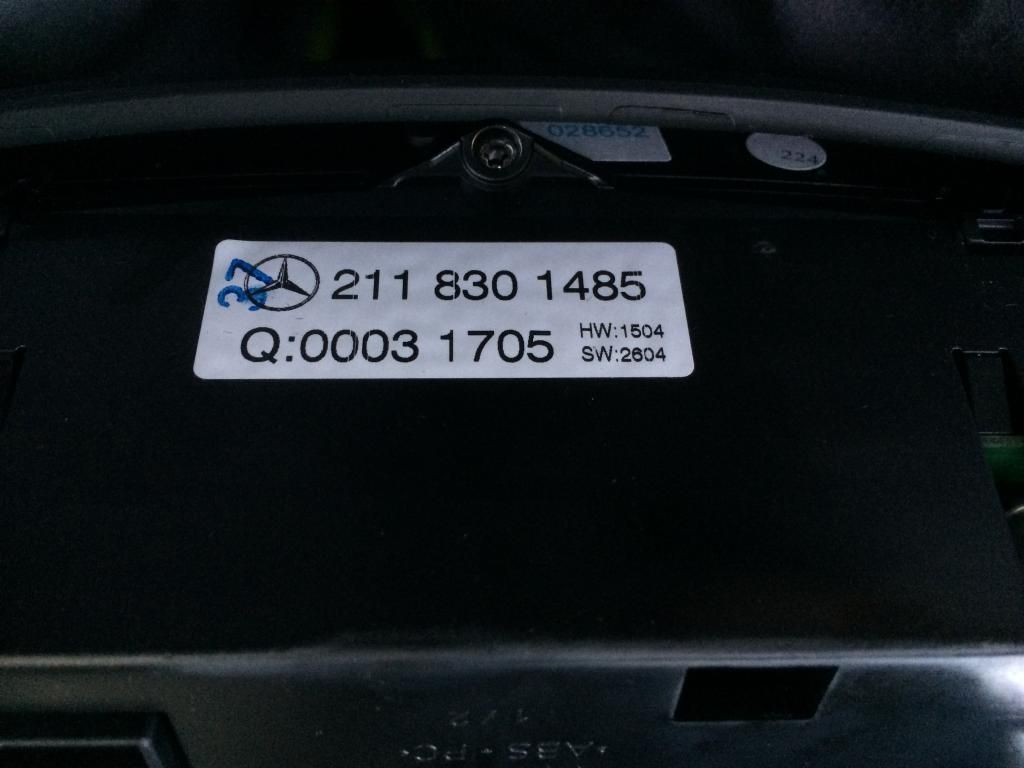
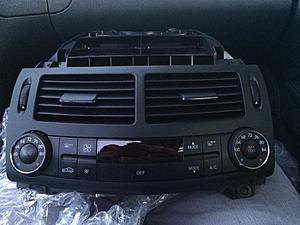
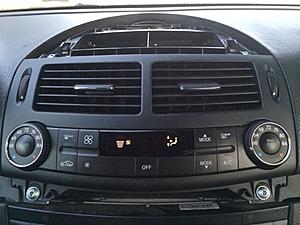
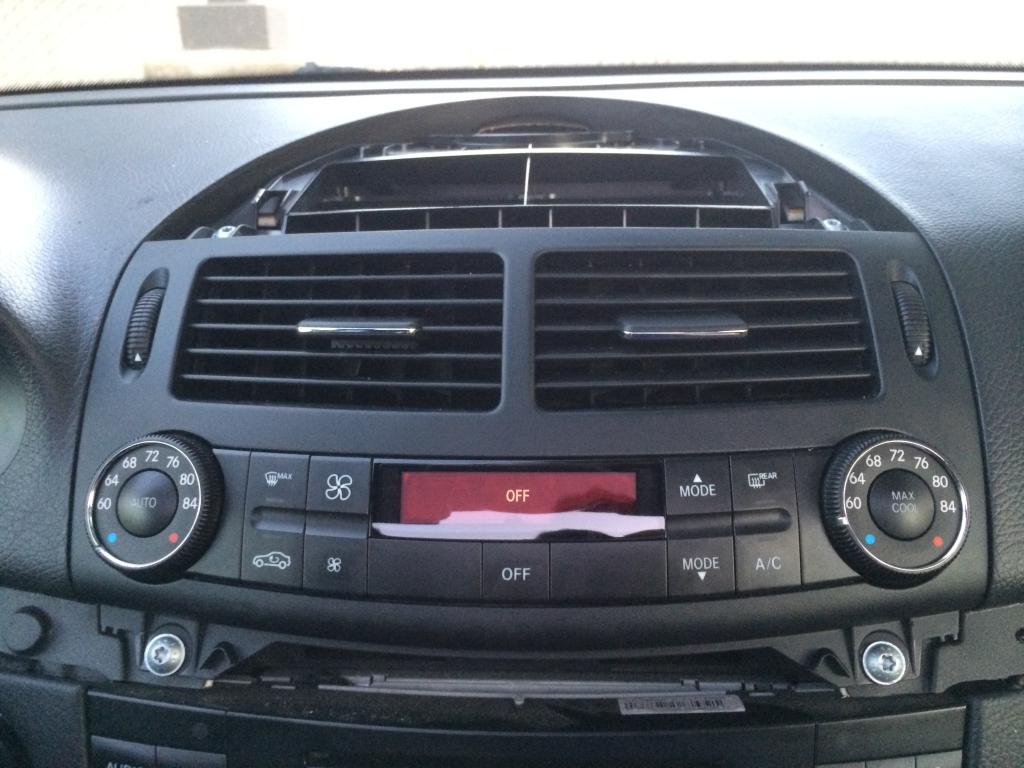
Heres my new unit ready for transplant.
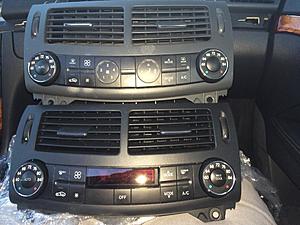
Comparison shot...
BE SURE TO TEST OUT THE UNIT BEFORE PUTTING THE REST BACK IN PLACE!!!
Now reverse the steps to reinstall the new unit.
Carefully line up all of the slide lock clips.
When sliding the wood trim back towards the driverside be sure that the threaded end on the far left doesn't get hung up on the mating clip attached to the dash. Once the slide lock clips are snug press down on the far right to lock the threaded end in place.
When reinstalling the mesh panel slide the vent side tabs in place first.
Then press down on the places where the lock pins were.


All done!


Comparison shot...

BE SURE TO TEST OUT THE UNIT BEFORE PUTTING THE REST BACK IN PLACE!!!
Now reverse the steps to reinstall the new unit.


Carefully line up all of the slide lock clips.

When sliding the wood trim back towards the driverside be sure that the threaded end on the far left doesn't get hung up on the mating clip attached to the dash. Once the slide lock clips are snug press down on the far right to lock the threaded end in place.

When reinstalling the mesh panel slide the vent side tabs in place first.

Then press down on the places where the lock pins were.
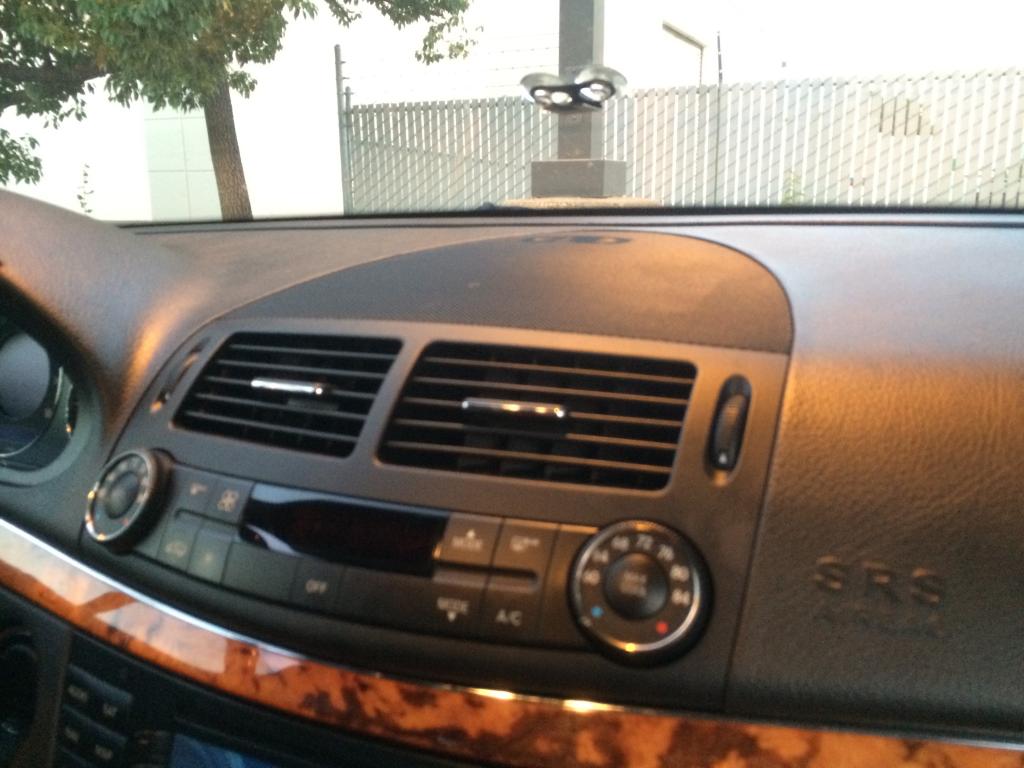

All done!
Last edited by Drag0na5h; 07-28-2014 at 11:09 PM.
07-26-2014, 08:53 PM
#120