Backup camera Part1
 09-15-2011, 02:12 PM
#1
Super Member
Thread Starter

Join Date: Aug 2011
Location: Philly area
Posts: 861
Likes: 0
Received 37 Likes
on
34 Posts
350 GLK, C280
Backup camera Part1
Finally installed a back-up camera in the GLK.
This is a job not for the faint of heart. Read all the posts in the C class forum on back up cameras first. There are some slight differences.
ii. Then page 3 (rotating the selector between the seats) to select #17 rear view camera. Select the top choice SRVC (select rear view camera).
iii. Get out of this program and go to the System menu on the regular user screen. At the bottom select setup and then Rear view camera and then Activation by R gear.
Now when you select reverse a blank screen with some lines should show up. Mine seemed to take a couple of ignition offs before the screen showed up.
Bought a camera off E bay for $24. Said it was for an S class or GLK. Came within a week from China. More on this later.
Need to buy Fakra cable (see C-class forum)
This is a job not for the faint of heart. Read all the posts in the C class forum on back up cameras first. There are some slight differences.
- Screen Setup
- tested out the screen interface by holding Phone hang-up, 1 and # for 10 seconds.
- tested out the screen interface by holding Phone hang-up, 1 and # for 10 seconds.
ii. Then page 3 (rotating the selector between the seats) to select #17 rear view camera. Select the top choice SRVC (select rear view camera).
iii. Get out of this program and go to the System menu on the regular user screen. At the bottom select setup and then Rear view camera and then Activation by R gear.
Now when you select reverse a blank screen with some lines should show up. Mine seemed to take a couple of ignition offs before the screen showed up.
Bought a camera off E bay for $24. Said it was for an S class or GLK. Came within a week from China. More on this later.
Need to buy Fakra cable (see C-class forum)
 09-15-2011, 02:16 PM
#2
Super Member
Thread Starter
Join Date: Aug 2011
Location: Philly area
Posts: 861
Likes: 0
Received 37 Likes
on
34 Posts
350 GLK, C280
part2
Cant seem to get the pics to be in the document but there are several parts here so look at the pics on the bottom
2 Next step was to get the radio out.
a. You need to pry out the air vents.
i. There are 2 spring clips on top and 2 on bottom
ii. Get a plastic pry bar set from Harbor Freight (95214) (about $5.00) and slowly pry from the sides until you can pry from the top and bottom. XXX7
iii. Go easy. Once the unit comes out a little you can see the clips and push them down to make it easy to remove.
iv. Once out disconnect the wires
v. Check the front grill and snap it back into place if it has become unclamped. XXX8
b. Once the vent is out, pry off the plastic strip above the control to expose the 2 screws. XXX9
c. Remove the 2 screws. XXX10
d. Behind the metal panel above where the 2 screws attached there is a tab on each side. Lifting the two tabs will let the control come out. XXX11
e. Protect the gear shift, turn on the ignition and move the shifter to D
f. Pull the control out.
3 Very simple so far
4 Now we need to install a video cable into the green connector on the back of the control. Xxx-12
5 I bought a cable for a BMW as told in the C-Class Forum, which would work but there was interference with the cable that goes from the white connector on the control to the screen.
09-15-2011, 02:25 PM
#3
Super Member
Thread Starter
Join Date: Aug 2011
Location: Philly area
Posts: 861
Likes: 0
Received 37 Likes
on
34 Posts
350 GLK, C280
Sorry but pdfs don't seem to show up
2 I bought a cable for a BMW as told in the C-Class Forum, which would work but there was interference with the cable that goes from the white connector on the control to the screen.
a. I modified the connector by cutting it down.
b. I cut off the other connector on the other end of the cable and installed an RCA female on the other end. (see the C class forum sticky notes for installations)
c. A right angle Fakra would have been better.
d. You must remove the screen connector (just pulls out) to put in the video cable
e. The modified video cable has a FAKRA connector on one side and a female RCA on the other.
f. I bought a10 foot RCA extension cable from radio shack as an extension
g. Using a long piece of coat hanger
i. I first removed the end panel from the driver side of the dash. It just pulls out
ii. I threaded the coat hanger from the end of the dash to the center
iii. Tape the female end of the extension to it and pulled it through the dash
iv. Plug the male RCA into the Fakra cable female RCA and tape the connection so it will not come apart.
h. Reinstall the controller
i. Before anything else turn on the radio and see that it still works
1. All cables are connected
ii. Install controller
iii. Push tabs down
iv. Install screws
v. Install plastic strip. Don�t forget as it can�t be installed after air vents are in.
vi. Install air vents.
Camera Installation
3 Removal of back panel
a. Open tail gate and stop at a convenient height by pressing tail gate button.
b. Remove covers on the two handles. They just pry off.
c. Remove 2 torex screws from each handle.
d. There are 2 spring clips holding the lower panel to the metal door. Pull on the panel to expose them and try to get something in the gap to pry these out .
i. Warning, just pulling may pull the clip out of the plastic.
ii. If this happens don�t worry too much as the panel is actually held tightly by the torex screws
iii. Remove the clip from the metal frame and try to replace in the plastic hatch cover if able.
e. Remove the connectors from the light and hatch switch. Don�t push the switch as the hatch will try to open or close. If you do, push it again to stop the hatch.
f. The main cover is held on by orange plastic Christmas tree type grips.
i. Start to pull out from the bottom
ii. Use the plastic wedge tool at each orange site as you lift the cover off.
iii. The orange grip will most of the time come off with the plastic cover
iv. Remove any grips that stayed in the metal frame and replace into the plastic cover.
v. These grips detached without any damage to the cover.
4 Pop out the black plastic cover made for the camera above the license plate.
5 Although my camera was suppose to be for the GLK it did not quite fit in the hole.
a. It had side guides that were too wide and was not really long enough
b. I filed out the hole for the side guides, but in retrospect I should have just cut them from the camera.
c. I installed the camera in the hole and later would use some Fast setting 3M 5000 caulk for sealing the unit after turning it on and seeing what it would see. (later)
2 Running extension cables to the camera
a. I popped out the flexible tube at the top of the hatch on the driver side.
i. Just pull the rubber off each end
ii. Then pull out the plastic pieces by pressing each of the 4 latches.
iii. Reinsert the rubber on to the plastic pieces
b. The camera came with an RCA extension cable and a short power cable. I used this RCA cable and a piece of 2 wire cable for the power to feed from the headliner end of the rubber tube to the camera.
c. Use a coat hanger to pull the wires through the rubber tube.
d. On the hatch side, I was able to snake the wires down through a hole in the hatch on the Driver side and down to the bottom of the hatch.
e. Feed the wires to the camera
f. Make the connections and then tape them so they will not come apart.
i. Use crimps to connect the power
09-15-2011, 02:27 PM
#4
Super Member
Thread Starter
Join Date: Aug 2011
Location: Philly area
Posts: 861
Likes: 0
Received 37 Likes
on
34 Posts
350 GLK, C280
post4
CABLES
2 Running the cables inside
a. There is a hole just inside the roof where you removed the rubber tube. This allows you to take the wires down under the head liner.
b. Dress the wires across under the headliner and down under the plastic cover behind the rear window
i. Removing the rubber door seal by just pulling off will help to slide the wire between headliner and roof
c. Remove the access cover at the drivers side rear. (access to the tail light and 12 volt plug)
d. The wires can be brought into this area by using the pry bars and slipping under the plastic and fabric pieces down the rear pilar without any damage.
3 Connections
a. For Power, don�t use the back up light. The 12V socket in the rear is only powered when the key is on. The camera draws so little power that it can stay on all the time the key is on. This also helps keep it in sync. Using the backup light may effect the rear computer which would see a change in the bulb current. Turning the camera on as you switch to reverse may also cause a delay in the cameras sync so the picture appears torn for a few seconds.
b. I used the clamp on plastic connections to get power from the 12 volt socket.
i. Reach behind the plug and unscrew the big ring nut holding the socket in
ii. Pull the socket out of the panel
iii. The electrical plug is pulled from the socket sideways not directly out the back
iv. Remove the plug, remove the big nut and cut back the cloth winding around the two wires.
v. Install the crimp connectors. Brown is ground and the pink stripe is power
vi. Put the big nut on the wire, push the wire through the hole from the back side, install the plug on the socket and install the socket in the car.
c. Video test
i. Connect the RCA cable from the camera to the RCA cable earlier installed from the radio control. Just dress it over the seats.
ii. Make sure there is nothing in the way of the rear hatch closing
iii. From the driver seat, use the rear hatch switch on the driver door and close the hatch
iv. Turn on the ignition (don�t start the car) and put the transmission in reverse.
v. A picture out the back should be seen on the screen
1. IF not check if the screen is blank (see section 1 above)
2. If the screen is blank check all the power connections and the video connections.
3. If still no picture check the camera with a 12 volt battery and plug it into a TV with video input
vi. Open the rear hatch using the driver switch
1. The hatch can be pulled down for the rest of the operations
d. Put the car back in park and remove the key
CLOSE IT UP
4 Almost there.
a. With the picture on the screen, I tried to move around the camera for the best view. I then used the 3M Fast 5000 marine sealant ( from Home Depot) to seal it in place
i. This takes less than an hour to skin and sticks to almost anything.
ii. I caulked it from the inside to get a full seal.
iii. The caulk had set by the time I finished the rest of the project
b. I ran the cable from the front down the under the door sill plate
i. Just pull the door sill straight up
c. Under the rear door sill, no need to pull this one off. Just push cable under from the inside.
d. Up the back of the rear door opening and snaked it through a hole under the soft padding into the back where I could connect it to the RCA cable from the camera.
e. Please note I did not have to drill any holes to do any of this job. The holes are there you just need to find them.
f. I taped the RCA connectors together.
5 Reassembly
a. Reinstall the rubber tube at the top of the hatch by pushing into the holes
b. Reinstall the Driver side rear area cover.
c. Clean up the tail gate wiring with wire ties to keep from future rattles. Wire rattles are very annoying.
d. Reinstall the hatch large panel
i. Insure the tabs are under the other panels
ii. Properly position the orange grips in the holes then Bang the areas over the grip with your palm to seat them.
e. Plug in the light and switch on the lower panel
f. Install the lower panel making sure the spring clips engage in the slots in the frame and, very important, the tabs on the upper edge are under the panel installed in 13 d
g. Screw in the 4 torex screws in the handles and snap on the covers.
6 Test that the tail gate opens and closes
7 You now have a Back-up camera
The picture shows the screen. The long white thing is a 6 foot ruler under the center of the car. The picture is slightly off center due to the placement of the camera in the GLK provided hole. The red lines are about 1 foot away from the bumper
Total cost about $40.00. Total time about 4 hours
09-16-2011, 12:53 AM
#5
Junior Member

Join Date: Aug 2006
Location: Ohio
Posts: 36
Likes: 0
Received 0 Likes
on
0 Posts
'02 C230 Coupe, '87 EVO II Turbo
Excellent writeup. I'm planning on doing this exact addition when we get our new '12 GLK. We ordered the S32 COMAND Launch Package and with this mod it'll basically do what the multimedia package does for about $2k less.
I'm probably going to install the VIM (video in motion) module as well so DVDs can be played while underway.
Thanks again!
I'm probably going to install the VIM (video in motion) module as well so DVDs can be played while underway.
Thanks again!
Trending Topics
09-16-2011, 05:31 PM
#8
Super Member
Thread Starter
Join Date: Aug 2011
Location: Philly area
Posts: 861
Likes: 0
Received 37 Likes
on
34 Posts
350 GLK, C280
My RR Sport had sensors and I used them all the time in parallel parking and turning around in tight driveways. Sensors require drilling and alot of wire. This was just easier and lets me see where the car behind me is when I back in.
09-16-2011, 07:14 PM
#9
Super Member
 09-16-2011, 07:31 PM
#10
Super Member

BTW great write up but how long did it take?[/quote]
At the end of his post, he said ''Total cost about $40.00. Total time about 4 hours''.
i guess u didn't read the whole post

At the end of his post, he said ''Total cost about $40.00. Total time about 4 hours''.
i guess u didn't read the whole post
09-19-2011, 05:59 PM
#11
MBWorld Fanatic!
I LOVE the back-up camera!
Have one on the G37 coupe; love that one, too.
Really saves those painted bumpers!
Have one on the G37 coupe; love that one, too.
Really saves those painted bumpers!
09-20-2011, 10:21 AM
#13
Super Member
Thread Starter
Join Date: Aug 2011
Location: Philly area
Posts: 861
Likes: 0
Received 37 Likes
on
34 Posts
350 GLK, C280
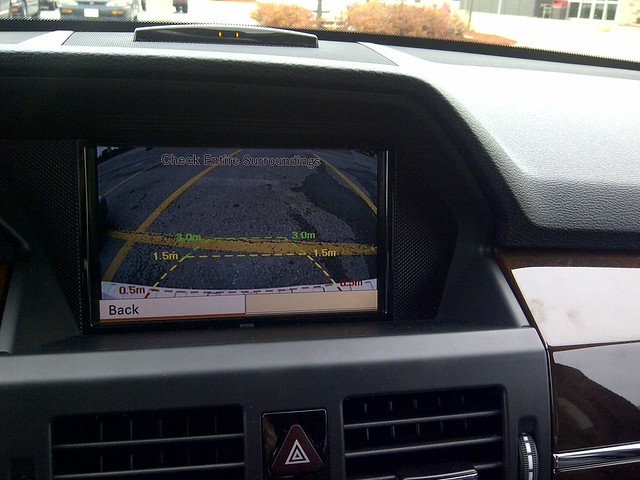
The blue arc's from the top with red connecting arc is programmed in by Mercedes.
The lines at the bottom are built into the cheap-o camera. I looked for one without them, but, even though it didn't show them in the pic on E-bay, they were there.
I believe this is the camera since all the specs seem to match
http://www.sunway-electronic.com/pro...asp?pro_id=564
(remember, I do not suggest you use the backup light circuit as shown)
They seem to have cameras for many cars.
http://www.sunway-electronic.com/search.asp?cat_id=37 5 pages.
Could have used a Kenwood CCD 2000 but that would have cost $200 for the camera and you need to create your own mount. I am happy to be able to see the car behind and the curb. I did not need any better picture quality and if the camera goes bad, $24 and 1 week and I am back in business.
09-21-2011, 11:50 AM
#14
MBWorld Fanatic!
Join Date: Oct 2009
Posts: 2,071
Likes: 0
Received 18 Likes
on
14 Posts
Nissan GT-R BE / '12 Ducati-1199 Panigale S / '12 C300-4M Loaded/GLK350-4M Loaded
We haven't any pets anymore, and our kids are all grown up and off at college, so the chances of them hanging around behind or leaving their toys under the car doesn't exist.... so we simply prefer the old fashion way of turning our heads when backing up even though we have the camera.
09-21-2011, 02:44 PM
#15
MBWorld Fanatic!

did you ask if they don't have one with the built-in reference lines? I am sure they must have one. after all the hardwork you did you should have just paid the $850 OEM camera (i think) and not go on all the trouble unless you added the nav screen afterwards. but kudos still!
Can't leave with a backup camera anymore on any car except on a b-class as most of the cars designed today have a small back glass and high trunk line that is hard to see what you are backing-in.
Can't leave with a backup camera anymore on any car except on a b-class as most of the cars designed today have a small back glass and high trunk line that is hard to see what you are backing-in.
09-21-2011, 03:10 PM
#16
Super Member
Thread Starter
Join Date: Aug 2011
Location: Philly area
Posts: 861
Likes: 0
Received 37 Likes
on
34 Posts
350 GLK, C280
I try to buy my cars off 1 year lease turn-in. That way I don't suffer the first year depreciation and I get a 100,000 mile warranty instead of the new car 50K. I turn them in at about 70K in 4 years just before they start needing things but still have resale value. For the first year even people who lease usually follow the service and with CarFax you can tell what service has been done. This time I turned in a 2007 Range Rover Sport.
So this car came with Nav but no backup camera. If I could have found one with the camera, I am sure the price difference would not have been $800. Probably nothing. But in my method you get what is available. The camera was a fun exercise, and since I have the tools , I learned a lot about the GLK. WOuld have like to have had the lighting package but not available.
So this car came with Nav but no backup camera. If I could have found one with the camera, I am sure the price difference would not have been $800. Probably nothing. But in my method you get what is available. The camera was a fun exercise, and since I have the tools , I learned a lot about the GLK. WOuld have like to have had the lighting package but not available.
10-05-2011, 01:11 PM
#17
Super Member
Thread Starter
Join Date: Aug 2011
Location: Philly area
Posts: 861
Likes: 0
Received 37 Likes
on
34 Posts
350 GLK, C280
you can elliminate 1 set of guide lines if you go to the 4th page of the HI setup (see above for getting into programs) and turn off the SRVC Guidelines. On mine it is the last item. It seems to take a restart to have any of these changes take effect.
10-05-2011, 01:39 PM
#18
MBWorld Fanatic!

Join Date: Sep 2011
Location: East Texas
Posts: 1,522
Likes: 0
Received 3 Likes
on
3 Posts
2004 Volvo XC70; 2012 GLK 350 4matic
Lisa is getting the backup camera in her new GLK. Down here in Texas, we need a horziontal, bi-directional periscope to peer around the giant trucks parked on either side of us when exiting parking spaces at the gorcery store or in small towns.
10-08-2011, 03:14 PM
#19
Super Member
Bop11 or any expert:
Could you or someone please confirm what type of FAKRA connection it required for the GLK 350?
I've read from C-class forum and some mentioned "A" type and others said it's "E" type, but according to the picture from Mid City Engineering, it looks like it's a "D" type or even "Z" type.
Which one is the RIGHT ONE???
Thanks
10-12-2011, 09:31 AM
#20
Super Member
Thread Starter
Join Date: Aug 2011
Location: Philly area
Posts: 861
Likes: 0
Received 37 Likes
on
34 Posts
350 GLK, C280
I did not take special interest in the actual lock pins of the plug. As you can see from the pictures above the cable I got from the BMW was a black connector which is coded as Code A in the Fakra specs. However the jack mounted in the radio is Green which would be a Code E.
Code A is for Radio antenna ( which the cable was) and Code E is for TV which the back up camera is. The Code A worked without any force.
Looking at the pictures I would guess it is a Code E. But because the bumps are on the jack and there is only 1 on a Code E approximately where one of the slots is on a Code A it worked OK.
Remember to buy an RA (Right Angle) if you are making the cable, and you won't need to modify it as I did. And it is the PLUG you need not the Jack.
Maybe by both A and E as they are cheap. $.50 to $4.00 on Ebay or try RFSUPPLIER.com
10-13-2011, 05:03 PM
#21
Super Member
10-27-2011, 03:31 PM
#22
Super Member
Thanks to bop11, Rick Hunter & VaderSS. 
I've just installed the backup camera for my GLK.
Below are some of the pictures, which i took from my blackberry, which is not the greatest.
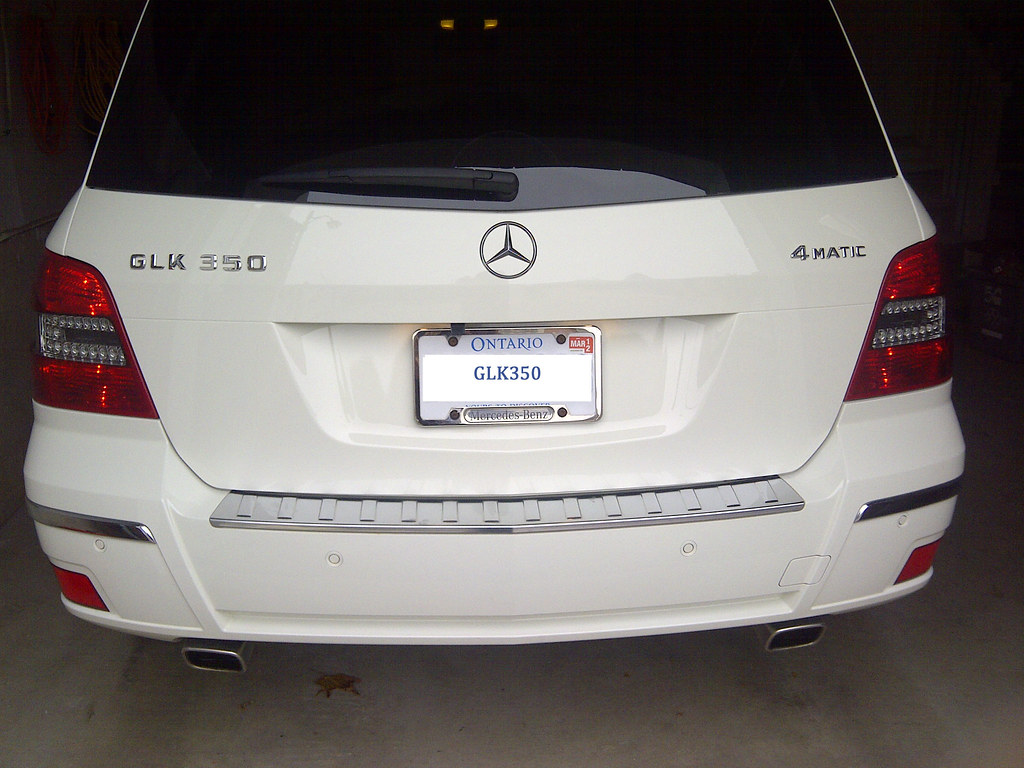
The back of my car, camera installed just above the license plate.
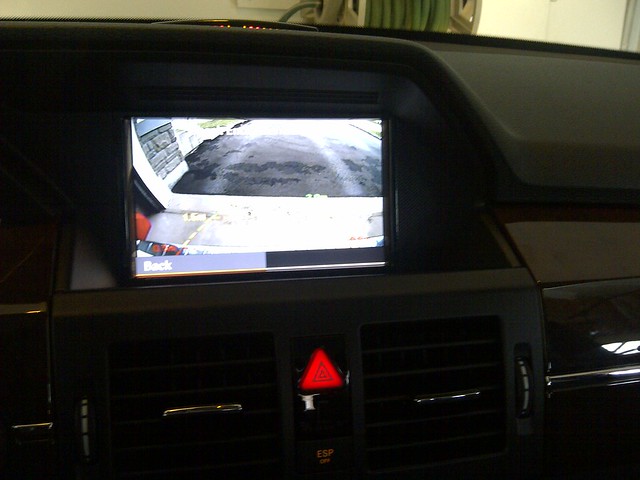
Picture taken from inside my garage.
Picture taken in a parking lot.
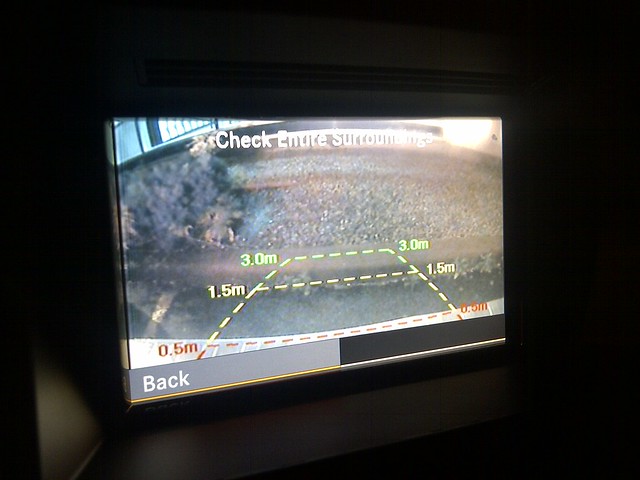
Picture taken at night (it was raining at the time too).
Hopefully an extra eye will help!
It was a great exercise, i know a bit more about my car.
Would I do it again???? DEFINITELY
I've just installed the backup camera for my GLK.
Below are some of the pictures, which i took from my blackberry, which is not the greatest.
The back of my car, camera installed just above the license plate.
Picture taken from inside my garage.
Picture taken in a parking lot.
Picture taken at night (it was raining at the time too).
Hopefully an extra eye will help!
It was a great exercise, i know a bit more about my car.
Would I do it again???? DEFINITELY
Last edited by ble2716; 10-27-2011 at 03:39 PM.
 10-27-2011, 09:32 PM
#24
Super Member
10-28-2011, 09:35 AM
#25
Super Member
Thread Starter
Join Date: Aug 2011
Location: Philly area
Posts: 861
Likes: 0
Received 37 Likes
on
34 Posts
350 GLK, C280
Which camera did you finaly get? Yours seems to have a better angle for looking further back. Although mine is great for parallel parking so you can really see how close you are to the guy behind, I would like to see a longer view. I could modify the mount, but at $25 it is easier just to replace it.


