When you click on links to various merchants on this site and make a purchase, this can result in this site earning a commission. Affiliate programs and affiliations include, but are not limited to, the eBay Partner Network.
This weekend I'm installing my new DDX419. A full write-up with photos will be on the way for those interested. A few notes below:
1) I have a 2000 ML55. The 2000 and earlier appear to have WIRES going to the amp and (I believe) 2001+ fiber optic going to the amp. For non-audio wiring folk, fiber optic means you can't simply plug a new head unit in and use the stock amp and speakers. If your car is post 2000, you would have to bypass the amp and replace ALL speakers and run new wiring to each speaker to have a new head unit.
2) You need a VW wiring harness - This matches directly with MCS 2000 and earlier ML55 (and I imagine other M class with MCS). The only difference, is that yellow is ignition and red is FULL power. You'll have to either swap the pins in the harness, or just mis-match colors to the head unit. New head units typically call yellow FULL power (12v continuous) and red switched/ignition 12v. I just mis-match the colors and wire red to yellow and yellow to red. All speaker wiring matches up.
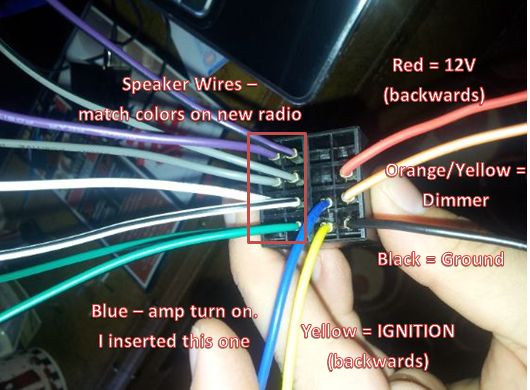
3) You will need to take the harness that comes with the new head unit and SPLICE it to the purchased VW harness above. IE, use butt connectors and crimp matching colors together. Speakers are gray, white, purple, green. Power are black/brown, yellow, red, blue etc. I am using blue for remote turn on and am connecting the orange illumination to make sure the screen dims at night so it doesn't blind the people in the car. Also, wire the light green parking brake wire to ground so DVD's play all the time, not just when in park. Note I do not recommend this for drivers. It's nice for passengers for long trips. (more on wiring later with photos and a diagram)
4) Use the Mercedes stereo removal tools and pull the radio out
5) Remove the black plastic tabs in the back that hold the old unit in. NOTE: once you do this, the old unit will not hold in properly. I call this a permanent mod. So make sure you get a head unit you like . This can be done with a saw, razor, dremel, etc.
6) Slide in the new double din bracket (should fit easily into the previous hole). Then your new unit should slide right in and you can use the stock trim ring hopefully...else you may need to shop around or buy a universal ring and trim to fit.
Note that there is no need to use a low voltage or PAC adapter for this application. I have a w208 and used one. I also have the w163 and it SOUNDS GREAT without the PAC. If anything, it may sound better than my 208. It gets very loud as well!
I picked the DDX419 because I don't want 5 million things connecting to a base unit. This one has BT built in and my wife can connect her iphone via BT for pandora, itunes music, and Garmin Street Pilot for navigation. It also has a USB and Aux built in to the front. And it has a volume knob. Beleive it or not, the volume knob is really hard to beat. We had a full screen model and "push button" volume is annoying!
Hello, I have a problem with my 2000 ML430 stock head unit. It turns on, Nav works, but there is no sound in Nav, and when I press scan on AM/FM, it will just keep scanning and scanning forever. When I select a preset, there is no sound.
I took it to a stealership to have it diag., they said it was burnt out. I also took it to a stereo shop, and they said in order to install another head unit (other than the OEM), they would need to put in a whole new system, due to the Bose Sound System.
Both choices are expensive. But I saw your DIY, and am wondering, if I went with the Kenwood DDX419 6.1" WVGA In-Dash Video, and follow those steps, would it work in my ML?
FYI, I found this very lovely post and writeup on this process. What I will do is link to this one, but add some images of the stripping/crimping, B-connector (speaker) wire connections, a diagram, and final photos. The only difference is my method assumes wired system vs fiber optic system. All mounting is otherwise the same.
1) Wiring layout. (you will not use the MB cd changer - one small connector can stay loose) Note I added the blue wire for "amp control". Not sure it's necessary. The red and yellow are for VW and are OPPOSITE of MB. Make sure to either swap the wires or connect red to yellow and vice versa (easy method). See next pic
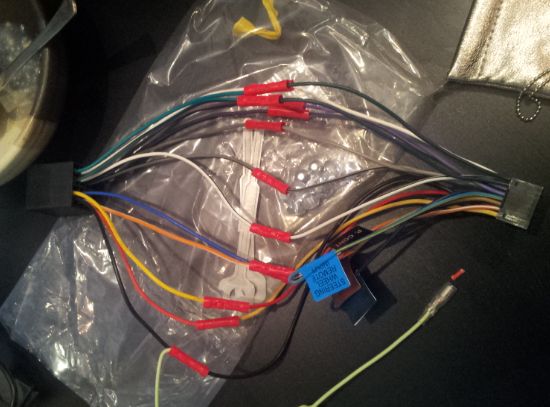
2) Crimp all wires on one harness first, then match them one by one via color match and signal match on the previous wiring layout with the head unit diagram.
3) Remember, red/yellow on the VW harness is opposite of most red/yellow.
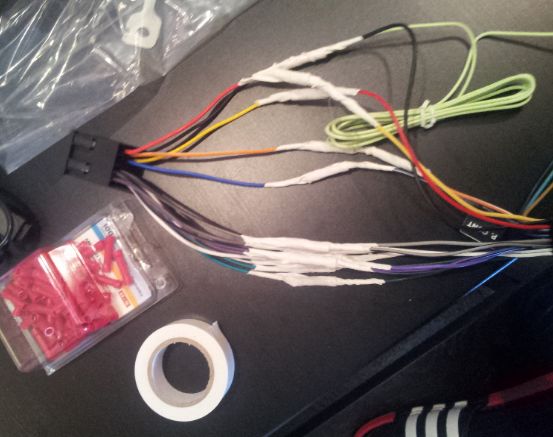
4) Photo of all crimped together. Note the green parking wire is GROUNDED to ensure DVDs play.
5) I always tape after to make sure wires can't come loose even if something happens to the crimp - a bit of a tension loop.
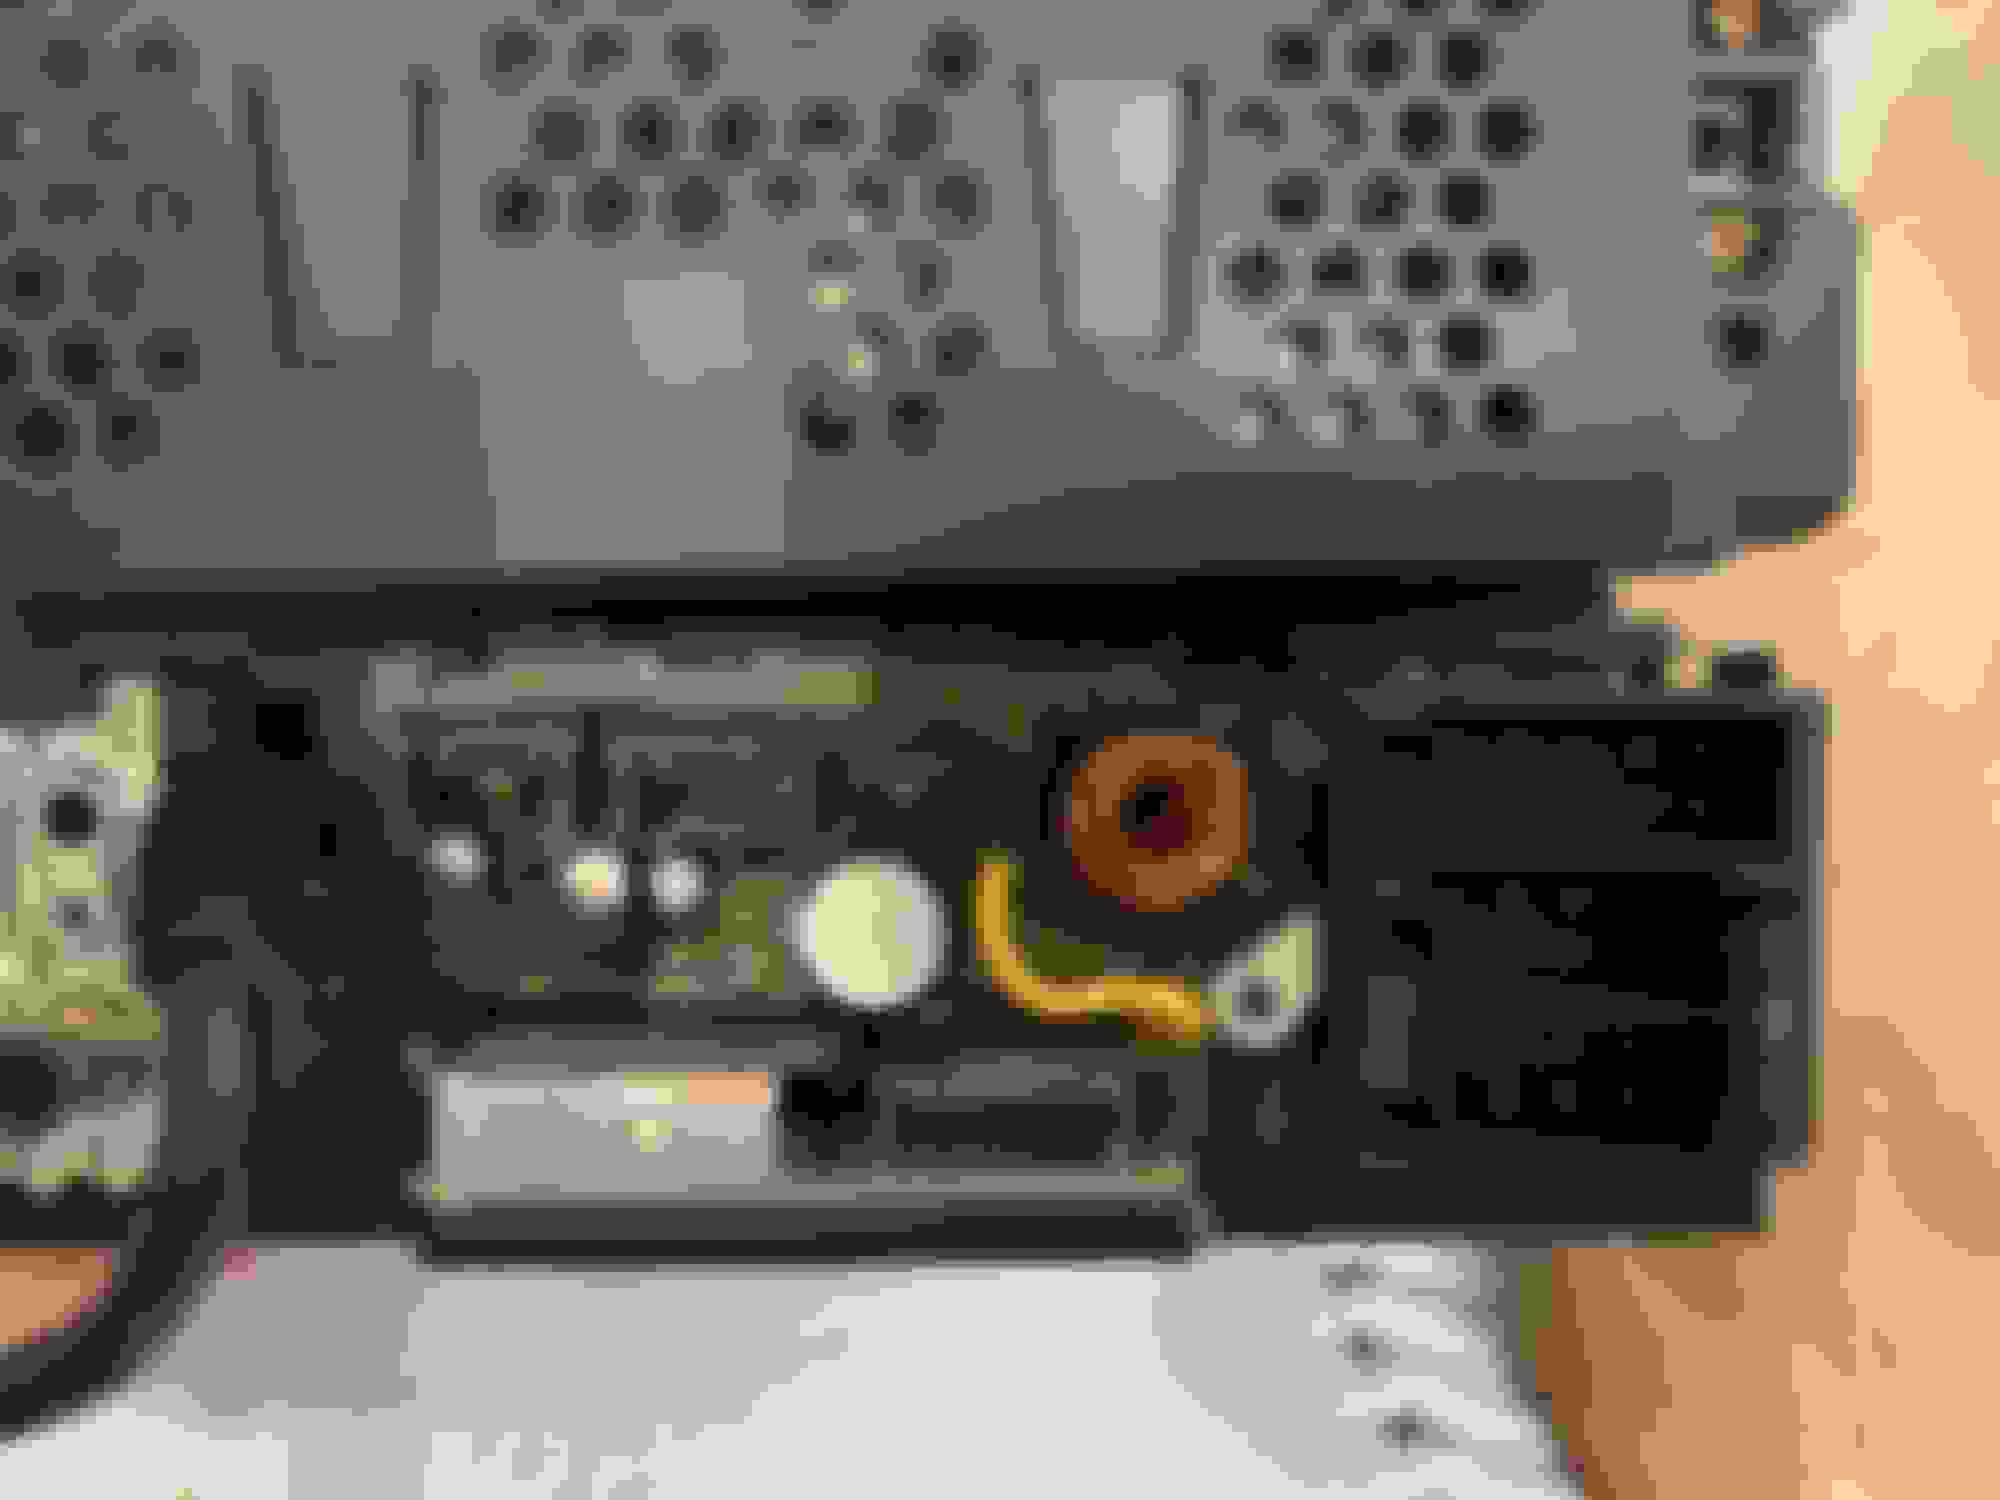
6) Final product
Last edited by da_guitarist; 11-15-2012 at 10:48 PM.
Do it! just order those parts, get a small (no taller than 3") saw for the tabs in the back of the radio cubby, and color match just like I did. It's plug and play except for the radio adapter, the cutting/crimping of the harness, and sawing the tabs.
I joined the forum just to state that this does work, and you do not need the PAC line output converter. My daughter has a 2000 ML430 that I replaced the radio in, and was concerned that it would be much more difficult. If you have the bose system, and you want to replace the head unit, then follow these steps by the OP, and you will have success.
Just one note: when you insert the wire for the remote turn on for the amp into the wire harness, be sure to put it exactly where it shows in the picture, and you will have no issues.
Thank you so much for this write up, and detailed explanations. I hope others out there find this just as useful!
*Update* The �new� head unit�s wire harness is an exact match to the existing OEM. Simple plug and play. 24 years and an off brand (Nakamichi) later, who�da thunk? Just need the antenna adapter and done (suggested purchase based on the OP Amazon link post for the VW wire harness).
My 2000 ML55 seems to match the line-level swap based on the harness wiring, but also has the fiber optic plug.
Last edited by Daytripr; 01-05-2024 at 03:15 PM.
Reason: New info.
 11-01-2012, 08:39 AM

 . This can be done with a saw, razor, dremel, etc.