CLS W219 facelift LED Tail lights modules


 01-06-2012, 12:04 AM
#30
Junior Member

Join Date: Jul 2010
Posts: 74
Likes: 0
Received 0 Likes
on
0 Posts
CLS55 AMG
i'm interested too frenchie! btw, happy new year to everyone.
i hope there is a DIY vid coming soon. sounds easy enough.
how much for modules & shipping to the Lone Star State?
i hope there is a DIY vid coming soon. sounds easy enough.
how much for modules & shipping to the Lone Star State?
01-12-2012, 08:13 PM
#31
Member
Thread Starter
Hello,
I wish to all a Happy New Year.
I've already sent a PM to 20 members, i've got an answer from half.
Please Check your Inbox.
For those that didn't have PM, please contact me if you're interested.
I'll give you more details.
On Saturday, i'll meet the Tech' and will post some pics of the final product, with some minor modifications (boxes, "IN" plug) etc...
I will also post the DIY for removing Old Tail lights and fitting the facelift ones.
Regards,
Frenchy.
Last edited by TheFrenchy; 01-12-2012 at 08:15 PM.

 01-13-2012, 08:20 PM
#34
Member
Thread Starter
Hello,
here is the DIY on how to remove the plastic housing in the trunk, and side carpets to access the 5 bolts of each Tail Lights :
You'll need :
- A little Flat Screwdriver
- a rubber lever
- L shape Spanner of 8 mm & 10 mm
- Torx #15
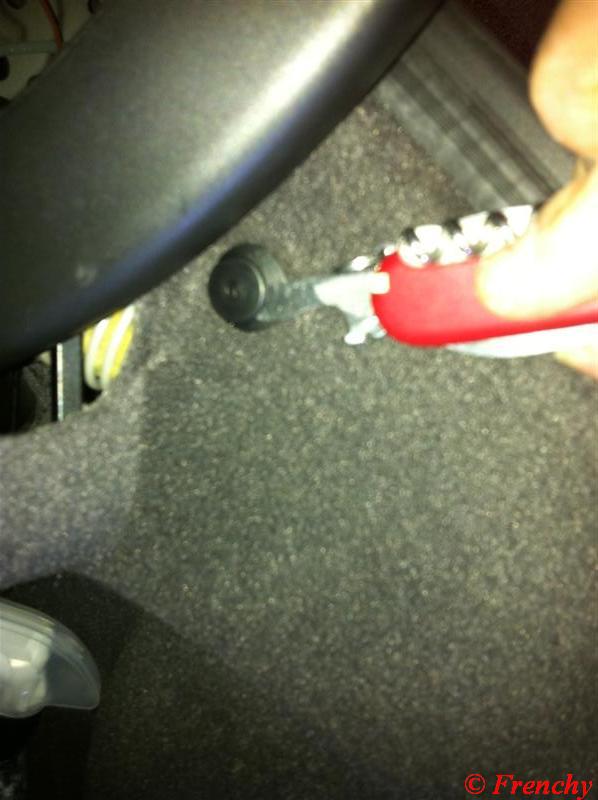
First you have to remove to small 4 plastic clips that retains the Plastic cover in the trunk :


Using one or 2 little flat screwdrivers, pull up the clip, and finish to extract it using a strong rubber lever to prevent any scratches on the cover.


When it's completely pulled, remove it.
When the 4 clips are removed, then you can pull out the cover :


Then, you'll have to unscrew with the torx#15, the small brackets for the trunk net on both sides, left and right.


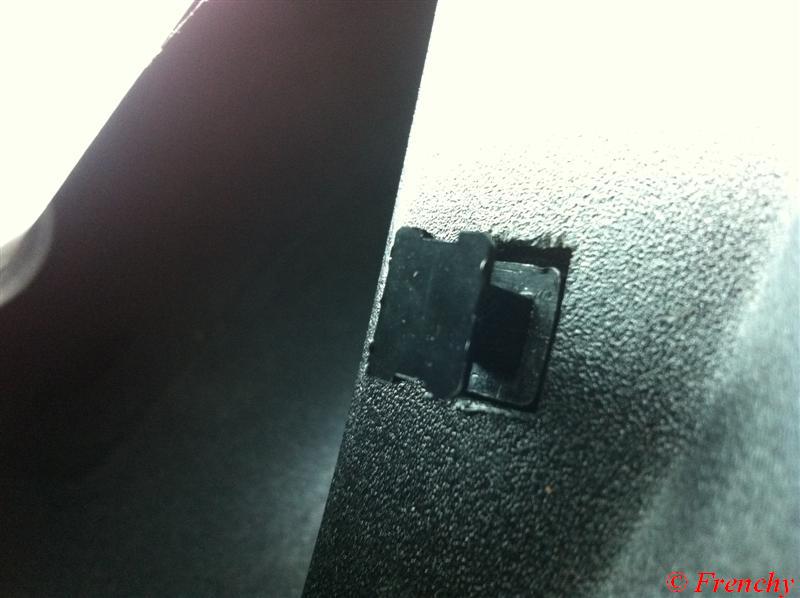
After the brackets, you'lle have to remove 2 small clips on Top of each side carpets :
Now you can pull the carpets and make some enough place to access the bolts of the Tail lights.

Leave the small finition part over the rubber, you'll have to place it back at the end.

On the Left side, you should see this :

This big grey box is the central locking compressor, that why it's in foam rubber housing to isolate from the noise.
Unclip the OEM connector on the Back of the Tail light :


Just pull up this box, the bracket behind will loose and gives you more access to the side bolt of the tail light.


here is the DIY on how to remove the plastic housing in the trunk, and side carpets to access the 5 bolts of each Tail Lights :
You'll need :
- A little Flat Screwdriver
- a rubber lever
- L shape Spanner of 8 mm & 10 mm
- Torx #15
First you have to remove to small 4 plastic clips that retains the Plastic cover in the trunk :
Using one or 2 little flat screwdrivers, pull up the clip, and finish to extract it using a strong rubber lever to prevent any scratches on the cover.
When it's completely pulled, remove it.
When the 4 clips are removed, then you can pull out the cover :
Then, you'll have to unscrew with the torx#15, the small brackets for the trunk net on both sides, left and right.
After the brackets, you'lle have to remove 2 small clips on Top of each side carpets :
Now you can pull the carpets and make some enough place to access the bolts of the Tail lights.
Leave the small finition part over the rubber, you'll have to place it back at the end.
On the Left side, you should see this :
This big grey box is the central locking compressor, that why it's in foam rubber housing to isolate from the noise.
Unclip the OEM connector on the Back of the Tail light :
Just pull up this box, the bracket behind will loose and gives you more access to the side bolt of the tail light.
01-13-2012, 08:21 PM
#35
Member
Thread Starter
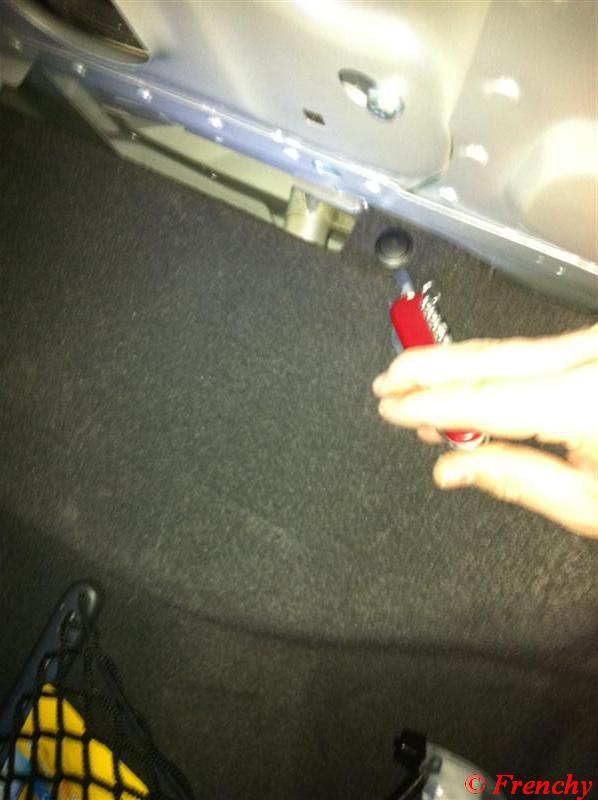
Now you should see the 4 bolts, unscrew them using the L-shape spanner #8.

The 5th bolt is in the hole you can see it at the bottom of this picture :
After removing the 5 bolts, pull out the side of the tail light slowly, like this :
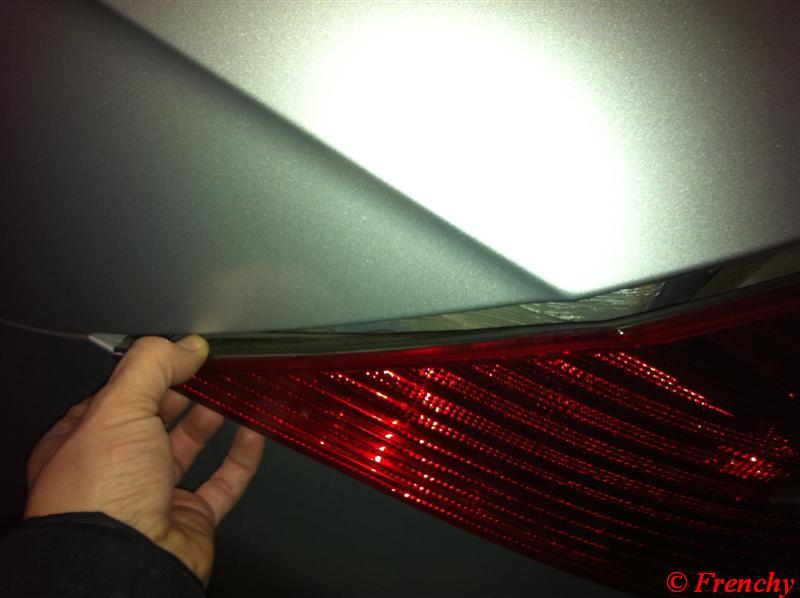
Then, pull back to you the Top of the Tail light like this :

Here are the 5 holes for the screws :

Install the new Tail light :

Since the Foam Rubber is New and strong, you'll have to push with your hand on the Tail light and screw the 5 bolts on the back with the other hand.
Doing like this will Fit the tail light perfectly.
First push on the side and screw a little bit the side bolt :

Then push the Top and the rest of the light and screw the 4 other screws.

If the Tail light is well fit, then the rubber Seal should be compressed like this :

To remove the Tail light on the Right side, you'll have to remove first the Big bottle (Air reserve).

This bottle is fixed by 3 bolts : 2 on the top, one under. Remove the bolts using the 10mm L-shape spanner.

Place the bottle left to make more place to work.
Now you should see the 5 bolts of the Right Tail light, remove them using the 8mm L-shape spanner and proceed as for the left side.

Tomorrow, i'll post some other pics of the modules (final product) and their installation on the Black metalic traverse on both sides.
Regards,
Frenchy.
The 5th bolt is in the hole you can see it at the bottom of this picture :
After removing the 5 bolts, pull out the side of the tail light slowly, like this :
Then, pull back to you the Top of the Tail light like this :
Here are the 5 holes for the screws :
Install the new Tail light :
Since the Foam Rubber is New and strong, you'll have to push with your hand on the Tail light and screw the 5 bolts on the back with the other hand.
Doing like this will Fit the tail light perfectly.
First push on the side and screw a little bit the side bolt :
Then push the Top and the rest of the light and screw the 4 other screws.
If the Tail light is well fit, then the rubber Seal should be compressed like this :
To remove the Tail light on the Right side, you'll have to remove first the Big bottle (Air reserve).
This bottle is fixed by 3 bolts : 2 on the top, one under. Remove the bolts using the 10mm L-shape spanner.
Place the bottle left to make more place to work.
Now you should see the 5 bolts of the Right Tail light, remove them using the 8mm L-shape spanner and proceed as for the left side.
Tomorrow, i'll post some other pics of the modules (final product) and their installation on the Black metalic traverse on both sides.
Regards,
Frenchy.
Last edited by TheFrenchy; 01-13-2012 at 08:24 PM.
02-02-2012, 02:09 PM
#36
Newbie

Join Date: Feb 2012
Posts: 2
Likes: 0
Received 0 Likes
on
0 Posts
2006 cls 500
LED tail lights ...
"Anzo Tail Light -- ANZO LED TAIL LIGHTS, CRYSTAL CLEAR/RED LENS, SET OF 2 -- Bulbs included; SAE and DOT compliant to FMVSS-108; Computer designed to add safety and stylish appearance to the vehicle's exterior; Features OEM style weather-tight connections and wire harnesses; Offers superior brightness, uses less power, and emits almost no heat; Changes the look of the vehicle by adding a clean, modern, and symmetrical style; Resistant to vibration and shock; Tested in simulated rain, humidity, and shock to ensure quality; Easy plug and play installation; With 1-year Anzo unlimited warranty."
Notes c, clk, cl, cls,
Design : LED Material : Plastic lens Certification : DOT, SAE approved Quantity sold : Set of 2 Product fit : Direct fit Color/finish : Red and crystal clear lens Bulb included : With bulb(s) Condition : New Location : Left or Right
Last edited by cjc0953; 02-02-2012 at 02:51 PM. Reason: add image
02-02-2012, 03:57 PM
#37
"Anzo Tail Light -- ANZO LED TAIL LIGHTS, CRYSTAL CLEAR/RED LENS, SET OF 2 -- Bulbs included; SAE and DOT compliant to FMVSS-108; Computer designed to add safety and stylish appearance to the vehicle's exterior; Features OEM style weather-tight connections and wire harnesses; Offers superior brightness, uses less power, and emits almost no heat; Changes the look of the vehicle by adding a clean, modern, and symmetrical style; Resistant to vibration and shock; Tested in simulated rain, humidity, and shock to ensure quality; Easy plug and play installation; With 1-year Anzo unlimited warranty."
Notes c, clk, cl, cls,
Design : LED Material : Plastic lens Certification : DOT, SAE approved Quantity sold : Set of 2 Product fit : Direct fit Color/finish : Red and crystal clear lens Bulb included : With bulb(s) Condition : New Location : Left or Right
This big deal of this thread was the utilization of OEM Mercedes hardware. I will put it out there - aftermarket lights are CRAP, and always will be. They dont seal well, aren't built to a Mercedes spec, and always get foggy after a few months. The big deal here was the use of OEM parts, which immediately appealed to everyone.

Last edited by AMG Chris; 02-02-2012 at 03:59 PM.
The following users liked this post:
WWDance (04-20-2020)


 02-11-2012, 08:10 PM
#45
Member
Thread Starter
Hello,
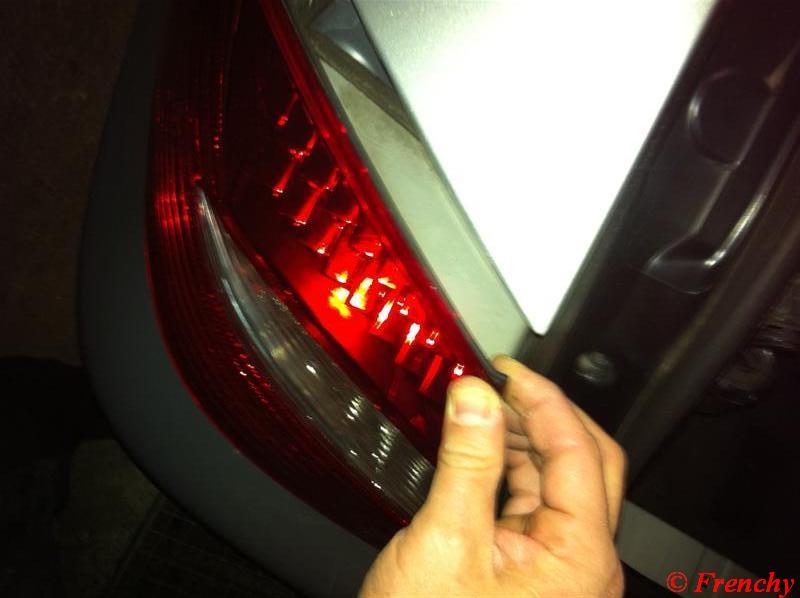
today mcobinad comes from England, he wanted me to install his new Led Tail Lights...
He takes some pics during installation....here are mine (sorry for poor Quality, take them with my Iphone) :


And i also activate this for him ;-)

Regards,
Frenchy.
PS : i will send PM's today...
today mcobinad comes from England, he wanted me to install his new Led Tail Lights...
He takes some pics during installation....here are mine (sorry for poor Quality, take them with my Iphone) :
And i also activate this for him ;-)
Regards,
Frenchy.
PS : i will send PM's today...
Last edited by TheFrenchy; 02-11-2012 at 08:26 PM.
02-13-2012, 04:56 PM
#48
Newbie

Join Date: Feb 2012
Posts: 1
Likes: 0
Received 0 Likes
on
0 Posts
cls550
I am very interested in this way I want to apply to my car
Is the Fund is compatible with the model 2007
I want to know how much the price
This is my email ge7ad-1212@hotmail.com
help me pllz
Is the Fund is compatible with the model 2007
I want to know how much the price
This is my email ge7ad-1212@hotmail.com
help me pllz


 02-14-2012, 04:17 PM
#50
Member
Join Date: Jul 2011
Location: UK
Posts: 125
Likes: 0
Received 0 Likes
on
0 Posts
Designo Brilliant Black Paint W219
Am very satisfied with the job Frenchy did for me. His products are real and very reliable. I travelled from the UK to France for the upgrade and believe me it's really worth it. The facelift lights really enhance the look of the early CLS. Do not hesitate to order the module from Frenchy. It's plug & play and easy to install.


