Mercedes-Benz C-Class: How to Replace Cabin Air Filter
If you notice your car isn't defogging its windows as fast as it once did, or that there's a bit of a musty smell to the cabin of the car, chances are it's time to change the cabin filter. This particular component needs to be changed out once a year, and cleaned a couple of times a year. Fortunately, it's an easy task to perform.
This article applies to the Mercedes Benz C-Class w204 (2007-2014).
Changing the cabin air filter in your Mercedes-Benz w204 is a relatively easy job, and something that can be done in about ten minutes or so. You should do it about once a year to make sure fresh air gets into the cabin of the vehicle—as opposed to musty air,—and to ensure that the window defoggers constantly perform at optimal levels. Here’s a brief step-by-step on how to perform this chore yourself, in case this is your first time.

Materials Needed
- Air filter
- Screwdriver
- T25 Torx and ratcheting wrench
- Vacuum (if just cleaning the filter)
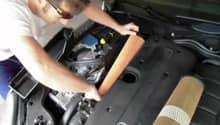
Step 1 – Remove screws in glove compartment
The cabin air filter is located in the car’s glove compartment. Open this area, and remove the three screws under the glove box to access the filter.
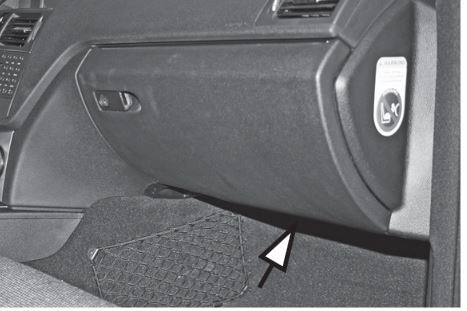
Step 2 – Remove post to release filter
If you drop it down low enough, there is a post attached to the under panel that has a hook on it. Just push this to the side, and the panel will drop. These fasteners are secured with a T25 Torx fitting.

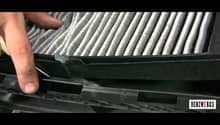
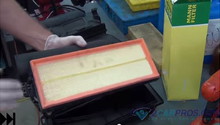
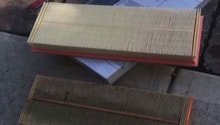
Step 3 – Replace or clean air filter
Just pull the air filter out. If you’re doing a quick cleaning, use the nose of a vacuum to give it a once over. If you are replacing it with a new filter, simply discard the old model and replace with new one.

Figure 3. Filter set screw locations. 
Figure 4. Removing filter.
Step 4 – Re-install
Push the air filter housing back into the compartment, and re-install the post under the panel to ensure the unit is secure. It should go in with ease, so do not force the unit in. Finally, re-install the three screws back into their appropriate holes under the glove box.
Related Discussions
- DIY: How to Change Cabin Air Filter - MBWorld.org
- Cabin Air Filter Firsthand Account Watching Stealership Work - MBWorld.org
- Cleaning Cabin Air Filter - MBWorld.org
- Cabin Air Filter - MBWorld.org
- Cabin Filter Change - MBWorld.org