Mercedes-Benz E-Class and E-Class AMG: How to Replace Brake Line
Brake lines are a critical component to the safety of yourself and others. Periodically checking the condition of your brake lines ensures you will not be surprised by a sudden loss in your braking power. Learn how to replace them if necessary here.
This article applies to the Mercedes-Benz E-Class and E-Class AMG (2002-2009).
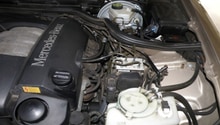
The brake lines on automobiles transverse the entire length of the under-body, both front to back and side to side. They are susceptible to road debris as well as weathering from the elements as time passes. As the brake pedal is pressed, fluid stored in the master cylinder reservoir is forced to the brake caliper pistons by way of the brake lines. Brake line pressure can exceed 1,000 PSI while stopping! As such, the smallest of leaks will create major problems in your braking system which include:
A sinking brake pedal,
More effort required to stop the vehicle,
and pulling to one side of the road while braking.
A periodic visual inspection is the best way to determine if your brake lines are problem-free . If rust, kinks, or brake fluid from a leak is found, do not wait to repair them! If you choose to complete the repair yourself, be aware that brake fluid is corrosive.
Materials Needed
Jack stands (up to 4)
1 jack
Socket set
Screwdrivers
Flare wrench set (11mm, 14mm)
Brake line bender
Brake line cutter
Brake line flaring kit
Wire brush
Penetrating oil (WD40)
Duct or masking tape
Towels/pan for brake fluid spills
Small pencil torch
4 pairs of male and female brake pipe fittings
Copper brake pipe
Brake fluid (DOT 4)
Brake bleeding kit
Solder
There are two types of brake flares: S.A.E. flares and D.I.N. metric flares. The S.A.E. double flare resembles a cocktail glass, as opposed to the D.I.N. bubble flares. Your Mercedes is expected to have only D.I.N. metric flares. This will be the only type you can use. It is recommended you use the same diameter brake pipe as the original. Your E-Class will most likely have a brake line that is 4.75 mm in diameter.
If you need to purchase a brake flaring kit, it's advised to purchase one that will flare both S.A.E. and Metric. Depending on which type of brake line material you decide to buy (kunifer copper, or regular copper) make sure your flaring kit specifically mentions that it works with kunifer. Kunifer is a harder material, and the tools required to flare/bend it are generally more expensive.
A simple tool called a "brake pipe end cap" can be made to eliminate the chances of dirt entering the system. This tool also ensures fluid does not escape. To make them, simply use your brake flaring kit, male and female fitments, a soldering iron and solder. Cut several short sections of the pipe (about 1" long) and flare one end. Male fitments require a single flare; female requires a double. Slip on the fitment and seal the unflared end with solder to finish fabricating the tool.
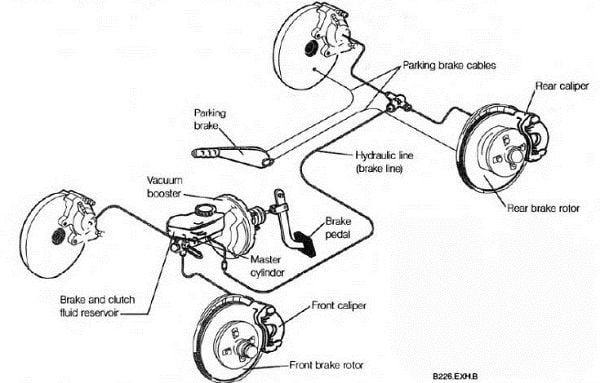
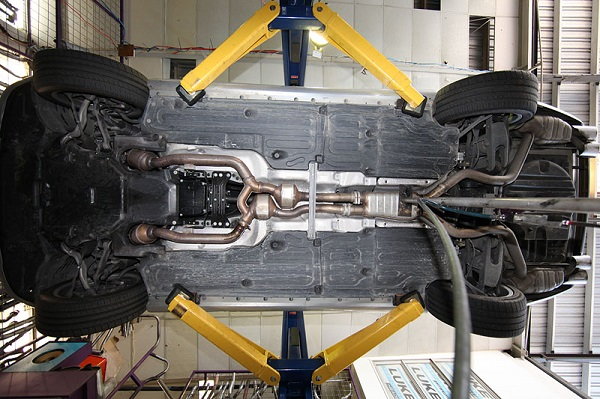
Step 1 – Locate the paths of the brake lines
Using Figure 1, familiarize yourself with the brake line layout on your Mercedes. Purchase some spare type 4 plastic square nuts as these are known to crack on removal. 8 mm petrol hose can be used for the type 5 fastener.
Pro Tip
It is important to re-check your work both visually and with a road test. After driving for some time (50 miles), it is suggested to repeat the check.
Figure 1. A general diagram showing the routing of the brake lines.
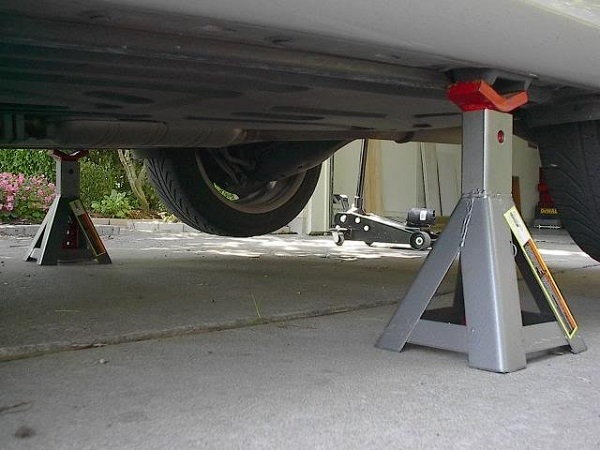
Step 2 – Raise the vehicle with the jack
First, slightly loosen the wheel nuts on the wheels you will be removing. This will be determined by which brake line(s) are being replaced. The rear requires all 4 wheels, as opposed to the front brake lines which only require the front wheels be removed. Once the vehicle is raised place your jackstand into position. Do not rely solely on the jack itself as it can fail and crush you! There are spots designated on the underbody of the car for the jack and jackstands to rest against.
Pro Tip
To eliminate the chance of damage while supporting the vehicle, a block of wood can be used as a "cushion."
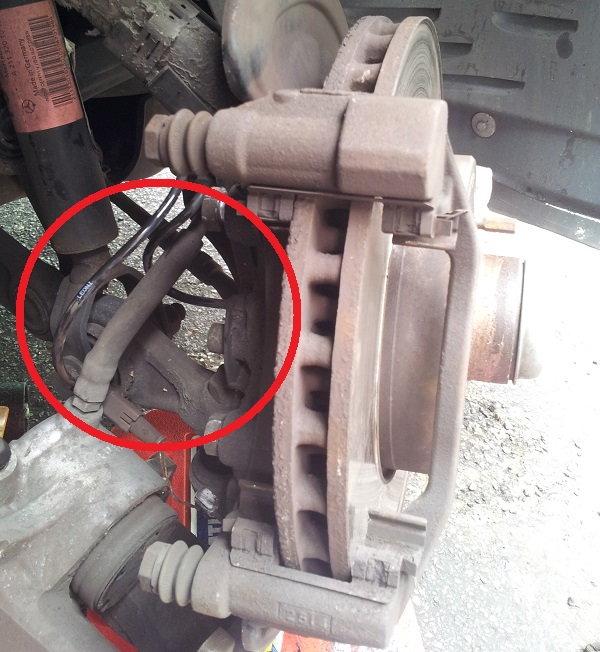
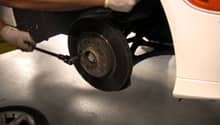
Locate the fitting between the rubber brake hose and the brake line. It will be found under the wheel arch on the side of the frame. Spray the fitting with WD-40 to aid in the removal. If removing the brake hose, spray it at the caliper (do not spray the brake pads). Spray the bleed nipple as well. Allow time for the penetrating oil to seep into the fittings. Rust is common in this area, so take your time when removing things, otherwise, you will be racking up a hefty parts bill from your friendly Mercedes-Benz dealership.
Figure 3. Brake lines circled.
Step 4 – Locate the brake fluid reservoir
Referring to Figure 7, locate the brake fluid reservoir and junction box. The brake lines are labeled (HR, VR, HL, VL). Refer back to Figure 3 for their positioning. After unscrewing the reservoir cap, place a rubber glove over the reservoir and re-tighten the cap to form an air tight seal. This helps prevent fluid loss when you unscrew the brake line fittings.
Figure 4. Brake fluid reservoir and master cylinder.
Step 5 – Seal and remove the brake lines
Ready your brake pipe end caps along with some rags and jars. Using a flare wrench, unscrew the brake line(s) from the junction box. Place the brake lines into the jar to catch the fluid. Seal the hole in the junction box with the male brake line end cap. Seal the brake line with the female brake line end cap. Clean any brake fluid that was spilled quickly.
Step 6 – Remove the under guard trays
If you are working on the rear lines, the rear section of the under guard tray beneath the engine/transmission has to be removed. The E-Class has three trays in total. It is recommended to remove all three in case something is dropped from the engine bay. The guards need to be unbolted from the back to the front. Once removed, you should have access to the brake lines and body fasteners.
Figure 5. Under trays removed from E-class AMG model.
Step 7 – Remove the line(s) from the fasteners
There are a series of fasteners (a lot like metal clips) that secure the brake lines to the chassis of the vehicle. These can be removed with a series of screwdrivers and trim removal tools. We do recommend wearing gloves, because they can be sharp and nick your fingers when working with them. Working front to back, carefully release the brake line from the vehicle body.
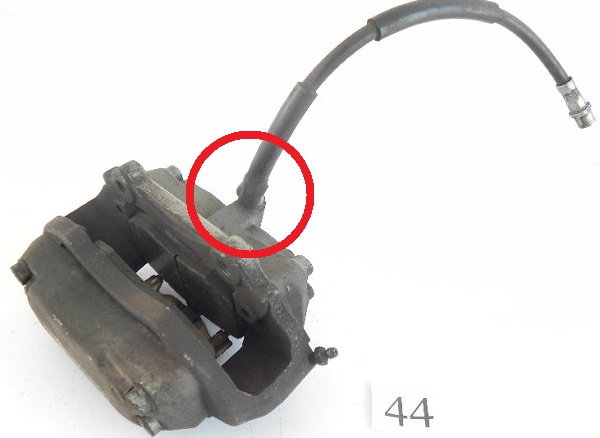
Step 8 – Disconnect the brake line from the hose or caliper
Move back to the brake line fitting in the wheel arch area and ready yourself with a flare wrench, regular wrench, male and female brake line end caps, and a pan to catch fluid. Be aware that even with the WD-40, the fitting may snap, causing fluid to spill out. The flare wrench ensures the fitting will not be rounded. Support the brake hose end of the fitment with an ordinary wrench to stop it from rotating. There is a flat cut into the cylindrical steel ferrule of the brake hose for this as shown in Figure 10. Undo the brake line from the brake hose and seal both ends with the brake line end caps.
Figure 6. Use your wrench and remove the line.
Step 9 – Remove the old brake line(s) from the car
Be careful not to break any lines as you maneuver them from under the car. Some bending is needed, but the lines bend a lot before braking. The removal of the front lines is straightforward. To remove the rear lines, follow these steps:
Working at the front of the car, bend and maneuver the brake lines down and through the engine bay and onto the ground beneath the car.
Working at the back of the car, start by releasing the brake line(s) from around the suspension and springs in the wheel arch. Push them under the car and above the subframe.
Working under the rear of the car, first remove the brake line from the recess in the floorpan where a 90 degree turn is located. Otherwise, it will get caught in components as you move it towards the front. At the back of the car, bend the brake line as needed until it clears the rear subframe. Pull the lines toward the front of the car once they are cleared of the frame/rear subframe, and they will be ready to be removed.
Step 10 – Prepare the new brake line(s)
It is recommended you do not pre-bend the rear brake lines as they must first be guided through the rear subframe due to the small amount of clearance between it and the body. The original brake line can be used as a template. Copper brake lines will allow some bending before they break, but be sure to use a brake pipe bender for the sharp bends. Otherwise, the pipe will collapse and kink.
To seal the new brake line while setting it up, flare one end and seal it with a brake line end cap tool. Leave the other end unflared and seal it with tape. Using two different colors of tape ensures you will not get the lines mixed up.
Step 11 – Fit the new brake pipe
Before you start, keep these three things in mind:
Make sure the pipe does not rub against any of the chassis components or frame. A type 5 body fixing can be used to help protect the line.
Ensure all body fasteners are closed and the brake line is held securely in place.
Lubricate the brake pipe fitments with brake fluid. Copper grease can be used, although use only a small amount. Any grease that gets inside the lines will contaminate the system.
The fitment of the front brake lines is straightforward. To install the rear brake lines, follow this procedure:
Guide the new brake line down and through the engine bay, fitment end first. Keep the line unbent and follow the path of the original. Continue to guide it through until it reaches the rear subframe.
Now straighten the rest of the pipe that is rolled outside of the car.
Working at the rear of the car, work the pipe through and guide it up over the rear subframe. Feed it all the way to the rear wheel arch following the original brake line path.
Ensure the pipe has been routed correctly. Working from the rear forwards, start to make bends in the line. The first bend is the brake hose to brake line (you will need your brake line bender for this one).
Before tightening the fitment, bend the line to allow it to fit around the rear spring.
Continue working backwards to forwards, bending and fastening the line into the body fasteners as you go.
When you have reached the junction box, make the final bend before measuring and cutting the pipe. Flare the line's end and bolt it down to the junction box.
Step 12 – Bleed the brakes
It is recommended you use a pressure bleed system instead of the older method as this will prevent master cylinder scoring. Remove the rubber covers from the bleed nipples and follow the manufacturer's brake bleeding sequence.
If you are flushing the brake system with new fluid, you will notice the new fluid is clearer than the old. Use this to determine when the system has been flushed. Special colourants can also be added to make this easier. Connect your brake bleeding kit in sequence, wheel by wheel, remembering to close the nipple before you move on. Continue to bleed until you no longer see bubbles flowing through the line. Once you have completed this process, carefully press down on the brake pedal five or six times and repeat the bleeding procedure.
Go back and take another look at all of the lines, bolts and screws that were removed during the job. Ensure all of your brake line fittings are leak free and that everything has been tightened securely,
Press down on the brake pedal. If it does not feel spongy, you have successfully removed air from the system. Press down on the pedal firmly, and hold it down for 20 seconds. Repeat the visual inspection. If no leaks are found, you're now ready to re-install the wheels and lower the car to the ground.
As you begin the test drive, first gently apply the brakes. If they function correctly, try an emergency stop in a safe area. Repeat the visual inspection.
After driving for another 50 miles, remember to repeat the inspection.
Why is My Brake Pedal Soft?
A soft brake pedal is an indication of a brake system failure. Restore proper operation with a system inspection.
This article applies to the Mercedes-Benz C-Class w204 ...
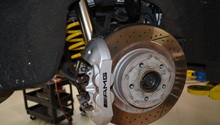
Brake Modifications
A fancy car needs fancy brakes.
This article applies to the Mercedes-Benz E-Class and E-Class AMG (2002-2009).
It’s true that the better you maintain your brakes, the longer they will last. ...
How to Replace Brake Fluid
Does your brake pedal feel spongy? Find out how to replace the brake fluid in your E-Class in as little as one hour.
This article applies to the Mercedes-Benz E-Class and E-Class AMG ...
Why Does My Brake Pedal Go to the Floor?
Have you lost pressure on your brake pedal?
This article applies to the Mercedes-Benz E-Class and E-Class AMG (2002-2009).
You are driving down the road coming to a stop ...
How to Replace Brake Pads and Rotors
Doanster, Benzwerks, Scott Elliot
Are your brakes making noise? Do you want to reduce the amount of dust your brakes pads release? Changing your brake pads and/or rotors is the ...
Brake Modifications
Decrease your Mercedes-Benz' stopping distance with some brake upgrades!
This article applies to the Mercedes-Benz C-Class w204 (2007-2014).
Brake modifications not only increase the ...