Mercedes-Benz E-Class: How to Replace Third Brake Light
Did your "bulb out" indicator turn on, but your brake lights still appear to be working? Look closer, and this article will show you how to replace the third brake light in your Mercedes-Benz E-Class w211.
This article applies to the Mercedes-Benz E-Class w211 (2002-2009).
Manufacturers build vehicles with safety in mind. Mercedes-Benz's E-Class is no exception. So when it comes to the brake system, the brake lights in your Mercedes-Benz E-Class w211 are important things to consider. However, when drivers think about their vehicle's brake lights, they usually think about the left and right tail lamps. Often overlooked is the small, slightly hidden "third brake light." By law it's required that your brake lights, including this third brake light, are all operational. It is an added bit of safety to the drivers traveling behind you because it serves as an extra warning that the vehicle has slowed down. The process for replacing the bulb in the third brake light assembly is similar to changing the bulbs on left or right assemblies. Continue reading to do the job yourself.

Materials Needed
- Replacement third brake light
- Medium flat head screwdriver
- T25 Torx screwdriver
- Glass cleaner (optional)
Step 1 – Remove the plastic clips and caps
There is carpeting that covers the underside of the trunk lid, which is secured by plastic clips. The trunk hinges also have plastic caps that cover the bolts.
- Use a flat head screwdriver to remove the plastic clips.
- Then, remove the plastic caps from the trunk lid hinges.
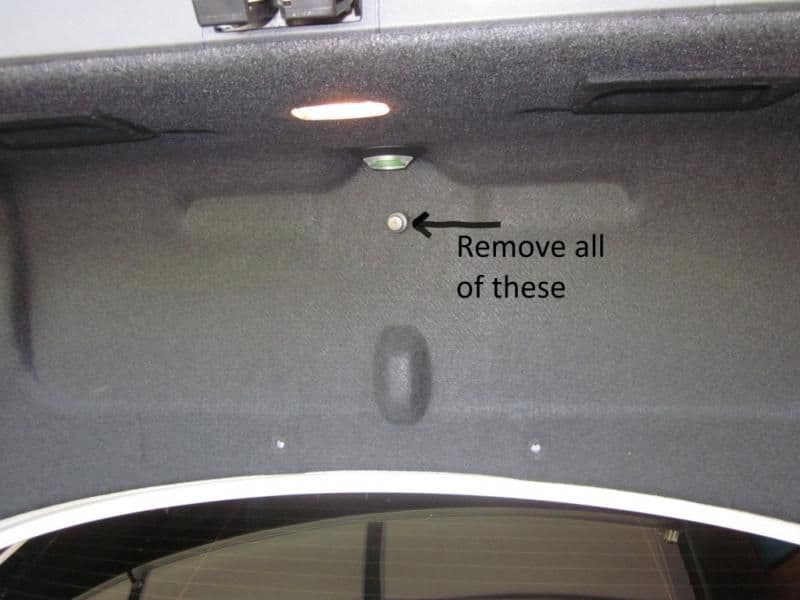
Figure 1. Location of plastic clip on the trunk lid. 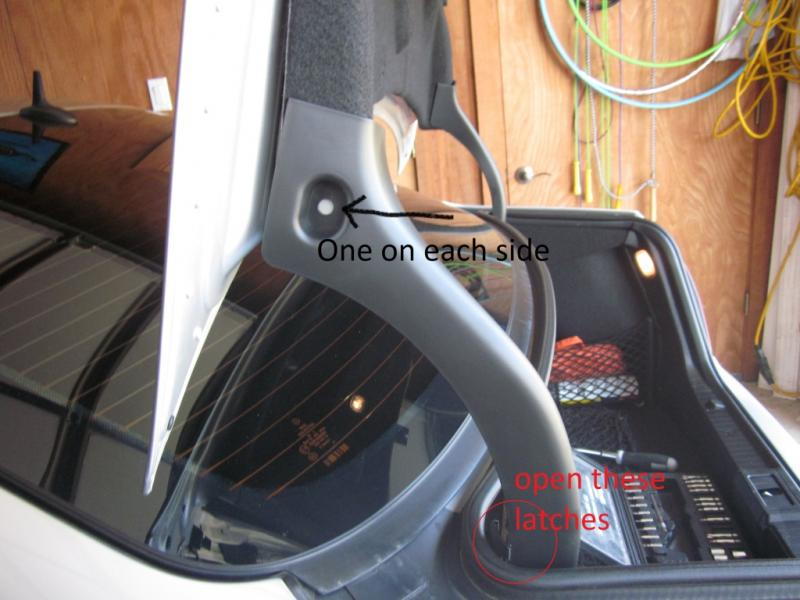
Figure 2. Location of plastic clip on the trunk hinges.
Step 2 – Remove the Torx screws
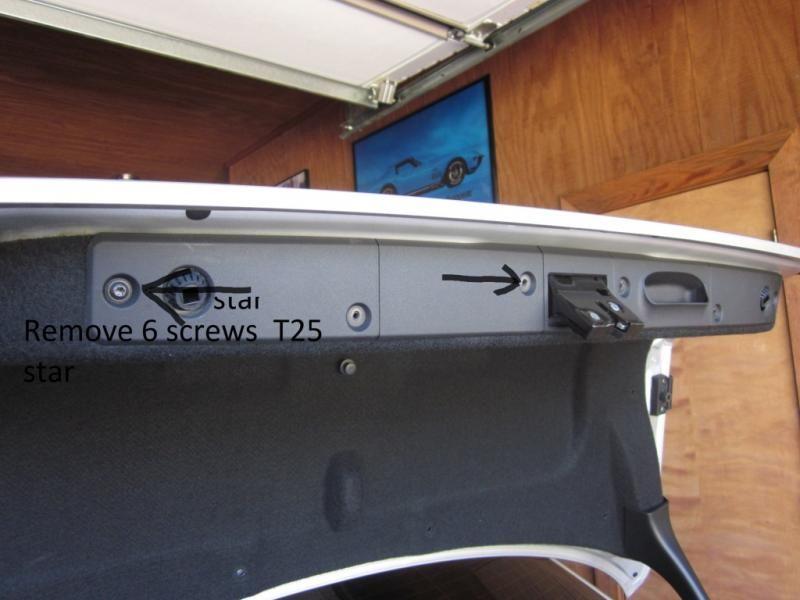
The panel that secures the light fixture for the third brake light is secured with T25 Torx screws.
- Remove the six T25 Torx screws.
- Then, pull down the carpeting to expose the third brake lamp.
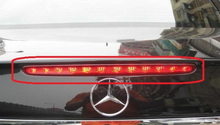
Step 3 – Remove the third brake light
The LED portion of the original brake light assembly will need to be swapped out before the new assembly can be installed.
- Push outward on the black tabs located on the outer edges of the light assembly.
- Wiggle the light assembly from left to right, and remove it.
- Disconnect the electrical harness.
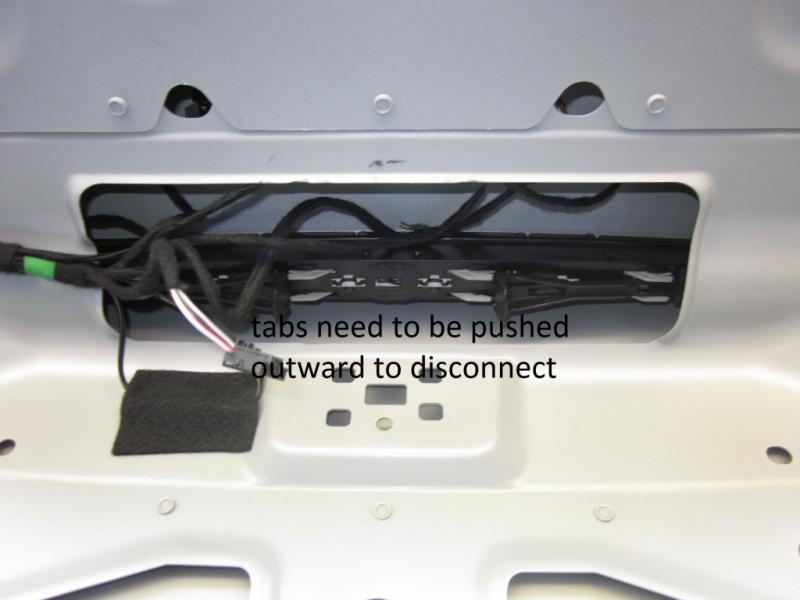
Figure 4. Press on outer tabs of the brake light assembly. 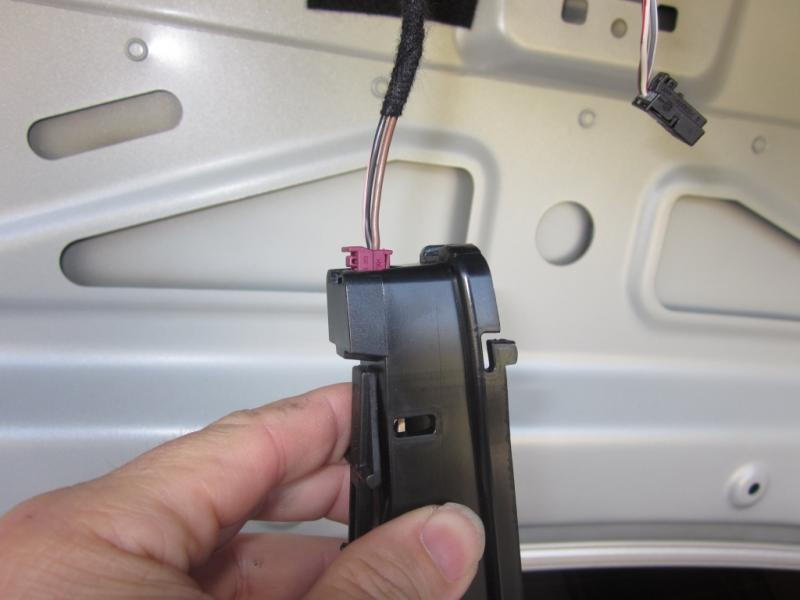
Figure 5. Disconnect wire harness from the brake light assembly.
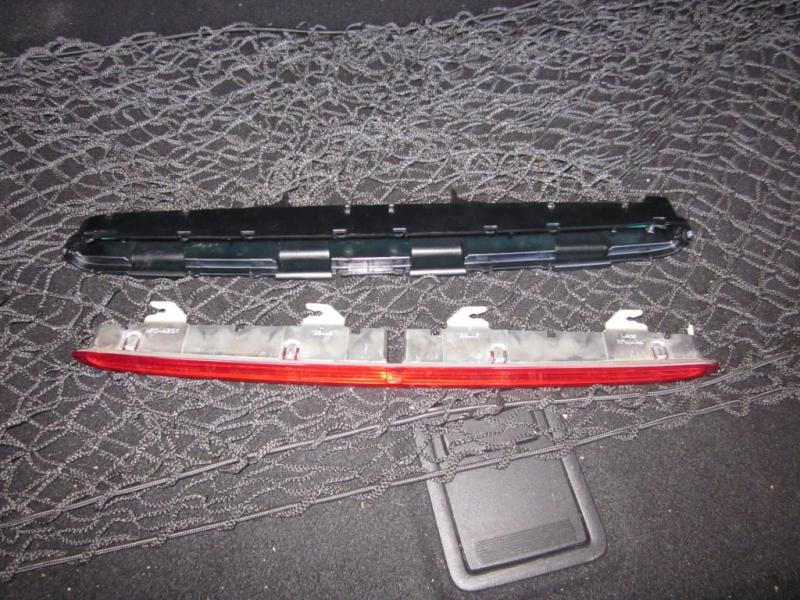
Step 4 – Separate LED panel from the assembly
The LED panel is affixed to a plastic cover by tabs. These must be separated before the new LED assembly can be installed.
- With your flat head screwdriver, softly press on the metal tabs of the plastic cover. Work your way across the length of the LED panel.
- Remove the original LED panel from the cover.
Step 5 – Install the new LED panel
Install the replacement brake light in reverse order to the steps above.
- Pry the tabs just enough to guide the new LED panel into place.
- Press the tabs down to secure the panel.
- Reconnect the trunk lid electrical connector.
- Begin with the left side of the brake light assembly, and insert it into the trunk lid slot.
- Re-install the trunk carpeting.
- Fasten the six T25 Torx screws.
- Reattach the plastic clips.

Pro Tip
Before installation, it is recommended cleaning the surface of the third brake light assembly to ensure a good seal.
Related Discussion
- Third Brake Light DIY Replacement - MBWorld.org