
Janiak's 2002 C230 Kompressor Coupe Build **Pics**
 03-20-2013 | 10:48 PM
#1

Thread Starter
Junior Member
Joined: Dec 2012
Posts: 28
Likes: 0
2002 Mercedes C230 Coupe
Janiak's 2002 C230 Kompressor Coupe Build **Pics**
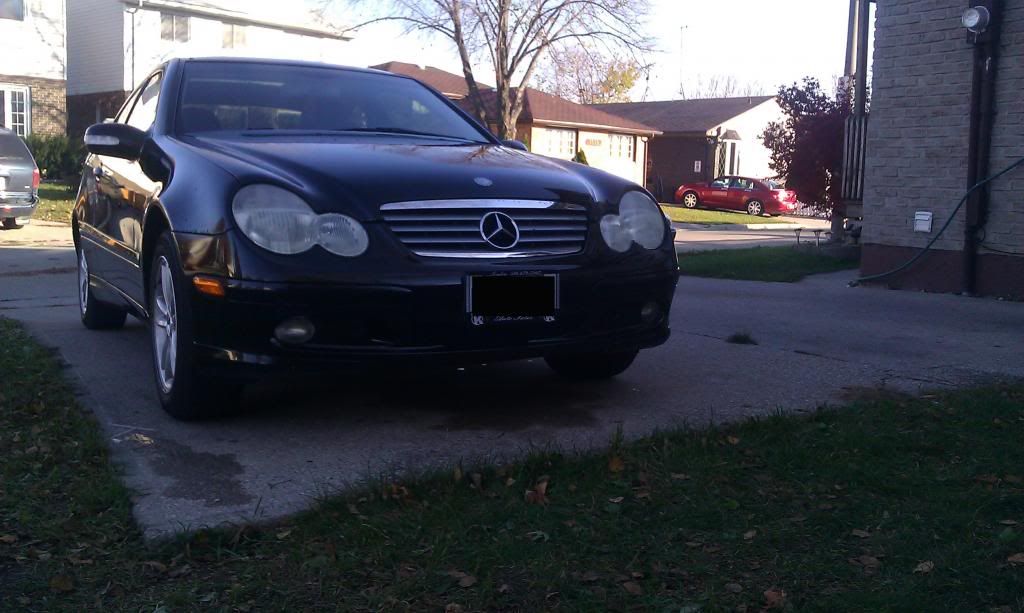
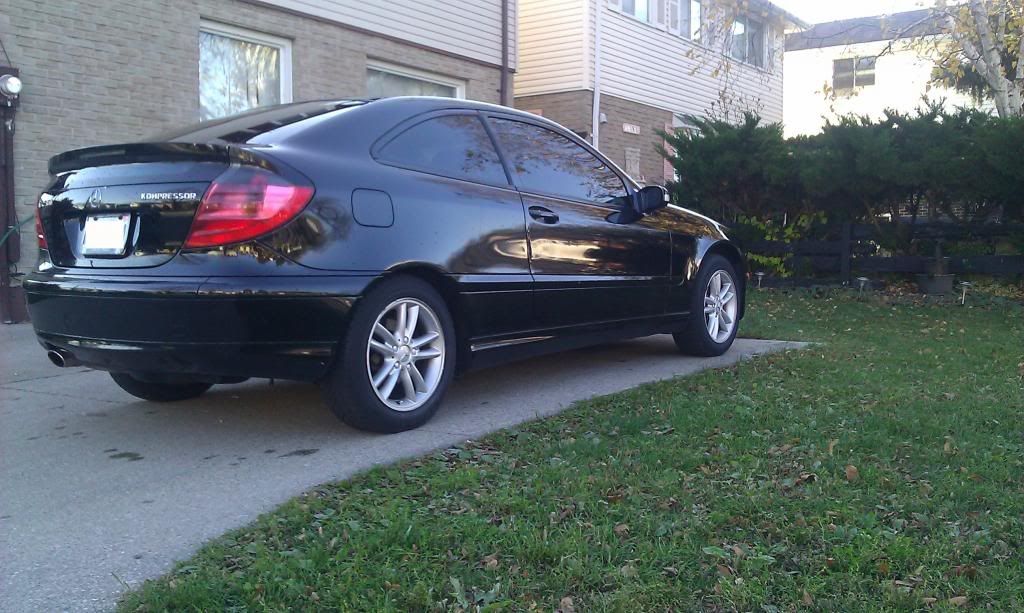
Hey there everyone, I have been lurking on the forums for some time now before I got my first Mercedes. After looking for a car that was in my taste I finally got a 2002 C230 Coupe 6 speed manual in September 2012. Since late October 2012 it has been stored for the winter months until it is nice enough to take out to play. During this time though the mod bug hit me and I started making some purchases.
I got the following parts:
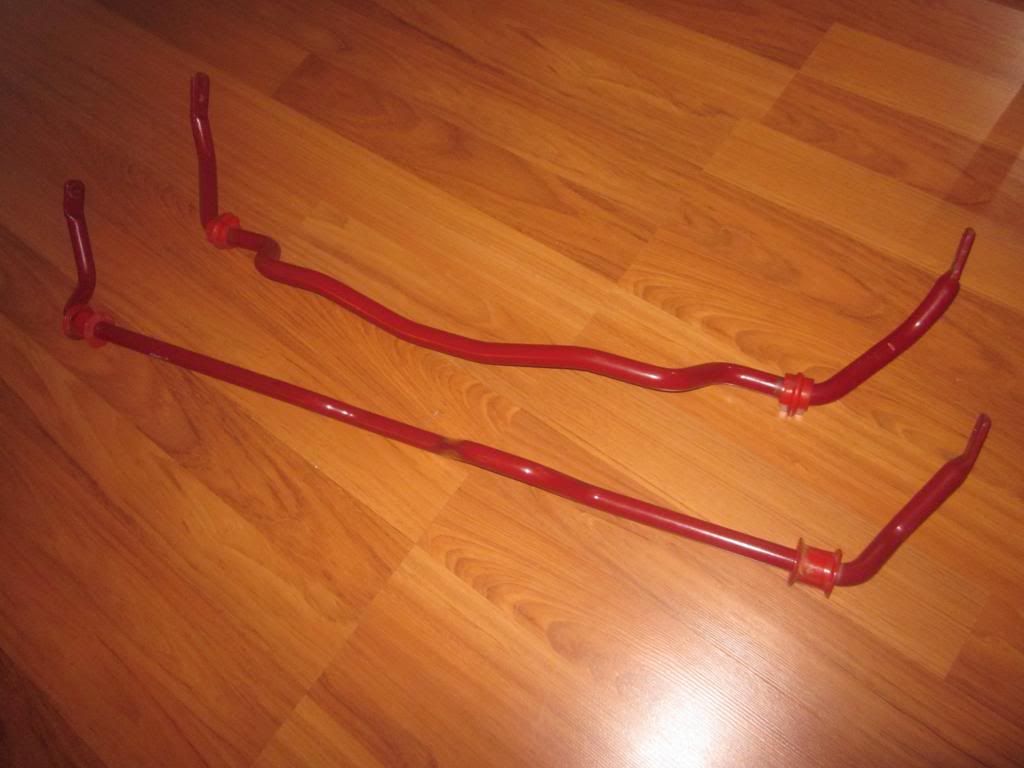
Eibach Front and Rear sway bars (courtesy of infected )
)
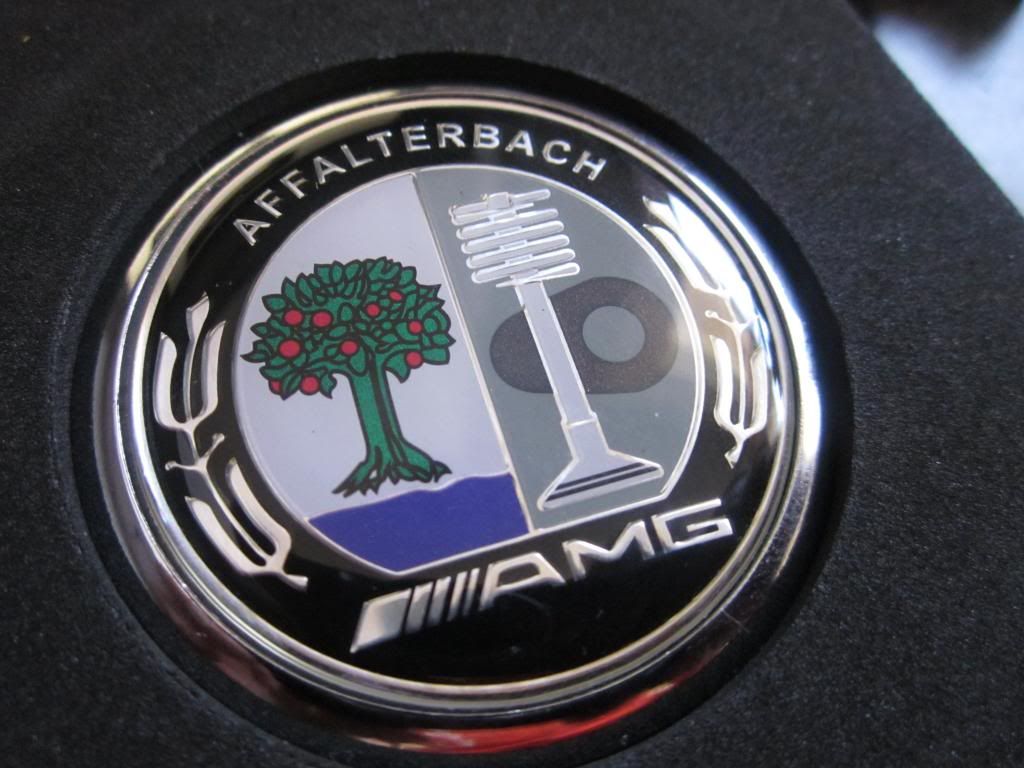
A new black AMG Affalterbach hood emblem (yes I know its not an AMG model but I like how it differs from the regular badge)
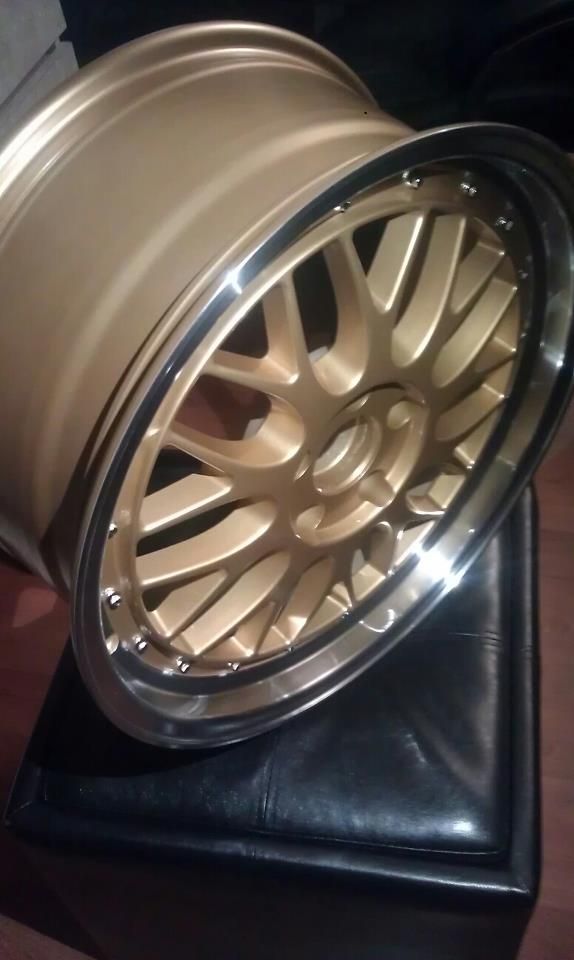
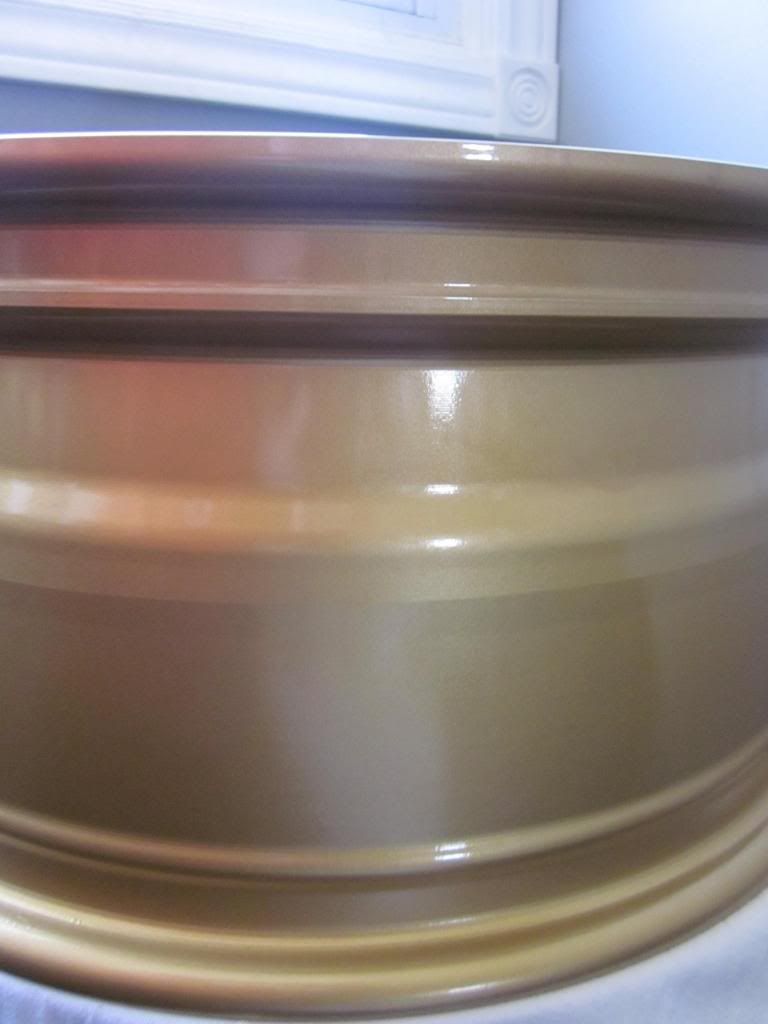
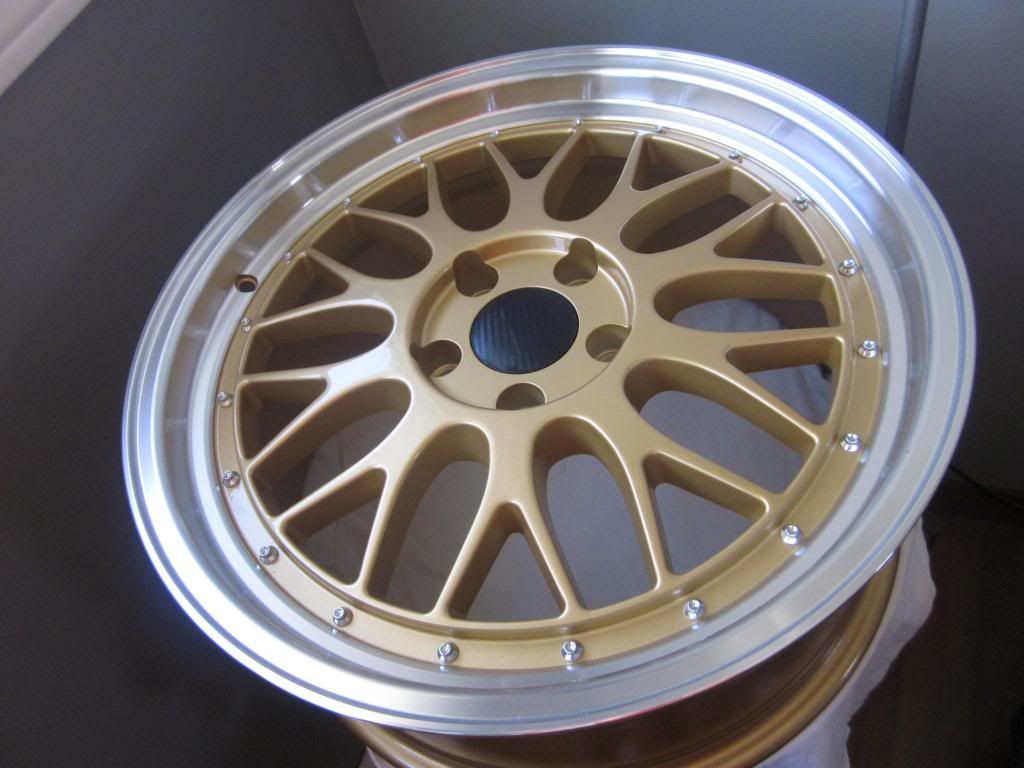
4 Gold 18x8 Work VS-XX replicas
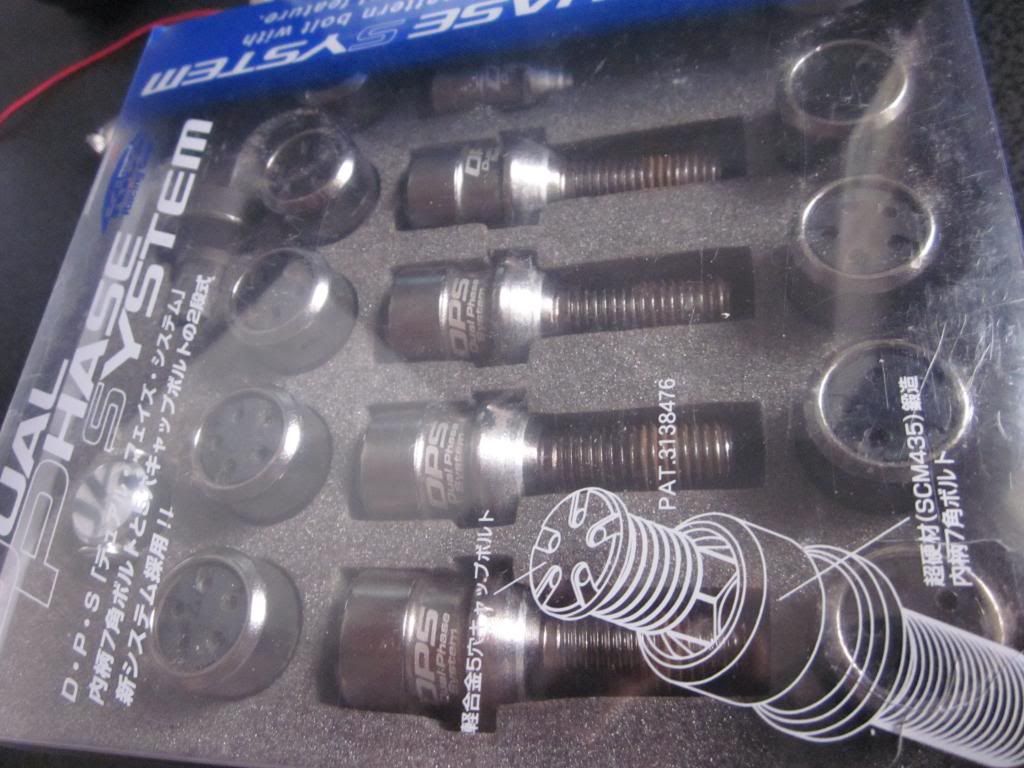
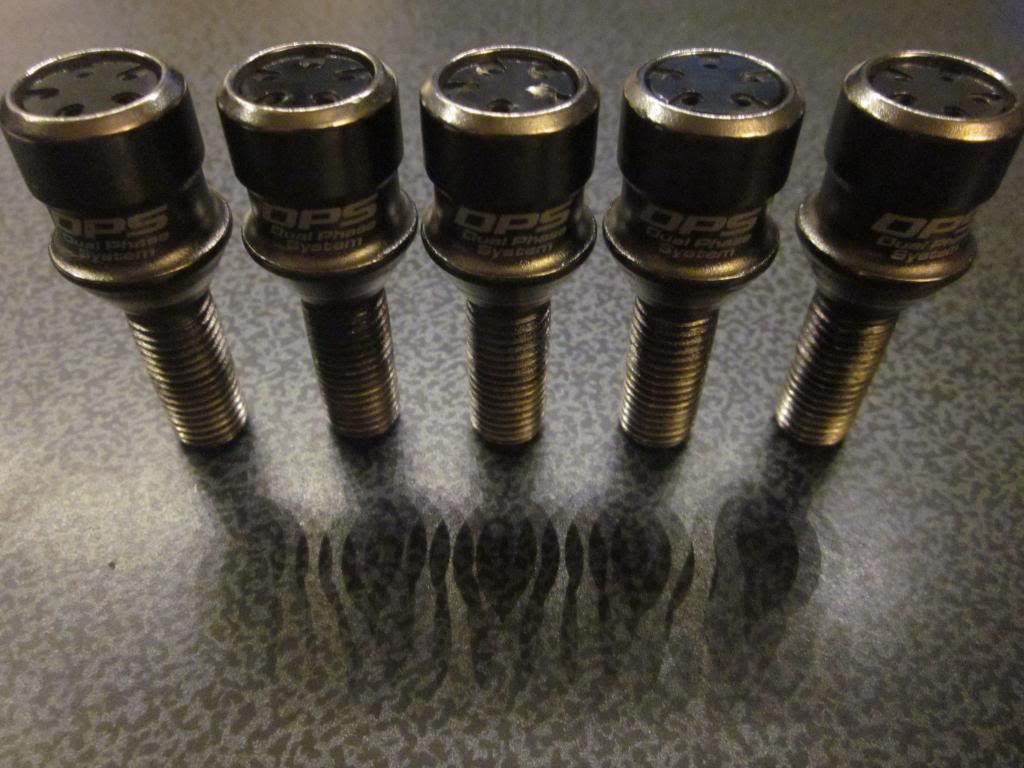
Project Kics DPS Lugs ( from infected again )
For tyres I decided to go with two 215/45/18 Bridgestone Potenza RE760 for the front, and for the rear two 245/45/18 Bridgestone Potenza RE760
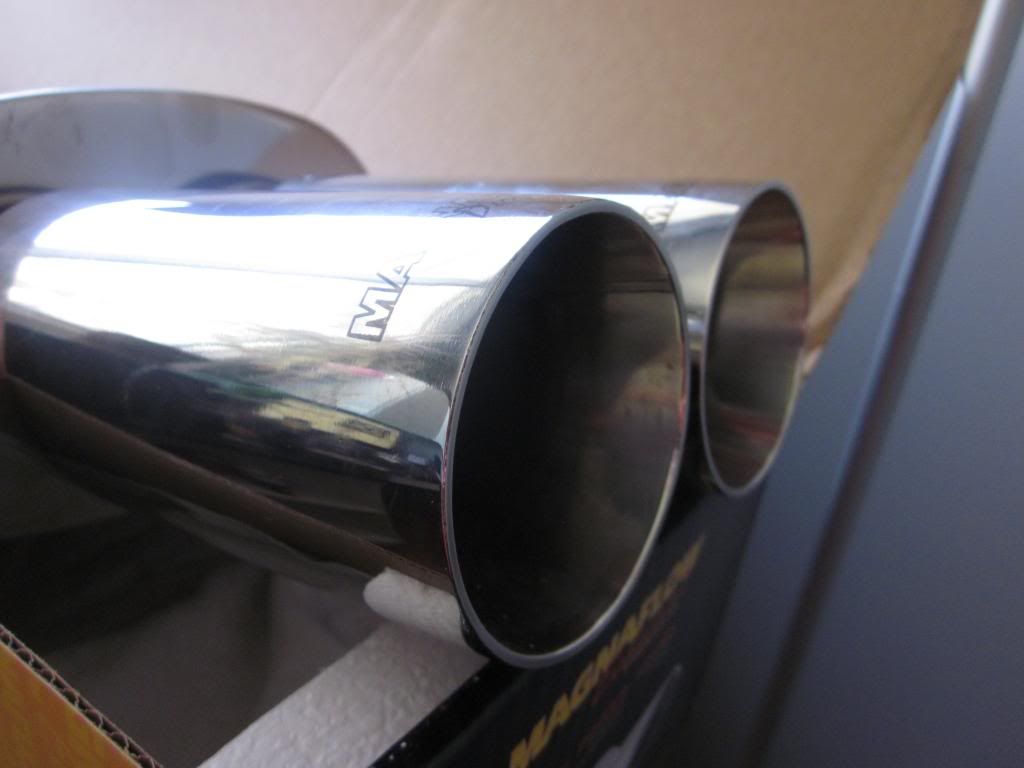
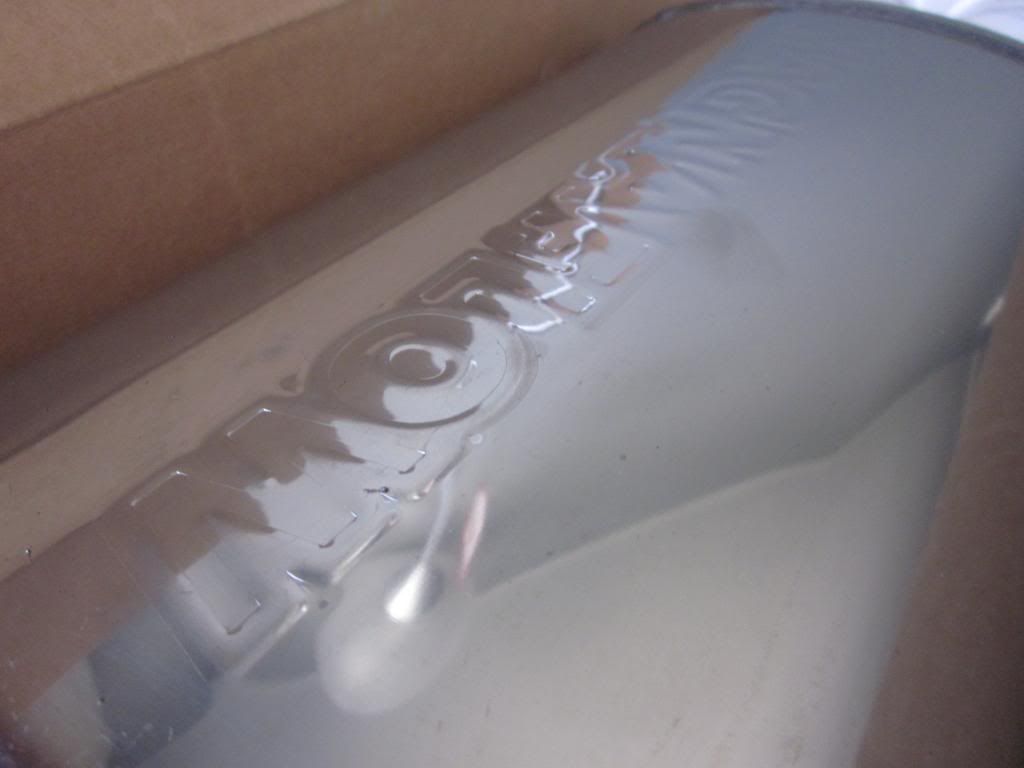
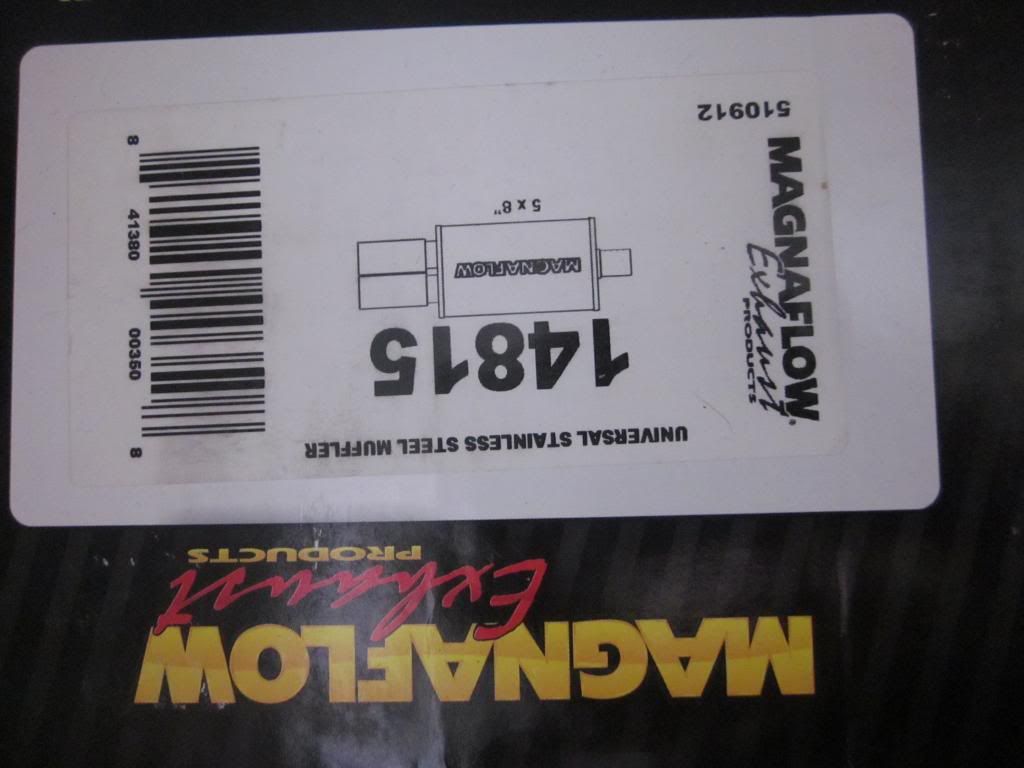
Magnaflow 14815 exhaust
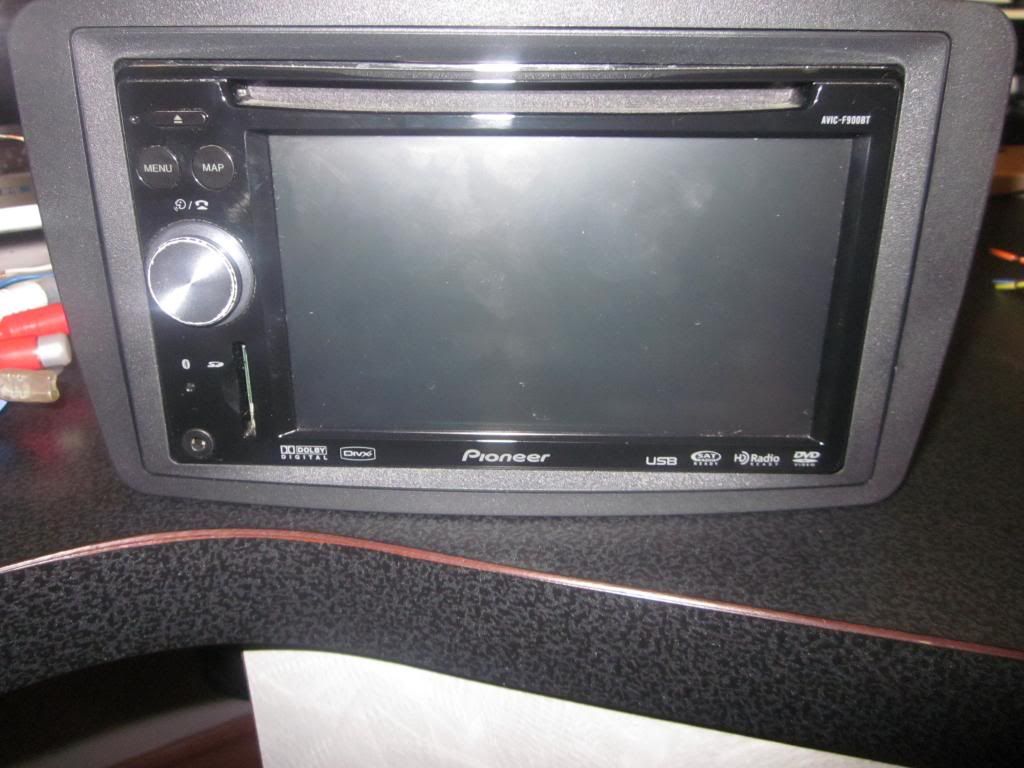
Pioneer AVIC F900-BT (I had from my old car )
All the mounting brackets needed/wire harness for the Pioneer
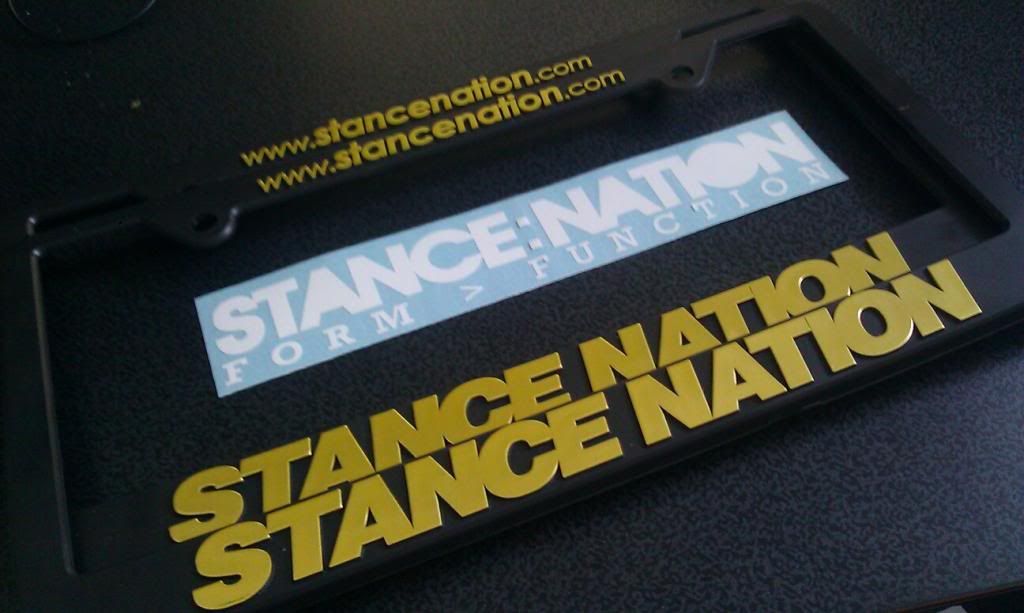
And finally a pair of gold Stancenation license plate covers
It is very tempting to go and start working on the car but it is just too cold still but as soon as the weather is nice enough is when the work on the car will begin.
Until then here are some pictures of what I have got.
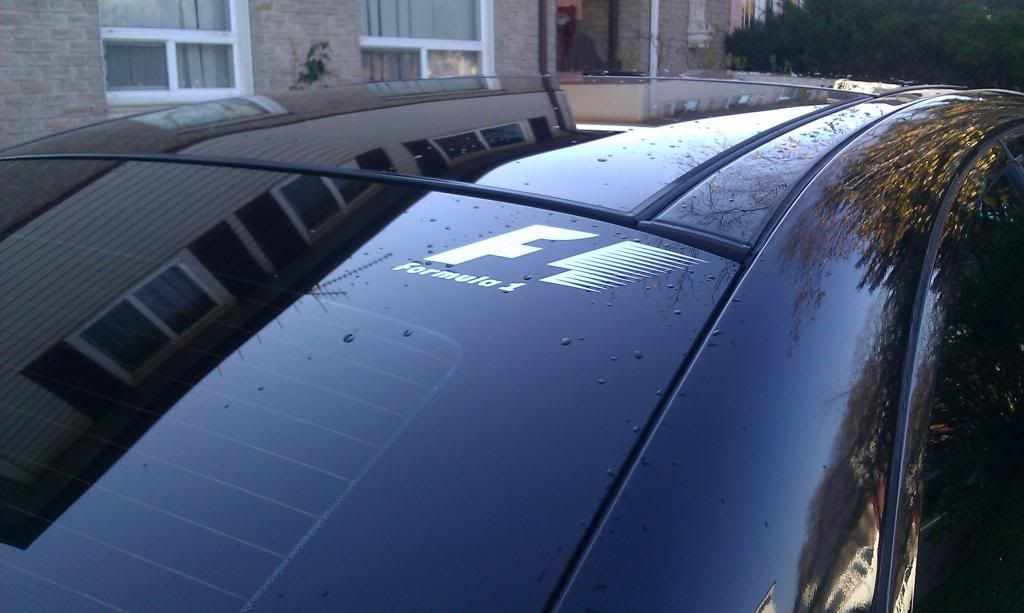
I am a huge Formula 1 fan so it is a necessity to have this
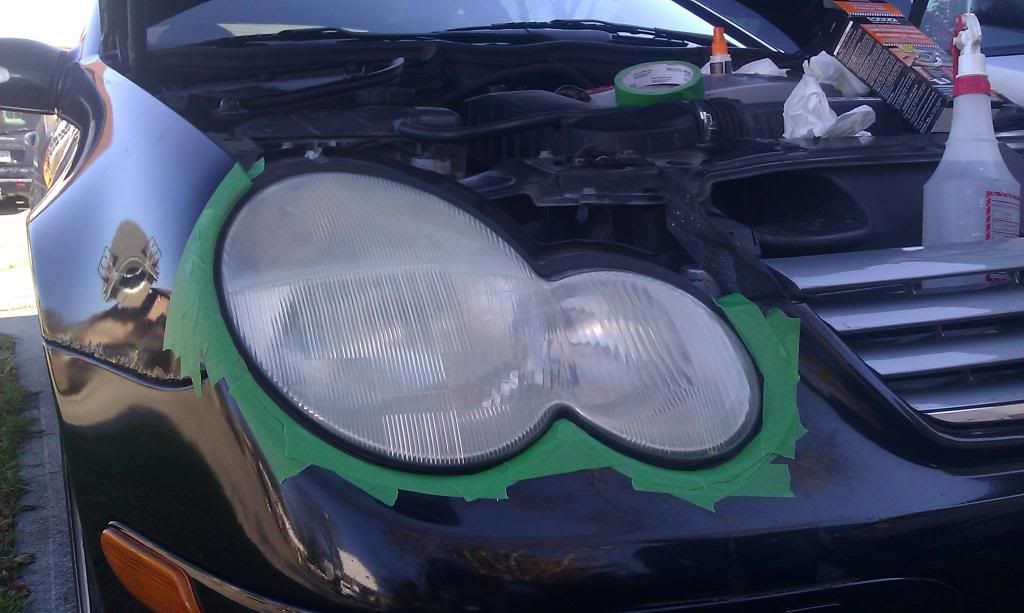
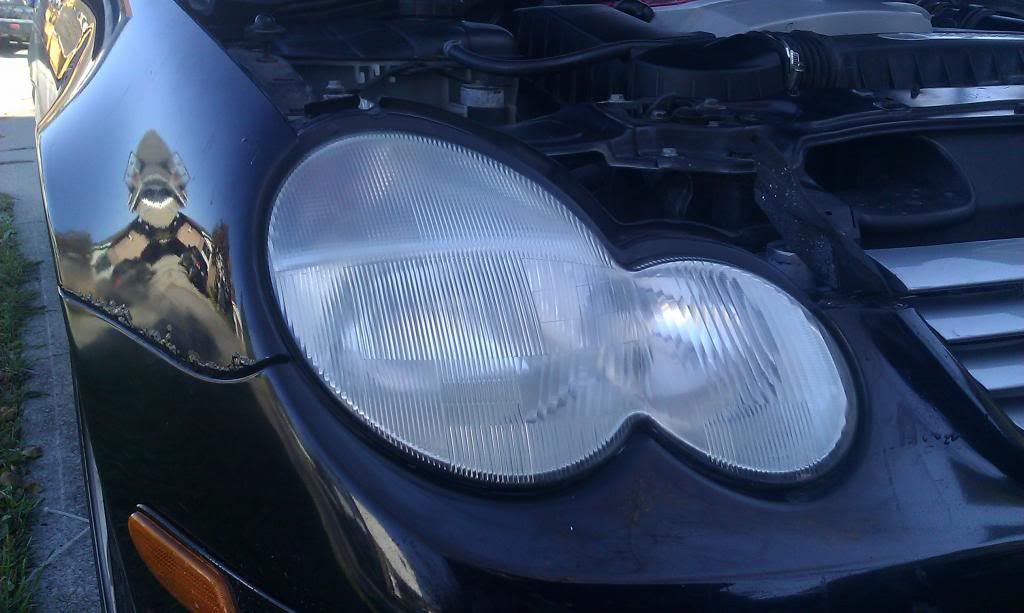
This is before I have cleaned up the headlights to remove some of the oxidization
and after
Here are the Plate covers
And now the wheels...
Lugs
Exhaust
Badge
Sway bars
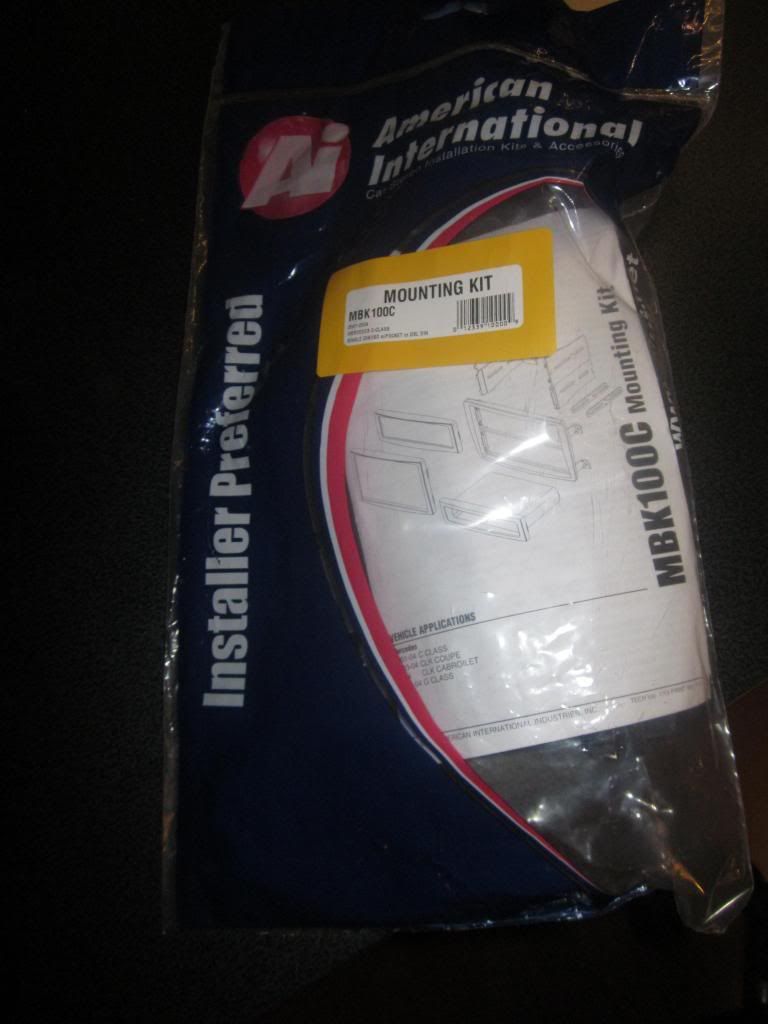
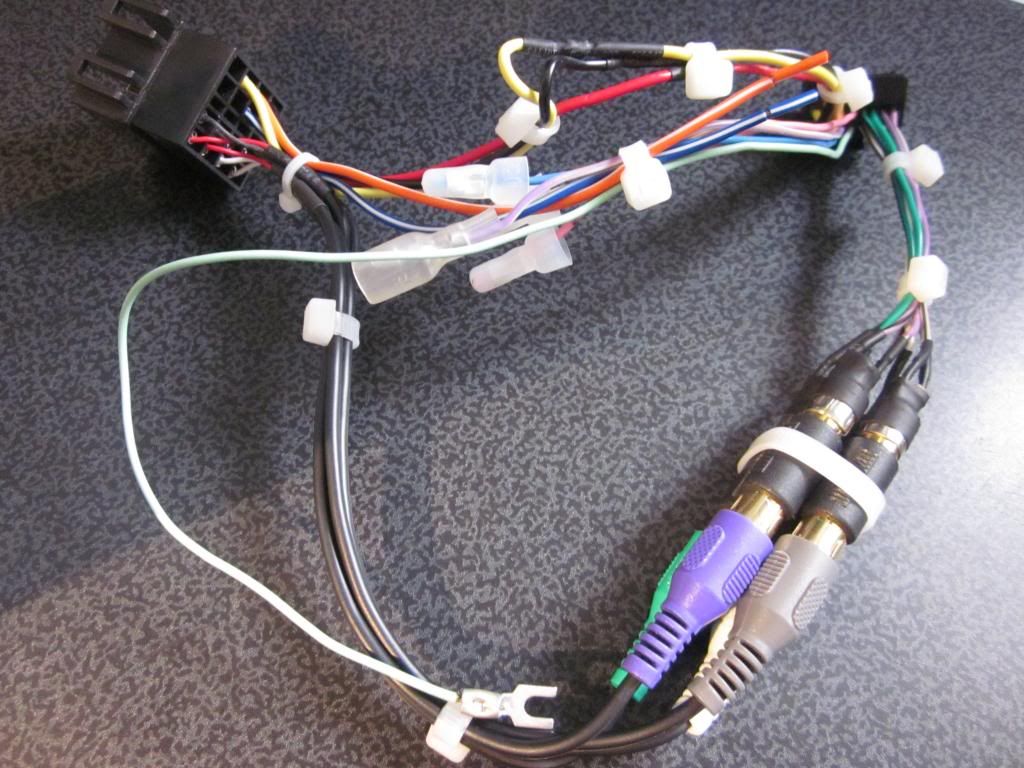
Mounting kit for the radio

how it looks together
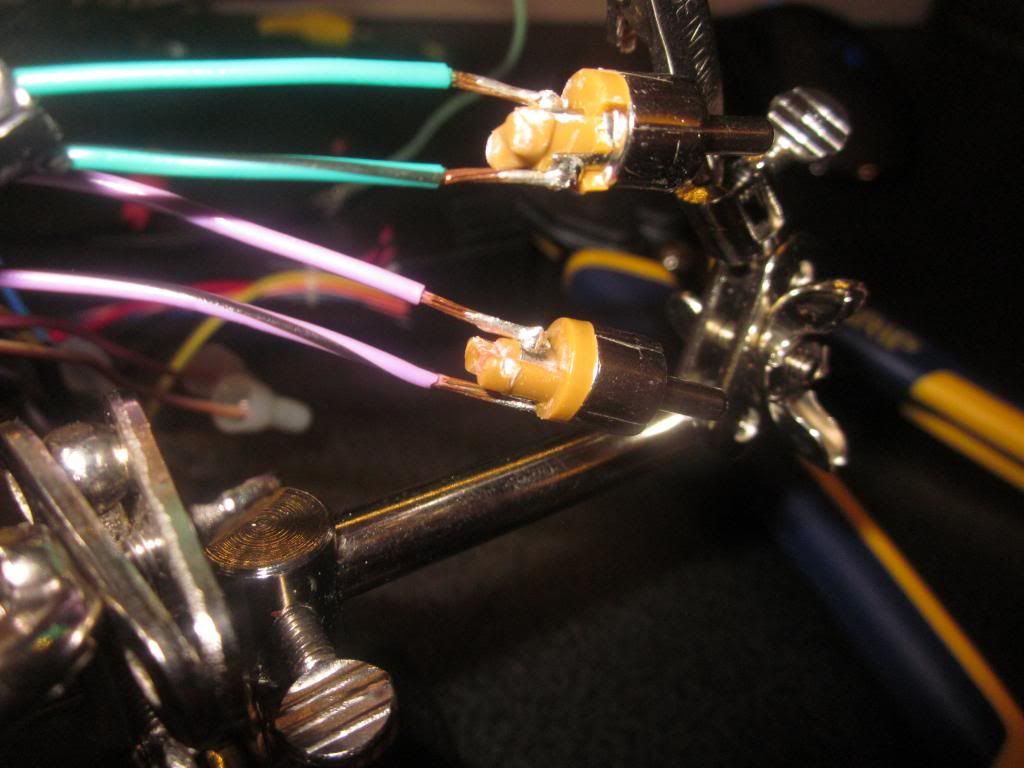
And how a little bit of the fun stuff, wiring up the harness to the head unit
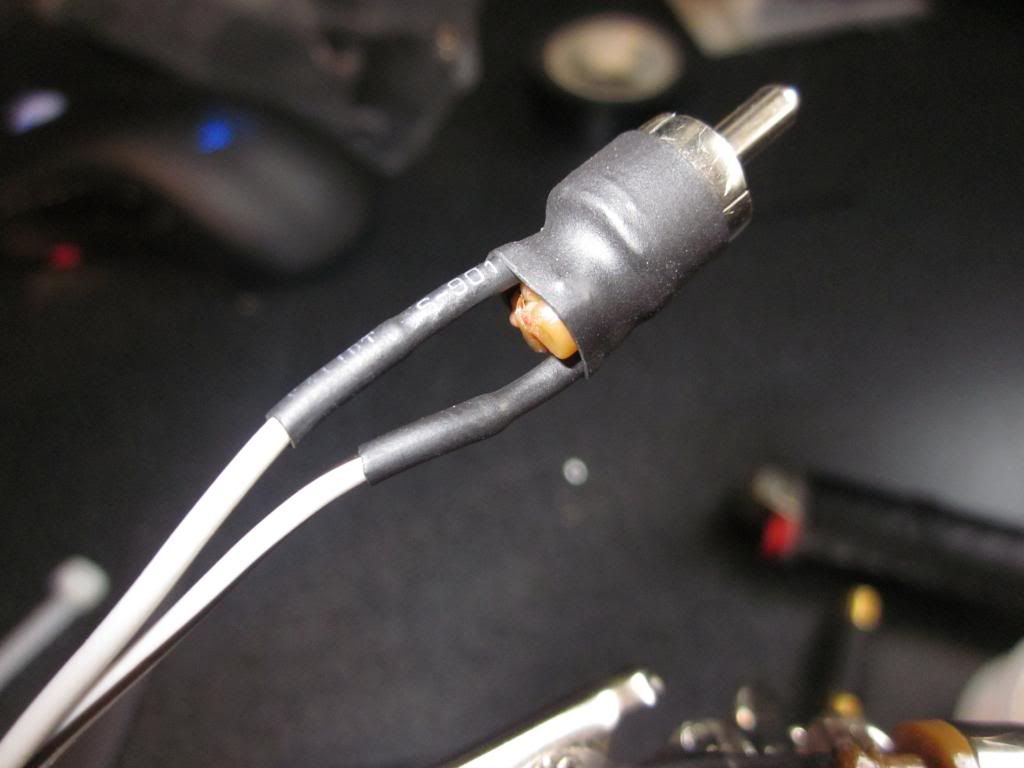
I had to get male coaxial ends to the speaker outputs coming from the AVIC as I did not want to cut the harness
During
After
All speakers done
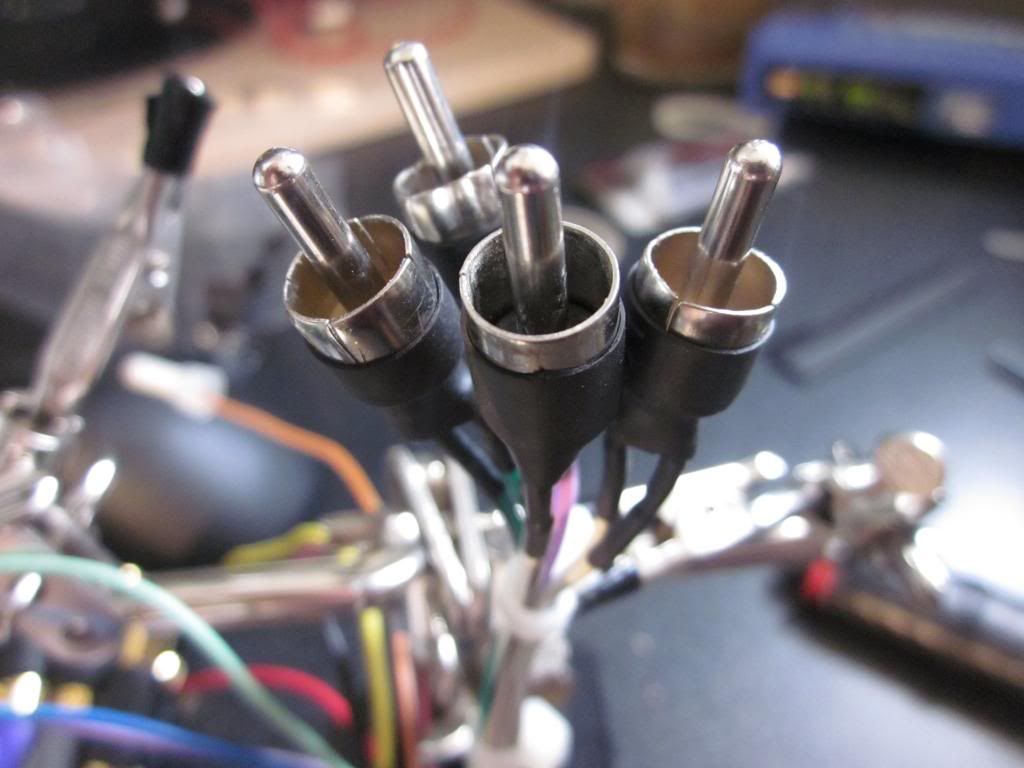
Also I needed some female to female adapters so I searched through my parts bin and voila
That is all I have for now but I will be posting more within roughly 2 weeks time. I will try to make DIY type posts with everything I do. The car is new to me so I am learning as I go and I'm sure other members wouldn't mind more DIY's
As for future upgrades I plan on getting H&R Coils sometime within the month of April 2013, maybe clear headlights, and the facelift tails.
I will appreciate any feedback as the build goes on and am looking to make some new forum buddies!
Thanks again !!
Janiak
I got the following parts:
Eibach Front and Rear sway bars (courtesy of infected
)A new black AMG Affalterbach hood emblem (yes I know its not an AMG model but I like how it differs from the regular badge)
4 Gold 18x8 Work VS-XX replicas
Project Kics DPS Lugs ( from infected again )
For tyres I decided to go with two 215/45/18 Bridgestone Potenza RE760 for the front, and for the rear two 245/45/18 Bridgestone Potenza RE760
Magnaflow 14815 exhaust
Pioneer AVIC F900-BT (I had from my old car )
All the mounting brackets needed/wire harness for the Pioneer
And finally a pair of gold Stancenation license plate covers
It is very tempting to go and start working on the car but it is just too cold still but as soon as the weather is nice enough is when the work on the car will begin.
Until then here are some pictures of what I have got.
I am a huge Formula 1 fan so it is a necessity to have this
This is before I have cleaned up the headlights to remove some of the oxidization
and after
Here are the Plate covers
And now the wheels...
Lugs
Exhaust
Badge
Sway bars
Mounting kit for the radio
how it looks together
And how a little bit of the fun stuff, wiring up the harness to the head unit
I had to get male coaxial ends to the speaker outputs coming from the AVIC as I did not want to cut the harness
During
After
All speakers done
Also I needed some female to female adapters so I searched through my parts bin and voila
That is all I have for now but I will be posting more within roughly 2 weeks time. I will try to make DIY type posts with everything I do. The car is new to me so I am learning as I go and I'm sure other members wouldn't mind more DIY's
As for future upgrades I plan on getting H&R Coils sometime within the month of April 2013, maybe clear headlights, and the facelift tails.
I will appreciate any feedback as the build goes on and am looking to make some new forum buddies!
Thanks again !!
Janiak
03-21-2013 | 06:22 AM
#6
Out Of Control!!
Joined: Nov 2001
Posts: 10,067
Likes: 10
From: Westwood, NJ
2004 Civic Si. FWD for the Win!
He probably should get some spacers, but I'm sure that'll occur to him once the rims go on.
Very nice start - good to see infected's parts go to a good home.
Not understanding the license plate covers, though. Maybe it's a Canadian thing?
Very nice start - good to see infected's parts go to a good home.
Not understanding the license plate covers, though. Maybe it's a Canadian thing?
03-21-2013 | 06:53 AM
#7
MBWorld Fanatic!
Joined: Feb 2009
Posts: 5,054
Likes: 10
From: fort worth, tx
06 C230 SS 6spd
Stance nation is like hellaflush. It's just another company. And with 8" in back he shouldn't put that plate on until has some spacers because the offset on the wheels look high but that's mho
Trending Topics
03-21-2013 | 07:18 AM
#8
Thread Starter
Junior Member
Joined: Dec 2012
Posts: 28
Likes: 0
2002 Mercedes C230 Coupe
Thanks for the input guys, yeah 8" is small for the rear but I didn't have the funding to get a staggered set of wheels (that will happen way in the future). As for the spacers, I'm sure that I'll need them just not sure what sizes so I'll get to that when the time comes.
03-21-2013 | 09:41 AM
#9

Super Member
Joined: May 2009
Posts: 818
Likes: 3
From: Atlanta, GA
'02 C230 Coupe (Me) '03 SLK320 6MT (Wife)
Good start! I think those wheels are going to look nice on the Black. Always good to see Coupe's on here. At least I feel that a new one showing up will keep the universe in balance!
03-21-2013 | 09:56 AM
#10

Member
Joined: Oct 2009
Posts: 131
Likes: 0
From: Toronto, ON
2002 C230 Coupe & 2010 C300 Sport
Nice work so far. Love the F1 sticker. I've got very small Senna S stickers on the front of my car...in front of the front wheels on the side of the bumper.
If you upgrade your brakes, C32/C55 AMG calipers are a nice addition.
Good luck!
If you upgrade your brakes, C32/C55 AMG calipers are a nice addition.
Good luck!
03-21-2013 | 04:32 PM
#11
MBWorld Fanatic!
Joined: Feb 2009
Posts: 5,054
Likes: 10
From: fort worth, tx
06 C230 SS 6spd
if you get spacers you'll end up probably needing to get new lug bolts and not be able to use the ones you bought. just make sure the lug bolts arent too long because it'll mess the brake system up. I went with a stud conversion and its one of the best mods I did. now i dont have to keep getting new bolts when getting spacers or different wheels. stud conversion kits only cost around 100 or less. Plus it allowed me to get the more eye pleasing lug nuts out there. I have the Muteki burning blue sr48 lugs.
03-21-2013 | 04:38 PM
#12
Out Of Control!!
Joined: Nov 2001
Posts: 10,067
Likes: 10
From: Westwood, NJ
2004 Civic Si. FWD for the Win!
Mmmmmm!!  I love those.
To the OP - if you do the stud conversion (which I recommend as well), make sure you get the right nuts - ball or cone. OEM are ball seats, most aftermarkets are cone, but not all, like my OZ rims are ball seat.
I'm getting my Honda nuts I use for my car powdercoated on Saturday, so that's an option if you do go with ball seats - there aren't many options out there than chrome ones for ball seat nuts (the S2k CR edition has black ball seat nuts, for example).
I love those.To the OP - if you do the stud conversion (which I recommend as well), make sure you get the right nuts - ball or cone. OEM are ball seats, most aftermarkets are cone, but not all, like my OZ rims are ball seat.
I'm getting my Honda nuts I use for my car powdercoated on Saturday, so that's an option if you do go with ball seats - there aren't many options out there than chrome ones for ball seat nuts (the S2k CR edition has black ball seat nuts, for example).
03-21-2013 | 10:09 PM
#13
Thread Starter
Junior Member
Joined: Dec 2012
Posts: 28
Likes: 0
2002 Mercedes C230 Coupe
I have read about the brake swap it would sure look nice, only wonder about it is do the sedan ones differ from the coupe ones and are they direct swap?
if you get spacers you'll end up probably needing to get new lug bolts and not be able to use the ones you bought. just make sure the lug bolts arent too long because it'll mess the brake system up. I went with a stud conversion and its one of the best mods I did. now i dont have to keep getting new bolts when getting spacers or different wheels. stud conversion kits only cost around 100 or less. Plus it allowed me to get the more eye pleasing lug nuts out there. I have the Muteki burning blue sr48 lugs.
hmmm this sounds like a great idea.... For the conversion would I just be needing to get extended studs, loctite, and then just thread them into the existing stud holes and then just get lug bolts? If so I might hold off with putting the wheels on until I do the lug conversion... and yeah the SR48's are a thing of beauty.
Mmmmmm!! I love those.
To the OP - if you do the stud conversion (which I recommend as well), make sure you get the right nuts - ball or cone. OEM are ball seats, most aftermarkets are cone, but not all, like my OZ rims are ball seat.
I'm getting my Honda nuts I use for my car powdercoated on Saturday, so that's an option if you do go with ball seats - there aren't many options out there than chrome ones for ball seat nuts (the S2k CR edition has black ball seat nuts, for example).
I love those.To the OP - if you do the stud conversion (which I recommend as well), make sure you get the right nuts - ball or cone. OEM are ball seats, most aftermarkets are cone, but not all, like my OZ rims are ball seat.
I'm getting my Honda nuts I use for my car powdercoated on Saturday, so that's an option if you do go with ball seats - there aren't many options out there than chrome ones for ball seat nuts (the S2k CR edition has black ball seat nuts, for example).
Thanks for the input guys !
 03-22-2013 | 01:09 AM
#15
Thread Starter
Junior Member
Joined: Dec 2012
Posts: 28
Likes: 0
2002 Mercedes C230 Coupe
Thanks and yes I think there are only 3 other coupes in my city so its a pretty rare car to see around which is what I love about it. As for sound, I plan on changing the speakers to something after market just have to figure out how to get to them since they are positioned behind all the panels. amp/sub I'm not to sure, maybe if I find a good price down the road I'll scoop some up but I don't think so .
03-22-2013 | 11:03 AM
#17
Out Of Control!!
Joined: Nov 2001
Posts: 10,067
Likes: 10
From: Westwood, NJ
2004 Civic Si. FWD for the Win!
One final thing to remember - if you plan on having the OEM spare as your back-up, you'll need to get a set of 5 ball seat nuts for it. You won't be able to use the lugbolts that come with the spare at that point.
It's something that may have not occurred to you until it was too late to rectify.
It's something that may have not occurred to you until it was too late to rectify.
03-22-2013 | 11:52 AM
#18
Thread Starter
Junior Member
Joined: Dec 2012
Posts: 28
Likes: 0
2002 Mercedes C230 Coupe
One final thing to remember - if you plan on having the OEM spare as your back-up, you'll need to get a set of 5 ball seat nuts for it. You won't be able to use the lugbolts that come with the spare at that point.
It's something that may have not occurred to you until it was too late to rectify.
It's something that may have not occurred to you until it was too late to rectify.
03-22-2013 | 12:00 PM
#19
Out Of Control!!
Joined: Nov 2001
Posts: 10,067
Likes: 10
From: Westwood, NJ
2004 Civic Si. FWD for the Win!
Rogue Engineering Wheel Studs
A couple of other people here use them as well, and they've been very good. Helps that their shop is 5 mins from work too.
 03-22-2013 | 06:52 PM
#20
MBWorld Fanatic!
Joined: Feb 2009
Posts: 5,054
Likes: 10
From: fort worth, tx
06 C230 SS 6spd
i personally have the extended ones which stick out quite a bit but thats why i bought the sr48 lugs. I have 75mm track lugs from motorsports hardware they are black zinc coated.
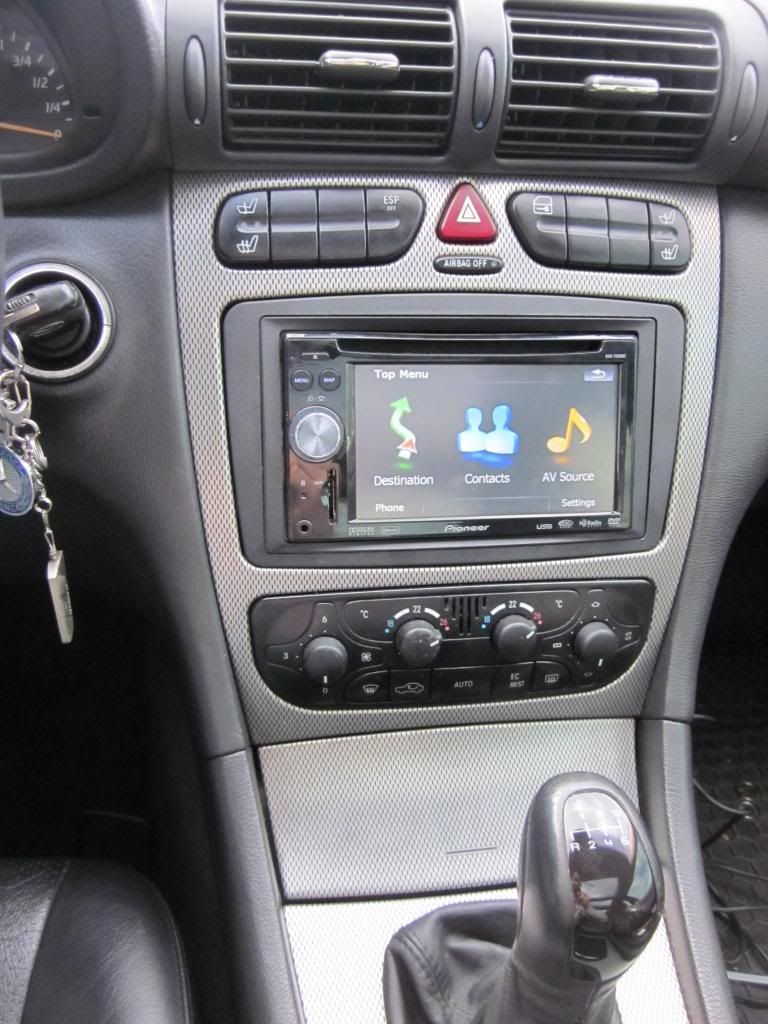
04-01-2013 | 11:43 PM
#21
Thread Starter
Junior Member
Joined: Dec 2012
Posts: 28
Likes: 0
2002 Mercedes C230 Coupe
Update!
So finally the weather is nice enough to start getting some work done on the car.
First thing I am doing the the Pioneer HU install.
There are a few threads already posted about how to remove all the trim surrounding the stock unit and I thank you for all the information and i decided to make my own.
Step 1:Vent Removal
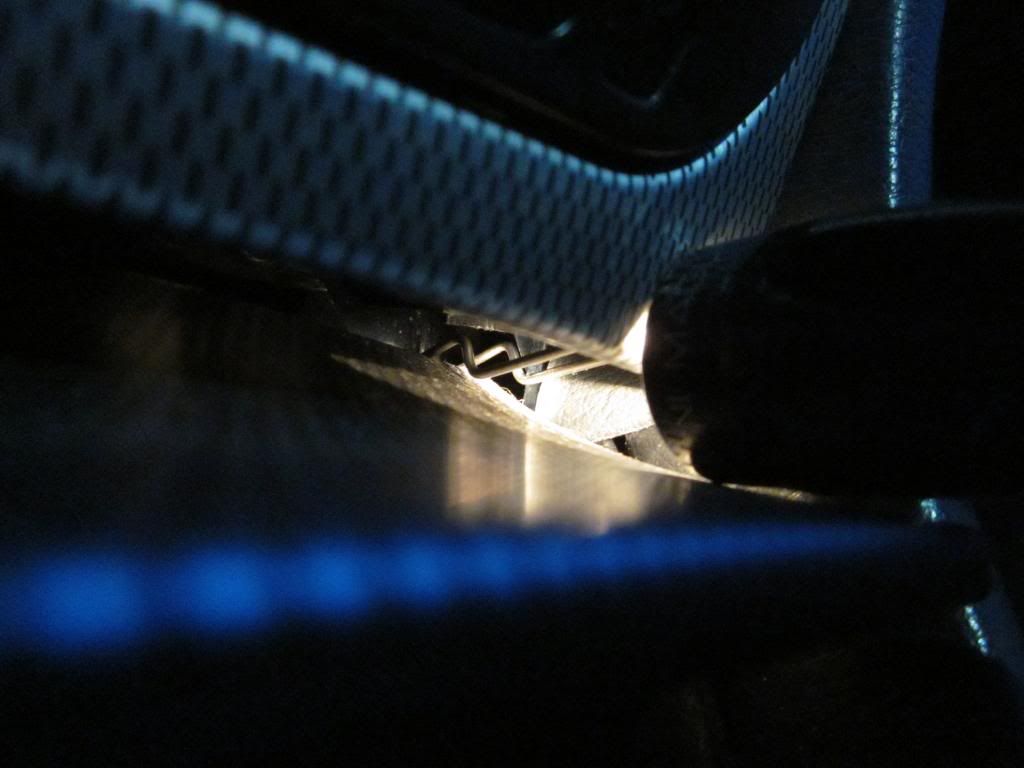
In order to remove the vent you have to press the bottom small tabs on both the left and right side ( red square I marked ) and while doing so move the vent upward and it should crate a small gap to get the the T20 screws holding the vent in place. Once you remove the screw on both side move the vents back down and press the top tab (Yellow square I marked) and push the vent down. When you have the both vents down there will be a little slot that has "teeth" on the upper corners of the vent. Insert a thin flat screwdriver and press downward to unlatch the teeth, at the same time pull the vent towards yourself to get it free. I forgot to take pictures of this process but its pretty straight forward.
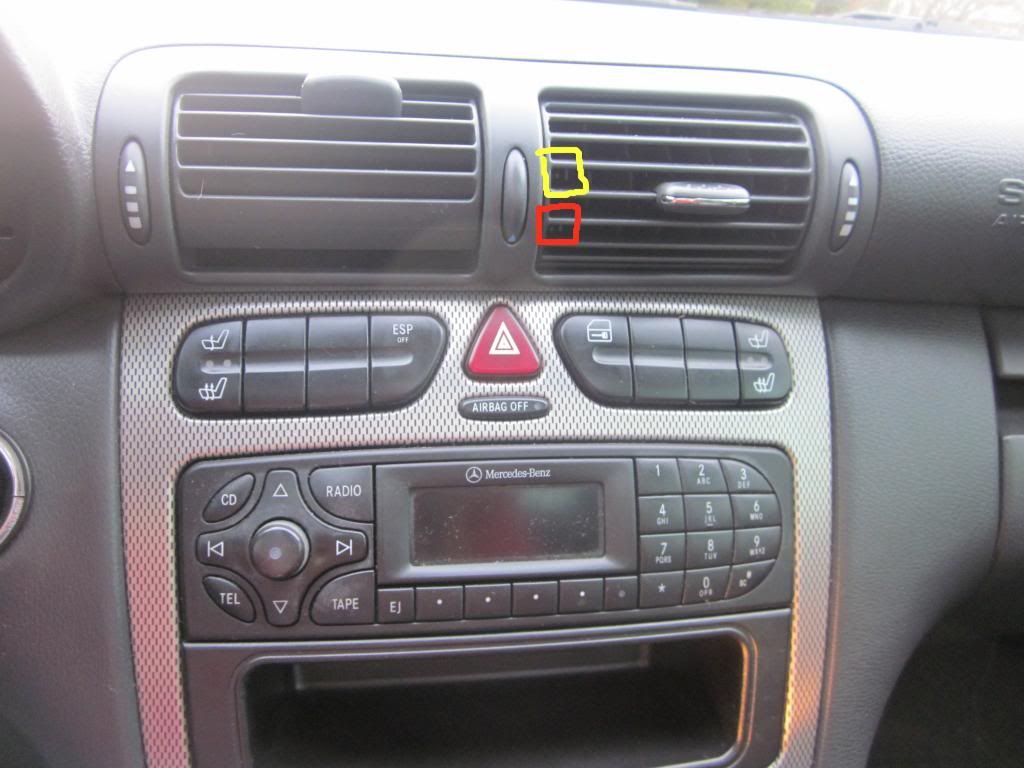
Step 2: Trim Removal
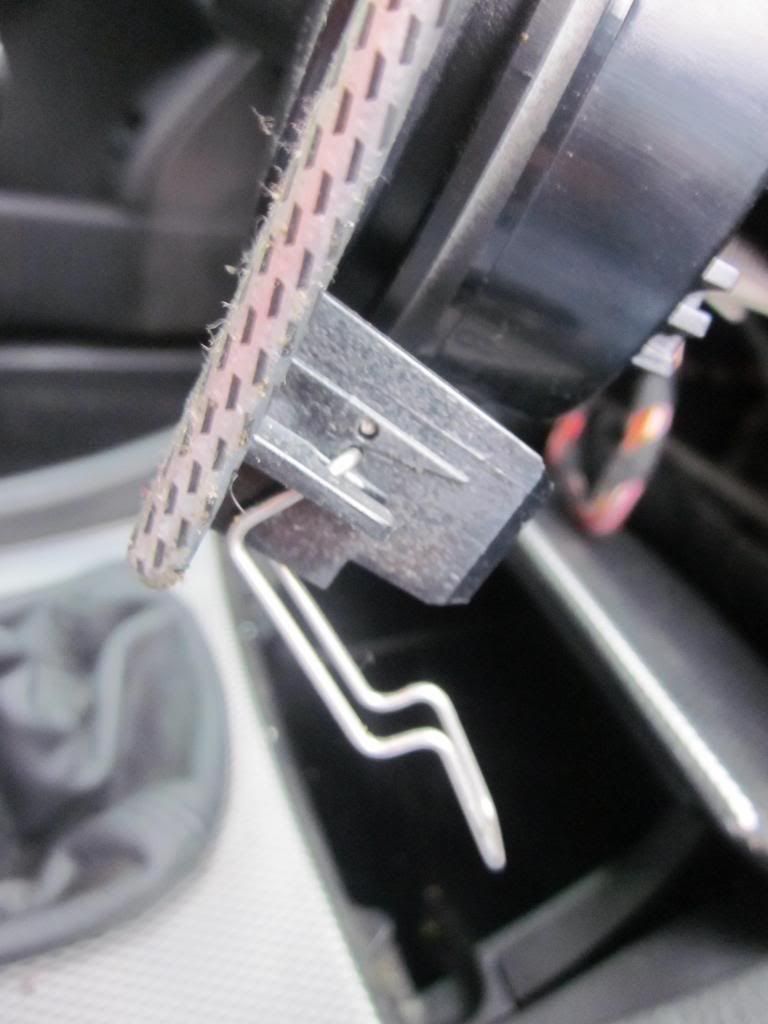
There are two(2) metal tabs that hold the bottom of the trim in place, Just use the small flat blade screwdriver and pull them down once they are free the trim simply comes off with the heater controls and the controls on top. Just unplug the wires attached to both units. There should be two up top and two on bottom.
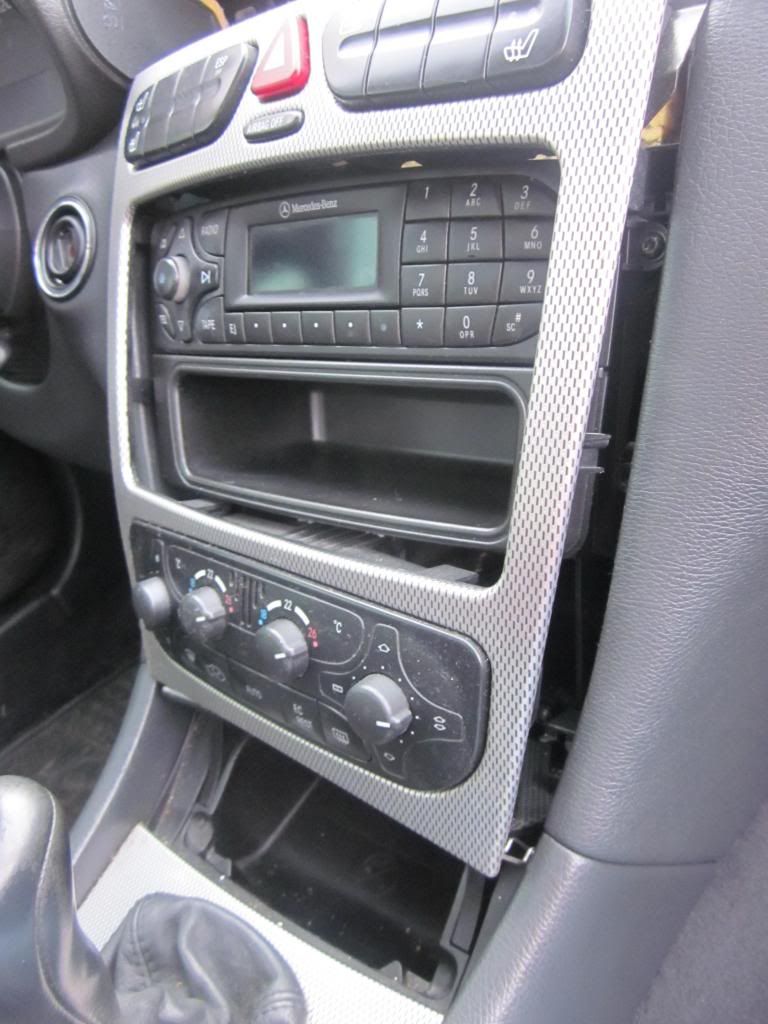
Step 3:Unit Removal
There are two(2) T20 screws holding the stock unit in place, unscrew those and pull the unit out, the bottom din will basically fall out once you remove the unit.
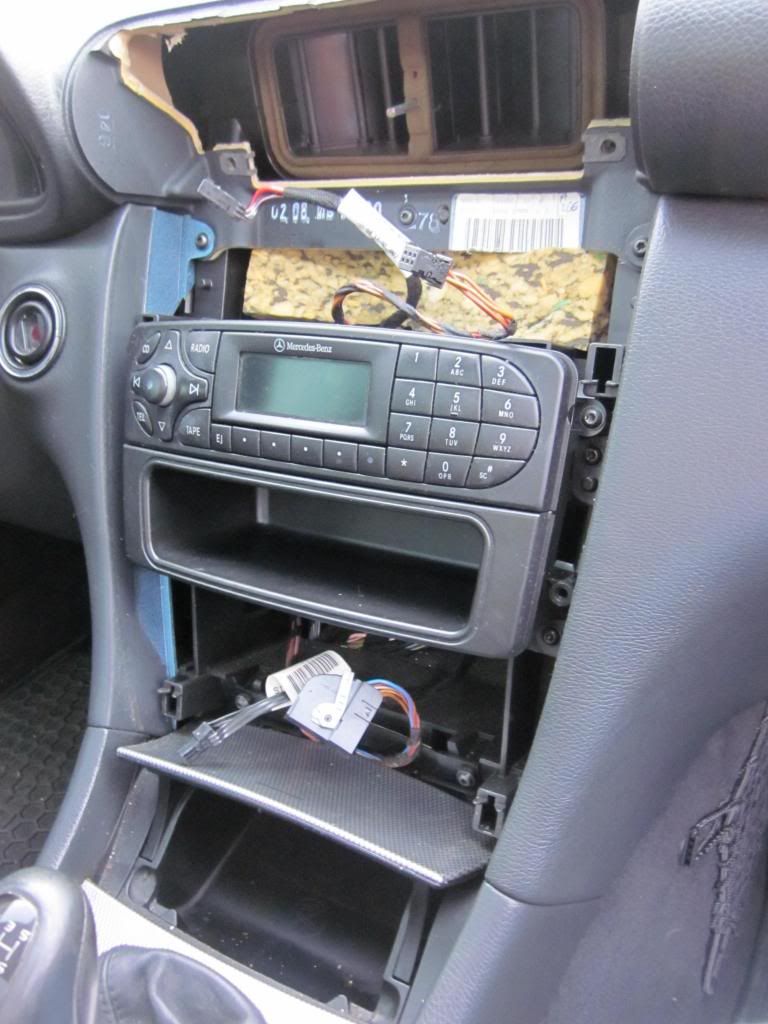
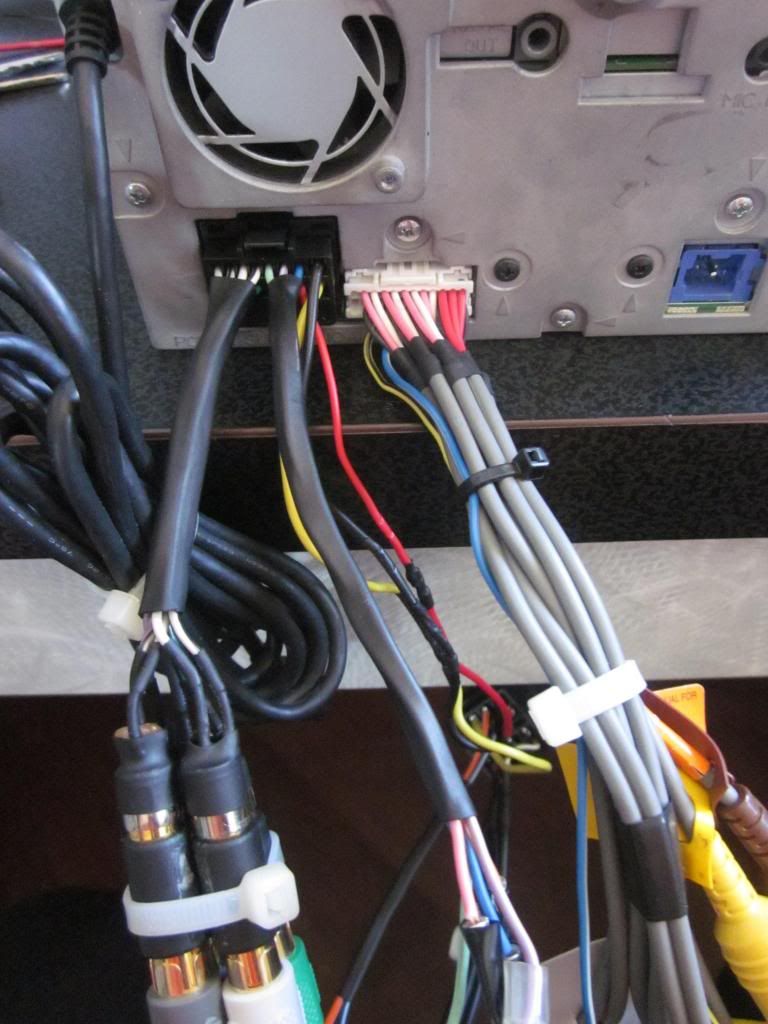
Once you have the unit free there should be 6(six) plugs in the back of it. You will only be needing 3(three) of them; Radio antenna, Speaker plug, and Power plug. The rest and be tucked away to maximize the room behind the new unit.
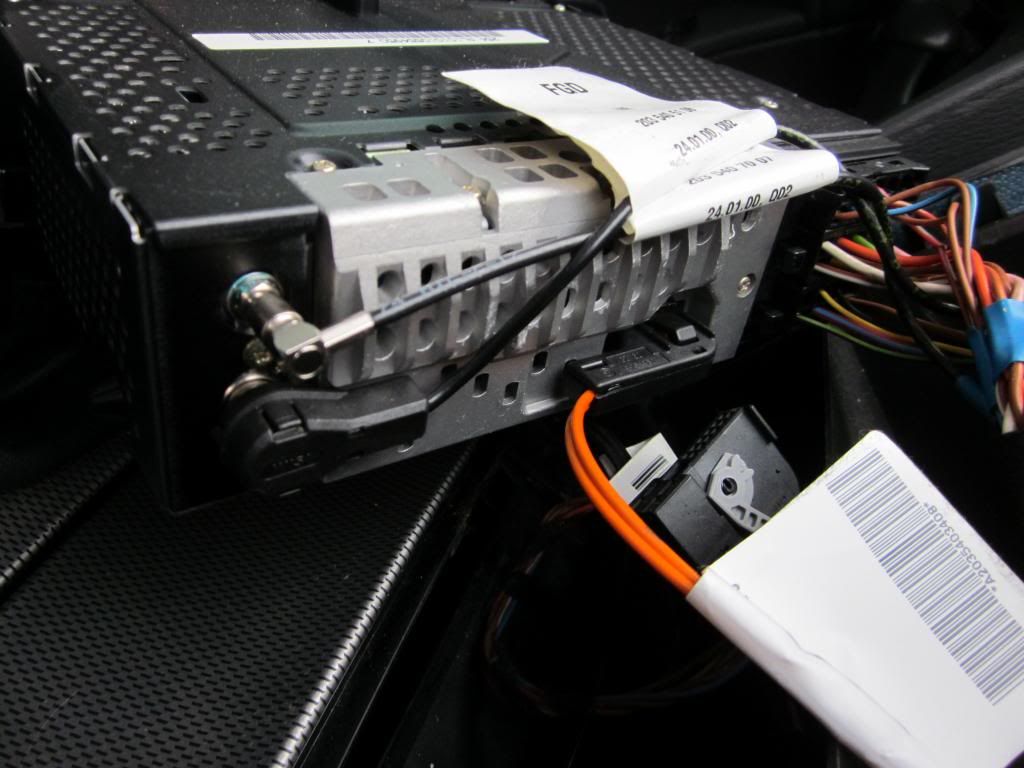
Step 4: New Headunit Install
I only needed the 3 plugs as stated above, Just plug them in and tuck away as much of the harness as possible.
The bottom most plug is the speaker plug. the one in the middle is for power and the top I am unsure of but I think its for the telephone and steering wheel controls.
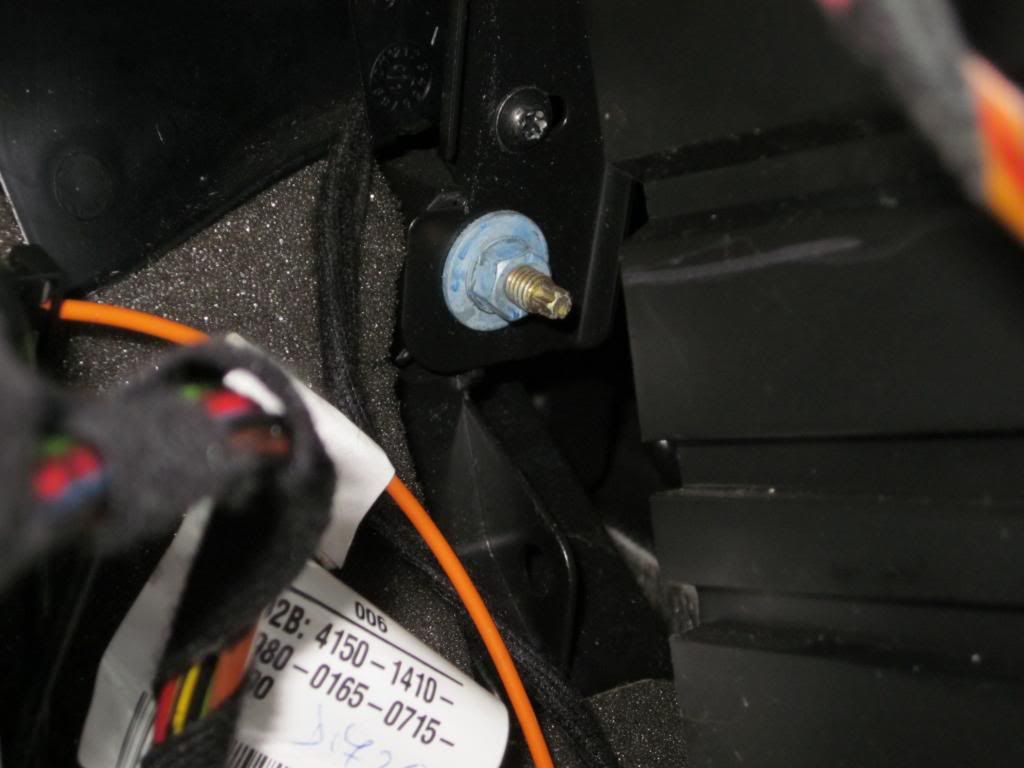
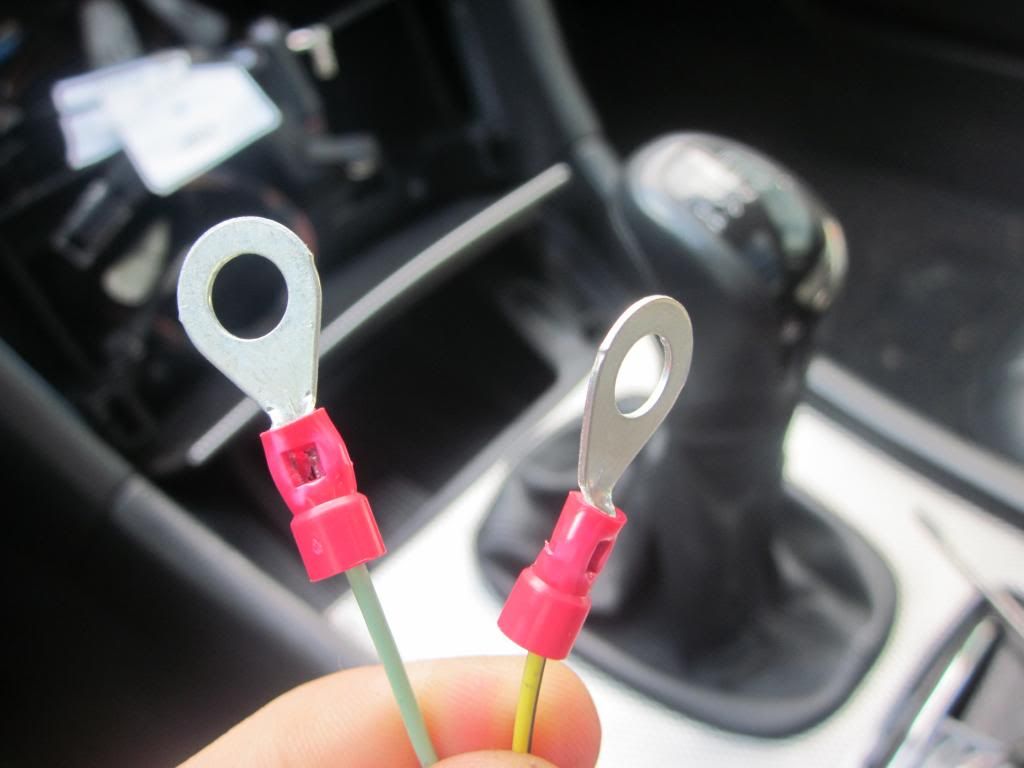
There should be a ground screw in the back, I used this for my ground and the mute wire from the Pioneer. The mute wire(yellow/black stripe) is used to bypass the unit into making it think it is always in park so you can use the GPS functions while the car is moving and watch videos etc. In order to bypass the unit you have to change the location of this wire on the original plug just youtube it and there are plenty of videos how to to it.
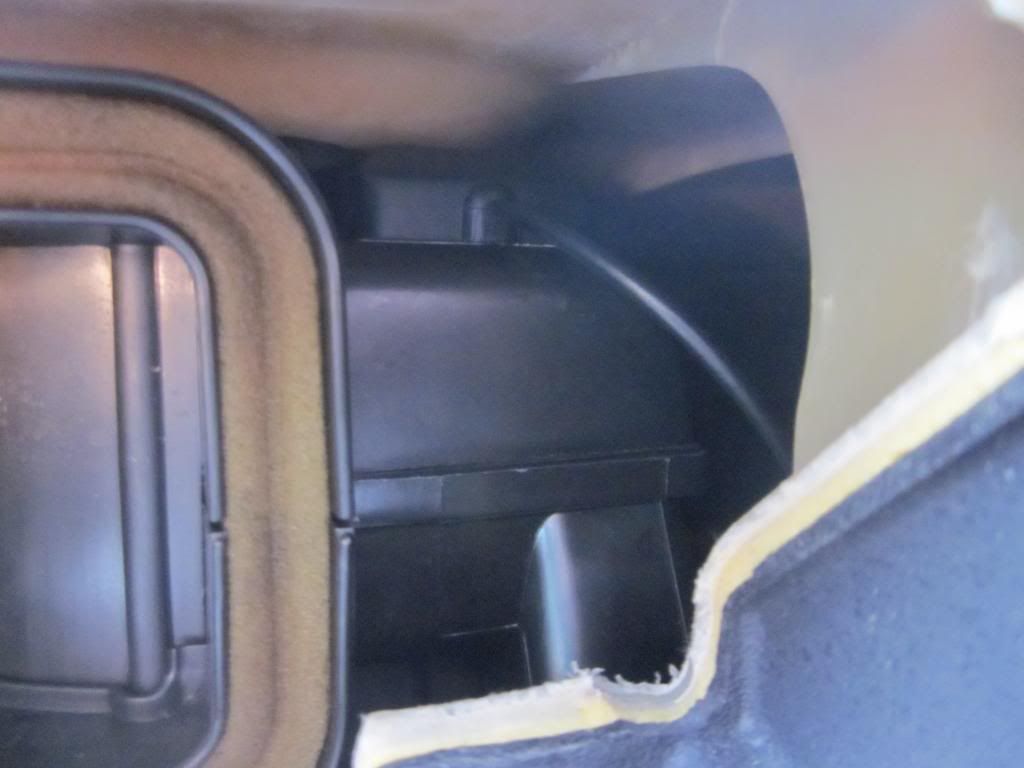
I placed the GPS antenna above the top vent using some double sided tape in a place that would be concealed.
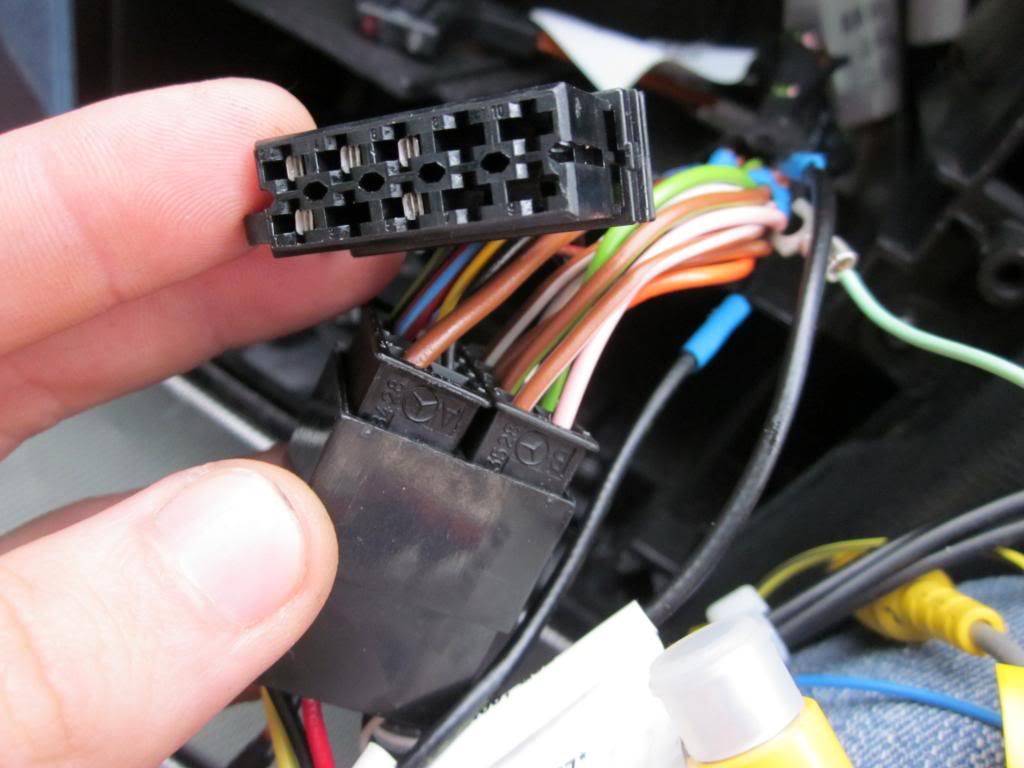
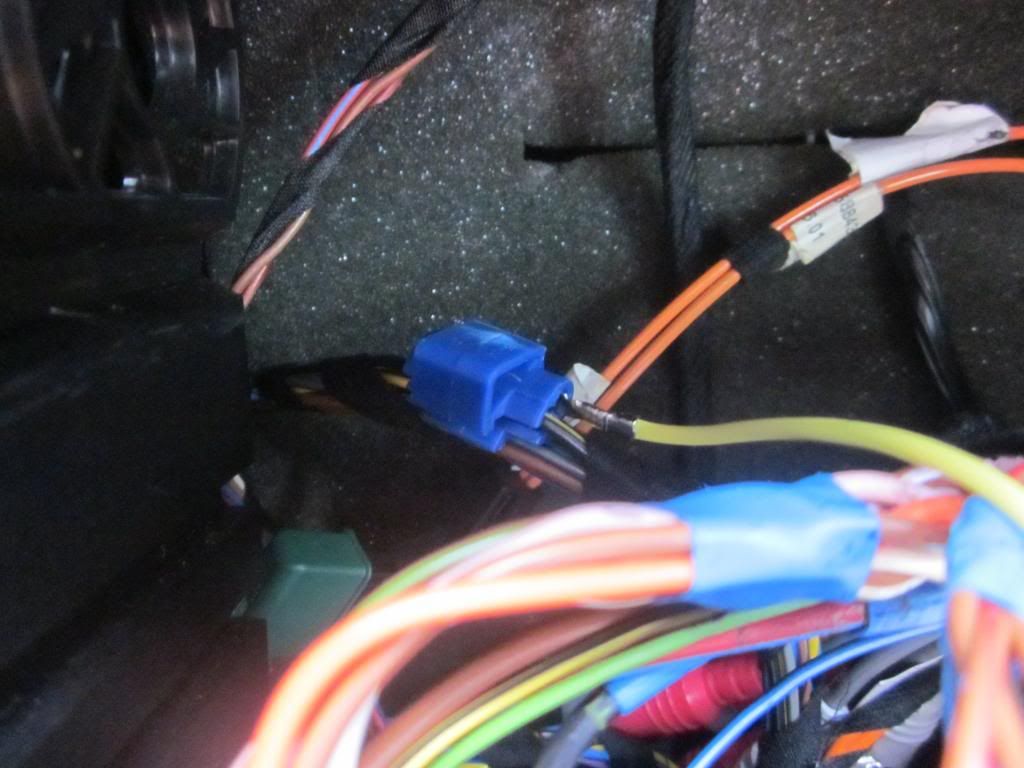
Now initially I thought I had everything done right but AVIC unit wouldn't power up. So I had to tap into the accessory wire(cigarette wire) in order to get it working.
Here are the leads from the cigarette adapter, I used my Ohm meter to check whats what. The solid black with a yellow stripe is the accessory wire. I followed it back up to a position that was most suitable for me and used a wire tap to get into it.

And Voila!
The AVIC works.
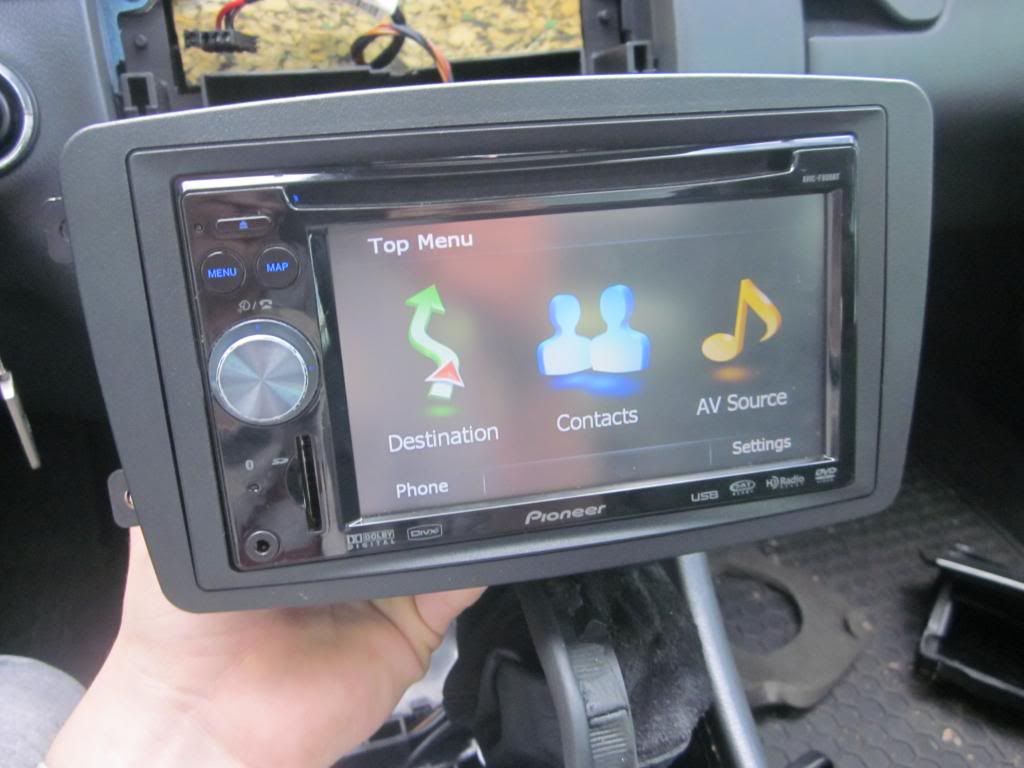
Now just reverse the steps to getting it back to normal and enjoy your new aftermarket headunit!
I am not responsible for any damage you do to your car or the headunit, this is just a guideline on how I did my installation.
Thanks !
So finally the weather is nice enough to start getting some work done on the car.
First thing I am doing the the Pioneer HU install.
There are a few threads already posted about how to remove all the trim surrounding the stock unit and I thank you for all the information and i decided to make my own.
Step 1:Vent Removal
In order to remove the vent you have to press the bottom small tabs on both the left and right side ( red square I marked ) and while doing so move the vent upward and it should crate a small gap to get the the T20 screws holding the vent in place. Once you remove the screw on both side move the vents back down and press the top tab (Yellow square I marked) and push the vent down. When you have the both vents down there will be a little slot that has "teeth" on the upper corners of the vent. Insert a thin flat screwdriver and press downward to unlatch the teeth, at the same time pull the vent towards yourself to get it free. I forgot to take pictures of this process but its pretty straight forward.
Step 2: Trim Removal
There are two(2) metal tabs that hold the bottom of the trim in place, Just use the small flat blade screwdriver and pull them down once they are free the trim simply comes off with the heater controls and the controls on top. Just unplug the wires attached to both units. There should be two up top and two on bottom.
Step 3:Unit Removal
There are two(2) T20 screws holding the stock unit in place, unscrew those and pull the unit out, the bottom din will basically fall out once you remove the unit.
Once you have the unit free there should be 6(six) plugs in the back of it. You will only be needing 3(three) of them; Radio antenna, Speaker plug, and Power plug. The rest and be tucked away to maximize the room behind the new unit.
Step 4: New Headunit Install
I only needed the 3 plugs as stated above, Just plug them in and tuck away as much of the harness as possible.
The bottom most plug is the speaker plug. the one in the middle is for power and the top I am unsure of but I think its for the telephone and steering wheel controls.
There should be a ground screw in the back, I used this for my ground and the mute wire from the Pioneer. The mute wire(yellow/black stripe) is used to bypass the unit into making it think it is always in park so you can use the GPS functions while the car is moving and watch videos etc. In order to bypass the unit you have to change the location of this wire on the original plug just youtube it and there are plenty of videos how to to it.
I placed the GPS antenna above the top vent using some double sided tape in a place that would be concealed.
Now initially I thought I had everything done right but AVIC unit wouldn't power up. So I had to tap into the accessory wire(cigarette wire) in order to get it working.
Here are the leads from the cigarette adapter, I used my Ohm meter to check whats what. The solid black with a yellow stripe is the accessory wire. I followed it back up to a position that was most suitable for me and used a wire tap to get into it.
And Voila!
The AVIC works.
Now just reverse the steps to getting it back to normal and enjoy your new aftermarket headunit!
I am not responsible for any damage you do to your car or the headunit, this is just a guideline on how I did my installation.
Thanks !
04-02-2013 | 01:11 PM
#24
Member
Joined: Oct 2009
Posts: 131
Likes: 0
From: Toronto, ON
2002 C230 Coupe & 2010 C300 Sport
Did your car originally come with the premium bose audio system? If so, how does it sound with with your current headunit? The reason I ask is because I'd like to change my headunit to one similar to yours and I have the bose system and I've read that there may be compatibility issues negatively affecting sound quality.
04-02-2013 | 04:39 PM
#25
Thread Starter
Junior Member
Joined: Dec 2012
Posts: 28
Likes: 0
2002 Mercedes C230 Coupe
Yes I do, just not sure as to what brand. Any recommendations?
Did your car originally come with the premium bose audio system? If so, how does it sound with with your current headunit? The reason I ask is because I'd like to change my headunit to one similar to yours and I have the bose system and I've read that there may be compatibility issues negatively affecting sound quality.
No. The Mercedes did not come with the Bose package that I know of. I do not have the amp in the back or the speaker grille badges, although I did notice some extra wires tucked behind the stock radio, so I'm guessing it does have the wires for it. As for the way it sounds, I haven't really given it much listening to in the benz since I just installed yesterday but I can tell you that in my other car that the unit came from it definitely made a difference with the stock speakers and as to how much I can tune the EQ + all the other features the Pioneer has.


