When you click on links to various merchants on this site and make a purchase, this can result in this site earning a commission. Affiliate programs and affiliations include, but are not limited to, the eBay Partner Network.
PM BerBer63. He asked for that P/N on the previous page that nobody answered lol.
I sent him one as soon as I snapped it. Waiting to hear back.
From what I've found, the plastic fitting isn't sold separately from the IM. I did my best to repair it, but not sure how long that'll hold up.
Understanding now what this little plastic part does and how it clips in, I would recommend that anyone doing this project NOT try to pull out the actual fitting. It would be far safer to remove the other end of the vacuum line (which is literally 4 inches away).
Thanks a lot for the excellent guide! I have a 3699-P0191 code (No CEL,No rough idle) I started hearing whistling/whining sound lately and the oil dipstick popped out a few times now. The car has 75k miles. There's plenty of space on the ML63 between the engine and firewall, makes me think of replacing the valve without removing the IM.
I noticed there wasn't really a DIY for the intake manifold gasket replacement. I needed to do mine since the car was whining when warm. Here is my attempt at a DIY for the intake mani gasket and PCV valve.
First, remove the airboxes and intake tubes. Then remove the Y-pipe. There is a tab on either side of the y-pipe that just basically lifts to release. I also removed the vacuum hose attached to it. You can see the tabs below.
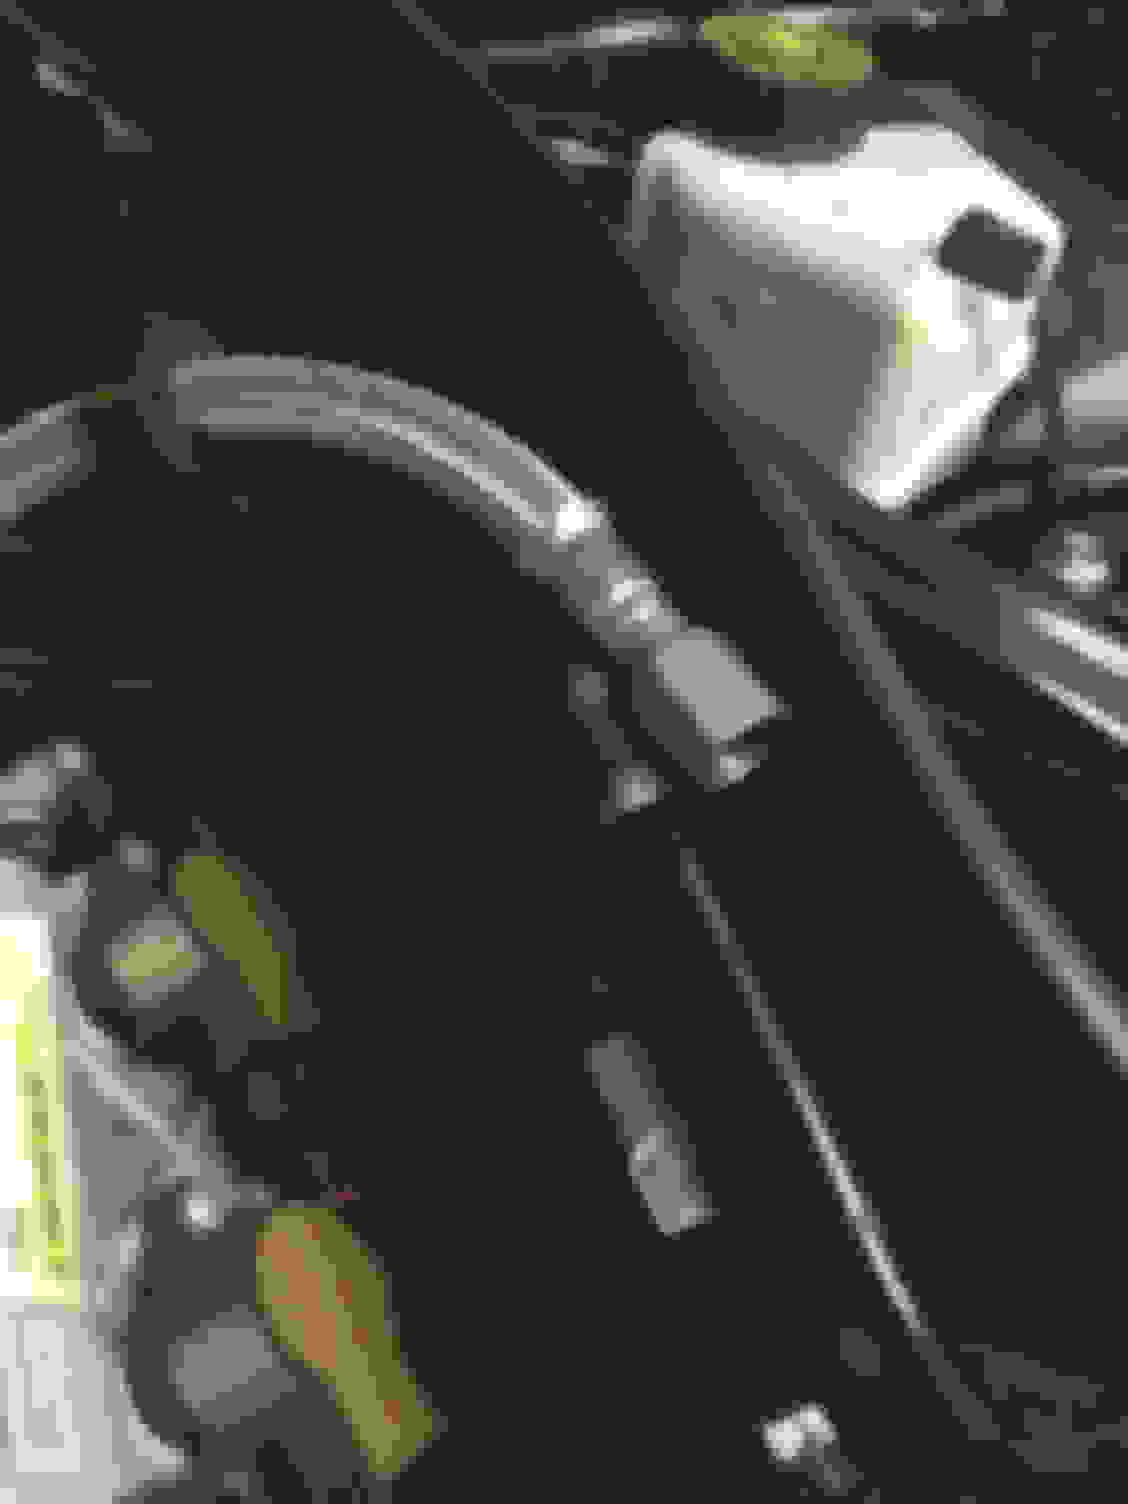
Next, undo the vacuum hose at the front of the intake mani. It should just pull out.
Next, unhook all 4 plugs at the front of the intake manifold.
Remove the top connector on the PCV valve at the back of the intake mani on the passenger side. I think the one screw is a T30.
On the driver's side, undo the (I think this is what this is?) EGR tube from the back of the mani. There should just be 2 tabs you pinch and the tube slides right out.
Then cut the 6 zipties that are holding the wiring harness for the fuel injectors and disconnect the wiring harness from the injectors. I found that a small flathead screwdriver or a pick helped to undo the plugs in the tight space. You can see where the zipties are that I replaced. Also, disconnect the plug on the fuel rail, driver's side of the intake manifold.
Disconnect the intake air temp sensor at the back of the manifold. I forgot to take a pic, but it's the only sensor at the back of the intake manifold, driver's side that is on the oval intake part.
Next, undo the 10 T45 intake manifold bolts and throw them away. They are torque to yield. I found 2 of mine to be finger tight, likely the cause of my leaky intake manifold.
Then undo the line going to the fuel rail on the driver's side bulkhead. I used a 9/16 and an 11/16 wrench. Have a rag ready as a small amount of fuel will come out.
From there, the intake mani should lift off. I couldn't figure out how to get one vacuum line off the bottom, so I left it. There was plenty of room to take care of the PCV valve and the gaskets still.
With the intake mani out of the way, replace the PCV valve at the back of the motor. It just clips on. It took quite a bit of wiggling and force to get it off. I have no idea how people replace it without taking the mani off. Take the old one off. Pop the new one on.
Wipe any crap out of the heads with a rag and some brake clean. Mine were pretty clean after 70k miles.
Wipe the mating surfaces down and make sure everything is nice and clean. Pop the new gaskets on and set the manifold back down. Torque via the torque sequence below. Do the reverse of everything making sure to reconnect all the plugs and vacuum lines. Pop the airboxes back on and give it a start.
I hope this helps someone. It wasn't too hard. The intake mani is surprisingly light too. I'm no master mechanic and I took my time and did it all in about 2.5 hrs.
Finally got around to doing this. About a week after I bought the car it threw some lean codes. As I wasn't near my tools I just tightened down the intake bolts I could get to, and most of them were barely finger tight. Fast forward 16 months later and I had the time to do the R&R. Also was noticing some slight pinging when tipping in at part throttle. Also was getting some whistling when the car was warm from the engine compartment.
Some comments on the original post.
1) The one hose that the OP thought was the egr valve hose I believe is actually the vacuum connection for the brake booster. Doesn't really make any difference on the procedure.
2) the hose at the bottom of the intake the OP couldn't get off is attached to the bottom rear of the intake manifold with one time use oetiker clamps. They are a bit of a pain to remove and besides needing new clamps need a crimper to replace. I elected to cut the stock rigid hose as I needed to get the intake completely out of the car. I used 9/32" vacuum hose to splice the original hose together when intake was replaced.
3) In general I was pretty stunned at how brittle most of the electrical connectors housings or clips were. The IAT sensor clips just fell apart. I didn't plan on that and didn't have a spare laying around but I think the oring seal and the bit of silicone sealant I put on the flange should hold the IAT in place. So anyone reading this be careful when pulling the connectors apart.
4) The PCV valve was also brittle - it literally snapped in two whenI tried to remove it.
Also as the OP stated I don't see how you could possibly remove and replace it without taking off the intake. The water pipe at the back of the engine prevented access to the bottom part of the PCV. I had to bend the water pipe mounts to get enough room to remove and replace the PCV.
5) There was significant gunk built up in the intake runners and the intake ports on the head and the reason I decided to cut the hose I mentioned in #2 as I needed to get the intake out of the engine compartment to clean it.
6) Took me about 40 minutes to clean out the intake runners and the intake ports with carb/throttle body cleaner. Picture of some of the used paper towels.
Post cleaning
7) the injectors were also pretty badly gunked up. Cylinder 1 injector was practically completely clogged.
8) New bosch injectors identical to the AMG branded one except for that exclusive AMG logo. But much cheaper!
9) Used this Lisle Torque angle gauge to measure the 90 then 10 degree settings. Worked like a charm. Highly recommended.
10) Not a fan of the zip ties to tie down the fuel injector harness but they work.
Once I was done buttoning it back up (seemed like the hardest thing for some reason was getting the driver's side airbox back in place correctly) the car started right up. Idled smoother than before and the whistle was gone. Also some slight pinging that was present prior under partial load when tipping in on the throttle was gone. Pinging was probably due to the crap spray patterns on the injectors. Car also had noticeably more power. I was really stunned at the crap on the injectors. I'm guessing the POs used crap gas. It'll be interesting to see how the fuel trims settle out.
Many thanks to the OP as it helped a lot having his write up. Probably saved me a few hours. The only thing I would add in summary if someone is planning on doing this is to have a spare IAT on hand and have a set of injectors.
I've already taken the manifold out twice. For me the fitting at the back with the plastic pipe that goes through the red gasket would not come off, so I disconnected it by the firewall, the opposite end of that pipe.
But my question is:
If you're comfortable doing this work (removing the intake manifold) and are already doing the bolt-by-bolt steps, how far are you from removing the heads, in the end of the day?
I mean Tassos said in one of the videos that the heads come off with the exhaust manifolds attached, so you'd have to disconnect the manifolds from the primary converters, you won't even have to buy exhaust manifold gaskets and nuts. You won't have to drop the exhaust.
There's an additional special tool, to remove something else from the timing chain, but I don't think the chain gets taken apart, I think it stays in one piece. I think basically there's only one more step and the heads come off..
I dunno man, I think you'd still be miles off man...generally speaking, wouldn't front engine cover (and subsequent pulleys, accessories etc) need to come off first?
I've already taken the manifold out twice. For me the fitting at the back with the plastic pipe that goes through the red gasket would not come off, so I disconnected it by the firewall, the opposite end of that pipe.
But my question is:
If you're comfortable doing this work (removing the intake manifold) and are already doing the bolt-by-bolt steps, how far are you from removing the heads, in the end of the day?
I mean Tassos said in one of the videos that the heads come off with the exhaust manifolds attached, so you'd have to disconnect the manifolds from the primary converters, you won't even have to buy exhaust manifold gaskets and nuts. You won't have to drop the exhaust.
There's an additional special tool, to remove something else from the timing chain, but I don't think the chain gets taken apart, I think it stays in one piece. I think basically there's only one more step and the heads come off..
I would say there's still a decent amount left to do? I saw the pics from my headbolt job. you have the valve covers, locking the cams, removing the cam gears or something, the cams themselves have to come out, and the exhaust manifolds have to be disconnected from the downpipes (or in my case, the headers had to be uninstalled)
the hose at the bottom of the intake the OP couldn't get off is attached to the bottom rear of the intake manifold with one time use oetiker clamps. They are a bit of a pain to remove and besides needing new clamps need a crimper to replace. I elected to cut the stock rigid hose as I needed to get the intake completely out of the car. I used 9/32" vacuum hose to splice the original hose together when intake was replaced.
If one were to cut off the oetiker clamp, couldn't a "normal" screw-type hose clamp be used in its place upon reassembly? What's magical about oetiker clamps?
If one were to cut off the oetiker clamp, couldn't a "normal" screw-type hose clamp be used in its place upon reassembly? What's magical about oetiker clamps?
Generally yes. My concern was screwing up the rubber fitting as the clamps can be some what of a ***** to remove. I would have needed someone to hold the manifold in place to properly get to the clamp and not jack up the hose. Wasn't going to ask my wife to throw out her back holding the manifold so went with plan B. But I will say seamless oetiker clamps give a more even distribution of clamping force than a work gear clamp does. Well at least if you believe oetiker marking material. Whether or not it would make a rat's *** of difference in this application who knows.
Generally yes. My concern was screwing up the rubber fitting as the clamps can be some what of a ***** to remove. I would have needed someone to hold the manifold in place to properly get to the clamp and not jack up the hose. Wasn't going to ask my wife to throw out her back holding the manifold so went with plan B. But I will say seamless oetiker clamps give a more even distribution of clamping force than a work gear clamp does. Well at least if you believe oetiker marking material. Whether or not it would make a rat's *** of difference in this application who knows.
geez - love the way the forum automatically stripped out the word b1tch and replaced with *****. Guess there are some v1g1n ears out there.
Almost 2 years on this post is still helping out big time! @chrisridebike8 thanks a lot for the detailed instructions you put together for this, I just finished up doing some work on my ML63 (same engine) everything went very well following instructions to the letter. The semi-disaster was one of the bolts snapped as I have a very inaccurate Torque wrench. I will redo it if I get any leaks, I've got enough Curil T in there to keep things kosher for a bit....I guess.
I just wanted to add my 2 cents as I didn't go in there because of a PCV issue (so I thought) but because I was getting multiple throttle body errors, actuator and potentiometer related. This made the car go into limp mode at will and it was unusable. So I decided to change the PCV while going in, and bought a metal intake manifold centre plate just in case I got in there and it was leaking, I had to because I'm thousands of miles away and I didn't want my car waiting another 2 weeks. Well it turns out the ML63 had a metal one in there already.
Ok so after I opened up the intake manifold to access the throttle bodies and clean them up, I saw the issue. The intake manifold was filled with oil, and there was oil all over the bottom of the throttle bodies, the oil came in through the hole the PCV connects to, good thing I decided to change the PCV!
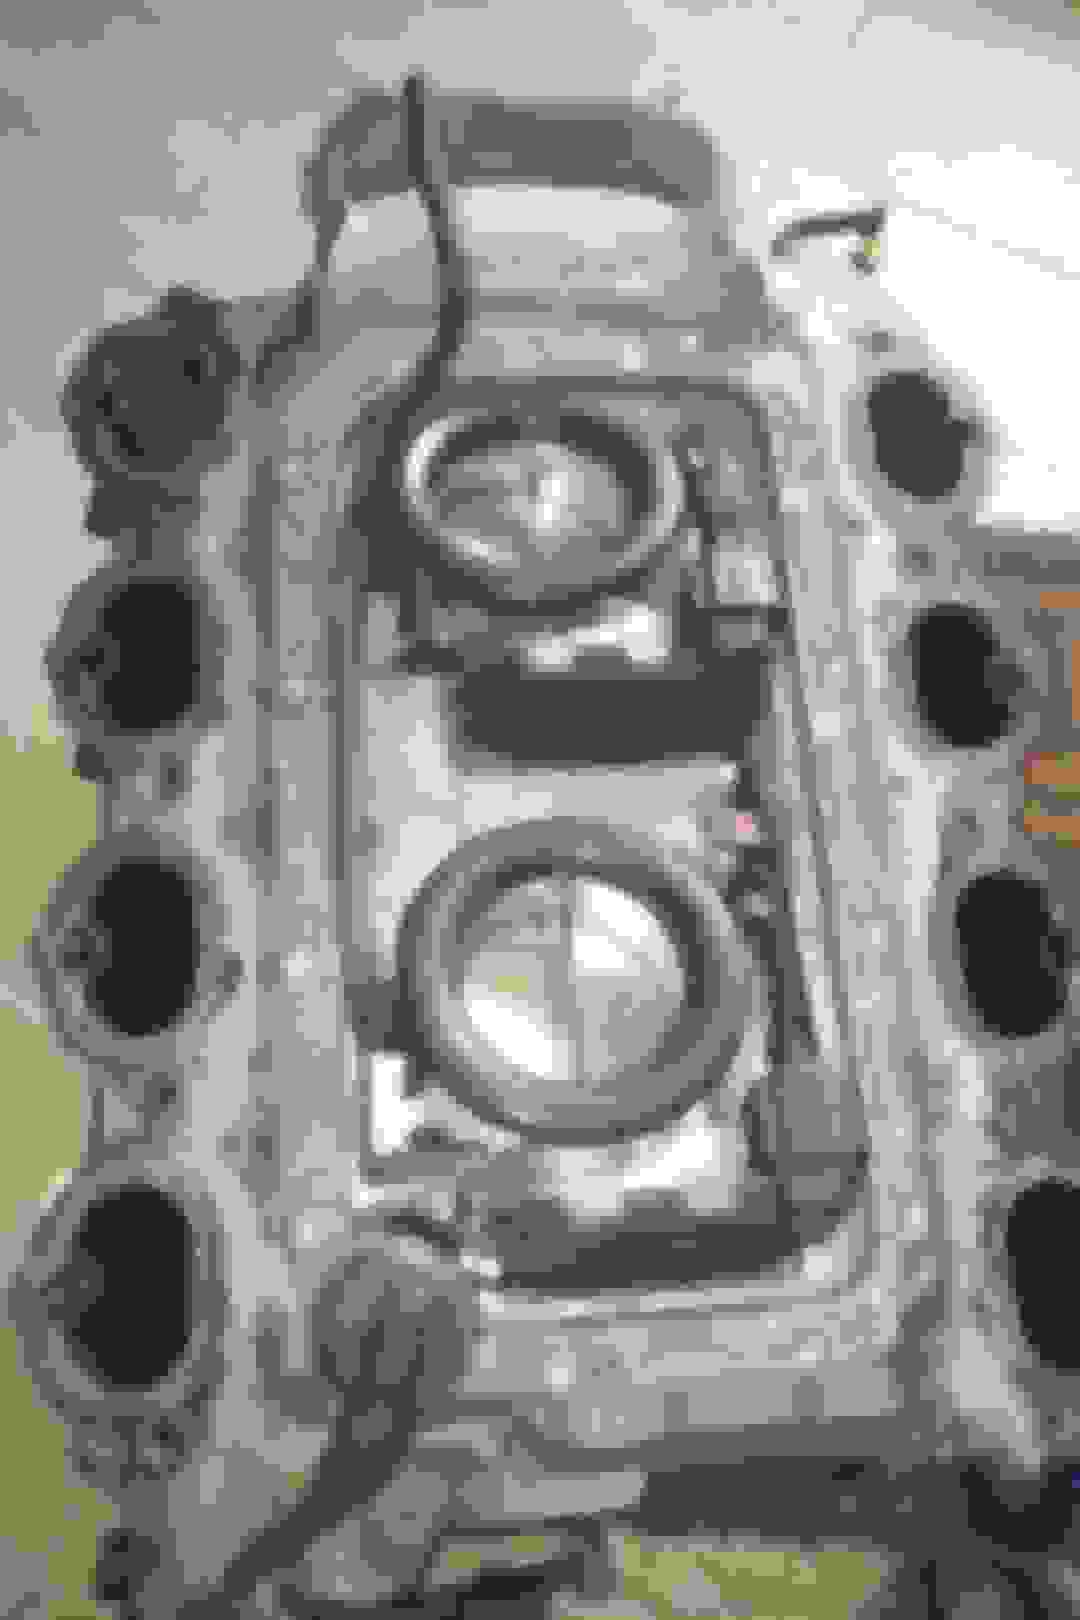
Back cover of intake manifold removed to expose twin throttle body
Back of throttle body plate behind where the TB's attach to
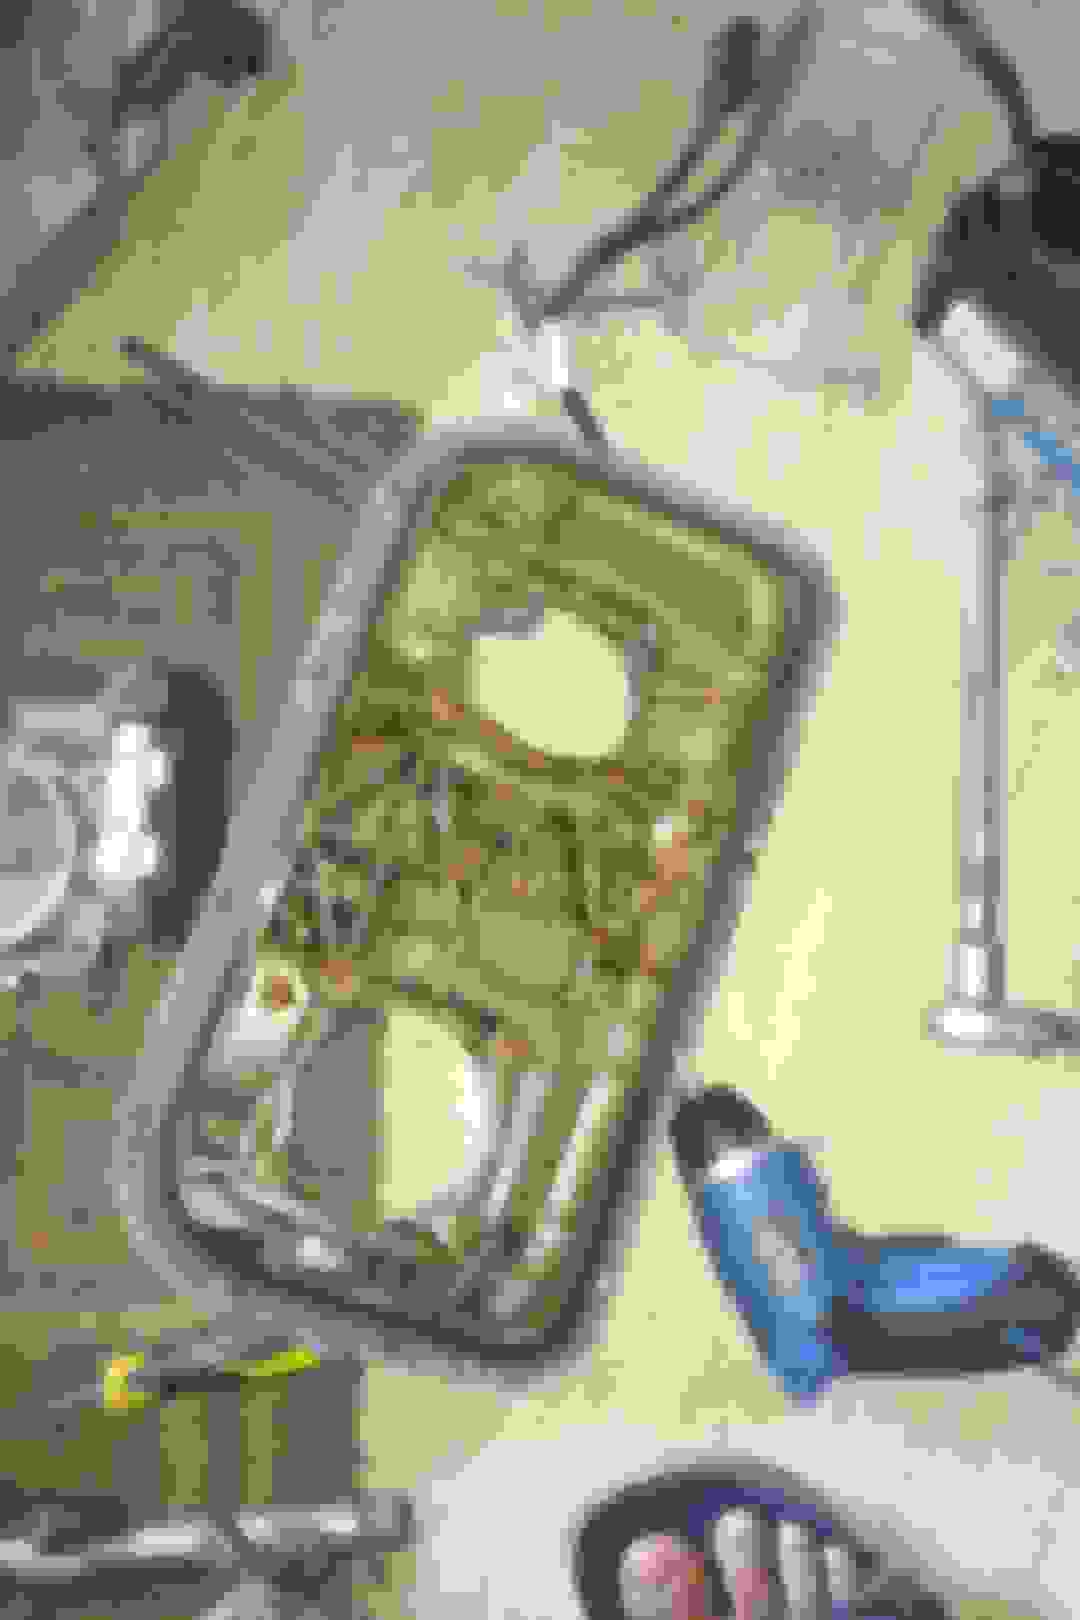
Inside the chamber of the intake manifold, the PCV attaches to the top right, the oil came in through there
Well right off the bat the car started well, idled well and actuator/potentiometer errors gone, drove it around bit and so far so good! This is a far cry from 2 weeks ago where the car would just go into limp mode as soon as I start the engine, I guess the oil in the intakes stopped the actuators from performing optimally.
I did a test of the throttle bodies before putting them back together, disconnect the fuel pump and connect the battery turned the ignition on and pressed the throttle from inside and the actuators moved quite very effectively.
I thought I'd just share this as I searched for weeks and could not see anyone that had the same errors I was having, I came here to learn how to remove the intake manifold and this seems to have solved my problems all together.
Thanks again chrisridebike8
Last edited by NaijaBerry; 04-28-2018 at 06:17 PM.
I see. So what�s the 10 90 10 thing? Sequence 1 to Torque all bolts to 10nm. Then sequence 2 to tighten again 90deg, then sequence 3 tighten again another 10deg?
Last edited by Zerocarpileup; 08-11-2018 at 04:37 AM.
 02-23-2017, 06:54 PM