DIY - replace rear air springs
#1
Member
Thread Starter
DIY - replace rear air springs
I hope the following instructions are helpful to anyone replacing their own springs, I've benefitted from the work of others and felt it was time to give a little back. Here goes...
Car in question is a 2010 E550, 90k miles. Problems started 3 months ago when approx. once a week the car would be listing badly to the right side at the rear after standing over night. I replaced that spring and now the other has started to sag so I figured it's time for that one. I could have waited but the Arnott parts have a lifetime warranty and didn't want to overwork the compressor.
If you can tackle a brake job you can do this, don't be put off by instructions that call for Mercedes diagnostics systems, you don't need them. Also worth noting is that the Arnott instructions are incomplete.
Replacing the first unit took around 3 hours and the second was closer to 2.
Here is the sequence I recommend. Some of the photo's relating to removing the brake caliper and the electrical connection to the shock are out of sequence but you'll figure it out. Let me know if things aren't clear. Safety wise you'll be jacking the car up and removing the brake caliper if you're not comfortable with those then you should leave the job to a professional.
Sequence…
(i) Loosen, do not remove, wheel bolts.
(ii) Jack up vehicle, lower on to stands. I prefer to lift on the differential and use jack stands on the jack points for the rear.
(iii) Disconnect battery, you don't want the airmatic to try to do things while you have it apart.
(iv) Remove wheel.
(v) Remove plastic cover below lower arm, this allows access to the bottom of the spring which you'll need to thump to loosen.
(vi) Remove cable from base of shock (provides clearance when removing and installing spring).
(vii) Unbolt rear caliper (also done to allow clearance when removing and installing spring).
(viii) Pull down top of dust cover to expose hard plastic spring outer. Drill hole, small say 1/8" dia, in original air spring to release air. It's about like removing a valve from a small tyre.
(ix) You can now unseat the top of the spring from the mounting point and access the nut on the air line to spring, remove fitting, inspect line to make sure there are no gashes, etc. Cover line to protect from dirt.
(x) Unseat base of air spring from lower arm, I had to use a hammer.
(xi) Remove rear spring.
(xii) Install new spring, the base which fits in the lower arm is keyed, so rotate to align properly. You also need to align to allow air line to connect. Getting the spring into place is a little tricky, you need to slide in, compress and then rotate, don't get into a rush. Don't worry if you crease some of the outer dust protector, it'll return to shape when installed.
(xiii) Insert air line, it just pushes in, my Arnott springs had a white plastic protective piece installed in the fitting that needs to be removed, however DO NOT REMOVE the brass fitting. Simply press the airline fully into the new fitting.
(xiv) Locate new spring at both upper and lower ends
(xv) Reattach rear caliper (torque bolts to 28 ft lbs)
(xvi) Reattach cable to shock.
(xvii) Connect battery and check spring inflates properly.
(xviii) Reattach cover below lower arm
(xix) Reattach rear wheel and torque wheel nuts (torque wheel nuts to 96 ft lbs)
(xx) Pump brakes to reseat pads.
Tools needed…
(i) Floor jack, jack stands compatible with MB jack points.
(ii) 17mm socket for wheel nuts
(iii) 10 mm spanner for battery terminal and air line fitting
(iv) 7mm Allen socket wrench for brake caliper bolts
(v) Large needle nose pliers to remove cover below lower arm.
(vi) Small screw driver to release cable connector from shock, also use to remove brass ring – part of original air line fitting.
(vii) Torque wrenches for brake caliper and wheel bolts.
Peter
Last edited by T100T; 05-22-2016 at 11:02 AM.
The following 12 users liked this post by T100T:
biker349 (11-23-2022),
Doctor Memory (05-21-2019),
Fliplegend (01-28-2022),
Gabriel Morris (08-25-2020),
HK-UK 500 (02-20-2019),
and 7 others liked this post.

Popular Reply
05-21-2016, 11:30 PM
Member
Thread Starter
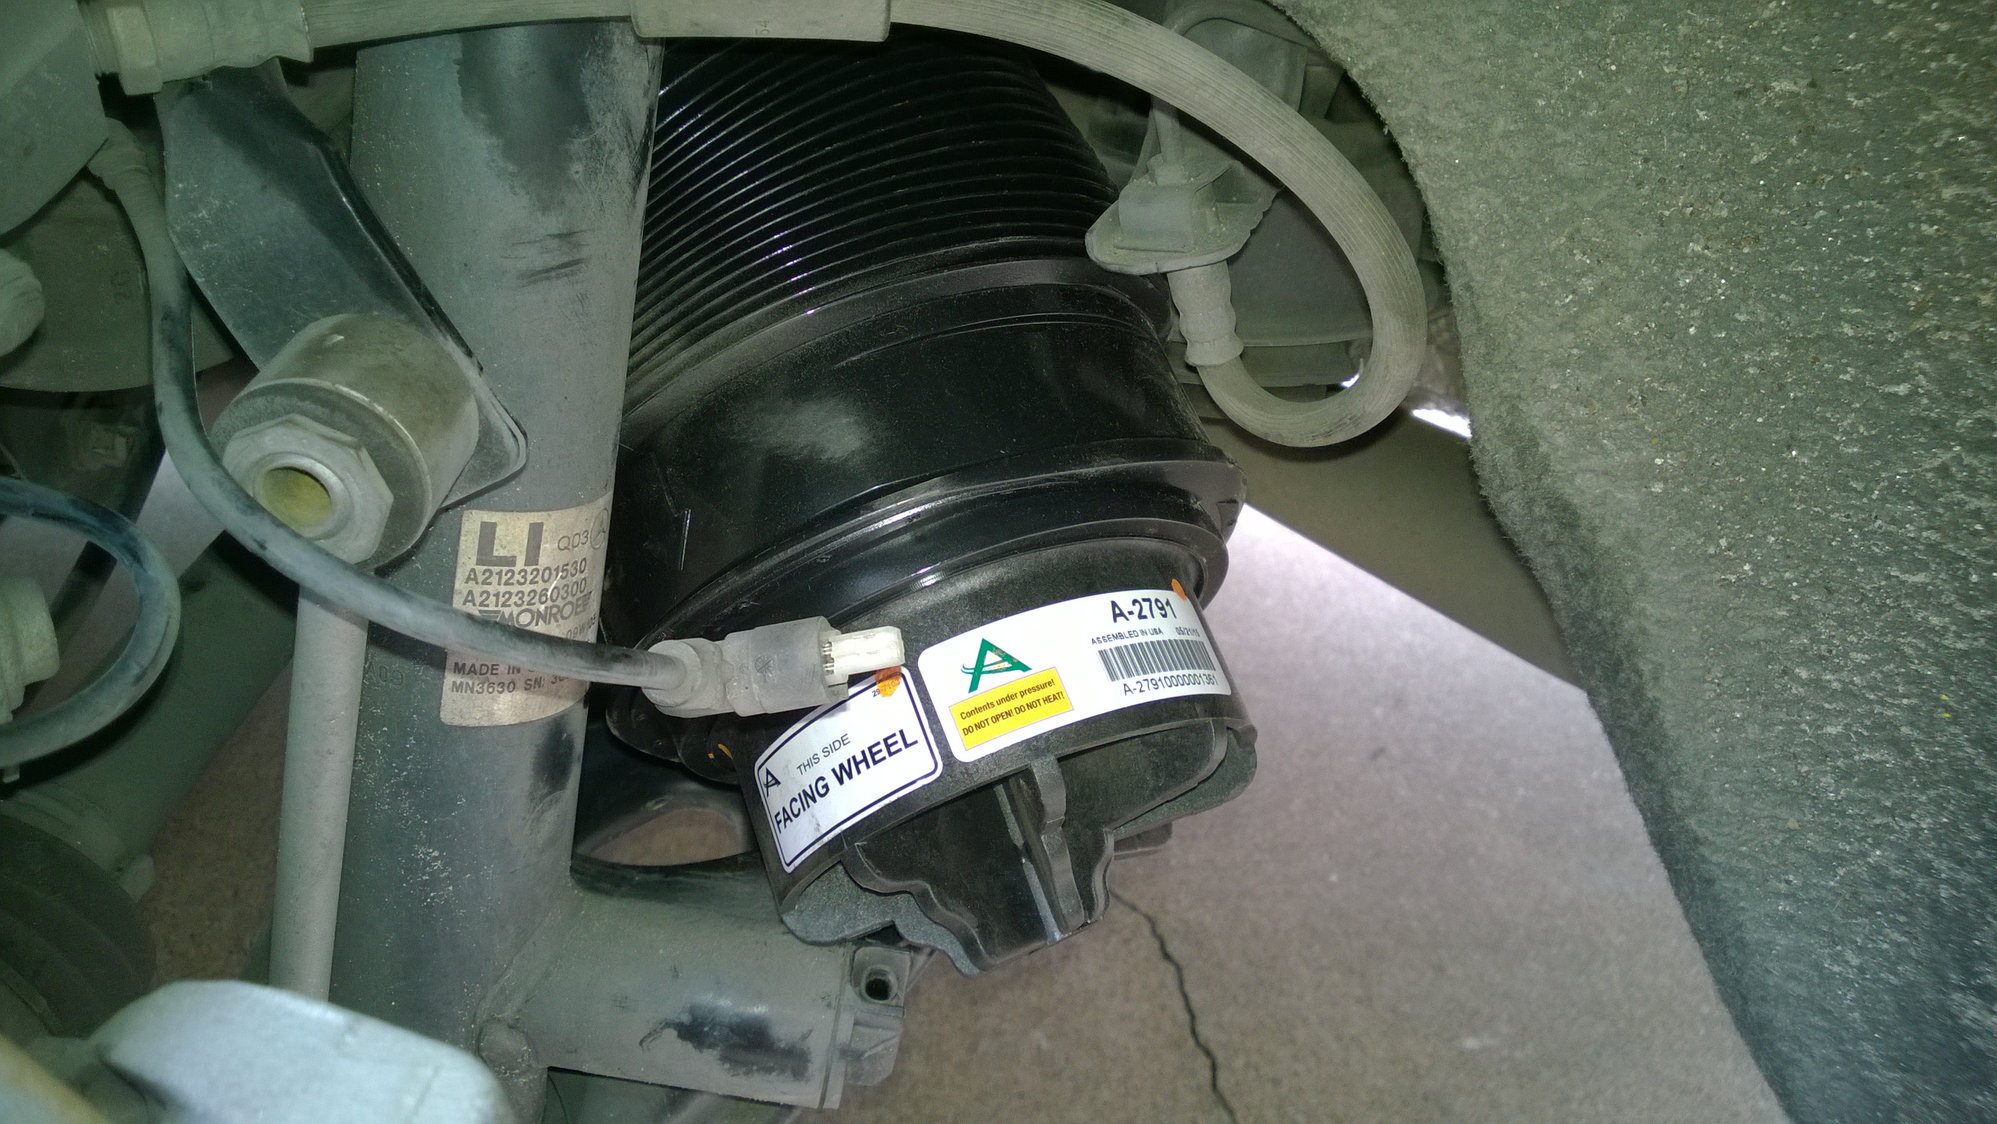
With the brake and electrical connector out of the way slide the new spring into place.
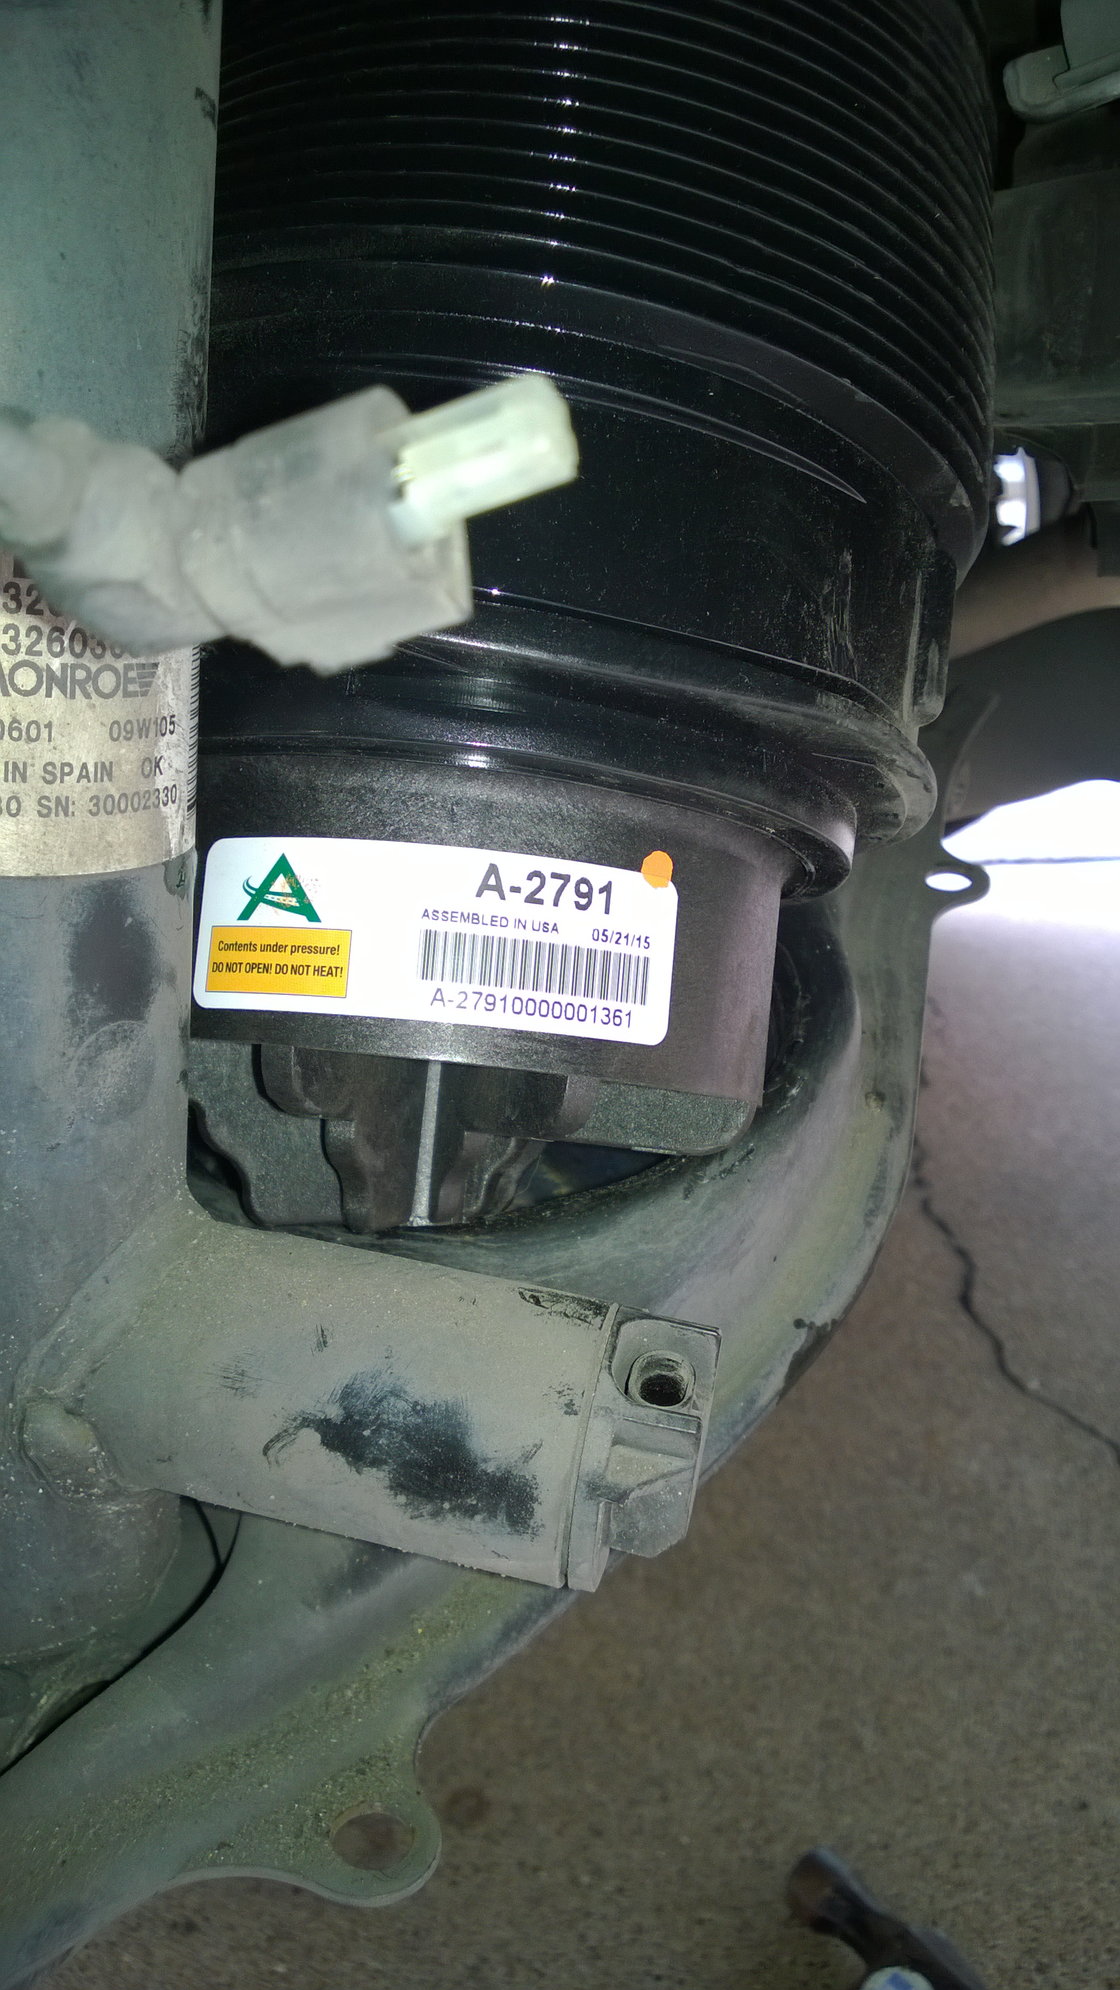
Compress spring and rotate base into recess in arm.

Insert air line into fitting, fully seat, note how it is routed behind brake line. DO NOT LOOSEN OR TIGHTEN BRASS FITTING. Just push the line fully in.

Note arrow, be sure spring is properly aligned.
Re install cover from bottom of suspension arm, just clips in place.
I made sure the spring was properly aligned at the top and reconnected the battery, I can't be sure if I had to turn the ignition on or if the compressor automatically started to inflate the spring. However I was careful to not have the spring poorly seated or aligned when it inflated.
At this point you're pretty much done, reattach the brake caliper and cable to the shock, put the wheel back on and you're good to go.
Some of the above photo's are out of sequence but hopefully you'll be able to figure things out. It's not a difficult job.
#2
Member
Thread Starter
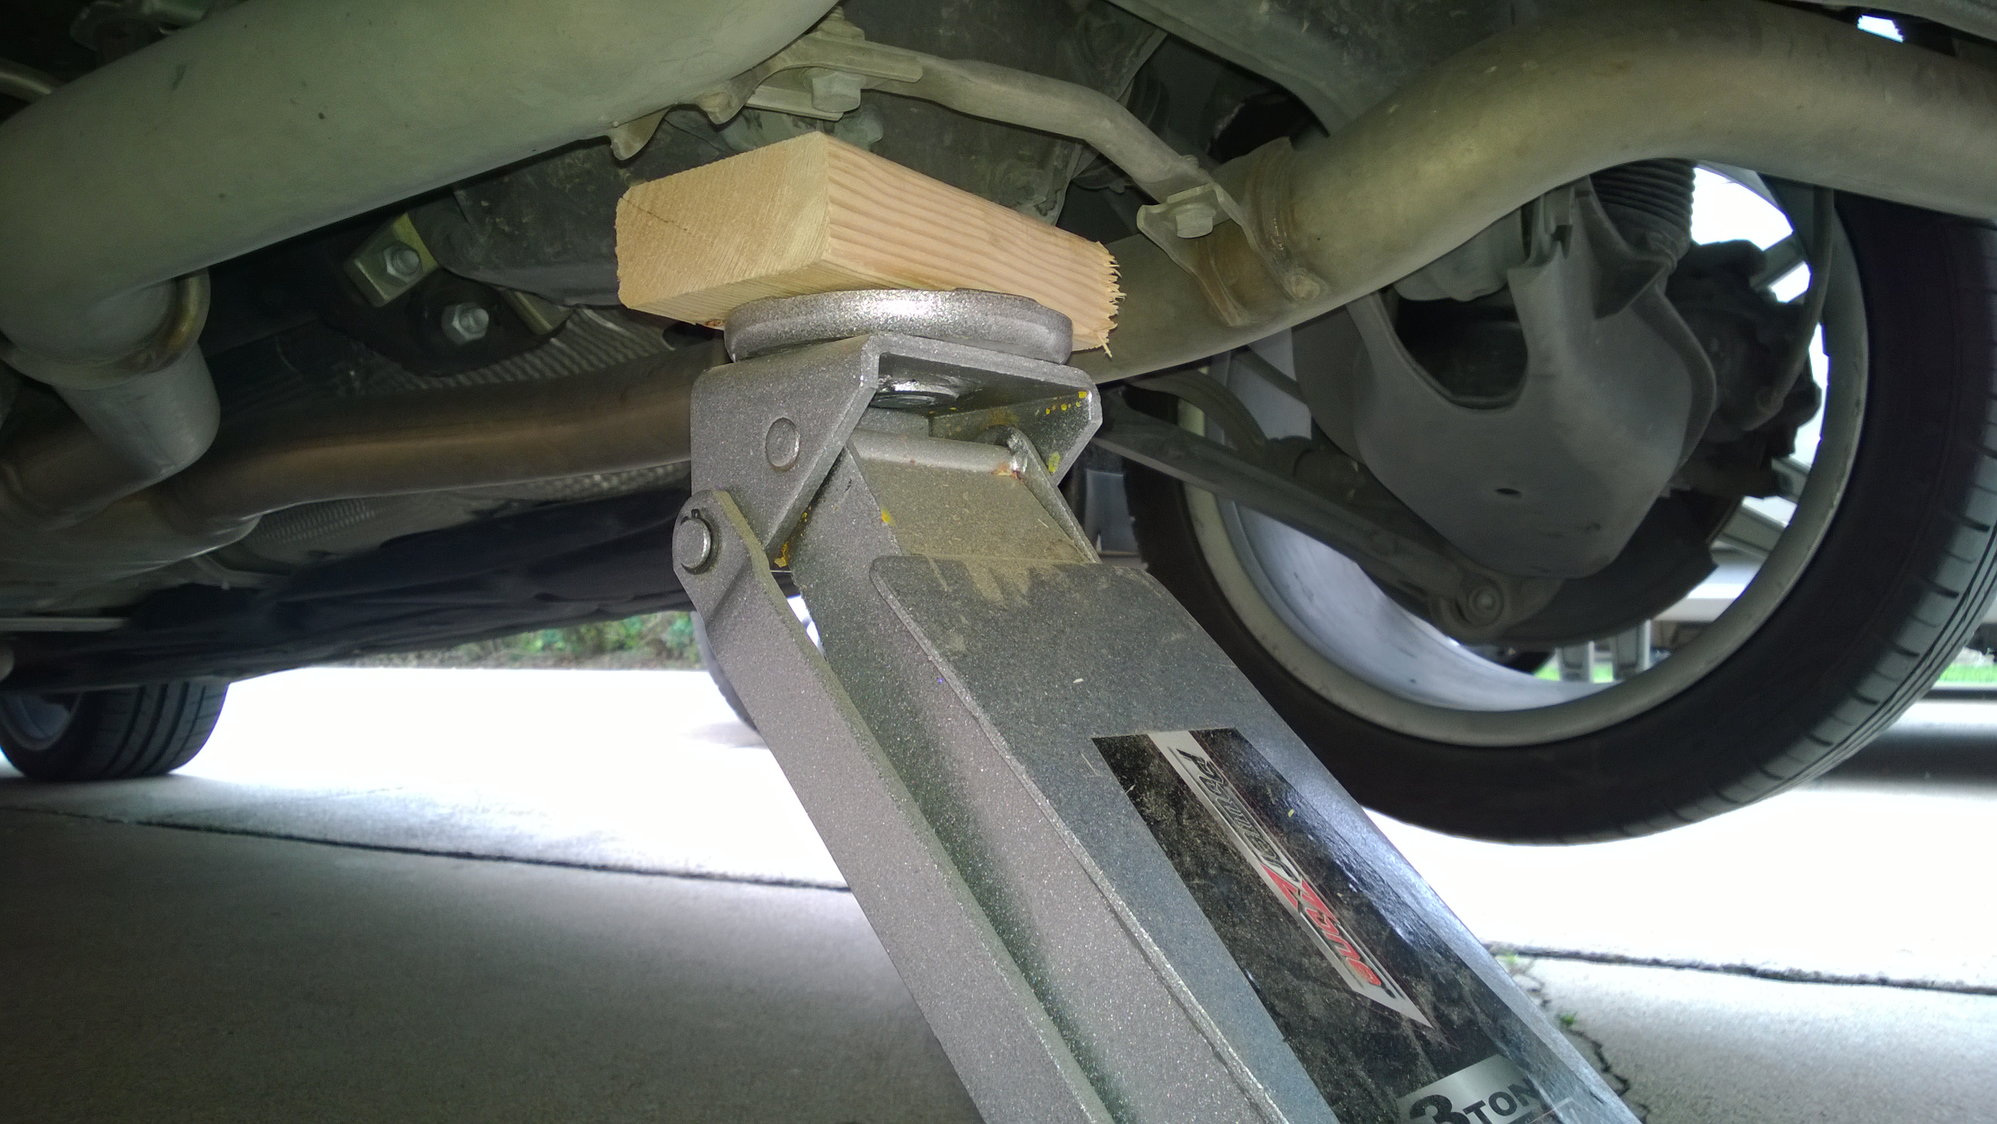
Jack on differential

Disconnect battery, you don't want the airmatic doing anything while you're working on it.
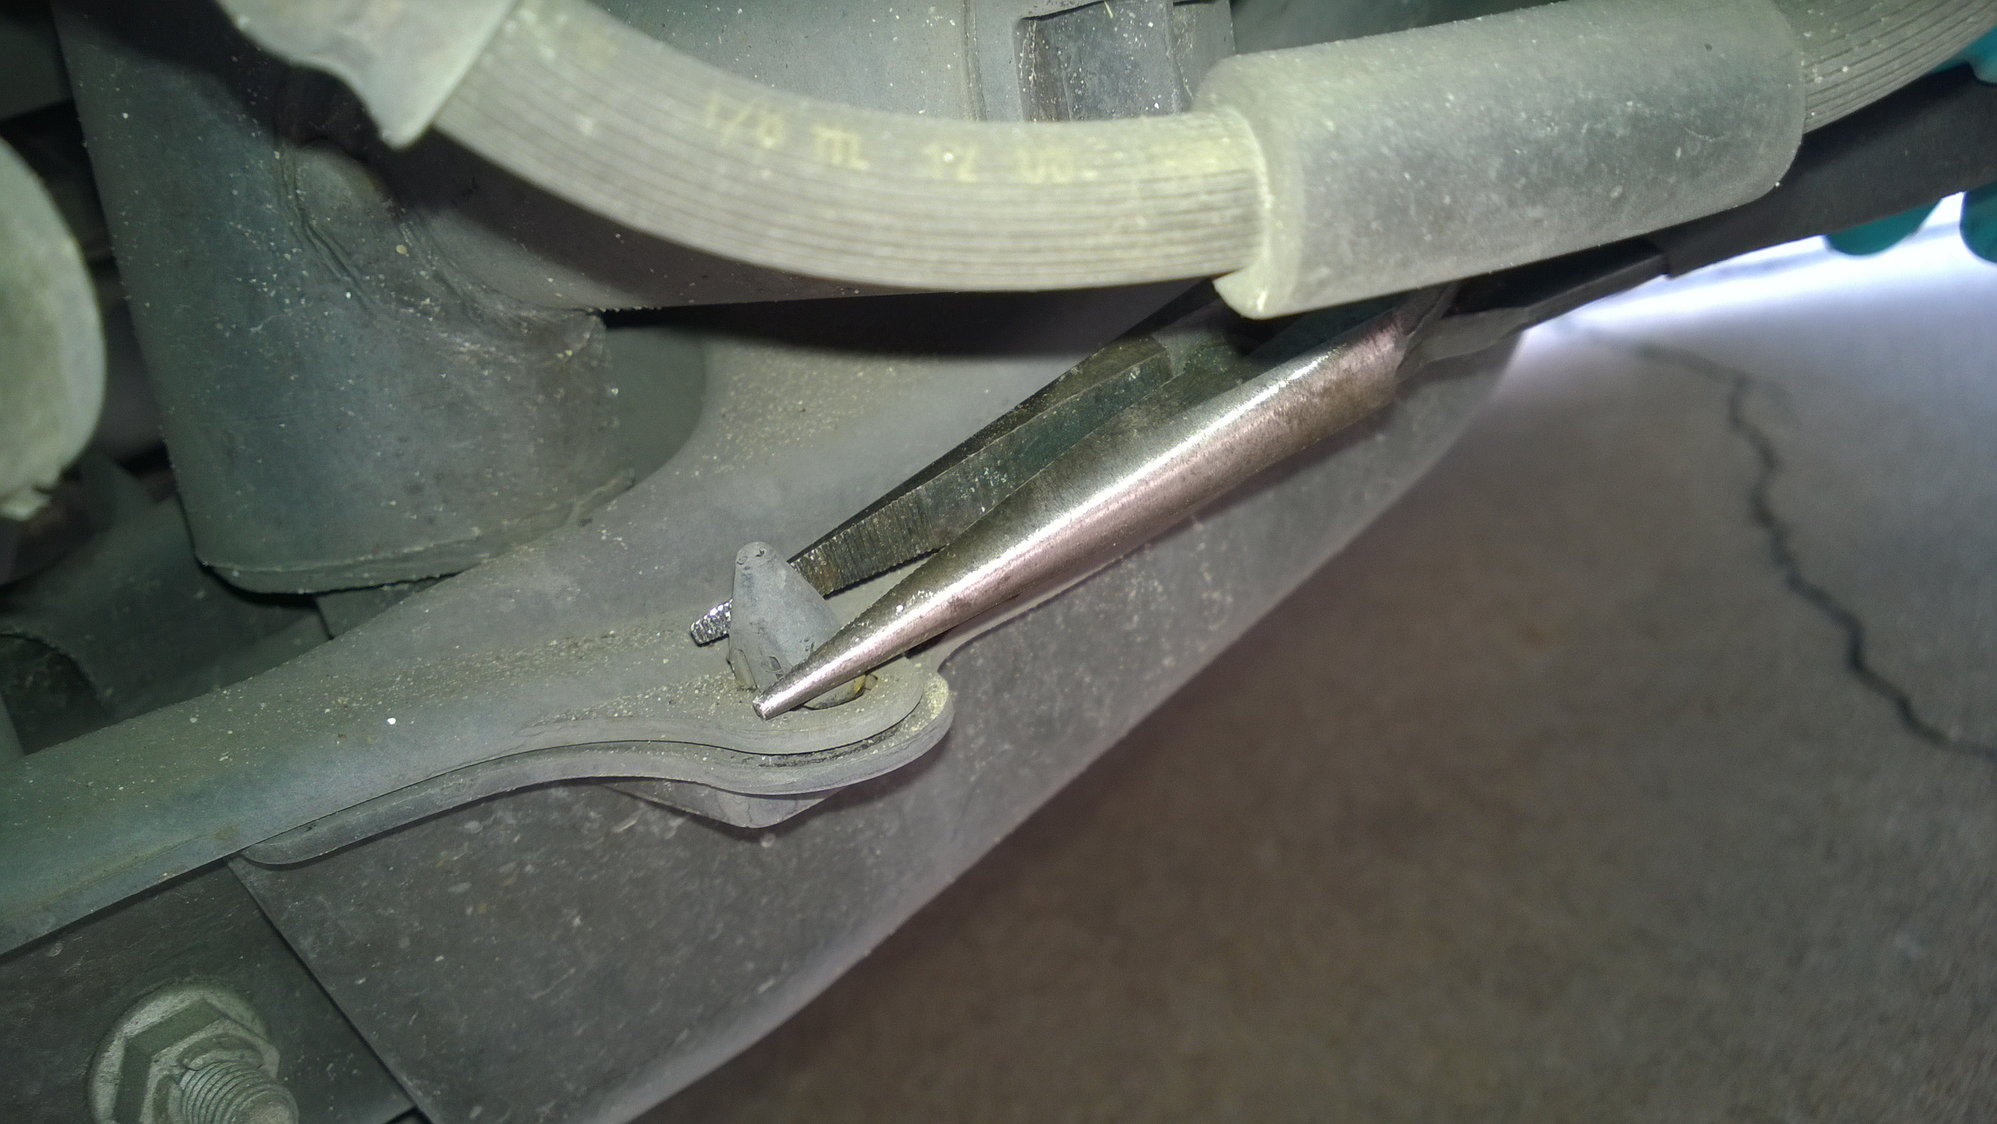
Compress ears on tabs so cover comes free.
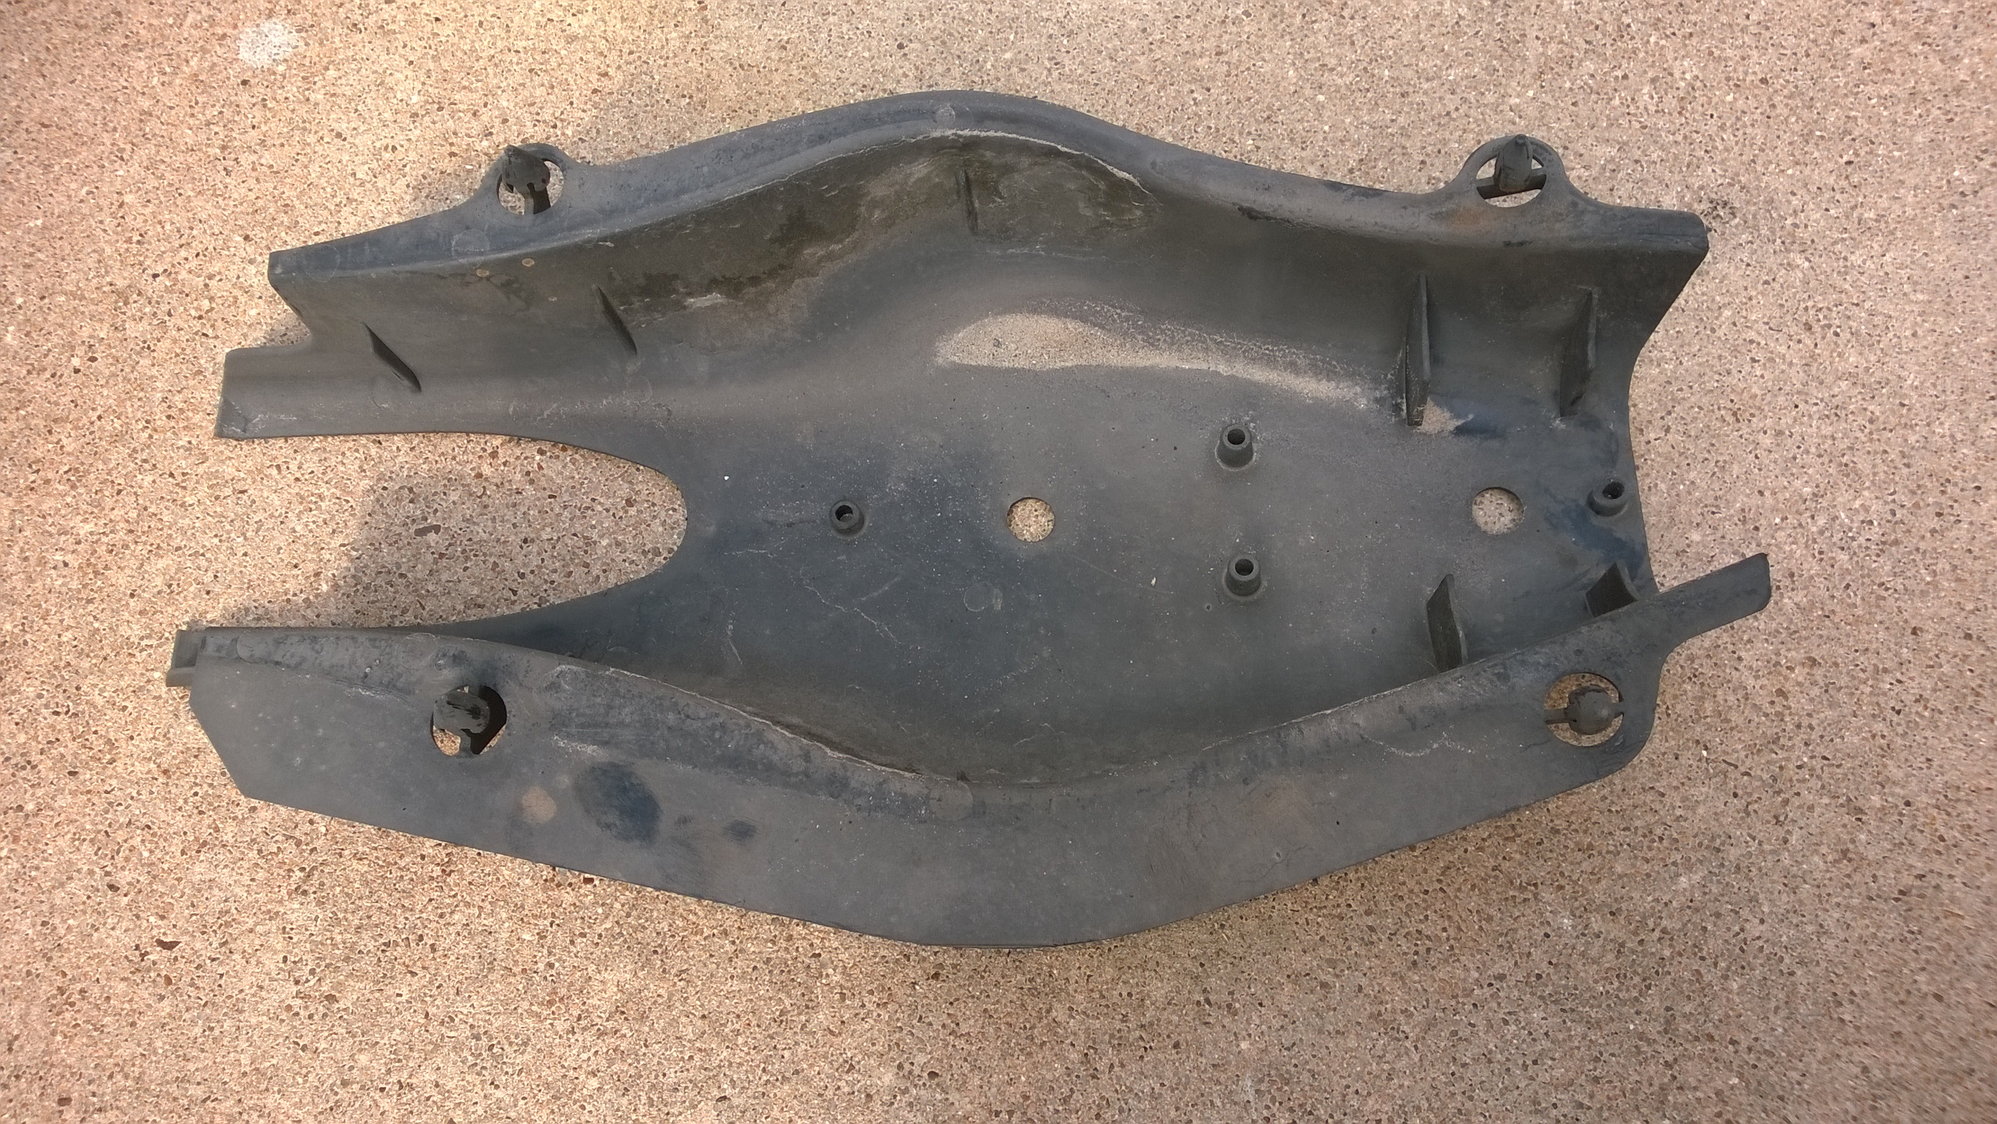
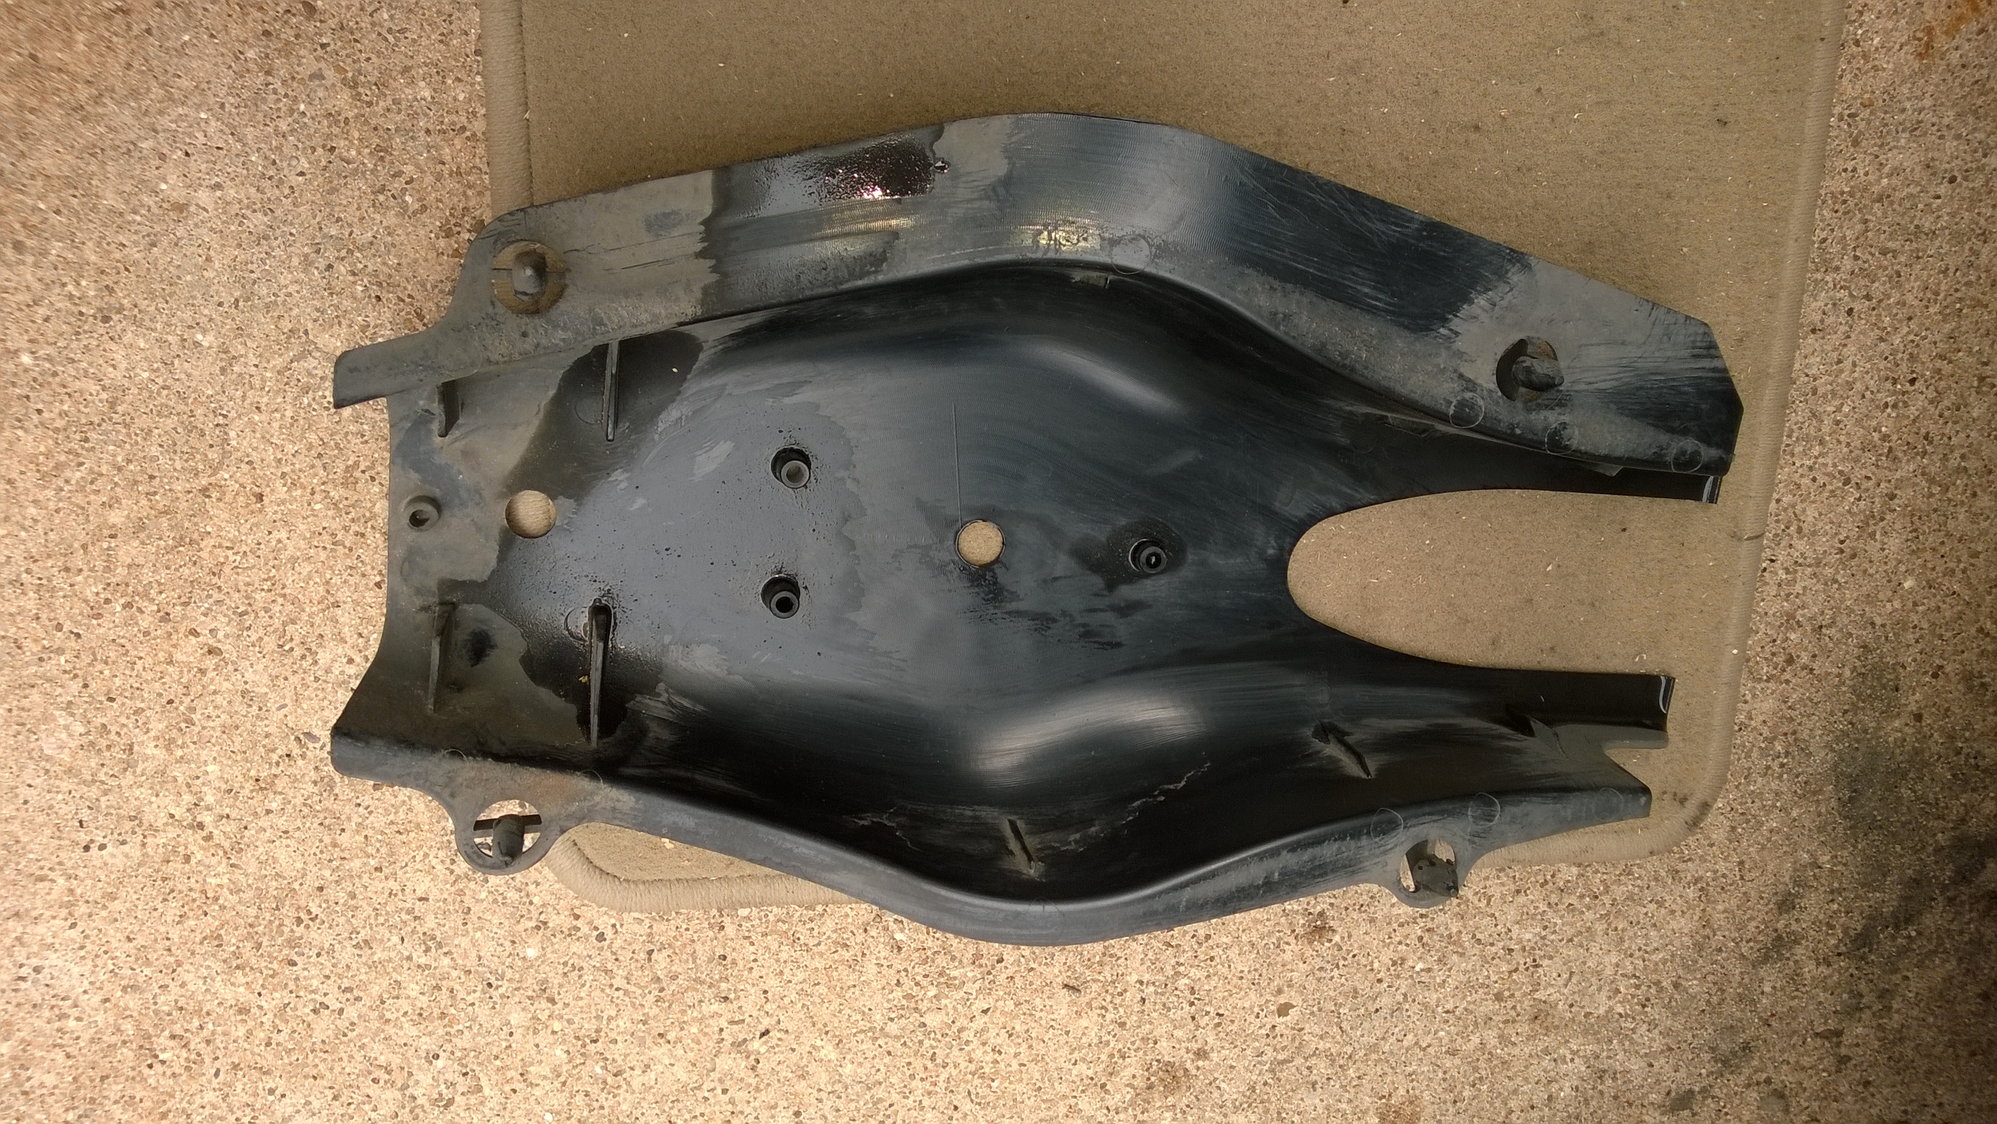
Cover from under lower arm.
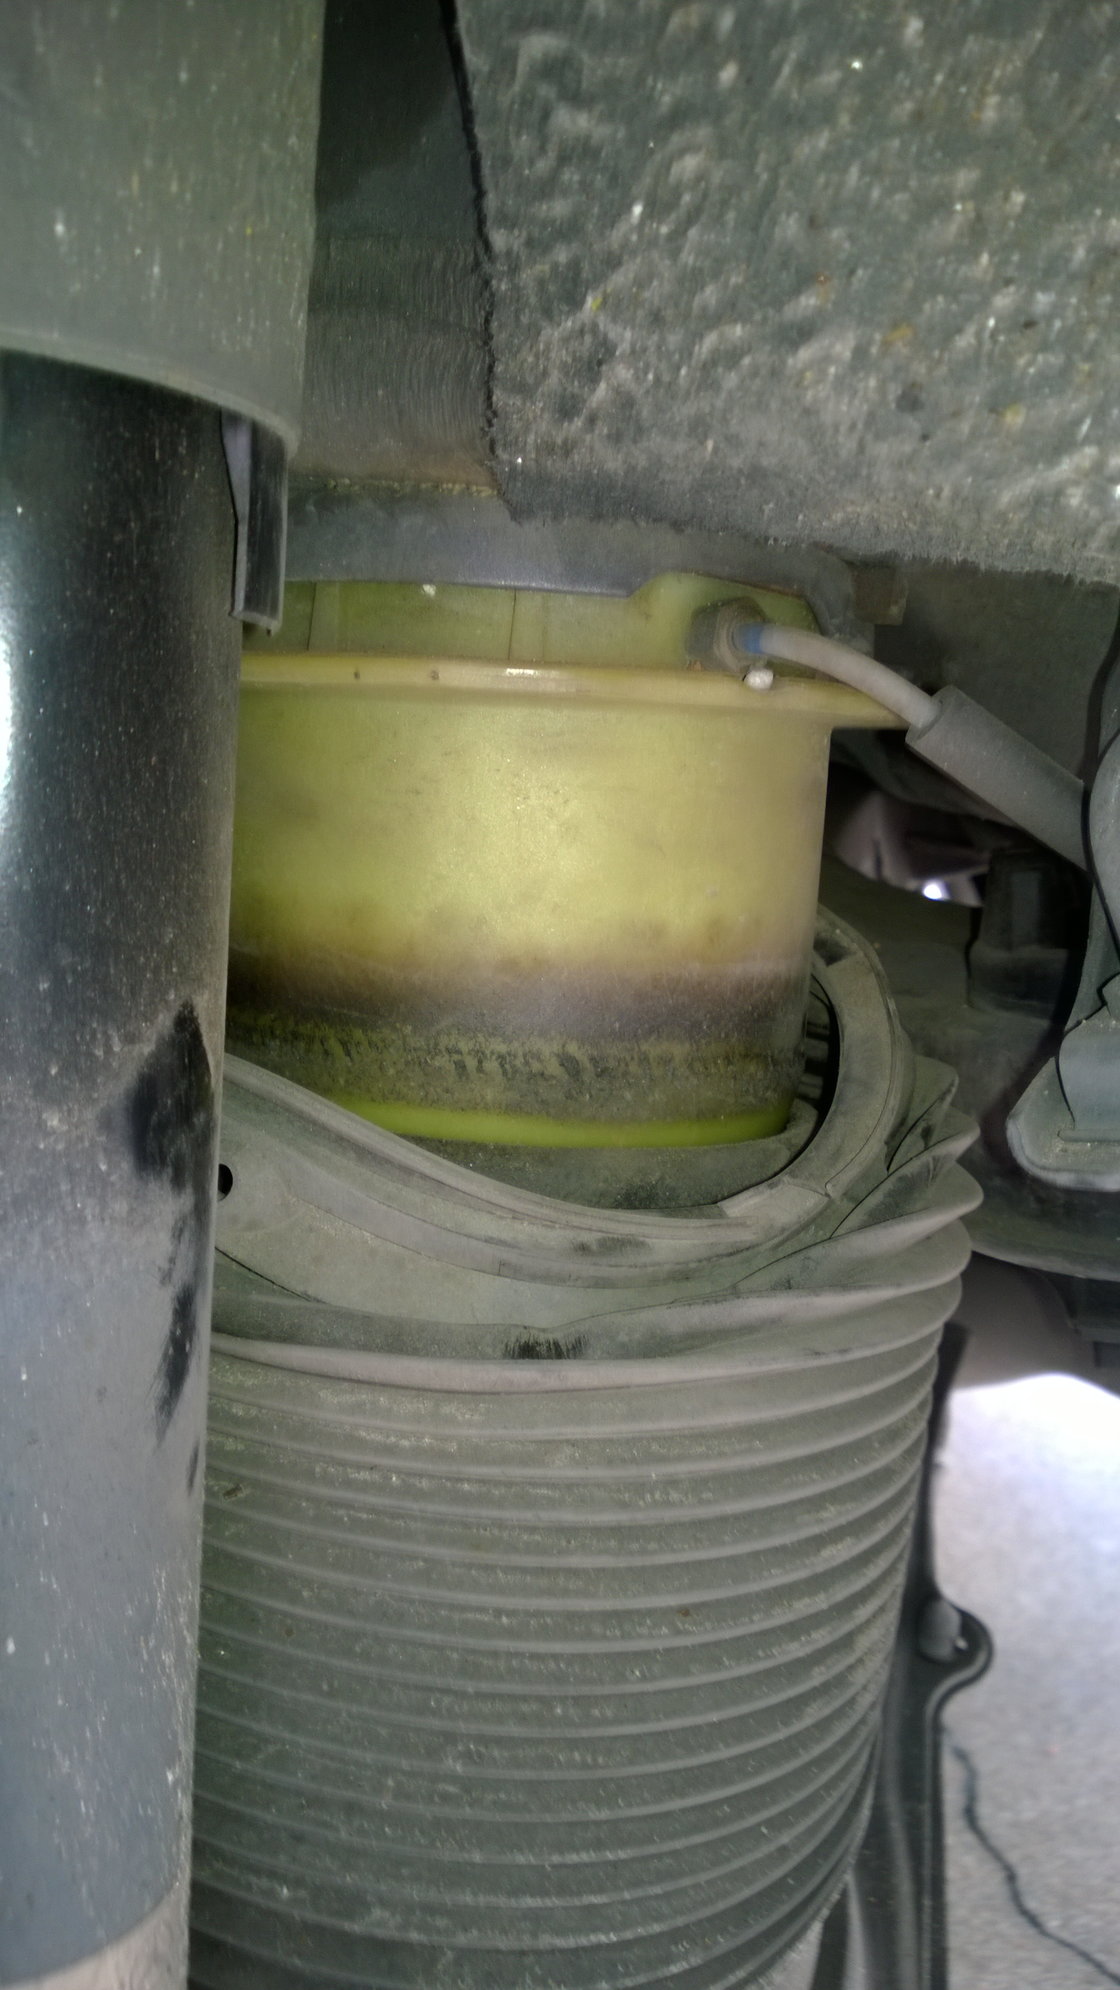
I couldn't figure out how to disconnect the air line without being able to compress the spring, so pull down the dust cover to expose area to drill hole.
Last edited by T100T; 05-22-2016 at 10:52 AM.
The following 5 users liked this post by T100T:
biker349 (11-23-2022),
Fliplegend (01-28-2022),
HK-UK 500 (02-20-2019),
StephenW2016 (03-17-2019),
TeeEl (02-20-2019)
#3
Member
Thread Starter
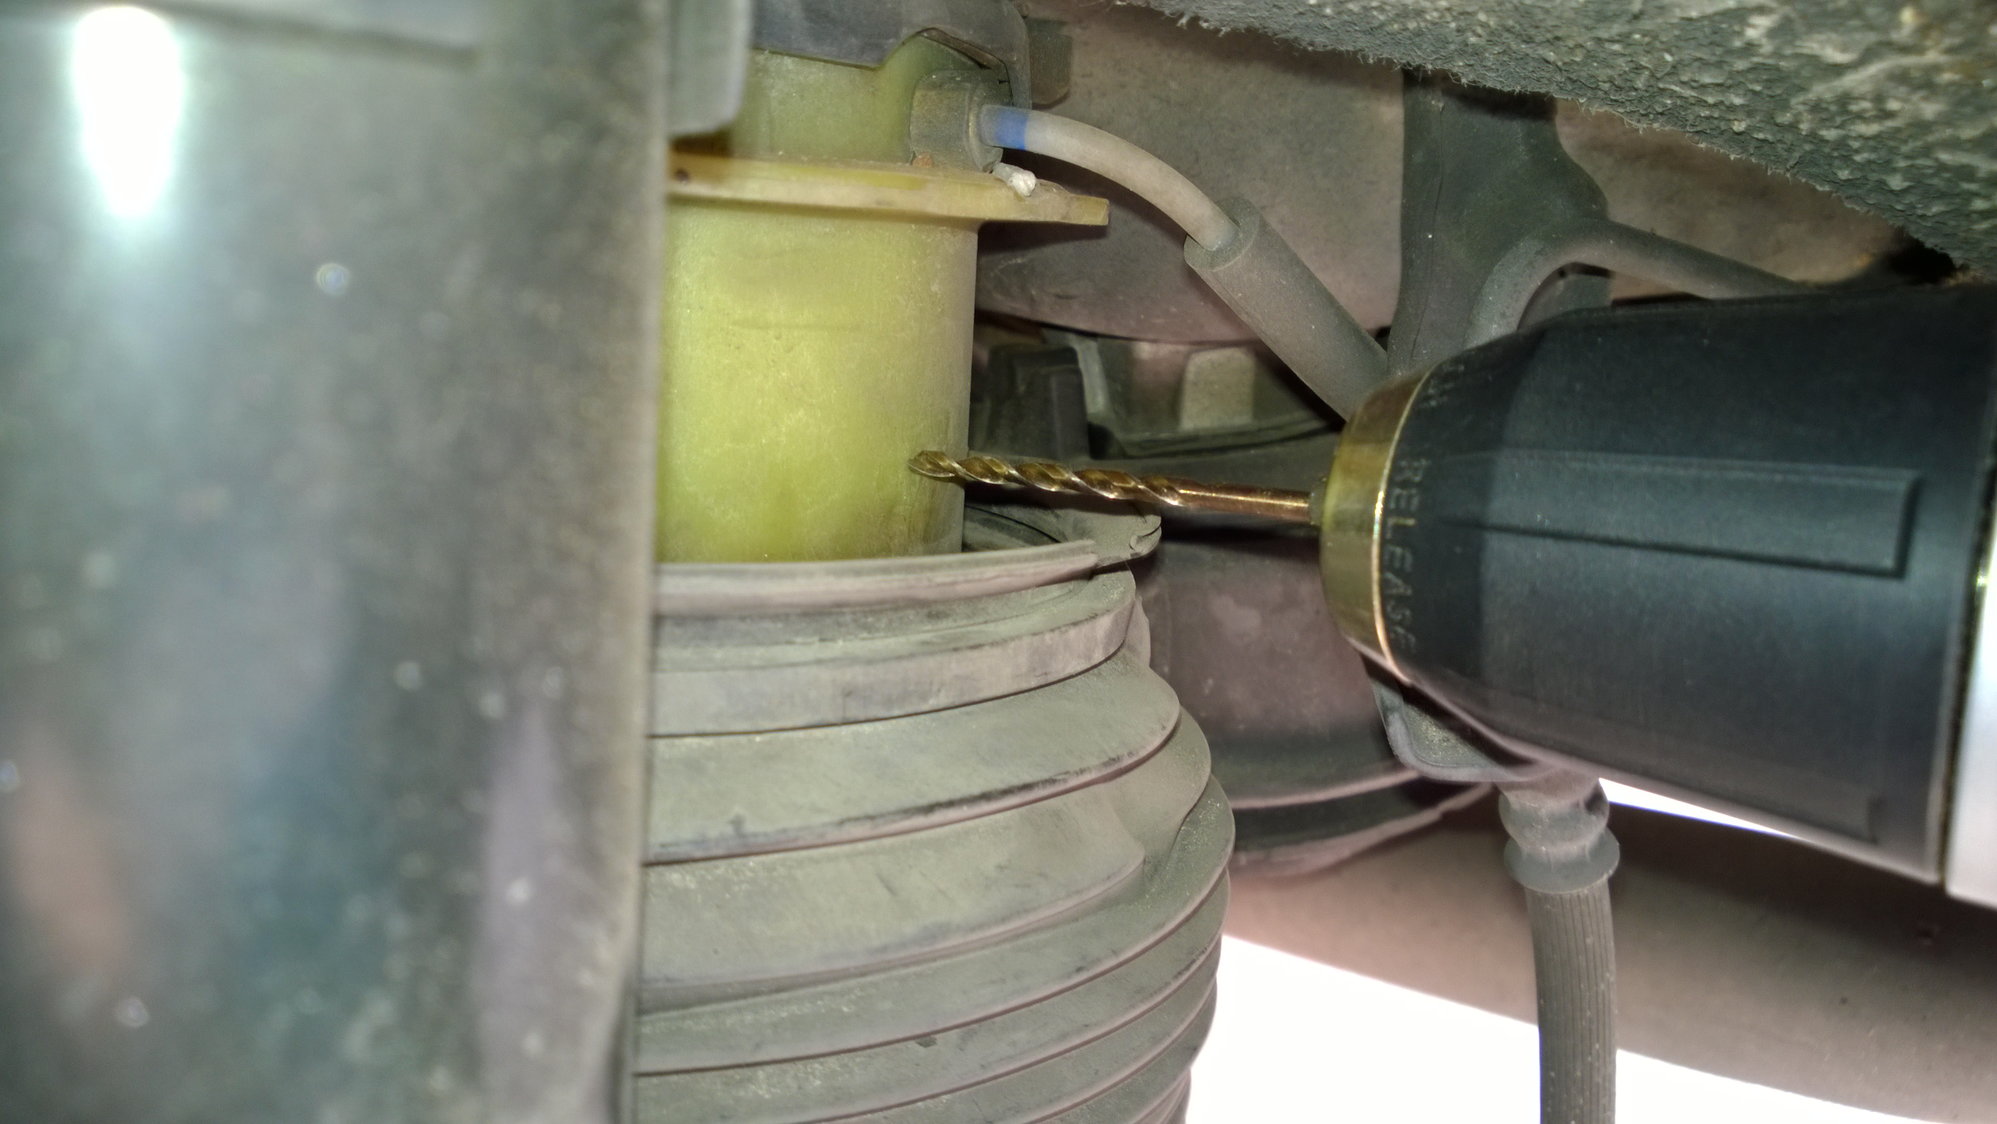
It's soft plastic and will drill easily, use a small bit.
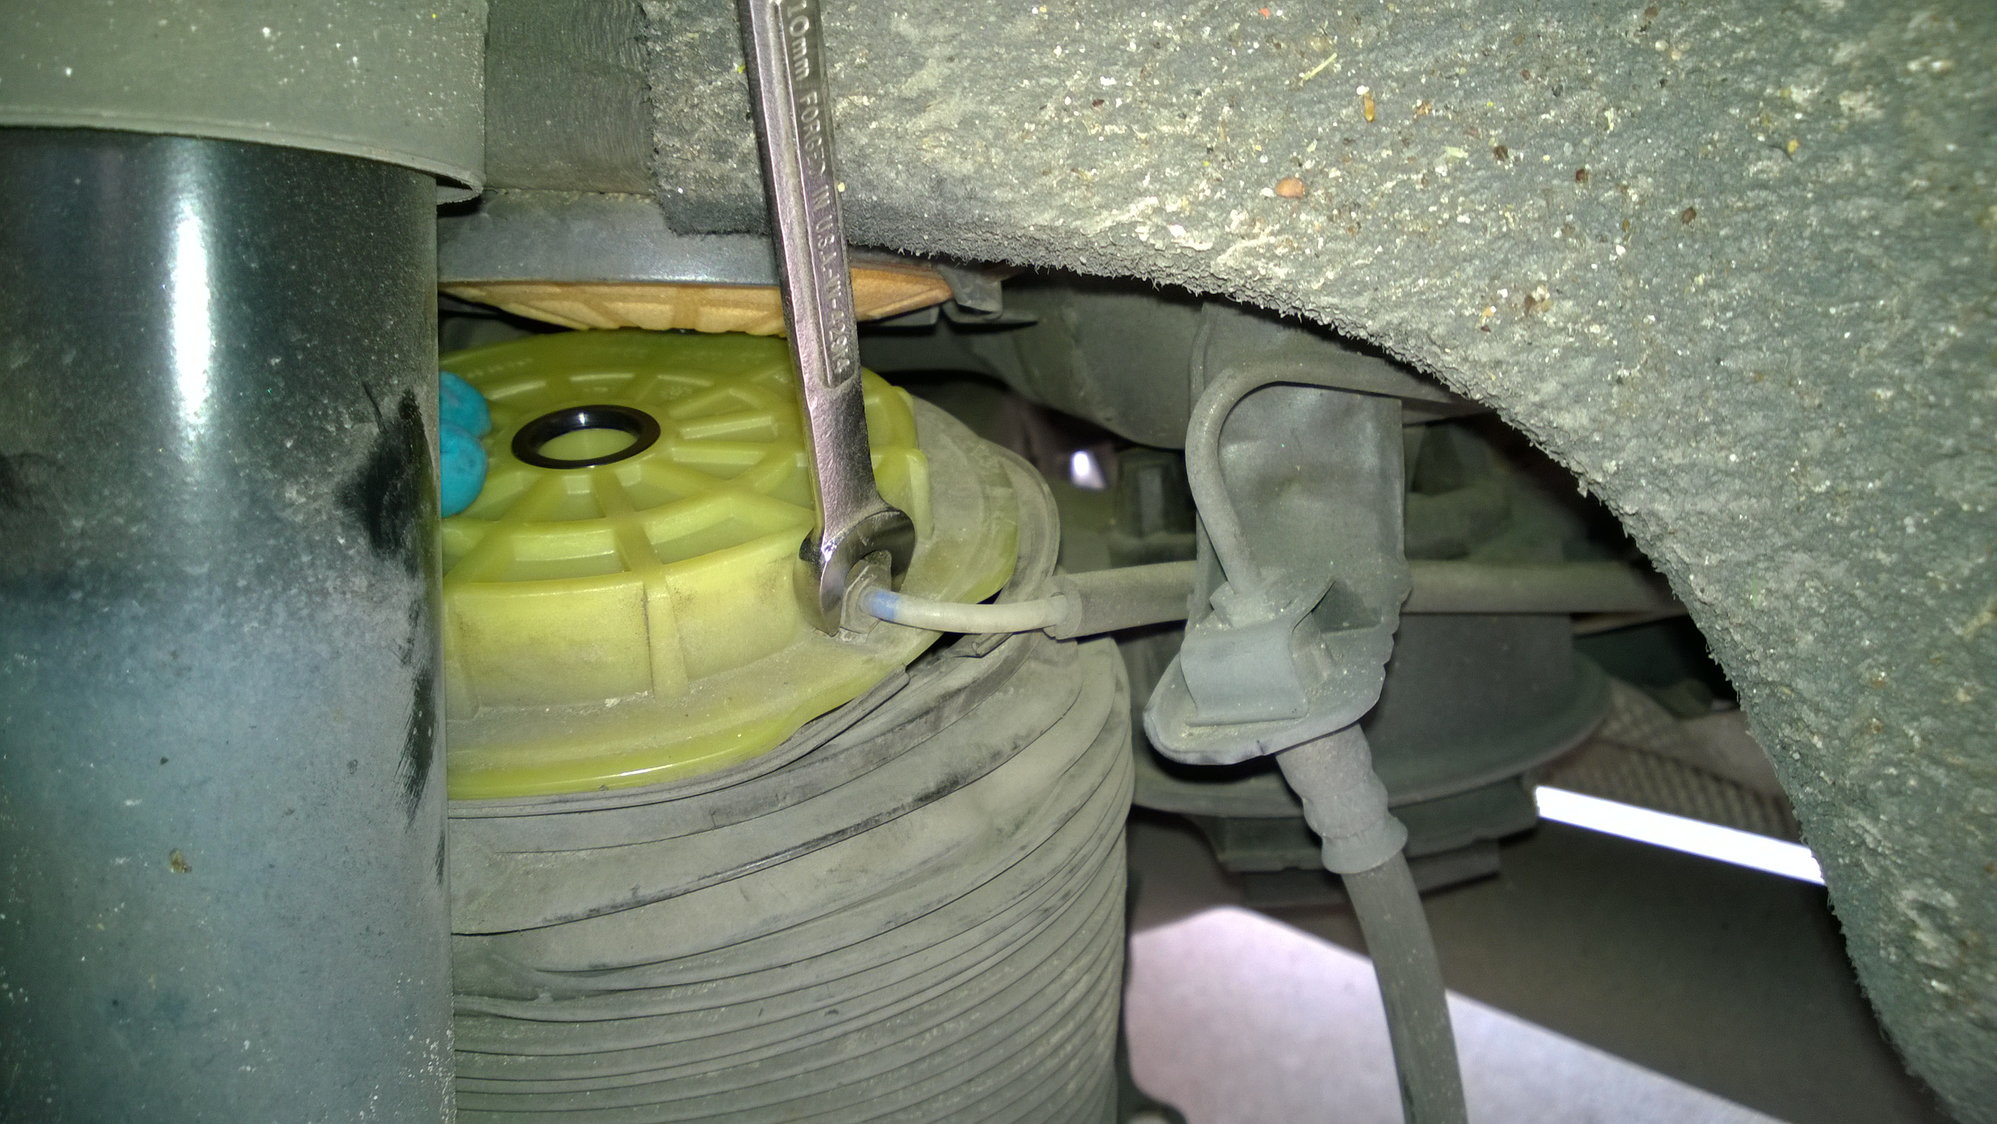
With no pressure in the spring you can now compress it and get a wrench on the air line fitting, try to keep things clean, you don't want contaminants in the system.
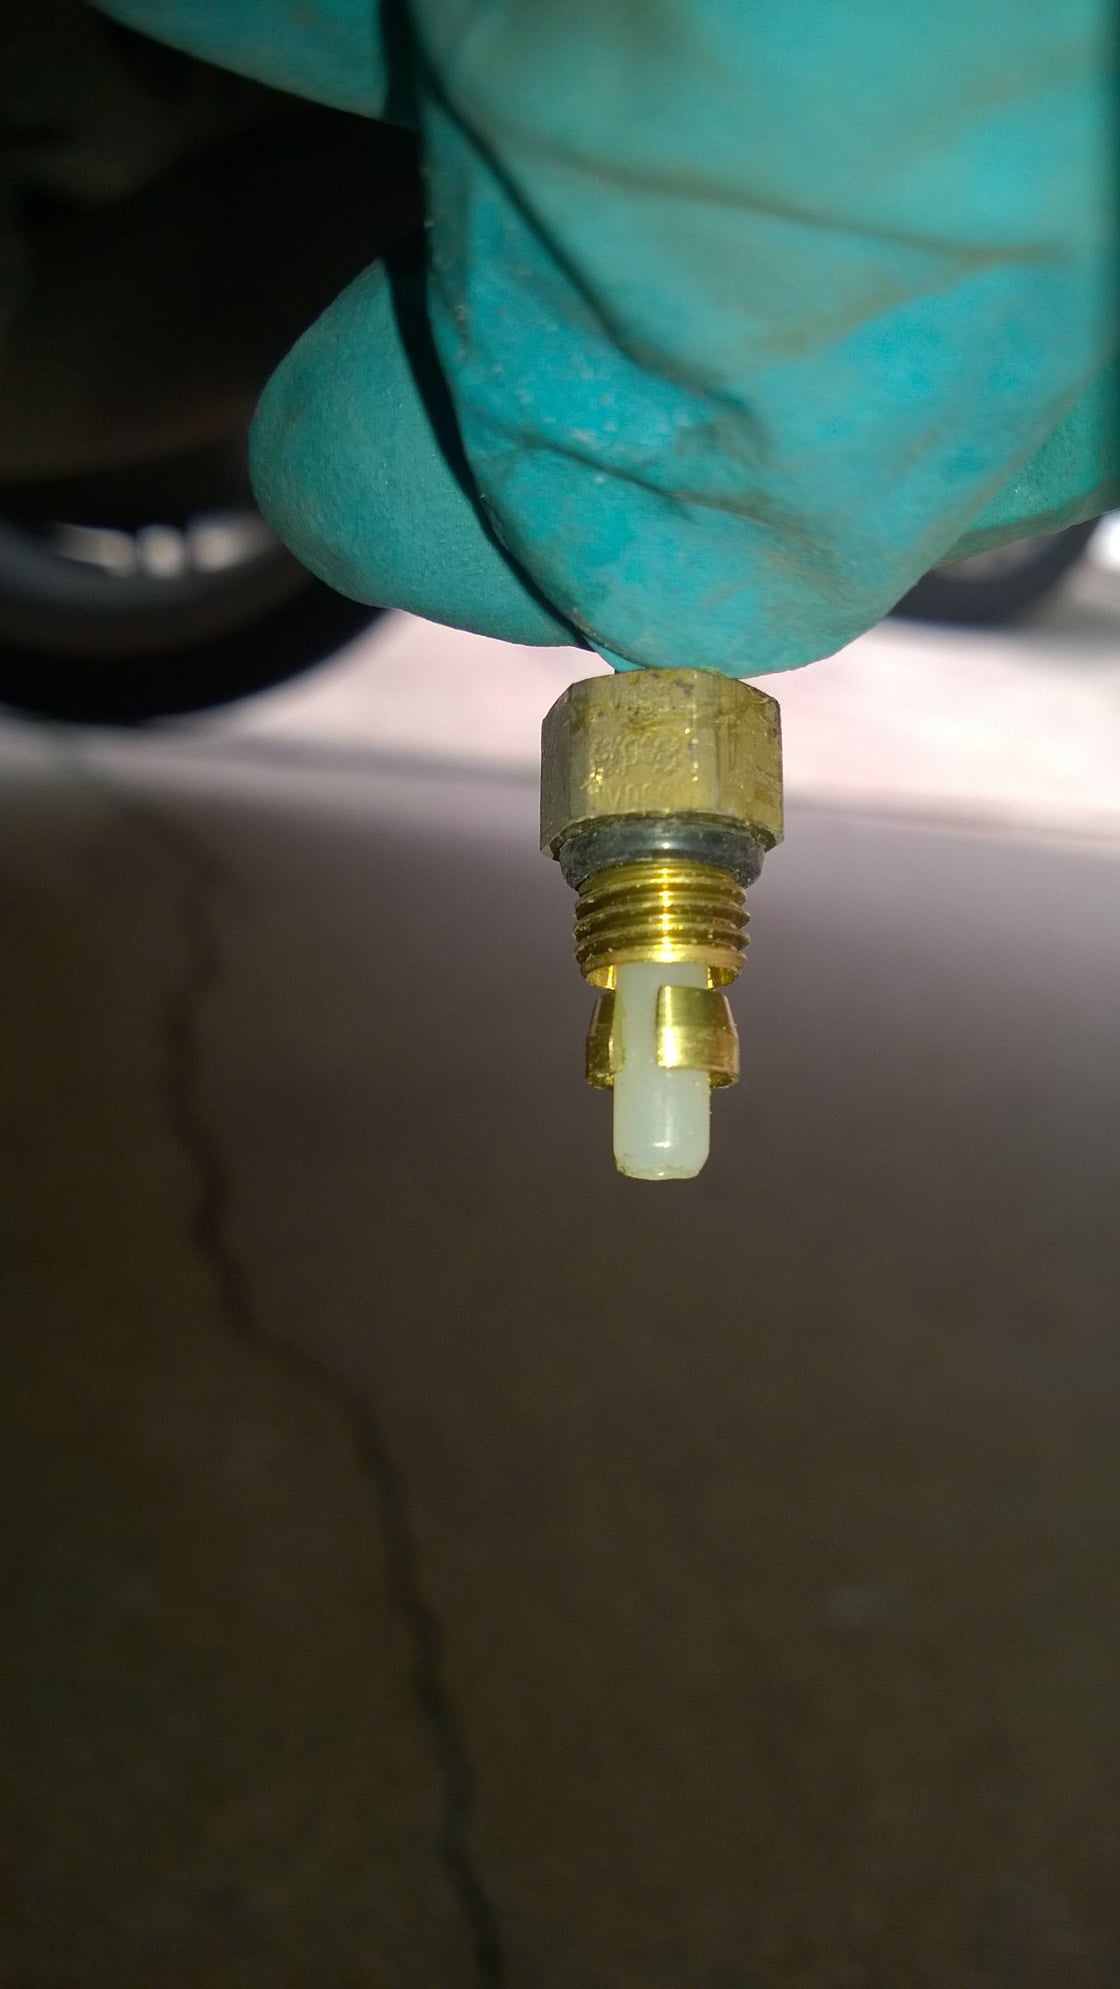
Slide the nut back and pry open the collet. Do not damage the plastic line. If you damage the line you'll need to trim so it will seal properly in the new spring. Mine had some marks but worked fine.
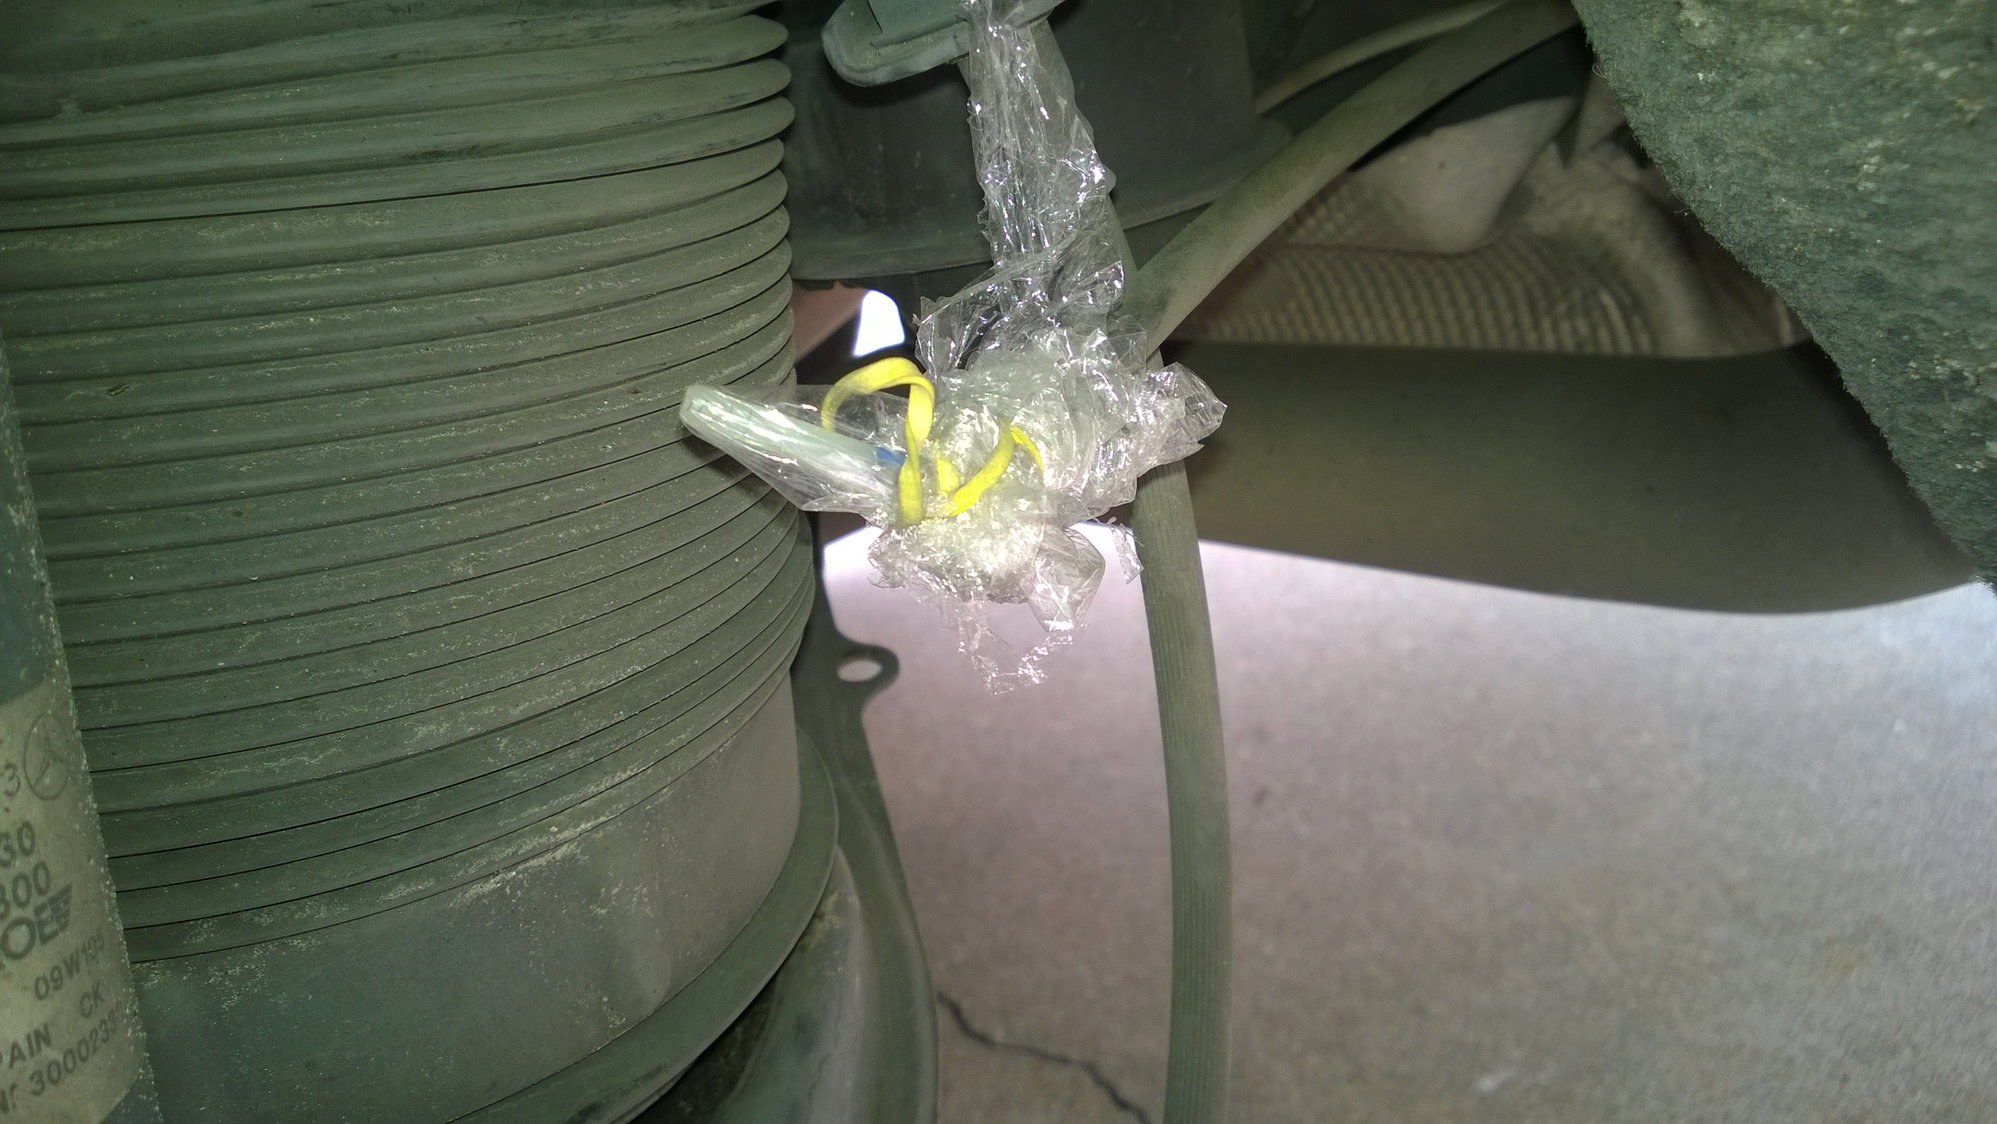
I put some plastic on the end of the line to keep clean. Tuck it out of the way to the rear of the car as you don't want to damage it when removing/installing the spring.
Last edited by T100T; 05-22-2016 at 10:53 AM.
The following 5 users liked this post by T100T:
biker349 (11-23-2022),
Fliplegend (01-28-2022),
HK-UK 500 (02-20-2019),
StephenW2016 (03-17-2019),
TeeEl (02-20-2019)
#4
Member
Thread Starter
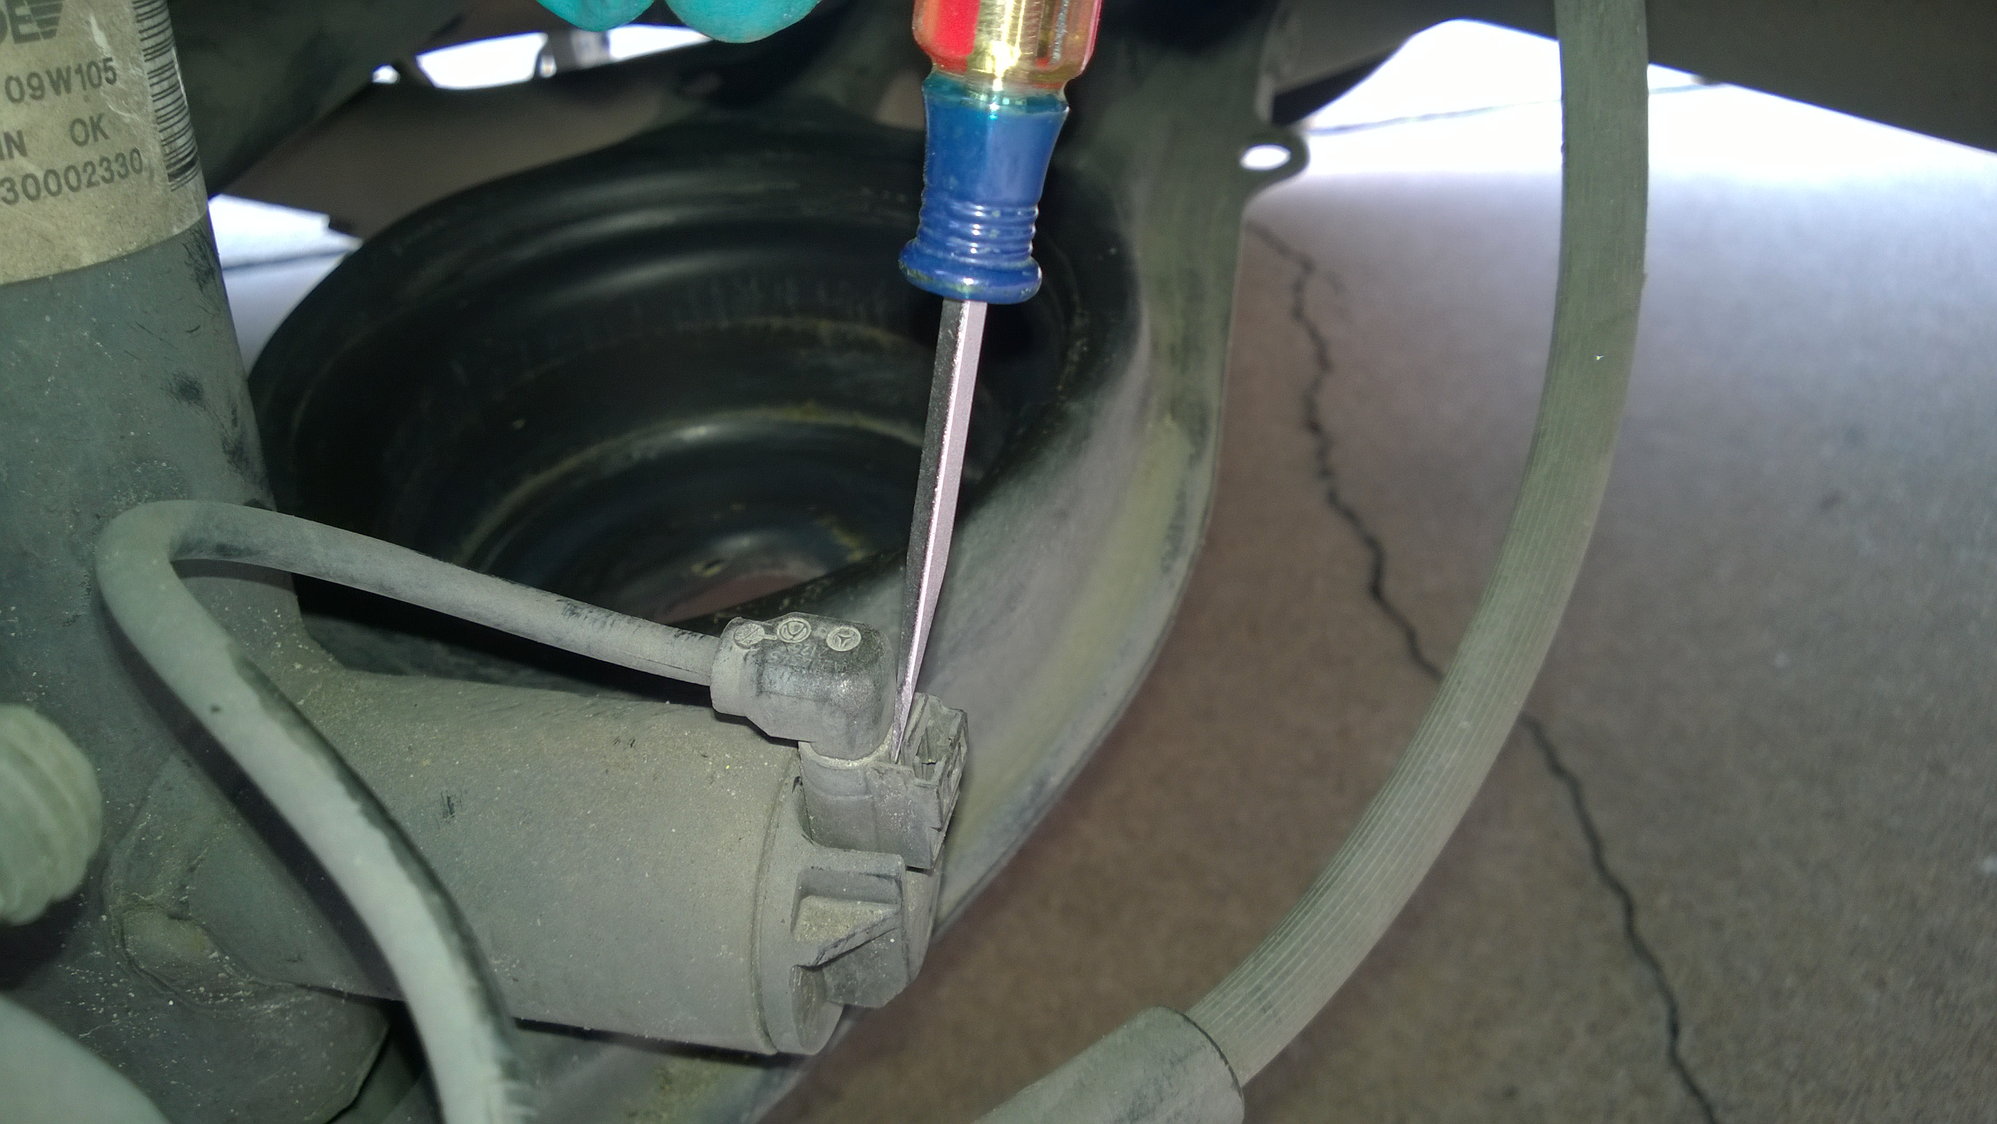
This picture is out of sequence, removing this cable from shock and brake caliper will give easier access to remove spring.
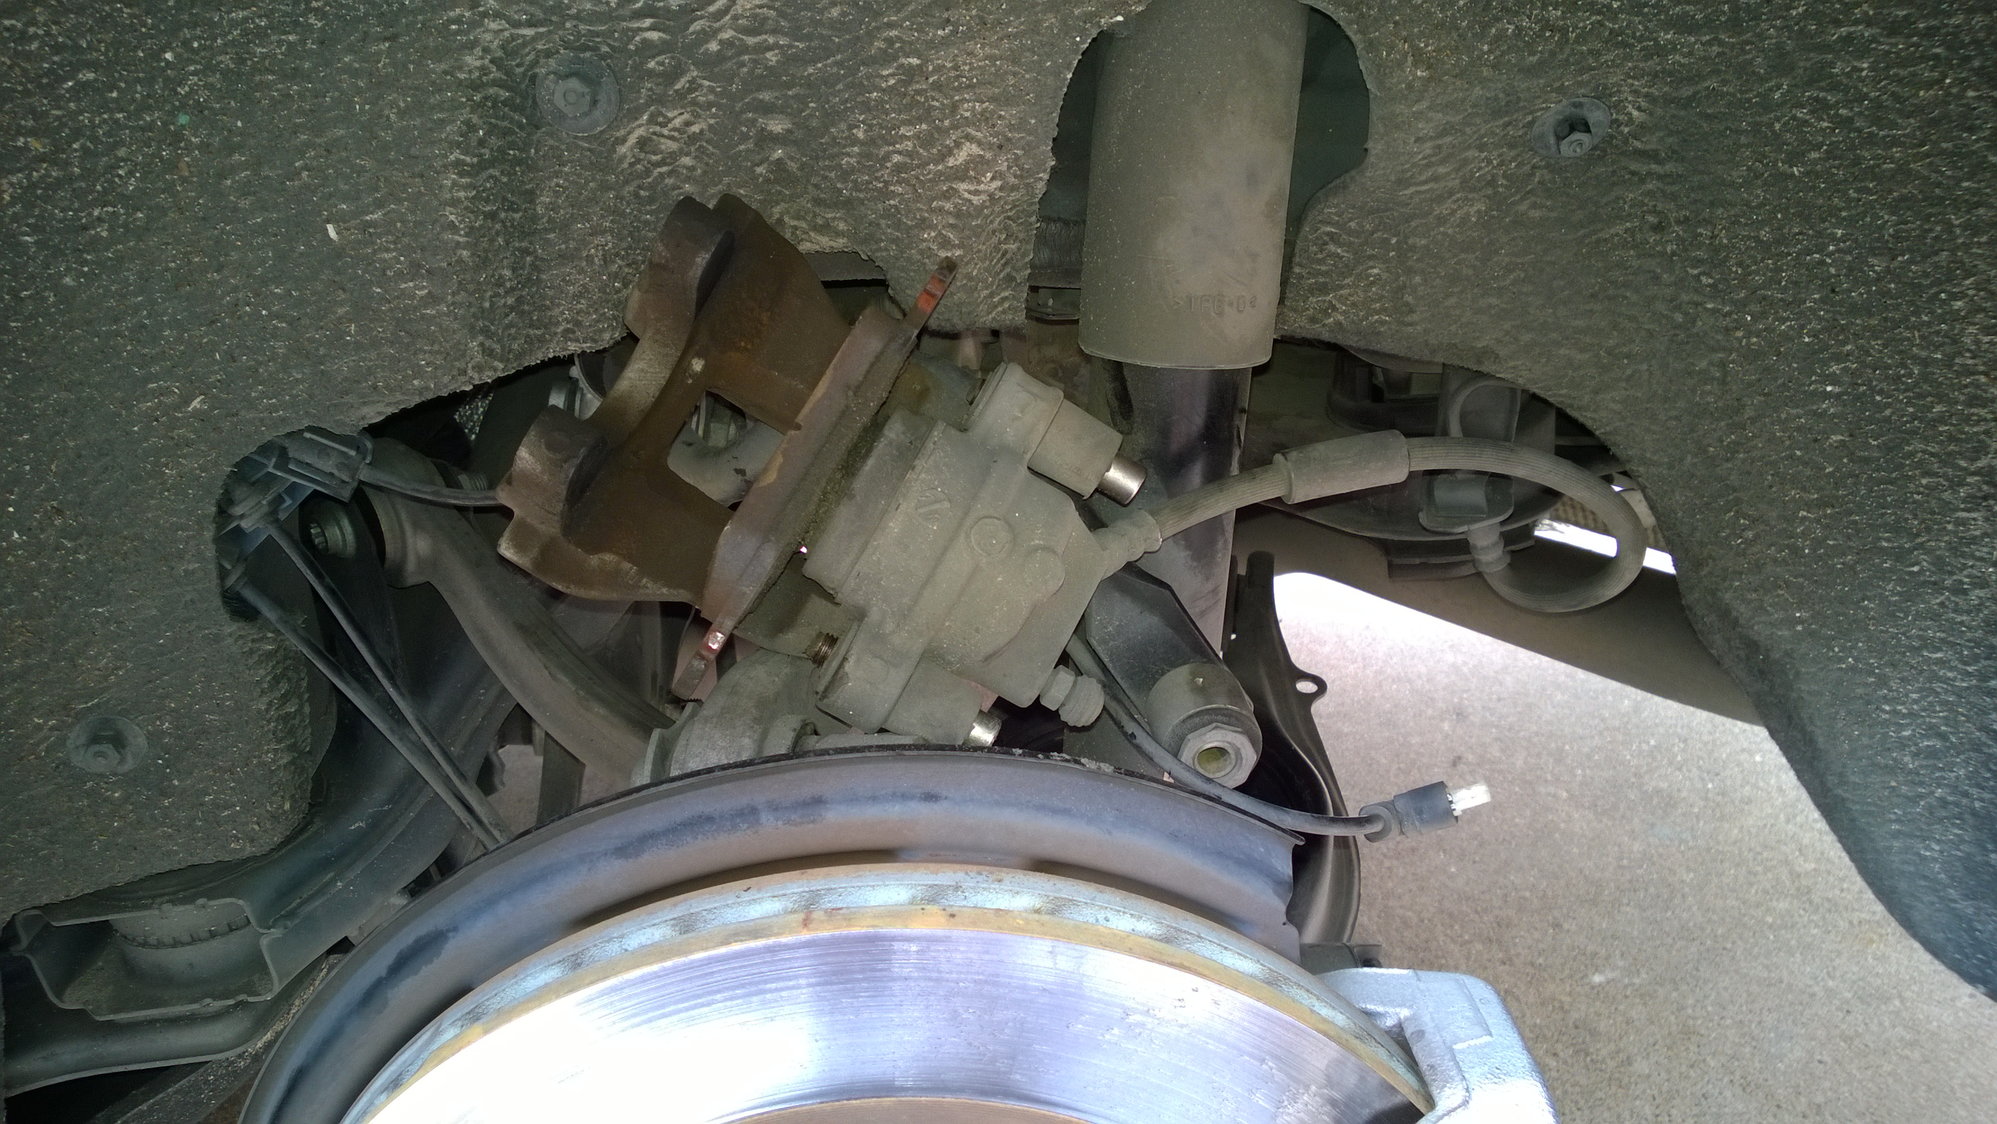
Photo is also out of sequence, shows rear brake caliper disconnected to give better access.
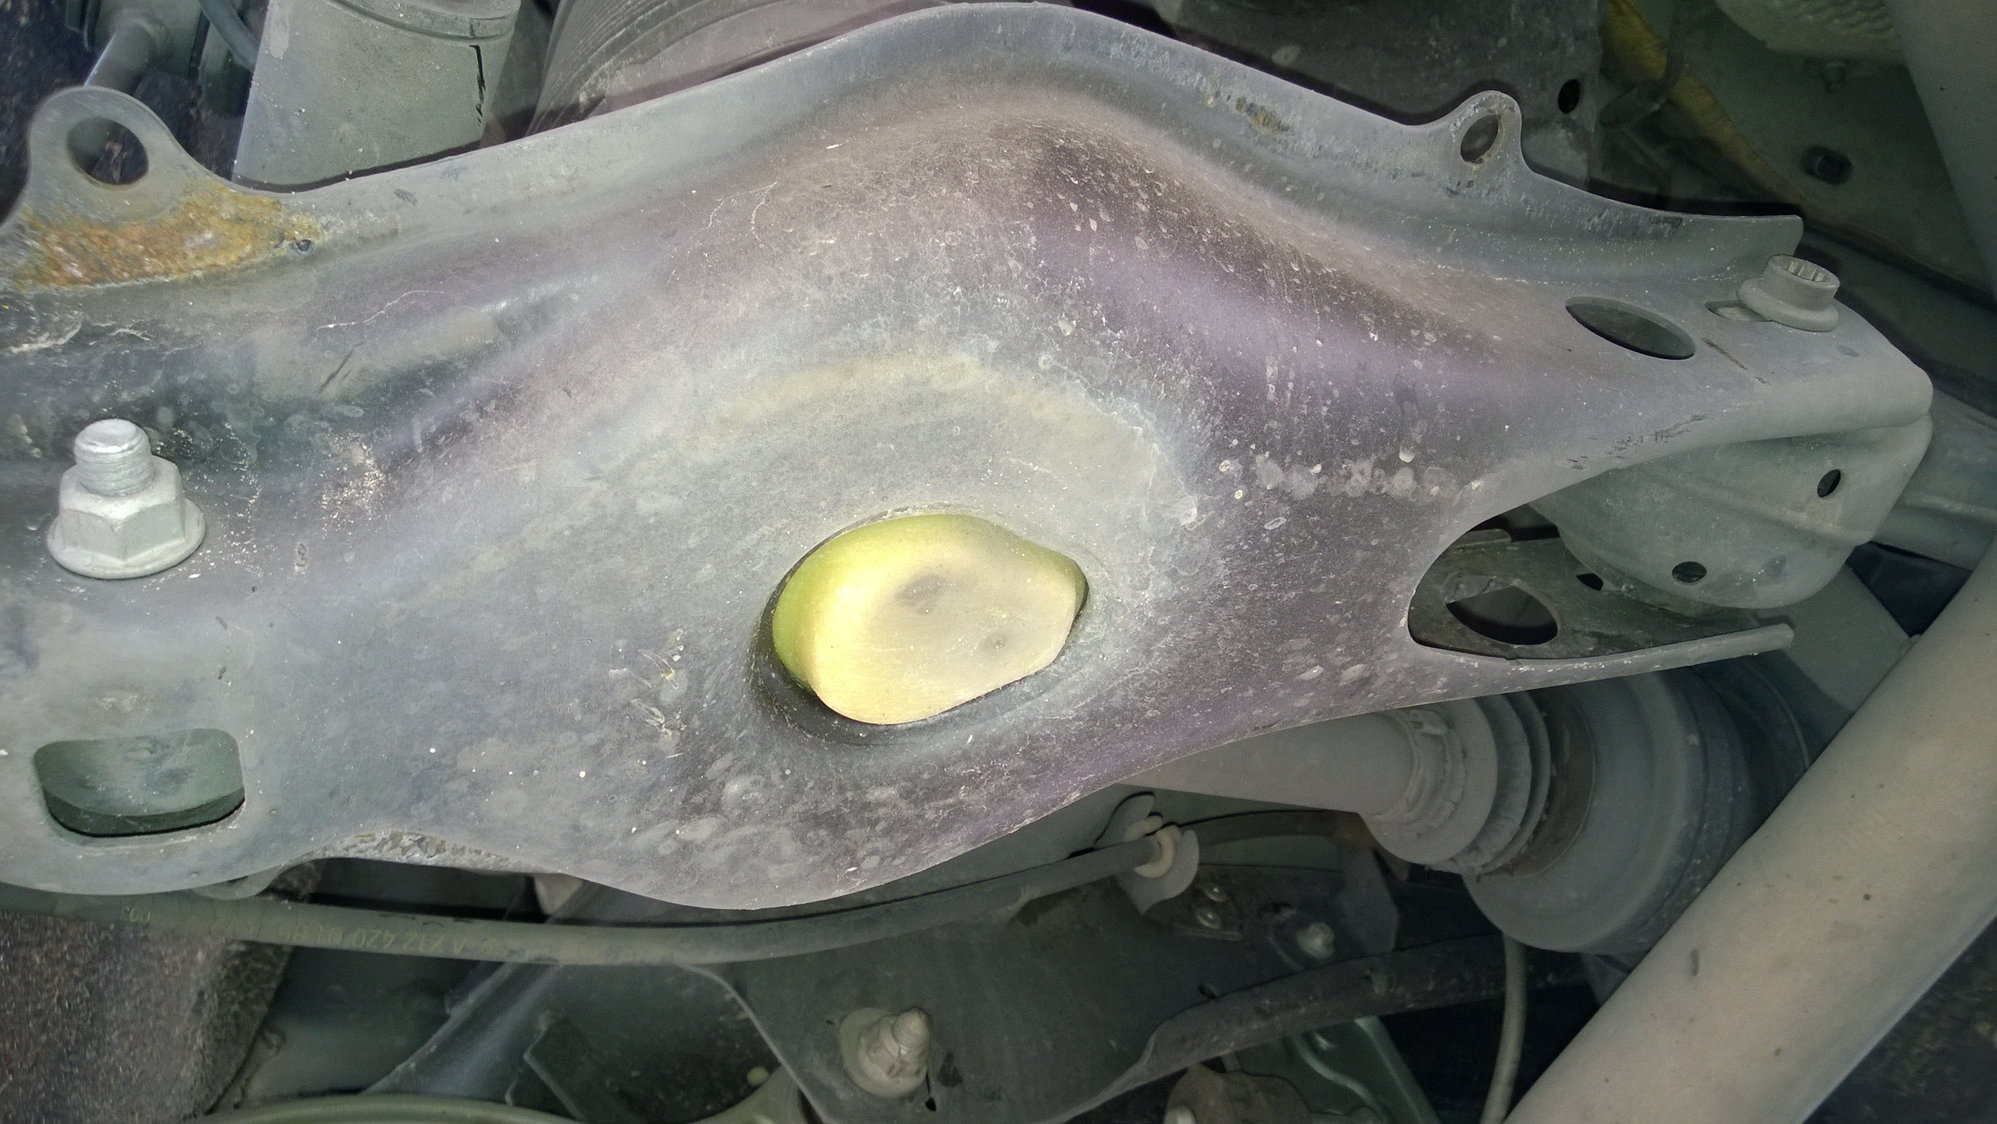
View from under suspension arm. I needed to thump the bottom of the spring to unseat it.
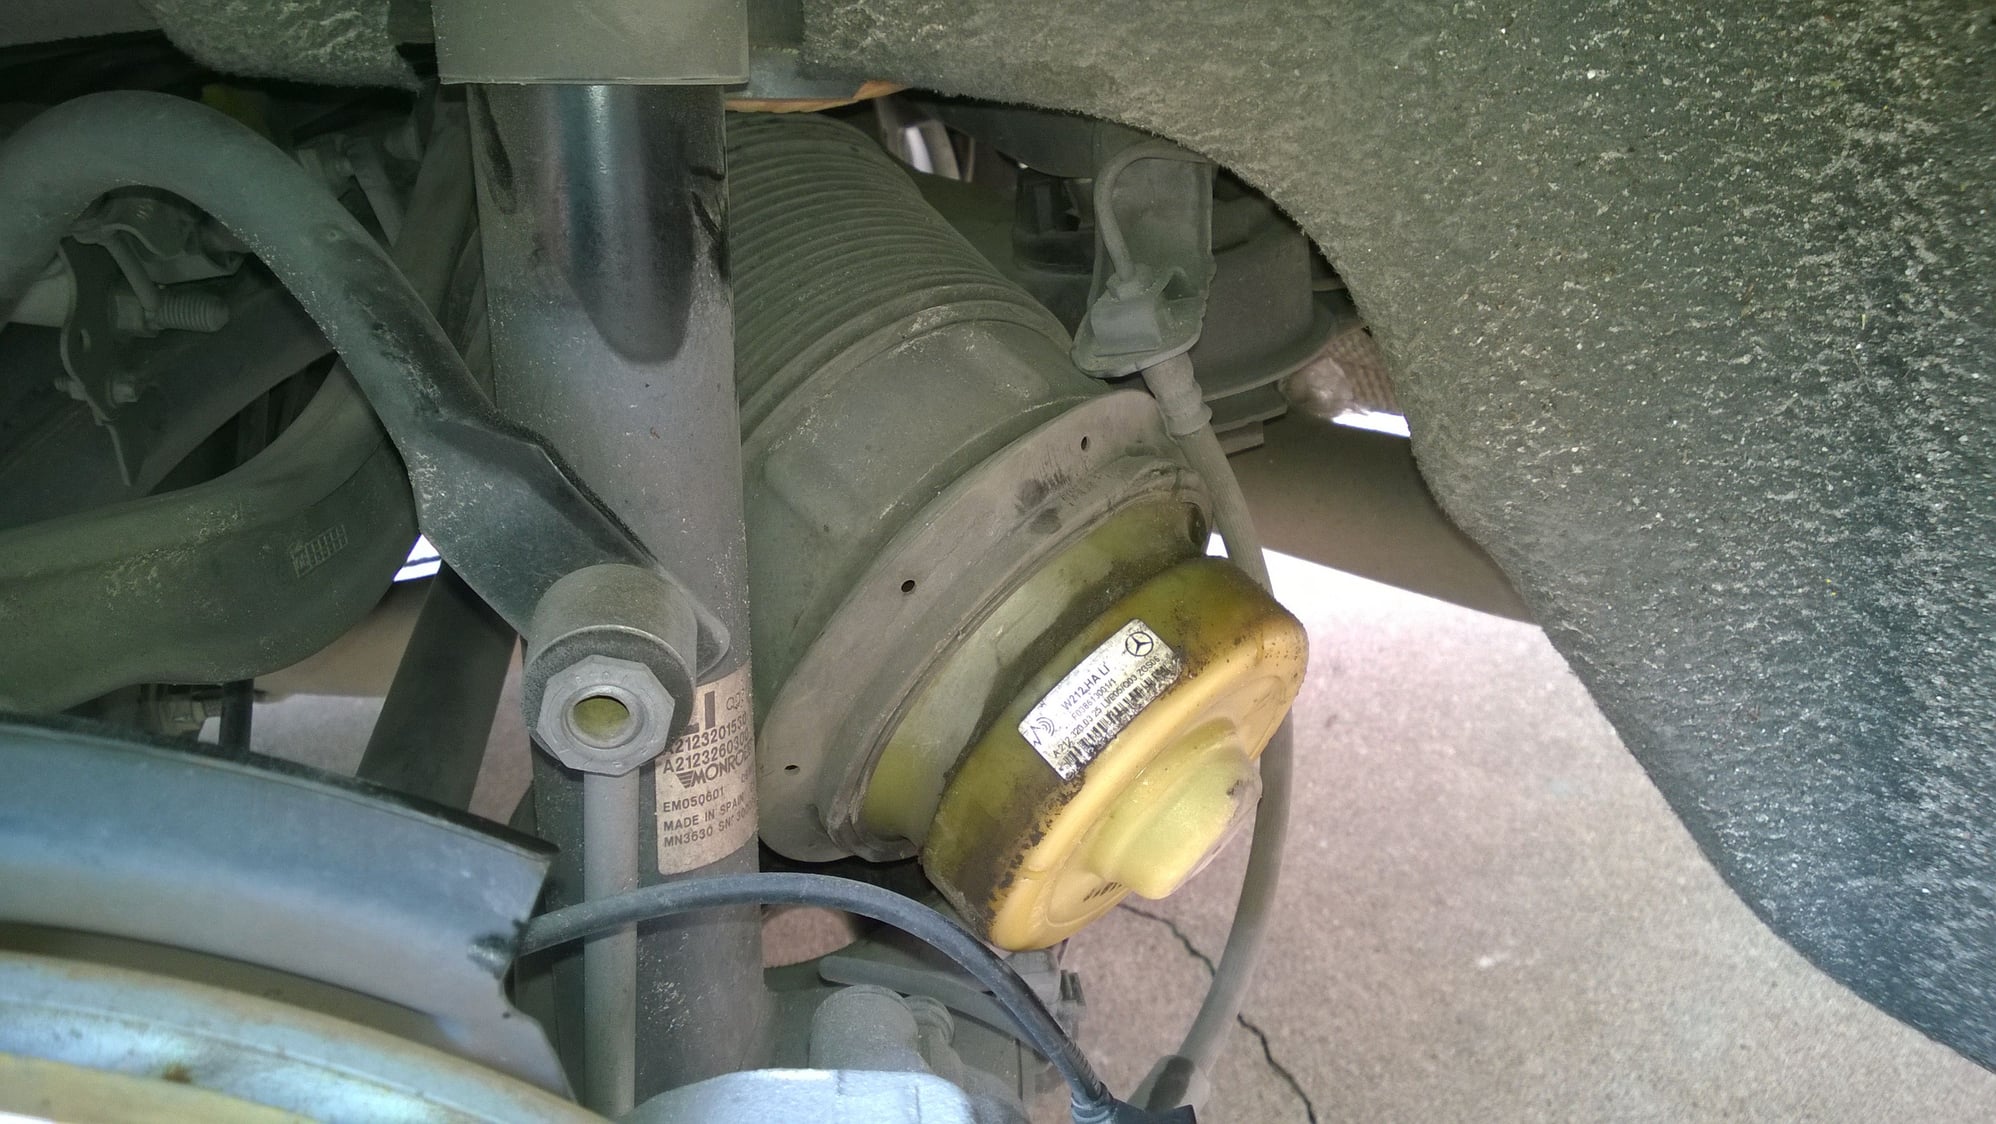
Remove old spring. Note the text here says remove the electrical connection and caliper first which is definitely the way to go but the photo shows I removed the spring first and then removed the electrical connection and caliper. It's far easier to install the new spring with the electrical connection and caliper out of the way so you may as well make things easier on yourself and remove them before taking the old spring out.
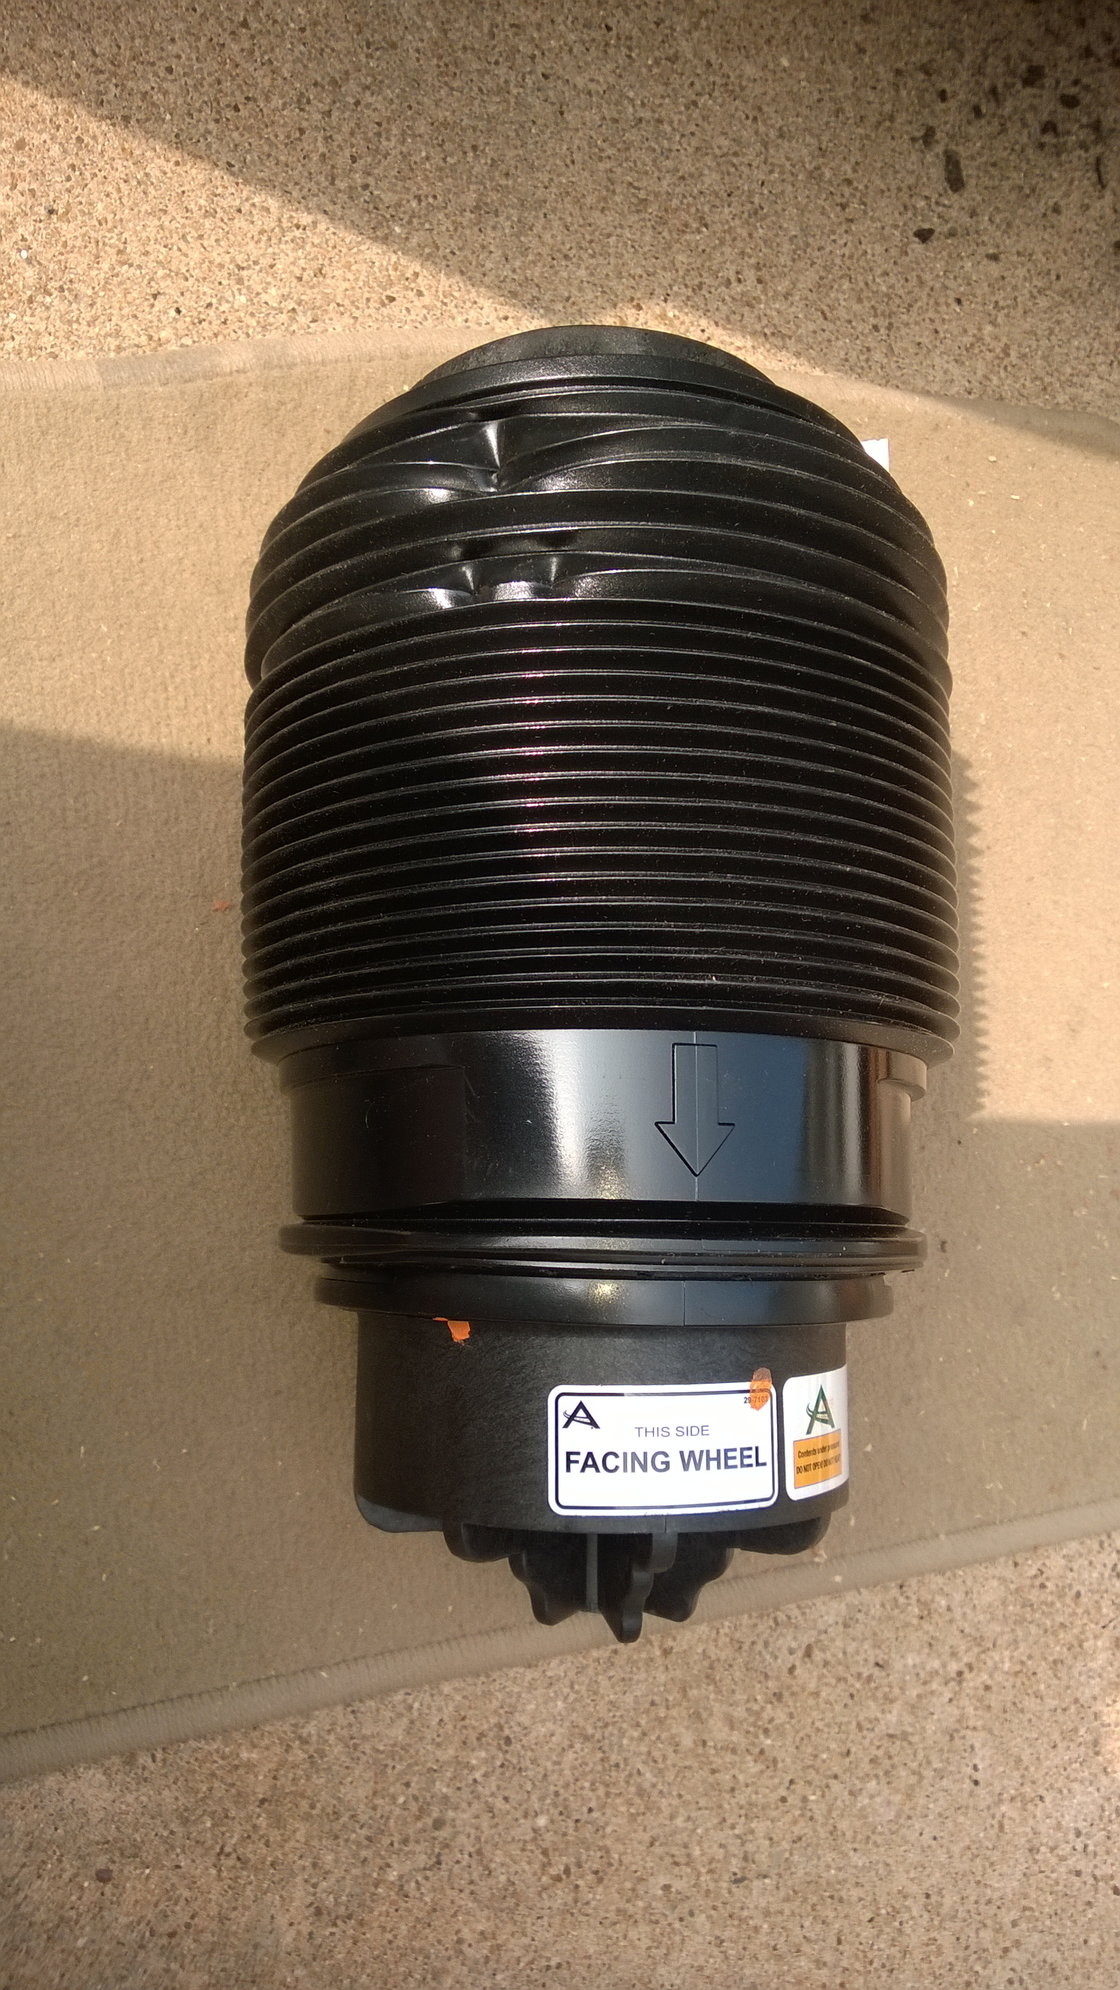
New spring, note arrow to be facing wheel. Don't worry about the odd crease in the dust cover, they sort themselves out once fitted.
Last edited by T100T; 05-22-2016 at 11:03 AM.
The following 5 users liked this post by T100T:
biker349 (11-23-2022),
Fliplegend (01-28-2022),
HK-UK 500 (02-20-2019),
StephenW2016 (03-17-2019),
TeeEl (02-20-2019)
#5
Member
Thread Starter

With the brake and electrical connector out of the way slide the new spring into place.

Compress spring and rotate base into recess in arm.

Insert air line into fitting, fully seat, note how it is routed behind brake line. DO NOT LOOSEN OR TIGHTEN BRASS FITTING. Just push the line fully in.

Note arrow, be sure spring is properly aligned.

Re install cover from bottom of suspension arm, just clips in place.
I made sure the spring was properly aligned at the top and reconnected the battery, I can't be sure if I had to turn the ignition on or if the compressor automatically started to inflate the spring. However I was careful to not have the spring poorly seated or aligned when it inflated.
At this point you're pretty much done, reattach the brake caliper and cable to the shock, put the wheel back on and you're good to go.
Some of the above photo's are out of sequence but hopefully you'll be able to figure things out. It's not a difficult job.
Last edited by T100T; 05-22-2016 at 11:03 AM.
The following 21 users liked this post by T100T:
belarus27 (11-02-2016),
biker349 (11-23-2022),
Ferris_E550 (07-29-2016),
Fliplegend (01-28-2022),
GuestFromTampa (06-14-2017),
and 16 others liked this post.
#7
Member
Thread Starter
Couple of additional comments
Two things I've learned since changing the rear spring...
Firstly, the air compressor sits under a cover on the left rear of the car, do a search and you'll find pictures elsewhere on this forum or just look where the small pneumatic lines go. The compressor is under a cover (4 x 10 mm nuts). Next to the compressor is the valve block which controls the air to and from each of the four springs. So instead of drilling a hole to let the air out of the old spring you can just back off the nut of the appropriate line at the valve block. Best to clean the area prior to disconnecting. The lines are color coded and labeled to make it easy. I found it easier to remove the valve block (2 torx screws) so I could access the nut. See the attached picture.
Secondly, installing the new spring into the limited place is quite tricky and if the car has been sitting with the spring without pressure, i.e. collapsed then be prepared to push down on the wheel hub to extend the space to receive the spring. Easier if you have a helper. Be careful when installing the new spring not to damage the air fitting.
Good luck, it's not a tough job, just don't get in a rush.
Peter
The following 4 users liked this post by T100T:
Trending Topics
#8
Member
Join Date: Jan 2011
Location: West Linn, Oregon
Posts: 217
Likes: 0
Received 62 Likes
on
48 Posts
2011 E550 - 4Matic, 2008 ML550
Awesome write up - one question - you note in caps, do not tighten or loosen brass fittings, but you don't say when to tighten them? before buttoning it all back up?
Thanks for this!
Thanks for this!
The following users liked this post:
MaMaChup (05-26-2020)
#9
Member
Thread Starter
You do not tighten the fitting at any stage, it comes from Arnott fully screwed into the air spring all you have to do is insert the tube and it will self seal. Arnott makes this clear in their documentation, it may not be the same if you're fitting MB parts.
Peter
Peter
#10
MBWorld Fanatic!
Join Date: Jun 2013
Location: Sacramento , CA
Posts: 1,900
Received 195 Likes
on
171 Posts
2010 e550 p2
changed out my rear left air spring today
took me roughly about 2 hours.
didnt remove brake calipers or any connectors.
Arnott PDF instructions make it seem too simple , which it kinda is ...
thanks OP for giving me and idea what i need to do..
i will add my pics in case anyone would wanna do it themselves.
took me roughly about 2 hours.
didnt remove brake calipers or any connectors.
Arnott PDF instructions make it seem too simple , which it kinda is ...
thanks OP for giving me and idea what i need to do..
i will add my pics in case anyone would wanna do it themselves.
The following 6 users liked this post by belarus27:
biker349 (11-23-2022),
Ferris_E550 (11-09-2016),
Fliplegend (01-28-2022),
jahquan3 (06-13-2017),
John Wu (10-15-2018),
and 1 others liked this post.
#12
MBWorld Fanatic!
Join Date: Jun 2013
Location: Sacramento , CA
Posts: 1,900
Received 195 Likes
on
171 Posts
2010 e550 p2
But yea , DIYs are the way to go...to avoid those crazy labor and parts prices.... plus if you enjoy working on your cars n like getting to know things... its the best... makes you feel good bout yourself when u accomplish it.
#13
Super Member
Looks like we even had the same side air spring replaced with OP haha
But yea , DIYs are the way to go...to avoid those crazy labor and parts prices.... plus if you enjoy working on your cars n like getting to know things... its the best... makes you feel good bout yourself when u accomplish it.
But yea , DIYs are the way to go...to avoid those crazy labor and parts prices.... plus if you enjoy working on your cars n like getting to know things... its the best... makes you feel good bout yourself when u accomplish it.
The following users liked this post:
biker349 (11-23-2022)
#15
I'm dealing with the same issue on my 2010 E550. The Left (Driver Side) rear is losing air so I ordered the replacement A-2791 part however noticed on their site it says in all bold
https://www.arnottindustries.com/par...4_gid1219.html
NOTE: If replacing an OE unit with Arnott Air Spring A-2791 you MUST replace both rear air springs at the same time.
I had the issue diagnosed and it was confirmed the left side. I'd rather not purchase the passenger side unless absolutely required. I noticed on here it appears most of you just replaced just the same side I'm having problems with. Is the other side still OEM? Are you having issues since replacement if you've only replaced one side?
Thanks!
The following users liked this post:
biker349 (11-23-2022)
#16
MBWorld Fanatic!
Join Date: Jun 2013
Location: Sacramento , CA
Posts: 1,900
Received 195 Likes
on
171 Posts
2010 e550 p2
So far so good... and when i asked my ebay seller if its bad , and they saif its totally okay to replace just one (ofcoarse its possible for them to say so just to make a sale) but its been okay so far.
#18
Junior Member
Join Date: Mar 2006
Posts: 23
Likes: 0
Received 2 Likes
on
2 Posts
2013 E350 4matic Wagon, 2002 E320S4 - E-class W210 Wagon 4-matic
Thanks Pwells for the excellent DIY!
Two things I've learned since changing the rear spring...
Firstly, the air compressor sits under a cover on the left rear of the car, do a search and you'll find pictures elsewhere on this forum or just look where the small pneumatic lines go. The compressor is under a cover (4 x 10 mm nuts). Next to the compressor is the valve block which controls the air to and from each of the four springs. So instead of drilling a hole to let the air out of the old spring you can just back off the nut of the appropriate line at the valve block. Best to clean the area prior to disconnecting. The lines are color coded and labeled to make it easy. I found it easier to remove the valve block (2 torx screws) so I could access the nut. See the attached picture.
Secondly, installing the new spring into the limited place is quite tricky and if the car has been sitting with the spring without pressure, i.e. collapsed then be prepared to push down on the wheel hub to extend the space to receive the spring. Easier if you have a helper. Be careful when installing the new spring not to damage the air fitting.
Good luck, it's not a tough job, just don't get in a rush.
Peter
Firstly, the air compressor sits under a cover on the left rear of the car, do a search and you'll find pictures elsewhere on this forum or just look where the small pneumatic lines go. The compressor is under a cover (4 x 10 mm nuts). Next to the compressor is the valve block which controls the air to and from each of the four springs. So instead of drilling a hole to let the air out of the old spring you can just back off the nut of the appropriate line at the valve block. Best to clean the area prior to disconnecting. The lines are color coded and labeled to make it easy. I found it easier to remove the valve block (2 torx screws) so I could access the nut. See the attached picture.
Secondly, installing the new spring into the limited place is quite tricky and if the car has been sitting with the spring without pressure, i.e. collapsed then be prepared to push down on the wheel hub to extend the space to receive the spring. Easier if you have a helper. Be careful when installing the new spring not to damage the air fitting.
Good luck, it's not a tough job, just don't get in a rush.
Peter
(xii) Install new spring, the base which fits in the lower arm is keyed, so rotate to align properly. You also need to align to allow air line to connect. Getting the spring into place is a little tricky, you need to slide in, compress and then rotate, don't get into a rush. Don't worry if you crease some of the outer dust protector, it'll return to shape when installed.
Thank you Peter for the excellent writeup.
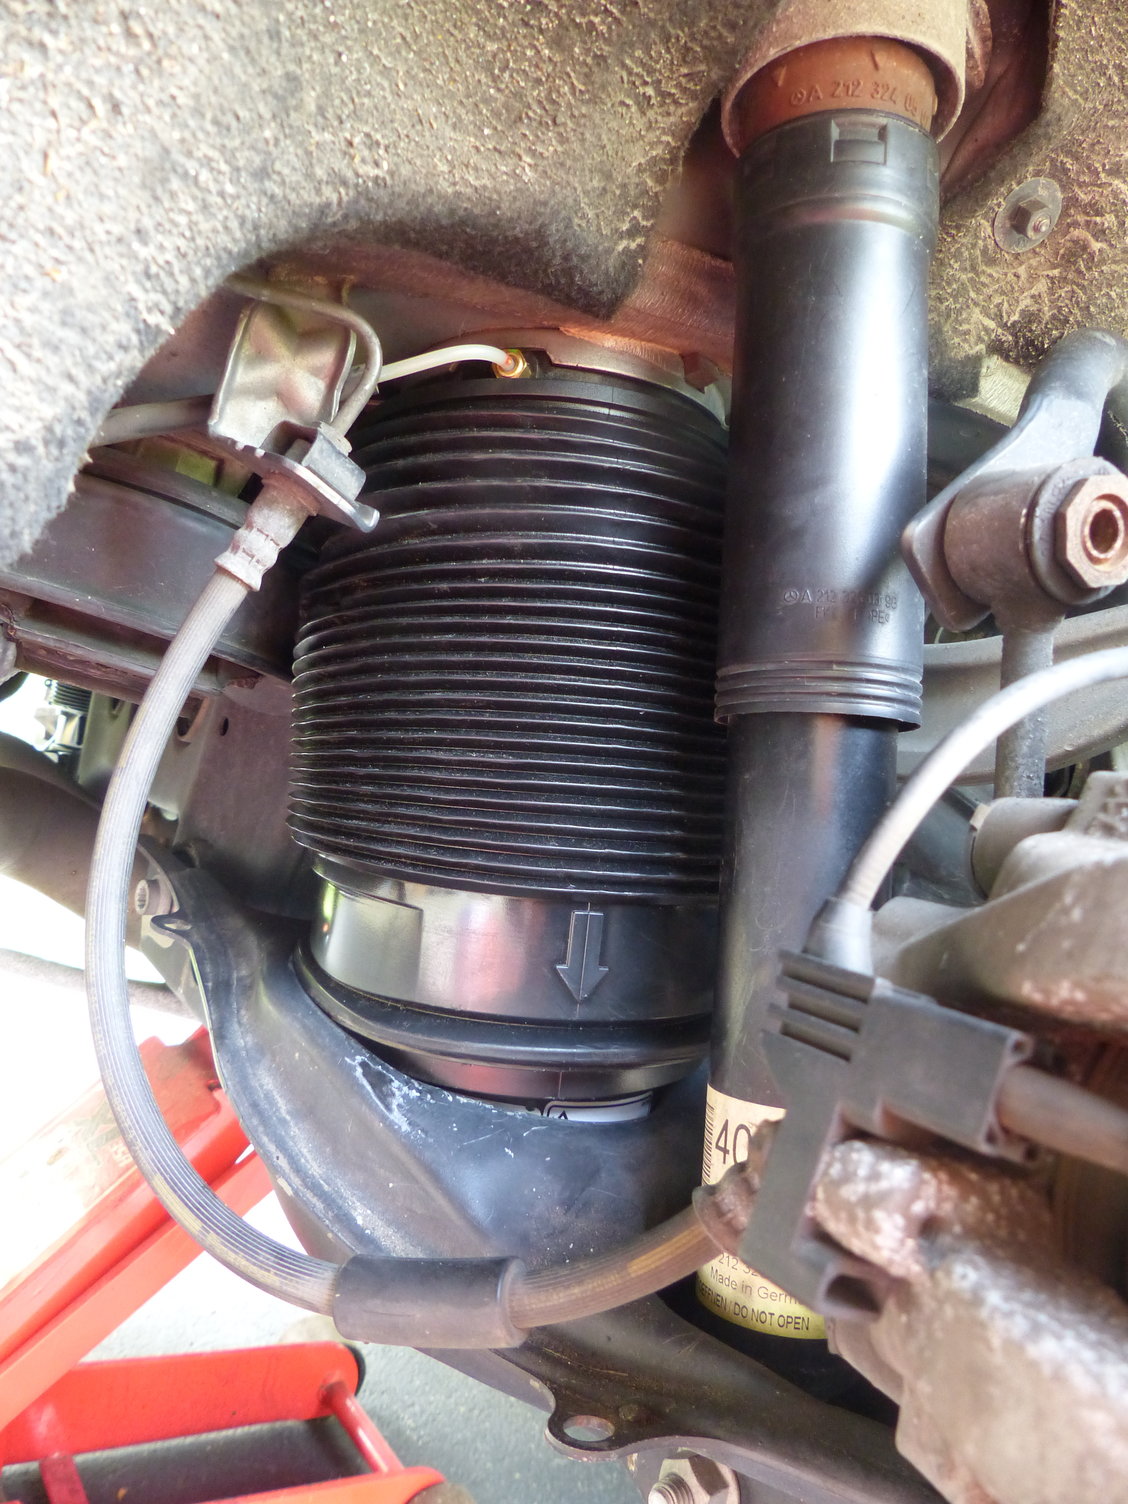
No electrical connector on the rear shock absorber on my 2013 E350 4matic Wagon. Removing the caliper doesn't give you any additional room to insert the new air spring. The picture shows a new Arnott air spring installed on the rear right of the car.
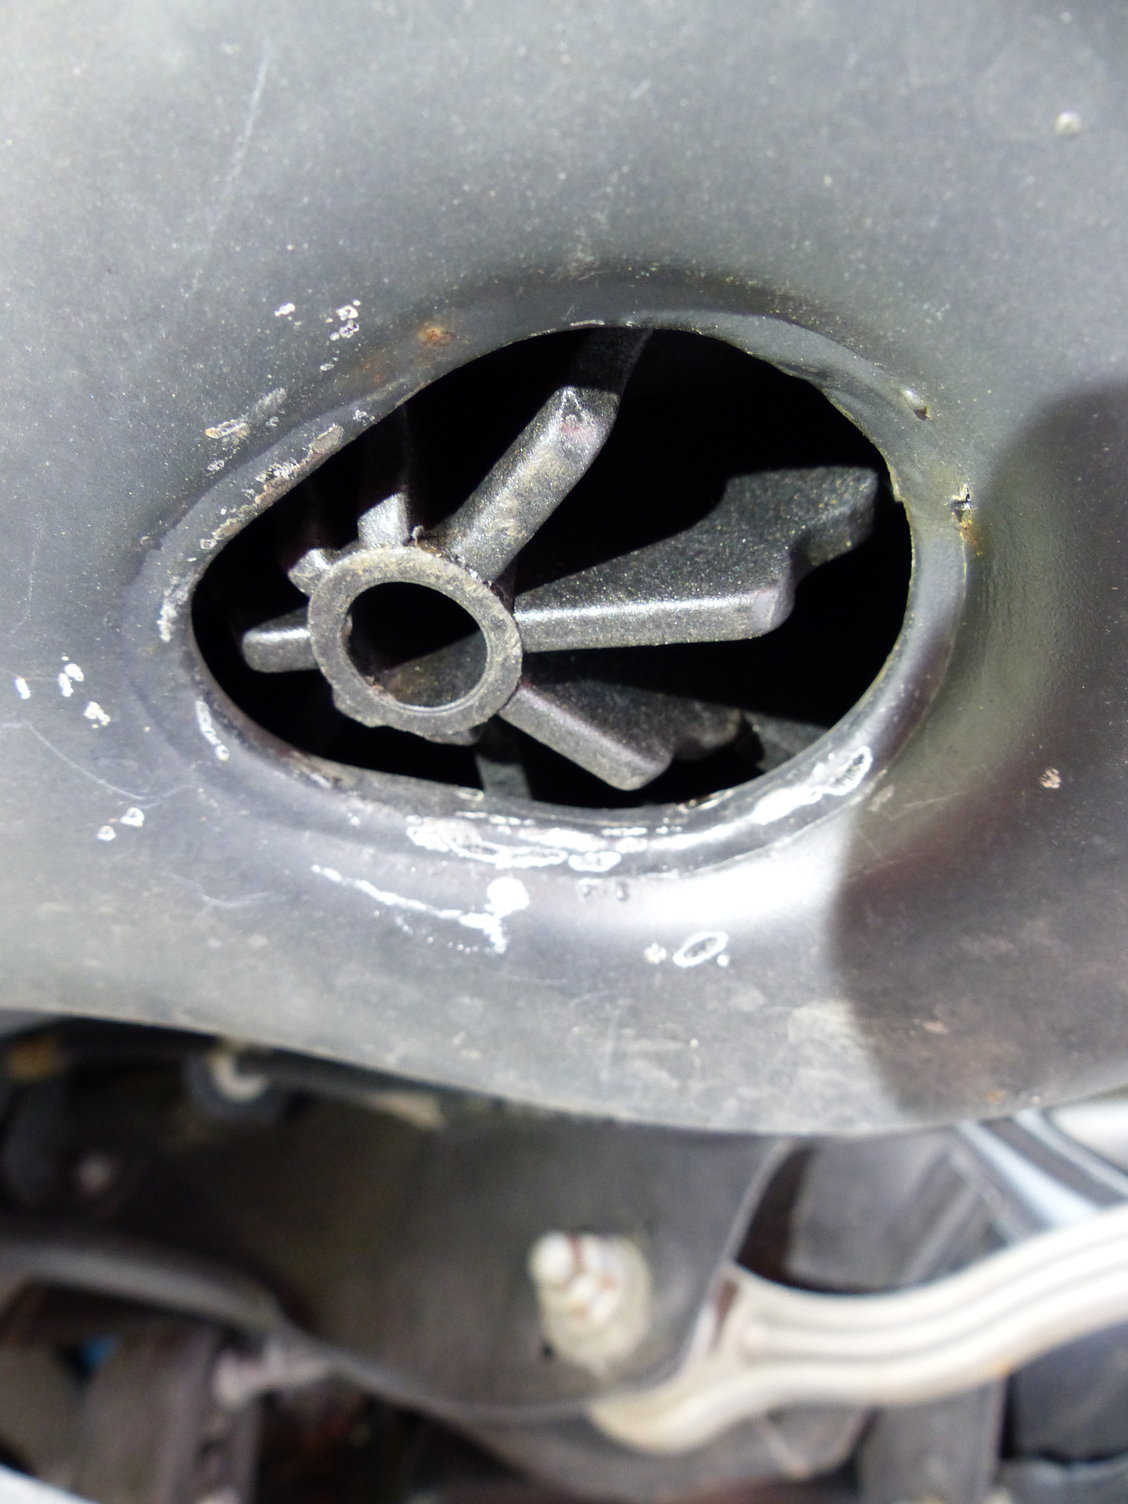
This is how the bottom of the Arnott air spring should look seated in the lower control arm as seen from underneath the car.
The following users liked this post:
biker349 (11-23-2022)
#19
I installed the replacement Arnott A-2790 Right Rear Airspring ($208 shipped from Amazon) and A-2791 Left Rear Airspring ($192 shipped from Amazon) on my 2011 E63 AMG yesterday. I primarily wanted to express my profound thanks to Peter pwells for this writeup that gave me the confidence to attempt it. It was really quite an easy project, taking me 4.5 hours start to finish. However, I spent 1 hour just getting the car up and the wheels off (just the peculiarities of my set up). I did not remove brake calipers. I did disconnect the quick electrical connection on the shock absorber. I did not attempt to remove the OEM airline fitting while the original airspring was in position - no room for the 10mm wrench as Peter said. I simply drilled a hole in it as Peter did, release the remaining air, and then could easily remove the airline fitting when the airspring was deflated.
My most important key learning and what I wanted to share with others that may pursue this DIY project: I did not understand the significance of what Atul was saying above. In it's natural "resting position" each rear wheel hub (without the wheel) is not fully extended from the car, and I spent an hour on the first one fighting to get the new Arnott airspring in place, using all manner of crowbars, mallets and brute force tools: I could maneuver the new airspring into the space but there was not enough room to then turn it vertically into the proper position. However when I finally remembered what Atul had briefly said above, that you need to pull down the brake/hub to fully extend the shock absorber, creating the space to get the new airspring into position, that was a game changer. I had my 16-year old, 165 pound son put some gloves on and basically hang from the disc brake rotor (the car was up on a lift) like he was doing a pull-up. 5 hangs and 10 minutes later - boom, right side done. 3 hangs and 5 minutes, left side done. If your car is not on a lift, maybe you could simply have your helper step on it from a step stool or something. Anyway, that was a game changer for me.
Don
Last edited by dn325ci; 06-18-2018 at 11:14 PM. Reason: My grammar sucks.
The following 5 users liked this post by dn325ci:
arnottdoug (06-19-2018),
biker349 (11-23-2022),
MaMaChup (05-26-2020),
Raj1471 (10-06-2019),
StephenW2016 (03-17-2019)
#21
I was unable to break the base from the lower control arm. I pried and used a hammer to 'thump' the bottom of the spring while laying on my back. I would not break loose. It didn't budge whenI tried jacking up with a deep socket pushing on the bottom of the spring. It appears to be stuck on the inside where I did not have access to.
I'm getting it towed to my local shop where they can have more leverage and if required take off the lower control arm.
Thanks for the DIY info though.
I'm getting it towed to my local shop where they can have more leverage and if required take off the lower control arm.
Thanks for the DIY info though.
#22
I was unable to break the base from the lower control arm. I pried and used a hammer to 'thump' the bottom of the spring while laying on my back. I would not break loose. It didn't budge whenI tried jacking up with a deep socket pushing on the bottom of the spring. It appears to be stuck on the inside where I did not have access to.
I'm getting it towed to my local shop where they can have more leverage and if required take off the lower control arm.
Thanks for the DIY info though.
I'm getting it towed to my local shop where they can have more leverage and if required take off the lower control arm.
Thanks for the DIY info though.
Don
The following users liked this post:
biker349 (11-23-2022)
#24
Hey guys,
I am about to do this job on my E63 - I have a question
How do I jack the rear of the car? I have cooling fins on my differential. Do I jack behind the fins? I feel like it's not an even surface.
Can I jack one side at a time and work on each side? I have done that in the past by using a hydraulic jack on the side front jack point and lift the car high enough that I can stick a jack stand on the rear point.
#25
MBWorld Fanatic!
Join Date: Jun 2013
Location: Sacramento , CA
Posts: 1,900
Received 195 Likes
on
171 Posts
2010 e550 p2
Hey guys,
I am about to do this job on my E63 - I have a question
How do I jack the rear of the car? I have cooling fins on my differential. Do I jack behind the fins? I feel like it's not an even surface.
Can I jack one side at a time and work on each side? I have done that in the past by using a hydraulic jack on the side front jack point and lift the car high enough that I can stick a jack stand on the rear point.
I am about to do this job on my E63 - I have a question
How do I jack the rear of the car? I have cooling fins on my differential. Do I jack behind the fins? I feel like it's not an even surface.
Can I jack one side at a time and work on each side? I have done that in the past by using a hydraulic jack on the side front jack point and lift the car high enough that I can stick a jack stand on the rear point.
i jacked up one side only on my 550. Had no problem to access and replace.
The following users liked this post:
biker349 (11-23-2022)


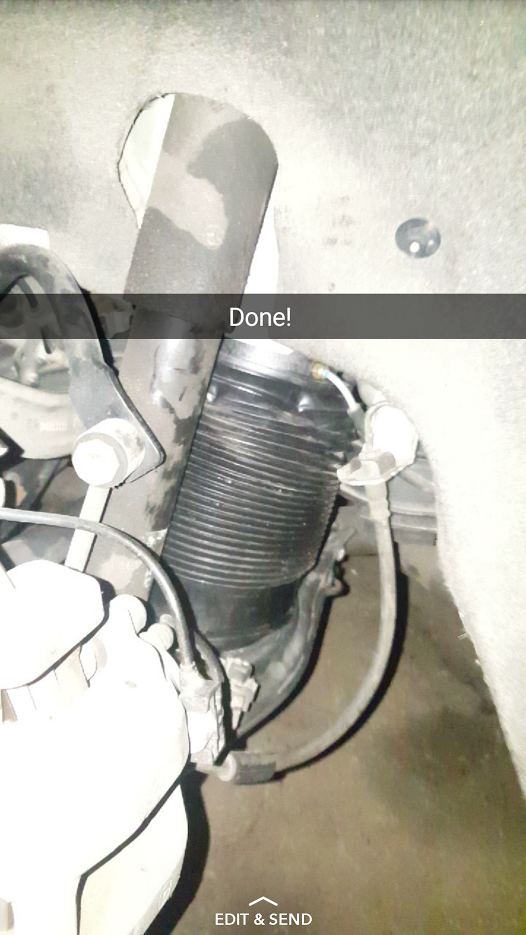
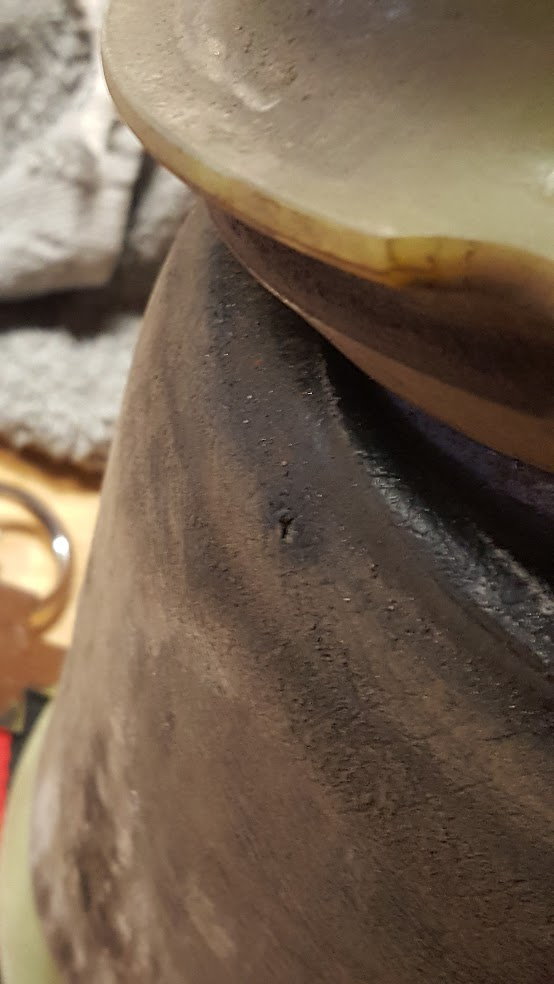
 I had the same issue and the install went without a hitch! I even found the hole in my old air strut.