When you click on links to various merchants on this site and make a purchase, this can result in this site earning a commission. Affiliate programs and affiliations include, but are not limited to, the eBay Partner Network.
Hello everyone! Mercedes BENZ W213 E class Full LCD screen retrofit HU5 to HU5.5 command / audio 20 system. I offer solutions!
Spoiler
I offer solutions!
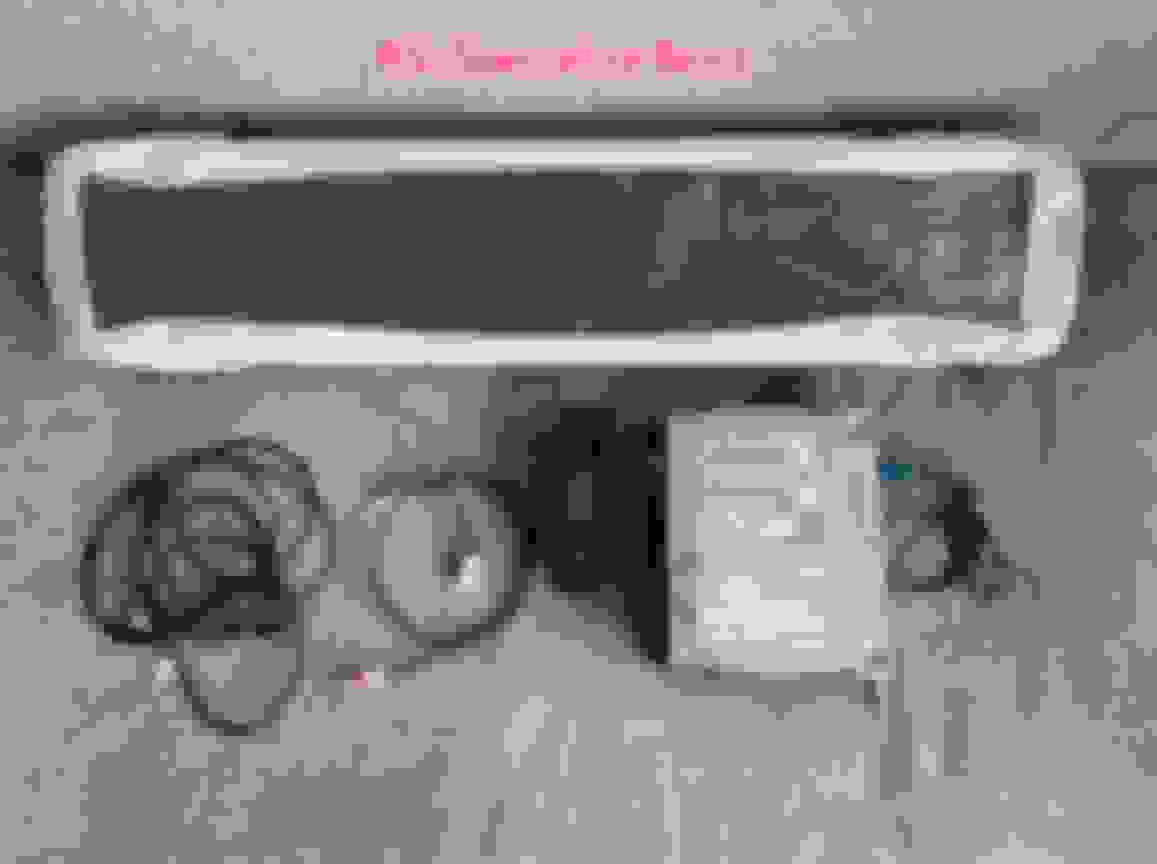
1,The hardware kit : LCD screen with cables ,HU5.5 command/Audio 20 ,Carplay BOX with cables,Screen atmosphere lamp
2,Used screen remote programming fixes like "----" and renew, and more AMG menu activate
3,360 system coding
3,Carplay activate
As the owner said,There's a small problem with the ambience lights.after we code,You can adjust the brightness.But it can't be adjusted to very high brightness
Last edited by RSBenzCode; 06-29-2021 at 02:59 AM.
Hello everyone! Mercedes BENZ W213 E class Full LCD screen retrofit HU5 to HU5.5 command / audio 20 system. I offer solutions!
Spoiler
I offer solutions!
1,The hardware kit : LCD screen with cables ,HU5.5 command/Audio 20 ,Carplay BOX with cables,Screen atmosphere lamp
2,Used screen remote programming fixes like "----" and renew, and more AMG menu activate
3,360 system coding
3,Carplay activate
As the owner said,There's a small problem with the ambience lights.after we code,You can adjust the brightness.But it can't be adjusted to very high brightness
I know that the topic has gone a bit stale, but maybe it'll be helpful for people looking for this retrofit later on, so that's what I did to make it work.
I don't take any liability for your actions, this is only a rough description of what I found out and what I did, not a detailed tutorial.
After reading this forum before registration and digging around literally everywhere to get the parts list to retrofit from the poorest possible infotainment (Audio 20, code 522) to the widescreen here's what I ended up with:
Screen:
If your car is pre-facelift, pay attention to the number of plugs on the rear. The pre-facelift car needs 2 multi-pin connectors!
On the market currently you can find a lot of facelifted screens, they differ by the fact, that they only have 1 multi-pin connectors.
This one is post-lift:
This one is pre-facelift:
HeadUnit:
Basically in 213 you could have 3 different HU's. They all have Anti-theft PIN protection if you buy used one!
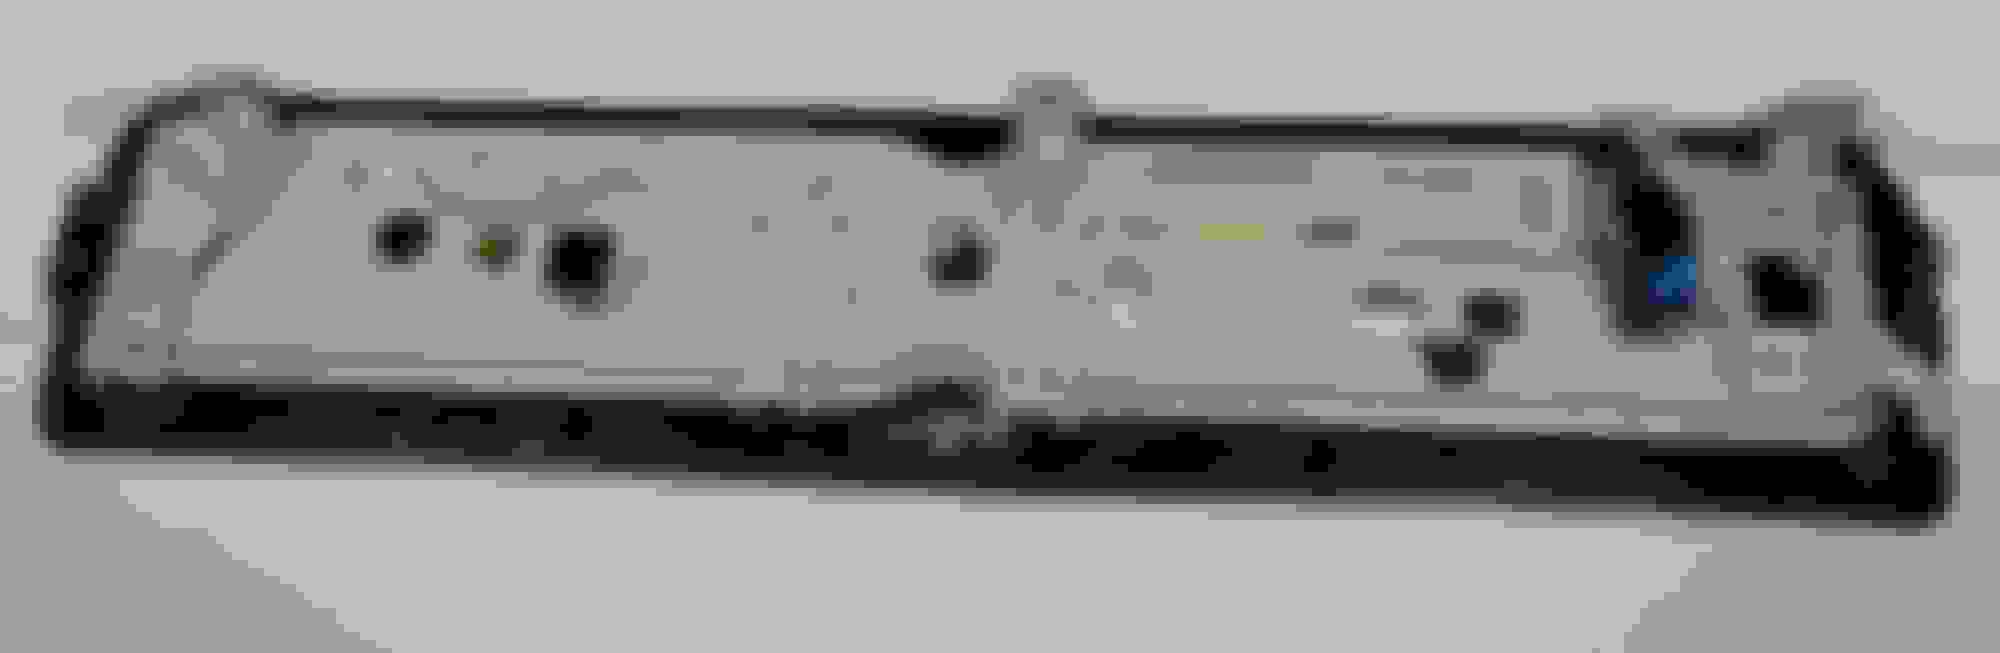
The basic one (the one that I also had) which is NTG5.1, and which under no circumstances can support any screen apart from the small one, you can always recognize it by the plugs layout:
Then you've got NTG5.5 ENTRY, which CAN support widescreen, but it might need additional cables and coding:
And then there's the NTG5.5 High, which ofc also supports widescreen, it also has more USB port connections, but it's typically really expensive:
Which one to take? If I'd be doing the same choice again, I'd go with the NTG 5.5 Entry, it does the same effect as the High one, just isn't so expensive and it's much easier to get.
Which one I ended up buying? NTG 5.5 High, because I didn't have the knowledge that Entry will be sufficient.
Cables:
THIS PART ISN'T FULLY COMPLETE FOR WIDESCREEN, AS I ENDED UP WITH 12.3" media, and analog speedo.
Here's the secret that most "retrofitters" are hiding, what you need is:
A2135405328 - To connect multimedia panel (in armrest) with the new HU.
A2135404721 - To connect HU with multimedia screen. I ended up buying this one, because the plug for Audio20 screen is absolutely different, you need 2 FAKRA connector and this part number has it. One of the connectors stays empty (the one to IC) if you're staying with analog cluster.
Fakra K 1m cable - This isn't a Mercedes part, but to connect your new HU with IC, you'll need what's called a Fakra K cable. The cluster side should be 90 degrees ending. If you'll search for it on google, you can order those for about ~10USD for 1m. Then you take the female side, release plug out of the connection and put that into the joined connector that you'll have from the A2135404721.
Multimedia box:
A2138200400 - Only this one works if you want AndroidAuto/Apple CarPlay to work. Very easy to recognize by the phone symbol, the default one for Audio20 also has 2 plugs but they are white and purple, in this one they're white and blue.
After you have your parts ready, you need to remove the screen and HU, on YT you can find nice tutorials on how to do that, protips:
1. After unscrewing the 3 screws that hold screen in place, there are also tabs that hold it, around the screw holes. Put a flat screwdriver from the windows side, lift the "screen mount" a bit, and it'll pop out easily.
2. Whilst removing center console panel to get to the HU, watch out for controller plug. It's short and easy to rip out of it's mounting point.
3. Better get some both long and short torx screwdrivers to get to all the bolts.
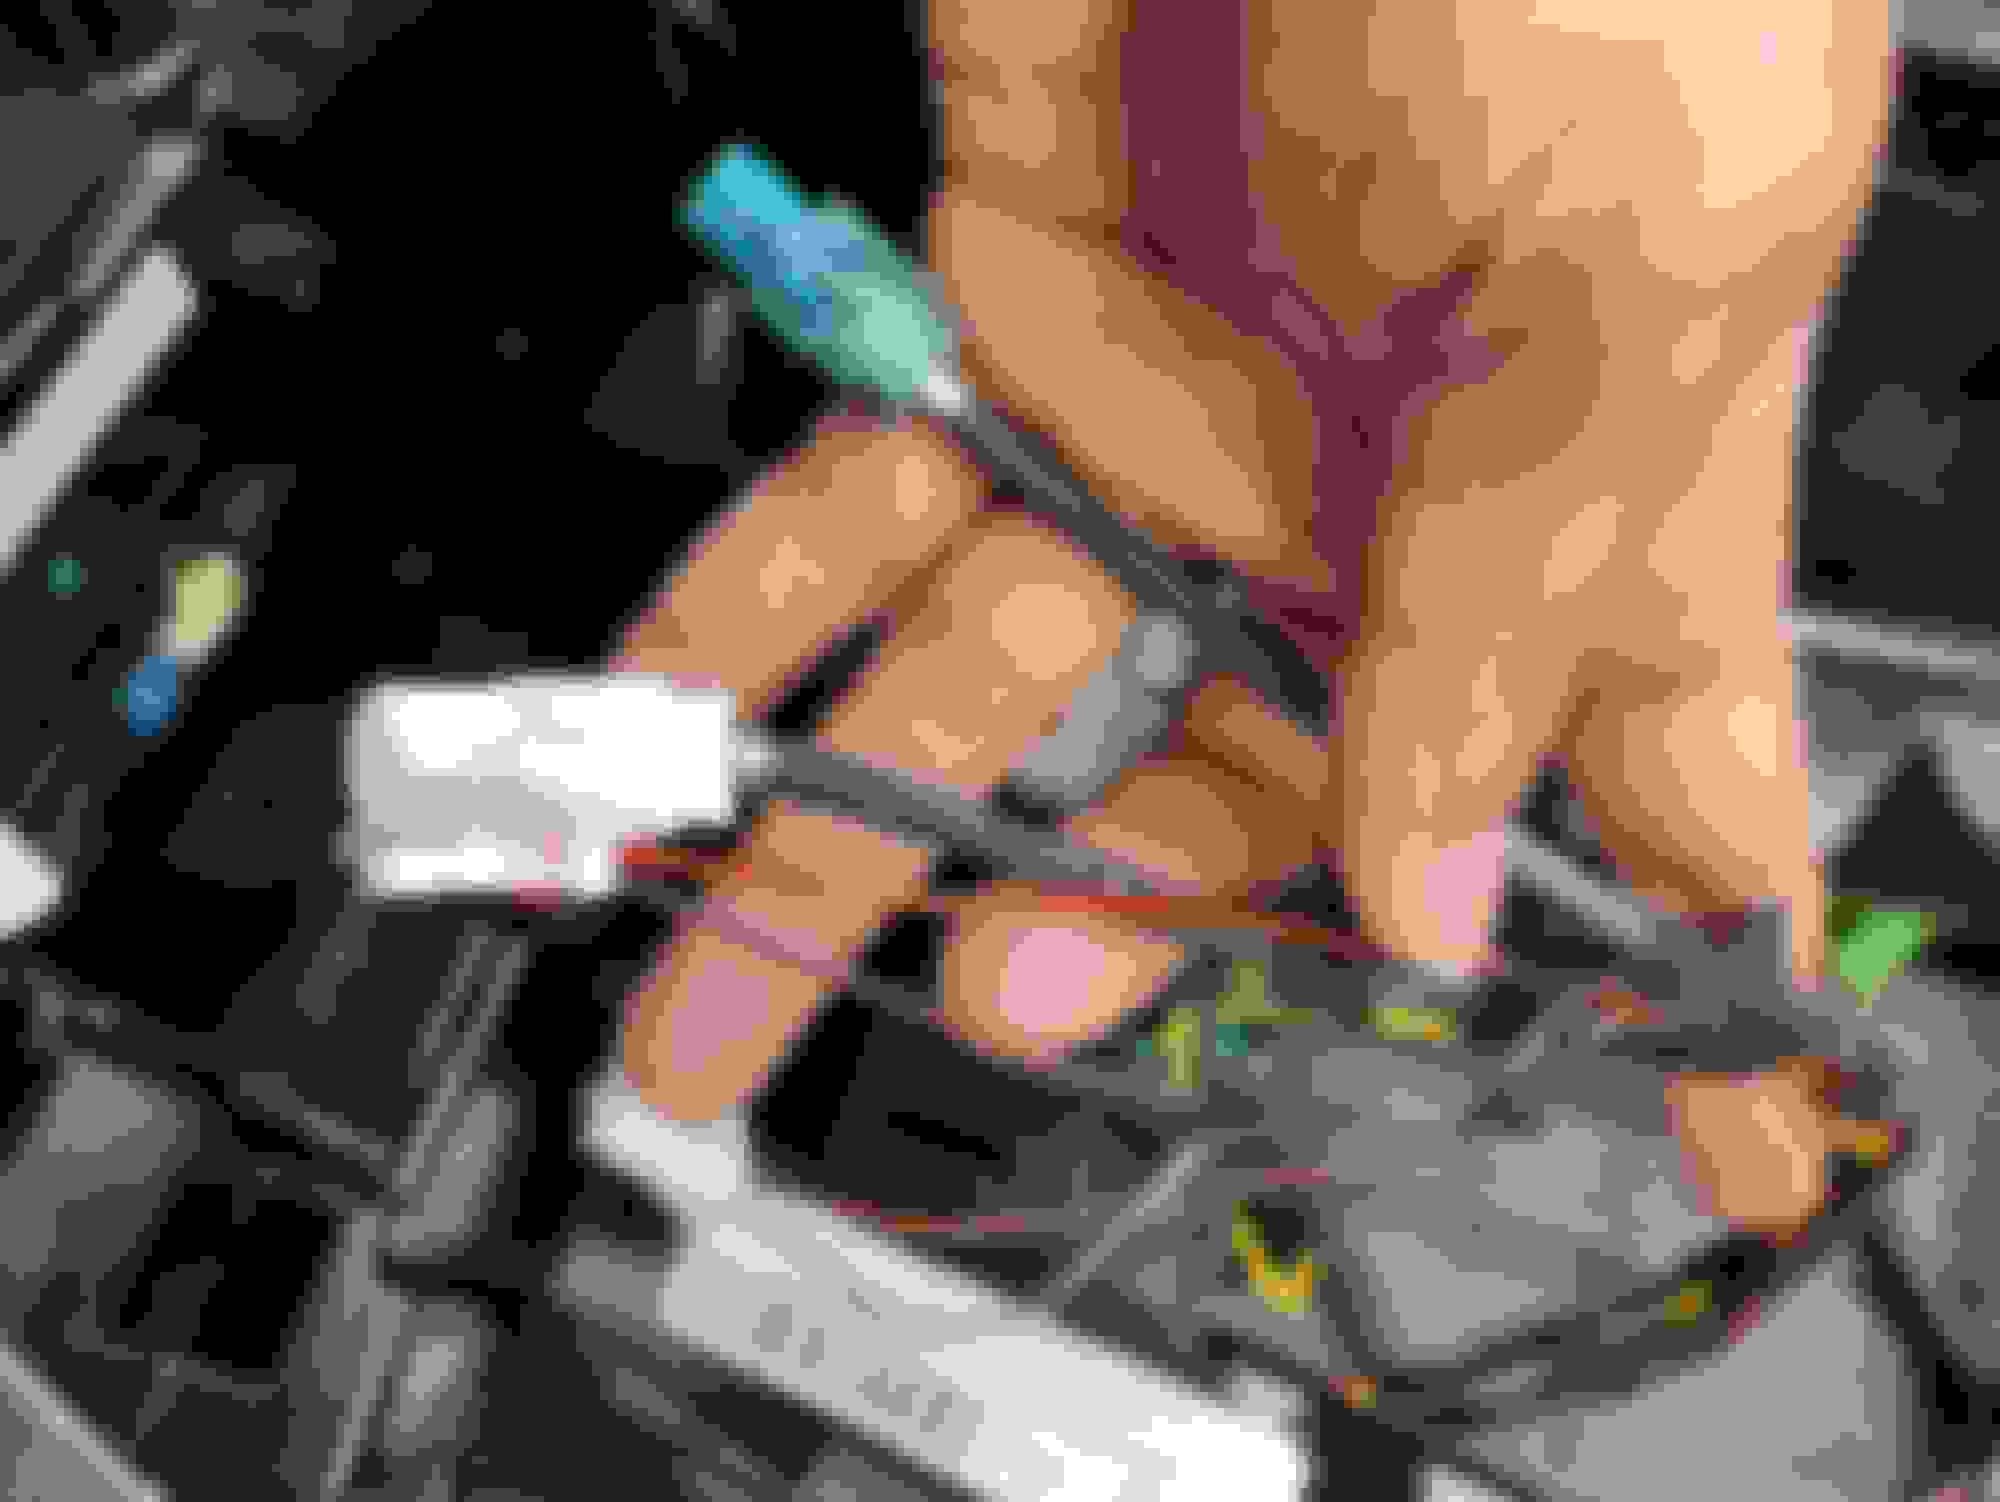
Now time for cable routing/plugs:
1. You'll notice that the RVC (rear view camera) plug is different, the NTG 5.5 HU's have it coupled with AUX connector. I was trying to find a number for that double connector, failed, discovered that after shaving a bit of the single (NTG5.1) RVC connector it fits the double socket, just needs a cabletie to hold on.
2. Routing of the new screen connector is really easy, just above the HU location there's an access hole that goes directly to the behind the screen area.
3. On the topic of HU->Multimedia cables, you'll see that in new cable set apart from the white and blue plug, you'll have also a red/green wire. Don't panic, you don't need to run it to the fuse box. In the old set, going to the previous multimedia panel, one of the plugs also has red/green wire, release it on the plug from the old one, plug into the new, and you're done.
After all of that, you can try to turn on the ignition, the screen should light up. If your HU is used, it'll turn on anti-theft protection.
Four ways around it:
1. Buy a new one.
2. Buy used one, with PIN. (That's what I did)
3. Buy used one, without pin, try to get pin. (There are some portals that sell those)
4. Buy used one, without pin, go to MB dealership, they can unlock it.
If the screen lighted up, shown you the anti-theft protection, it's time to start your coding.
What will you need?
1. Some kind of multiplexer (like MB Star C4/C5/C6), or pass-through.
2. Fully operational Vediamo or DTS Monaco, with car/modules files.
It's part that I did using DTS Monaco, and that's what I suggest as it's pretty straight-forward, but it has it's own crucial points, that I have spent hours trying to figure out.
1. Unlock your HU.
First you'll need to go into HU55, then select last tab with PIN, enter PIN for your HU and press "Transmit". After that's done with success, you'll need to do "Hard reset". If after this HU boots up, and the "Antitheft" message is gone, you're home!
2. Code your HU.
This case is very car-dependant, especially on what differed in between HU's donor and your car. In my case the difference was in audio (I have Burmeister) and Ambient lighting (I don't have it).
You need to go into "variantencoding", connect to your car, then browse through the list of possibilities, they typically are pretty well described.
3. Code your Parkman.
Yup, that's the issue from posts above. When you change your screen from the small one, the output resolution is different.
You need to go into Parkman55 module and change the output resolution in one of the "variantencoding" tabs. If you're seeing "invalid value" in any of the rows, this means that you've got old DTS Monaco data, that's what I had and what I lost ~5 hours on trying to debug.
Navigation - You'll notice the issue with navigation not working after installing the new HU. To make it work again, you'll need two separate codes. One to delete existing maps (because they were generated for the previous VIN of HU), and second one to make new maps run.
- How to get the maps? Download_Manager_COMAND_2.06.
- How to get the codes? "NTG5.5 Map activation code" and "NTG5.5 map delete code" (I'm not sure if I can just link to a shop that can do that)
Any further questions? Ask, I'll probably look here from time to time, the whole process (planning, fails, looking for part no's) has taken me ~4 months, but if I had to do it again, the install by itself is ~2h, coding another 1h if you are familiar with the software.
I just had my 2017 E class (W213) full LCD cluster retrofitted last weekend by Benzninja. I'm based in Los Angeles, CA. He did mine completely via remote coding. I will post a detailed photo exhibit of the entire process. To answer your question, his fees are as follows: $500 USD for membership plus $307 USD for the actual remote coding of the new LCD cluster. So you're looking at $800 USD for remote coding. Now, on top of this you will need to purchase your own C4 from Aliexpress, and a standalone laptop (used Lenovo for $150, and a Benzninja software SSD for $85 USD). So, yeah.. expensive. But after owning my E300 for 6 years, this simple full LCD cluster retrofit makes the car feel like new again. Worth it.
I just had my 2017 E class (W213) full LCD cluster retrofitted last weekend by Benzninja. I'm based in Los Angeles, CA. He did mine completely via remote coding. I will post a detailed photo exhibit of the entire process. To answer your question, his fees are as follows: $500 USD for membership plus $307 USD for the actual remote coding of the new LCD cluster. So you're looking at $800 USD for remote coding. Now, on top of this you will need to purchase your own C4 from Aliexpress, and a standalone laptop (used Lenovo for $150, and a Benzninja software SSD for $85 USD). So, yeah.. expensive. But after owning my E300 for 6 years, this simple full LCD cluster retrofit makes the car feel like new again. Worth it.
Hey Man,
I also am based in LA . I also retrofitted my digital dash in a 2019 Mercedes E 450 Convertible. The coding is done and everything. Costed me about 600 dollars for the dash and coding in total with AMG menu coding. The only thing now it that the dash came with an atmosphere light on top. So the ambient light ob the bottom works , but i never got to know how to connect the ambient light wire to the dash , so it just works normally without the top light. If you can please tell me how I can get that atmosphere light to connect that would be greatly apperacited.
I know that the topic has gone a bit stale, but maybe it'll be helpful for people looking for this retrofit later on, so that's what I did to make it work.
I don't take any liability for your actions, this is only a rough description of what I found out and what I did, not a detailed tutorial.
After reading this forum before registration and digging around literally everywhere to get the parts list to retrofit from the poorest possible infotainment (Audio 20, code 522) to the widescreen here's what I ended up with:
Screen:
If your car is pre-facelift, pay attention to the number of plugs on the rear. The pre-facelift car needs 2 multi-pin connectors!
On the market currently you can find a lot of facelifted screens, they differ by the fact, that they only have 1 multi-pin connectors.
This one is post-lift:
This one is pre-facelift:
HeadUnit:
Basically in 213 you could have 3 different HU's. They all have Anti-theft PIN protection if you buy used one!
The basic one (the one that I also had) which is NTG5.1, and which under no circumstances can support any screen apart from the small one, you can always recognize it by the plugs layout:
Then you've got NTG5.5 ENTRY, which CAN support widescreen, but it might need additional cables and coding:
And then there's the NTG5.5 High, which ofc also supports widescreen, it also has more USB port connections, but it's typically really expensive:
Which one to take? If I'd be doing the same choice again, I'd go with the NTG 5.5 Entry, it does the same effect as the High one, just isn't so expensive and it's much easier to get.
Which one I ended up buying? NTG 5.5 High, because I didn't have the knowledge that Entry will be sufficient.
Cables:
THIS PART ISN'T FULLY COMPLETE FOR WIDESCREEN, AS I ENDED UP WITH 12.3" media, and analog speedo.
Here's the secret that most "retrofitters" are hiding, what you need is:
A2135405328 - To connect multimedia panel (in armrest) with the new HU.
A2135404721 - To connect HU with multimedia screen. I ended up buying this one, because the plug for Audio20 screen is absolutely different, you need 2 FAKRA connector and this part number has it. One of the connectors stays empty (the one to IC) if you're staying with analog cluster.
Fakra K 1m cable - This isn't a Mercedes part, but to connect your new HU with IC, you'll need what's called a Fakra K cable. The cluster side should be 90 degrees ending. If you'll search for it on google, you can order those for about ~10USD for 1m. Then you take the female side, release plug out of the connection and put that into the joined connector that you'll have from the A2135404721.
Multimedia box:
A2138200400 - Only this one works if you want AndroidAuto/Apple CarPlay to work. Very easy to recognize by the phone symbol, the default one for Audio20 also has 2 plugs but they are white and purple, in this one they're white and blue.
After you have your parts ready, you need to remove the screen and HU, on YT you can find nice tutorials on how to do that, protips:
1. After unscrewing the 3 screws that hold screen in place, there are also tabs that hold it, around the screw holes. Put a flat screwdriver from the windows side, lift the "screen mount" a bit, and it'll pop out easily.
2. Whilst removing center console panel to get to the HU, watch out for controller plug. It's short and easy to rip out of it's mounting point.
3. Better get some both long and short torx screwdrivers to get to all the bolts.
Now time for cable routing/plugs:
1. You'll notice that the RVC (rear view camera) plug is different, the NTG 5.5 HU's have it coupled with AUX connector. I was trying to find a number for that double connector, failed, discovered that after shaving a bit of the single (NTG5.1) RVC connector it fits the double socket, just needs a cabletie to hold on.
2. Routing of the new screen connector is really easy, just above the HU location there's an access hole that goes directly to the behind the screen area.
3. On the topic of HU->Multimedia cables, you'll see that in new cable set apart from the white and blue plug, you'll have also a red/green wire. Don't panic, you don't need to run it to the fuse box. In the old set, going to the previous multimedia panel, one of the plugs also has red/green wire, release it on the plug from the old one, plug into the new, and you're done.
After all of that, you can try to turn on the ignition, the screen should light up. If your HU is used, it'll turn on anti-theft protection.
Four ways around it:
1. Buy a new one.
2. Buy used one, with PIN. (That's what I did)
3. Buy used one, without pin, try to get pin. (There are some portals that sell those)
4. Buy used one, without pin, go to MB dealership, they can unlock it.
If the screen lighted up, shown you the anti-theft protection, it's time to start your coding.
What will you need?
1. Some kind of multiplexer (like MB Star C4/C5/C6), or pass-through.
2. Fully operational Vediamo or DTS Monaco, with car/modules files.
It's part that I did using DTS Monaco, and that's what I suggest as it's pretty straight-forward, but it has it's own crucial points, that I have spent hours trying to figure out.
1. Unlock your HU.
First you'll need to go into HU55, then select last tab with PIN, enter PIN for your HU and press "Transmit". After that's done with success, you'll need to do "Hard reset". If after this HU boots up, and the "Antitheft" message is gone, you're home!
2. Code your HU.
This case is very car-dependant, especially on what differed in between HU's donor and your car. In my case the difference was in audio (I have Burmeister) and Ambient lighting (I don't have it).
You need to go into "variantencoding", connect to your car, then browse through the list of possibilities, they typically are pretty well described.
3. Code your Parkman.
Yup, that's the issue from posts above. When you change your screen from the small one, the output resolution is different.
You need to go into Parkman55 module and change the output resolution in one of the "variantencoding" tabs. If you're seeing "invalid value" in any of the rows, this means that you've got old DTS Monaco data, that's what I had and what I lost ~5 hours on trying to debug.
Navigation - You'll notice the issue with navigation not working after installing the new HU. To make it work again, you'll need two separate codes. One to delete existing maps (because they were generated for the previous VIN of HU), and second one to make new maps run.
- How to get the maps? Download_Manager_COMAND_2.06.
- How to get the codes? "NTG5.5 Map activation code" and "NTG5.5 map delete code" (I'm not sure if I can just link to a shop that can do that)
Any further questions? Ask, I'll probably look here from time to time, the whole process (planning, fails, looking for part no's) has taken me ~4 months, but if I had to do it again, the install by itself is ~2h, coding another 1h if you are familiar with the software.
Hi,
hoping someone can give some advice....
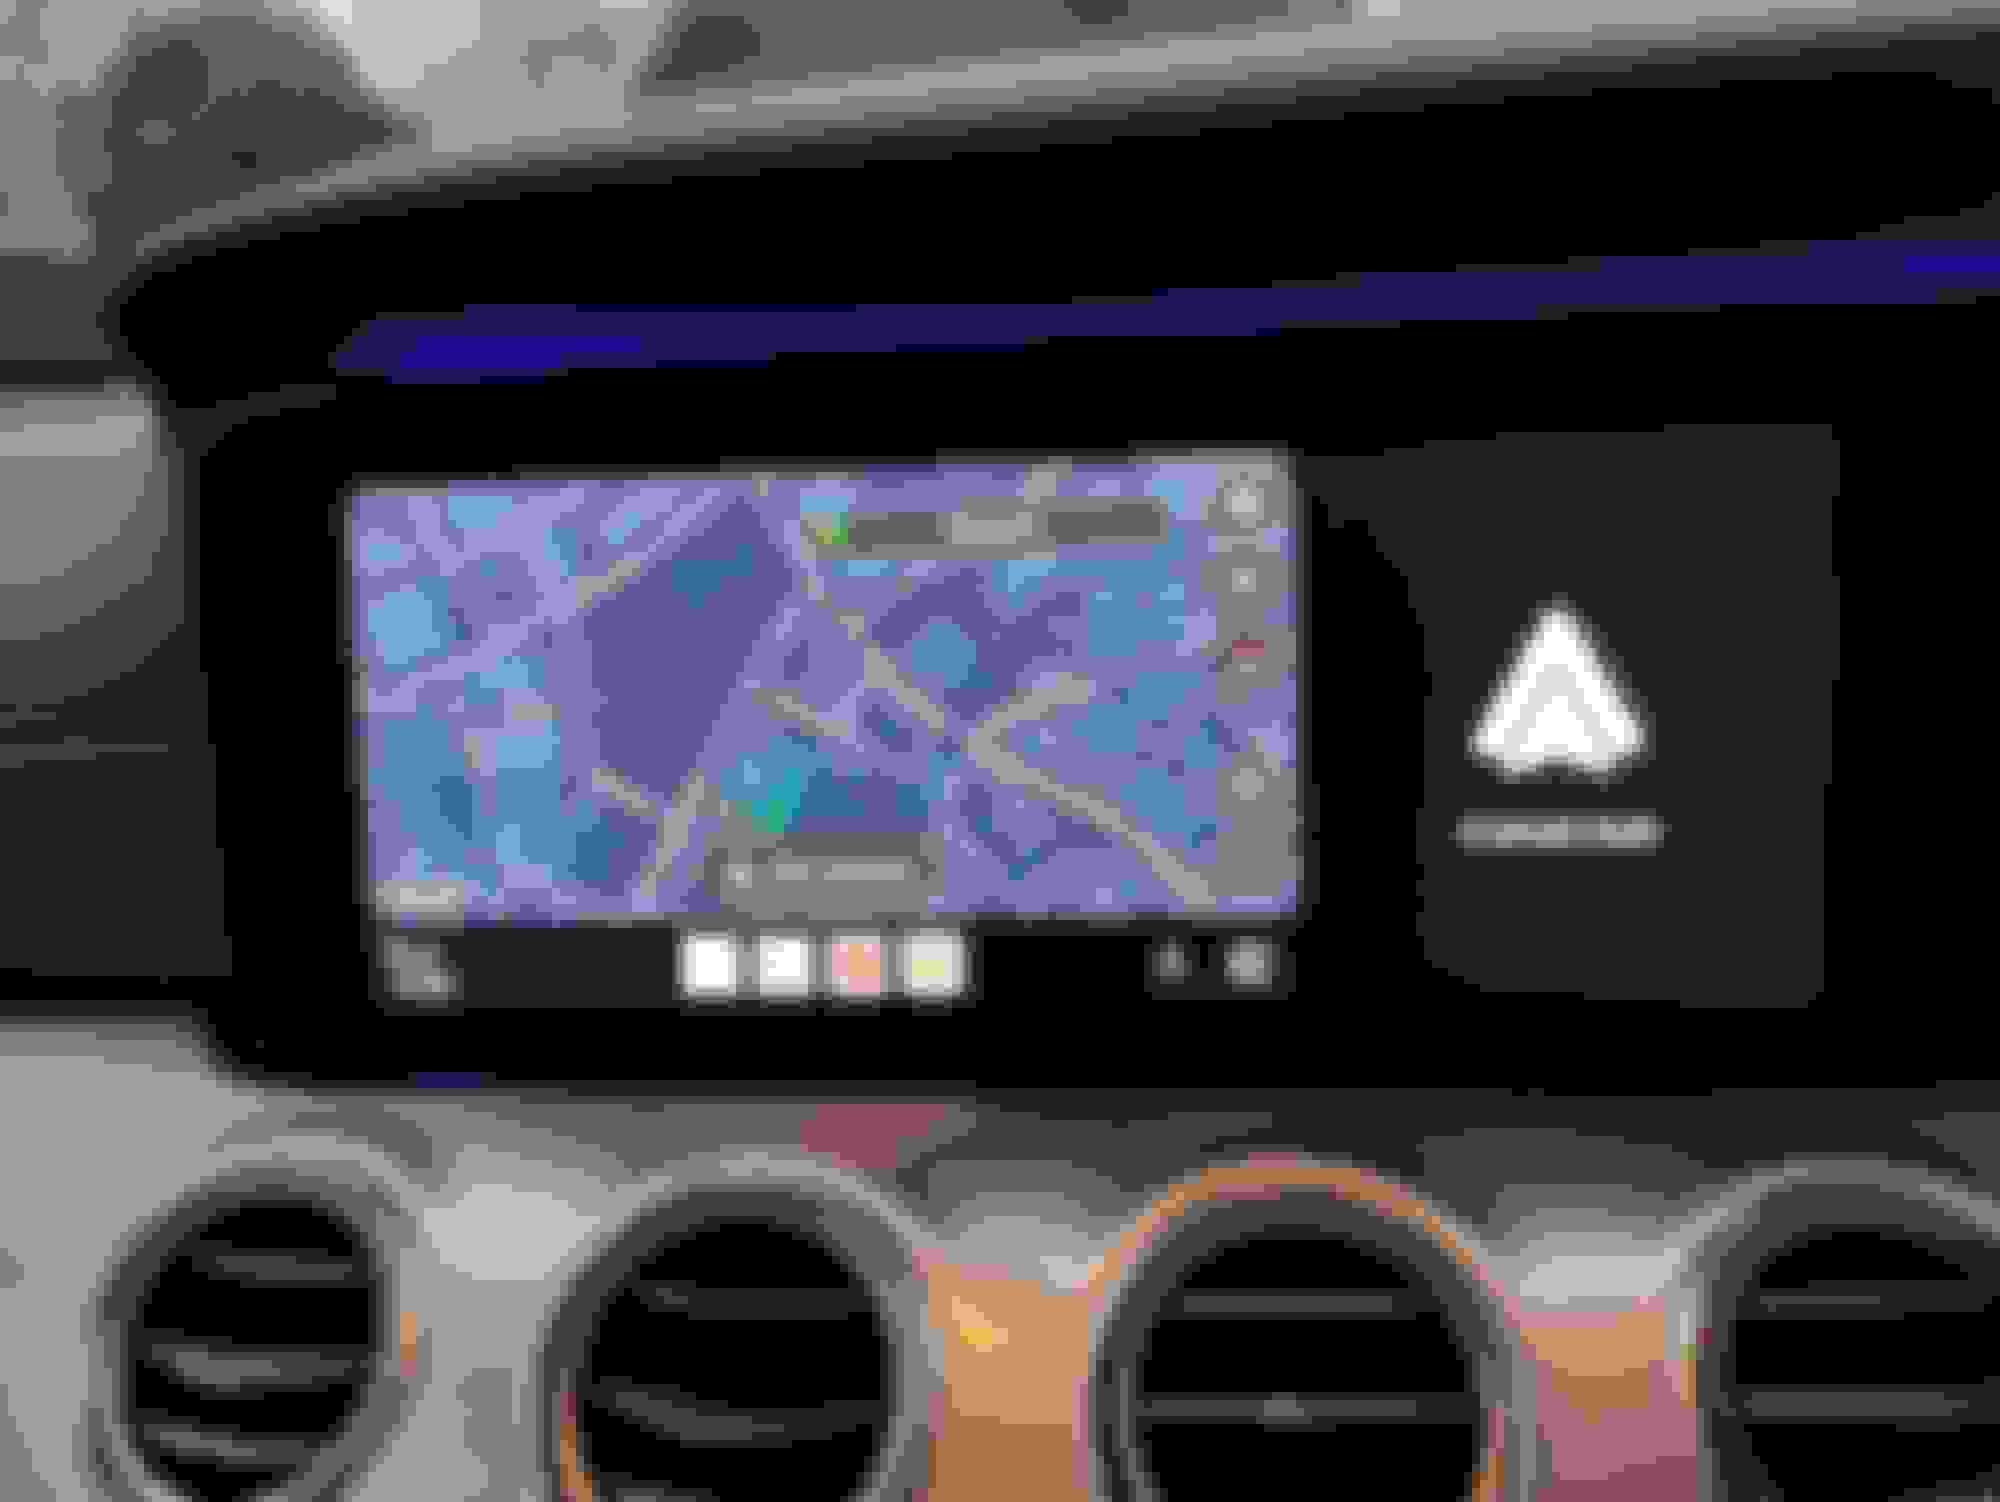
A friend of mine has replaced the headunit and cluster segment on my car to go from analogue + small screen to fully digital widescreen. Everything works fine apart from android auto. My friend just could not get android auto working. We have the high ntg5.5 head unit and multimedia box with part number A2138200400. when i plug in my phone to usb 1 the car recognises it and i can play music from the phone but when i plug the phone in usb 2 nothing happens. The car doesn't even recognise a phone is plugged in. Anyone have any ideas on what it could be? thanks
Have you also bought the A2135405328 cable to connect the new HU with the multimedia panel?
The old cable will still fit, but that's the clue that the Android Auto / Apple CarPlay won't work and only the HU will play music but nothing more.
The new one should have white and blue connectors, the old one will be (as far as I remember) white and violet.
thanks for the reply. no we didn't buy a new cable. but my friend did repin the existing cable and put a new connector on it. this is the wiring now. my friend lives too far for me to go back to him so i'm trying to fix it myself. i think it must be this wiring which is faulty or not repinned correctly. I did search for A2135405328 cable but i can't find anywhere to buy it. if you have a link then please let me know. i'm in the UK.
It sounds then like that's your problem right there.
I'm not in UK myself, but I can advise going to MB dealership and just giving them that part number, they'll give you a price and get it for you.
Otherwise, that's the only online shop in UK that I've found that you can order it from A2135405328 .
In case of this cable unfortunately repinning it won't help.
just an update on my issue...
it was a faulty cable. I used MB coders in Bedford who got to the bottom of the issue and replaced the cable. AA/Carplay now working perfectly. Highly recommend the guys at MB coders.


 06-29-2021, 02:53 AM