Projects on my new, to me, 1973 280SEL 4.5
 04-04-2017, 06:14 PM
#51
Member
Thread Starter

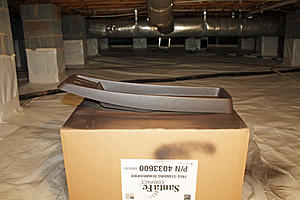
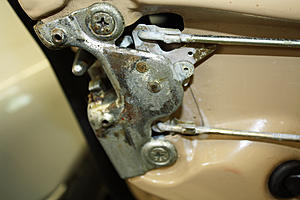
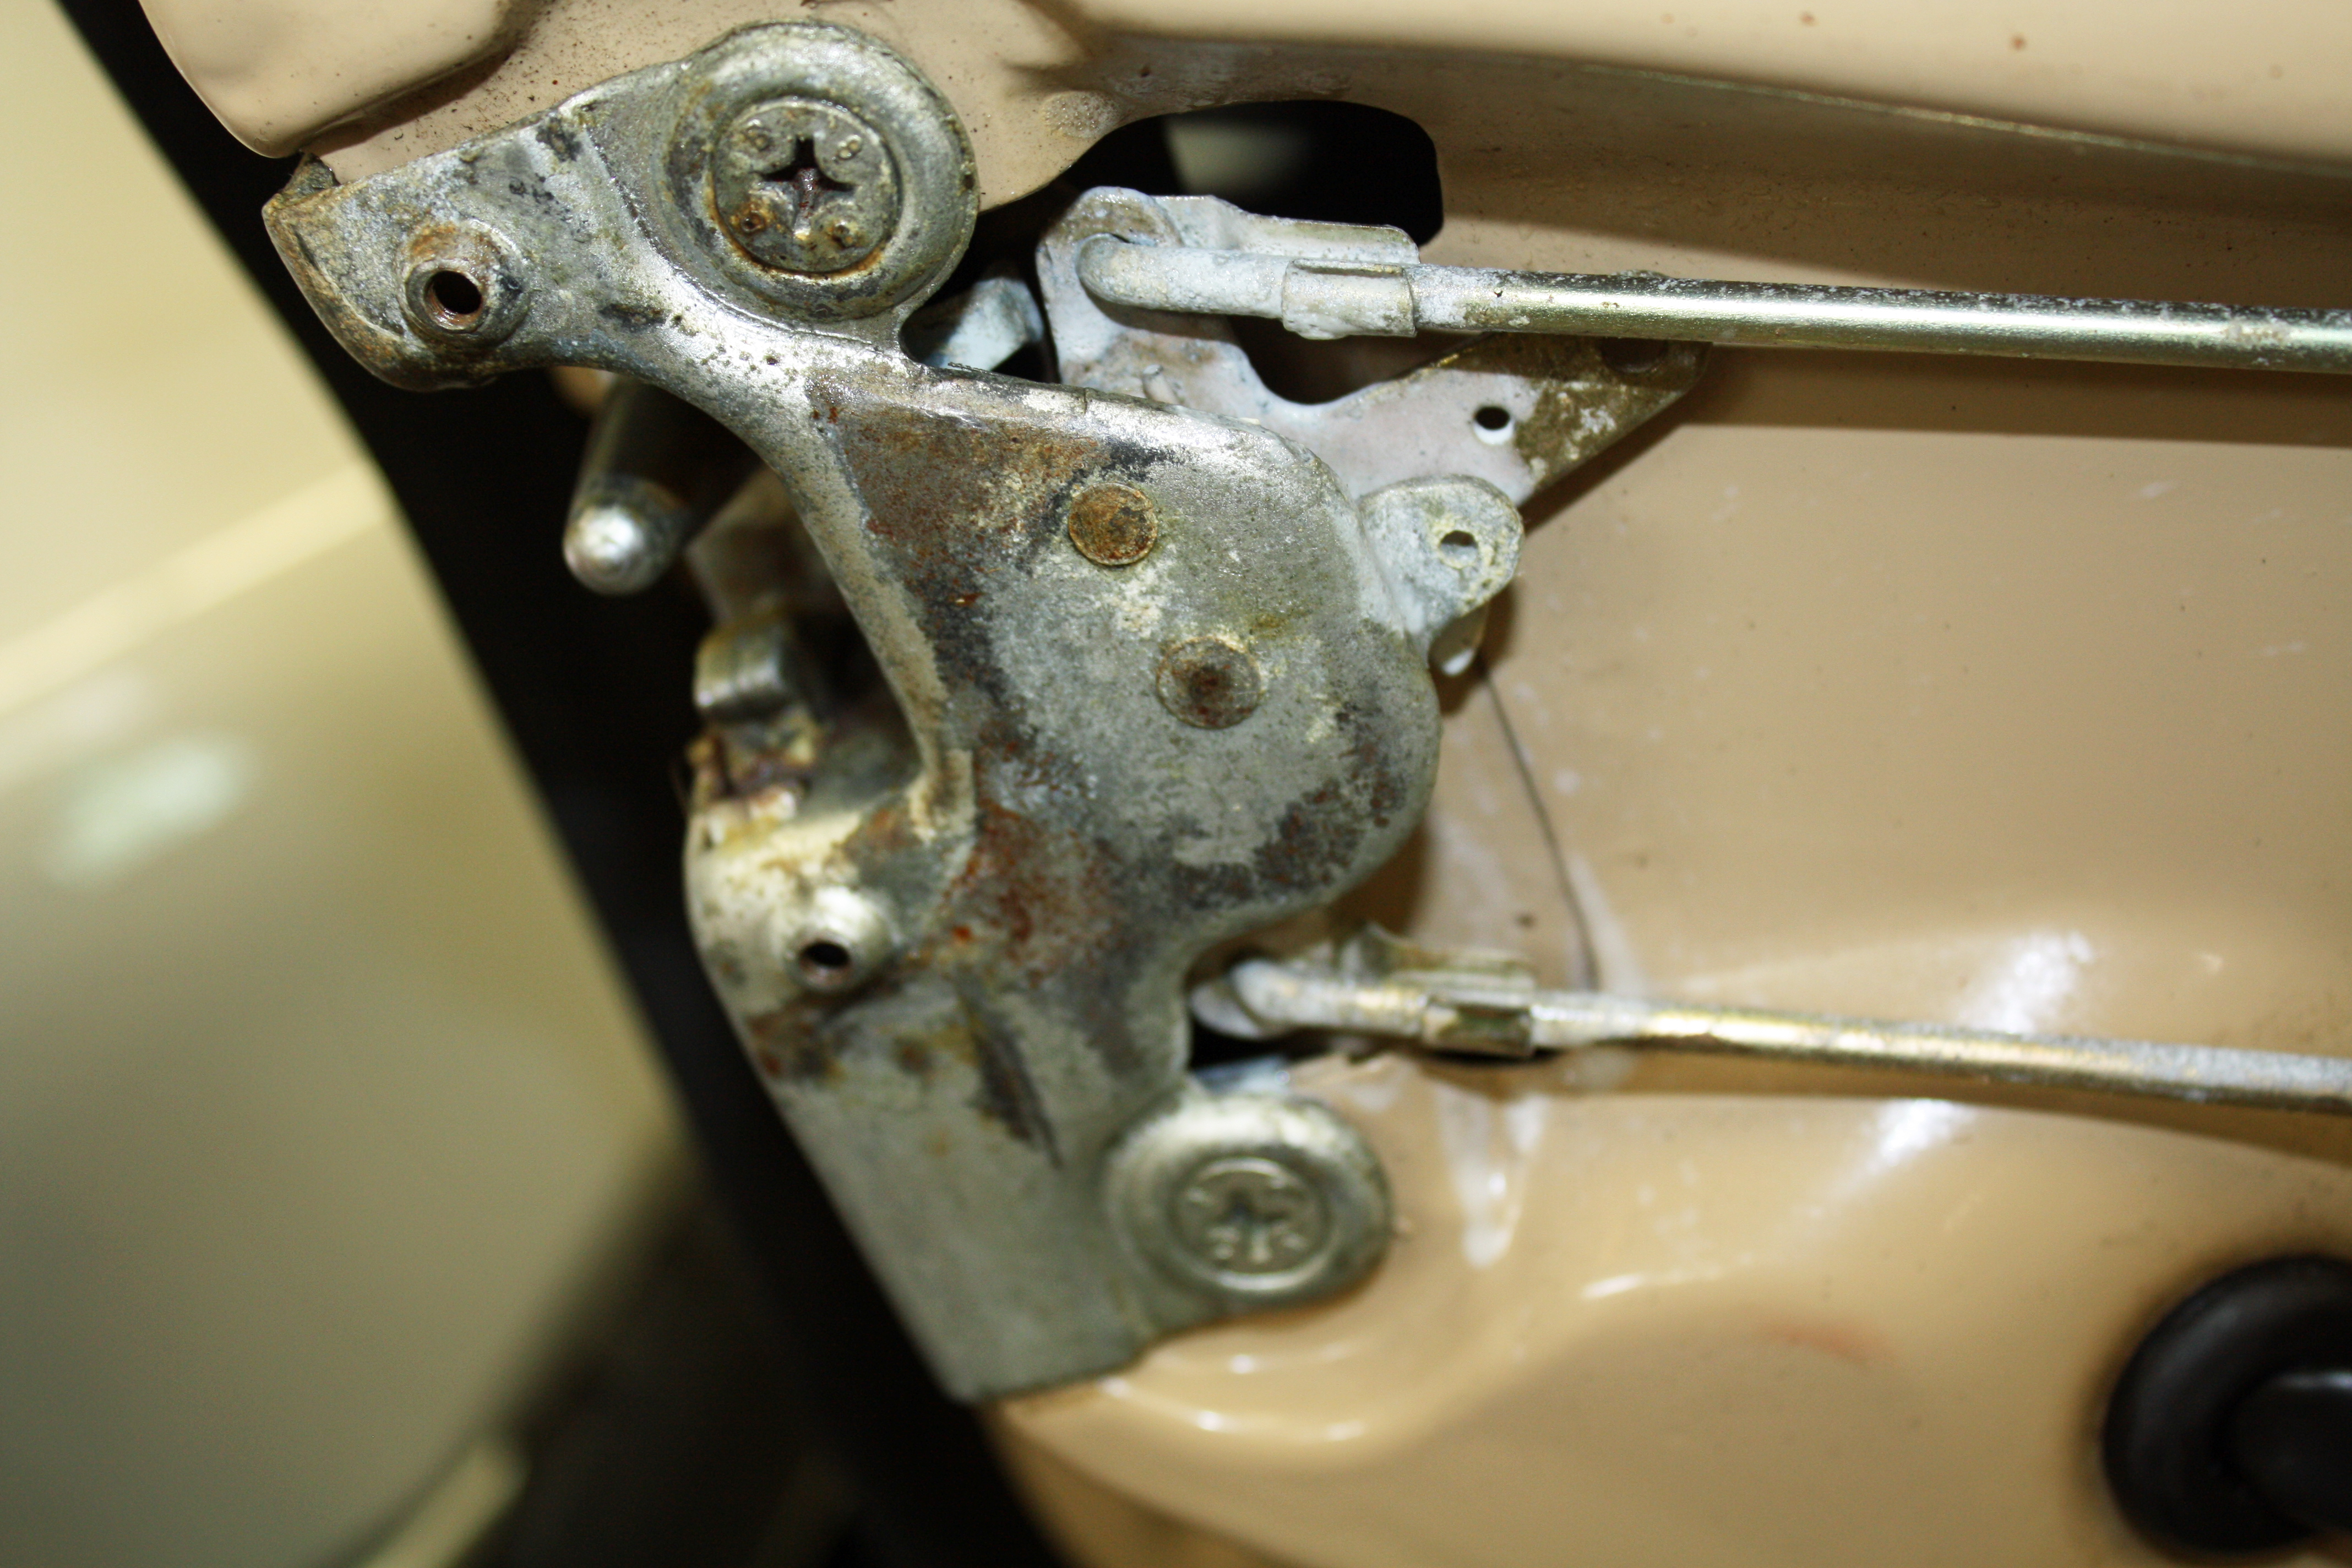
While trying to transfer the longer strap to the eBay check strap, I broke the casing. I bought another one from the same seller but it arrived with a small crack. He refunded my money but I gave up on buying a used one. A new one from Mercedes Benz Classic arrived yesterday.

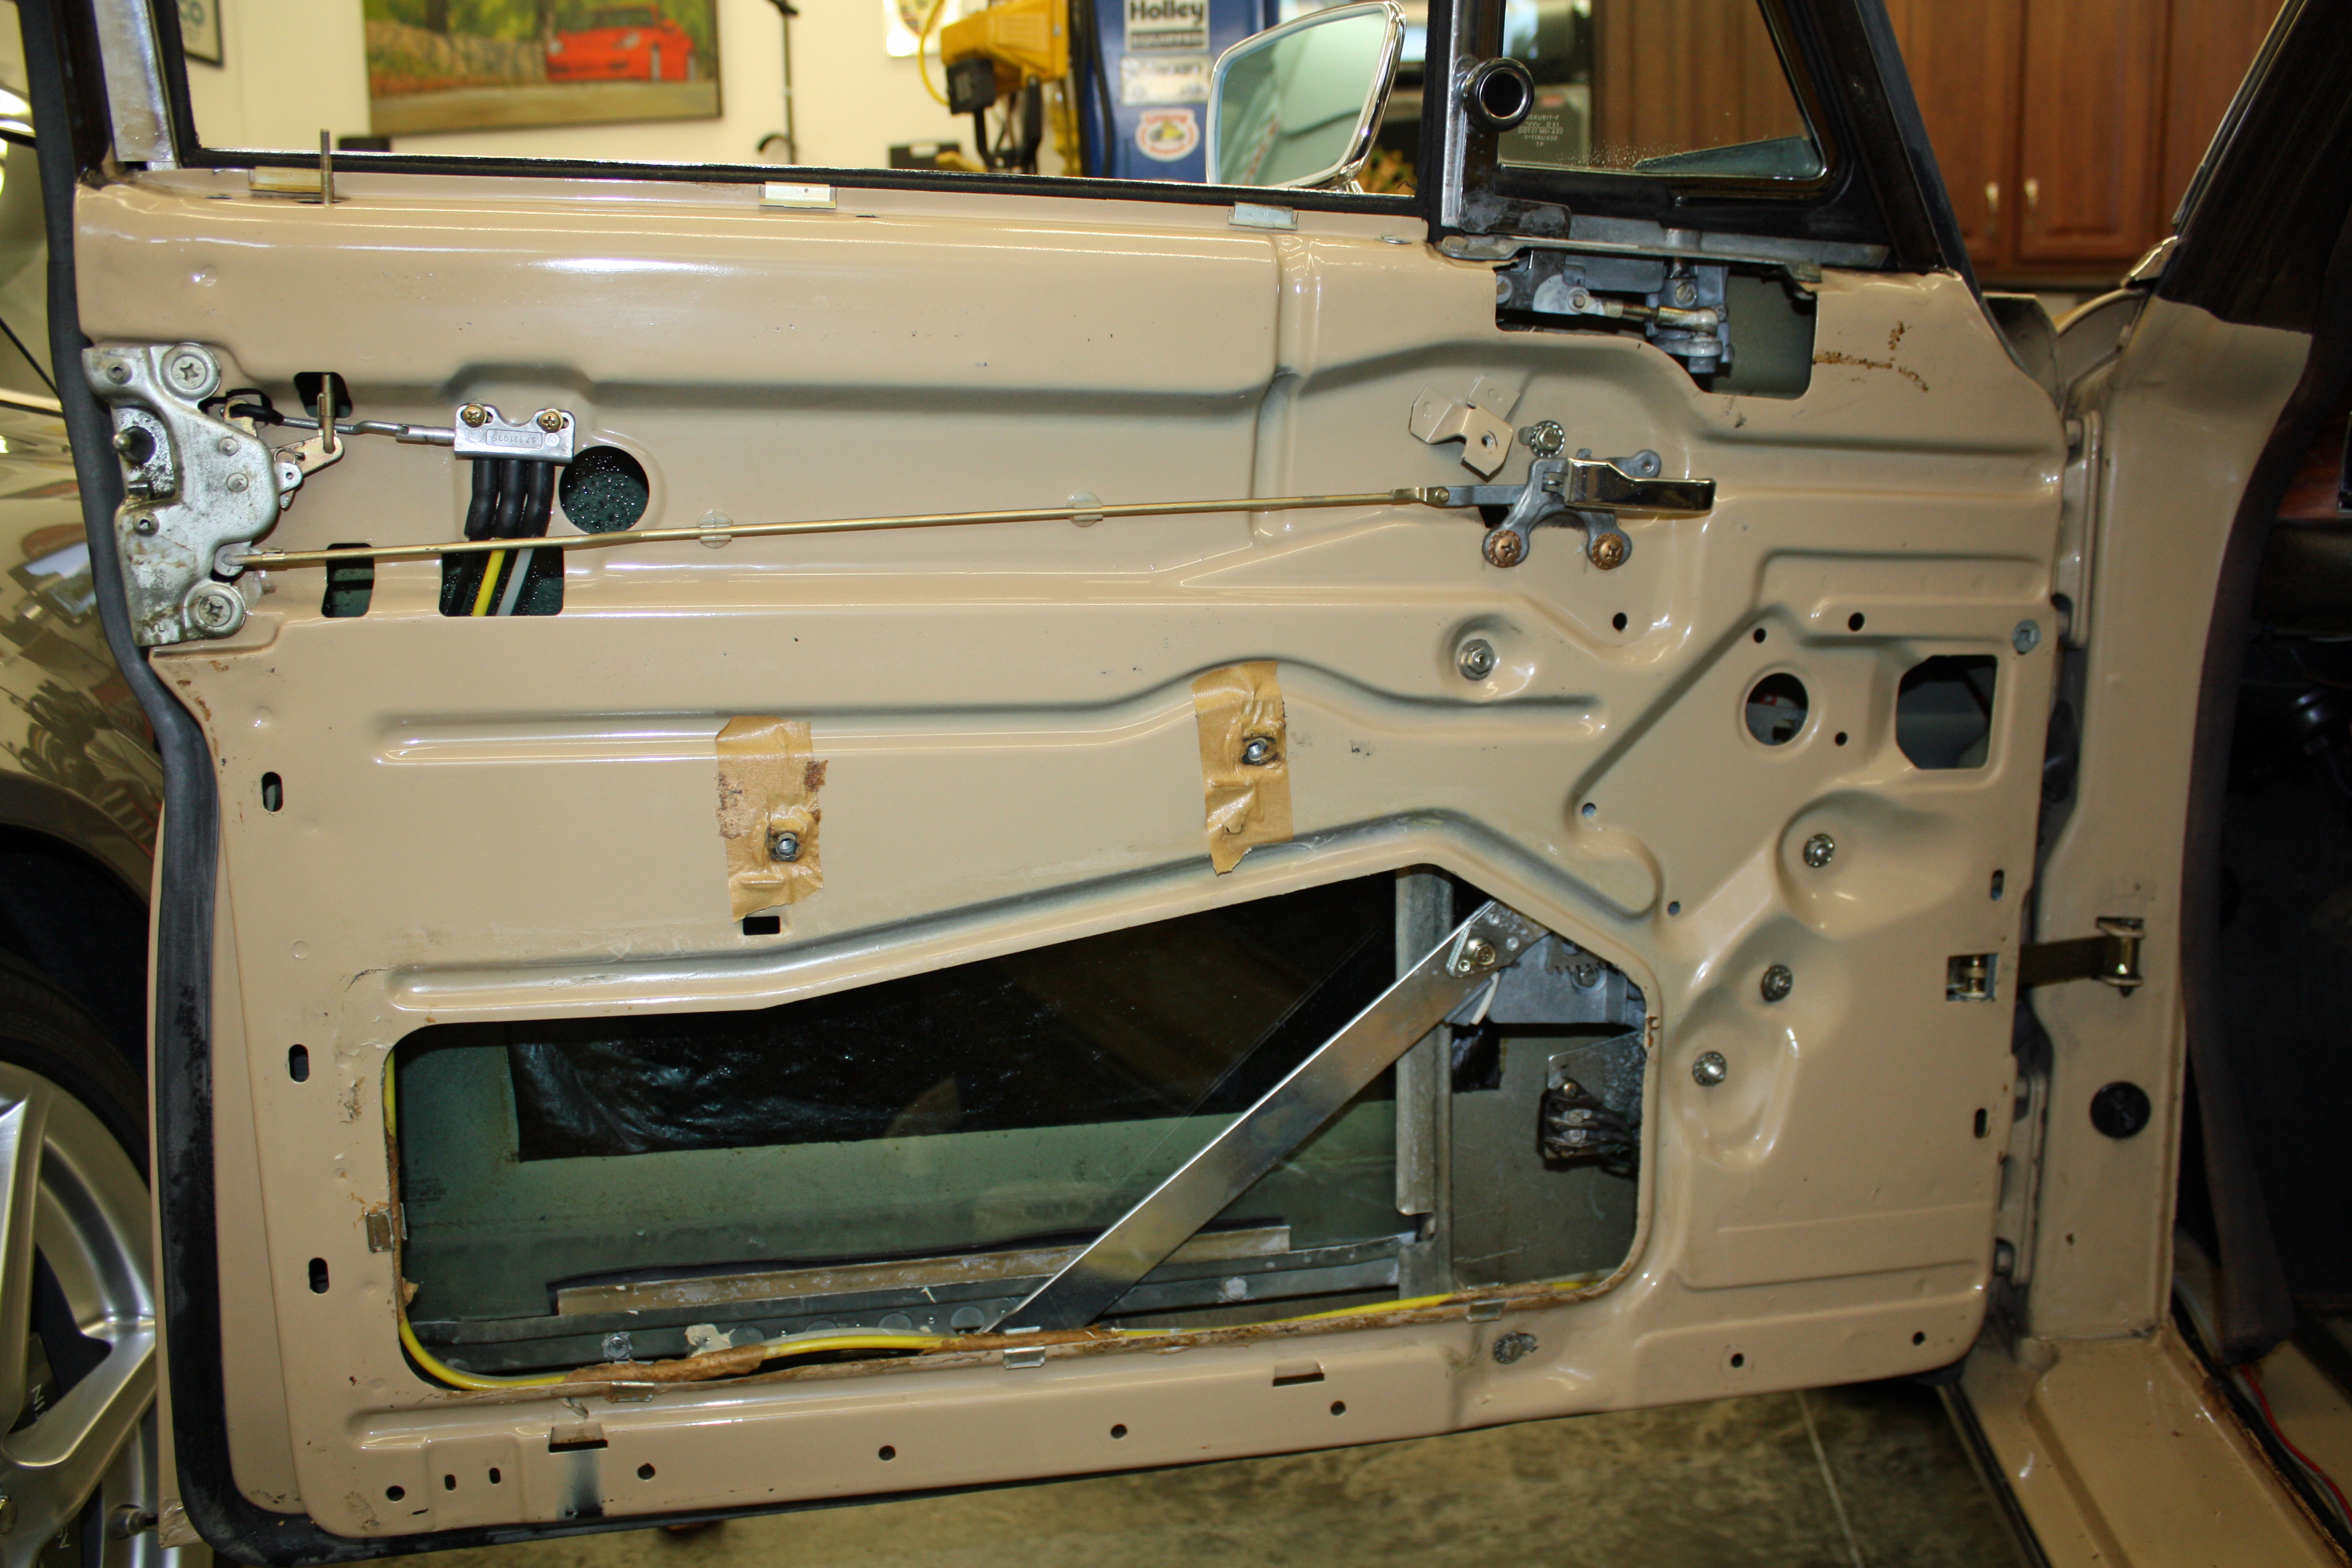
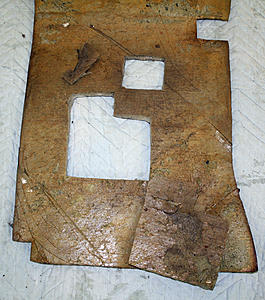
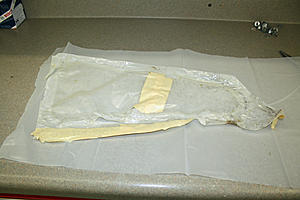
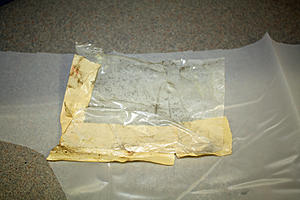
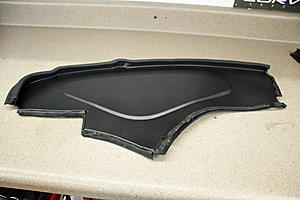
The plastic covering the large opening on the door was missing. I used a piece of paper to make a template by tracing the perimeter with a pencil. After cutting out the plastic pieces I used weatherstrip adhesive to adhere it to the door. Once I am caught up with projects, I may remove the other door cards to install plastic if needed.


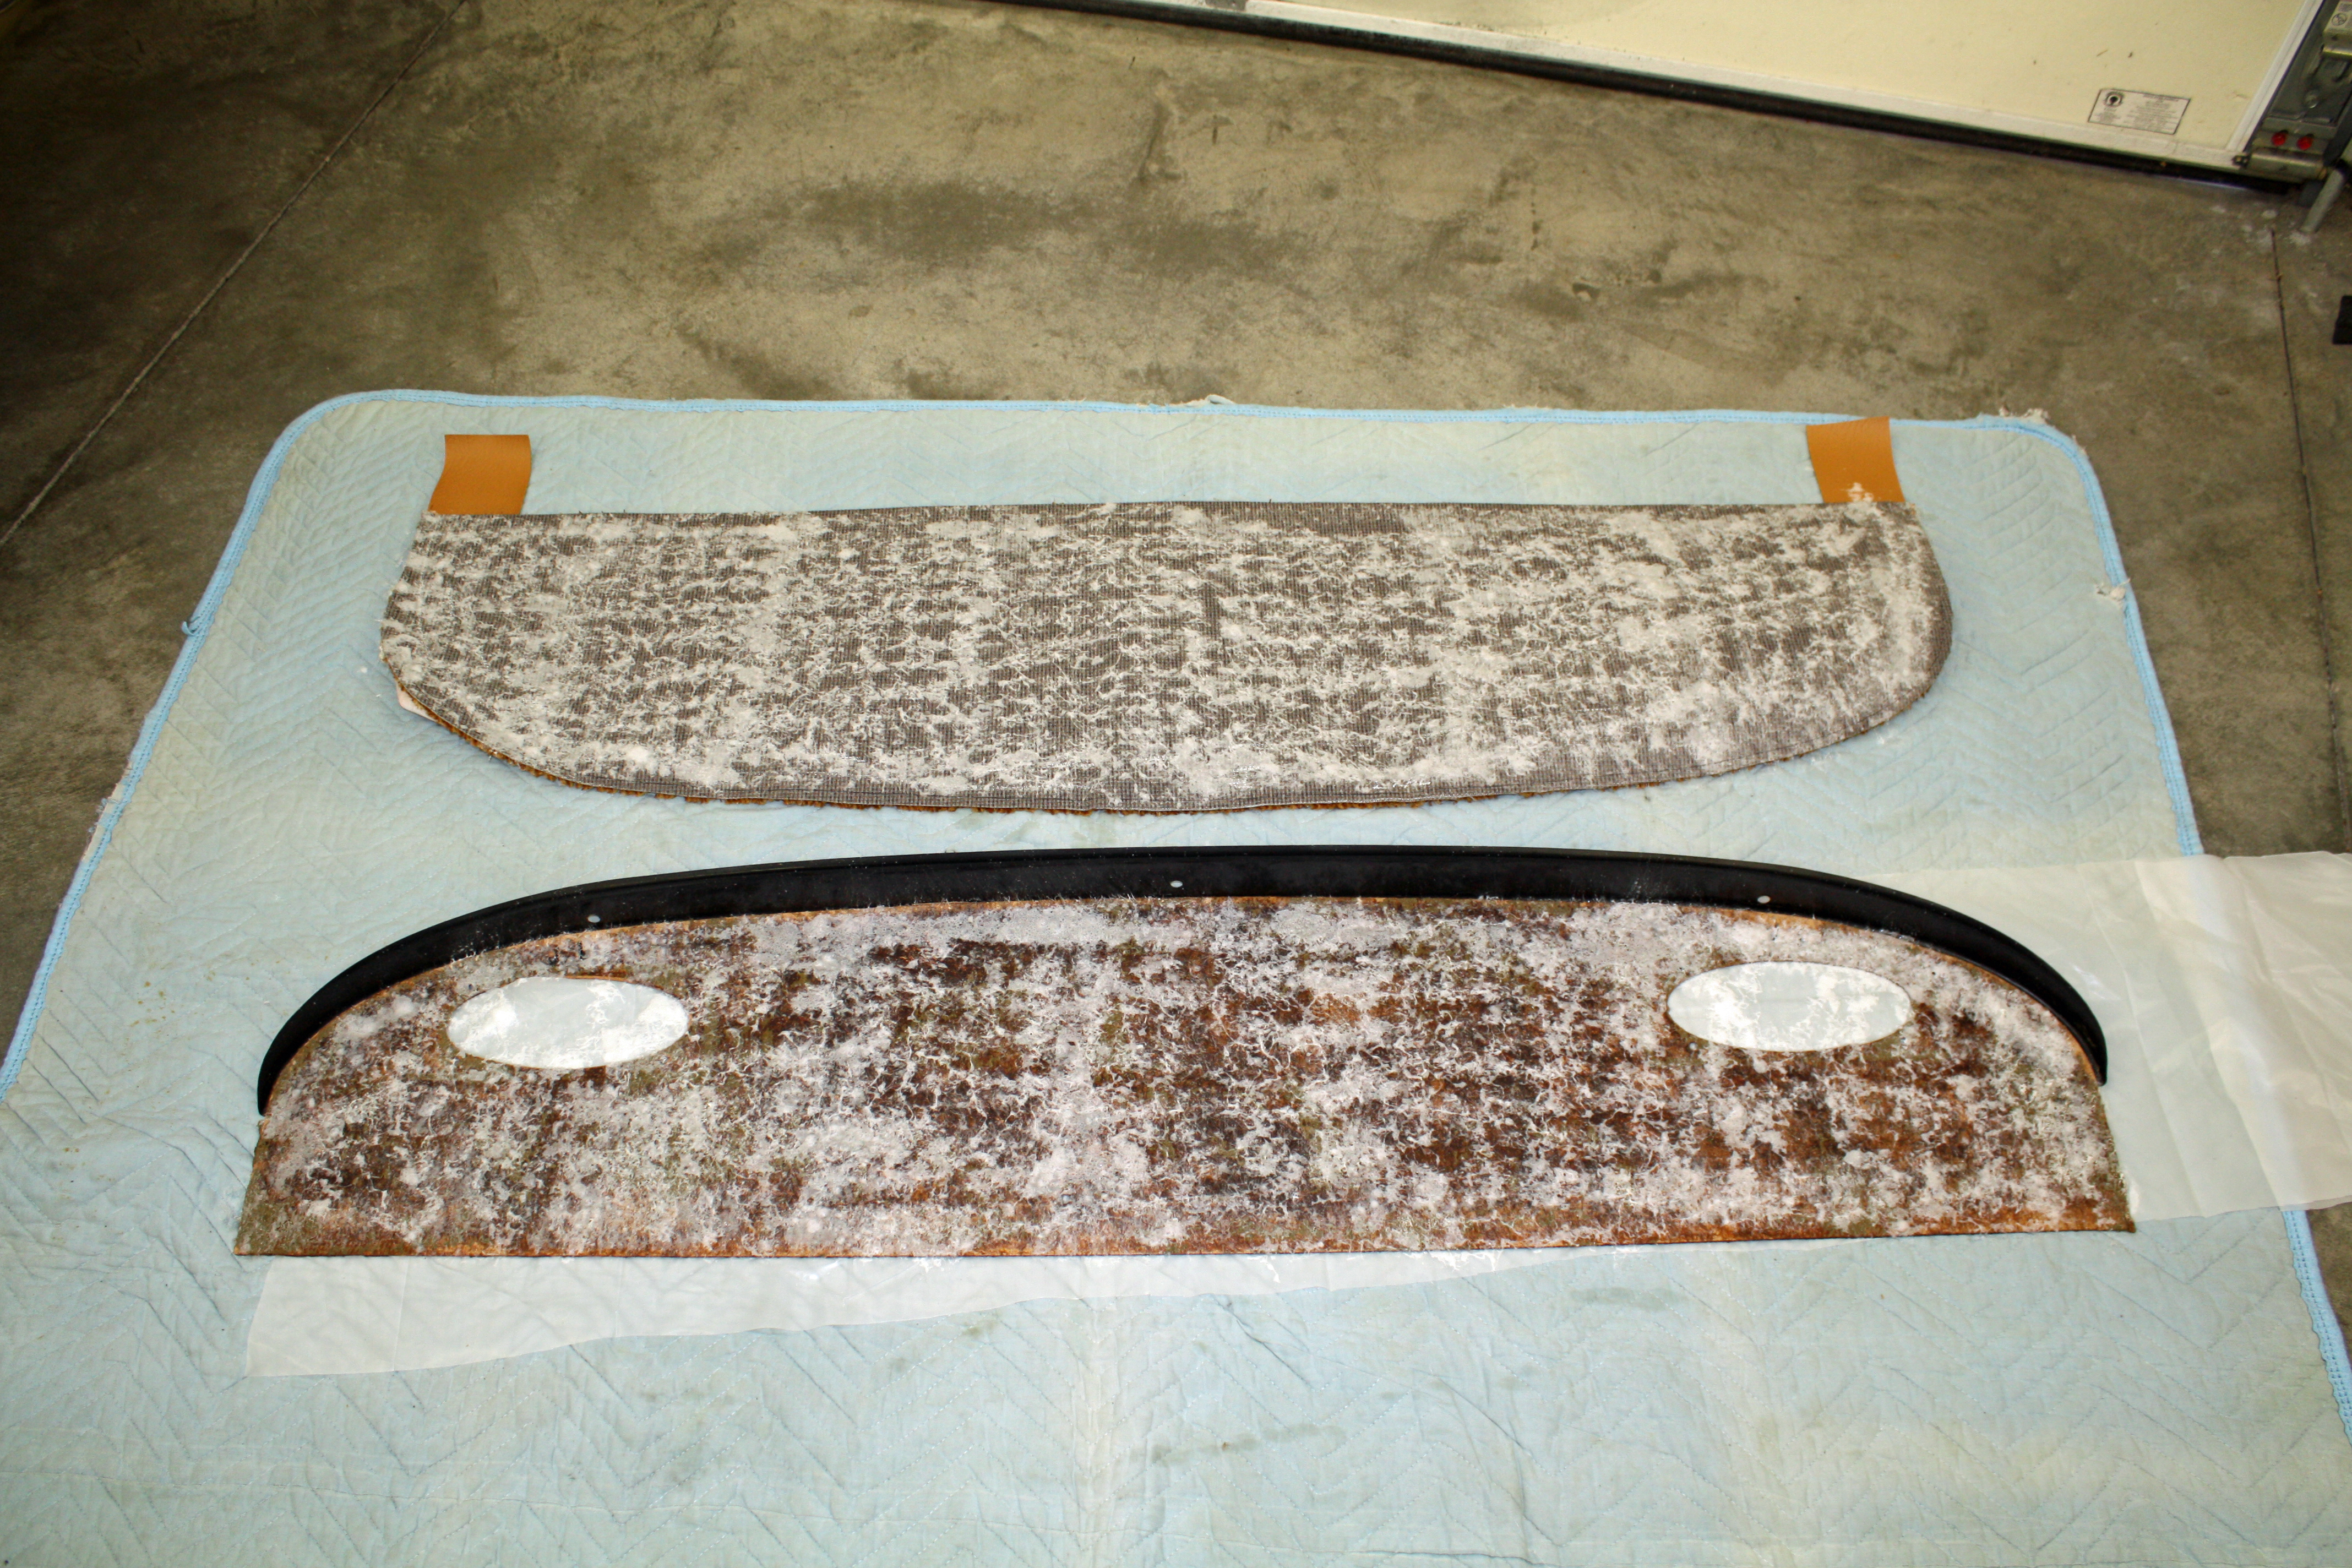
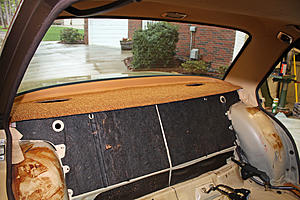
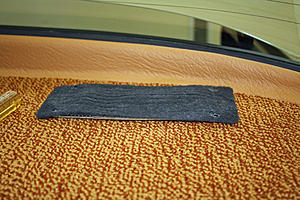
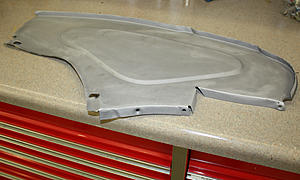
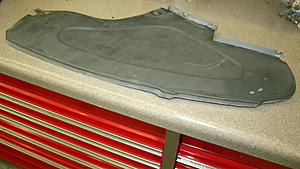
Next I began the carpet installation process by gluing the carpet to the rear deck panel. I will let it dry overnight before I adhere the vinyl trim to the metal trim piece. I will also have to cut out the speaker holes.

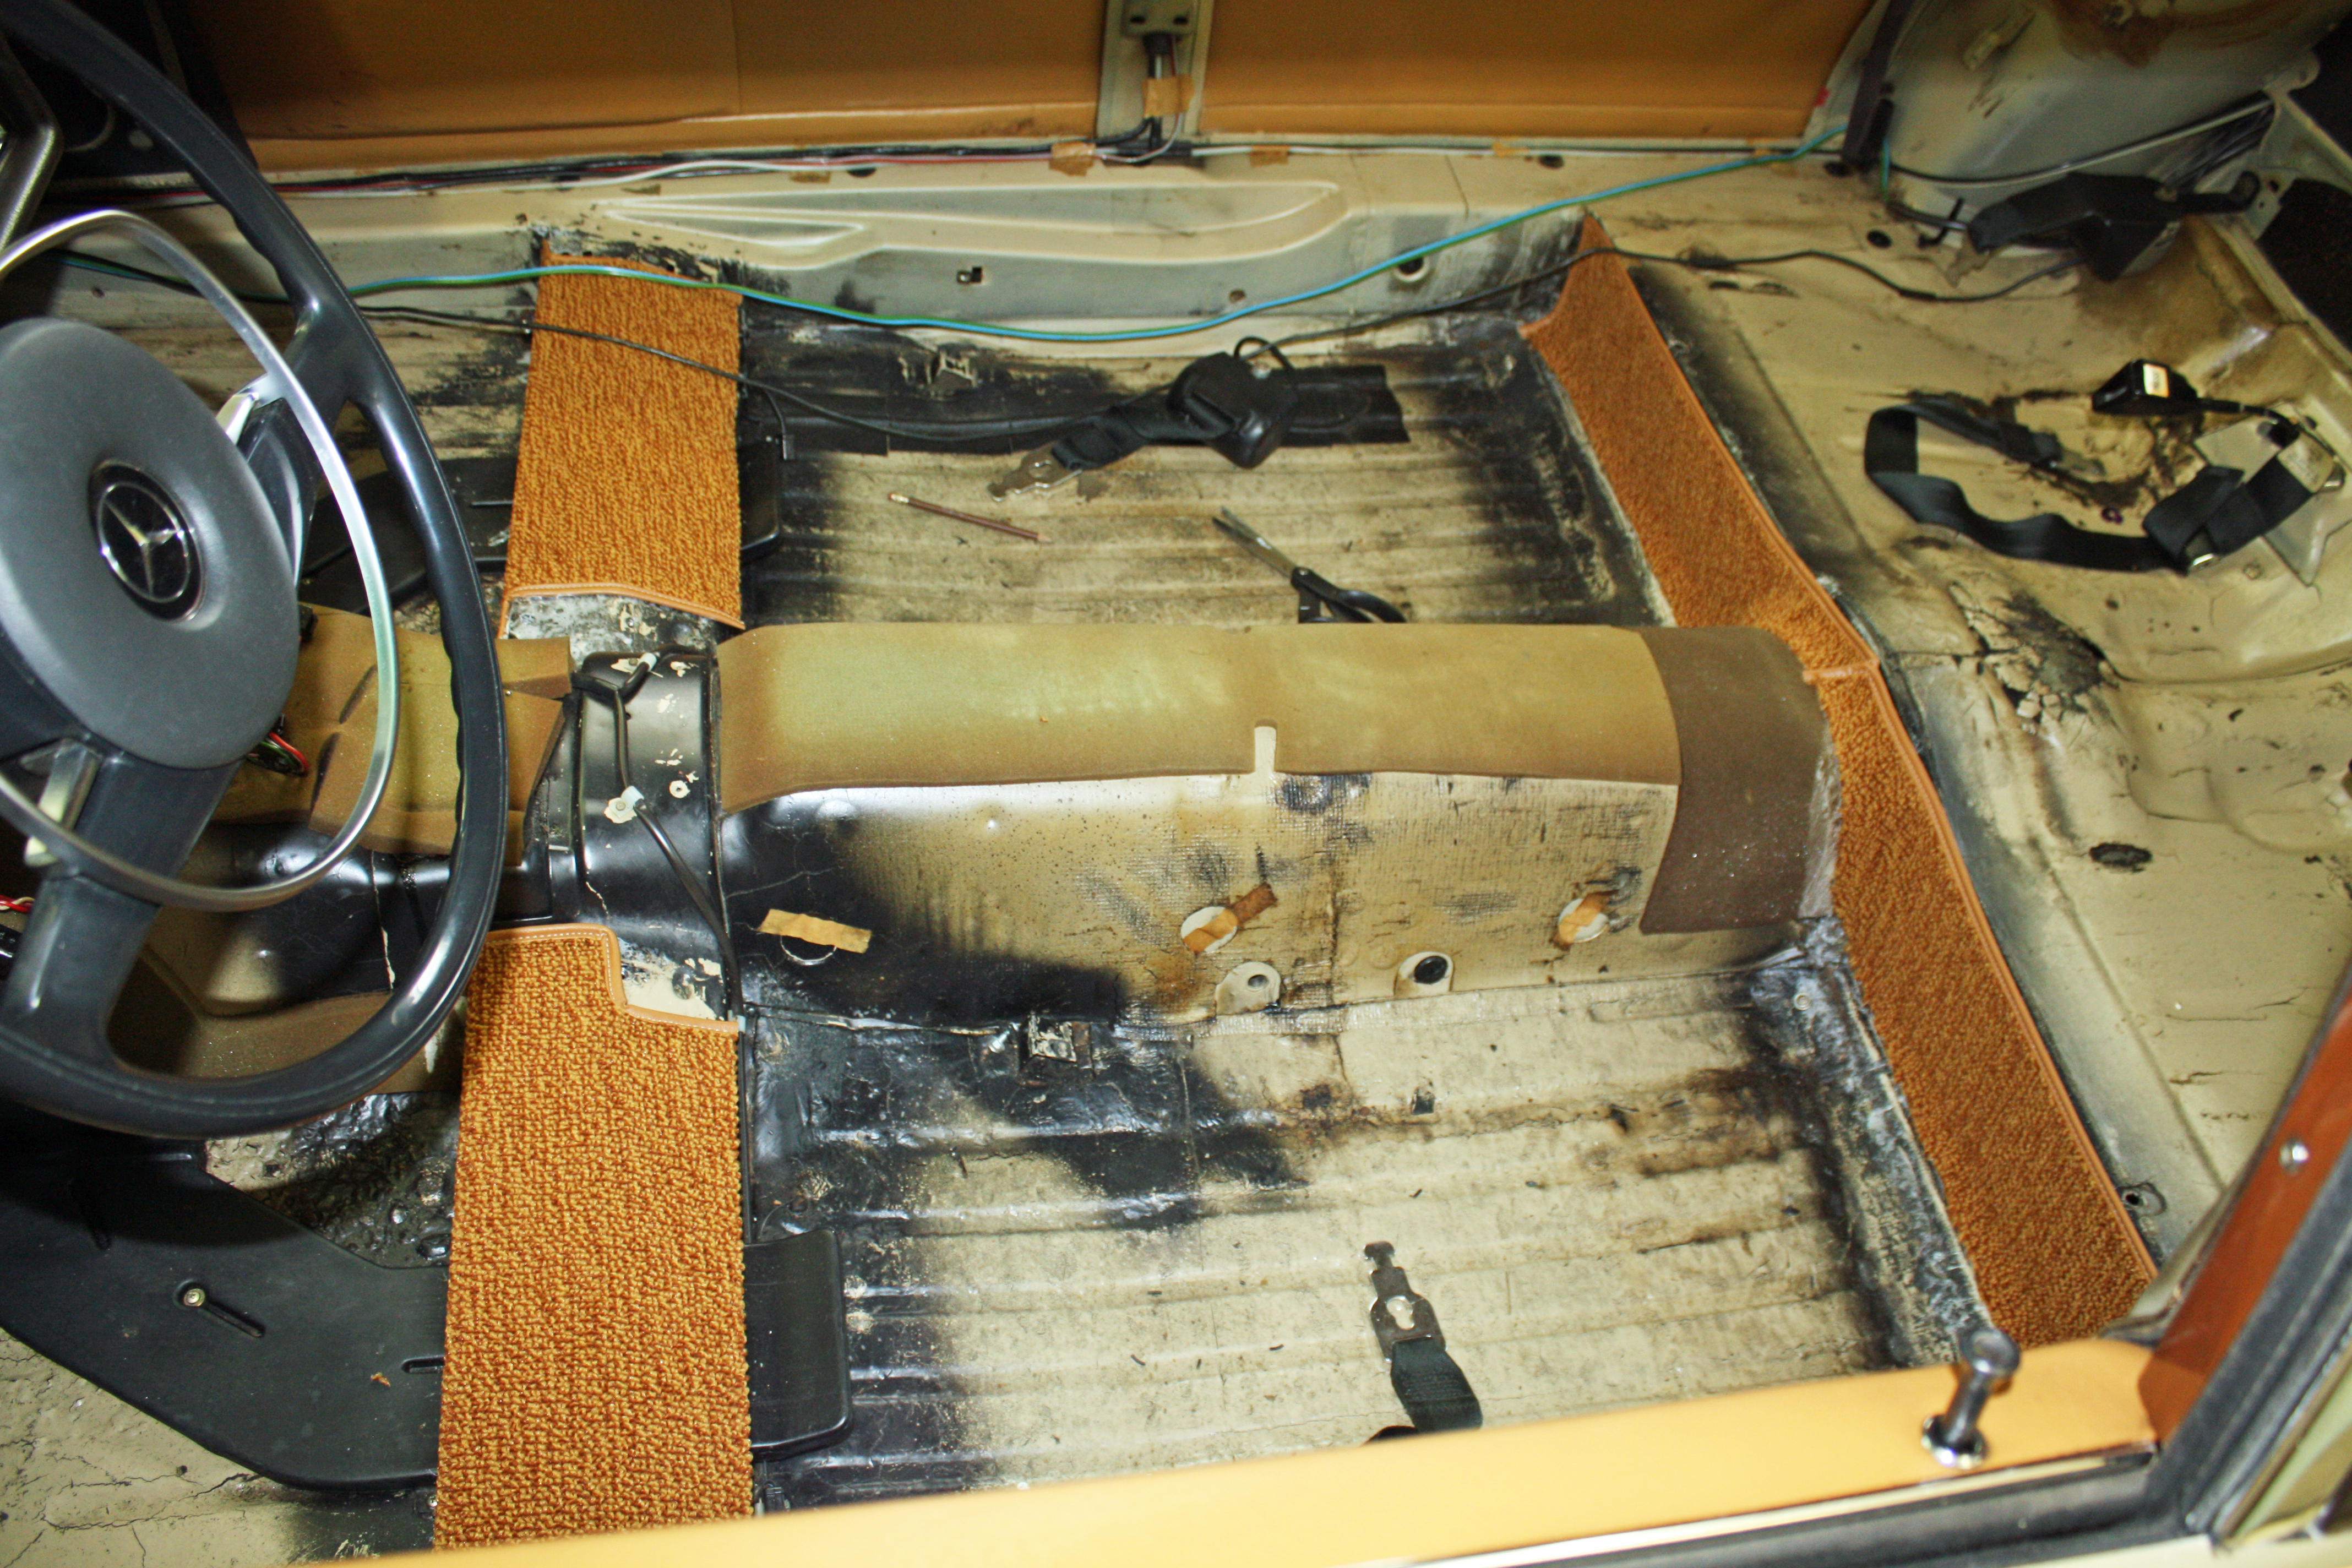
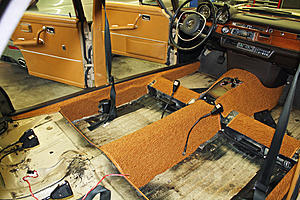
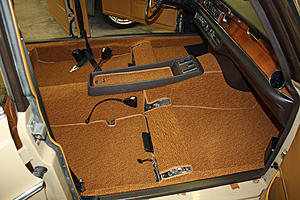
I laid out all of the carpet pieces on the floorboard to see where everything went and to decide which pieces would be the first to install. I began with the two pieces at the rear under the seat. For some reason, those pieces were not installed with the original carpet. The other two pieces I installed were the ones at the front of the front seats. With those items complete, I called it a day.


 04-05-2017, 04:13 PM
#52
Member
Thread Starter
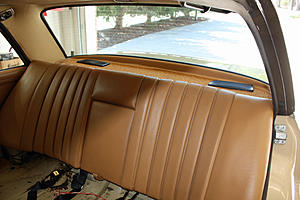
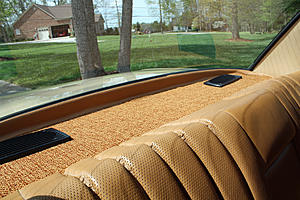
After getting my annual physical this morning, I was back at it on the car a little after noon. The first job was to complete the rear parcel shelf. The vinyl edge around the carpet had to be glued to the metal trim piece. I began with a small area in the center and then did each side from there separately. It was a little tricky getting the vinyl to lay flat and to get the top edge smooth. After I had completed this task, I cut out the speaker holes.

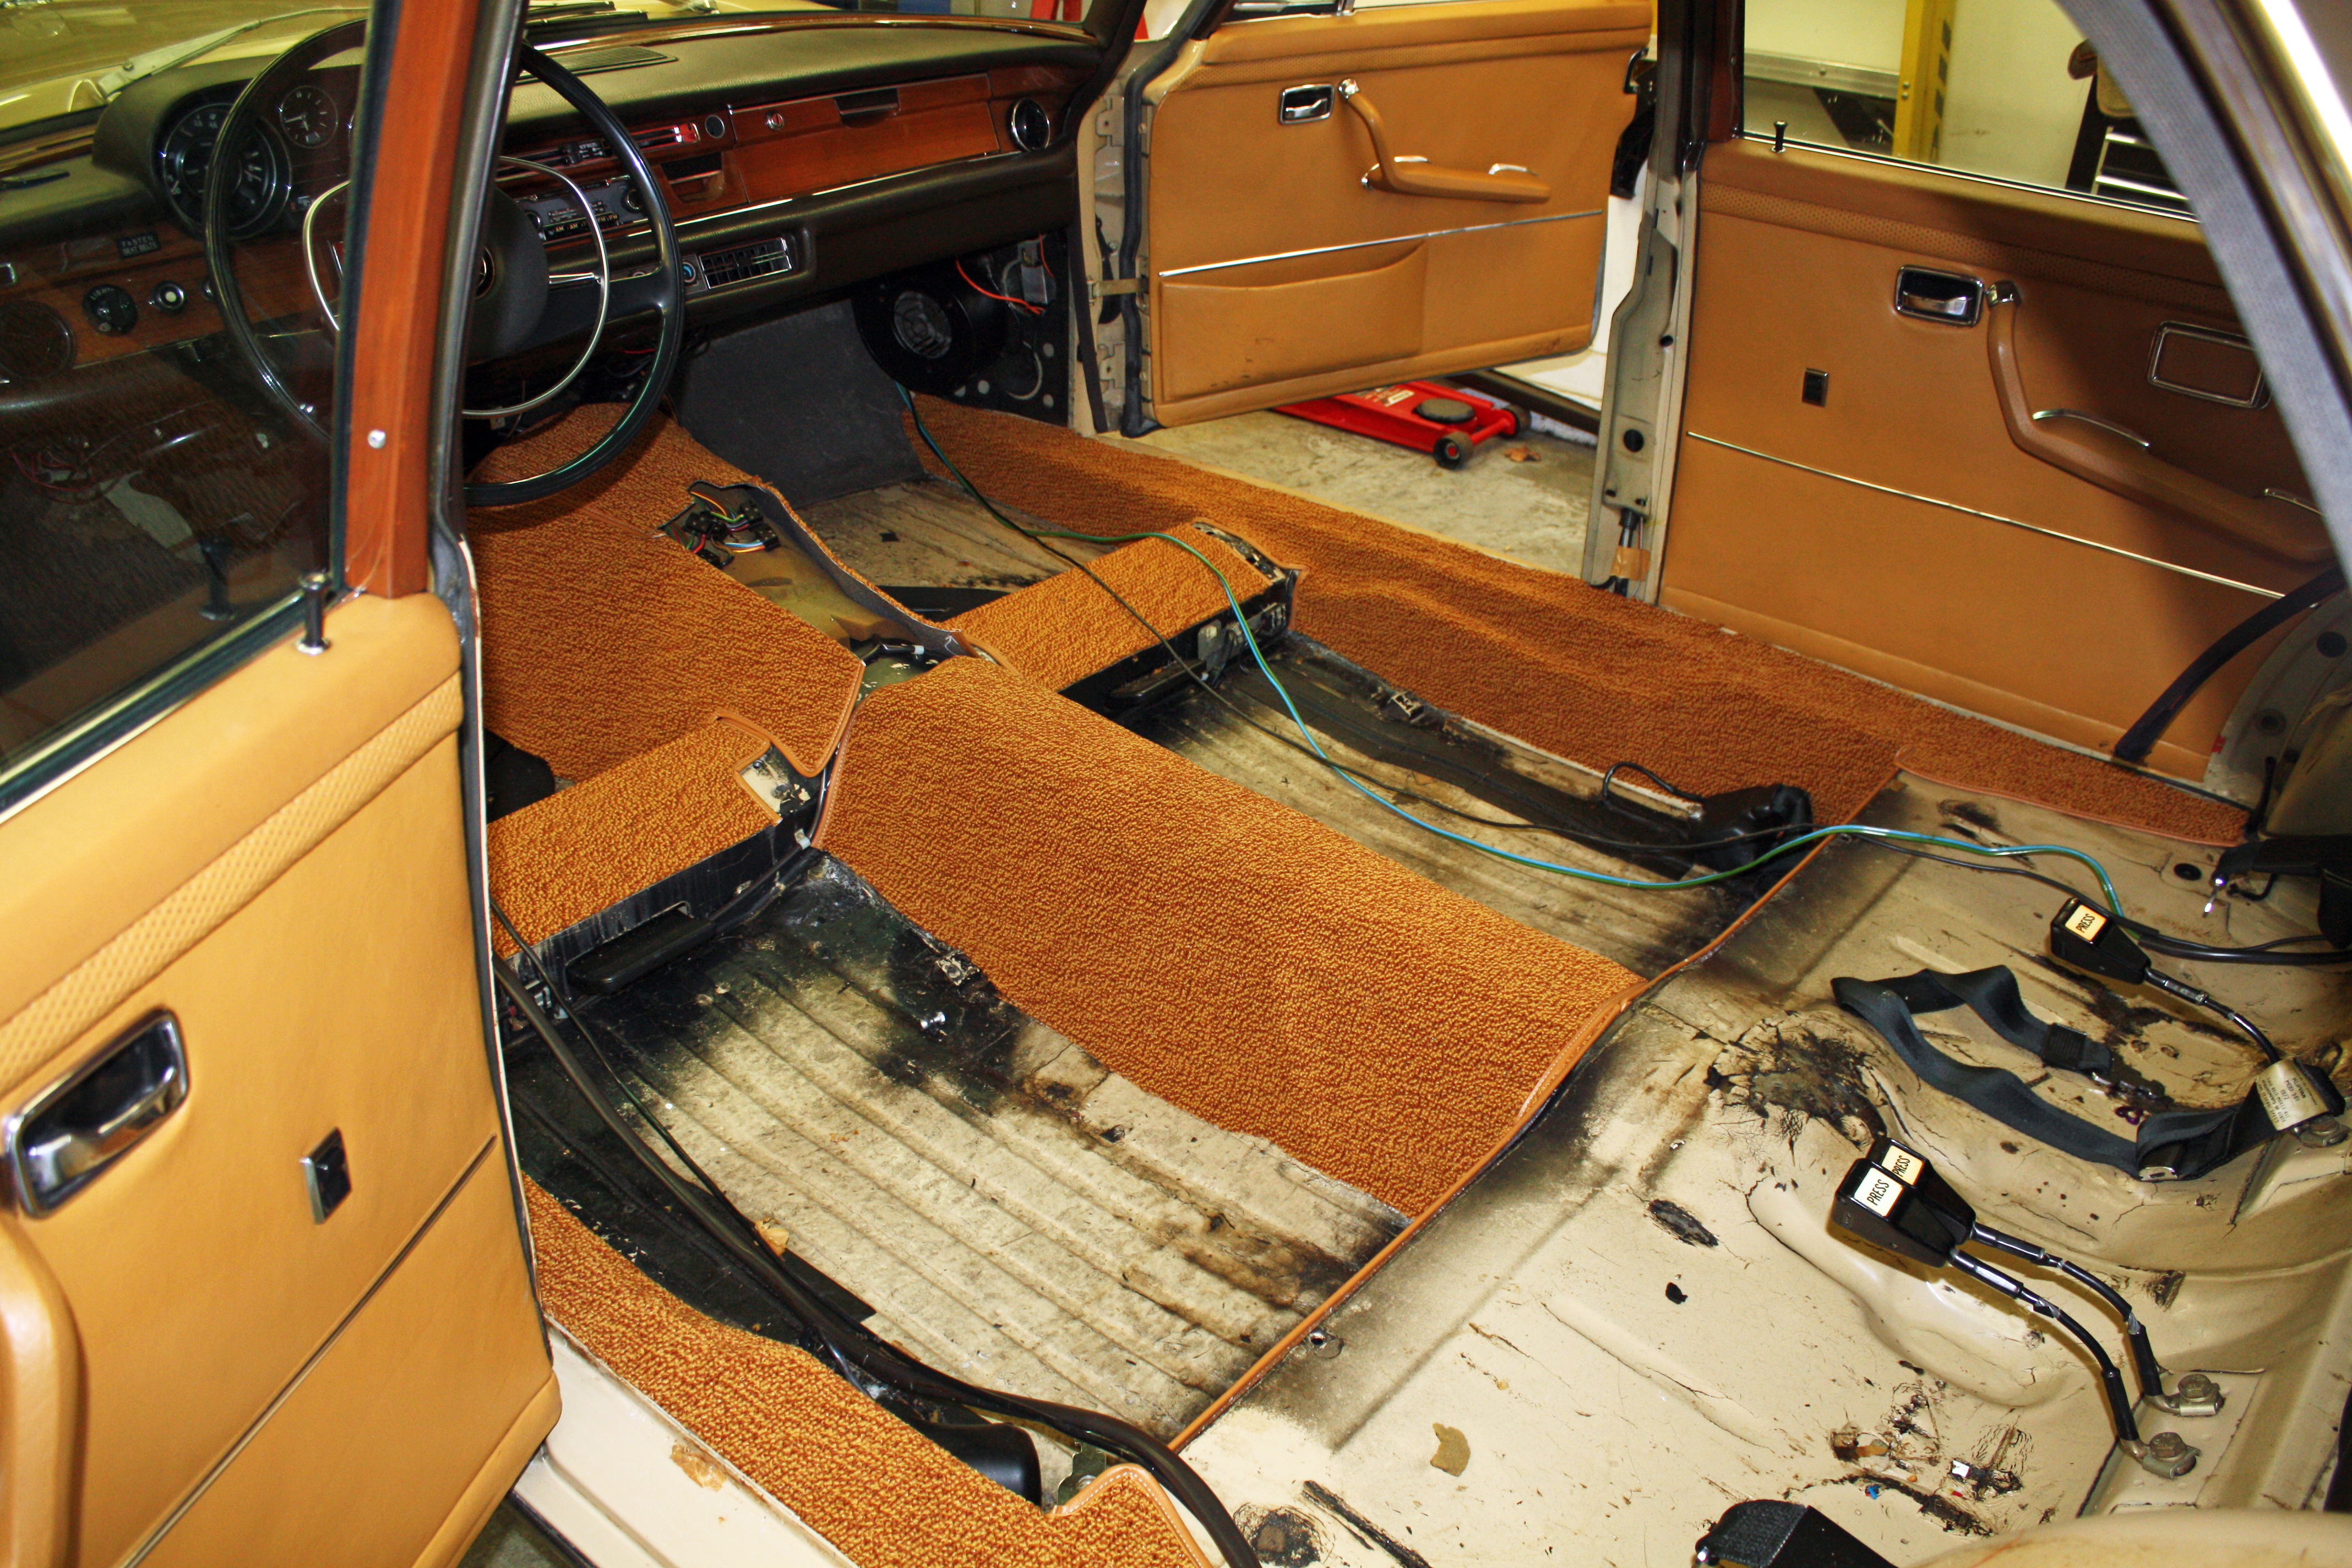
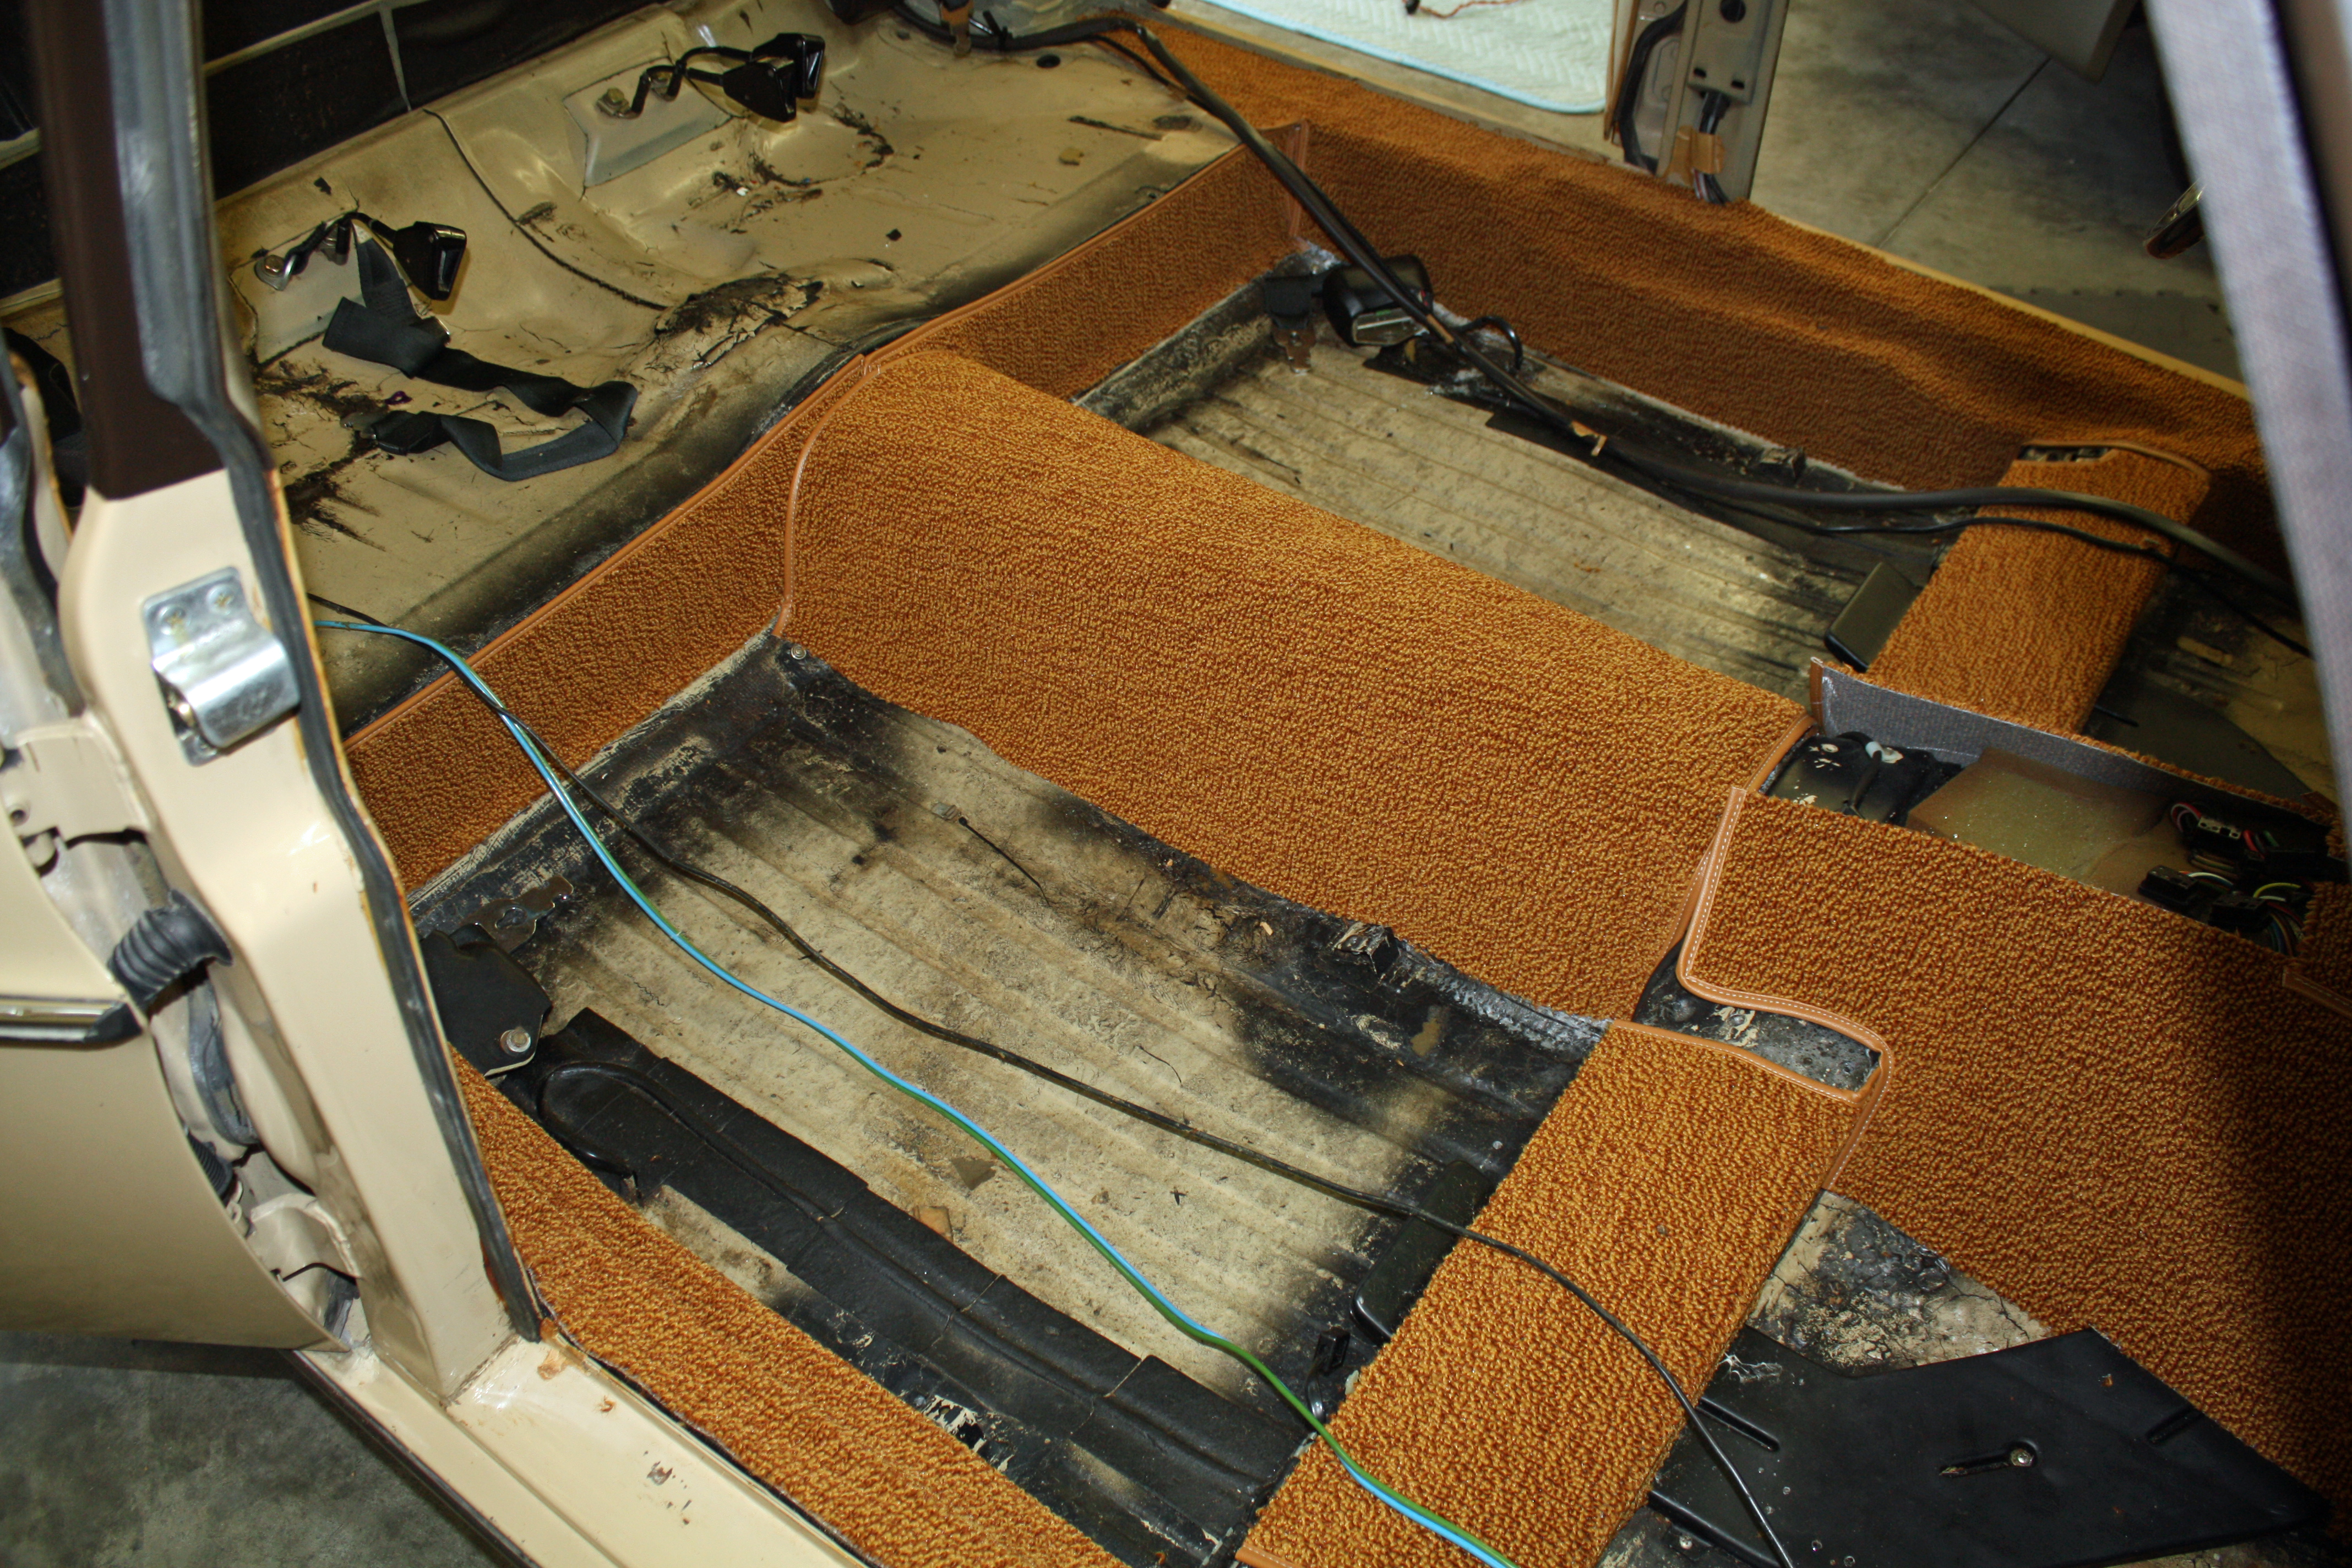
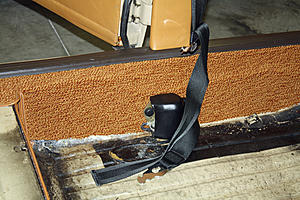
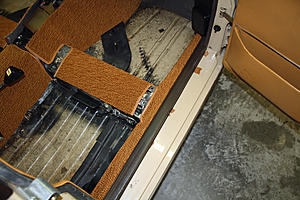
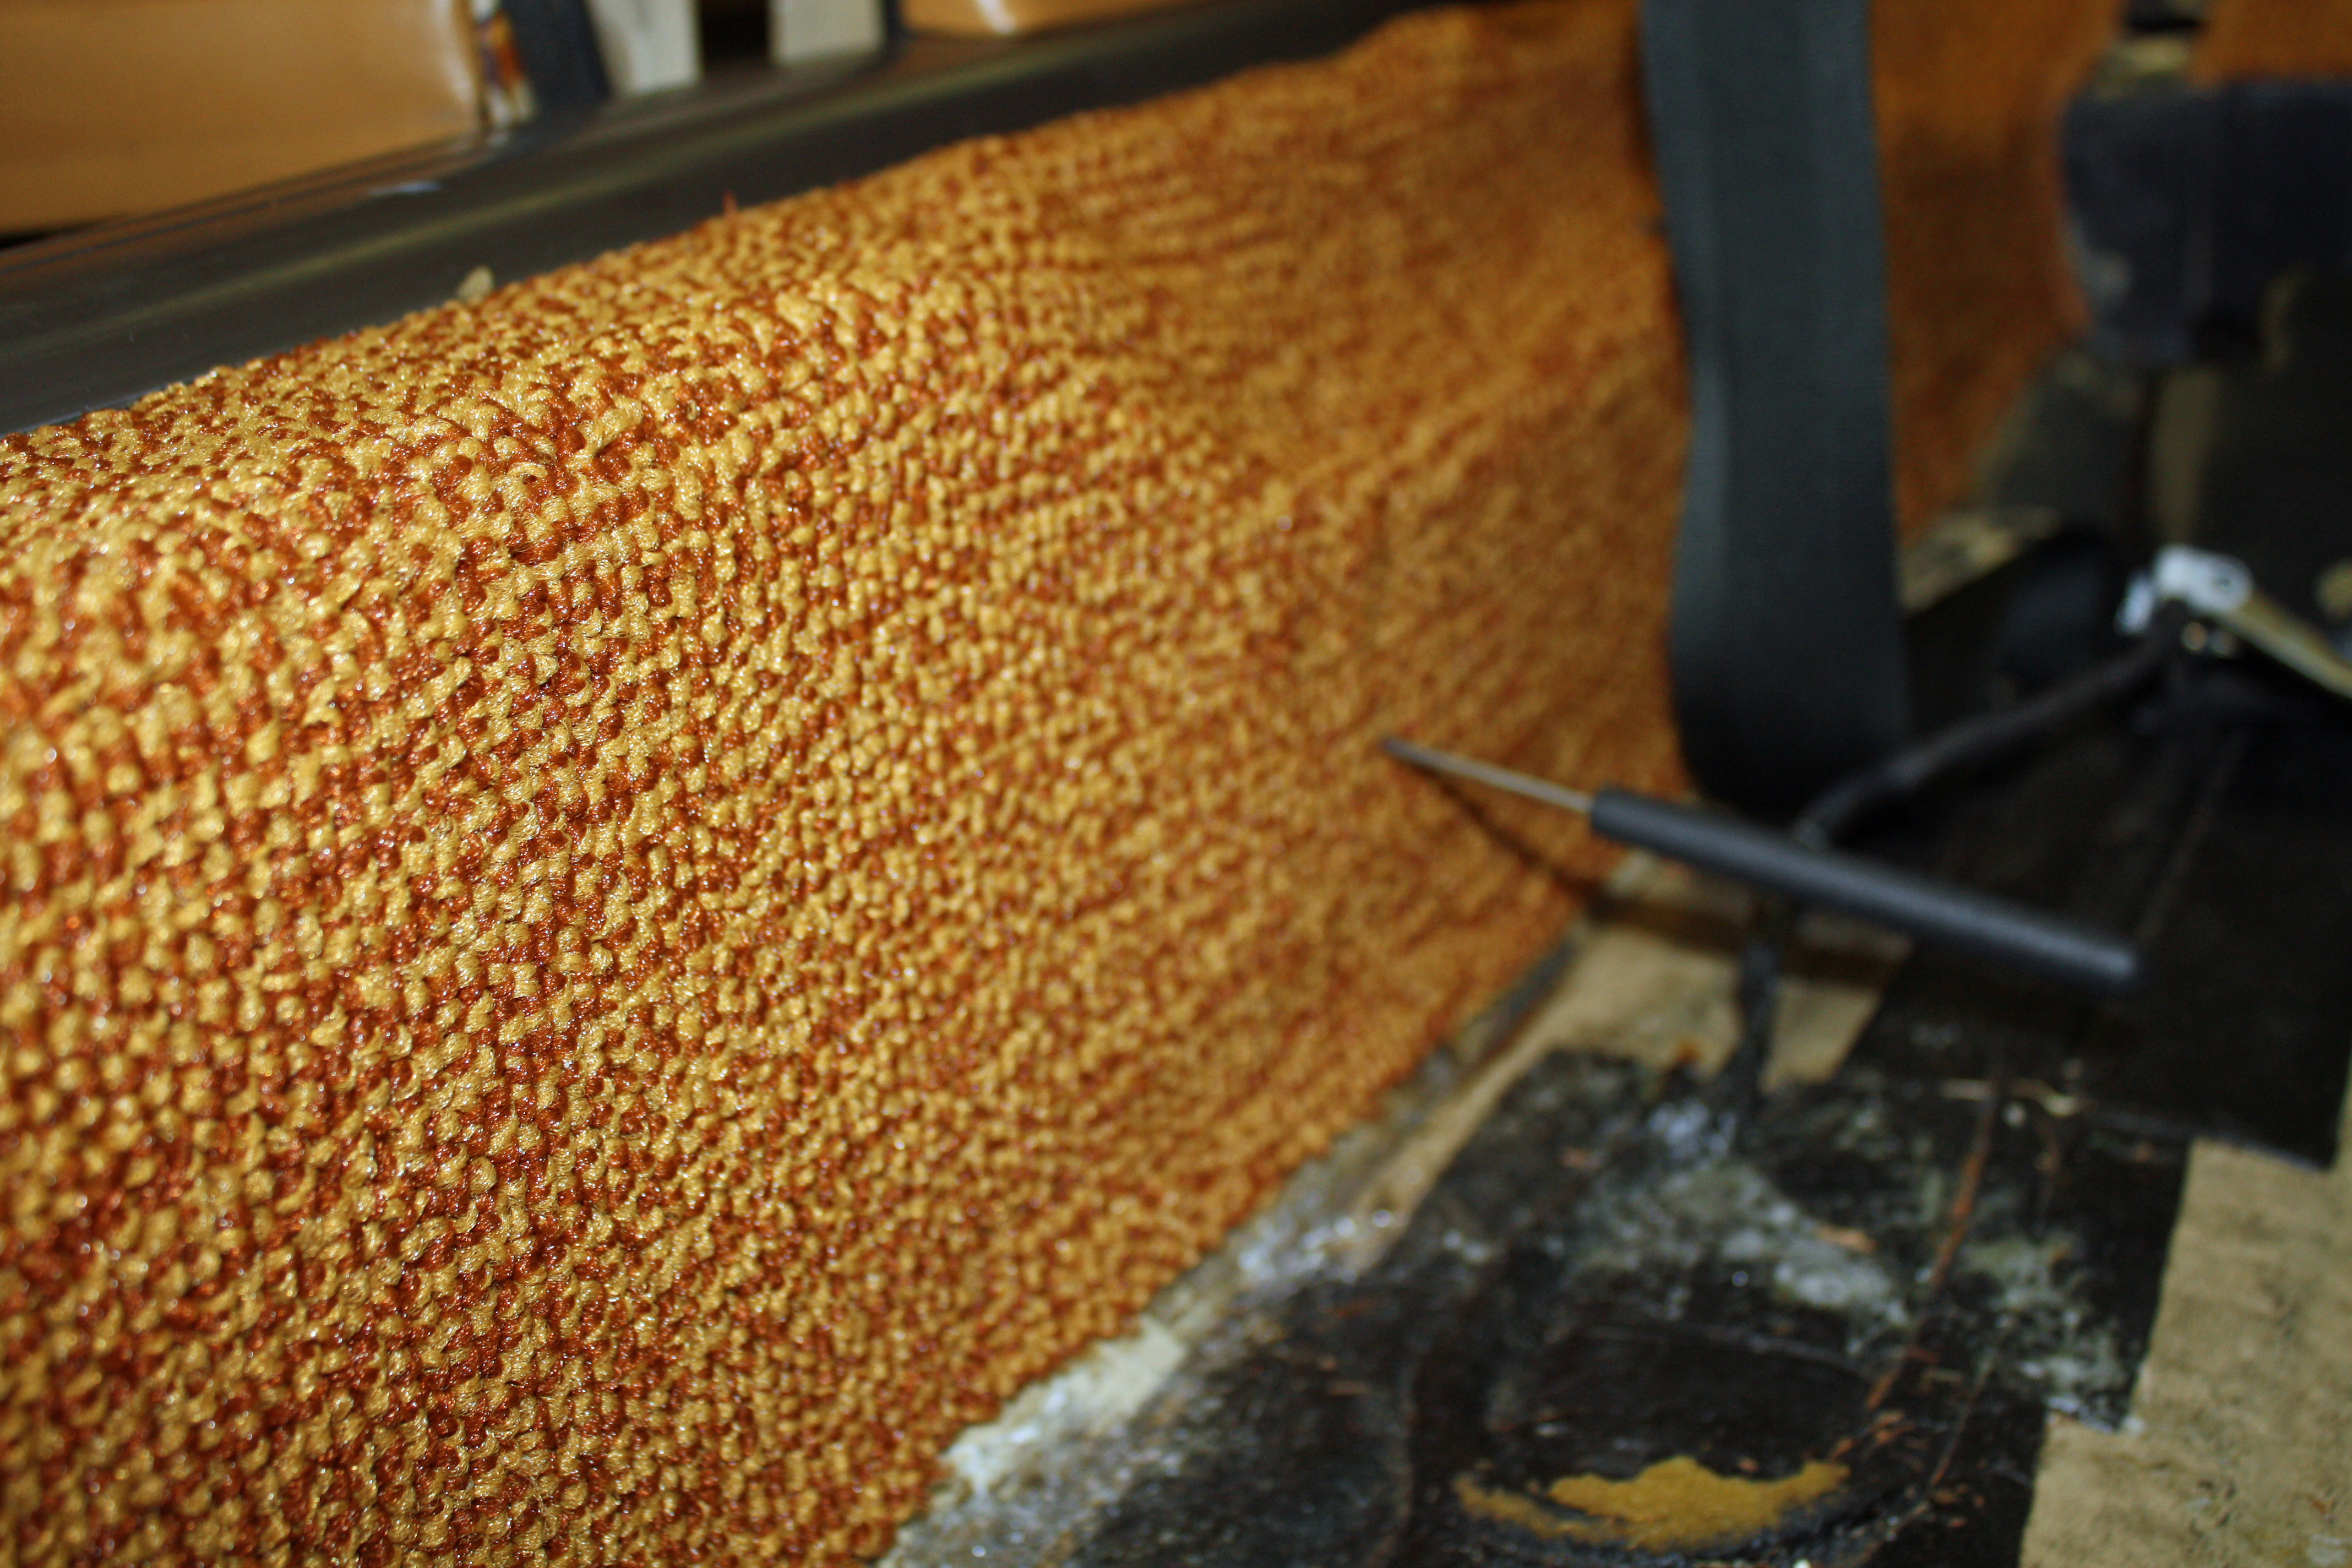
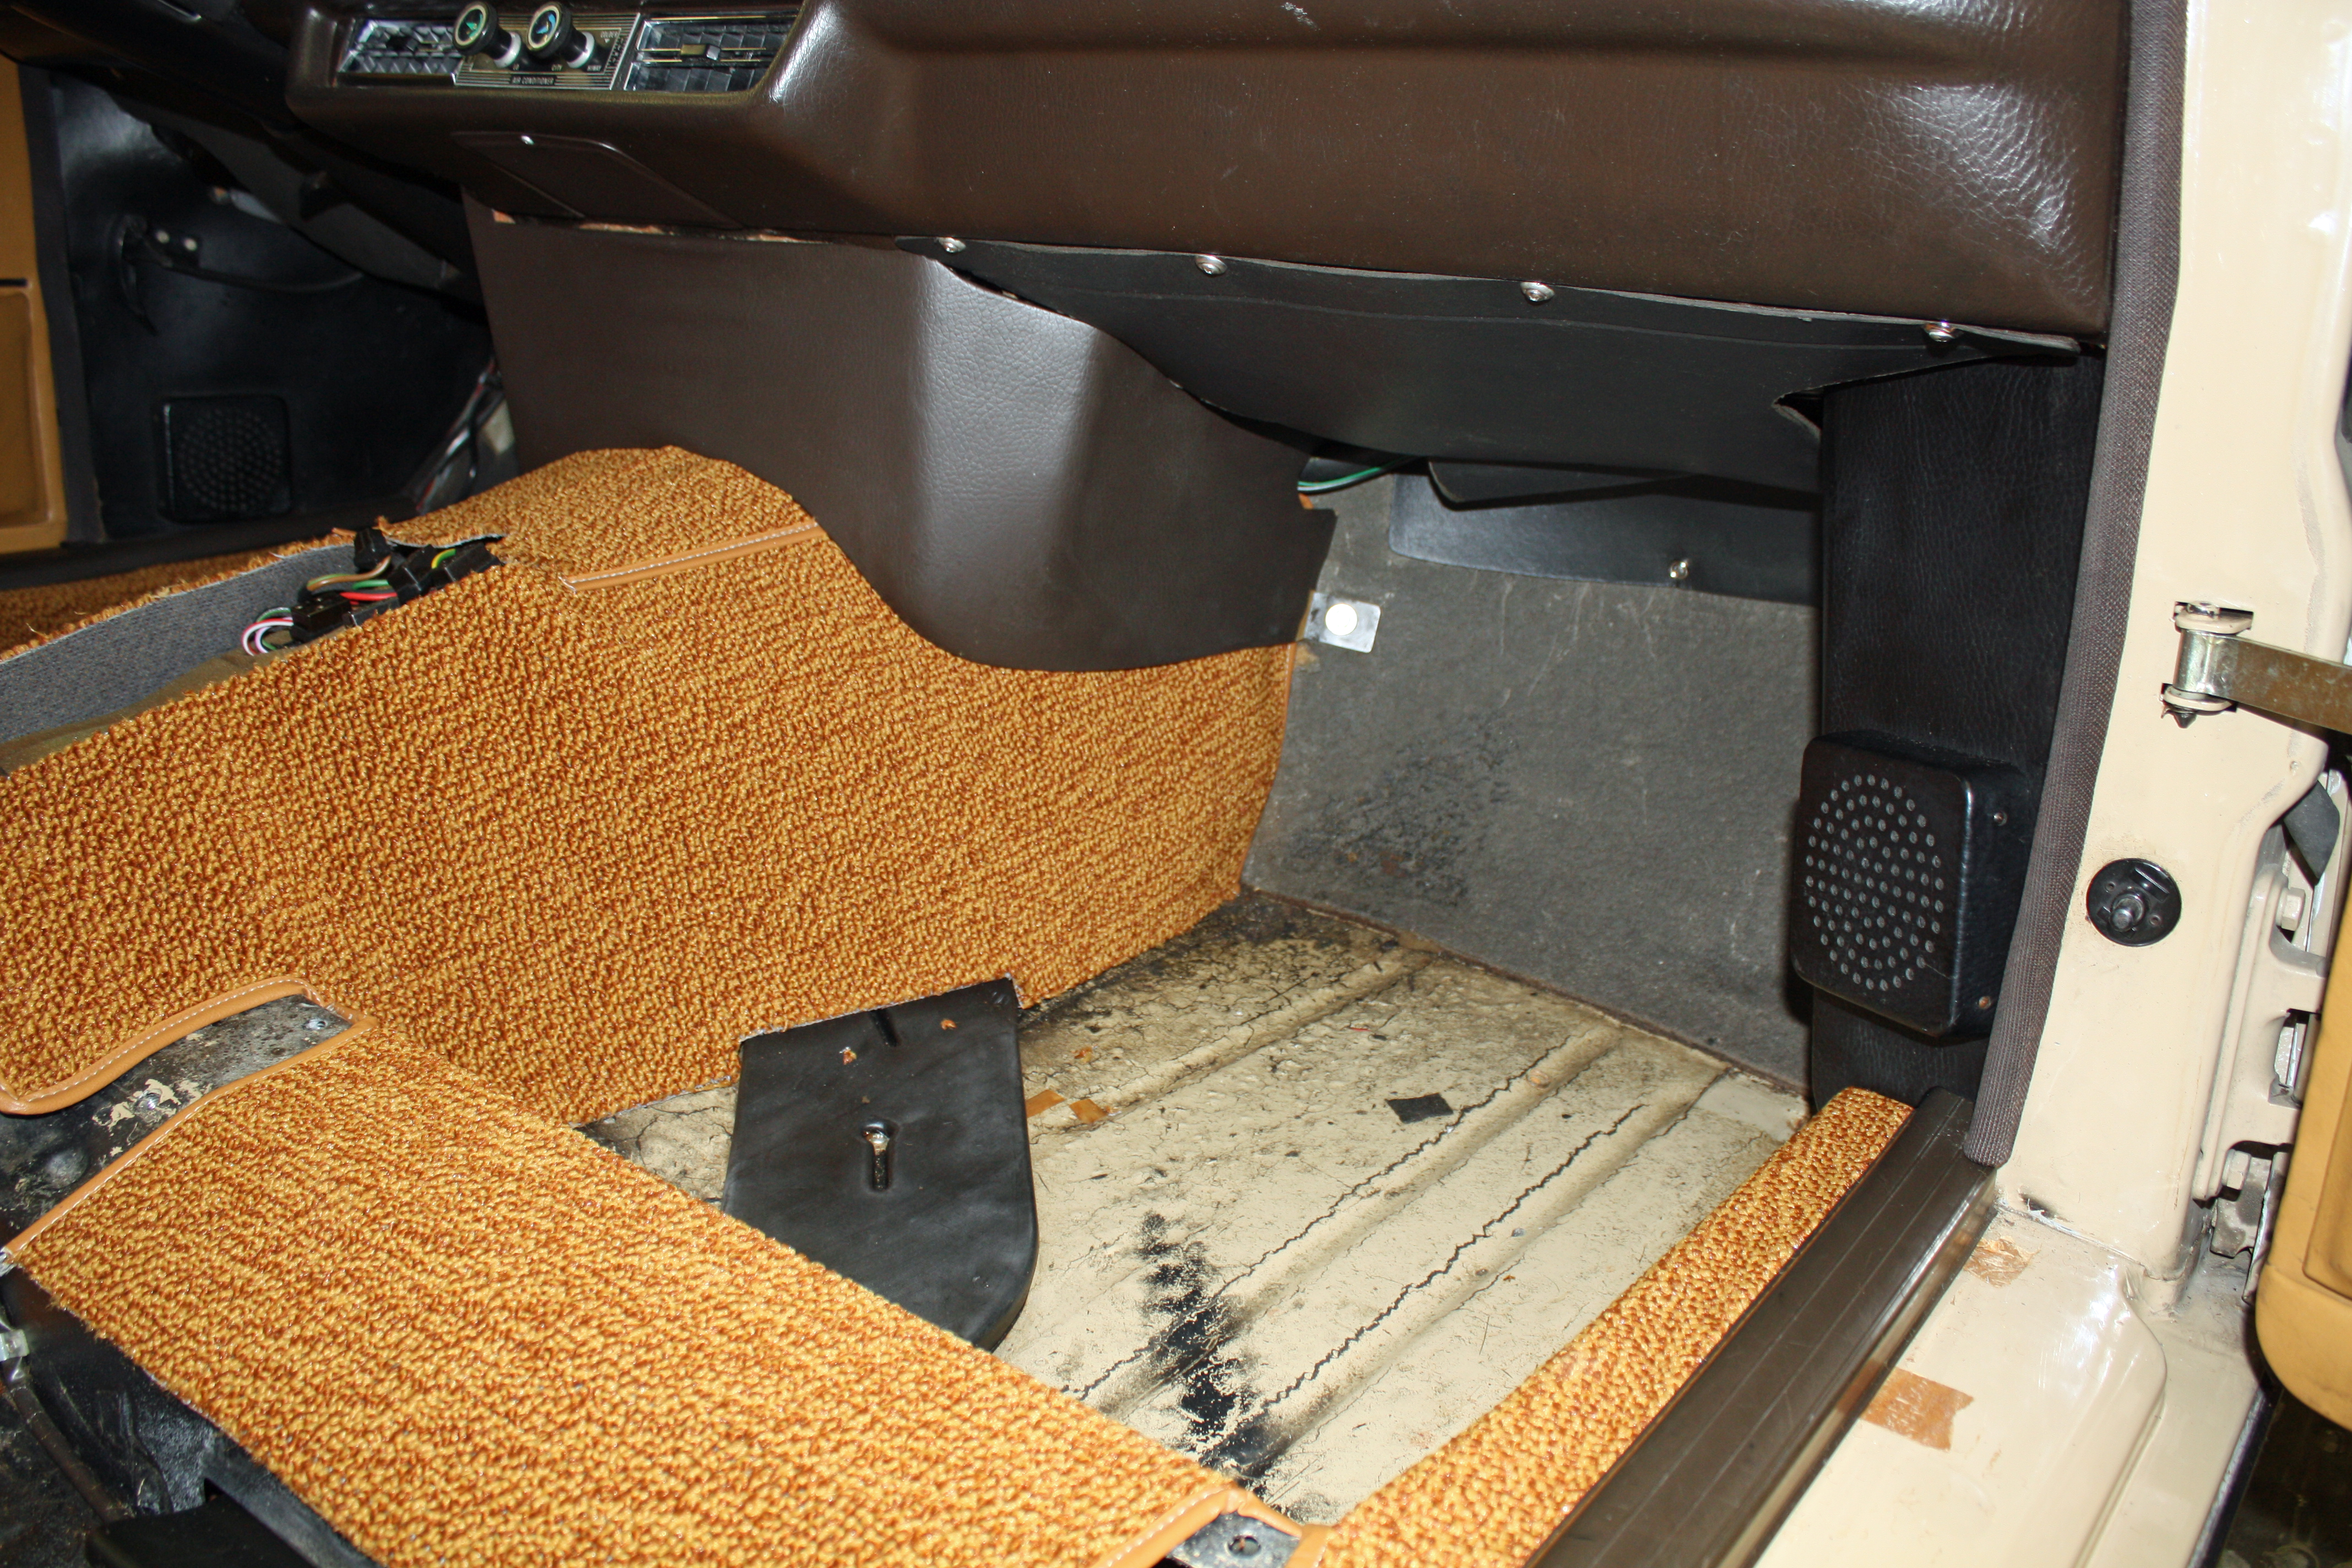
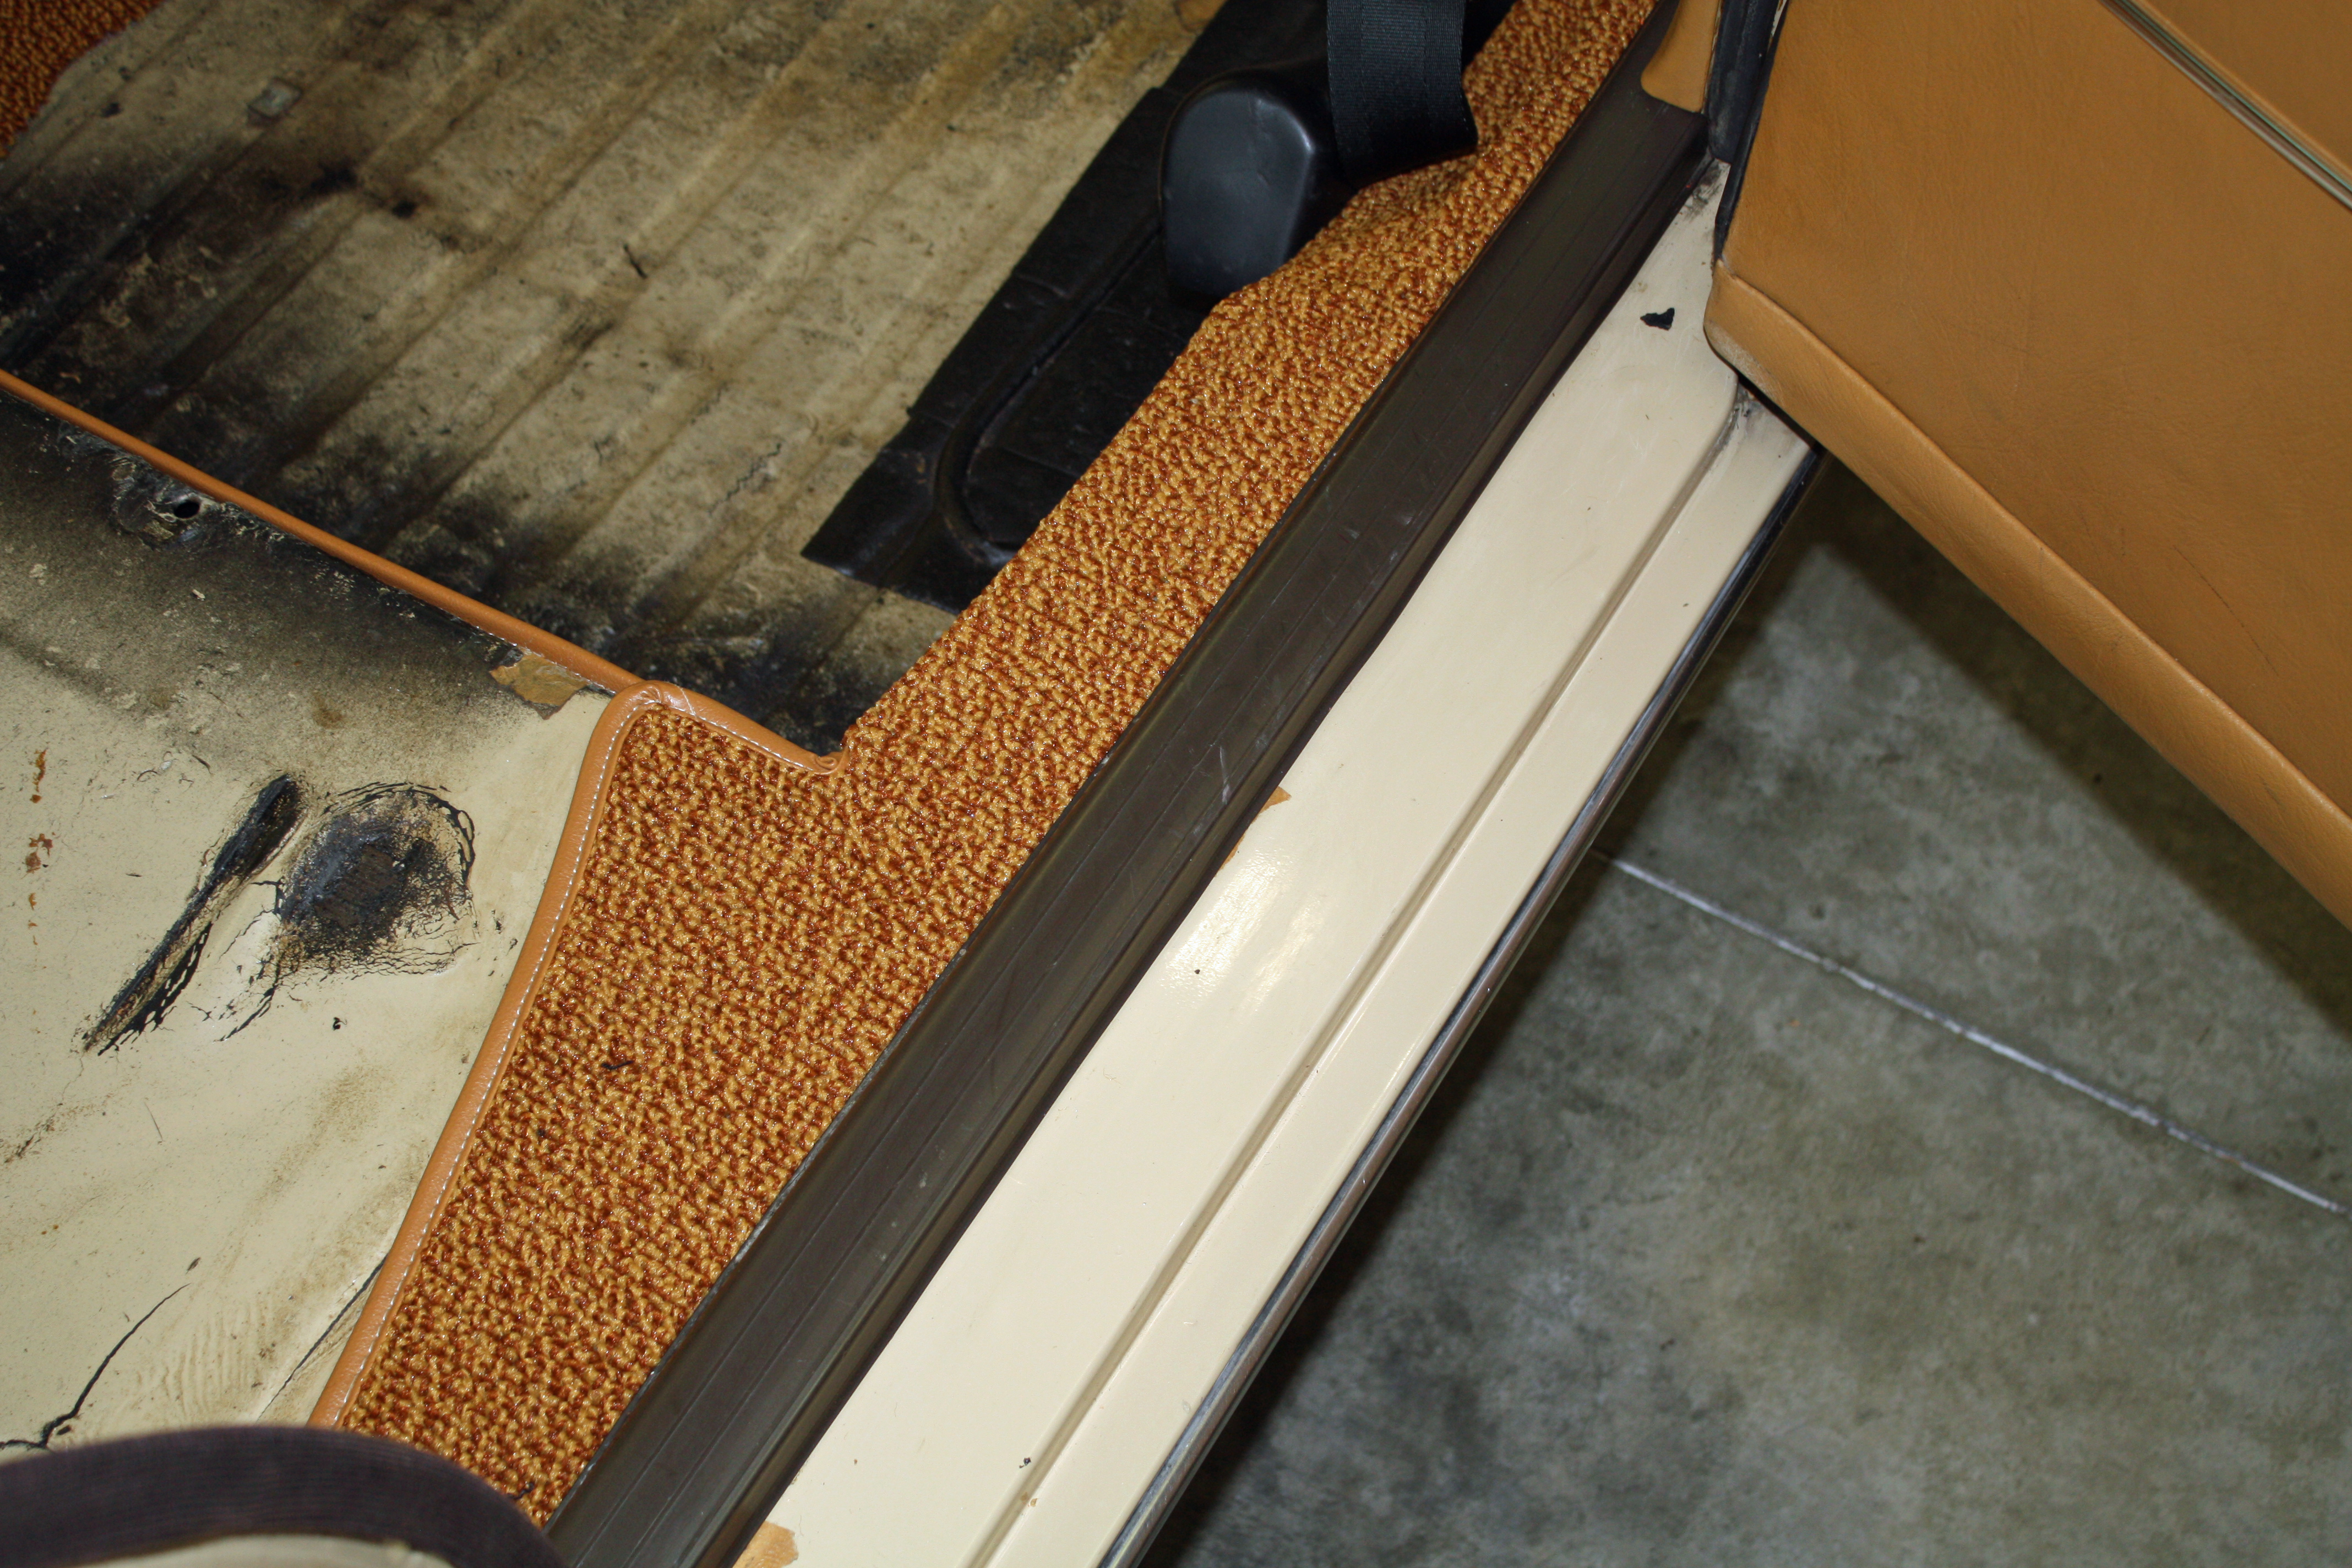
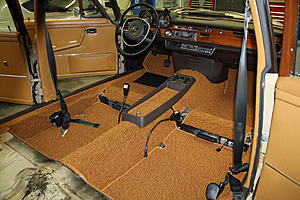
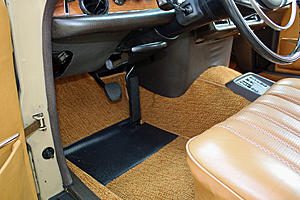
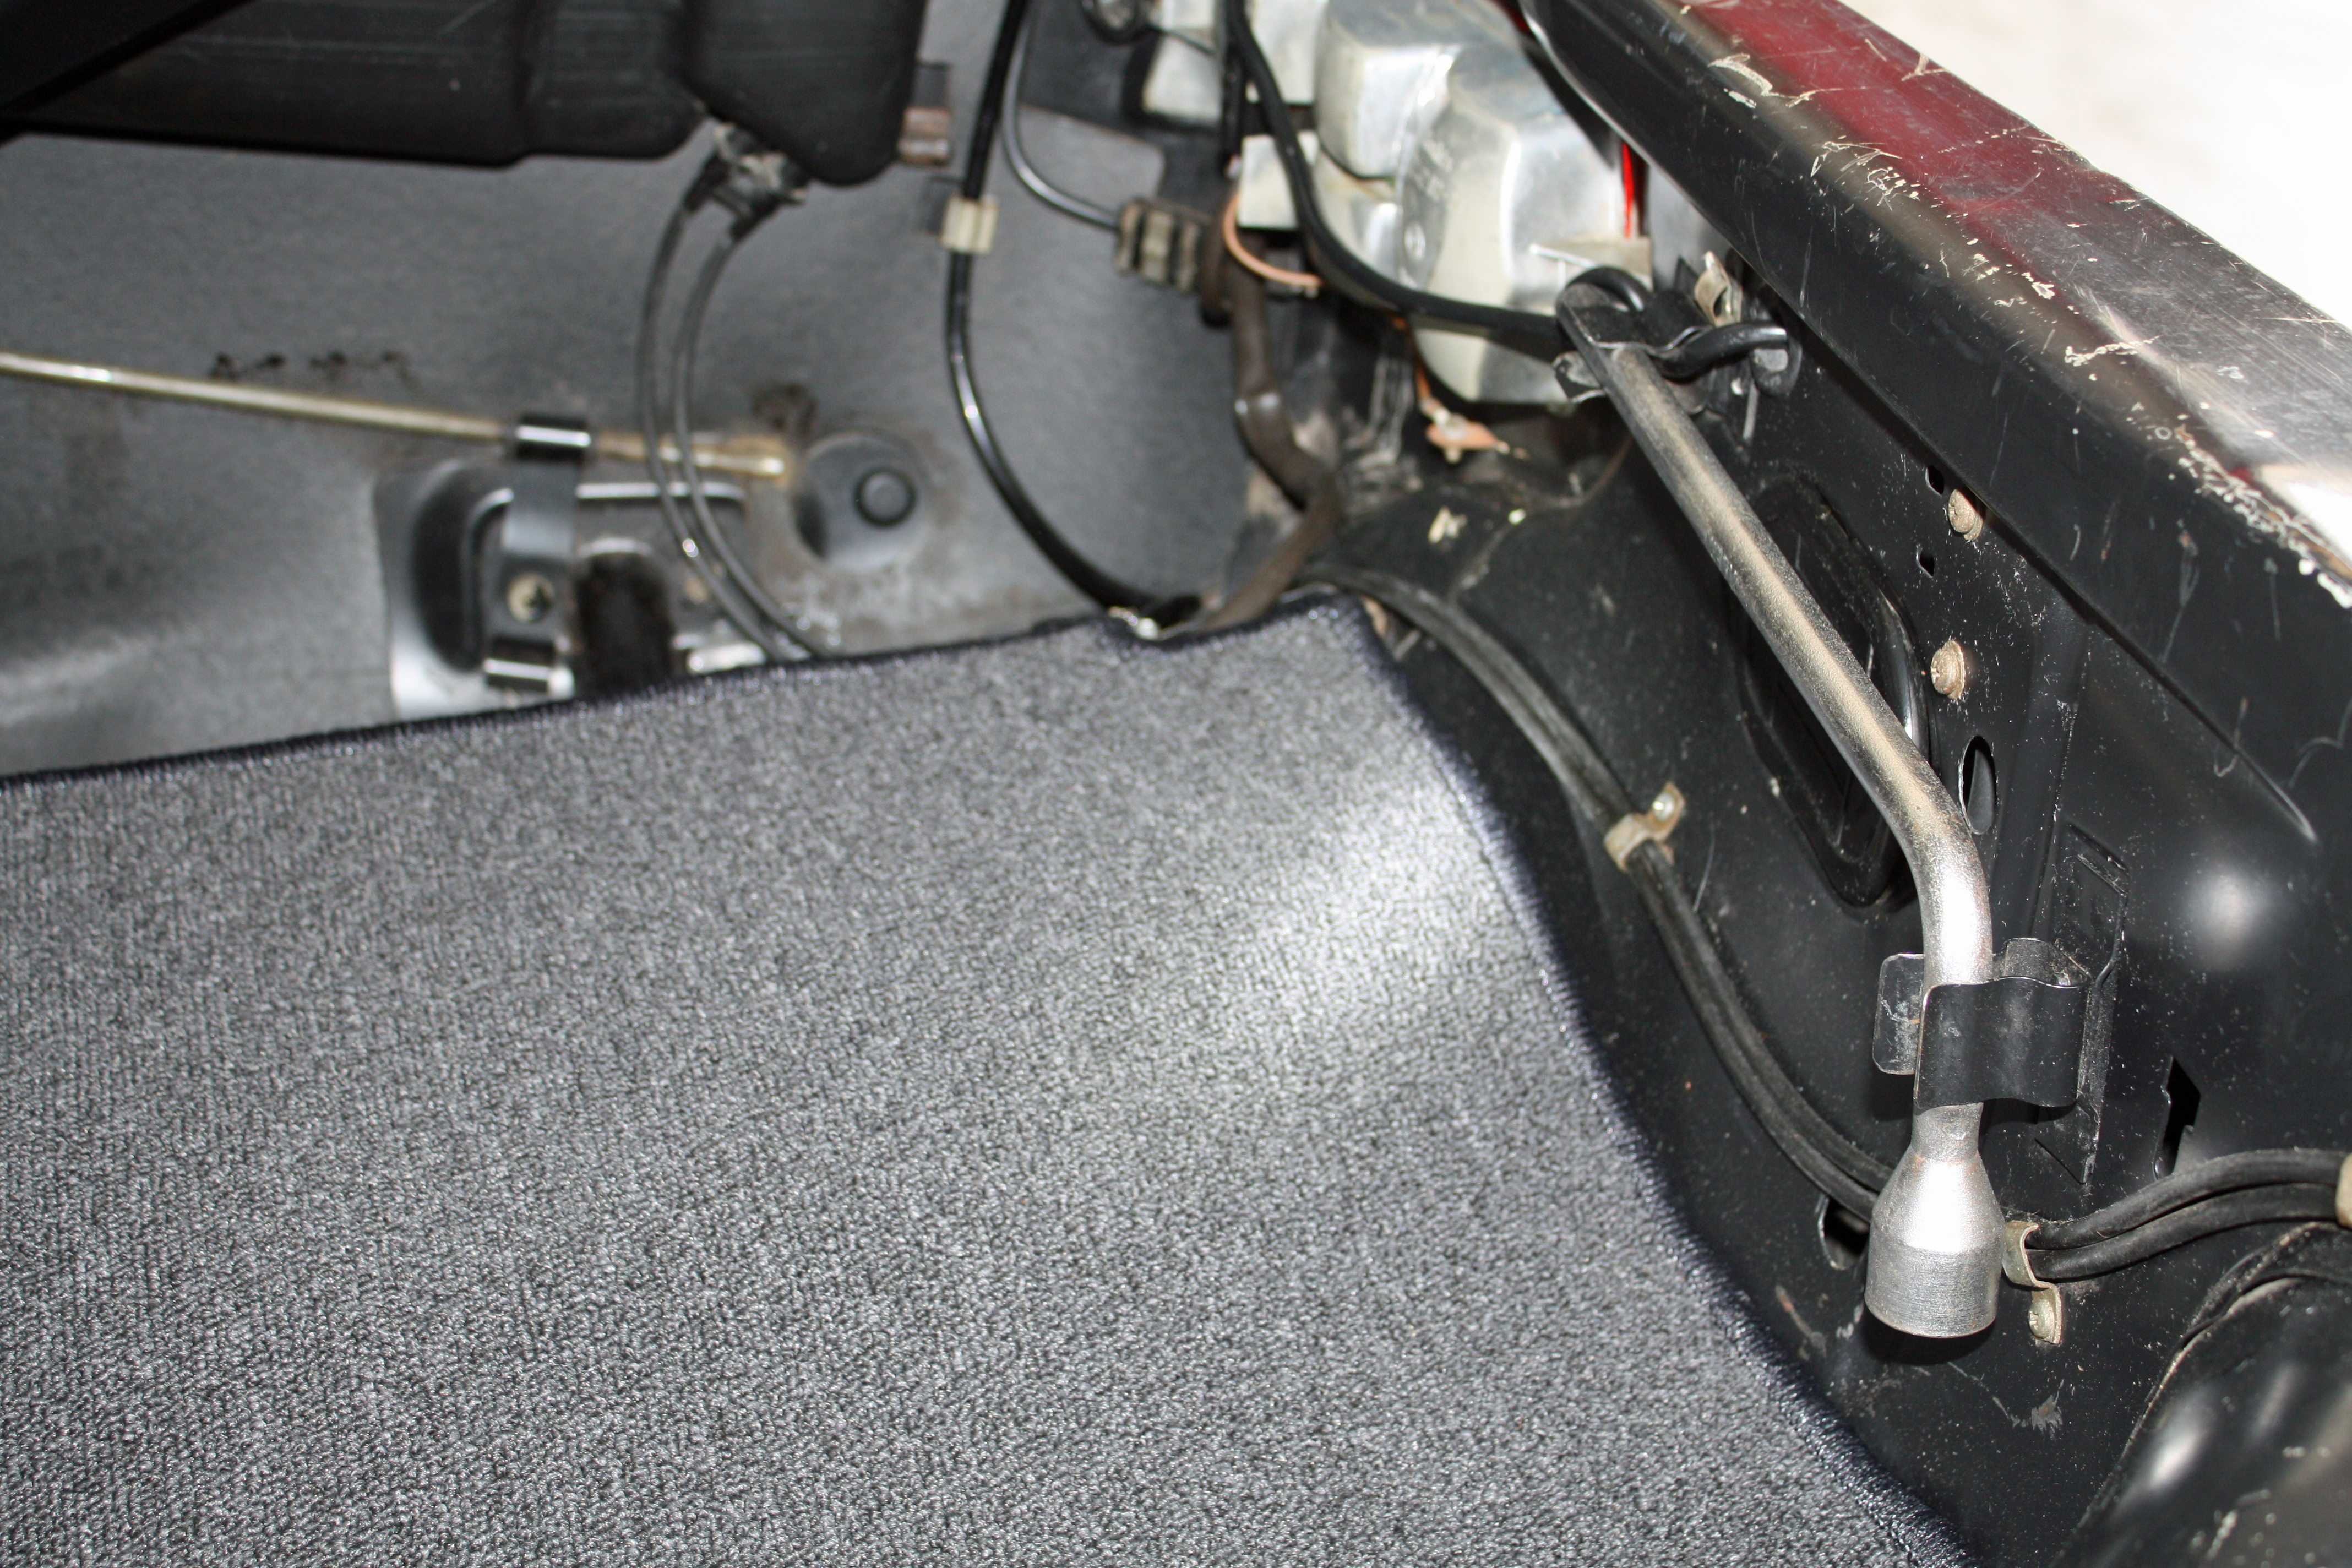
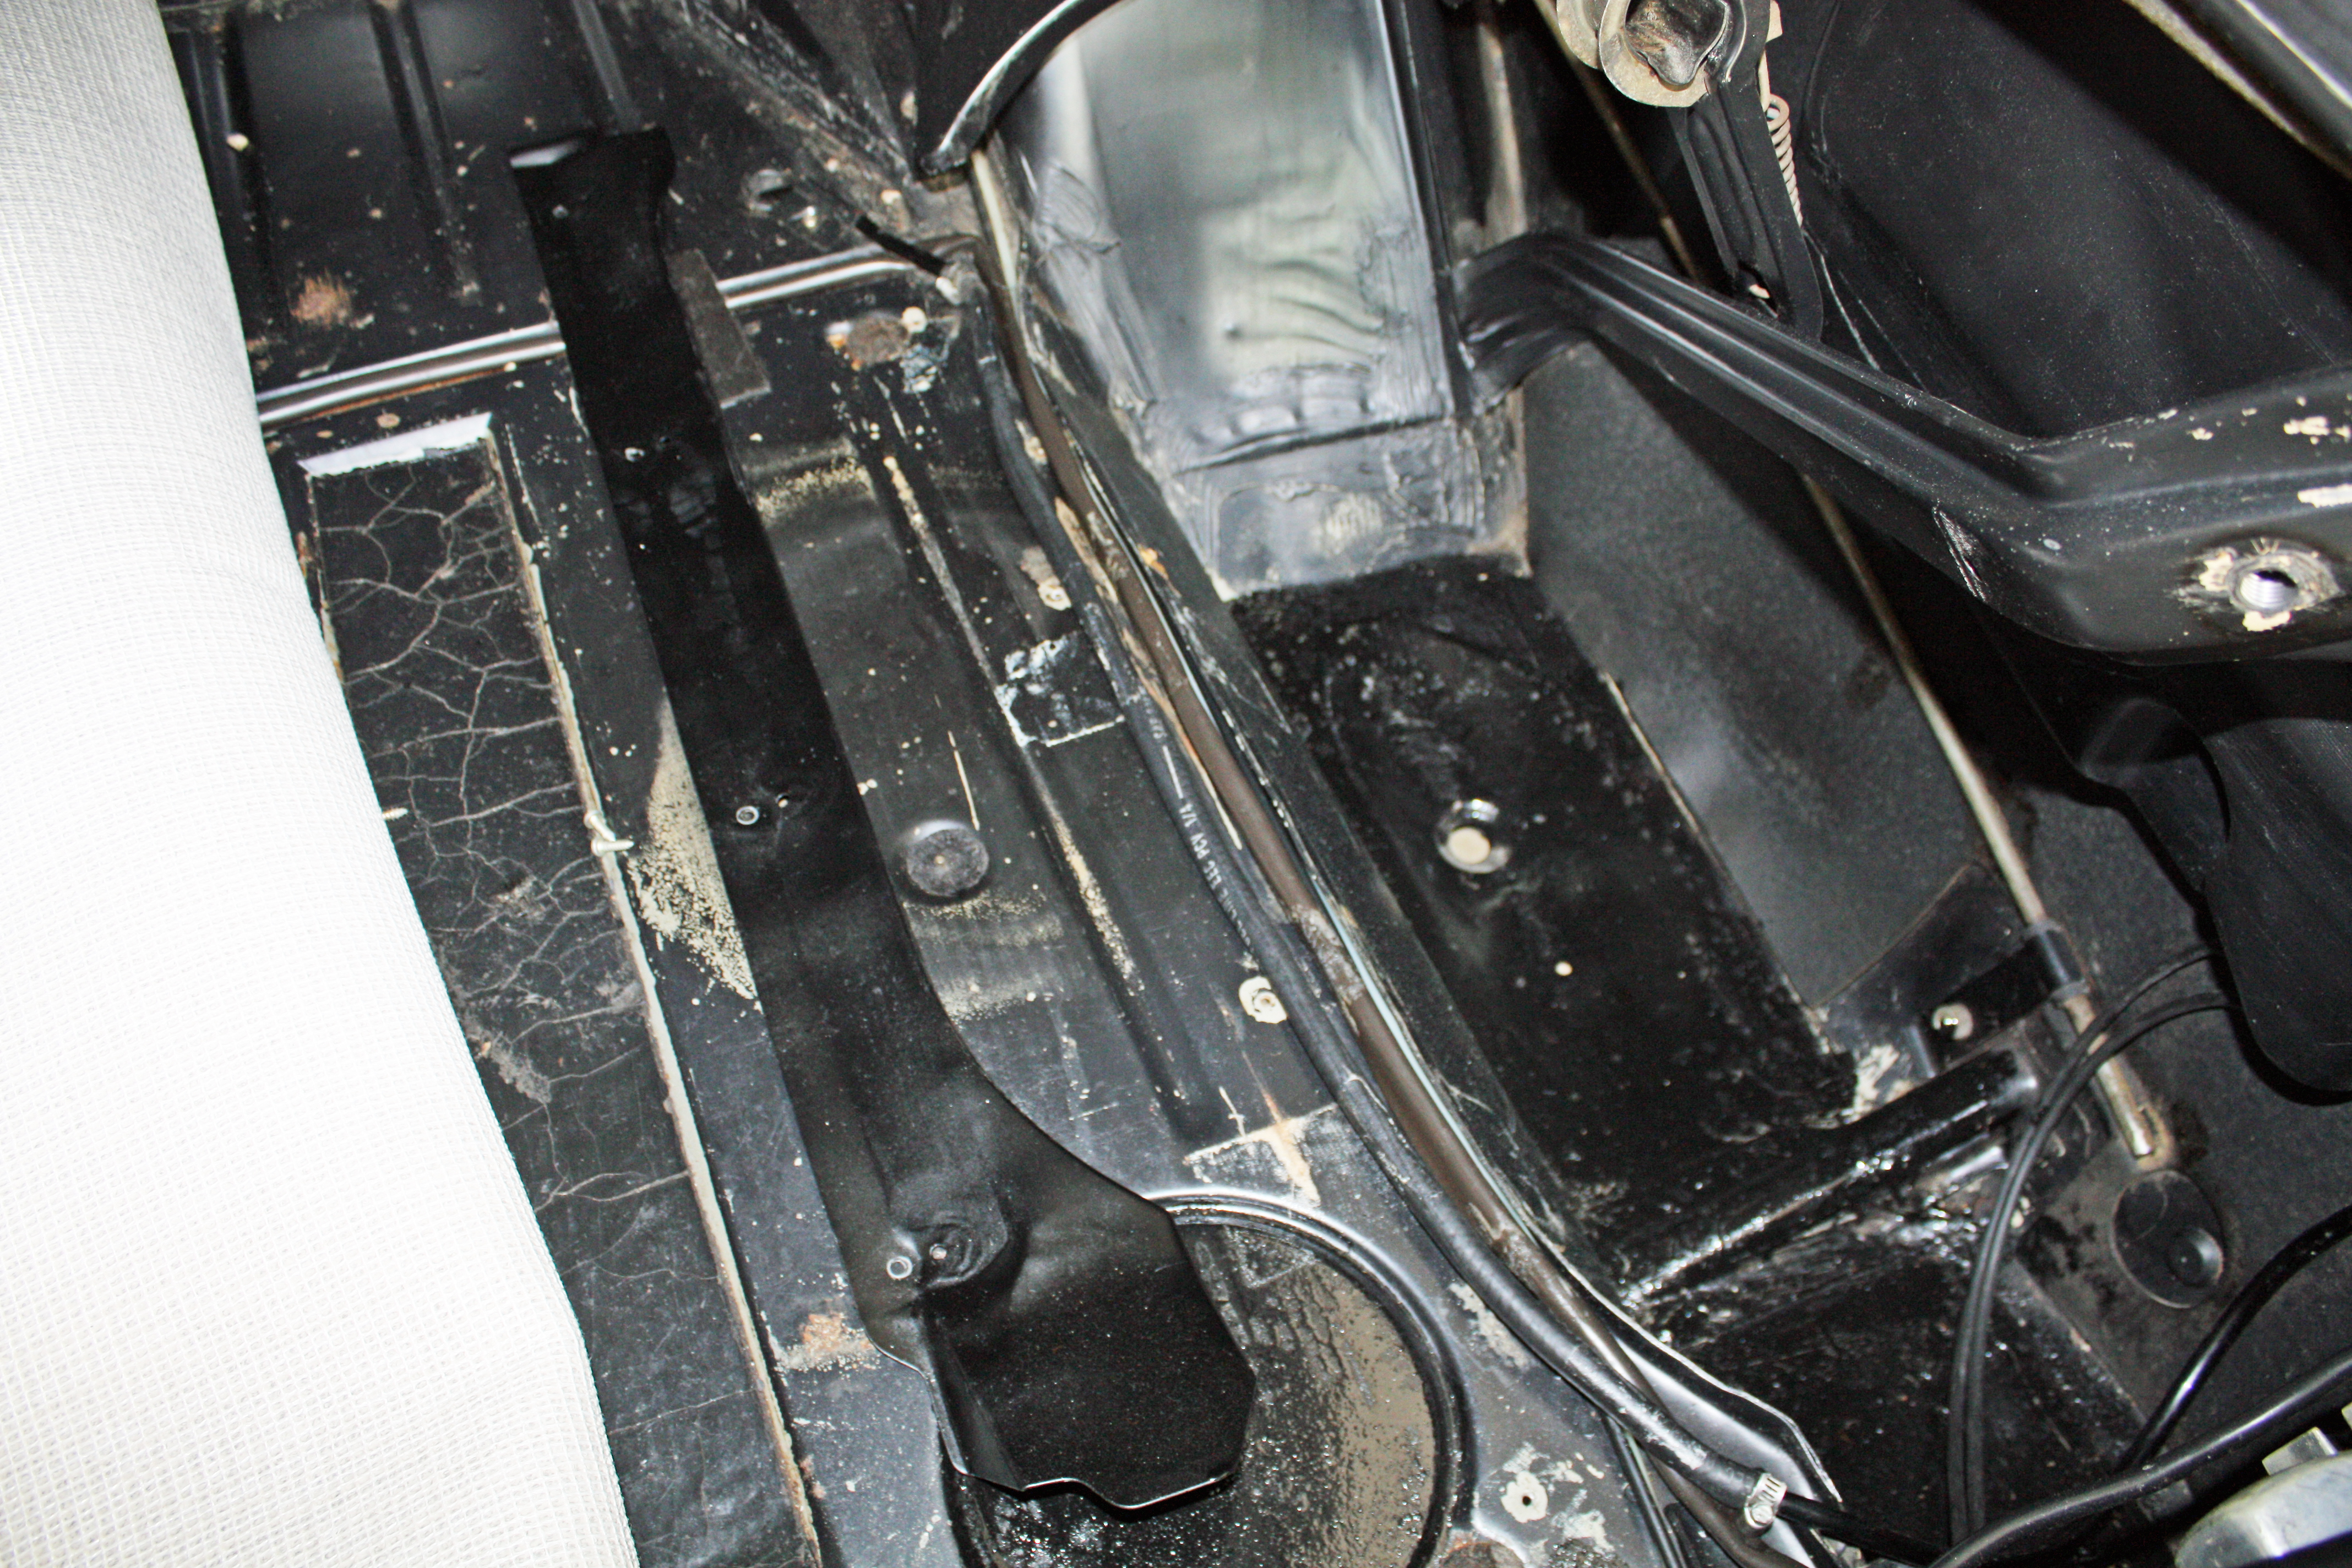
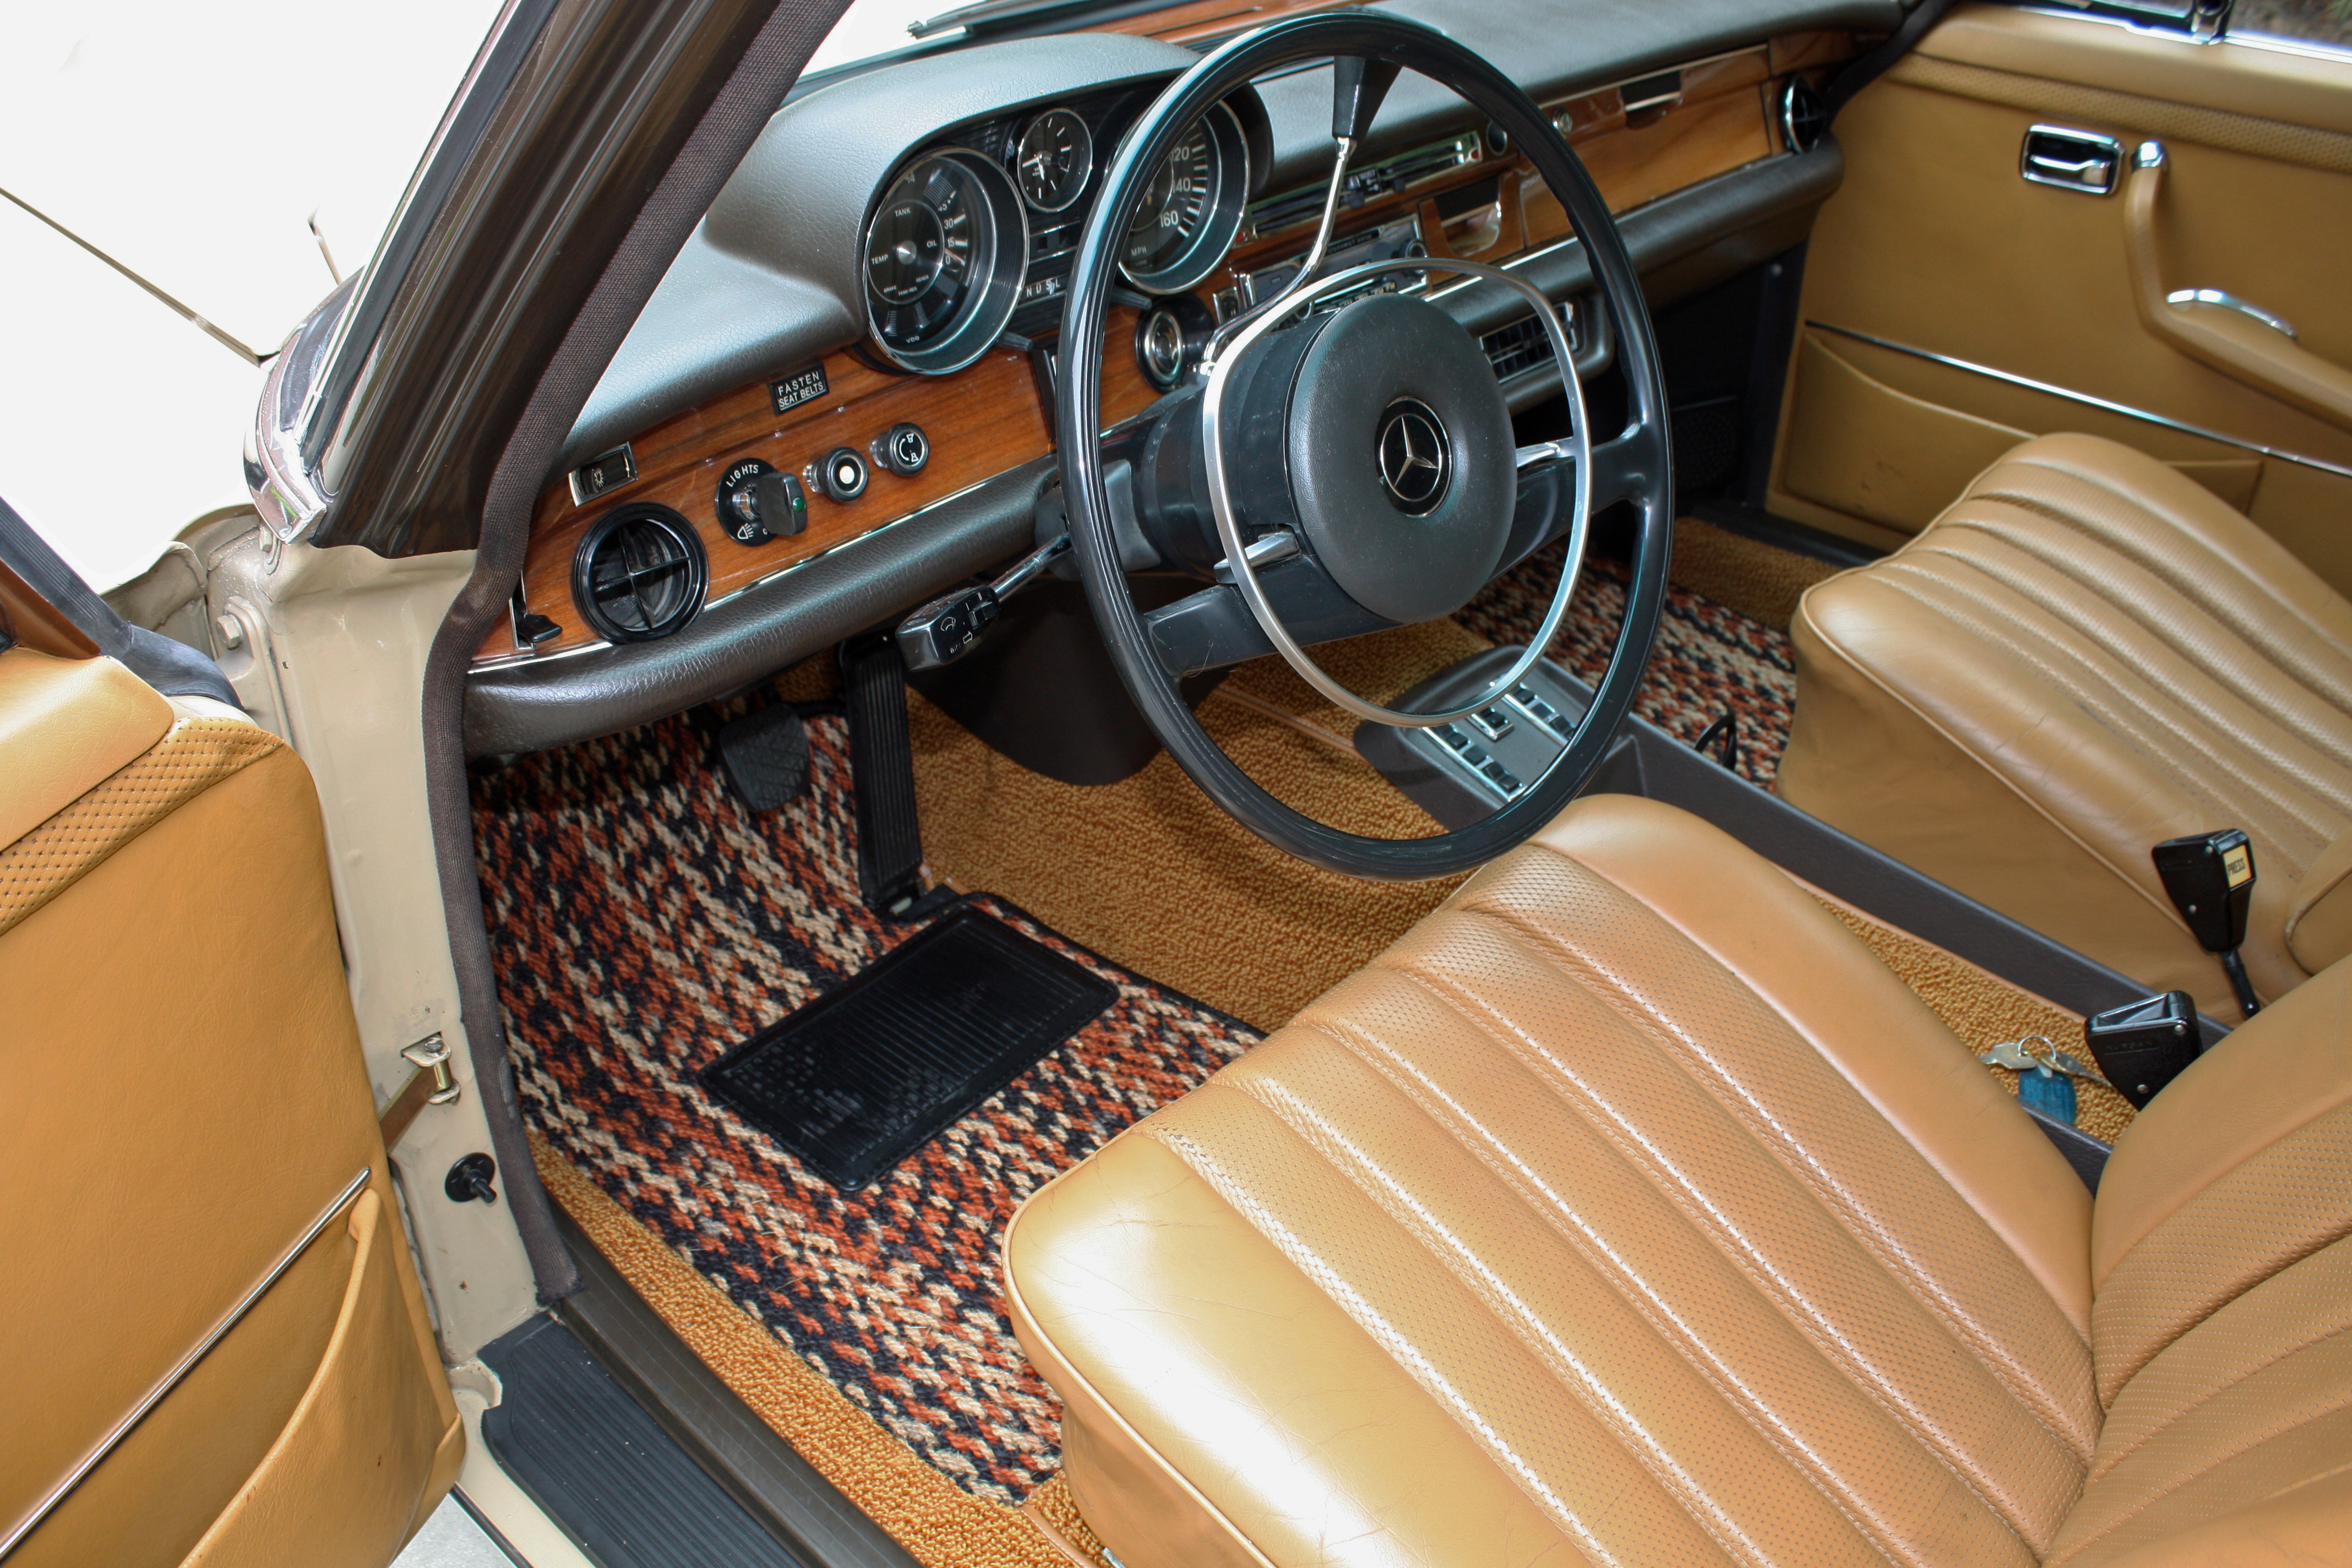
Installing the side carpet pieces was next. There is a cutout where the carpet meets the front raised metal that the seat mounts to. I had to make sure that the rear edge of that cutout was lined up before i could install the carpet from there to the rear. Again, I began with a small area and then fitted it as it went. The trickiest part here was the indentation in the inside rocker panel. Getting the carpet to lay right was a challenge.
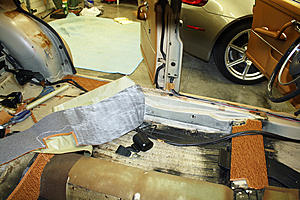
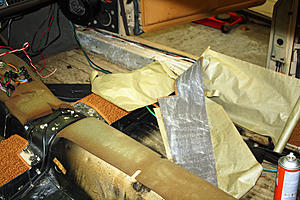
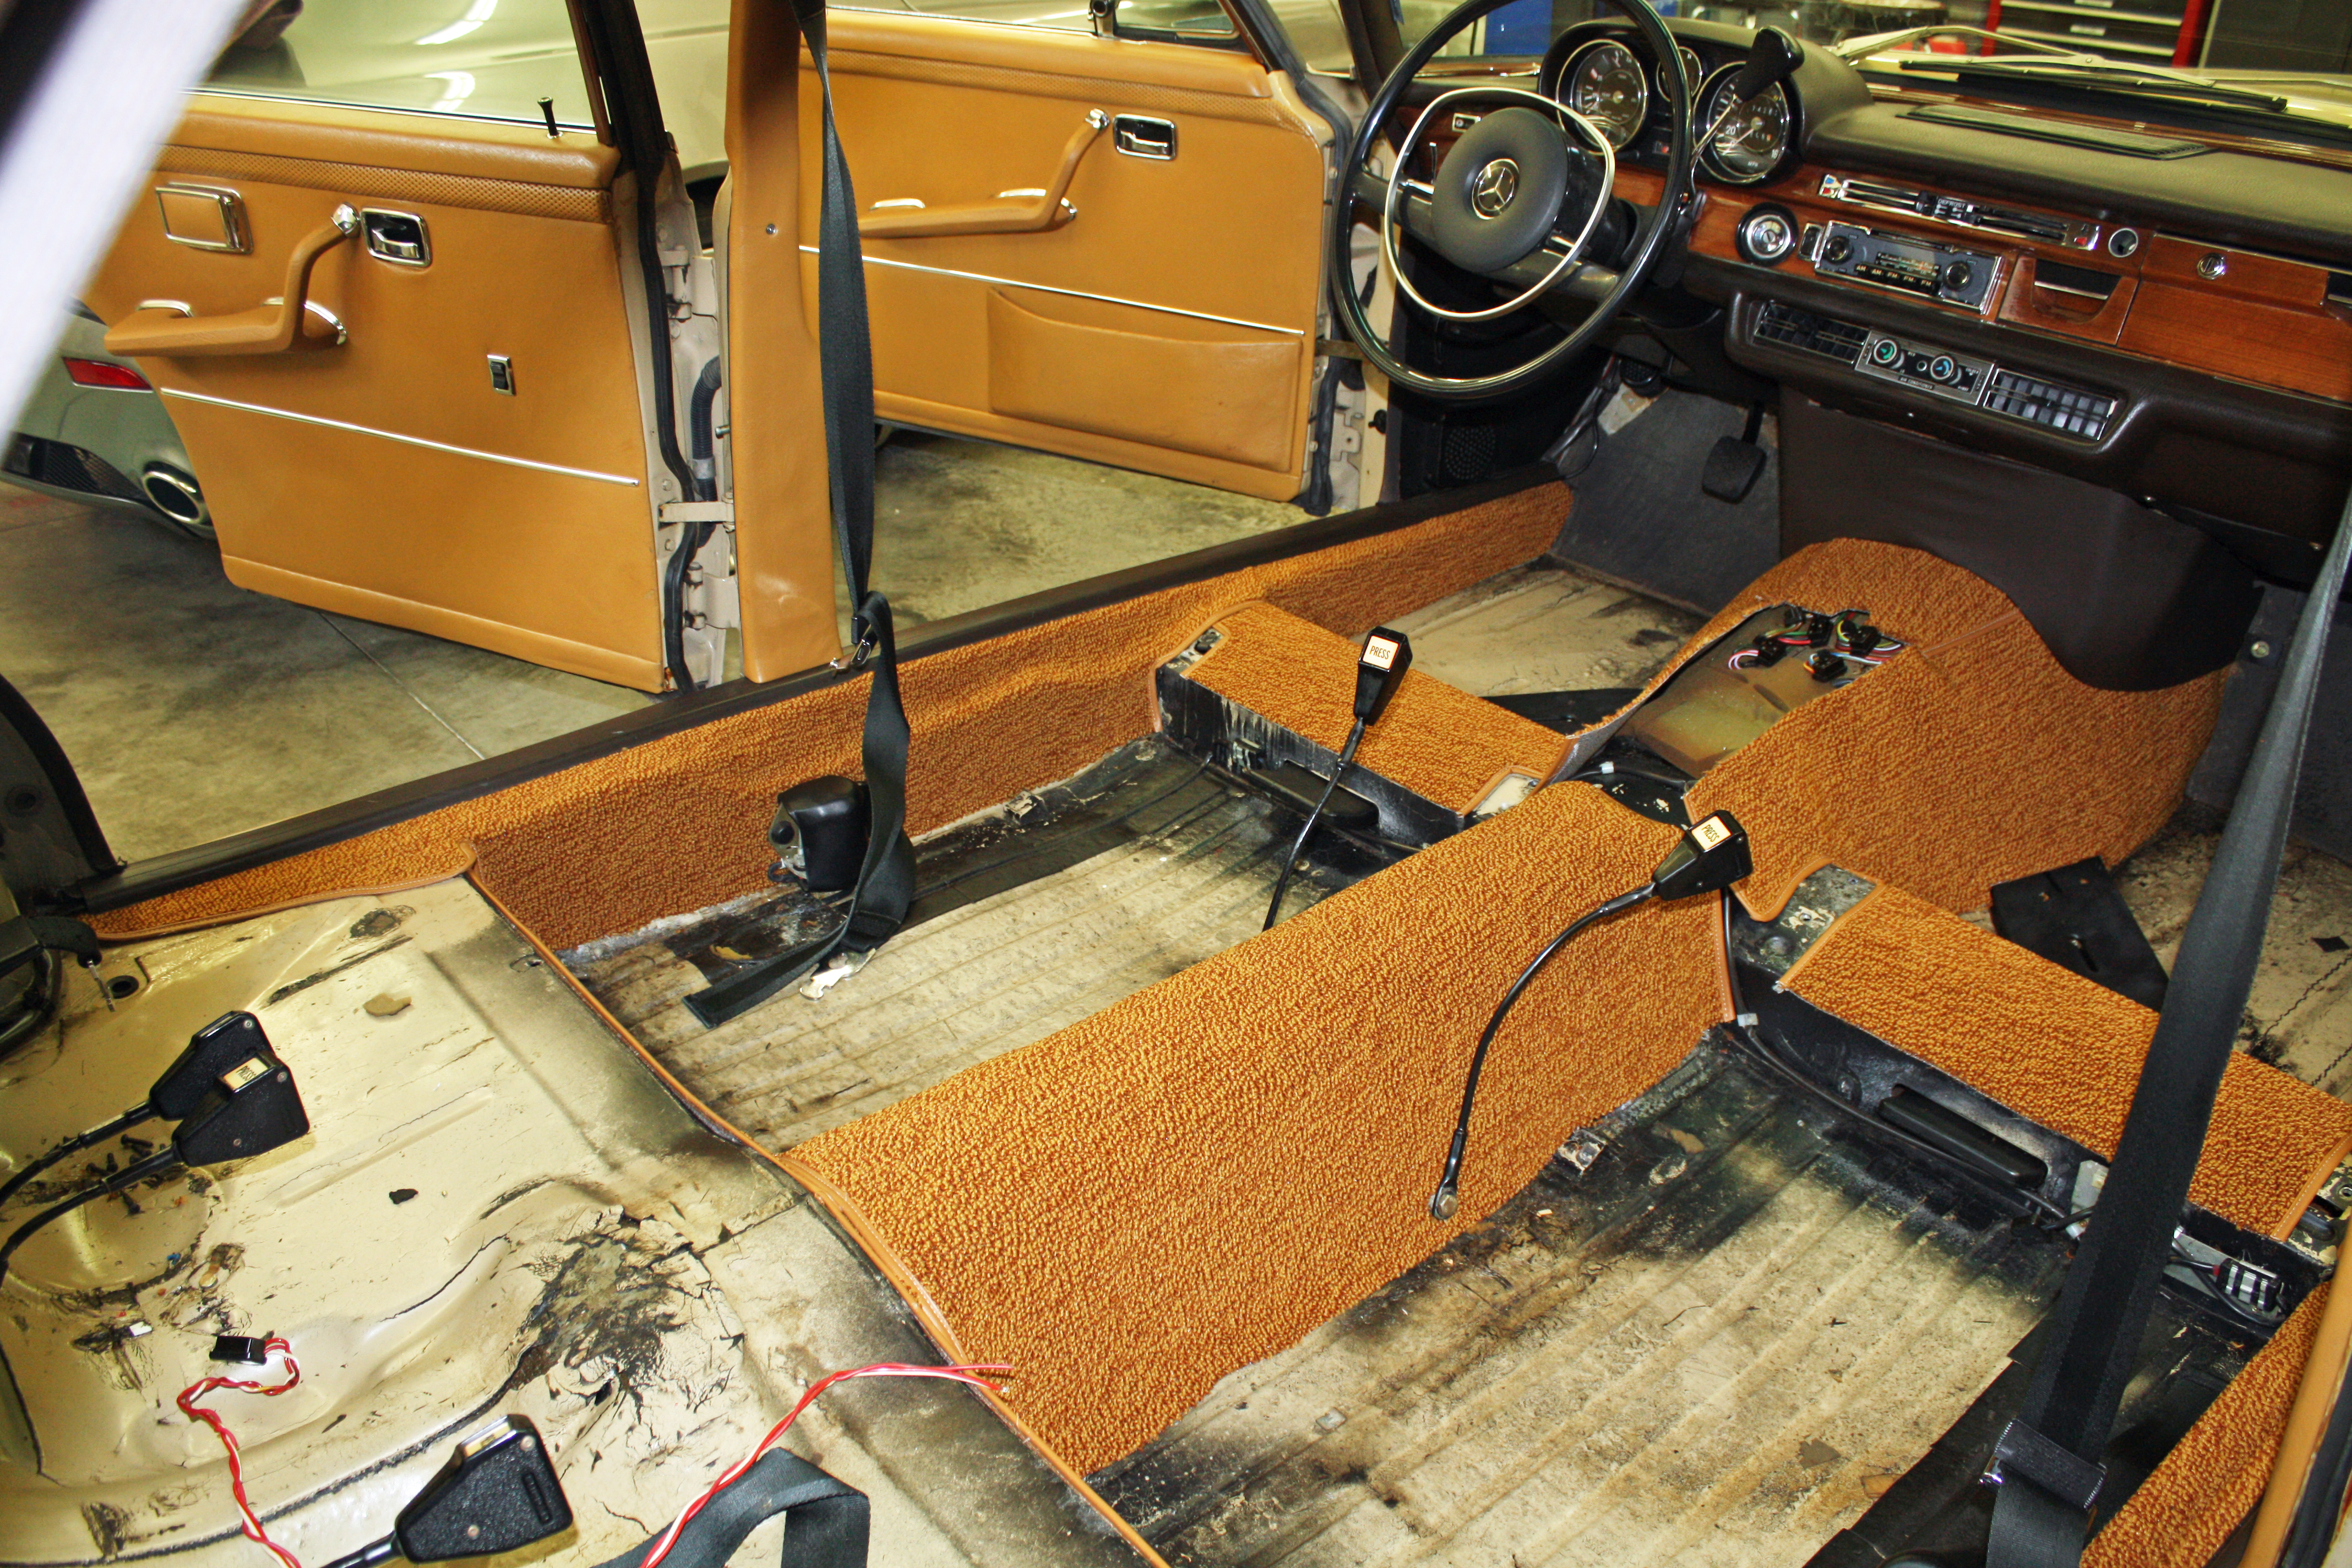
With both sides finished, I installed the center piece over the tunnel. The front tunnel piece was not glued at the factory. It is held in place with the AC surround trim and the console tray.

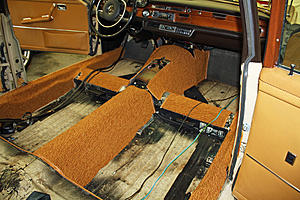

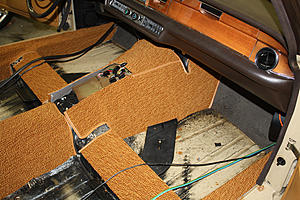
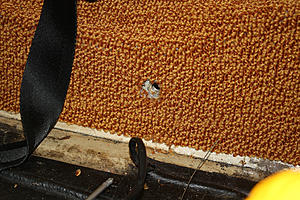
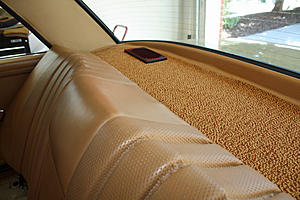
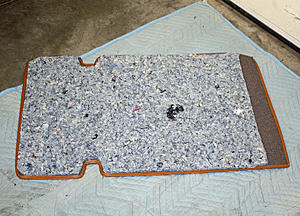
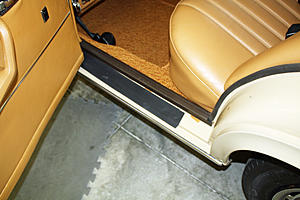
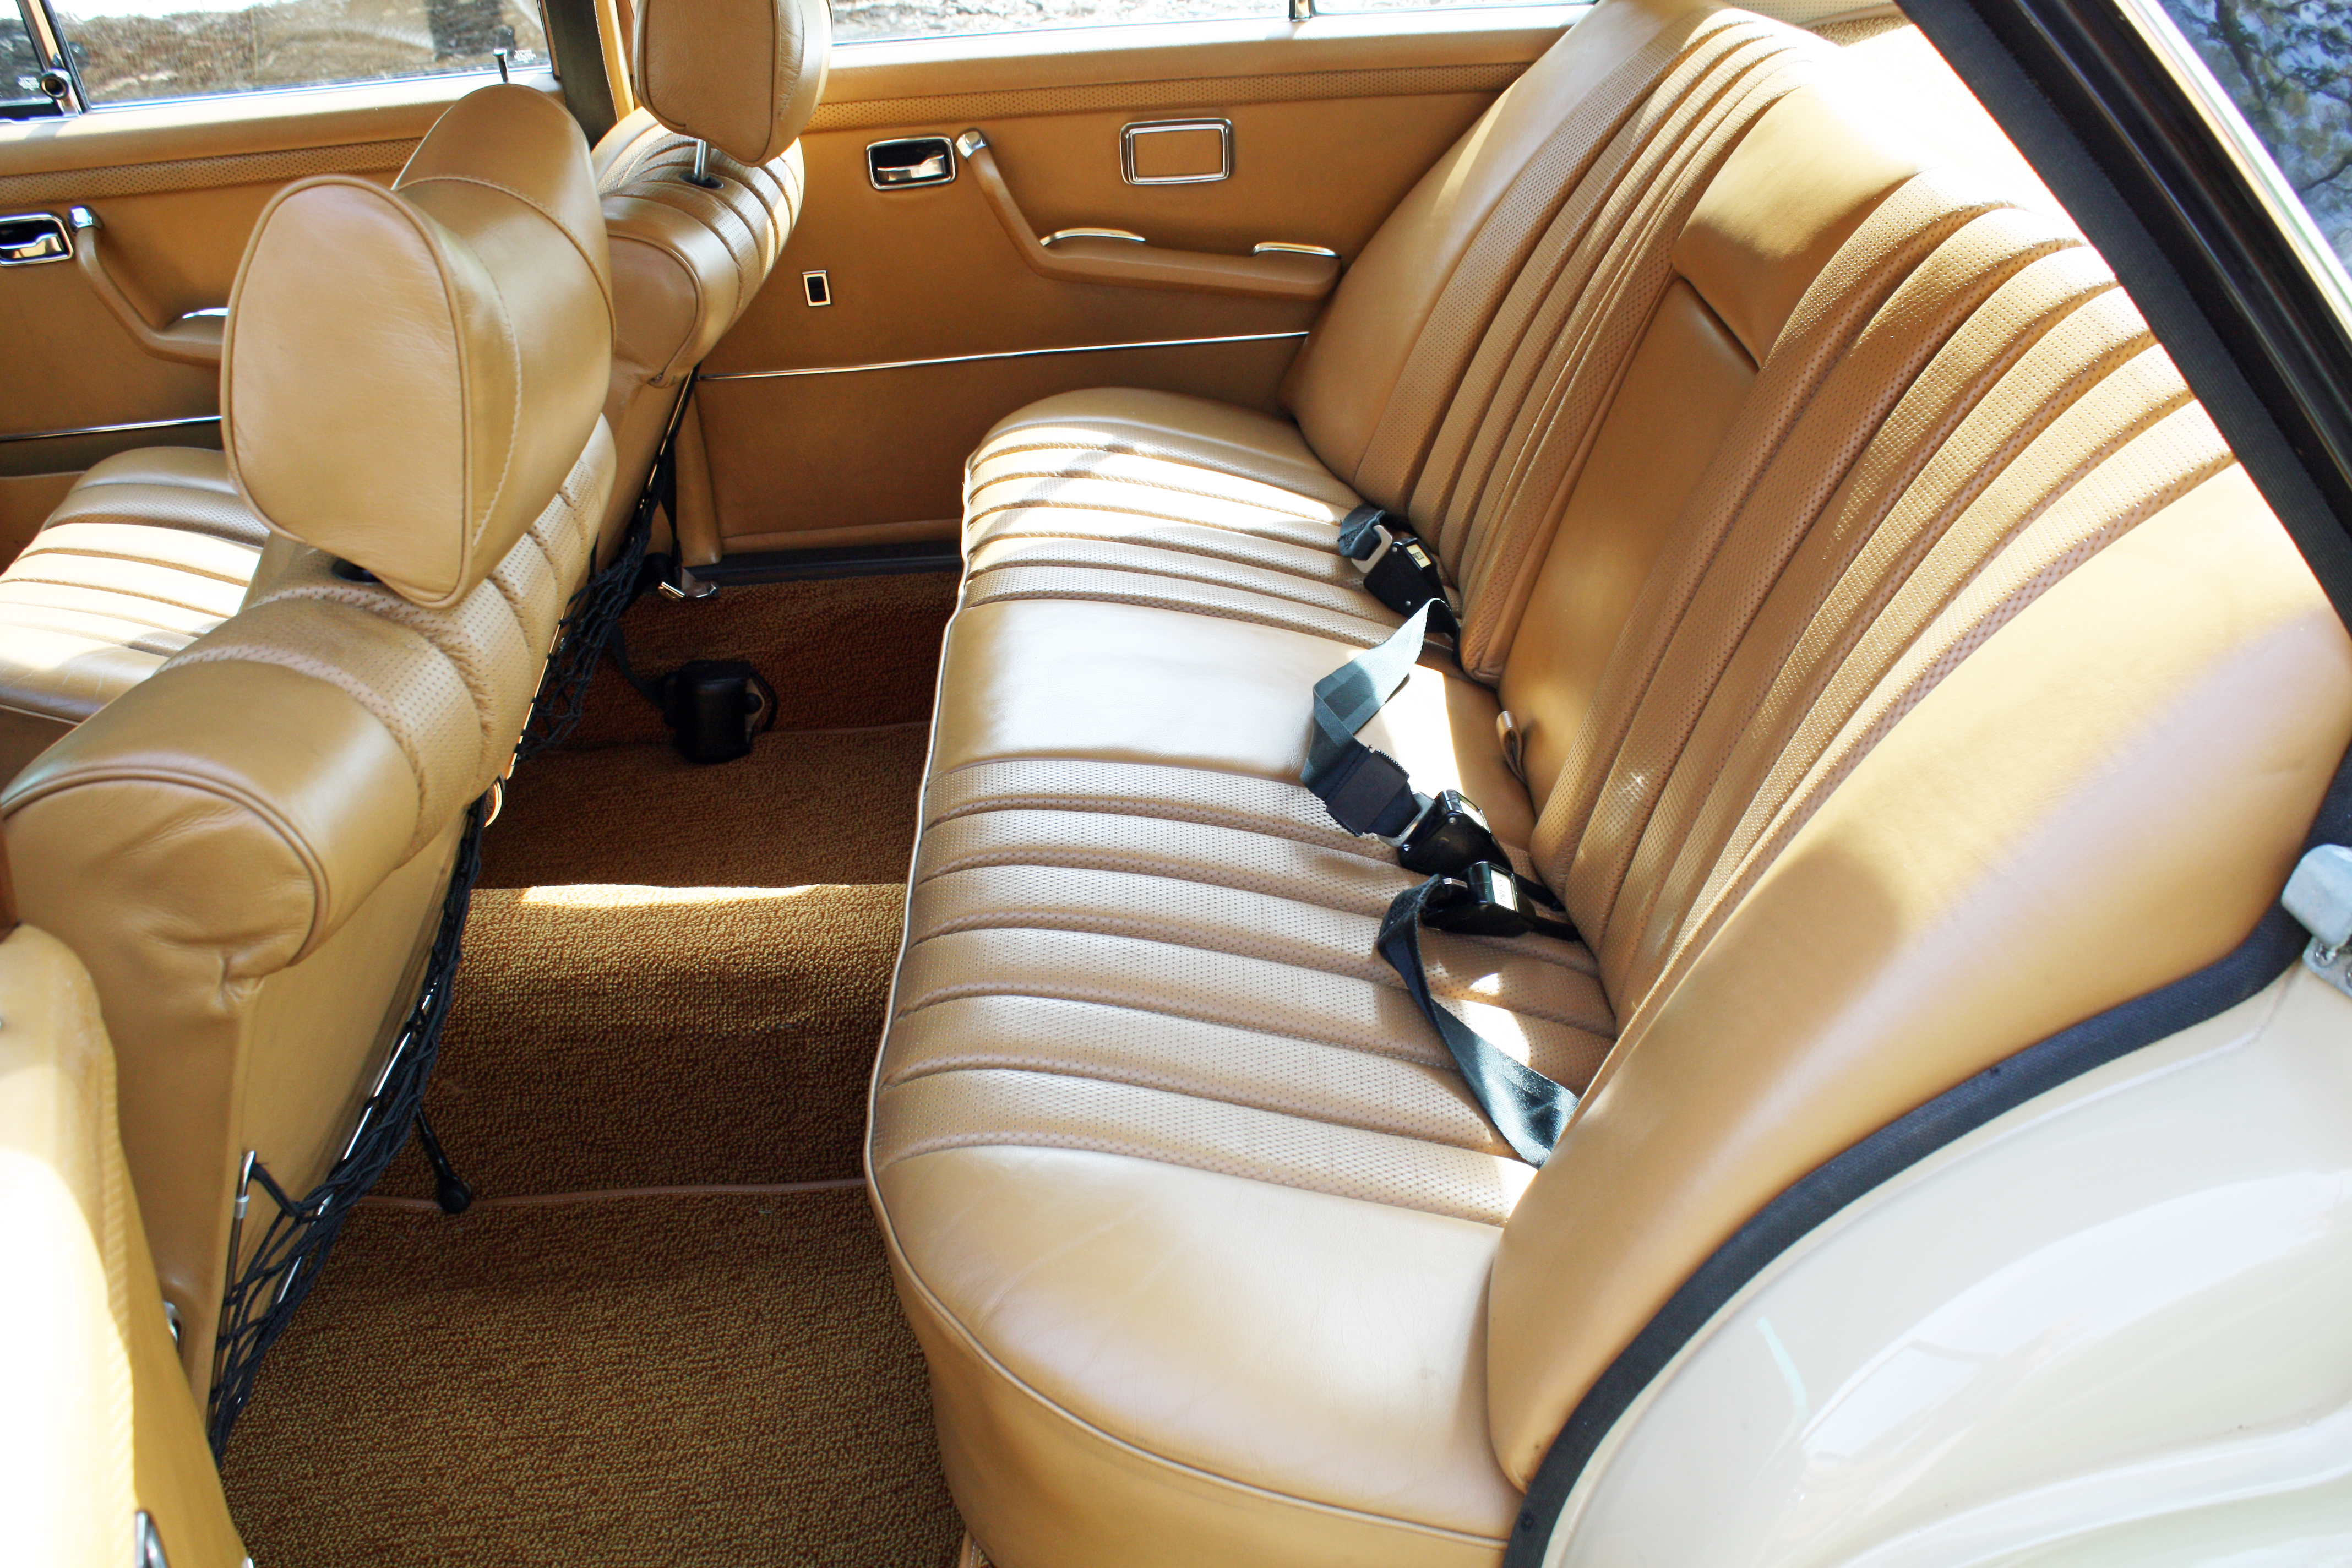
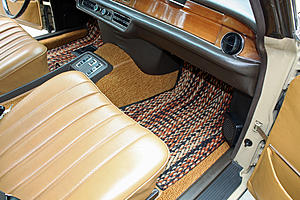
You can see the difference here between the original carpet condition and the new carpet. I never tried to clean up the old carpet and it might be interesting to do so to see the difference then.
When I removed the switches from the console tray, I discovered one switch that was not hooked up to anything. The other four window switches work as they should. Any idea of what the fifth switch is supposed to operate?


Installing the side carpet pieces was next. There is a cutout where the carpet meets the front raised metal that the seat mounts to. I had to make sure that the rear edge of that cutout was lined up before i could install the carpet from there to the rear. Again, I began with a small area and then fitted it as it went. The trickiest part here was the indentation in the inside rocker panel. Getting the carpet to lay right was a challenge.


With both sides finished, I installed the center piece over the tunnel. The front tunnel piece was not glued at the factory. It is held in place with the AC surround trim and the console tray.


You can see the difference here between the original carpet condition and the new carpet. I never tried to clean up the old carpet and it might be interesting to do so to see the difference then.

When I removed the switches from the console tray, I discovered one switch that was not hooked up to anything. The other four window switches work as they should. Any idea of what the fifth switch is supposed to operate?

 04-06-2017, 06:57 PM
#53
Member
Thread Starter
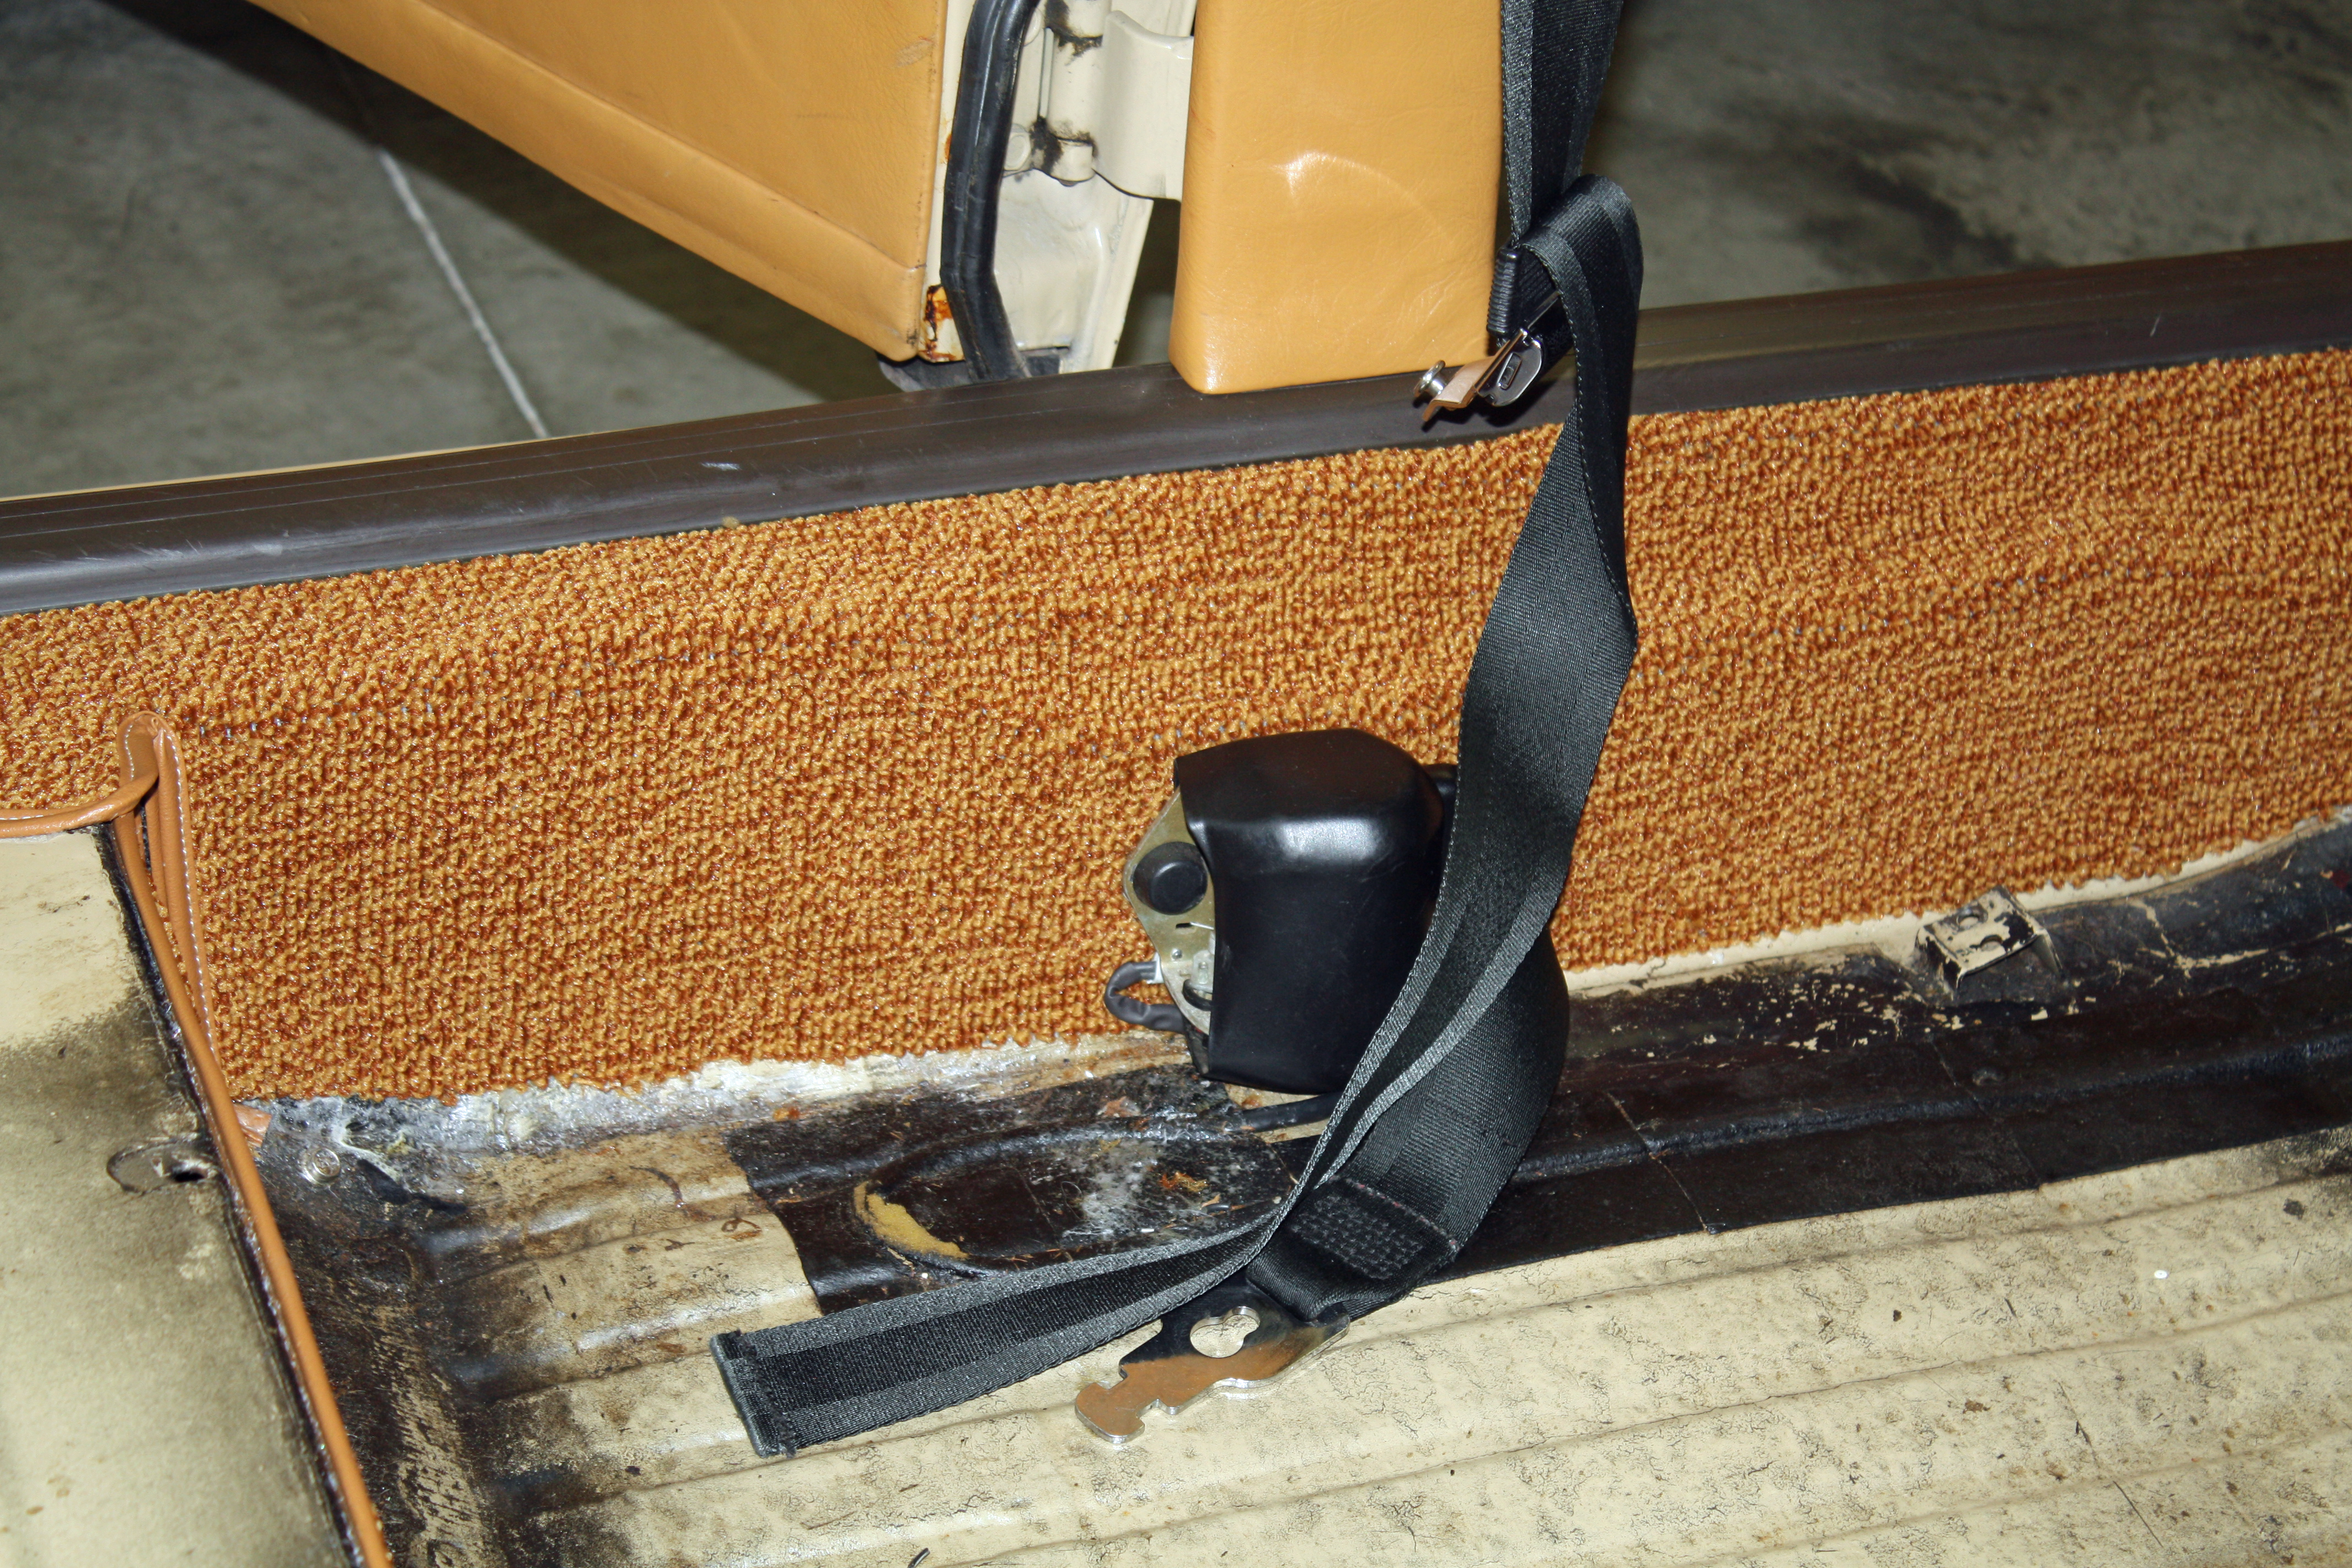
I spent a few hours this morning at the Fiat dealership having our tow car aligned. The rest of the day was spent re-installing trim, seat belts, and other tidbits that had been removed to install the carpet. It is a much slower process re-installing everything.
To find the seat belt holes I used a probe. There are many more photos that have been taken than what I have posted here. Those photos gave me an idea of where to look for the holes. I cleaned everything as I went including wiping down the seat belts.

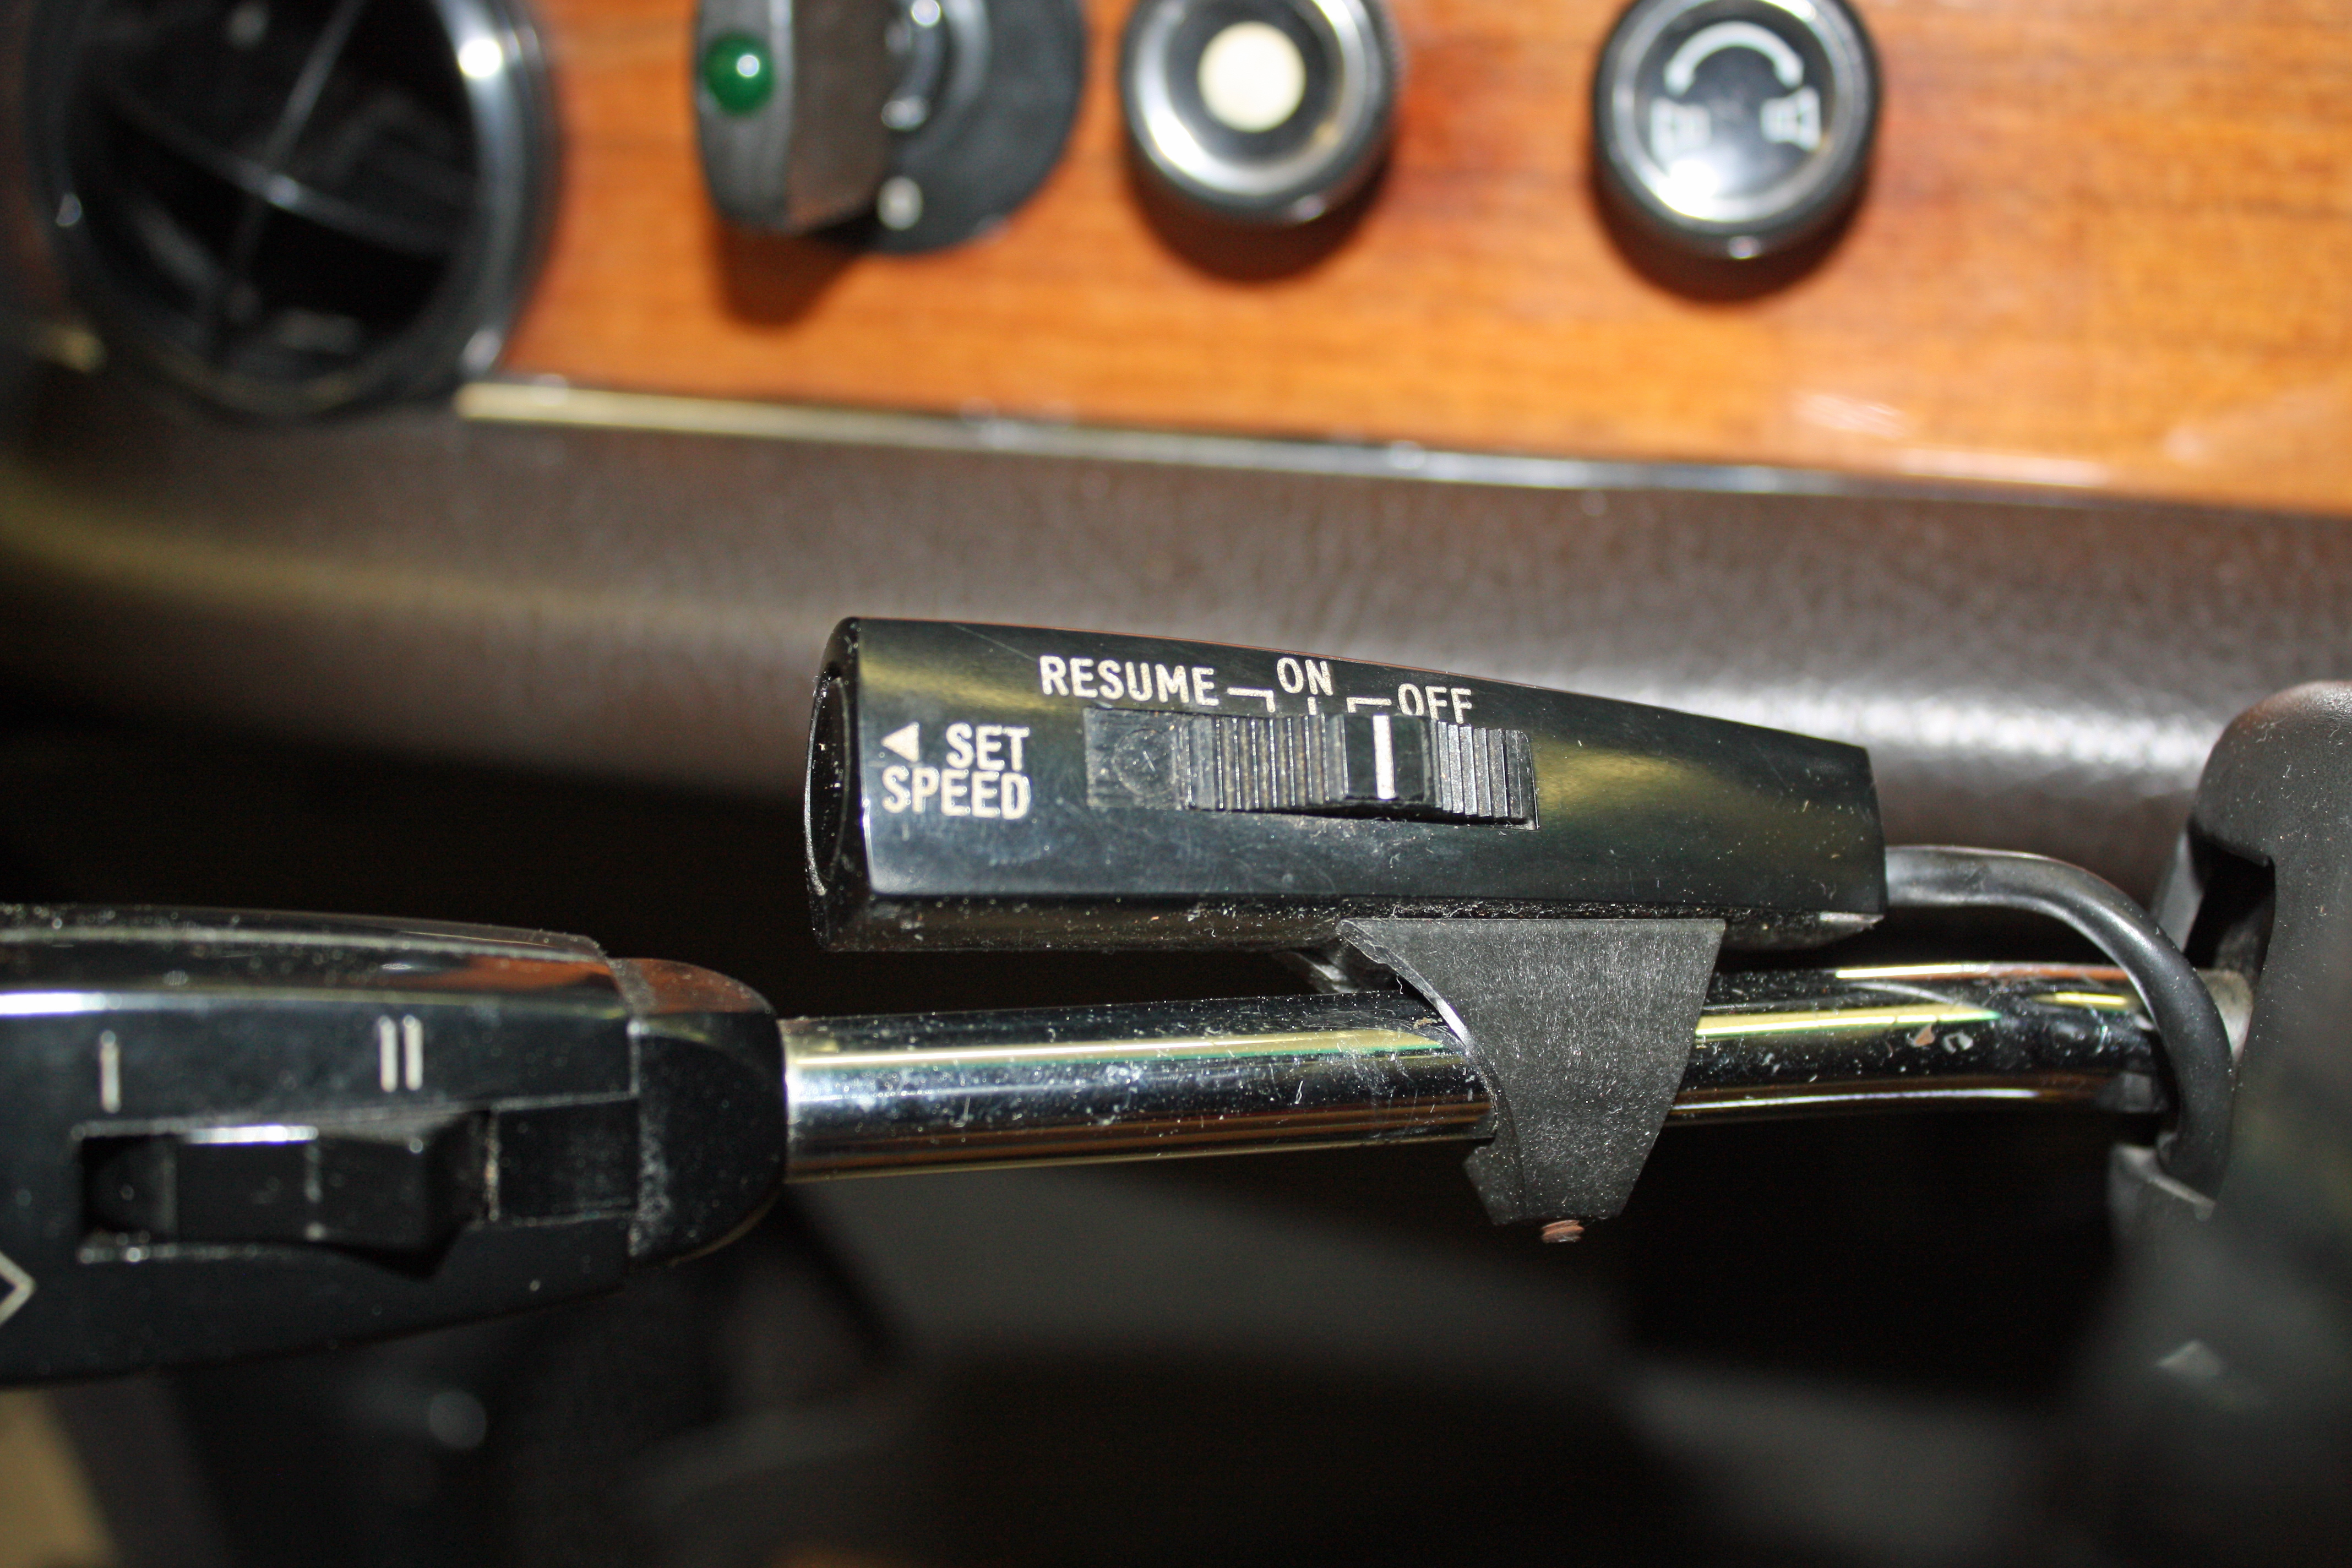
I had removed all of the under dash panels to both clean them and tidy up the wiring. To further the wiring tidiness, I removed the cruise control mechanism from the turn signal arm.


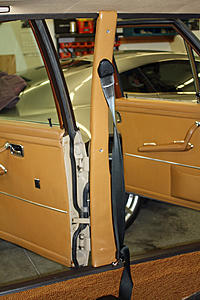
Door post interior trim was put in place as well as the threshold trim.

To find the seat belt holes I used a probe. There are many more photos that have been taken than what I have posted here. Those photos gave me an idea of where to look for the holes. I cleaned everything as I went including wiping down the seat belts.


I had removed all of the under dash panels to both clean them and tidy up the wiring. To further the wiring tidiness, I removed the cruise control mechanism from the turn signal arm.
Door post interior trim was put in place as well as the threshold trim.


 04-08-2017, 07:17 PM
#54
Member
Thread Starter
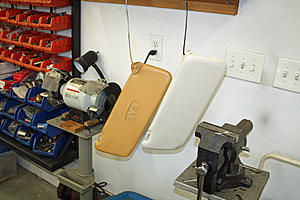
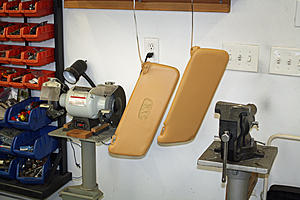
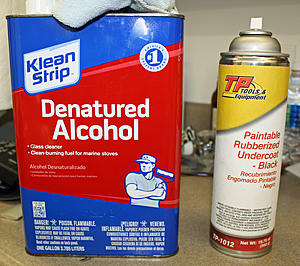
My sunvisors are pretty nasty looking. Very lumpy. I order a new pair but they did not have them in Bamboo. I ordered the beige ones. On my Corvette restoration, I had painted the dash. SEM makes specific paint for vinyls. I had looked at their website and decided that their Palomino color would be the closest to the sunvisor color in the car.
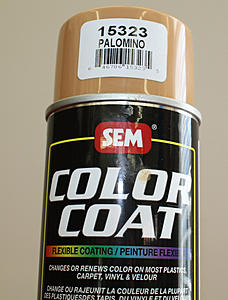
A trip to the best auto parts store in Salisbury netted me a can of paint. I wiped the new visors with some denatured alcohol and painted them. They are about a shade light but close enough as they are not directly next to the factory color.
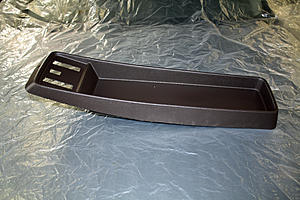
There was glue on the console. But the console did not like my adhesive remover.
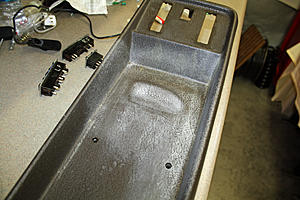
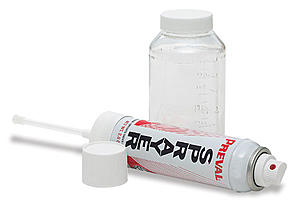
Another trip back to the parts store was made. SEM did not have a color dark enough and the right shade to match the console. So their paint magician mixed some special paint for vinyl. I had the console with me and he spent about 45 minutes getting to the right color. The paint he mixed was in a can and I wanted to spray it. He recommended a Preval sprayer. It worked great.
It was very windy yesterday and my usual outside place where I paint was not going to work. About three years ago I had had my crawl space completely lined with plastic and had installed a dehumidifier. At the rear of my crawl space, there is sufficient height for me to paint. I hadn't used this area before but it worked like a charm.
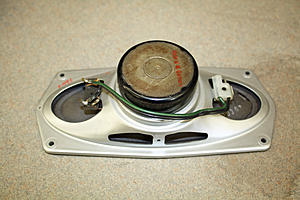
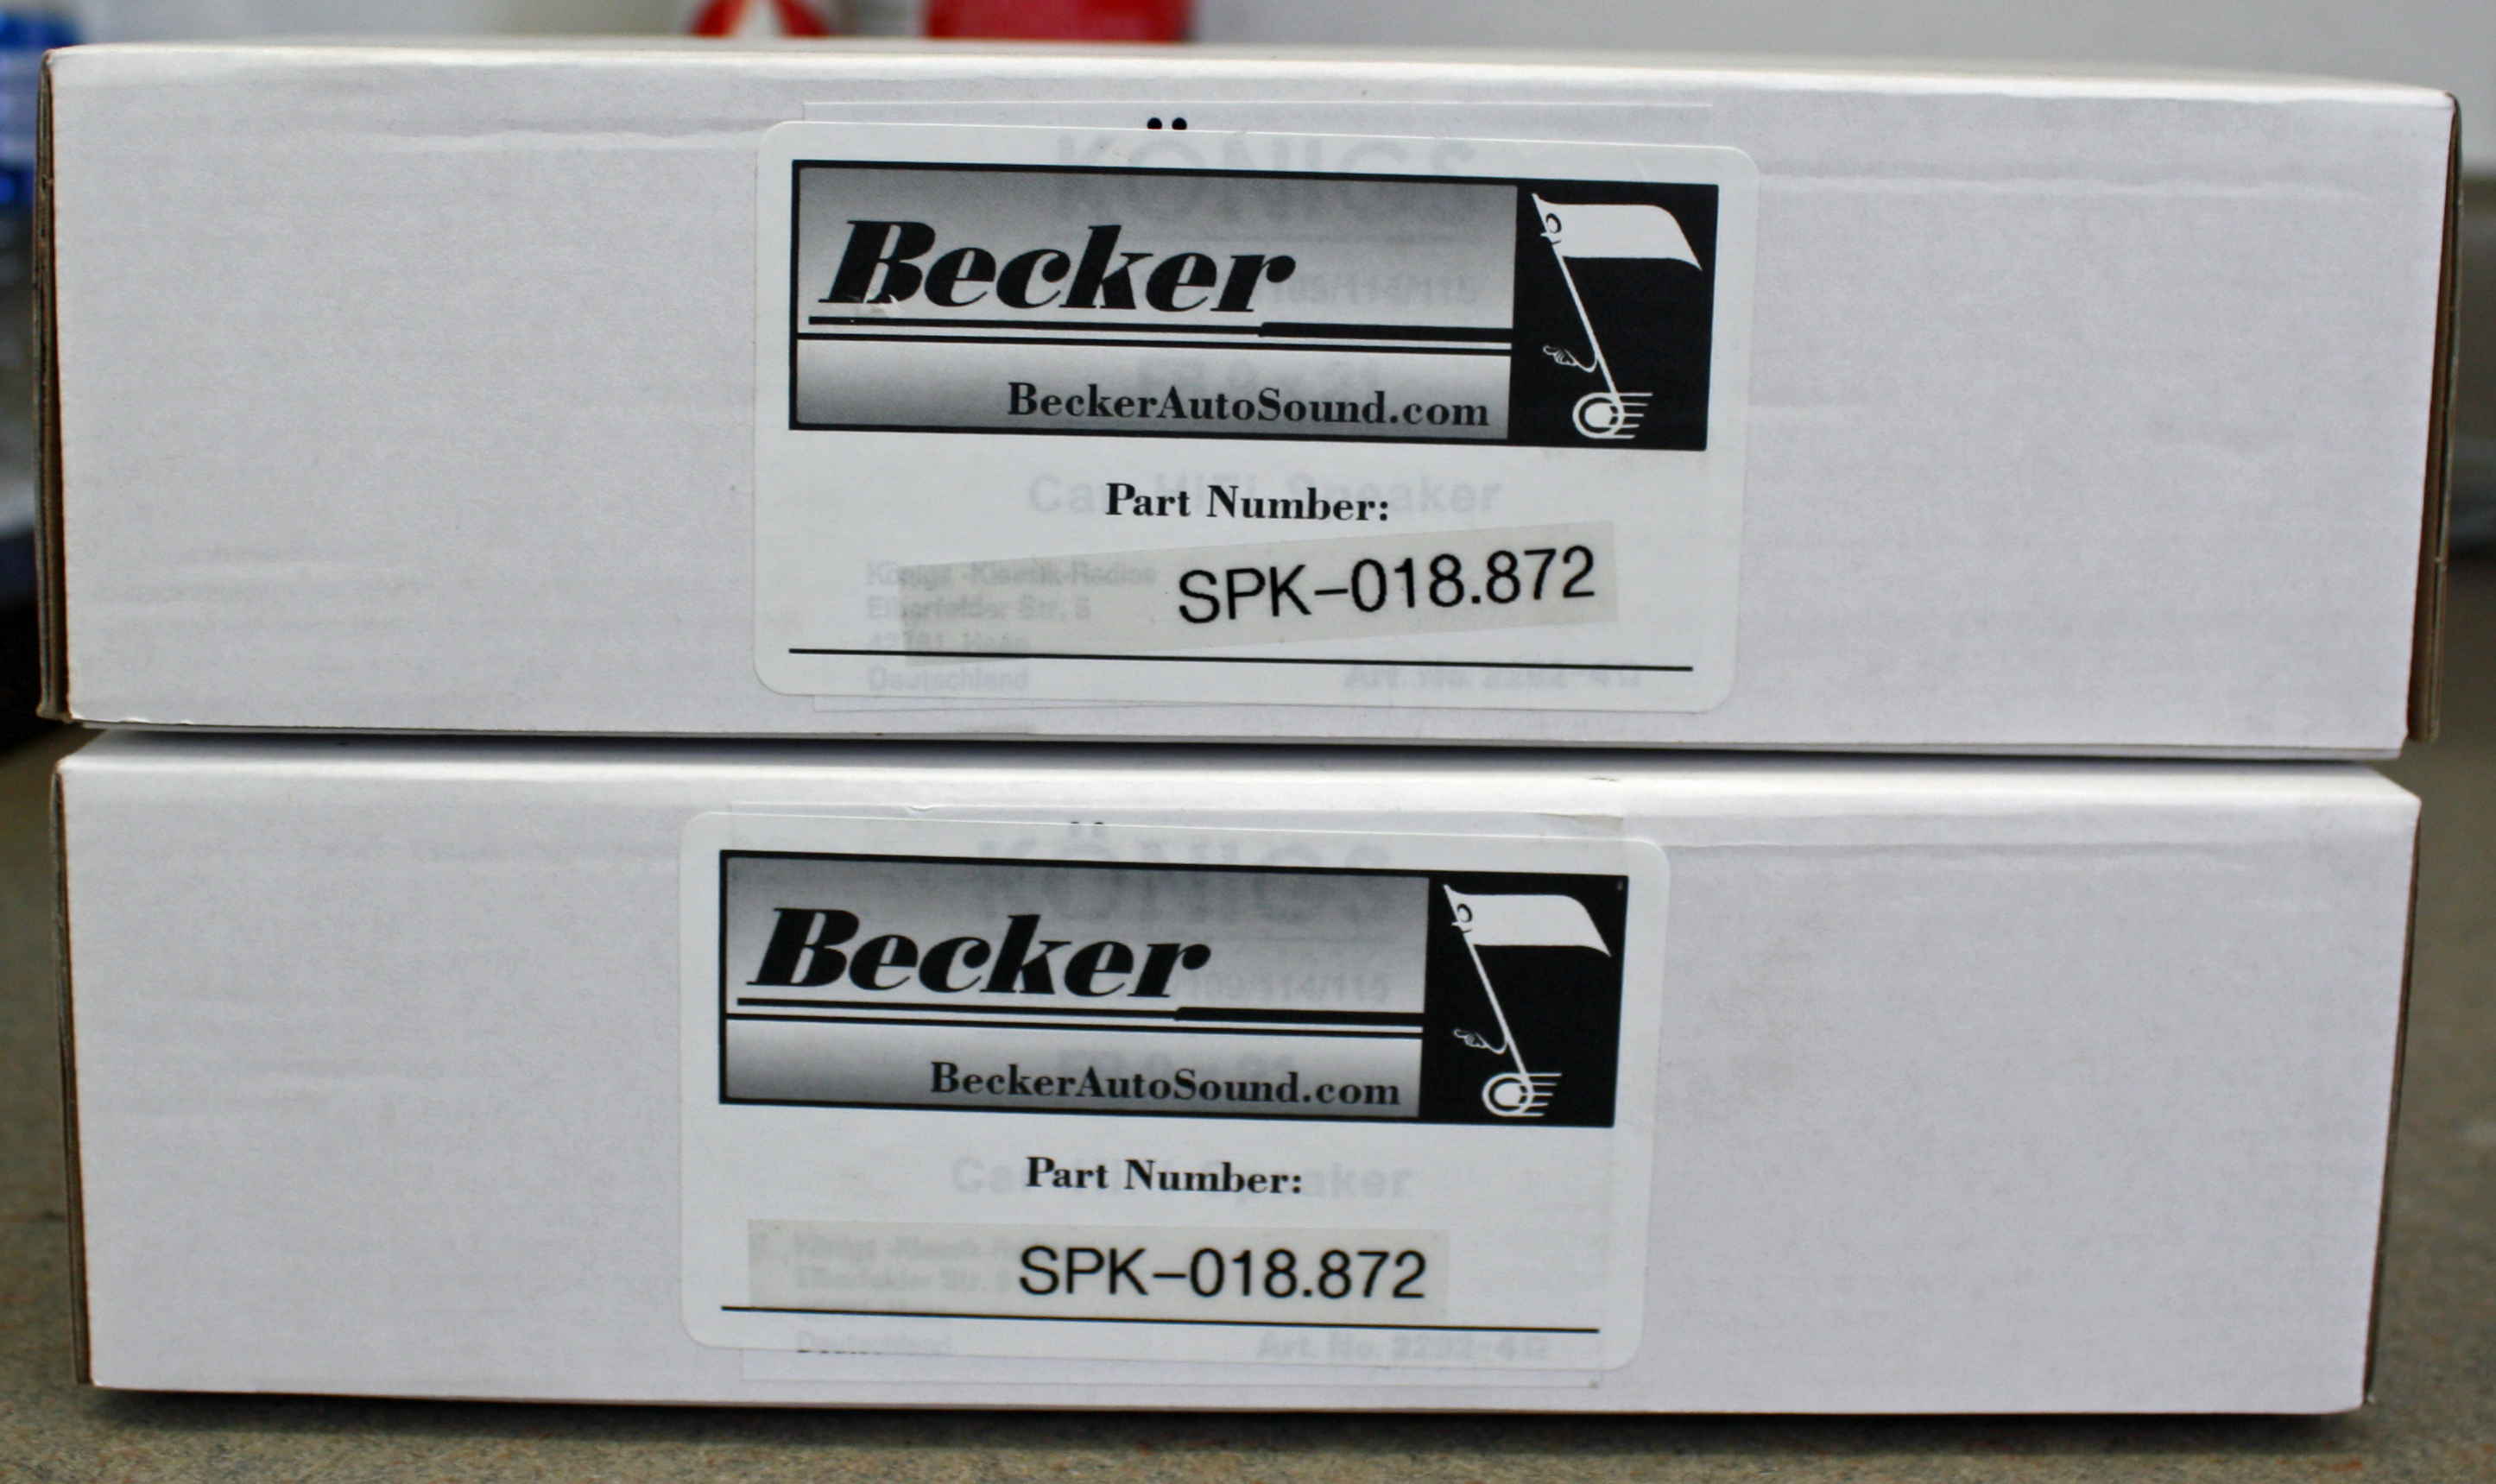
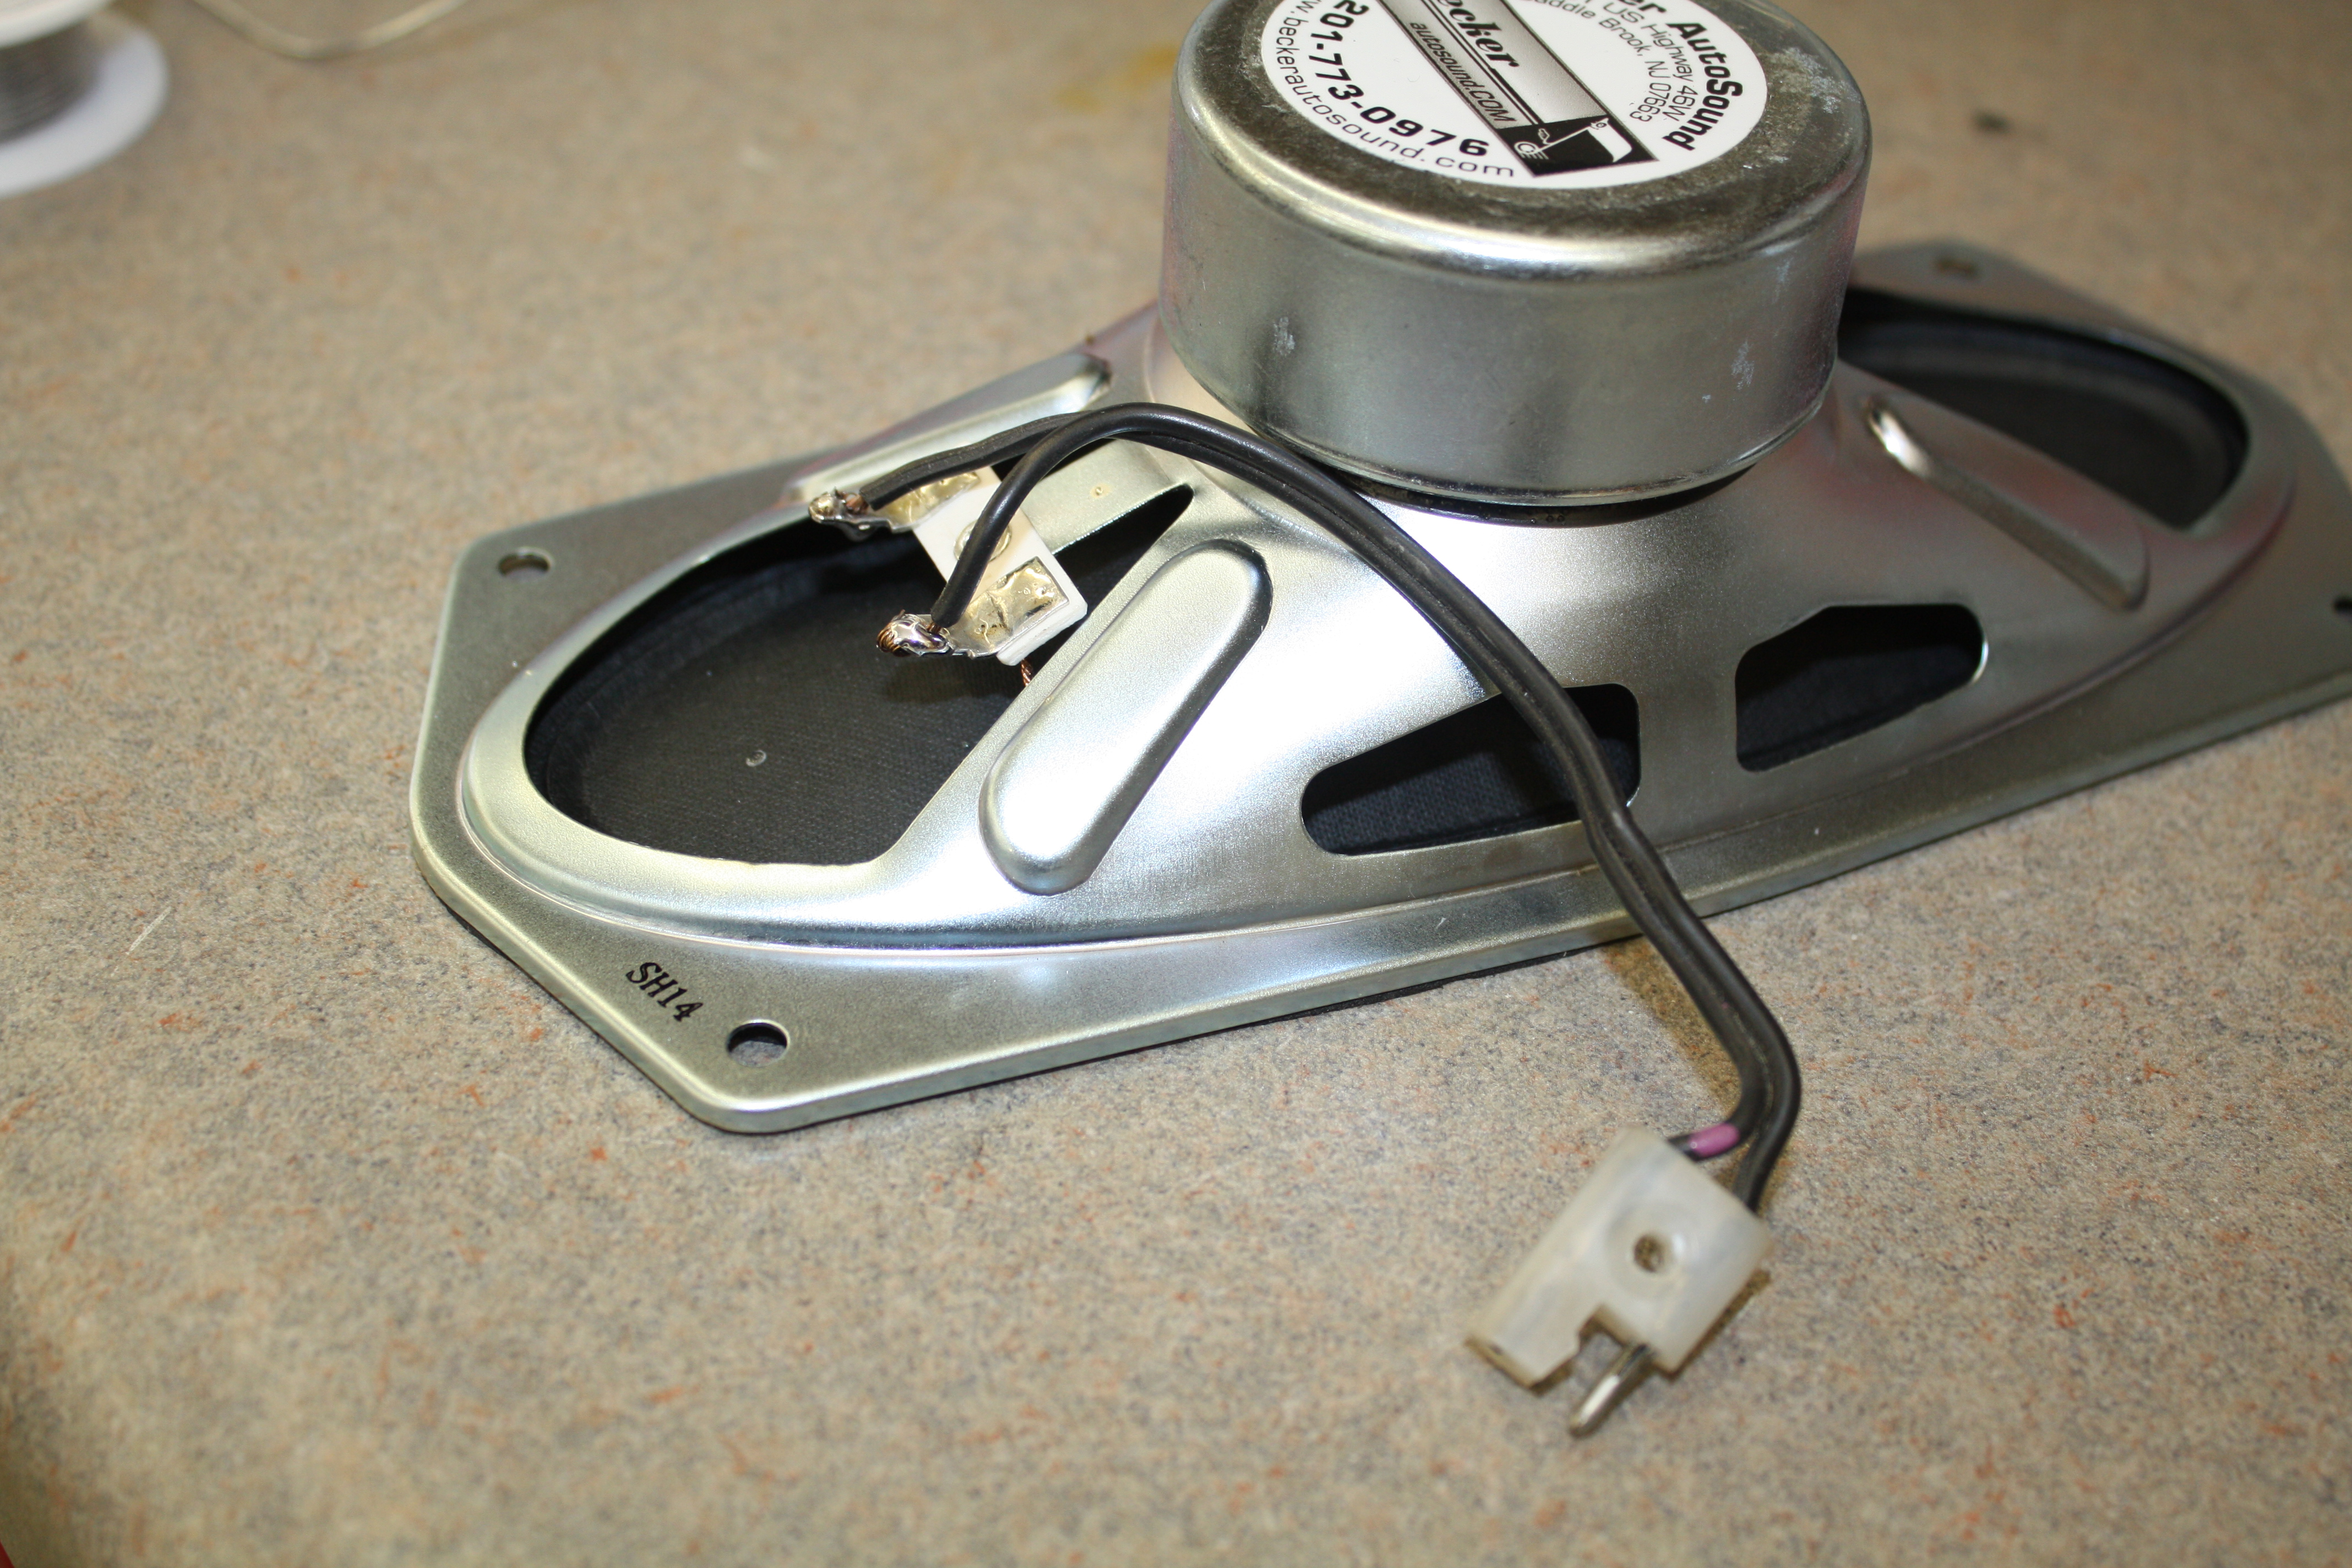
The old rear speakers are shot.
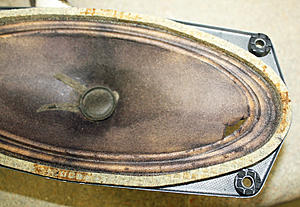
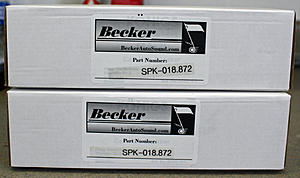
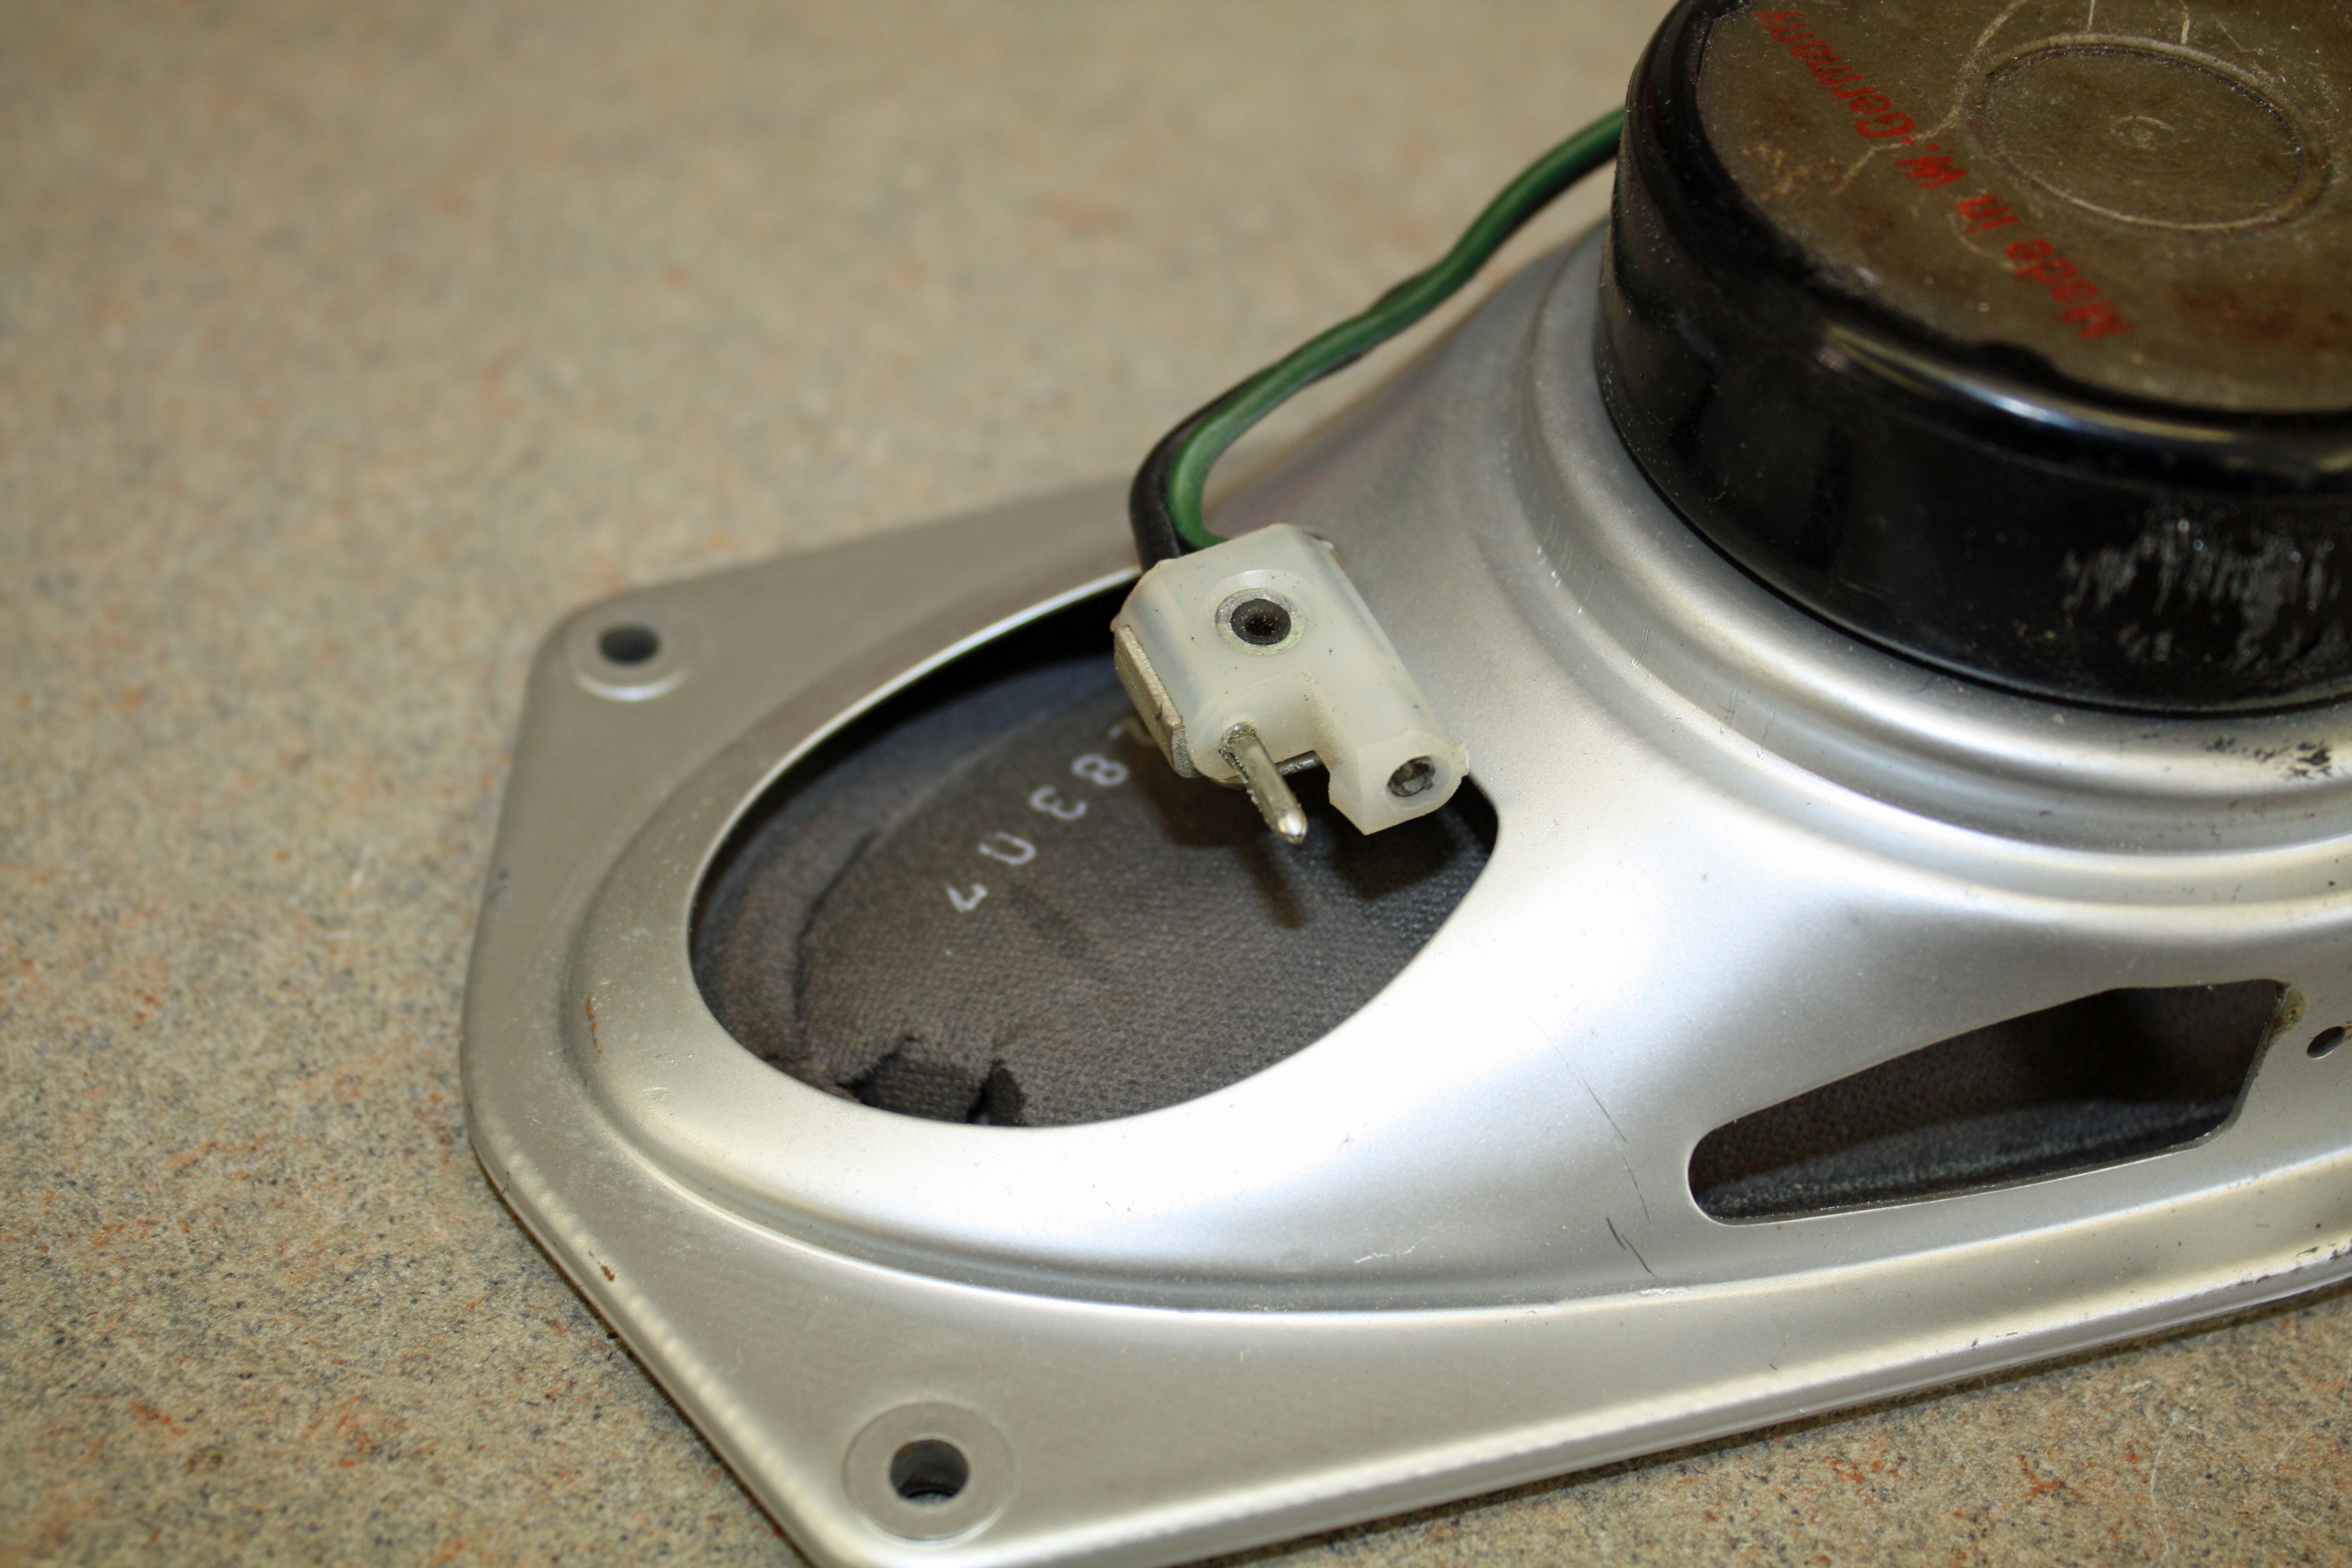
I ordered a pair of new speakers from Becker Autosound. While they are very similar to the original's, they did not have the wiring harness. I removed the wiring harness from the old speakers by drilling our the rivet that held the plug in place. I then soldered that plug to the new speakers.

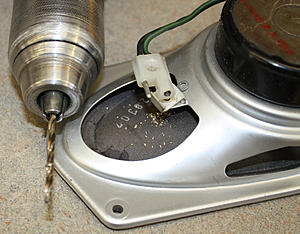
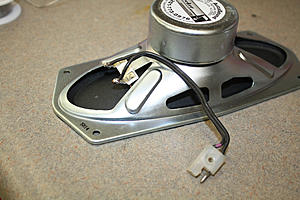
To find the screw holes for mounting the speakers, I resorted to my handy pick tool. I used a black magic marker to pinpoint the holes. Now I could mount the speakers, their cover and the grill. The rear seat back could then be re-installed.


A trip to the best auto parts store in Salisbury netted me a can of paint. I wiped the new visors with some denatured alcohol and painted them. They are about a shade light but close enough as they are not directly next to the factory color.


There was glue on the console. But the console did not like my adhesive remover.

Another trip back to the parts store was made. SEM did not have a color dark enough and the right shade to match the console. So their paint magician mixed some special paint for vinyl. I had the console with me and he spent about 45 minutes getting to the right color. The paint he mixed was in a can and I wanted to spray it. He recommended a Preval sprayer. It worked great.

It was very windy yesterday and my usual outside place where I paint was not going to work. About three years ago I had had my crawl space completely lined with plastic and had installed a dehumidifier. At the rear of my crawl space, there is sufficient height for me to paint. I hadn't used this area before but it worked like a charm.


The old rear speakers are shot.

I ordered a pair of new speakers from Becker Autosound. While they are very similar to the original's, they did not have the wiring harness. I removed the wiring harness from the old speakers by drilling our the rivet that held the plug in place. I then soldered that plug to the new speakers.


To find the screw holes for mounting the speakers, I resorted to my handy pick tool. I used a black magic marker to pinpoint the holes. Now I could mount the speakers, their cover and the grill. The rear seat back could then be re-installed.


 04-09-2017, 06:50 PM
#55
Member
Thread Starter
My wife is going to an artist workshop this week so I cleaned up her car this morning. We took the dog to a park for a walk and then I sat down to watch the NASCAR race with full intentions of falling asleep. When sleep did not happen, I decided to watch the race in the garage while I did some work on the car.
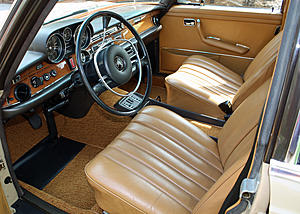
First up was installing the sunvisors. As you can see the old ones were nasty. Once I had them out of the car I could see that they weren't as dark a color as I had imagined. Too late now. You know how it is when you buy a car in a color that is marginal to you. Before long it is the best color ever for that car. That's kind of my feeling on the sunvisor color. I do like the way they look. They are a pretty close match to the door panels.


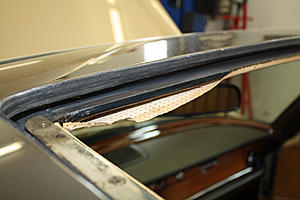
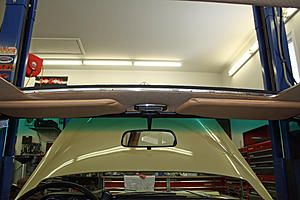
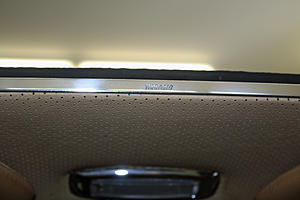
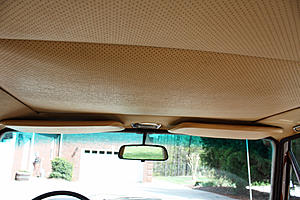
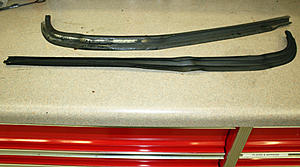
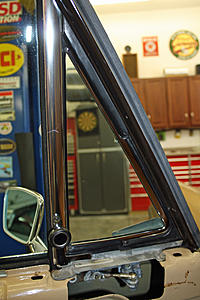
One of the first things I noticed when I took the car for a test drive was that the headliner was down at the front of the sunroof opening.
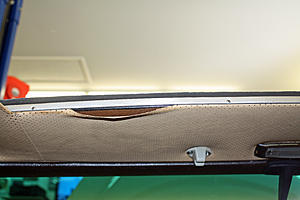
After opening the sunroof, I removed the front Webasto trim. I then pulled all of the loose material away from the metal opening. After cleaning up the old glue, I sprayed a wad of glue on the backside of one of the carpet speaker cutouts. I then used a small screwdriver to transfer the glue to the sunroof opening and the vinyl.

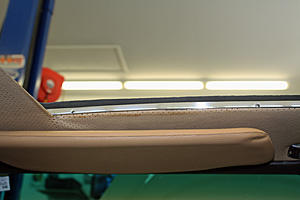
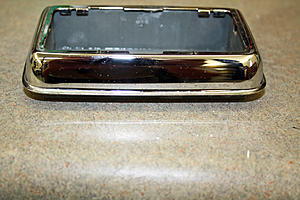
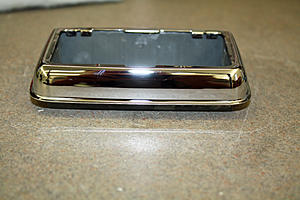
That piece of trim was aluminum. A little metal polish soon had it looking like new. The tops of the sunroof tracks are chrome and responded well to a bit of chrome polish. I also lubricated the tracks.
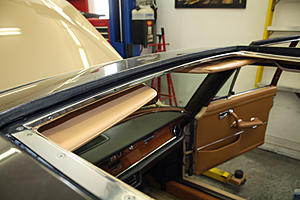
First up was installing the sunvisors. As you can see the old ones were nasty. Once I had them out of the car I could see that they weren't as dark a color as I had imagined. Too late now. You know how it is when you buy a car in a color that is marginal to you. Before long it is the best color ever for that car. That's kind of my feeling on the sunvisor color. I do like the way they look. They are a pretty close match to the door panels.


One of the first things I noticed when I took the car for a test drive was that the headliner was down at the front of the sunroof opening.

After opening the sunroof, I removed the front Webasto trim. I then pulled all of the loose material away from the metal opening. After cleaning up the old glue, I sprayed a wad of glue on the backside of one of the carpet speaker cutouts. I then used a small screwdriver to transfer the glue to the sunroof opening and the vinyl.


That piece of trim was aluminum. A little metal polish soon had it looking like new. The tops of the sunroof tracks are chrome and responded well to a bit of chrome polish. I also lubricated the tracks.


 04-10-2017, 06:56 PM
#56
Member
Thread Starter
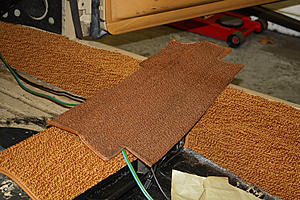
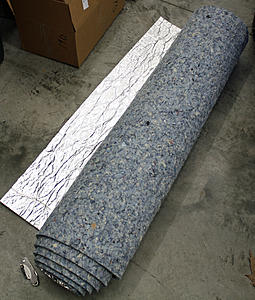
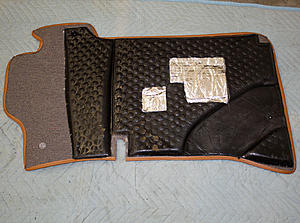
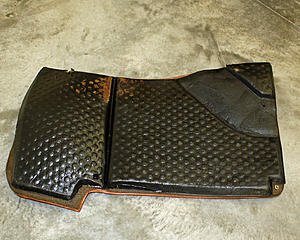
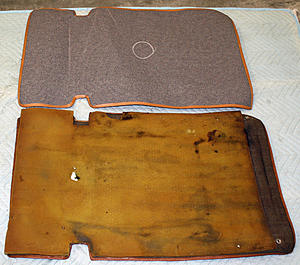
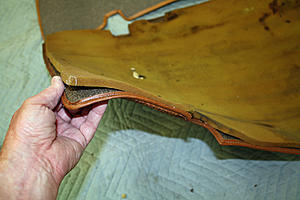
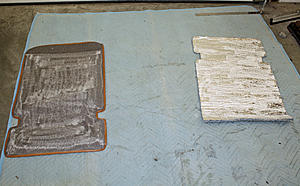
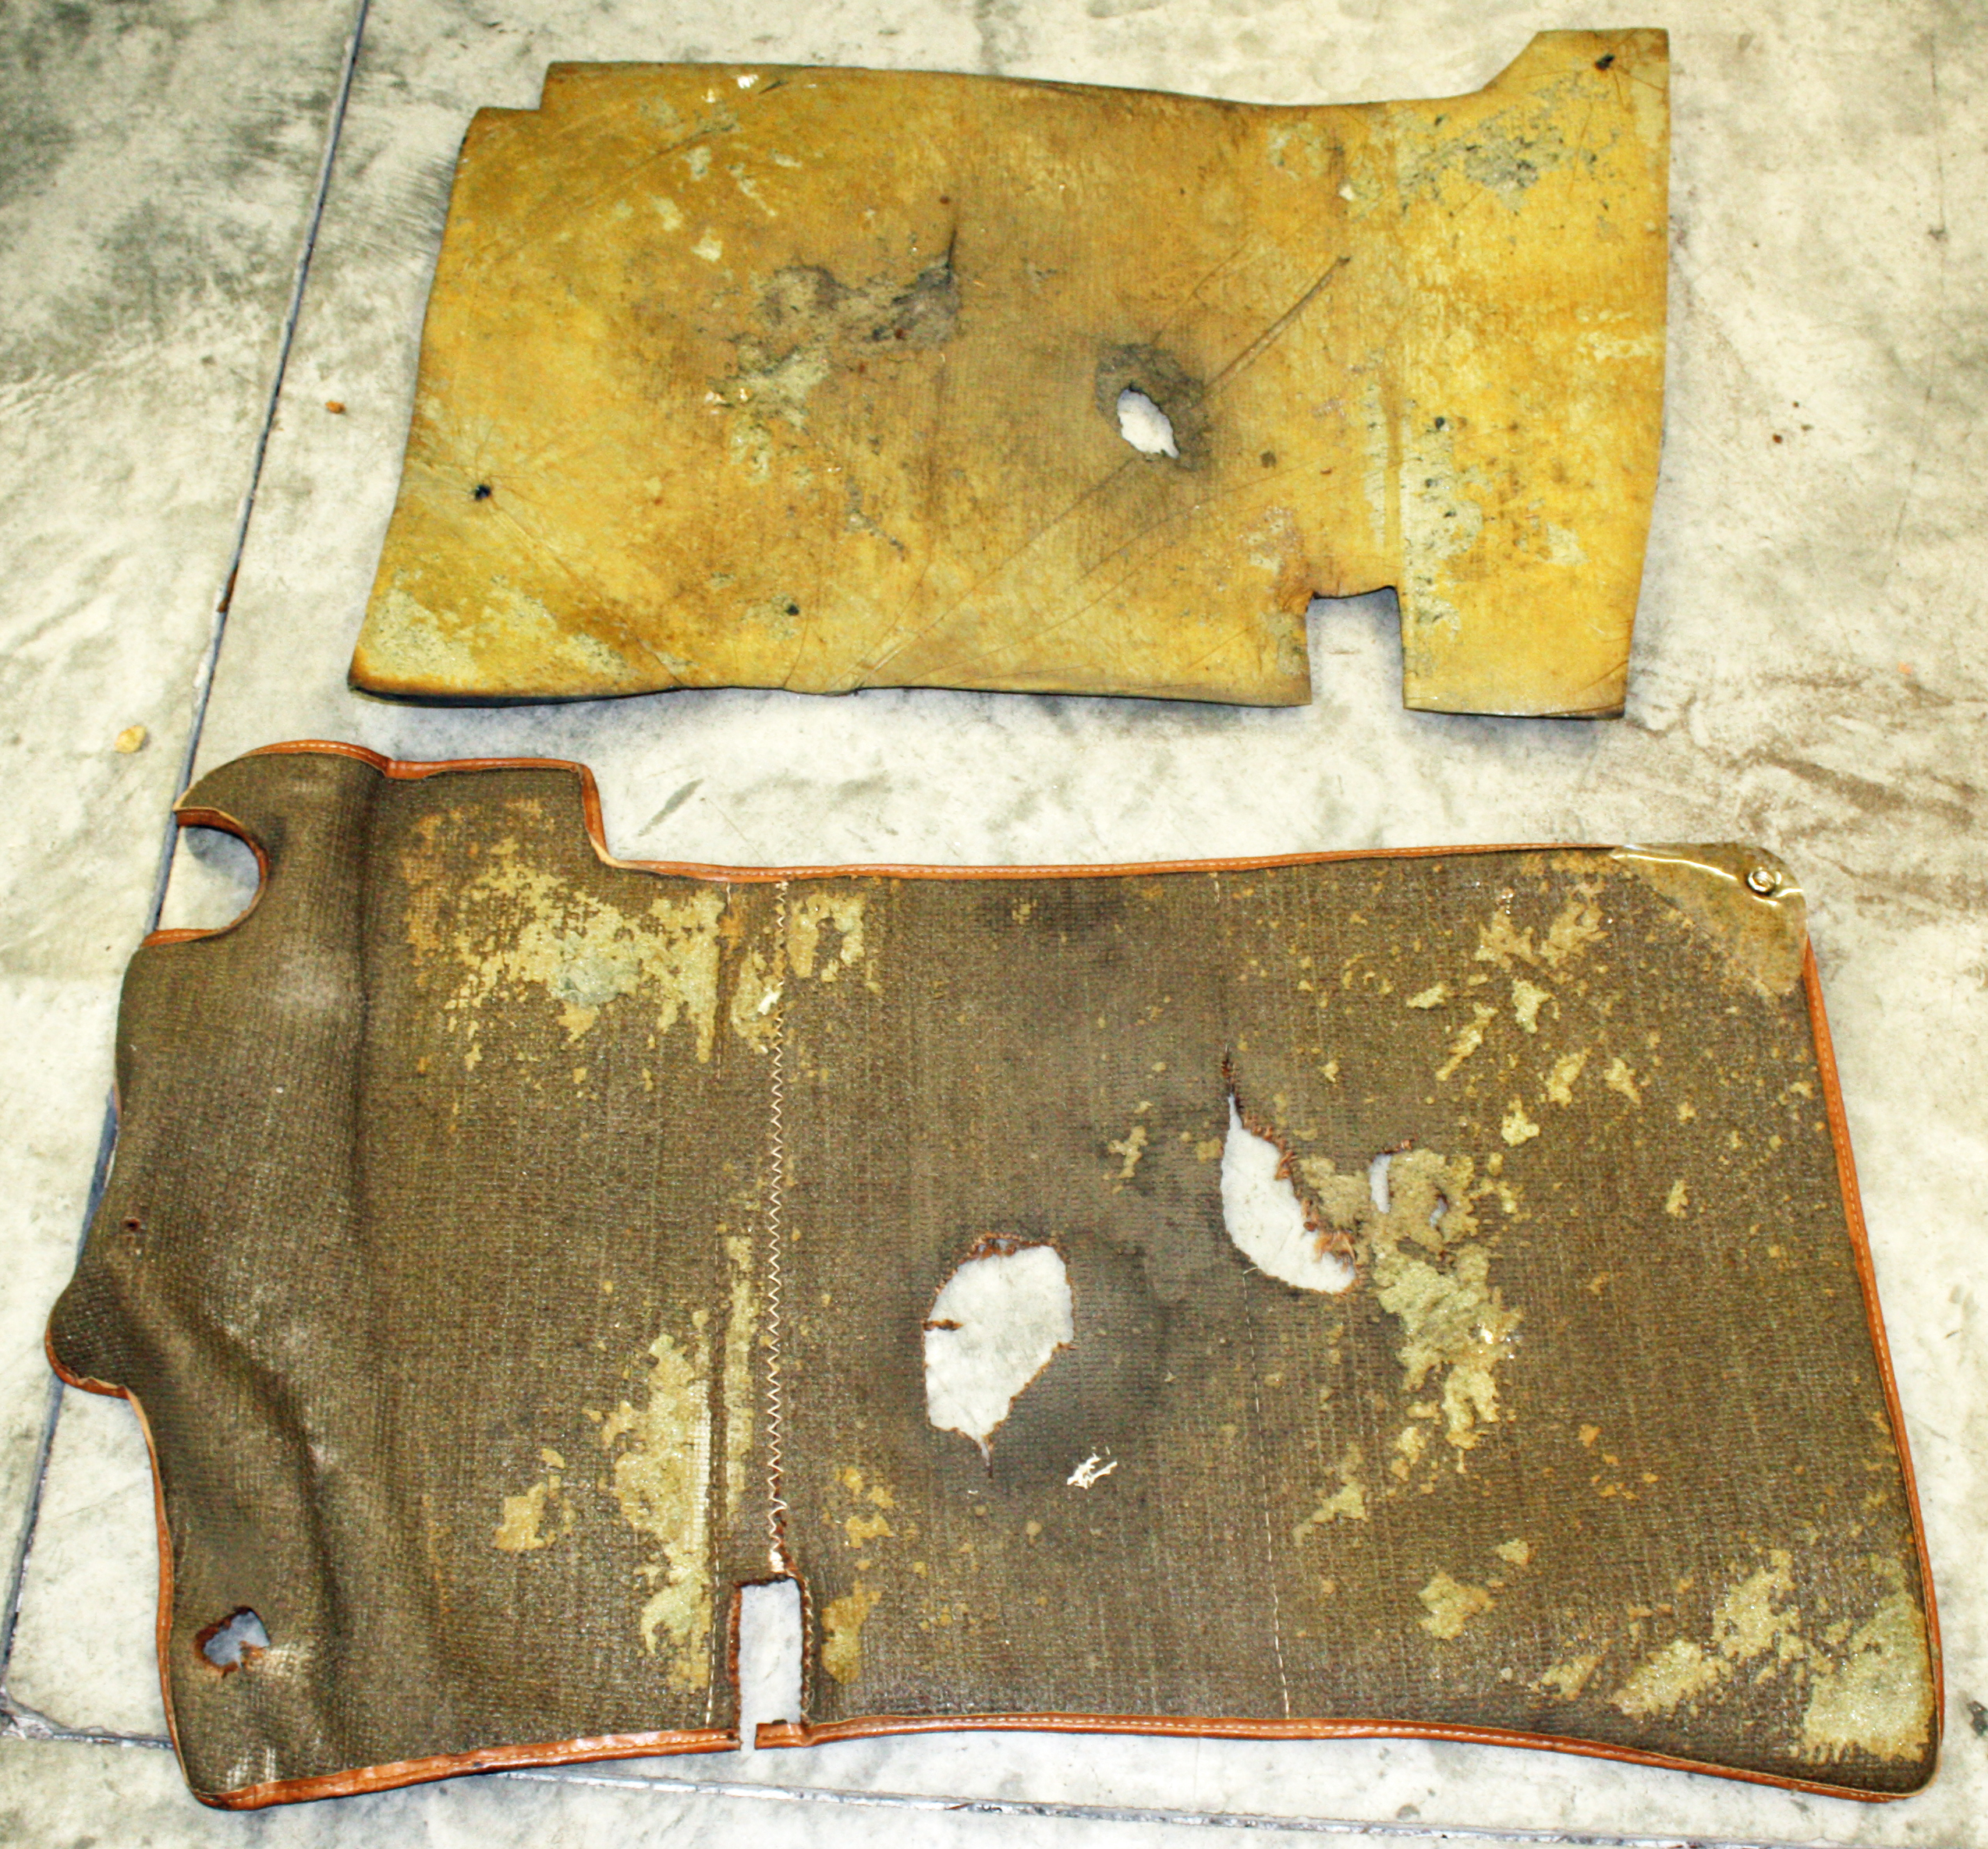
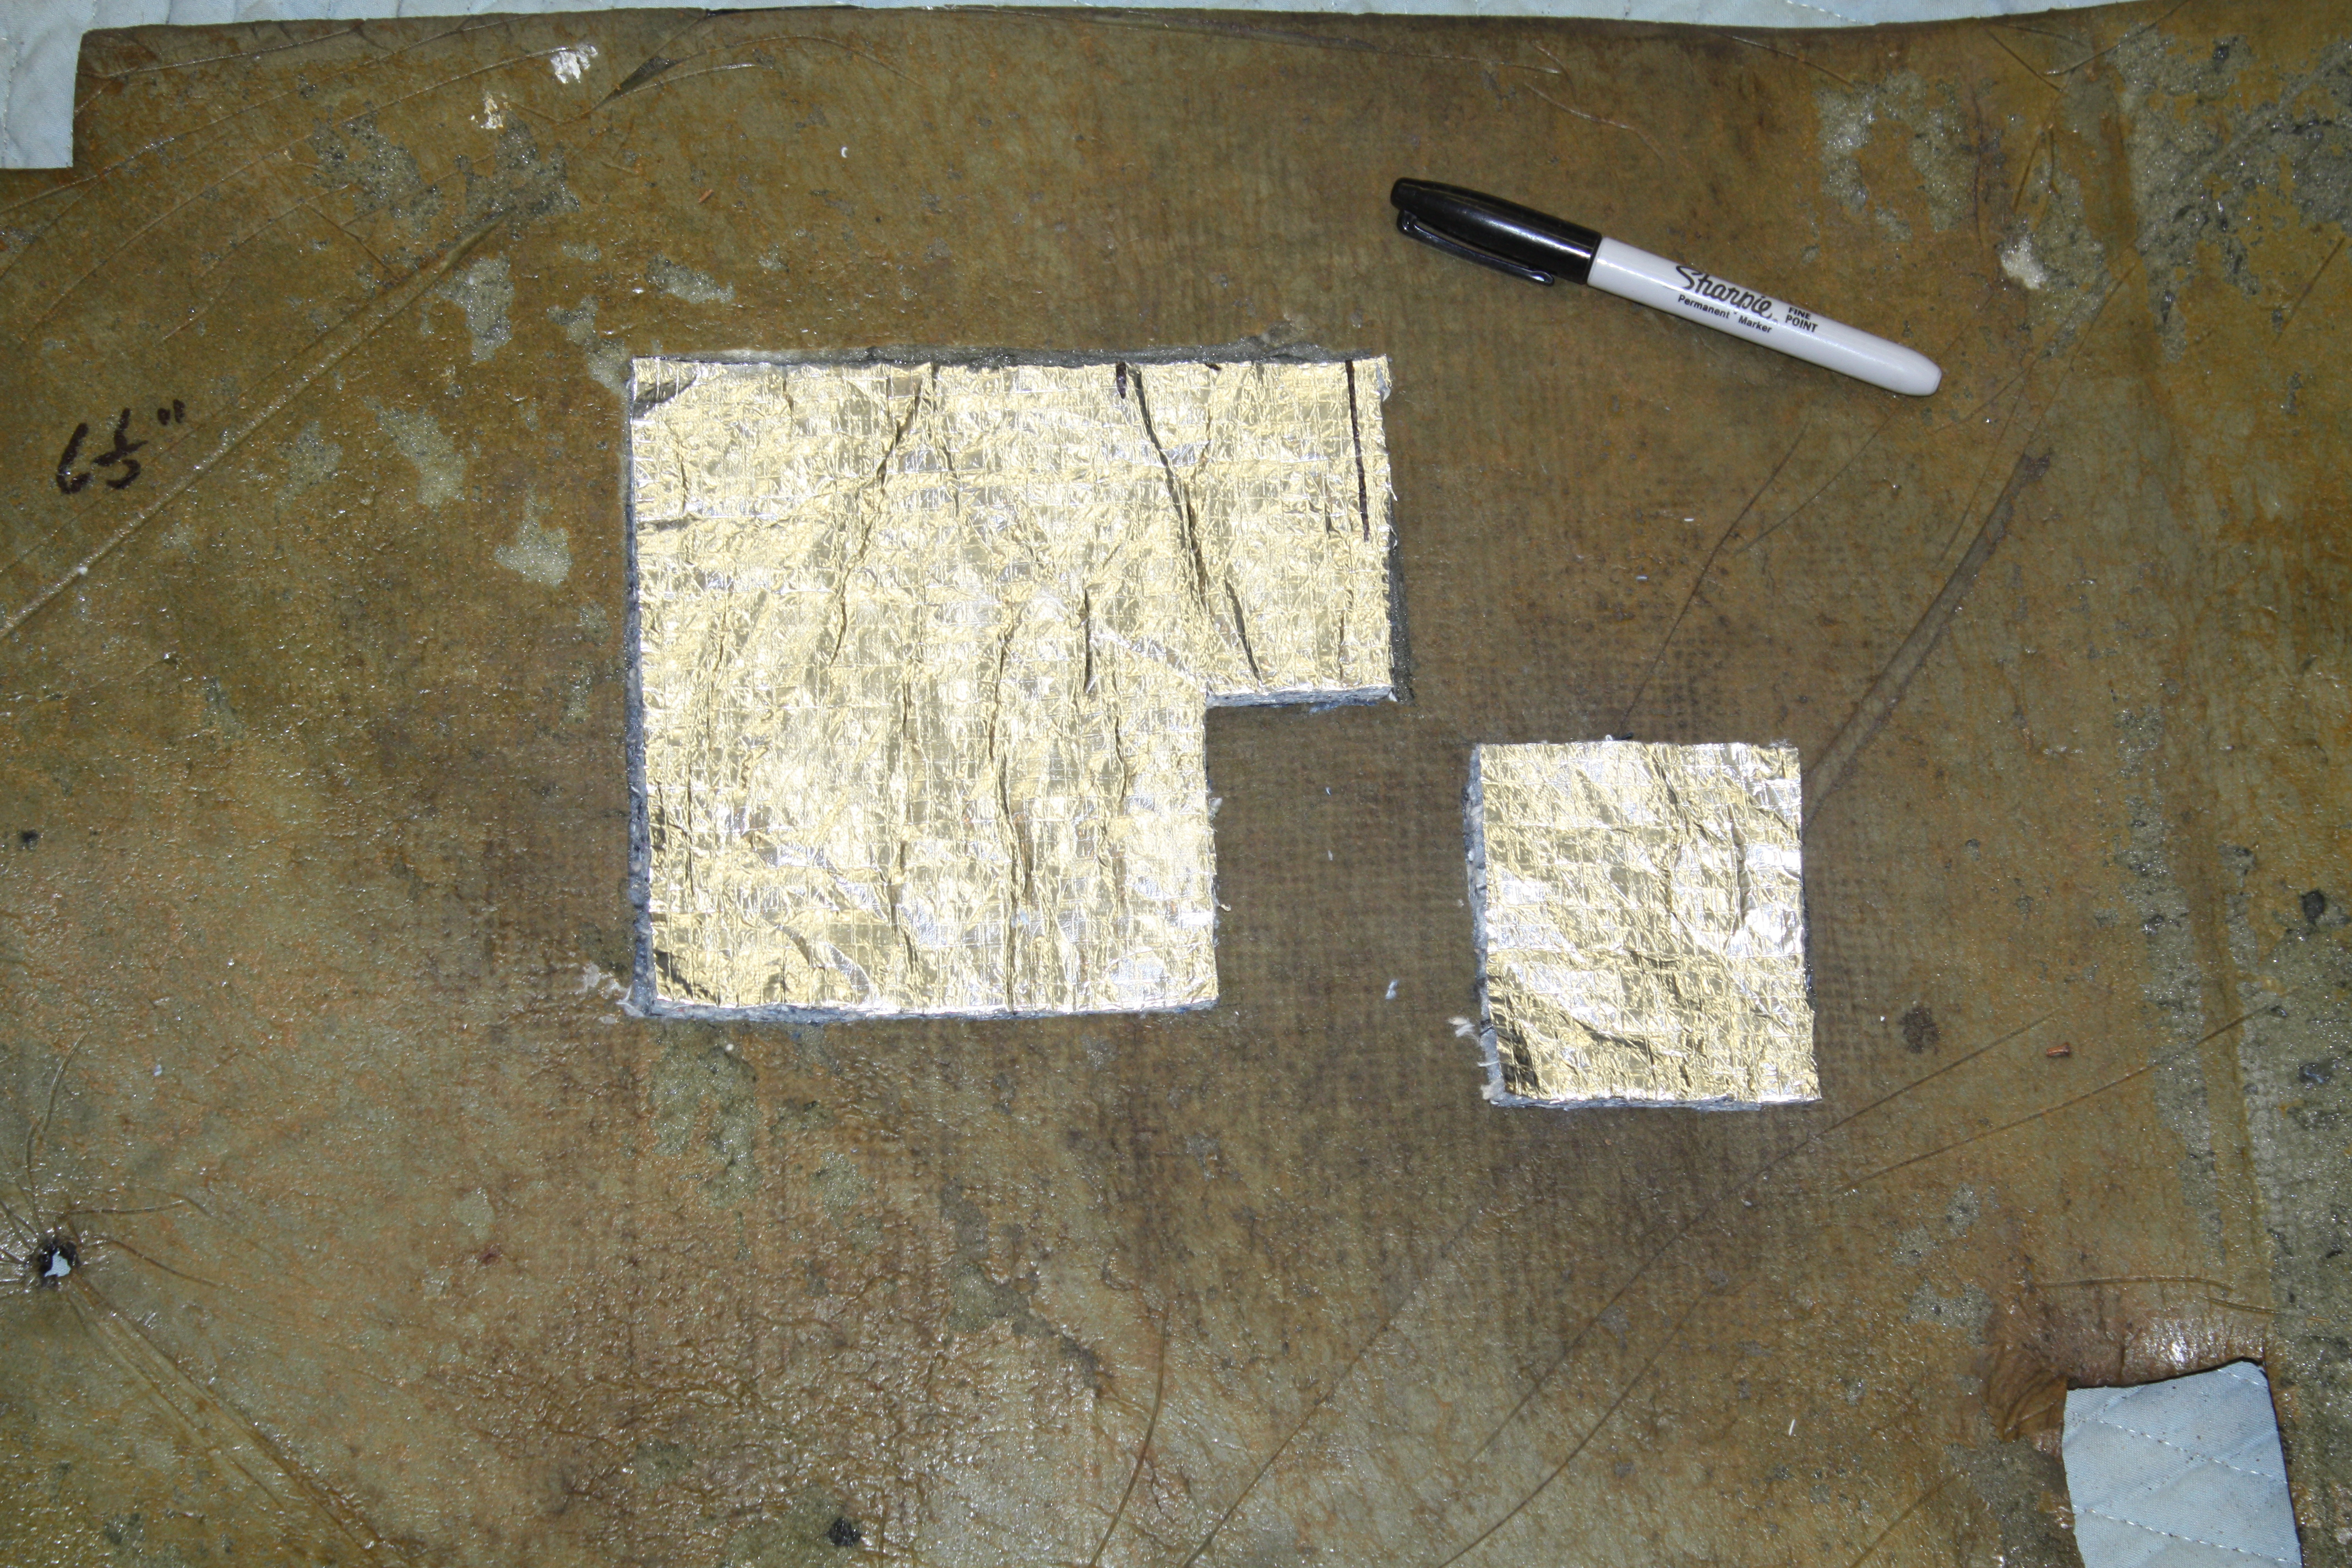
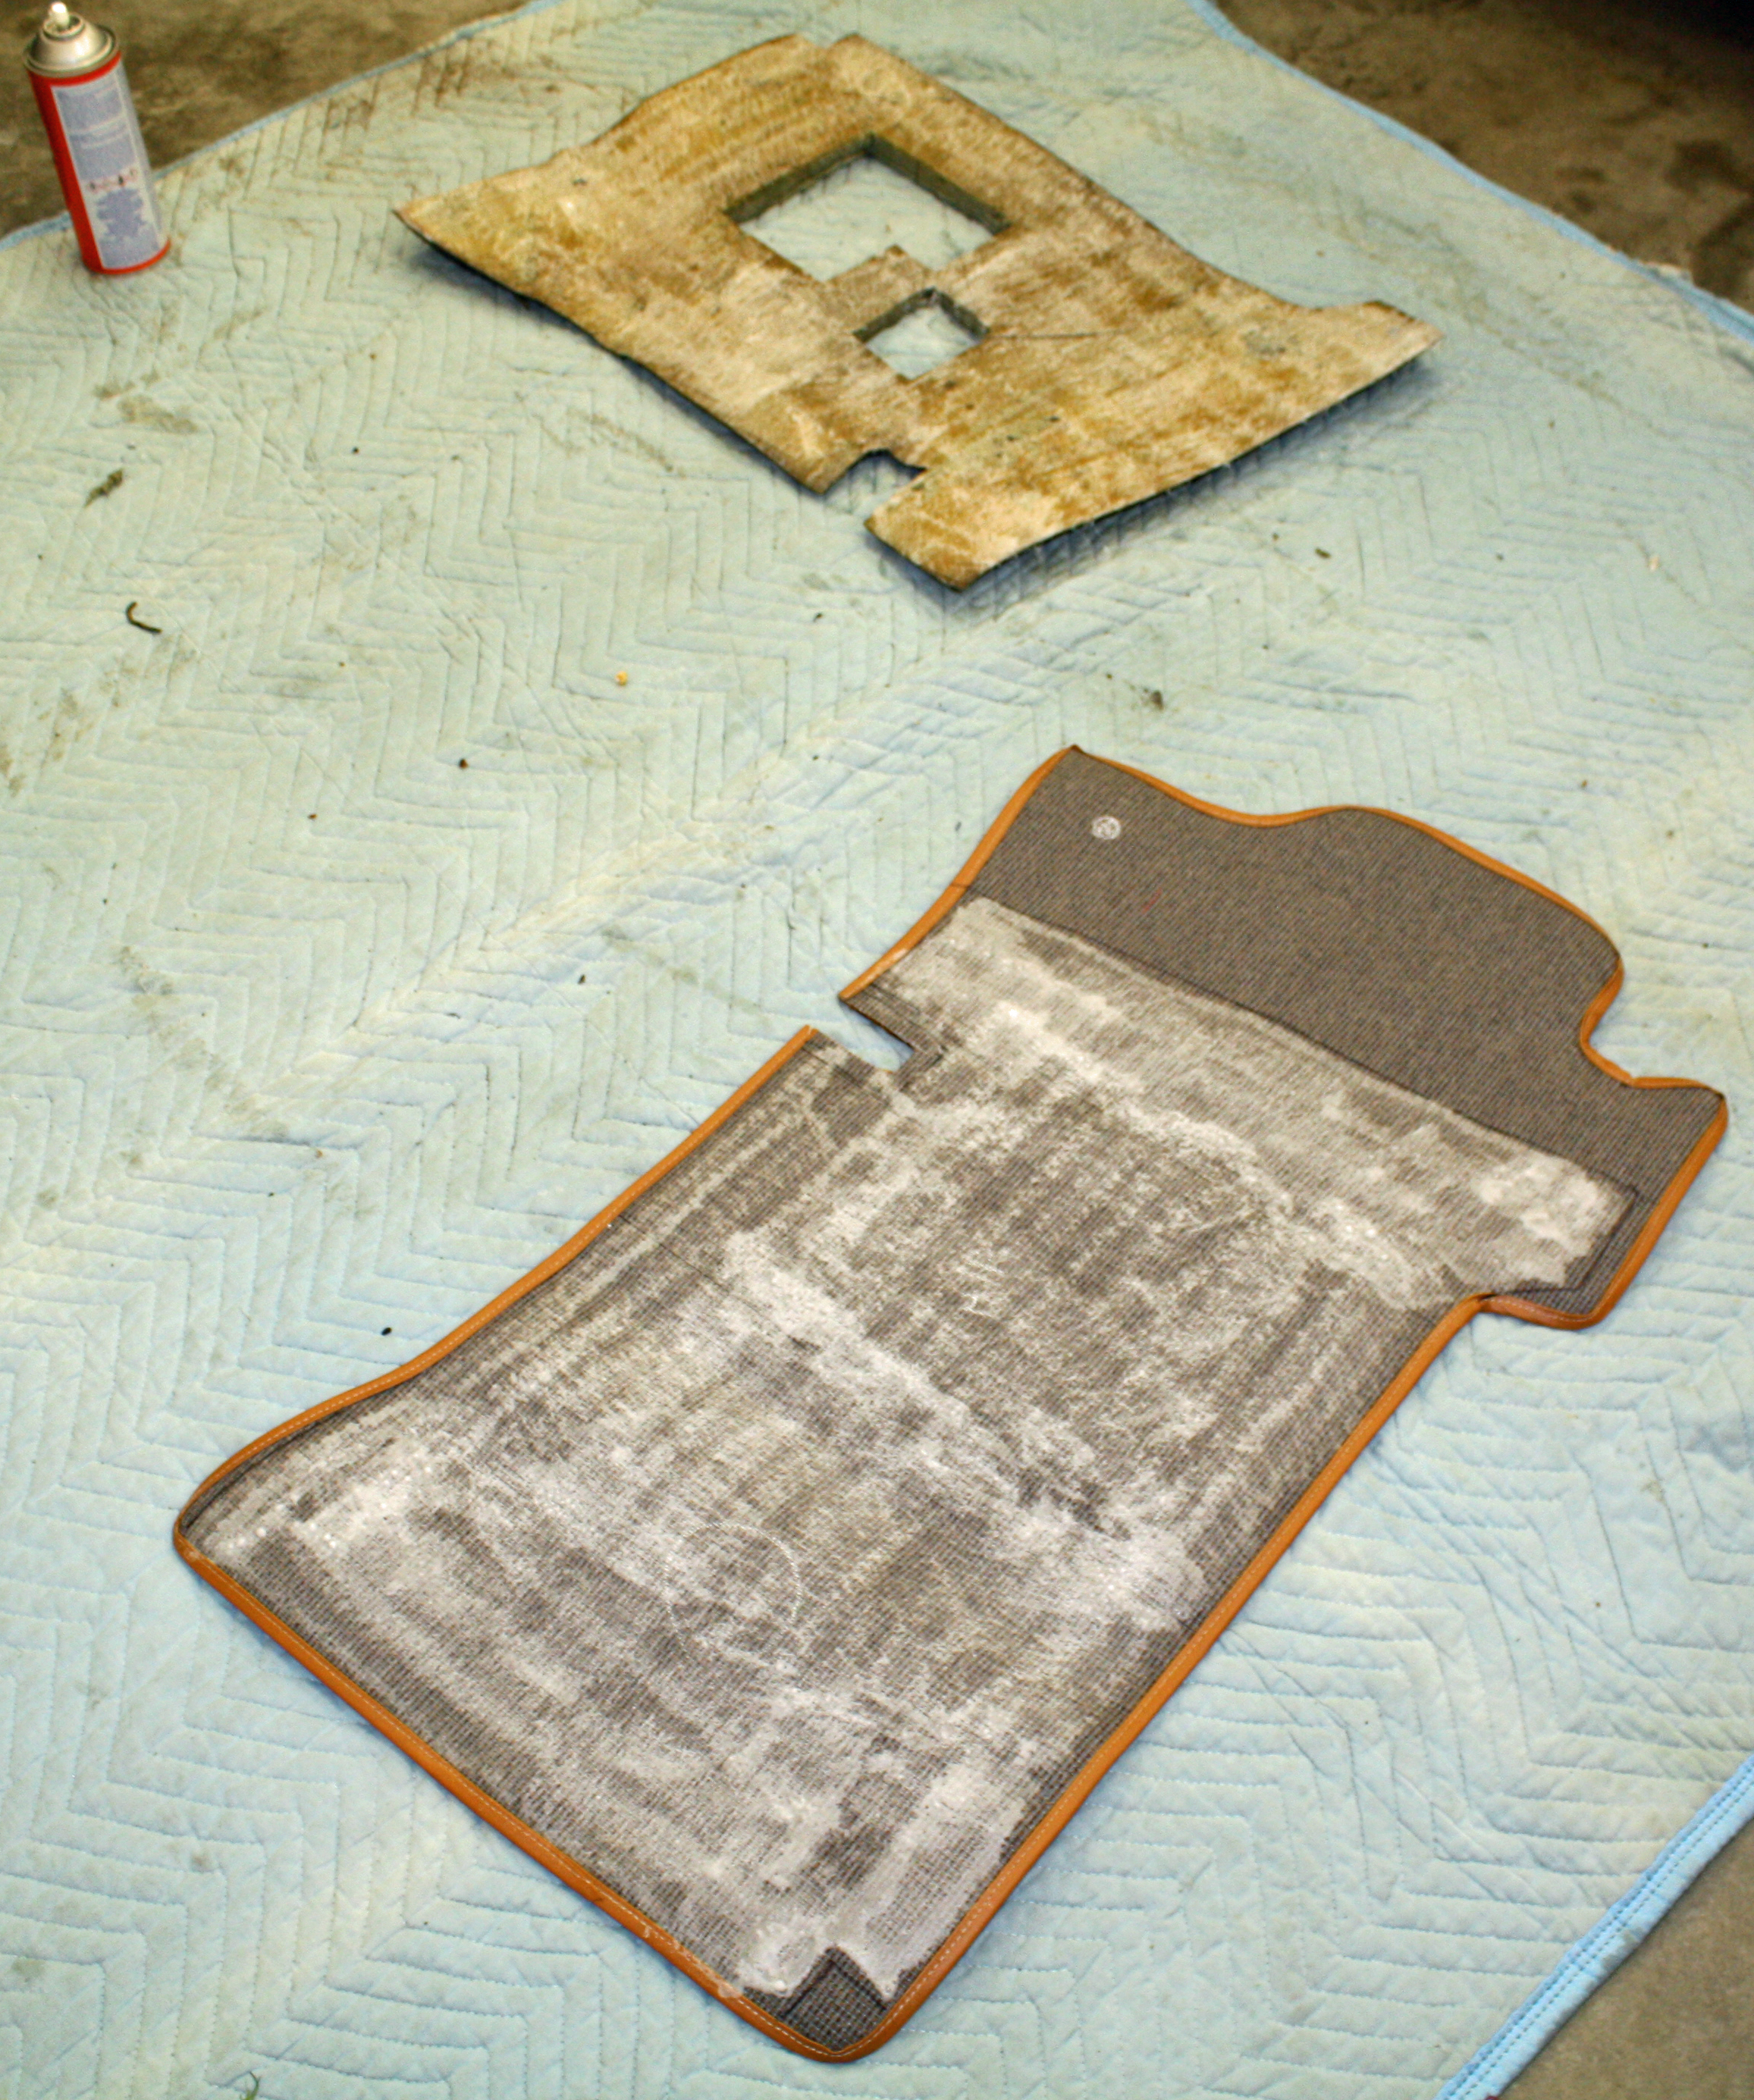
The four pieces of carpet that lay where one puts their feet had differing degrees of wear. The driver's side piece was the worst, by far. It had two holes worn not only through the carpet but also through the pad below. I wanted to save this pad as it has the cutout for the heat duct molded in. i very carefully separated the pad from the carpet. Once I had the pad out, I cut out rectangular holes in the worn areas to make it easier to patch them. I had purchased some carpet insulation that had an aluminum backing on one side. I cut out double thickness pieces to match the openings. I then used the adhesive to mount the pad to the rear of the new carpet. Once that was done, I glued in the patches.


The passenger side carpet pad was in good shape.
The padding on the back of the rear carpet pieces was a thin piece of foam. I did not even try to remove it as it would have come off in pieces. I cut the new insulation pad to size and glued one thickness to the carpet.
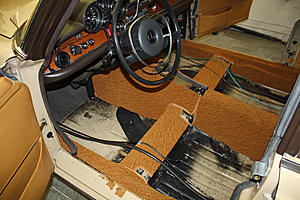
While waiting for the adhesive to dry I installed my newly painted console tray. After lunch, I placed the new carpet pieces in place. Finally, the carpet is installed!!!
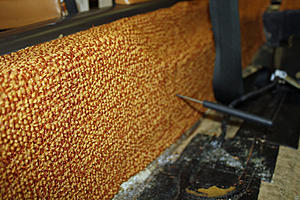
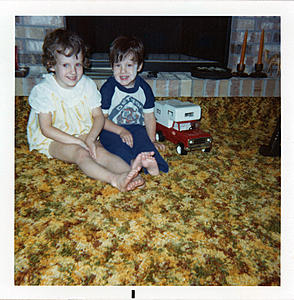
Looking at the colors of this carpet, it is easy to forget what was considered stylish in the '70's. It is very orange!! In 1974 we purchased our first house. Here is a photo of the kids in that house's family room. Multi-colored ****, baby!!! And we thought it was cool!!!


The passenger side carpet pad was in good shape.


The padding on the back of the rear carpet pieces was a thin piece of foam. I did not even try to remove it as it would have come off in pieces. I cut the new insulation pad to size and glued one thickness to the carpet.


While waiting for the adhesive to dry I installed my newly painted console tray. After lunch, I placed the new carpet pieces in place. Finally, the carpet is installed!!!


Looking at the colors of this carpet, it is easy to forget what was considered stylish in the '70's. It is very orange!! In 1974 we purchased our first house. Here is a photo of the kids in that house's family room. Multi-colored ****, baby!!! And we thought it was cool!!!

The following users liked this post:
jlpskydive (03-22-2018)
04-12-2017, 08:48 PM
#57
Member
Thread Starter
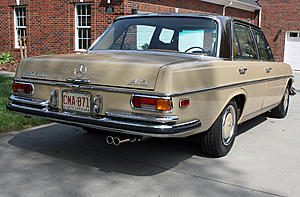
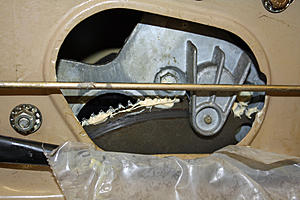
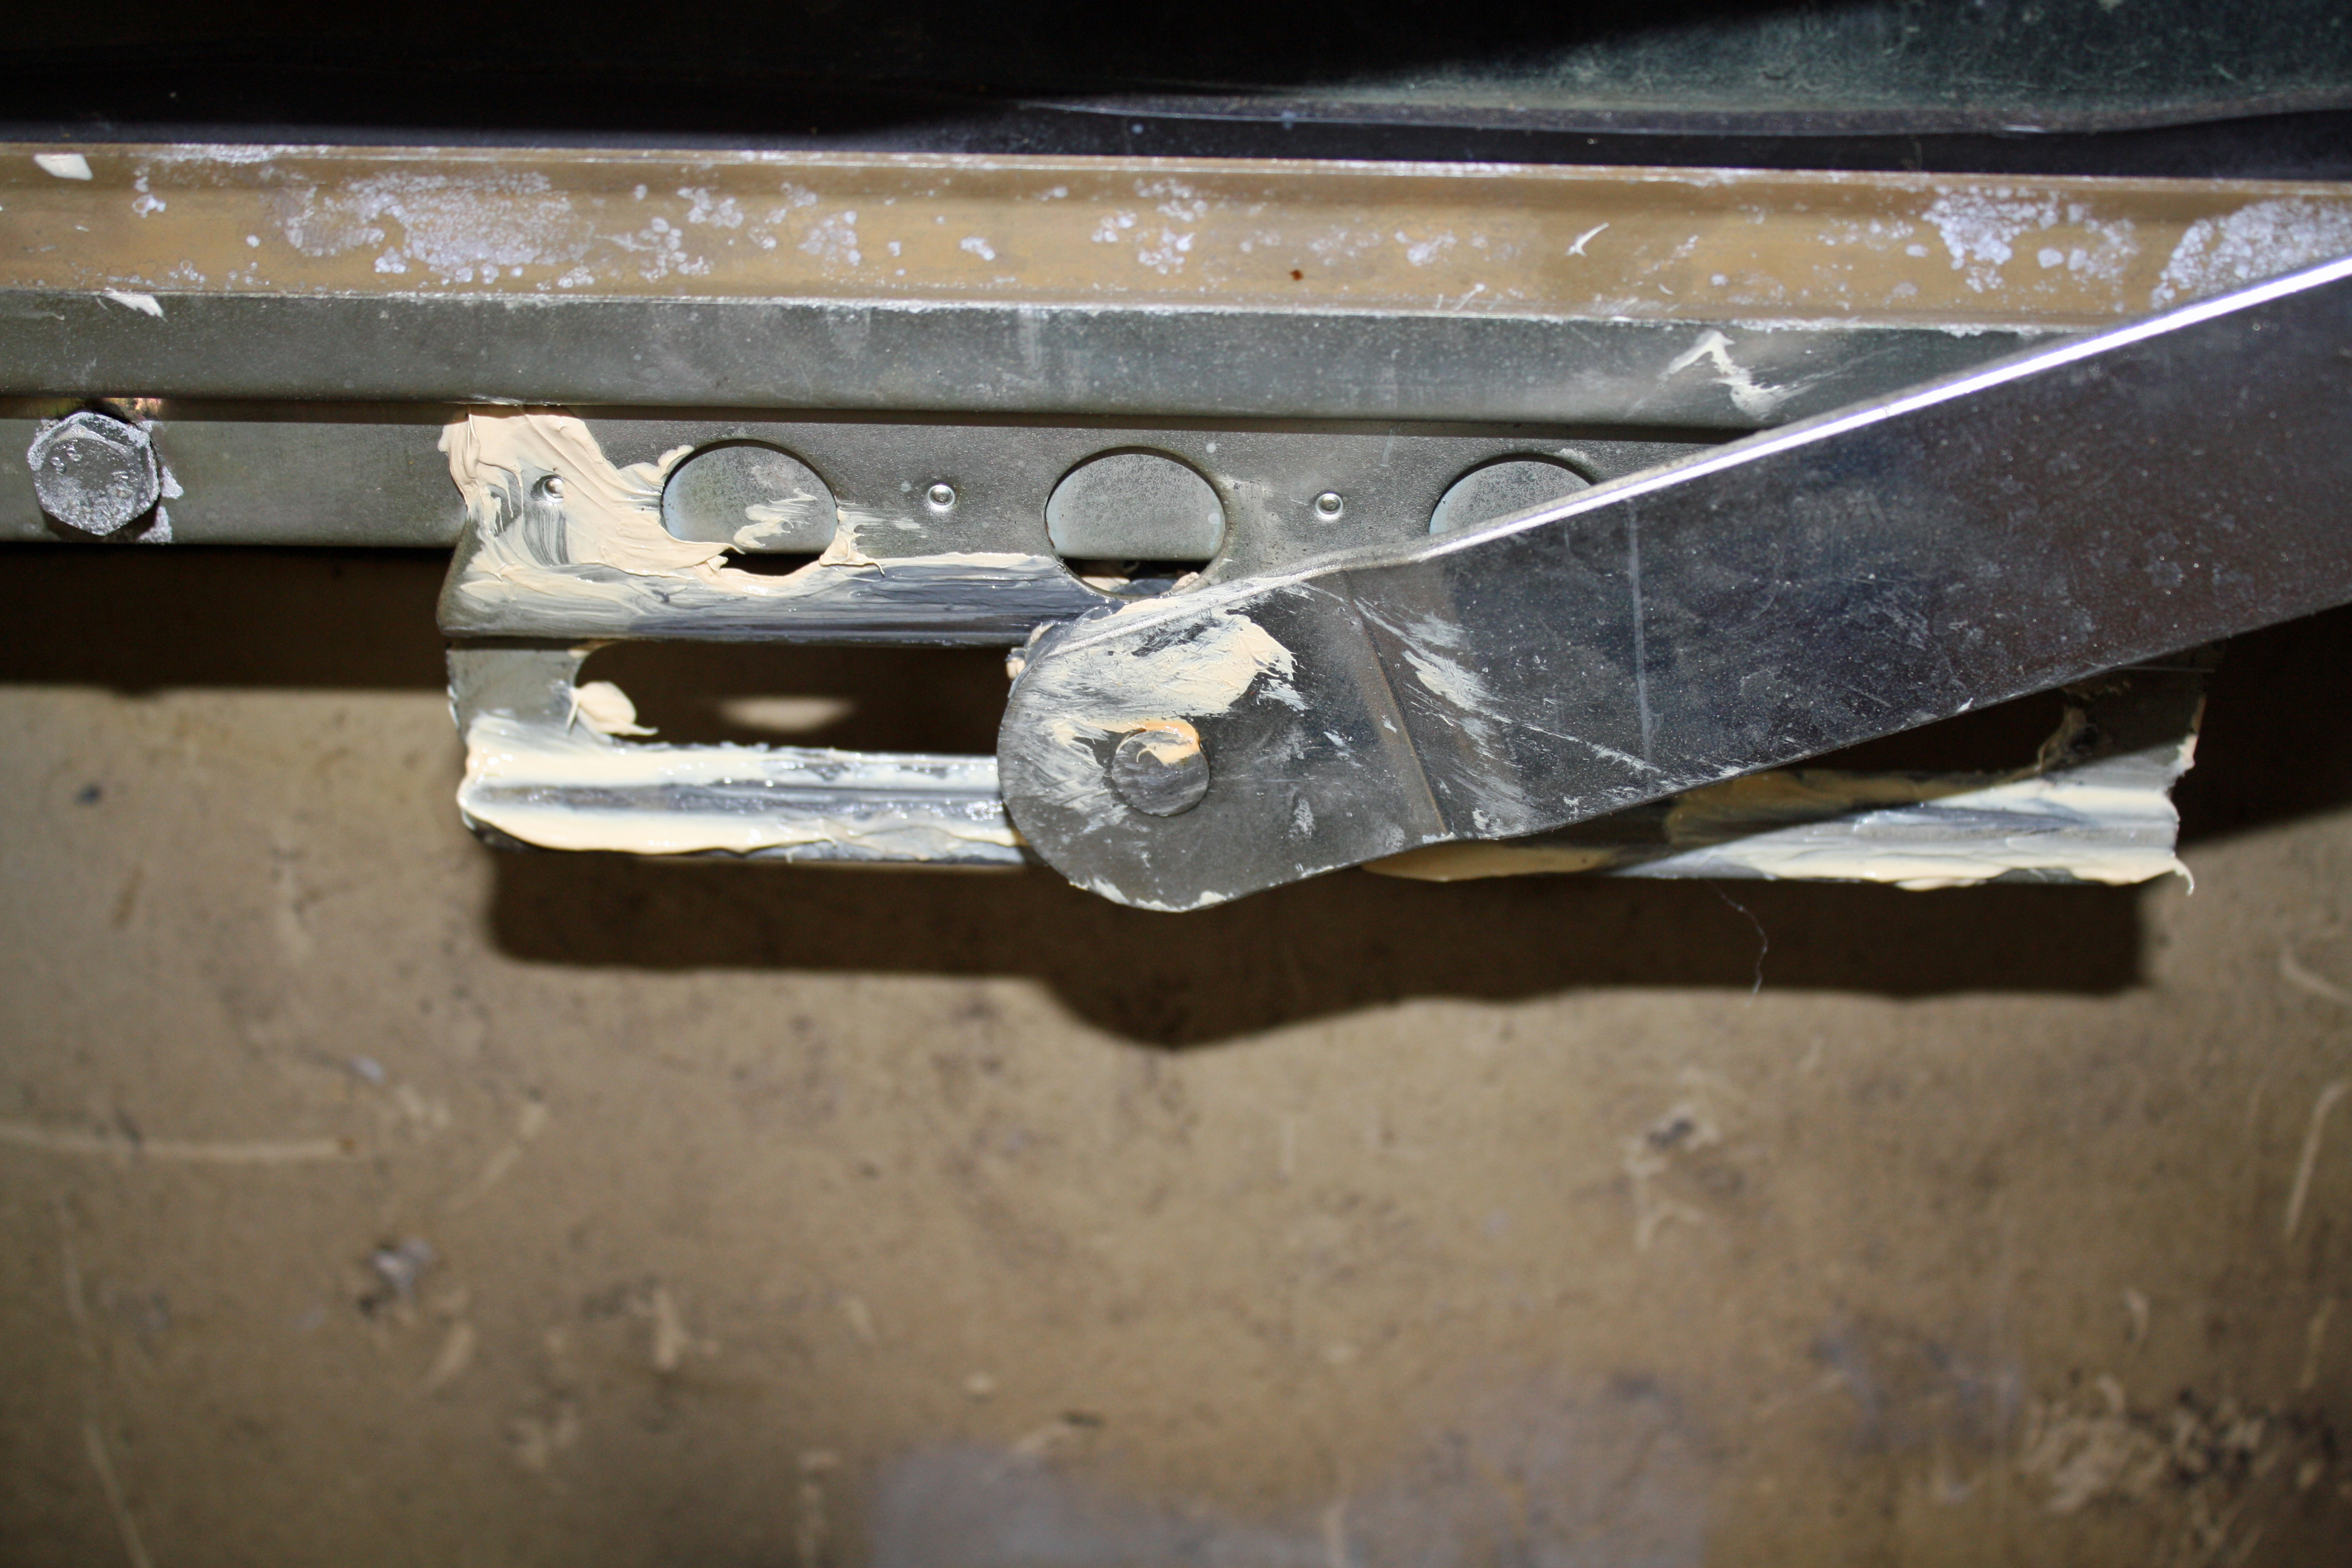
Yesterday was very frustrating. I spent most of the day trying to install the front seats with no success. I could get three bolts in but I could never get the fourth bolt to line up. I googled installing the seat and discovered one guy who spent five days installing one seat!!! I knew there had to be an answer.
I finally called my buddy Reese to see if a second set of eyes would help. I knew the problem was connected to the spring for raising and lowering the seat. My Google search came up with one guy who finally got his seat installed after removing the spring but he no longer had height adjustment. Which is why I resisted unhooking the spring. But after we both looked over the bottom of the seats, we could see no other way. I had the passenger seat in position and, after shining my light on the front edge, I could see that I could both see and reach the spring with the seat in place. By this time is was four o'clock. Besides being frustrated, I was worn out and called it a day.
A few days ago, JMela sent me a digital copy of the service manual. I had thanked him but had saved the file to the Mercedes file without looking at it. After dinner, I found the section on removing the seat. The very first instruction was to release the spring tension!!! There is a Mercedes tool for this which I felt confident I could duplicate. I went to bed looking forward to finally having seats in the car.
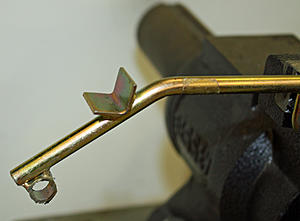
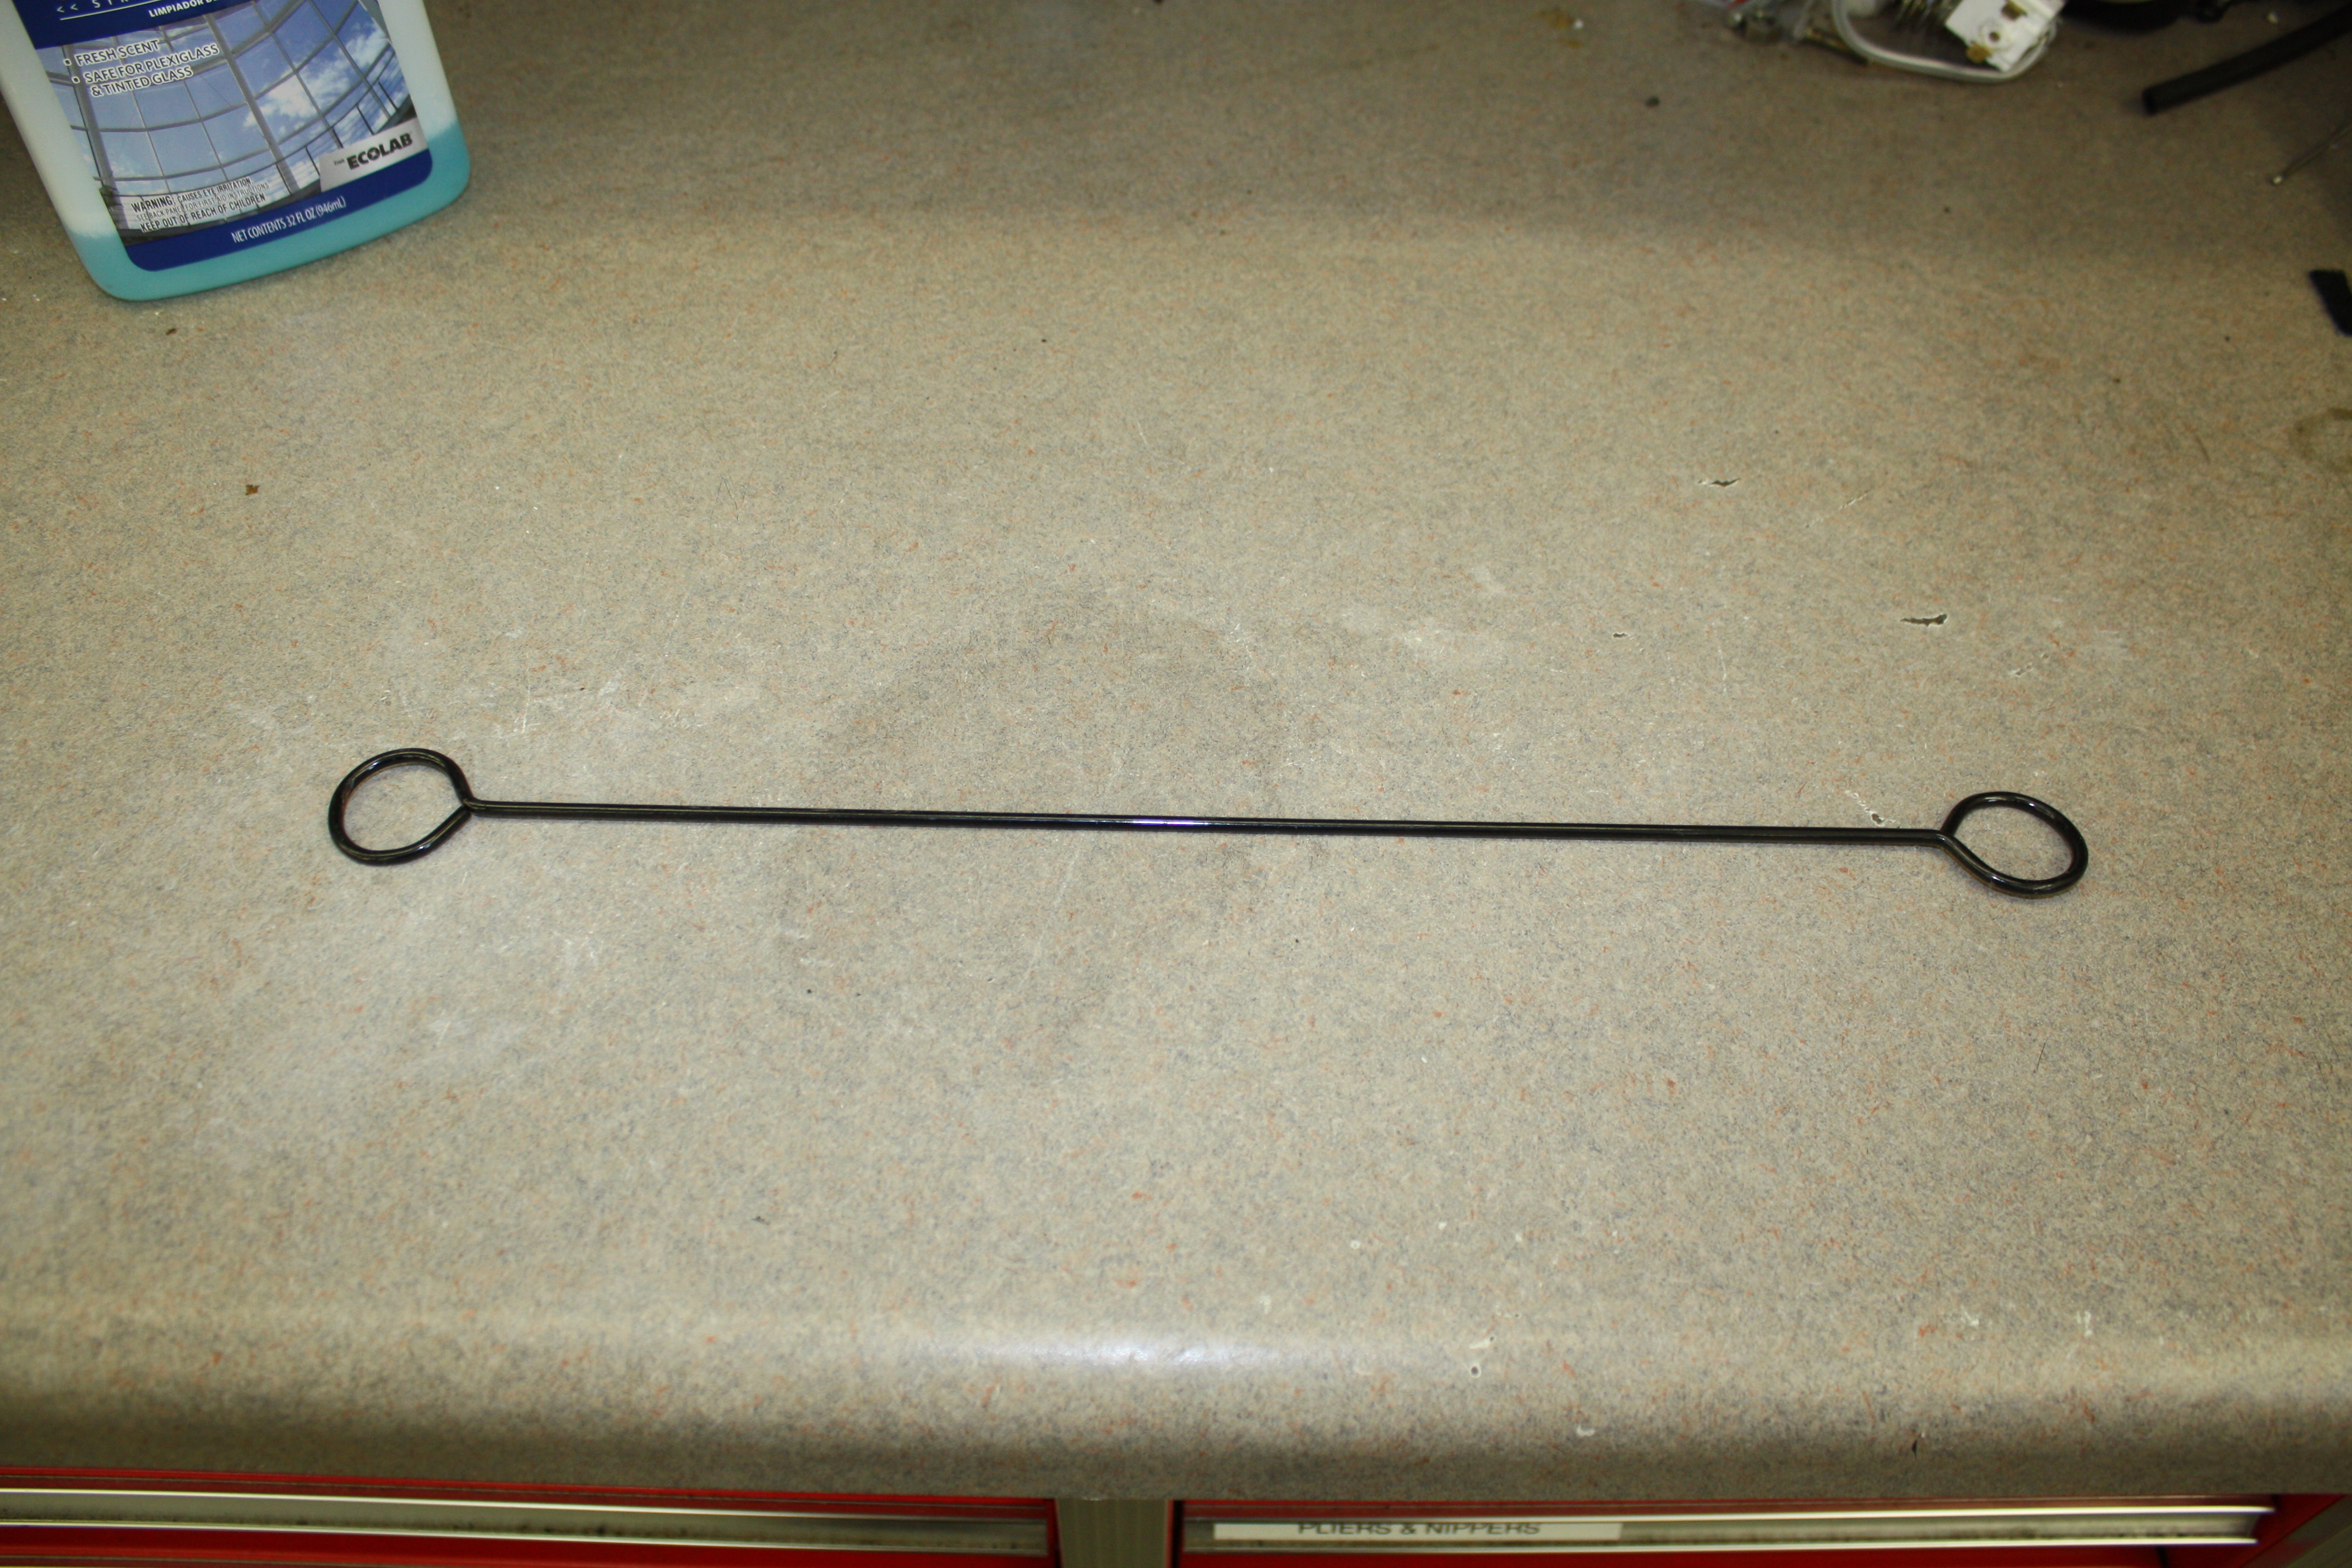
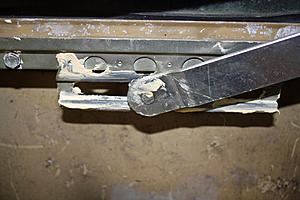
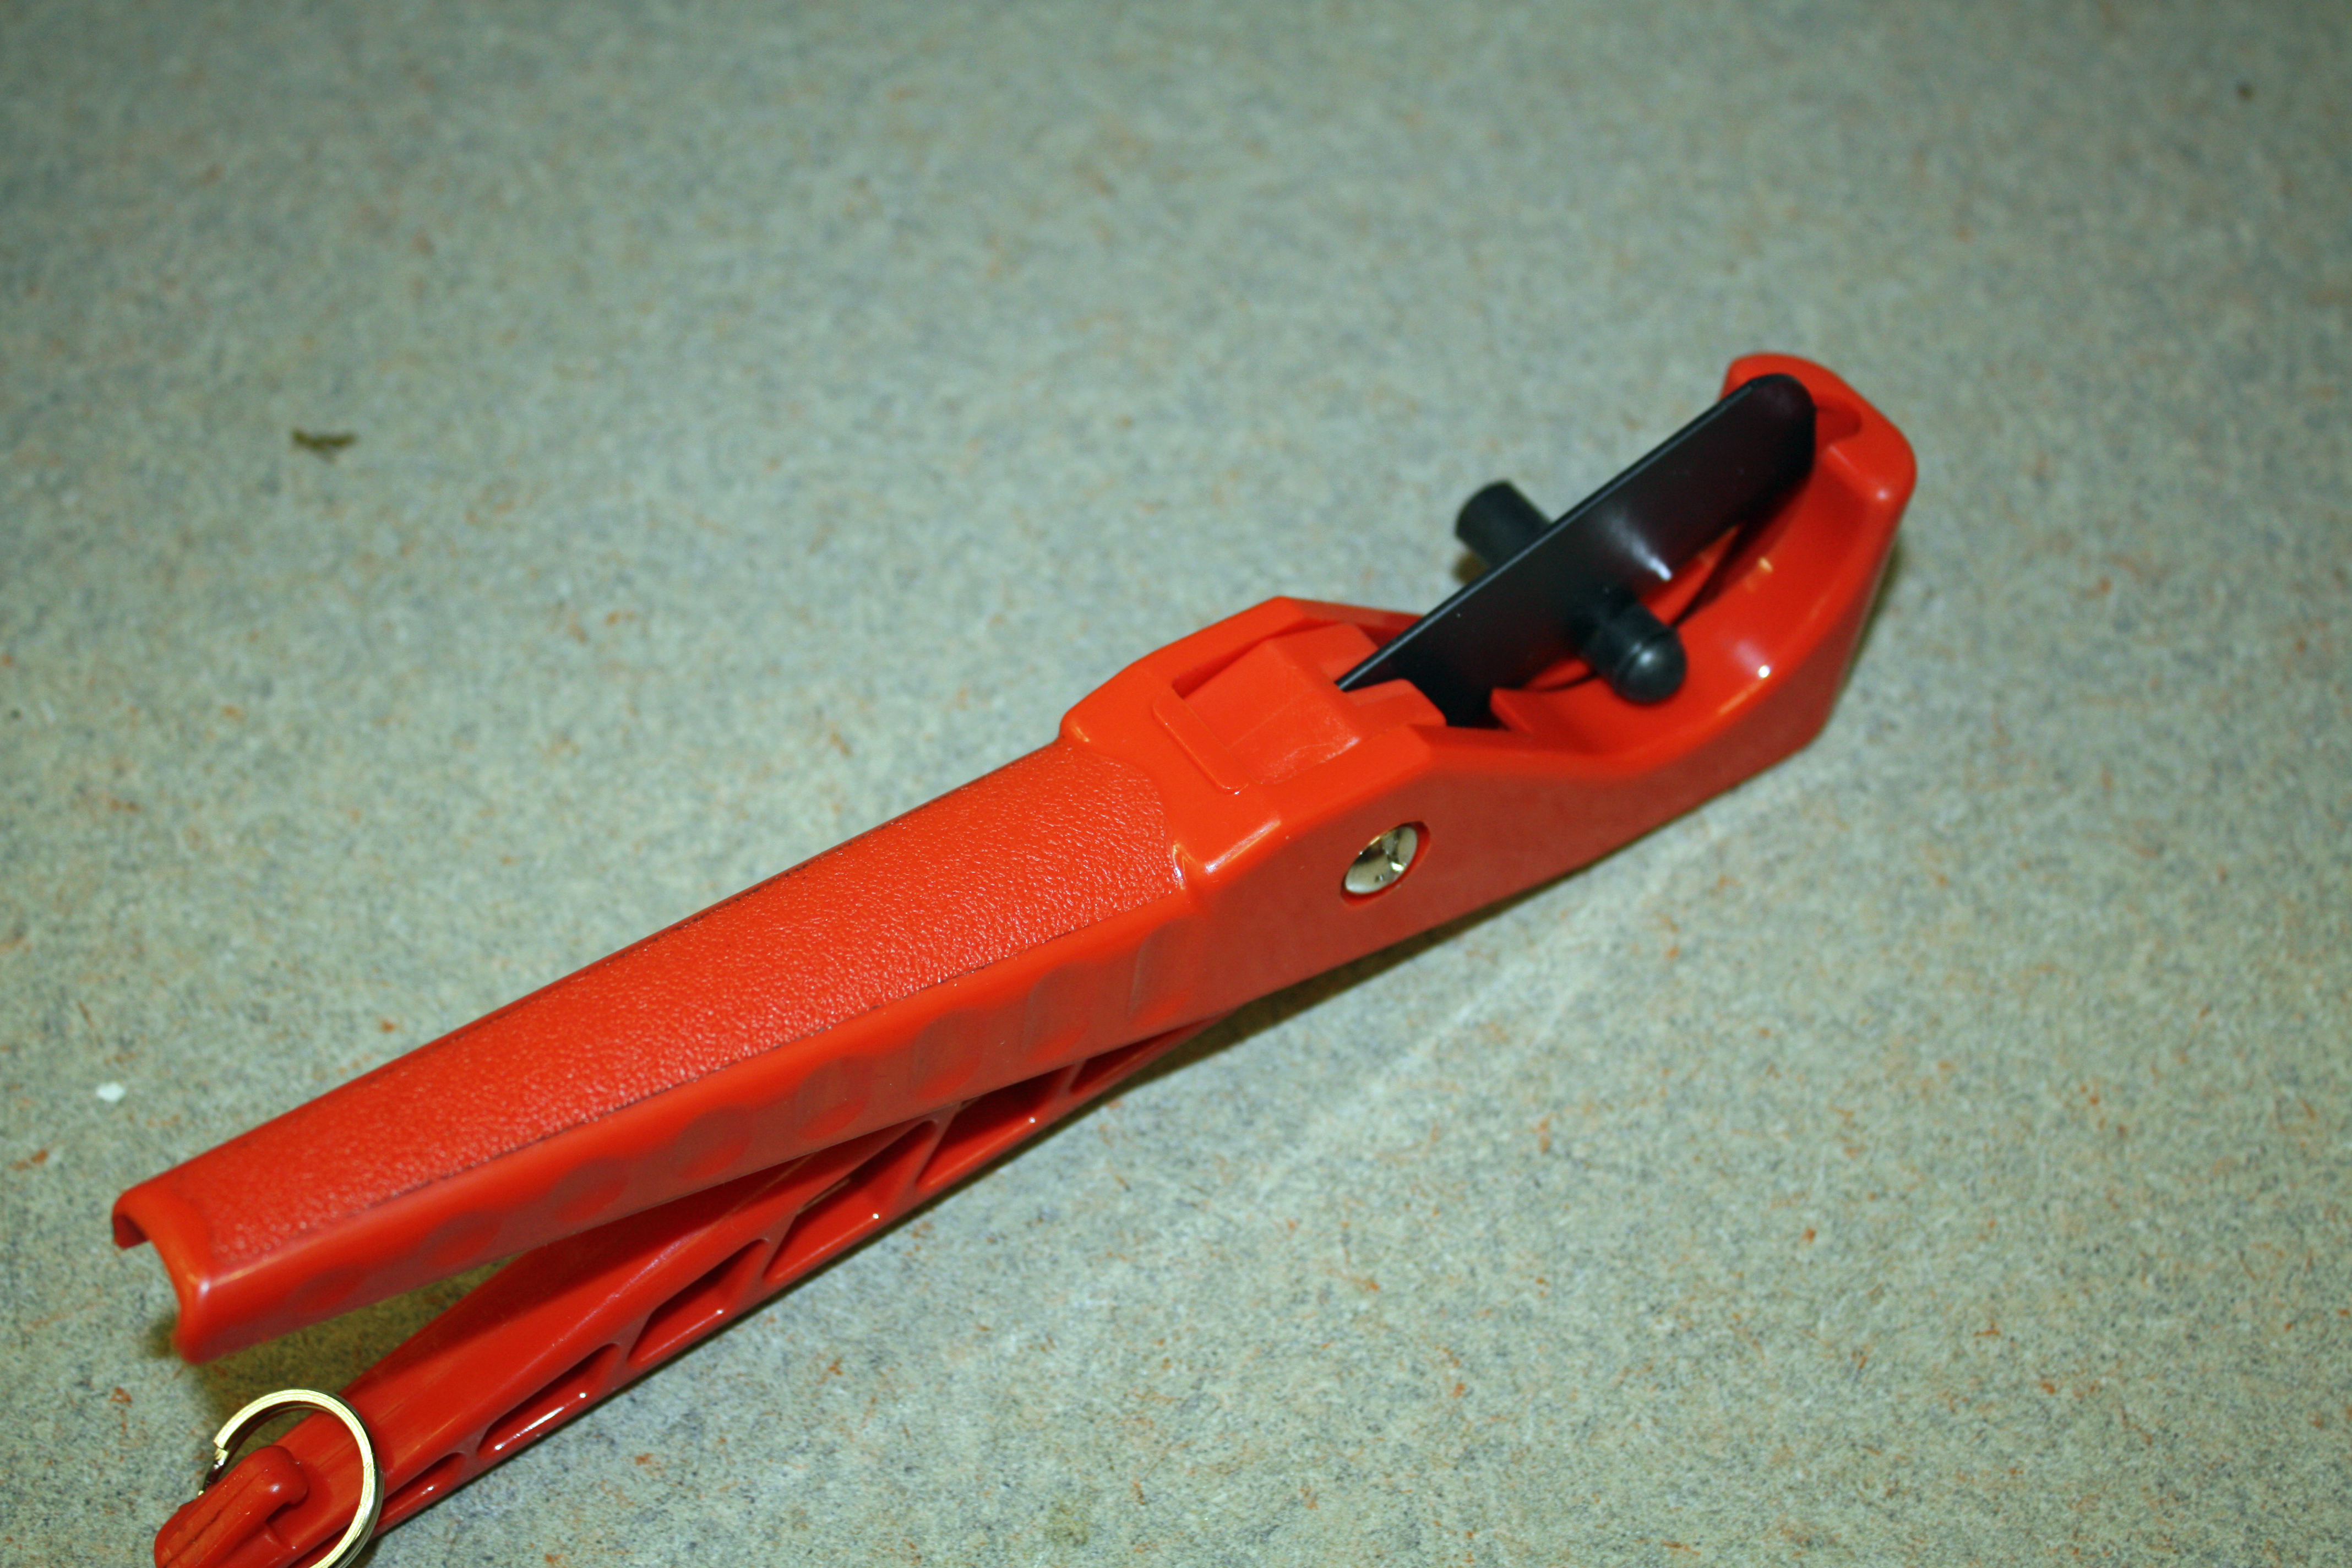
I was in the garage by eight. Earlier in this thread I used a tool made for installing the rubber exhaust hangers. When looking in my special tools drawer, I saw it and thought it would work.
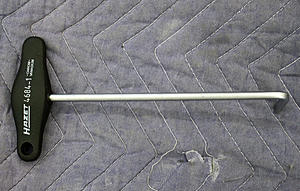

I tried it on the seat that was outside the car and it worked great. I had the three bolts in the seat in the car so I grabbed the spring with the tool and was easily able to remove it. In no time I had that fourth hole lined up and the seat was in!!!
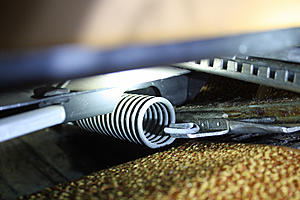
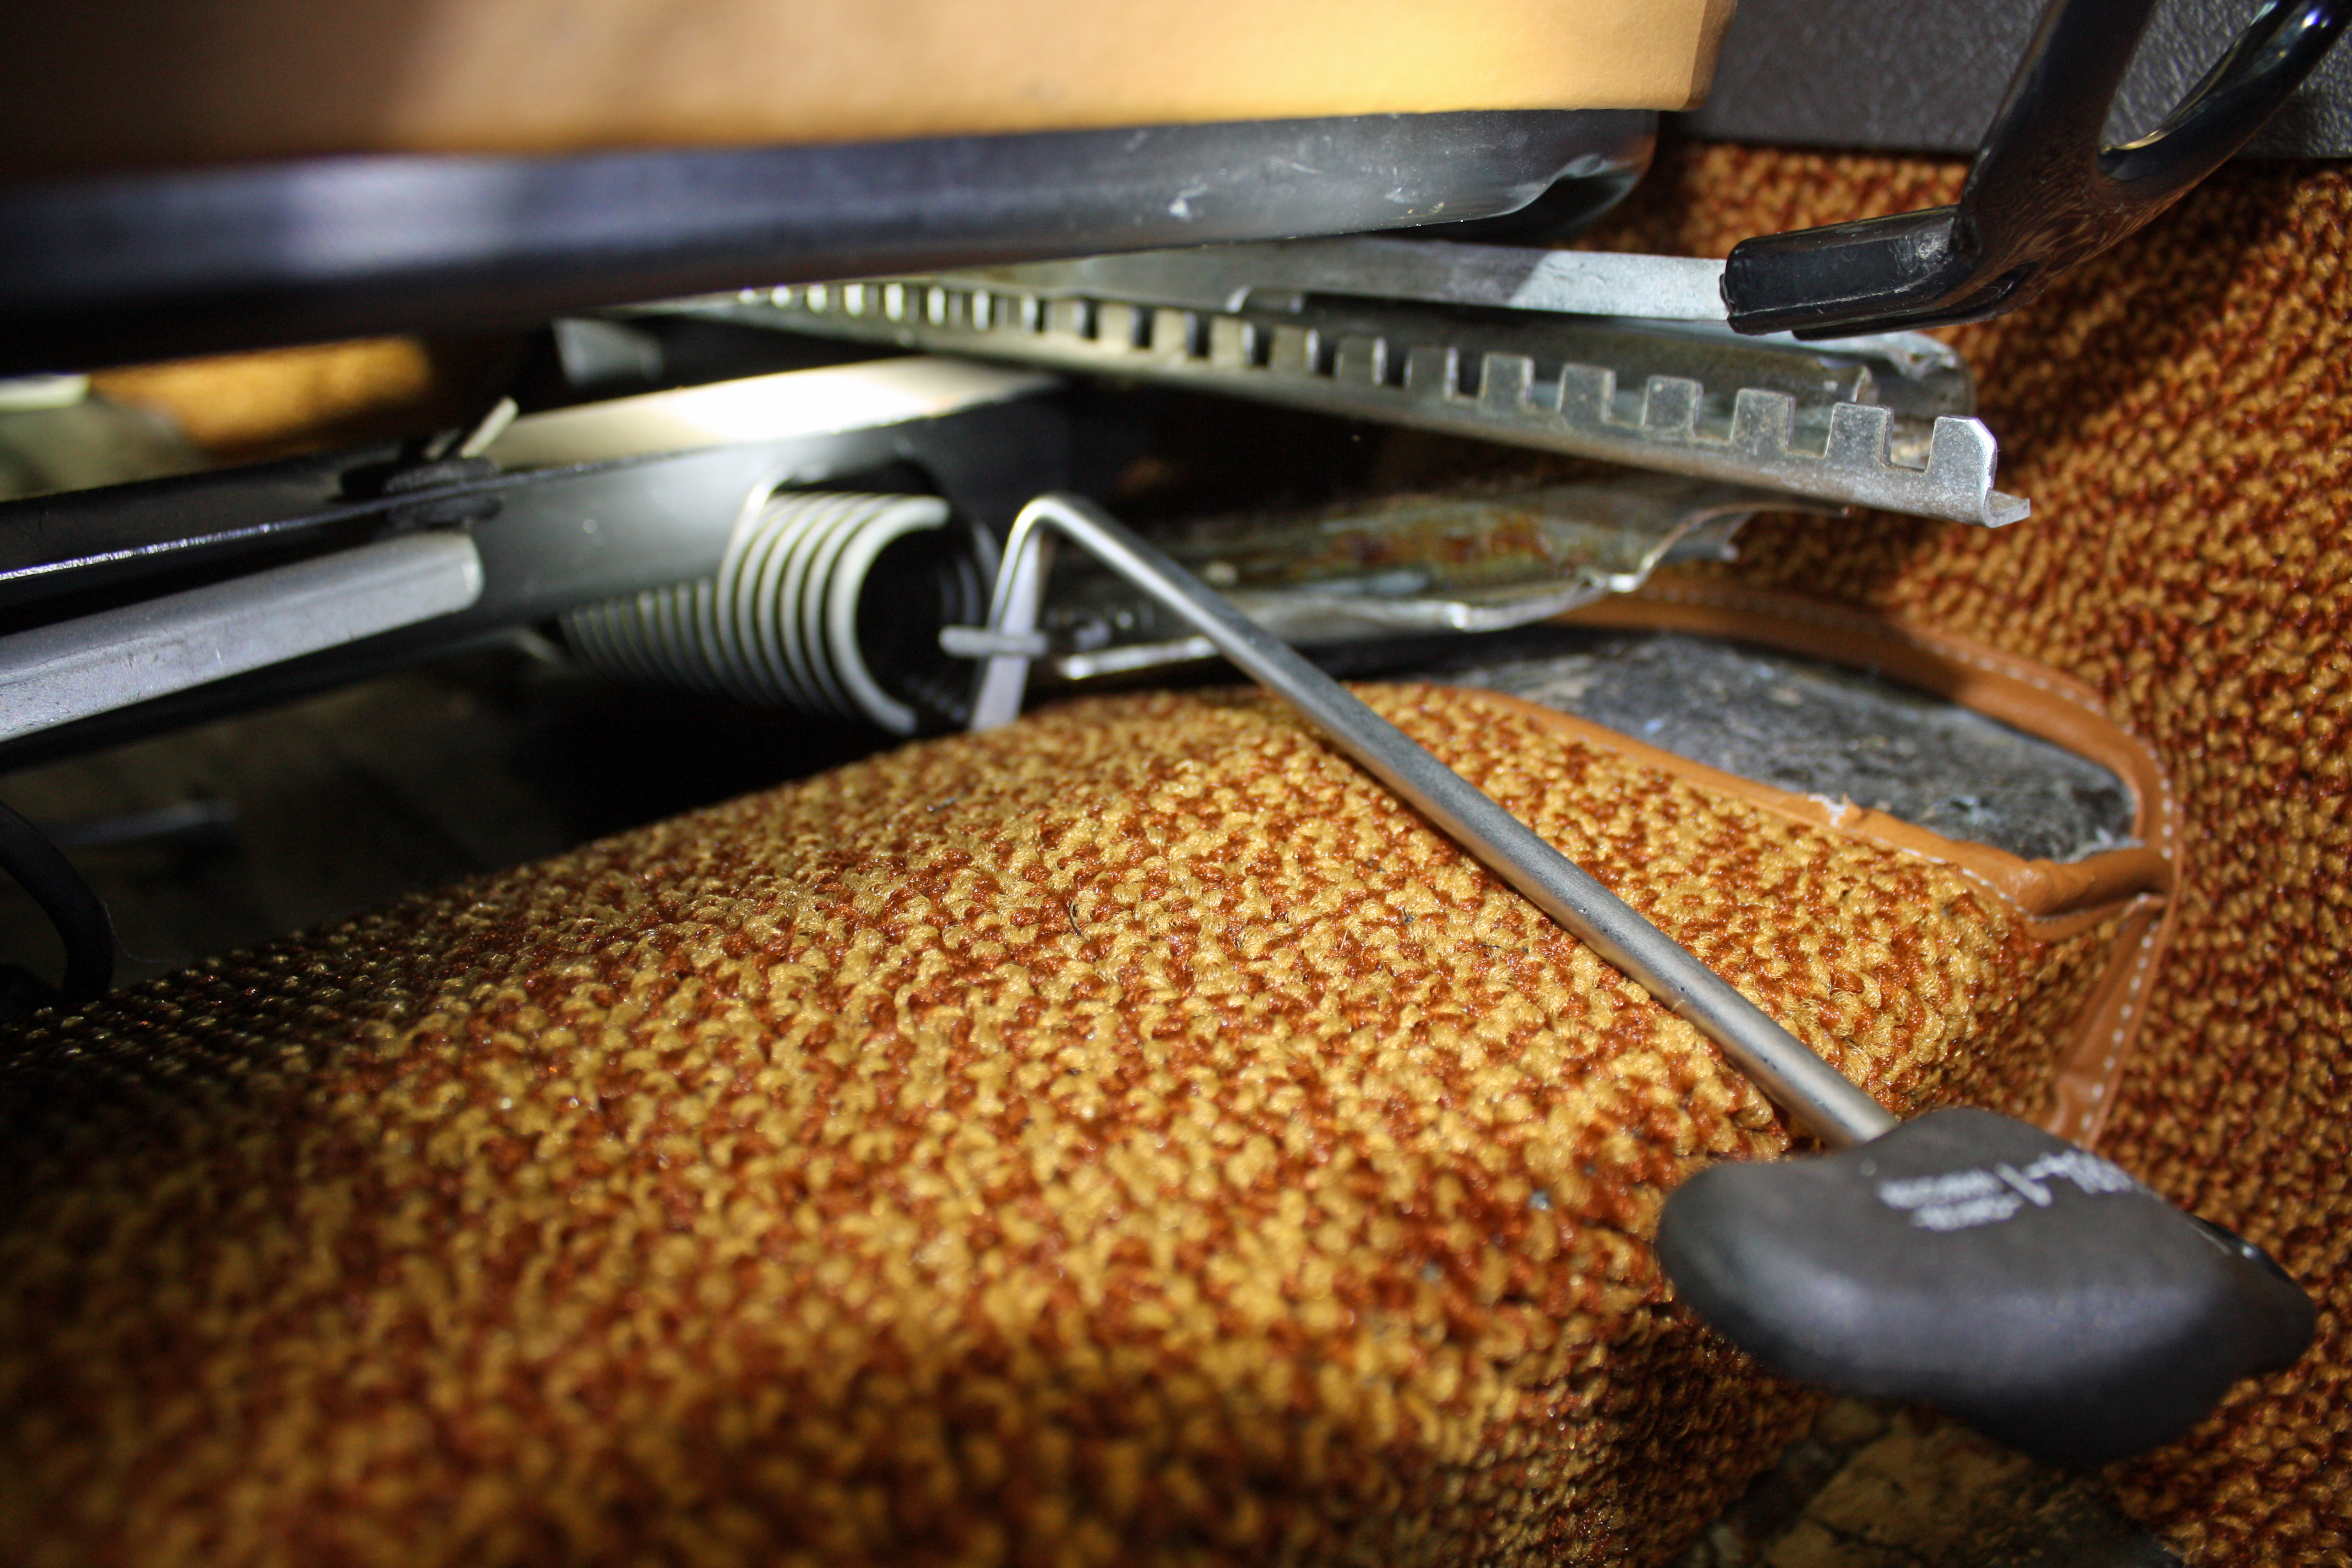
I tried to use the same tool to attach the spring but it did not work for that as it wanted to slip off and I could not guide it. So I rummaged through my junk metal collection to see what I could find. I found a piece that I thought would work with a little massaging. It had a loop on the end that was too wide so I cut part of it off on each side. There was also a piece on top that I cut off. I have no idea where I got it and what it came off of but it worked well. I taped the rear part of the spring to the bottom of the seat to make sure it would not accidentally come unhooked.

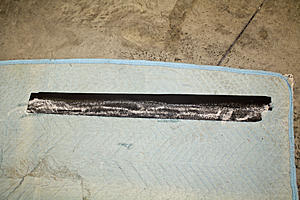
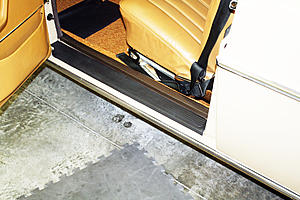
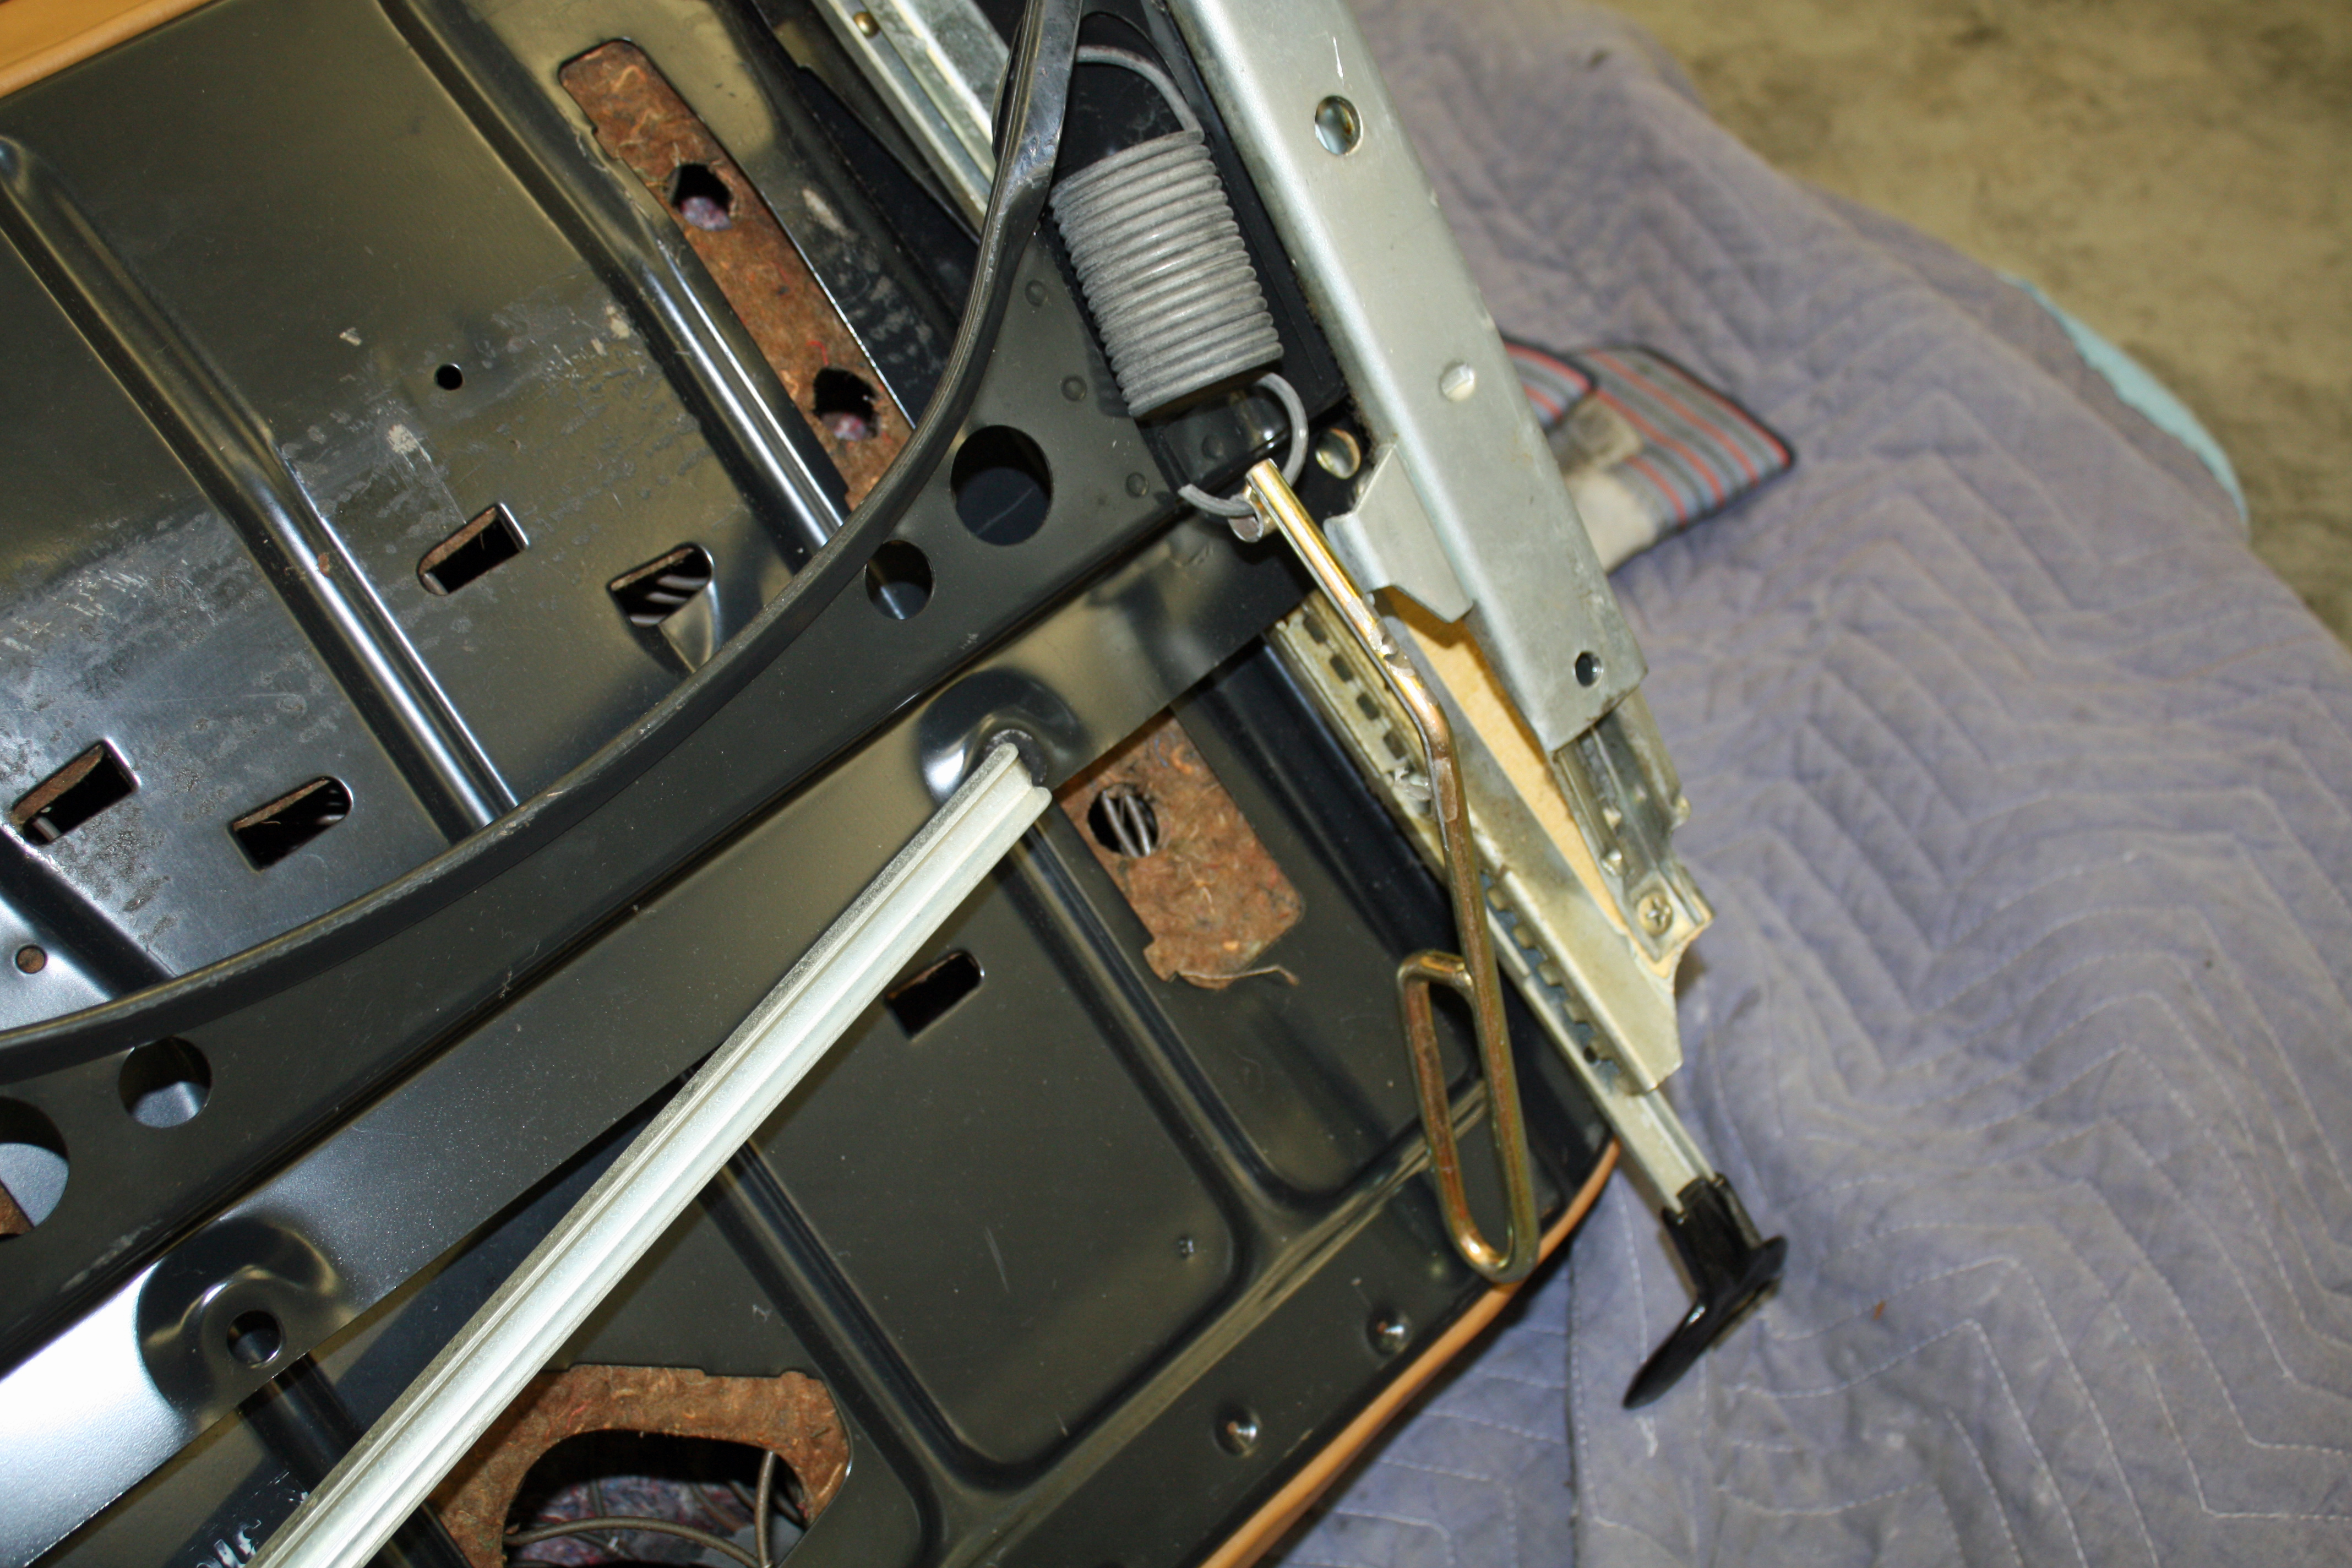
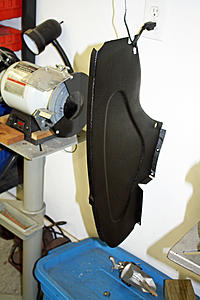
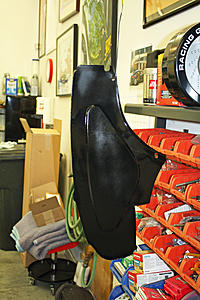
As you all saw earlier, the front rubber sill plate covers were in bad shape. I ordered a set but only get them in black instead of the original brown. More glueing ensued after I masked off the sill to keep from having glue everywhere. I purposely did not apply glue to the inner edge as I wanted to be able to slide the rubber under the plastic trim. After installing the front ones, I discovered that I had ordered a set for a SE rather than a SEL as the rears were 4" short.
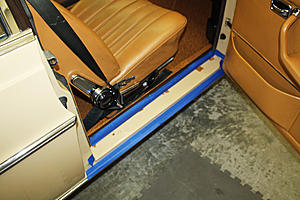
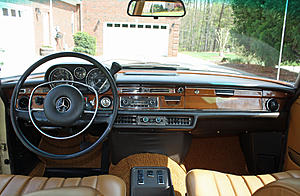
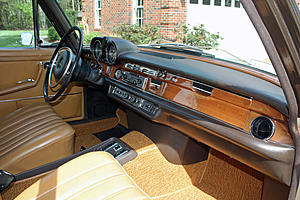
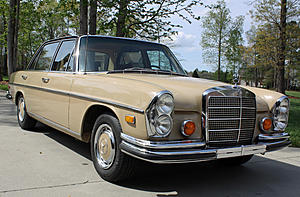
Other than the read door sill rubber protectors, I am finished with the cosmetic work. Time for the beauty shots!!

I finally called my buddy Reese to see if a second set of eyes would help. I knew the problem was connected to the spring for raising and lowering the seat. My Google search came up with one guy who finally got his seat installed after removing the spring but he no longer had height adjustment. Which is why I resisted unhooking the spring. But after we both looked over the bottom of the seats, we could see no other way. I had the passenger seat in position and, after shining my light on the front edge, I could see that I could both see and reach the spring with the seat in place. By this time is was four o'clock. Besides being frustrated, I was worn out and called it a day.
A few days ago, JMela sent me a digital copy of the service manual. I had thanked him but had saved the file to the Mercedes file without looking at it. After dinner, I found the section on removing the seat. The very first instruction was to release the spring tension!!! There is a Mercedes tool for this which I felt confident I could duplicate. I went to bed looking forward to finally having seats in the car.
I was in the garage by eight. Earlier in this thread I used a tool made for installing the rubber exhaust hangers. When looking in my special tools drawer, I saw it and thought it would work.


I tried it on the seat that was outside the car and it worked great. I had the three bolts in the seat in the car so I grabbed the spring with the tool and was easily able to remove it. In no time I had that fourth hole lined up and the seat was in!!!
I tried to use the same tool to attach the spring but it did not work for that as it wanted to slip off and I could not guide it. So I rummaged through my junk metal collection to see what I could find. I found a piece that I thought would work with a little massaging. It had a loop on the end that was too wide so I cut part of it off on each side. There was also a piece on top that I cut off. I have no idea where I got it and what it came off of but it worked well. I taped the rear part of the spring to the bottom of the seat to make sure it would not accidentally come unhooked.


As you all saw earlier, the front rubber sill plate covers were in bad shape. I ordered a set but only get them in black instead of the original brown. More glueing ensued after I masked off the sill to keep from having glue everywhere. I purposely did not apply glue to the inner edge as I wanted to be able to slide the rubber under the plastic trim. After installing the front ones, I discovered that I had ordered a set for a SE rather than a SEL as the rears were 4" short.


Other than the read door sill rubber protectors, I am finished with the cosmetic work. Time for the beauty shots!!


 04-15-2017, 09:51 PM
#58
Member
Thread Starter
The car has some small dents that don't show up in the photos. I have had good luck with paintless dent removal on other cars so I drove it about fifty miles to a shop I have used previously. I am going to take the car to him next week so he can do his magic. To make it easier I am going to remove all of the door cards, the plastic trim in the front wheelwells, the spare tire and the trunk side panels. That will save me some money and, even though he is a good guy, I feel more comfortable removing the panels myself. This will also give me the opportunity to lubricate the window mechanisms and seal up the door openings with plastic.
But the big new news today was the I still have an engine running issue. I began with a full fuel tank and the car ran perfectly until I was within a mile of the guy's shop. There was an unusually long stop light at a major intersection. As the car sat there idling, I could hear and feel it running rougher and rougher. When the light turned and I gave it some fuel, it died.
Knowing that I had had an issue with warm start, I had done some research last night. One of the things mentioned was that, once the car was started, pumping the accelerator to hopefully clean out the engine only made things worse. Another point mentioned was to let the fuel pump run for a bit before trying to start it. After letting the fuel pump run, it started but I could tell it wasn't idling correctly. So I gave it gas like there was an egg on the gas pedal and I oh so slowly edged away from the intersection, with tons of unhappy people behind me. There was another stop light within a half mile where I had to make a left turn. Fortunately, that light turned green as I was approaching and I was able to make the corner and into the shop's parking lot. But it wasn't running right.
While the shop owner was going over the car, I explained to him that I might have a problem getting it to run since the car would not be cooling down. He asked if there was pressure build up in the tank so I took off the gas cap and there did not appear to be a build up with the tank still at three quarters full.
It's a busy road in front of his business. As I prepared to leave, the car started but was running roughly. It died a couple times while I was waiting to pull out. Finally, I waited until there was an opening to start the car and basically let it idle out onto the street. I managed to make it around the right hand turn at the light but was now facing that long stop light at the major intersection. I had to go straight through that intersection and did not want to sit there in line. There was a gravel berm on the right so I drove onto it and made a right turn at the intersection without stopping. I then did a u-turn to go back to the main light where I now needed to make a right hand turn, which I successfully made. The car was running a bit better but still not like it should. I was now out in the country with the next stop sign about two miles away. By the time I reached that stop sign, the car was running fine.
I continued on another five miles or so to a stop light where I had to make a left turn. As I slowed down, I could feel the engine beginning to run rough. There wasn't anything coming so I actually turned left while the light was red so I did not have to come to a complete stop. Further on I had various turns and stops to make with the car running fine until I slowed down. As I was entering a small town, I was third in line behind a very slow moving tractor. Not good but I even managed to pass the tractor when I had a chance. Each turn or stop after that had the same rough running as the engine neared idle. I had to nurse it after each of these situations until I was back in the garage. What was unusual was that in between these stops and slow downs, the car ran like a top.
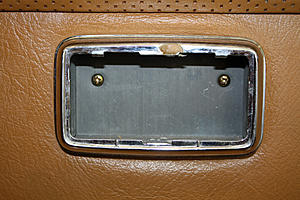
As I walked around to the rear of the car, I could smell gas fumes. I looked under the car and there were no leaks around the fuel pump and filter. I opened the license plate fuel door and the fumes were stronger. I released the gas cap and there was a ton of pressure. It actually sprayed a very small amount of gas on my hand.
By now the gas tank was half full. Which is probably another related issue as it used a half tank to go about a hundred miles. I walked the dog up to my buddy's house and we did some speculation. He asked if the gas cap was vented and I told him it did not appear to be. The problem seems to worsen as the gas tank level goes down. Those readers of this thread know that I have installed a new fuel pump, two new filters and have had the gas tank cleaned. I have also installed new plug wires, distributor cap, rotor and a new coil. I did not replace the spark plugs as they have not been in the car very long but I did remove all of them and they showed that they were burning cleanly. The car did not appear to be running rich. However, running rich is what I am suspecting when the idle deteriorated while sitting there.
Any suggestions would be appreciated.
But the big new news today was the I still have an engine running issue. I began with a full fuel tank and the car ran perfectly until I was within a mile of the guy's shop. There was an unusually long stop light at a major intersection. As the car sat there idling, I could hear and feel it running rougher and rougher. When the light turned and I gave it some fuel, it died.
Knowing that I had had an issue with warm start, I had done some research last night. One of the things mentioned was that, once the car was started, pumping the accelerator to hopefully clean out the engine only made things worse. Another point mentioned was to let the fuel pump run for a bit before trying to start it. After letting the fuel pump run, it started but I could tell it wasn't idling correctly. So I gave it gas like there was an egg on the gas pedal and I oh so slowly edged away from the intersection, with tons of unhappy people behind me. There was another stop light within a half mile where I had to make a left turn. Fortunately, that light turned green as I was approaching and I was able to make the corner and into the shop's parking lot. But it wasn't running right.
While the shop owner was going over the car, I explained to him that I might have a problem getting it to run since the car would not be cooling down. He asked if there was pressure build up in the tank so I took off the gas cap and there did not appear to be a build up with the tank still at three quarters full.
It's a busy road in front of his business. As I prepared to leave, the car started but was running roughly. It died a couple times while I was waiting to pull out. Finally, I waited until there was an opening to start the car and basically let it idle out onto the street. I managed to make it around the right hand turn at the light but was now facing that long stop light at the major intersection. I had to go straight through that intersection and did not want to sit there in line. There was a gravel berm on the right so I drove onto it and made a right turn at the intersection without stopping. I then did a u-turn to go back to the main light where I now needed to make a right hand turn, which I successfully made. The car was running a bit better but still not like it should. I was now out in the country with the next stop sign about two miles away. By the time I reached that stop sign, the car was running fine.
I continued on another five miles or so to a stop light where I had to make a left turn. As I slowed down, I could feel the engine beginning to run rough. There wasn't anything coming so I actually turned left while the light was red so I did not have to come to a complete stop. Further on I had various turns and stops to make with the car running fine until I slowed down. As I was entering a small town, I was third in line behind a very slow moving tractor. Not good but I even managed to pass the tractor when I had a chance. Each turn or stop after that had the same rough running as the engine neared idle. I had to nurse it after each of these situations until I was back in the garage. What was unusual was that in between these stops and slow downs, the car ran like a top.
As I walked around to the rear of the car, I could smell gas fumes. I looked under the car and there were no leaks around the fuel pump and filter. I opened the license plate fuel door and the fumes were stronger. I released the gas cap and there was a ton of pressure. It actually sprayed a very small amount of gas on my hand.
By now the gas tank was half full. Which is probably another related issue as it used a half tank to go about a hundred miles. I walked the dog up to my buddy's house and we did some speculation. He asked if the gas cap was vented and I told him it did not appear to be. The problem seems to worsen as the gas tank level goes down. Those readers of this thread know that I have installed a new fuel pump, two new filters and have had the gas tank cleaned. I have also installed new plug wires, distributor cap, rotor and a new coil. I did not replace the spark plugs as they have not been in the car very long but I did remove all of them and they showed that they were burning cleanly. The car did not appear to be running rich. However, running rich is what I am suspecting when the idle deteriorated while sitting there.
Any suggestions would be appreciated.
04-15-2017, 09:53 PM
#59
Member
Thread Starter
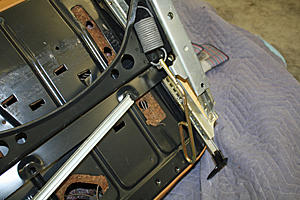
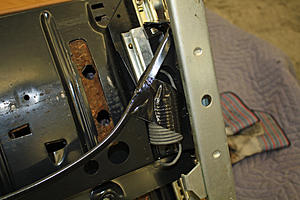
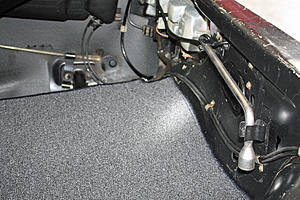
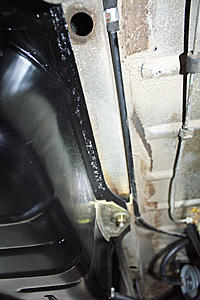
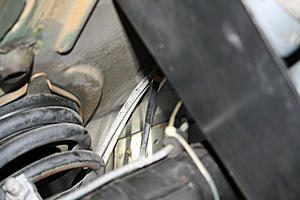
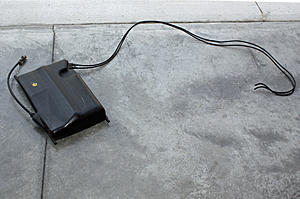
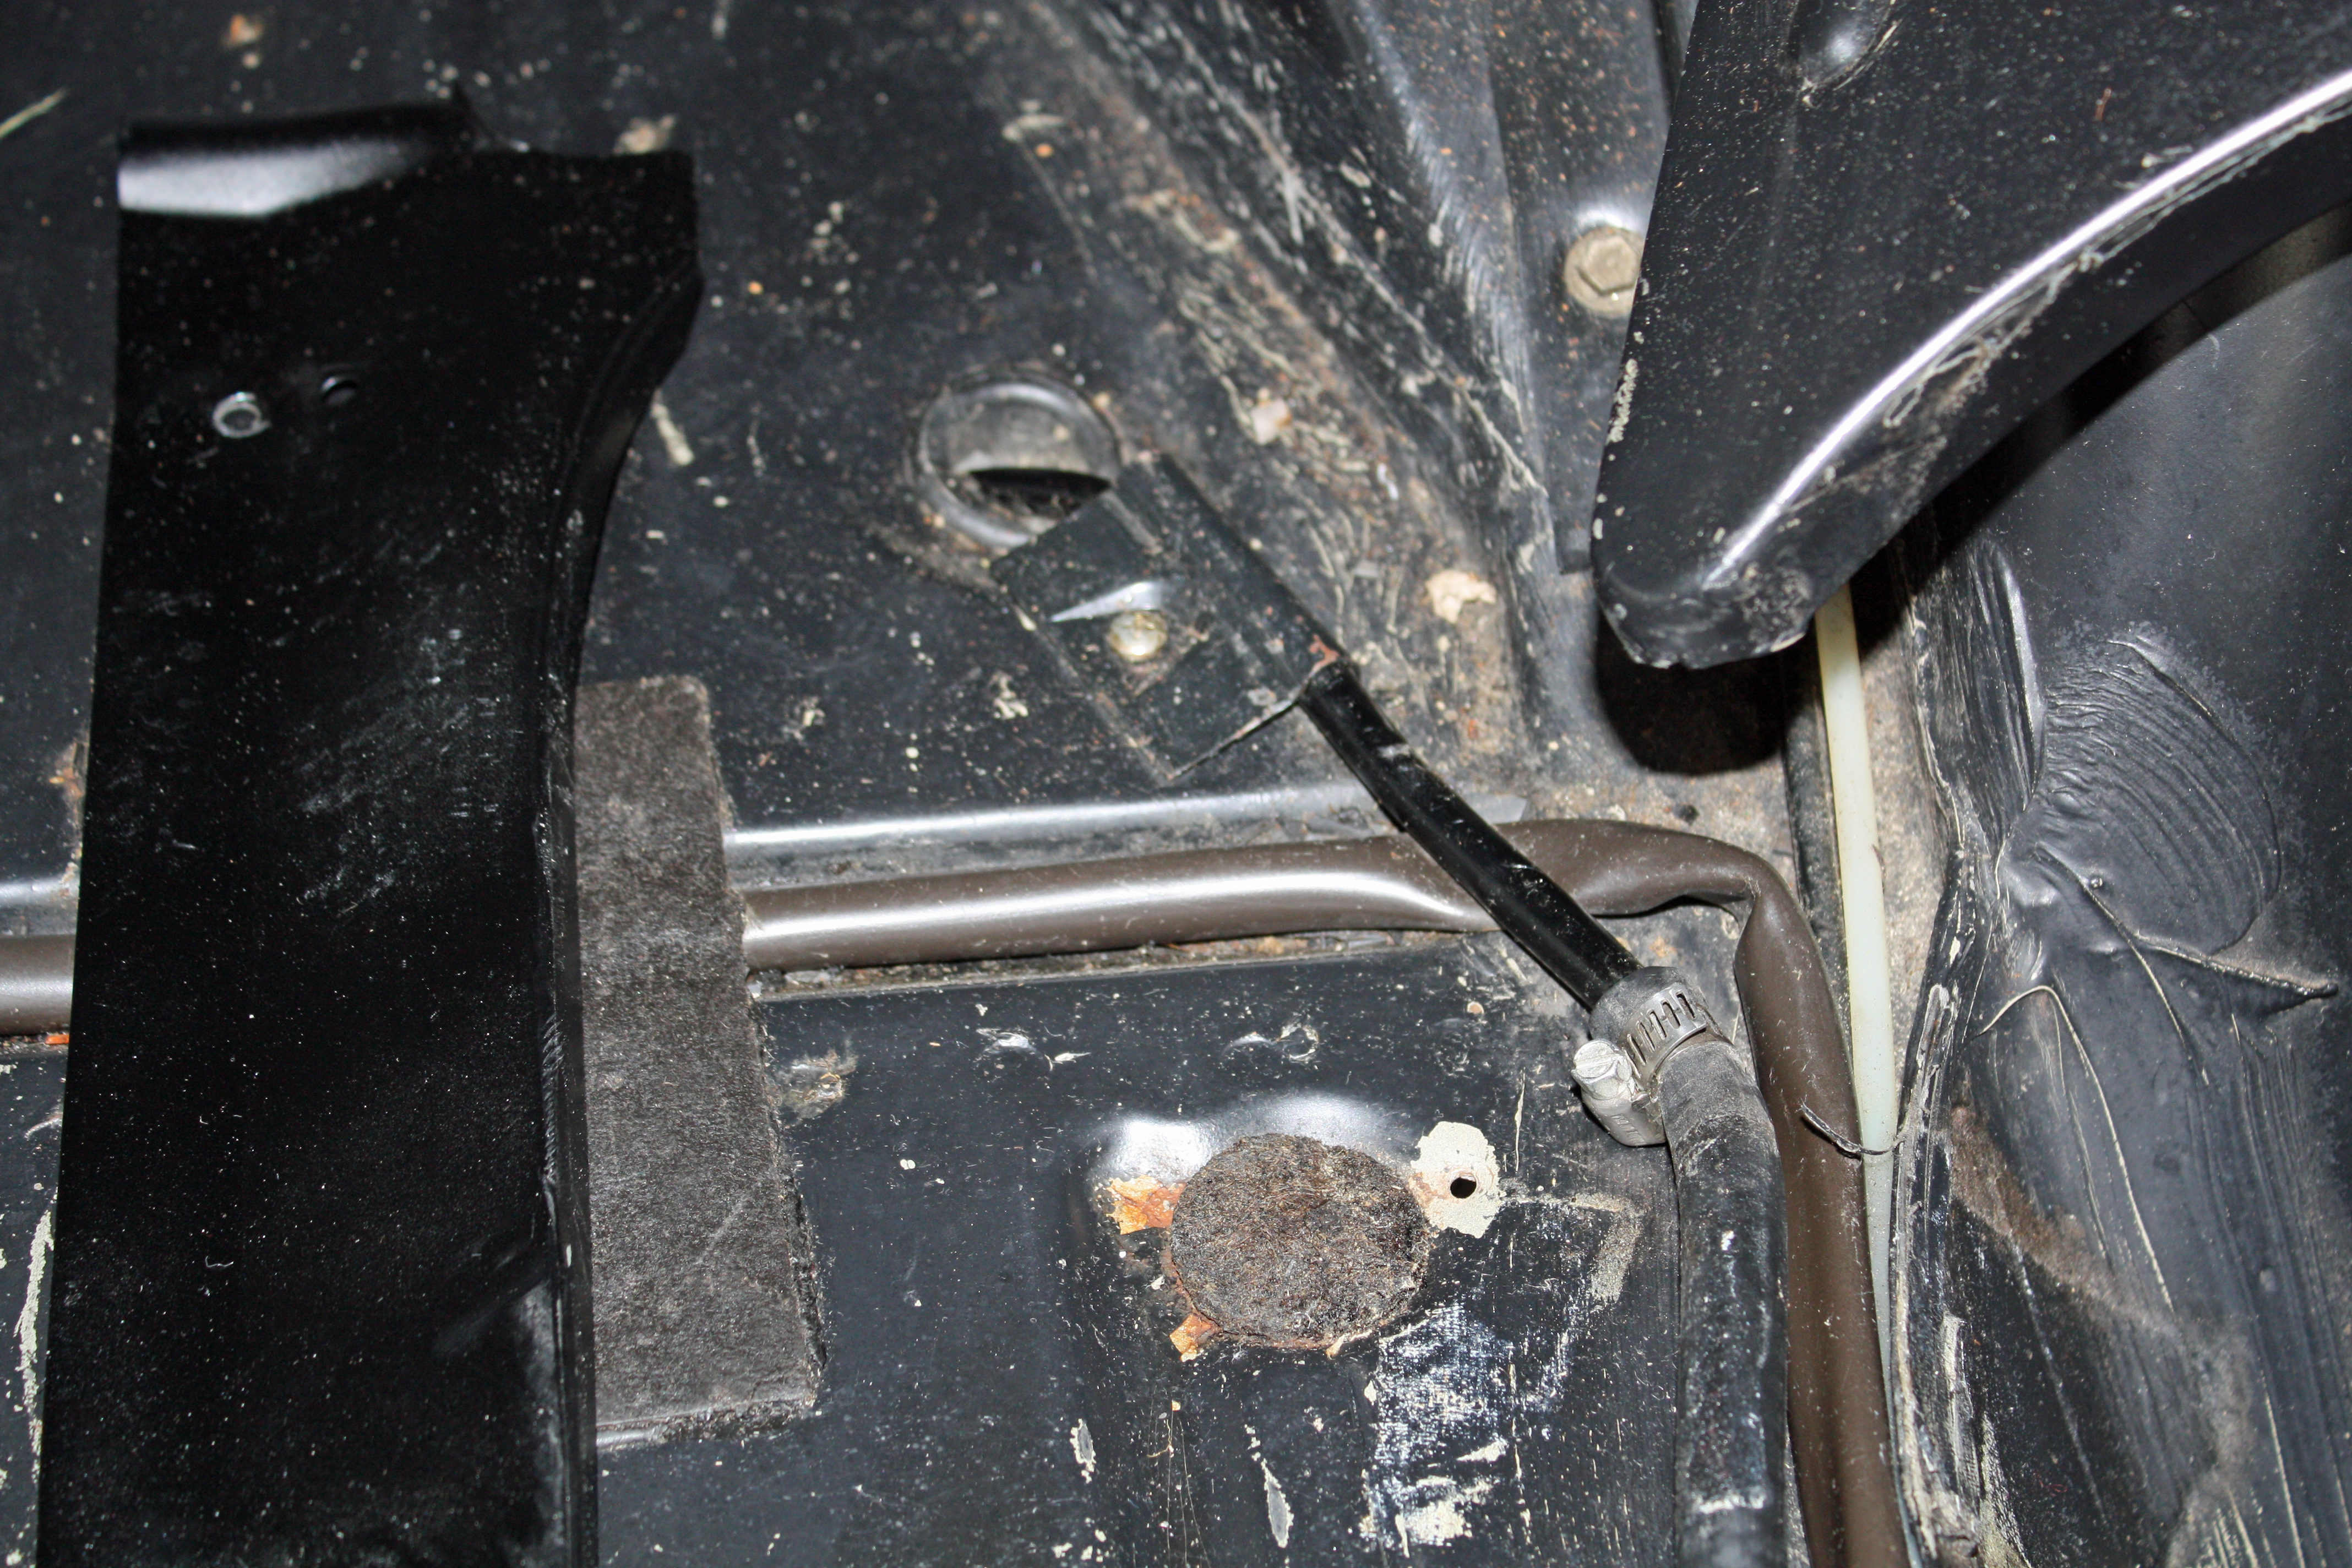
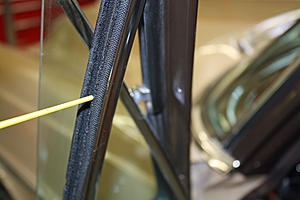
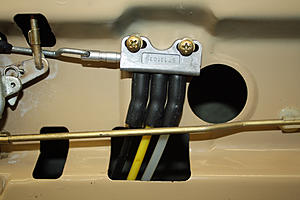
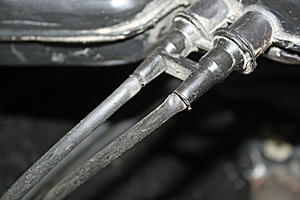
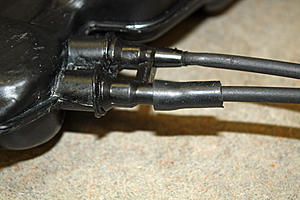
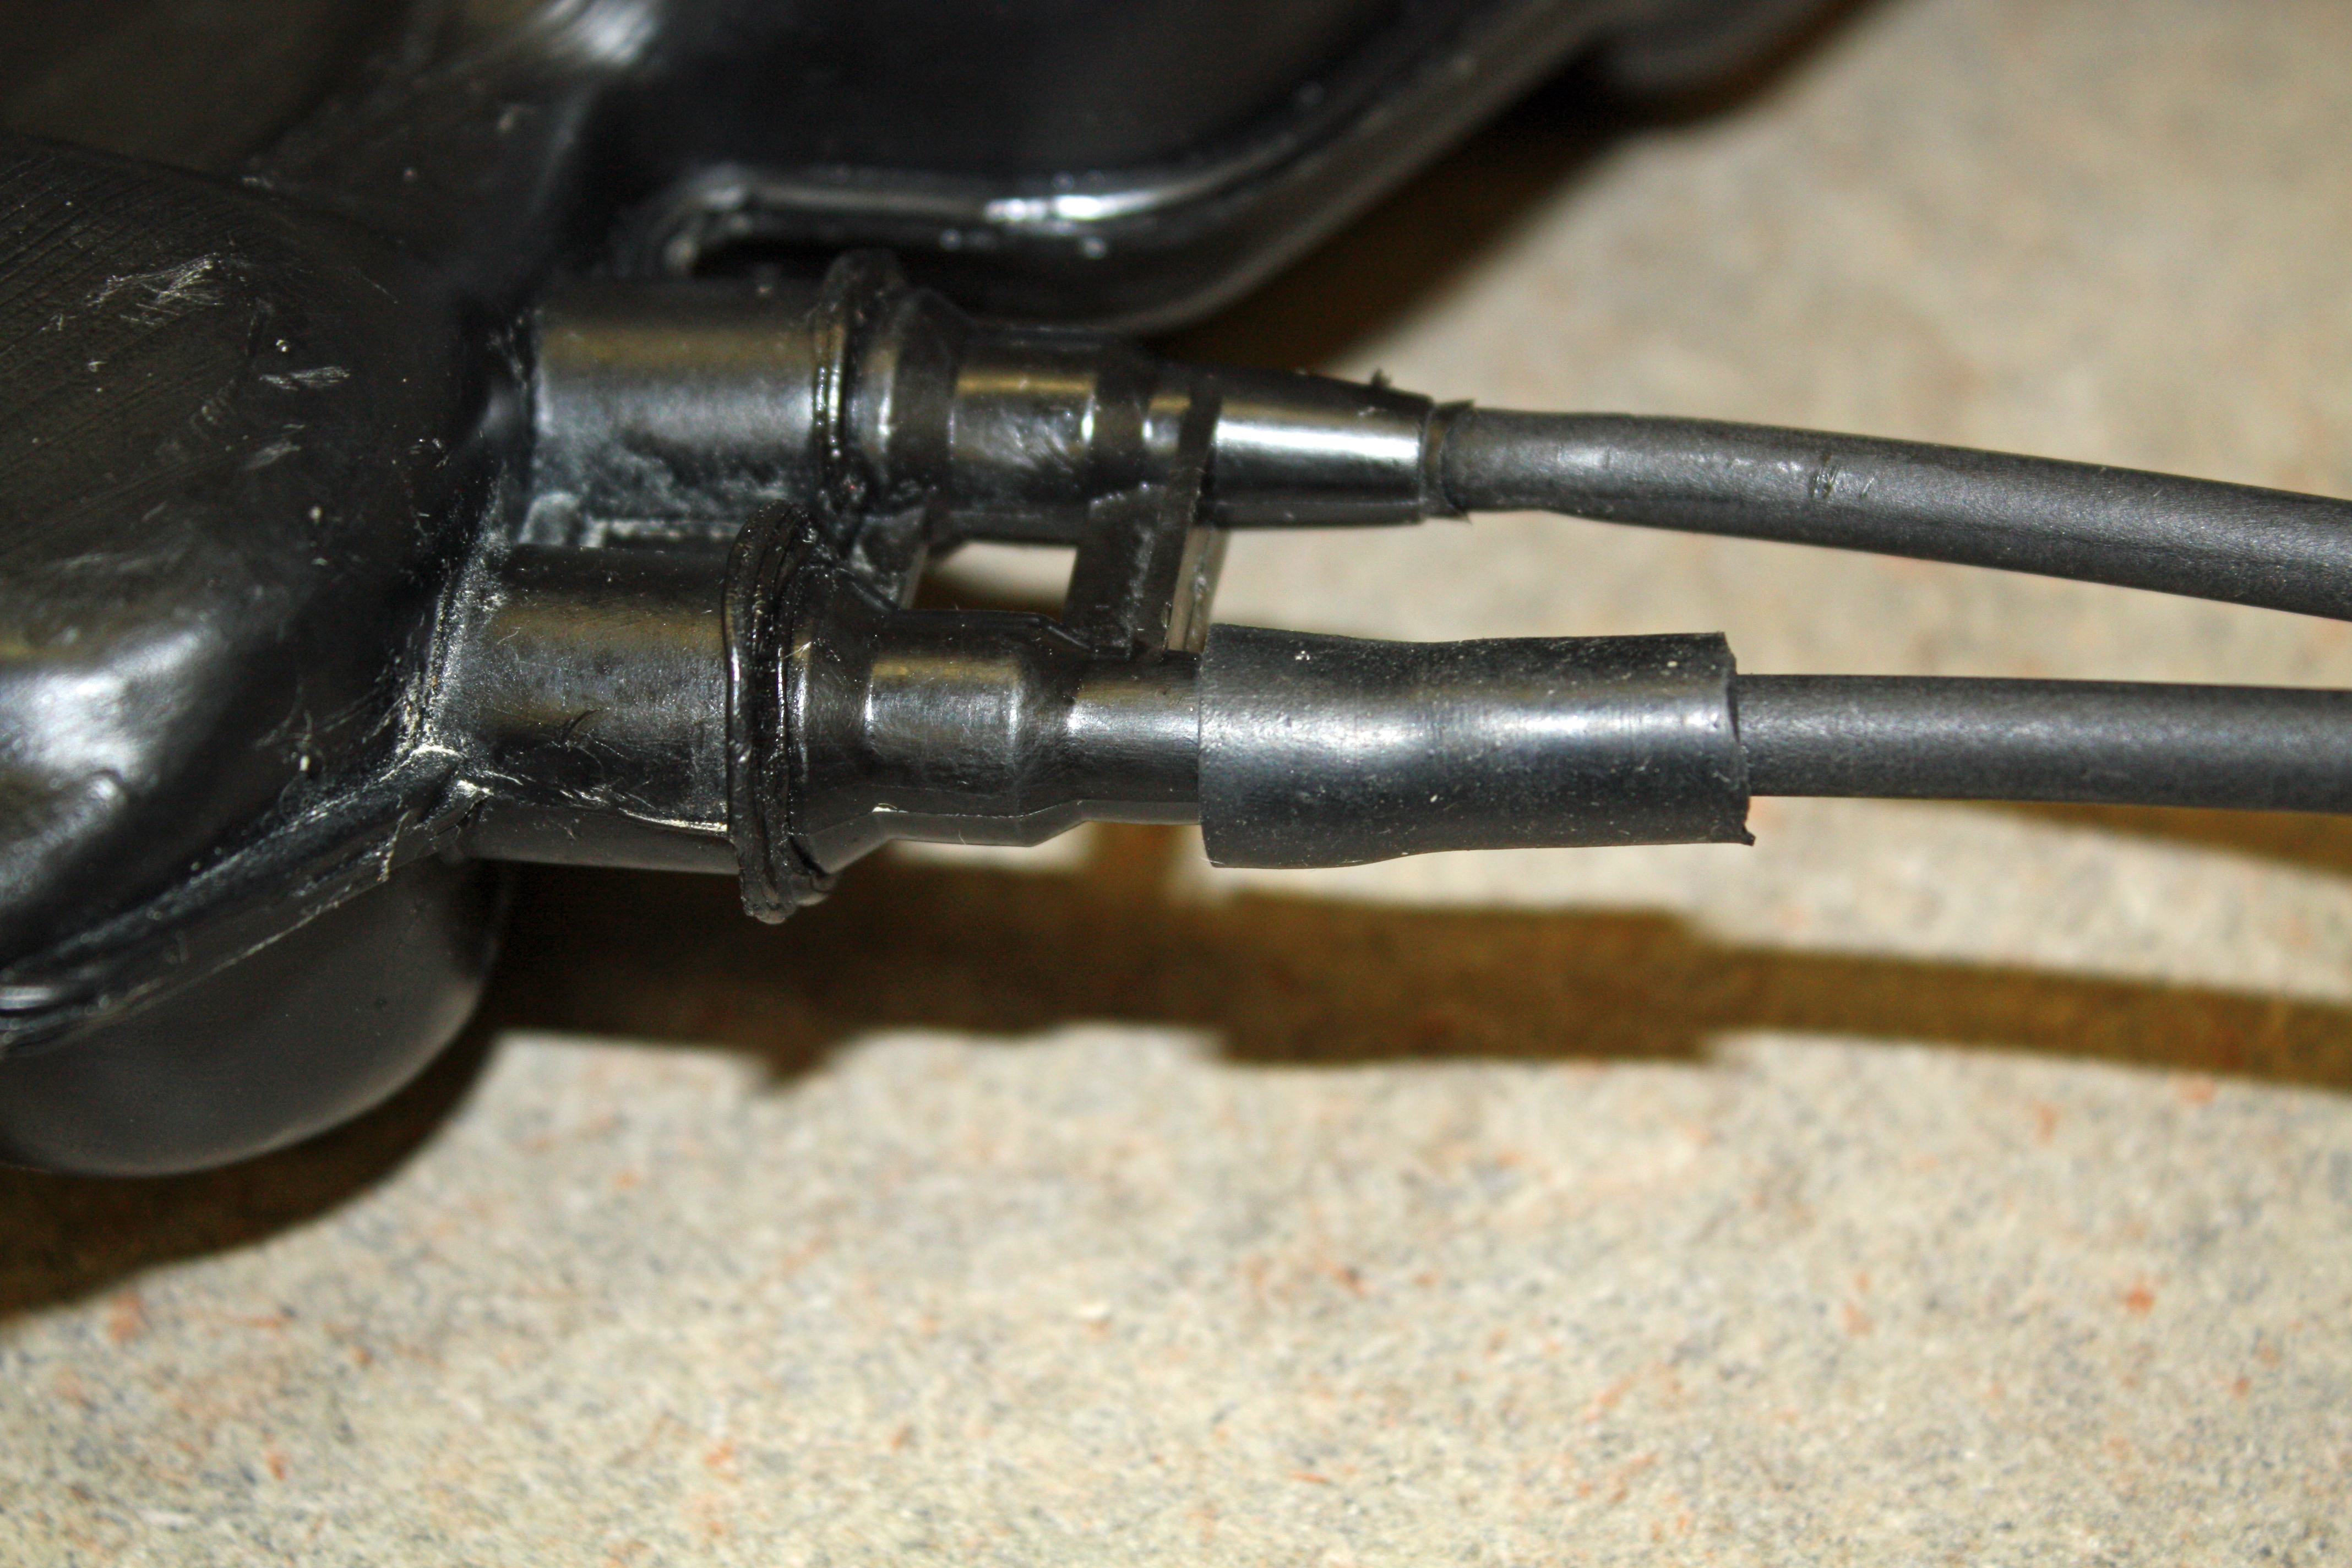
On our cars those two lines that end at the fuel tank neck go inside the trunk curve back to the right side to a large plastic piece that mounts to the inner lining behind the spare tire. The two lines enter at the bottom right and the vent line exits at the upper left. From there it runs alongside the spare tire well and then through the trunk floor. From there it runs along the back of the tank over to the left side and ends at a piece of equipment that I had asked about earlier in the thread. I did not have the car on the lift to track it from there but I believe it goes back to the engine. I had unhooked the lines just prior to taking this first photo. They were hooked up when I was driving the car yesterday.
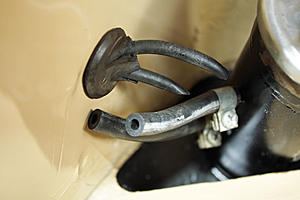
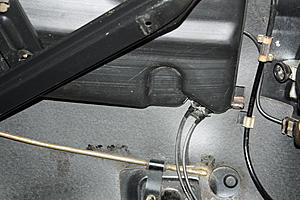
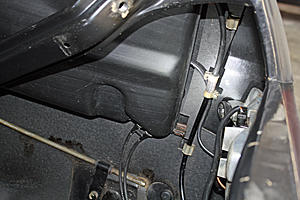
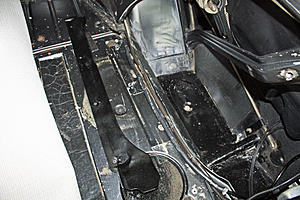
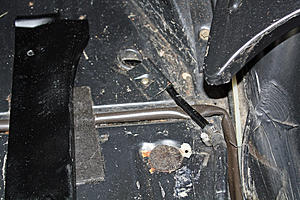
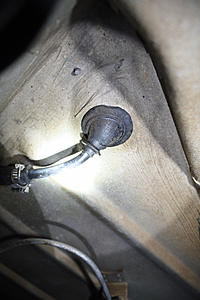
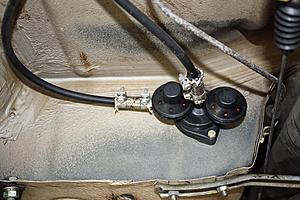
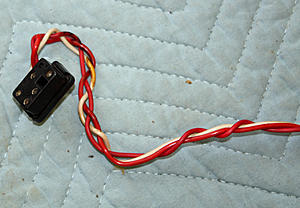
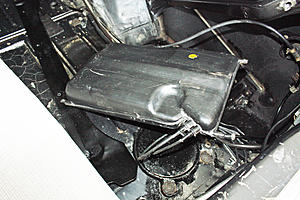
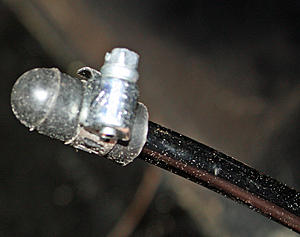
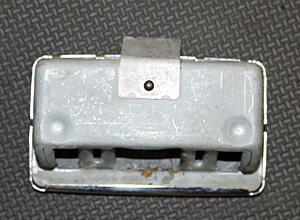
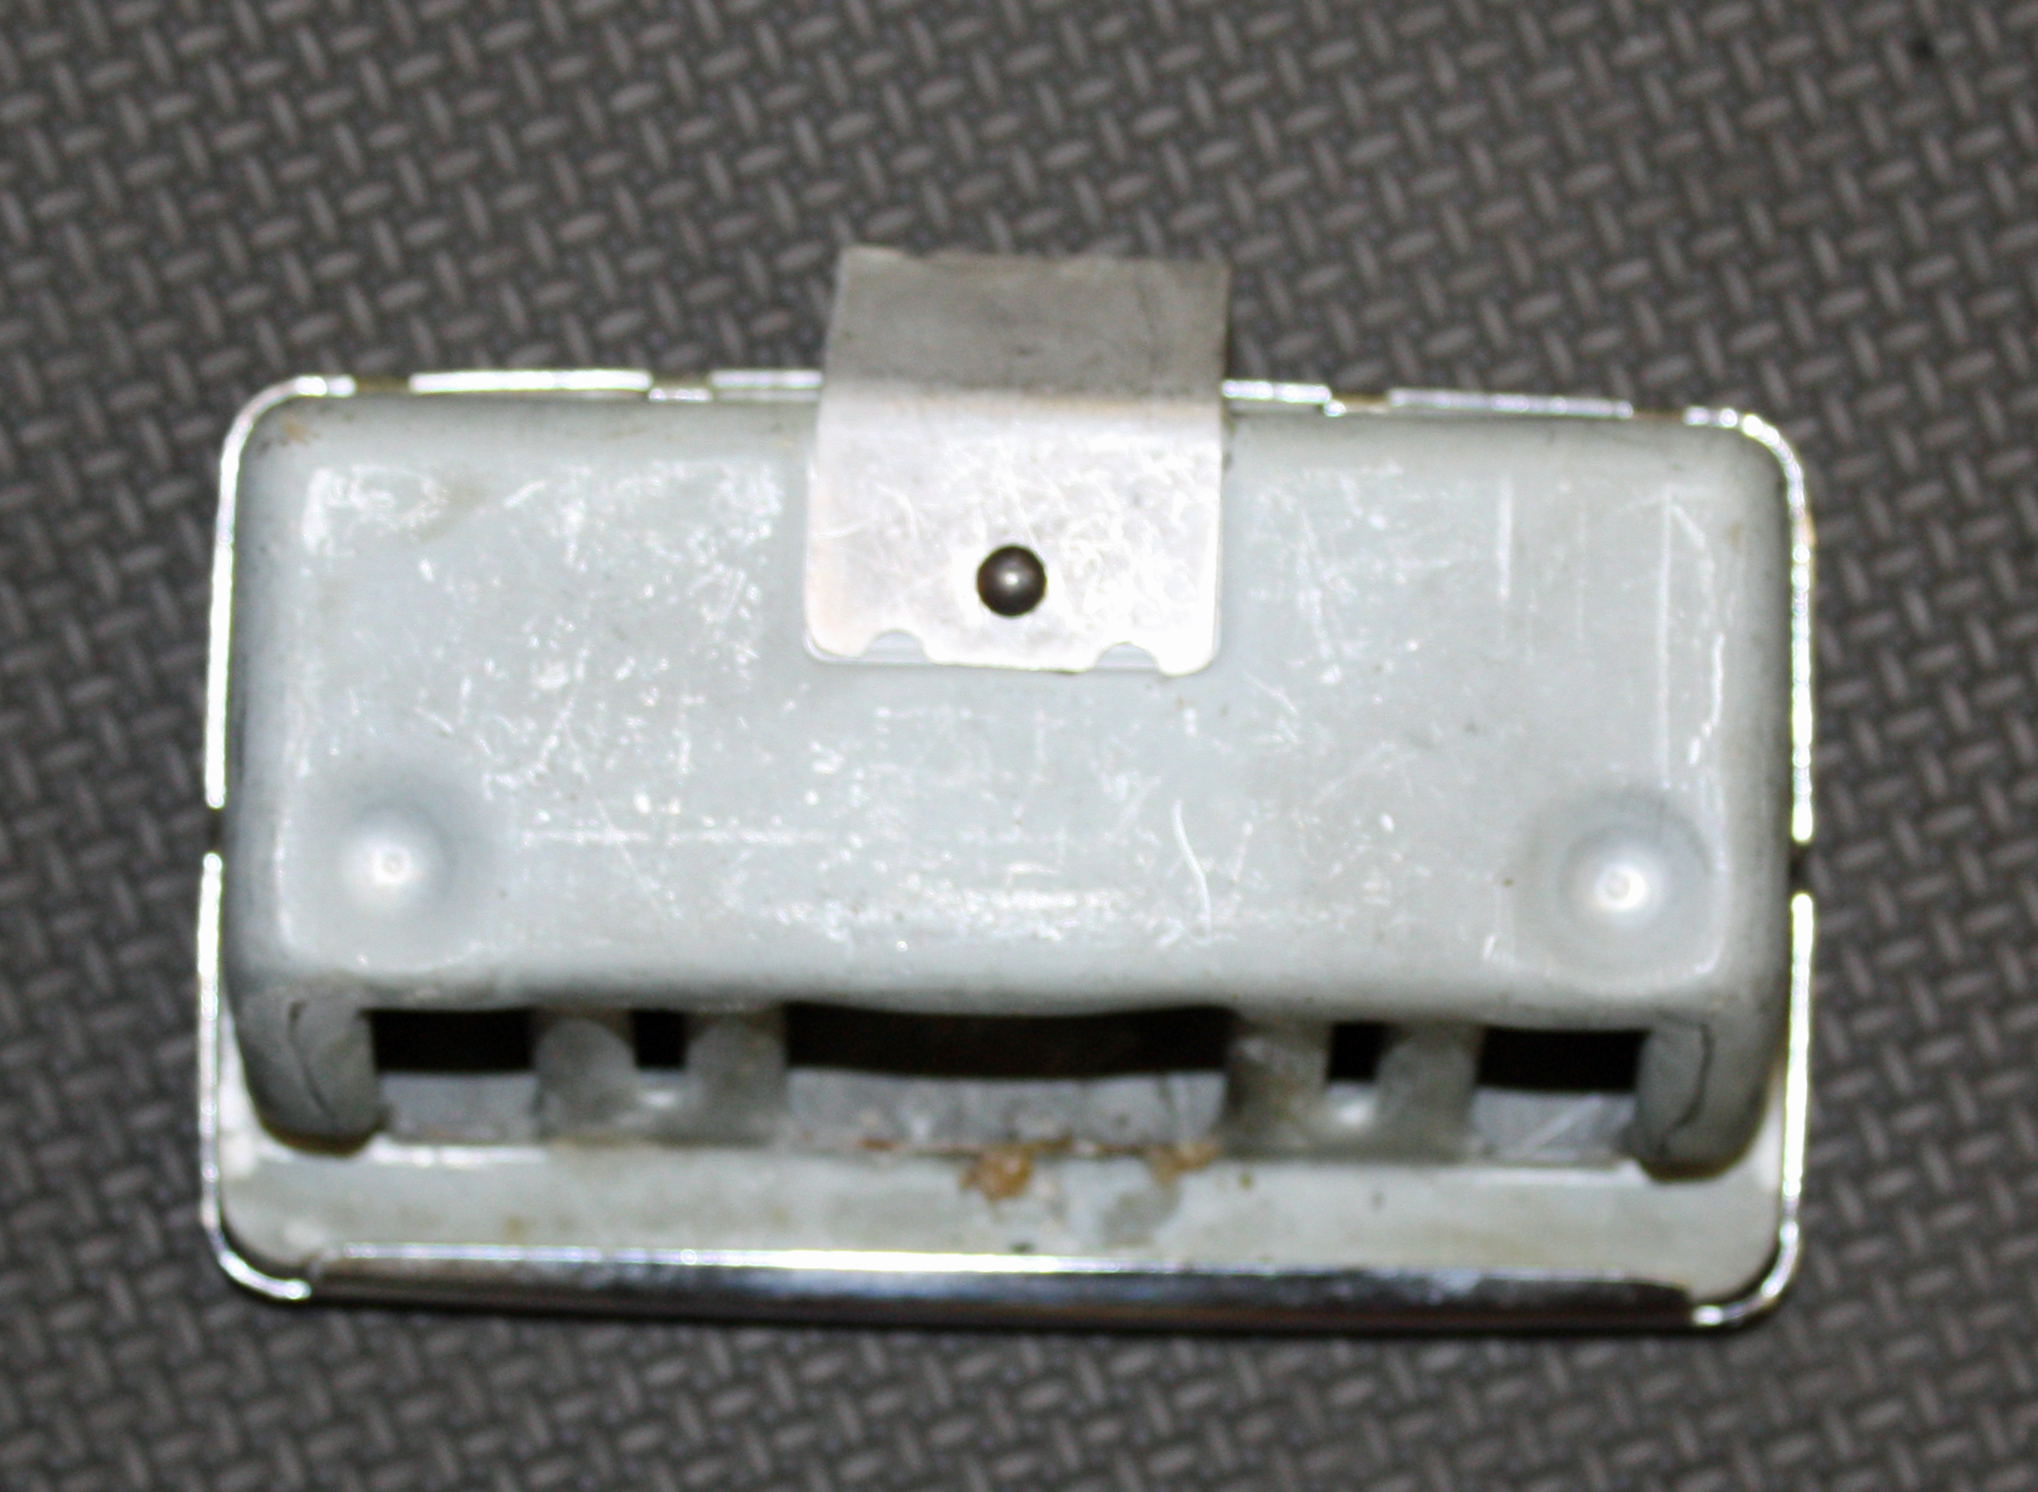
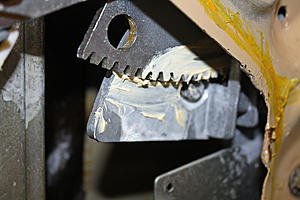
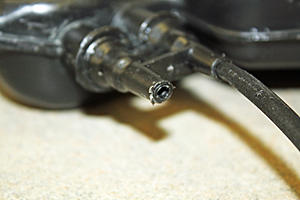
Here's what the box looks like. If you look closely at the closeup of the two connections on the bottom, you will see that the right one is pinched. There connectors appear to be molded into the box with the box and the lines coming as one piece. I haven't researched that yet. When I pulled this box out of the car, I was sprayed with some fuel from those lines. I pulled the box as it must come out if you want to remove the inner fender liner behind the spare. I removed both of them in the trunk in preparation for the paintless dent removal guy.

My temporary fix for now is to plug the hose on the bottom connection on the filler neck while adding a longer hose to the upper connection and letting it vent into the fuel filler area. After driving the car I noticed a gas smell in the trunk so I sealed that grommet where the two lines entered the trunk. I also sealed off the return line from the plastic box.

I drove the car for about 20 miles and it ran fine. Towards the end of the drive, I did notice the idle dropping when I slowed down. I saw my buddy in his yard and pulled into his driveway. We talked for about ten minutes. The engine was a hard start again but once I got it going, it ran fine down to my house. The owners manual has a section on starting the car. No gas is to be given when starting cold but it does recommend giving it gas when starting hot. I am not sure how much to give it before I would flood it. I will be experimenting here to find the right amount.
There are a number of threads about hard starting when warm but the only definitive solution seemed to be by one respondent who said all of his issues went away after he installed new injectors. That is an expensive option at this point but I do want to fix this if I can. The conjecture in the thread was that some injectors may have been leaking causing the car to run rich at low idle and startup. We are taking the car to the shop in Monday so I should have a better idea if the tank venting helped.


Here's what the box looks like. If you look closely at the closeup of the two connections on the bottom, you will see that the right one is pinched. There connectors appear to be molded into the box with the box and the lines coming as one piece. I haven't researched that yet. When I pulled this box out of the car, I was sprayed with some fuel from those lines. I pulled the box as it must come out if you want to remove the inner fender liner behind the spare. I removed both of them in the trunk in preparation for the paintless dent removal guy.


My temporary fix for now is to plug the hose on the bottom connection on the filler neck while adding a longer hose to the upper connection and letting it vent into the fuel filler area. After driving the car I noticed a gas smell in the trunk so I sealed that grommet where the two lines entered the trunk. I also sealed off the return line from the plastic box.


I drove the car for about 20 miles and it ran fine. Towards the end of the drive, I did notice the idle dropping when I slowed down. I saw my buddy in his yard and pulled into his driveway. We talked for about ten minutes. The engine was a hard start again but once I got it going, it ran fine down to my house. The owners manual has a section on starting the car. No gas is to be given when starting cold but it does recommend giving it gas when starting hot. I am not sure how much to give it before I would flood it. I will be experimenting here to find the right amount.
There are a number of threads about hard starting when warm but the only definitive solution seemed to be by one respondent who said all of his issues went away after he installed new injectors. That is an expensive option at this point but I do want to fix this if I can. The conjecture in the thread was that some injectors may have been leaking causing the car to run rich at low idle and startup. We are taking the car to the shop in Monday so I should have a better idea if the tank venting helped.
04-15-2017, 09:54 PM
#60
Member
Thread Starter
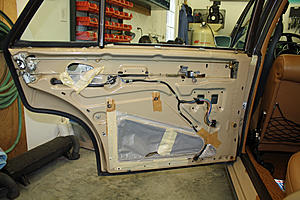
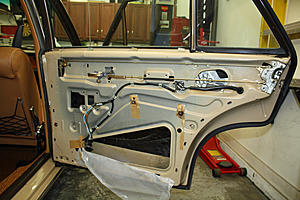
In preparation for the paintless dent repair, I removed all of the door cards. I had shown how to remove the front ones. The only difference on the rear door cards is that the ashtray must be removed to expose the two screws. To remove the ash tray, open it slightly and push down. It is spring loaded.
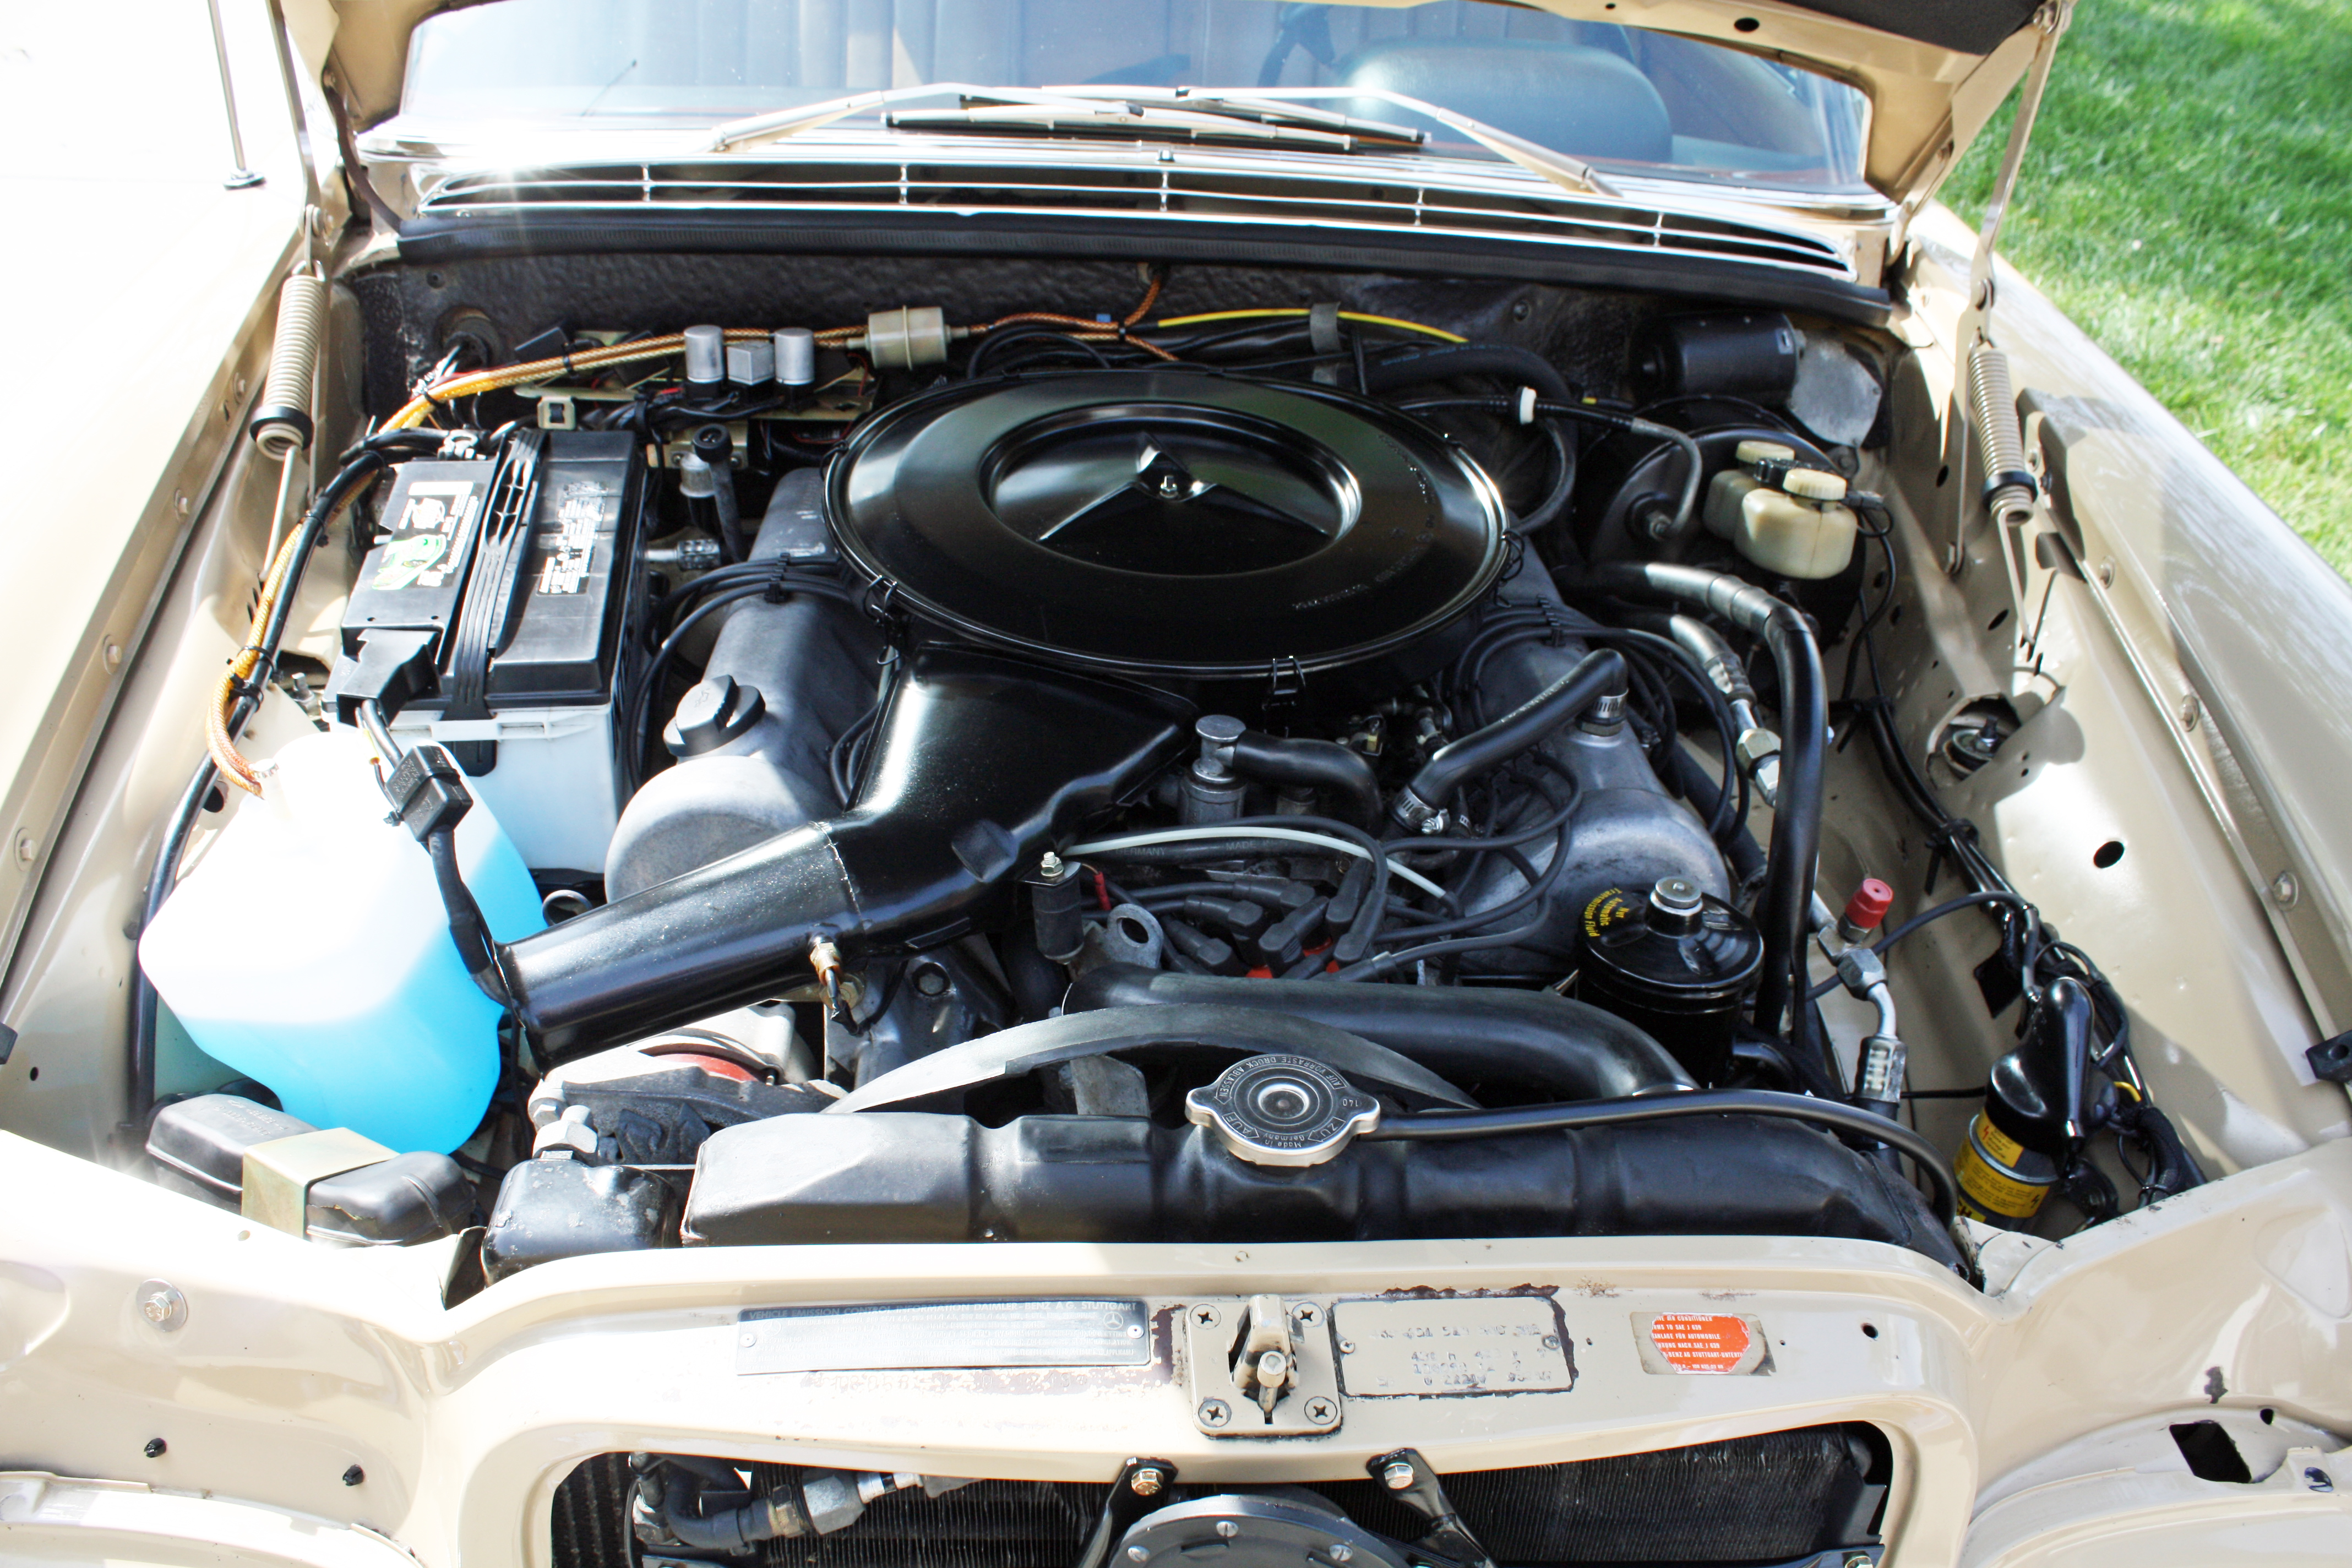
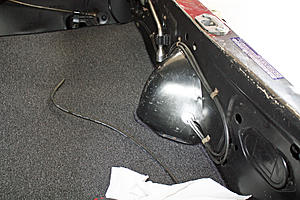
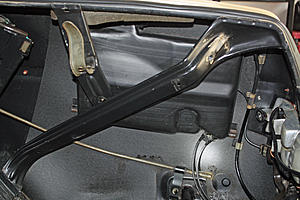
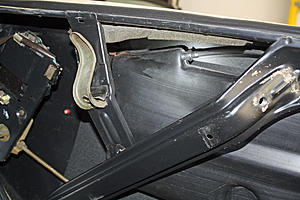
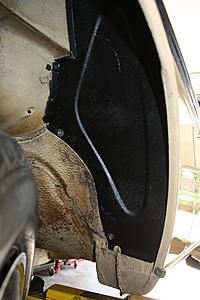
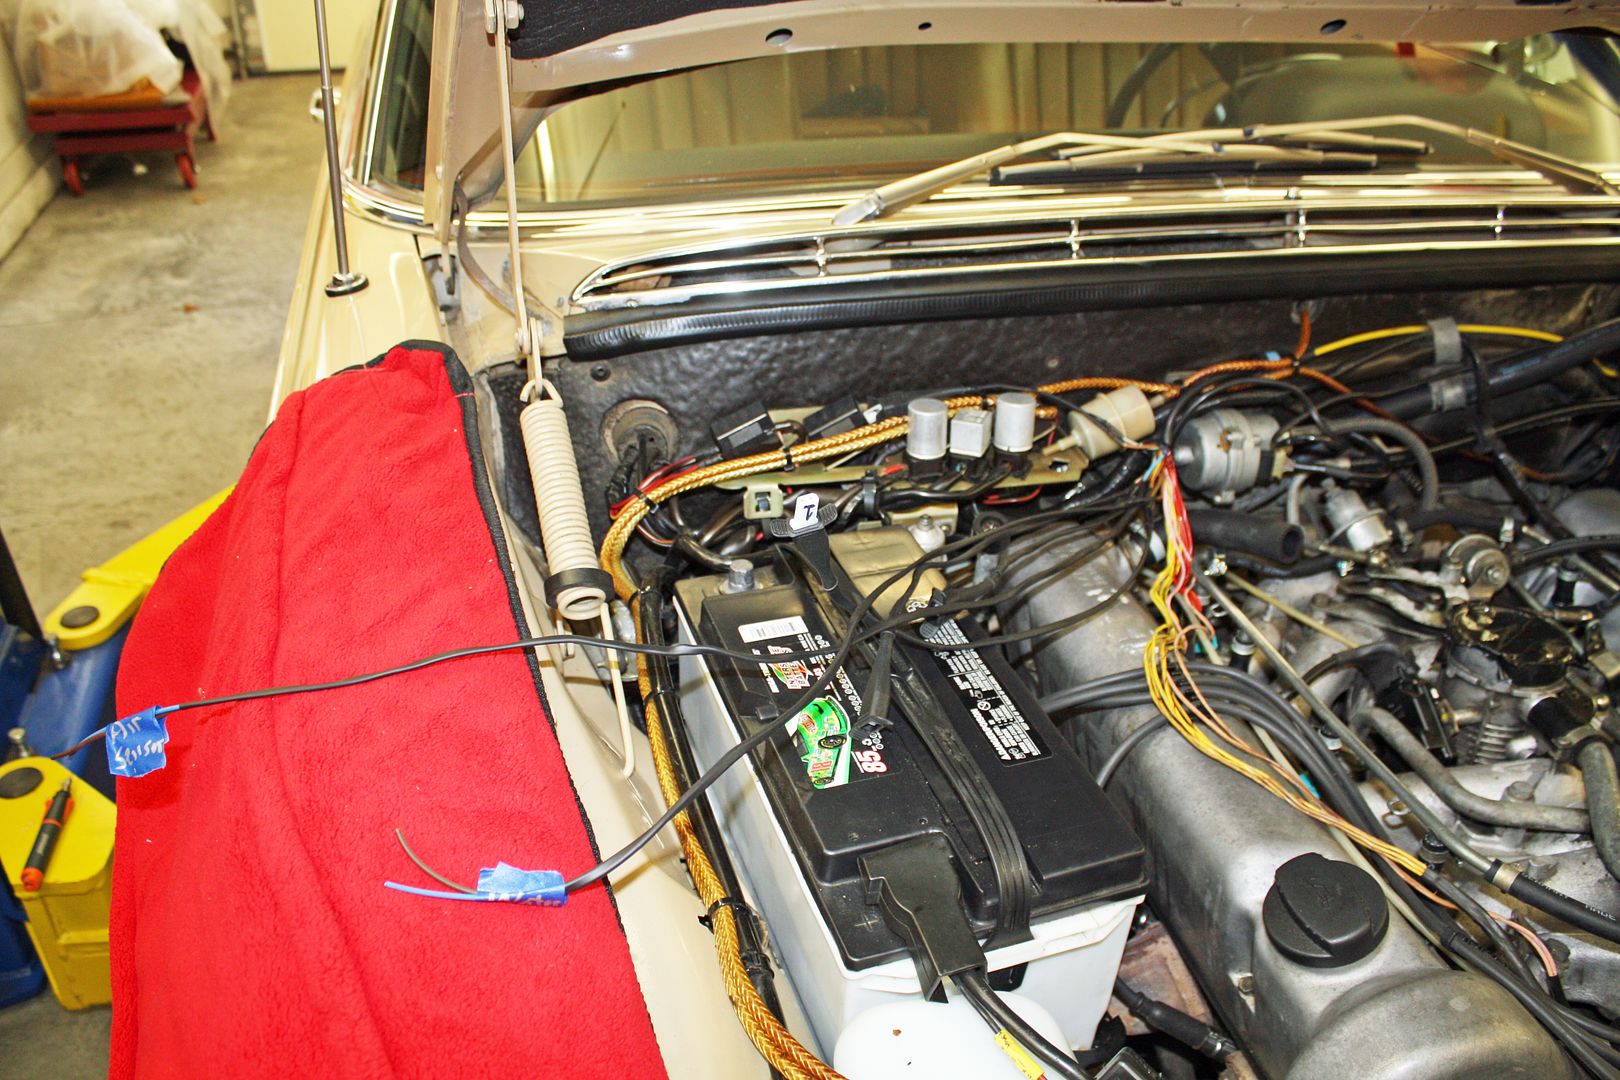
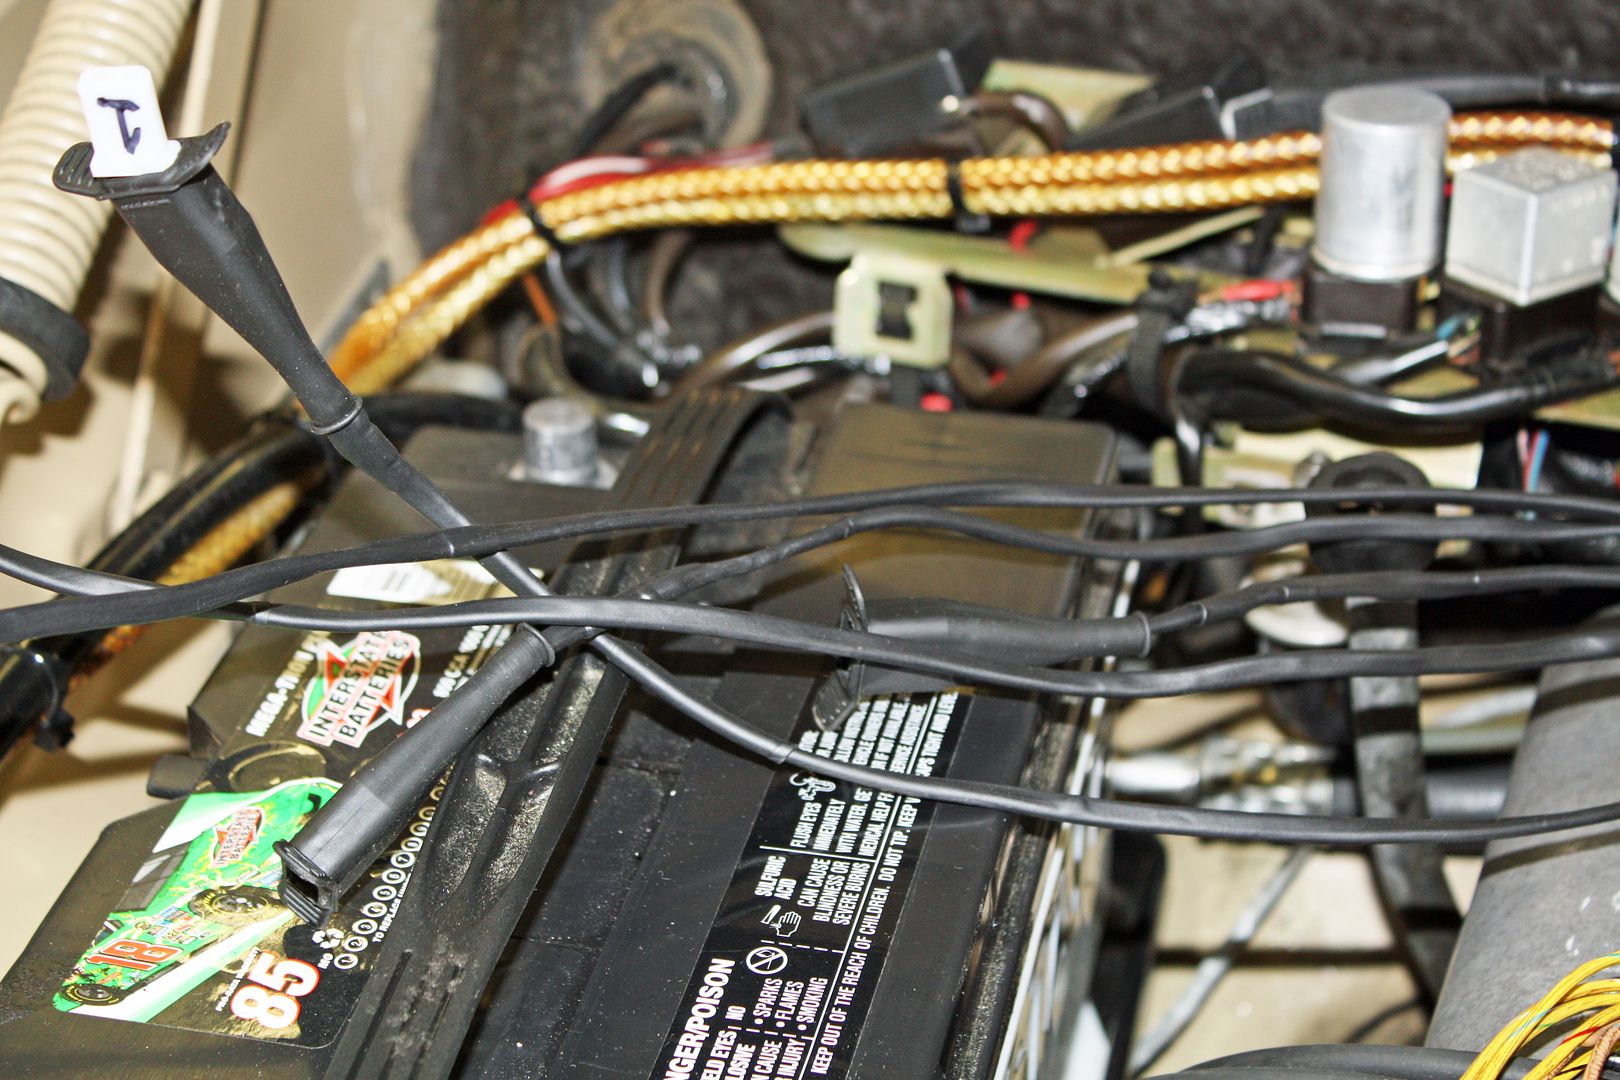
To remove the metal shields at the rear of both front wheel wells, two screws in the wheel well and two in the engine bay have to be removed. I had to remove the battery to reach the right side bottom screw in the engine bay.
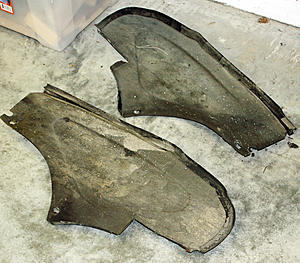
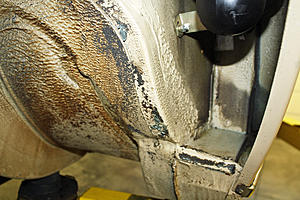
The left shield protects the vacuum accumulator while the right one protects a blower motor and the power antenna. While there was a bunch of dirt that fell out when the shields were removed, there is no rust.
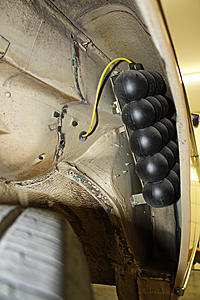
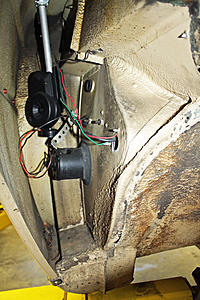
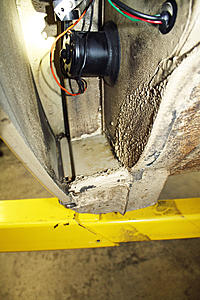
The antenna needed some attention. There was strapping there to secure the bottom of the antenna but it was not screwed to the antenna base.
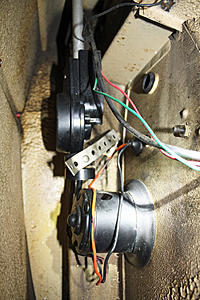
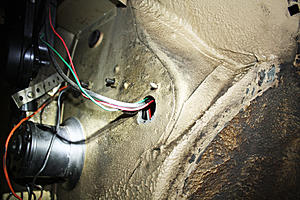
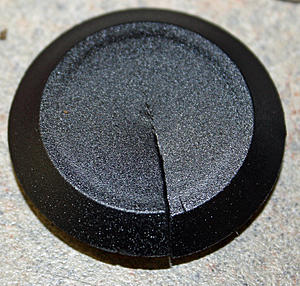
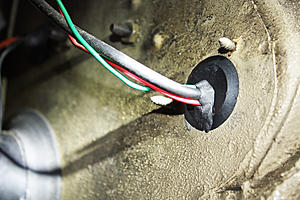
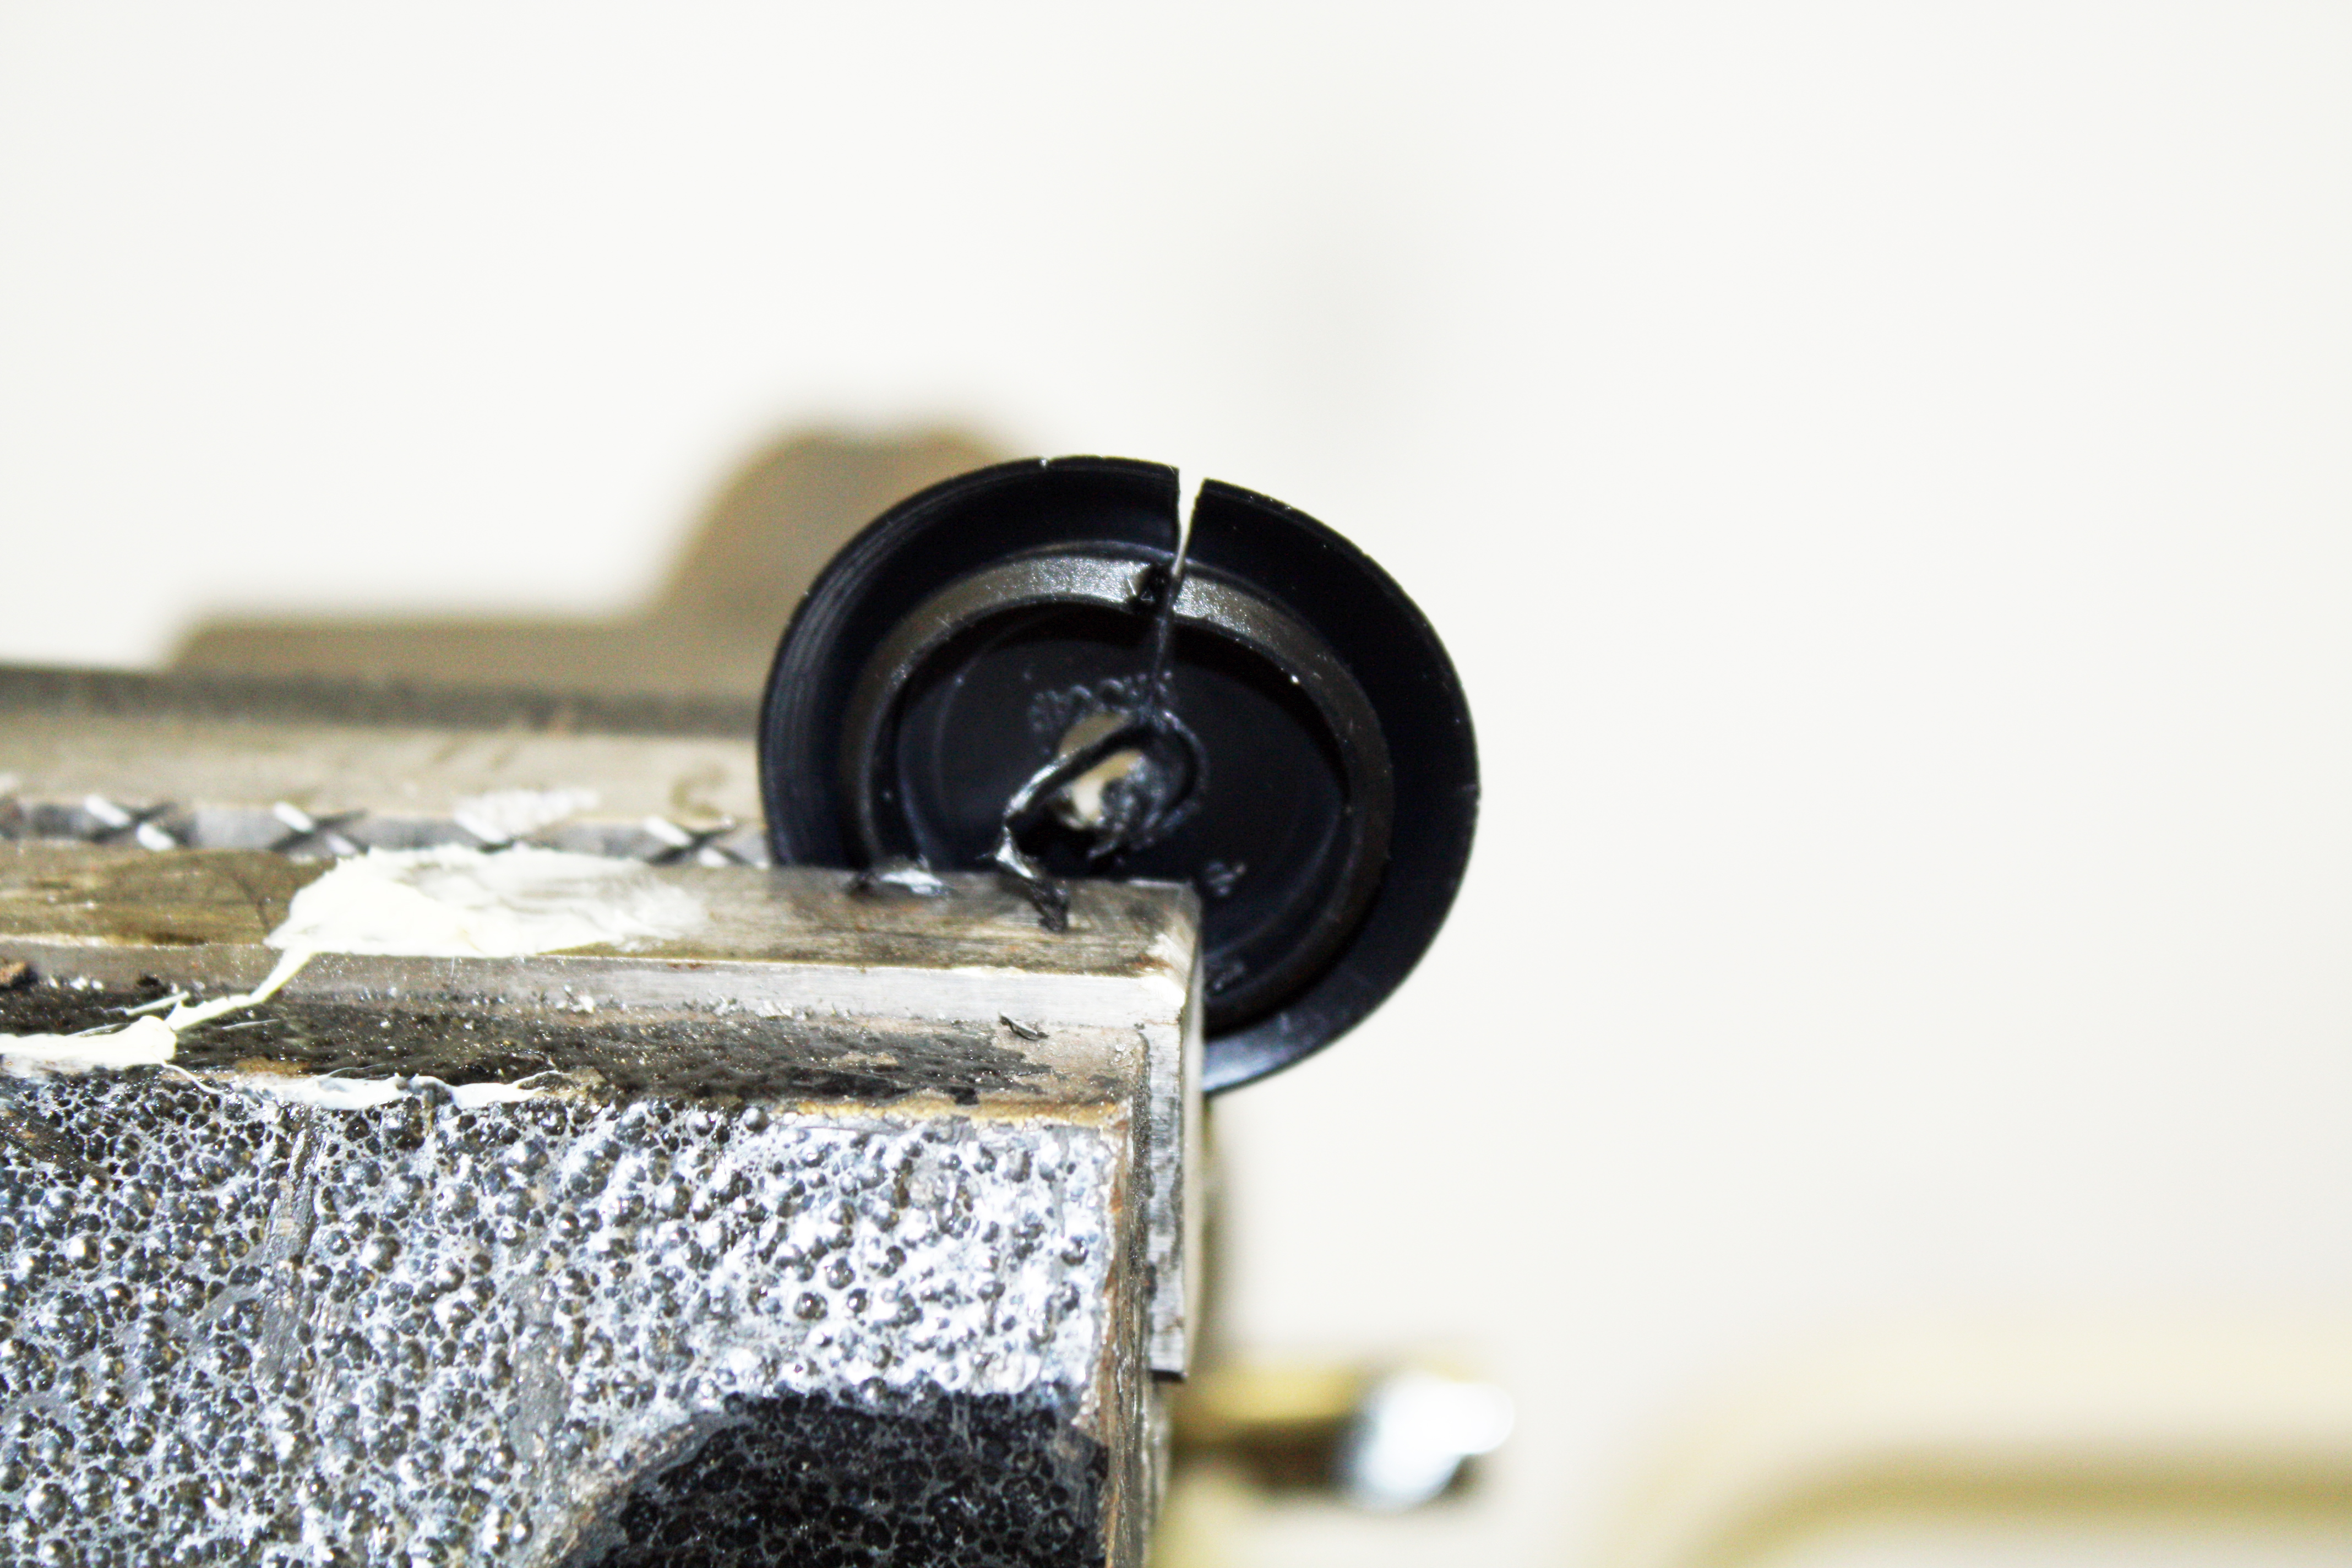
After securing the antenna, I addressed the missing grommet for the antenna wires from the interior. I had purchased a number of plastic caps for European cars. I had one that perfectly fit that hole. To make it work, I first cut a slot to the center of the cap. I then drilled a hole in the center. Now I could slip the cap over the wires. Once I had the cap snapped into the hole, I used putty to seal the center hole and the slit.


To remove the metal shields at the rear of both front wheel wells, two screws in the wheel well and two in the engine bay have to be removed. I had to remove the battery to reach the right side bottom screw in the engine bay.

The left shield protects the vacuum accumulator while the right one protects a blower motor and the power antenna. While there was a bunch of dirt that fell out when the shields were removed, there is no rust.


The antenna needed some attention. There was strapping there to secure the bottom of the antenna but it was not screwed to the antenna base.

After securing the antenna, I addressed the missing grommet for the antenna wires from the interior. I had purchased a number of plastic caps for European cars. I had one that perfectly fit that hole. To make it work, I first cut a slot to the center of the cap. I then drilled a hole in the center. Now I could slip the cap over the wires. Once I had the cap snapped into the hole, I used putty to seal the center hole and the slit.


 04-16-2017, 03:30 PM
#61
Member
Thread Starter
I think I solved the running issue today. The third owner had driven the car from Sacramento to Raleigh, NC. I had driven the car for two hours to get it home from Raleigh. Neither of us had a running issue on those drives. This got me to thinking about any part that I had changed that could have a heat related issue. The only part that came to mind was the coil.
This morning I re-installed the old coil. I drove it about 70 miles and it ran like it should . We then took the car to lunch after it had sat in the driveway for a while. It then sat at the restaurant parking lot while we ate and went through numerous stops, starts, slow downs, etc. It still ran just the way it should with no idle or dying issues. Because the coil was new I hadn't even considered that it could be the problem. Until today!
I bought the coil from Pelican and sent them a message about it today. I haven't probably put 400 miles on the car since I drove it home that day in January. As you all well know, I have been working on it most of the time. I replaced the coil as a precaution since the original coil appeared to be old. Turns out it still has some life left.
04-18-2017, 04:09 PM
#62
Member
Thread Starter
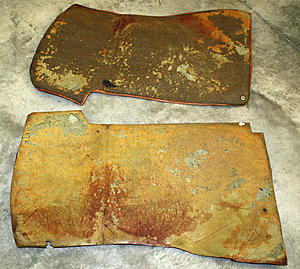
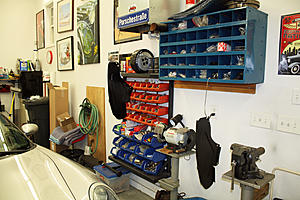
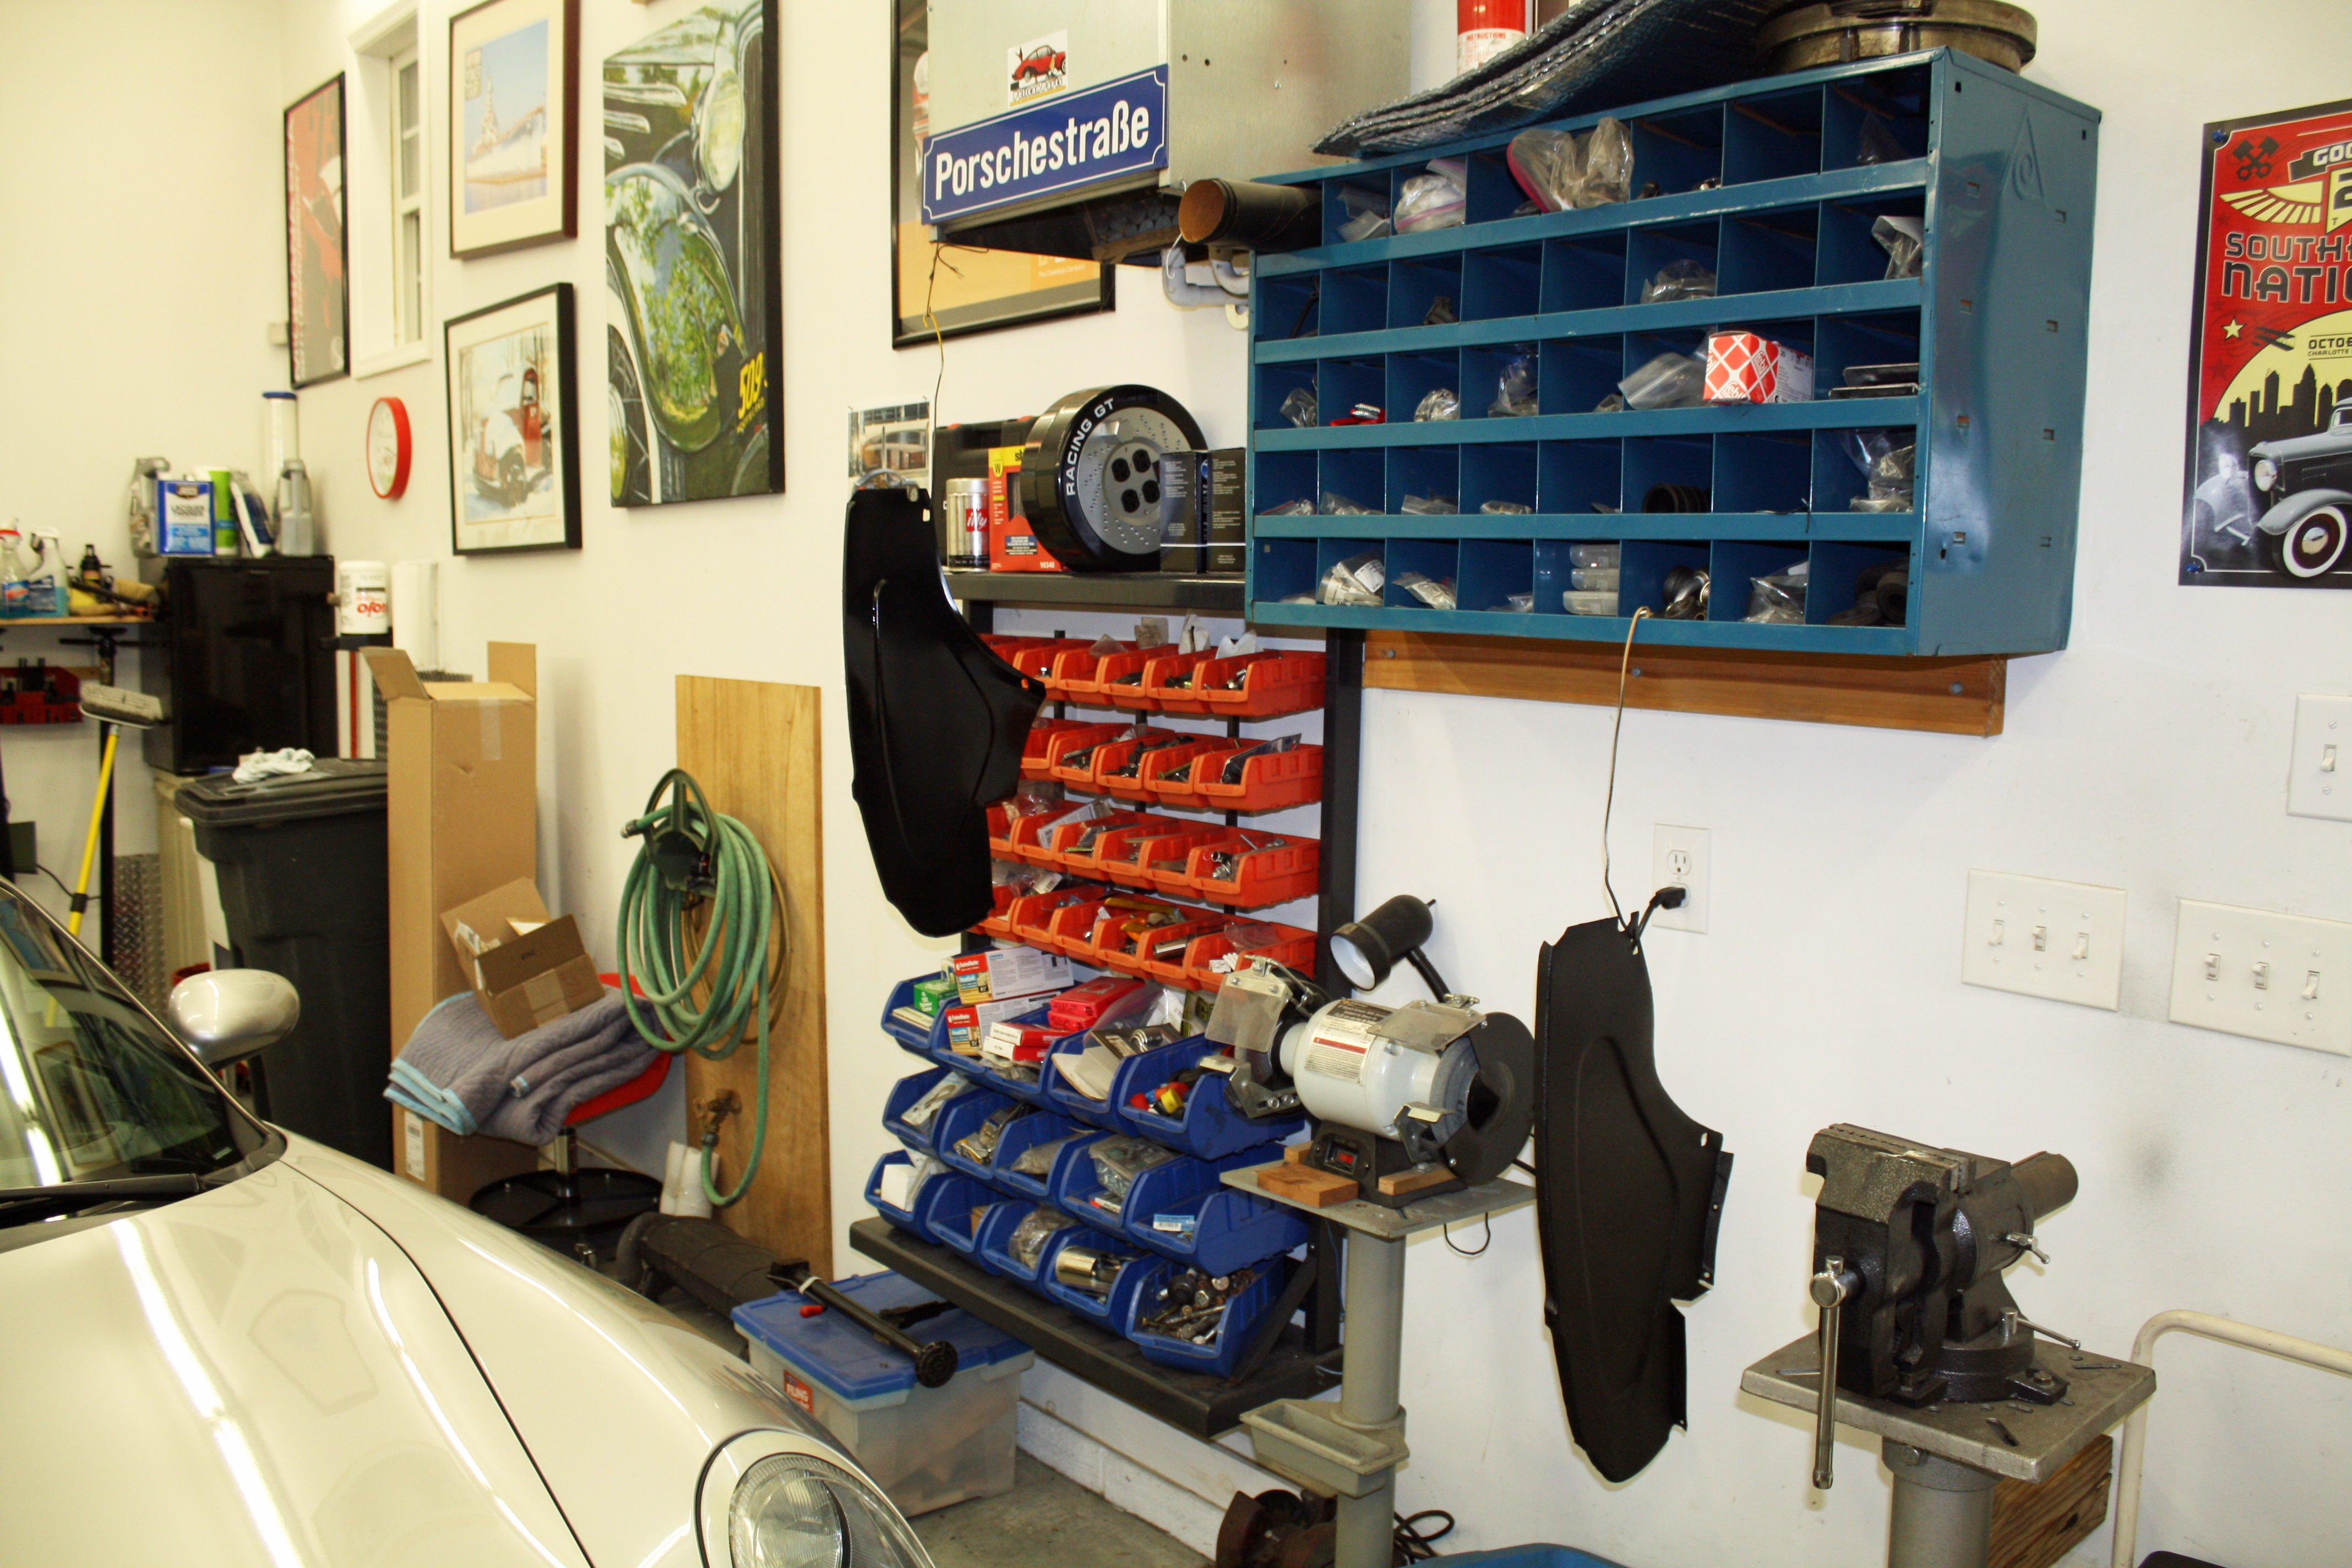
I worked on the dirt shields today. The side facing the tire has a textured surface much like that used on the rocker panels. The back side had a small amount of surface rust near the bottom where the debris sat. There is a rubber gasket on one side and strip caulking is used on the opposite side. I scraped away that caulking before I put the pieces in the bead blaster.
While I thoroughly cleaned up the paint on the back side, I only lightly blasted the textured side so it would be cleaner and to remove grease.
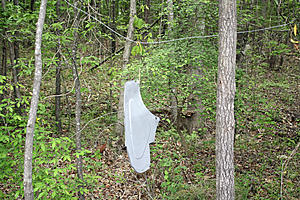
From another previous project, I had a can of black textured paint to use on the textured side. After thoroughly cleaning the shields and going over them with some denatured alcohol, I was ready to paint. I have stretched a piece of wire between two small trees in my backyard. With the hooks I have made from coat hangers, I hung the shields and painted away.

While I thoroughly cleaned up the paint on the back side, I only lightly blasted the textured side so it would be cleaner and to remove grease.


From another previous project, I had a can of black textured paint to use on the textured side. After thoroughly cleaning the shields and going over them with some denatured alcohol, I was ready to paint. I have stretched a piece of wire between two small trees in my backyard. With the hooks I have made from coat hangers, I hung the shields and painted away.


 04-19-2017, 04:24 PM
#63
Member
Thread Starter
Cleaning day today. The rubber gaskets for the dirt shields are in very good shape but they were dirty.
When I had replaced the door check strap on the driver's door, I had cleaned up the door trim for that door card. The rest of them received a similar cleaning today using chrome polish.
With the trim ready to go, I then did a thorough cleaning on each door card. They are ready to go back on the doors.

When I had replaced the door check strap on the driver's door, I had cleaned up the door trim for that door card. The rest of them received a similar cleaning today using chrome polish.


With the trim ready to go, I then did a thorough cleaning on each door card. They are ready to go back on the doors.
 04-20-2017, 06:42 PM
#65
Member
Thread Starter
I had found a wheel to replace the original one with the hogged out bolt holes. The spare tire was mounted on it today.
I received the replacement coil today. Another one made in Brazil. I am picking up the car from the paintless dent repair shop in the morning. I will bolt on the new coil to make sure it works.
Chances of rain each day this weekend will be a perfect time for putting the car back together.
I received the replacement coil today. Another one made in Brazil. I am picking up the car from the paintless dent repair shop in the morning. I will bolt on the new coil to make sure it works.
Chances of rain each day this weekend will be a perfect time for putting the car back together.
04-22-2017, 07:39 PM
#66
Member
Thread Starter
I picked up a computer virus while searching for information on fixing the clock in the car. Nothing seemed to work so I was at the Apple store early this morning for the fix. Took them all of ten minutes and I am back to normal. Well worth the trip.
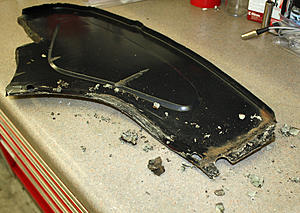
Because of that, I only had a couple hours to spend on the car. I picked it up yesterday at the Paintless Dent Repair (PDR). The guy did a fantastic job. I had dents on top of both front fenders, on the hood and various other places around the car. He was able to peel back the pad to get to the hood dent. None of them are visible now. There were a couple small ones that were in places that were not accessible for his tools. Count me pleased.
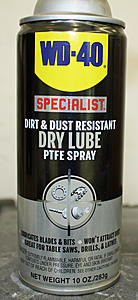
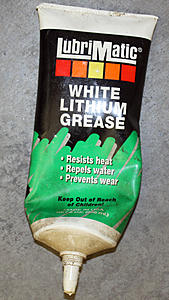
Today I lubricated all of the window tracks. I found a dry lubricant that I used on the felt window guides and I used white lithium grease on the slides and the gears. I also sprayed some while lithium on all of he door know joints. The front windows had been going up and down fairly quickly but the rears were very slow. There was little to no lubrication on the rear windows. They now go up and down nearly as fast as the front windows.
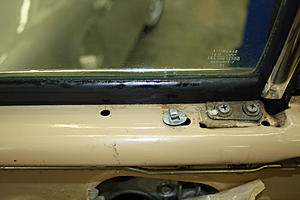
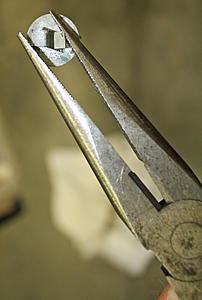
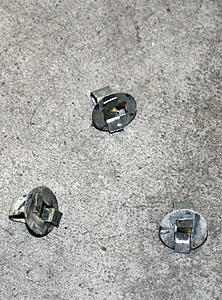
Before cleaning the doors, I removed all of the metal door card fasteners that had become stuck in the doors. Later I will transfer them to the door cards.
I also inspected the rubber vacuum connections for the door locks. There were in very good shape and the door locks are working well.
Now it was time to clean the doors and polish the interior door chrome trim. Now that the doors are clean, I can replace the plastic water protectors and begin putting everything back together.
Because of that, I only had a couple hours to spend on the car. I picked it up yesterday at the Paintless Dent Repair (PDR). The guy did a fantastic job. I had dents on top of both front fenders, on the hood and various other places around the car. He was able to peel back the pad to get to the hood dent. None of them are visible now. There were a couple small ones that were in places that were not accessible for his tools. Count me pleased.
Today I lubricated all of the window tracks. I found a dry lubricant that I used on the felt window guides and I used white lithium grease on the slides and the gears. I also sprayed some while lithium on all of he door know joints. The front windows had been going up and down fairly quickly but the rears were very slow. There was little to no lubrication on the rear windows. They now go up and down nearly as fast as the front windows.


Before cleaning the doors, I removed all of the metal door card fasteners that had become stuck in the doors. Later I will transfer them to the door cards.


I also inspected the rubber vacuum connections for the door locks. There were in very good shape and the door locks are working well.

Now it was time to clean the doors and polish the interior door chrome trim. Now that the doors are clean, I can replace the plastic water protectors and begin putting everything back together.

 04-23-2017, 09:22 PM
#67
Member
Thread Starter
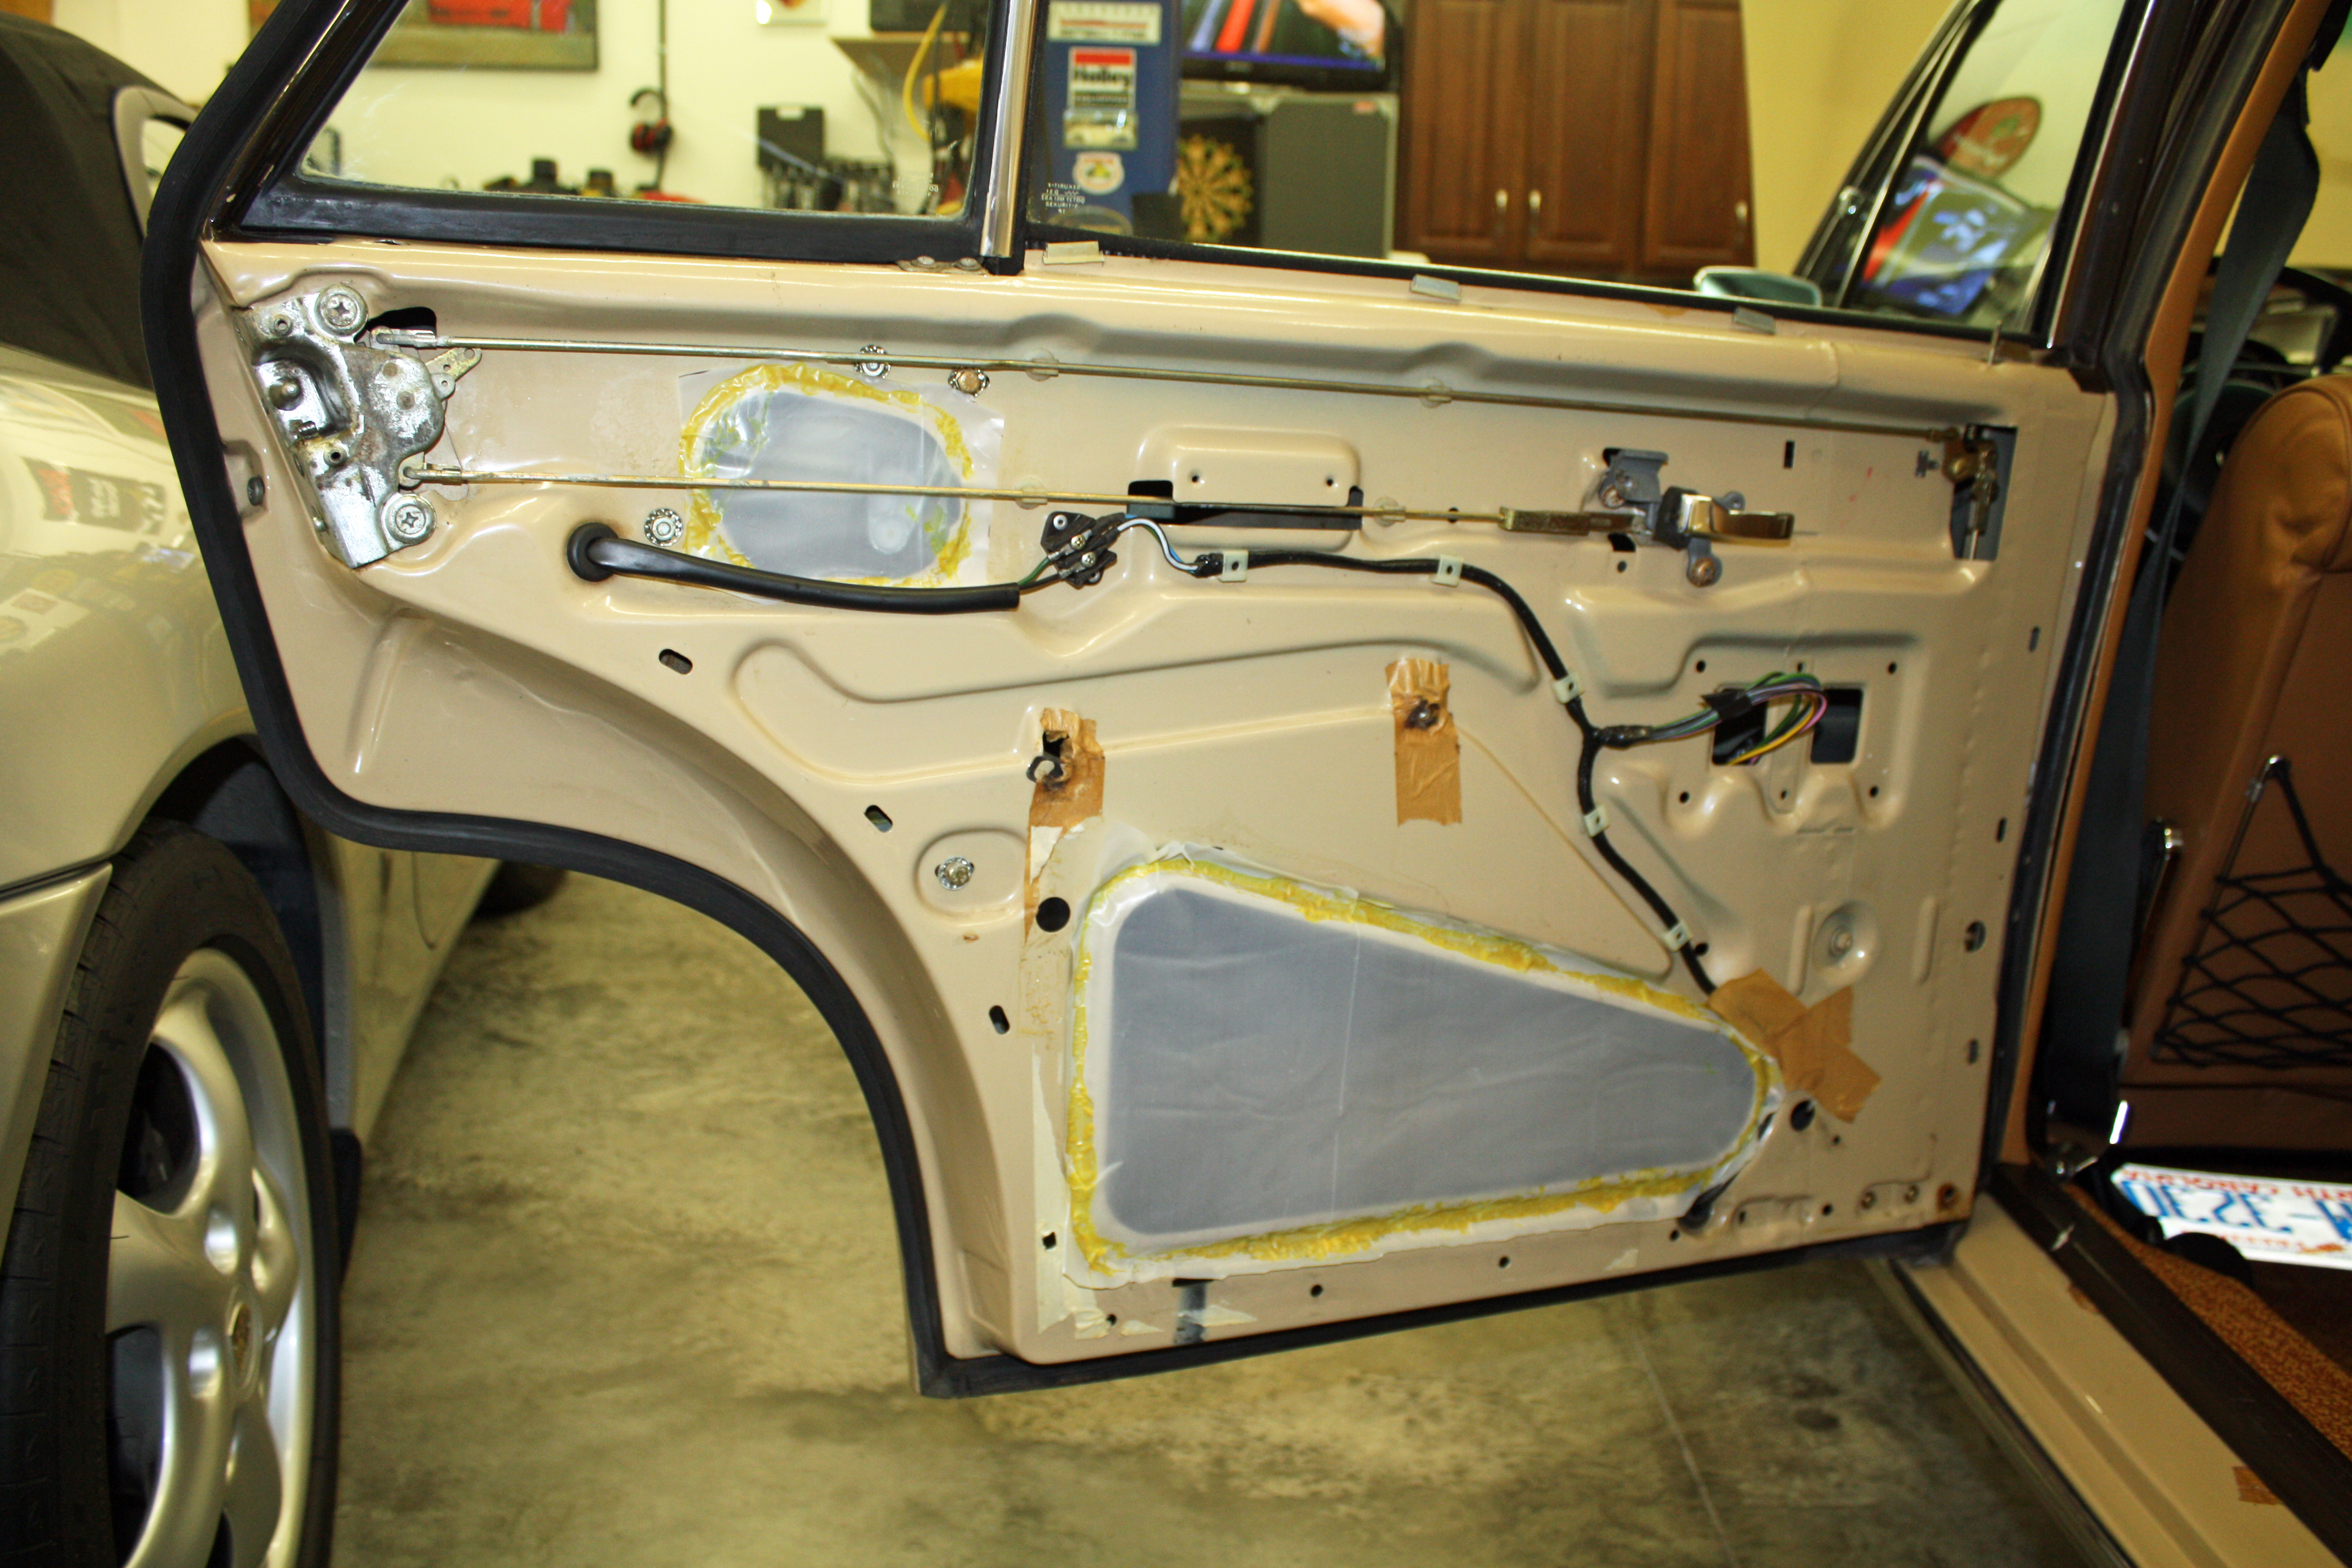
It rained here all day so it was garage time. Before I could re-install the door cards, I had to fix the plastic waterproofing on the doors. As I had already done the driver's door, it was just a matter of re-glueing it. The original plastic pieces were still on the rear doors so I used them as patterns. I had to make a
template for the passenger front door as there was no plastic on that door.

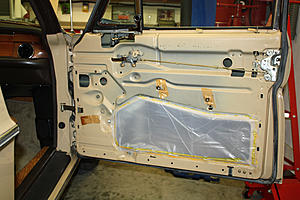
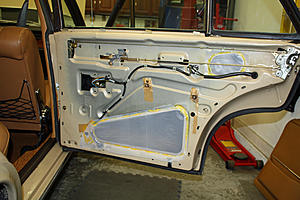
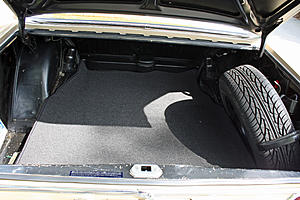
With the plastic in place, I could re-install the door cards and the wood trim. Time to move on to the trunk. I replaced the two side trim pieces I had removed.
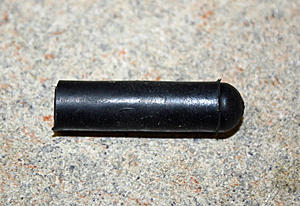
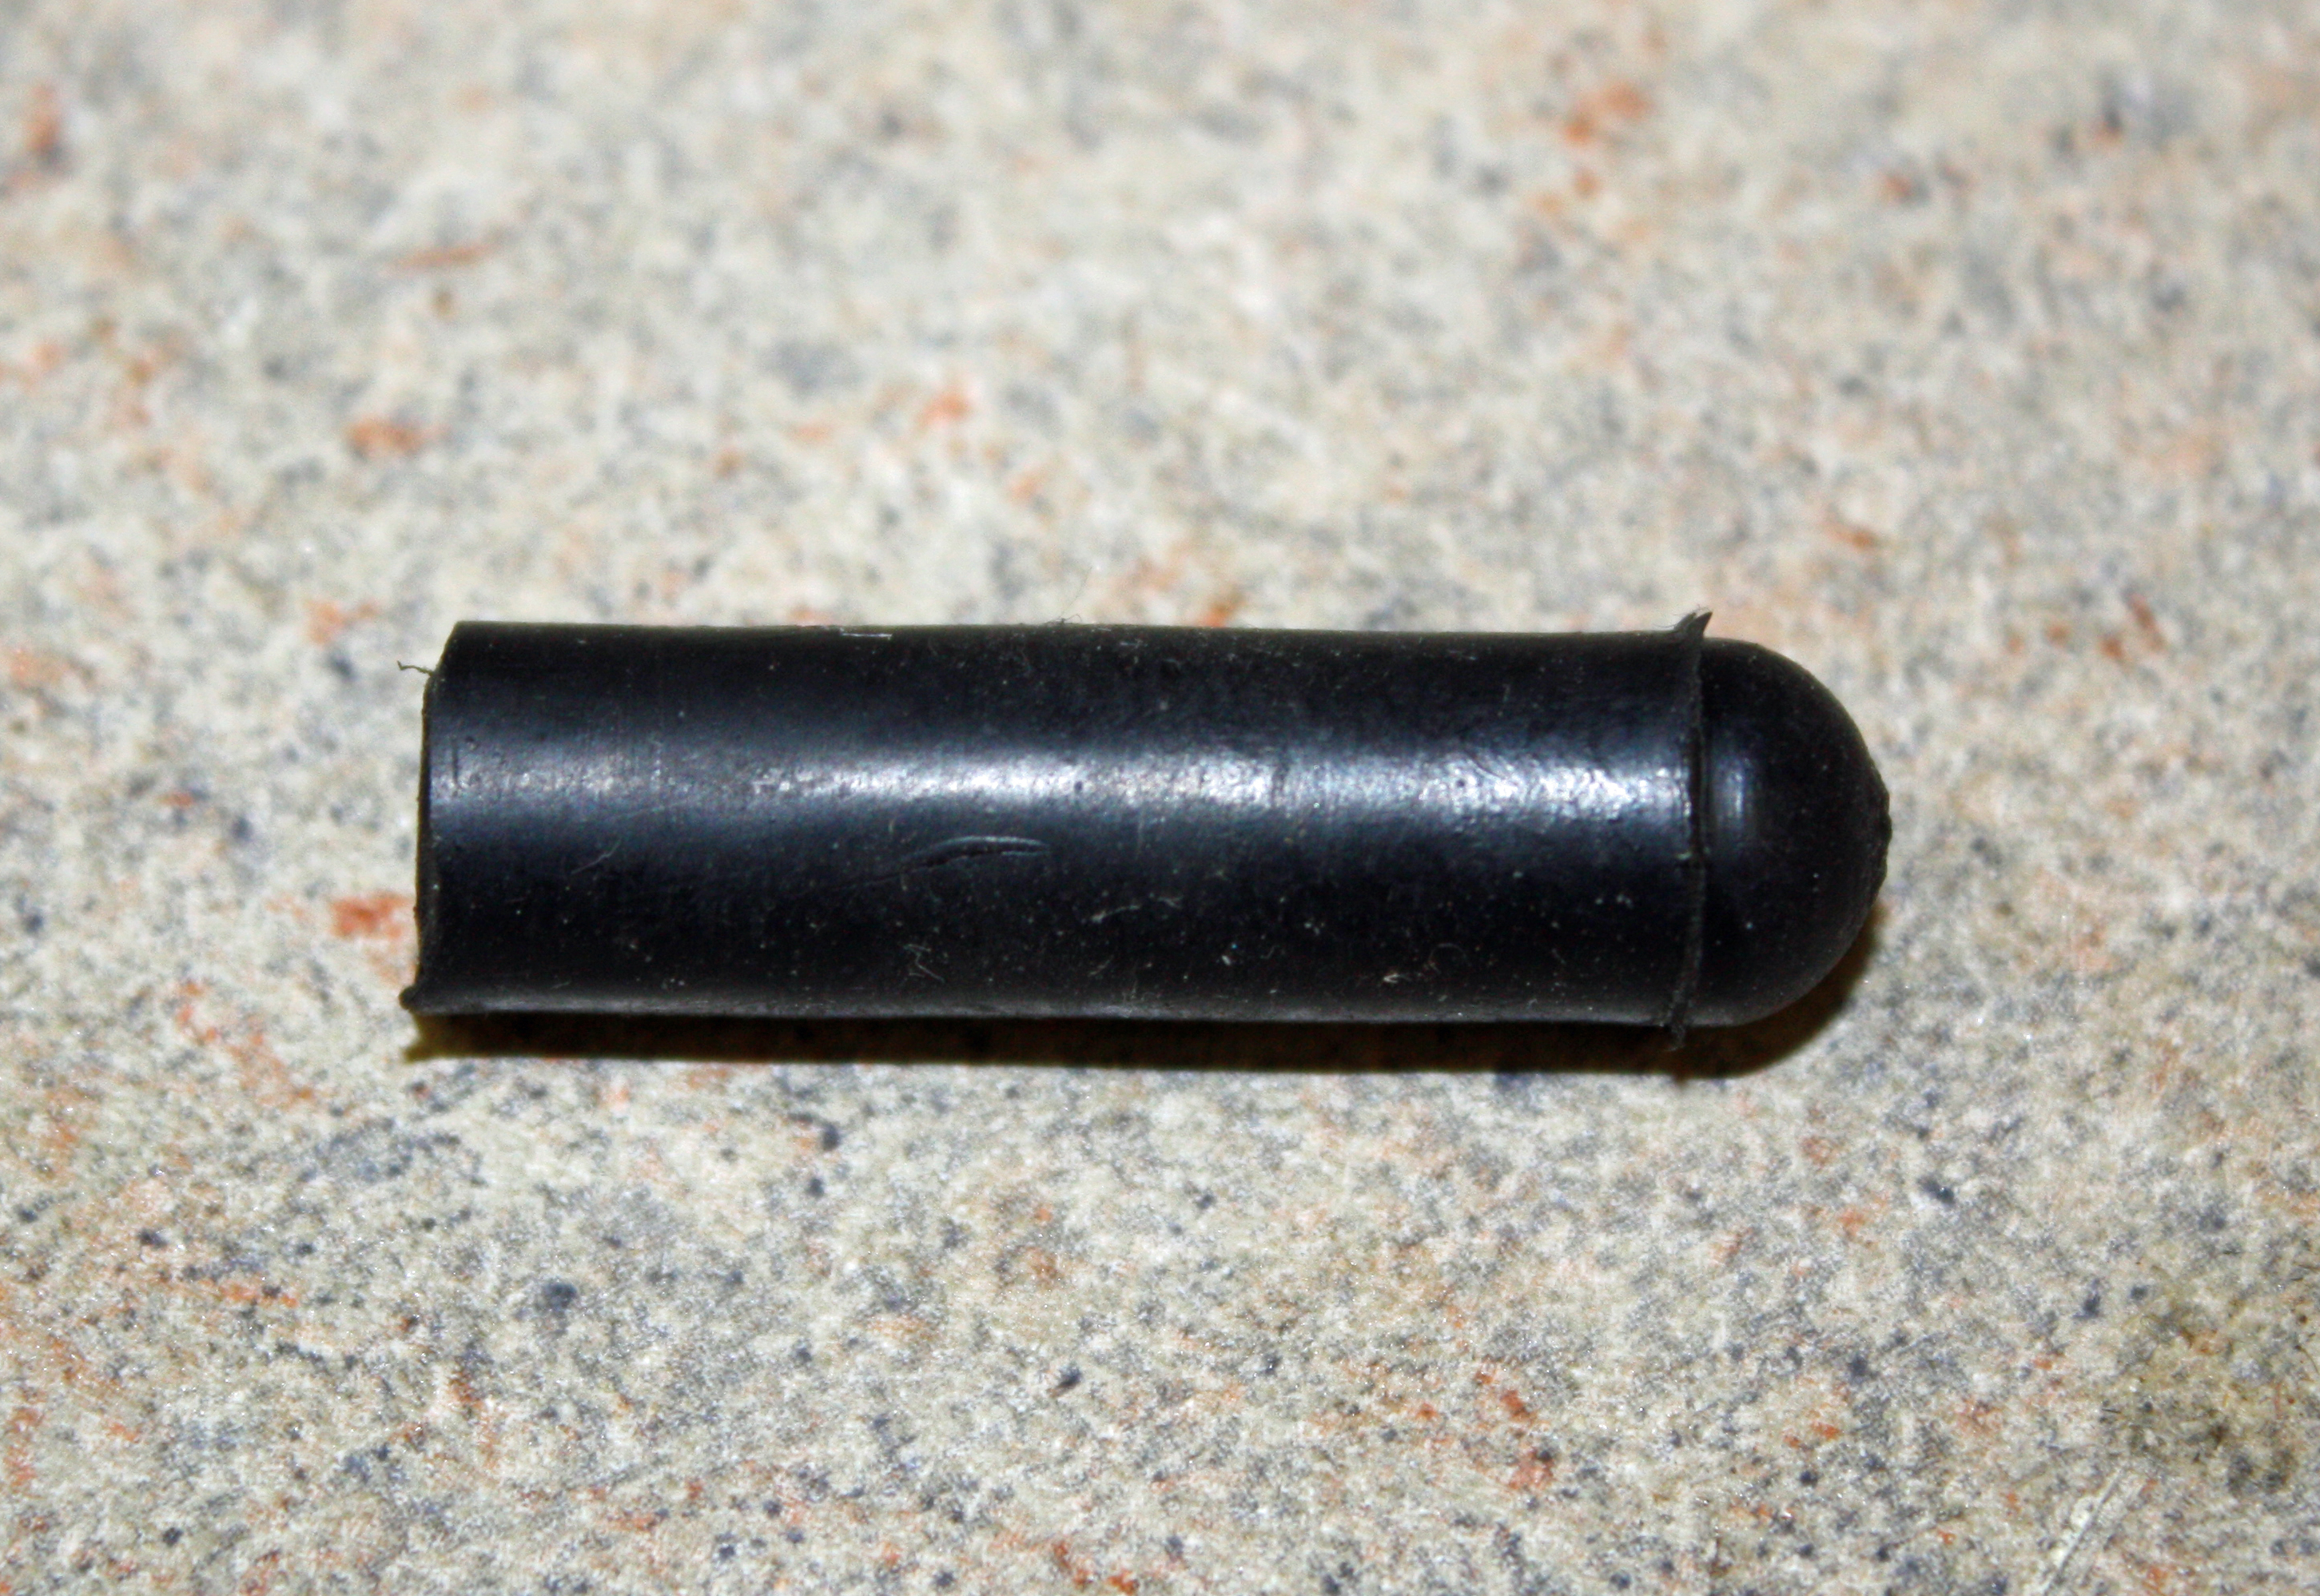
As I mentioned earlier, when removing the fuel expansion tank, I had discovered the one of the lines was pinched. By venting the tank directly, I was getting a lot of gas fumes in the garage. I priced a new tank, which comes with the lines already attached, from Mercedes Classic at $158 shipped. For that much money, I decided to try to fix it. I cut the line off and then cut another small piece off the line to get rid of the pinched part. So now I had to figure out how to re-attach the line. After looking in many drawers for ideas, I came across some rubber line caps. I found one the correct size. After cutting off the end, I attached it. It fit snugly but, to make sure, I did use a couple of hose clamps. I will be checking the tank for venting regularly.


template for the passenger front door as there was no plastic on that door.


With the plastic in place, I could re-install the door cards and the wood trim. Time to move on to the trunk. I replaced the two side trim pieces I had removed.
As I mentioned earlier, when removing the fuel expansion tank, I had discovered the one of the lines was pinched. By venting the tank directly, I was getting a lot of gas fumes in the garage. I priced a new tank, which comes with the lines already attached, from Mercedes Classic at $158 shipped. For that much money, I decided to try to fix it. I cut the line off and then cut another small piece off the line to get rid of the pinched part. So now I had to figure out how to re-attach the line. After looking in many drawers for ideas, I came across some rubber line caps. I found one the correct size. After cutting off the end, I attached it. It fit snugly but, to make sure, I did use a couple of hose clamps. I will be checking the tank for venting regularly.


 04-25-2017, 05:31 PM
#68
Member
Thread Starter
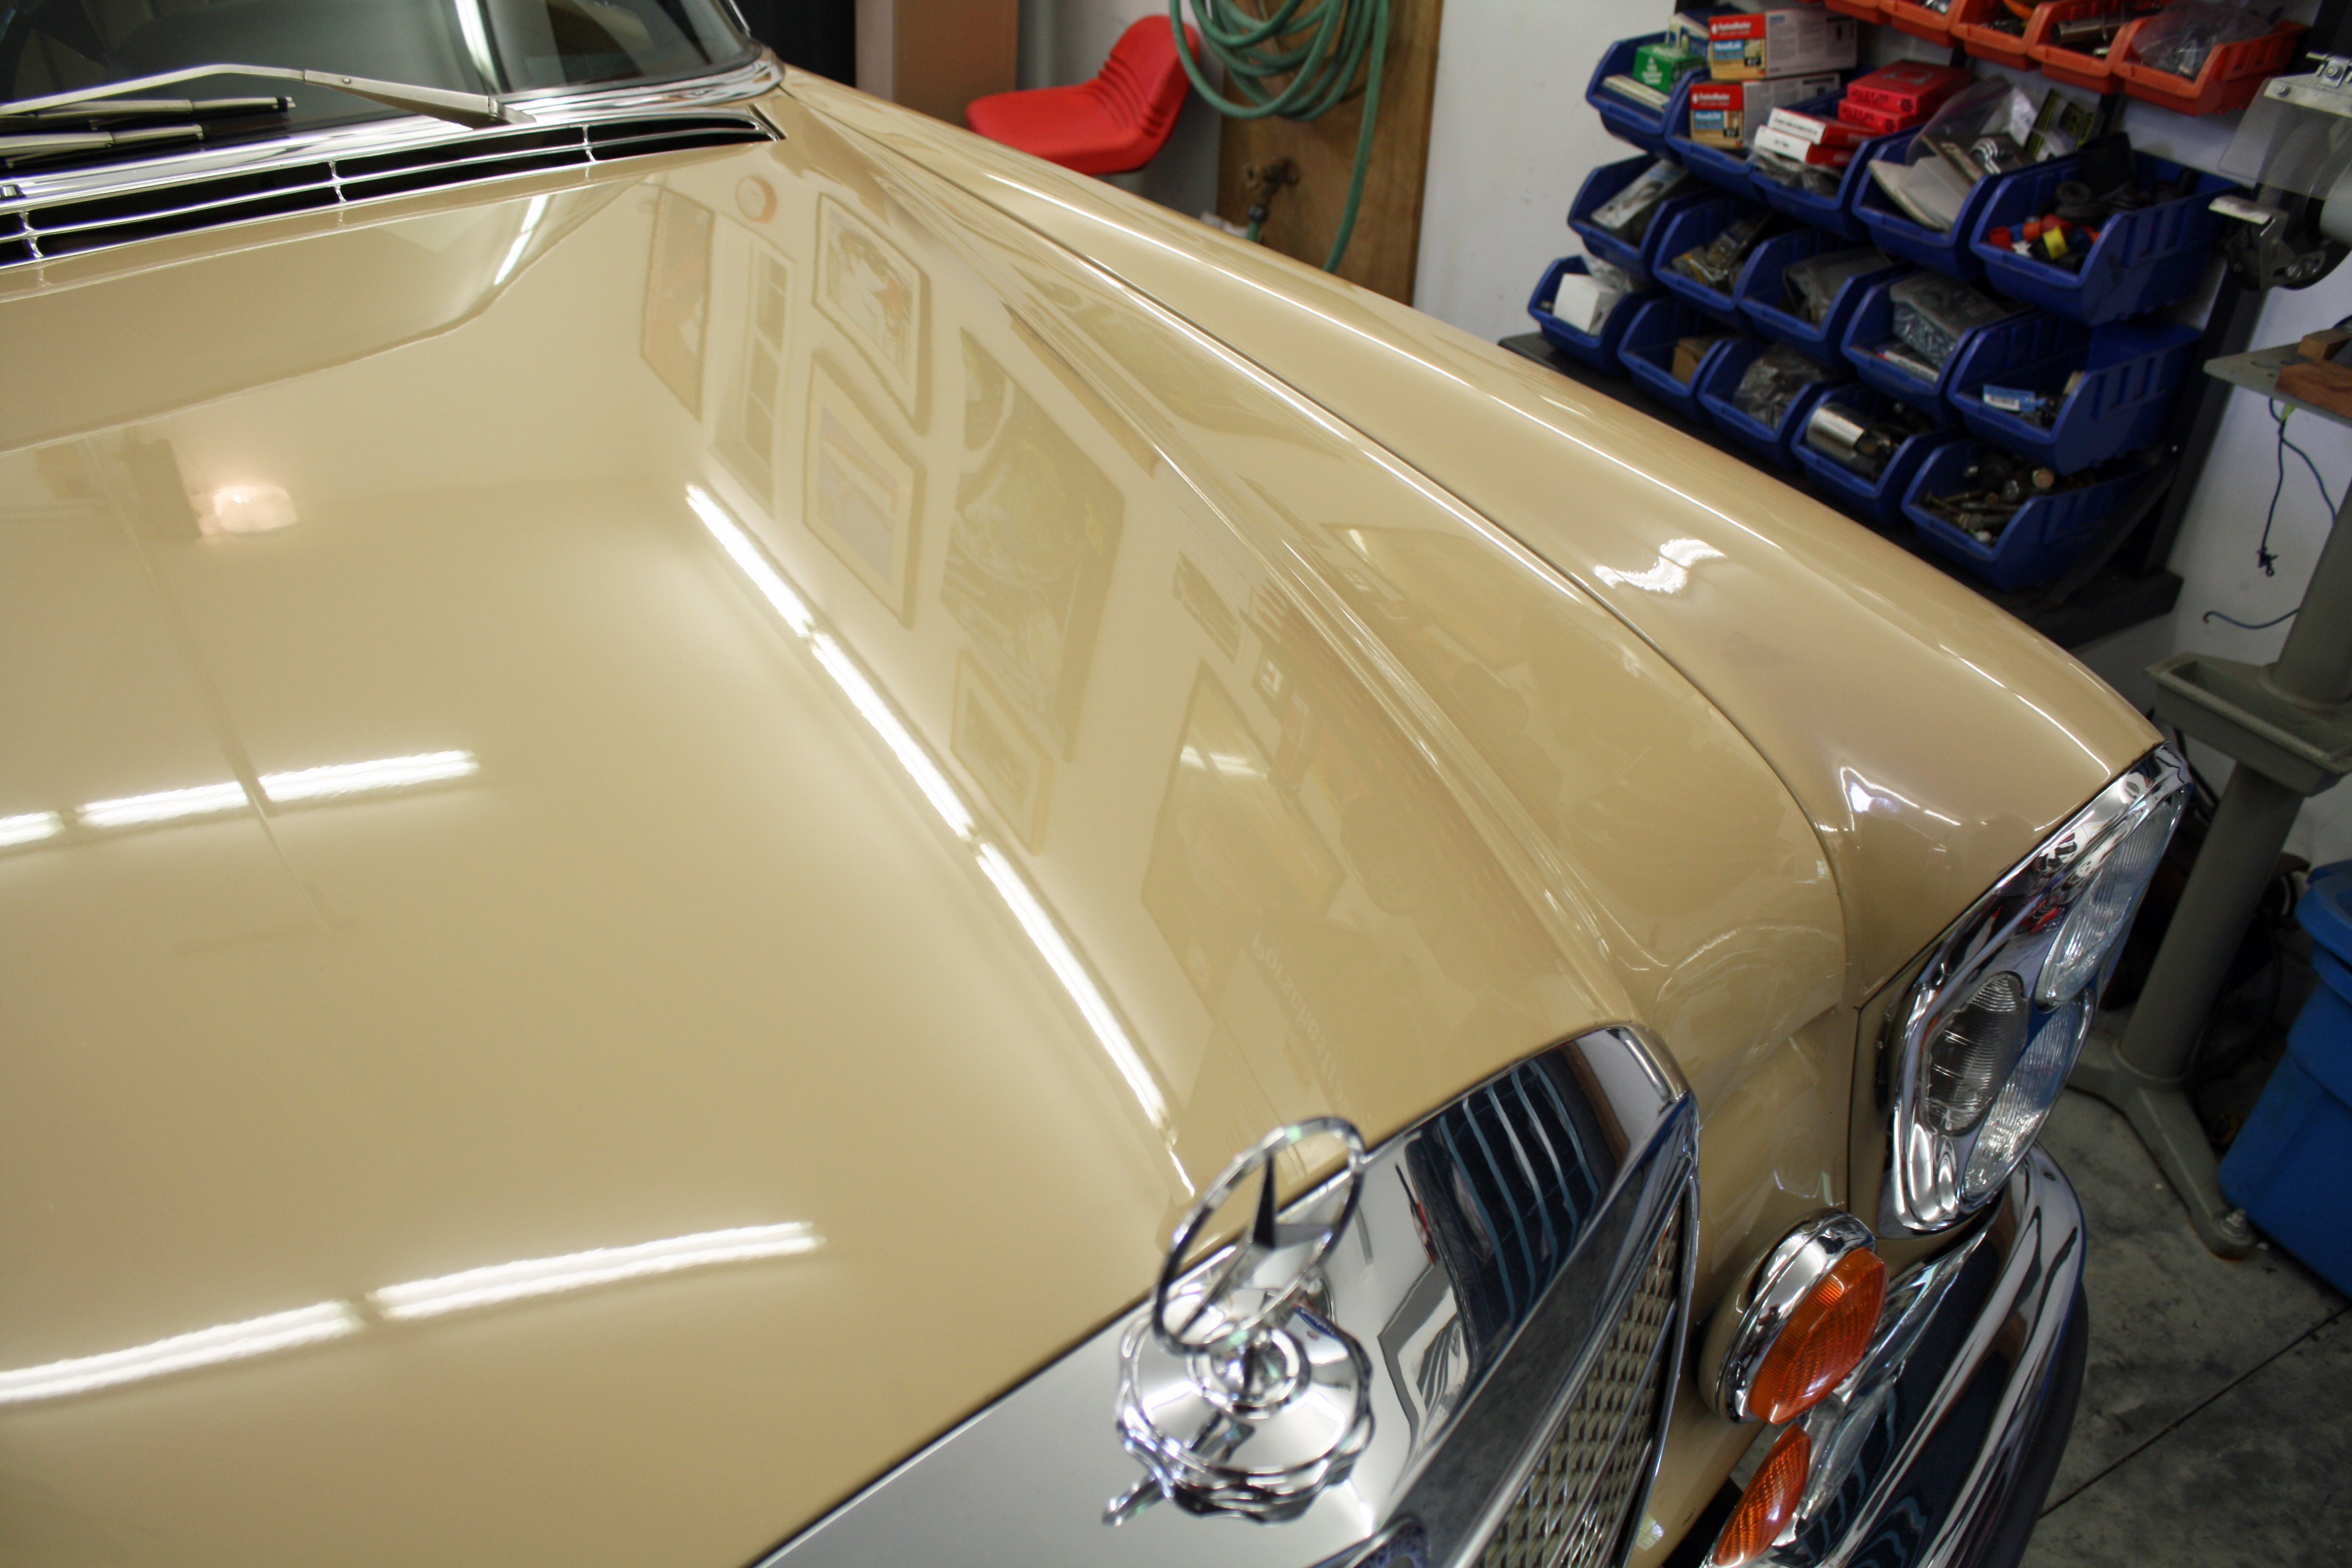
It is our high pollen season here so the car was basically green when I got it back from the PDR guy. Upon washing it yesterday, I discovered that I had forgotten to pull out my t-shirt to cover my belt and had lightly rubbed the paint on the front fender with my belt buckle when leaning into the engine bay. Out came my polish.
The mars were easily removed but I was surprised by what my rag looked like. It has the paint color on it. The guy I bought the car from and the guy he dealt with in California did not think the car had been painted.

Back in January I had used a 3M light polish with my orbital buffer on the car and the pad had not turned color, like the rag did, which led me to believe that the entire car had been clear coated. Thus no original paint. Now I was curious so I tried each panel to see what came off on the rag. Turns out the rear doors, rear quarters and the trunk had clear coat. That 3M polish is very mild so that may be the reason it did not turn color.
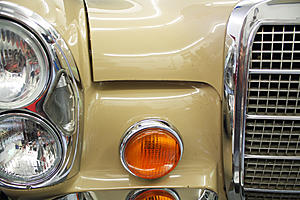
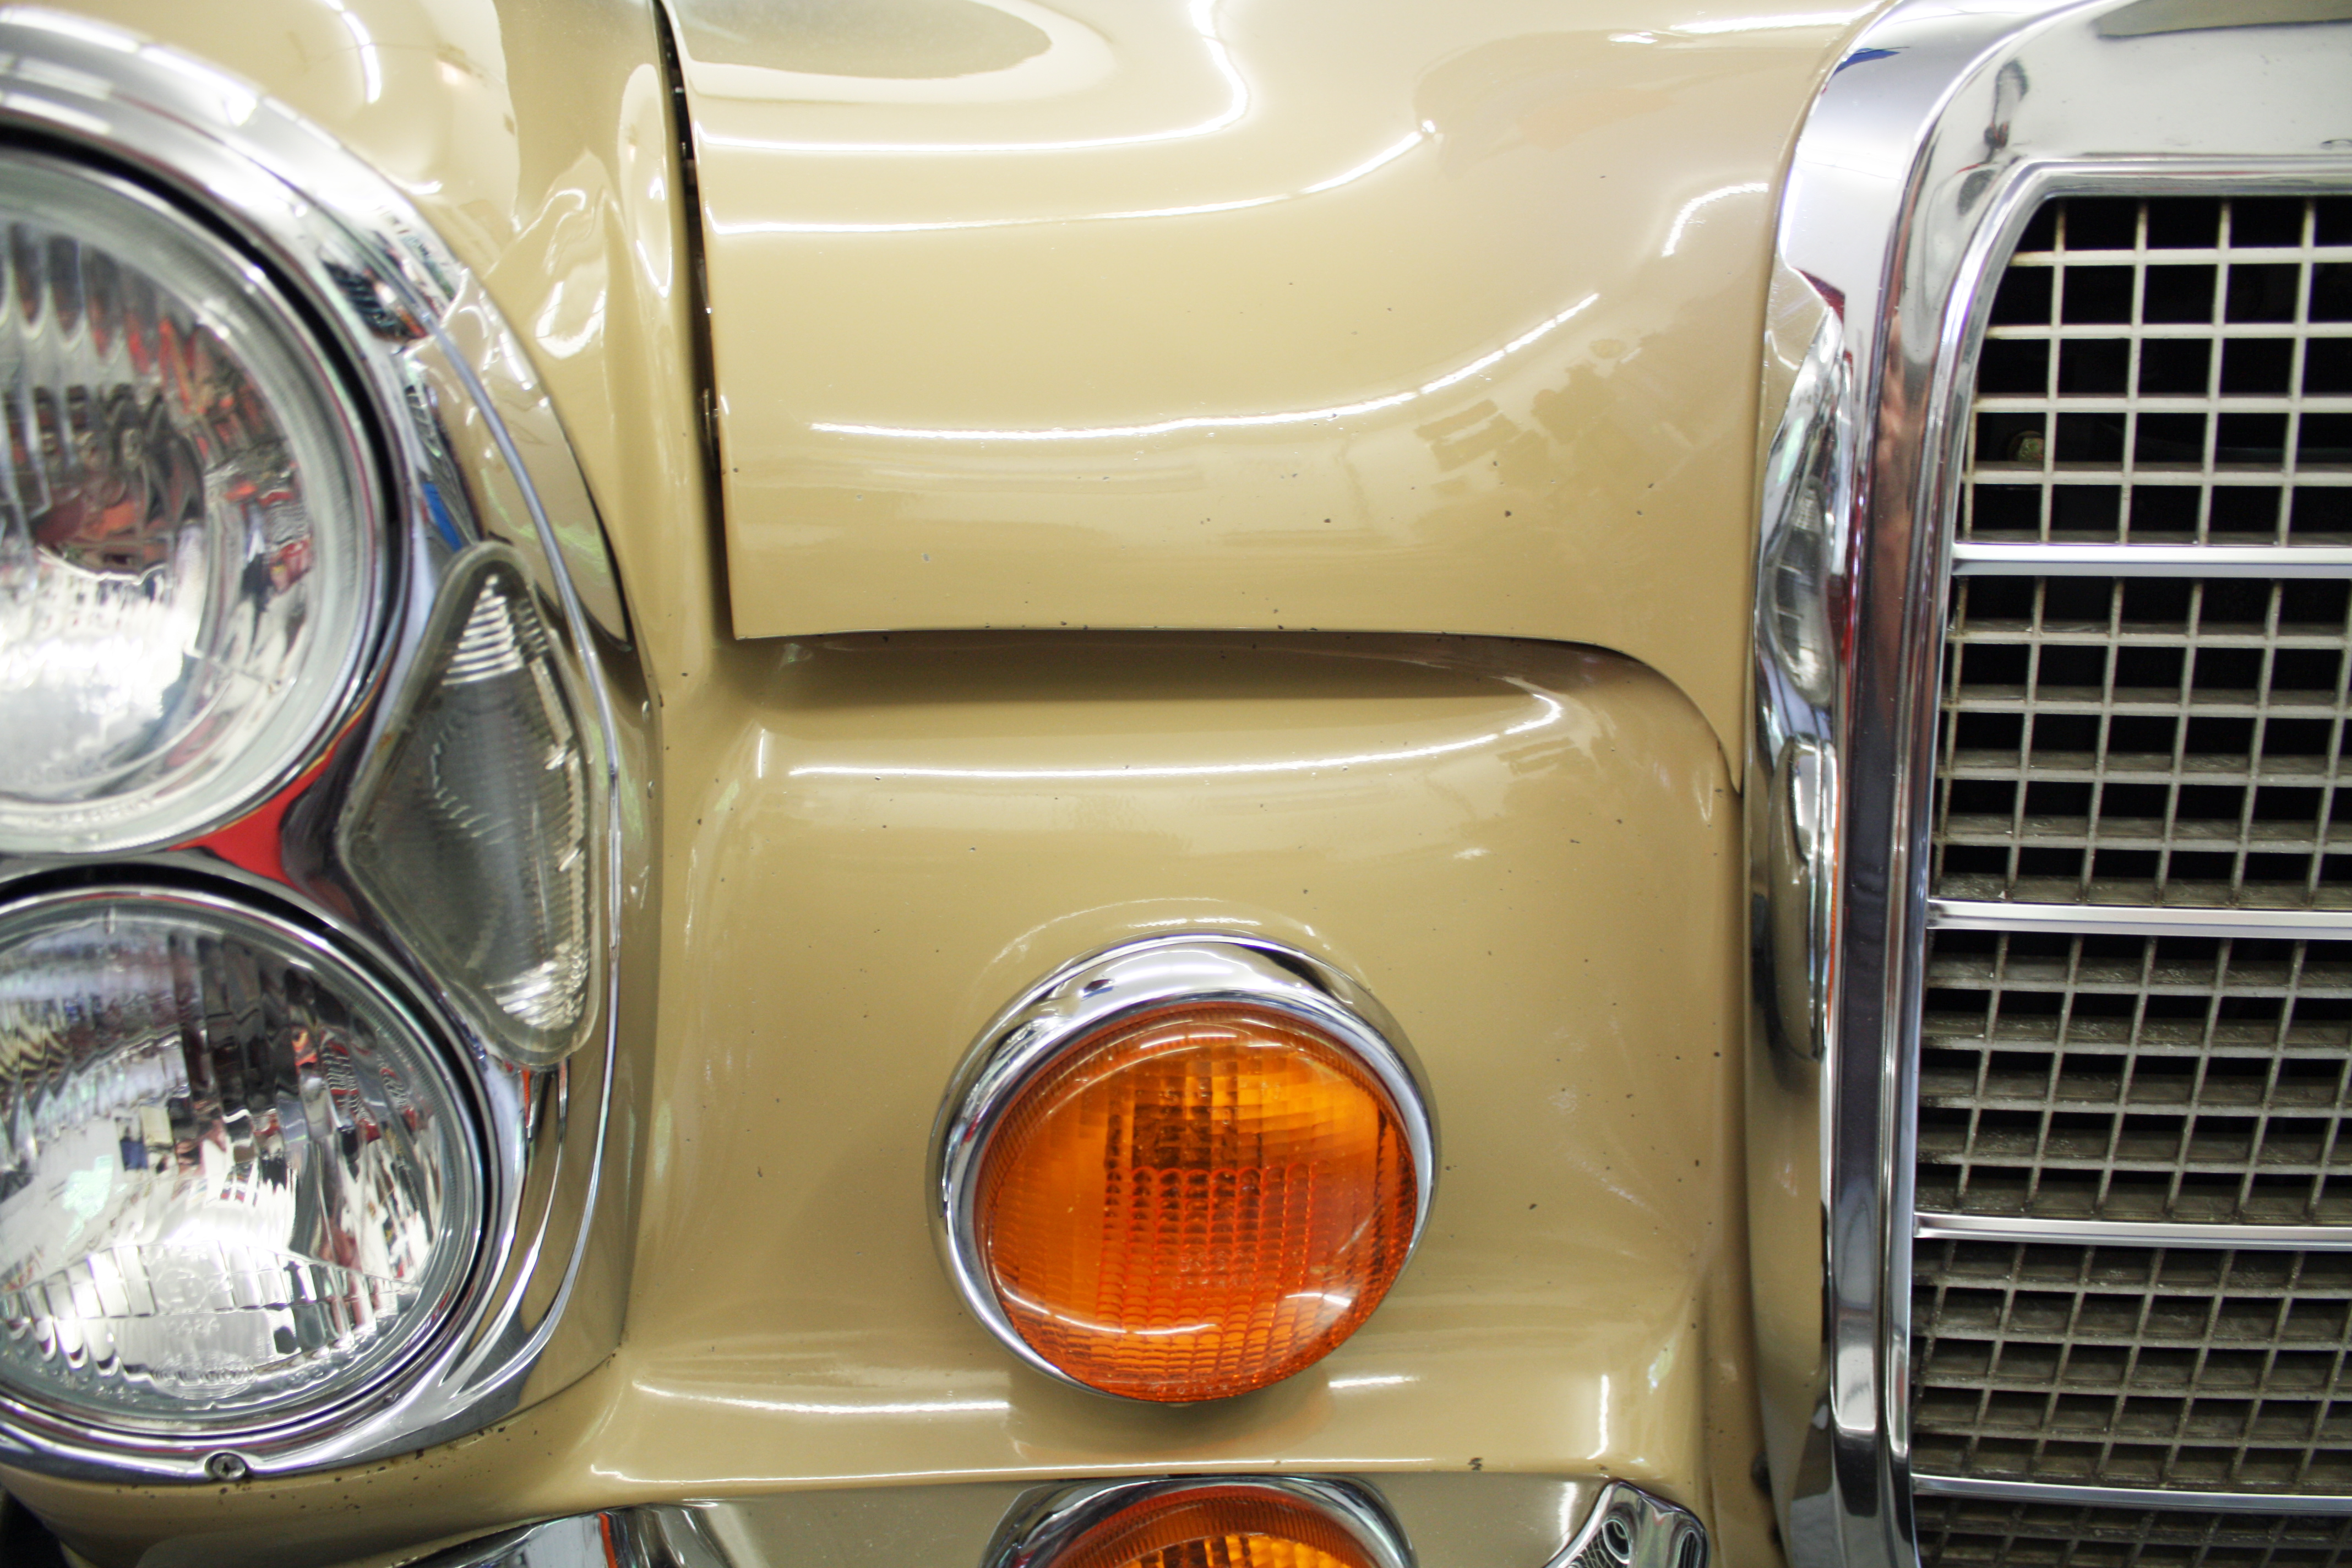
I had been curious as I did not see evidence of overspray, even on those areas that had been painted. Also, the stop chips on the nose are consistent on both the lower part by the turn signals as well as the hood. The rest of the car was single state paint.
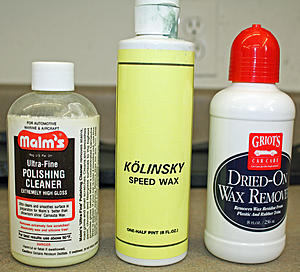
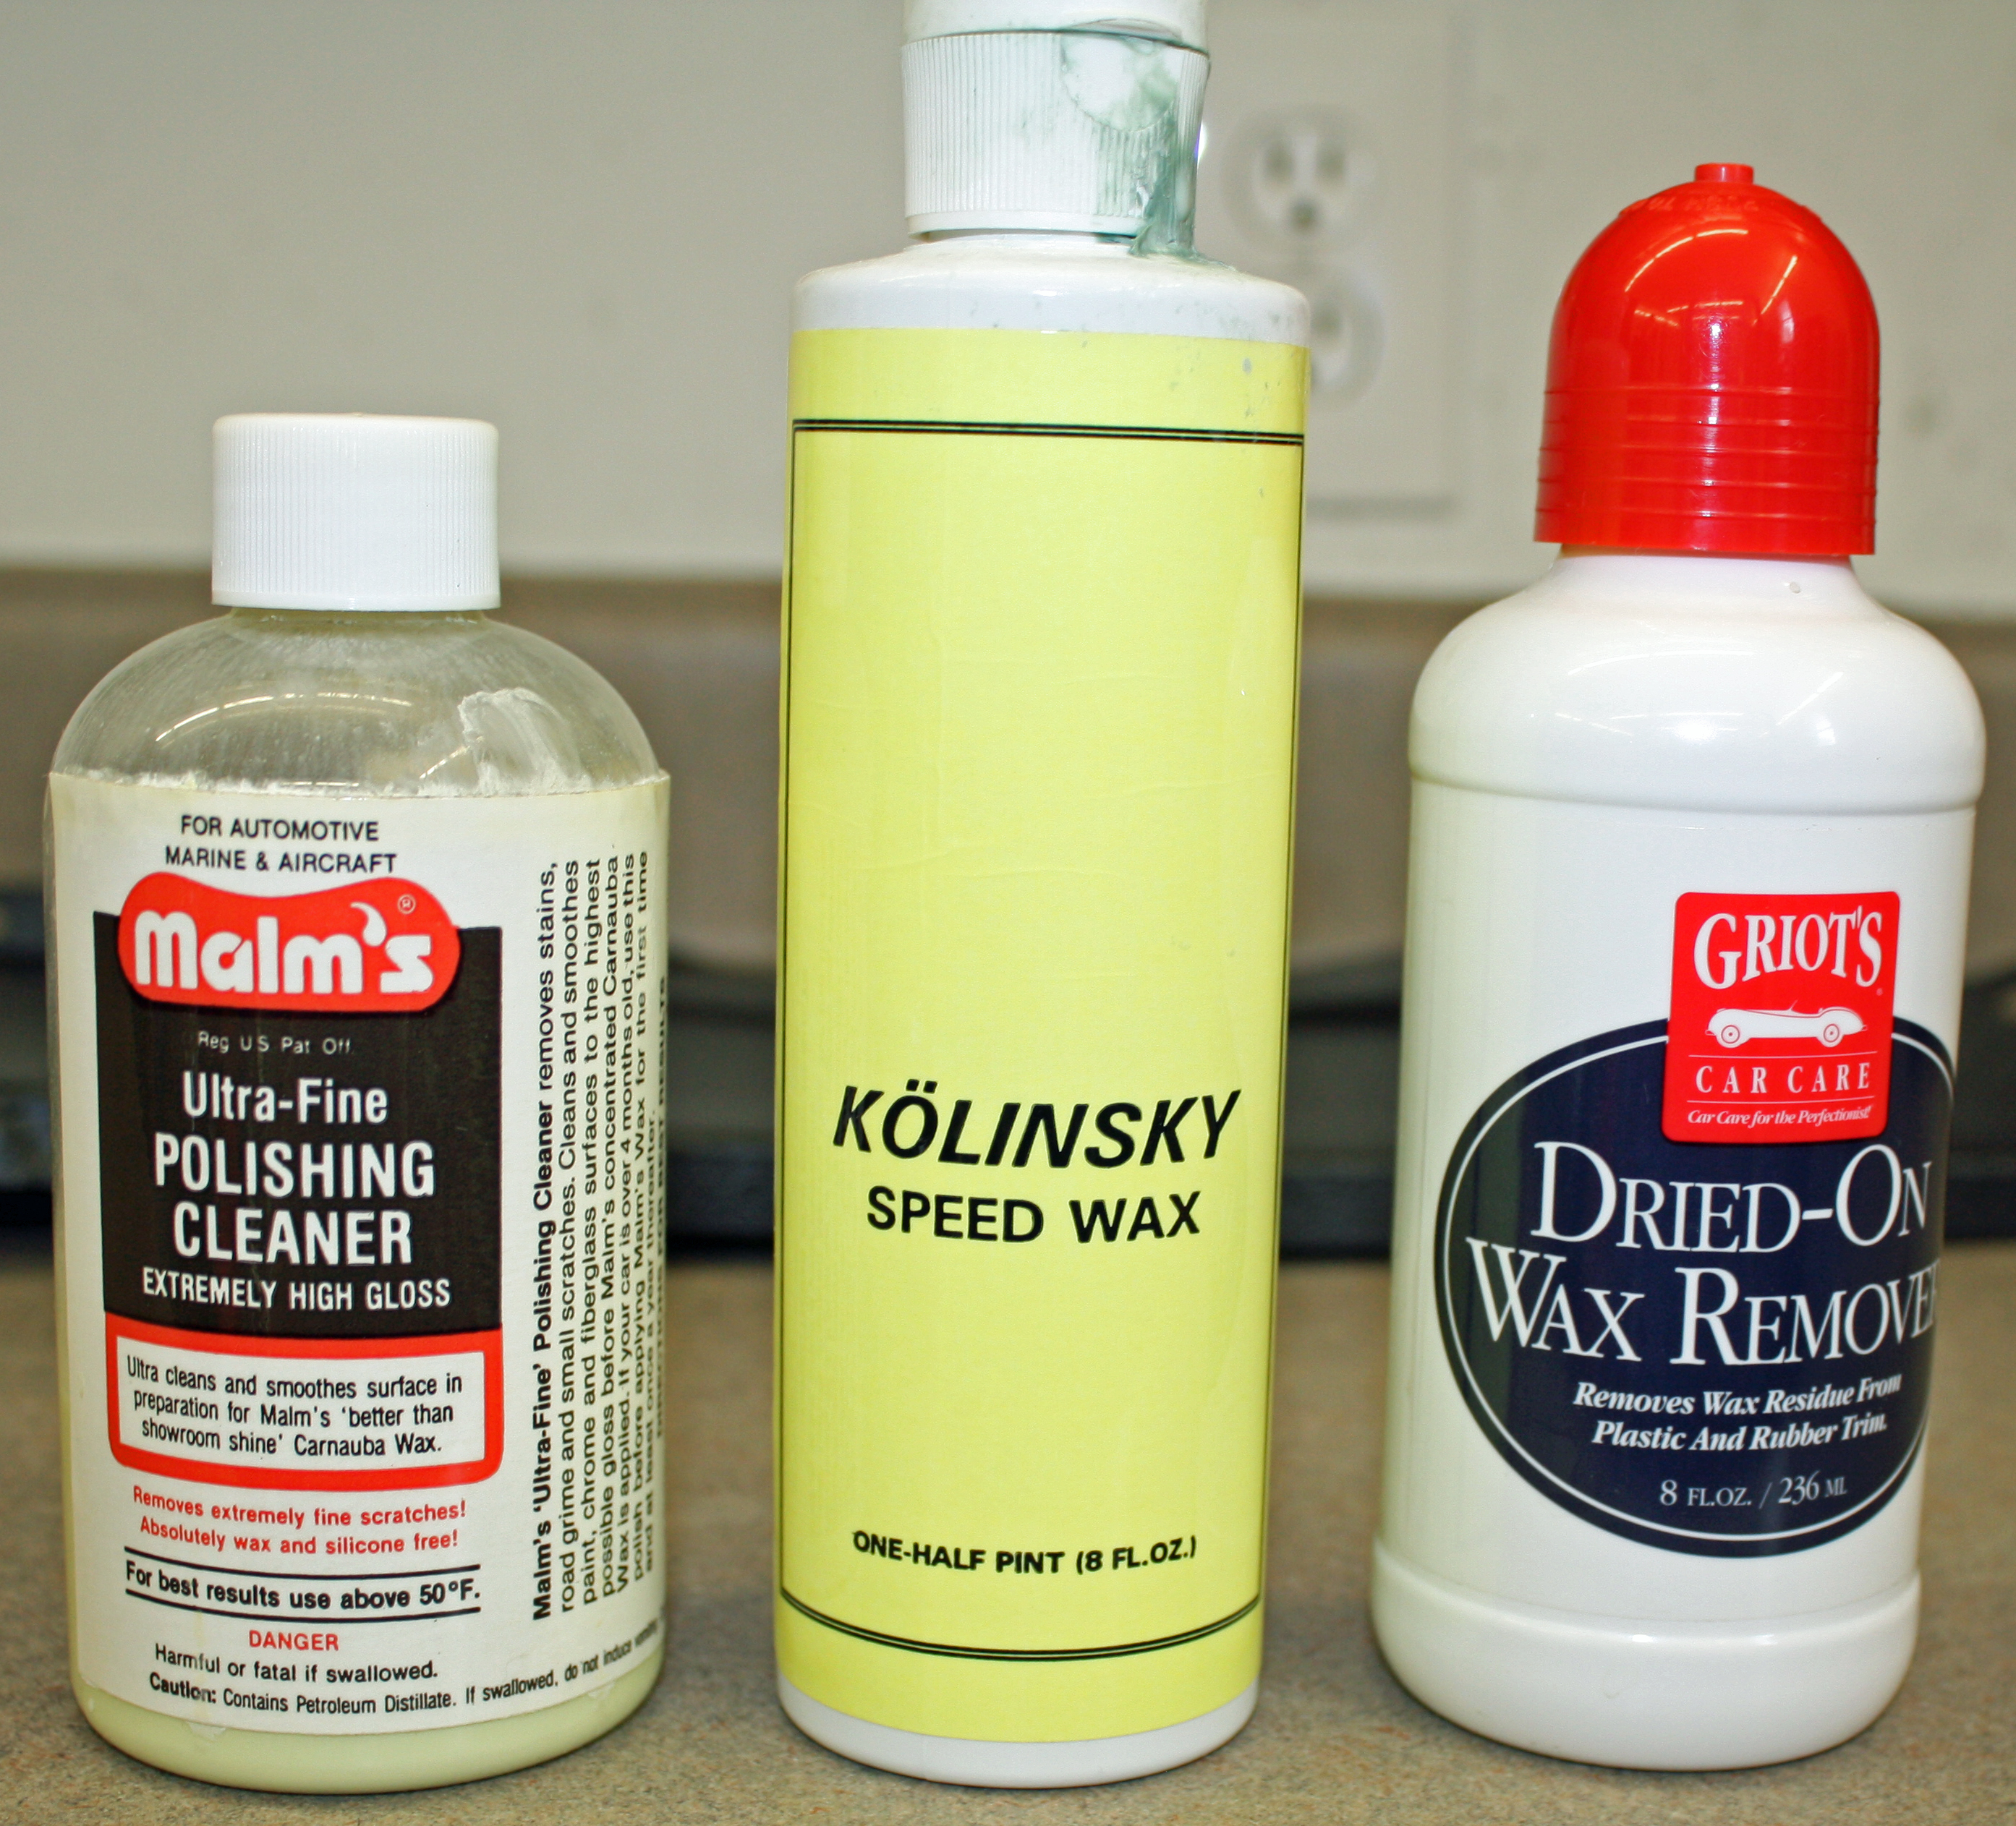
So I ended up completely hand polishing and then waxing the entire car!! Some time ago I had bought a Griot product for removing wax from plastic and rubber trim. I hadn't used it before but all the door rub strips had lots of wax on them. It worked reasonably well. Didn't remove all of the wax but the trim does look better.

The mars were easily removed but I was surprised by what my rag looked like. It has the paint color on it. The guy I bought the car from and the guy he dealt with in California did not think the car had been painted.

Back in January I had used a 3M light polish with my orbital buffer on the car and the pad had not turned color, like the rag did, which led me to believe that the entire car had been clear coated. Thus no original paint. Now I was curious so I tried each panel to see what came off on the rag. Turns out the rear doors, rear quarters and the trunk had clear coat. That 3M polish is very mild so that may be the reason it did not turn color.
I had been curious as I did not see evidence of overspray, even on those areas that had been painted. Also, the stop chips on the nose are consistent on both the lower part by the turn signals as well as the hood. The rest of the car was single state paint.
So I ended up completely hand polishing and then waxing the entire car!! Some time ago I had bought a Griot product for removing wax from plastic and rubber trim. I hadn't used it before but all the door rub strips had lots of wax on them. It worked reasonably well. Didn't remove all of the wax but the trim does look better.
 04-27-2017, 05:27 PM
#69
Member
Thread Starter
I installed the dirt shields in the front wheelwells yesterday. The rubber seal and some strip caulking should seal it up well.

I had ordered a set of Coco mats which also came yesterday. They have a very thick backing so I now have tons on insulation in the front footwells.

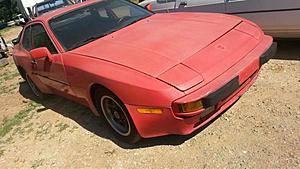
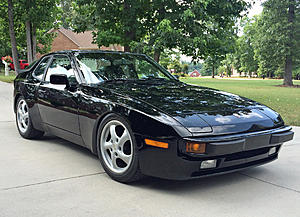
Some extra curricular work happened today. Yesterday evening I got a text message from my 16 year old grandson. He had a fender bender and wanted me to find a front spoiler/valance and right front fender for his 1987 Porsche 944. My text back was "Are you OK". He texted back that he probably would not have texted me about the parts if he hadn't been OK. Which was a good point and I was happy to hear that good news. He was passing a large truck on a two lane road when the truck came over towards him. It was either hit the truck or head for the ditch. He chose the ditch and hit a small sapling on the right front. My son said it was a relatively cheap learning experience.
Craigslist found a guy about 30 miles from here parting out a 944. He sent me a closeup of the dent in the fender which was slight enough for the princely price of $25. What I didn't catch was that price was with me taking the fender off. He was nice enough to lend me a 10mm socket and wrench along with a 10mm open end wrench, which was all that was needed. Fortunately, I had brought along a moving blanket to place the fender on. This was sorely needed as we had heavy rain the past two days so it was muddy in the junk yard. The photo below is of the parts car when it still had wheels on it. It was on the ground today.
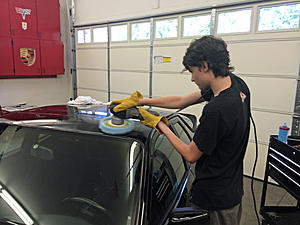
I found the '87 about three years ago. My son paid $3000 and spent about $2K fixing it up. So they don't have much money in it. Last summer Garrett spent a couple days at my house for a P&W Seminar. That would be Polish & Wax!! He was thrilled!! Unlike his dad and me, he is not really a car guy. Computers are his thing. Although he will get some hands on experience this weekend as he will be removing the fender and the front spoiler.
In discussing the accident, my son and I came to the conclusion that Garrett did not have enough horsepower. Had his car been quicker, he would have been around the truck before it pulled over into his lane. Matt just happens to have a LS1 motor sitting in his his garage and is itching to install it in the 944. We had installed that motor in Matt's '79 El Camino. He replaced it with a 4.8 liter iron block LS motor with his custom designed turbo system. It dynoed at just over 700HP at the crank. That motor is in his very, very stock looking El Camino, which is his daily driver. The paint is very tired and has dents. The only giveaway's are the 3" exhaust pipes and the wide black steel wheels with drag tires on the rear.


I had ordered a set of Coco mats which also came yesterday. They have a very thick backing so I now have tons on insulation in the front footwells.

Some extra curricular work happened today. Yesterday evening I got a text message from my 16 year old grandson. He had a fender bender and wanted me to find a front spoiler/valance and right front fender for his 1987 Porsche 944. My text back was "Are you OK". He texted back that he probably would not have texted me about the parts if he hadn't been OK. Which was a good point and I was happy to hear that good news. He was passing a large truck on a two lane road when the truck came over towards him. It was either hit the truck or head for the ditch. He chose the ditch and hit a small sapling on the right front. My son said it was a relatively cheap learning experience.
Craigslist found a guy about 30 miles from here parting out a 944. He sent me a closeup of the dent in the fender which was slight enough for the princely price of $25. What I didn't catch was that price was with me taking the fender off. He was nice enough to lend me a 10mm socket and wrench along with a 10mm open end wrench, which was all that was needed. Fortunately, I had brought along a moving blanket to place the fender on. This was sorely needed as we had heavy rain the past two days so it was muddy in the junk yard. The photo below is of the parts car when it still had wheels on it. It was on the ground today.

I found the '87 about three years ago. My son paid $3000 and spent about $2K fixing it up. So they don't have much money in it. Last summer Garrett spent a couple days at my house for a P&W Seminar. That would be Polish & Wax!! He was thrilled!! Unlike his dad and me, he is not really a car guy. Computers are his thing. Although he will get some hands on experience this weekend as he will be removing the fender and the front spoiler.


In discussing the accident, my son and I came to the conclusion that Garrett did not have enough horsepower. Had his car been quicker, he would have been around the truck before it pulled over into his lane. Matt just happens to have a LS1 motor sitting in his his garage and is itching to install it in the 944. We had installed that motor in Matt's '79 El Camino. He replaced it with a 4.8 liter iron block LS motor with his custom designed turbo system. It dynoed at just over 700HP at the crank. That motor is in his very, very stock looking El Camino, which is his daily driver. The paint is very tired and has dents. The only giveaway's are the 3" exhaust pipes and the wide black steel wheels with drag tires on the rear.
04-29-2017, 02:59 PM
#70
Member
Thread Starter
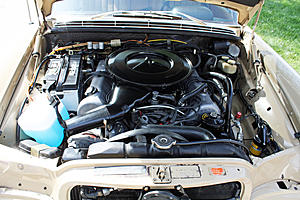
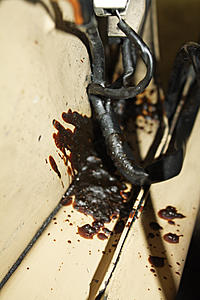
When I removed the old coil to install the new one today, I discovered a blob of paraffin located beneath the coil. I hadn't noticed this before as it is partially hidden when the coil is in place. It appears the insulation melted on the failed coil. I did notice some residue on the rear of the coil but I thought it might have come from some of the dirt that entered the engine bay when I power washed the bottom of the car.
I drove the car about 30 miles and everything seemed fine. I do have the old coil in the trunk along with the necessary tools to install it. By the way, the old coil was also made in Brazil.


I drove the car about 30 miles and everything seemed fine. I do have the old coil in the trunk along with the necessary tools to install it. By the way, the old coil was also made in Brazil.
Last edited by jerhofer; 04-29-2017 at 03:42 PM.
05-19-2017, 08:42 PM
#71
Member
Thread Starter
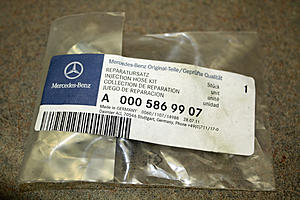
After a couple weeks off getting ready for our trip, I had some time to work on the car today. I had previously purchased a injector seal kit but had not gotten around to installing it. I began on the left side by removing the fuel lines on each end of the fuel rail. I loosened the top clamp on the hose from the injector to the fuel rail and then lifted the fuel rain away from the injectors.
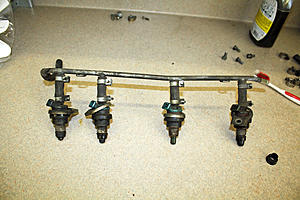
There is a 10mm bolt on the retaining clamp. Now the injector can be easily removed. At this point I realized that I could have removed the fuel rail and the injectors as one piece which is what I did on the right side.
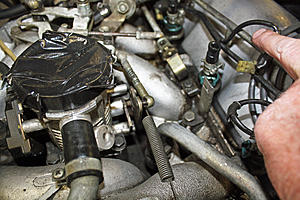
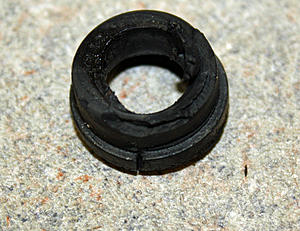
Because there was debris around the injector hole, I vacuumed it away. The bottom rubber seal was still in the hole so I hooked it to remove it and then vacuumed again. With the injector on the bench, I could proceed to remove the short hose. Since the bottom of the hose slides over a barbed end, I had to cut the lines away from the injector. With that done, I could remove the c-clip that retains the rubber mount and then the retaining clamp. After a thorough cleaning, I reassembled everything with the new parts and installed new hoses on the fuel rails.

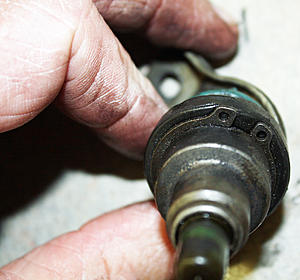
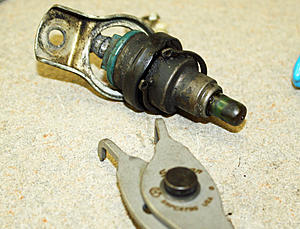
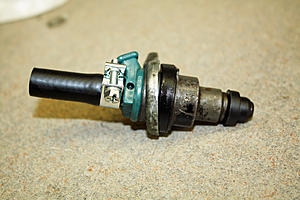
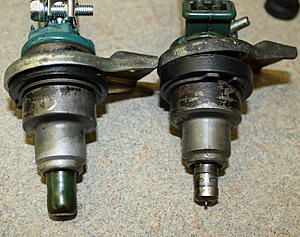
Everything was going great until I discovered that two of the four injectors on the right side were missing the plastic piece that covers the end of the injector. Without those pieces, the bottom seal did not fit tightly as it should. I e-mailed the photos of the injectors to Tom at Mercedes Benz Classic who said I definitely needed those parts and that he had them. Part No: 000-987-53-35. Eight of them are on the way so no driving the car this weekend.
There is a 10mm bolt on the retaining clamp. Now the injector can be easily removed. At this point I realized that I could have removed the fuel rail and the injectors as one piece which is what I did on the right side.

Because there was debris around the injector hole, I vacuumed it away. The bottom rubber seal was still in the hole so I hooked it to remove it and then vacuumed again. With the injector on the bench, I could proceed to remove the short hose. Since the bottom of the hose slides over a barbed end, I had to cut the lines away from the injector. With that done, I could remove the c-clip that retains the rubber mount and then the retaining clamp. After a thorough cleaning, I reassembled everything with the new parts and installed new hoses on the fuel rails.
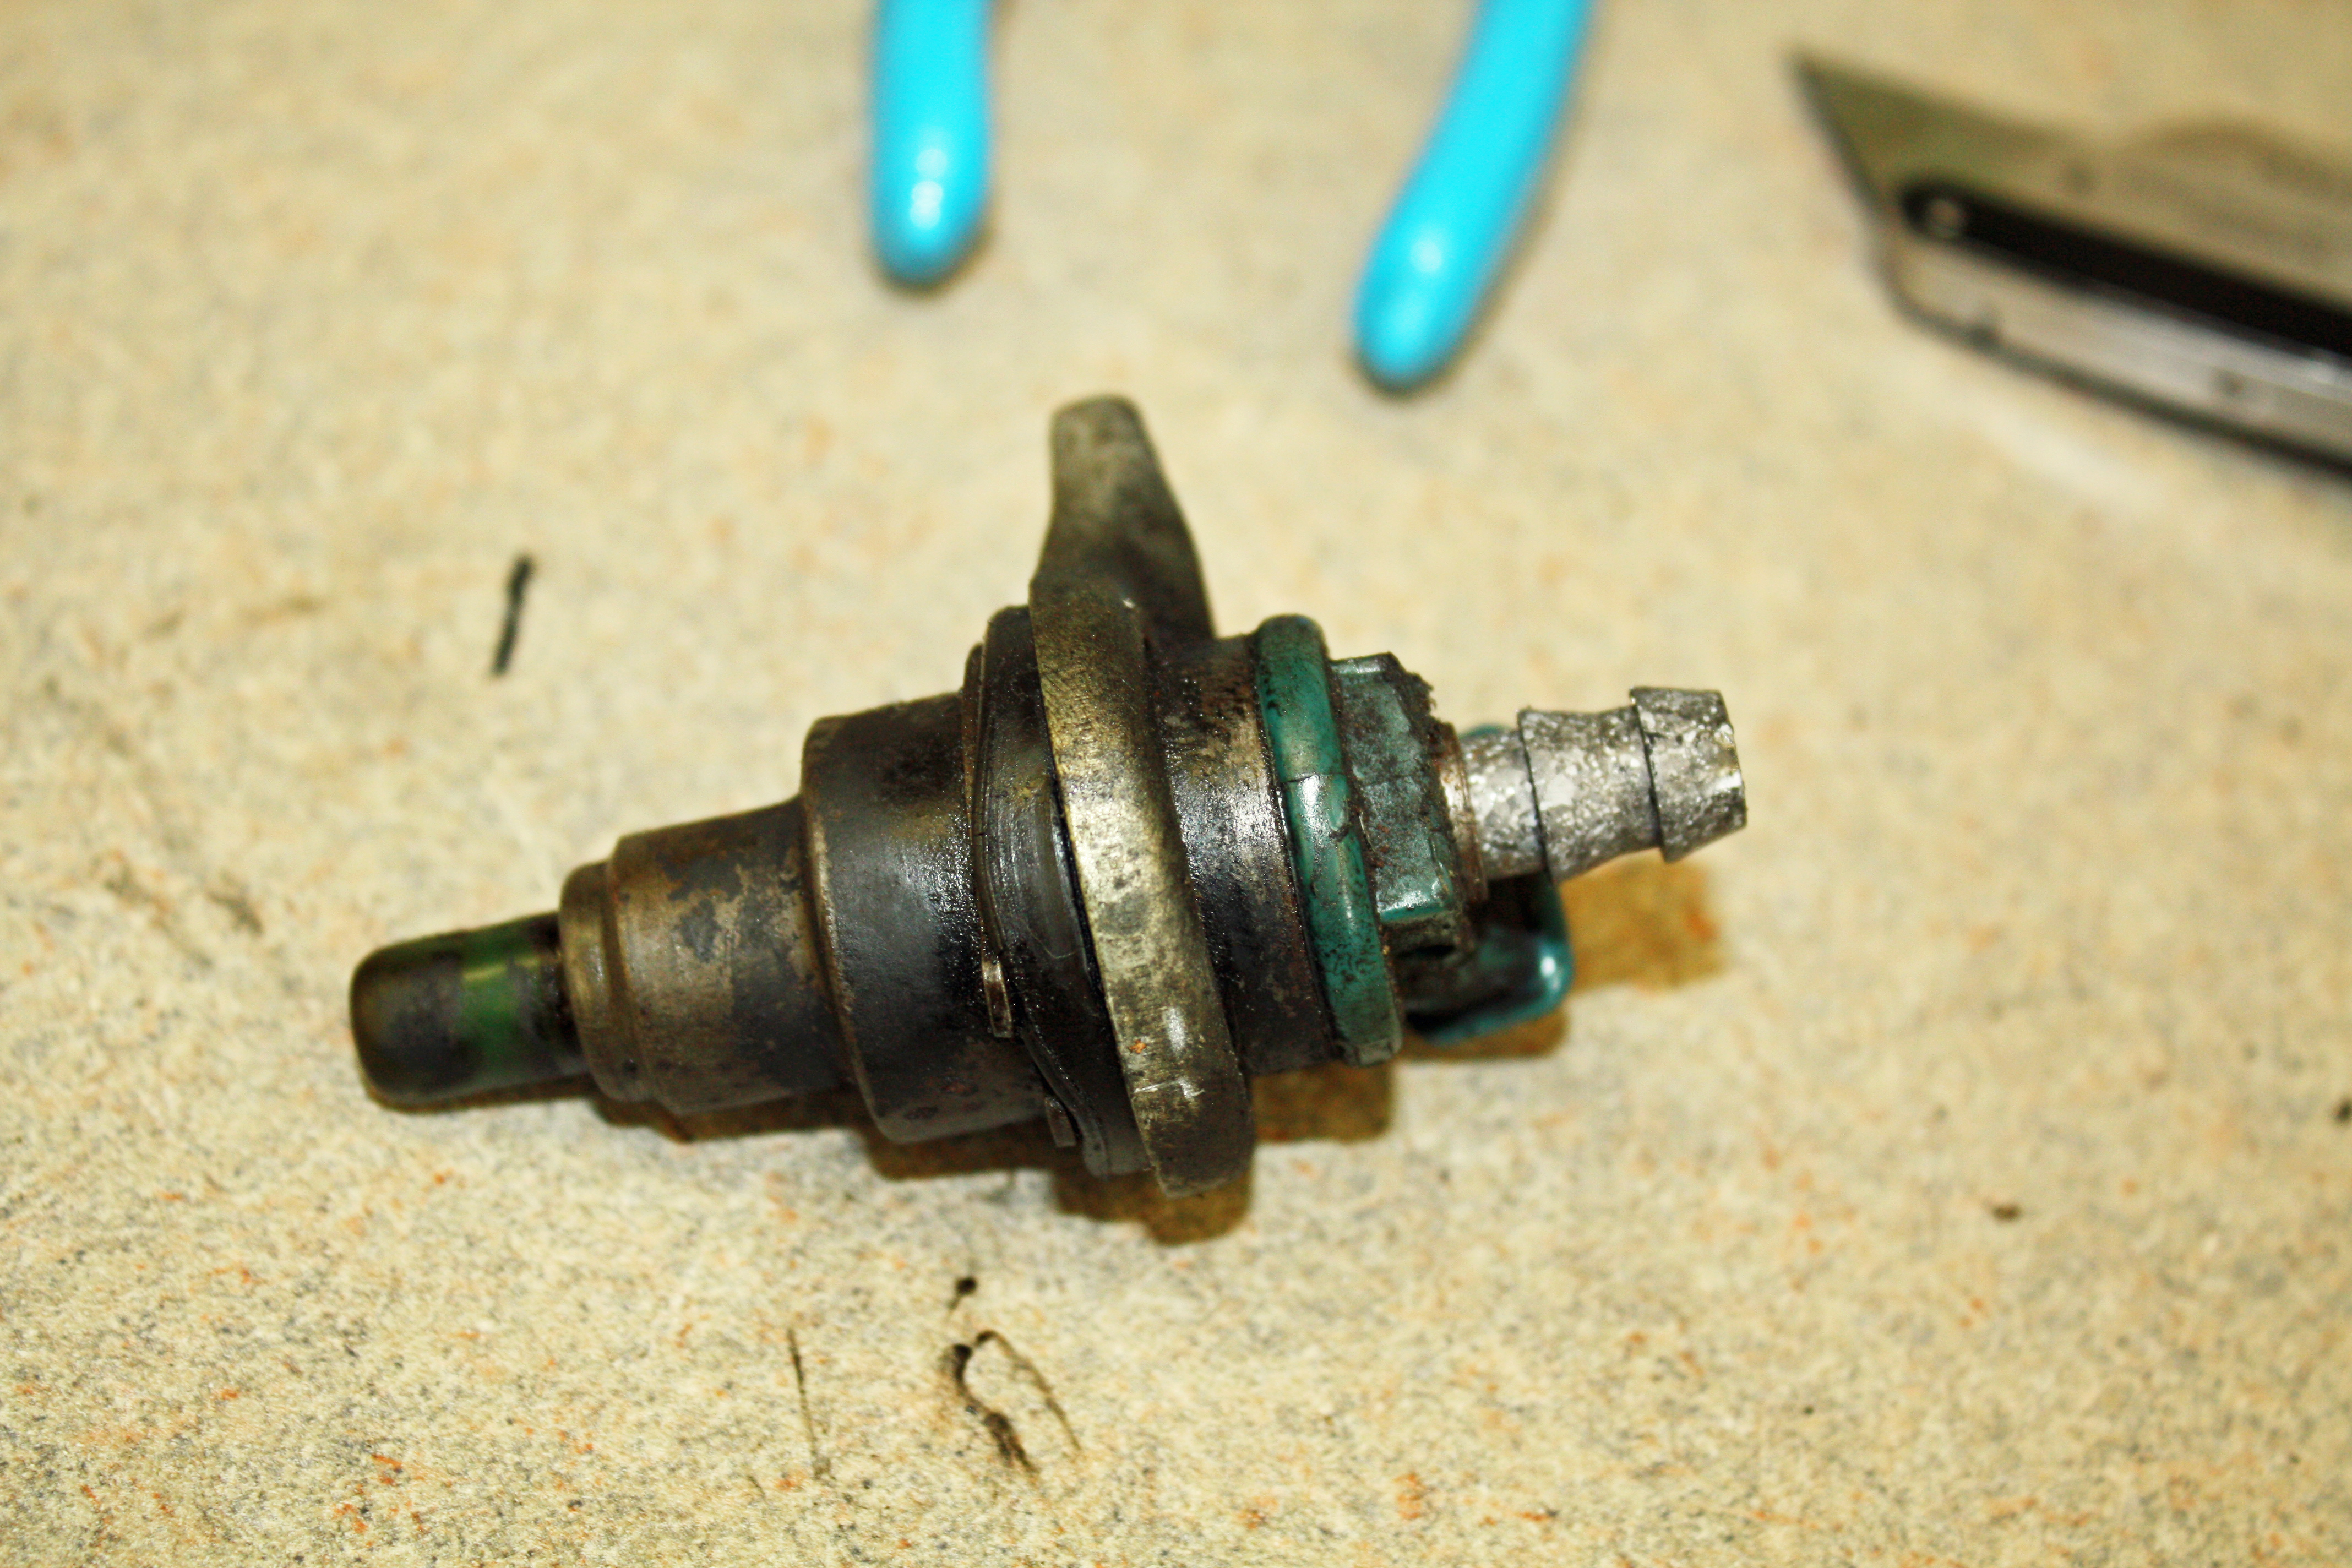


Everything was going great until I discovered that two of the four injectors on the right side were missing the plastic piece that covers the end of the injector. Without those pieces, the bottom seal did not fit tightly as it should. I e-mailed the photos of the injectors to Tom at Mercedes Benz Classic who said I definitely needed those parts and that he had them. Part No: 000-987-53-35. Eight of them are on the way so no driving the car this weekend.

 07-29-2017, 06:41 PM
#72
Member
Thread Starter
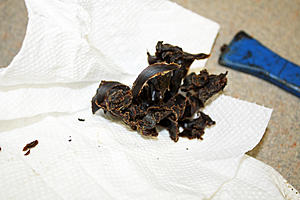
I am back from our RV trip, the motorhome is clean again, and I am ready to work on the Mercedes. I had sent the injectors to Witch Hunter to have them cleaned and flow tested. Three of the eight injectors were leaking externally and were deemed no good by Witch Hunter. So I ordered three new Bosch injectors. Once they arrived and I looked at them, I decided to go ahead and order the other five to have all new injectors. So I have five used injectors, that have been cleaned and flow tested, for sale.
The boots on the fuel injector wiring harness were either gone or in tatters. Also the wires appear to be very brittle. Mercedes Classic has the boots at, get this, $89 each!!! I did a Google search for D-Jetronic boots and found that Auto Atlanta had them for Porsche 914's at $9.50 each. Since the wires are brittle and to use the new boots, I found new fuel injector connectors. I will be making up a new fuel injector wiring harness including the wiring to the Cold Start Valve. I am waiting for all of the parts to arrive and should have everything finished sometime next week. While we had a great time on our trip, I am looking forward to working on the car.
BTW, one of the places we visited was Crater Lake in Oregon. It is a must see sight!! Amazingly beautiful!! 1900 feet deep with the deepest blue water color I have ever seen. It is at 7600 feet elevation and there was still lots of snow there in July.
07-31-2017, 04:01 PM
#73
Member
Thread Starter
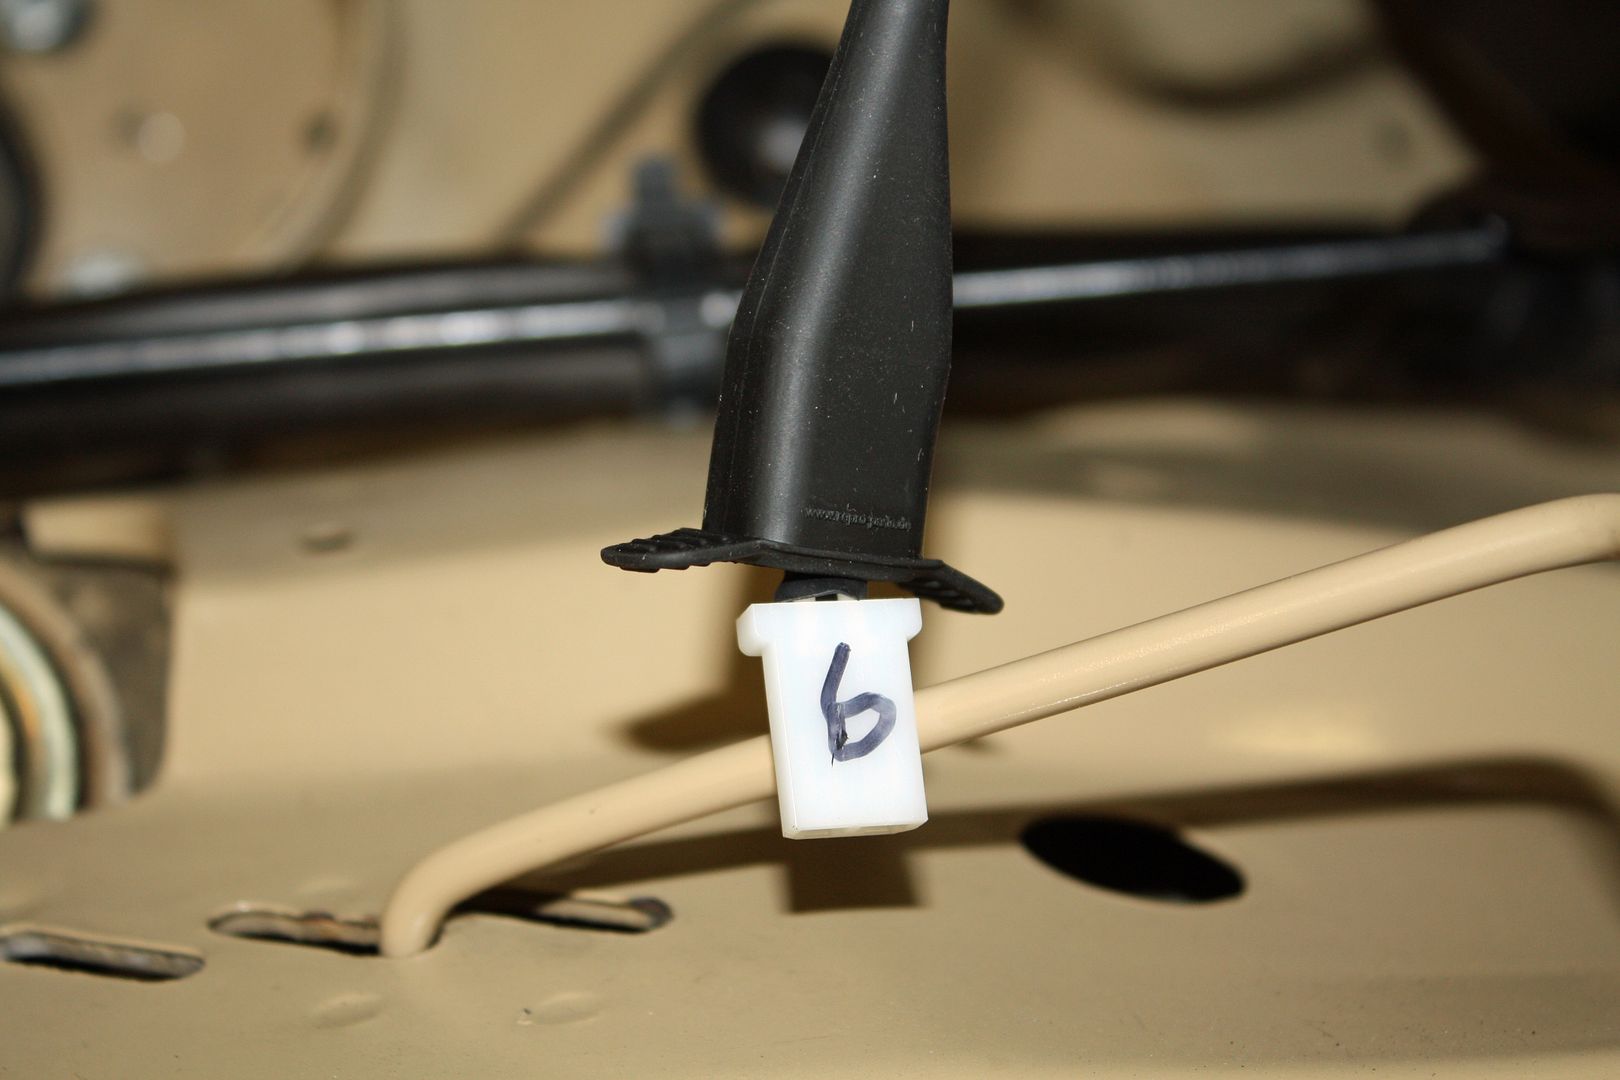
After trimming the shrubs and mowing the lawn, I did not have much time to work on the car today. However, I did get some organizing done.
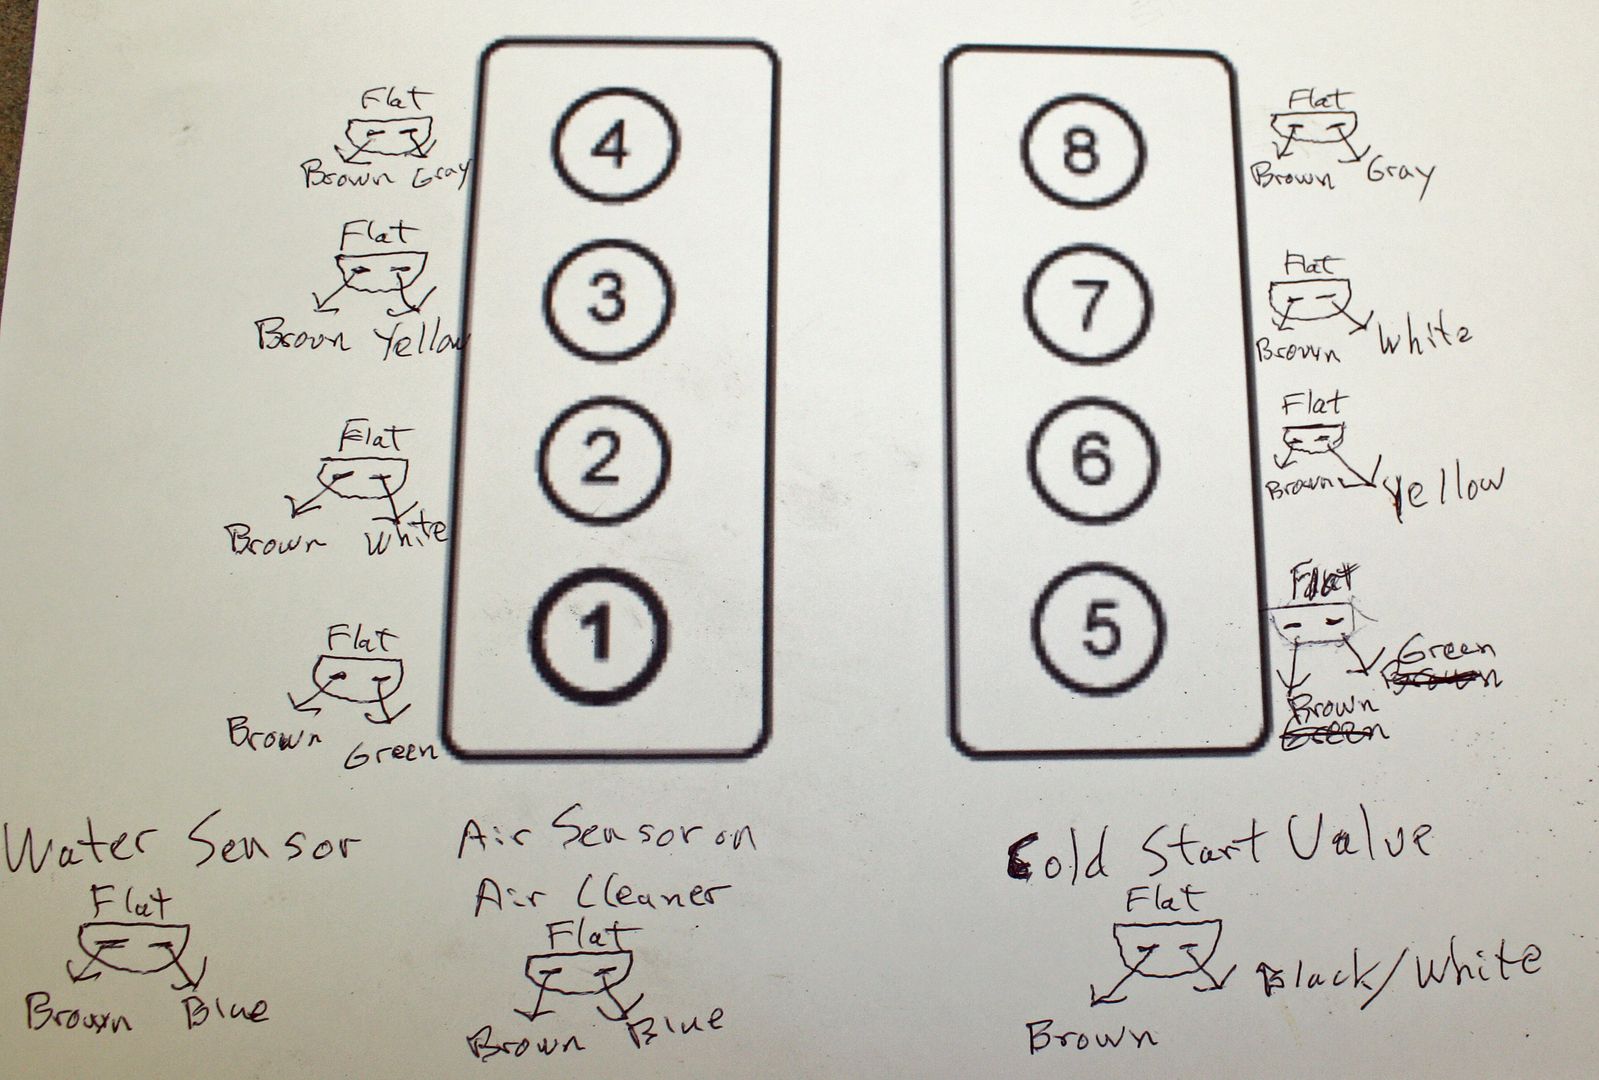
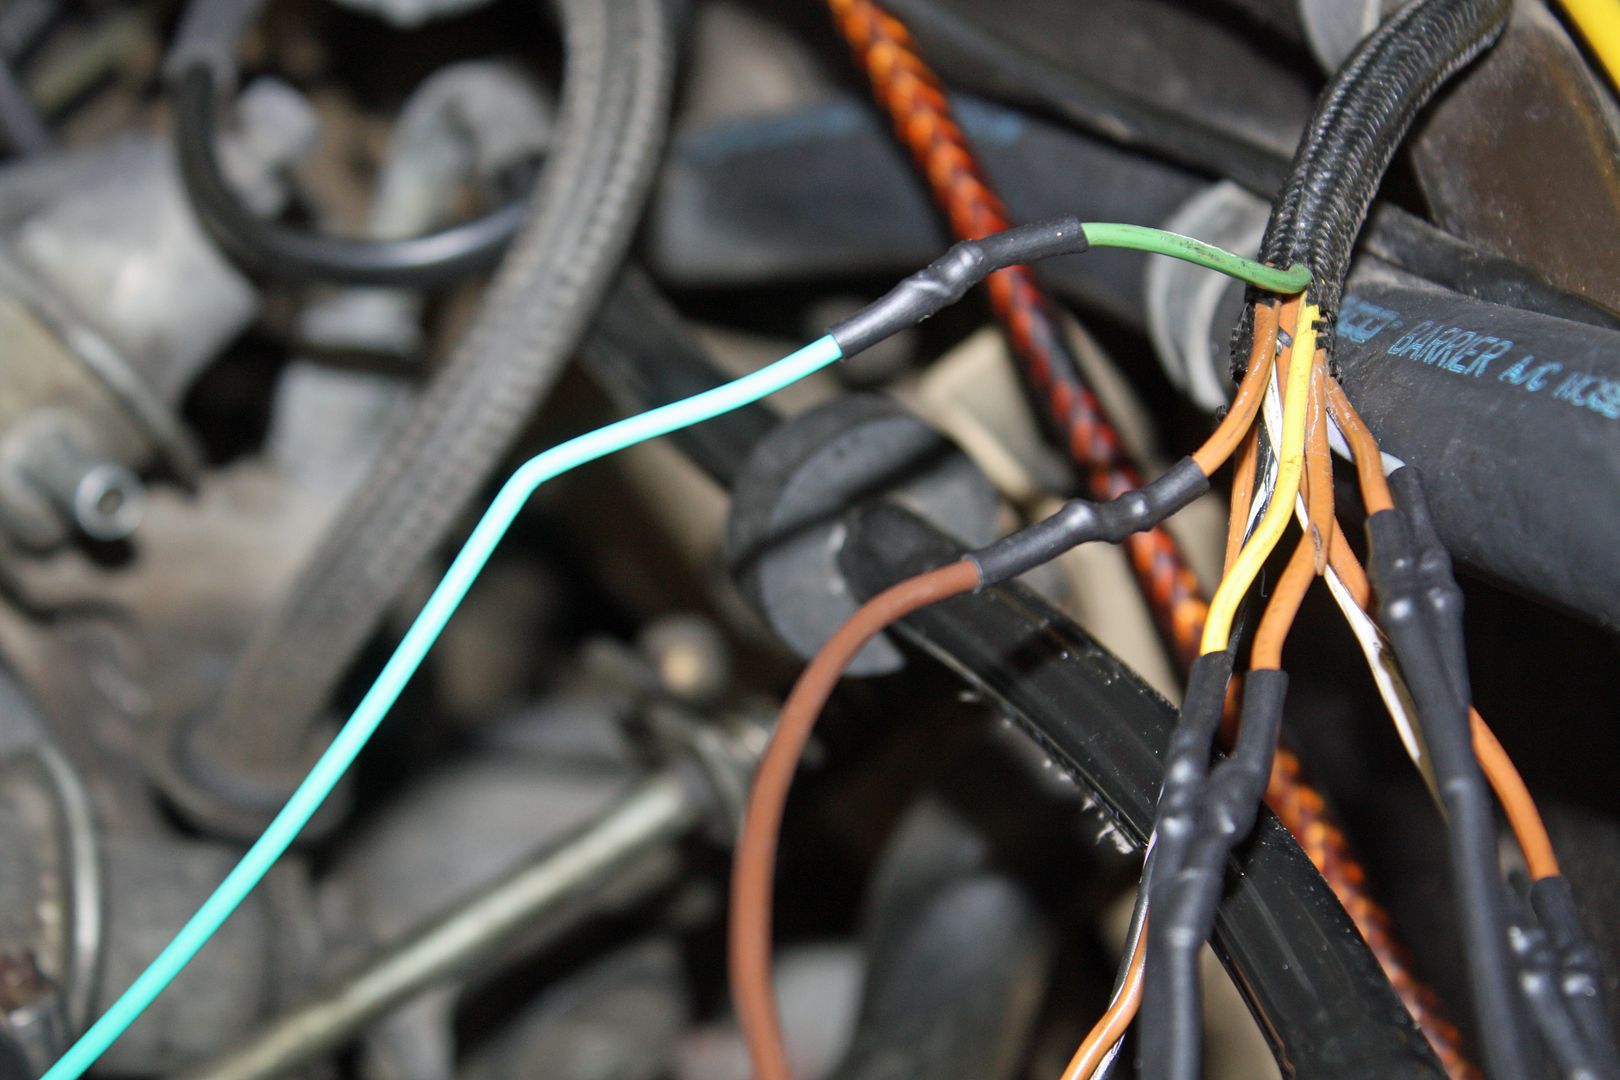
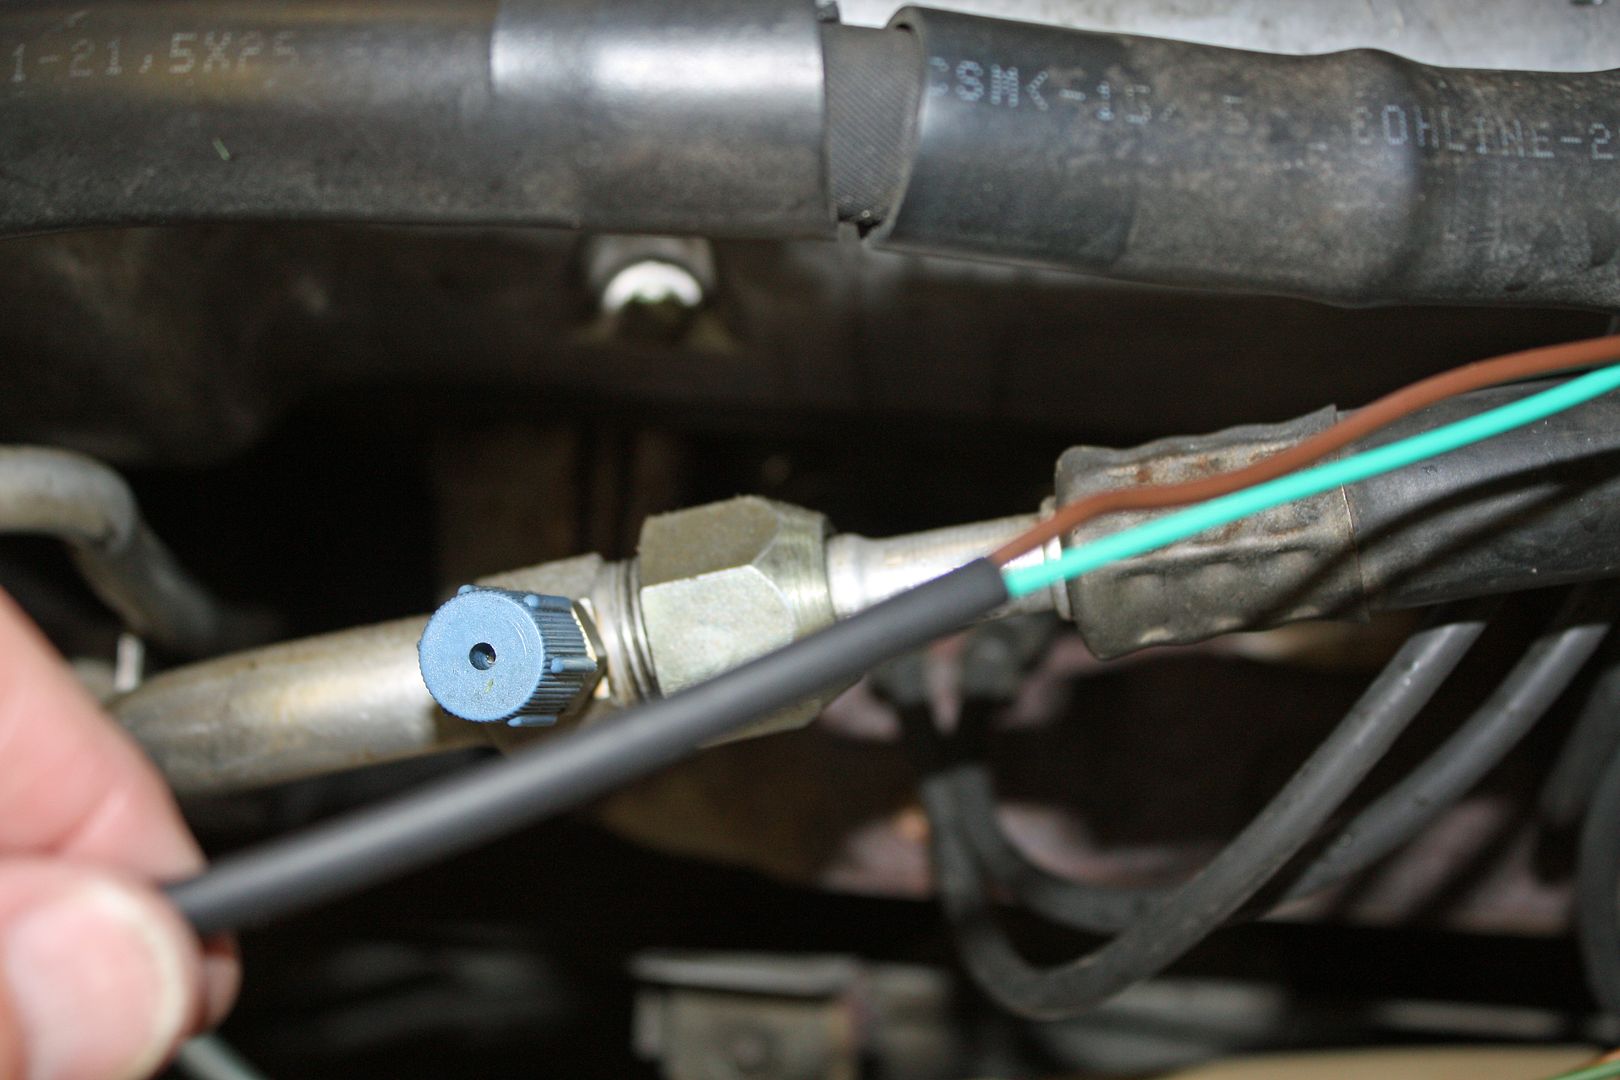
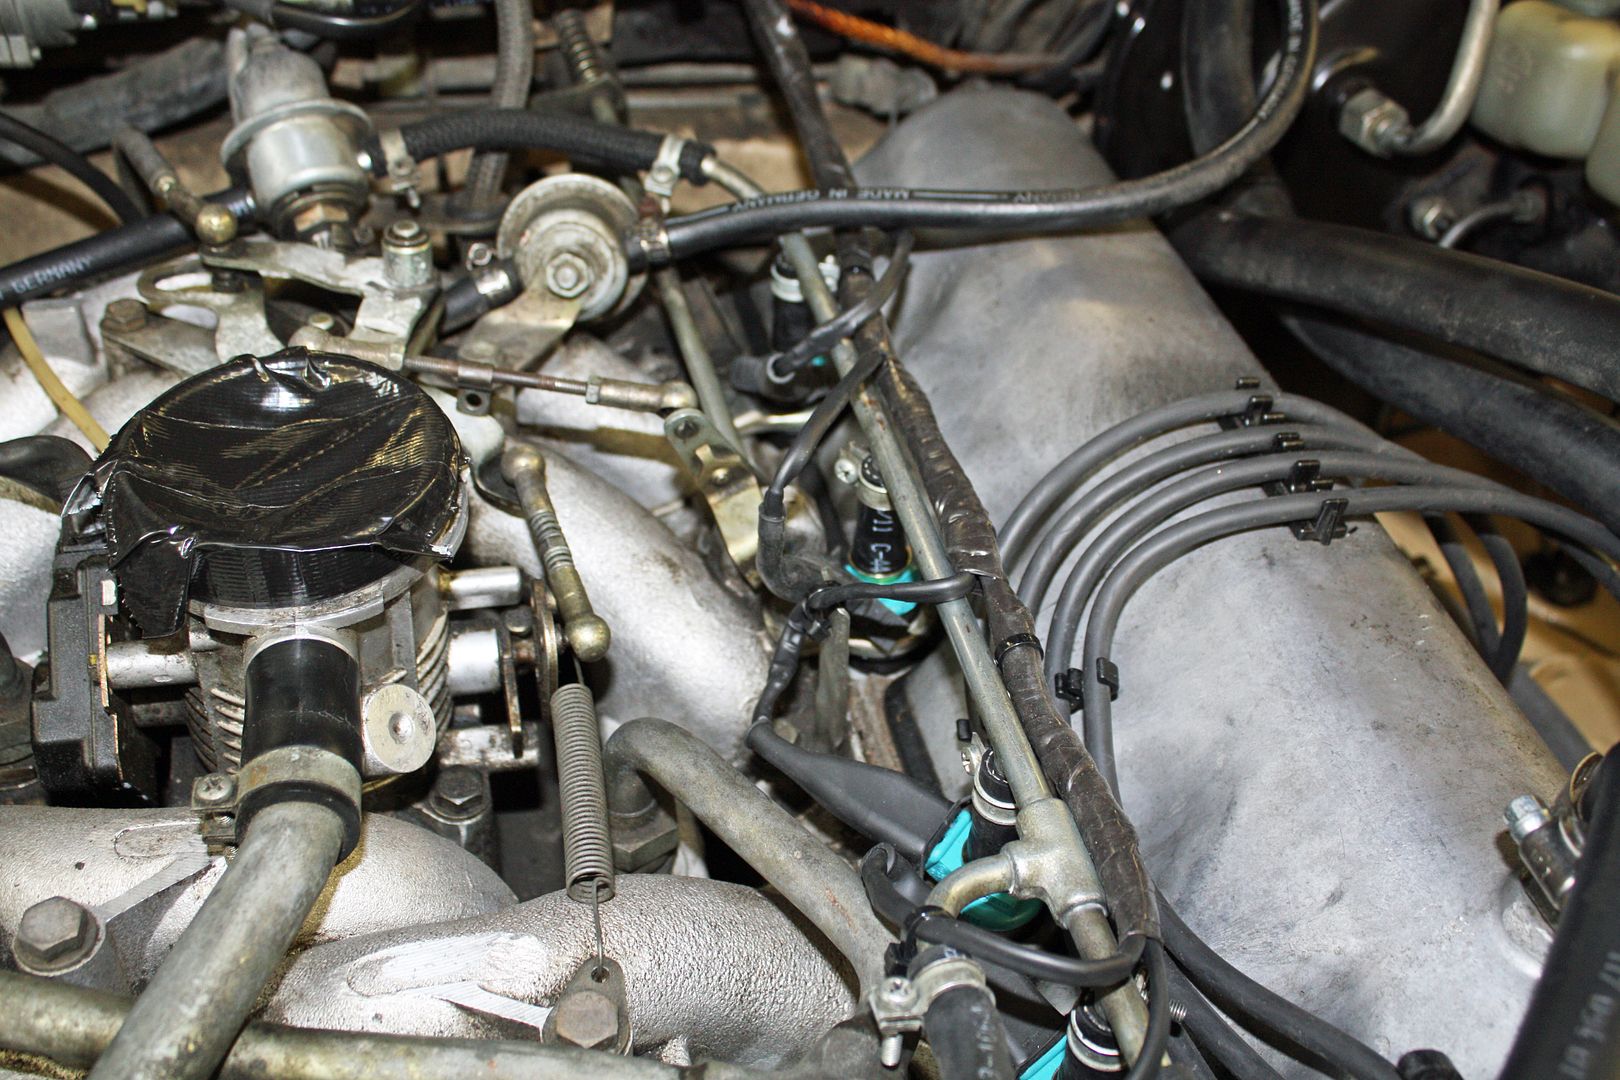
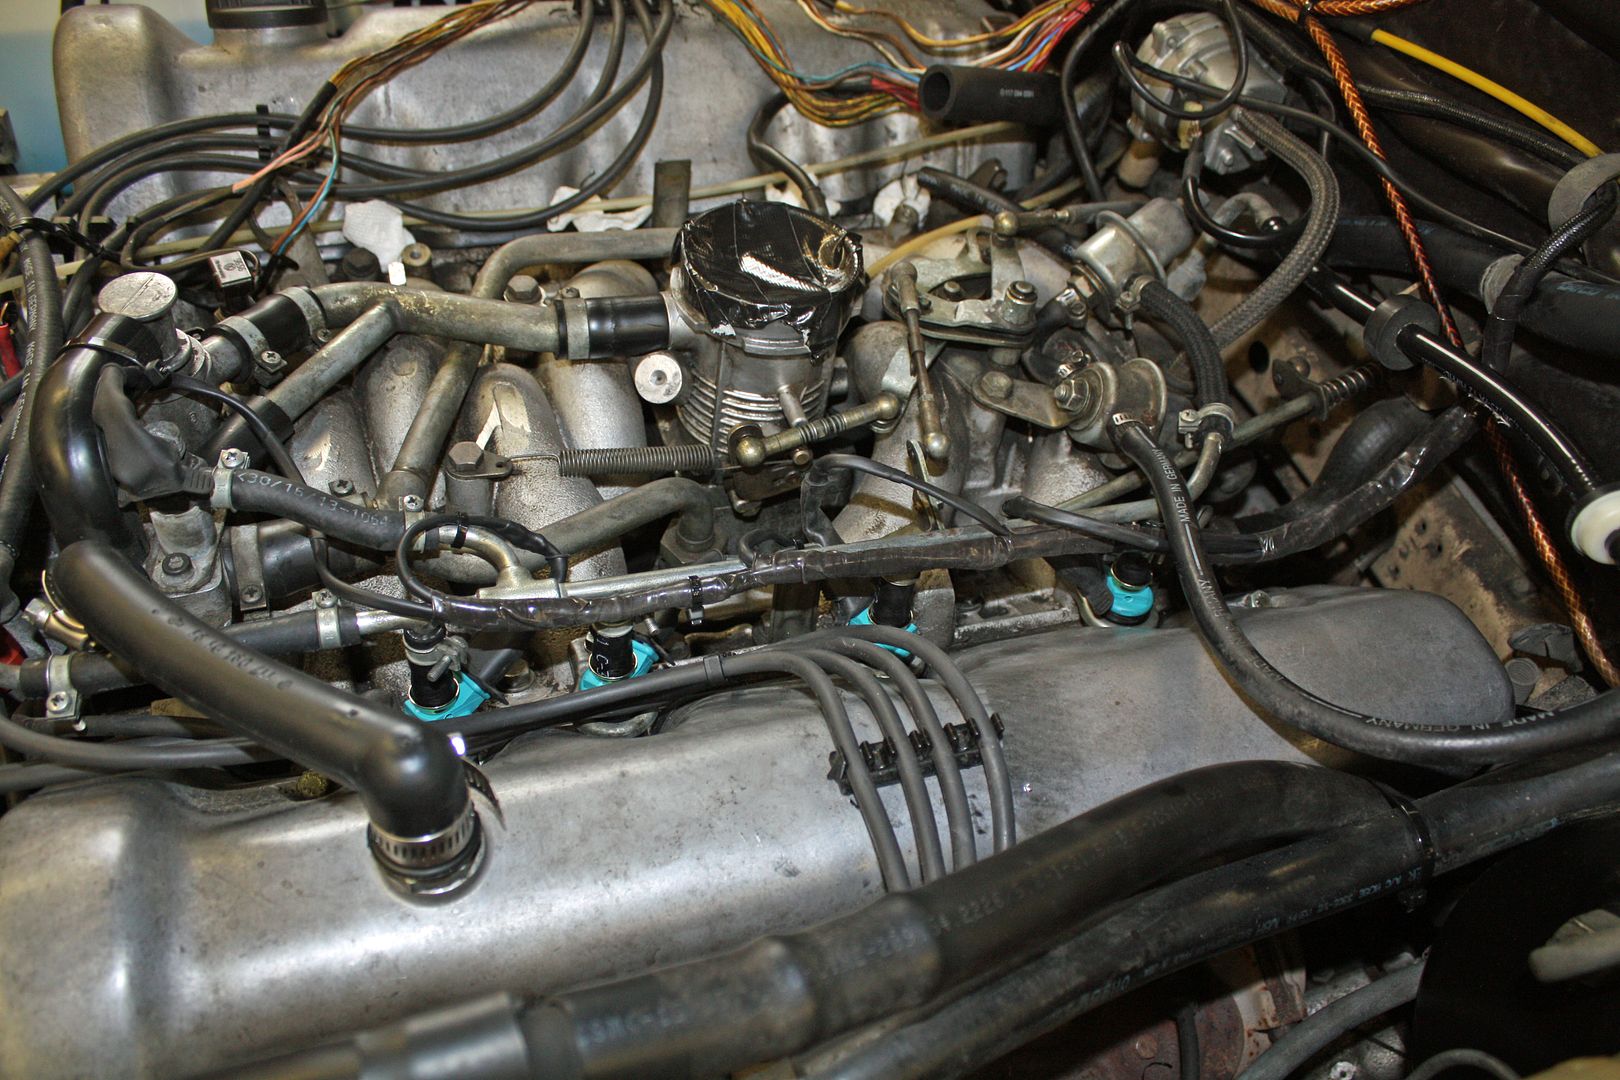
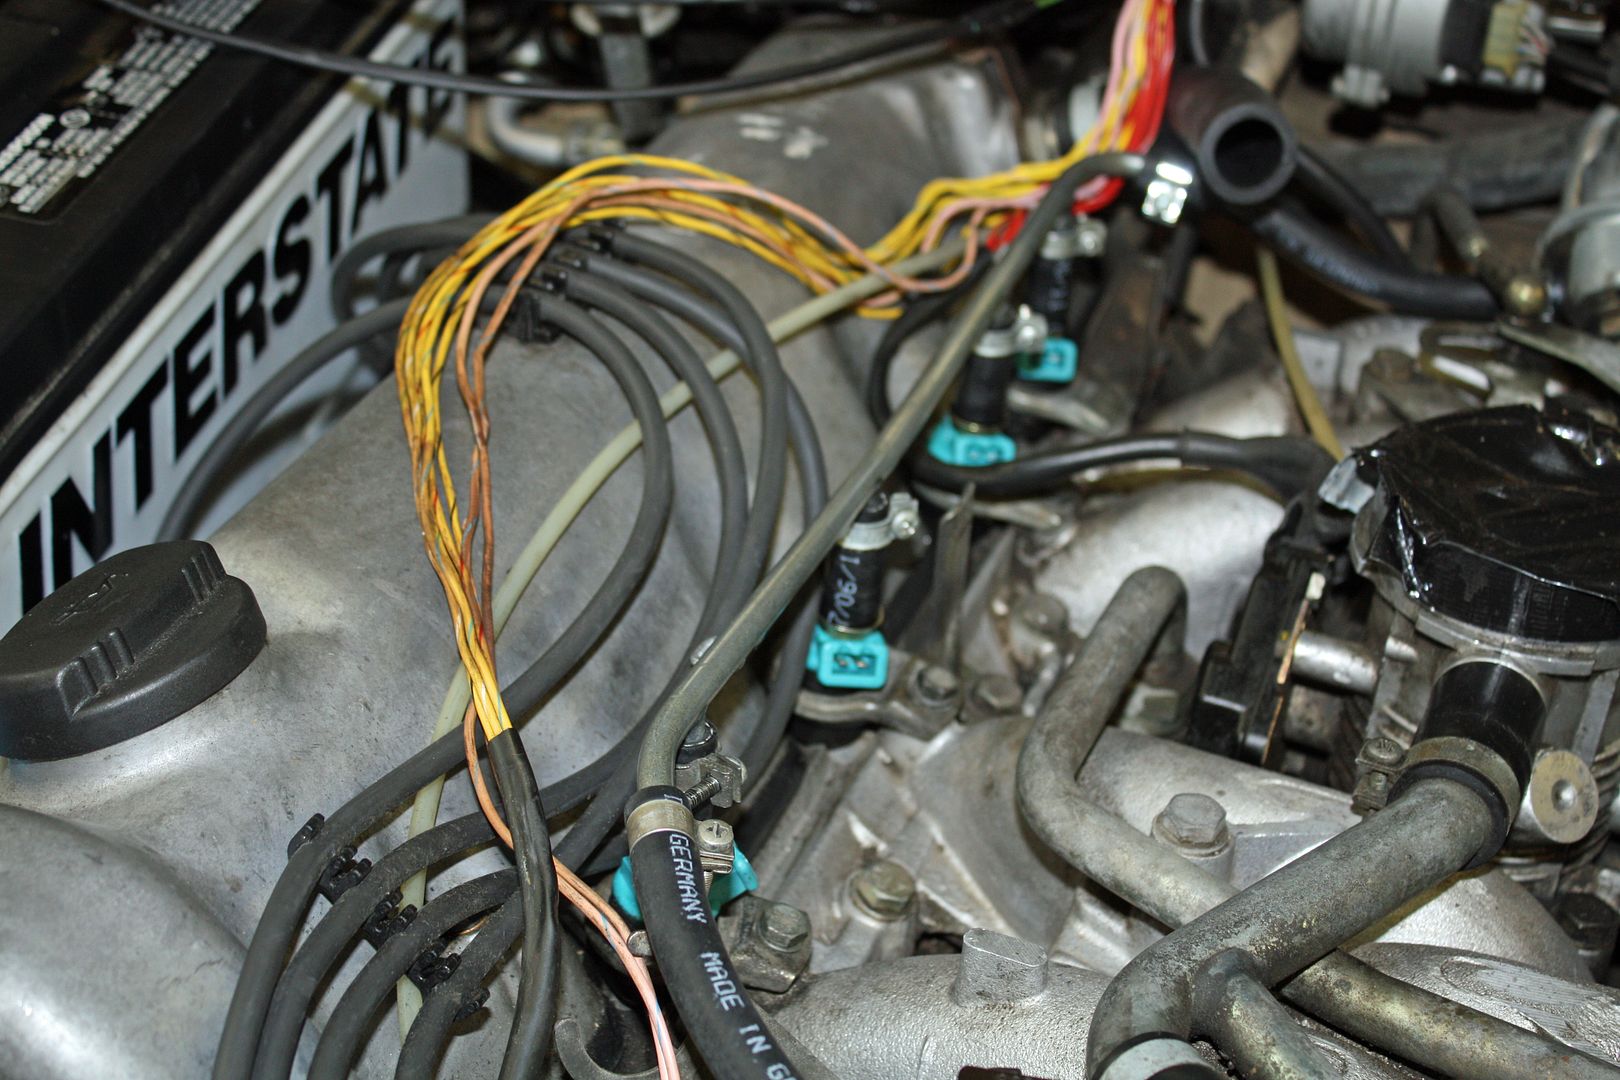
To do that organizing, I needed to strip back the wire coverings to expose the original wiring harness. Before I did that, I used a magic marker to place a cylinder number on each connector. In doing that, I discovered that the cold start valve, a water temp sensor and the cold air sensor on the air cleaner all used the same connectors and boots. I have more connectors and boots on the way.
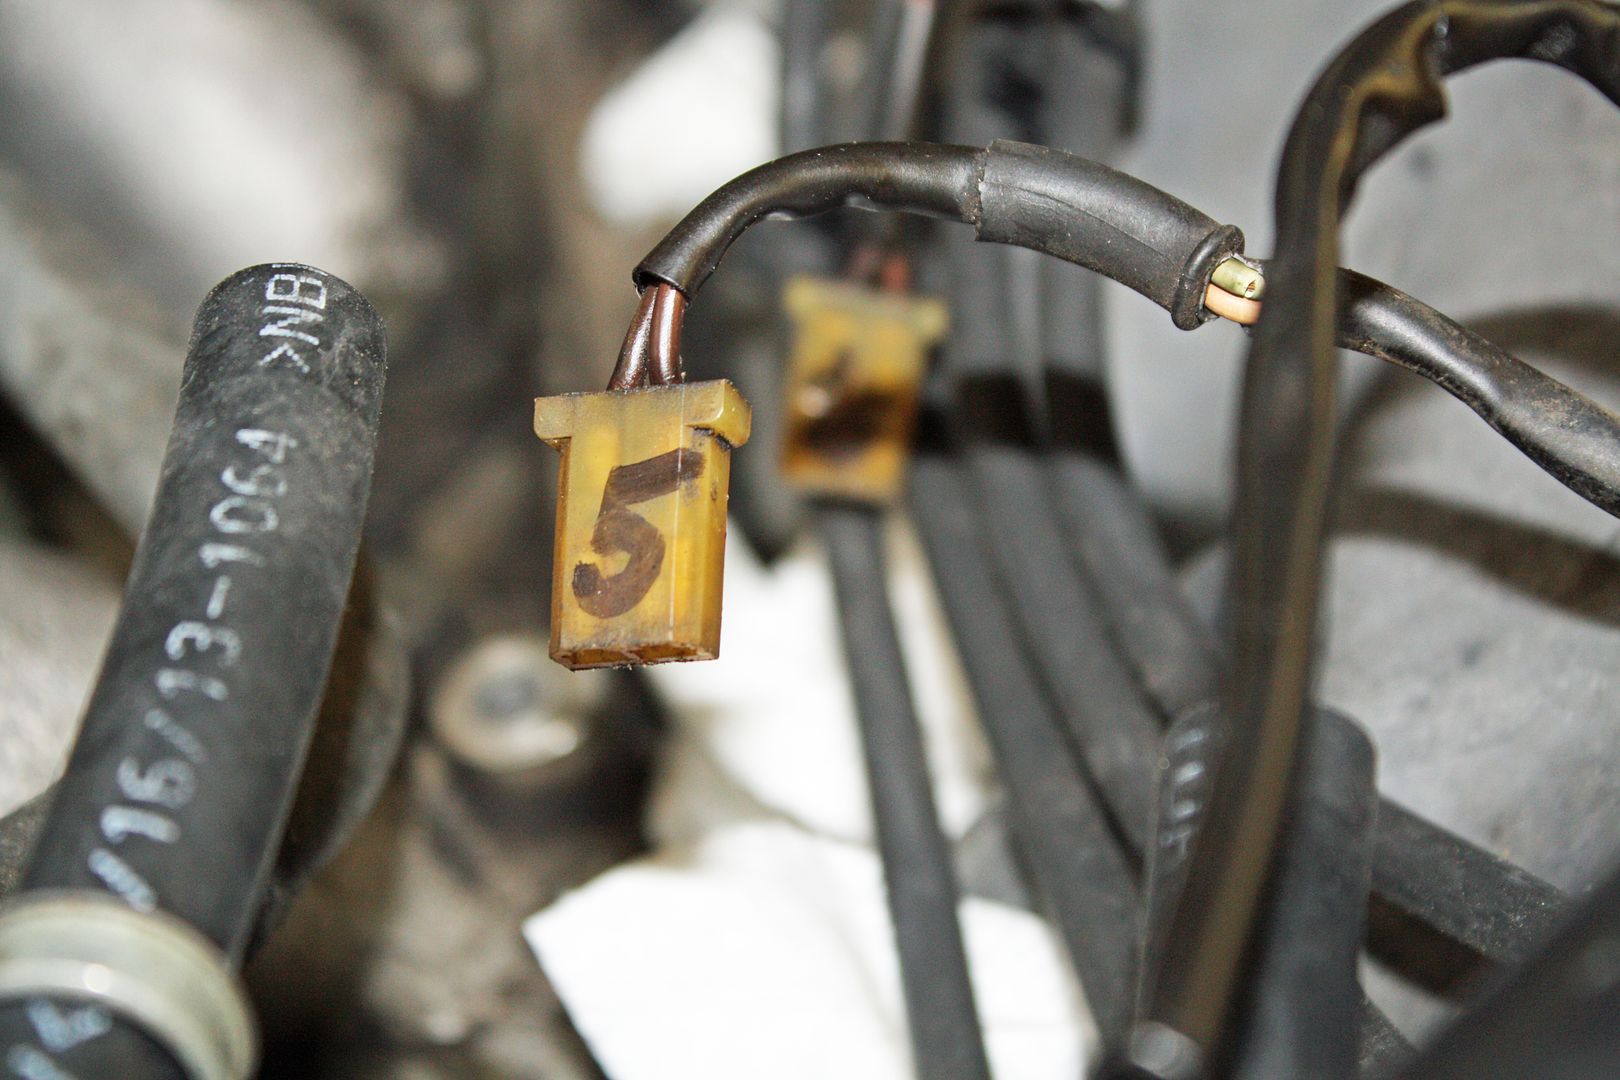
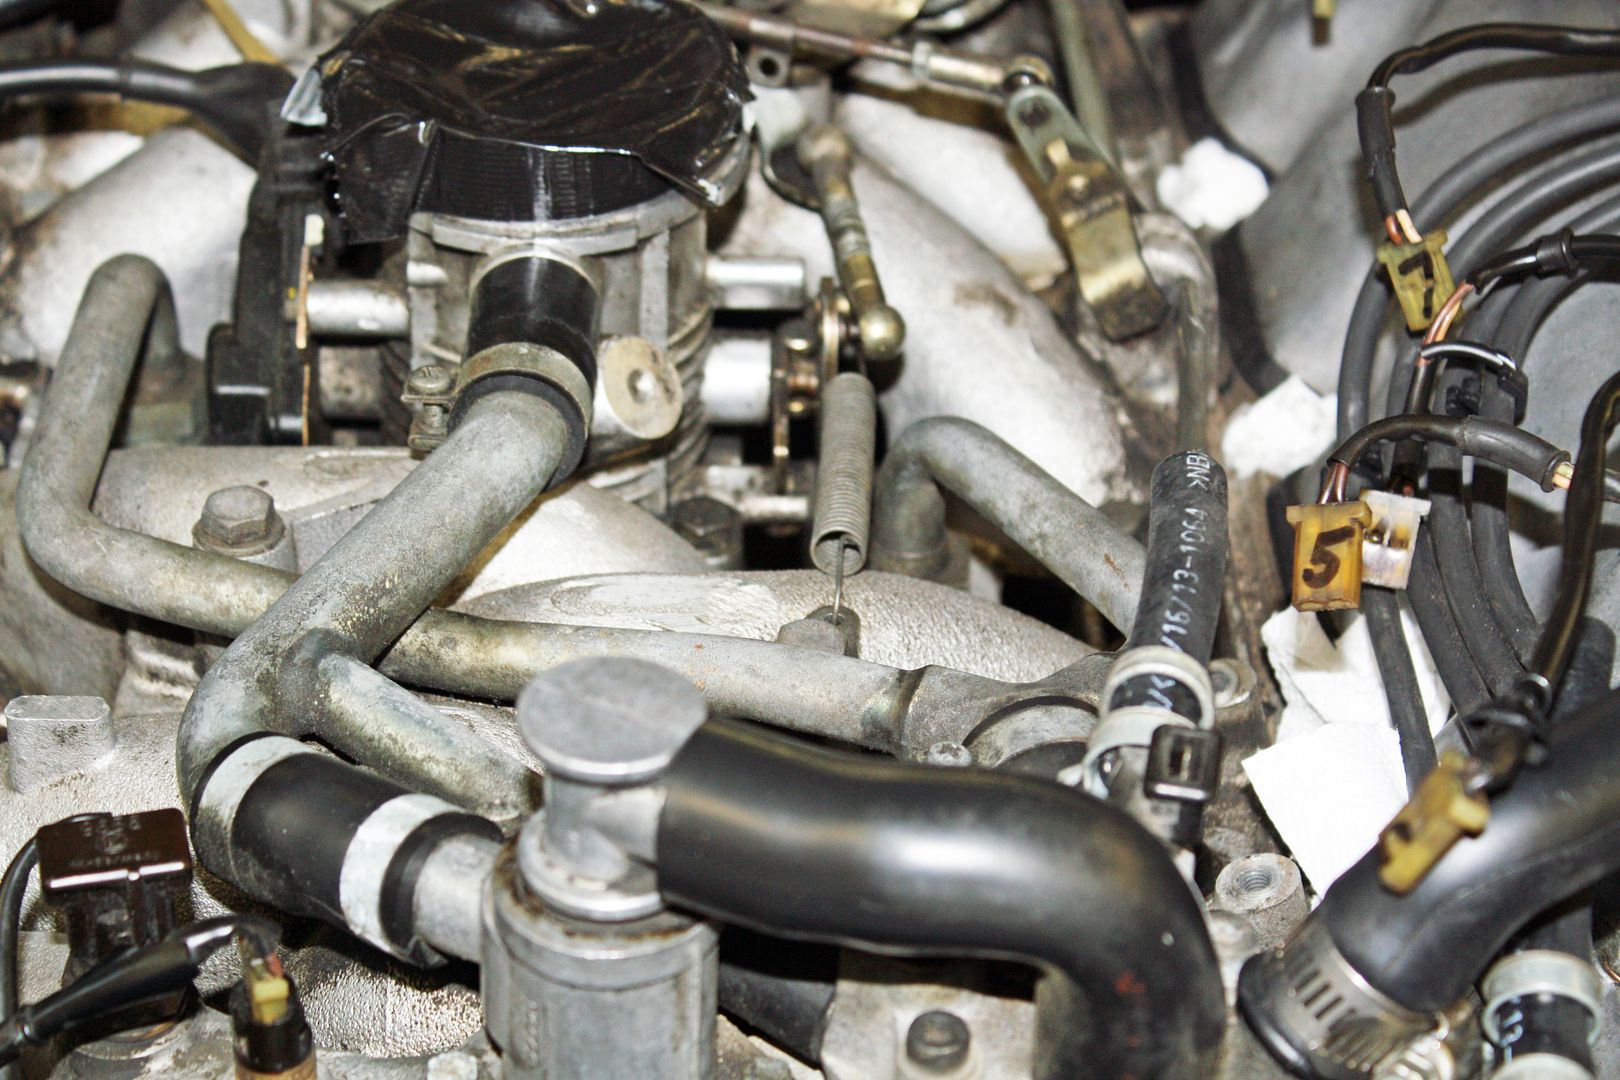
The connectors have a rounded and a flat side. Once I had the wire covering stripped, I noted which color of wire ran to each side of the connector. I found a cylinder layout online. Next to each cylinder number, I drew the outline of a connector and drew in two connector lines. I then wrote down the wire color for each fuel injector connector as well as the cold start valve, the water temp sensor and the cold air sensor. Now I am ready to begin the new wiring from the firewall to the various leads.
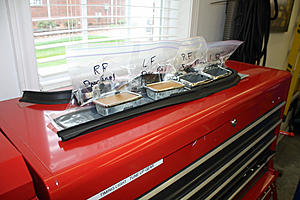
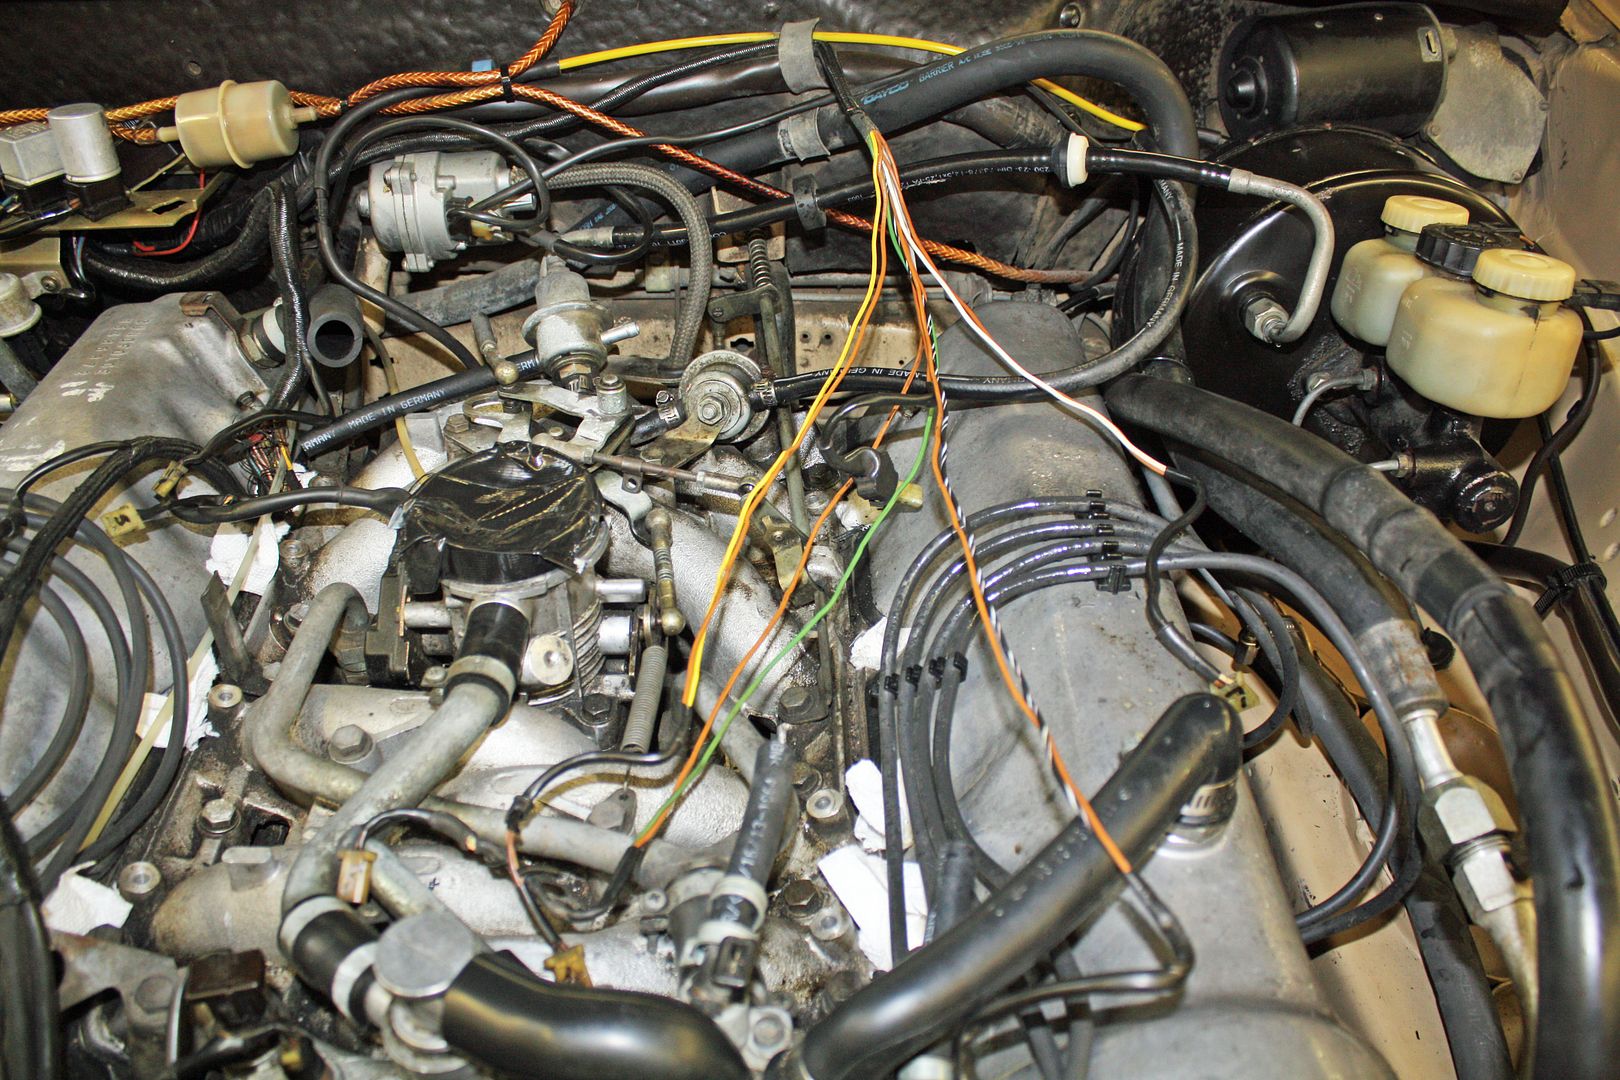
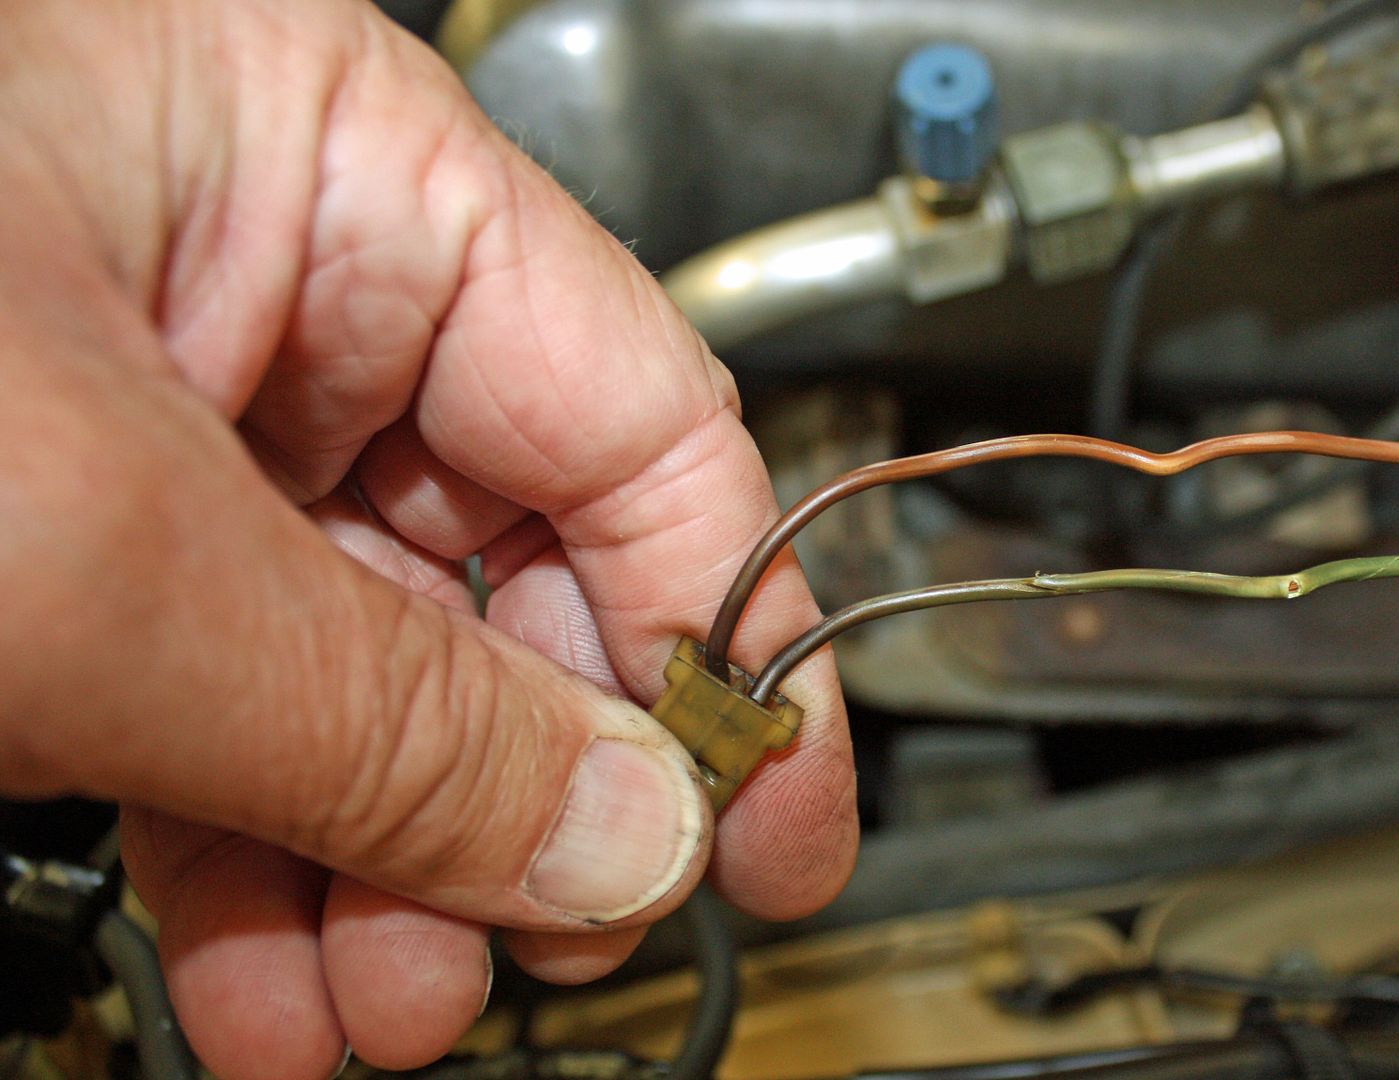
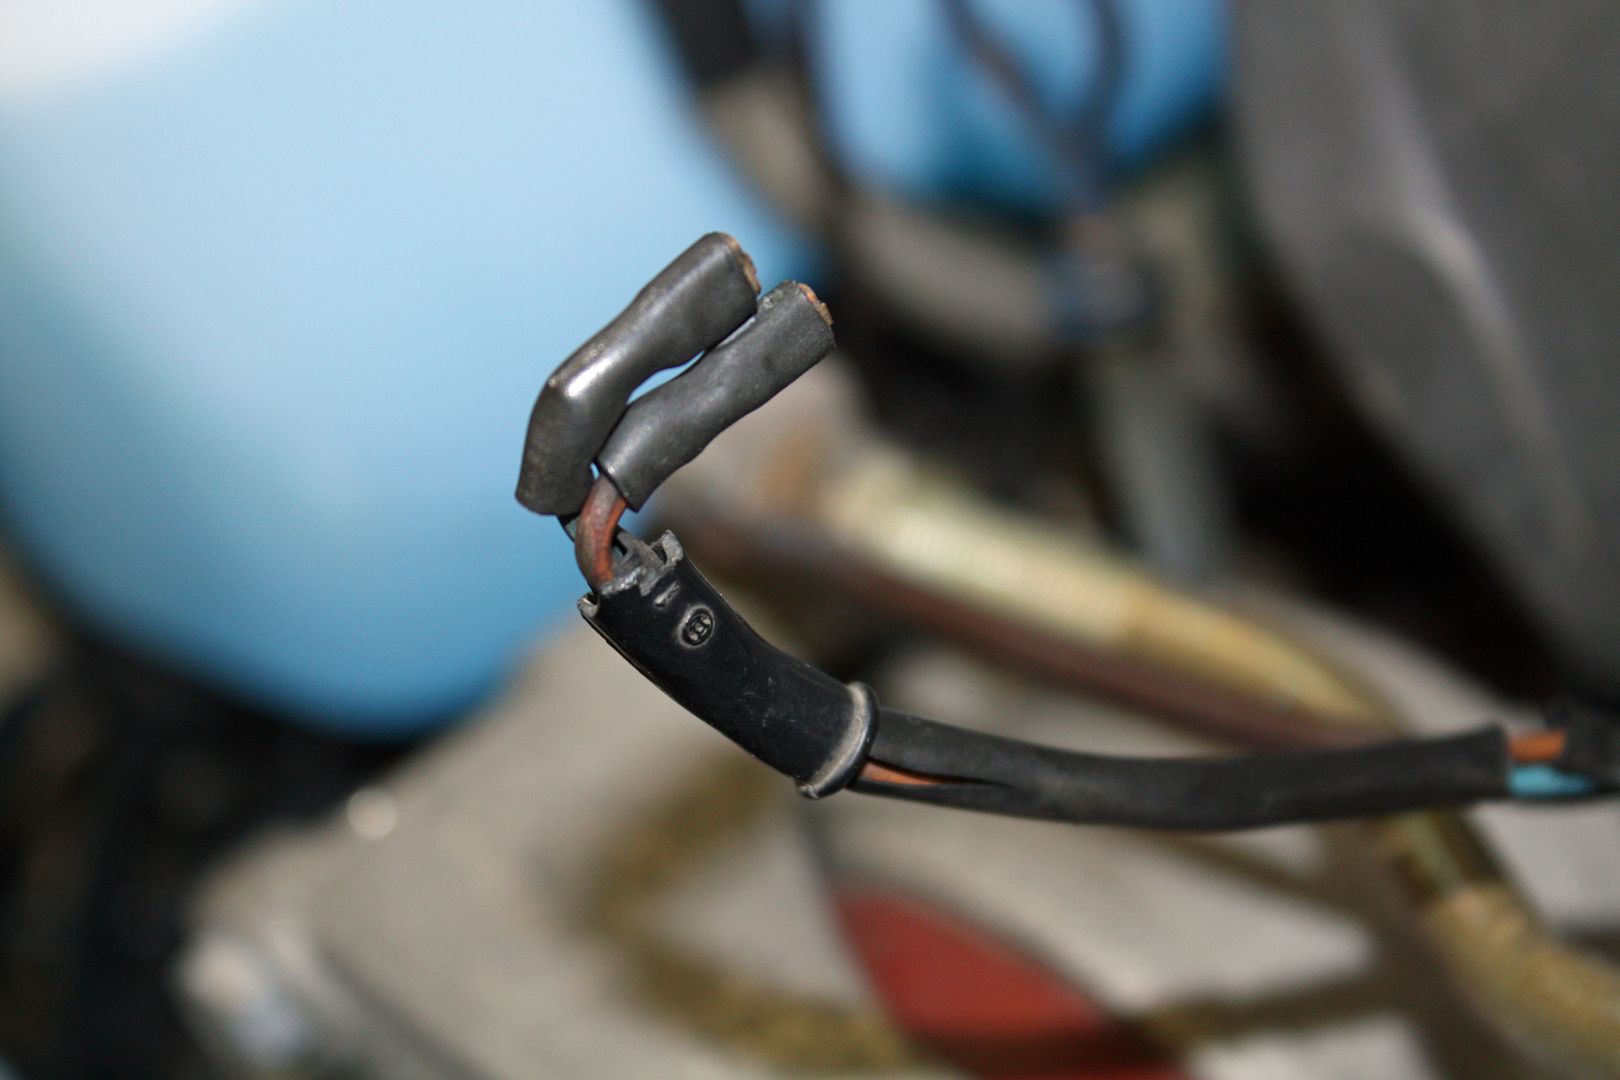
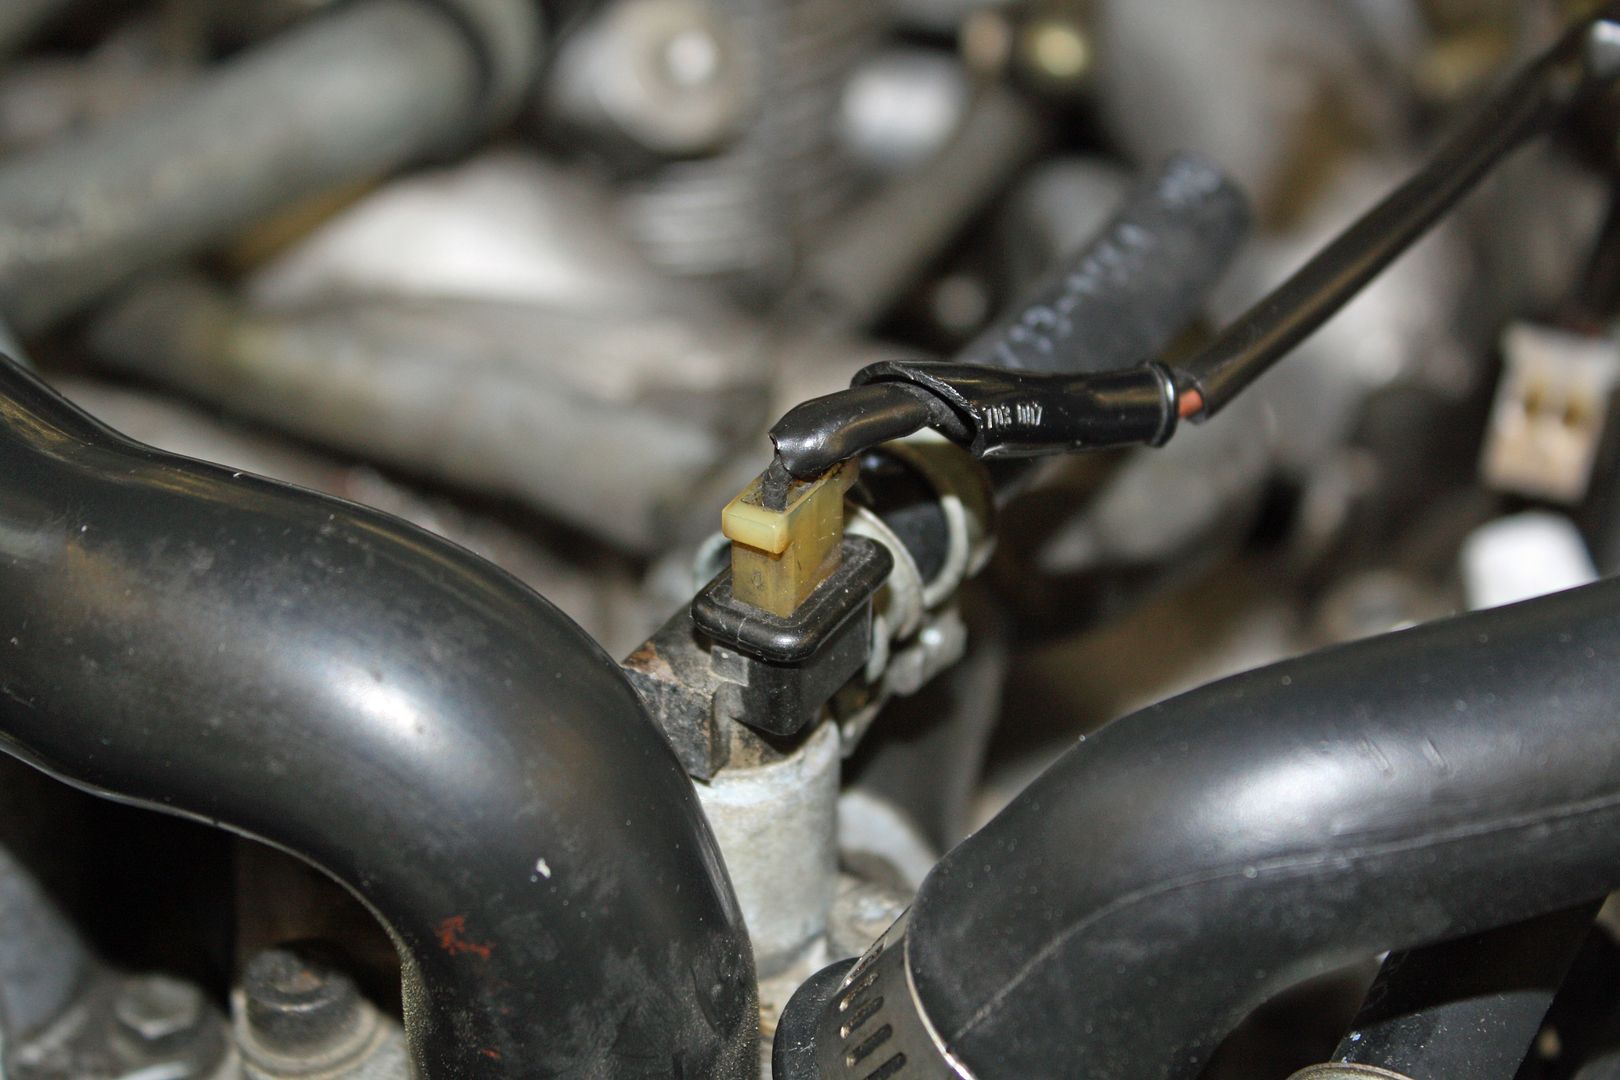
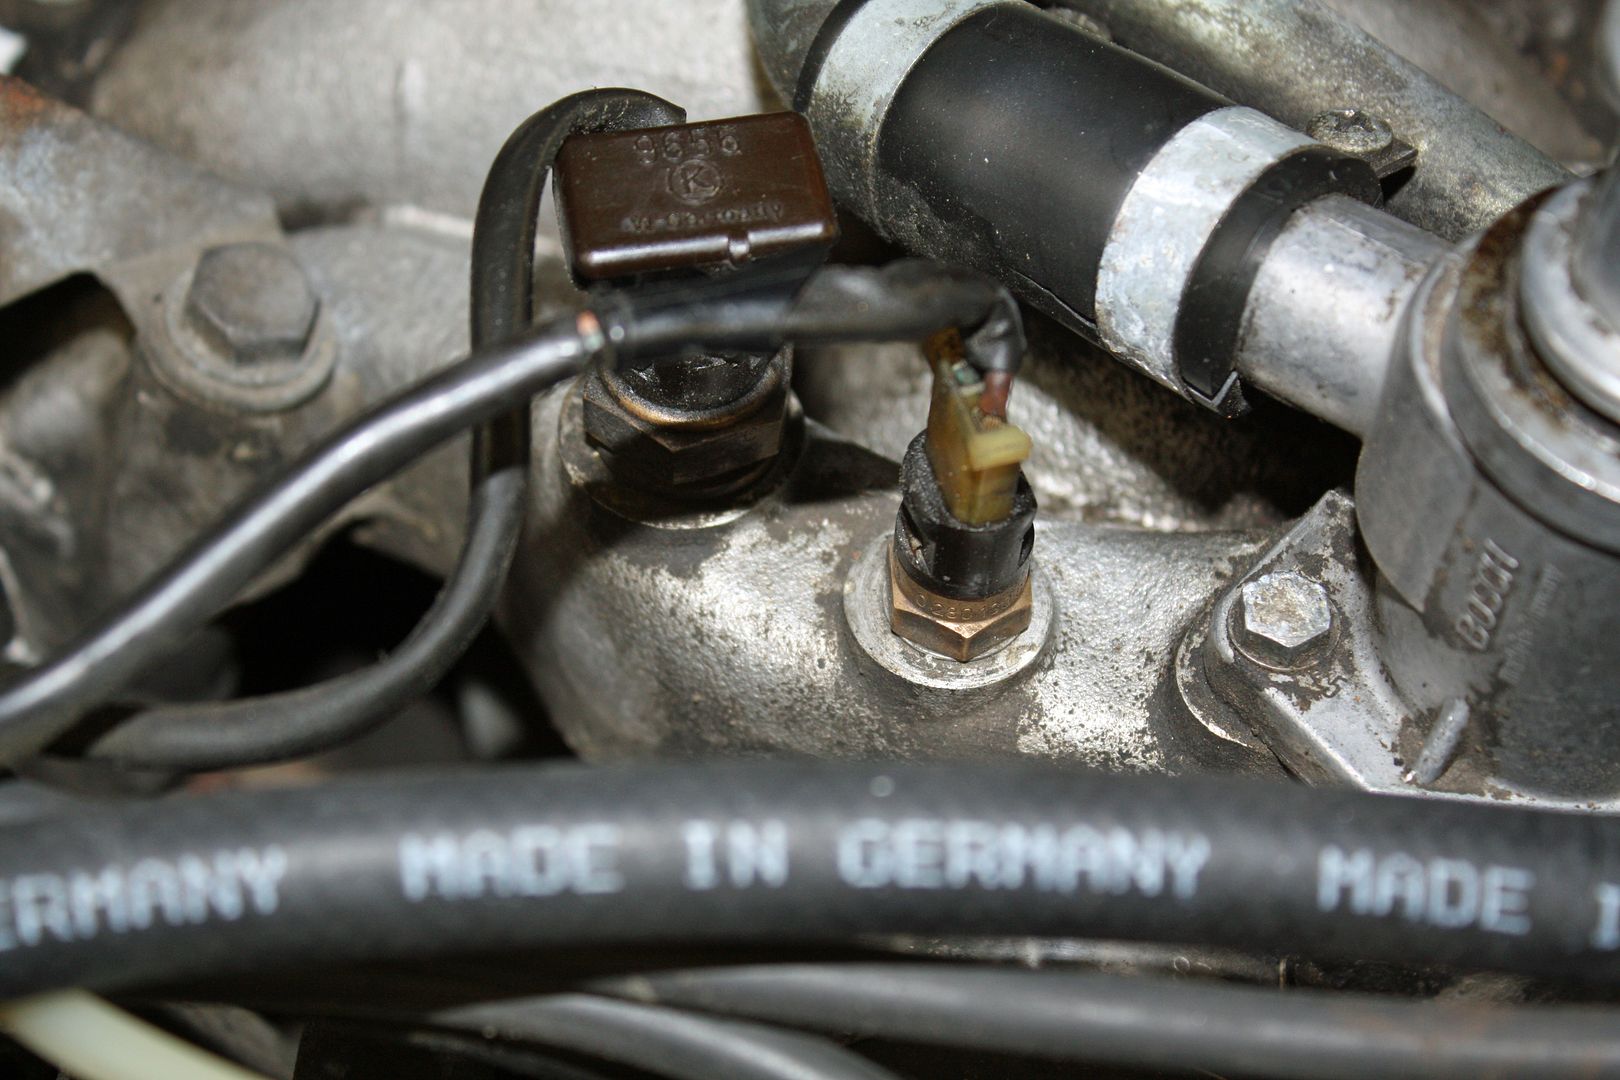
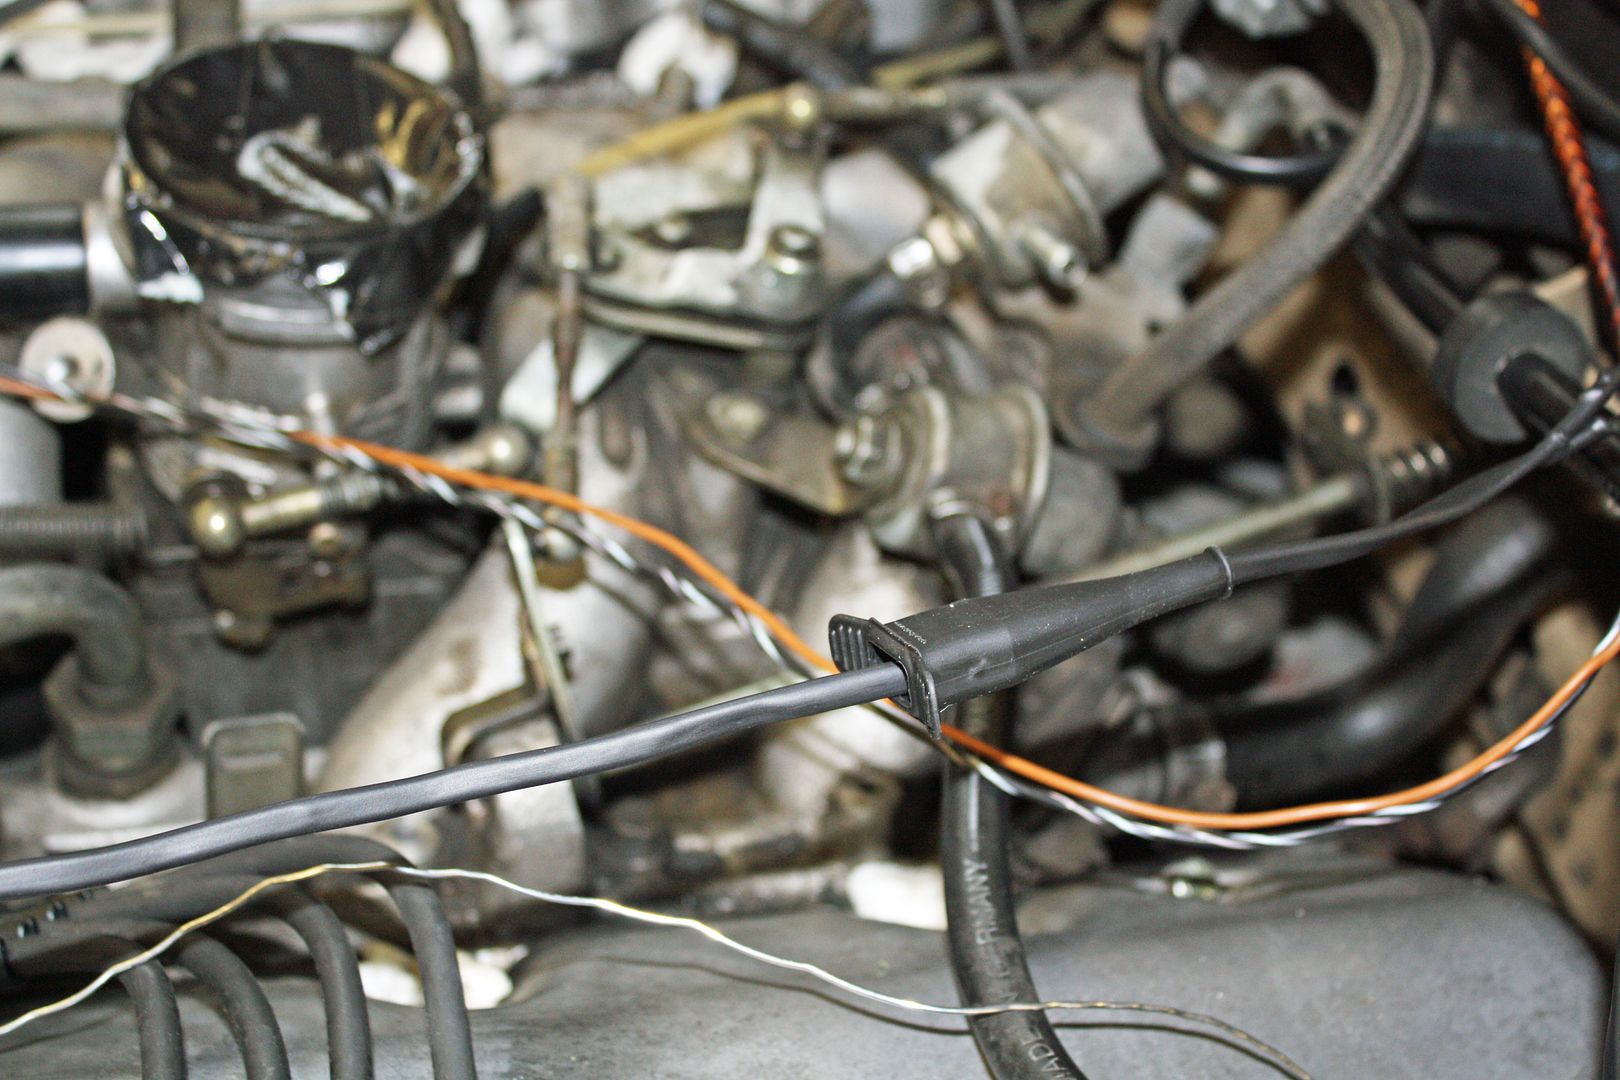
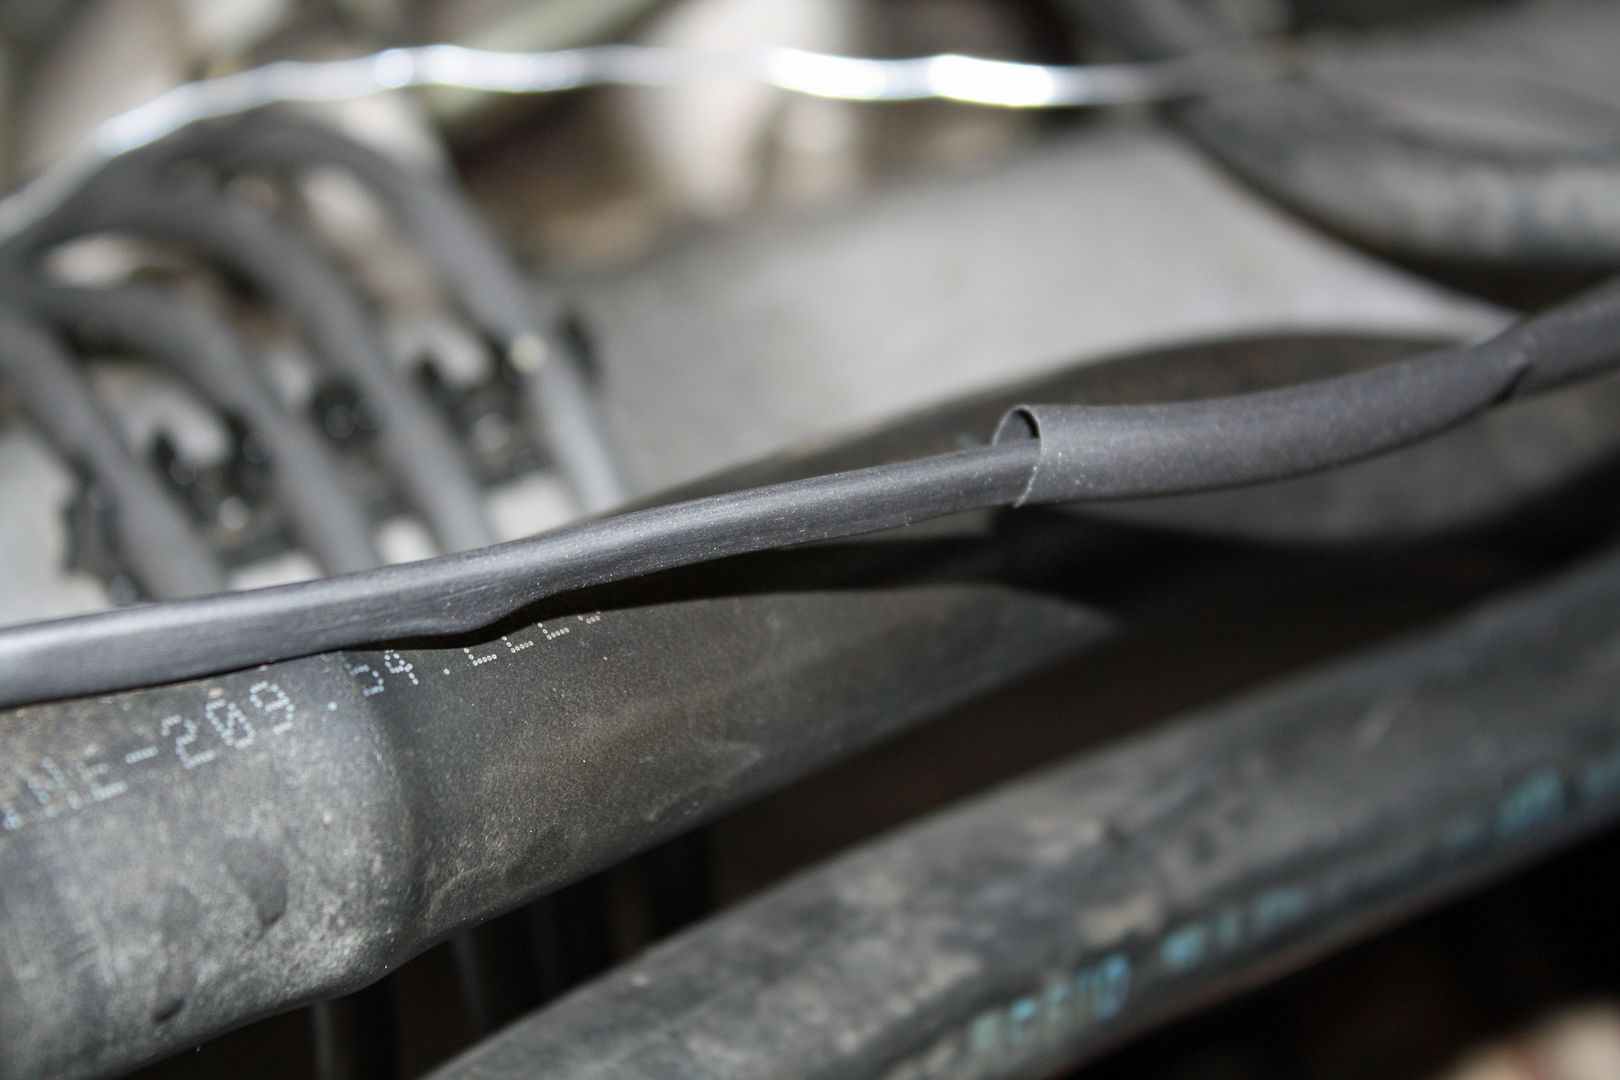
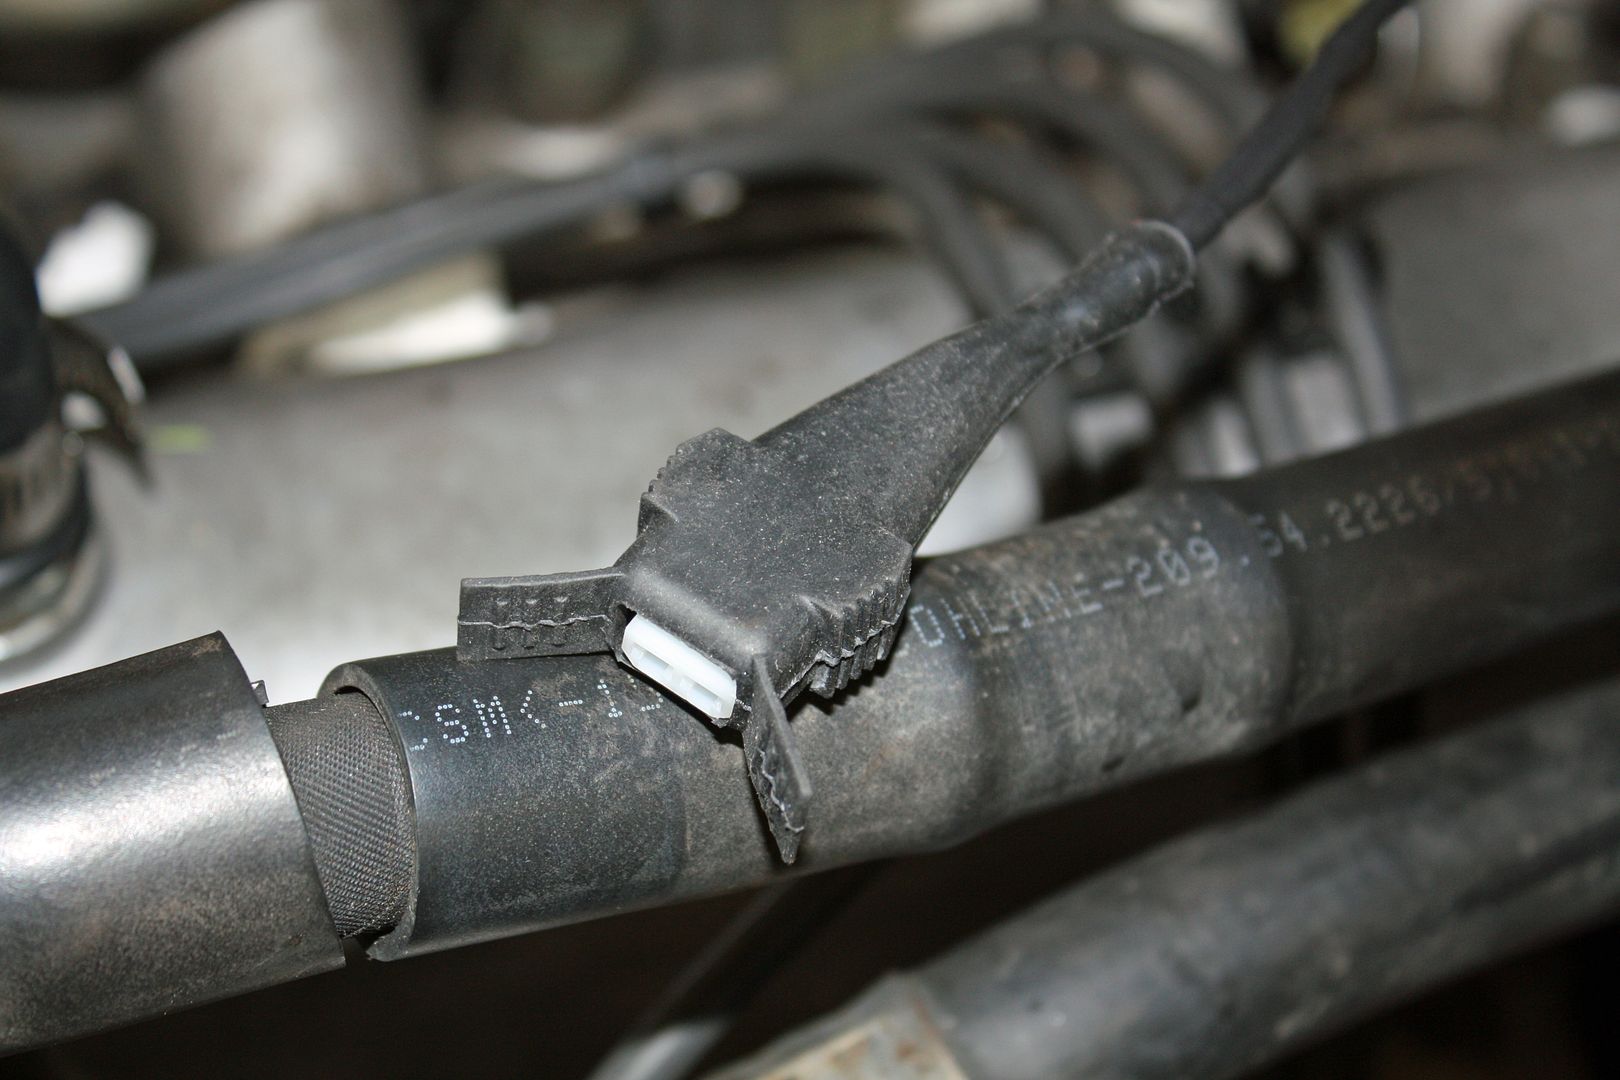
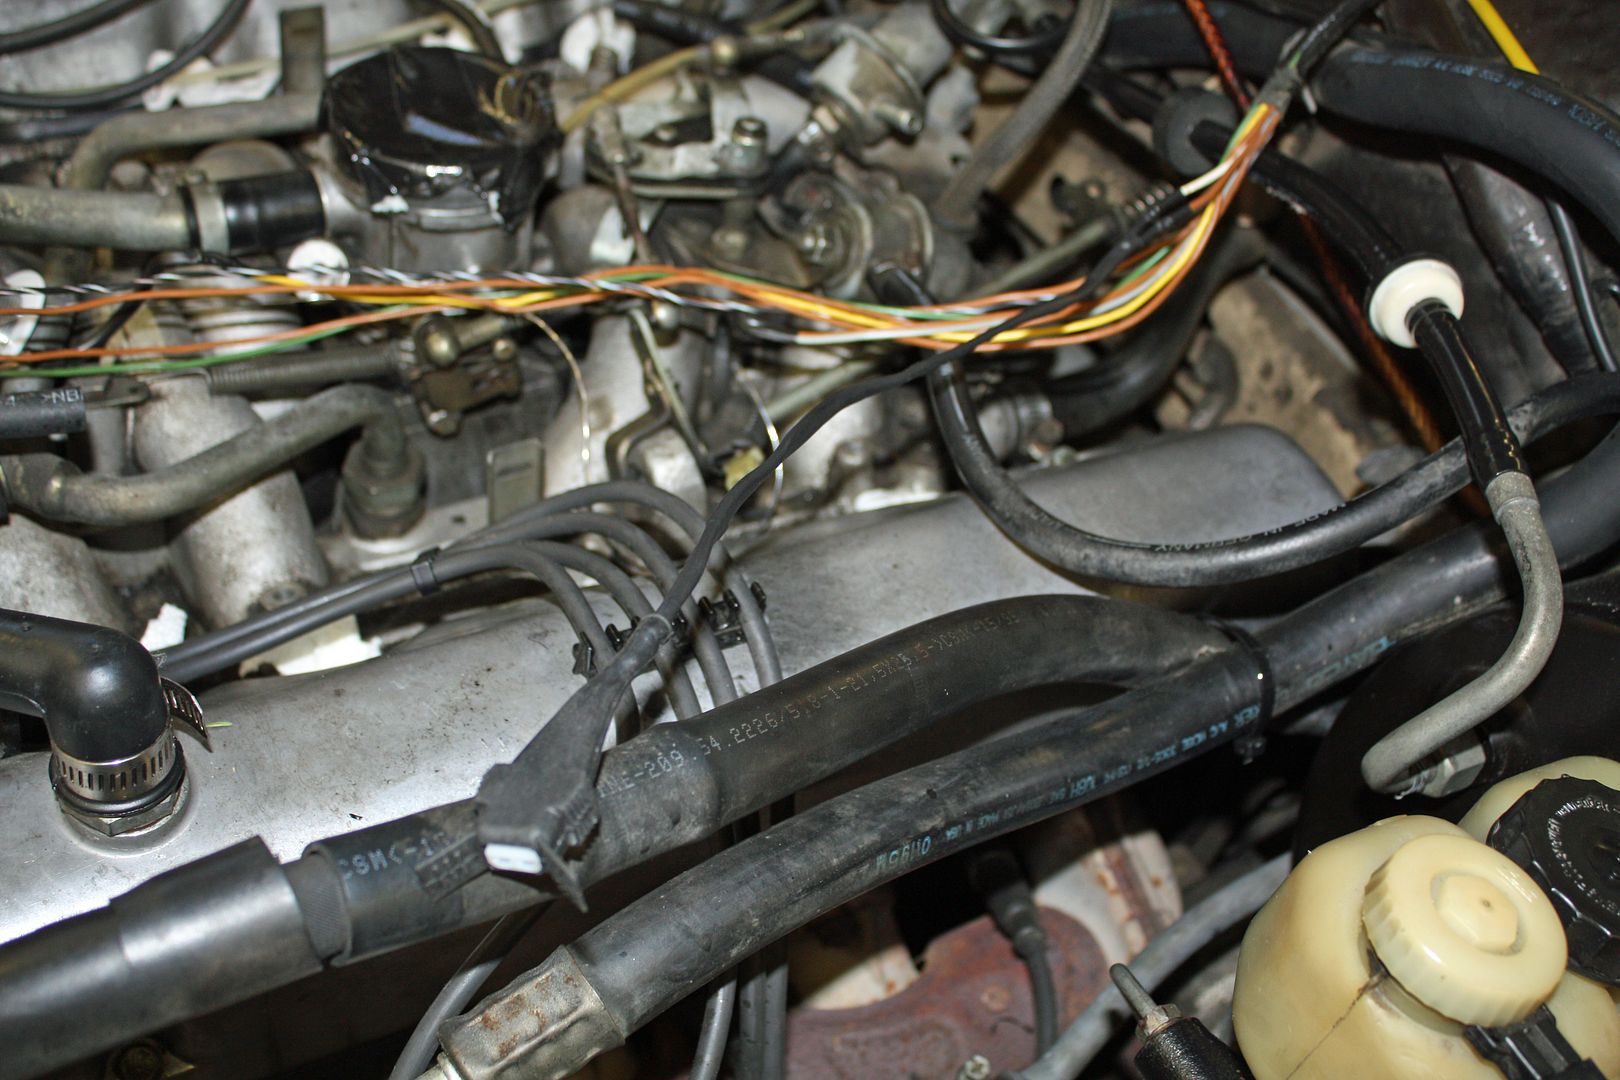
As you can see by these photos, the wiring had some issues. Most of the boots were either missing or in tatters, the shrink wrap on the wires to the connectors was hardened and some of the wiring covering had failed.


The air temp sensor connector must have failed in the past as there were two separate leads to it rather than a single connector.
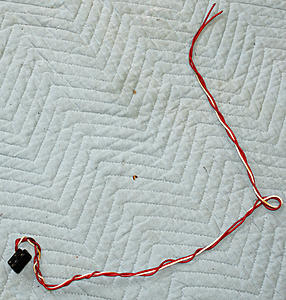
Here are the cold start and water temp sensors leads
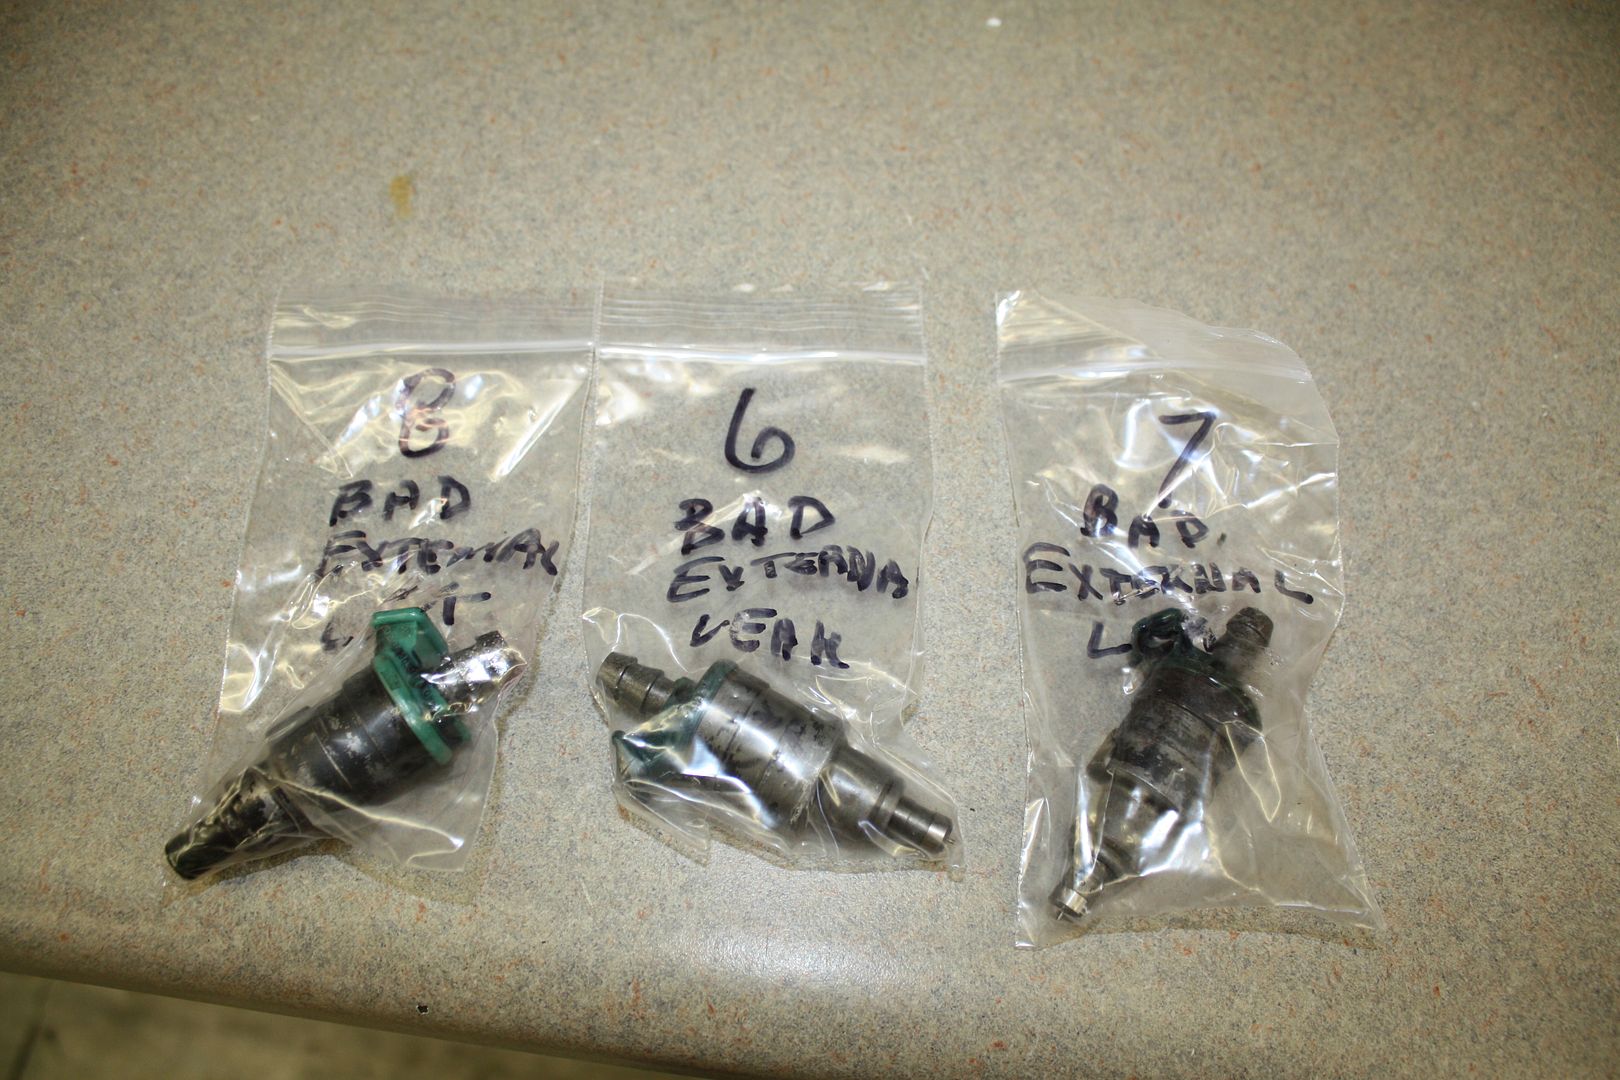
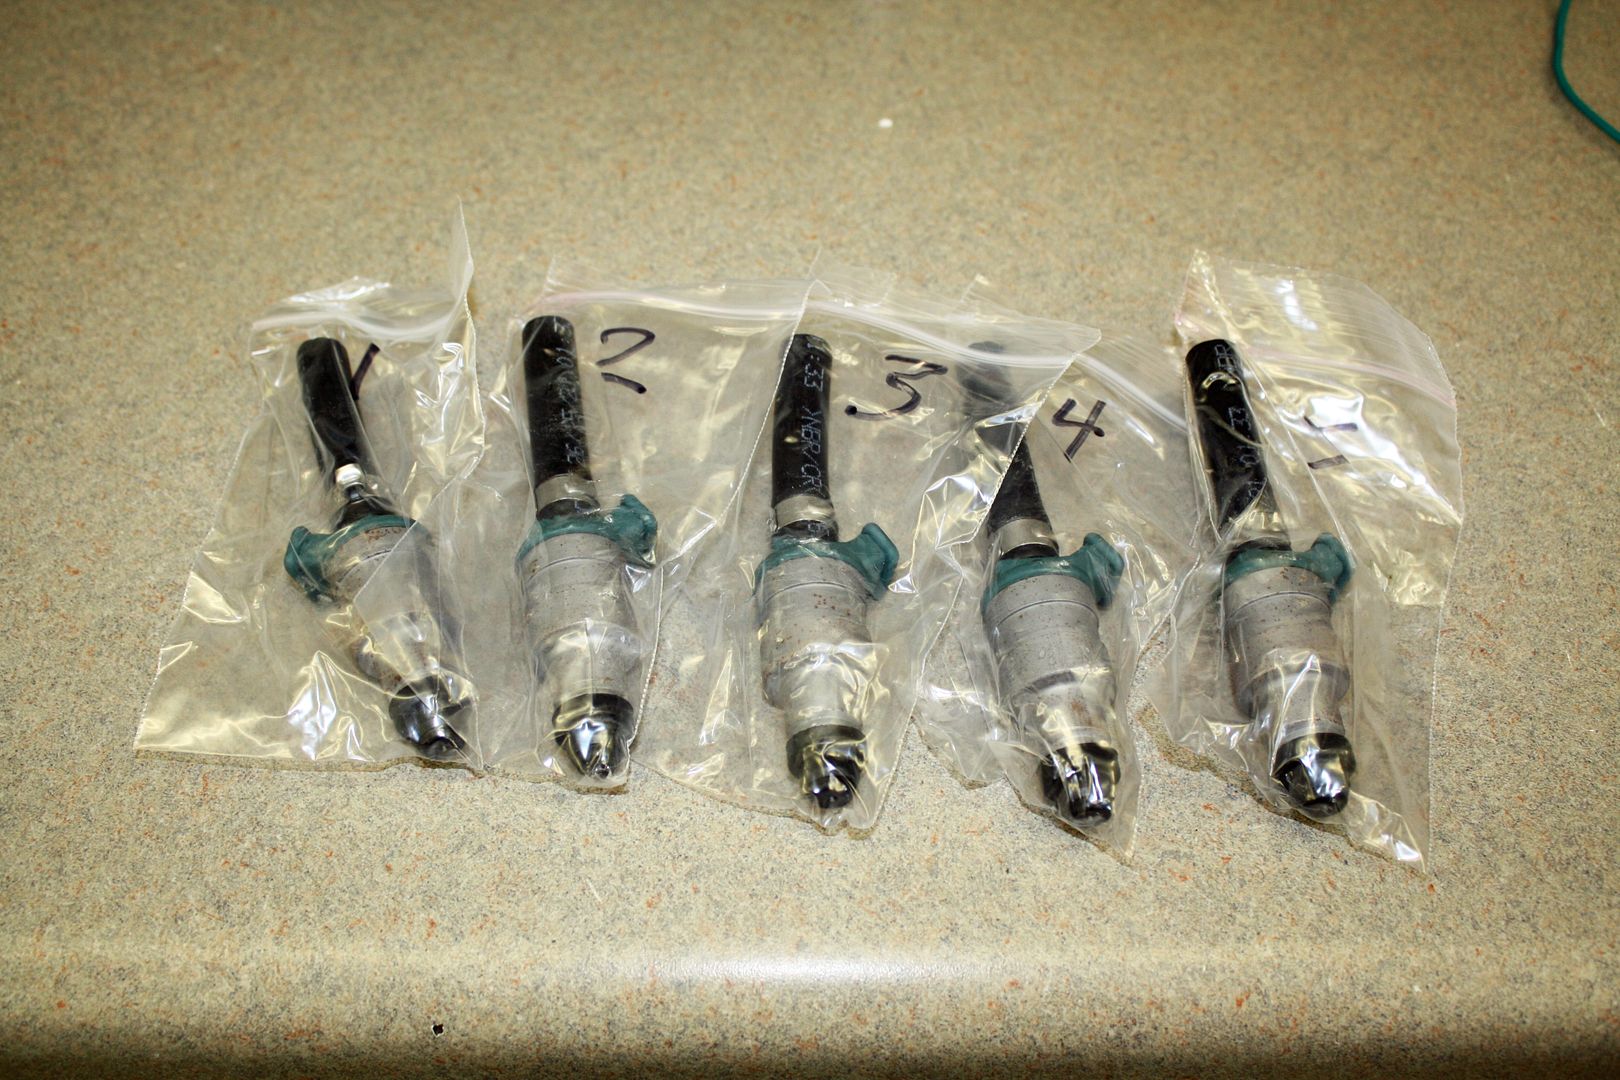
I removed the old injectors from their packing from Witch Hunter. They clearly marked which injectors were bad and have each of the cleaned and tested ones packaged individually.
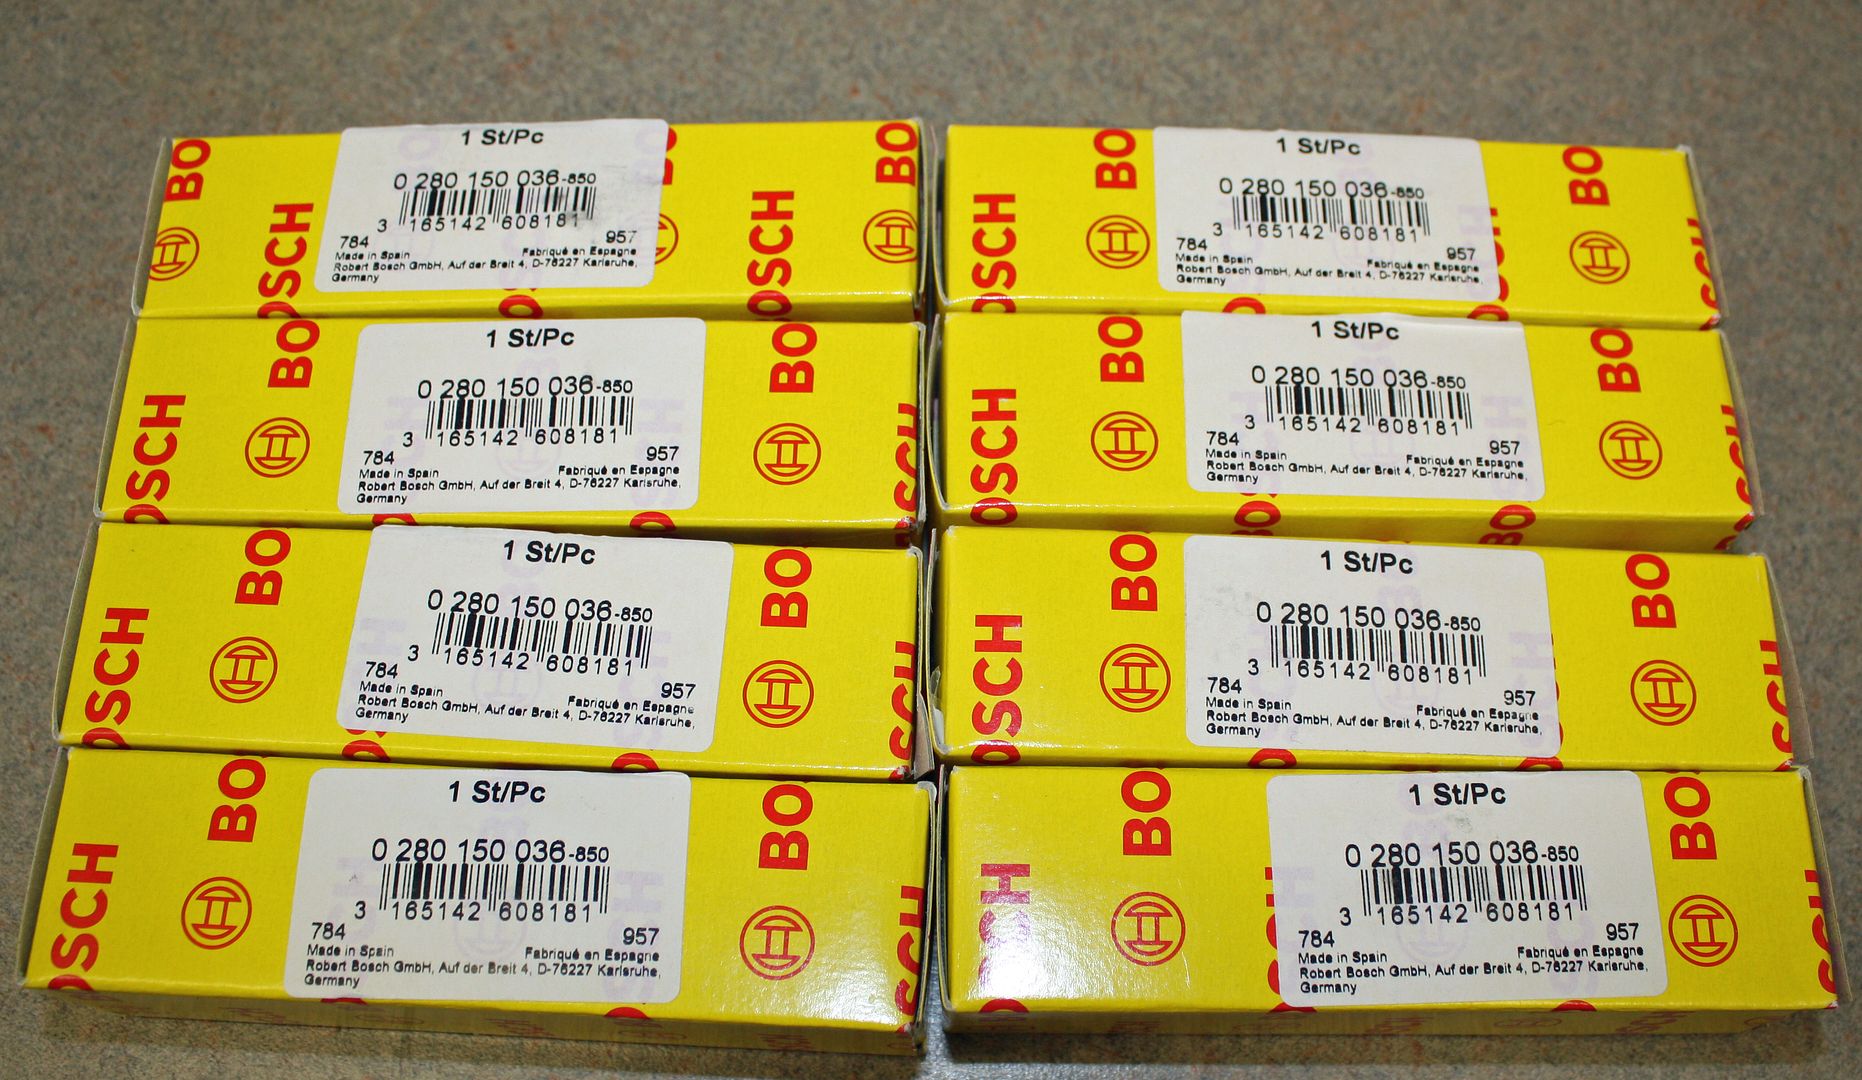
The new Bosch injectors are made in Spain.

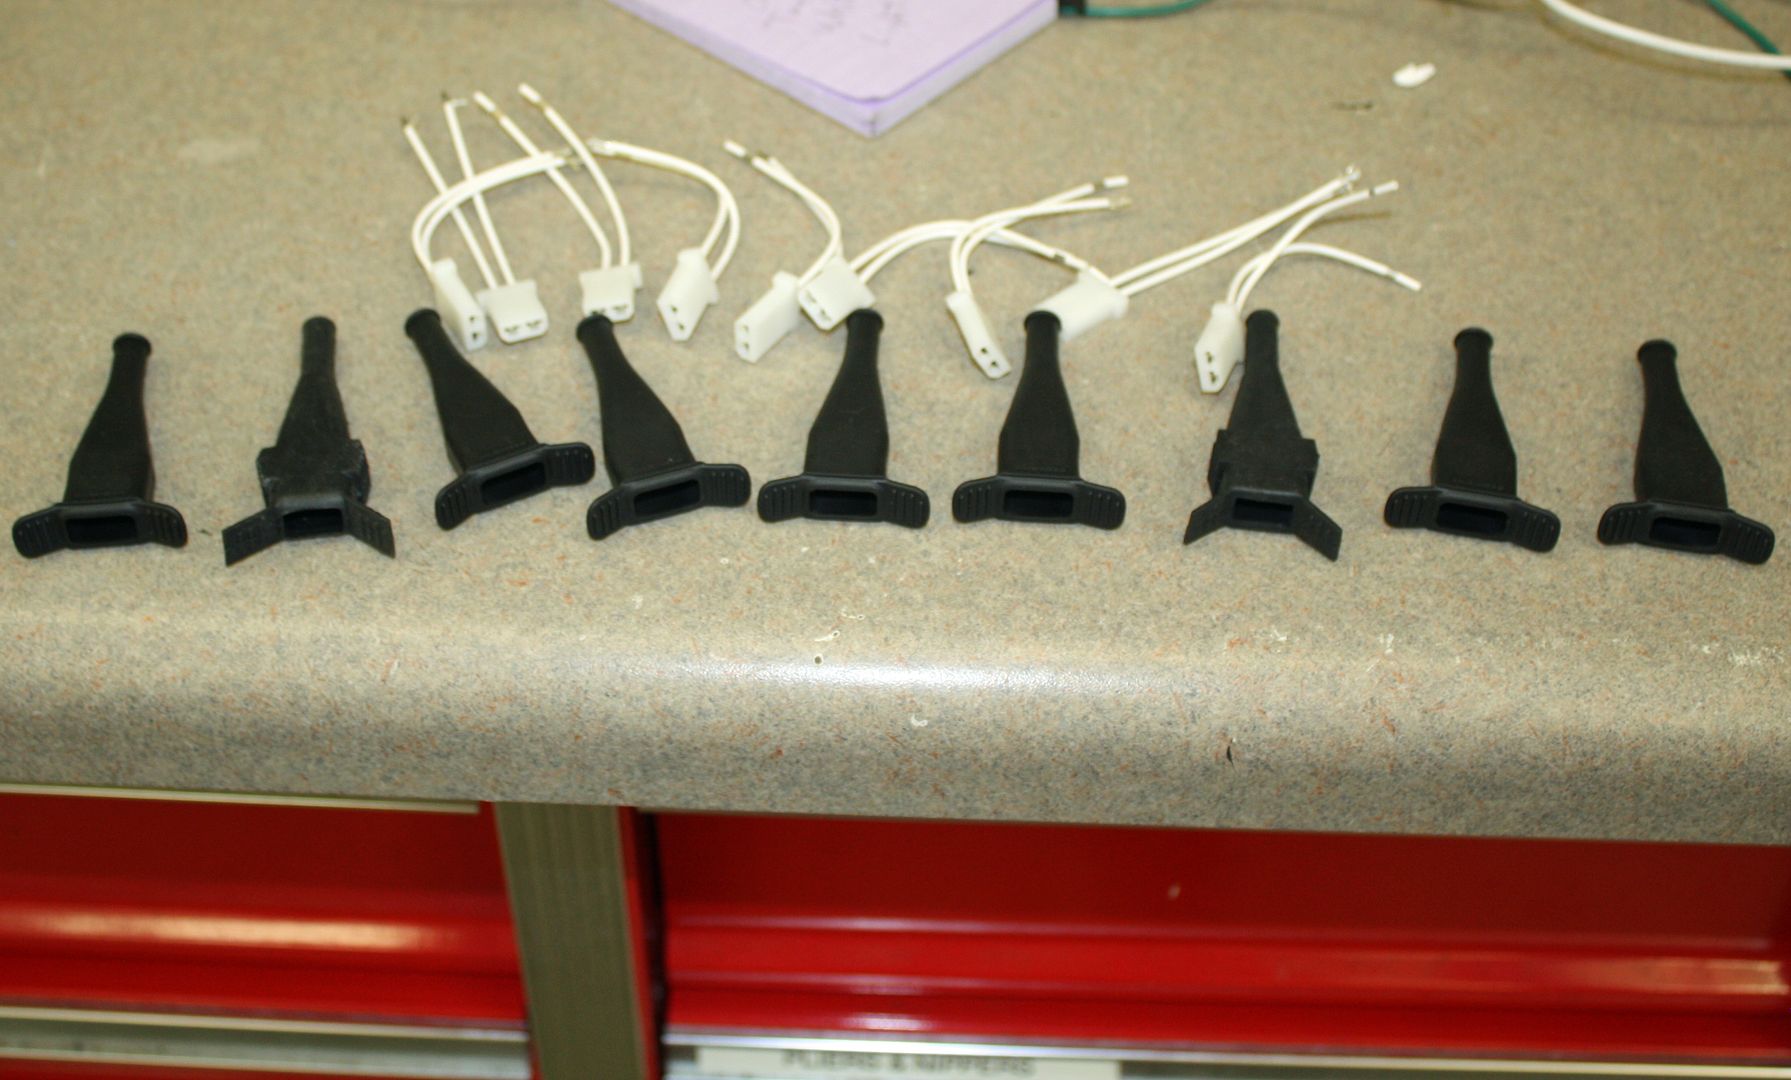
Here are the new connectors and boots.
Tomorrow will be the day to do some wiring and hopefully install the new injectors. It will be interesting to see if there is any difference in the engine performance. There should be.
To do that organizing, I needed to strip back the wire coverings to expose the original wiring harness. Before I did that, I used a magic marker to place a cylinder number on each connector. In doing that, I discovered that the cold start valve, a water temp sensor and the cold air sensor on the air cleaner all used the same connectors and boots. I have more connectors and boots on the way.


The connectors have a rounded and a flat side. Once I had the wire covering stripped, I noted which color of wire ran to each side of the connector. I found a cylinder layout online. Next to each cylinder number, I drew the outline of a connector and drew in two connector lines. I then wrote down the wire color for each fuel injector connector as well as the cold start valve, the water temp sensor and the cold air sensor. Now I am ready to begin the new wiring from the firewall to the various leads.

As you can see by these photos, the wiring had some issues. Most of the boots were either missing or in tatters, the shrink wrap on the wires to the connectors was hardened and some of the wiring covering had failed.


The air temp sensor connector must have failed in the past as there were two separate leads to it rather than a single connector.

Here are the cold start and water temp sensors leads


I removed the old injectors from their packing from Witch Hunter. They clearly marked which injectors were bad and have each of the cleaned and tested ones packaged individually.


The new Bosch injectors are made in Spain.


Here are the new connectors and boots.

Tomorrow will be the day to do some wiring and hopefully install the new injectors. It will be interesting to see if there is any difference in the engine performance. There should be.
08-01-2017, 04:02 PM
#74
Member
Thread Starter
I worked on the left side today. I had been thinking about what order I needed to do things to make a lead. Obviously, the first thing was to cut the wires. With that done, I could use the old lead as a guide as to wire length. The wire colors I had did not perfectly match the Mercedes color but were close enough. The one exception was the black/white wire to the cold start valve. I used a solid black wire there.
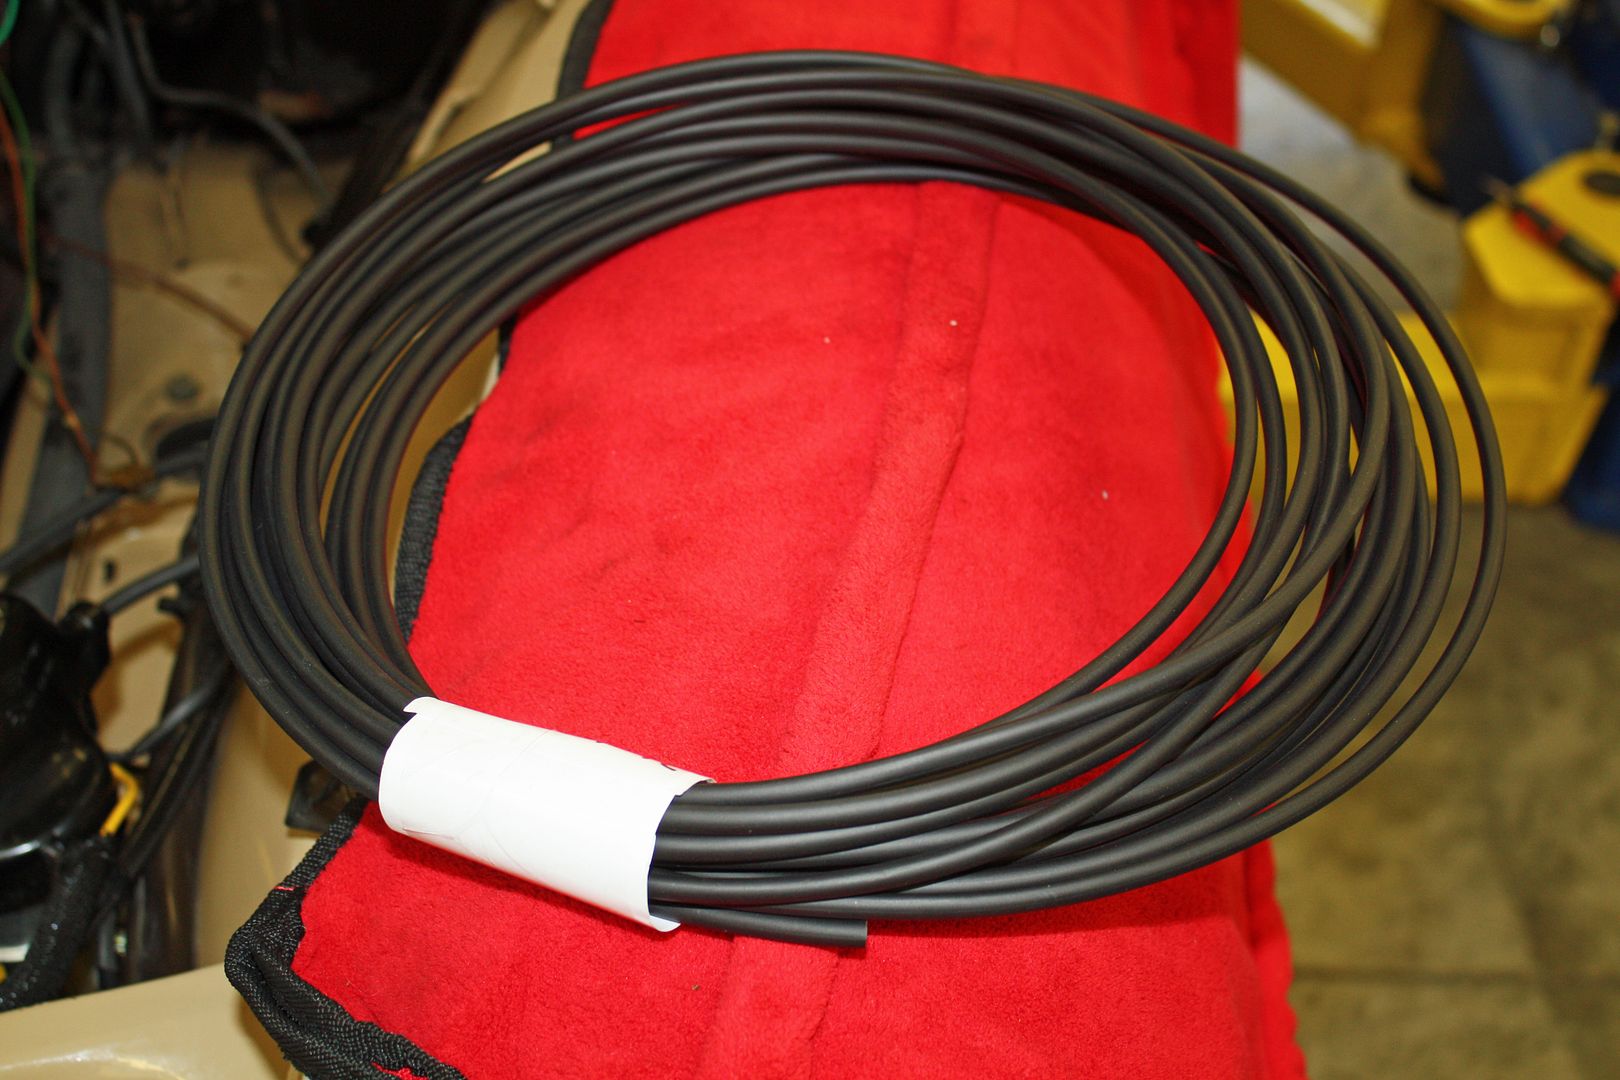
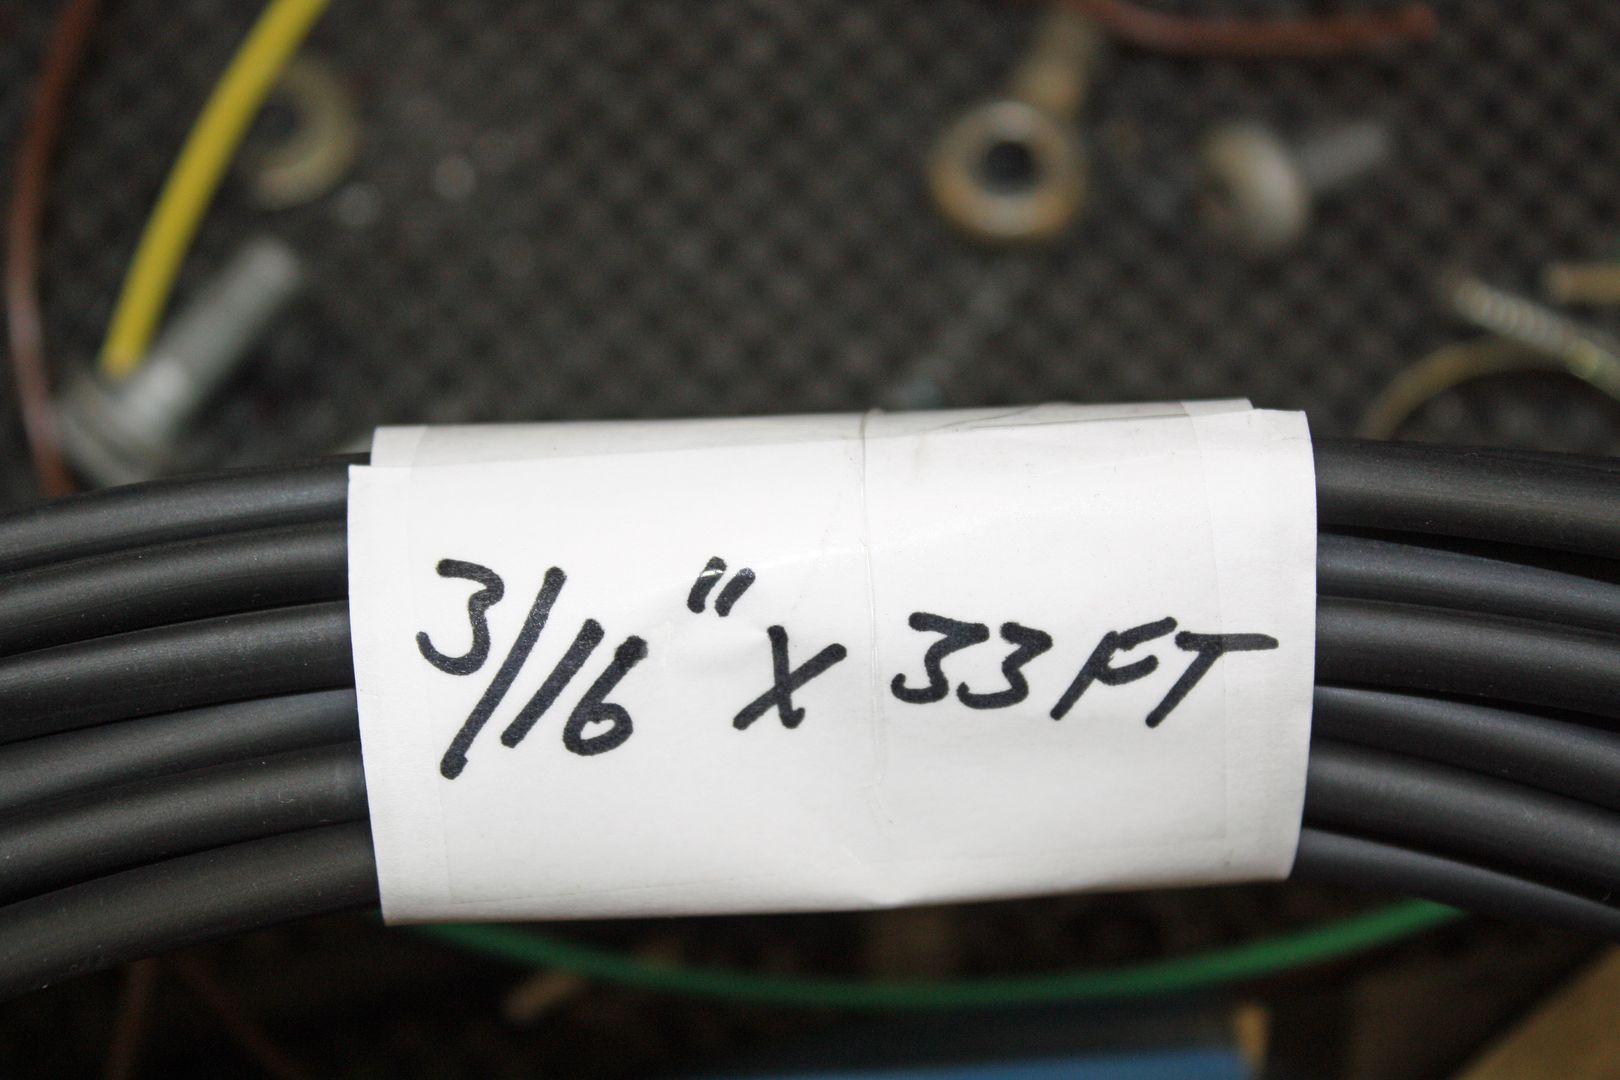
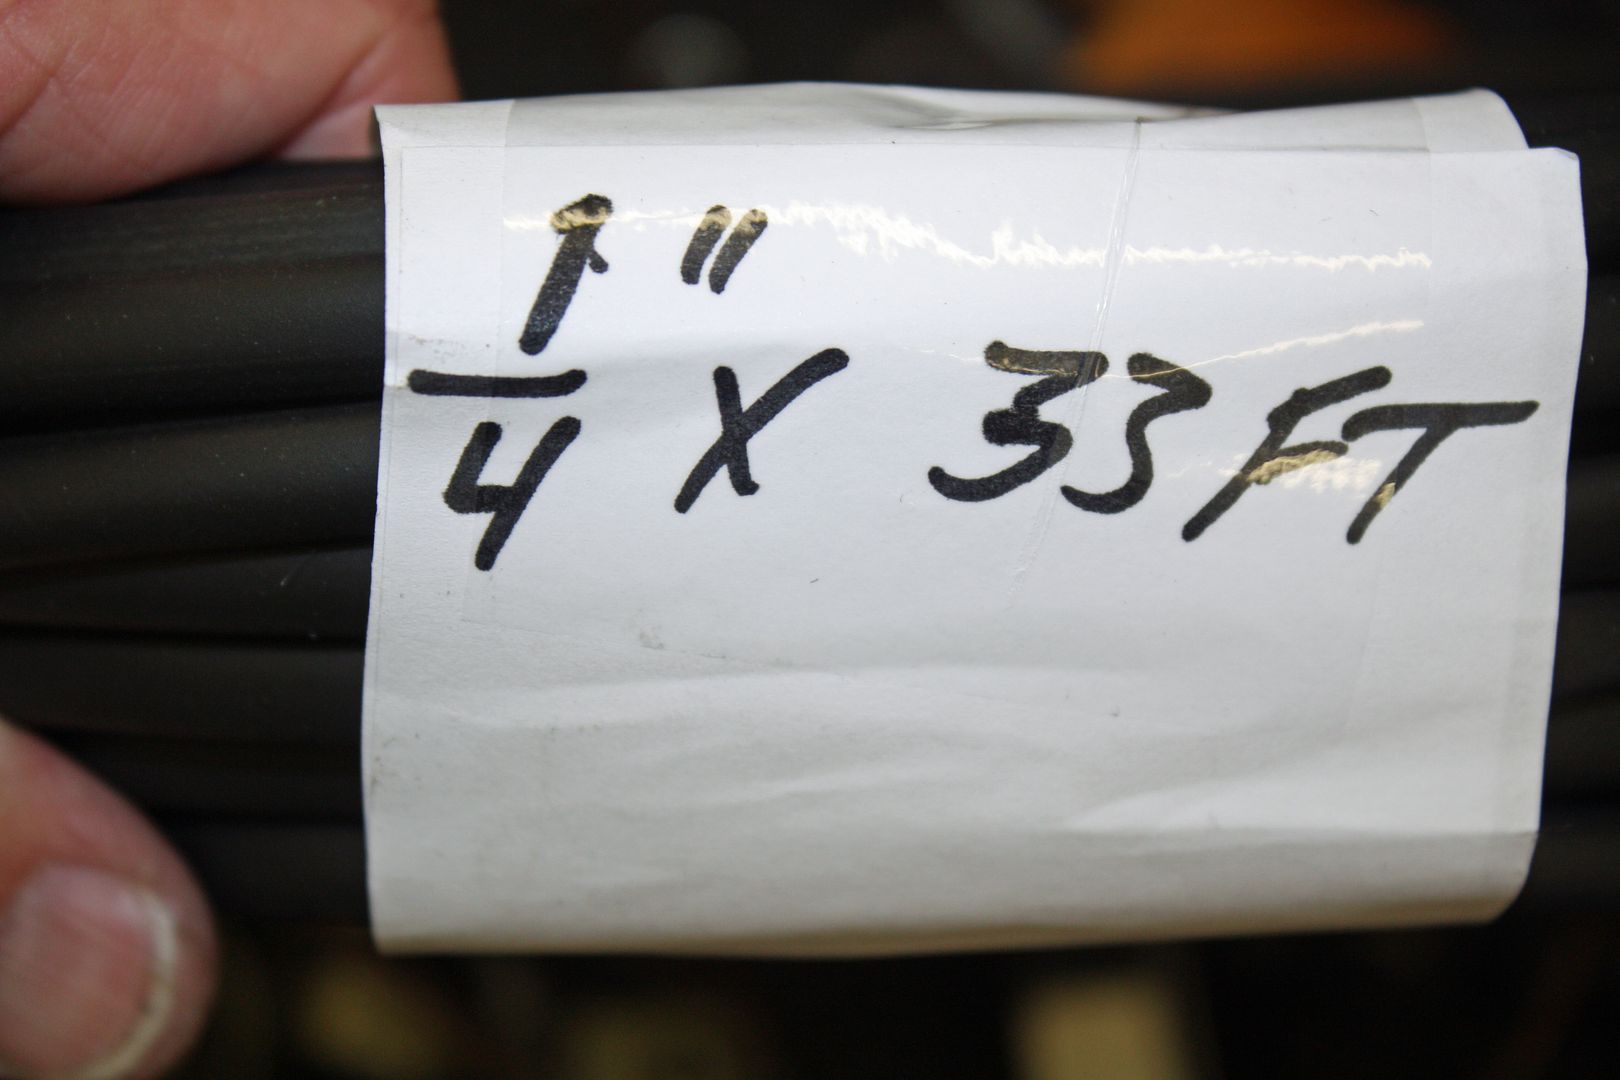
After cutting the wire and cutting new wires to the proper length, I soldered them at the firewall. After they were soldered and the joint was protected with shrink tube, I slid 3/16" shrink tube over the length of the wire leaving about three inches at the injector end. In anticipation of doing this, I had bought 33" lengths of shrink tube in both 3/16" and 1/4" size.
After I had applied heat to the 3/16" shrink tube, I slid the rubber boot to the end of the shrink tube. I then cut a shorter pieces of 1/4" shrink tube and slid it over the 3/16' tube up to the boot. After soldering the connector to the wires, I slid the 1/4" tube over the solder connection to the connector. After applying heat to the shrink tube, I could then slide the boot into place.
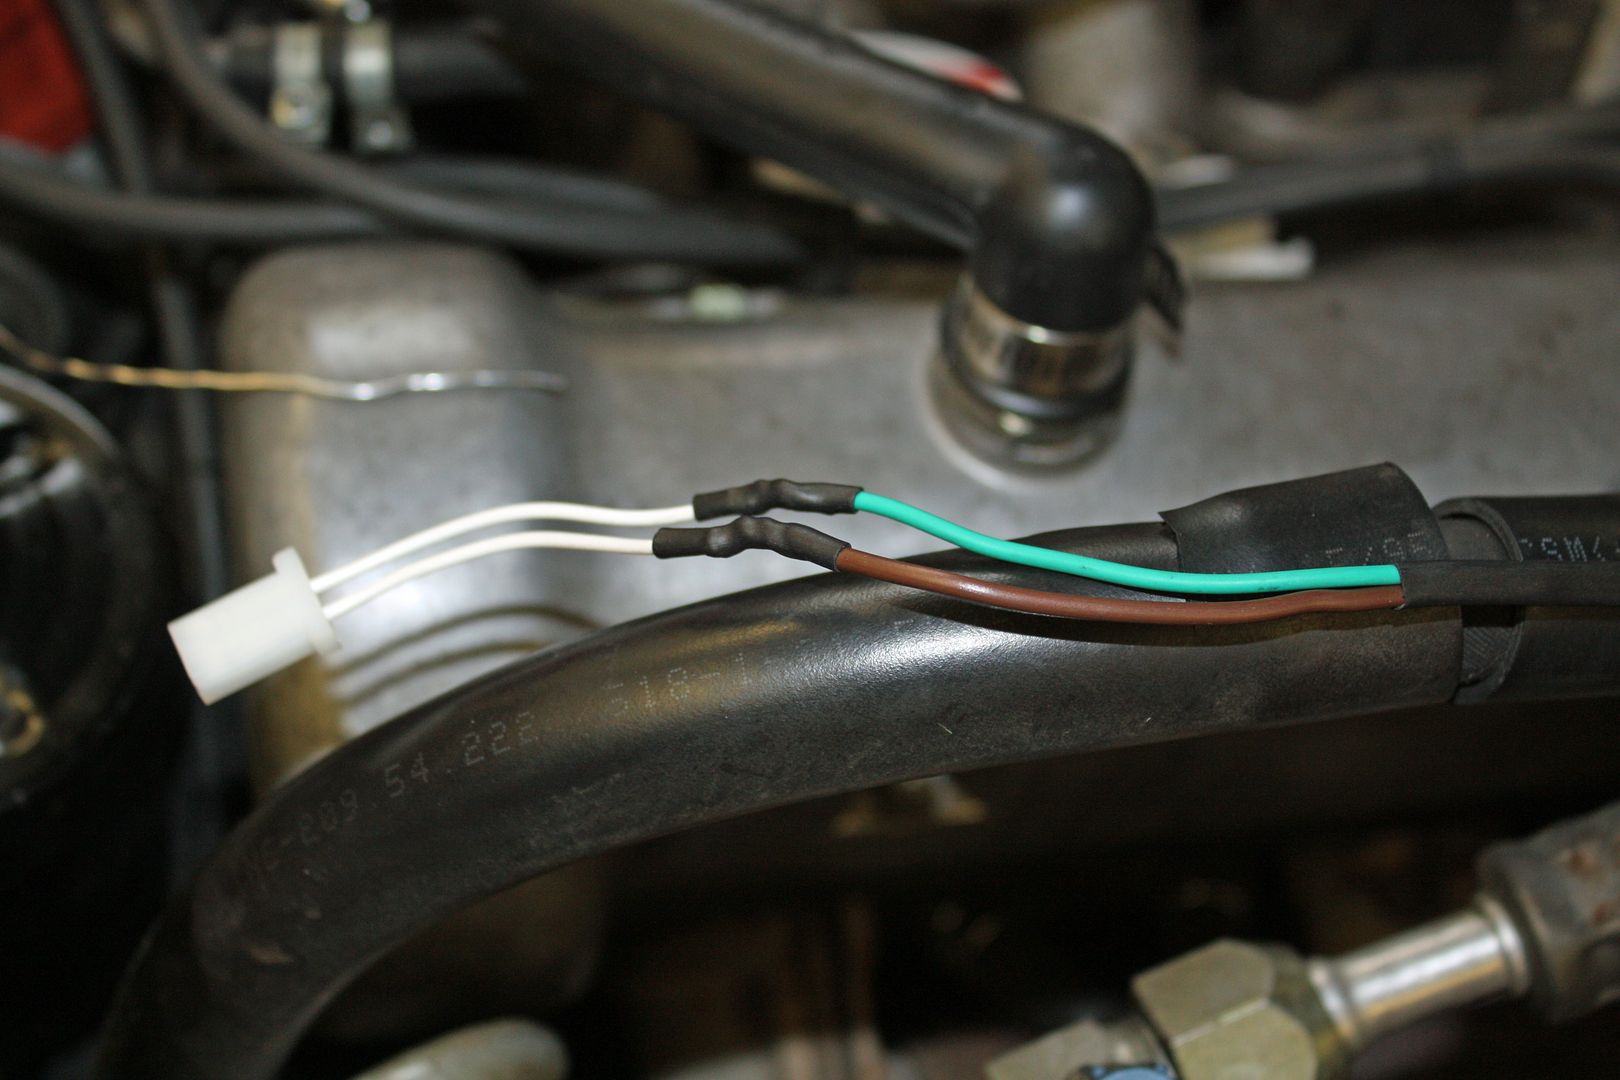
I used a NAPA silicone friction tape to wrap the wiring harness, installed the injectors and completed the wiring for the left side, including the wiring to the cold start valve.

After cutting the wire and cutting new wires to the proper length, I soldered them at the firewall. After they were soldered and the joint was protected with shrink tube, I slid 3/16" shrink tube over the length of the wire leaving about three inches at the injector end. In anticipation of doing this, I had bought 33" lengths of shrink tube in both 3/16" and 1/4" size.


After I had applied heat to the 3/16" shrink tube, I slid the rubber boot to the end of the shrink tube. I then cut a shorter pieces of 1/4" shrink tube and slid it over the 3/16' tube up to the boot. After soldering the connector to the wires, I slid the 1/4" tube over the solder connection to the connector. After applying heat to the shrink tube, I could then slide the boot into place.


I used a NAPA silicone friction tape to wrap the wiring harness, installed the injectors and completed the wiring for the left side, including the wiring to the cold start valve.


Last edited by jerhofer; 08-01-2017 at 04:09 PM.
08-02-2017, 03:17 PM
#75
Member
Thread Starter
I am waiting for two boots to arrive so I can complete the wiring. I did get all four of the injector wires fixed up and have done what I could with the air temp and water sensors wires. I also installed the new injectors with the fuel rail. So once the boots arrive, I will not have much to do to finish up this part of the project.
Initially I had found the injector connectors on Rock Auto for $4.87 for a package of three. I ordered four packages. Rock Auto sent me a message saying that they could not fill the order. So I went on eBay to order some from four different vendors to get at least nine of them. They all arrived this past week.
The other day when I realized that I needed a couple more, I went on eBay to order some more from the same four different vendors. All four of those vendors canceled their order as they could not get them. Once the orders were canceled by the eBay people, I went to Auto Atlanta's site where I had ordered the boots. They had the connectors at a higher price. I ordered four from them. In the meantime, Rock Auto found a package of three which arrived yesterday. So I have enough to complete the job. Hopefully they produce more as I am sure others will need these connectors. The connectors and boots have shipped from Auto Atlanta so I should have them tomorrow.


