Projects on my new, to me, 1973 280SEL 4.5
 08-03-2017, 03:54 PM
#76
Member
Thread Starter

The parts arrived on time today so I could finish up the job. After I buttoned everything up, I turned on the ignition and let the fuel pump run to check for leaks. I had to crank about three times before there was enough fuel to start it. I settled into a smooth idle. Once again I checked for leaks and everything was dry.
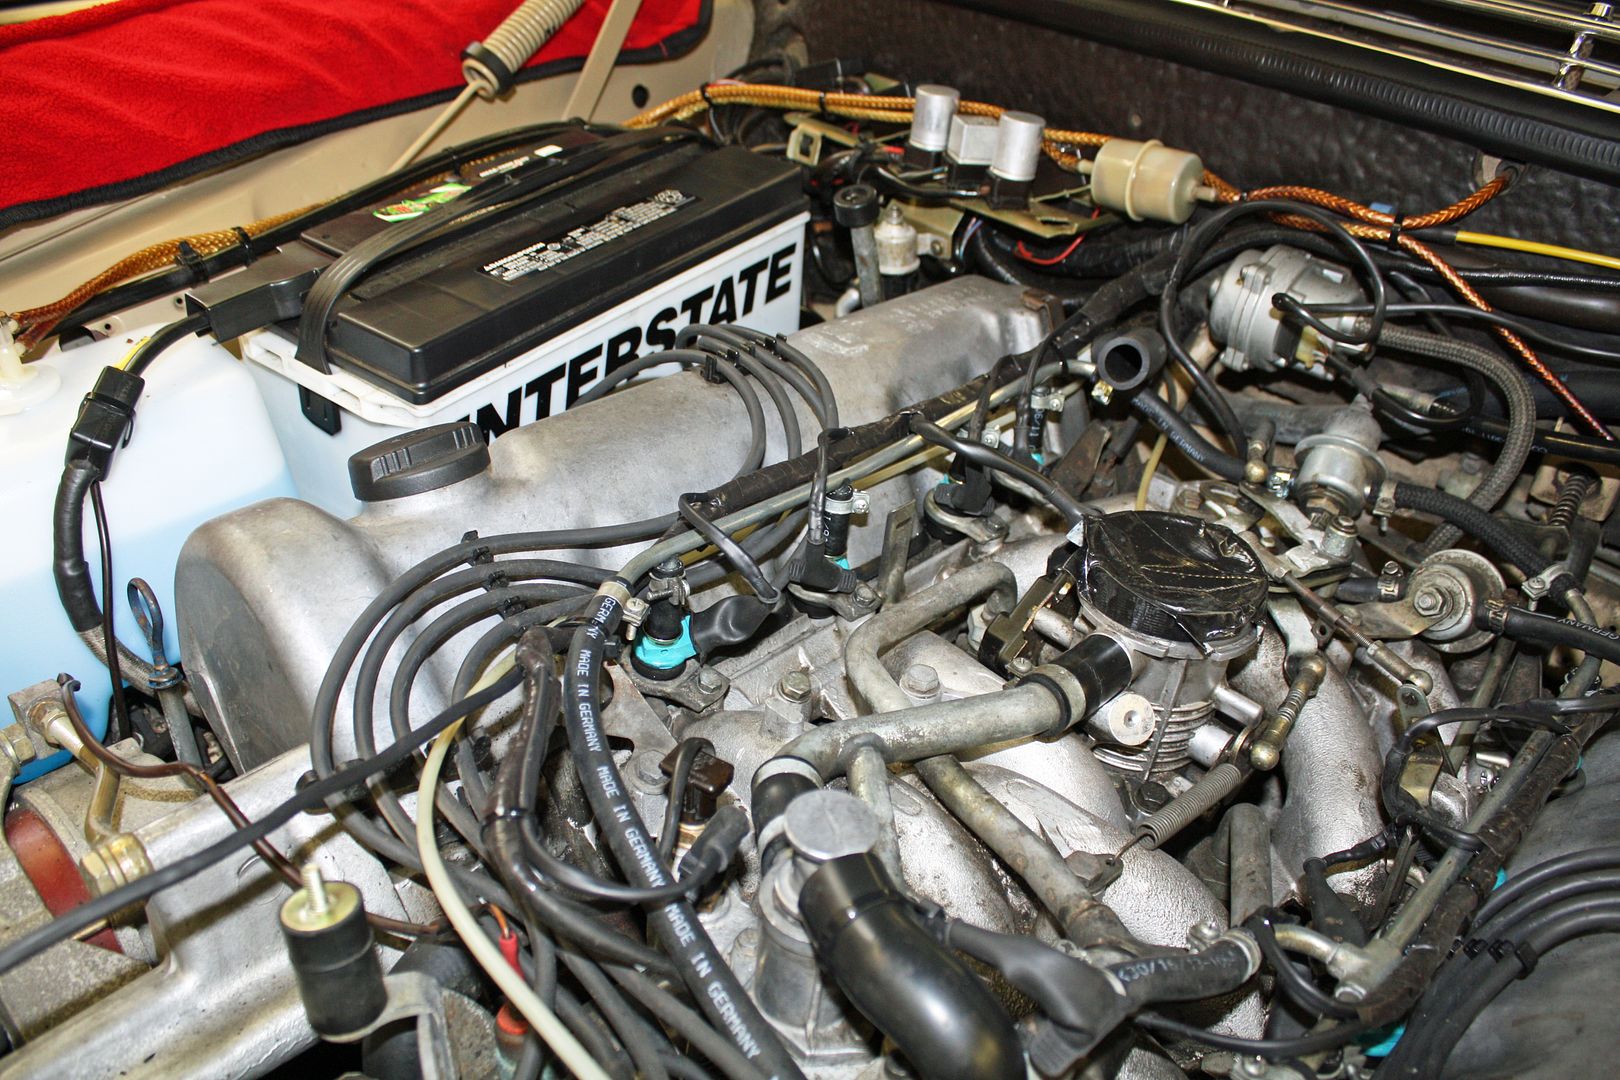
This is how the wires were connected to the air temp sensor on the air cleaner when I got the car and how it is connected now to the new sensor I had purchased.

I took the car for a test drive. The engine was obviously more responsive. I won't be winning many drag races but I could tell it had more power. I will be curious to see if my warm start issues are still there. We have a Cars and Coffee in Charlotte this Saturday. It's about fifty miles away so it will definitely be warmed up by the time I get there so I can test the warm start issue. No leaks when I checked the fittings after the test drive. Hurrah!!!
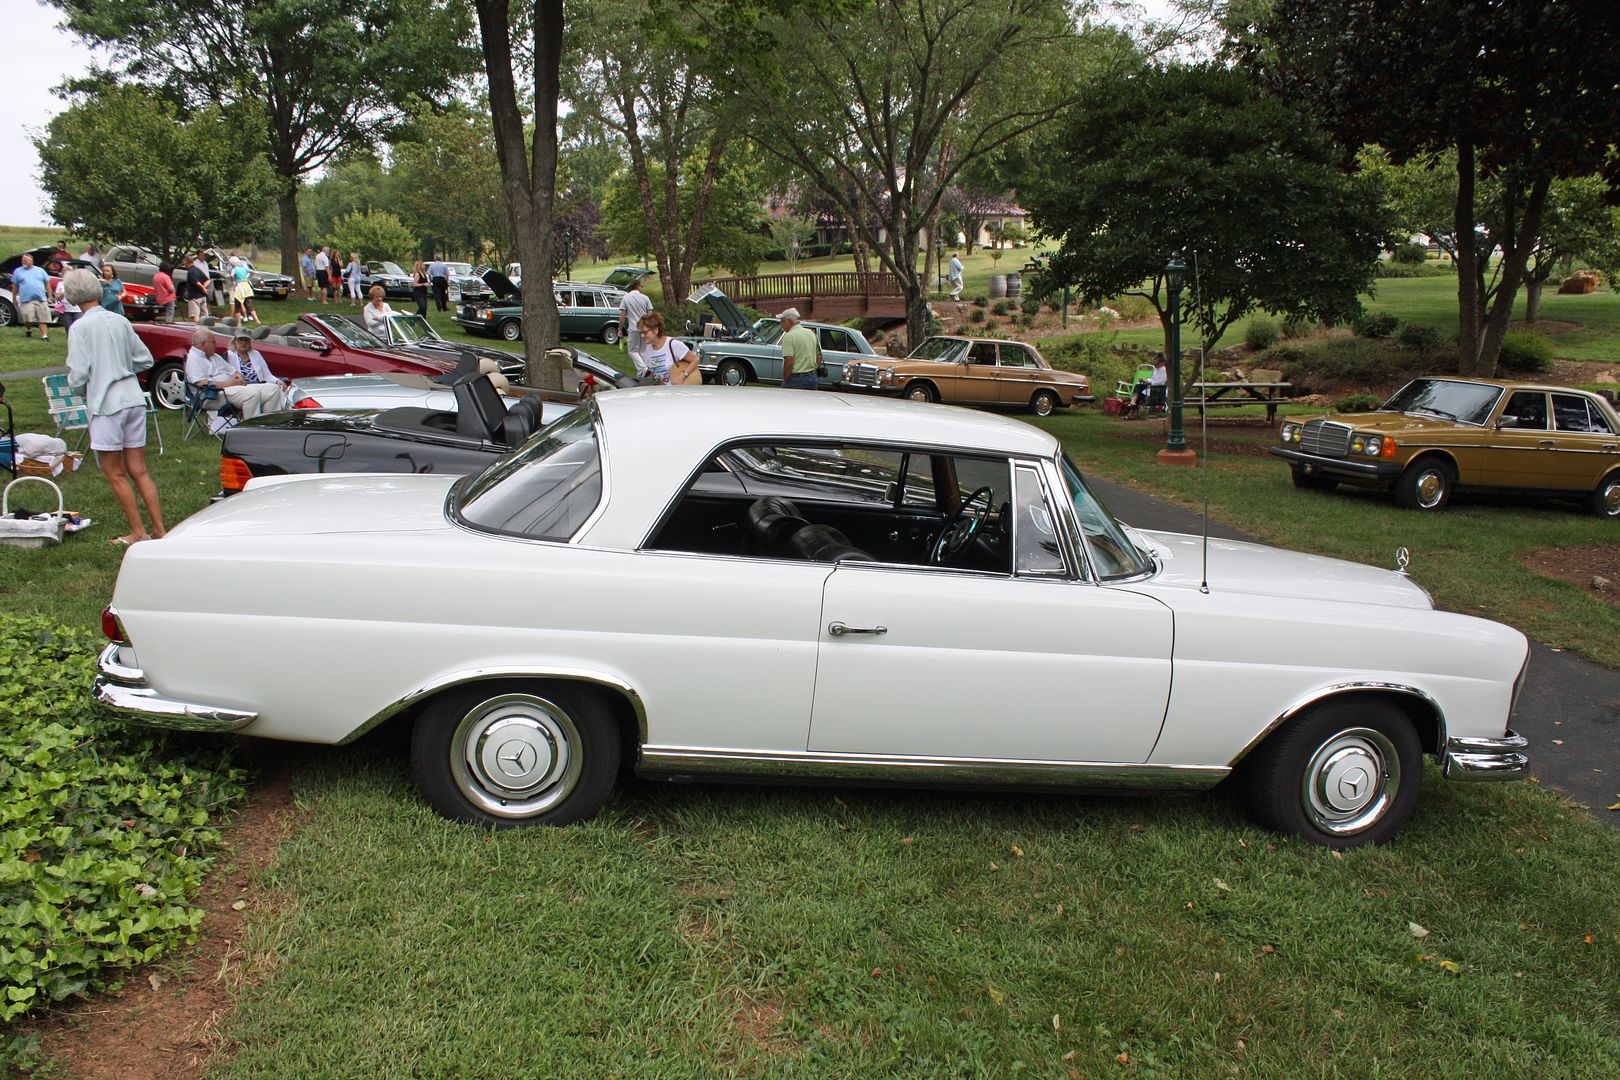
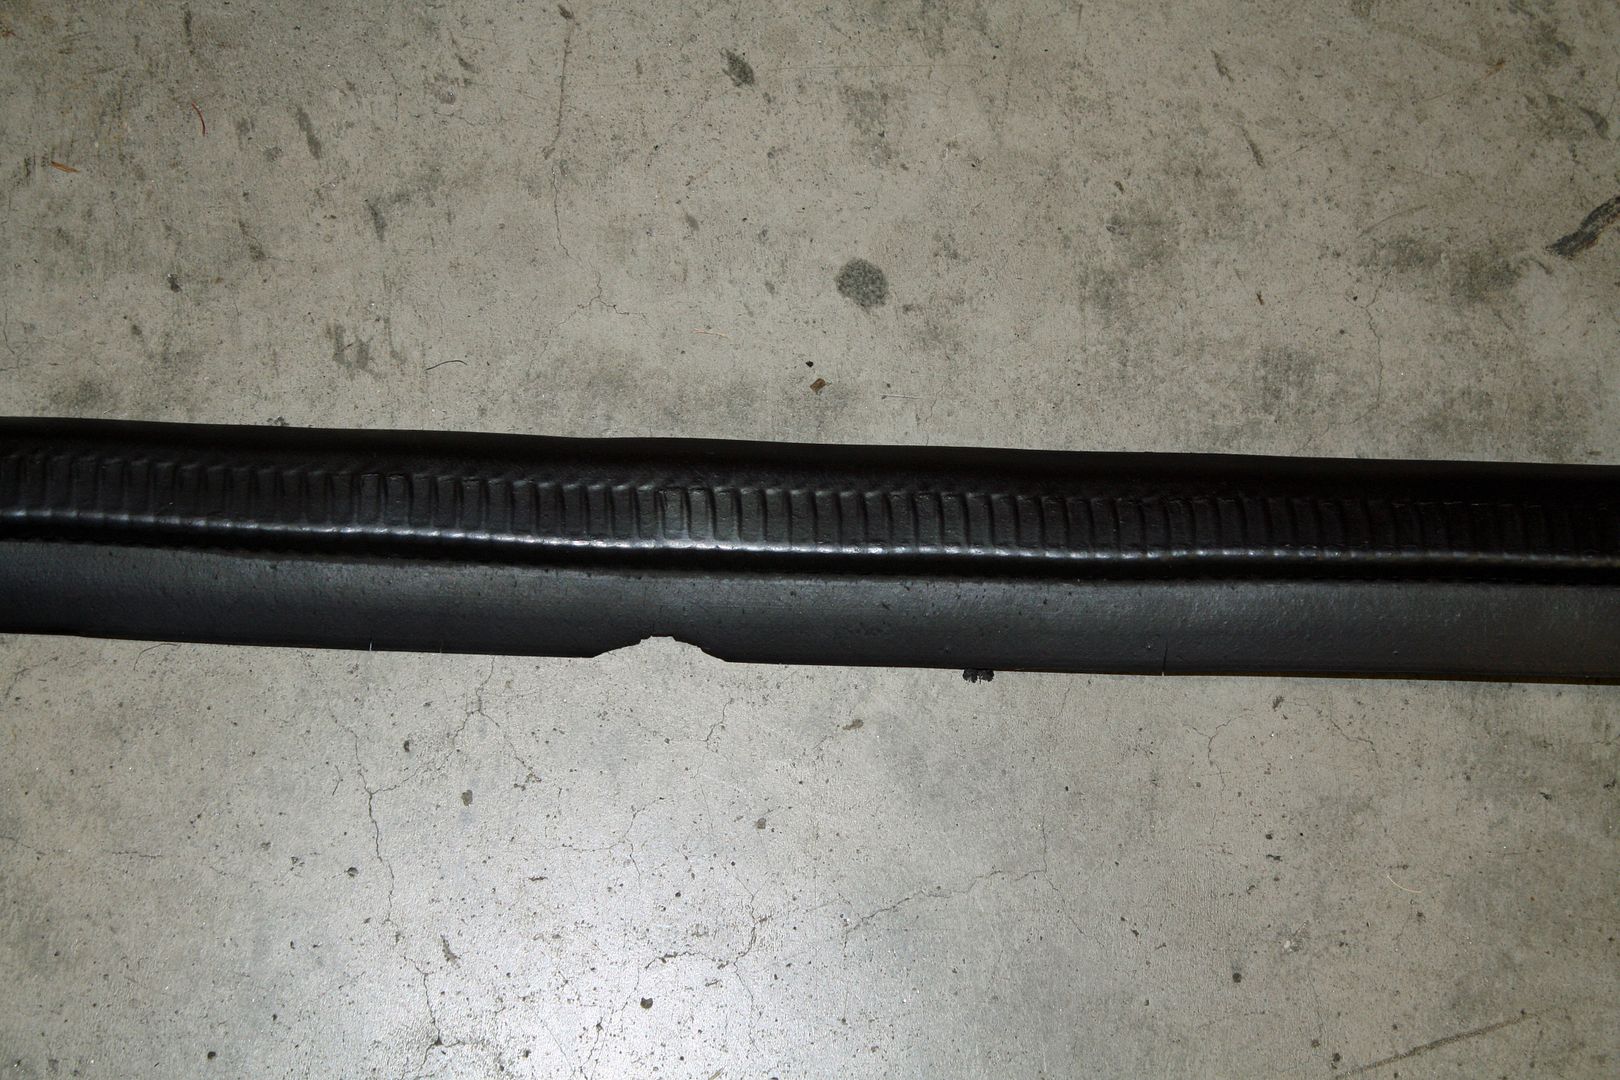
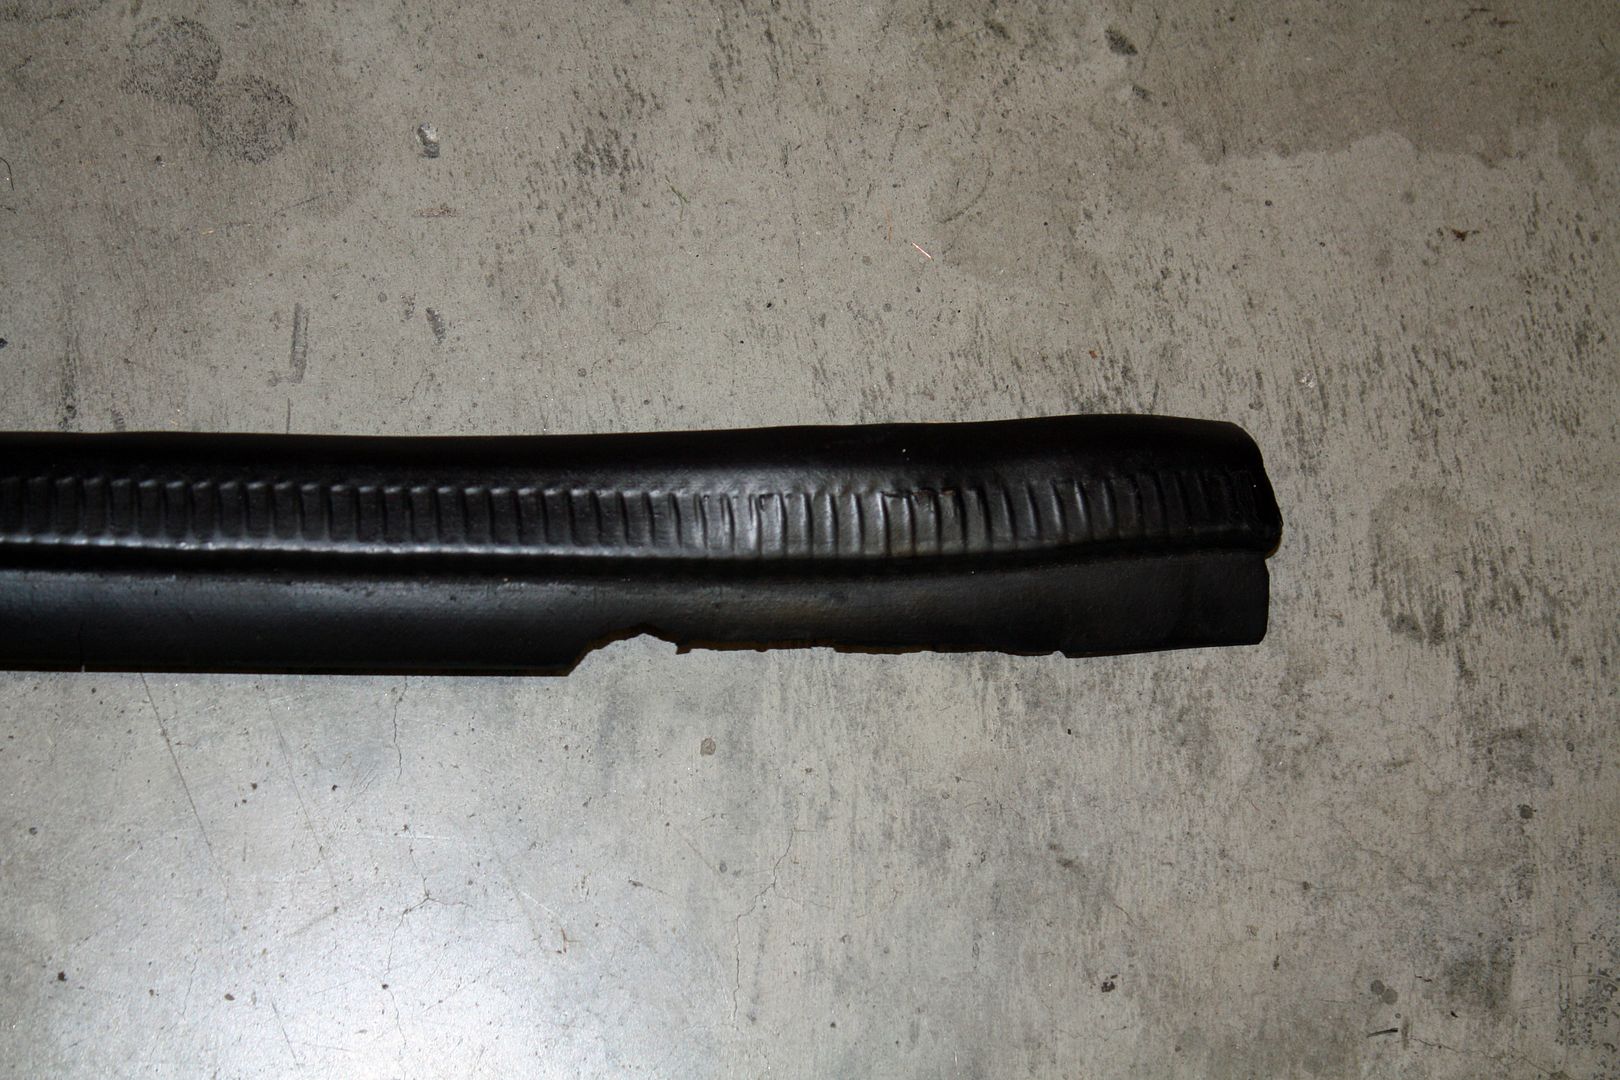
The threshold rubber I had ordered earlier was for a SE. While the fronts fit perfectly, the rears were 4" too short. I believe I mentioned earlier that I was able to find the SEL threshold rubber on German eBay. Those pieces had arrived just before our trip. I did have time to install the rears today.


This is how the wires were connected to the air temp sensor on the air cleaner when I got the car and how it is connected now to the new sensor I had purchased.


I took the car for a test drive. The engine was obviously more responsive. I won't be winning many drag races but I could tell it had more power. I will be curious to see if my warm start issues are still there. We have a Cars and Coffee in Charlotte this Saturday. It's about fifty miles away so it will definitely be warmed up by the time I get there so I can test the warm start issue. No leaks when I checked the fittings after the test drive. Hurrah!!!
The threshold rubber I had ordered earlier was for a SE. While the fronts fit perfectly, the rears were 4" too short. I believe I mentioned earlier that I was able to find the SEL threshold rubber on German eBay. Those pieces had arrived just before our trip. I did have time to install the rears today.

 08-04-2017, 03:55 PM
#77
Member
Thread Starter
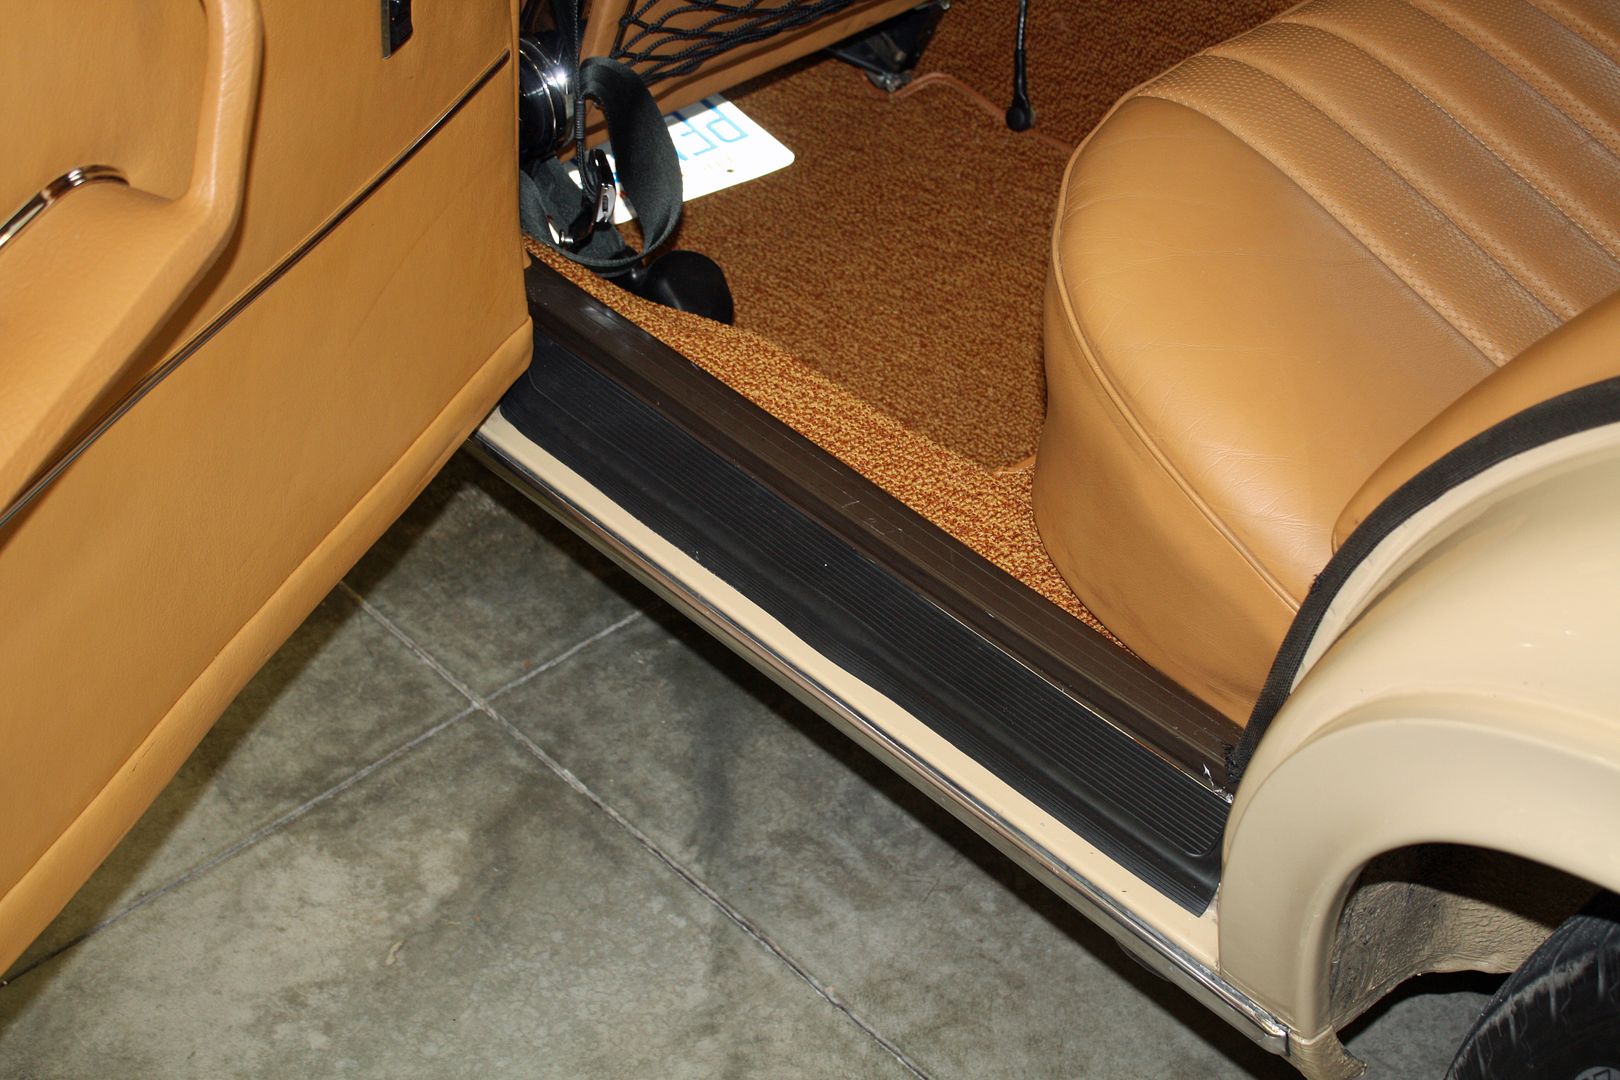
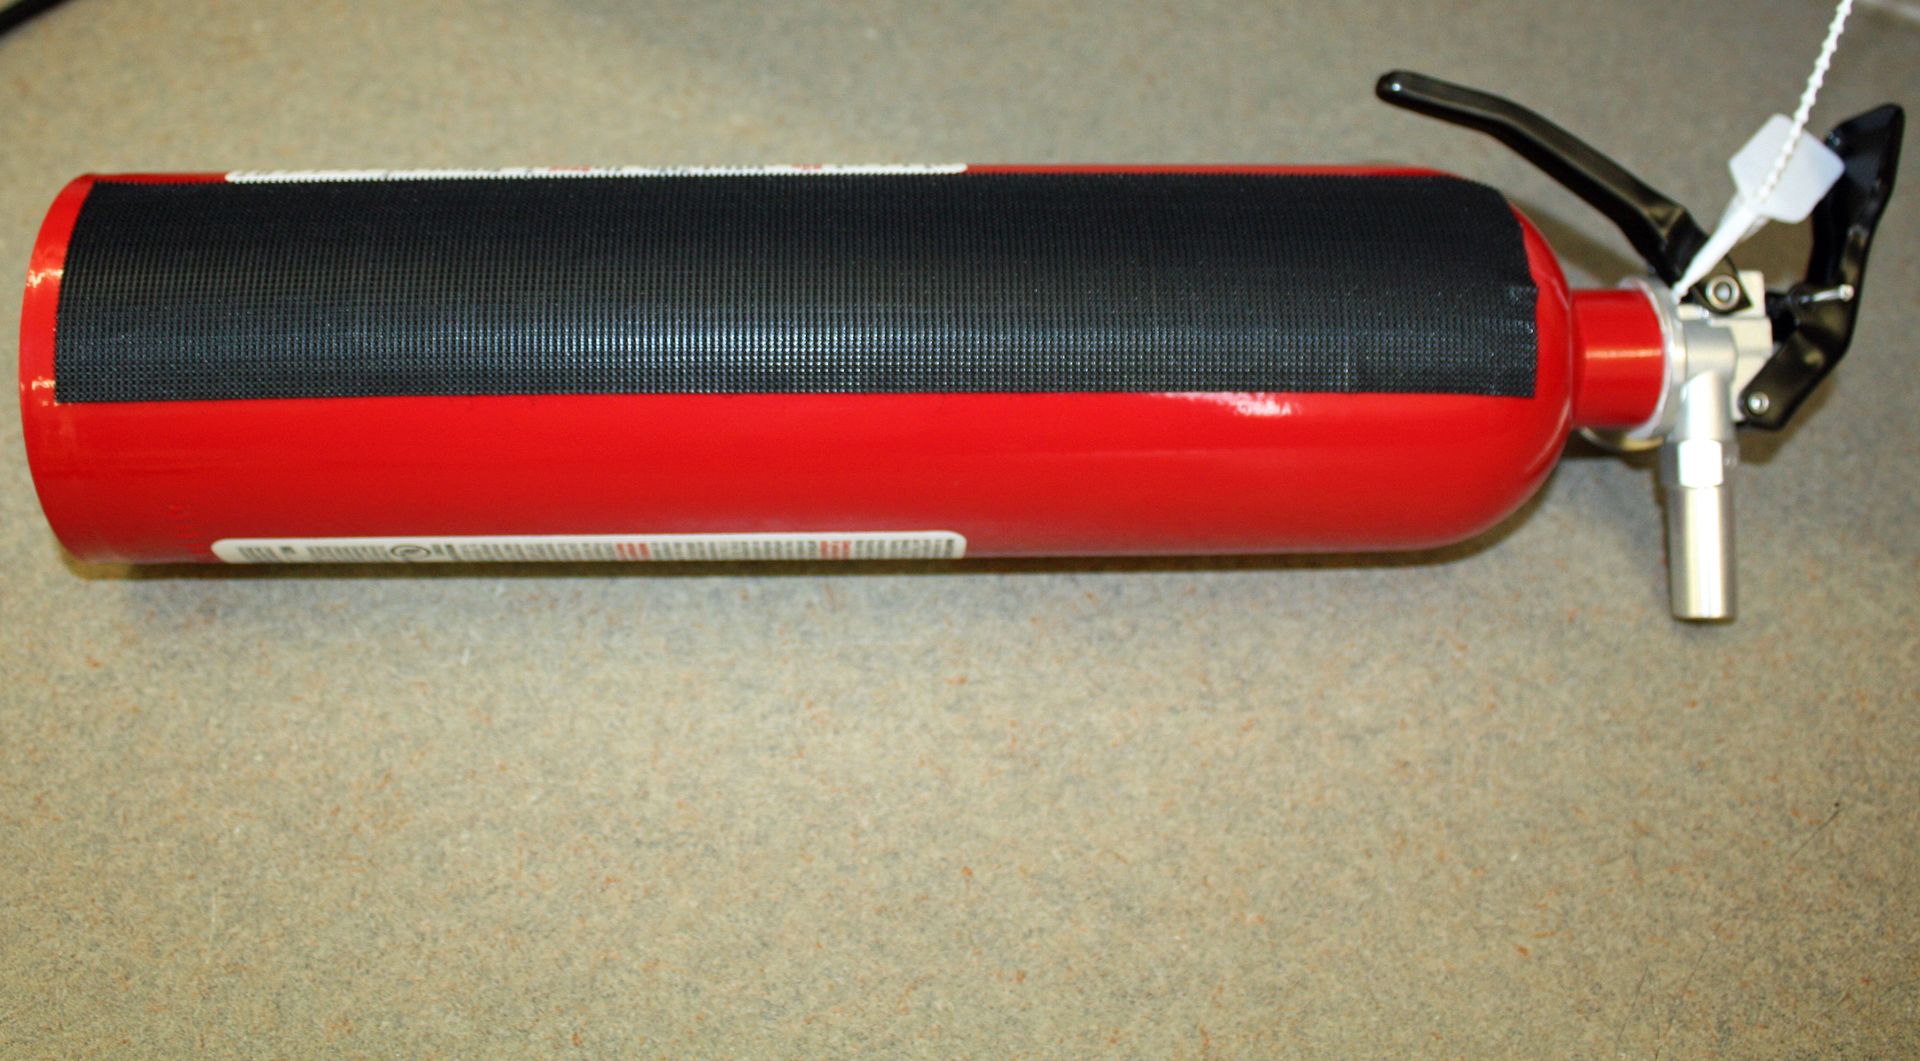
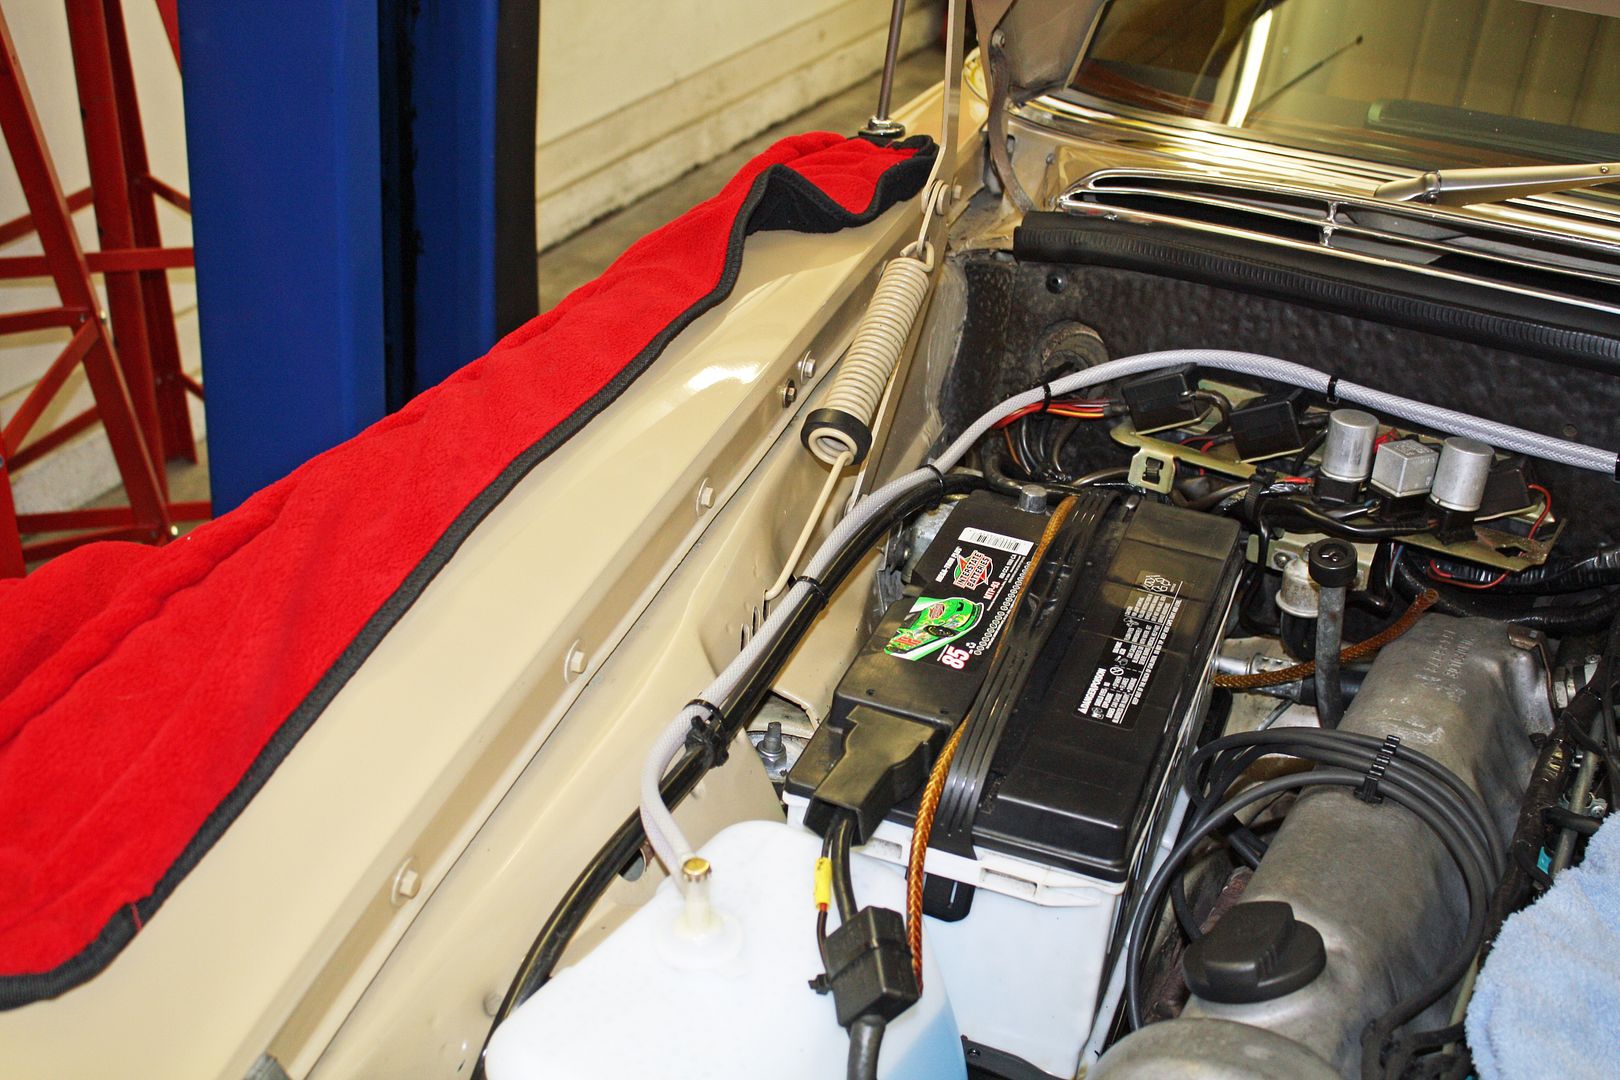
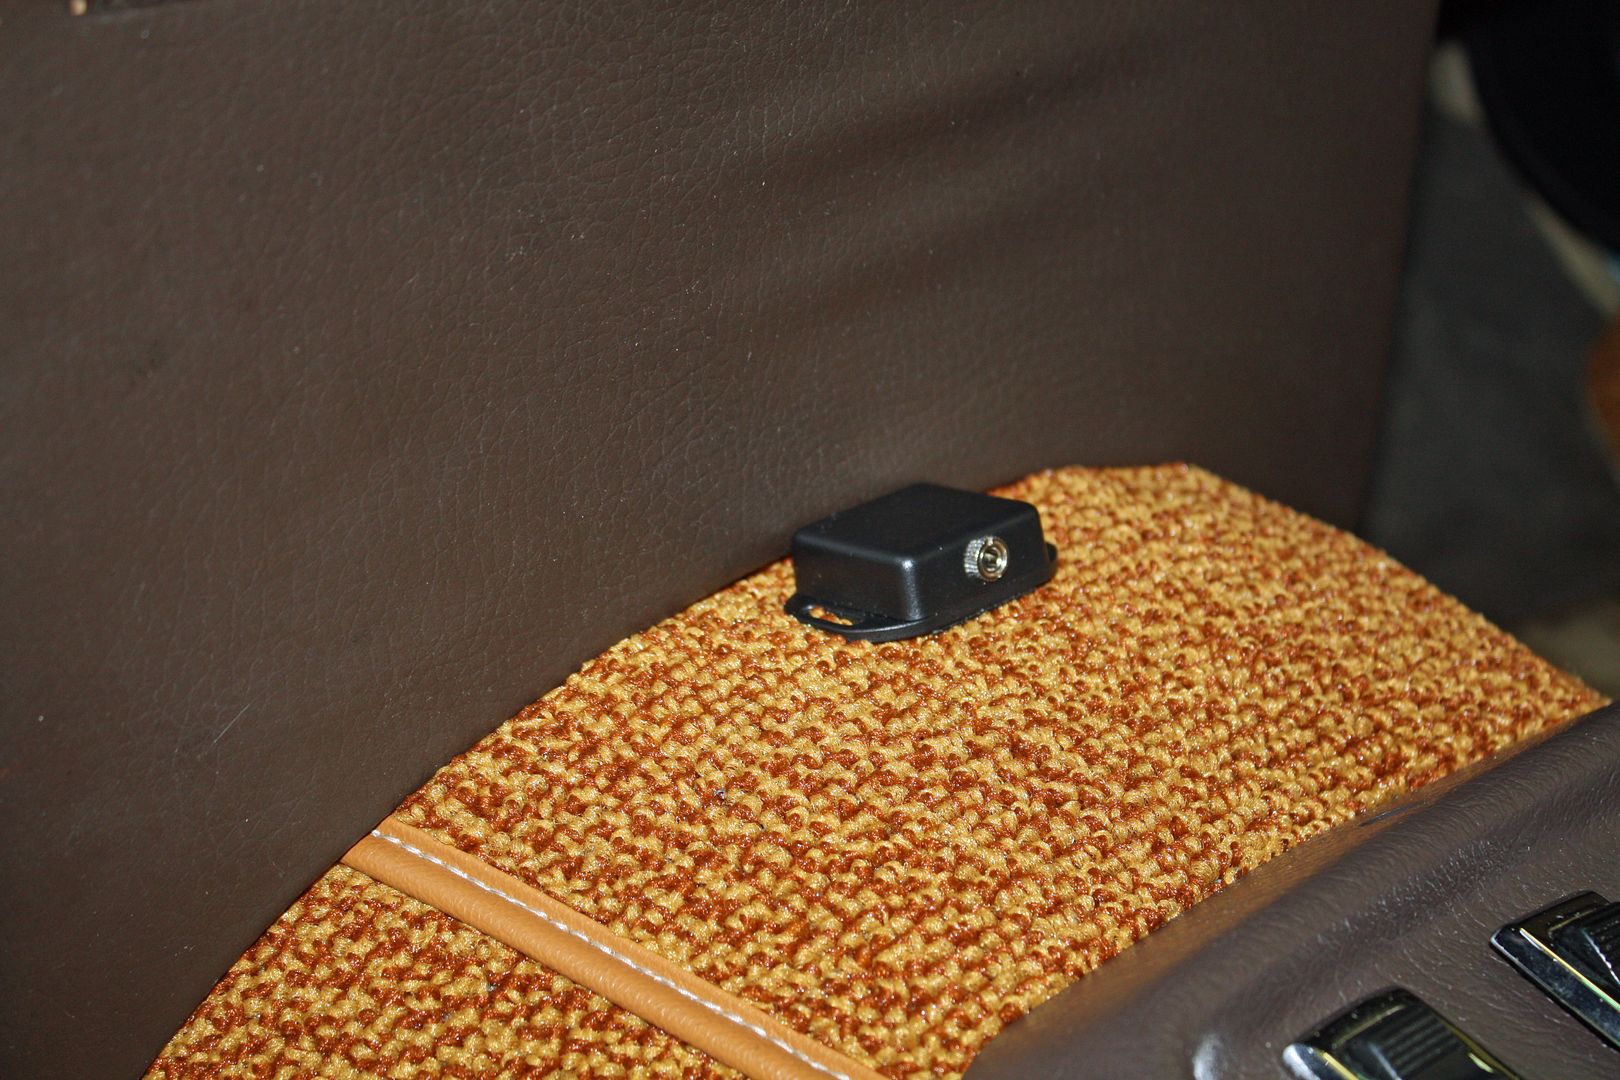
In anticipation of attending Cars and Coffee tomorrow morning, I washed the car today. I always feel more comfortable having a fire extinguisher in old cars. I was debating on where to install it but did not want to drill any holes. I came across some wide velcro. I tried a piece on the carpet and it stuck well. So I applied a piece of that Velcro to the fire extinguisher and stuck it to the carpet in the left rear footwell.

I had purchased a Garmin hard wire kit and finally got around to installing it today. I found a 12V ignition source under the dash on the left side and ran the wire alongside the door trim to the base of the left side of the windshield. I hate having a cord running to the GPS from the cigarette lighter. Much cleaner look this way.
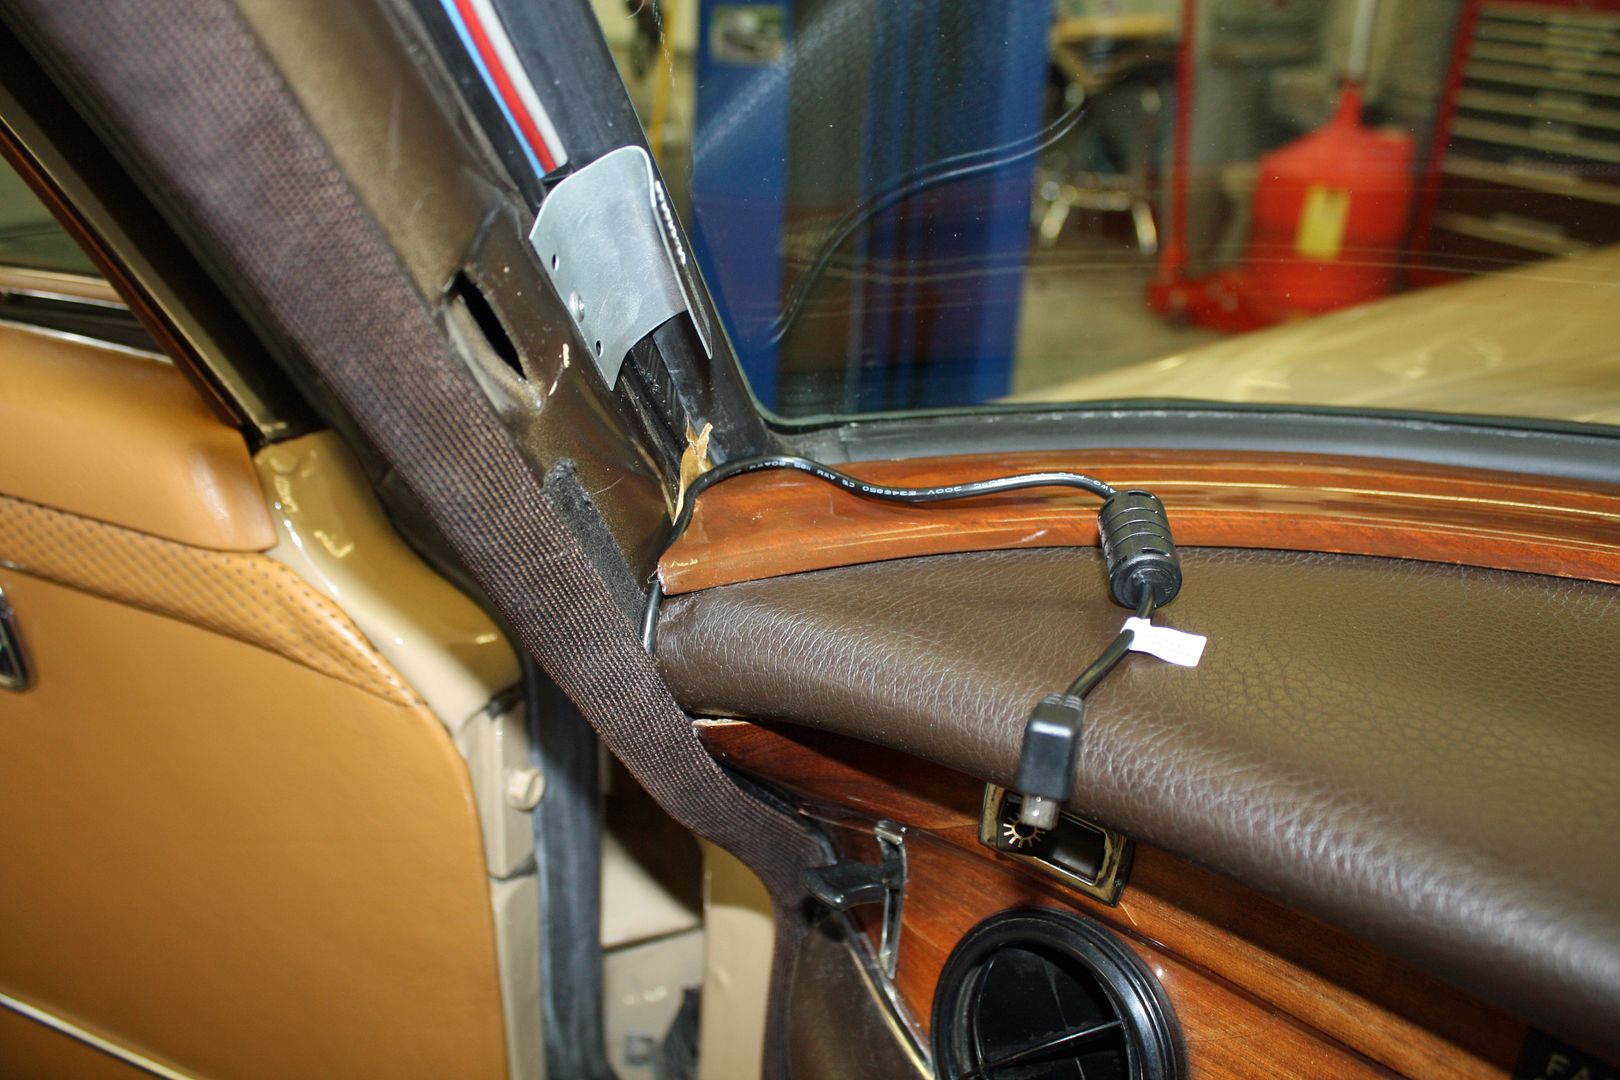
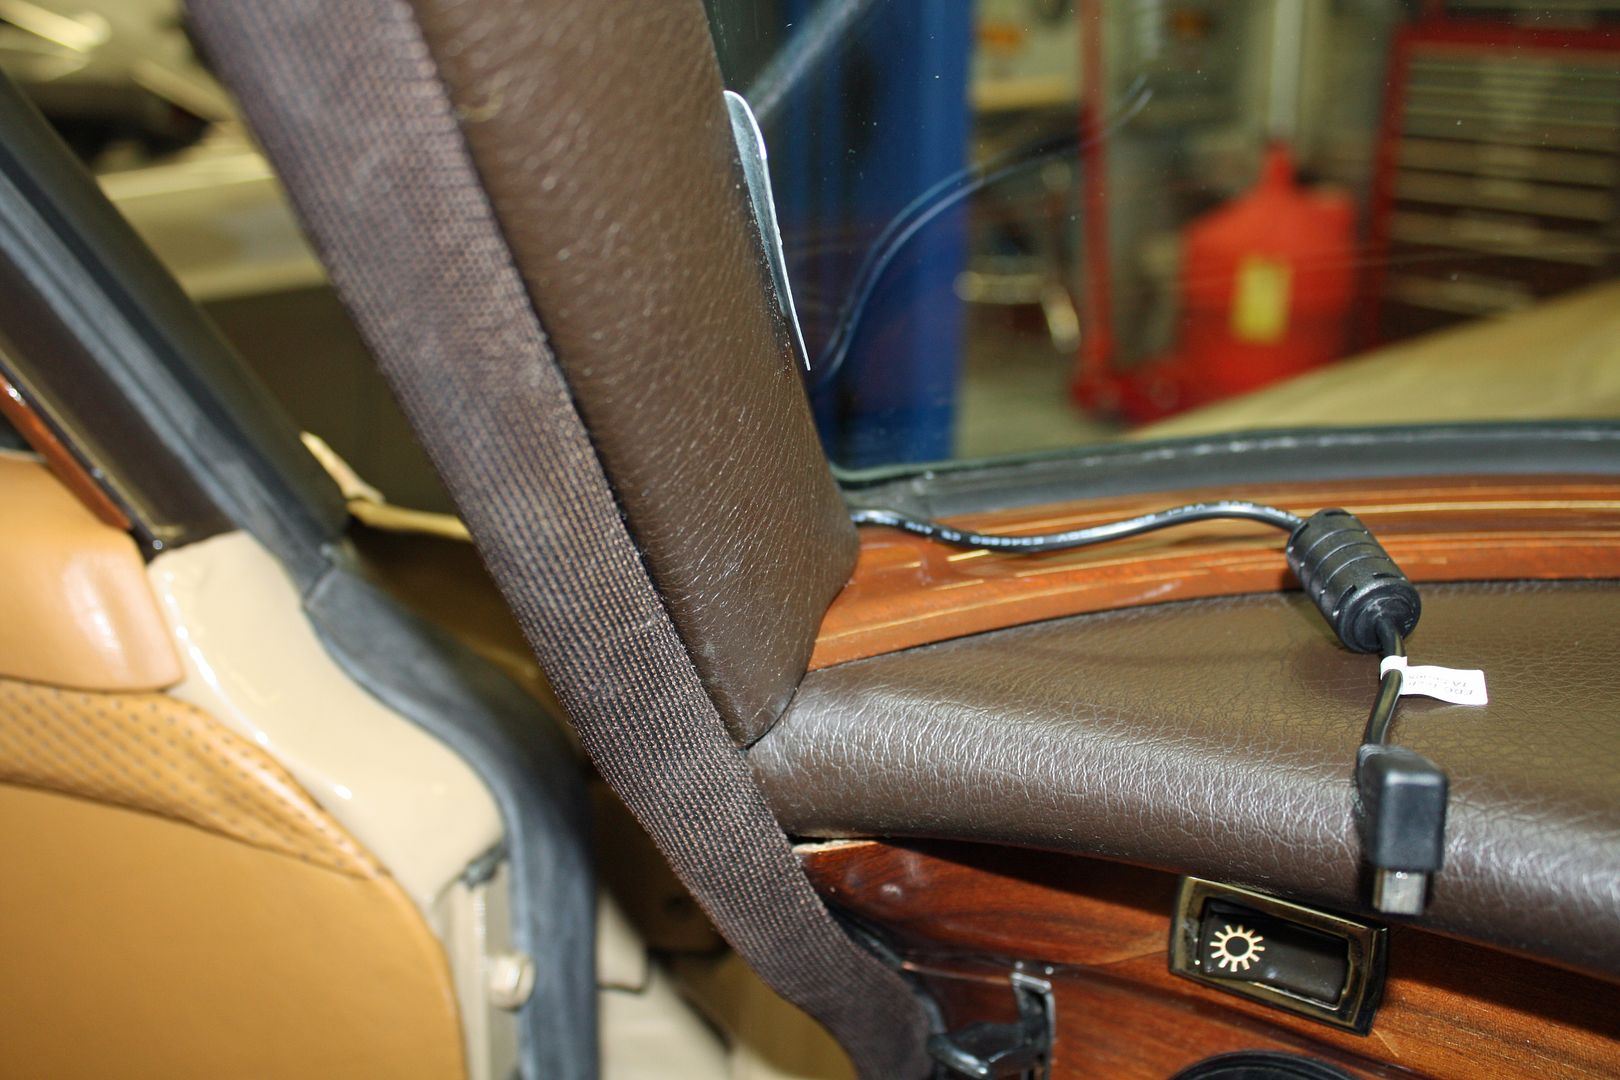
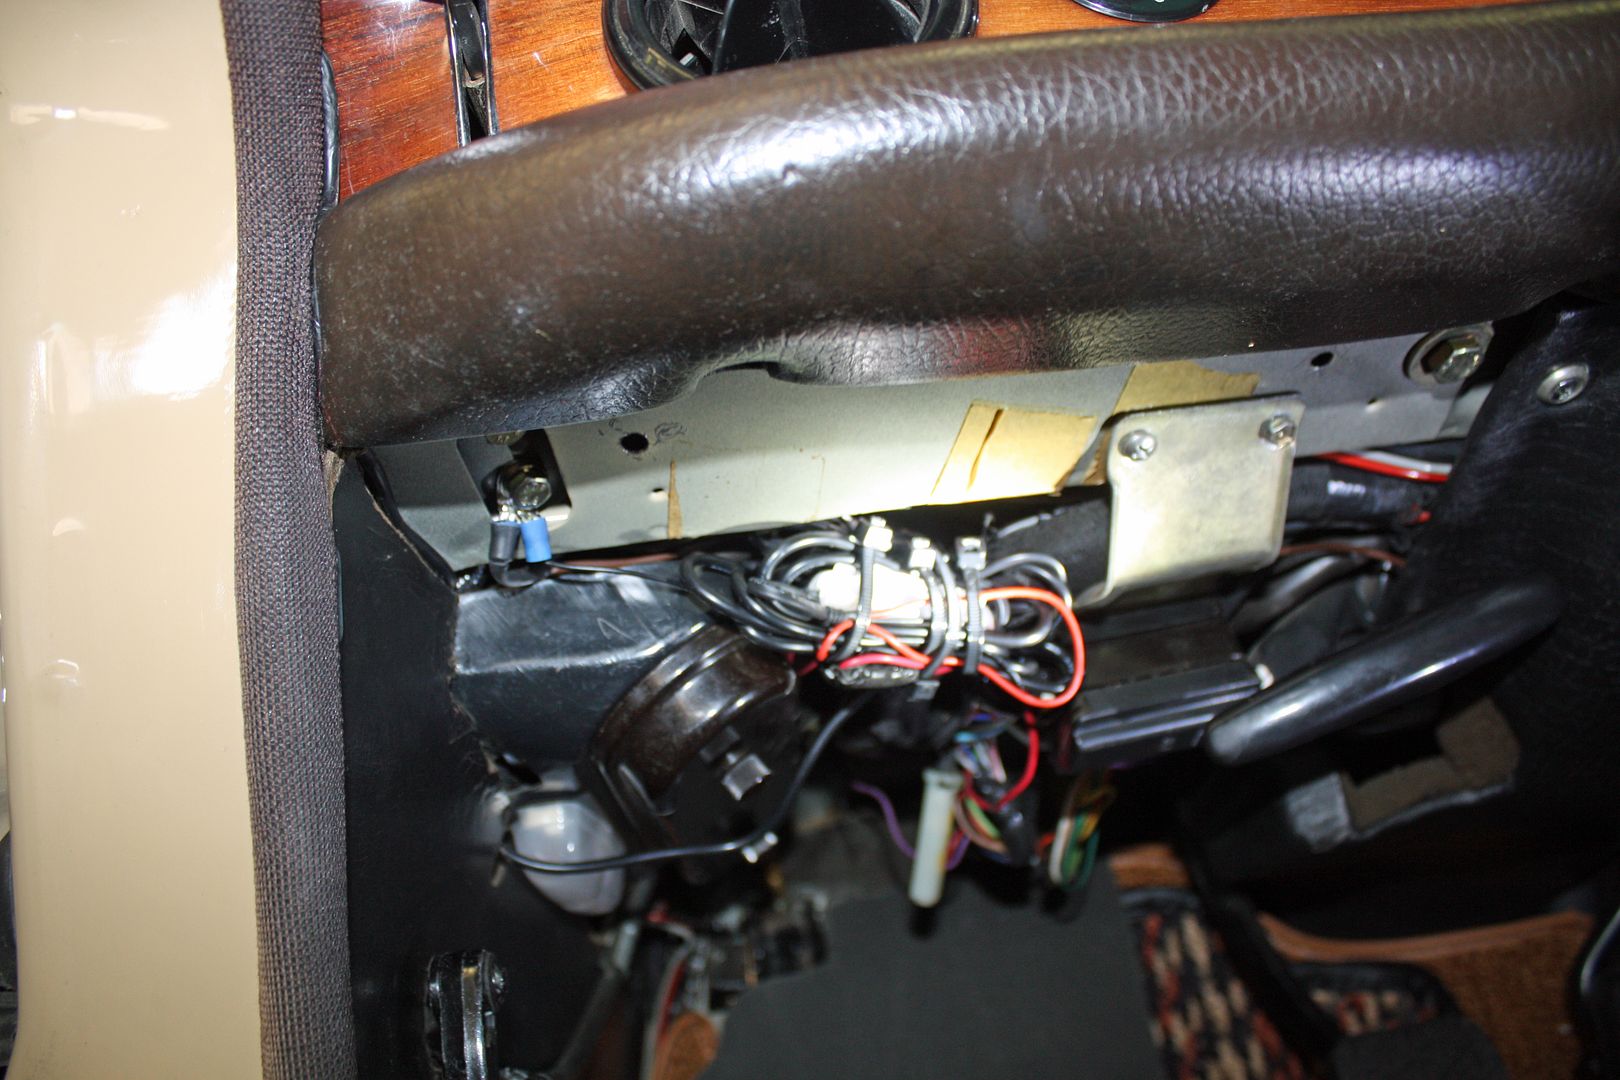
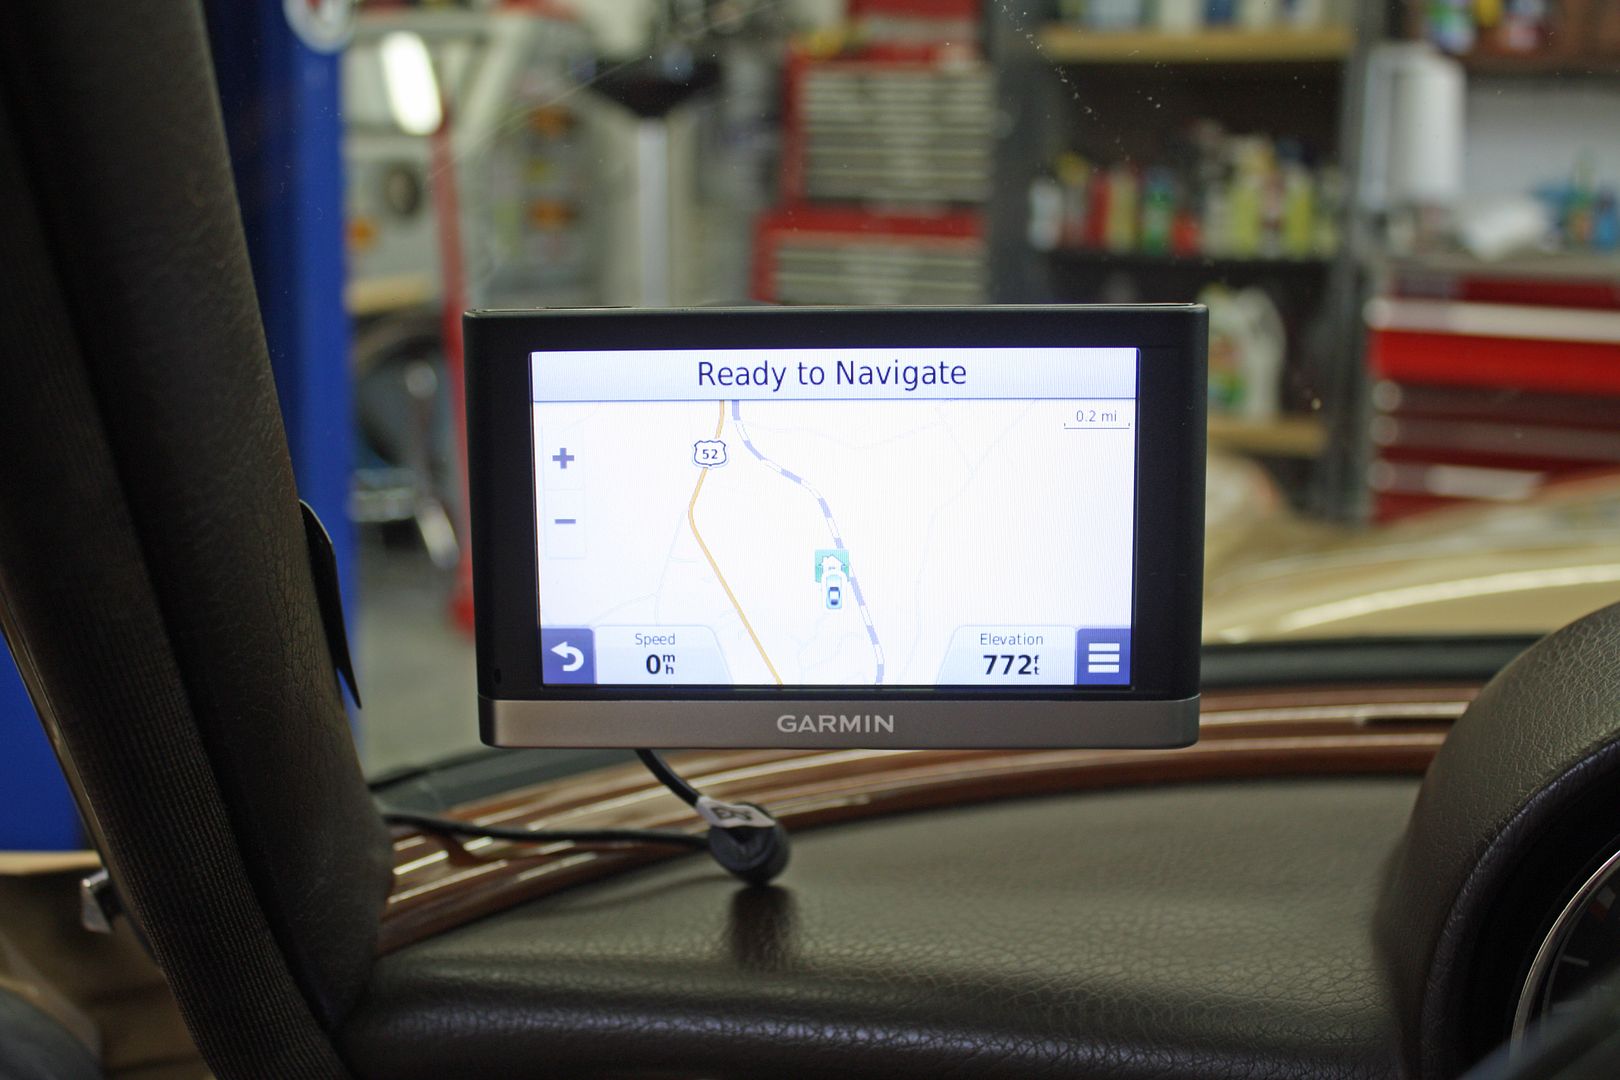


I had purchased a Garmin hard wire kit and finally got around to installing it today. I found a 12V ignition source under the dash on the left side and ran the wire alongside the door trim to the base of the left side of the windshield. I hate having a cord running to the GPS from the cigarette lighter. Much cleaner look this way.


 08-08-2017, 09:29 PM
#78
Member
Thread Starter
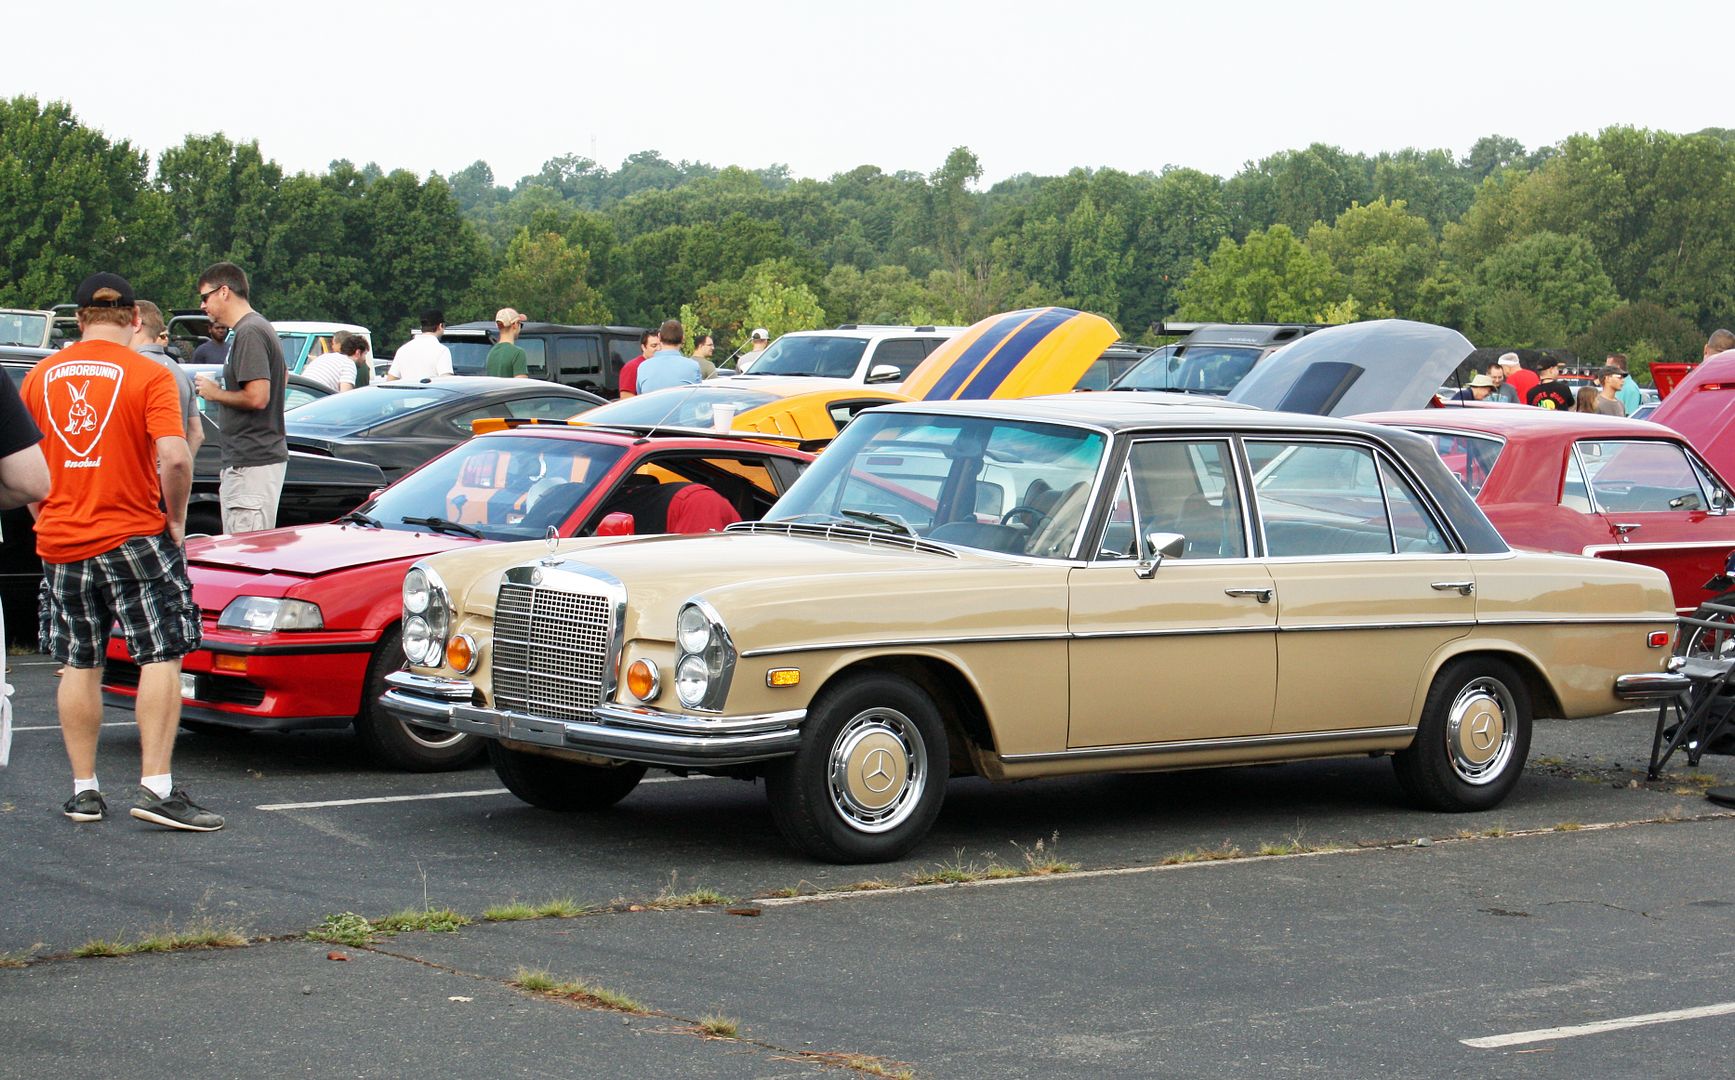
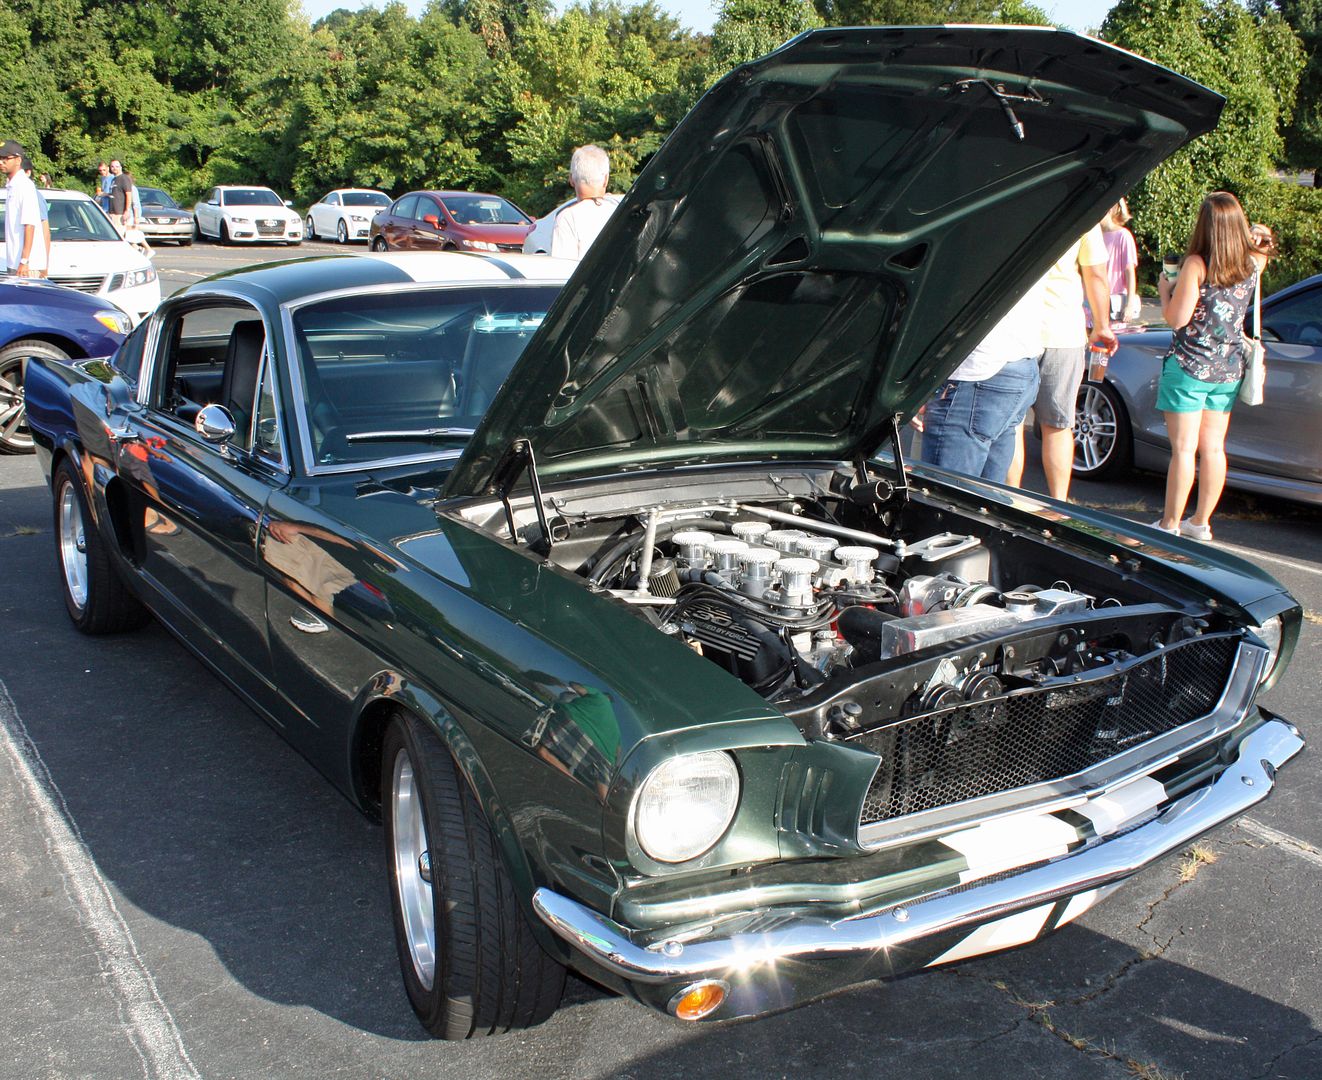
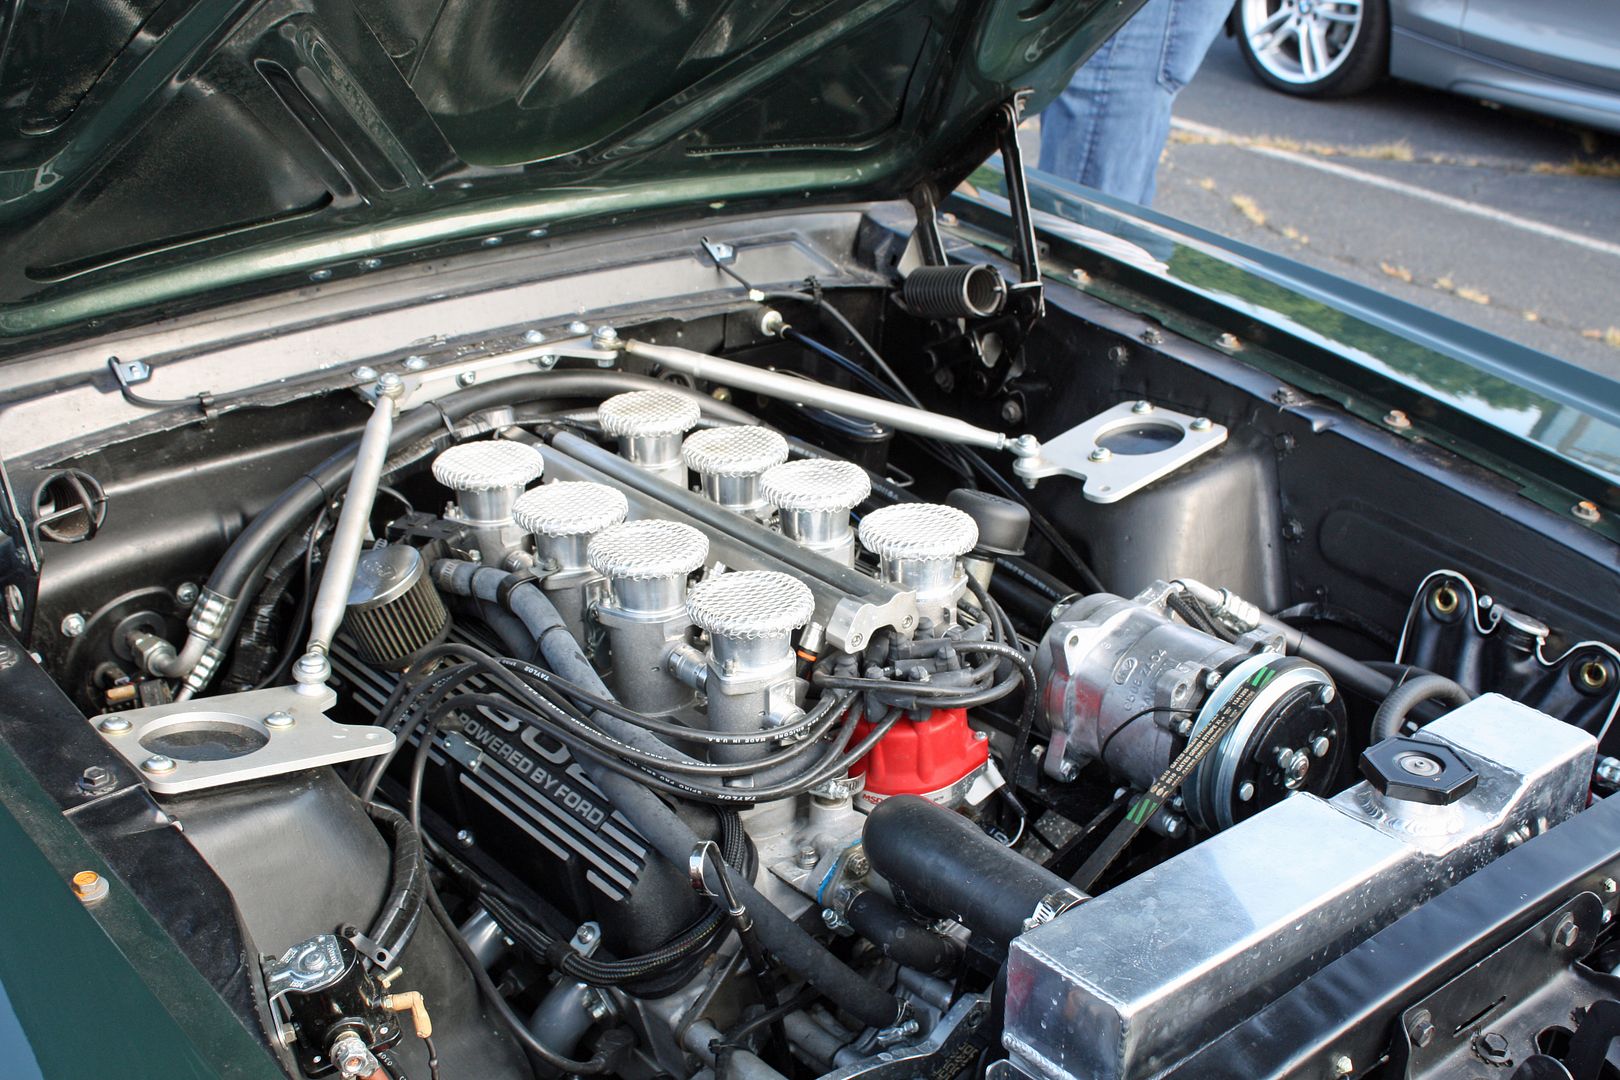
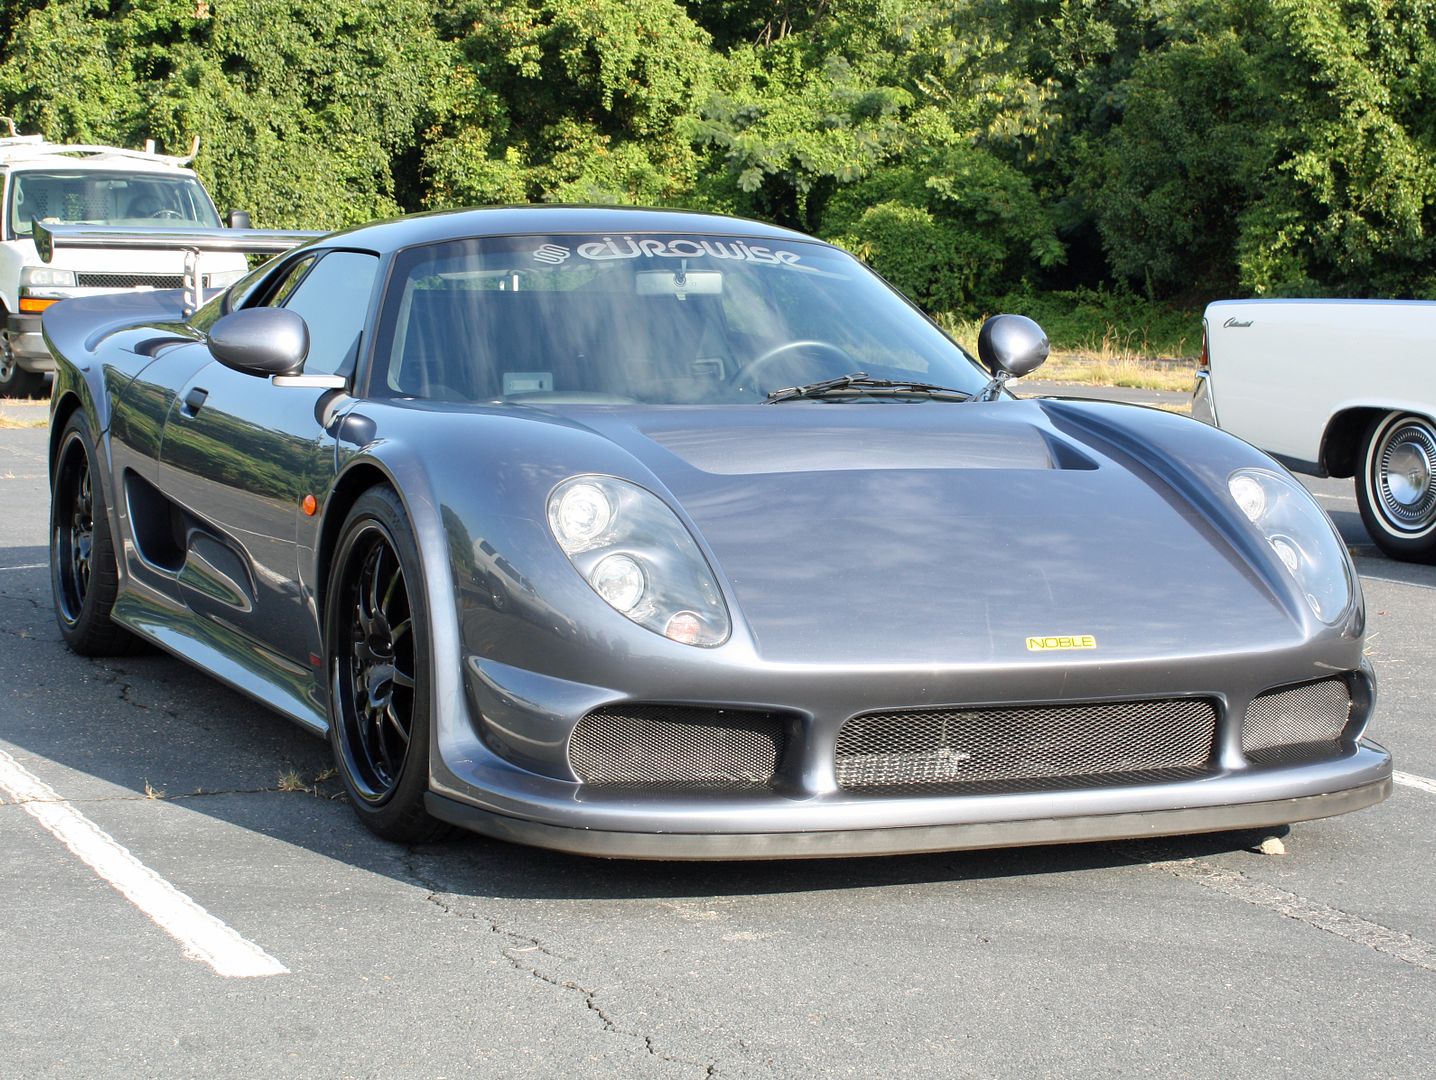
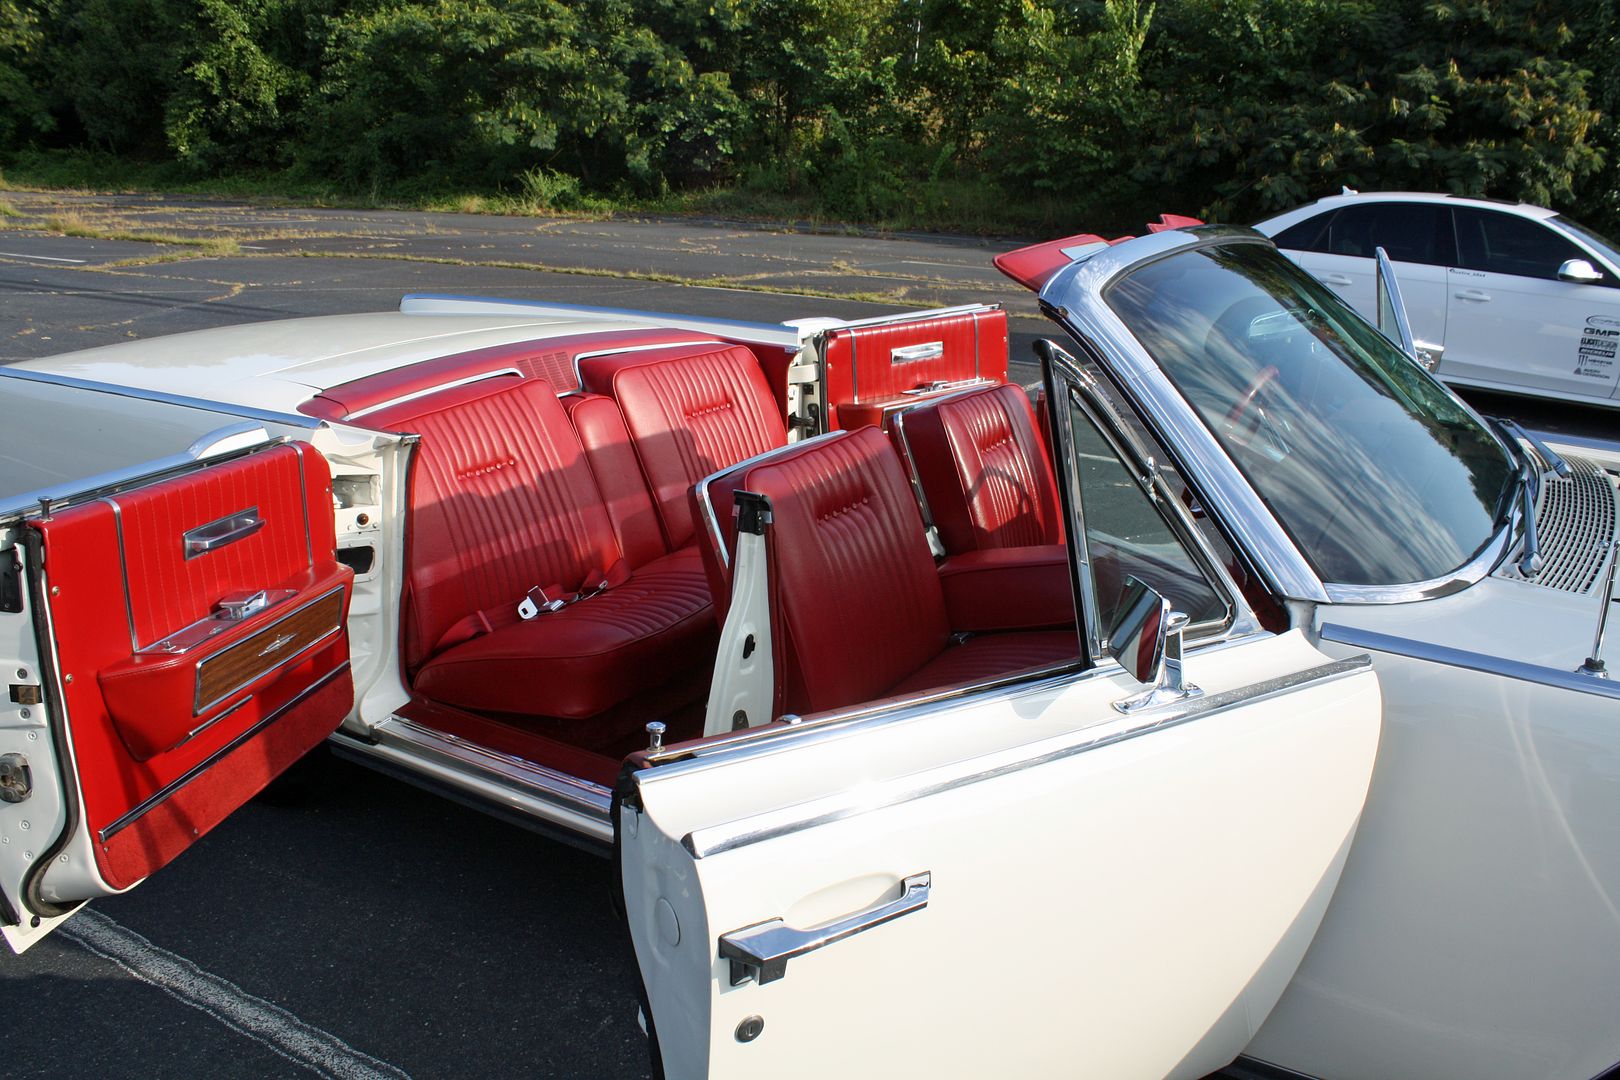
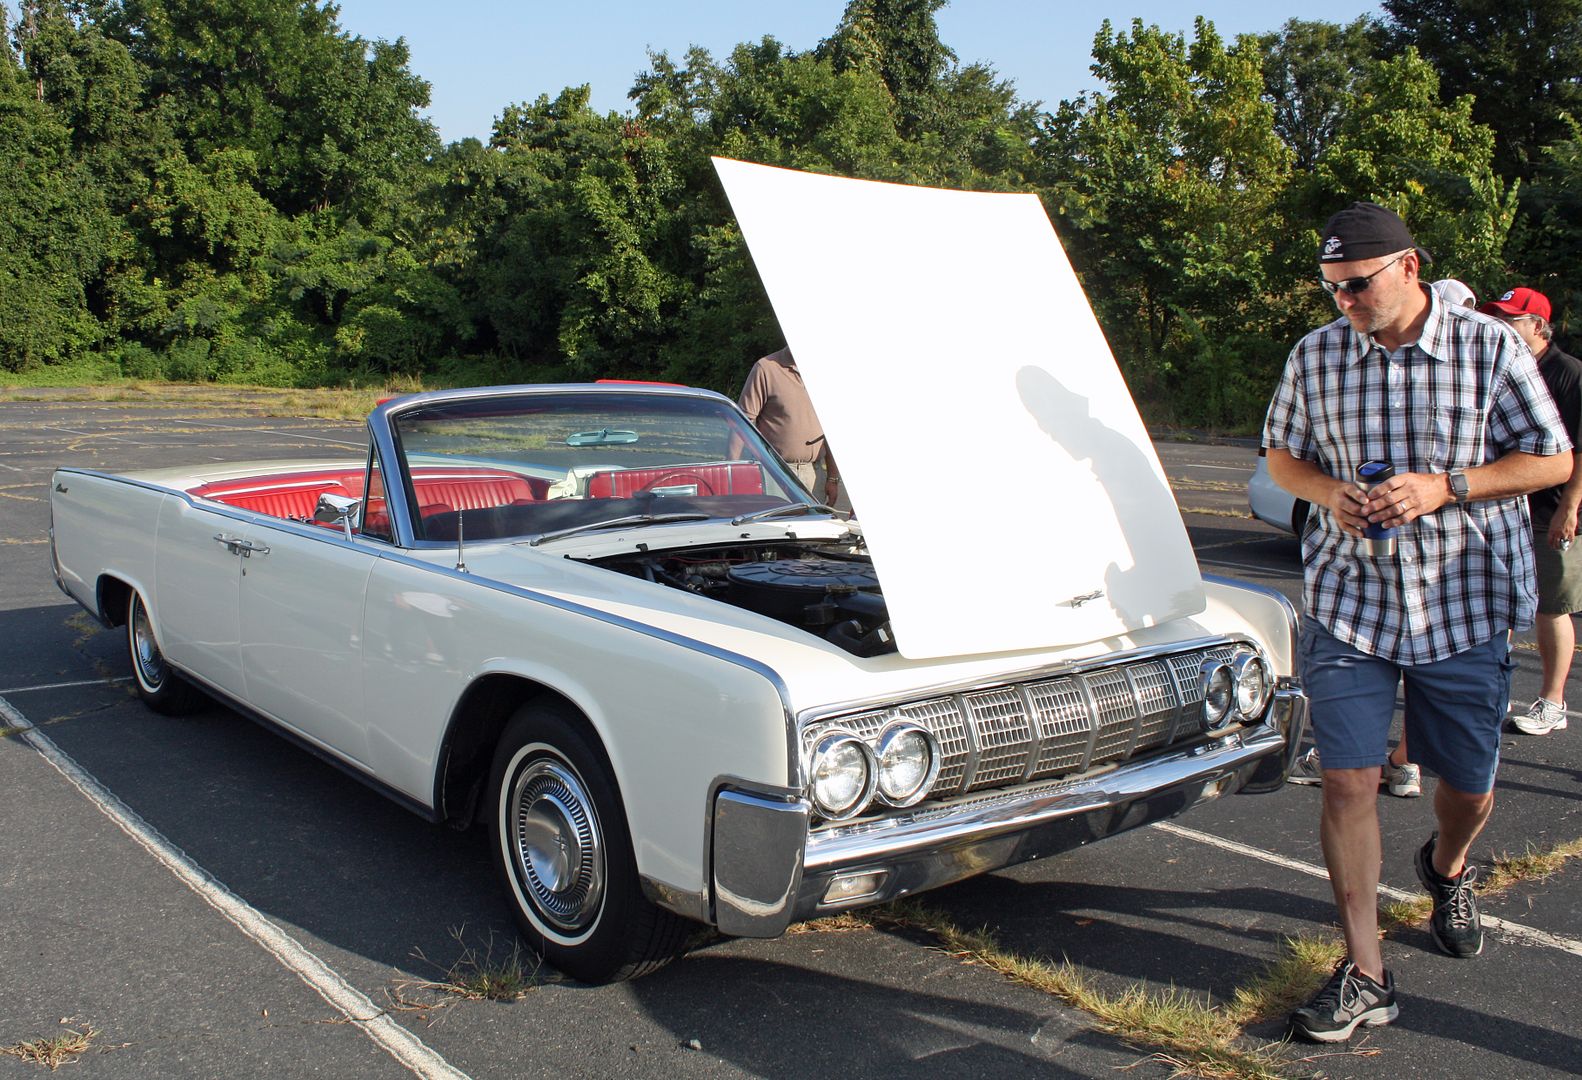
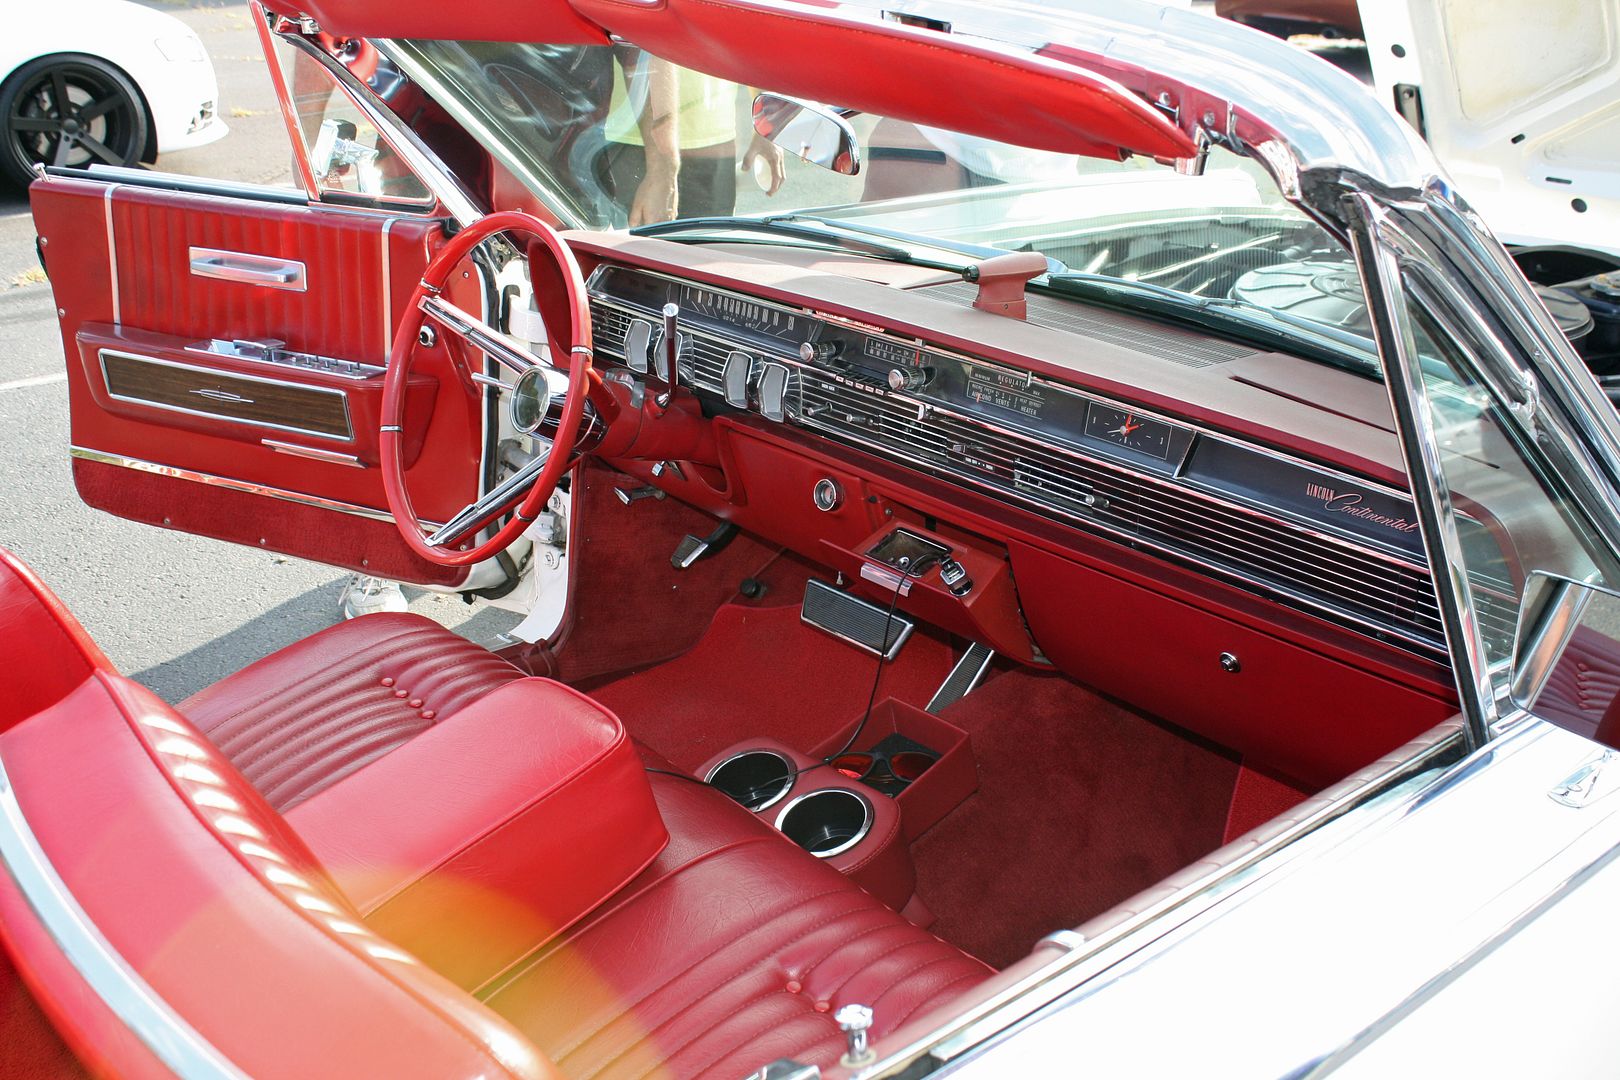
They had a great turnout at the Charlotte Cars & Coffee. I'm guessing at least 500 cars. I didn't see as many interesting cars as at some other times I have attended. Nice Mustang with photogenic fuel injection. This Lincoln suicide door convertible was outstanding. The owner had just installed an electronic fuel injection throttle body which sits completely under the air cleaner, including the electronics. He said it worked well and he was done with cars with carburetors. I also likes the Noble.
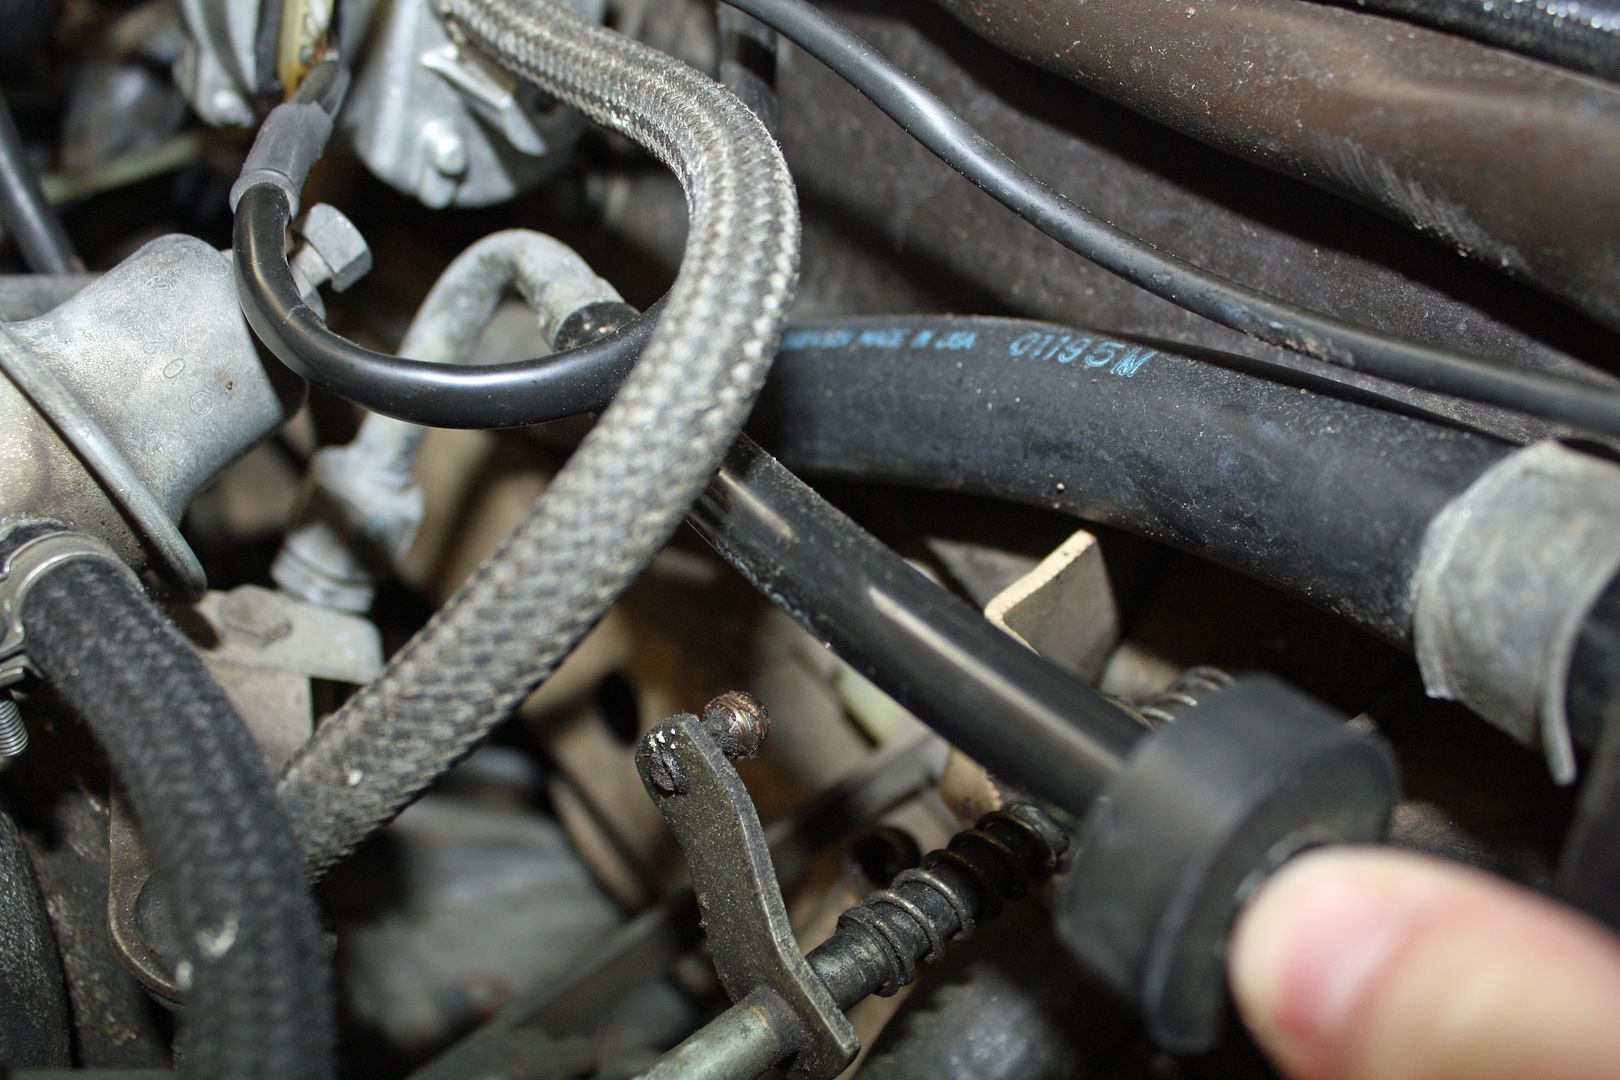
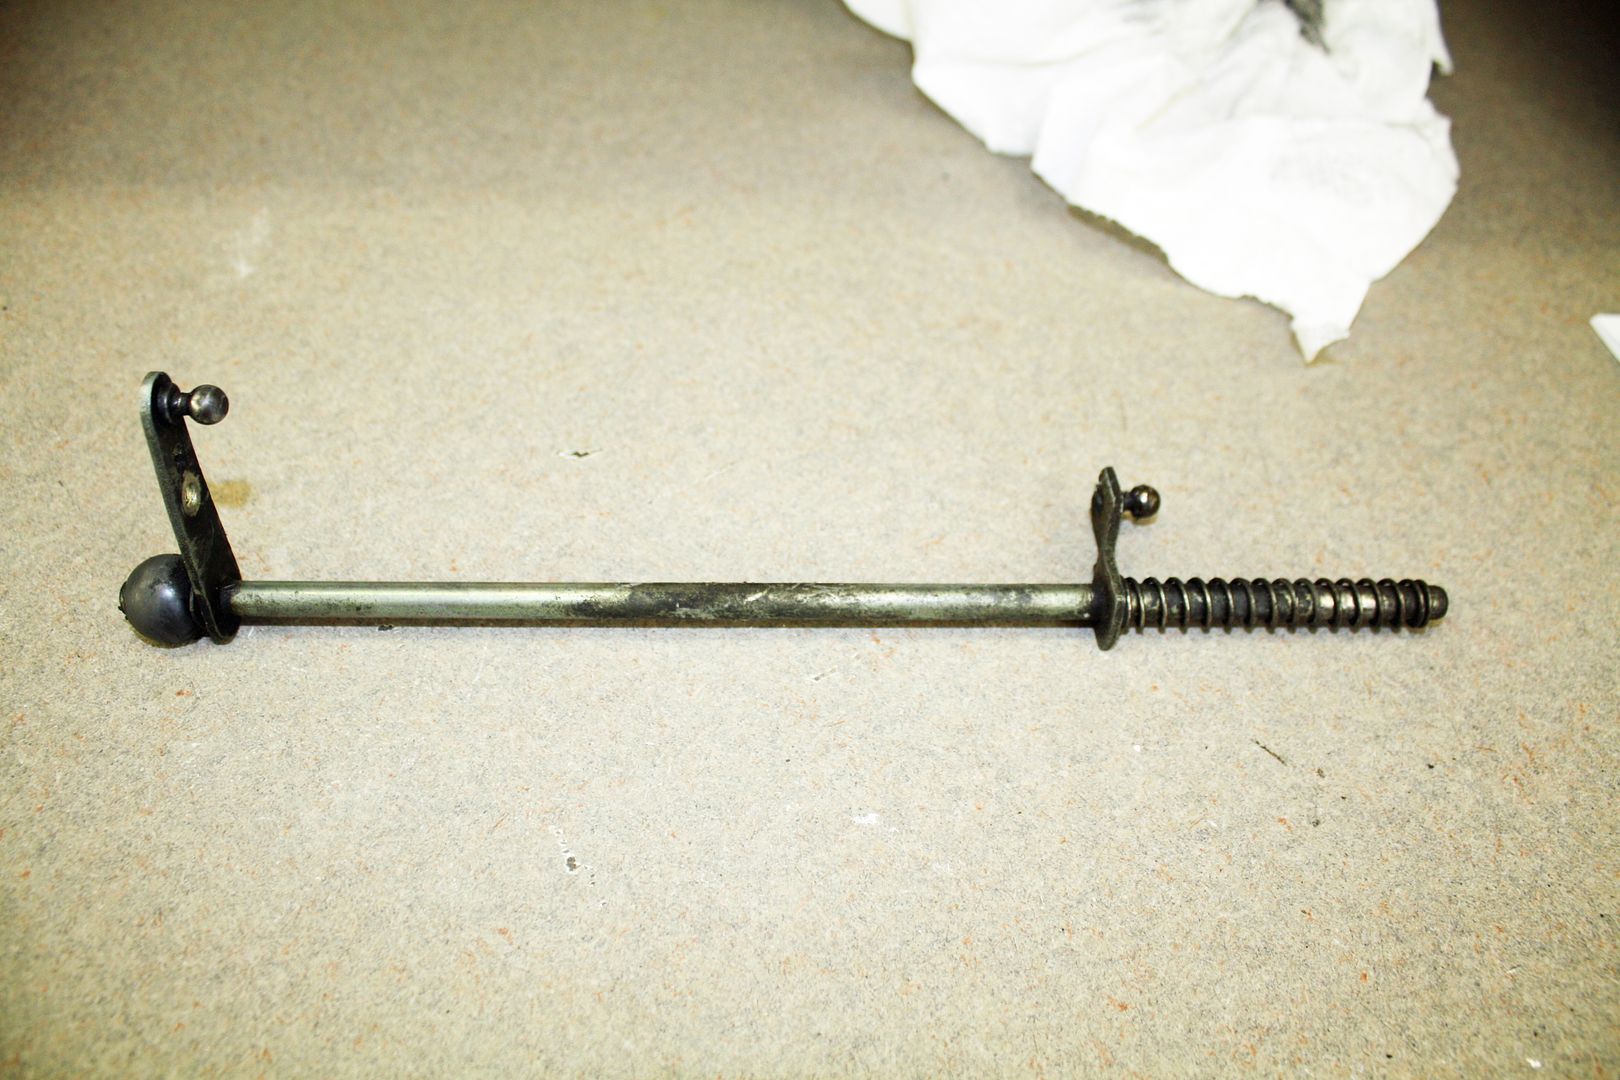
The car ran great!! No issues. However, I have always wondered if I have full throttle. So I drove over to my son's house so we could check it. I mashed down on the throttle and Matt said that it was only opening about half way. He did notice that something was amiss as the bushing on the firewall was completely gone and that rod was not allowing the throttle to fully open. The new bushings are on the way and I am excited to see what it feels like when the throttle fully opens!!

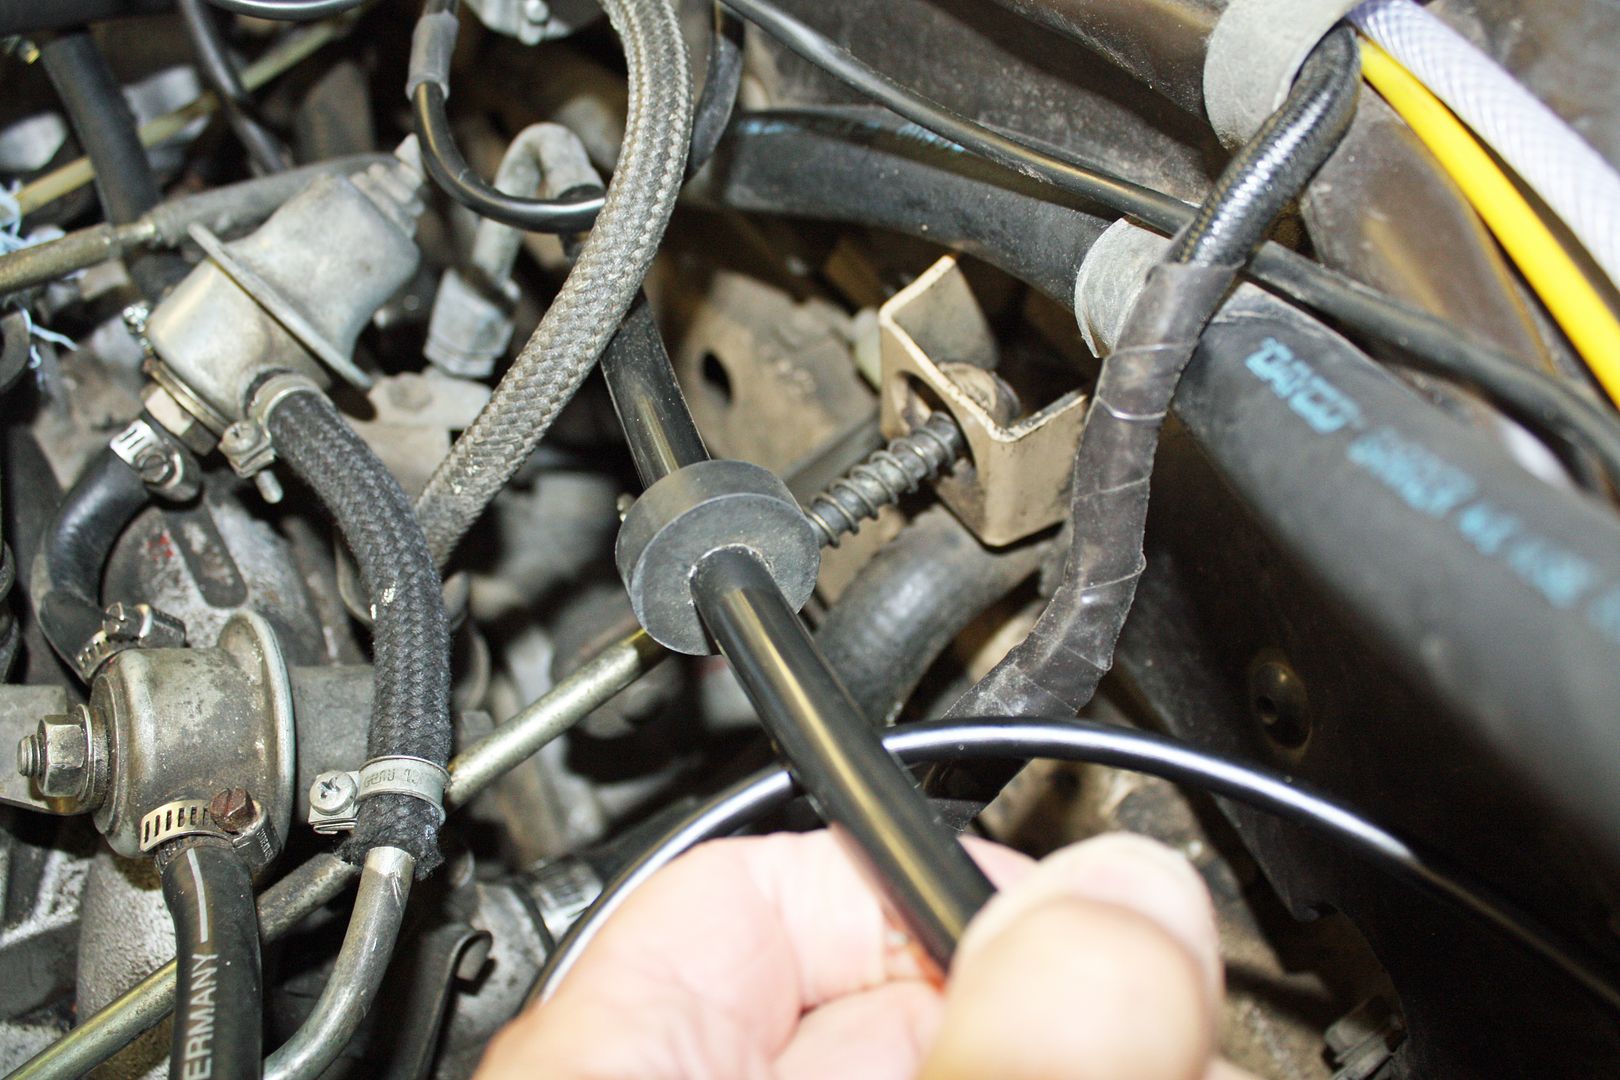


The car ran great!! No issues. However, I have always wondered if I have full throttle. So I drove over to my son's house so we could check it. I mashed down on the throttle and Matt said that it was only opening about half way. He did notice that something was amiss as the bushing on the firewall was completely gone and that rod was not allowing the throttle to fully open. The new bushings are on the way and I am excited to see what it feels like when the throttle fully opens!!

 08-08-2017, 10:06 PM
#79
Member
Thread Starter
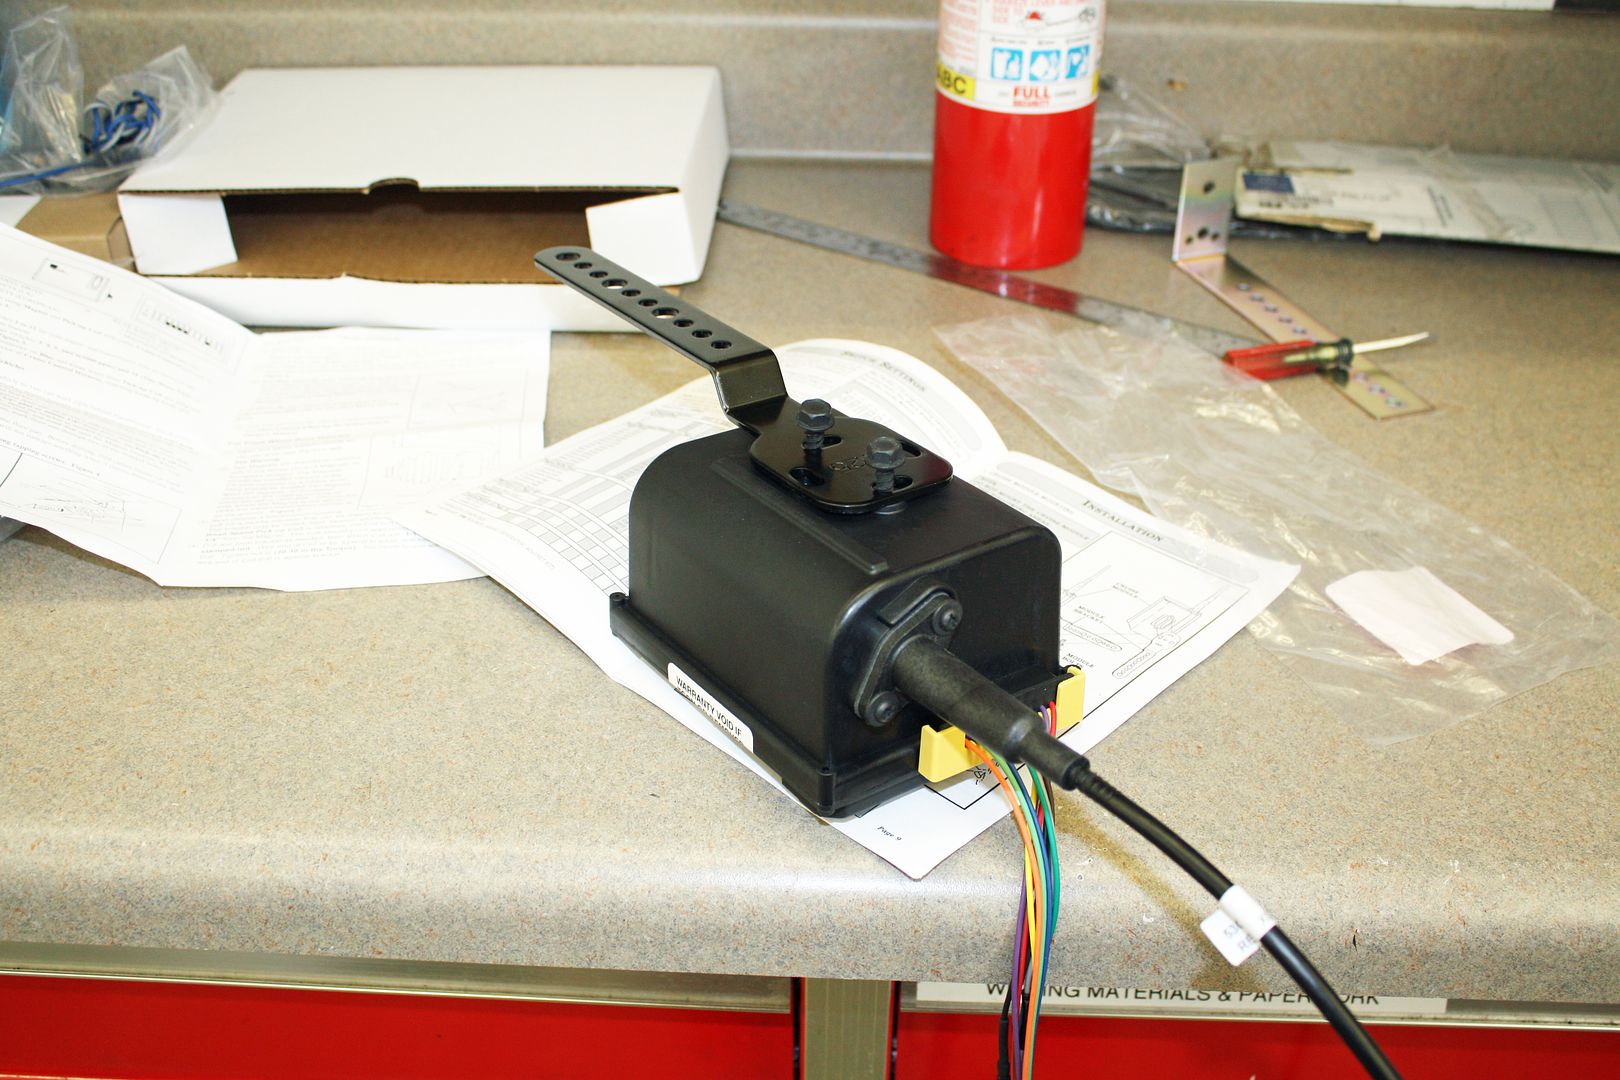
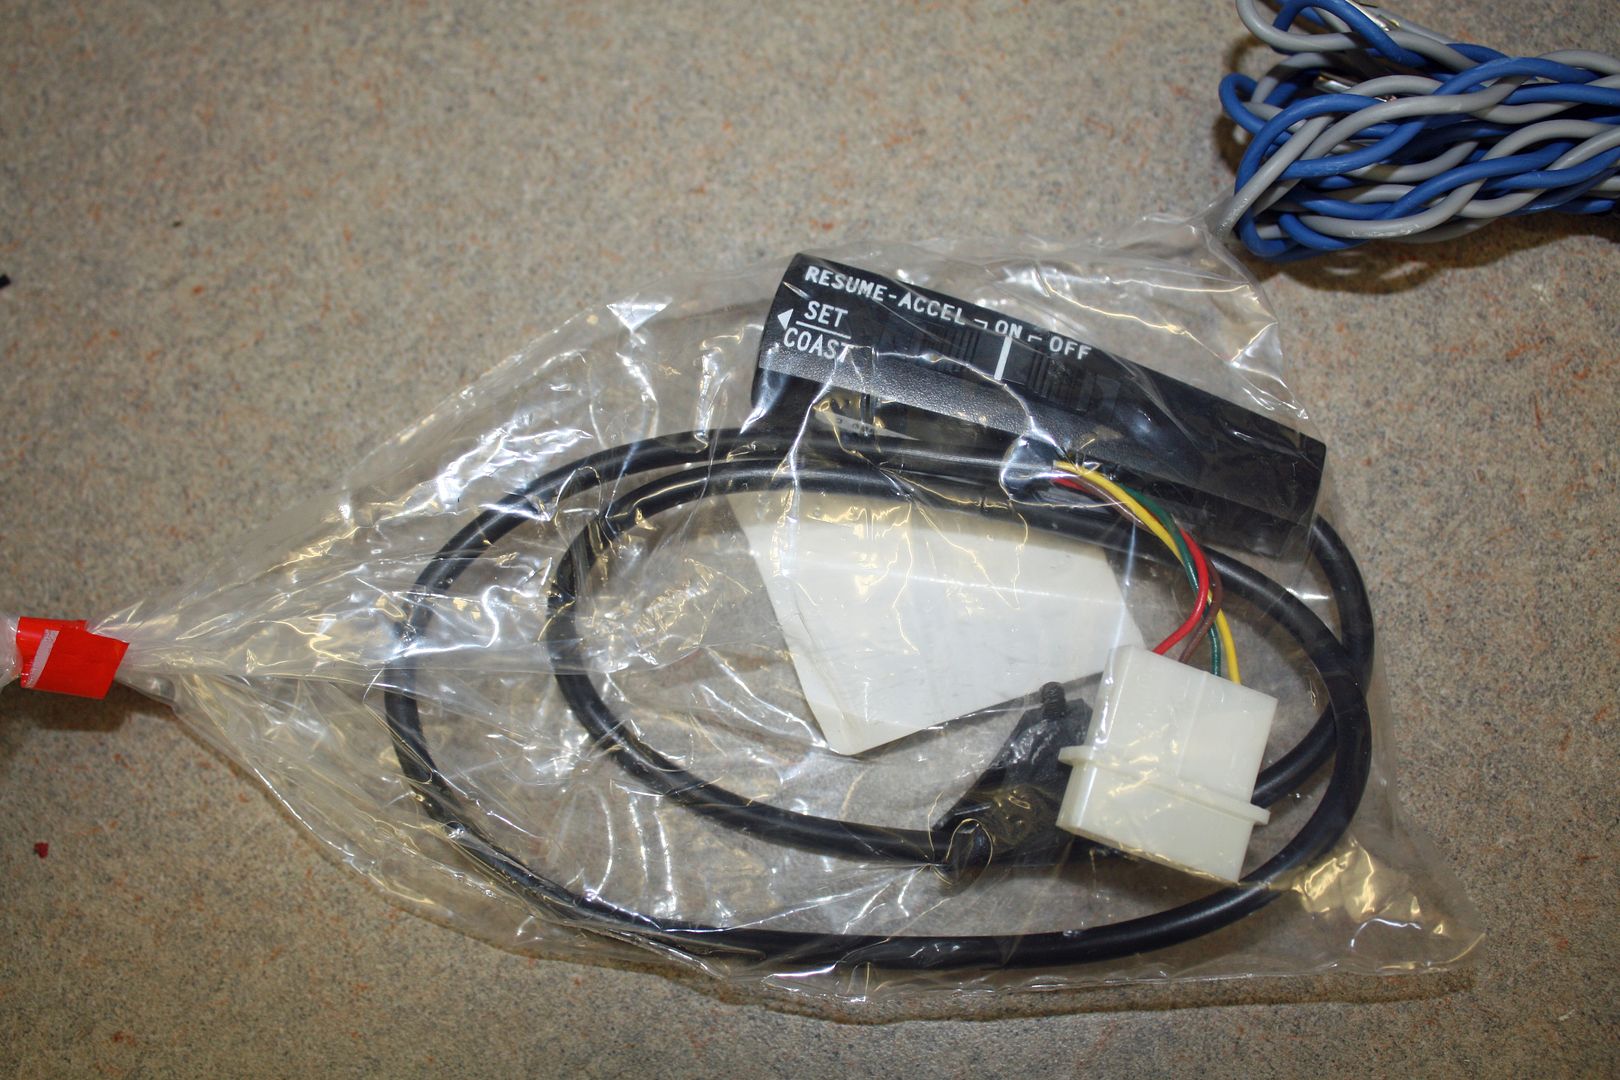
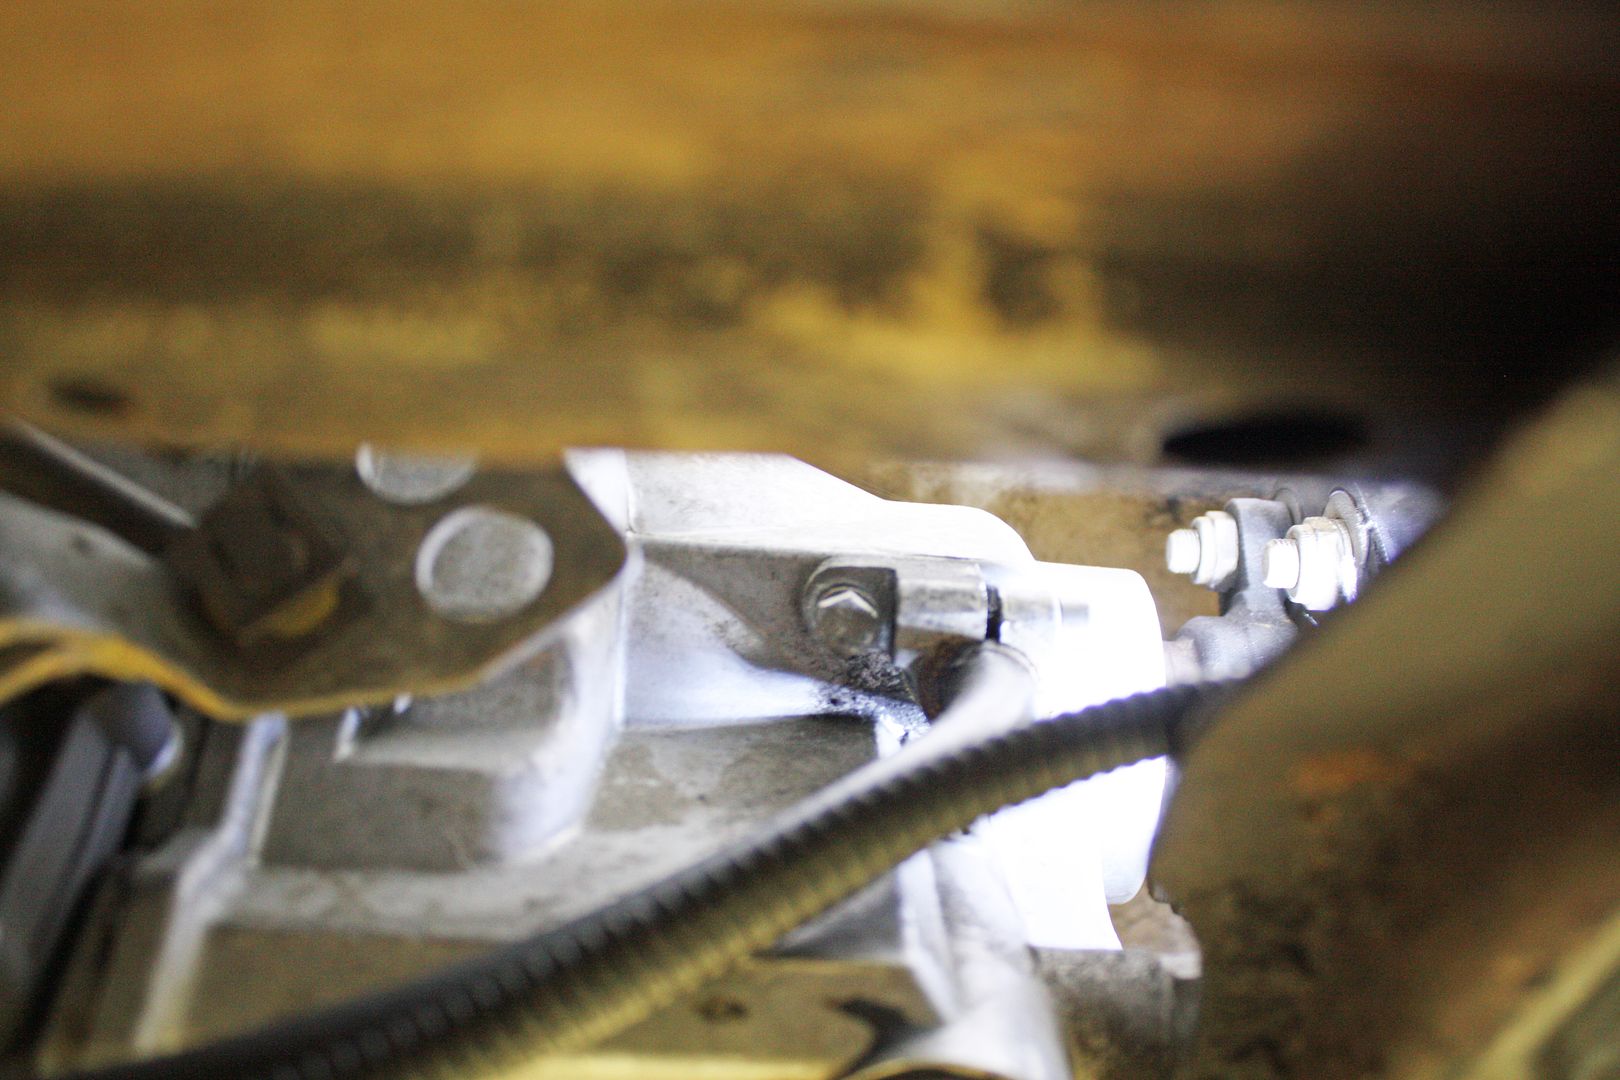
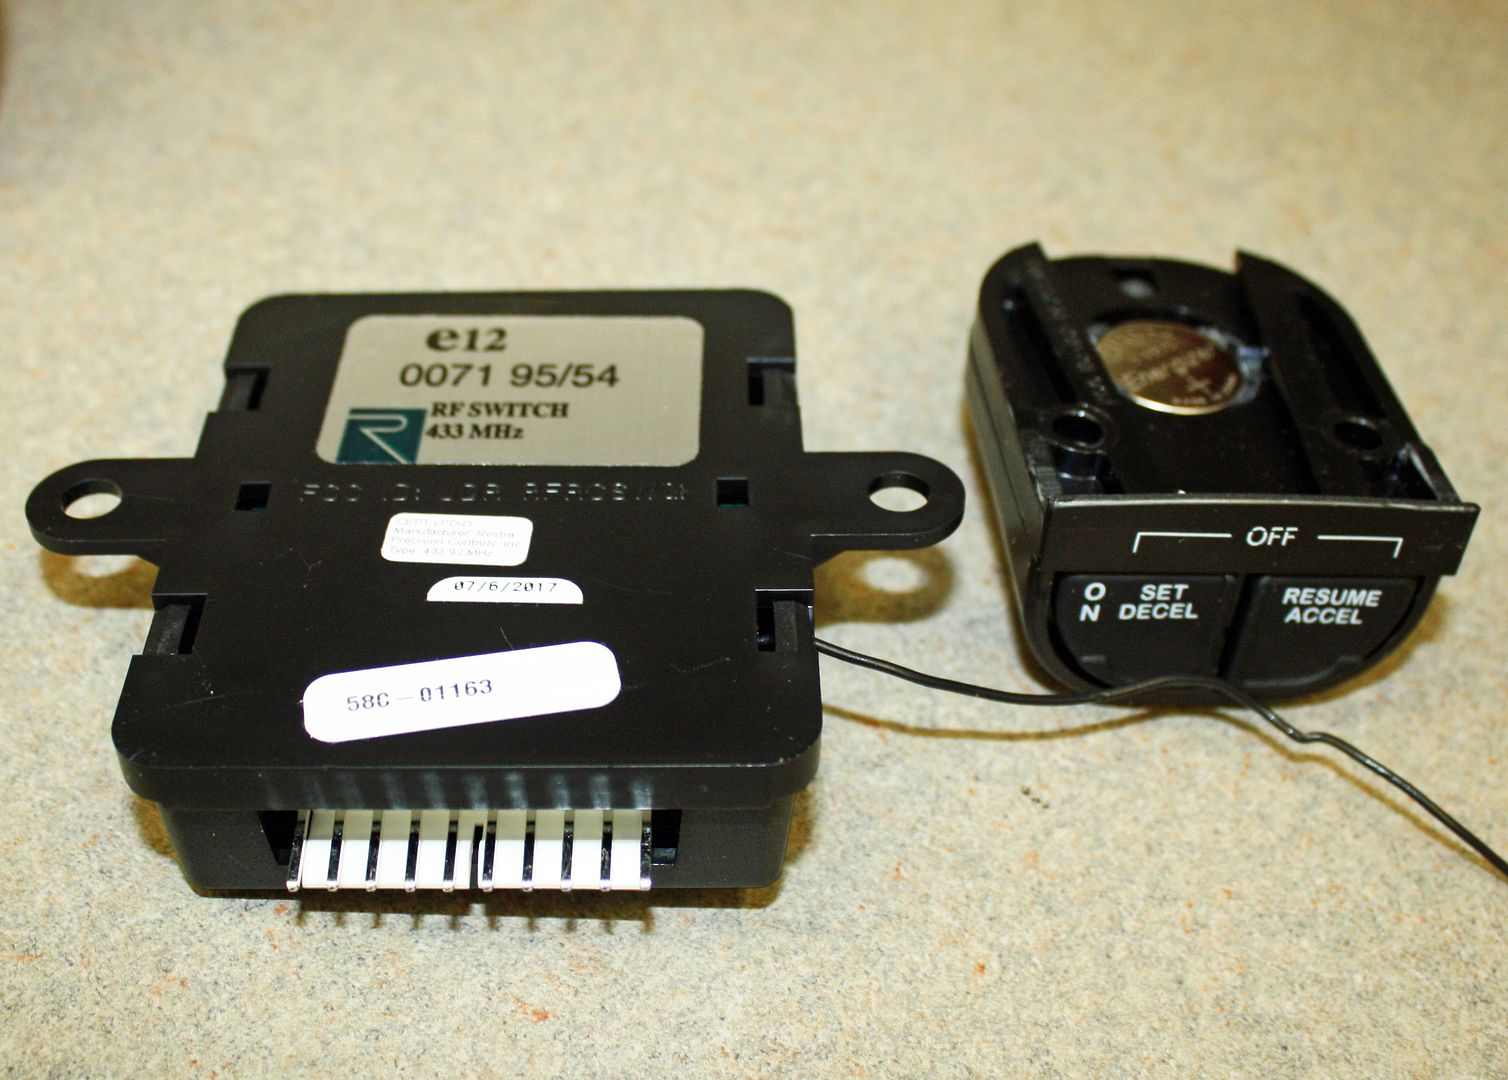
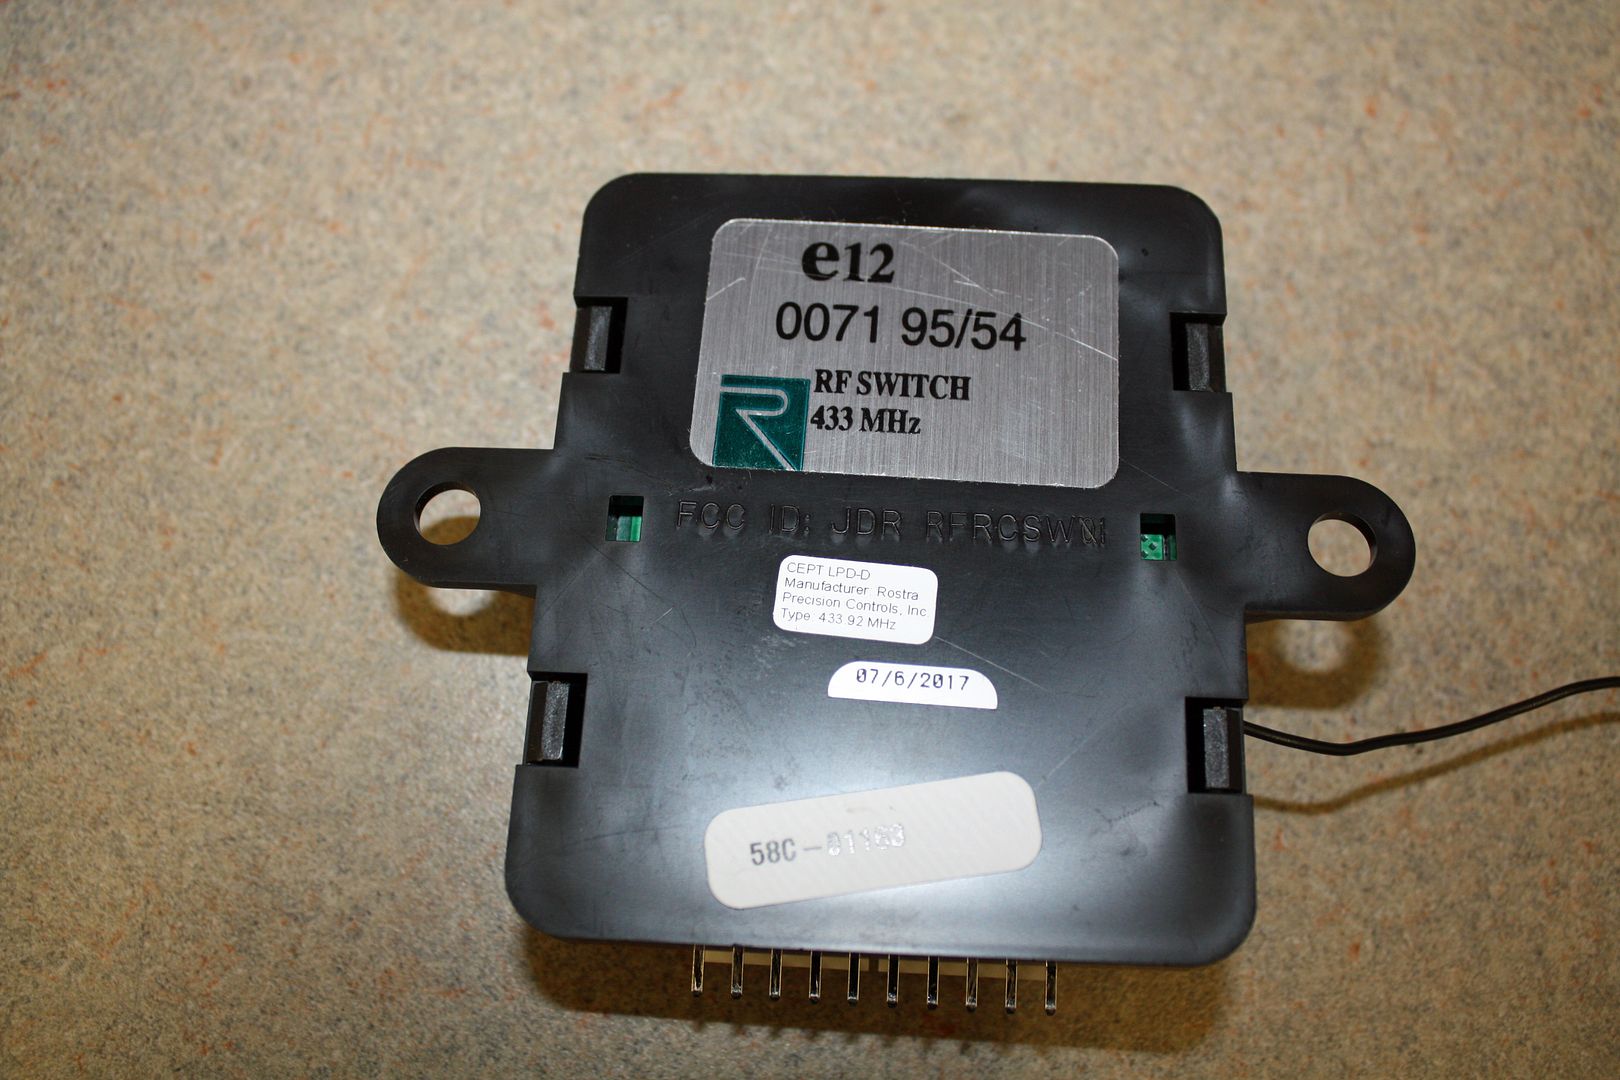
During the NASCAR race this past Sunday I began to install the cruise control. It is a Rostra unit and similar to others that I have installed, including a couple of them on motorcycles.
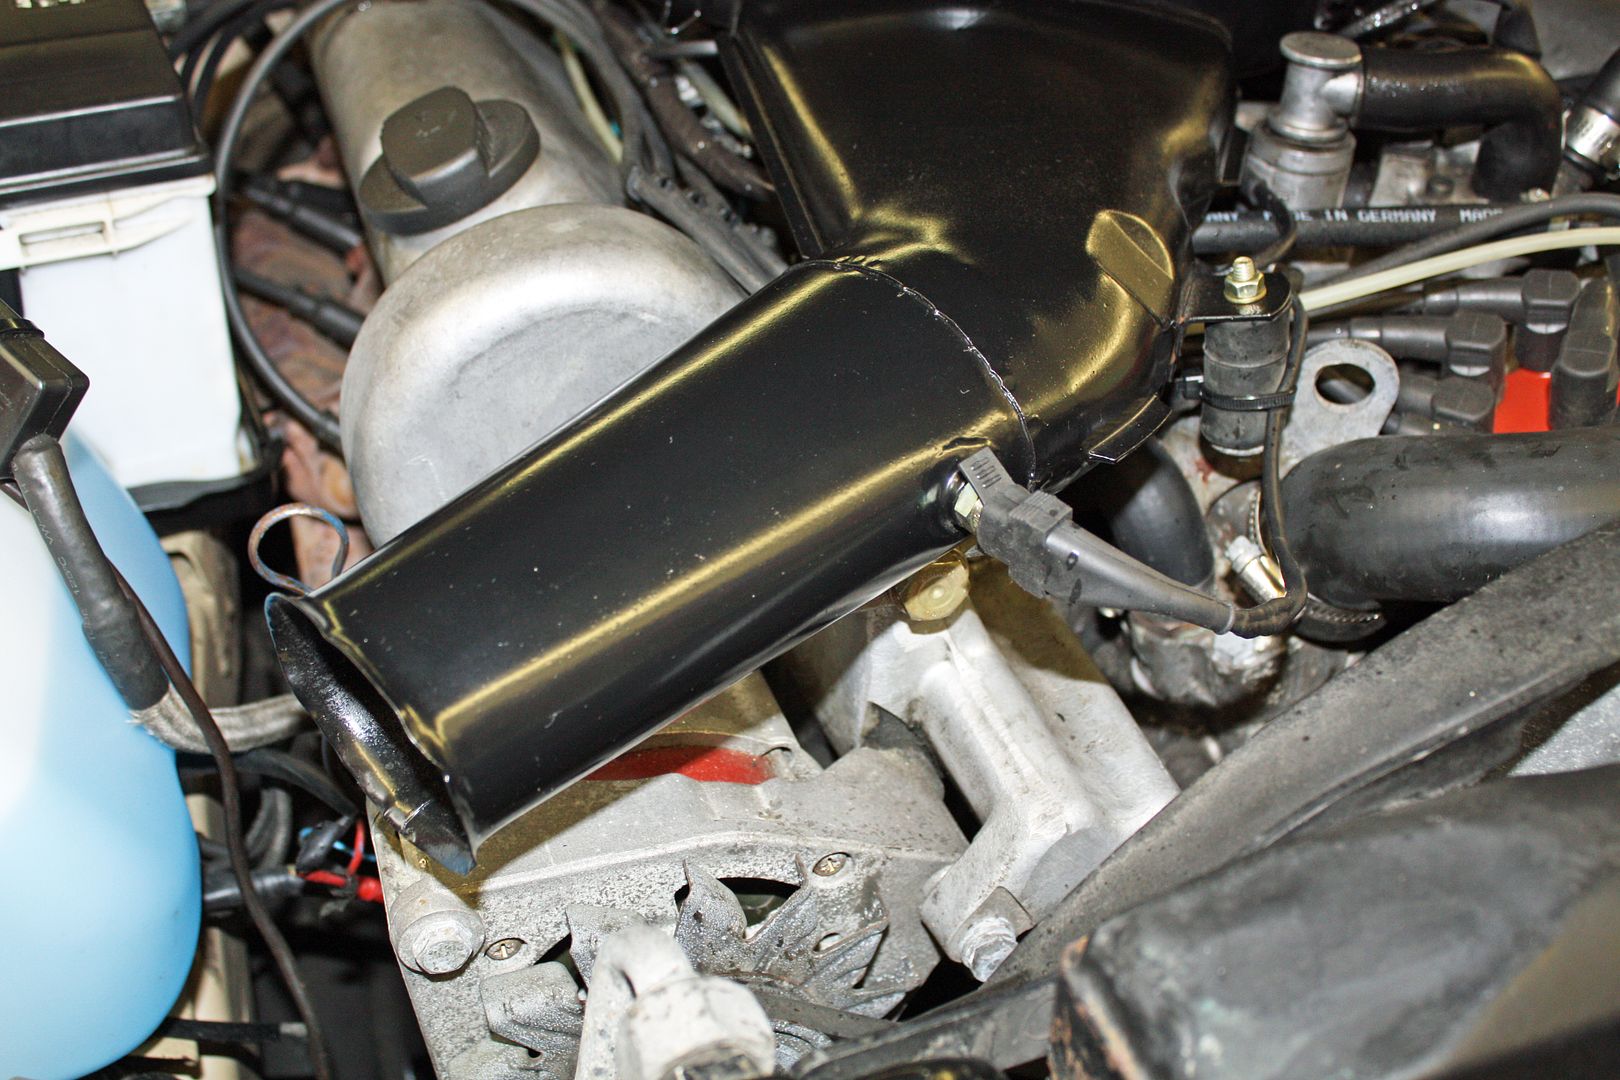
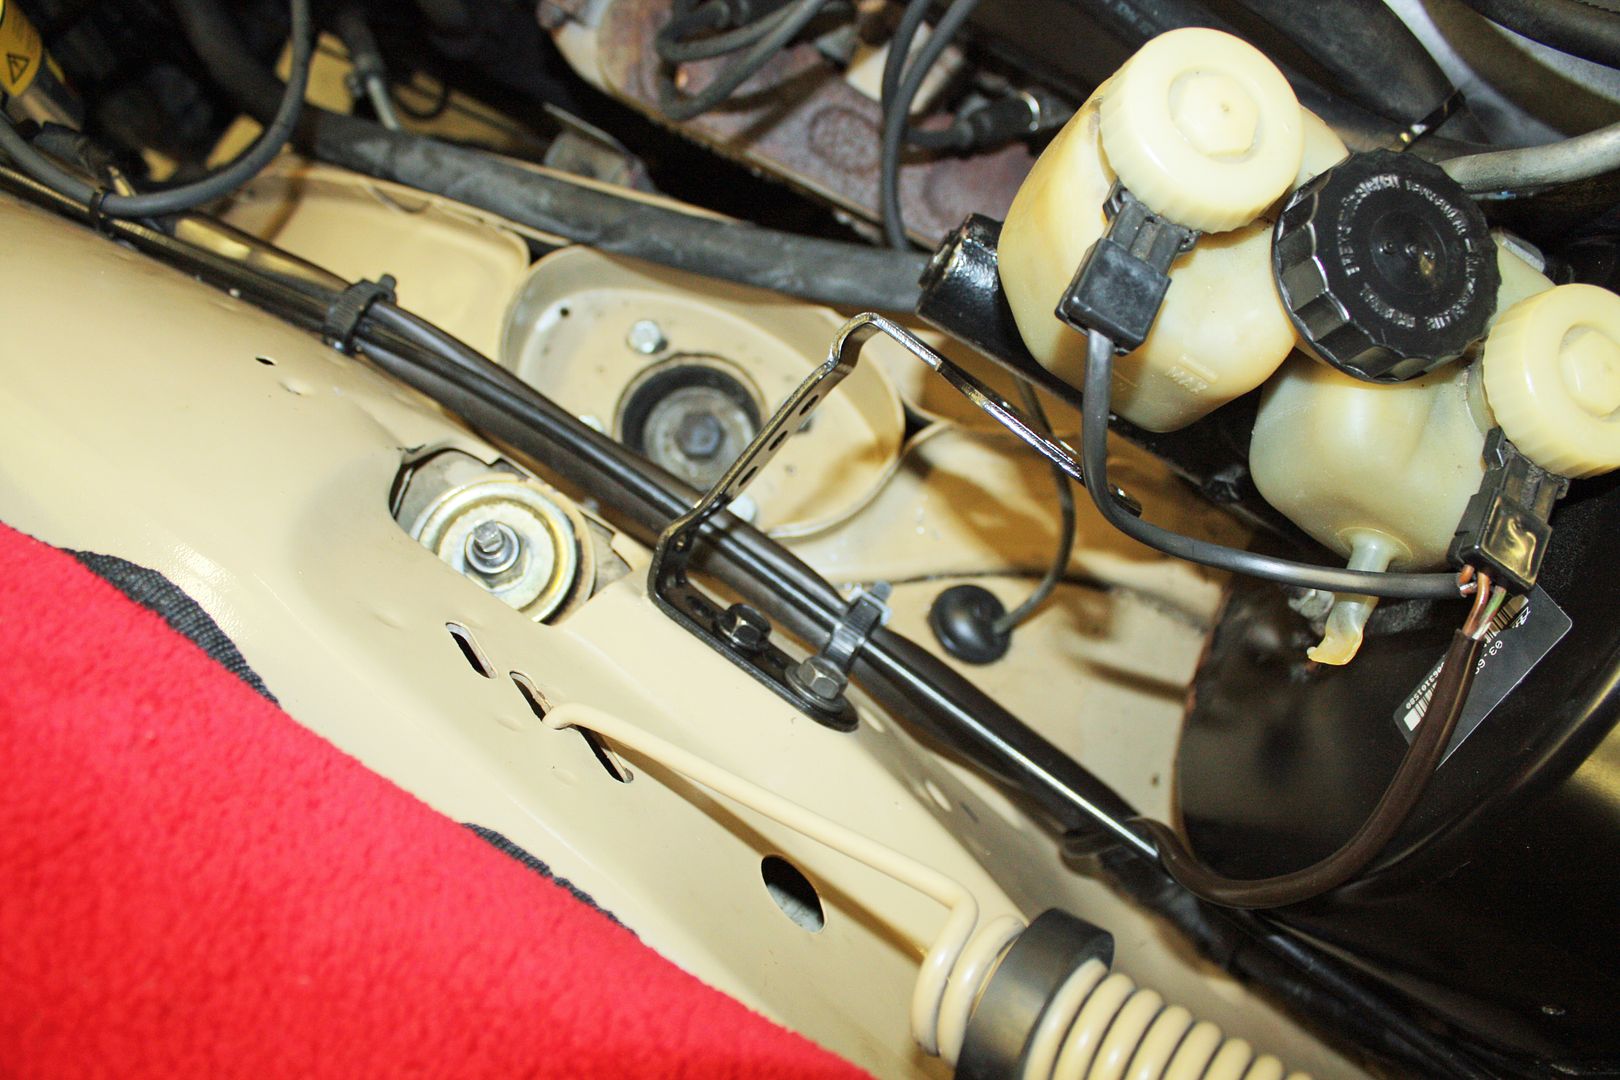
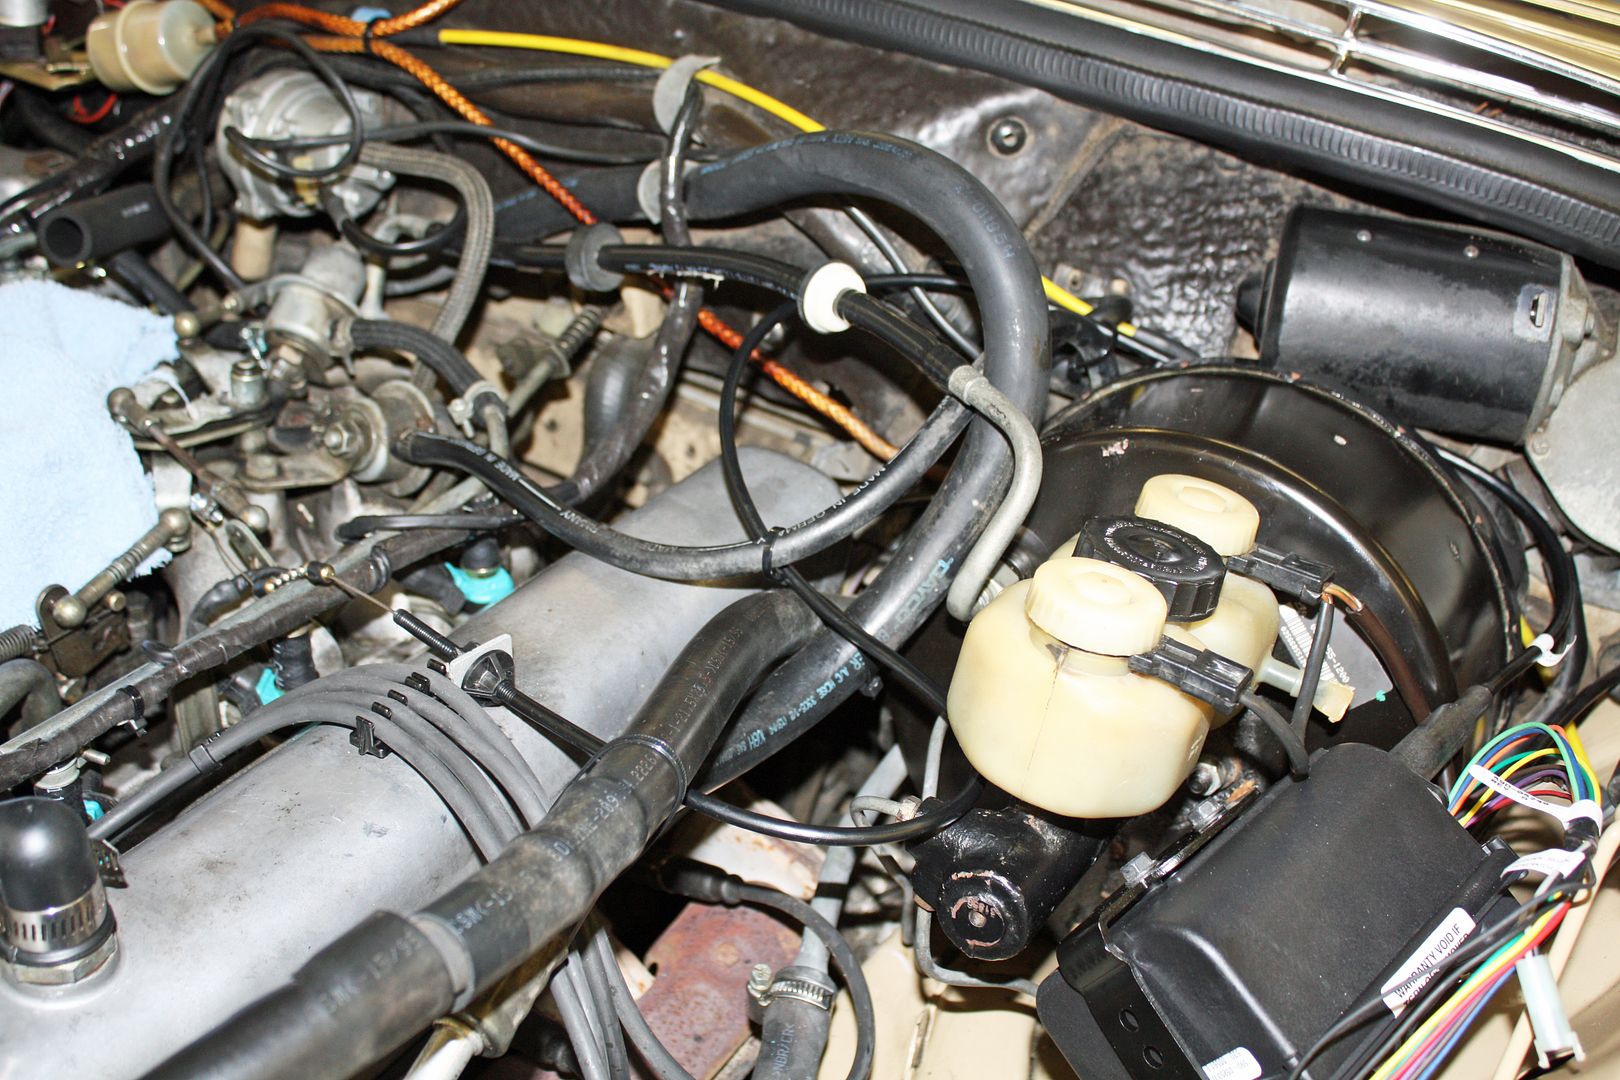
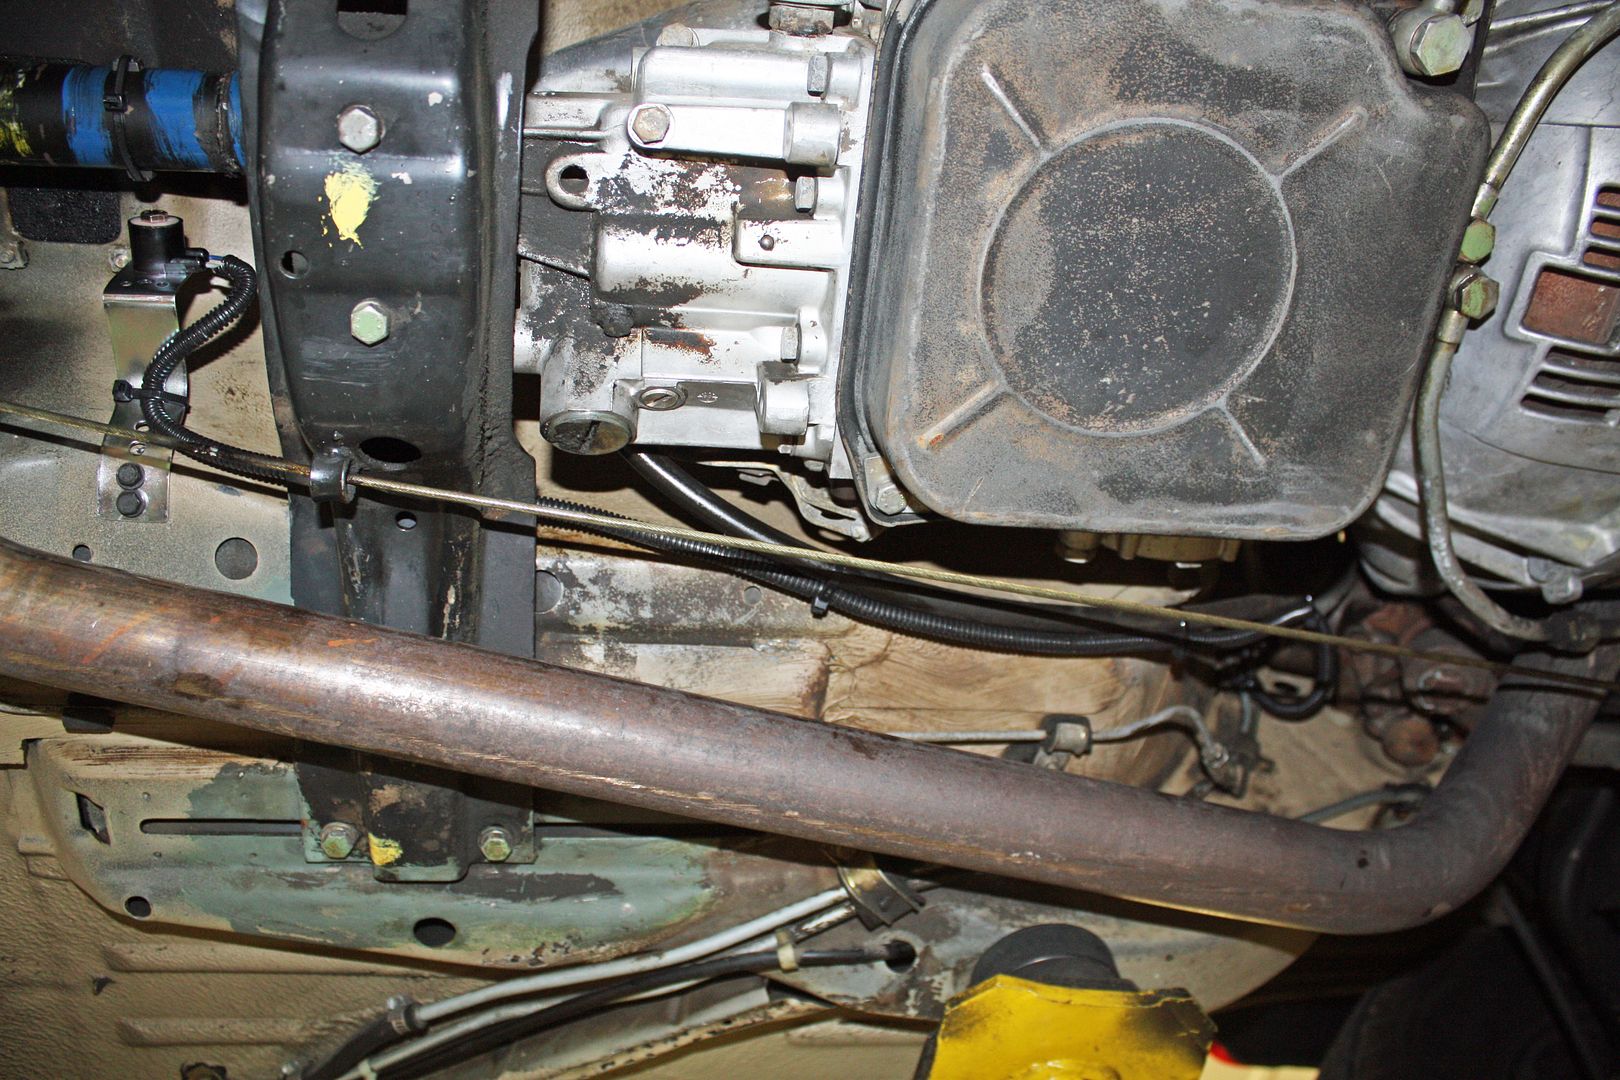
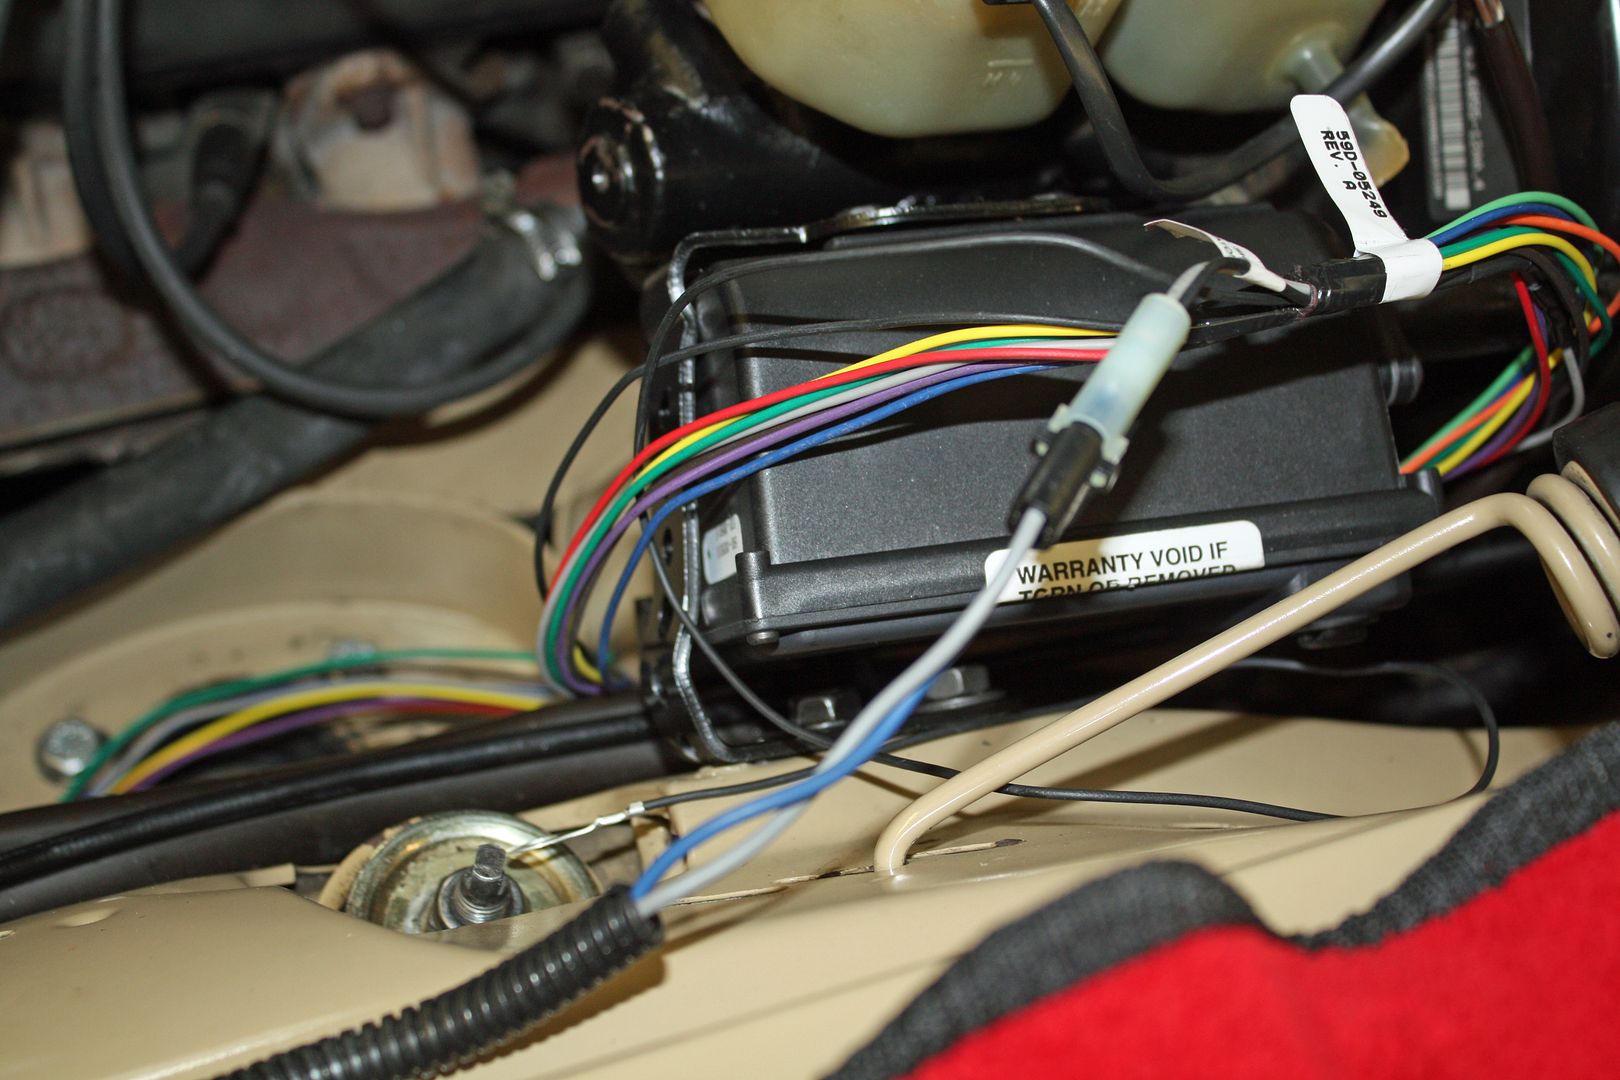
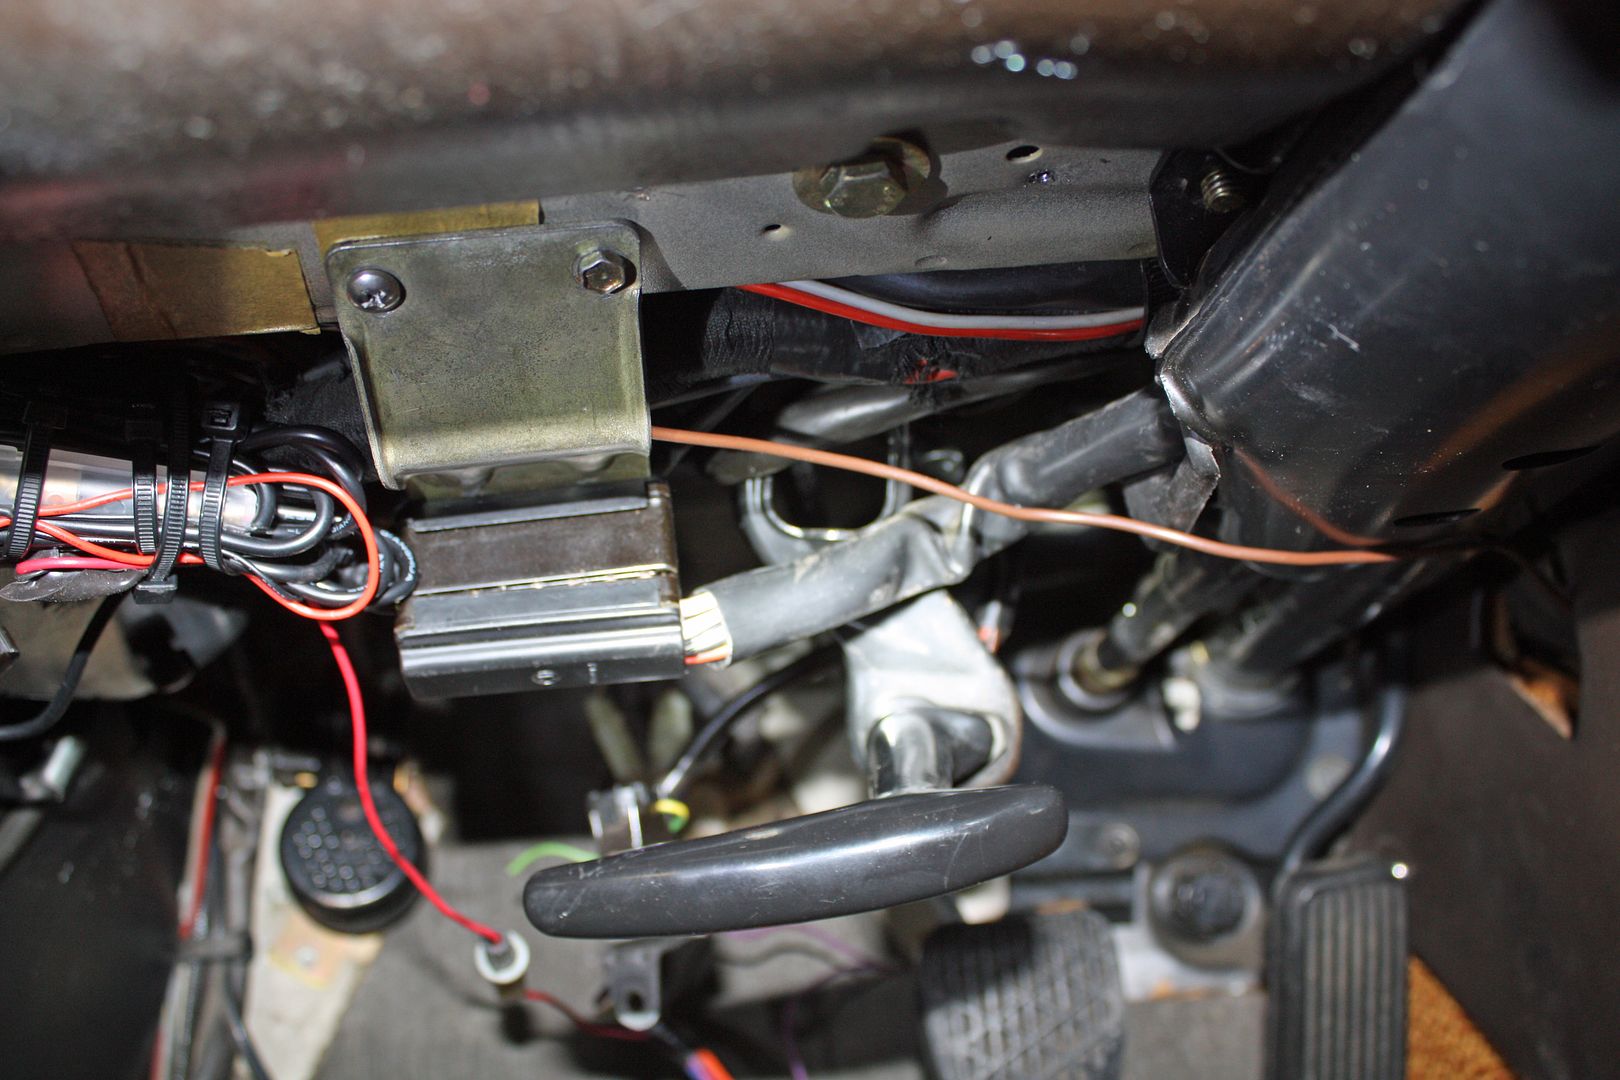
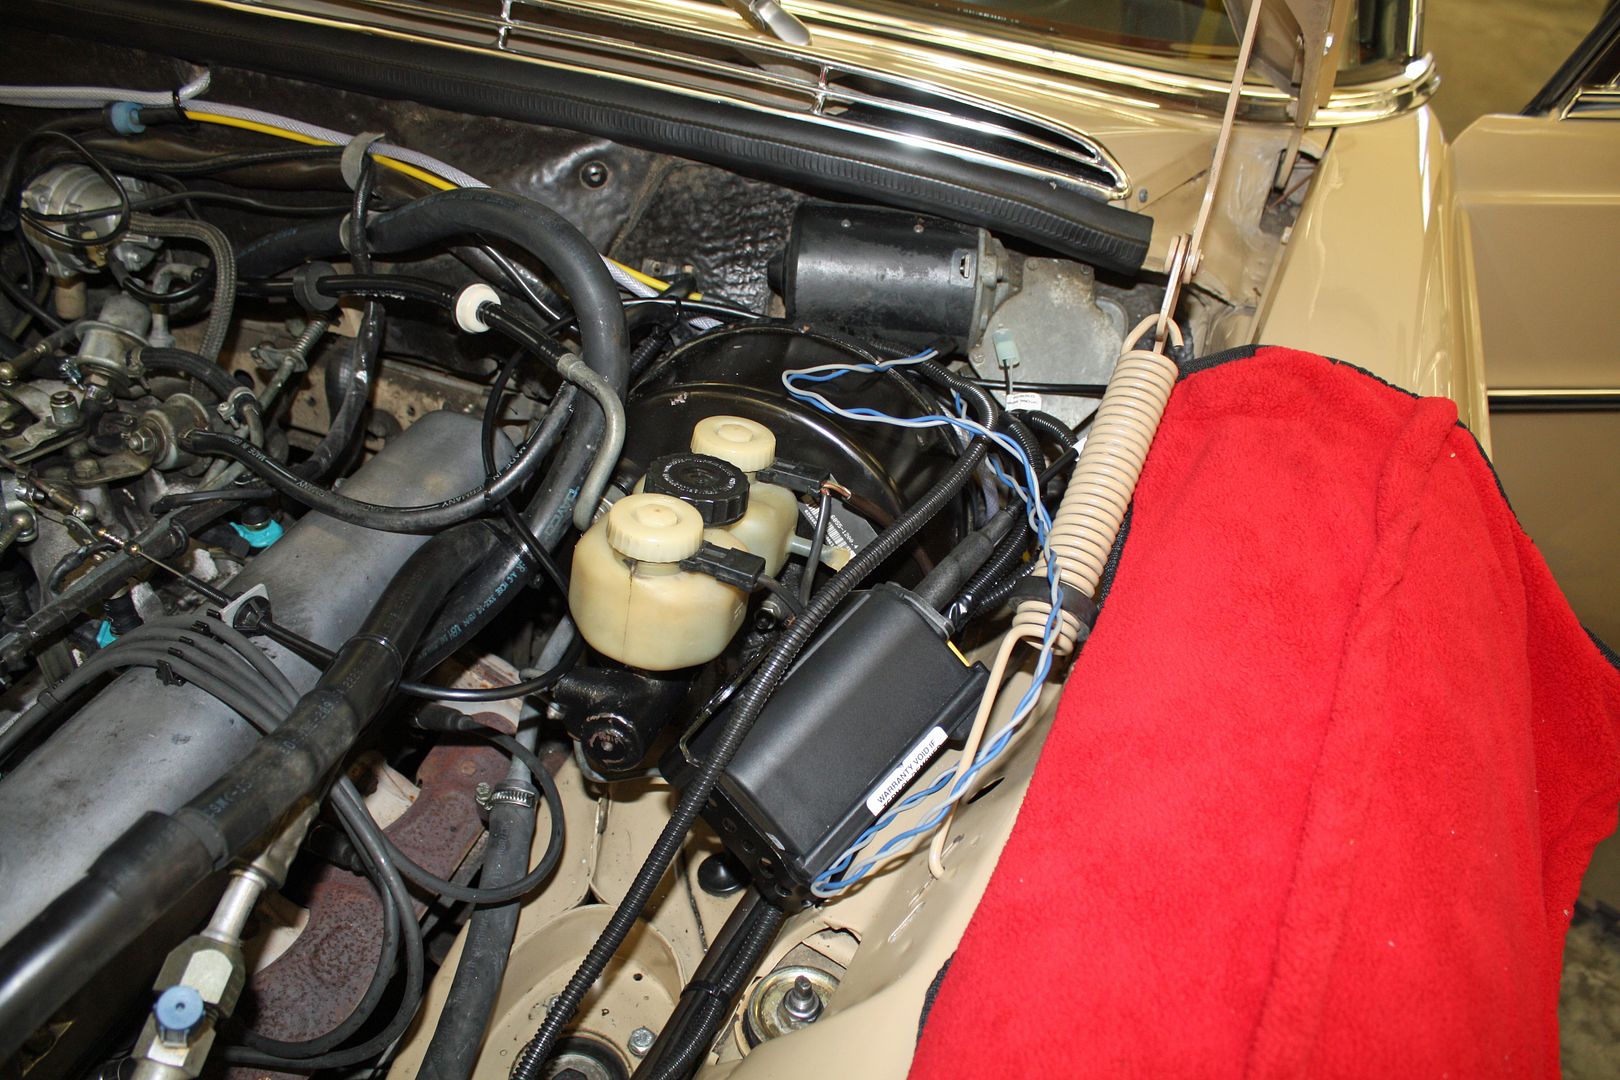
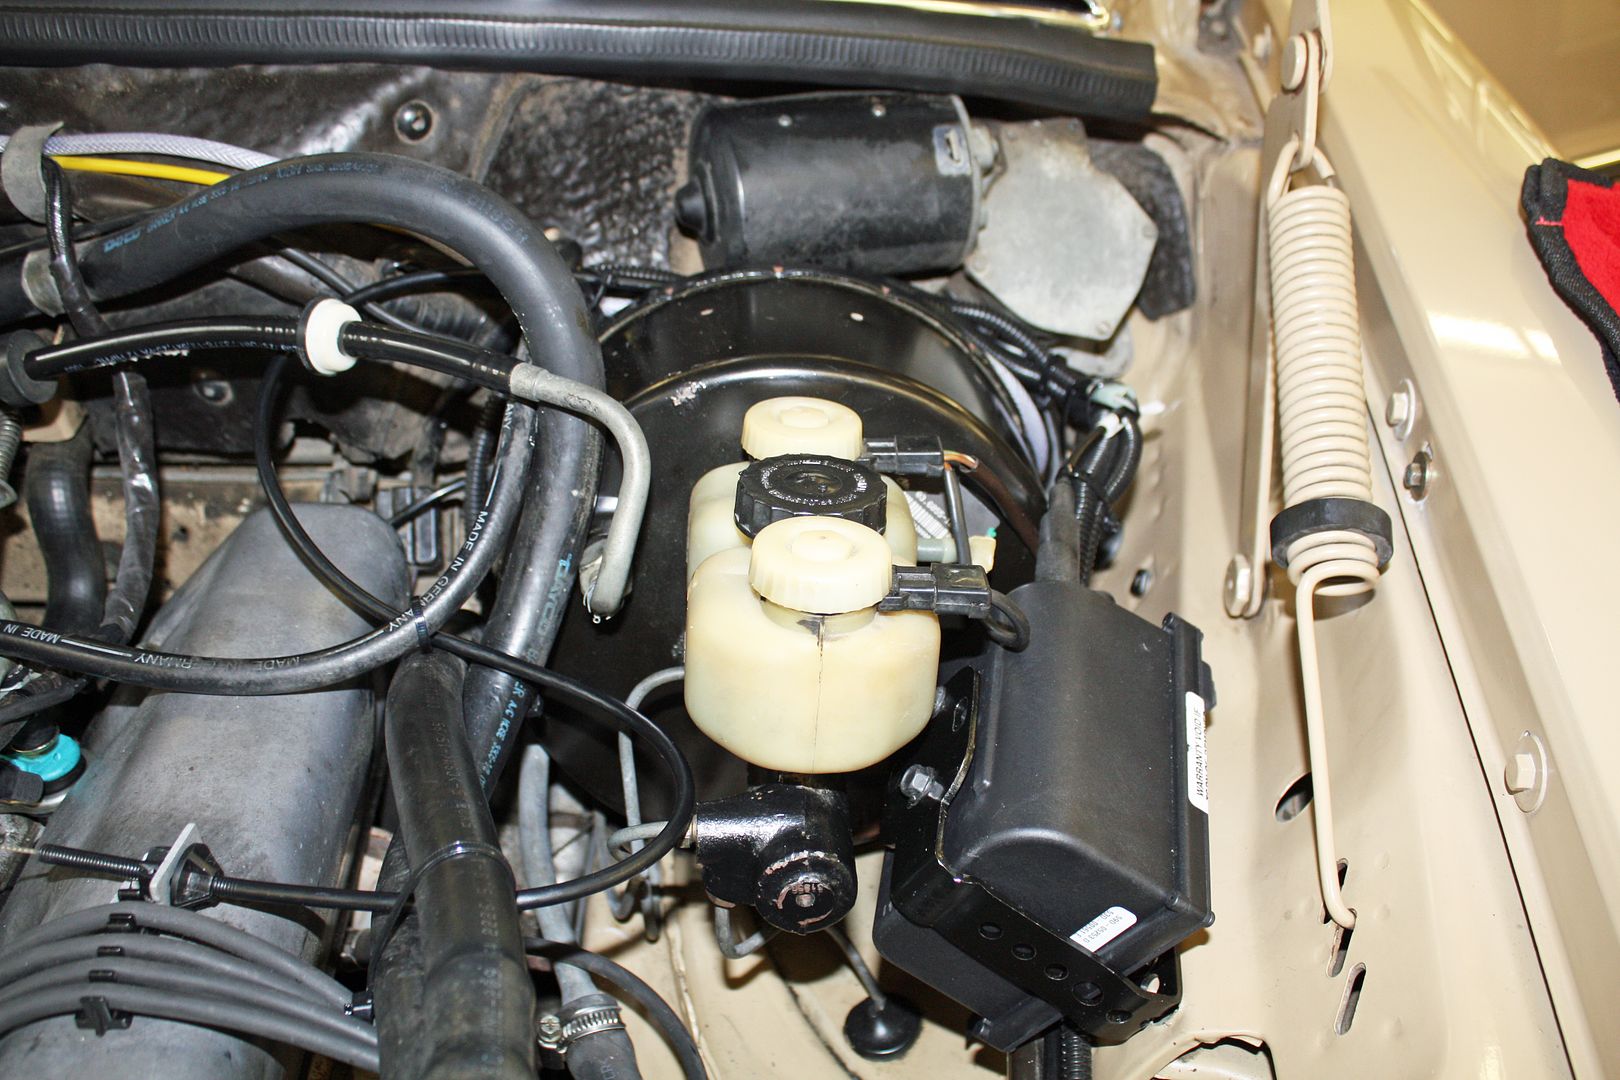
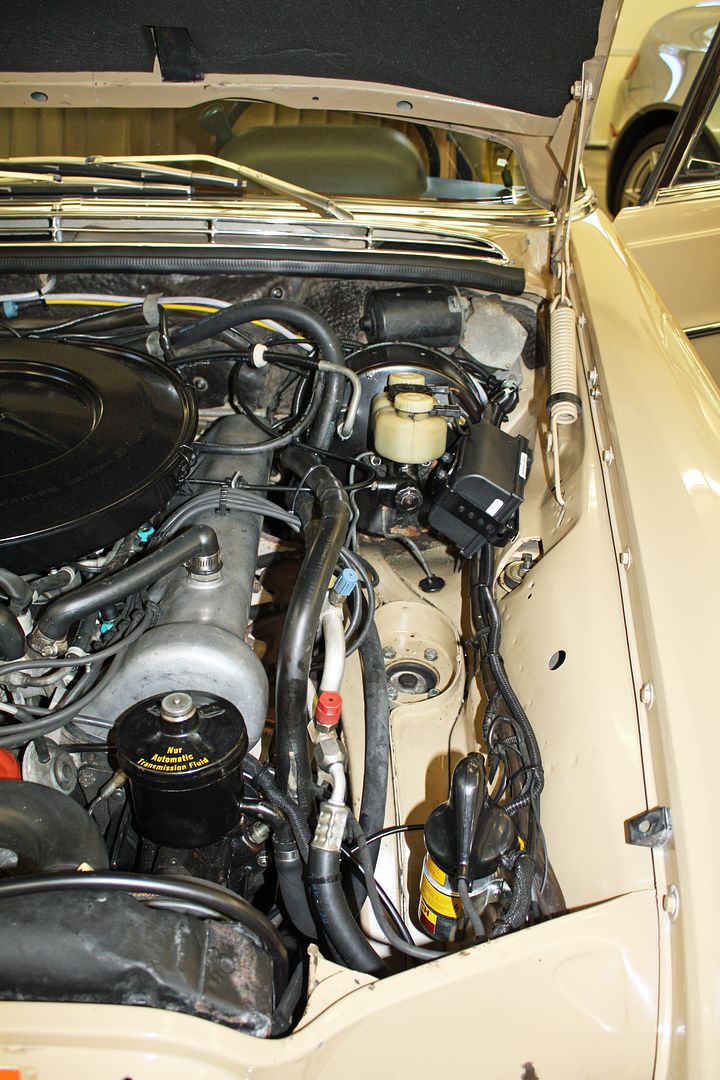
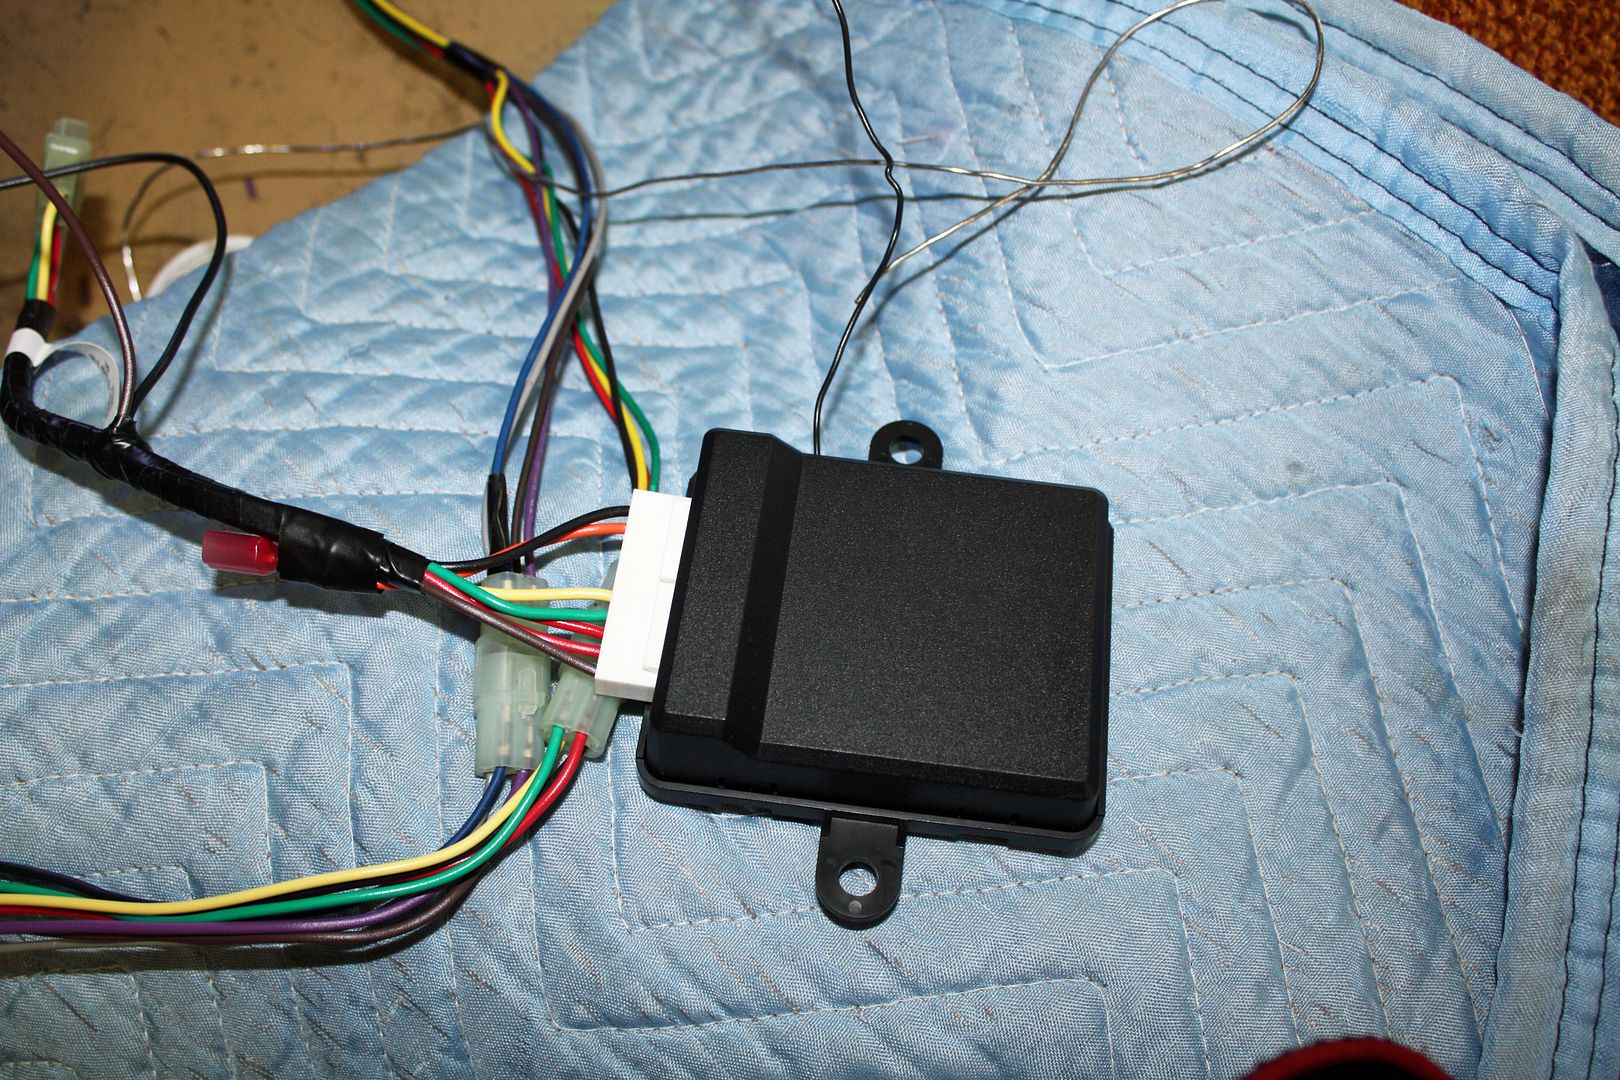
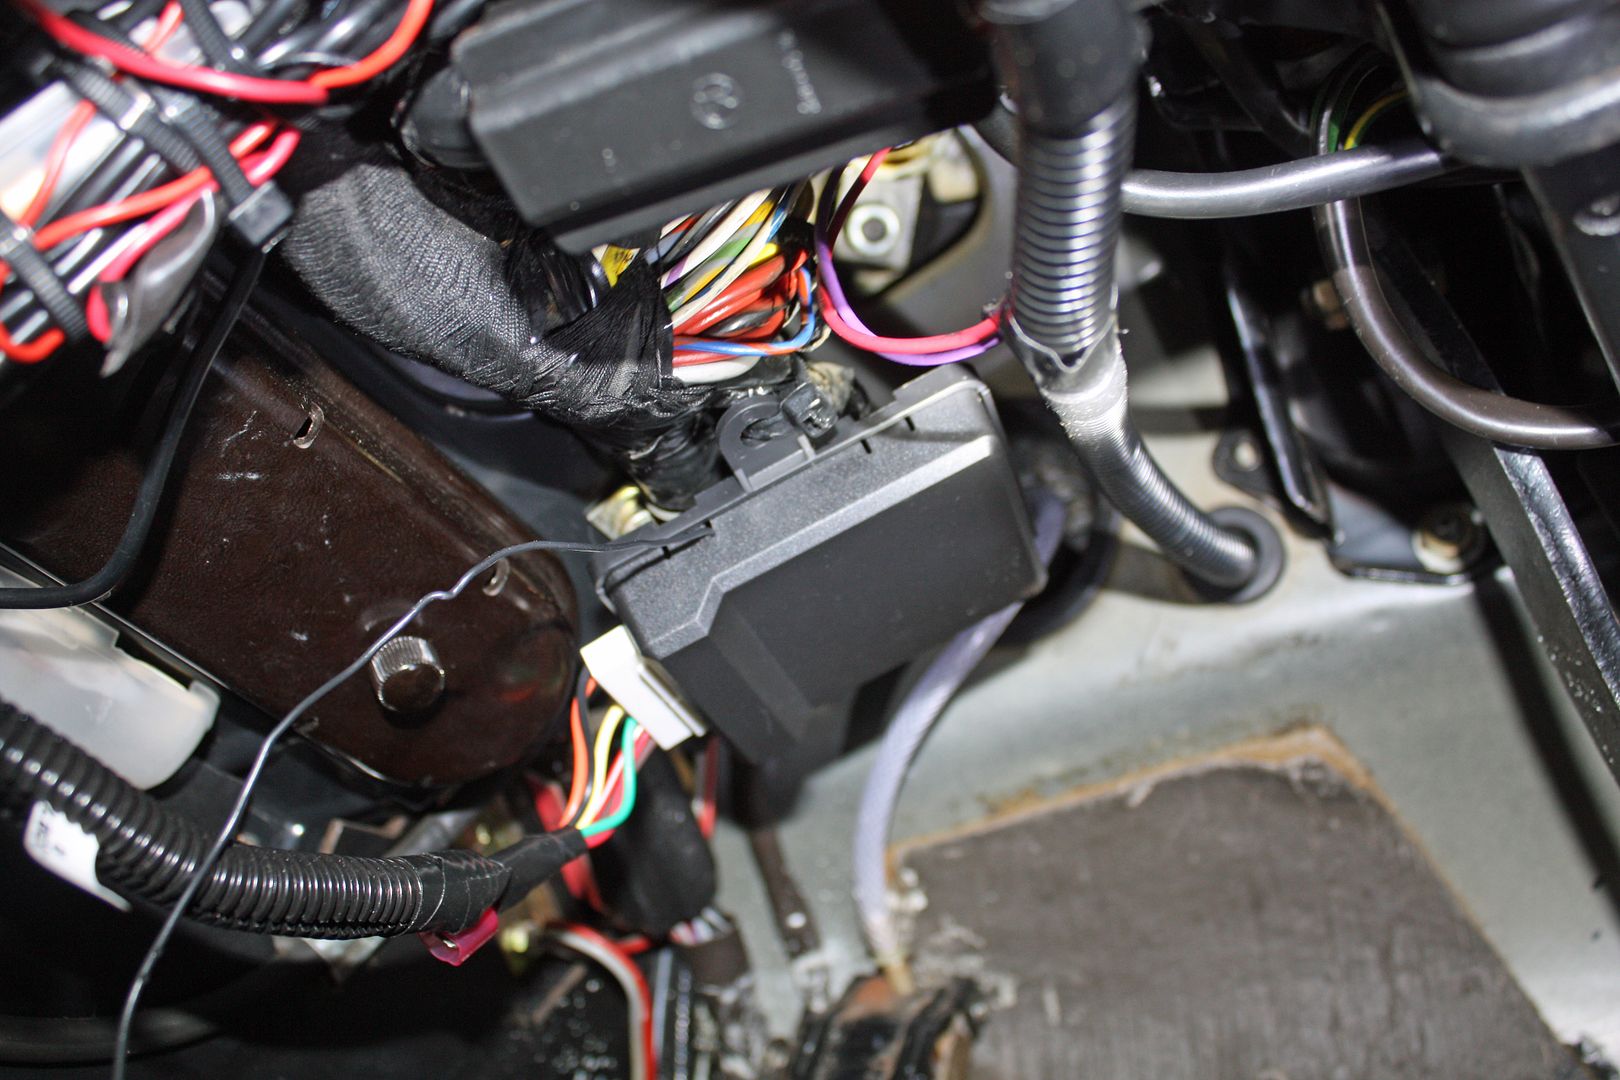
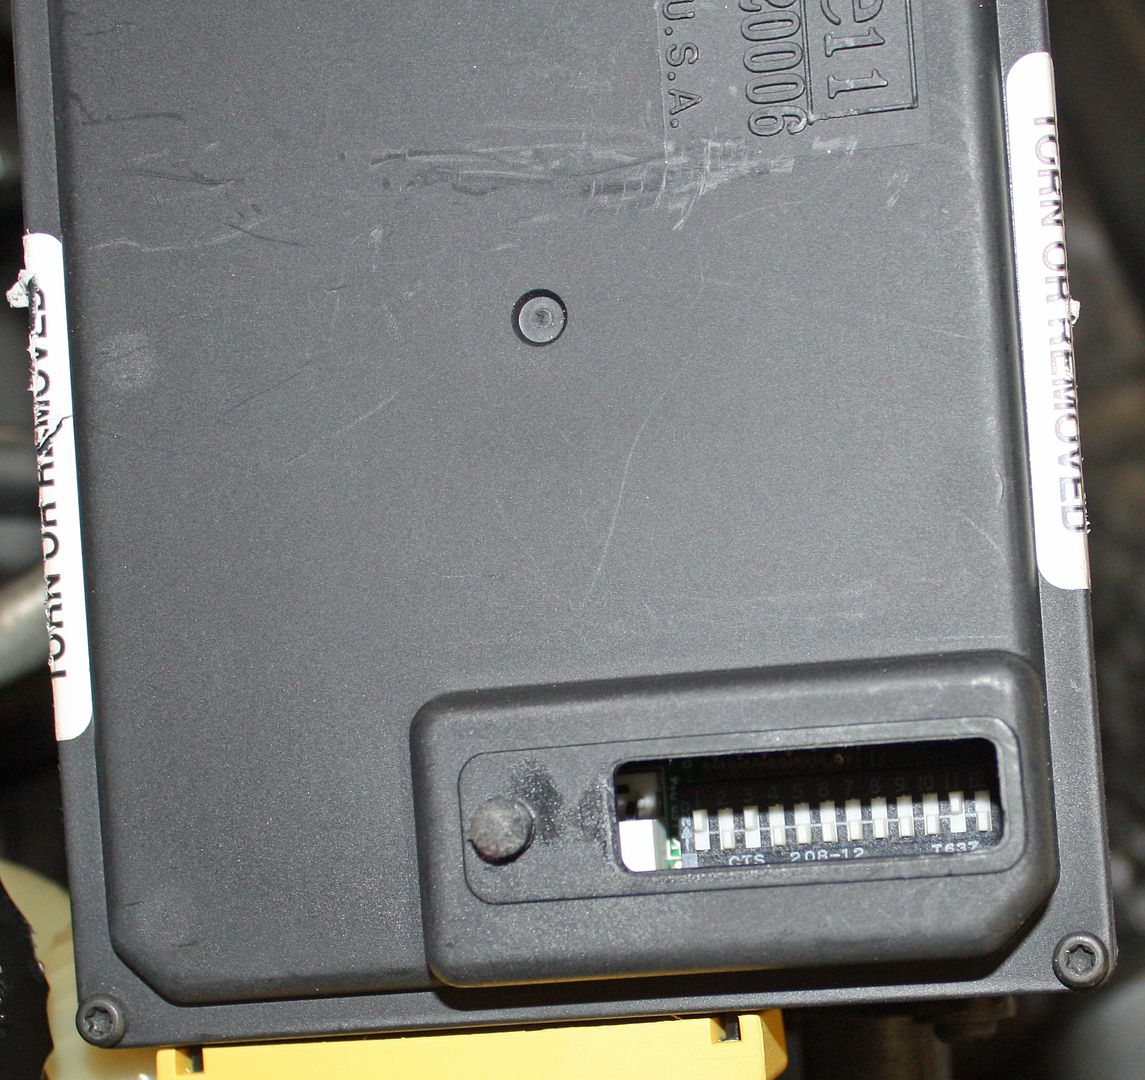
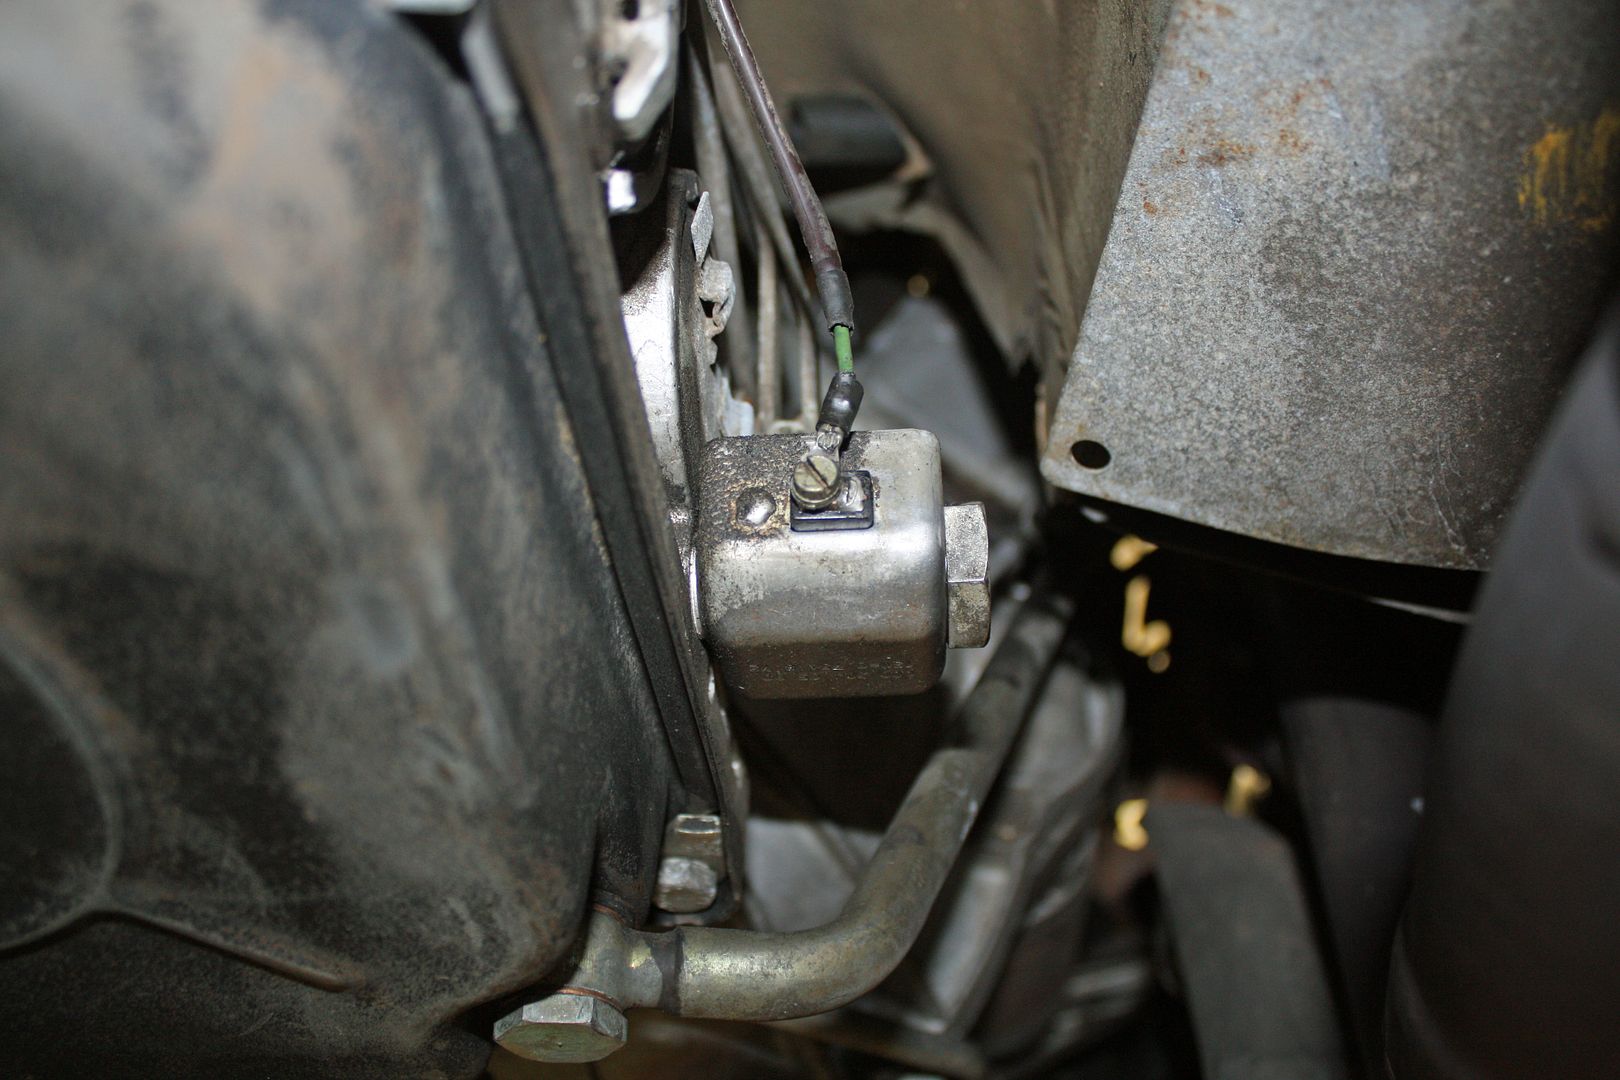
The first step is to install the control unit. Unlike older units like the one that was installed on my car back in 1976, today's units have the electronics and servo control all in one unit. Since the instructions say it should not be installed inside the car, on the bottom of the car, in the fenderwell of the car, or within 10" of the coil, the only place left to install it was on the left front inner fender next to the master cylinder. They send a straight bracket that you have to bend into place. Once I figured out exactly where I going to locate it, I began bending the bracket to make it work. By this time it was late so I finished up installing the control unit on Monday.

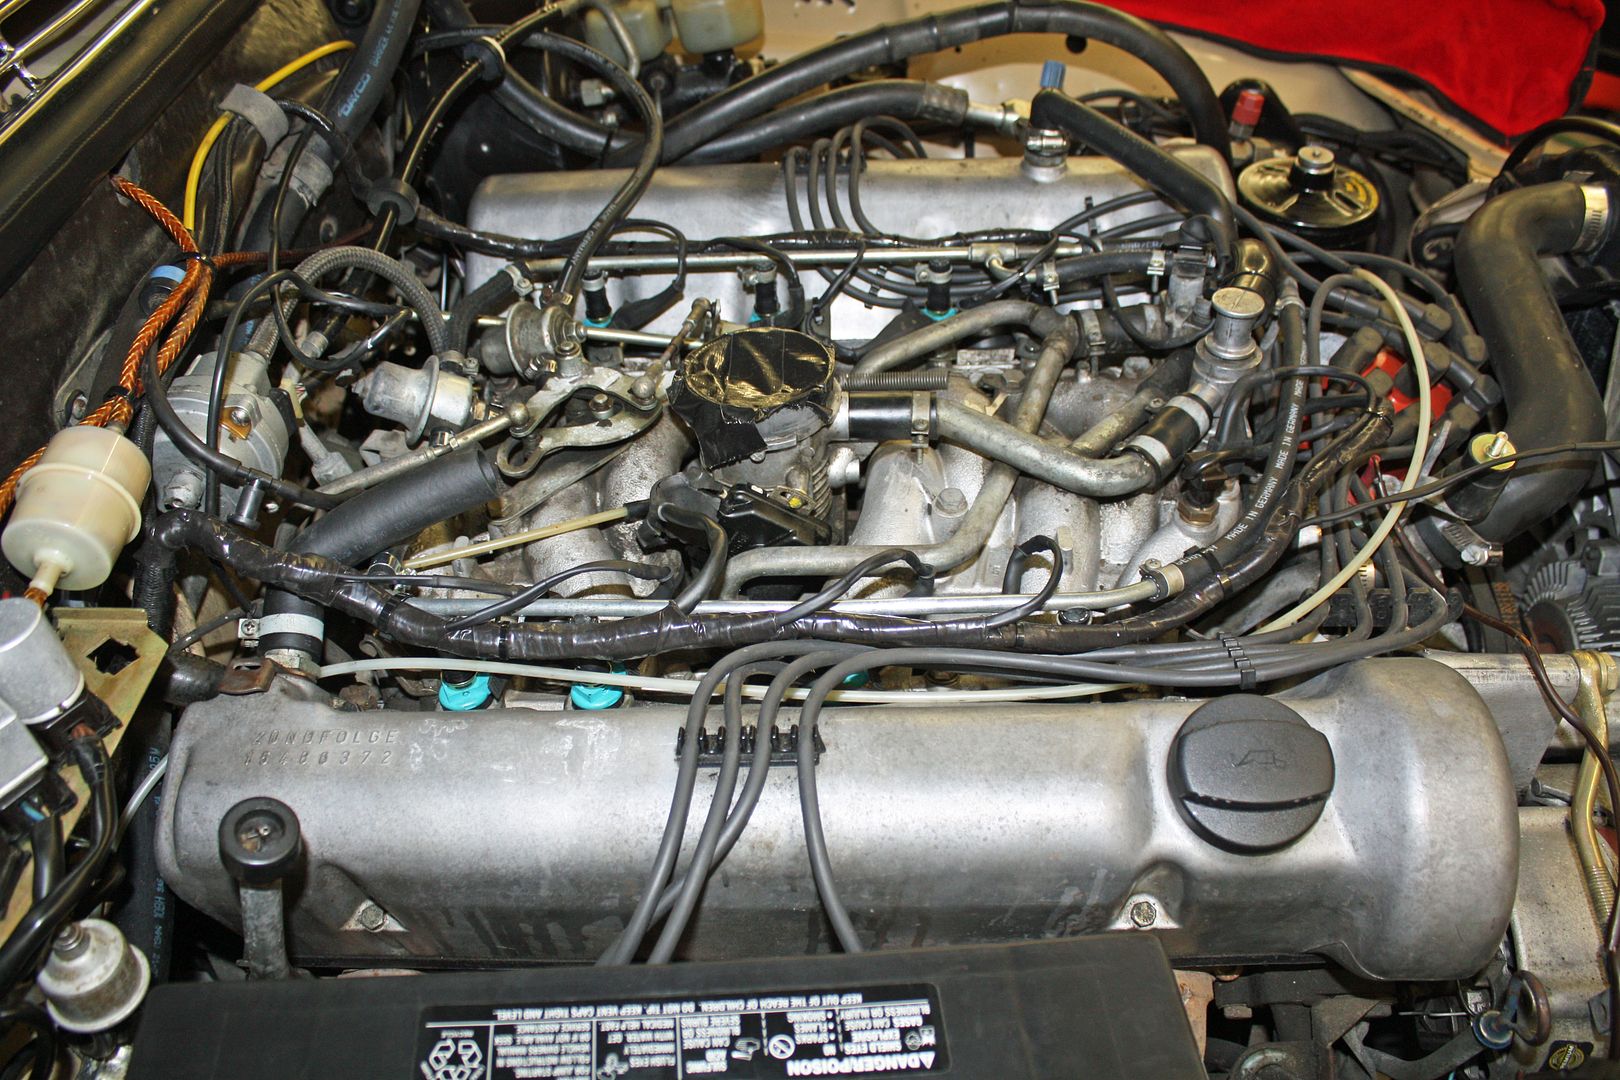
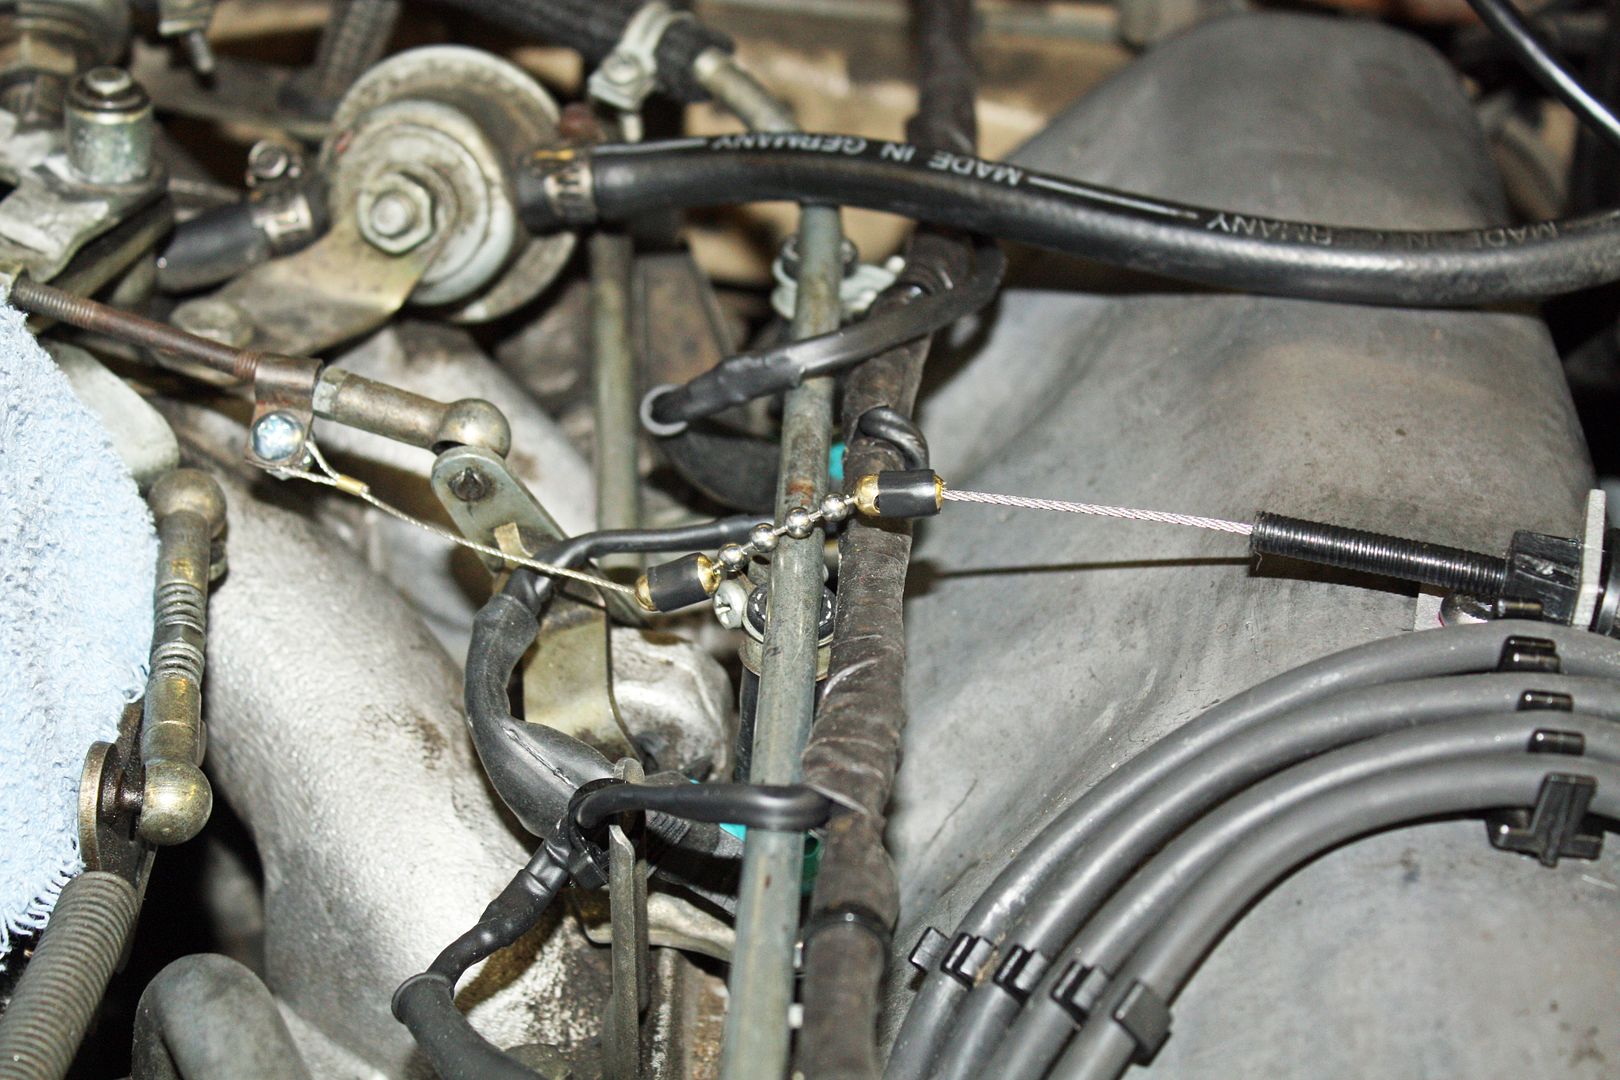
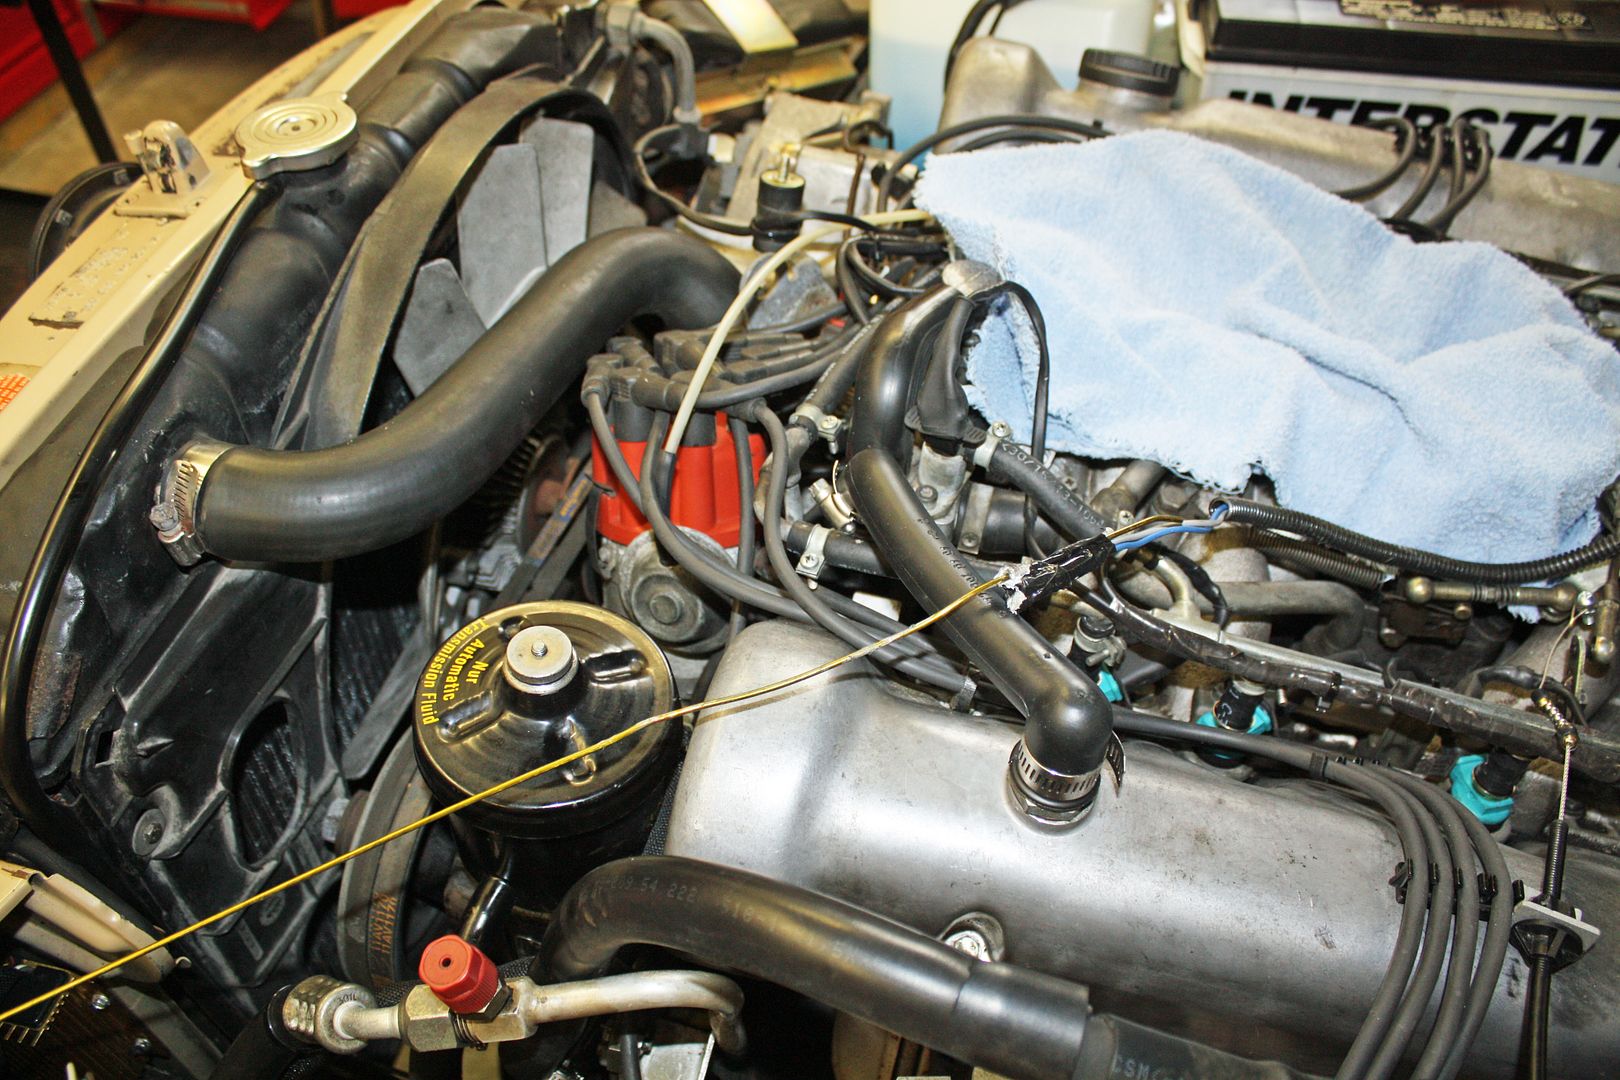
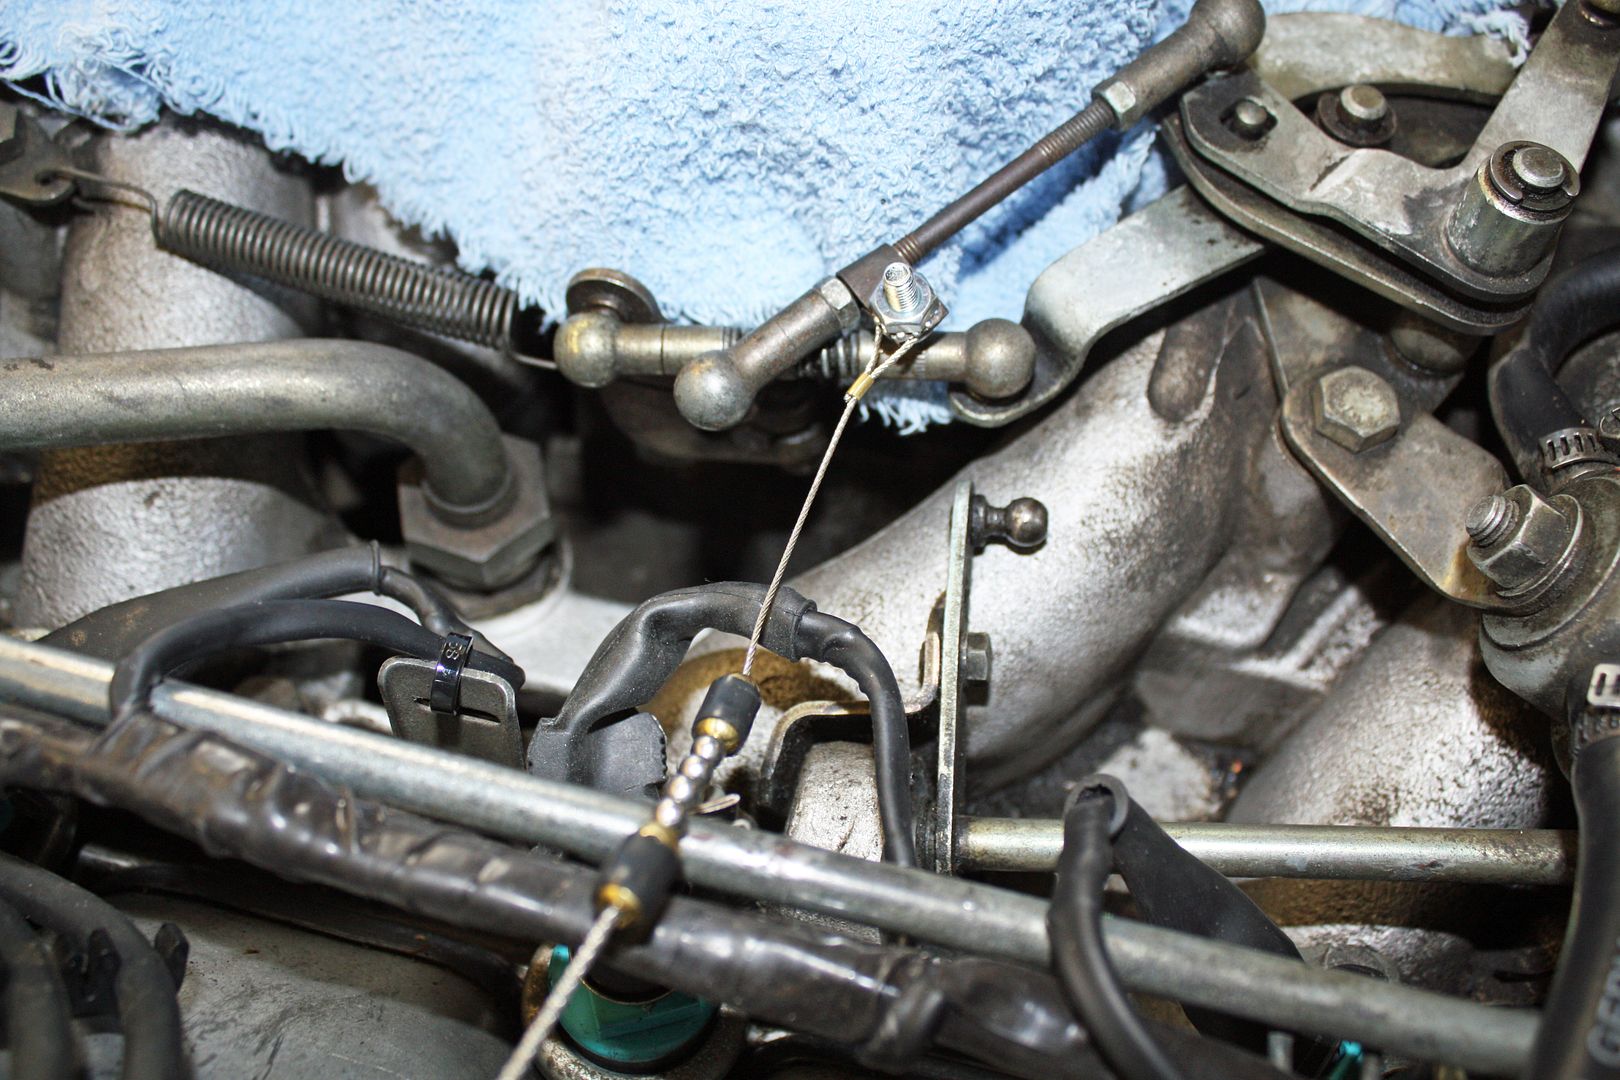
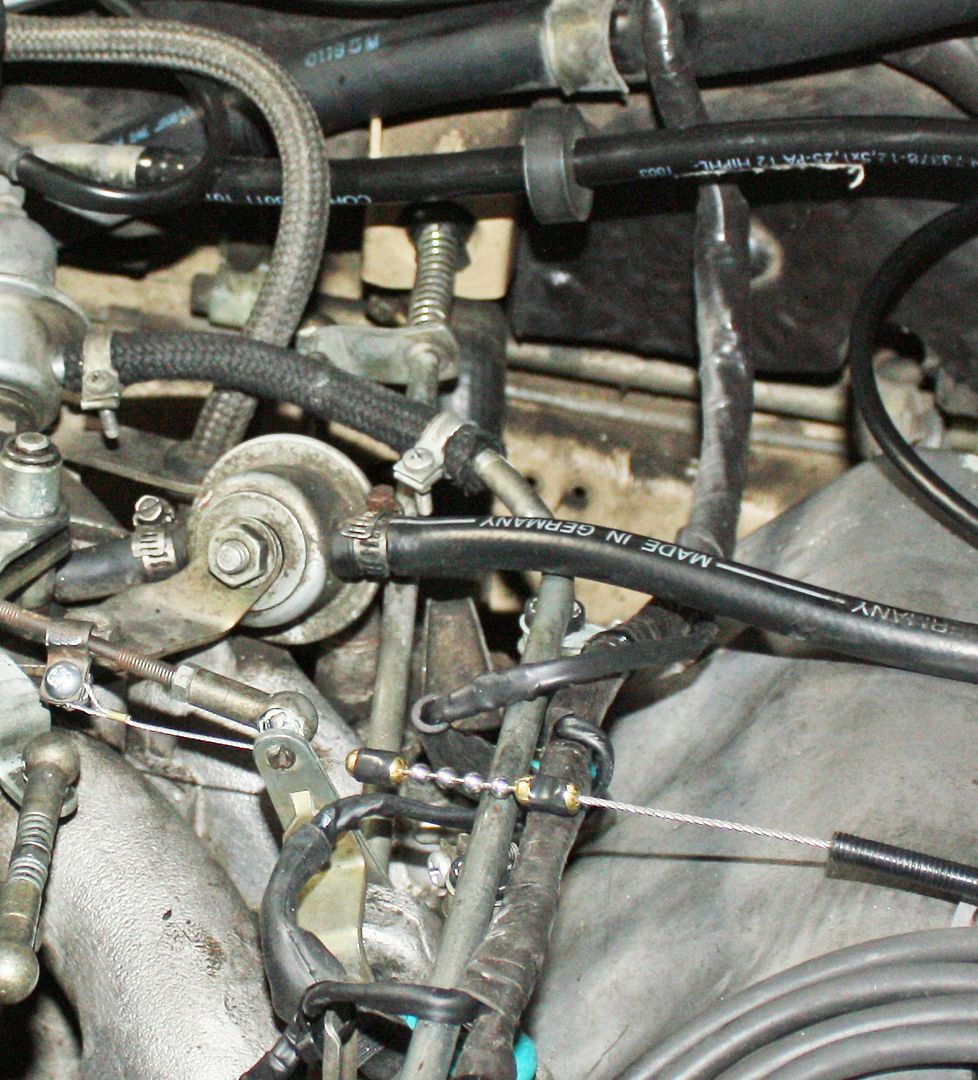
After finishing mounting the control unit, I needed to attach the cable to the throttle. Since there had been a cruise control installed when I got the car, I knew where I needed to attach it to the throttle. The instructions are very adamant about measuring how long you make the attaching cable and how much slack you must have. With that figured out, I needed to attach the square opening mount for the throttle retainer. It is another flat mount that you must bend into shape to work on your car.
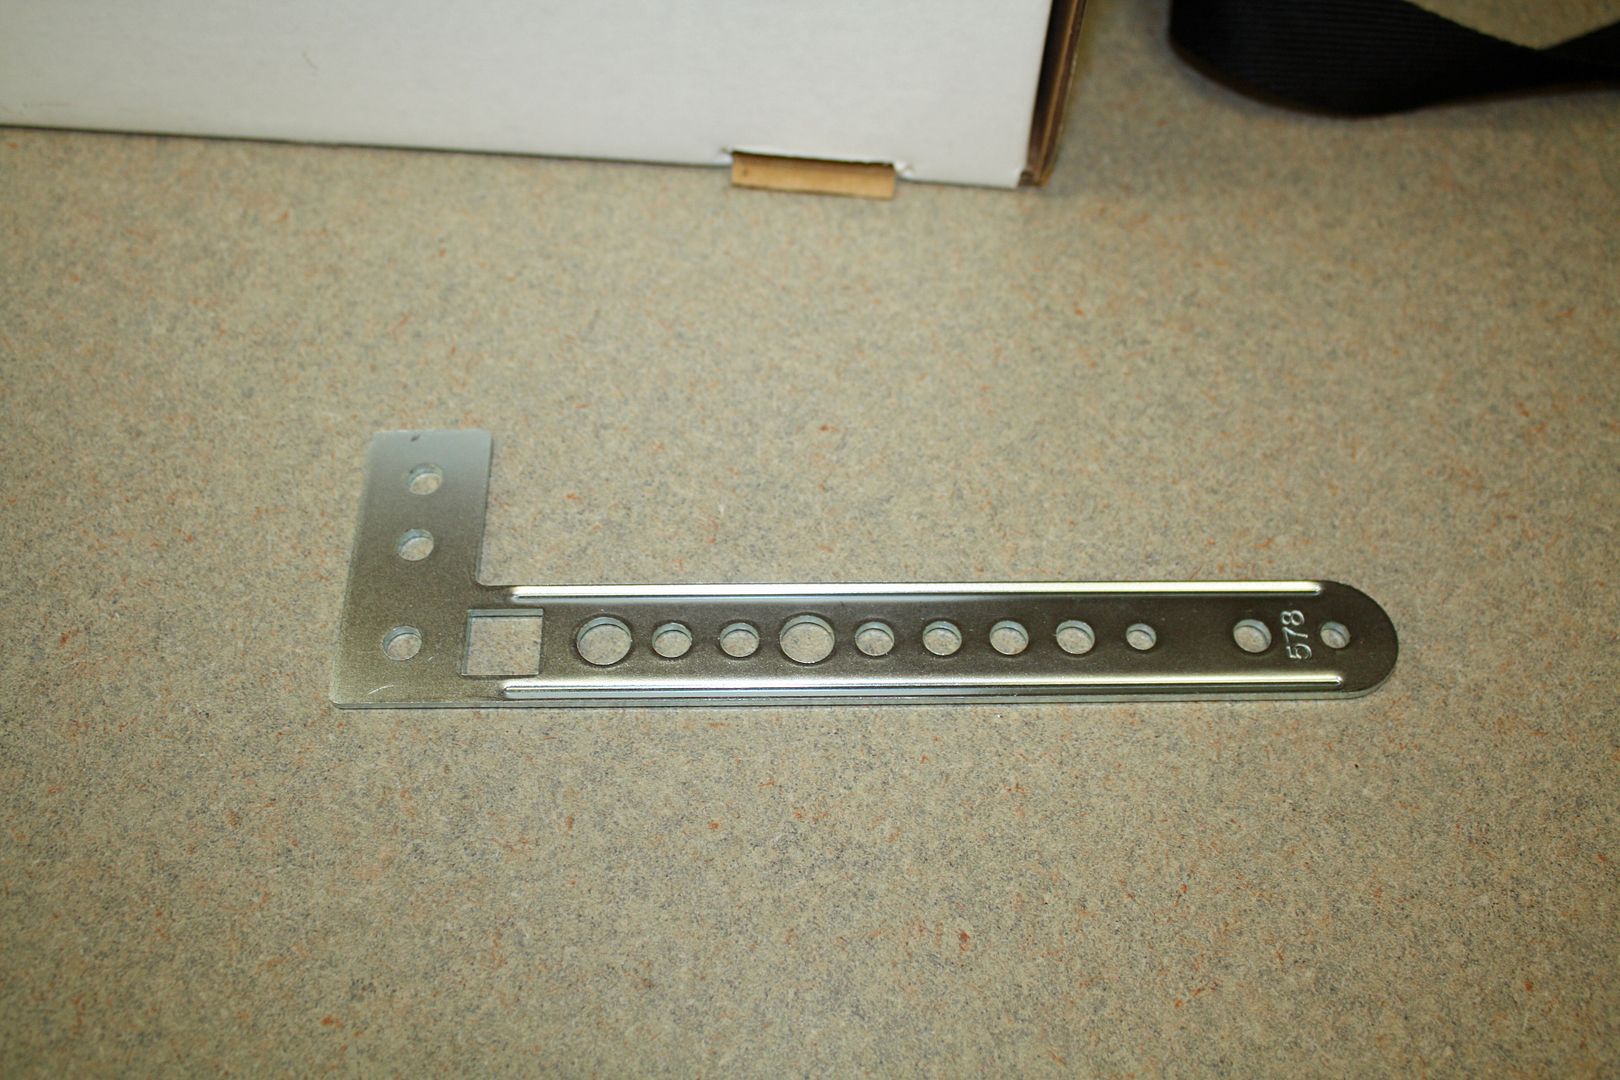
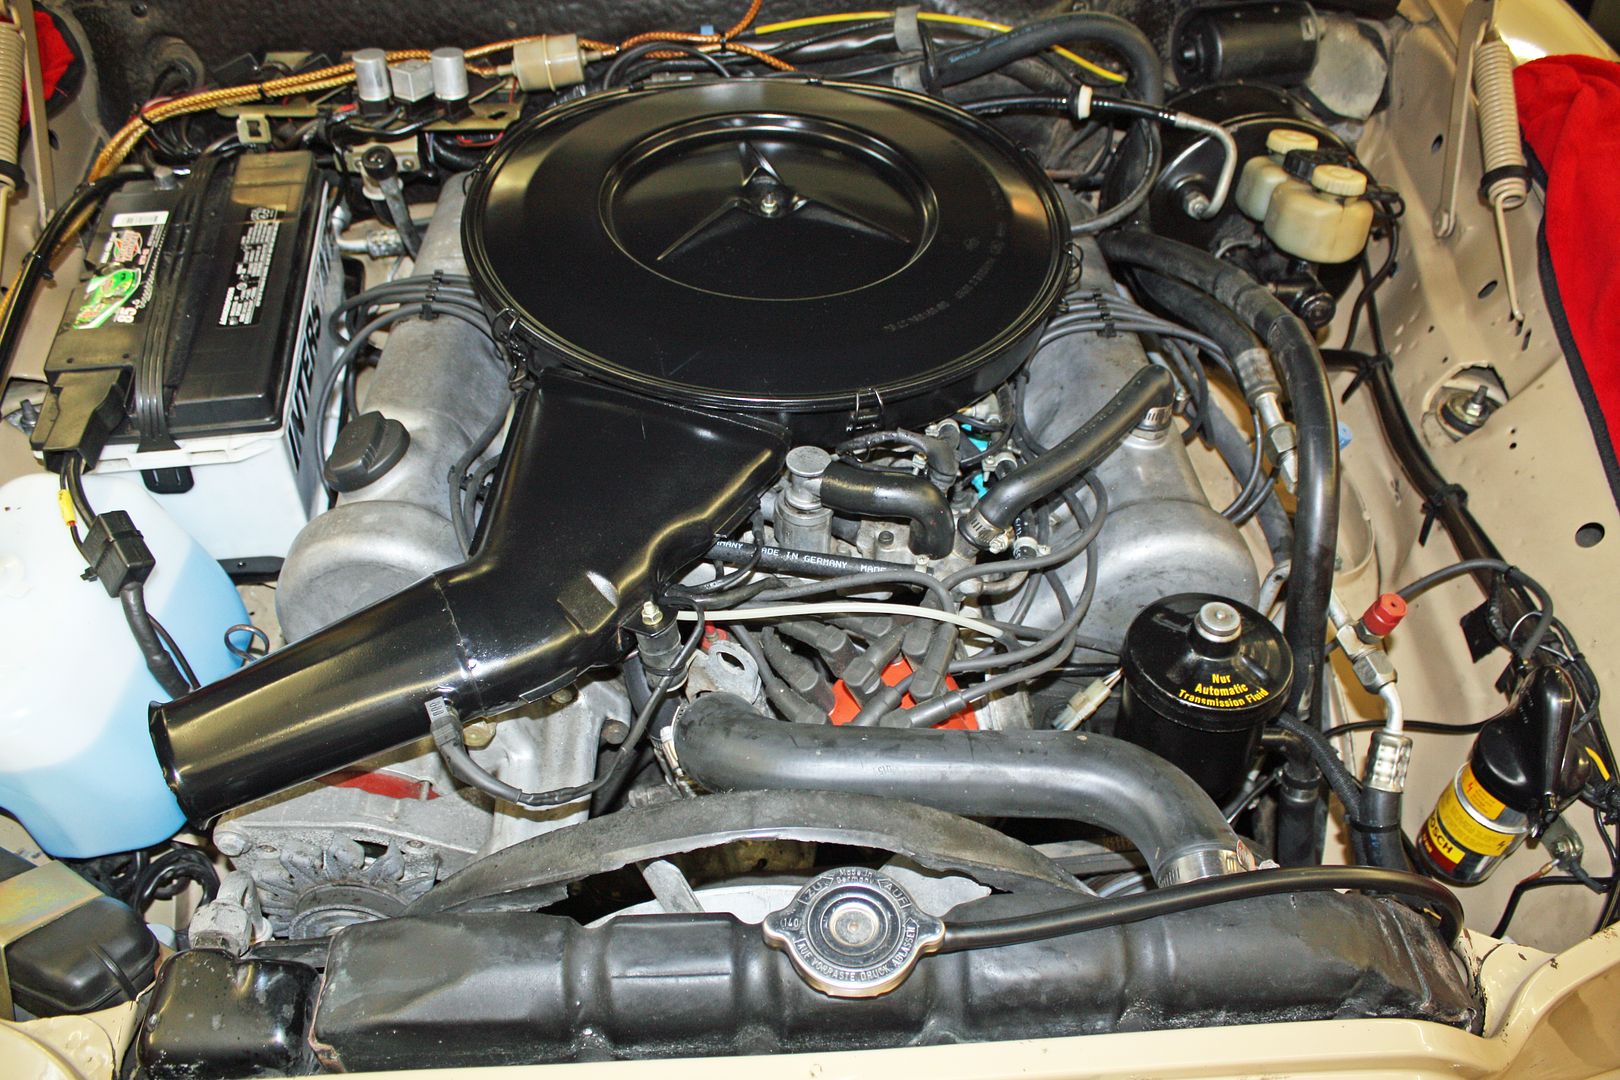
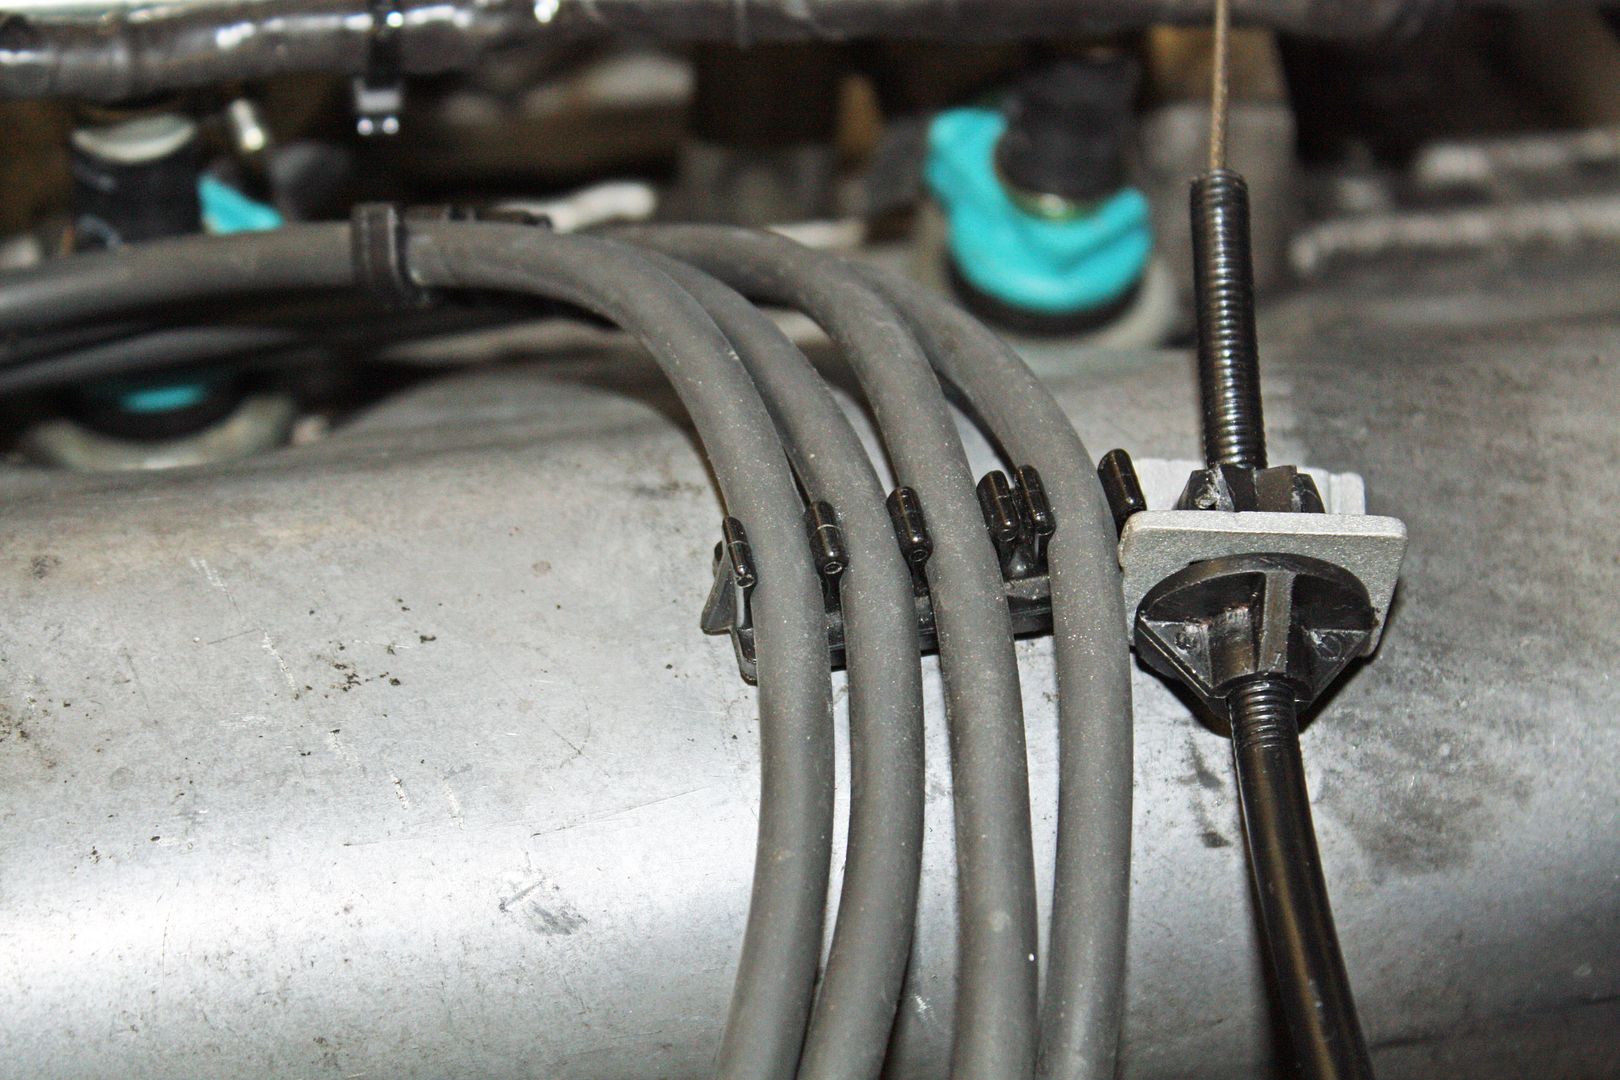
It needed to be mounted outside the air cleaner so the cable could run over the cam cover. However, I did not have any obvious attachment points that would work. After fussing around with it for awhile, I could see that the ideal place would be on top of the cam cover. Finally I pried out the spark plug wire retainer and, lo and behold, there were two M8 threaded holes there.
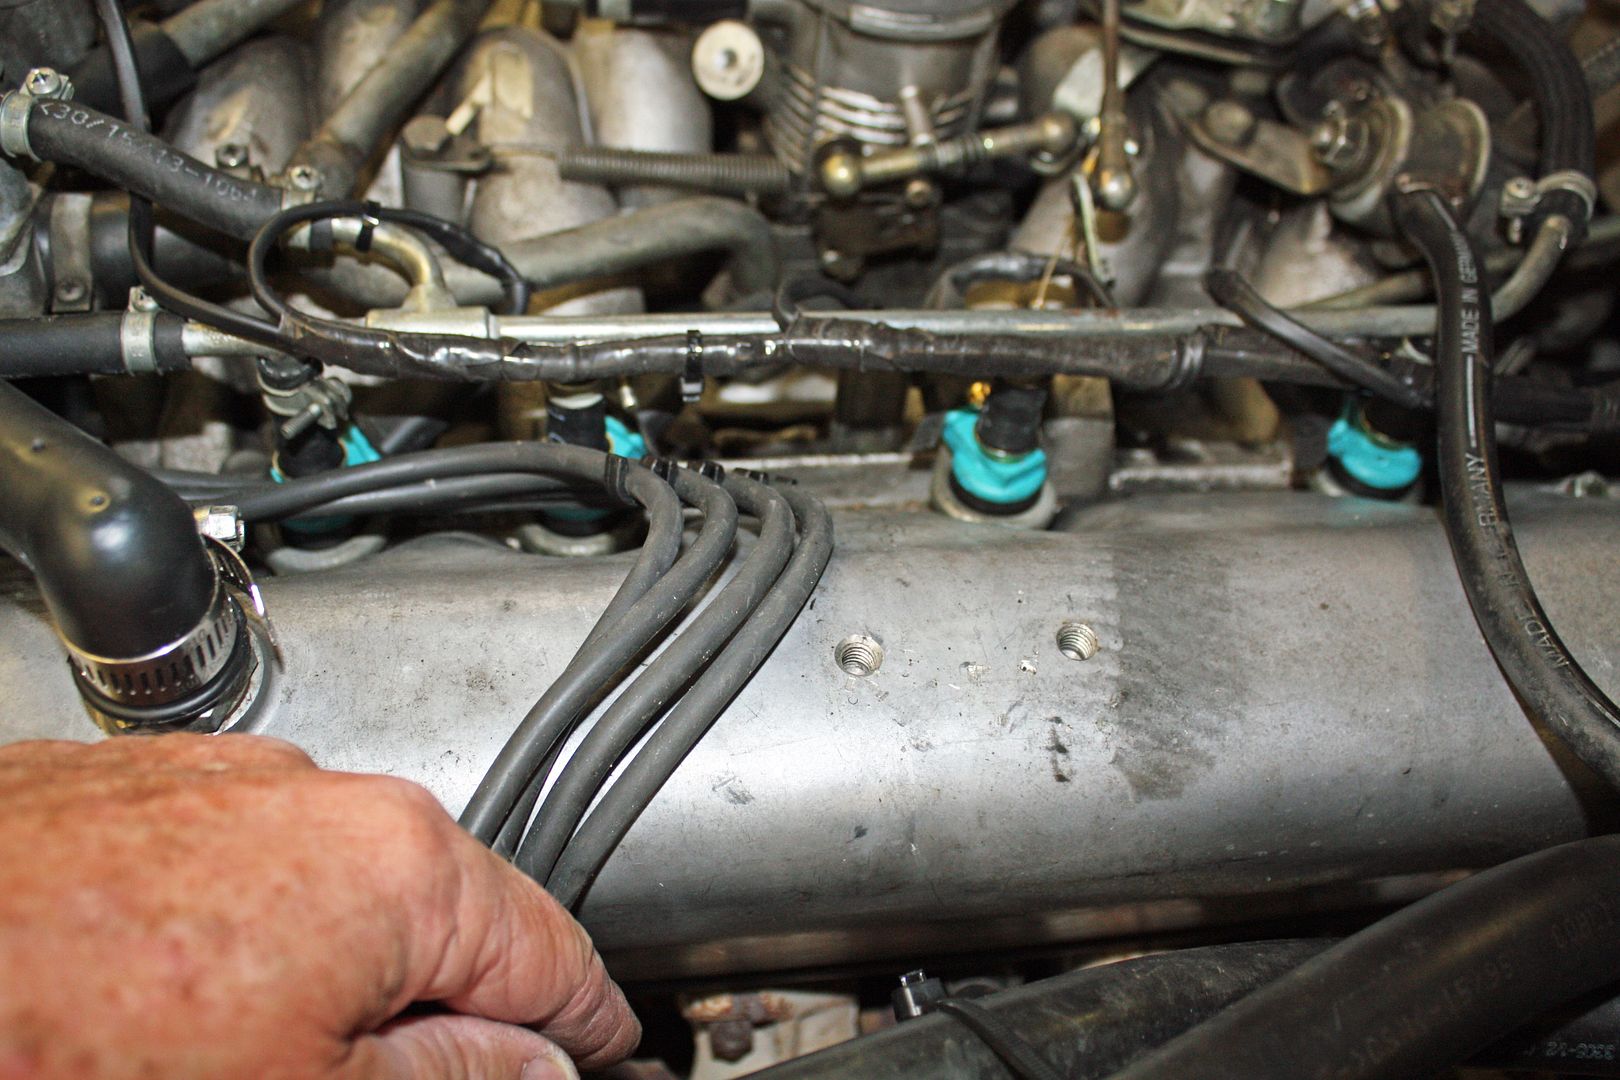
Evidently there is a metal guard on the bottom side of the cam cover as the holes were not very deep and I could feel the metal stop inside the cam cover. So I needed a short M8 bolt that had a shallow head. I found a stainless steel button head bolt that was a bit too long. I installed a nut on it and ground the end down to the correct length. I also ground off some of the head to give me more clearance. I then cut the bracket down to basically a right angle with the square opening facing the left side of the car. After painting it, I used red loctite to fasten the bolt to the cam cover. I then cut off part of the spark plug wire retainer and mounted it in the remaining hole.
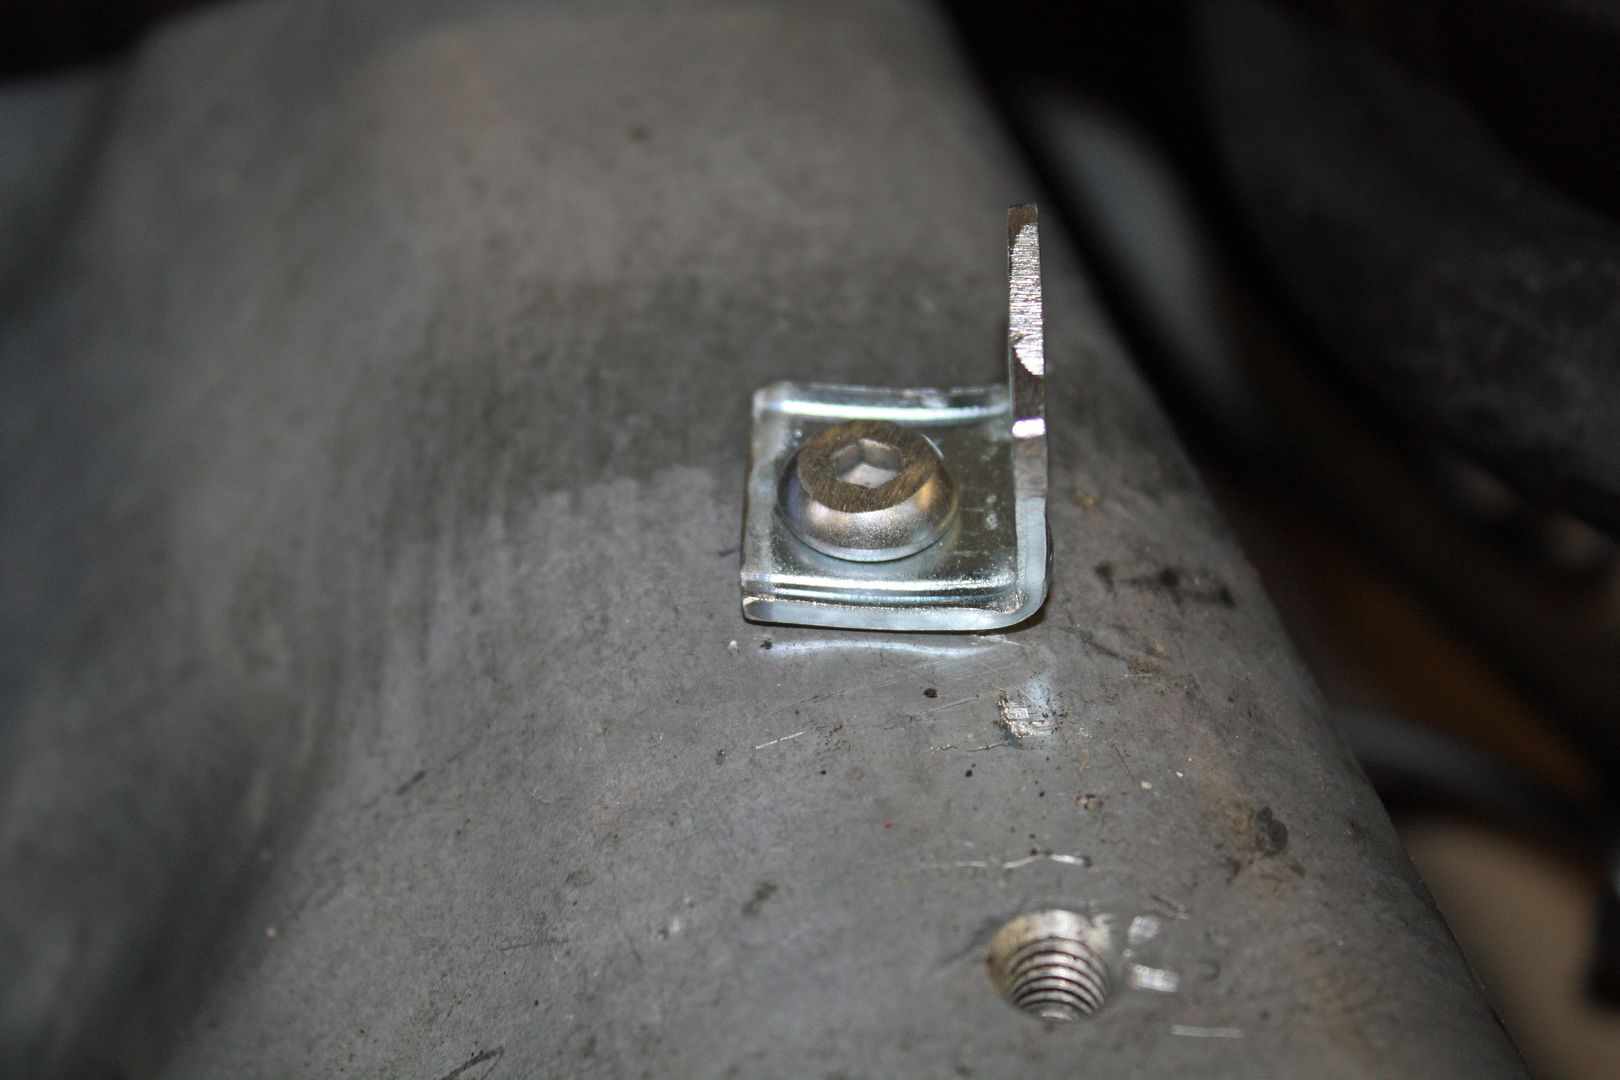
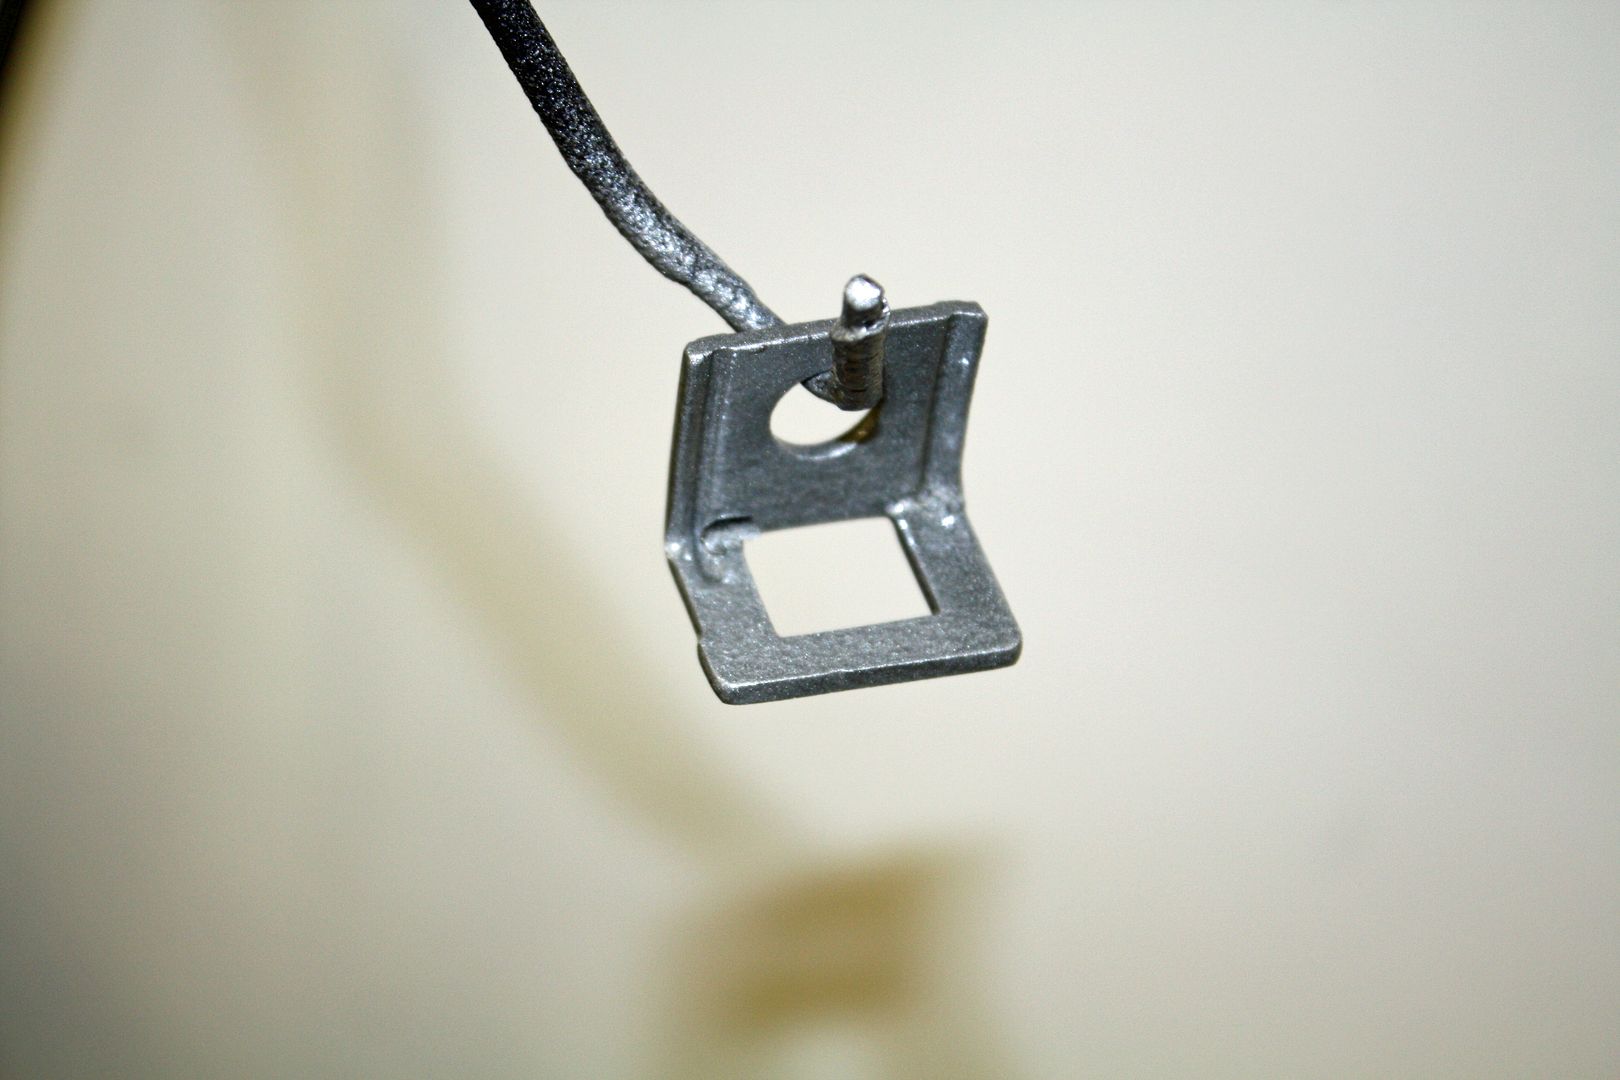
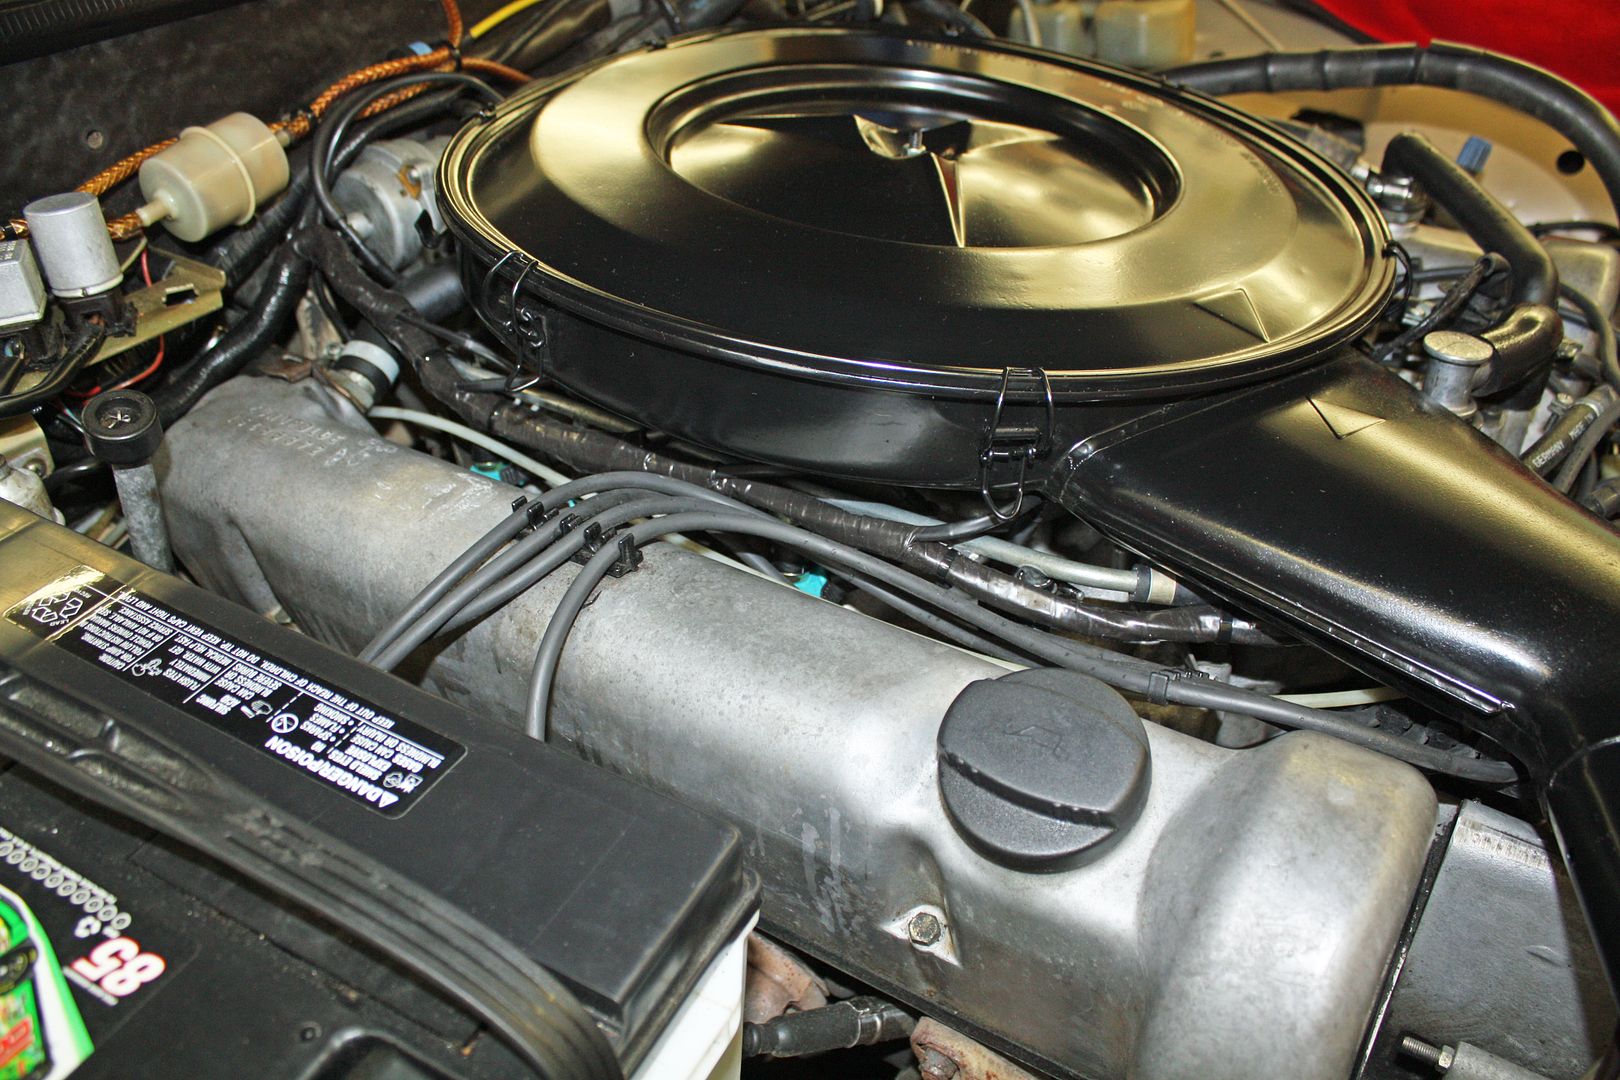
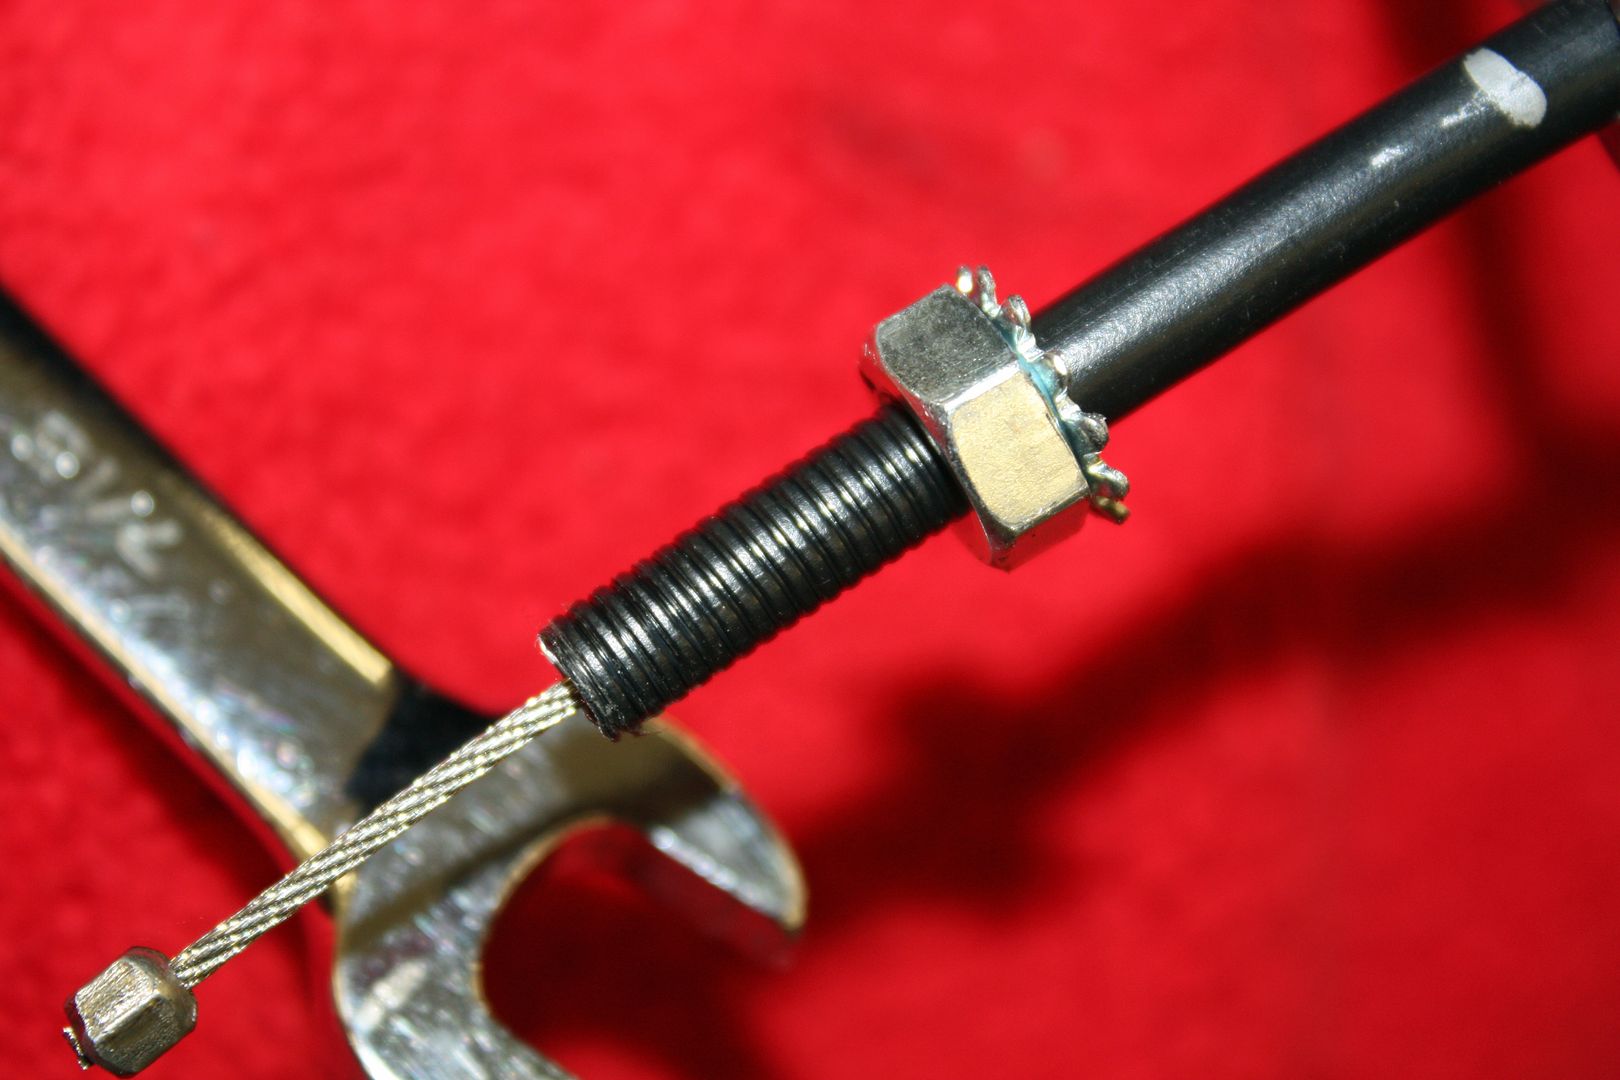
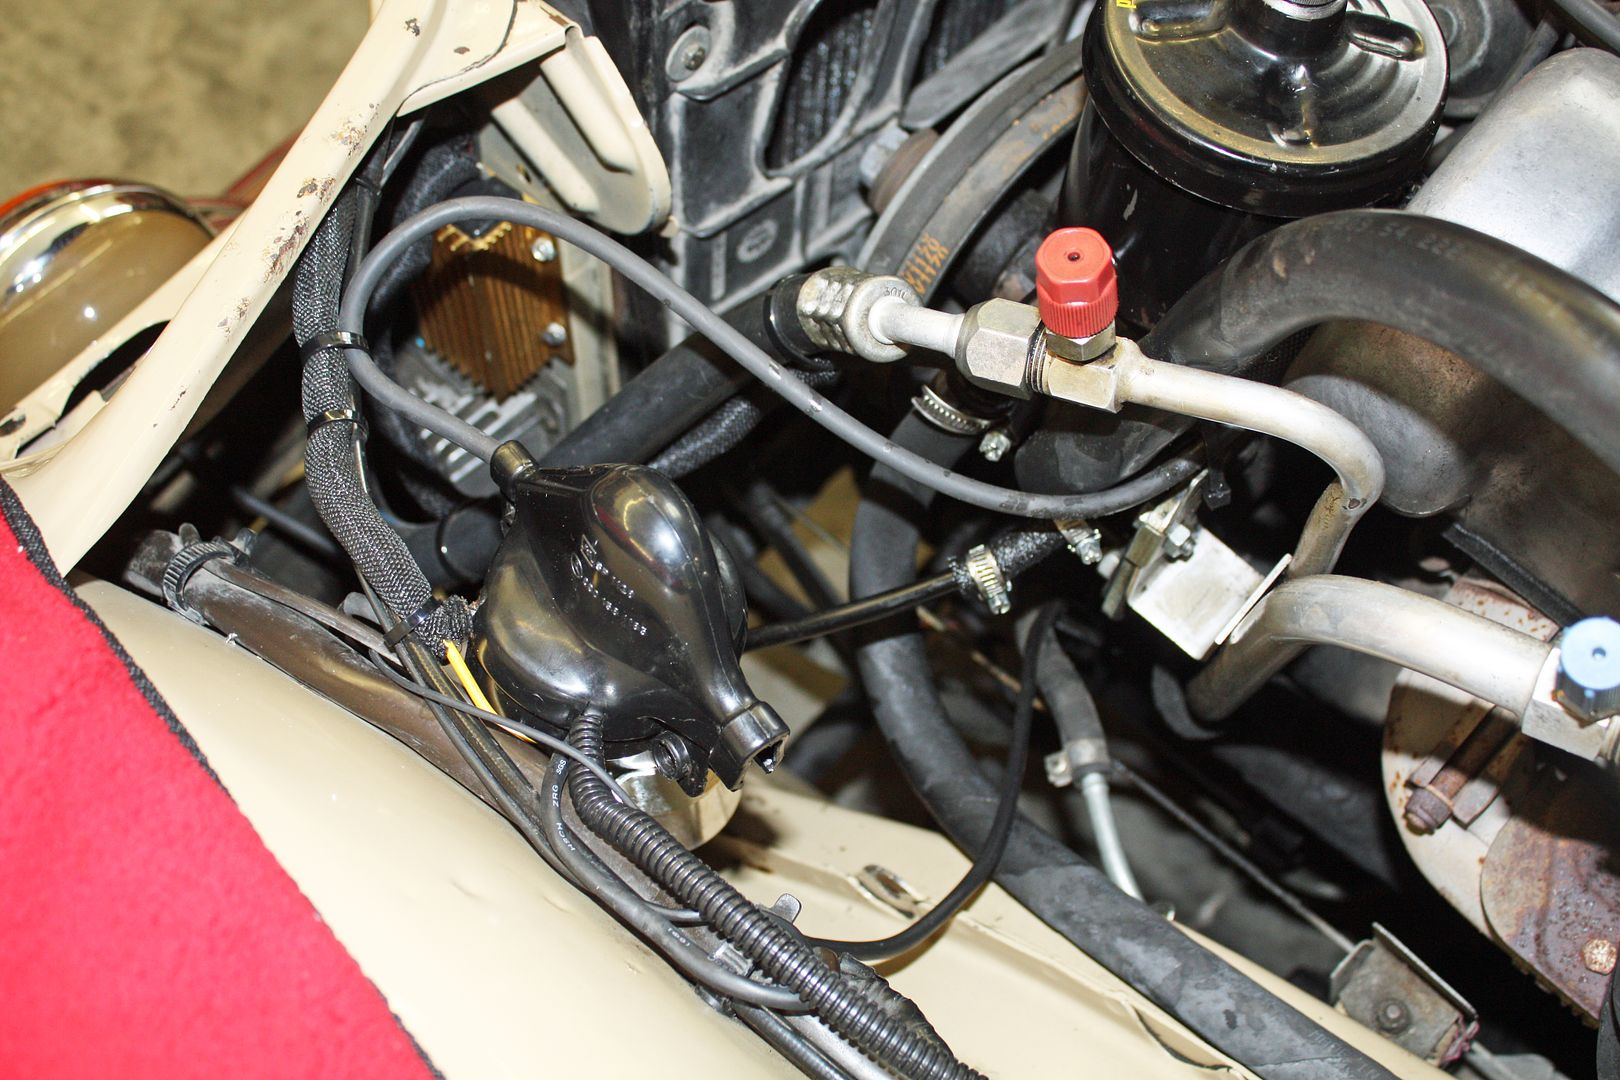
To mount the plastic cable retainer to the cable, the instructions say to thread a 1/4-20 nut onto the cable to make threads. Once the threads are made, the plastic retainer is screwed onto the cable and then inserted into the bracket I made. The cable was now routed from the control unit, looped behind the vacuum booster and then back to the engine.
And that part of the installation was complete.
The first step is to install the control unit. Unlike older units like the one that was installed on my car back in 1976, today's units have the electronics and servo control all in one unit. Since the instructions say it should not be installed inside the car, on the bottom of the car, in the fenderwell of the car, or within 10" of the coil, the only place left to install it was on the left front inner fender next to the master cylinder. They send a straight bracket that you have to bend into place. Once I figured out exactly where I going to locate it, I began bending the bracket to make it work. By this time it was late so I finished up installing the control unit on Monday.


After finishing mounting the control unit, I needed to attach the cable to the throttle. Since there had been a cruise control installed when I got the car, I knew where I needed to attach it to the throttle. The instructions are very adamant about measuring how long you make the attaching cable and how much slack you must have. With that figured out, I needed to attach the square opening mount for the throttle retainer. It is another flat mount that you must bend into shape to work on your car.

It needed to be mounted outside the air cleaner so the cable could run over the cam cover. However, I did not have any obvious attachment points that would work. After fussing around with it for awhile, I could see that the ideal place would be on top of the cam cover. Finally I pried out the spark plug wire retainer and, lo and behold, there were two M8 threaded holes there.

Evidently there is a metal guard on the bottom side of the cam cover as the holes were not very deep and I could feel the metal stop inside the cam cover. So I needed a short M8 bolt that had a shallow head. I found a stainless steel button head bolt that was a bit too long. I installed a nut on it and ground the end down to the correct length. I also ground off some of the head to give me more clearance. I then cut the bracket down to basically a right angle with the square opening facing the left side of the car. After painting it, I used red loctite to fasten the bolt to the cam cover. I then cut off part of the spark plug wire retainer and mounted it in the remaining hole.


To mount the plastic cable retainer to the cable, the instructions say to thread a 1/4-20 nut onto the cable to make threads. Once the threads are made, the plastic retainer is screwed onto the cable and then inserted into the bracket I made. The cable was now routed from the control unit, looped behind the vacuum booster and then back to the engine.


And that part of the installation was complete.
08-08-2017, 10:42 PM
#80
Member
Thread Starter
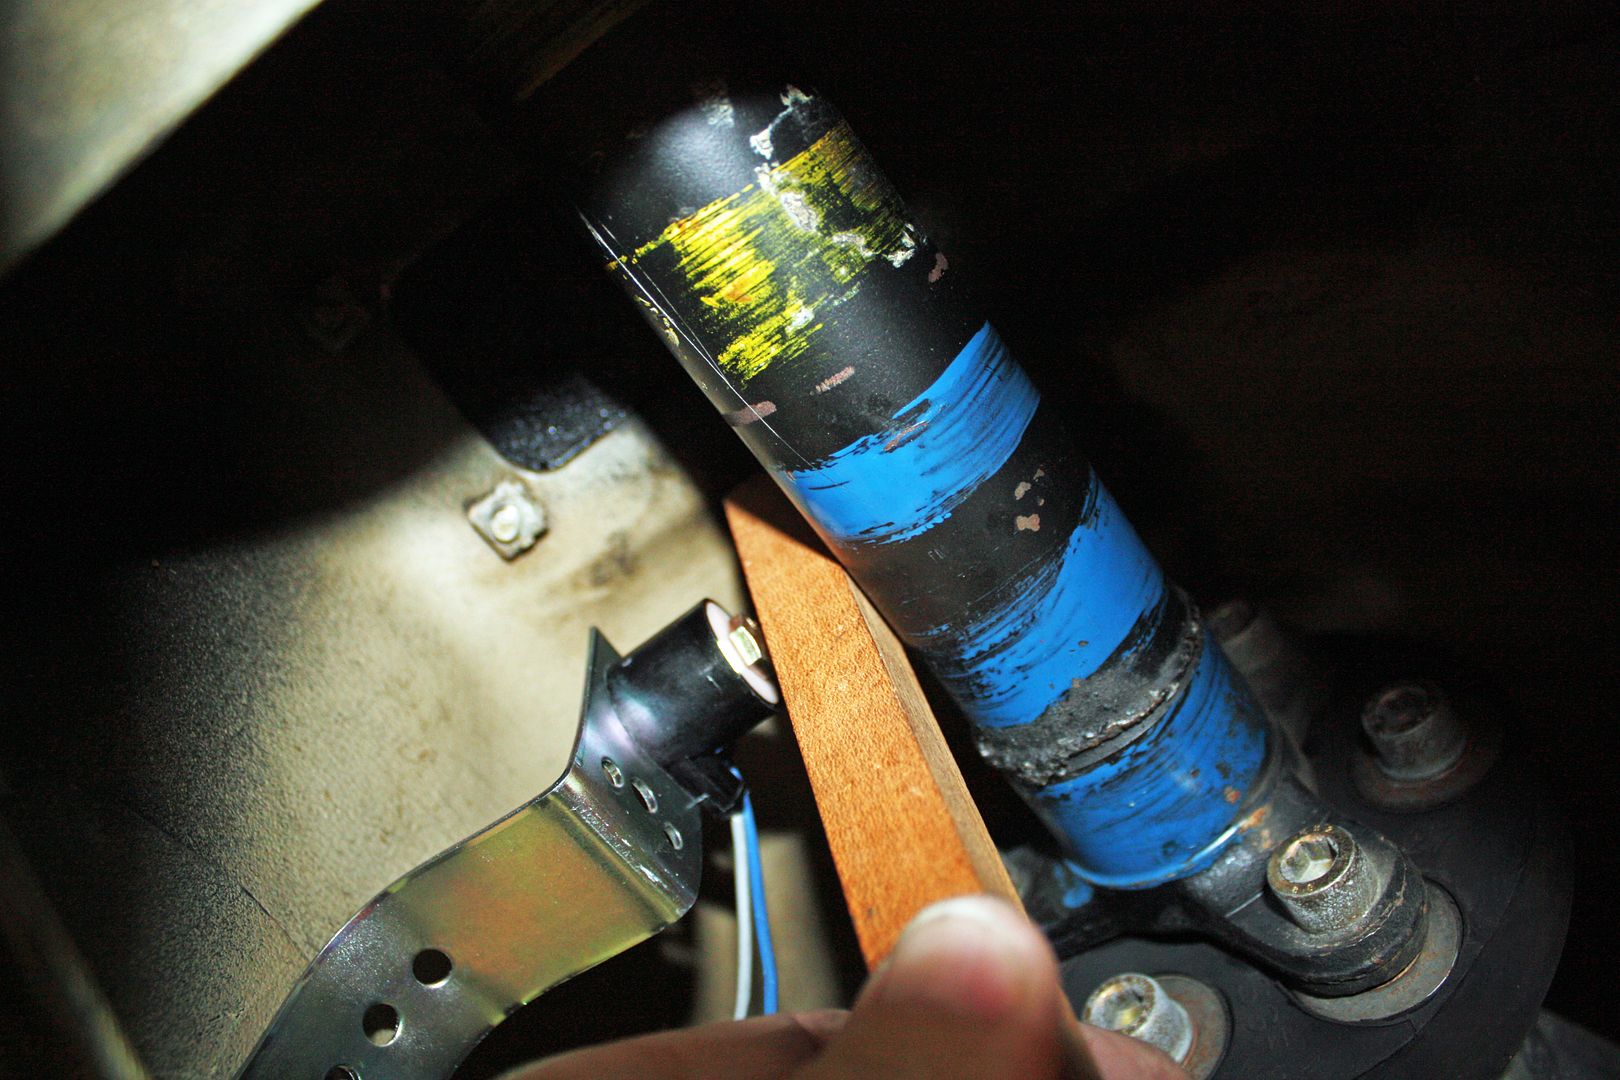
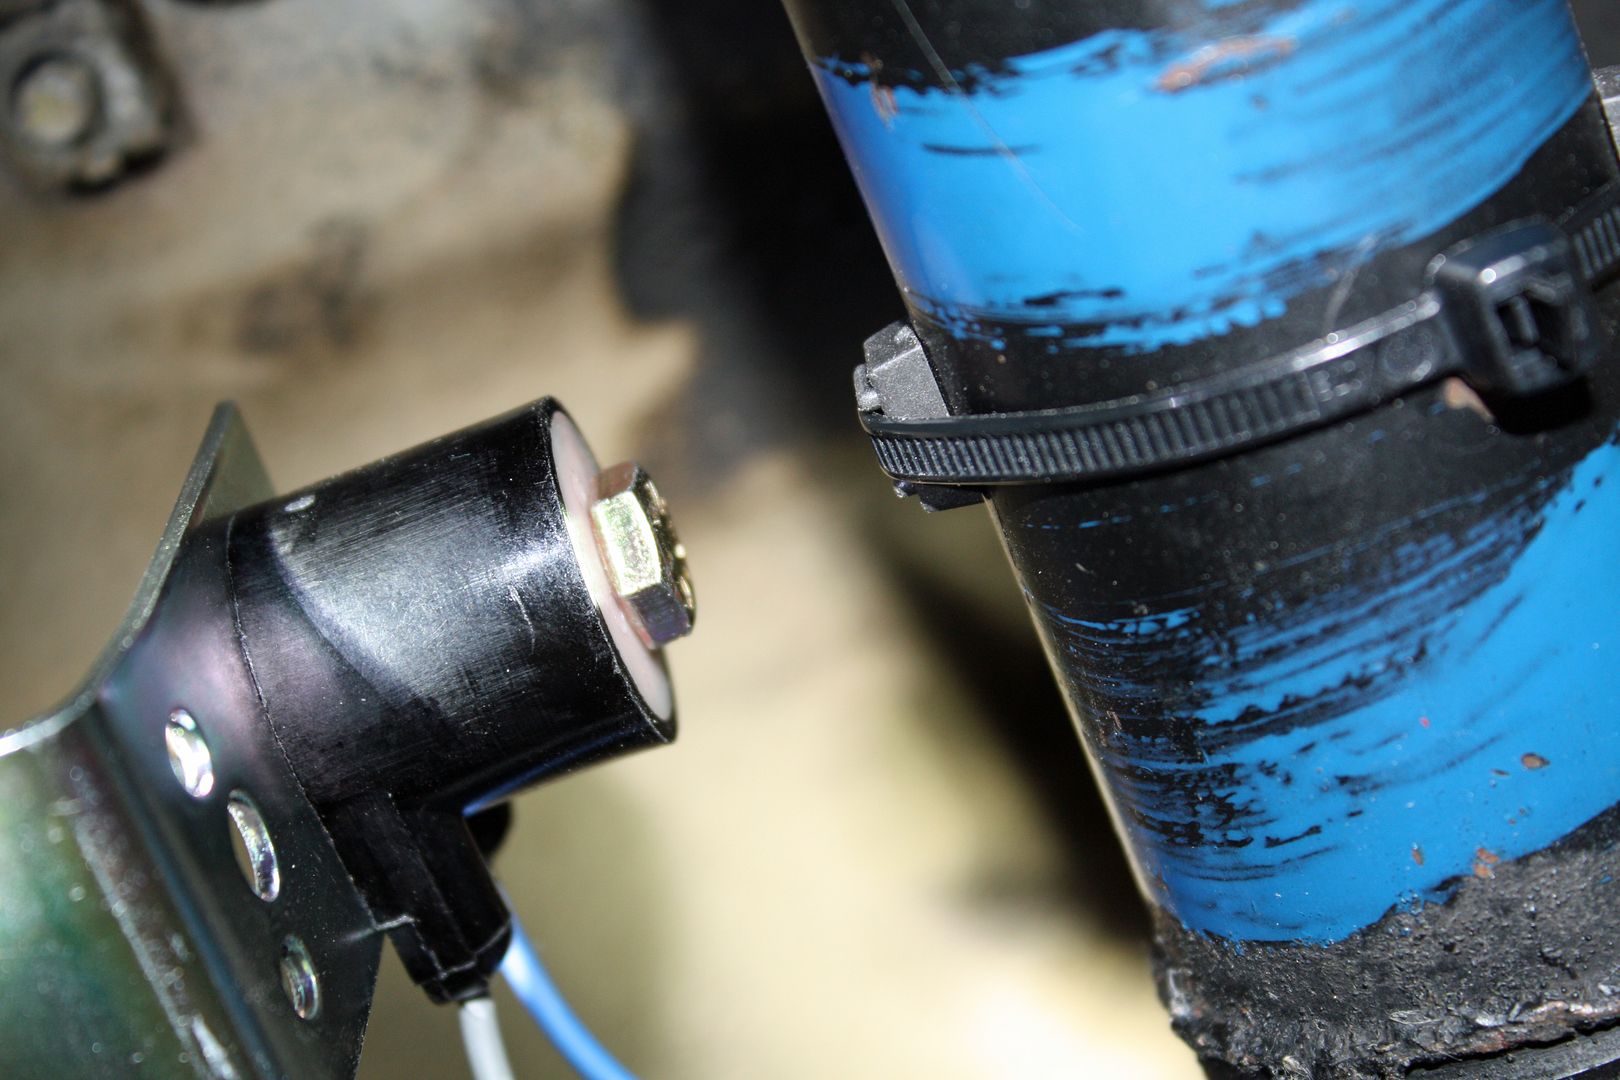
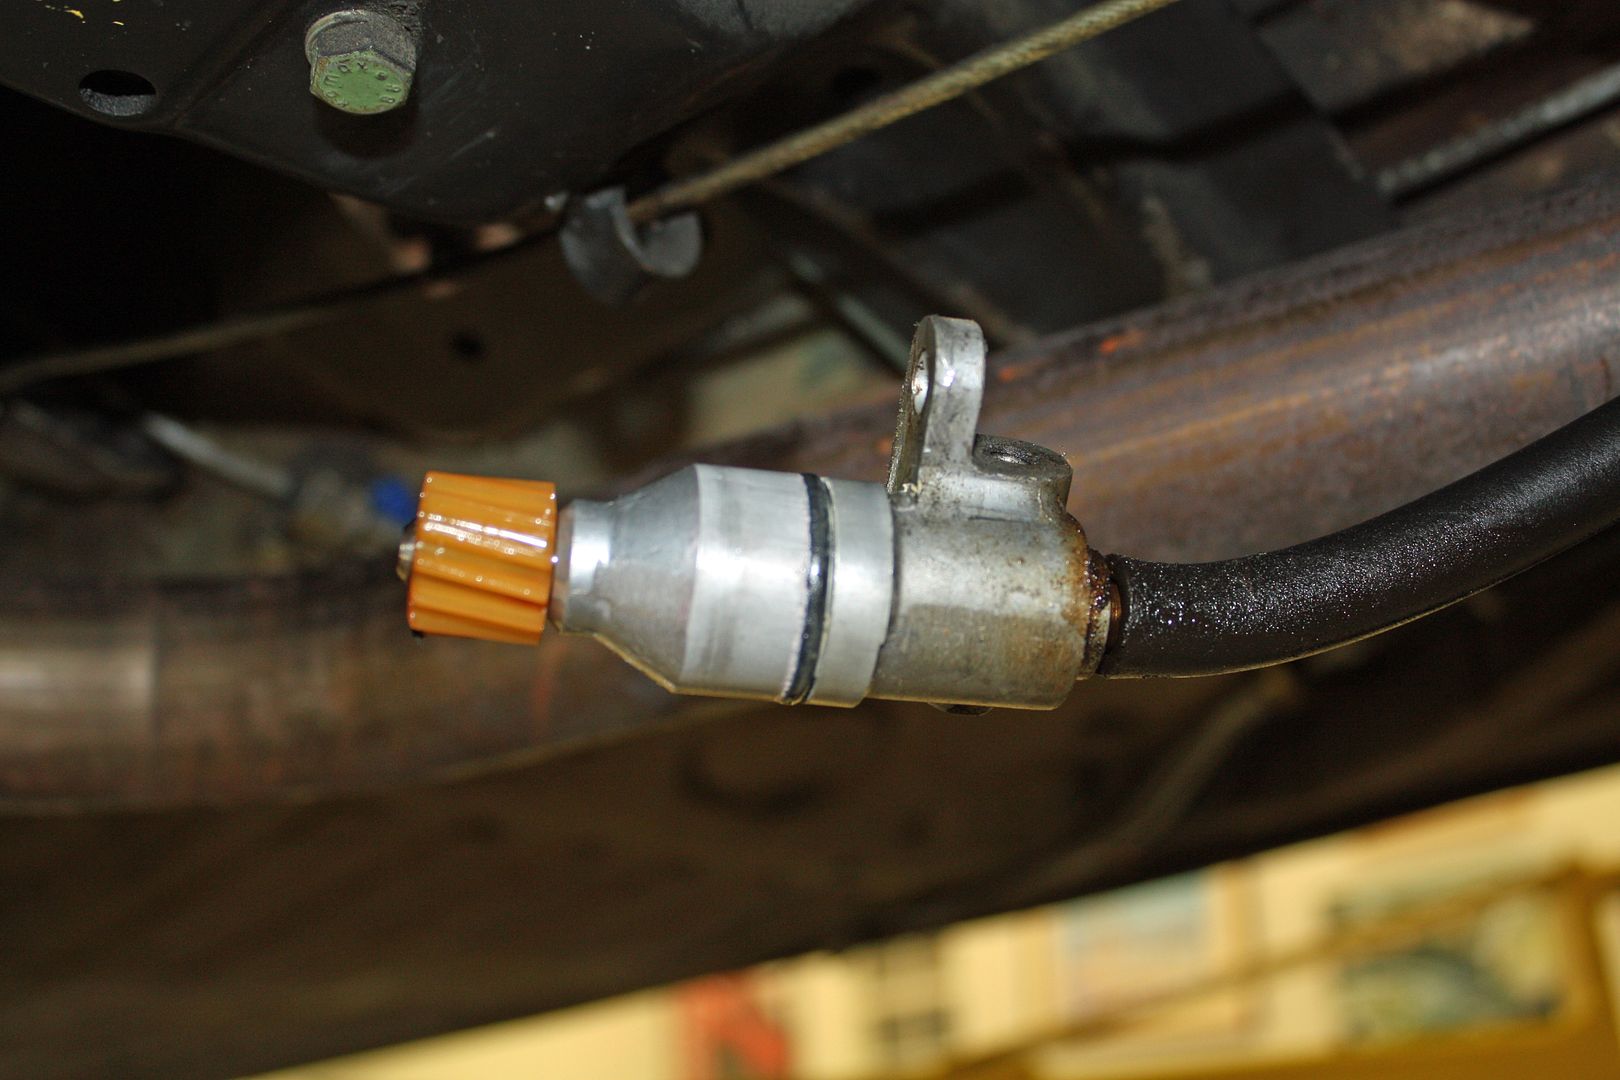
Since the speedometer is cable driven, I needed to install a magnetic sender. It needed to be mounted so it would face the drive shaft near the front. After mounting the sender, I secured two magnets to the drive shaft. It so happens that the old cruise control used the same type of system with the magnets taped on rather than secured with a wire tie.
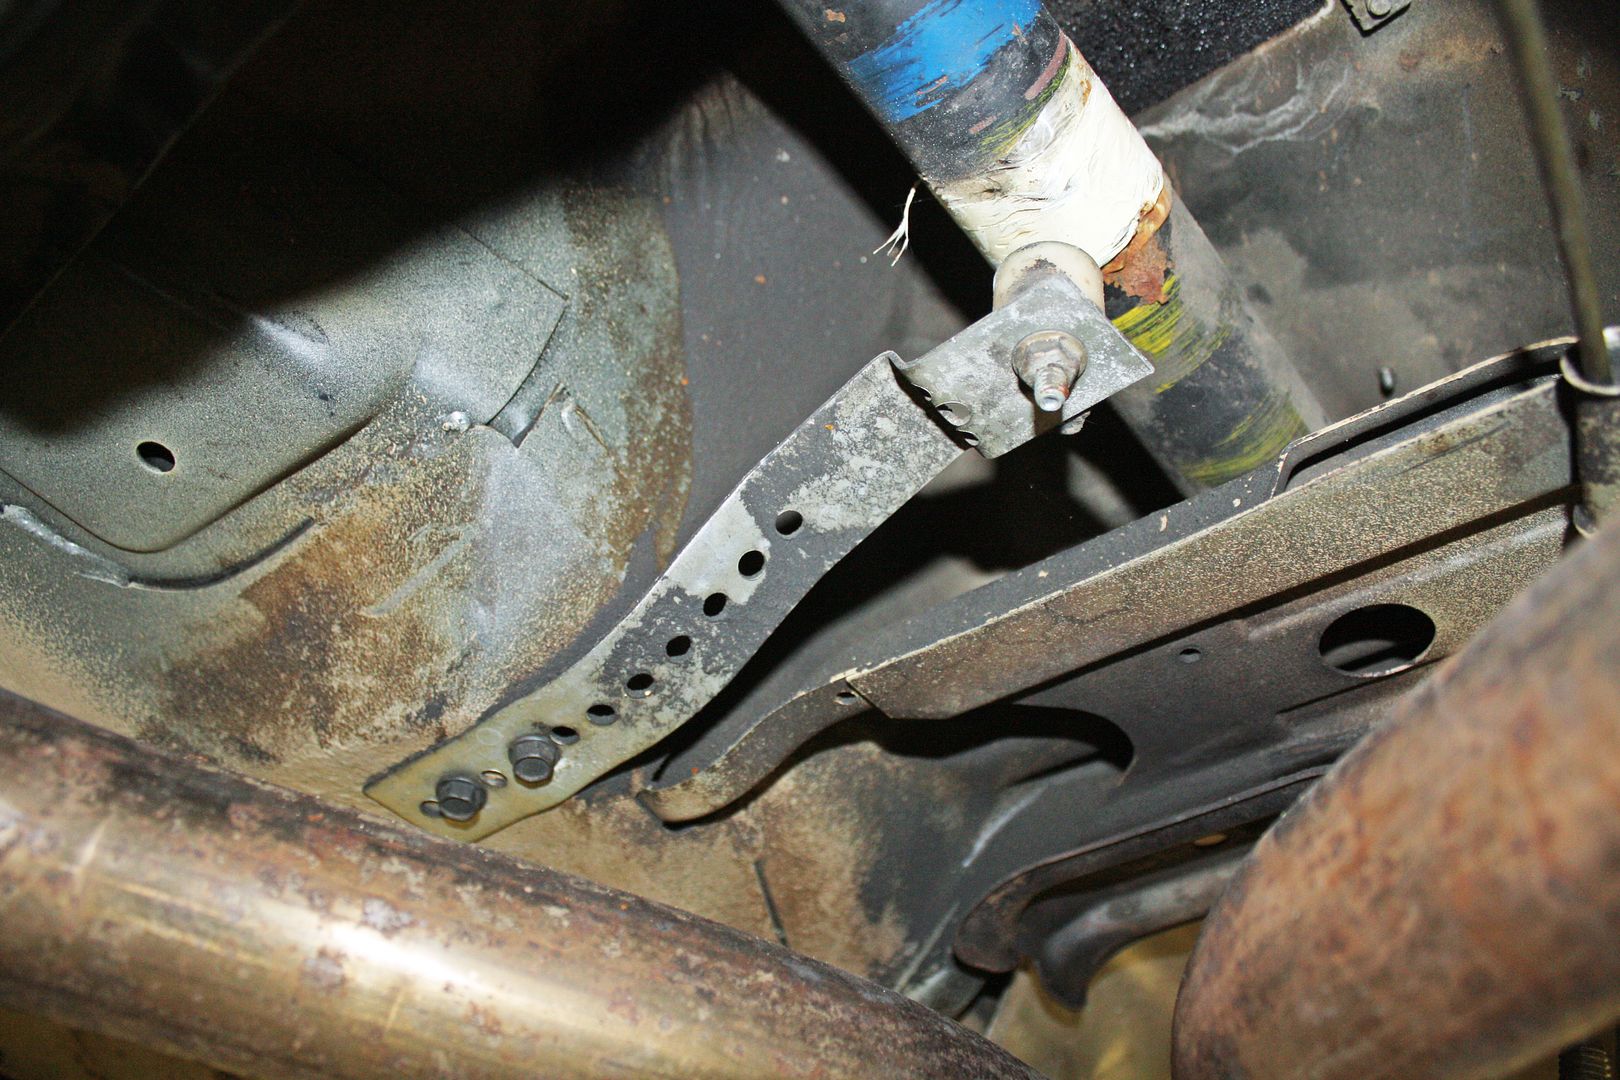
Another flat bracket was supplied that need to be bent into shape. The sender was to be 3/4" away from the drive shaft and centered on it. To gauge the distance I used a piece of 3/4" wood. Much easier than trying to use a tape measure.
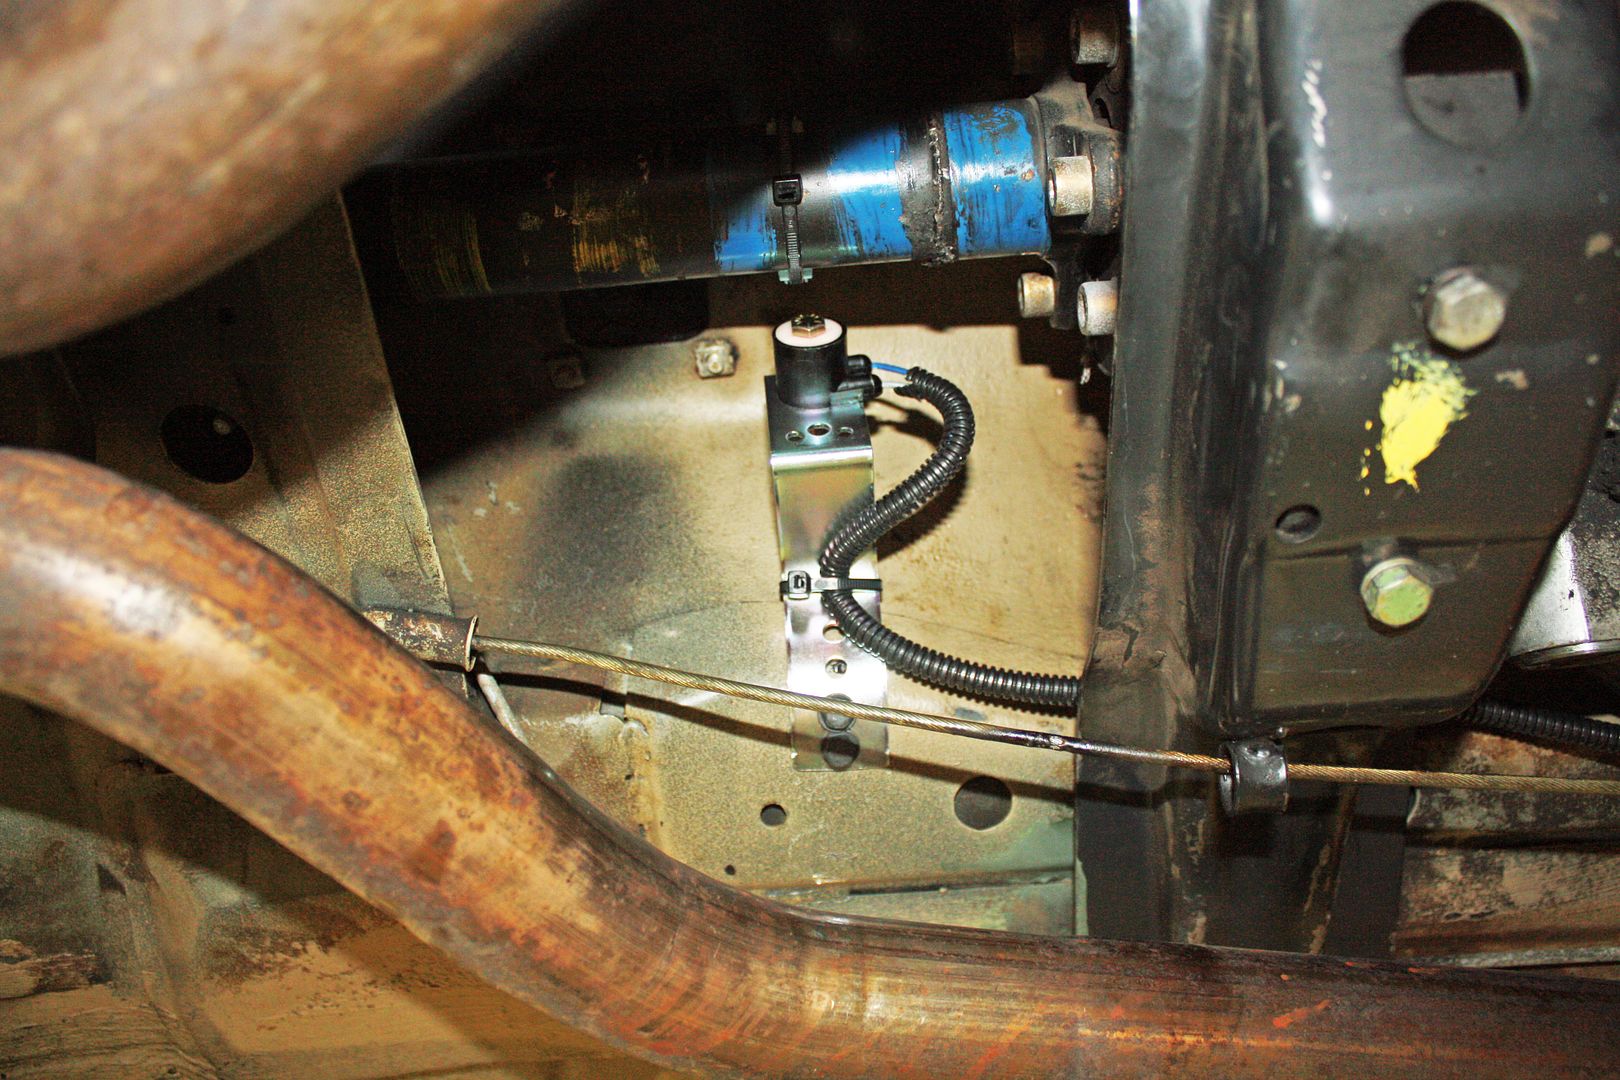
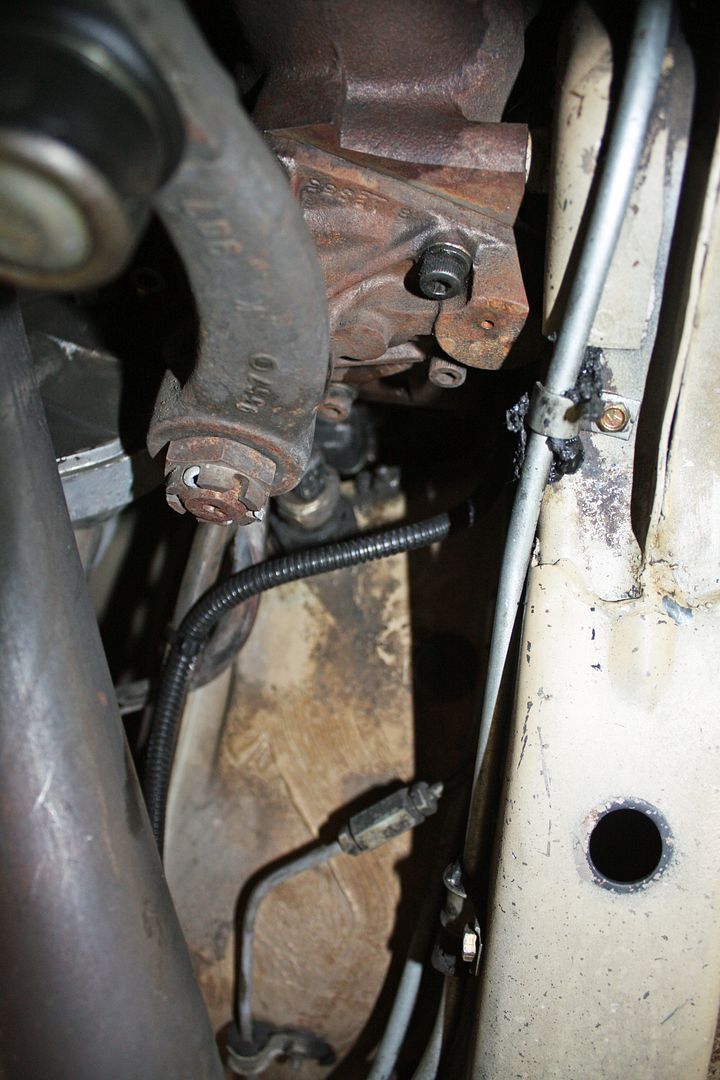
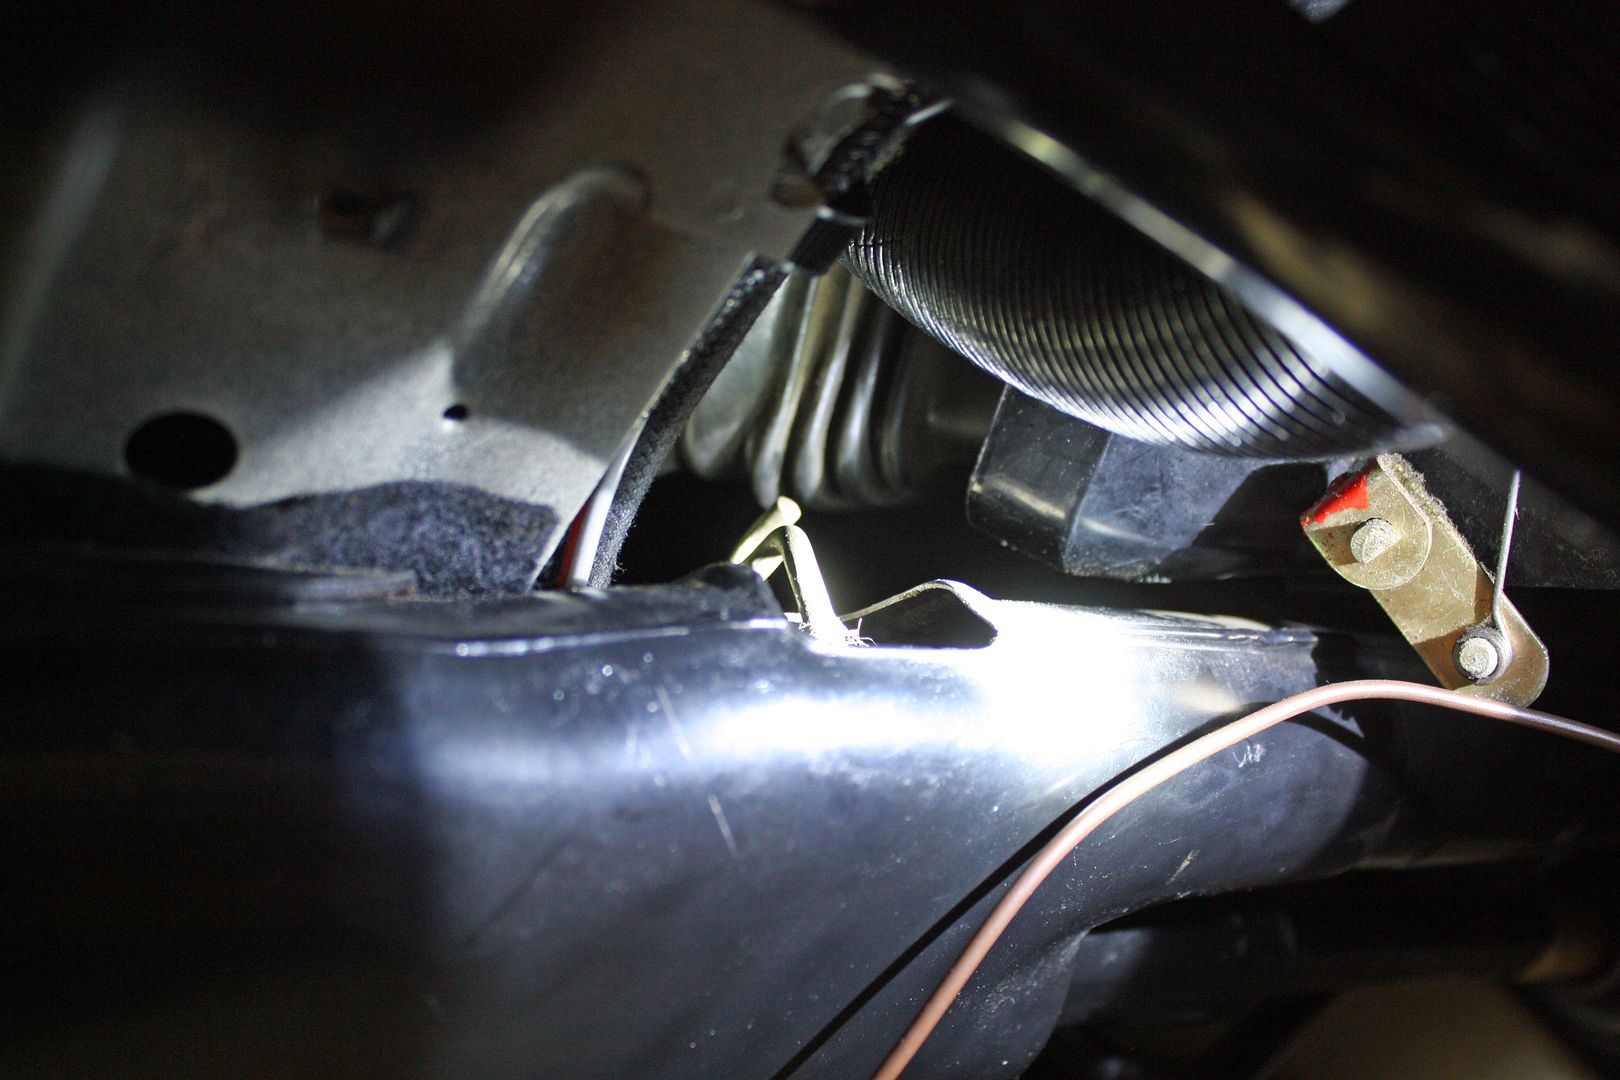
The next step was to run the wire forward up to the control unit. I ran it forward along the bottom rail to the point where it needed to go up. To get it into the engine bay, I ran a straightened coat hanger down from the top, taped the wire to the coat hanger and then pulled it up into the engine bay.
Now that I had it in the engine bay, I could insert the wire ends into the plug supplied in the kit. That plug is then inserted into the matching plug on the control unit harness.


With that part completed, I decided to mount the cruise switch. The old unit had one mounted on the turn signal arm. Having used those in the past, I ordered the same type for this car. However, the turn signal arm was too large a diameter to fit the switch. They will be taking this one back and I have ordered a wireless one that uses a RF signal. I can mount it anywhere.
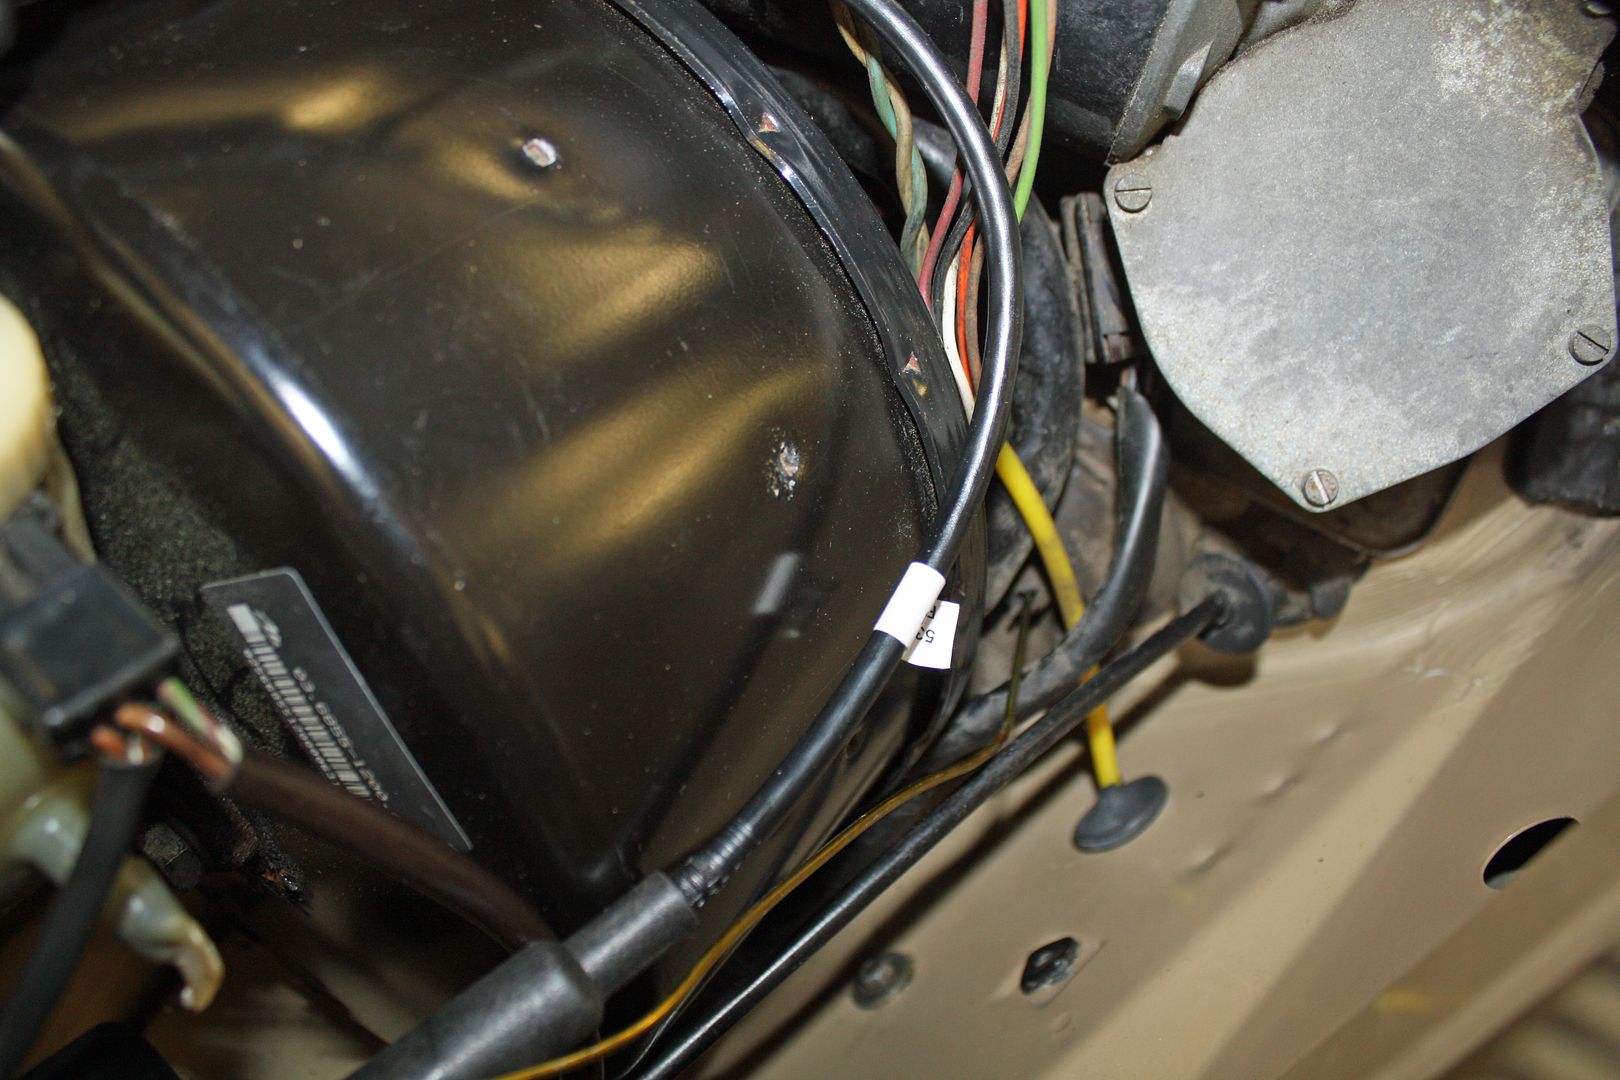
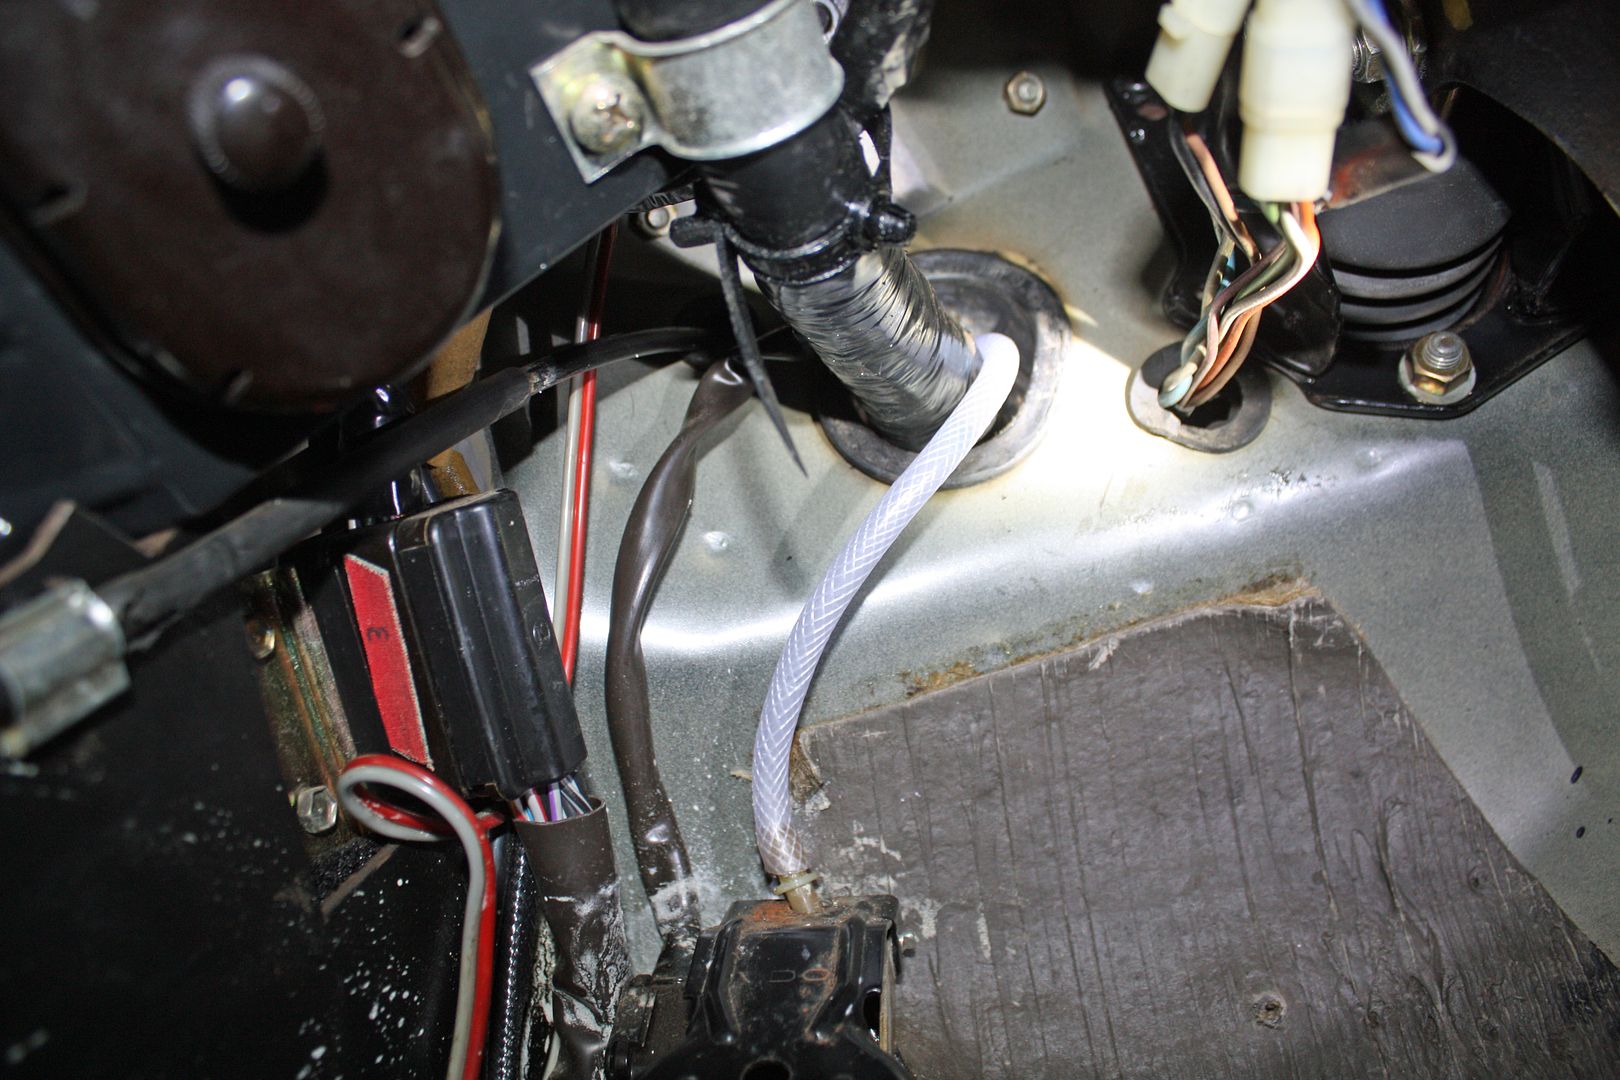
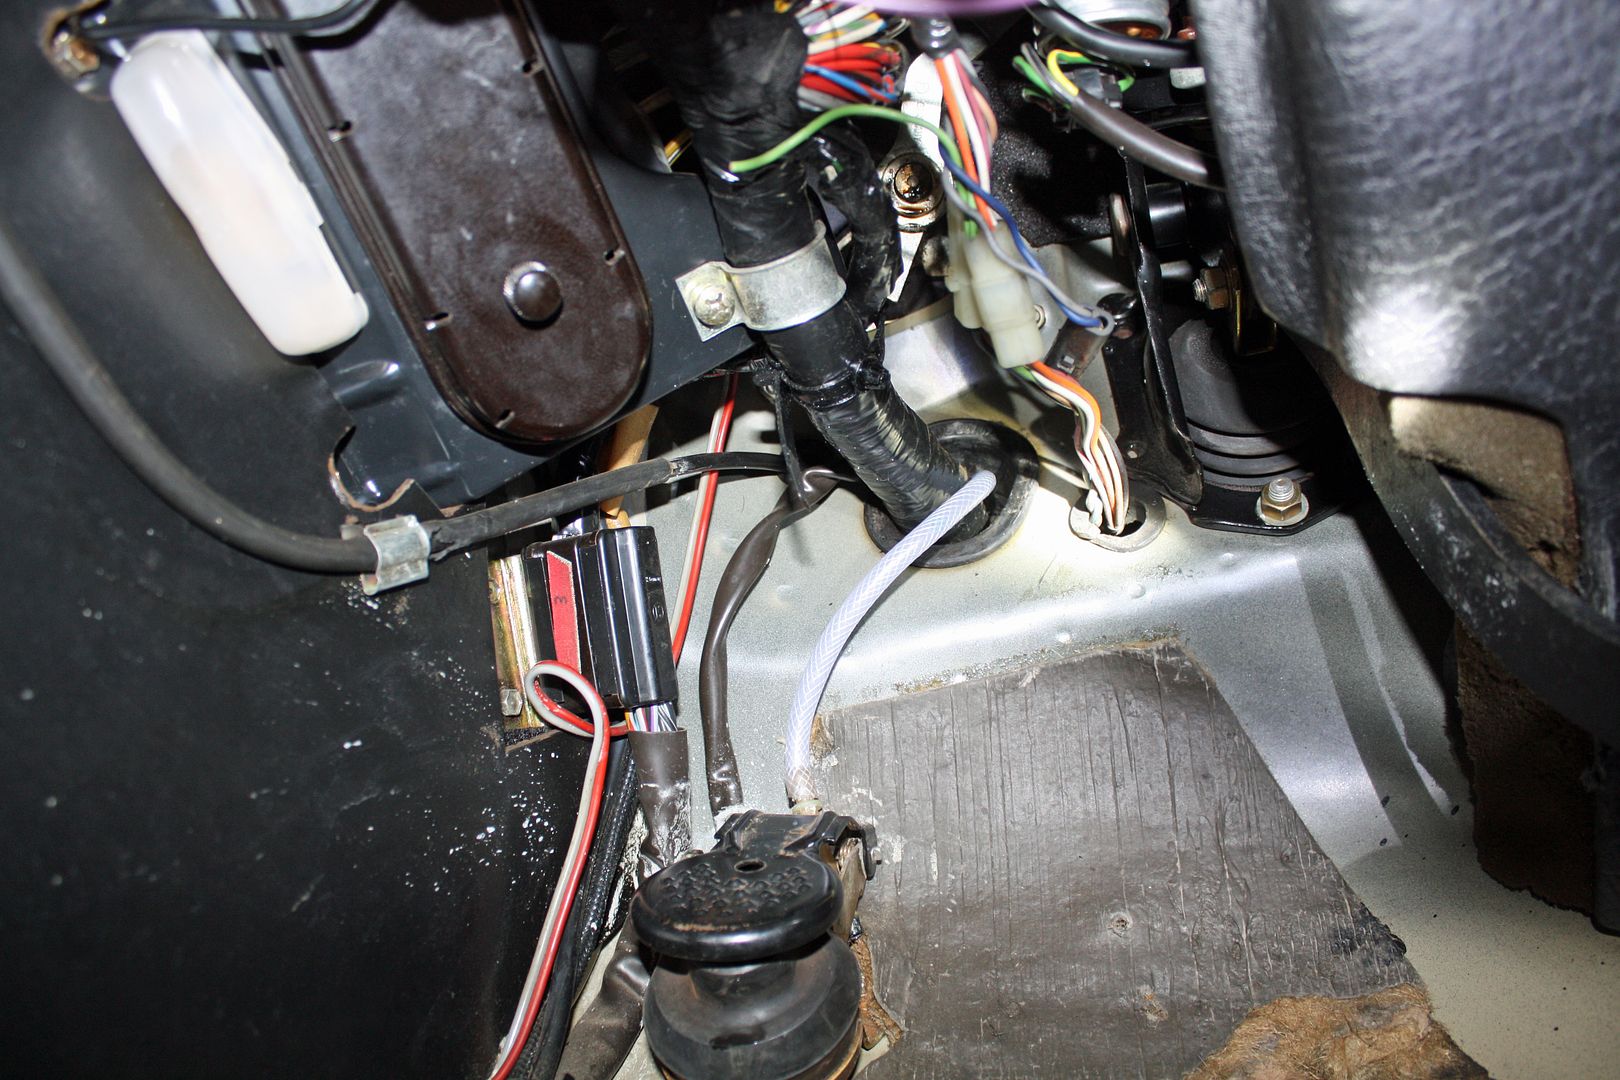
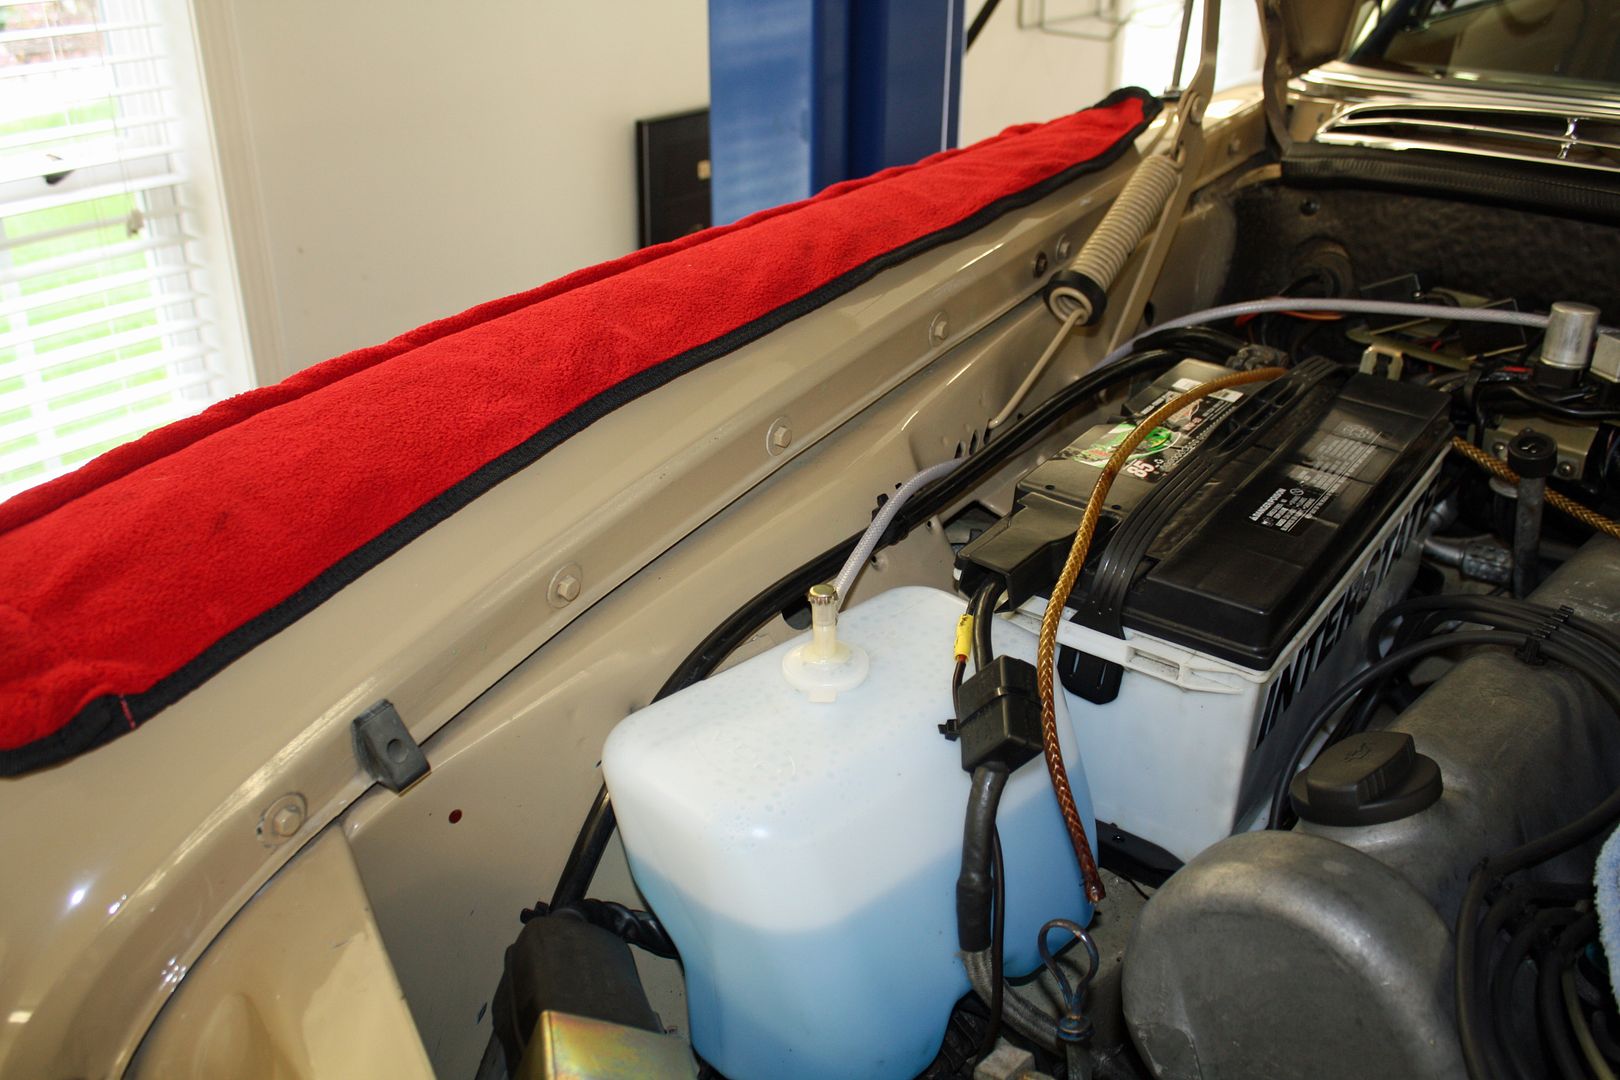
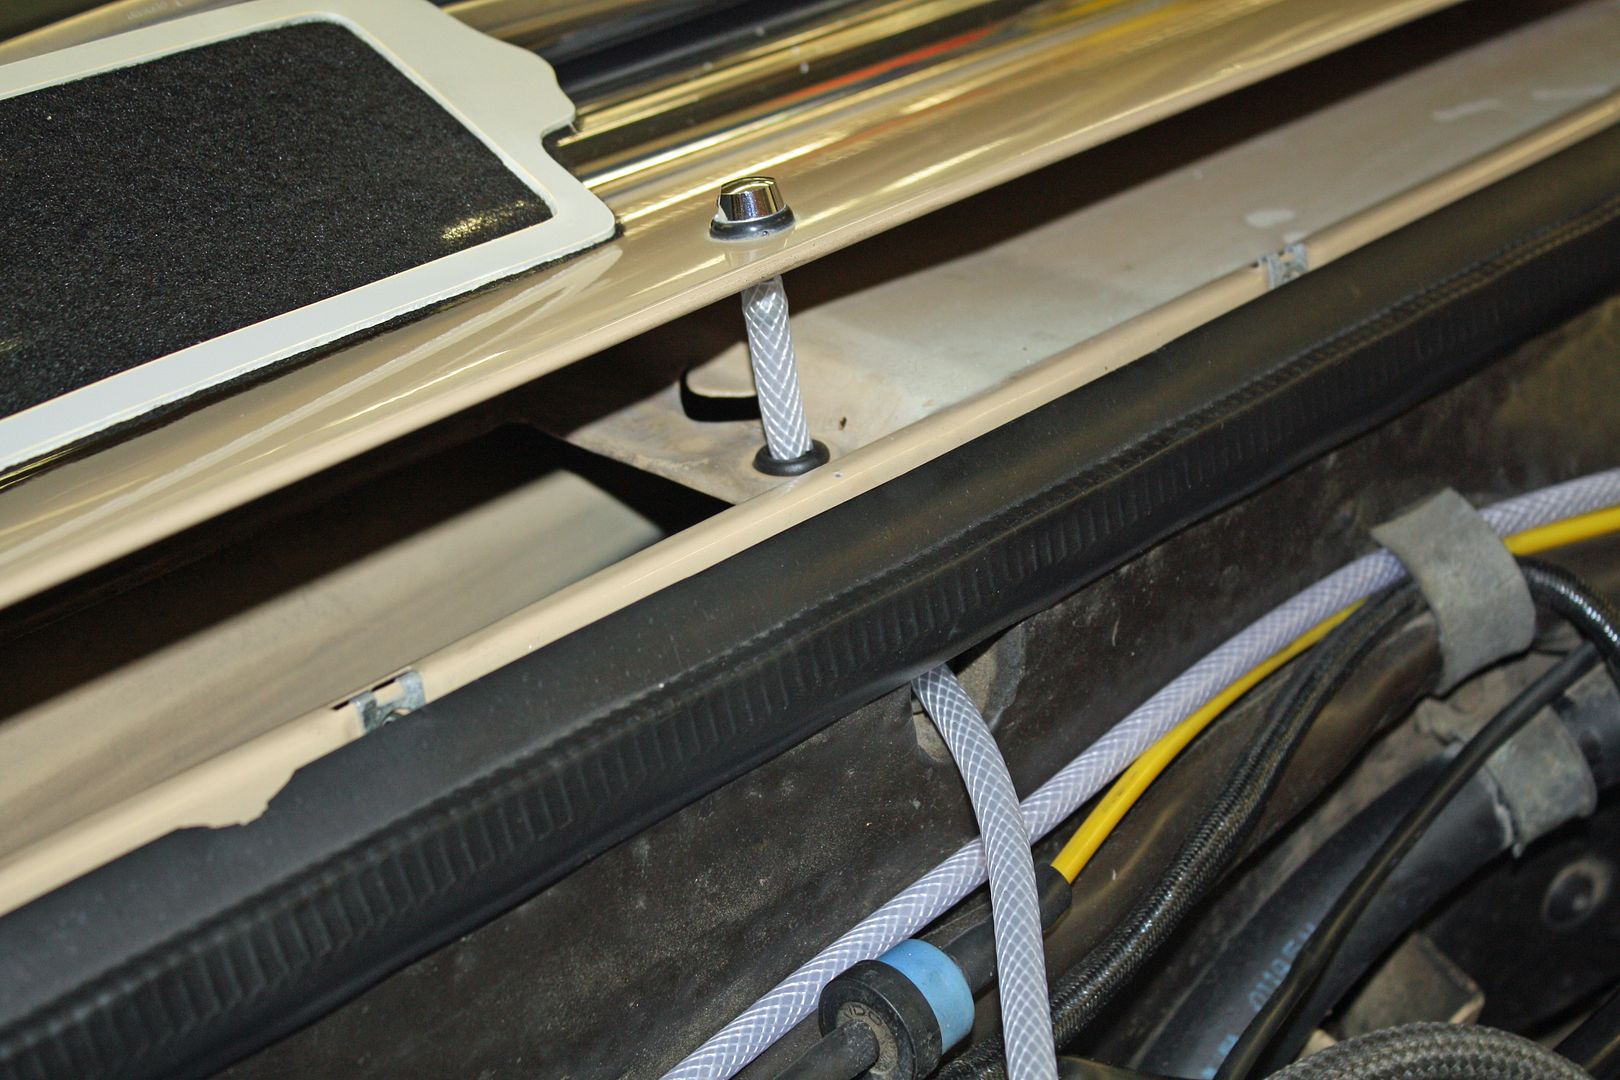
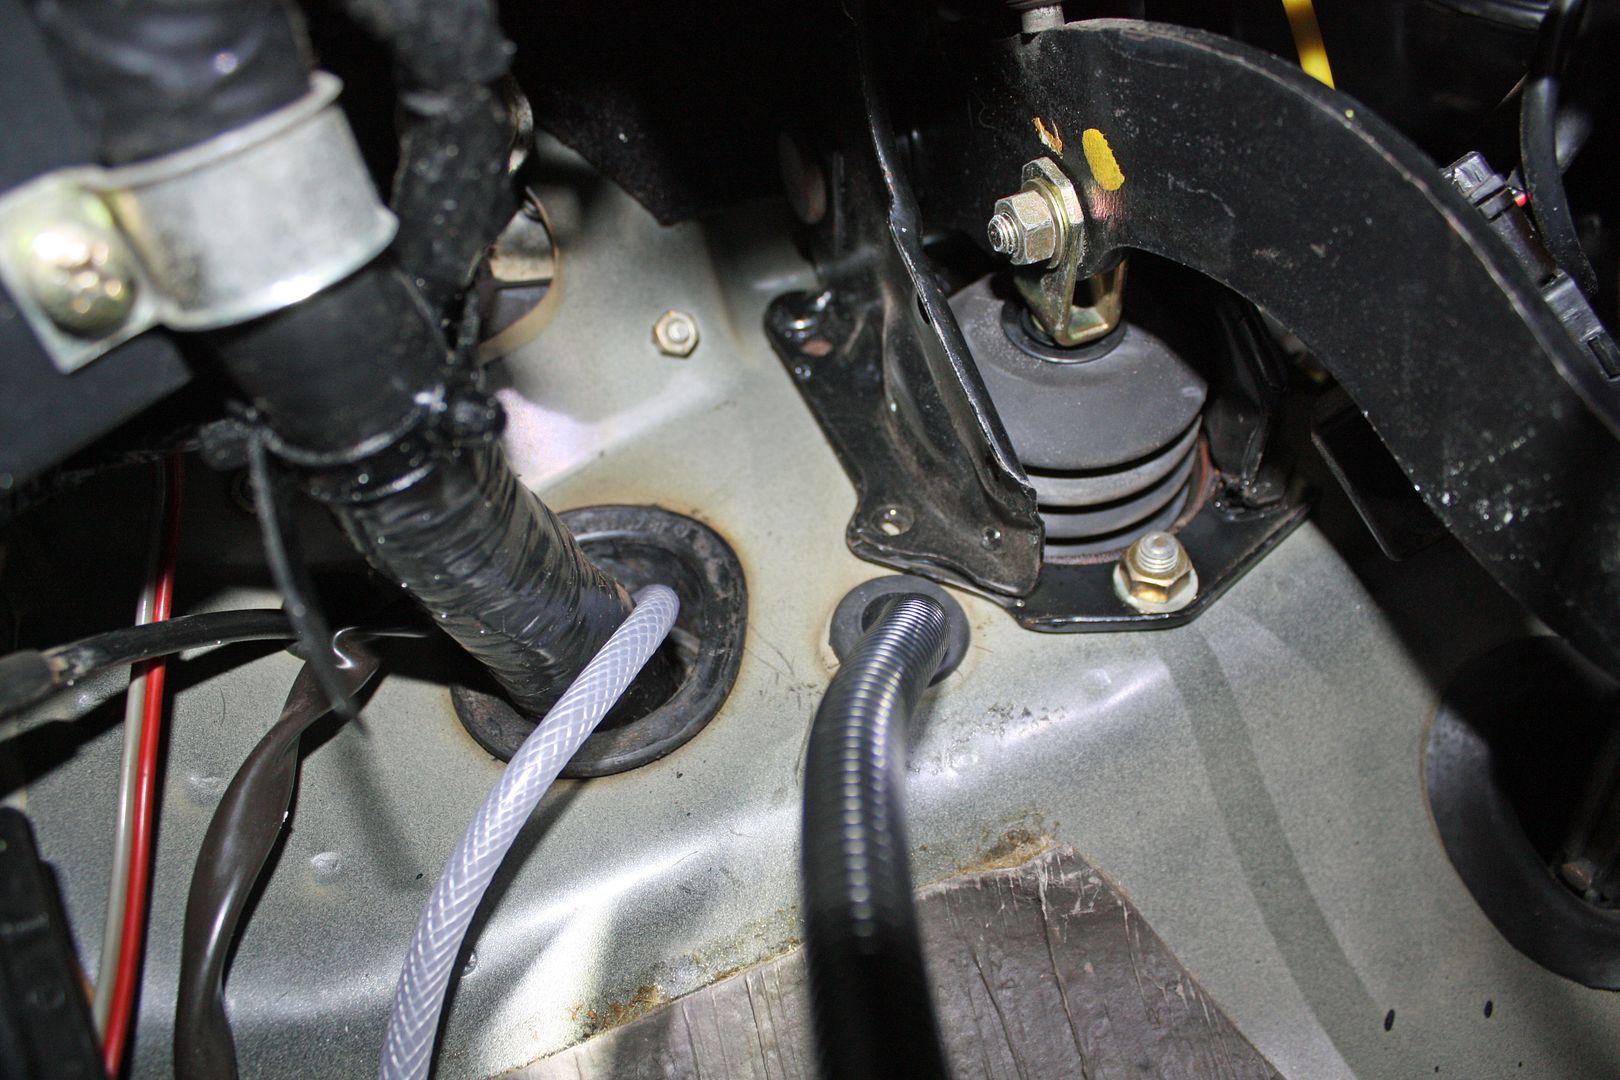
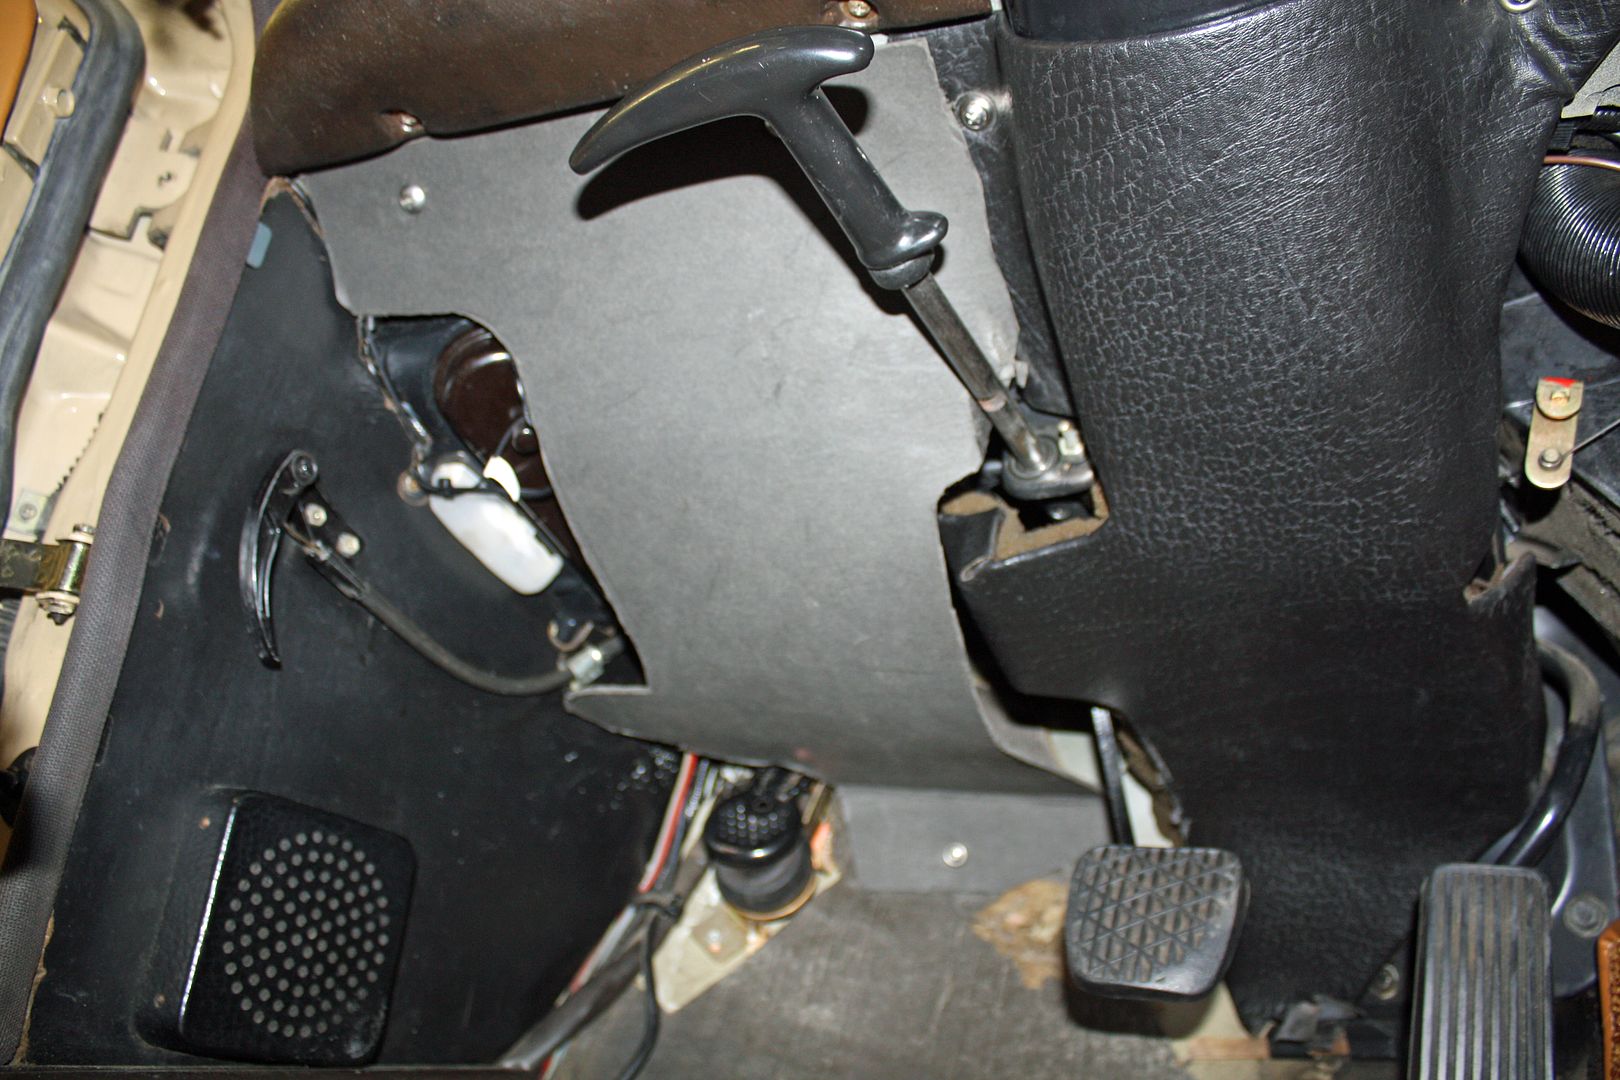
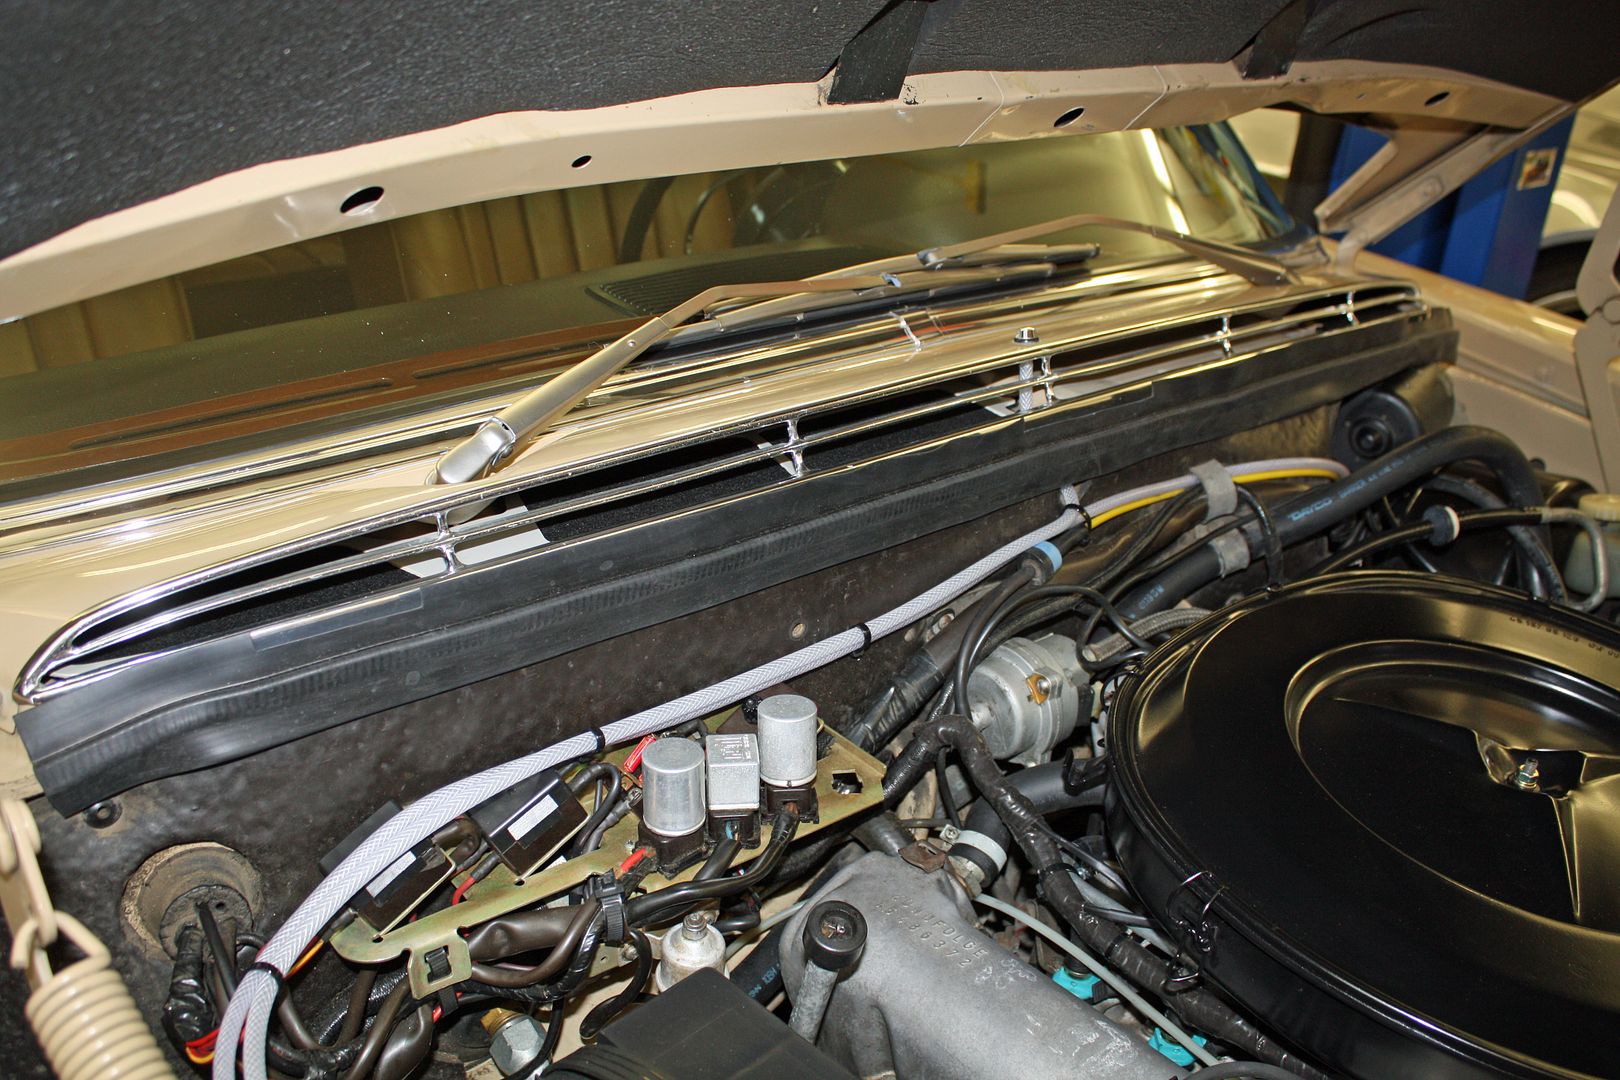
While I was inside the car, I removed the cardboard panel under the dash on the driver's side. Two of the cruise harness wires go to each side of the brake switch. In looking for that switch, I came across the windshield washer pump on the floor. I have new windshield washer hose and have been wanting to install it. I removed the old hose from the pump, and, after taping the new hose to the old hose, tried to pull the new hose through from inside the engine bay. Didn't work as the tape made it too wide to go through the hole in the grommet. So out came the coat hanger again. It worked and I now have that hose routed to the windshield washer tank. To replace the other line, I will need to remove the windshield wipers and the air intake cowl at the base of the windshield.

Another flat bracket was supplied that need to be bent into shape. The sender was to be 3/4" away from the drive shaft and centered on it. To gauge the distance I used a piece of 3/4" wood. Much easier than trying to use a tape measure.


The next step was to run the wire forward up to the control unit. I ran it forward along the bottom rail to the point where it needed to go up. To get it into the engine bay, I ran a straightened coat hanger down from the top, taped the wire to the coat hanger and then pulled it up into the engine bay.


Now that I had it in the engine bay, I could insert the wire ends into the plug supplied in the kit. That plug is then inserted into the matching plug on the control unit harness.


With that part completed, I decided to mount the cruise switch. The old unit had one mounted on the turn signal arm. Having used those in the past, I ordered the same type for this car. However, the turn signal arm was too large a diameter to fit the switch. They will be taking this one back and I have ordered a wireless one that uses a RF signal. I can mount it anywhere.

While I was inside the car, I removed the cardboard panel under the dash on the driver's side. Two of the cruise harness wires go to each side of the brake switch. In looking for that switch, I came across the windshield washer pump on the floor. I have new windshield washer hose and have been wanting to install it. I removed the old hose from the pump, and, after taping the new hose to the old hose, tried to pull the new hose through from inside the engine bay. Didn't work as the tape made it too wide to go through the hole in the grommet. So out came the coat hanger again. It worked and I now have that hose routed to the windshield washer tank. To replace the other line, I will need to remove the windshield wipers and the air intake cowl at the base of the windshield.


 08-09-2017, 04:17 PM
#81
Member
Thread Starter
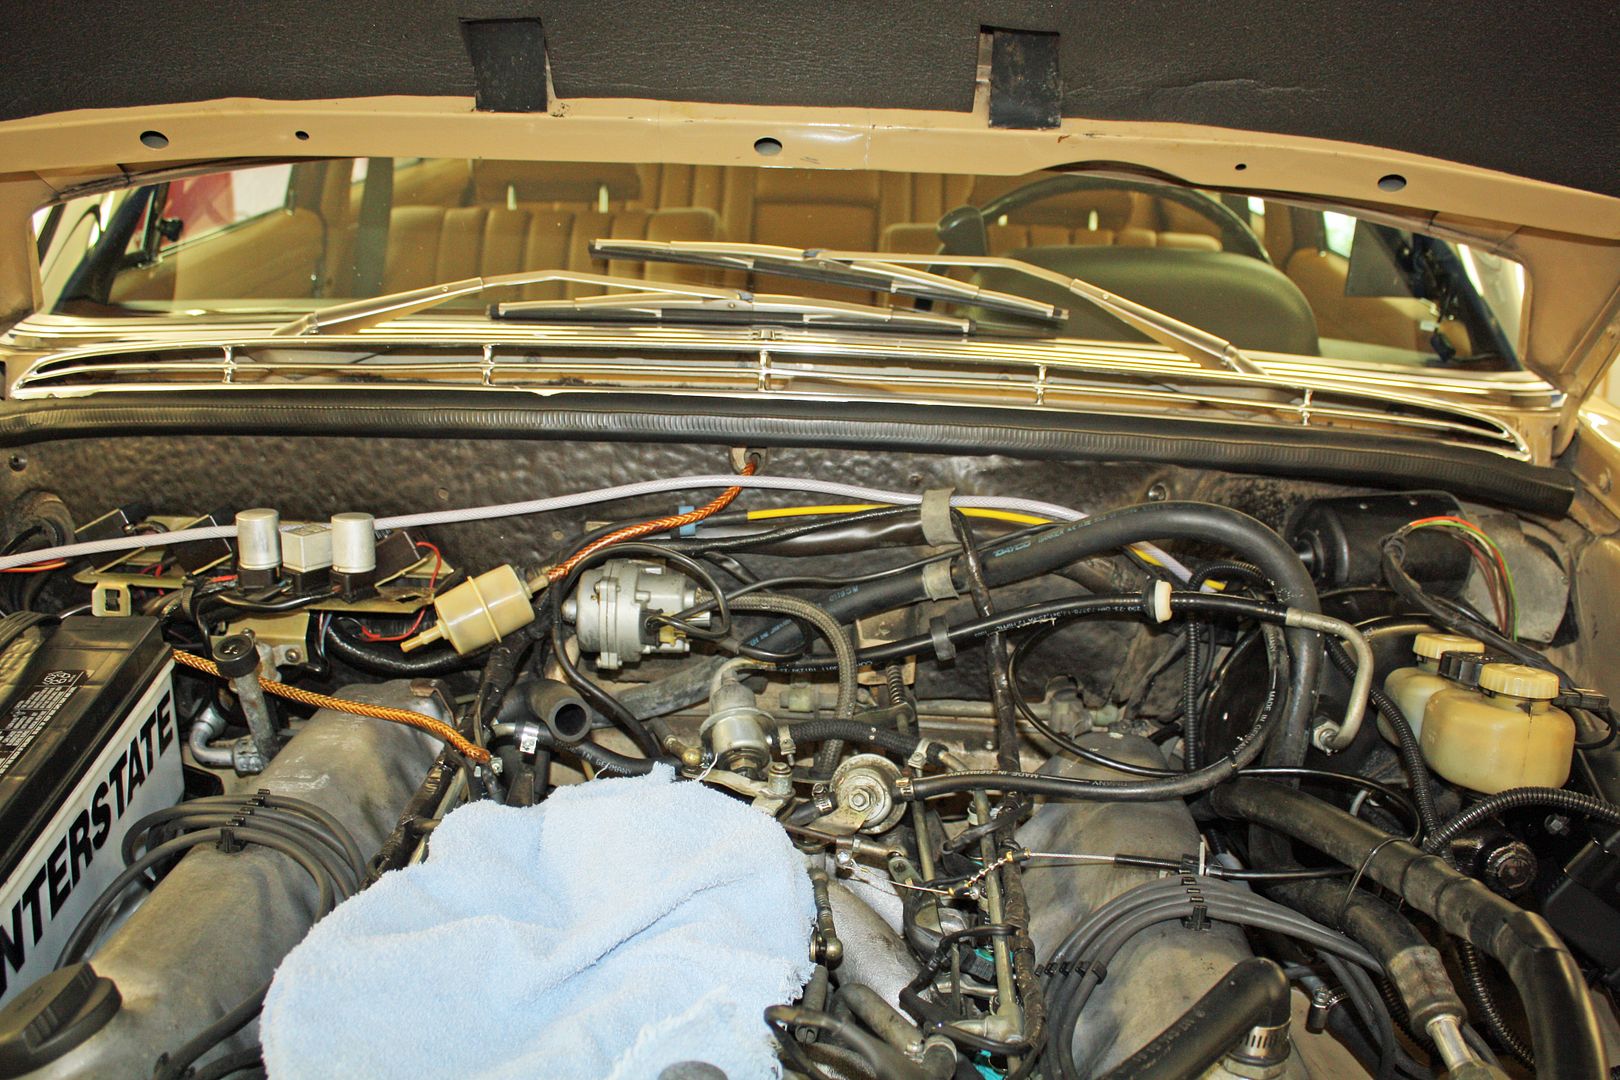
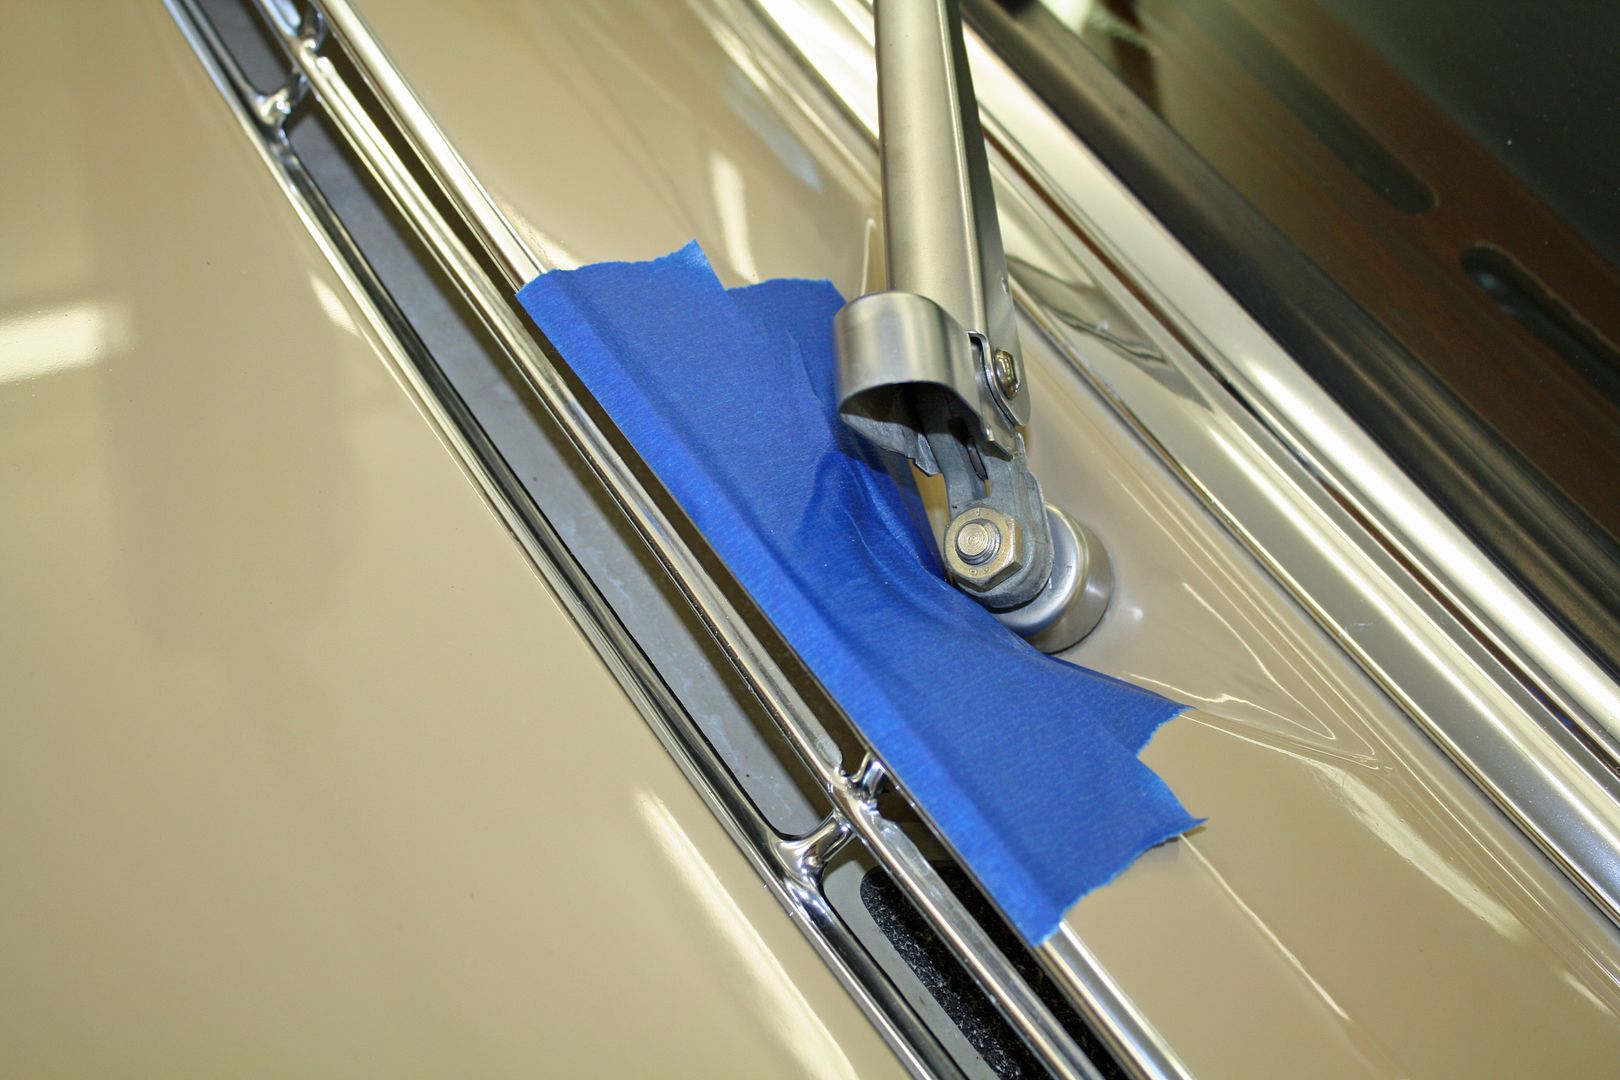
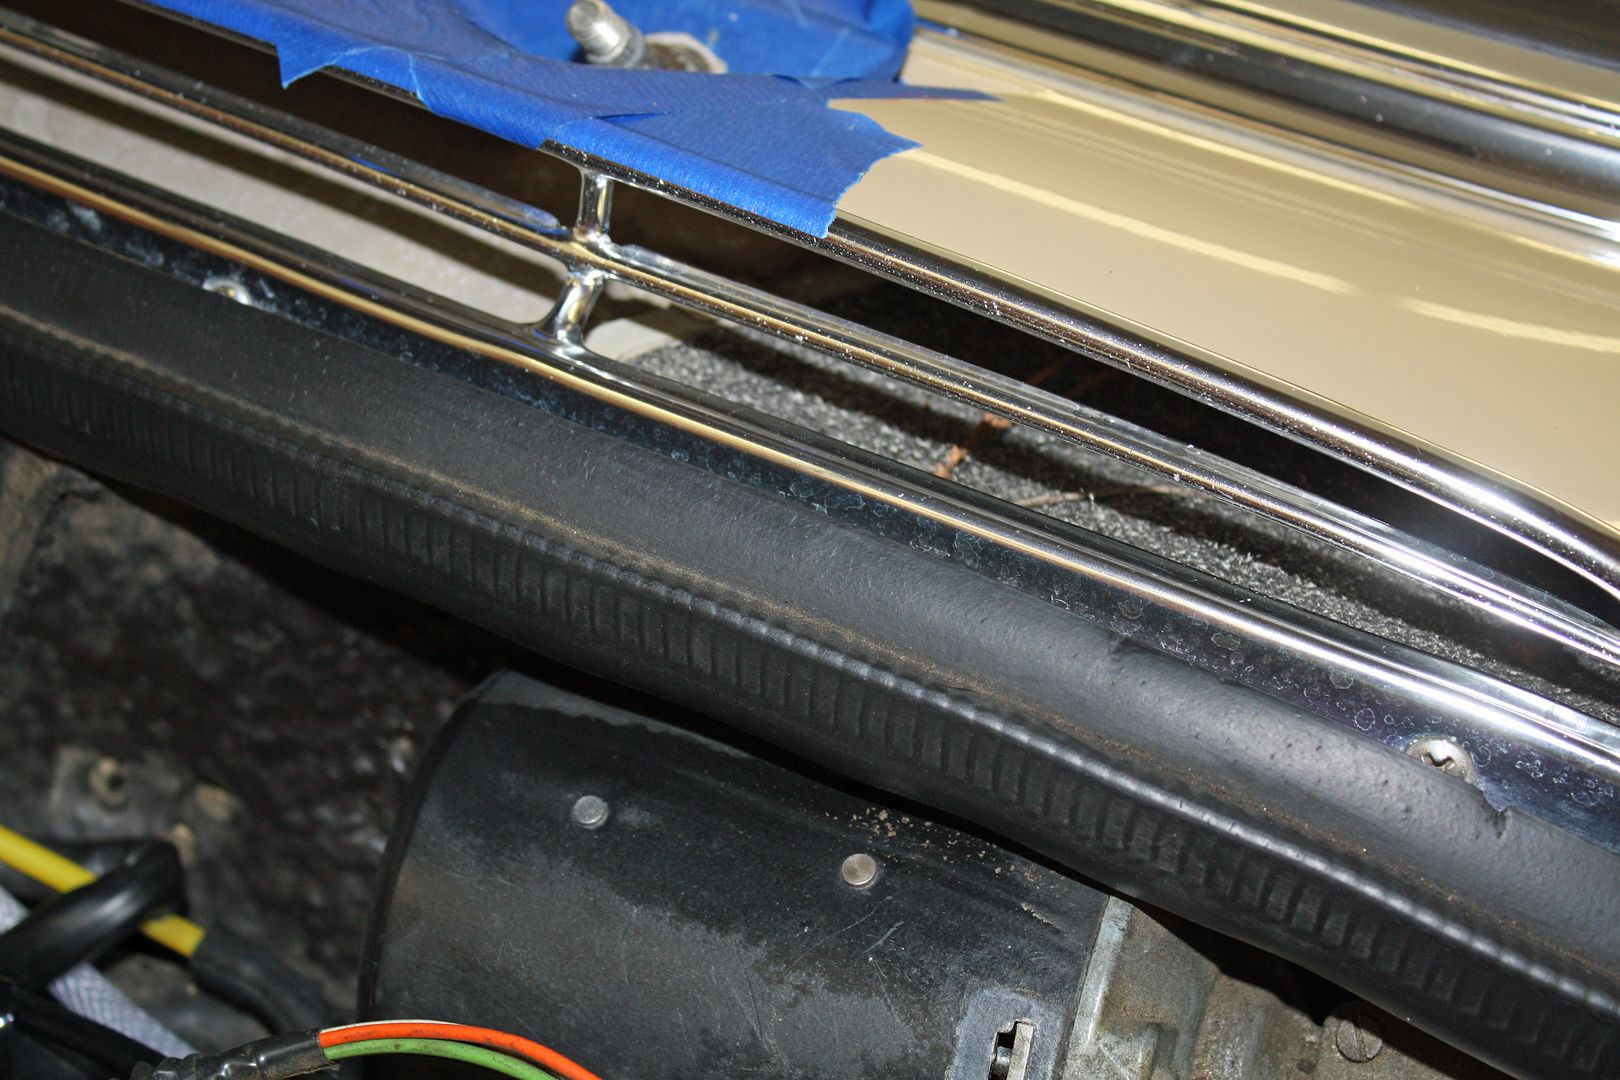
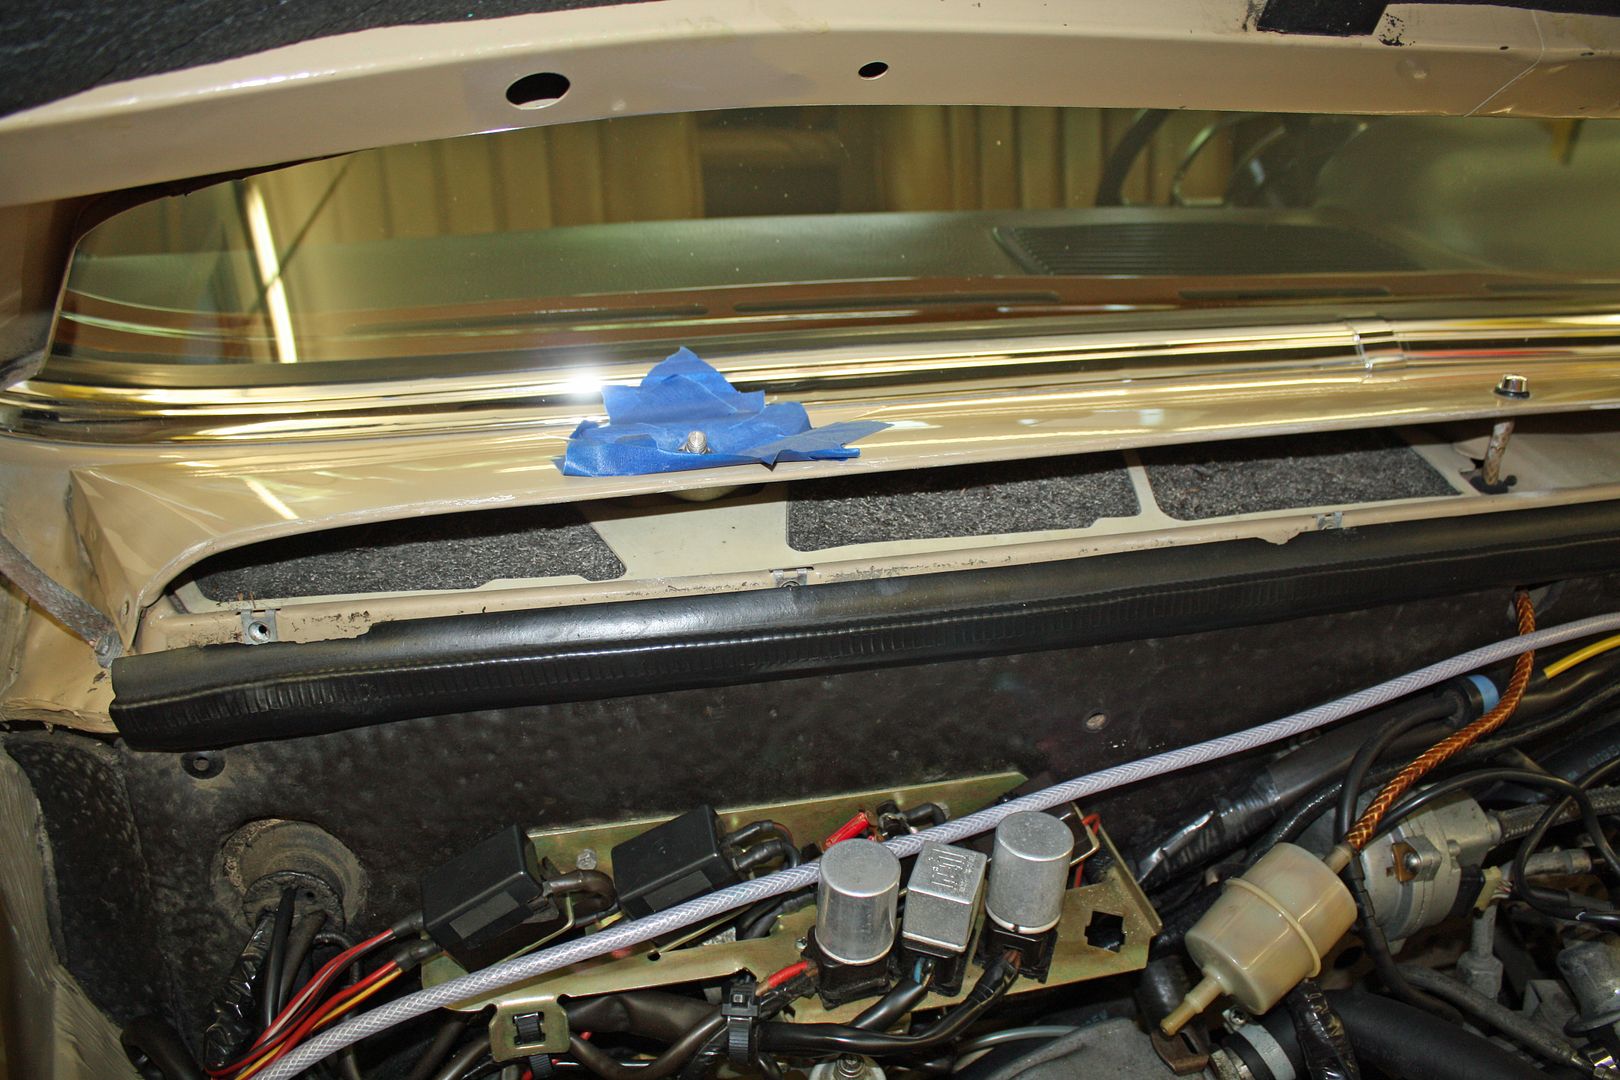
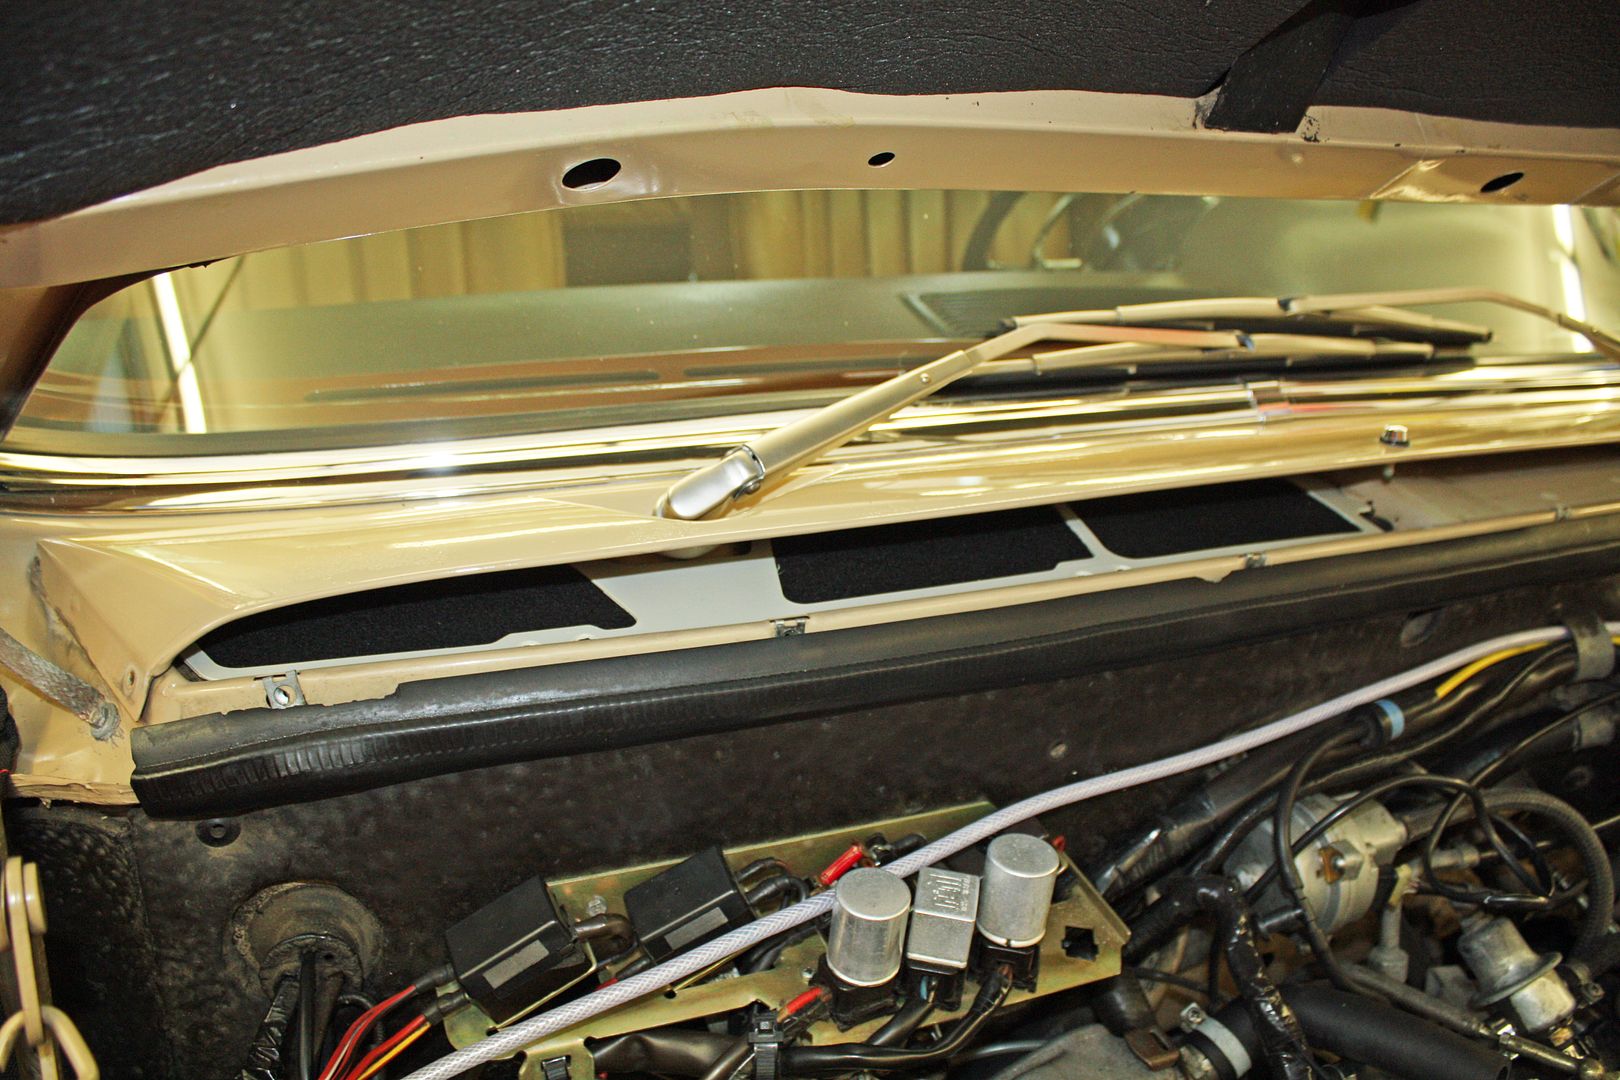
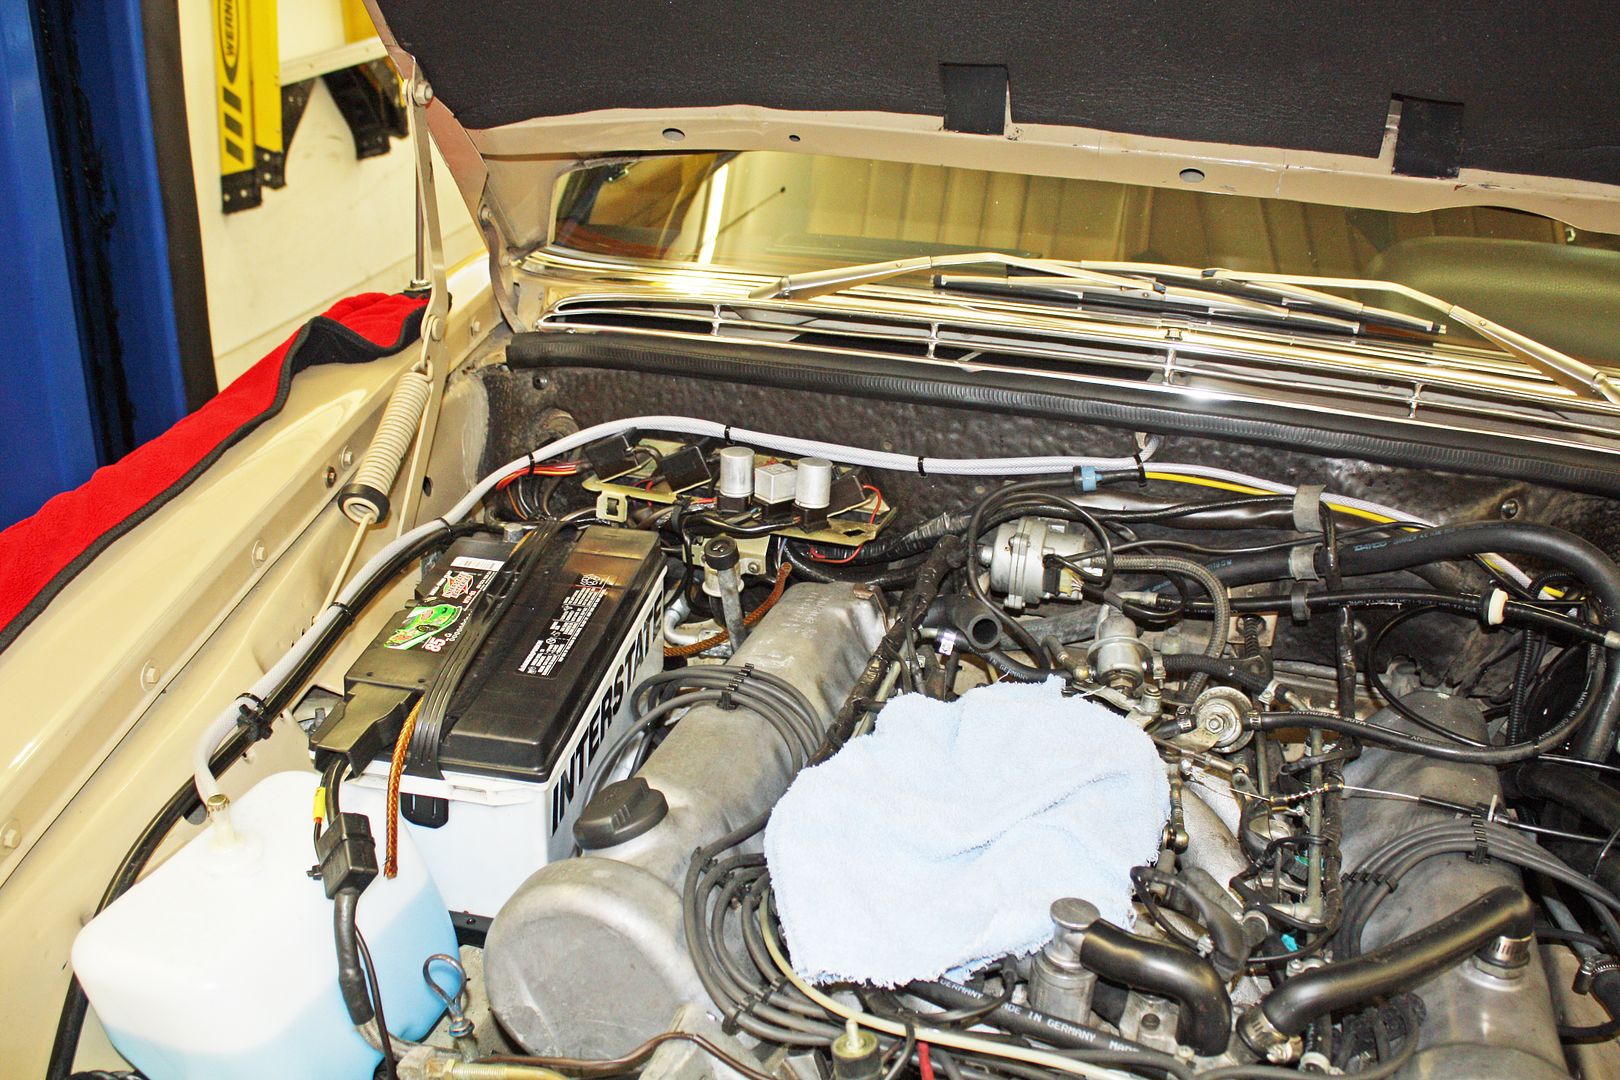
To complete the job of installing new windshield washer hose, I thought I needed to remove the cowl sheet metal. Turns out I only needed to removed the fresh air intake grill. However, before I figured that out, I had already removed the windshield wipers. Even though I did not need to remove them, I will show you how I did it just in case someone has a need to know.
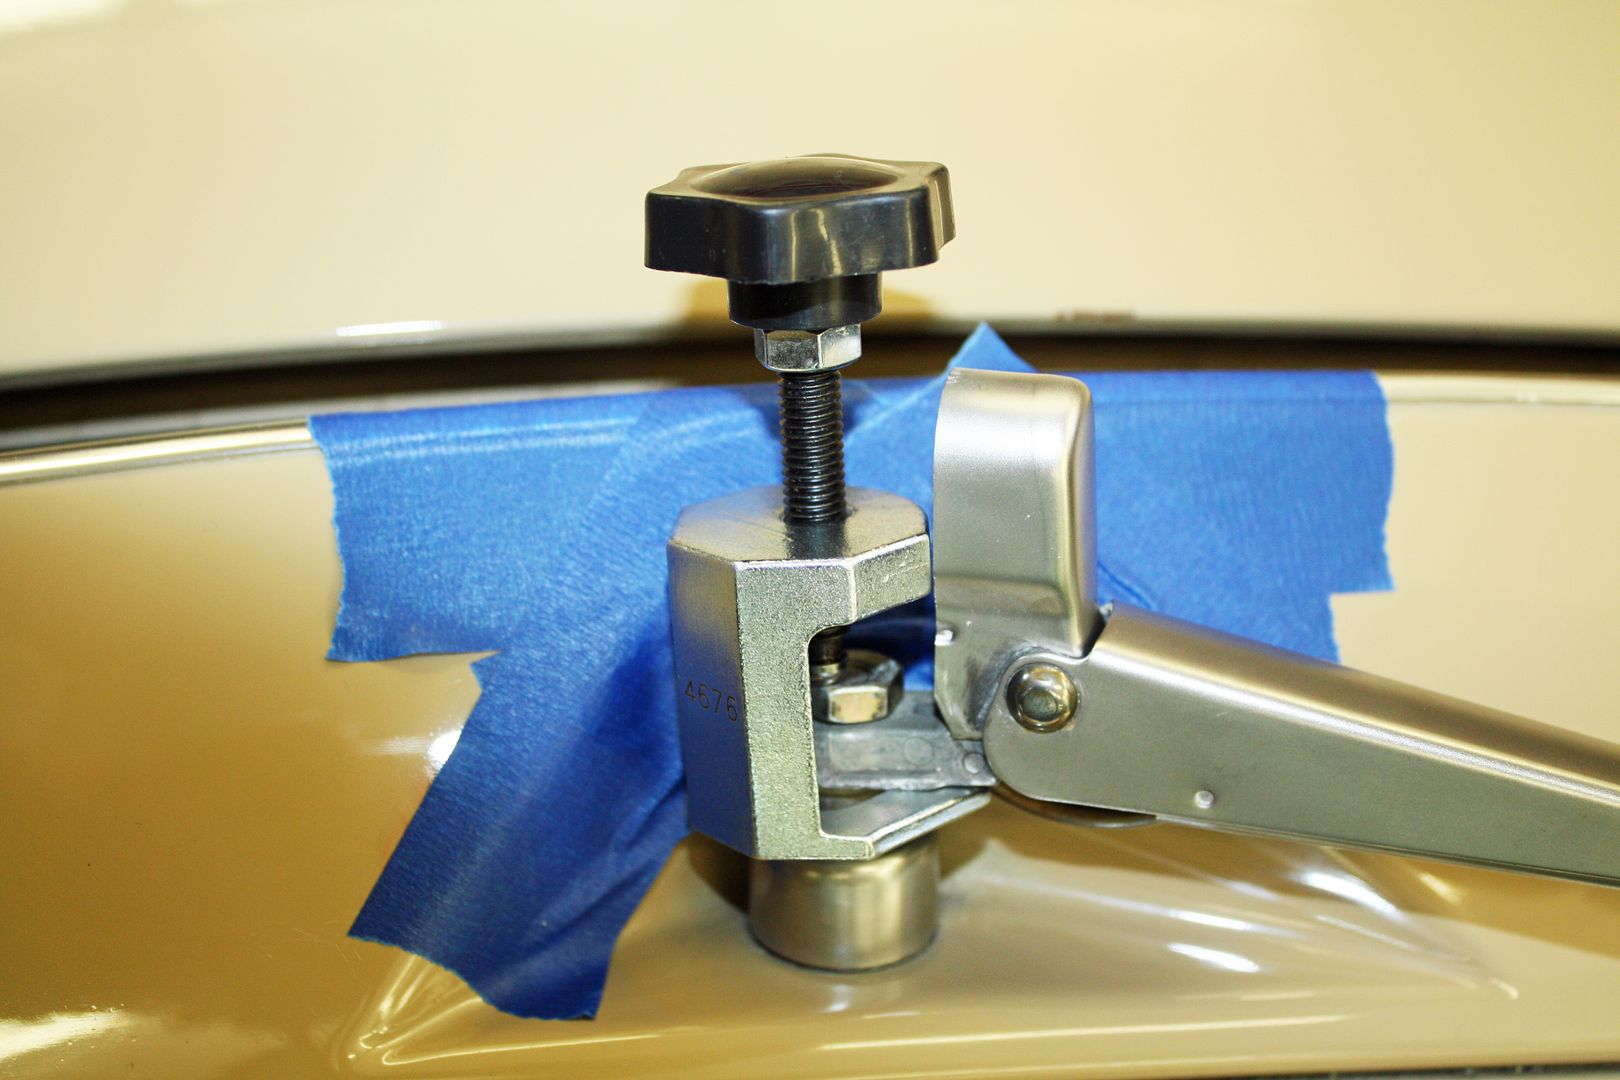
First I covered the area around the wipers with tape. After lifting up the cover, I removed the nut with a 13mm socket. To remove the wiper arm from the post I used a small puller. There wasn't room to line up the center post of the puller with the wiper post so I screwed the nut back on and used the puller on it . It did not take much pressure to remove the wiper arm but I could not manually do it.
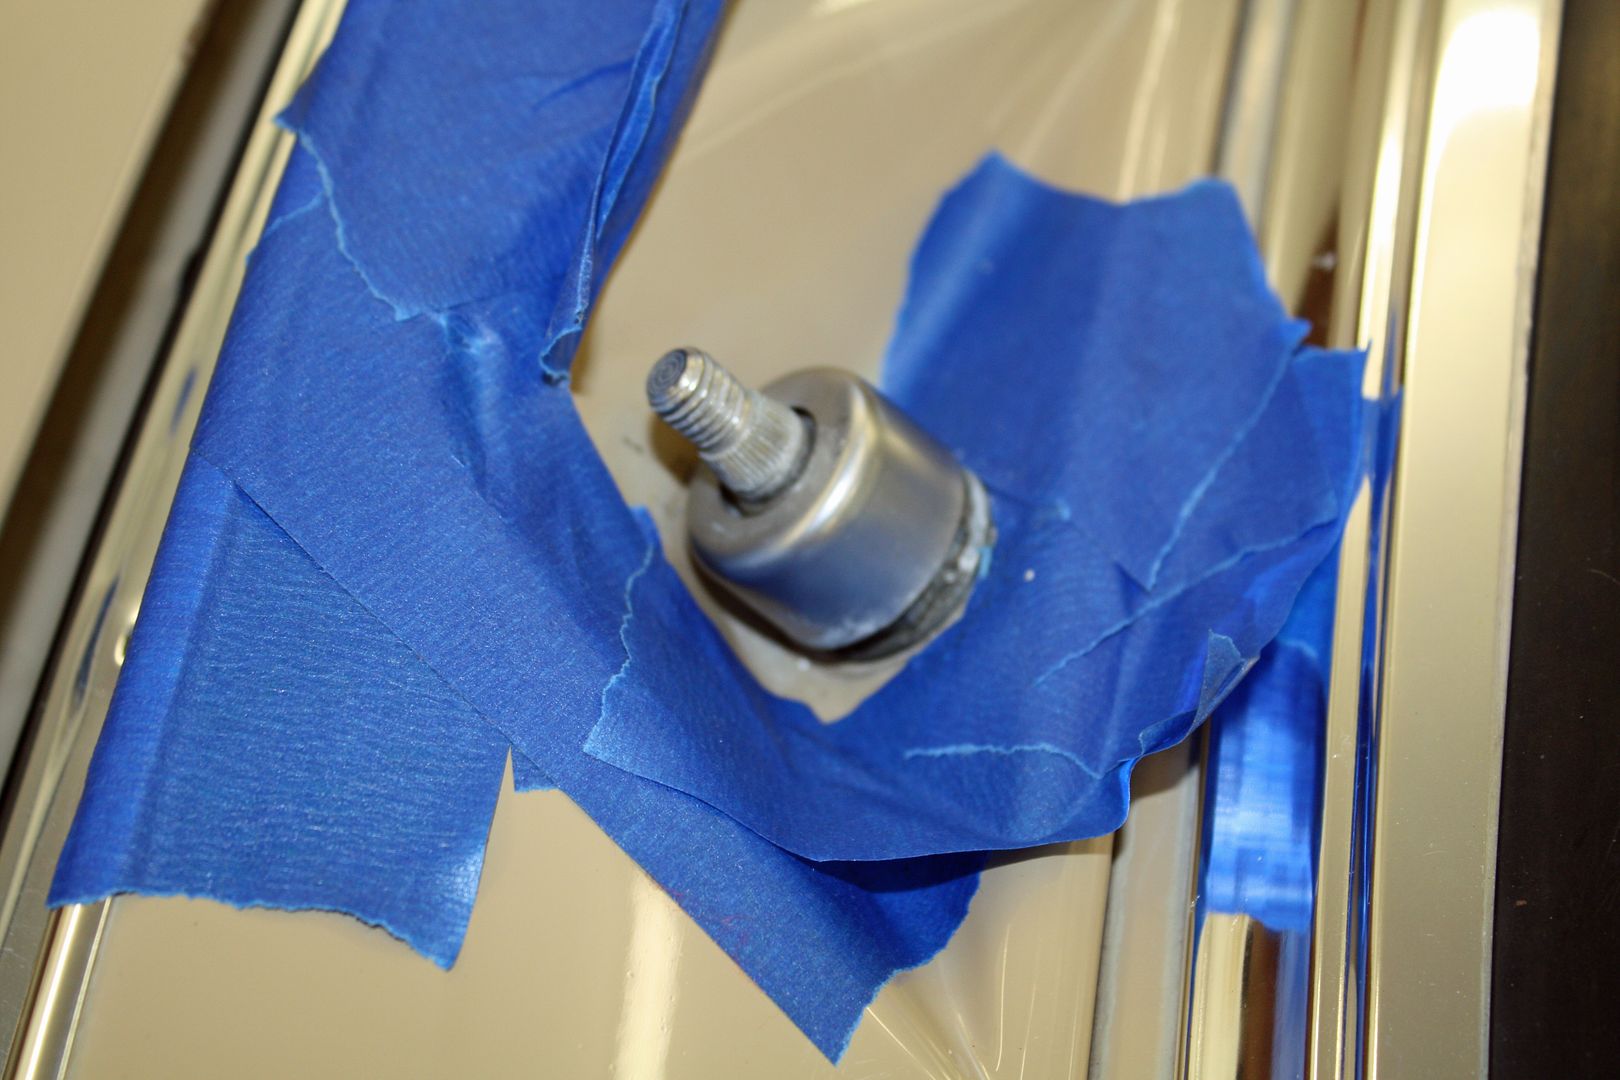
The silver colored plastic nut cover lifts off to reveal a 19mm nut. Once it is removed, along with the sheet metal screws, the cowl trim could be removed. Since I had them off, I removed the tape and used my polish around the wiper arm posts. This is a hard to reach area with the wipers in place.
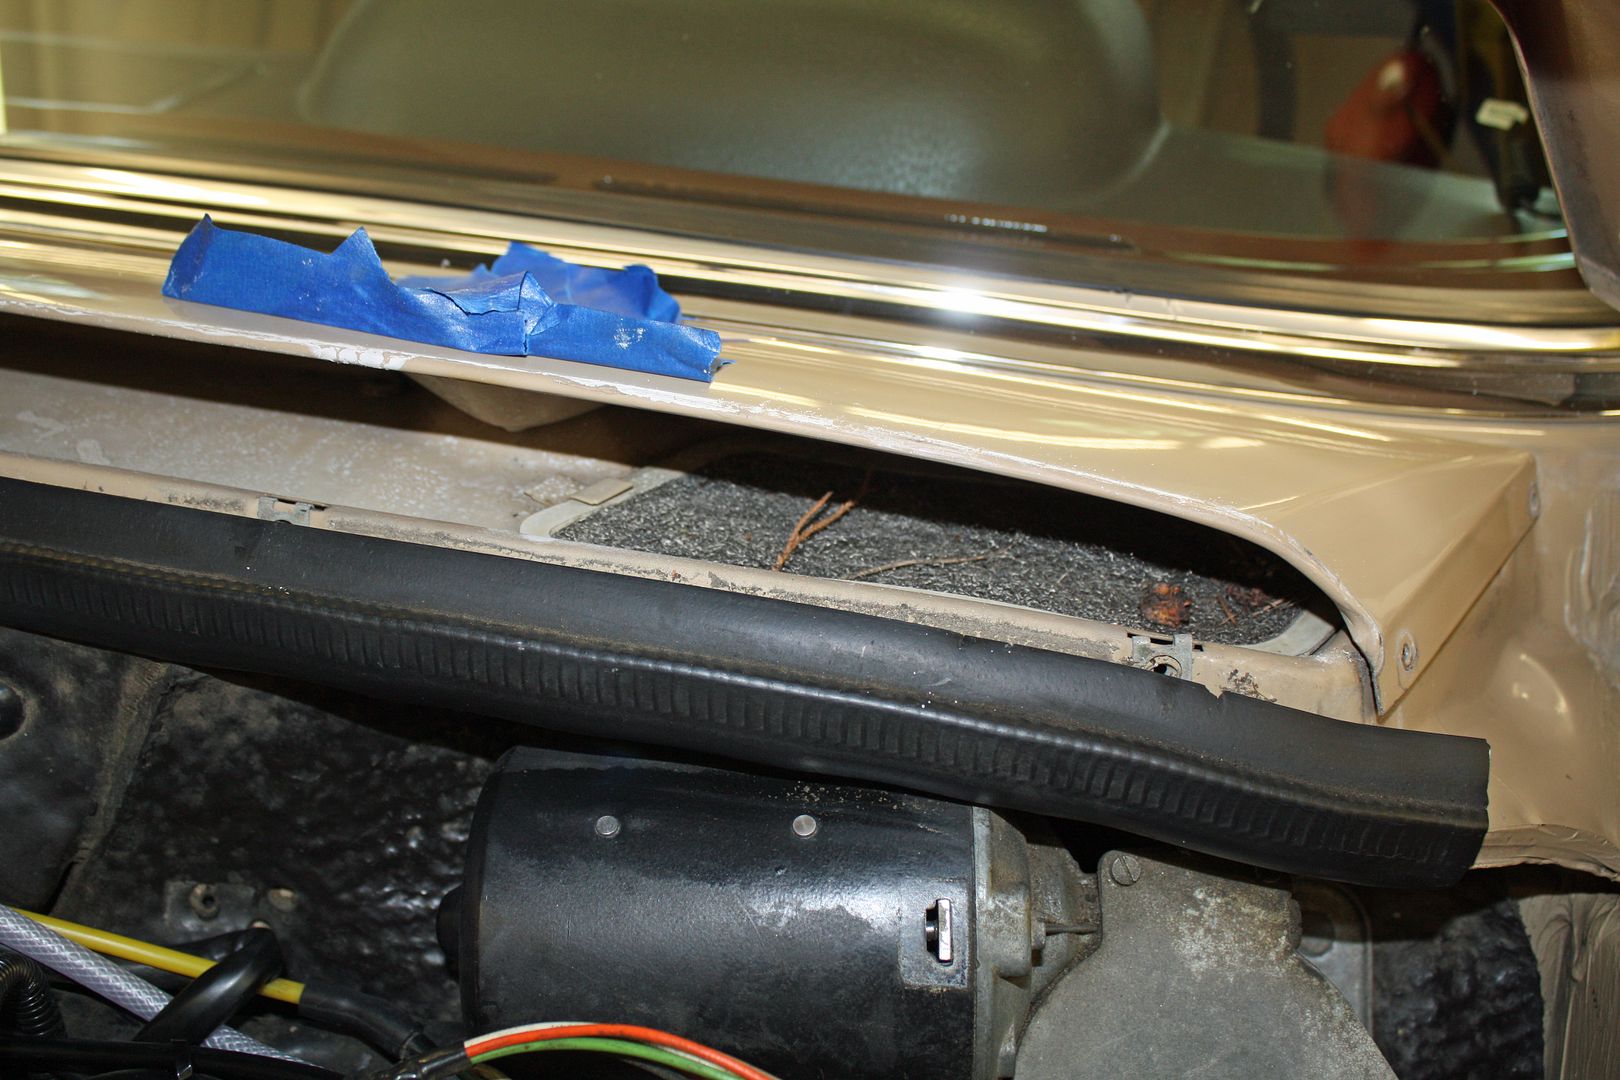
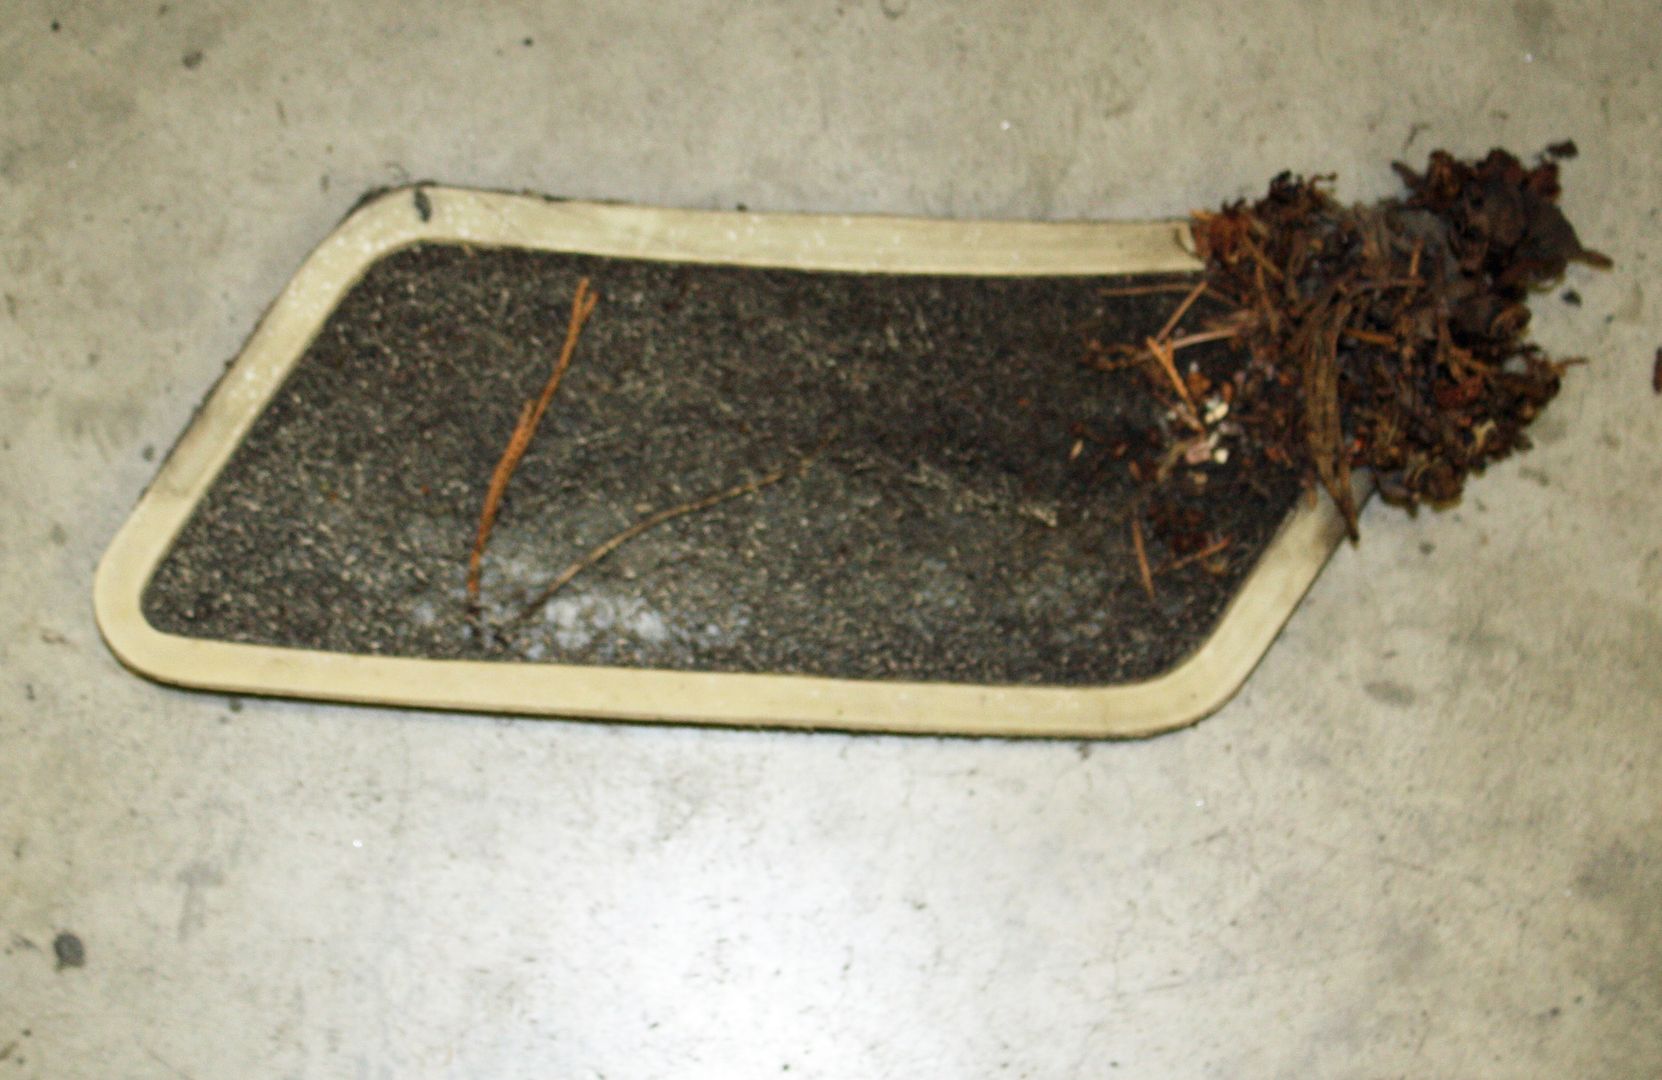
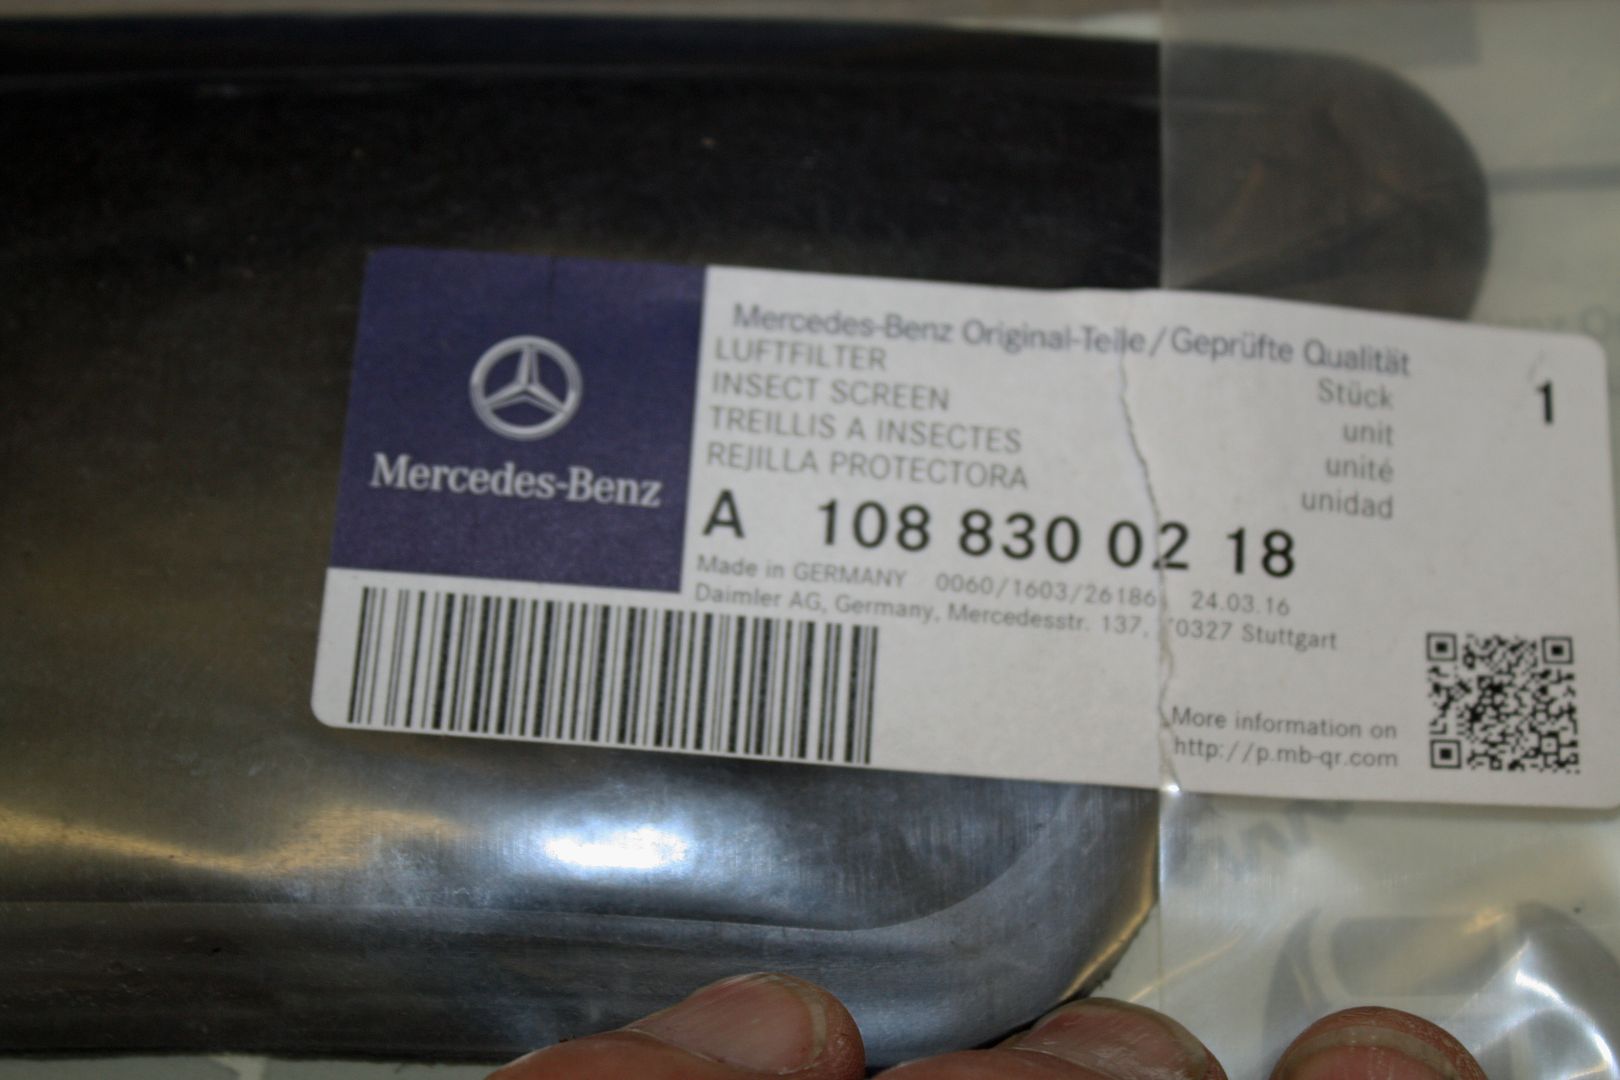
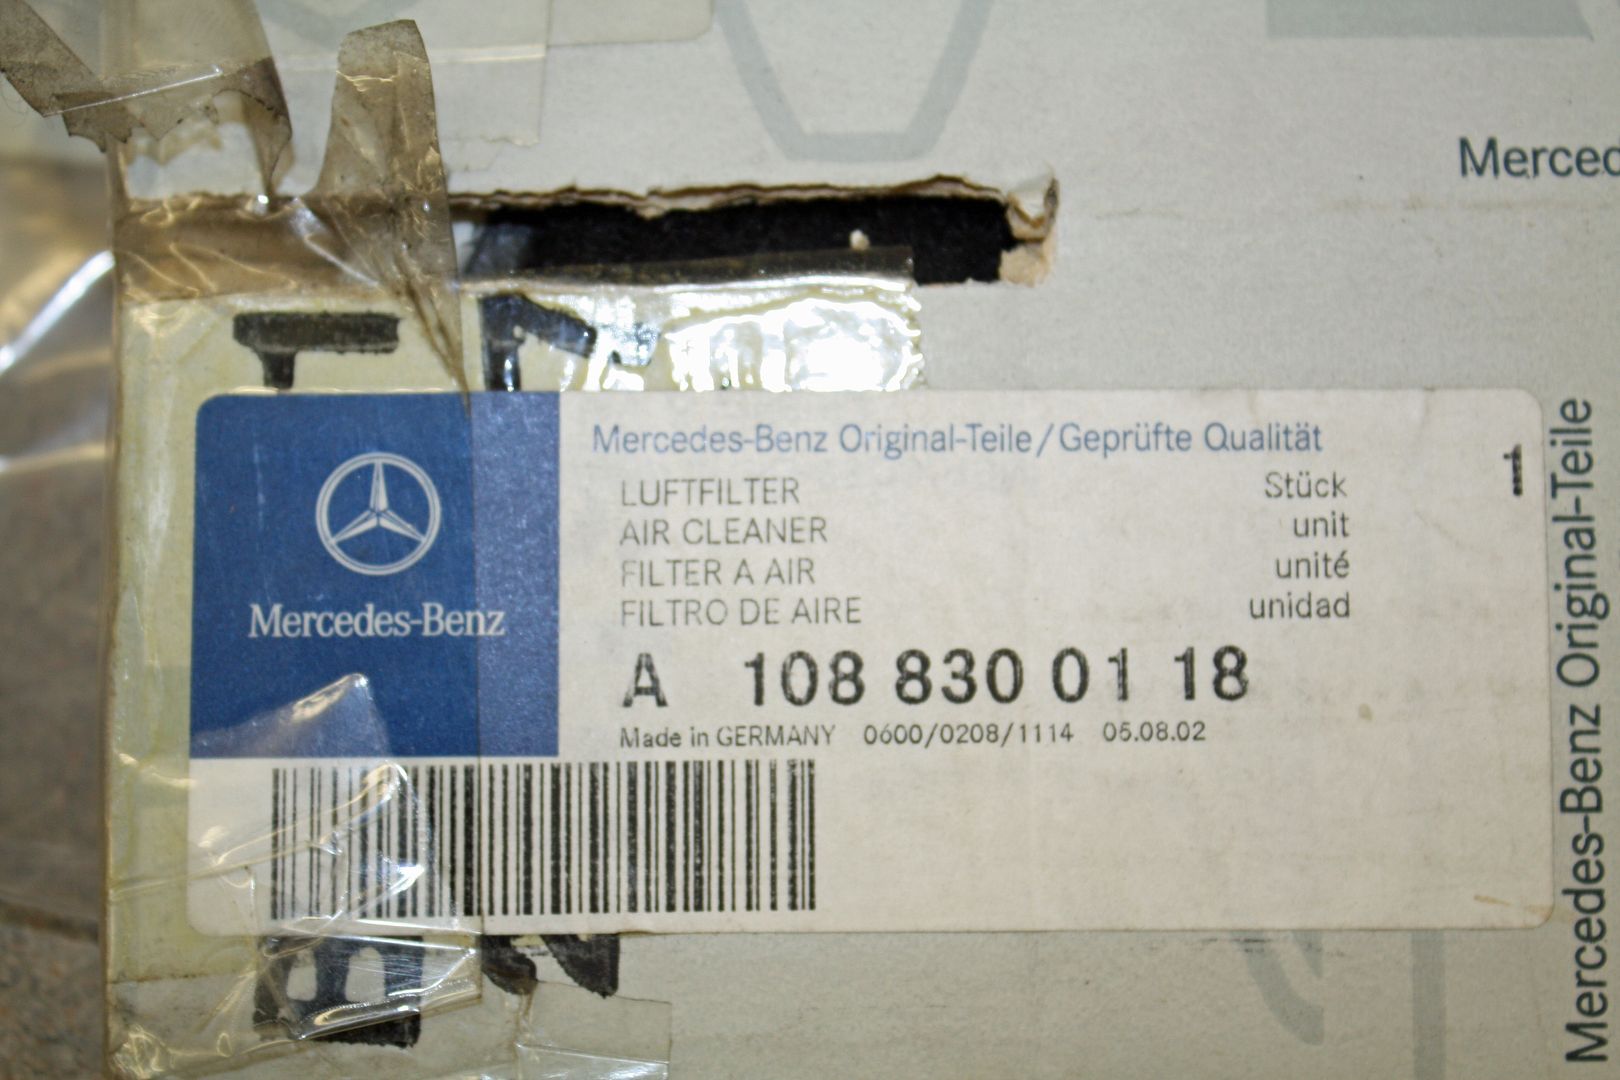
Next I removed the aluminum fresh air grill by removing the screws at its base. Once I had it off, I could access the windshield washer line. Unfortunately, the longest piece of hose I had was about six inches short. More is on the way.
I also took this opportunity to replace the cabin air filters. There is a large one on the right side and a small one on the left. They were very dirty and even had holes in them.

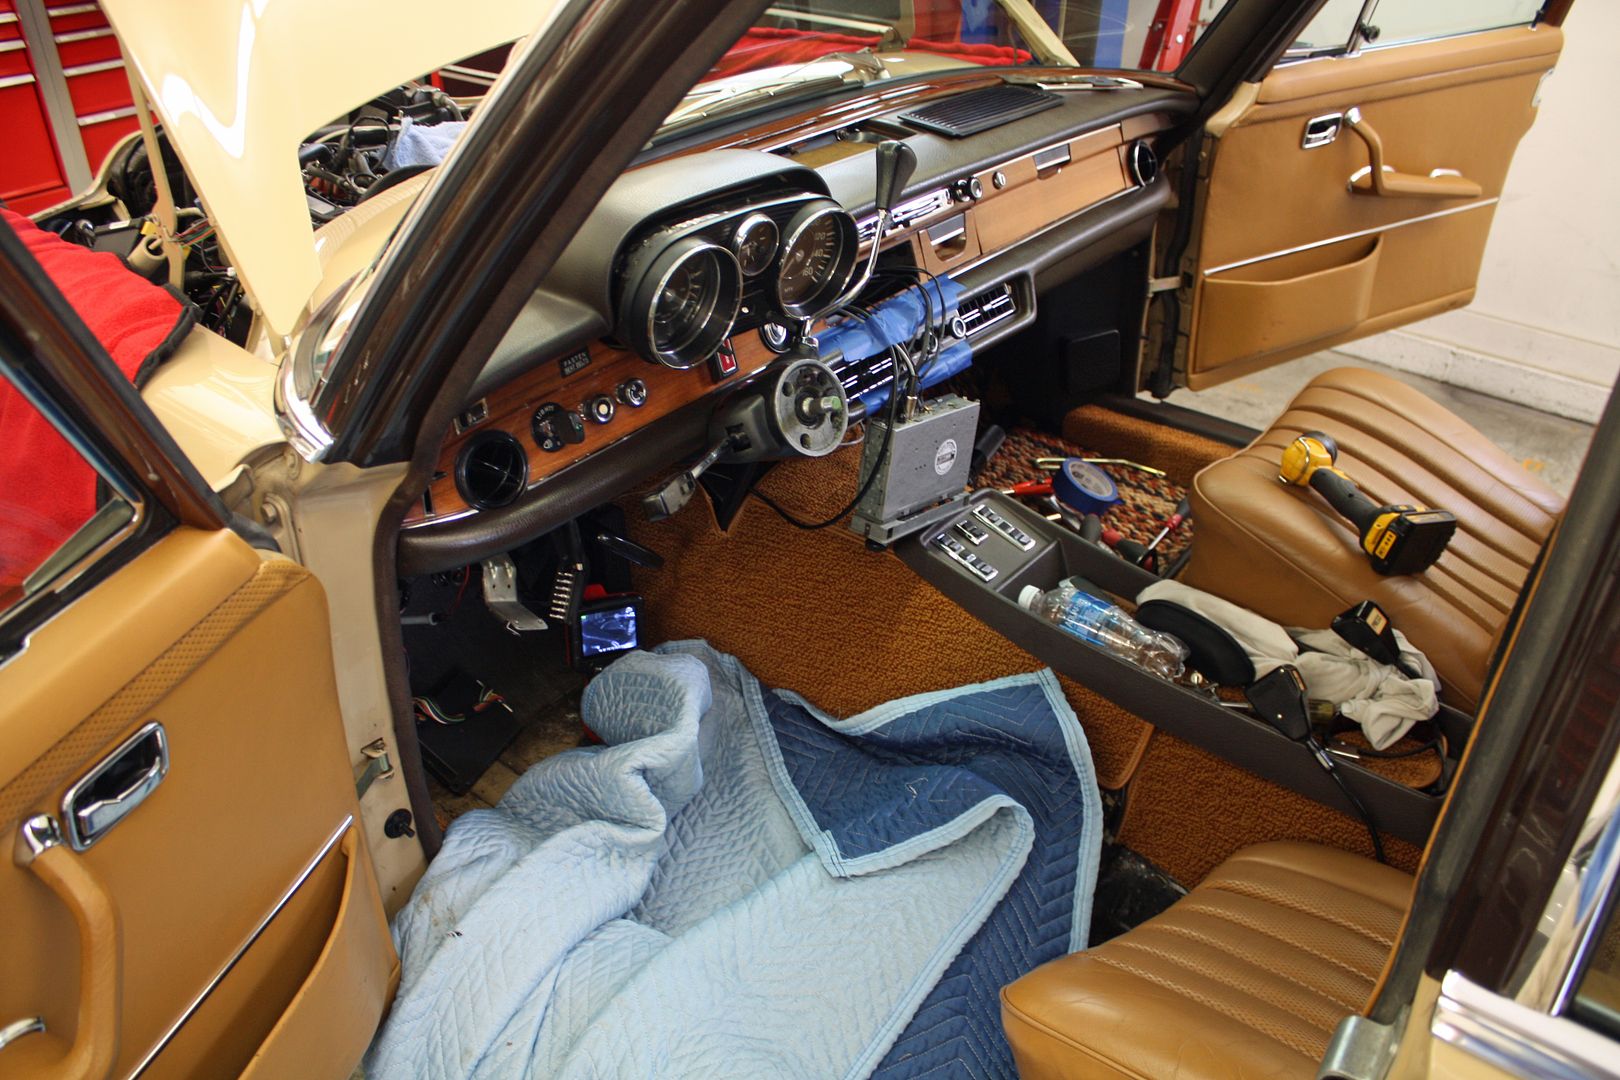
Since I am at a standstill on the cruise control install until the new switch arrives, I decided to install the rebuilt clock I had purchased before we left on our trip. Following instructions I found online for removing the instrument cluster, I unhooked the speedometer cable at the transmission to give it slack.
I had already removed the cardboard cover under the dash for the cruise control install. It was also advised to remove the bolts that fastened the parking brake bracket to give more room to get to the back of the instrument panel.
Since I have a column shift, I also needed to remove the bowden cable for the shifter. It is located on top of the shift column on the right side of the steering column.
I also removed the steering wheel which will make it easier for me to work under the dash for installing the cruise control. After working under there today, I think I will also remove the driver's seat.
The upshot of all this is that I could not reach the knurled nut that is supposedly holding in the instrument panel. When I reach up there I am encountering what feels like an air duct for the HVAC system. I cannot reach the back of the instrument panel. I even removed the radio and the sunroof switch but I still cannot access the rear of the instrument panel. It does pull out a about a 1/4". Tomorrow I will put the car back on the lift to see if there is a retainer for that speedometer cable between the transmission and where it enters the inside of the car. I am hoping that there is no knurled nut on he back of the instrument panel.
Any suggestions would be appreciated.
First I covered the area around the wipers with tape. After lifting up the cover, I removed the nut with a 13mm socket. To remove the wiper arm from the post I used a small puller. There wasn't room to line up the center post of the puller with the wiper post so I screwed the nut back on and used the puller on it . It did not take much pressure to remove the wiper arm but I could not manually do it.
The silver colored plastic nut cover lifts off to reveal a 19mm nut. Once it is removed, along with the sheet metal screws, the cowl trim could be removed. Since I had them off, I removed the tape and used my polish around the wiper arm posts. This is a hard to reach area with the wipers in place.


Next I removed the aluminum fresh air grill by removing the screws at its base. Once I had it off, I could access the windshield washer line. Unfortunately, the longest piece of hose I had was about six inches short. More is on the way.

I also took this opportunity to replace the cabin air filters. There is a large one on the right side and a small one on the left. They were very dirty and even had holes in them.


Since I am at a standstill on the cruise control install until the new switch arrives, I decided to install the rebuilt clock I had purchased before we left on our trip. Following instructions I found online for removing the instrument cluster, I unhooked the speedometer cable at the transmission to give it slack.


I had already removed the cardboard cover under the dash for the cruise control install. It was also advised to remove the bolts that fastened the parking brake bracket to give more room to get to the back of the instrument panel.

Since I have a column shift, I also needed to remove the bowden cable for the shifter. It is located on top of the shift column on the right side of the steering column.


I also removed the steering wheel which will make it easier for me to work under the dash for installing the cruise control. After working under there today, I think I will also remove the driver's seat.
The upshot of all this is that I could not reach the knurled nut that is supposedly holding in the instrument panel. When I reach up there I am encountering what feels like an air duct for the HVAC system. I cannot reach the back of the instrument panel. I even removed the radio and the sunroof switch but I still cannot access the rear of the instrument panel. It does pull out a about a 1/4". Tomorrow I will put the car back on the lift to see if there is a retainer for that speedometer cable between the transmission and where it enters the inside of the car. I am hoping that there is no knurled nut on he back of the instrument panel.
Any suggestions would be appreciated.
08-10-2017, 04:44 PM
#82
Member
Thread Starter
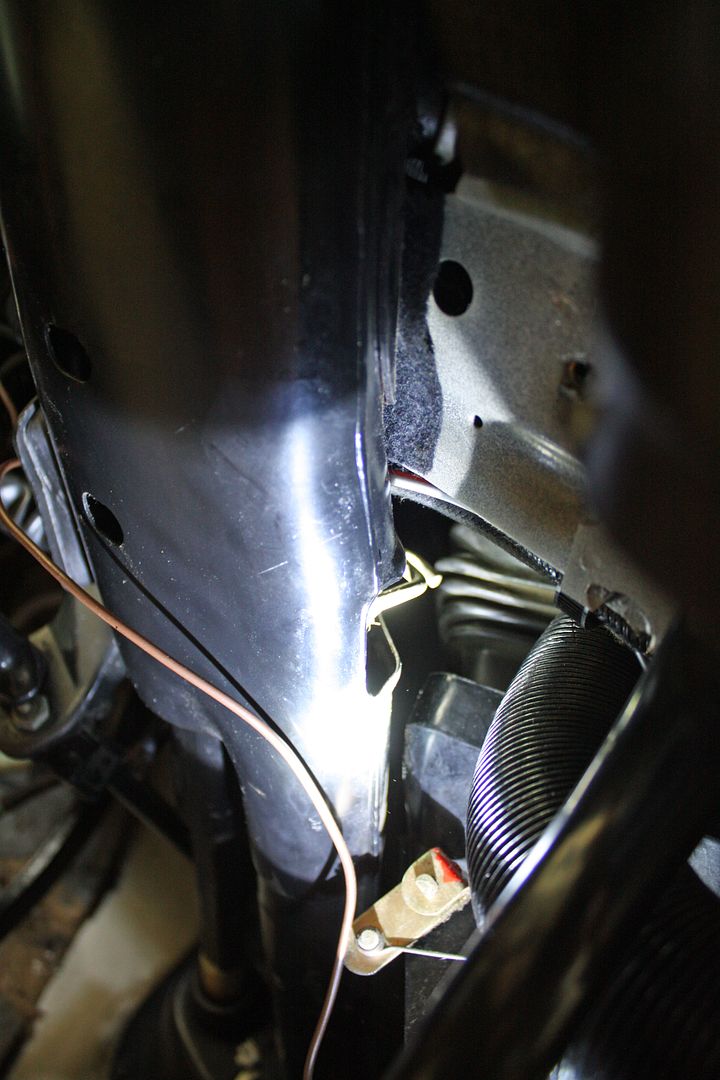
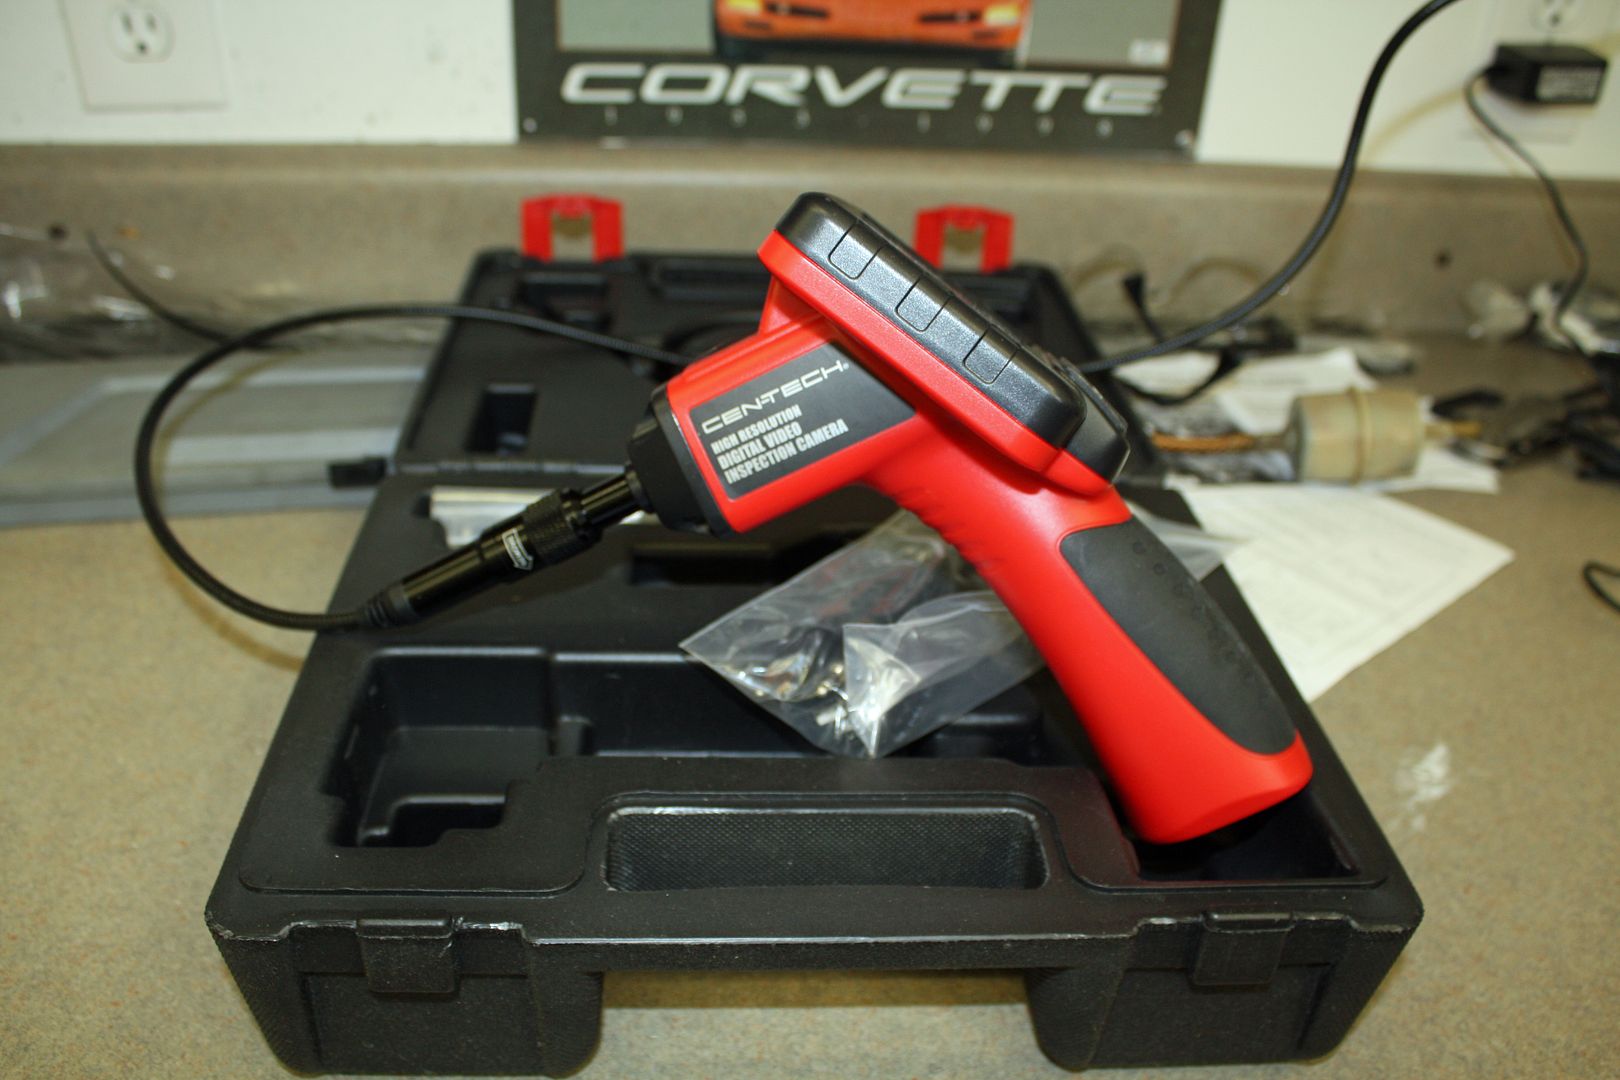
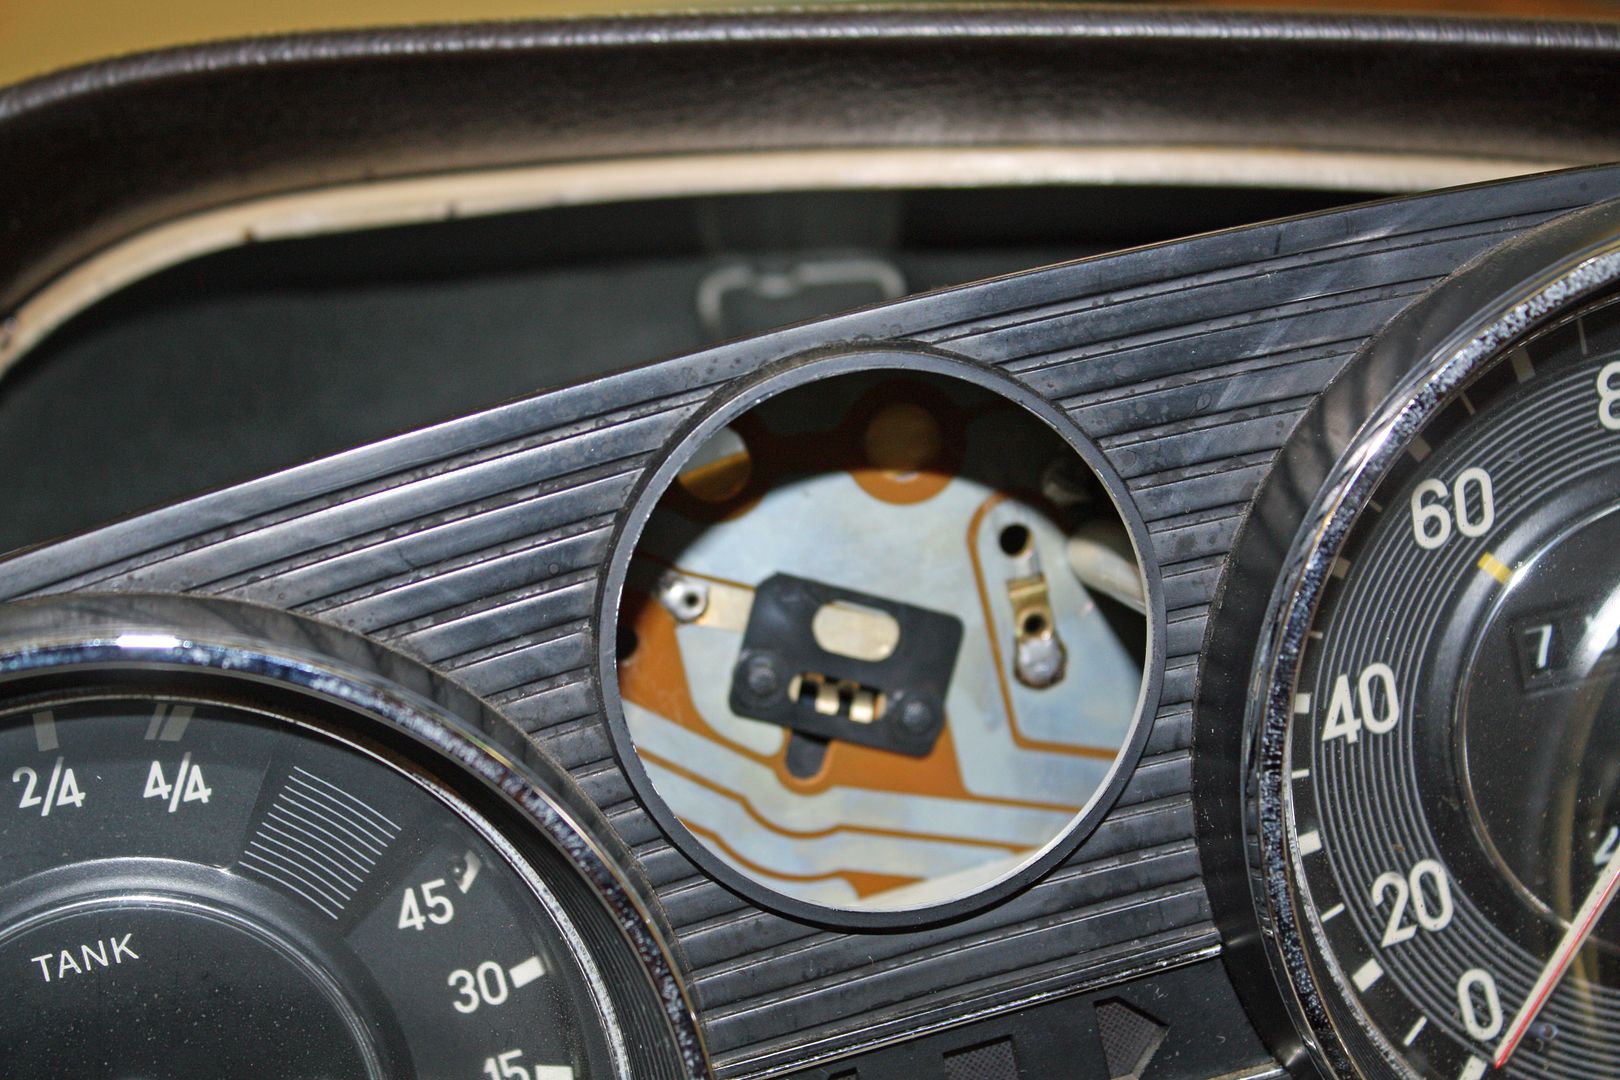
After spending the morning doing lawn work, I broke out the camera to see what I could see. I bought this camera at Harbor Freight and it works great. It has a light at the camera end of the cable which really helped in finding the knob. It can also be hooked up to a computer and you can download to a Mini SD card.
The first thing I did was to stick the camera end through the radio hole. By looking in through the hole, the light soon lit up the knob. It was there.

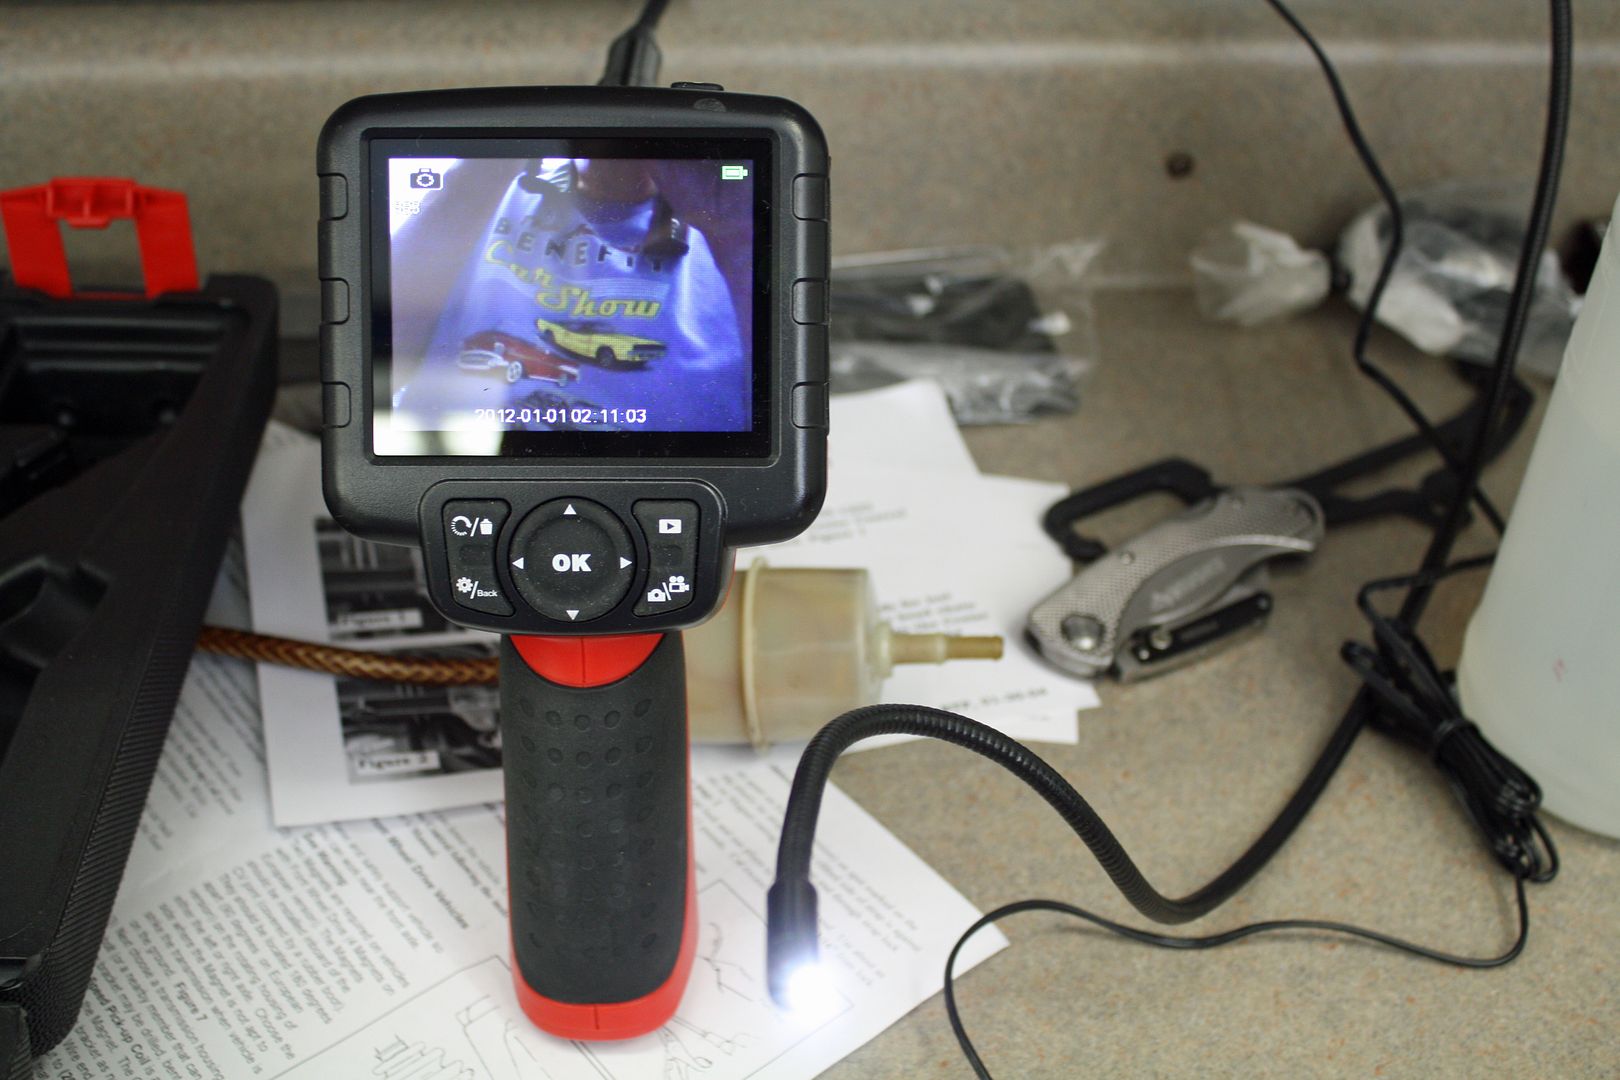
Now that I had an idea of where the knob was, I placed the monitor in the driver's footwell so I could see it while I was trying to feel for the knob. I taped the camera cable so it would not move if I bumped the camera.
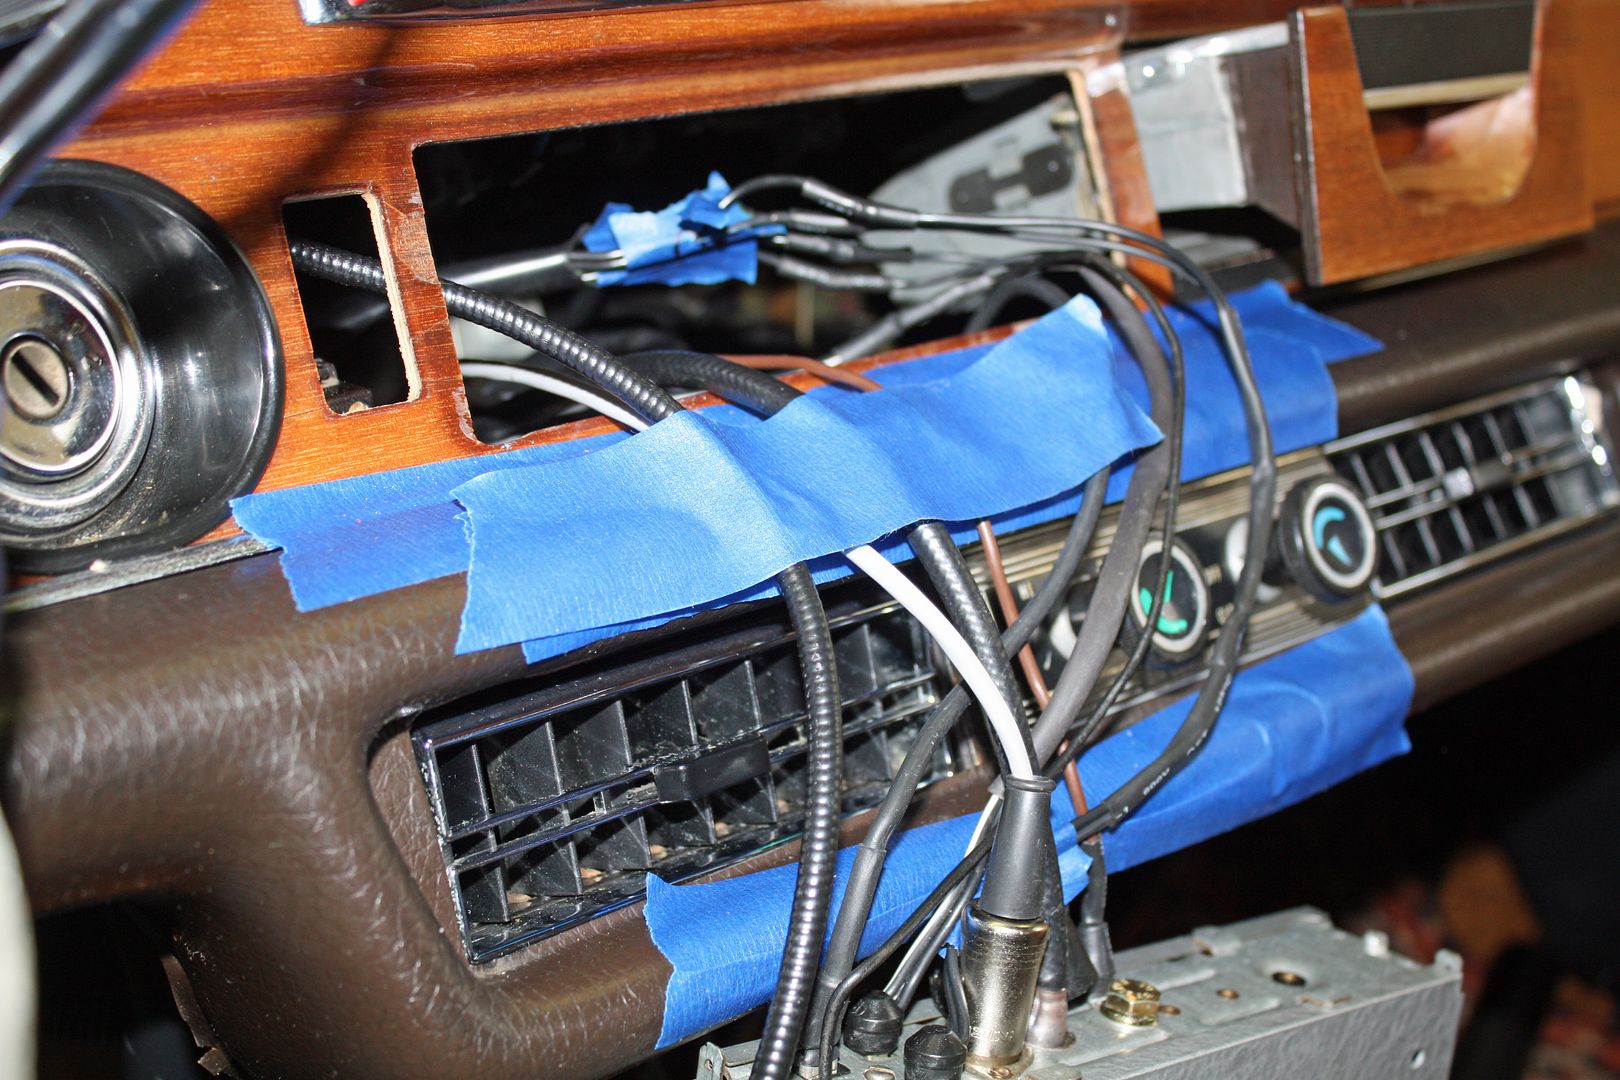
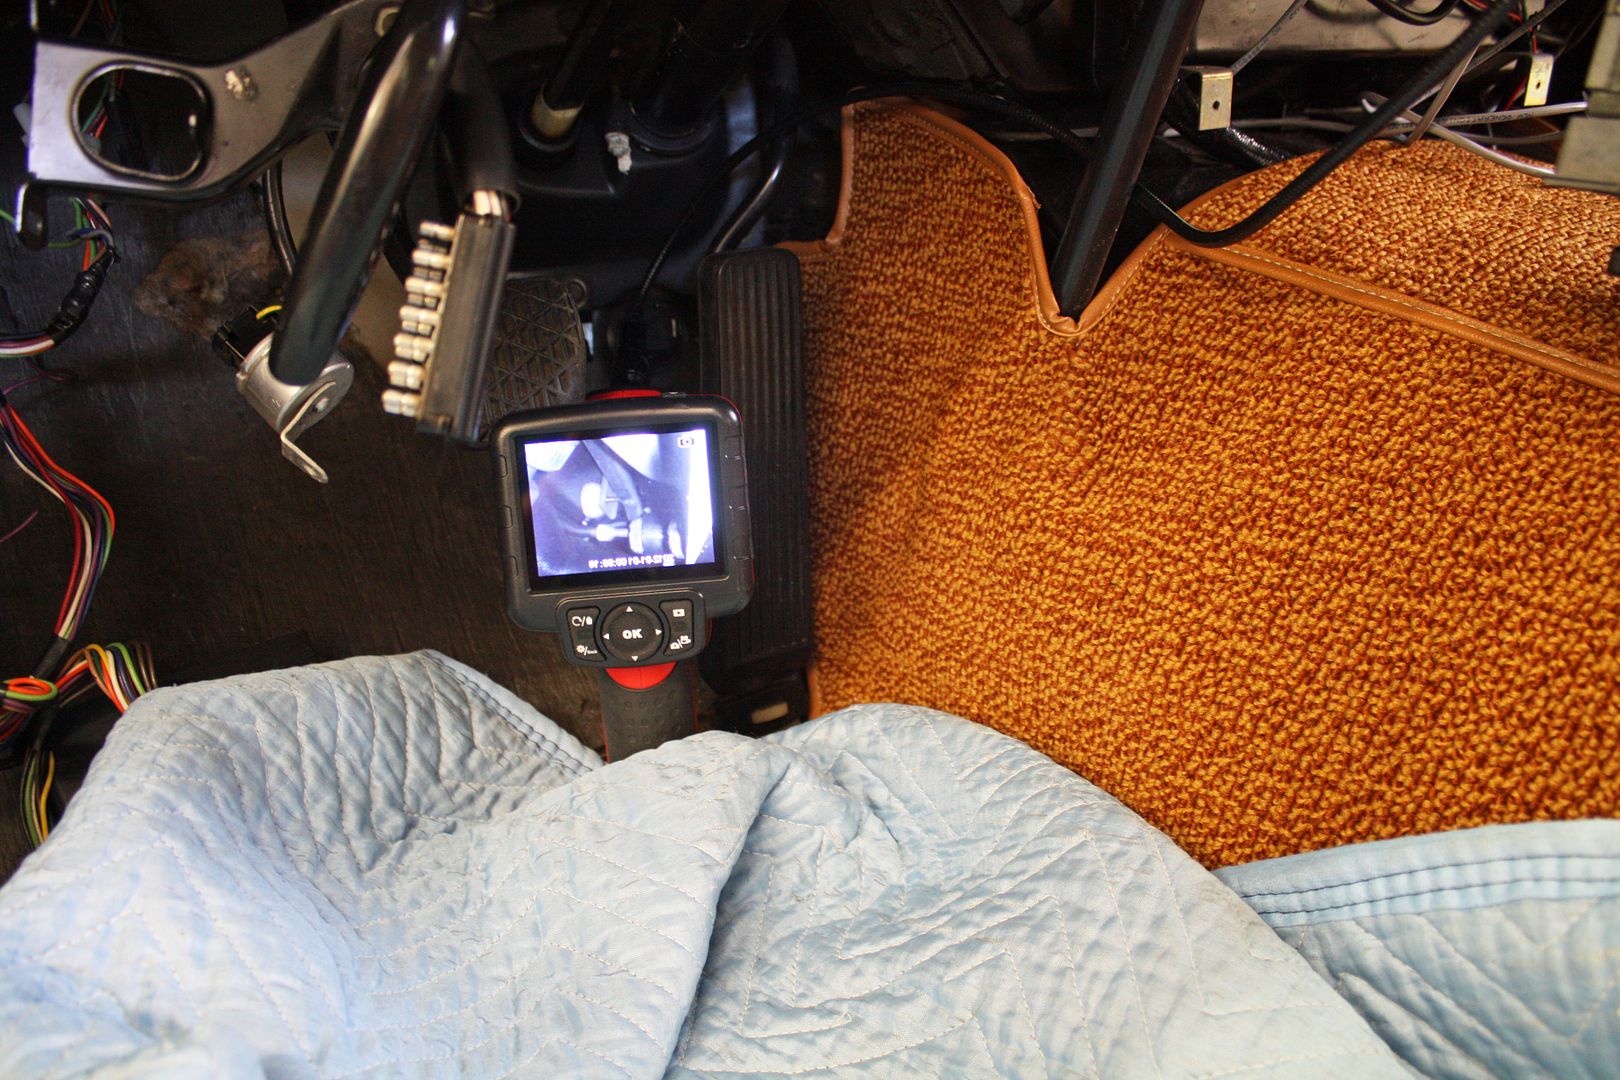
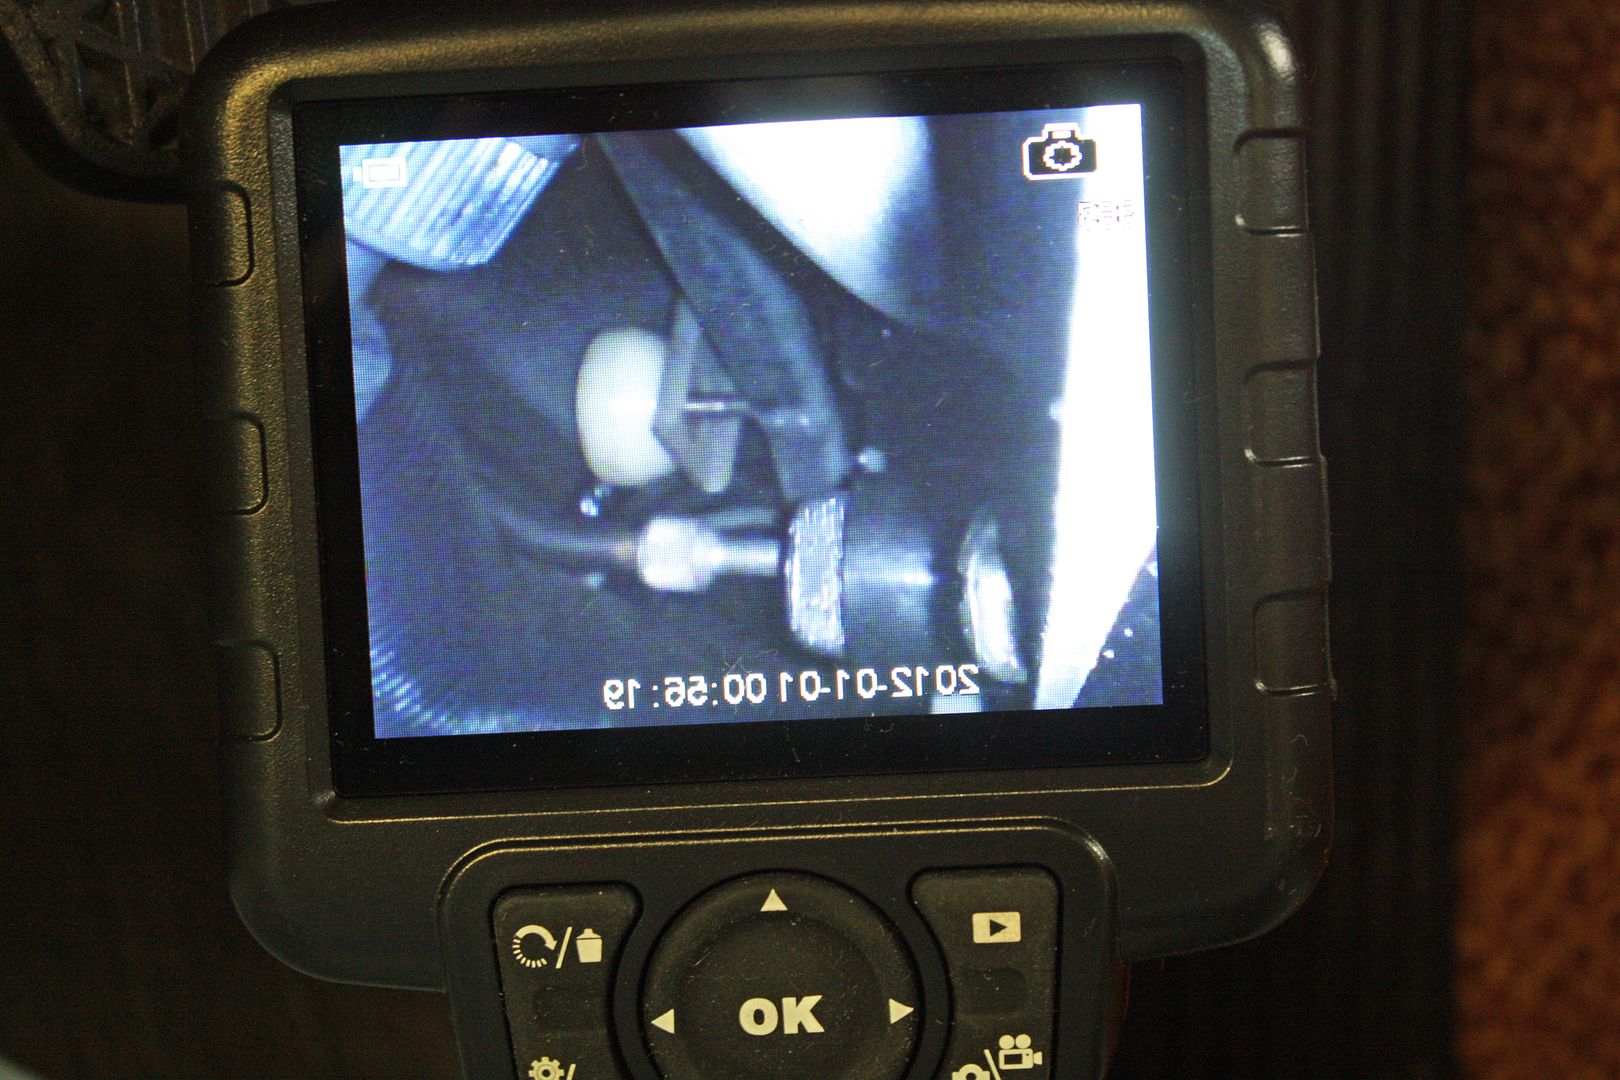
I tried shining a light up there to see if I could find a place where the knob would be accessible. After much fiddling, I finally stuck my hand up in a narrower hole. After some wiggling, I could see my fingers on the monitor. Before too long, I got one finger on the knob. Fortunately, it was not screwed on very tight. After some more contortions, I was able to spin it off. Victory was mine!! The knob will be placed in the glove box.
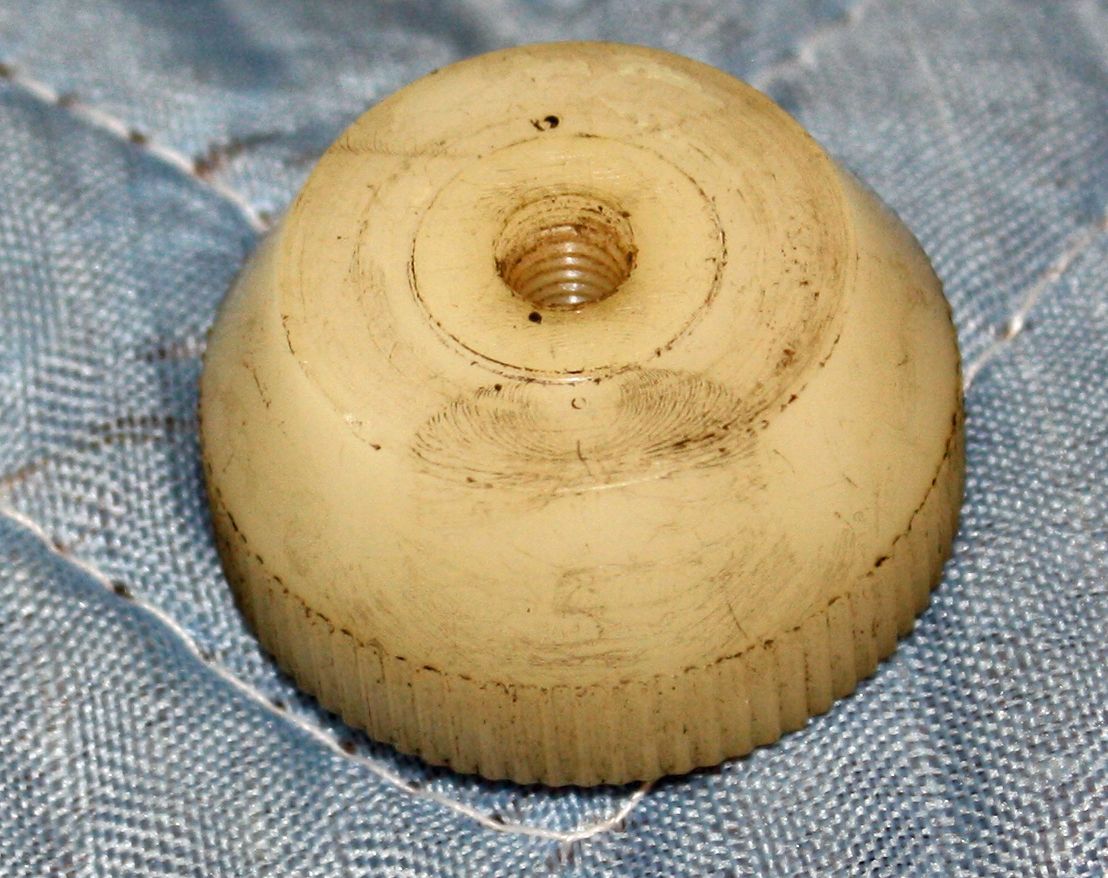
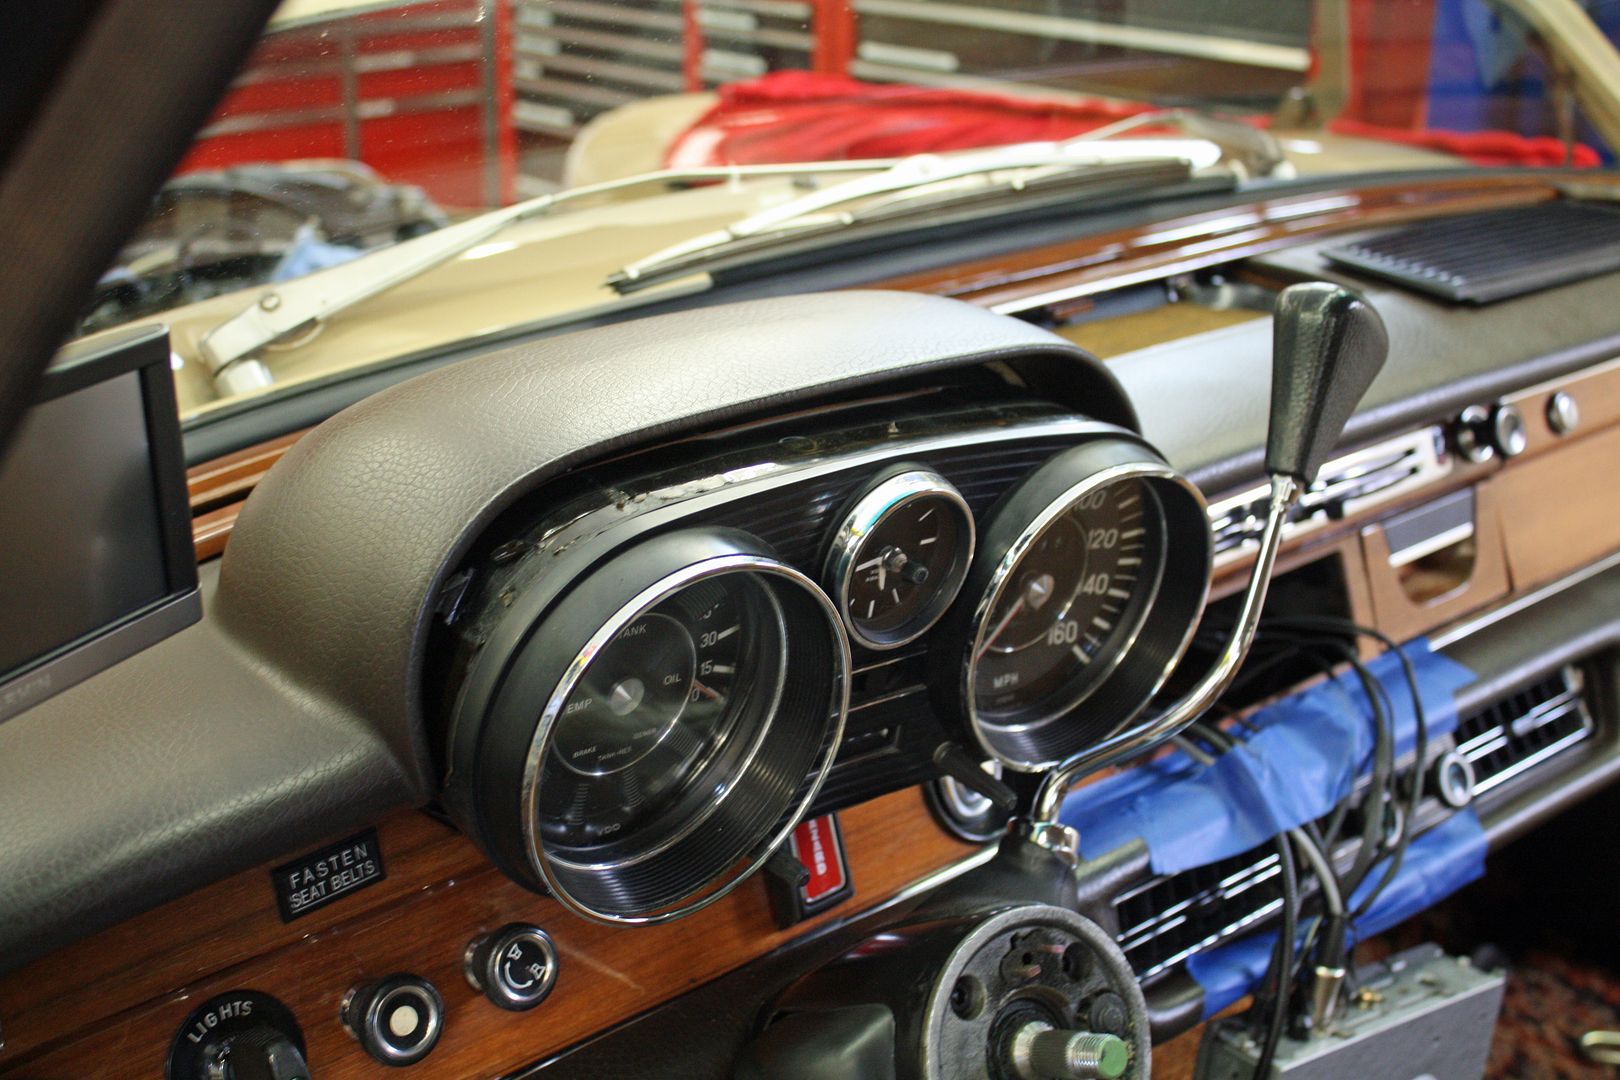
Now I could pull out the cluster far enough to remove the nuts that retained the clock.
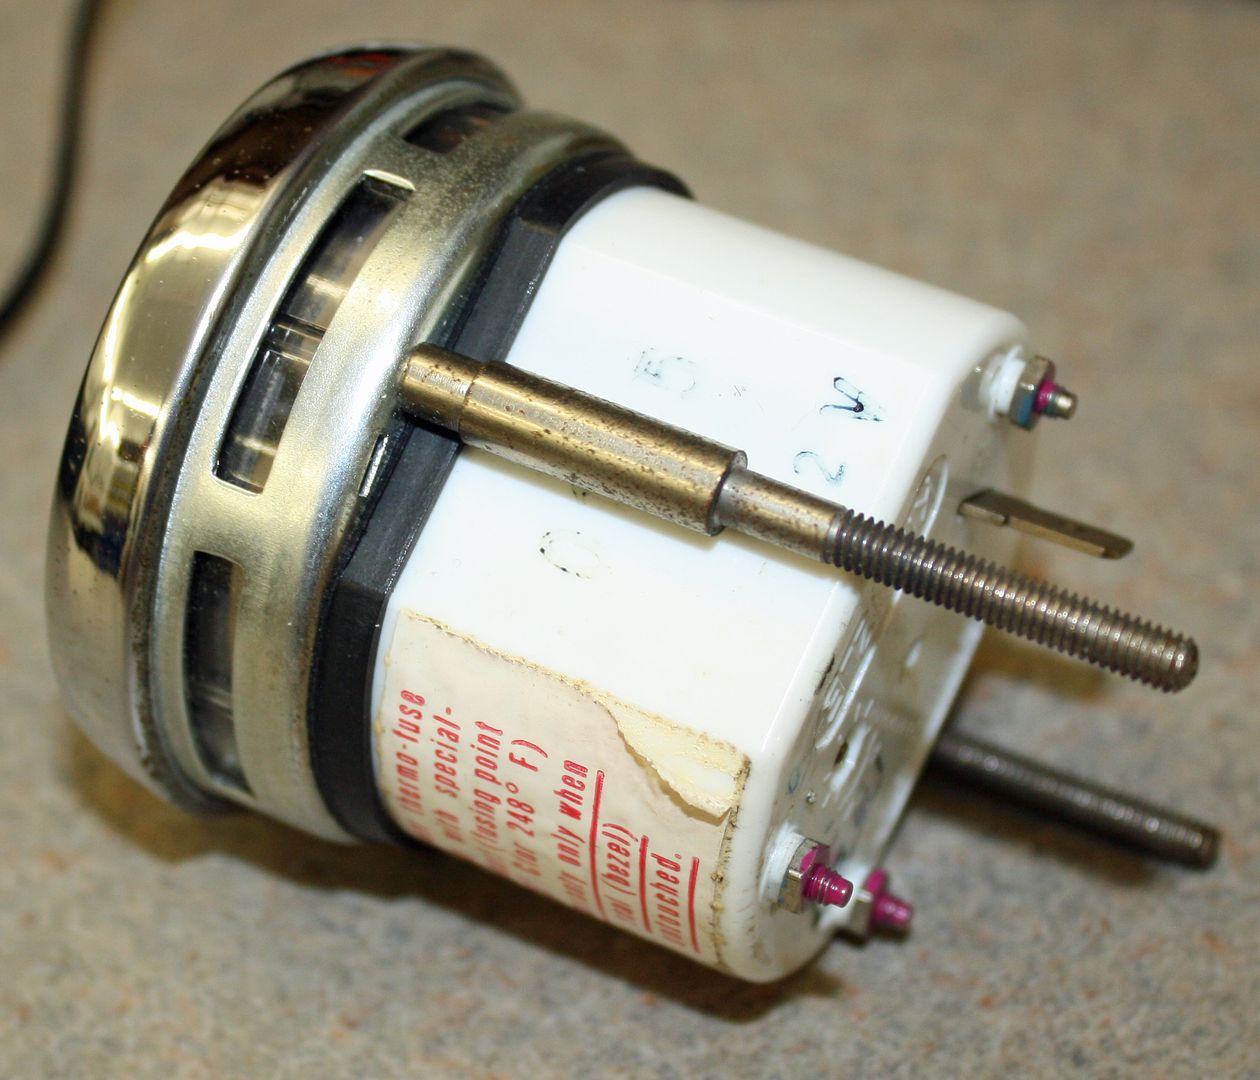
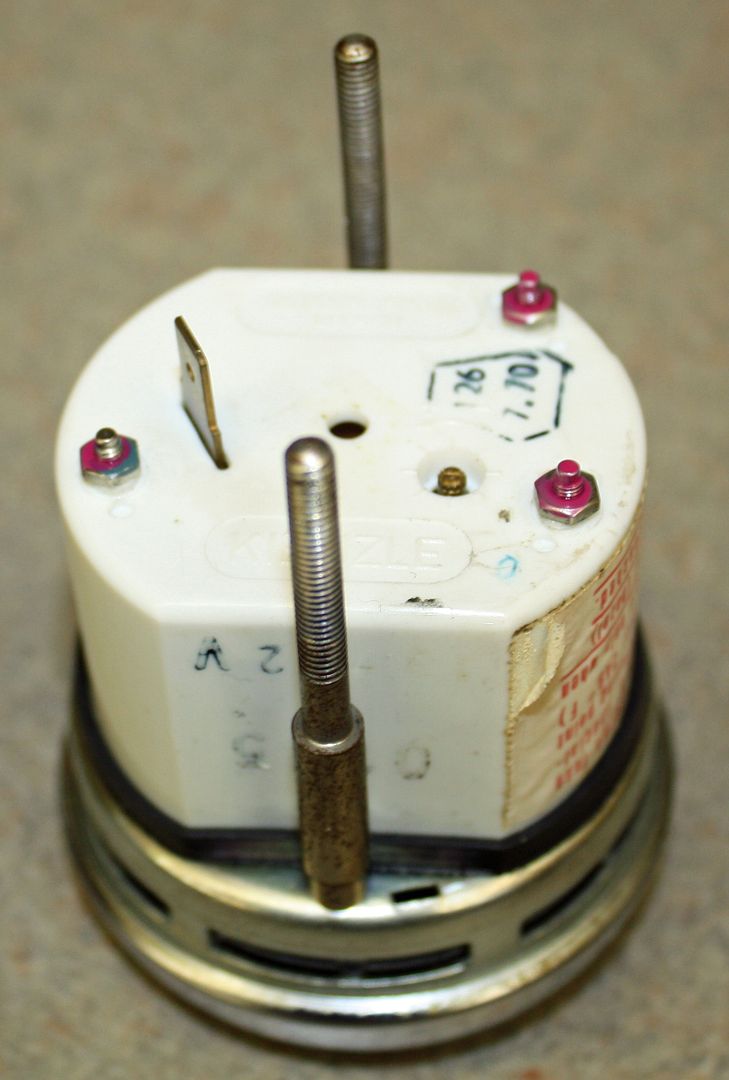
With the repaired clock installed, I hooked up the battery, set the time and then waited to see if the hands moved. They did. Now all I have to do is put everything back together.


The first thing I did was to stick the camera end through the radio hole. By looking in through the hole, the light soon lit up the knob. It was there.

Now that I had an idea of where the knob was, I placed the monitor in the driver's footwell so I could see it while I was trying to feel for the knob. I taped the camera cable so it would not move if I bumped the camera.


I tried shining a light up there to see if I could find a place where the knob would be accessible. After much fiddling, I finally stuck my hand up in a narrower hole. After some wiggling, I could see my fingers on the monitor. Before too long, I got one finger on the knob. Fortunately, it was not screwed on very tight. After some more contortions, I was able to spin it off. Victory was mine!! The knob will be placed in the glove box.


Now I could pull out the cluster far enough to remove the nuts that retained the clock.


With the repaired clock installed, I hooked up the battery, set the time and then waited to see if the hands moved. They did. Now all I have to do is put everything back together.

Last edited by jerhofer; 08-10-2017 at 04:50 PM.
08-16-2017, 05:53 PM
#83
Member
Thread Starter
After five days of doing projects on the house, after mowing the lawn this morning, I finally got back to the car today. I finished up the windhshield washer hose installation. I had to remove the right cabin filter to give access to the hose in the cowl area. To get the new lines to fit over the nipples, I had to use a heat gun. Once warmed up, the hose slipped on.
The other job I completed today was installing the new bushings on the throttle arm. Now when I push down on the gas pedal, the throttle body opens all the way. I popped off all of the rod ends and lubricated them as well.
Now I can work on completing the cruise control installation.


The other job I completed today was installing the new bushings on the throttle arm. Now when I push down on the gas pedal, the throttle body opens all the way. I popped off all of the rod ends and lubricated them as well.


Now I can work on completing the cruise control installation.
08-19-2017, 02:34 PM
#84
Member
Thread Starter
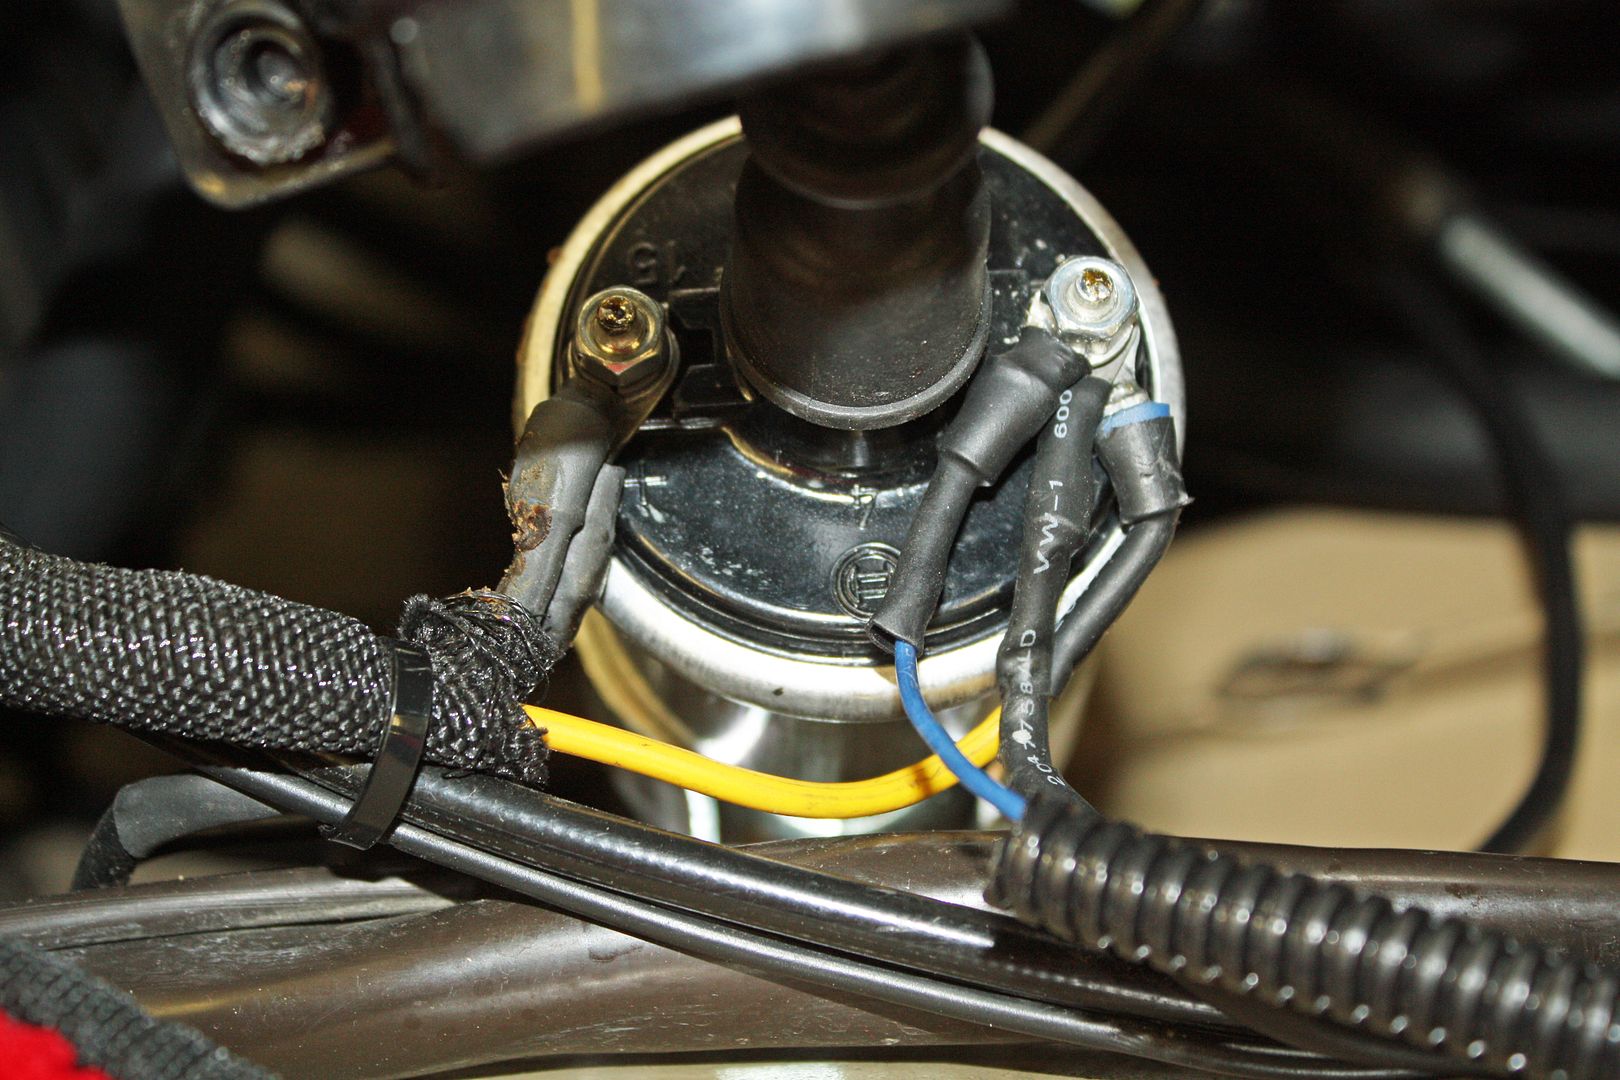
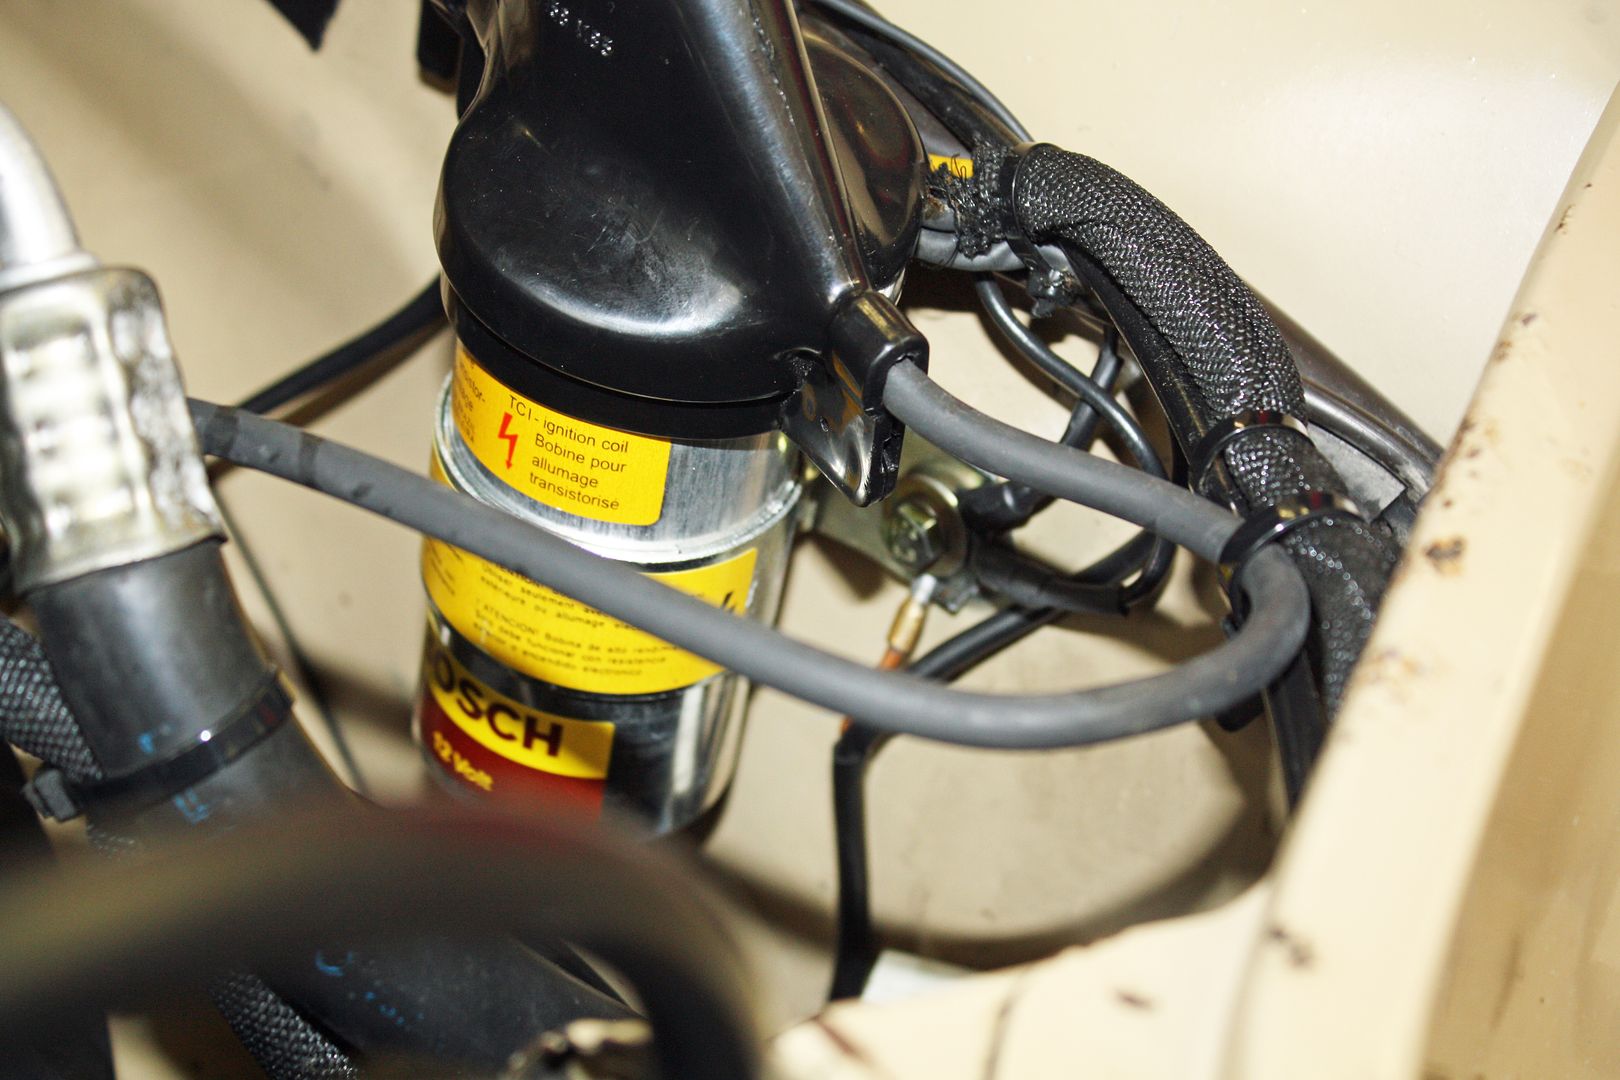
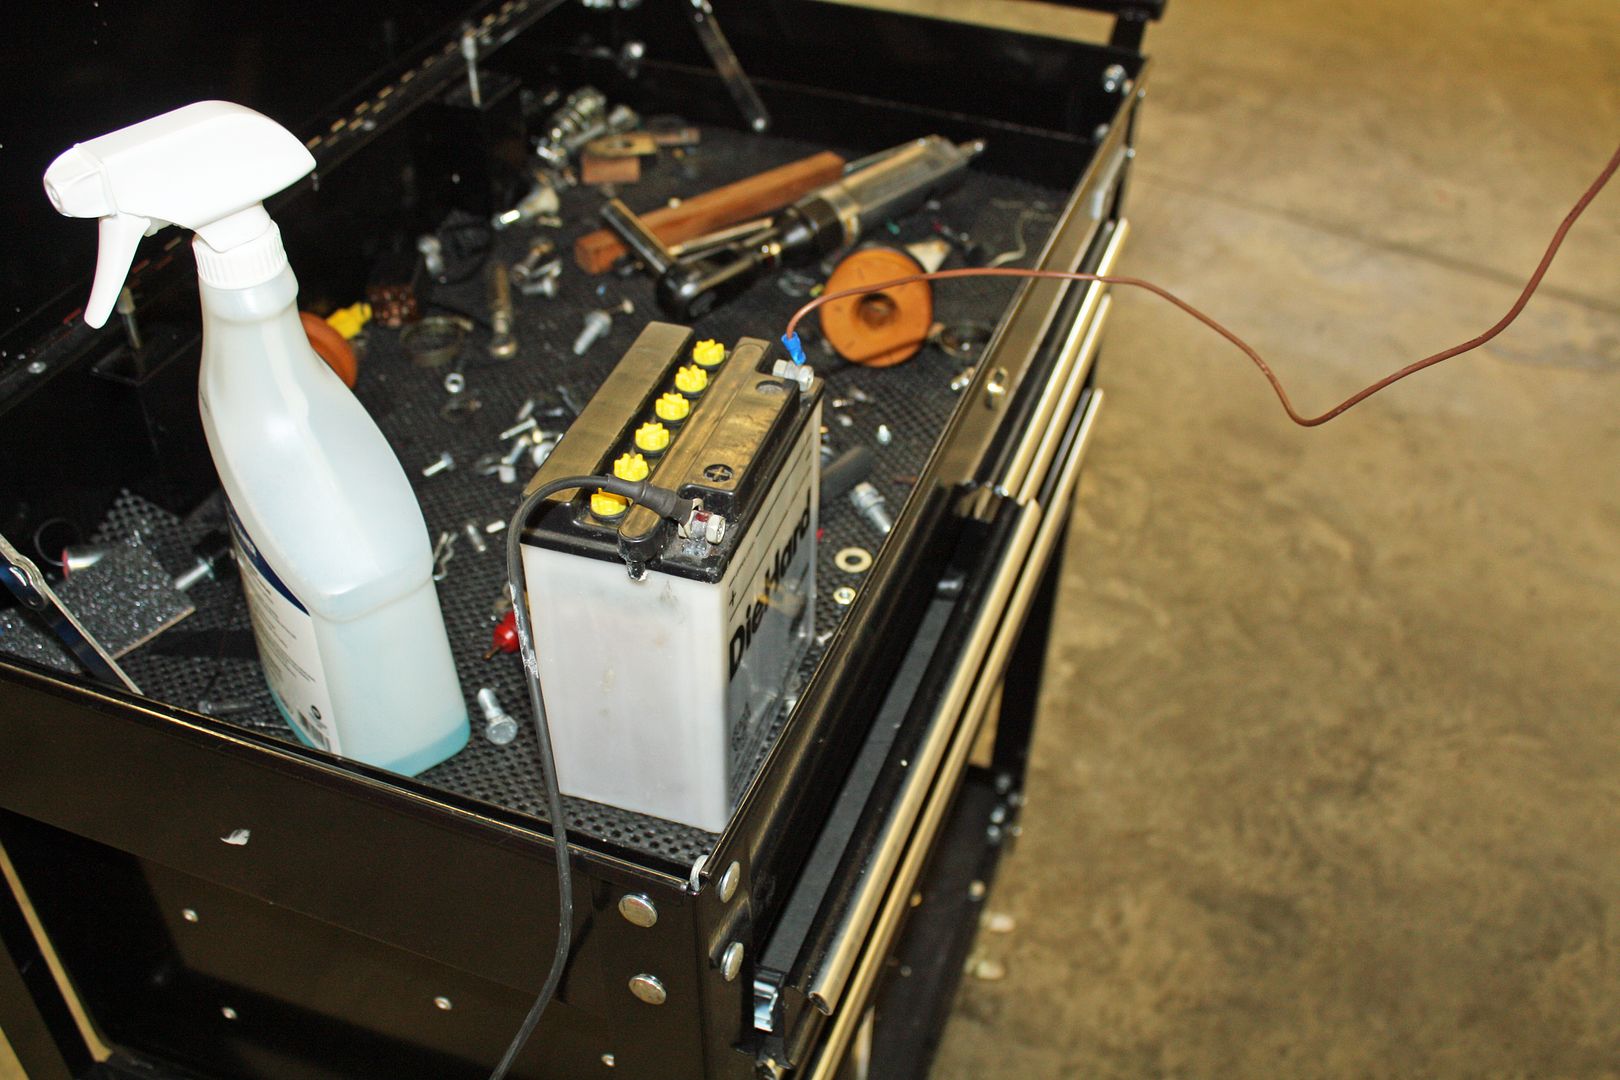
On Thursday I worked on completing the under hood work on installing the cruise control. The blue wire needed to be hooked up to the tach. The reason for this wire is that the cruise control will sense any sudden change in the engine RPM, such as accidentally engaging neutral, and quickly shut off the cruise control. Since I don't have a tach, I knew that I should be able to pick up this signal at the coil. I wasn't sure which side of the coil to use, so I called Rostra and was told to use the negative side. I also needed a ground in the engine bay so I used the common ground at the coil. The cruise servo box is supposed to be at least 10" from the coil. I had the box physically that far away from the coil but I had routed the coil wire so it entered the coil from the left side. I changed that wire over to the right side to make sure I did not get an electrical interference from the coil.
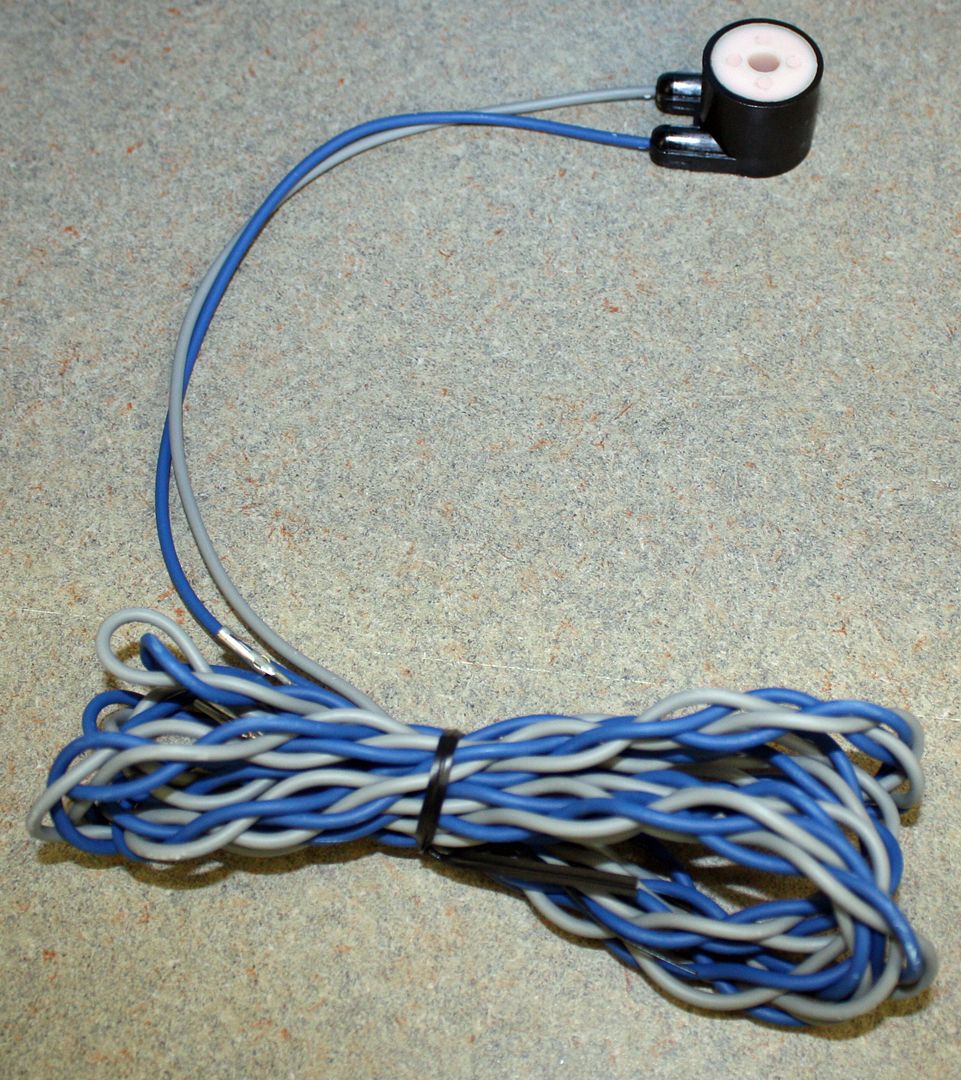
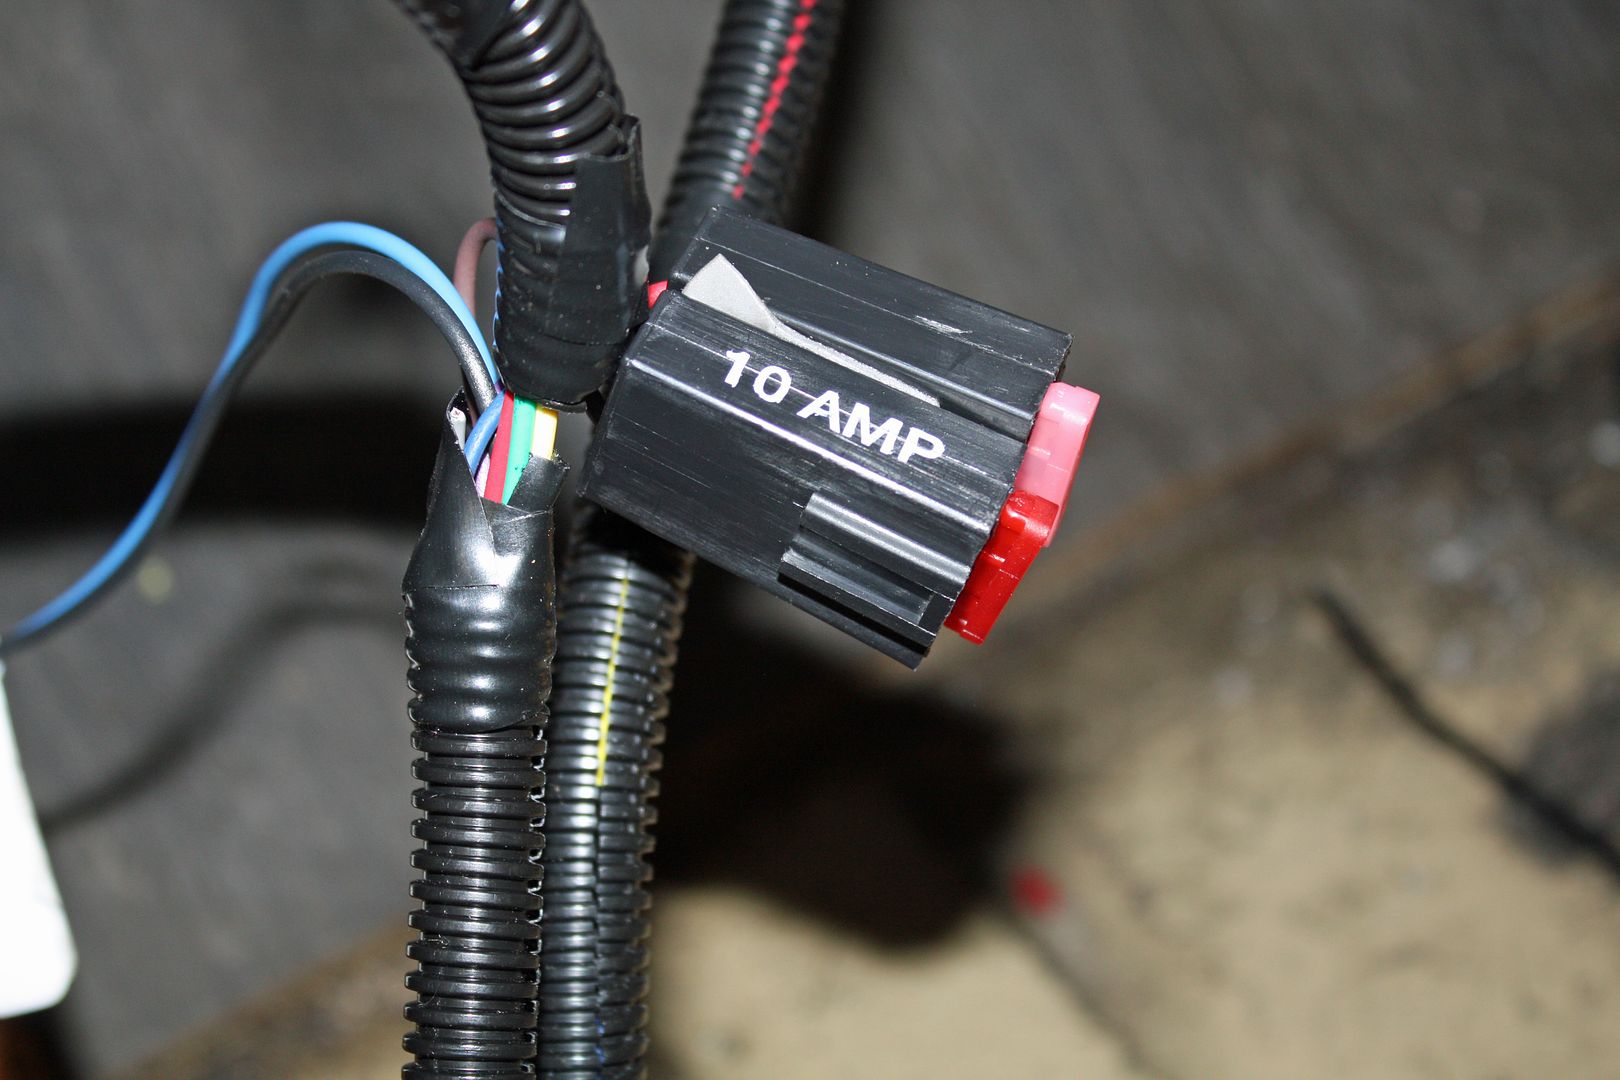
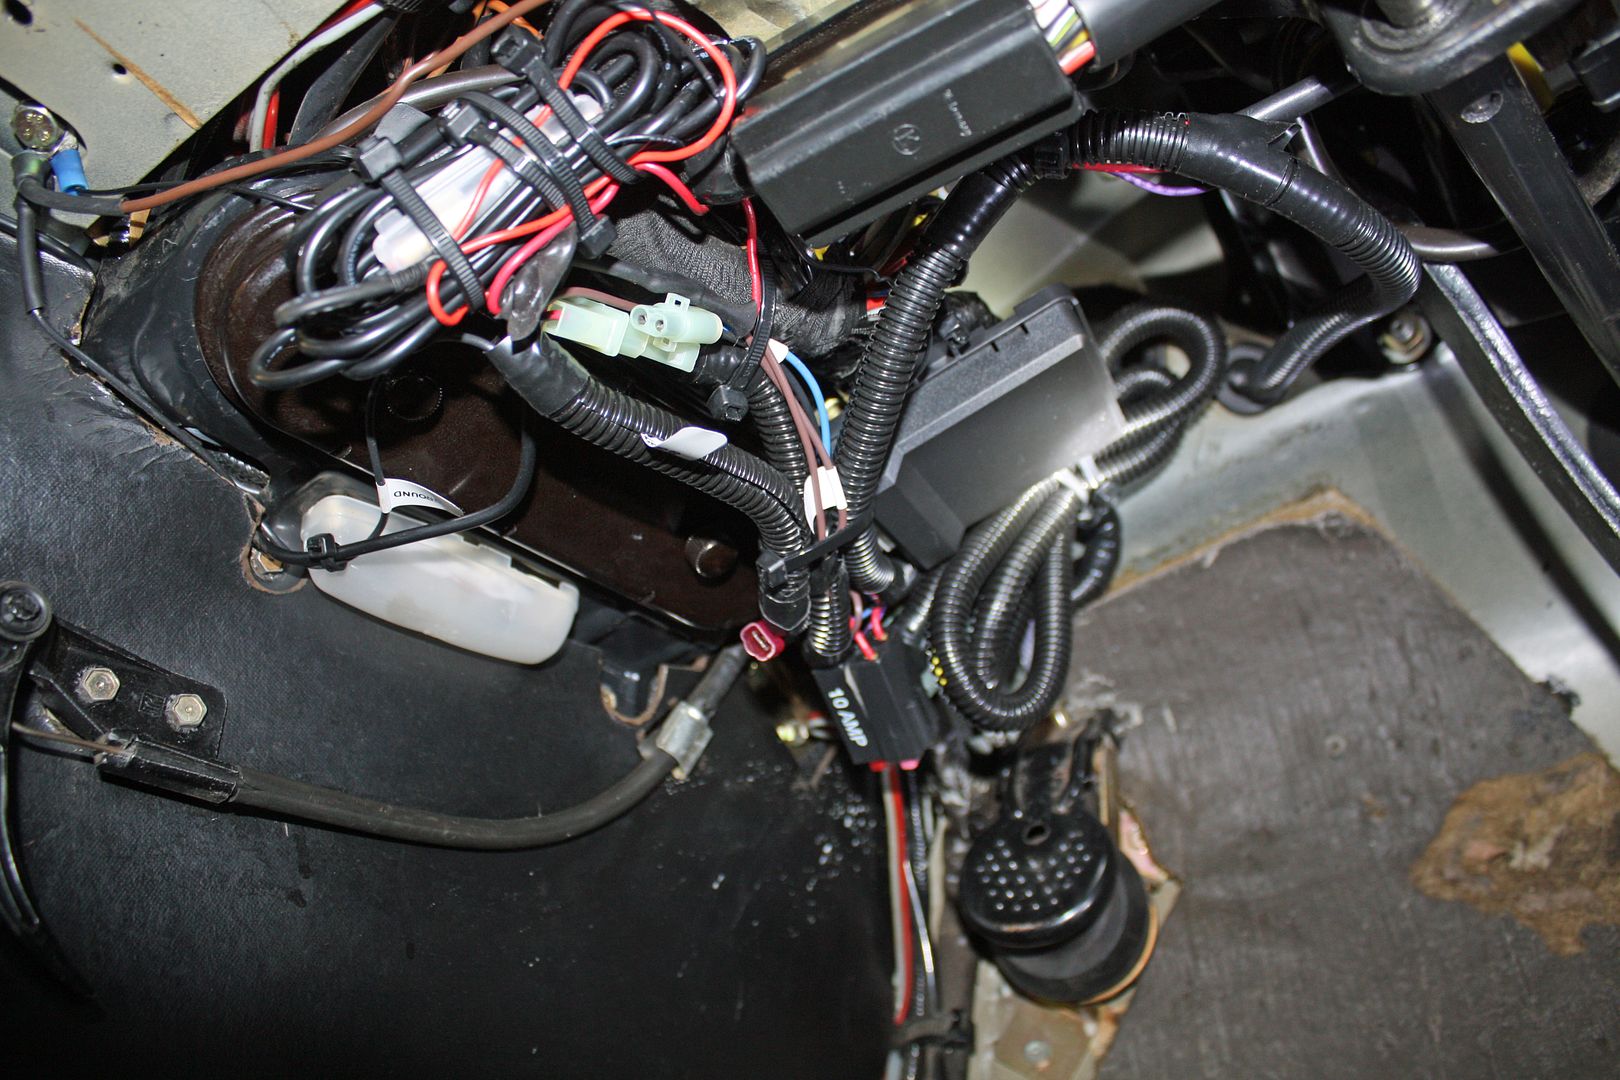
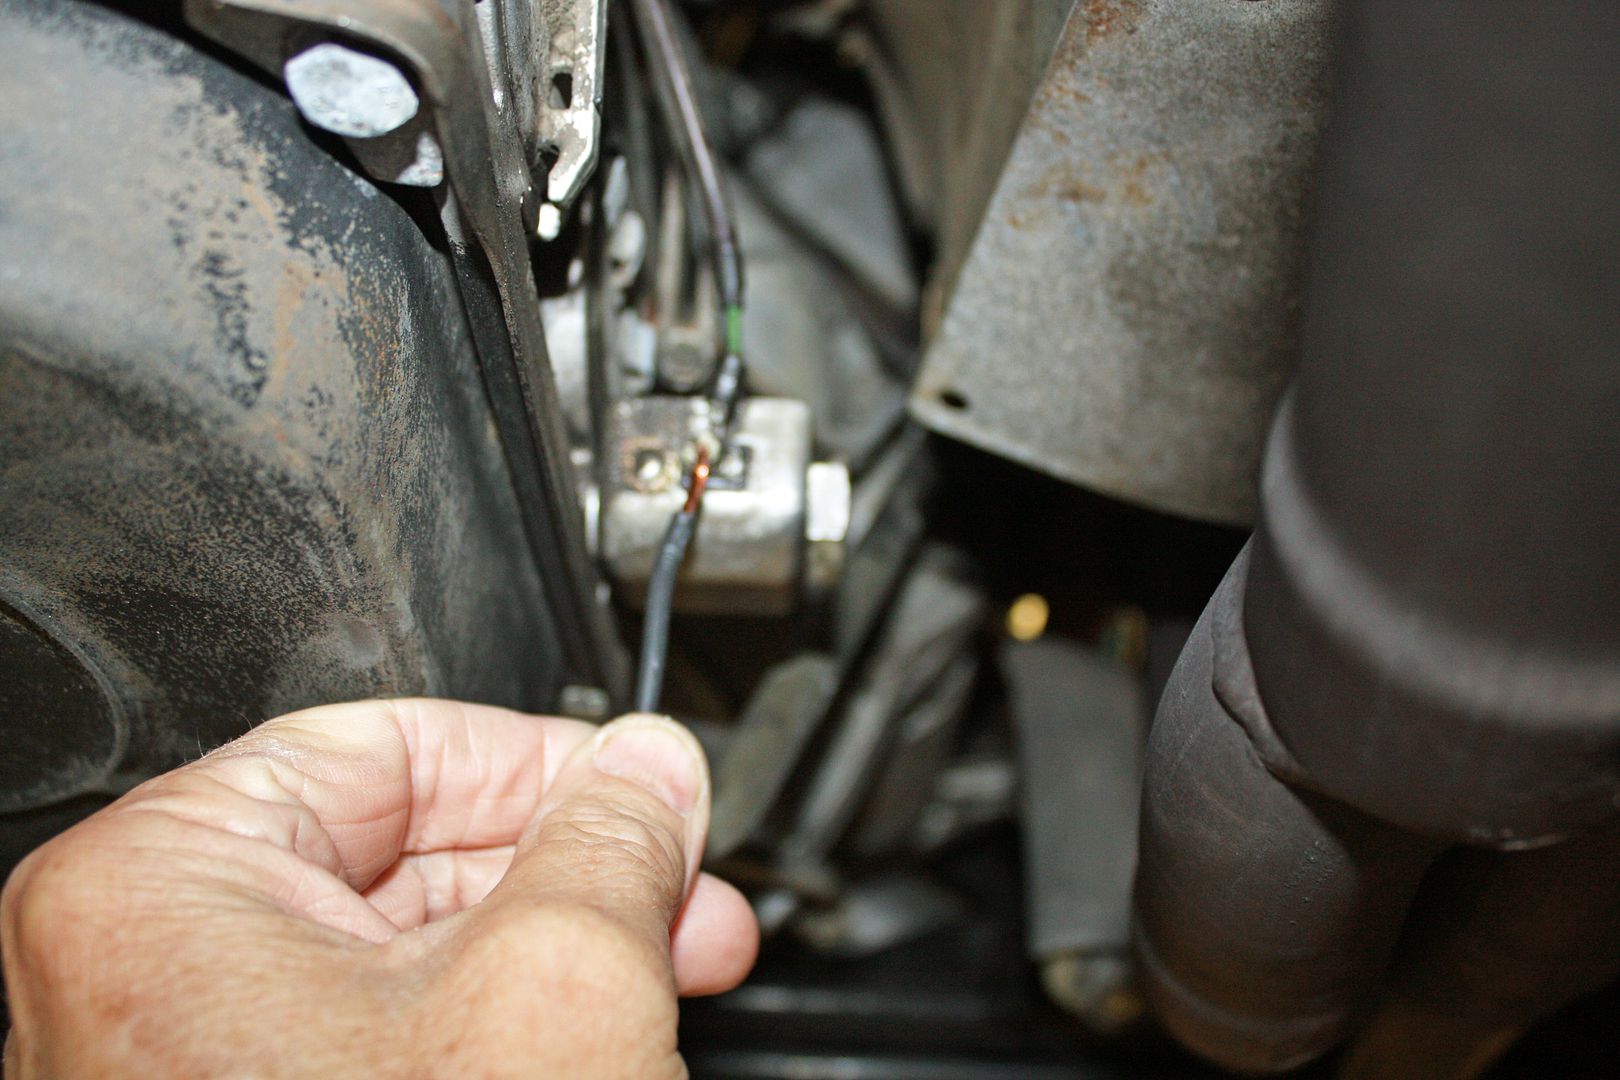
The two wires from the speed sensor were way too long so I shortened them while making sure the wires remained twisted as you see in the photo. For some reason it is important to twist these wires. With that done, I inserted all of the wires in convoluted tubing and tidied up the engine bay with zip ties.
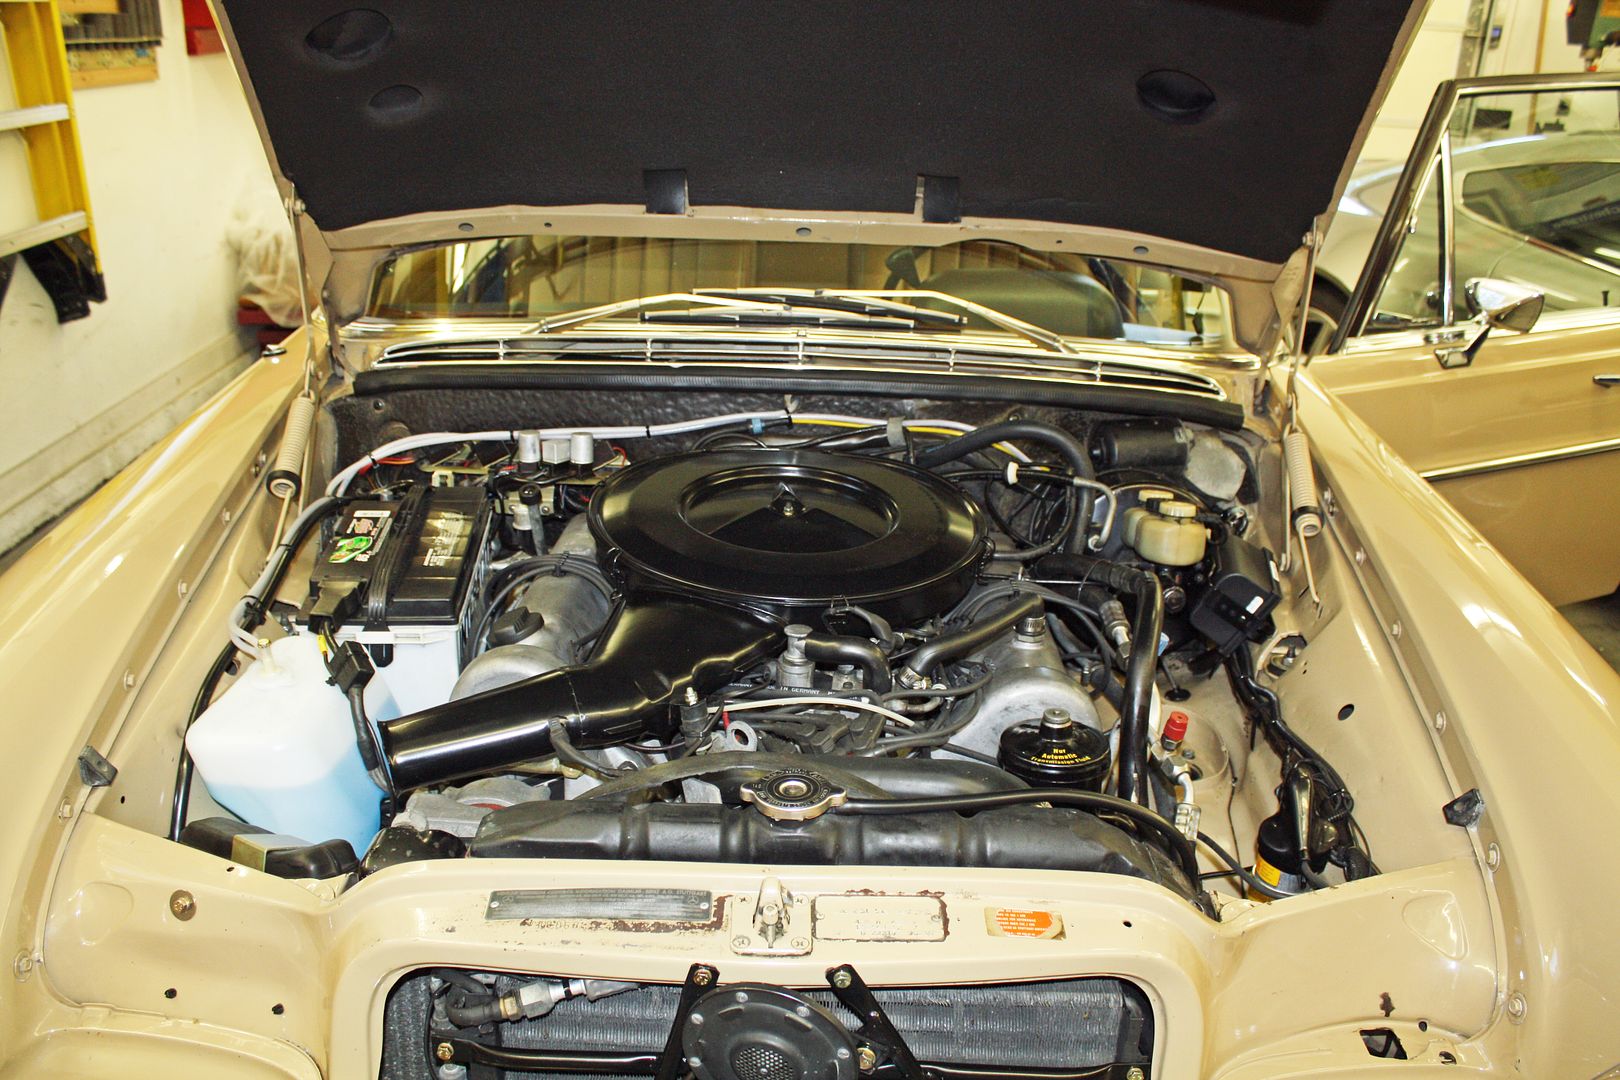


The two wires from the speed sensor were way too long so I shortened them while making sure the wires remained twisted as you see in the photo. For some reason it is important to twist these wires. With that done, I inserted all of the wires in convoluted tubing and tidied up the engine bay with zip ties.


 08-19-2017, 03:08 PM
#85
Member
Thread Starter
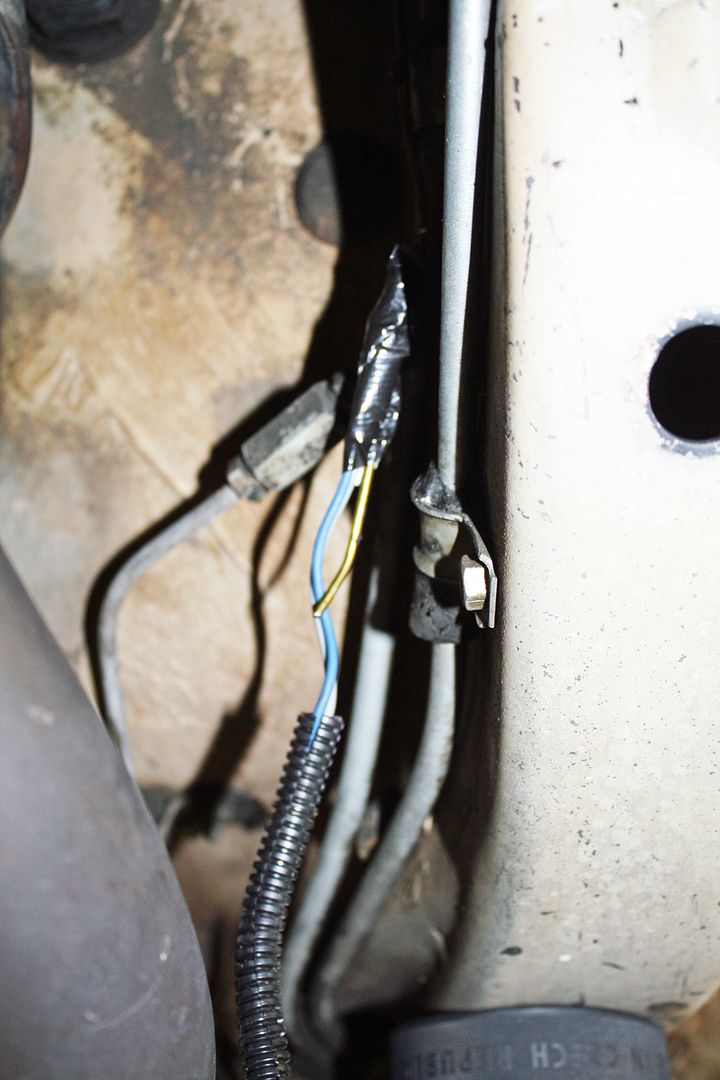
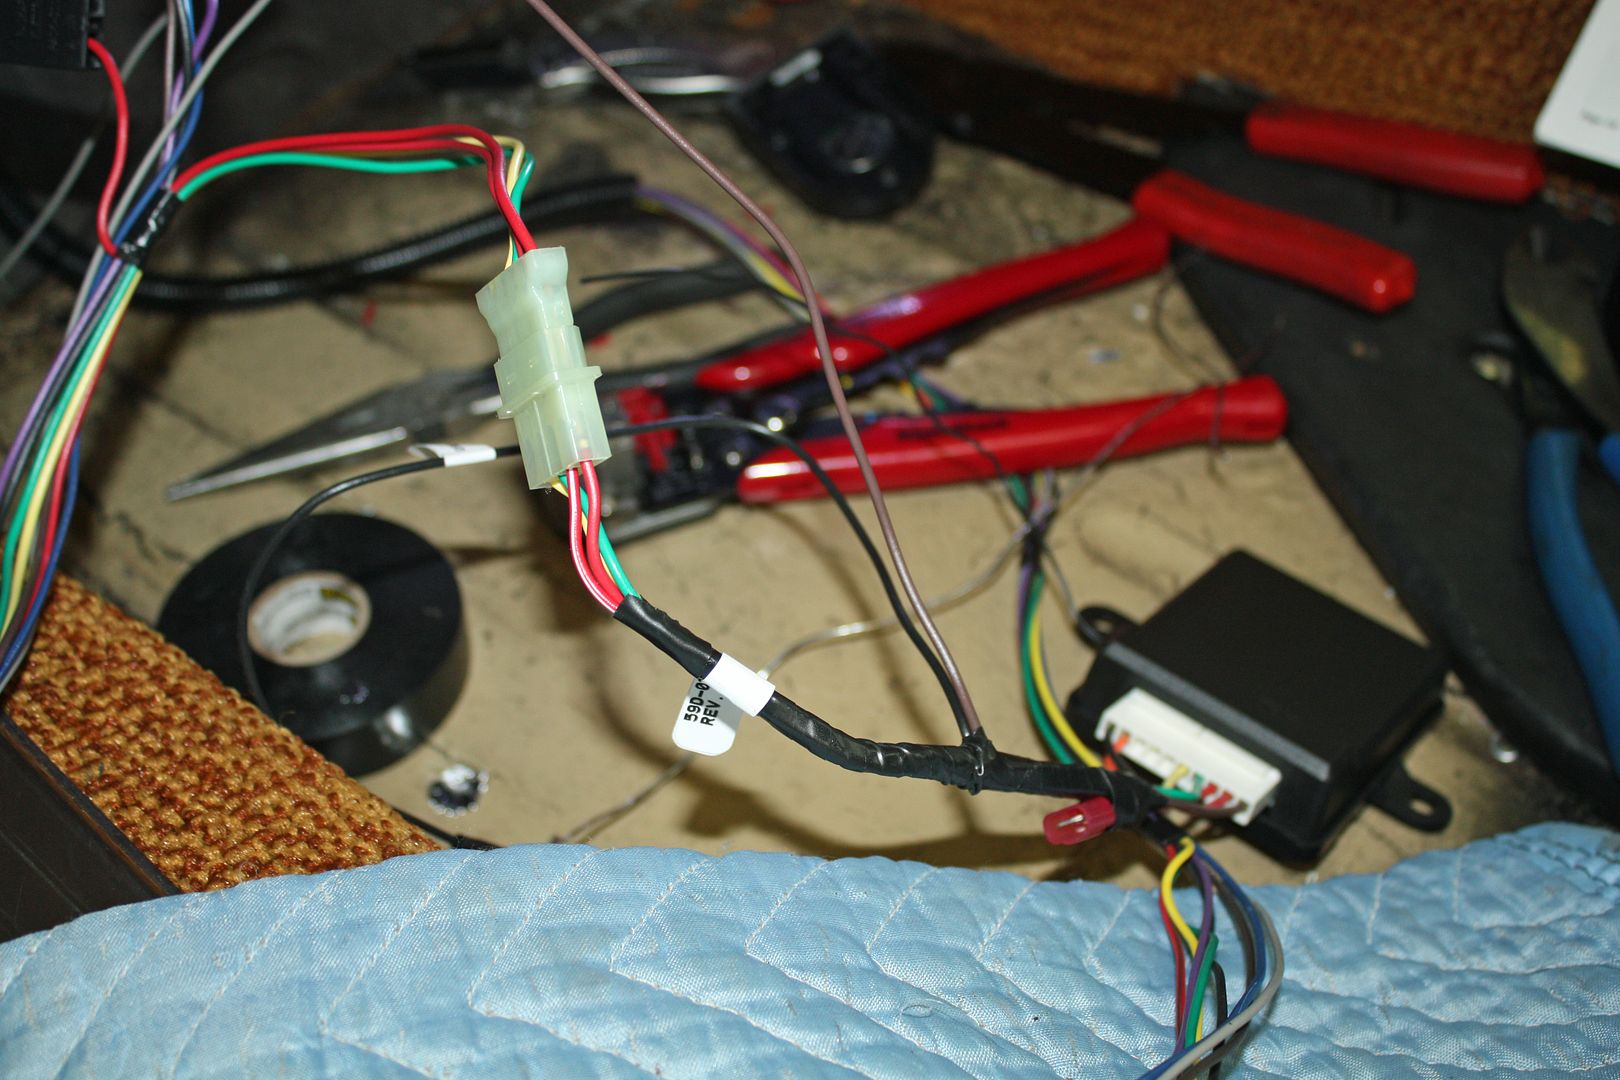
esterday I worked on the wiring for the cruise control inside the car. To feed the wiring into the car I got out my trusty coat hanger and pulled the wiring through the hole made by the person who installed a cruise unit back in 1976. I found a grommet that was the correct size to seal the hole.
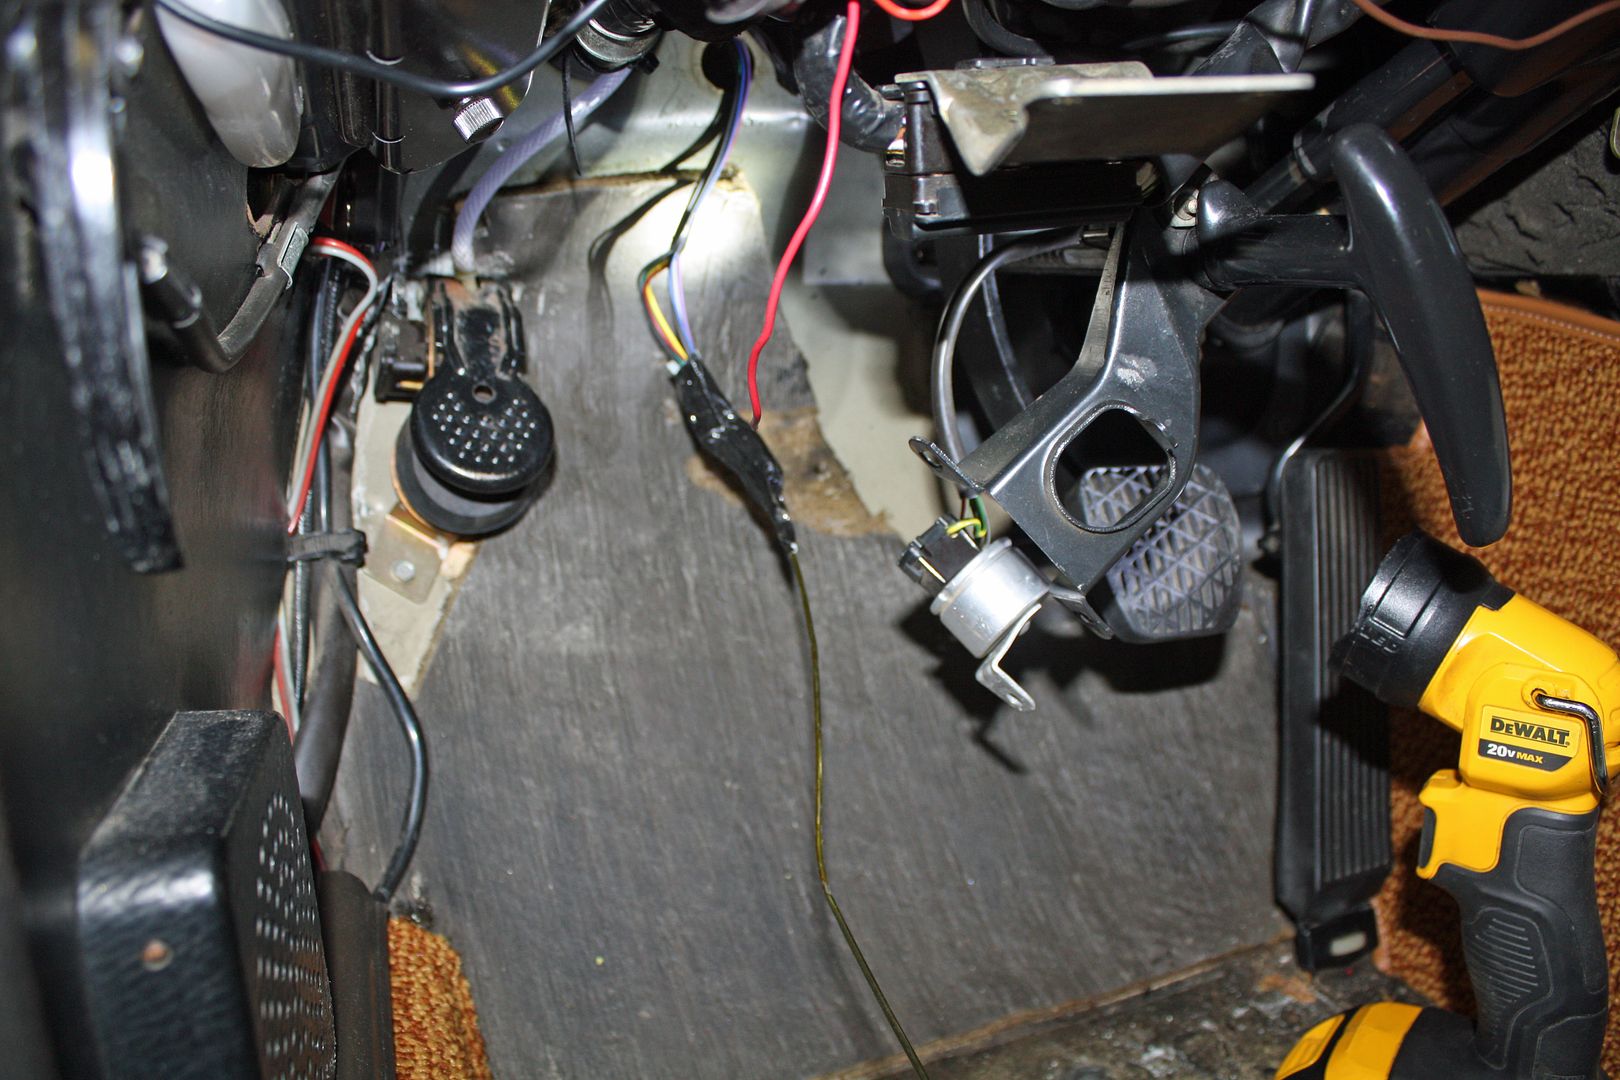
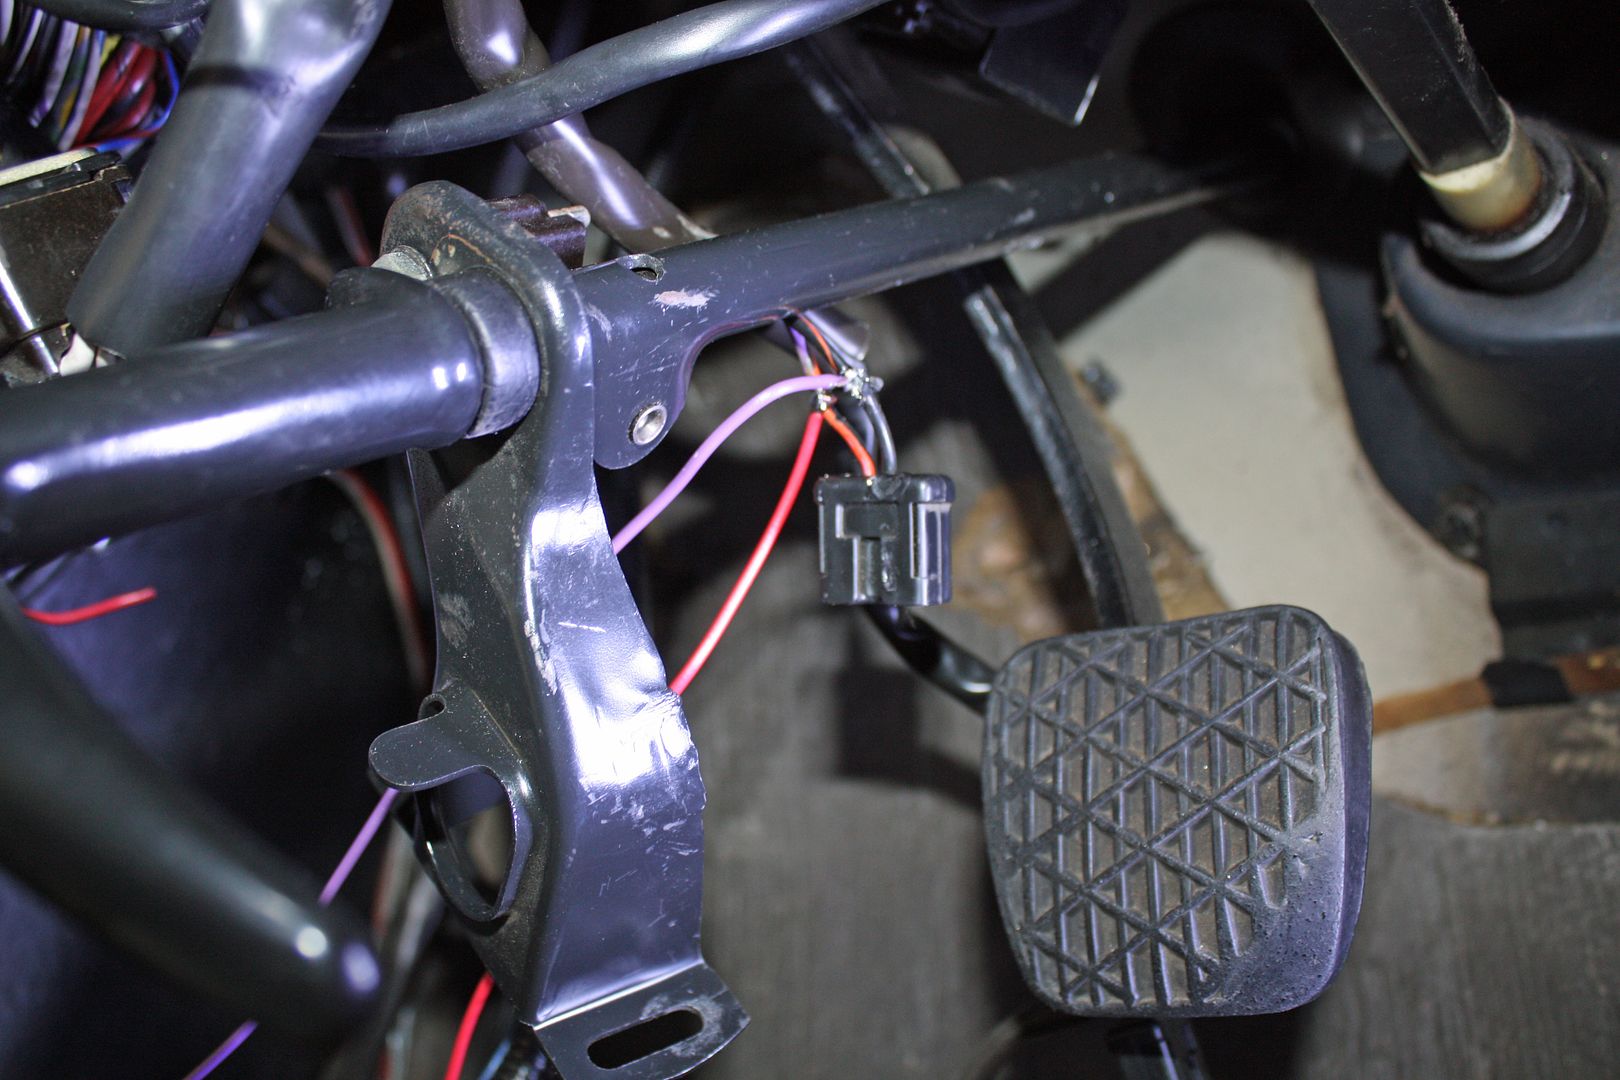
The red wire from the cruise harness was to go to the side of the brake switch that had 12V with the ignition on while the purple wire went to the other side. The function here is to turn off the cruise when the brake is engaged. Using my voltage tester, I determined which side was which. I found the switch, unplugged the brake switch cable, cut back the insulation, and soldered the wires to the appropriate sides.
As I mentioned earlier, I had to change out the cruise control switch to a remote unit. This unit uses a RF signal sent from the switch to the receiver that is plugged into the cruise harness. Both it and the main harness are to be hooked up to a 12V ignition hot wire. I used the same one that I had previously used for the hard wiring for the GPS.
By late afternoon yesterday, I had the wiring part of the installation completed. There is a wiring status check using a voltmeter that could now be performed to make sure each function of the cruise will work. All systems were go!!
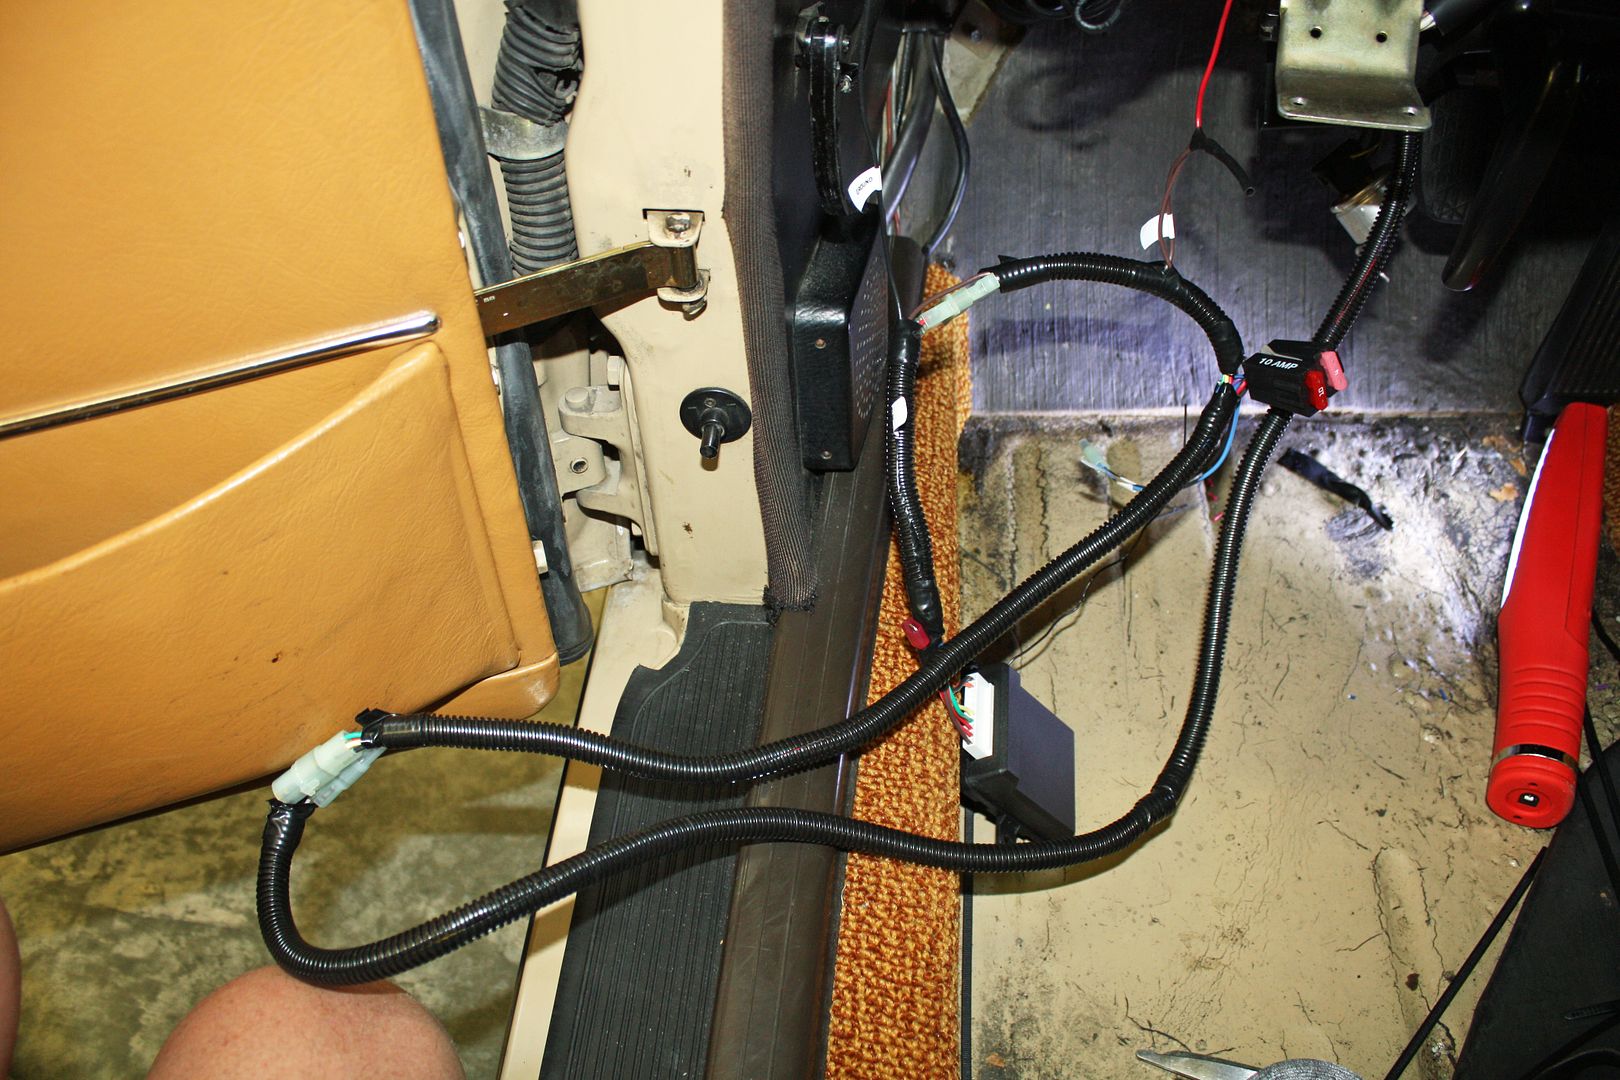
This morning I placed all of the inside wiring harness in convoluted tubing. There was lots of extra wire but it would have taken me forever to shorten each wire so I bundled everything up and secured the switch receiver and the wiring loom under the dash.
Now I could reinstall the cover under the AC, the seat and the steering wheel. When I had installed the refurbished Becker radio a few months back, I had forgotten to install the AUX input that Becker had provided. I remedied that this morning.
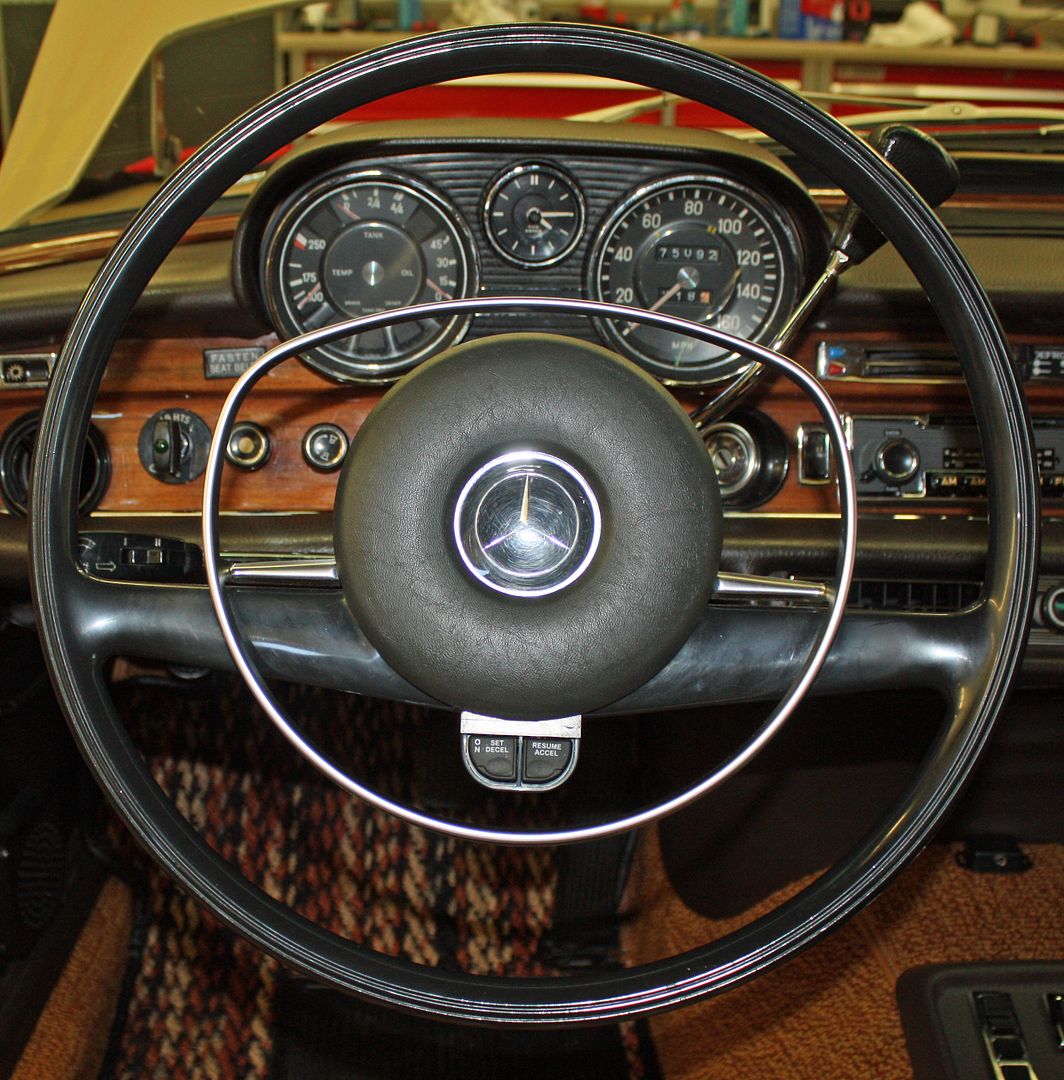
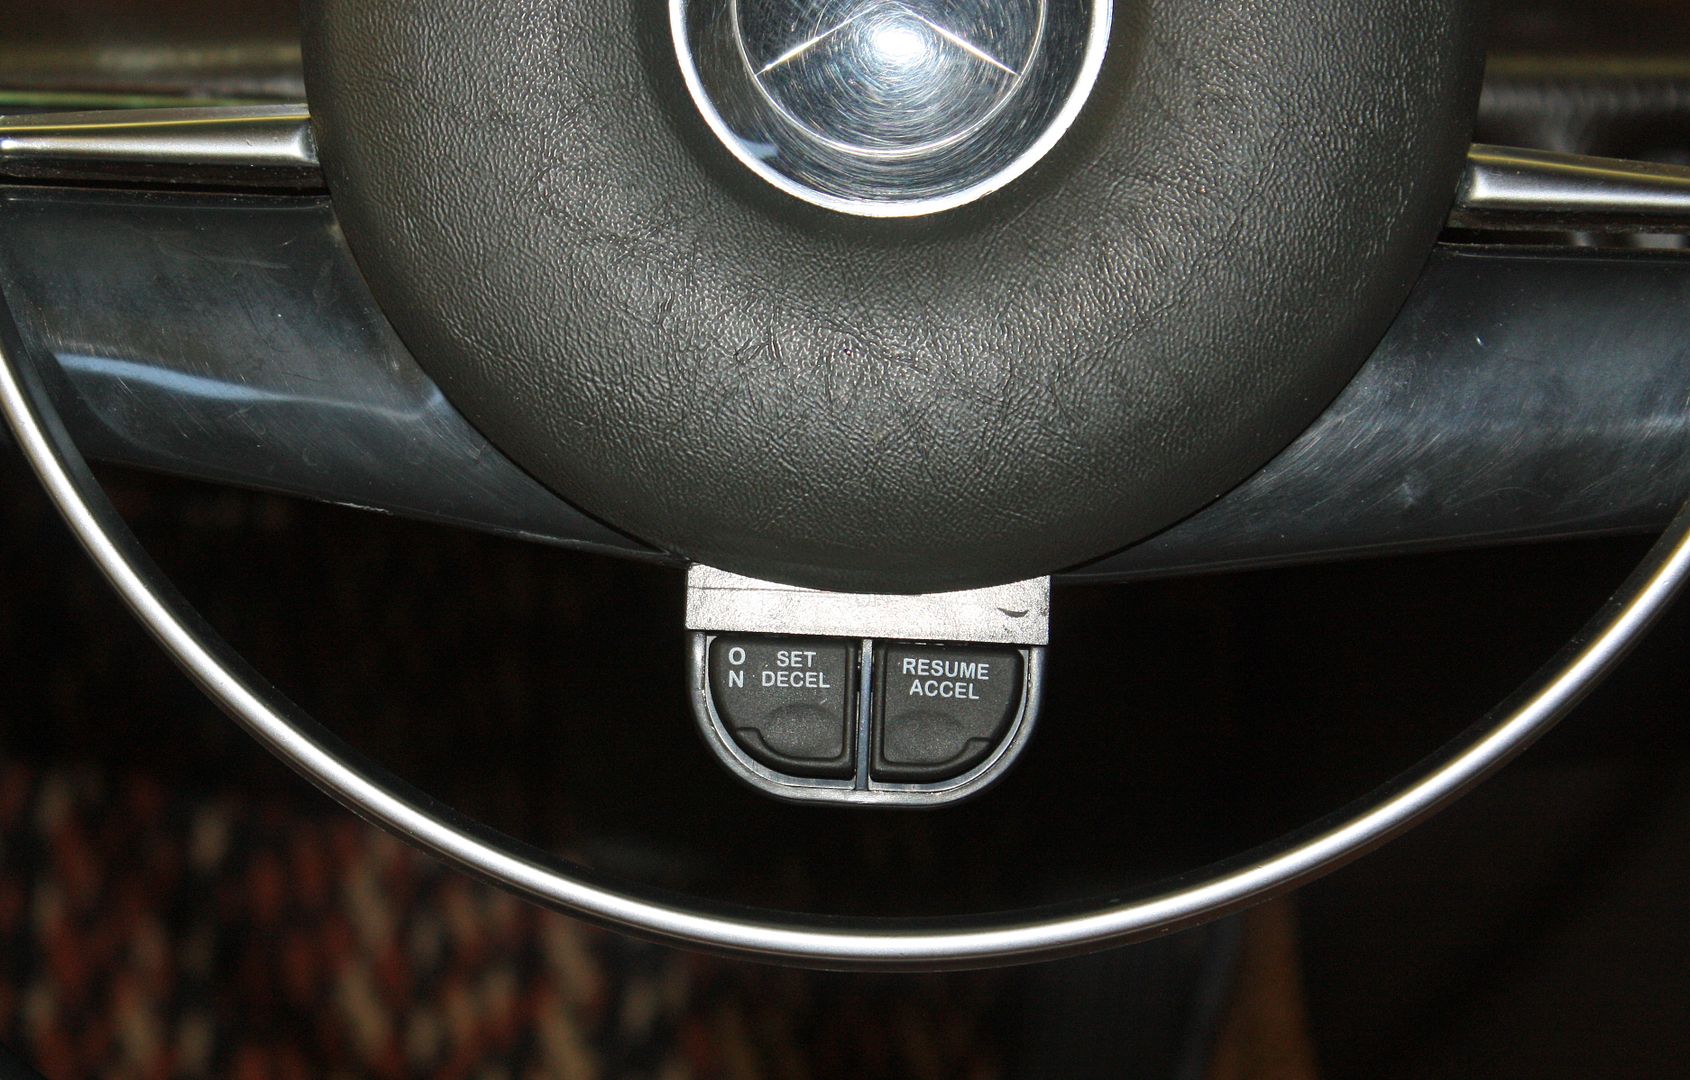
Now that I had the seat and steering wheel in place, I could determine the location for the switch. Since there are no wires, it could be mounted anywhere. Using a combination of velcro and very thin double sided tape, I mounted it on the bottom of the steering wheel hub. It is easily accessible while driving and has a factory installed look.
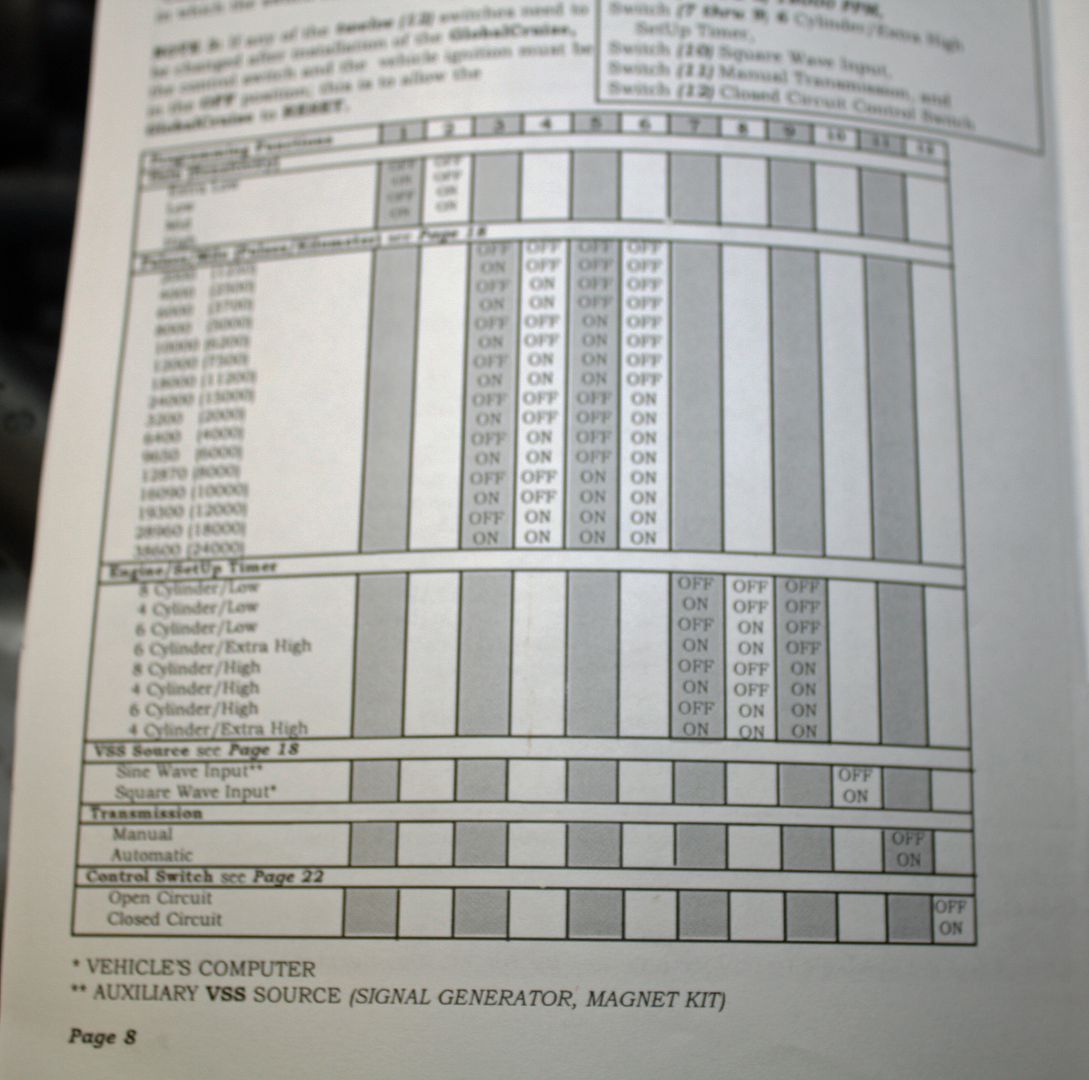
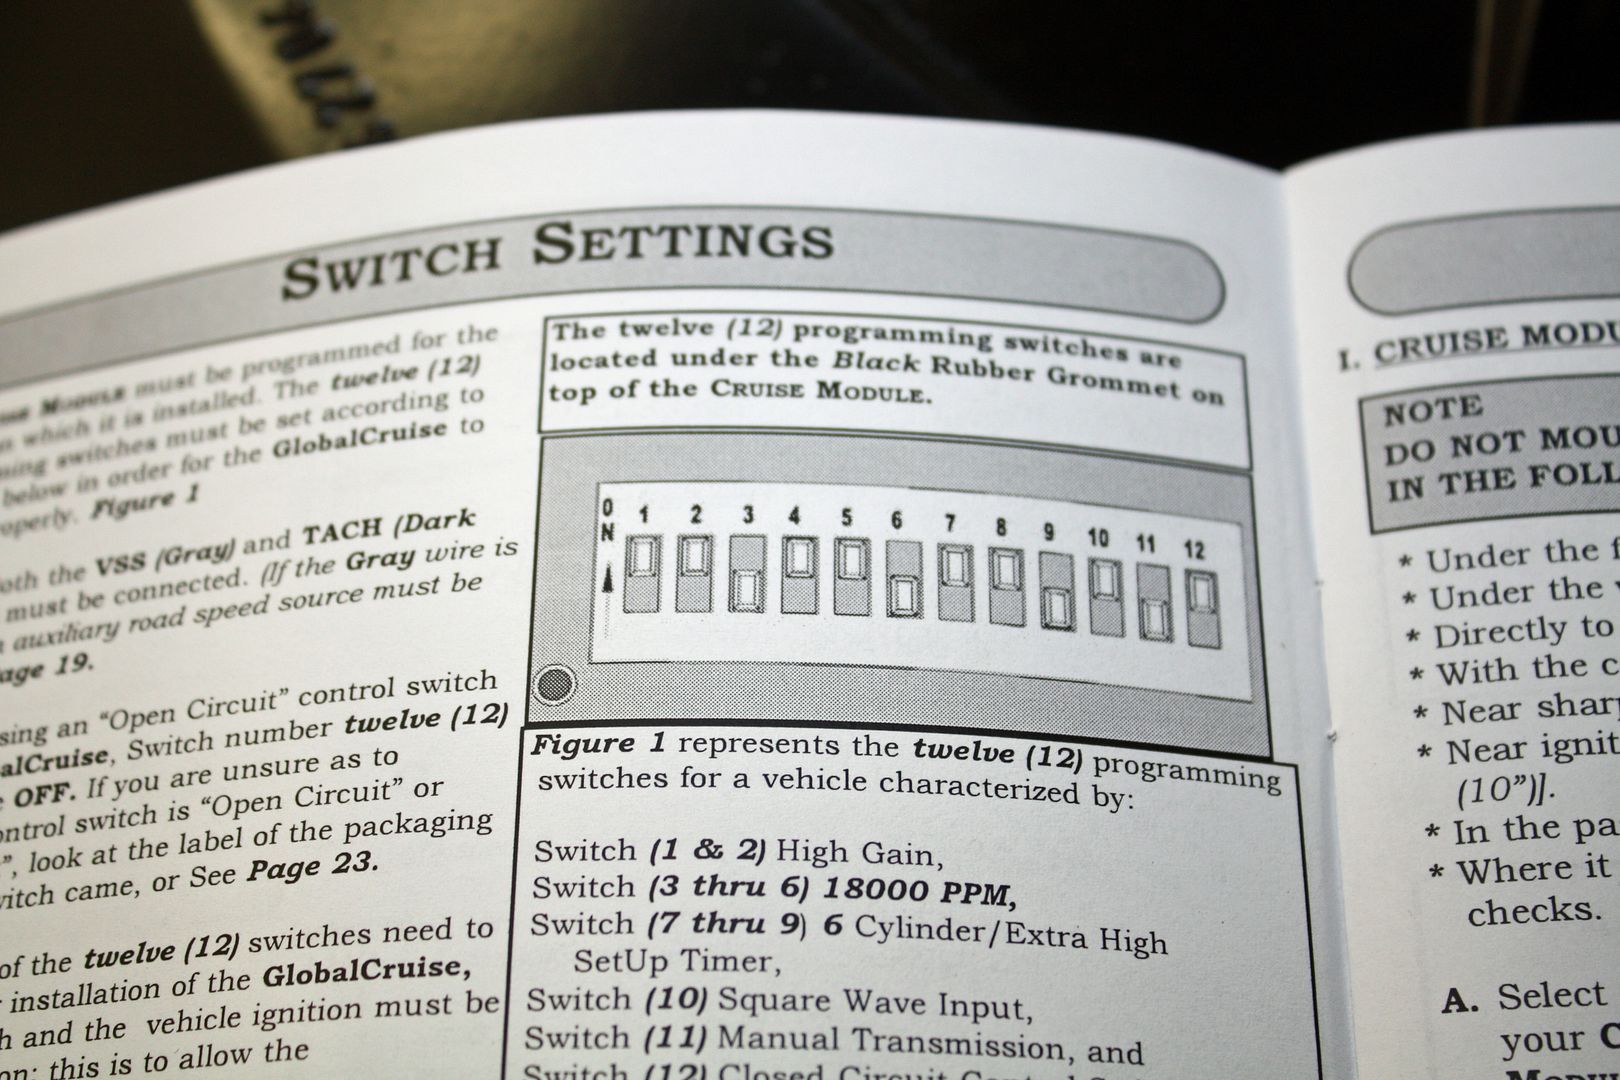
Now I was ready for a test drive. The cruise works and the hitting the brake pedal shuts it off. It is a bit slow to engage but there are changes to the dip switch settings that can adjust that. On Monday I will talk to Rostra about which settings will make it work like it should. I have had to do this every time I install one of these units as there are a lot of adjustments.
This was also the first time I have driven the car with the new throttle bushings. Much more responsive and, under hard acceleration, it will now hold the car in gear much longer. It still does not kick down to a passing gear, so I will need to address that.


The red wire from the cruise harness was to go to the side of the brake switch that had 12V with the ignition on while the purple wire went to the other side. The function here is to turn off the cruise when the brake is engaged. Using my voltage tester, I determined which side was which. I found the switch, unplugged the brake switch cable, cut back the insulation, and soldered the wires to the appropriate sides.


As I mentioned earlier, I had to change out the cruise control switch to a remote unit. This unit uses a RF signal sent from the switch to the receiver that is plugged into the cruise harness. Both it and the main harness are to be hooked up to a 12V ignition hot wire. I used the same one that I had previously used for the hard wiring for the GPS.


By late afternoon yesterday, I had the wiring part of the installation completed. There is a wiring status check using a voltmeter that could now be performed to make sure each function of the cruise will work. All systems were go!!
This morning I placed all of the inside wiring harness in convoluted tubing. There was lots of extra wire but it would have taken me forever to shorten each wire so I bundled everything up and secured the switch receiver and the wiring loom under the dash.


Now I could reinstall the cover under the AC, the seat and the steering wheel. When I had installed the refurbished Becker radio a few months back, I had forgotten to install the AUX input that Becker had provided. I remedied that this morning.

Now that I had the seat and steering wheel in place, I could determine the location for the switch. Since there are no wires, it could be mounted anywhere. Using a combination of velcro and very thin double sided tape, I mounted it on the bottom of the steering wheel hub. It is easily accessible while driving and has a factory installed look.


Now I was ready for a test drive. The cruise works and the hitting the brake pedal shuts it off. It is a bit slow to engage but there are changes to the dip switch settings that can adjust that. On Monday I will talk to Rostra about which settings will make it work like it should. I have had to do this every time I install one of these units as there are a lot of adjustments.
This was also the first time I have driven the car with the new throttle bushings. Much more responsive and, under hard acceleration, it will now hold the car in gear much longer. It still does not kick down to a passing gear, so I will need to address that.
08-19-2017, 03:33 PM
#86
Member
Thread Starter
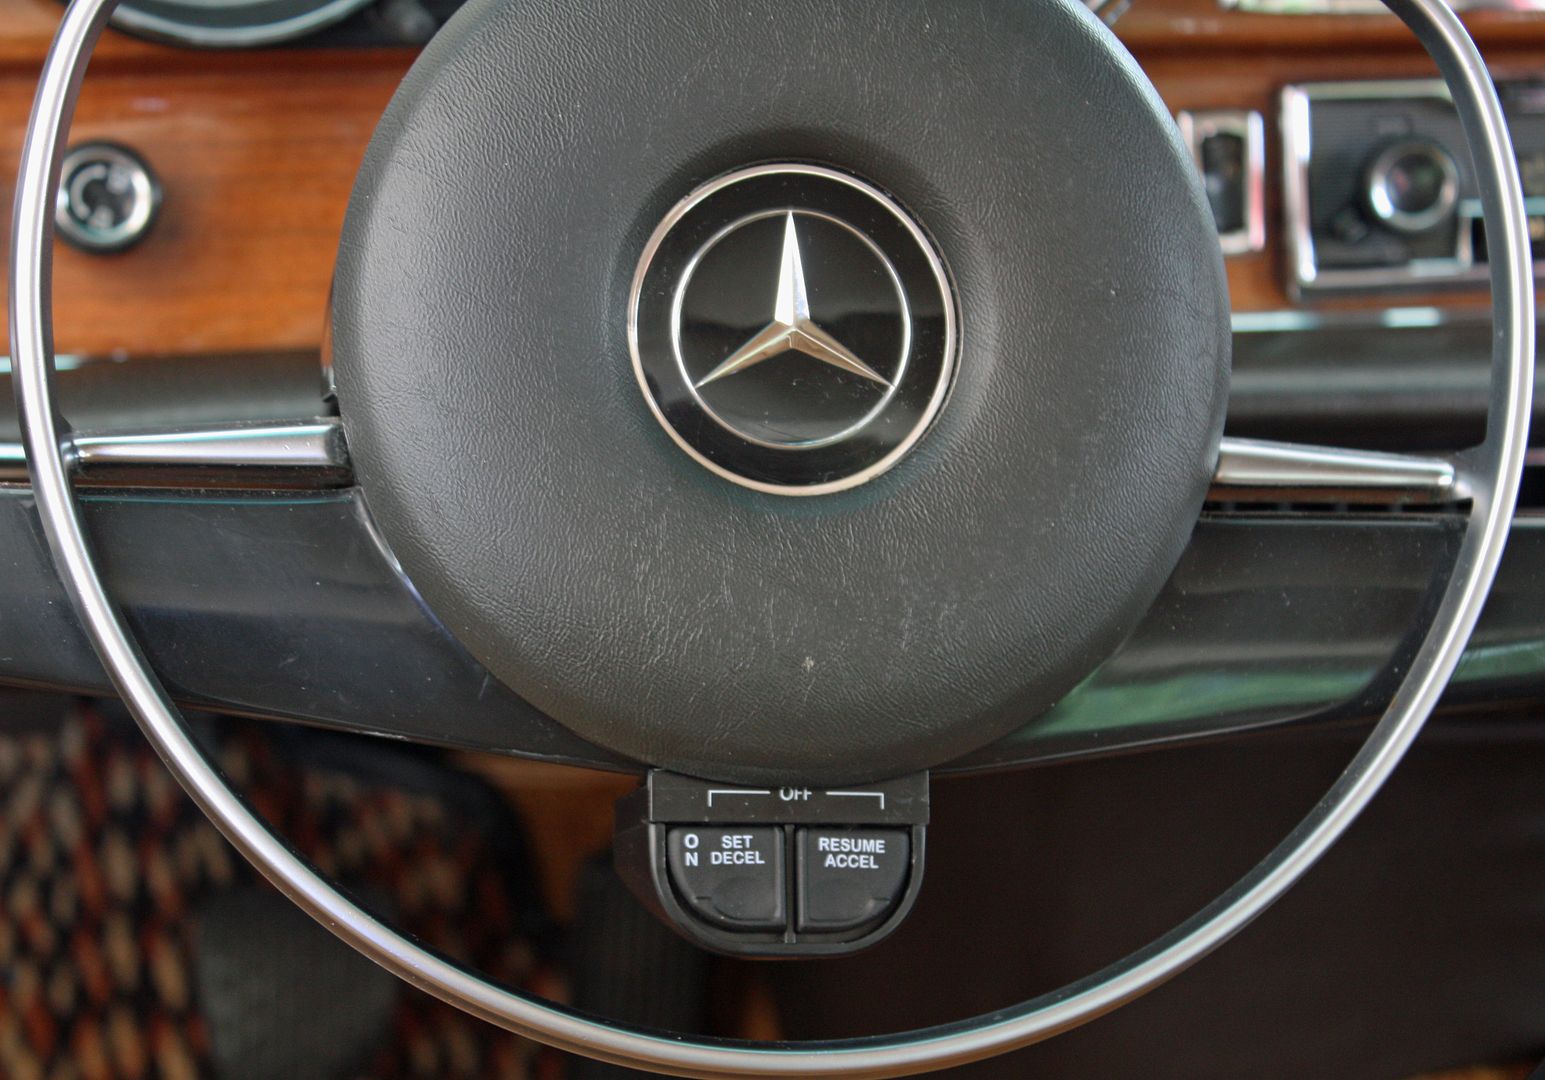
The more I looked at the photos of the cruise switch in my last post, the more I was upset with the glare from the flash. I think this one looks better and shows more accurately how the switch looks.
 08-20-2017, 05:16 PM
#87
Member
Thread Starter
I took my wife to dinner yesterday evening in the Mercedes. I like to use cruise even on relatively low speed roads in towns to keep me from going too fast. The cruise was very jumpy, to the point that the bucking could make one queasy. That drive told me I was going to have to make some adjustments.
I left early this morning to drive to a Cars and Cappuccino in Charlotte, about a fifty mile drive one way. I take a twisty two lane road, with a 55 speed limit, over to the interstate that I typically set the cruise at 63mph. The cruise was very slow to engage but once I had it set, it worked great. Going up and down some hills wasn't as smooth as it should be. More adjustments needed.
Once I was on the interstate and had the cruise set, it worked great and kept the speed within two mph. Again, it was slow to engage.
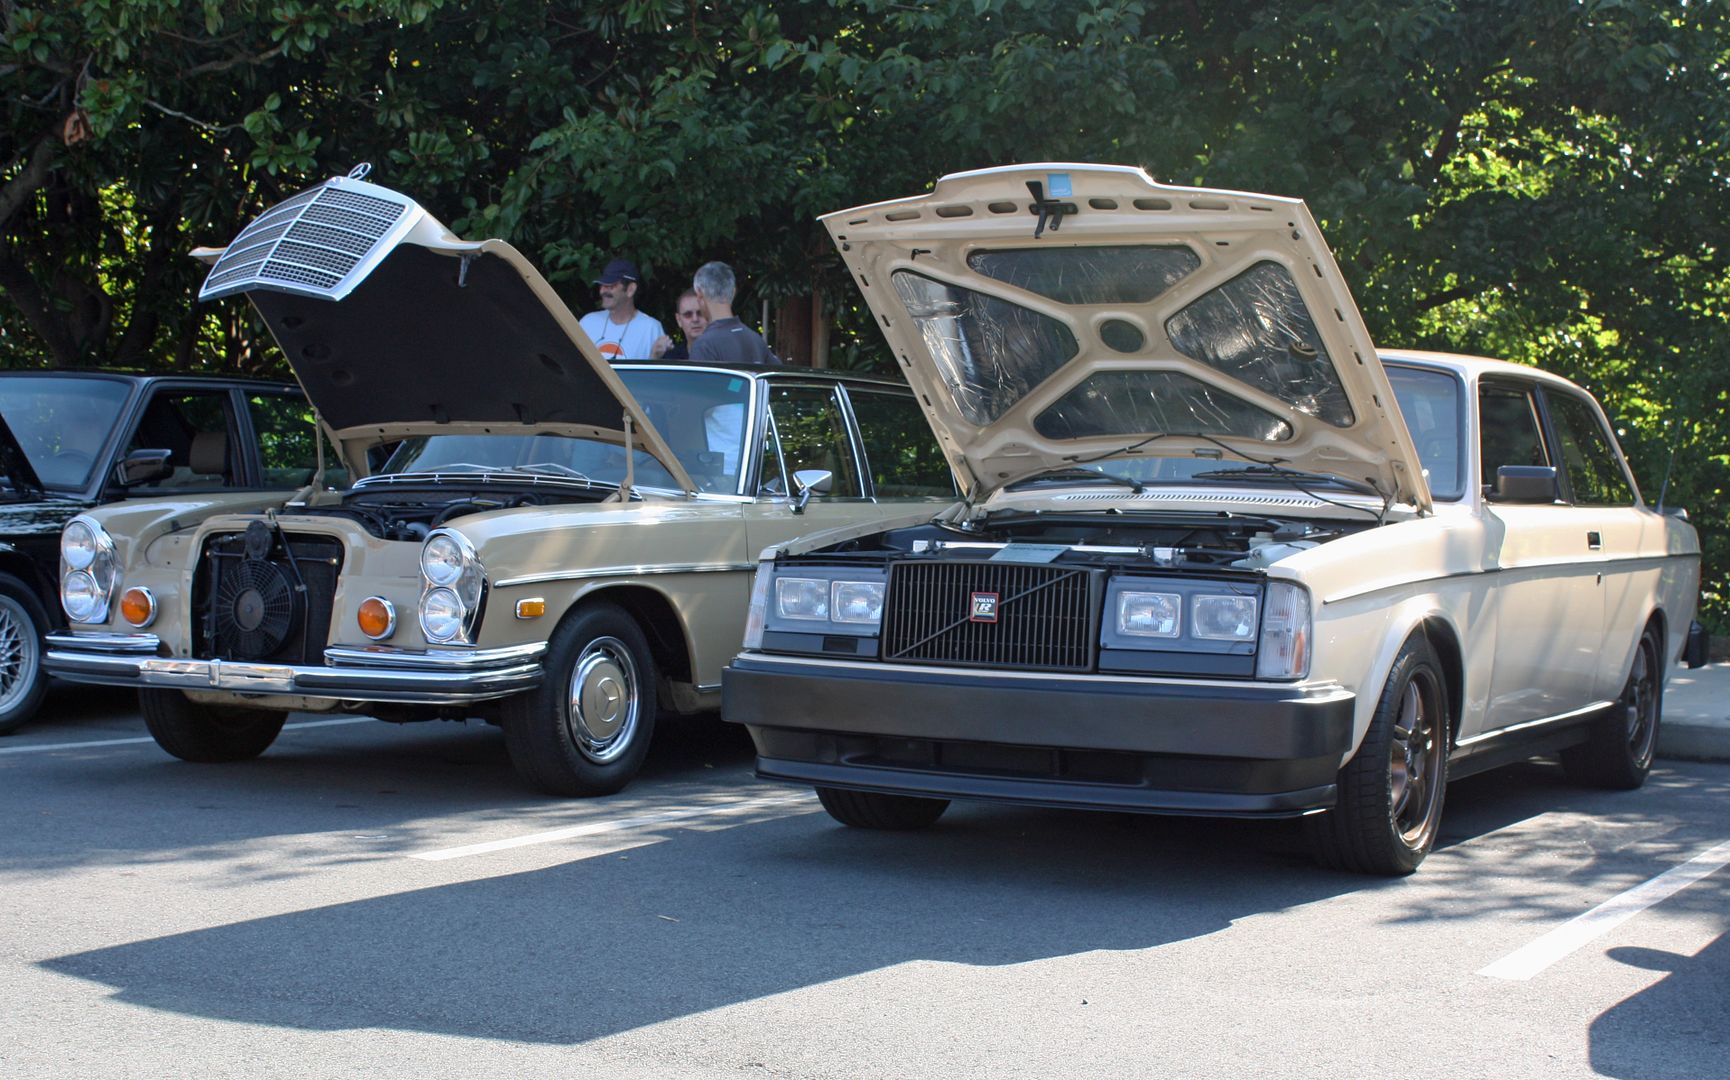
One of my friends has a '90's Volvo two door coupe. When I first met him, he had a 5.0 Ford V8 in the car in a very professional installation. During the past year, he took that motor out and installed a Chevy LS3. He does great work and you would think that LS3 came in the car. On both of these engine conversions, he had used the same Rostra cruise that I used. He told me that he originally set his dip switches for V8 high. I set mine on V8 low as it does not have high horsepower. His didn't work the way he wanted either and he eventually set the dip switch for four cylinder low and it works great!! The setting was the exact opposite of what he thought he should be using. He told me to keep experimenting with the settings until I found the one that worked. His car is also beige so we created our own beige European car section.
Cars and Cappuccino is supposed to be for European cars only. More and more non-European cars were beginning to show up and about four months ago, a Corvette left the event with tires burning. The property owner said they did not want them back. So they did something unusual. On their Facebook page and on threads on various car sites, they said they were going to make the event invitational. If you wanted to attend, you were to send them a list of the cars you had to determine if you fit the bill. Then they sent those who had the correct type of cars an email with the location and you were asked to refrain from forwarding the email. You pay $20 per year and get a cling on sticker that can be used in a number of cars. This lets them know you have paid your dues.
I was gone on my RV trip for the first two events so today was my first time at the new venue. It worked out great as there were about forty very nice cars, they opened the restaurant early with a limited menu and everyone had a great time. Nobody created a scene when they left. It's a shame that car groups have to resort to these types of procedures to keep their venues.
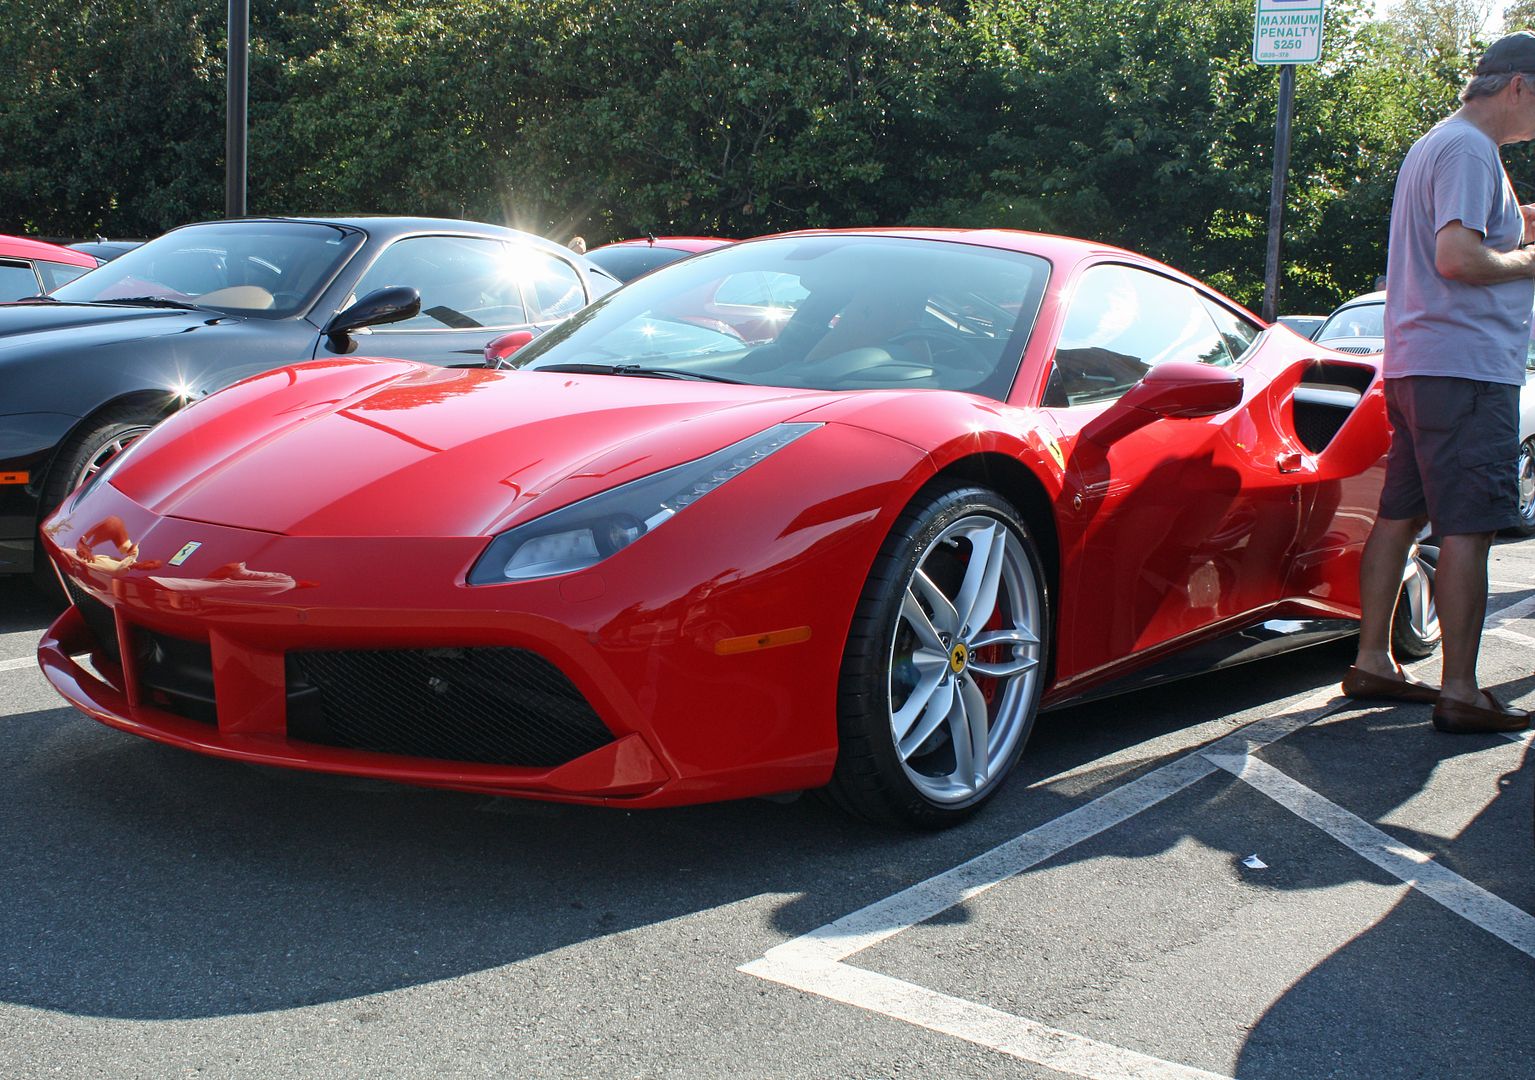
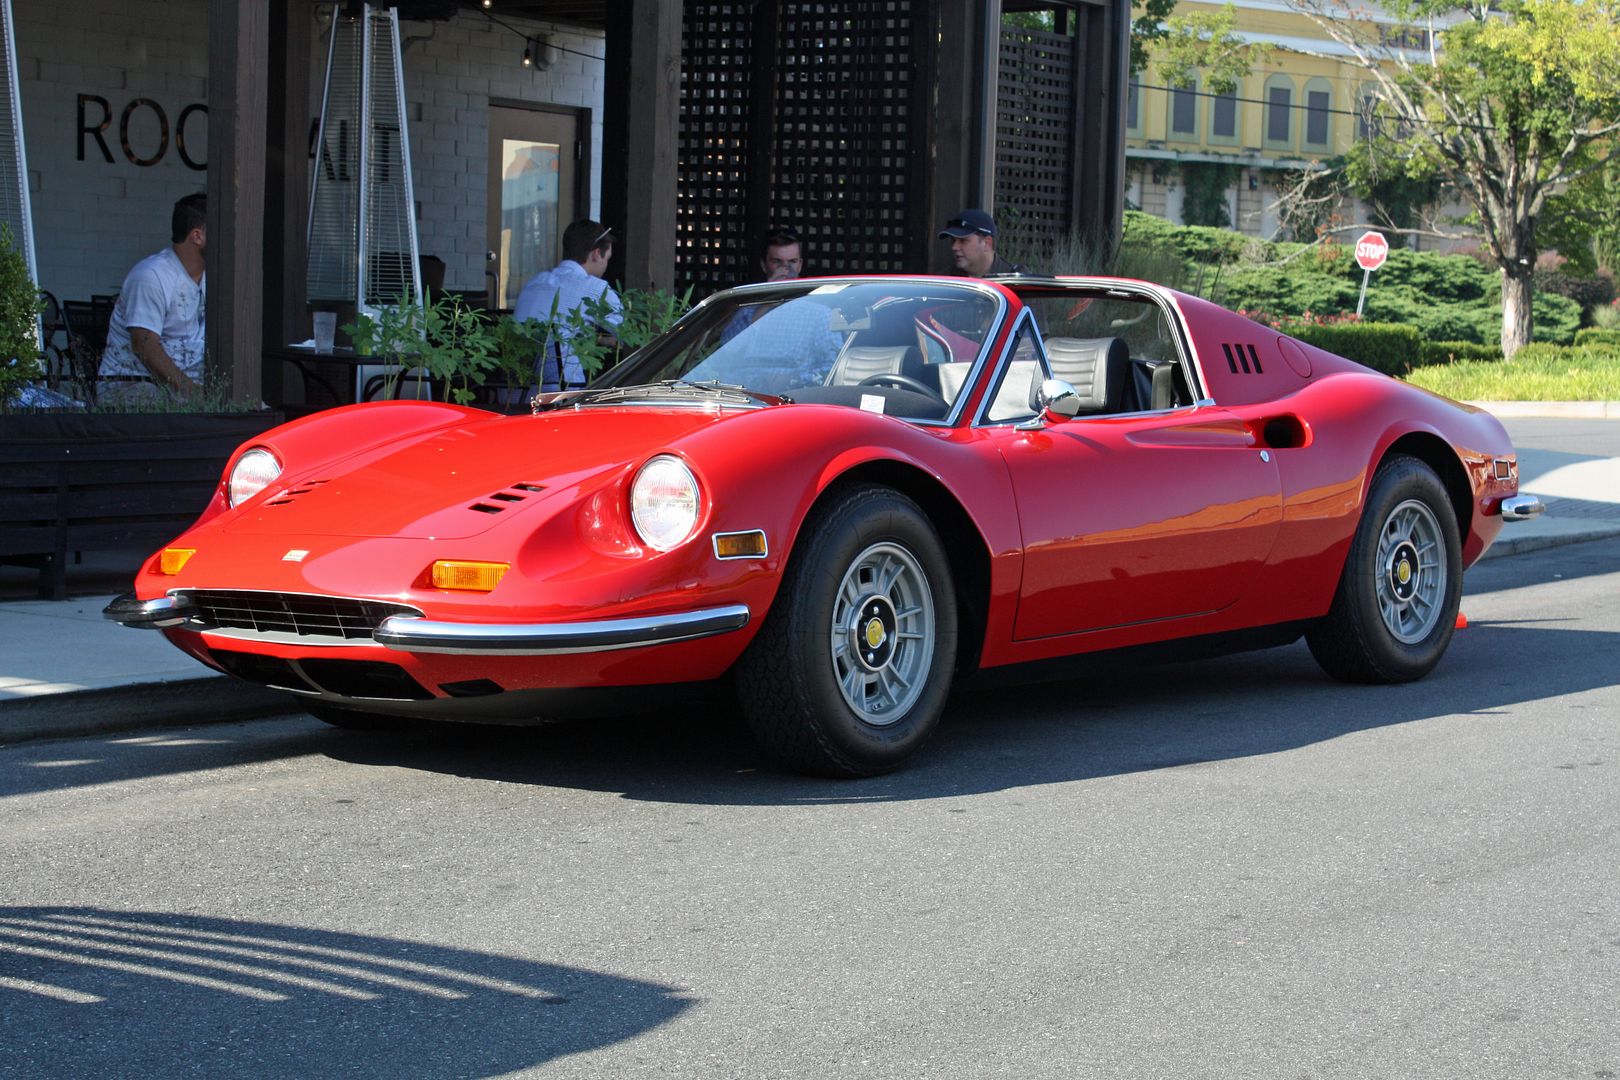
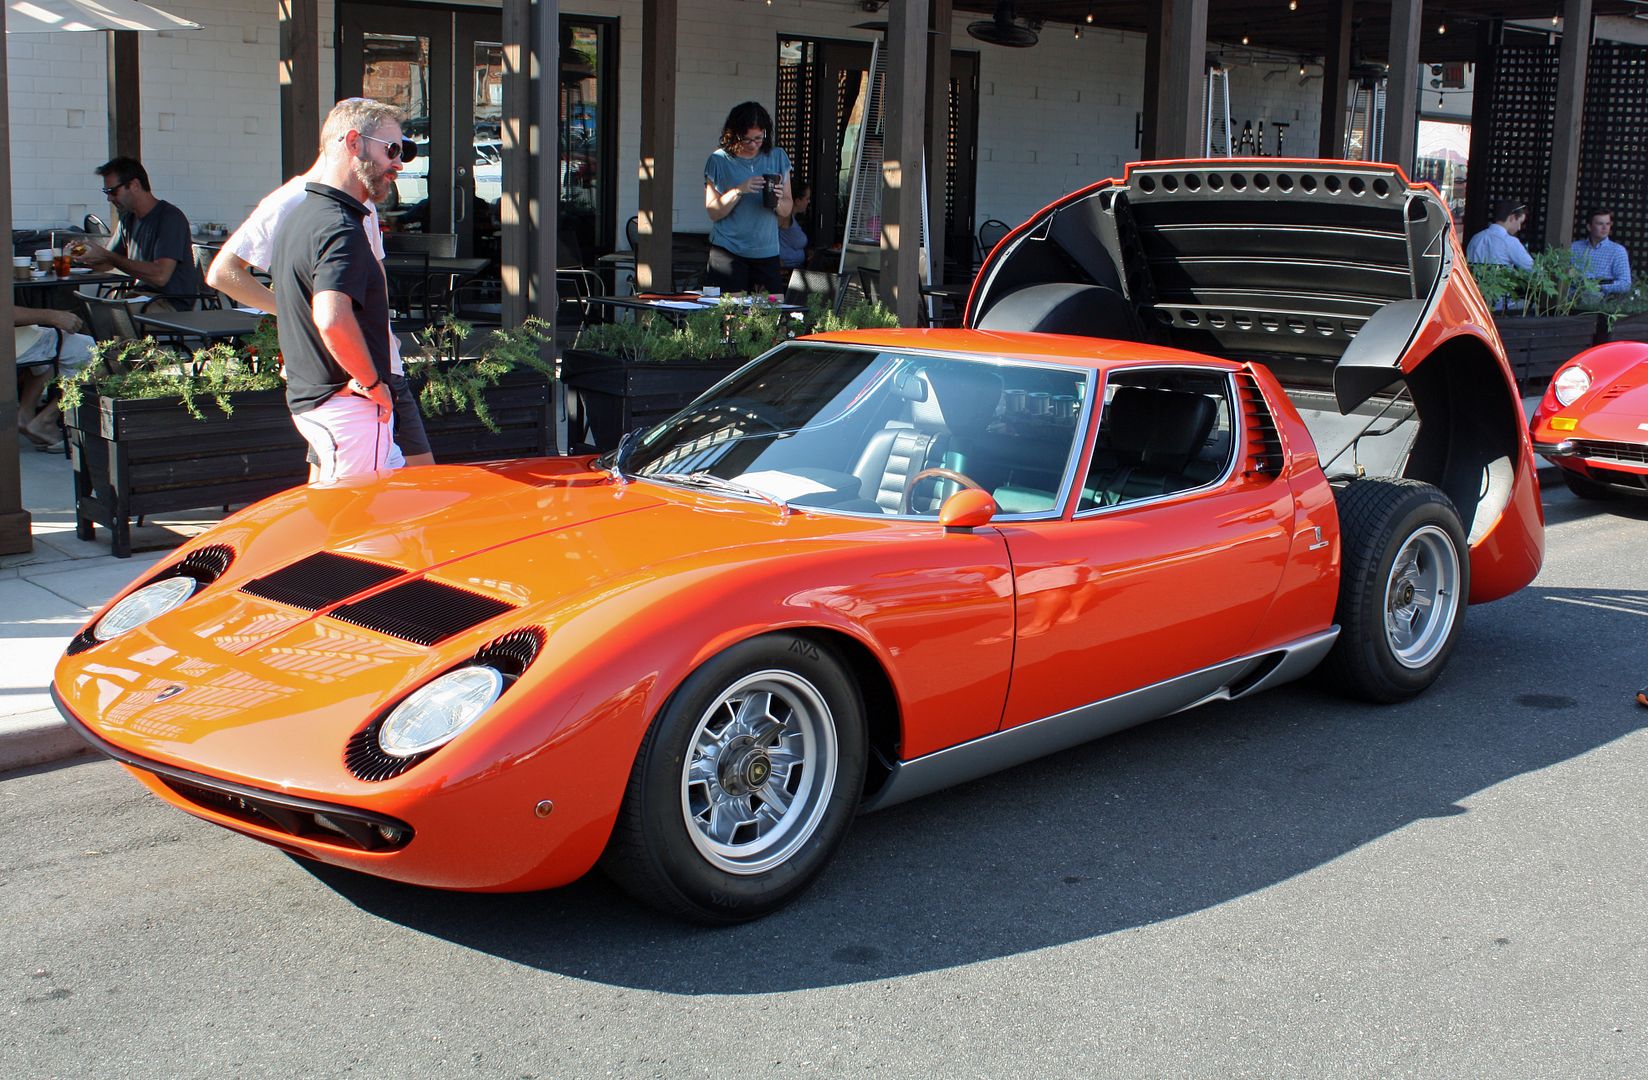
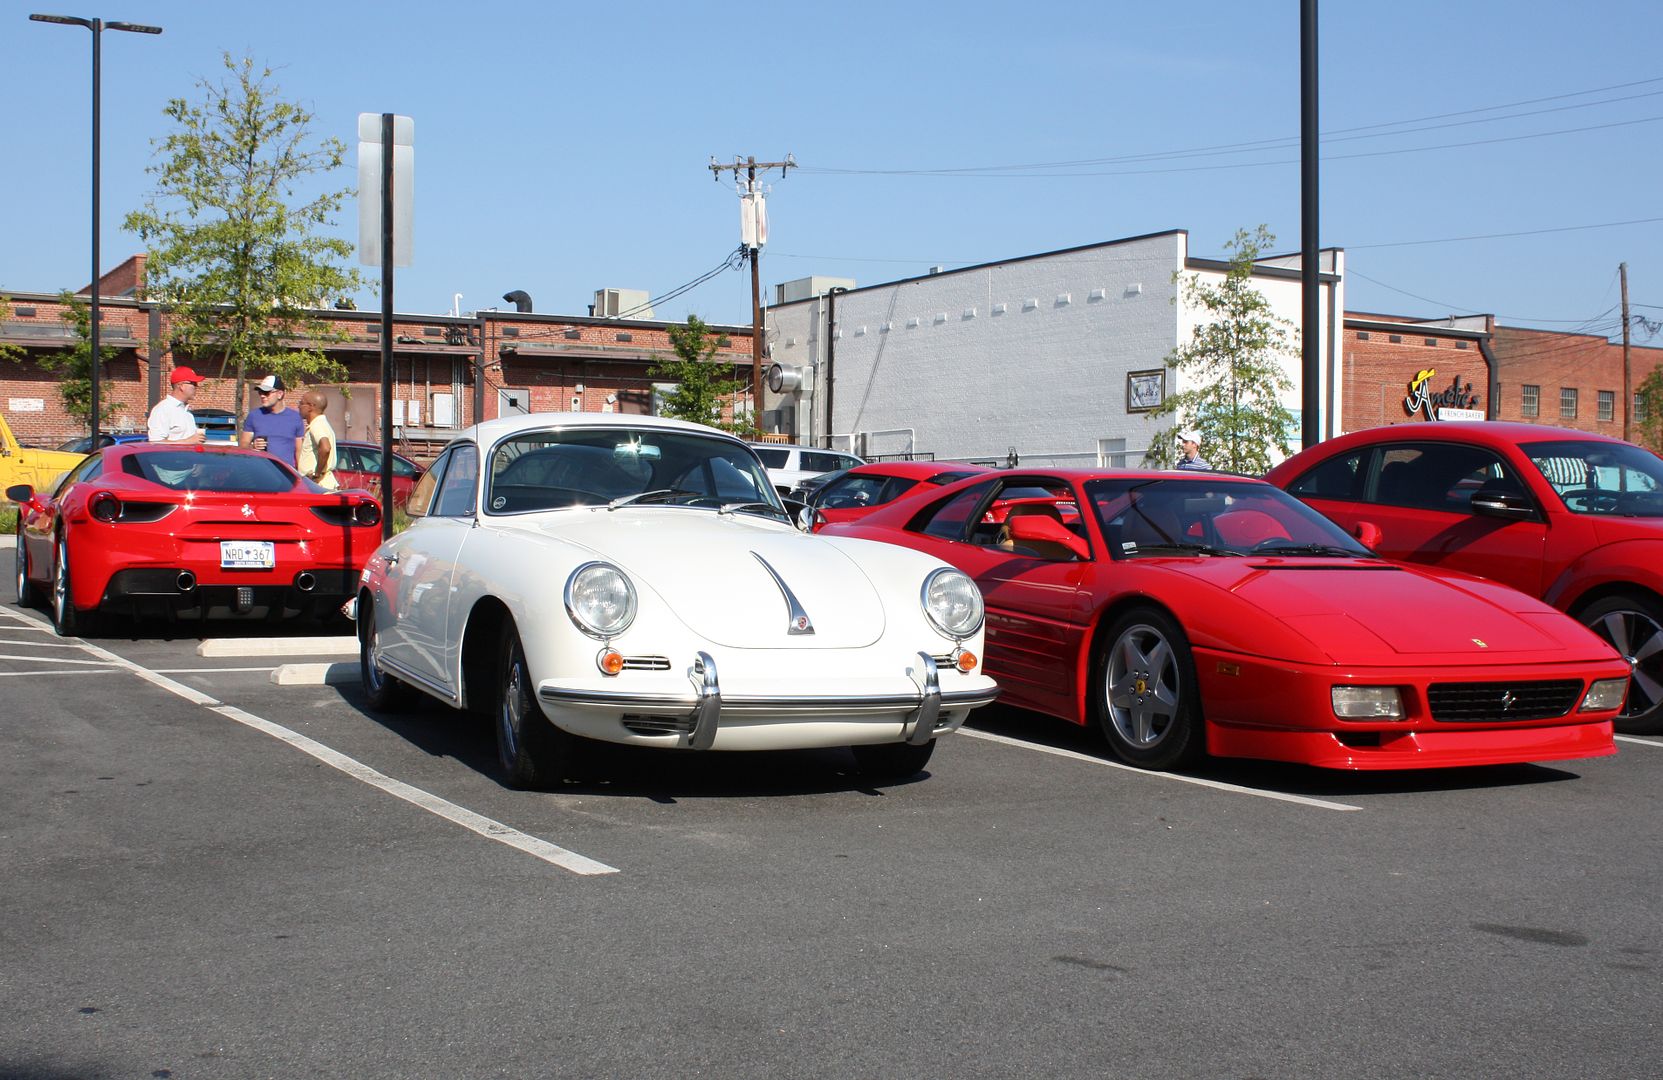
Italian cars were well represented with a number of Ferrari's and a Lamborghini Miura.
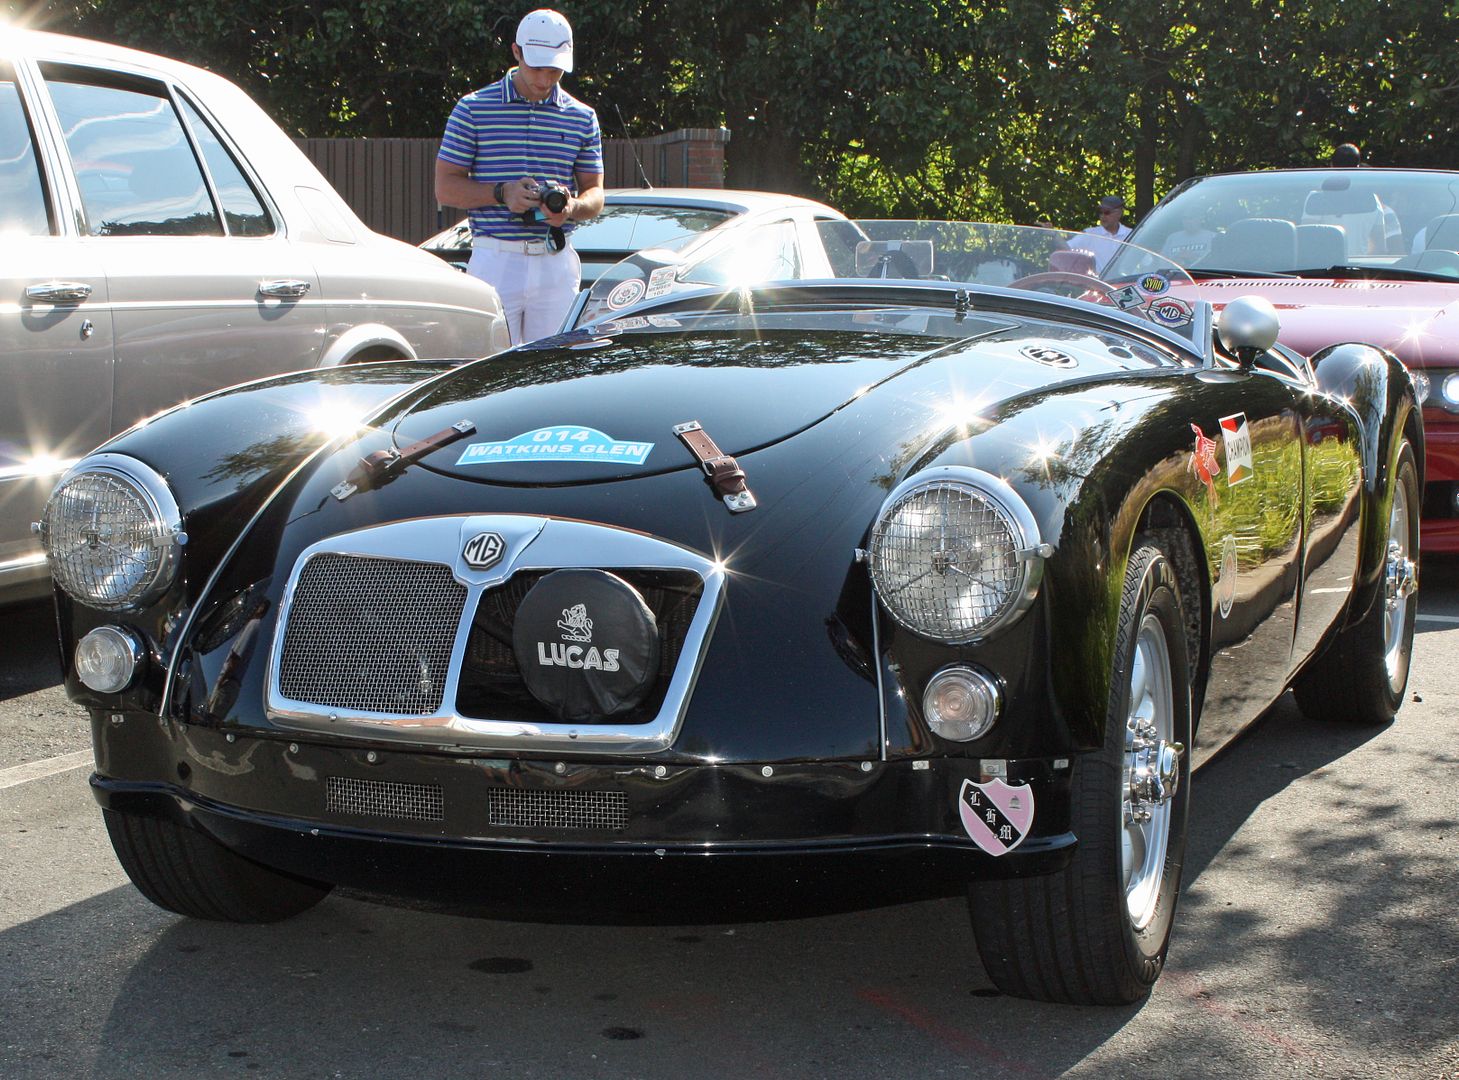
There was a LeMans replica MGA there that was outstanding. More on this type of car possibly to come from me as there is a similar car for sale in my little town. I am going to look at it on Tuesday.
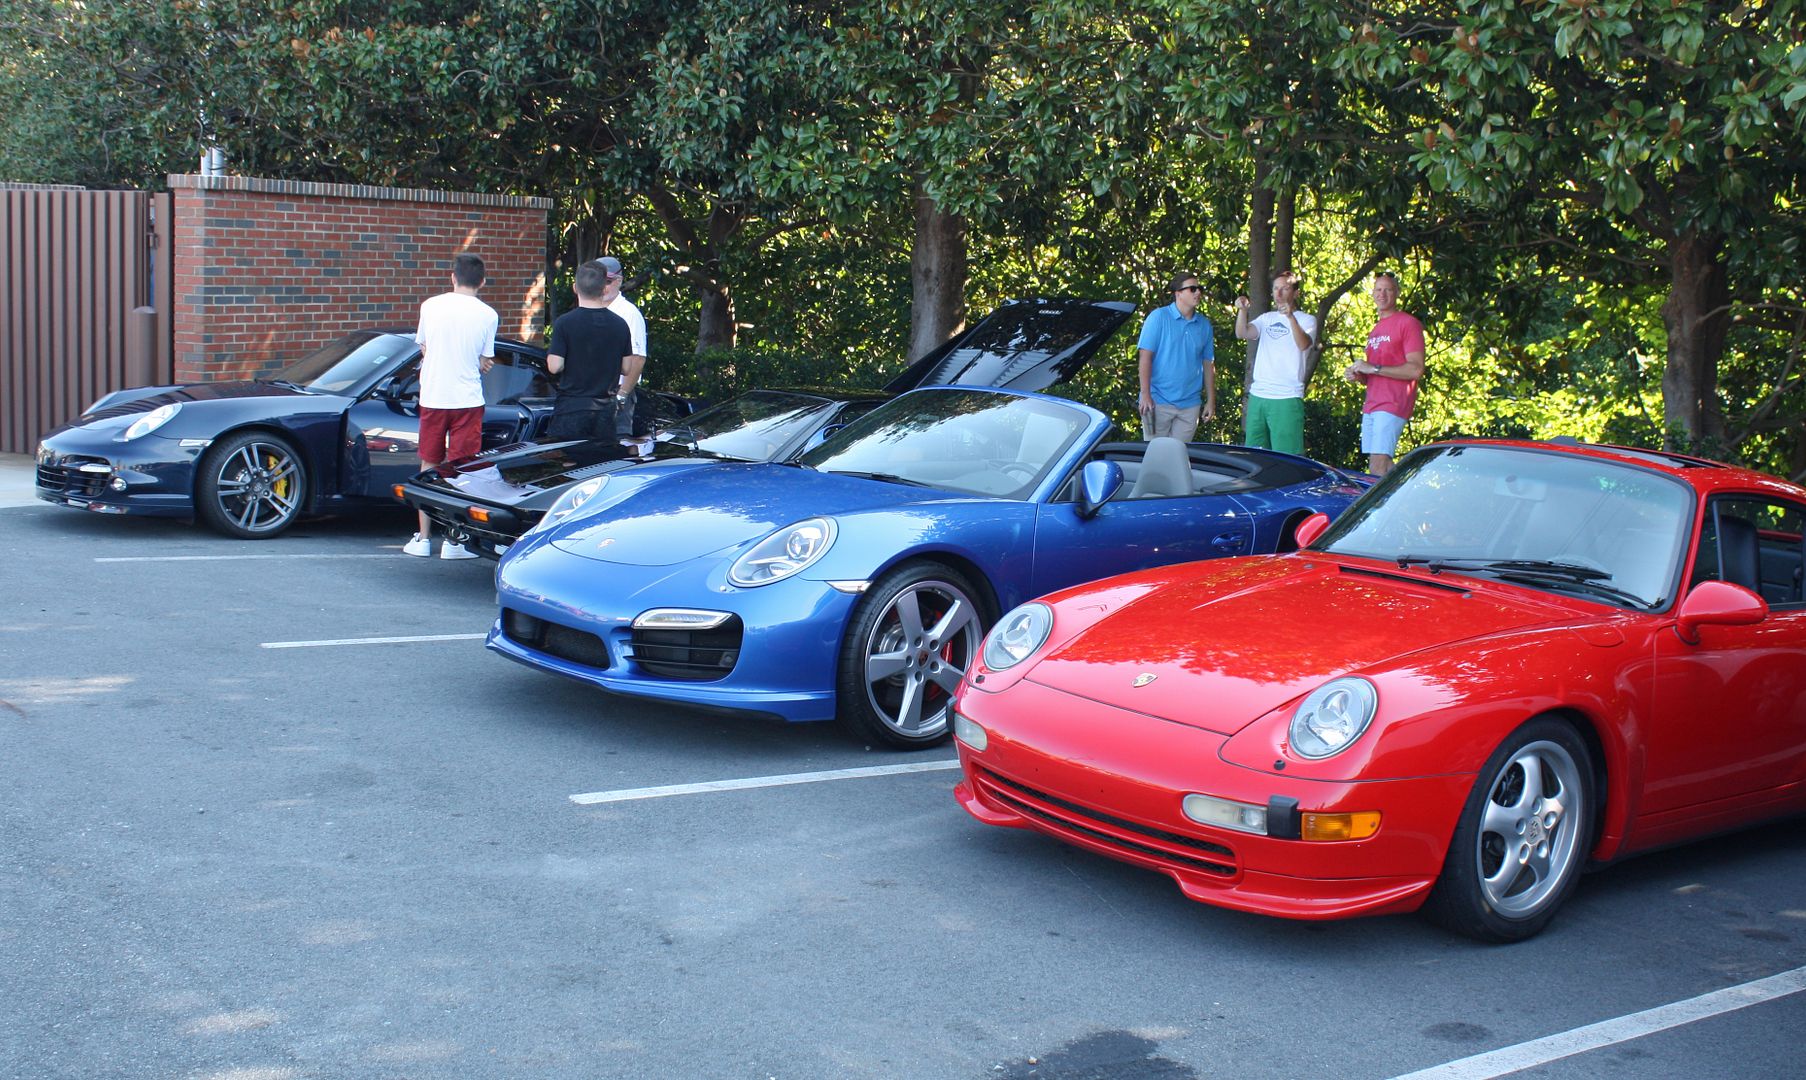
The Germans were well represented by Porsche and a E30 M5.
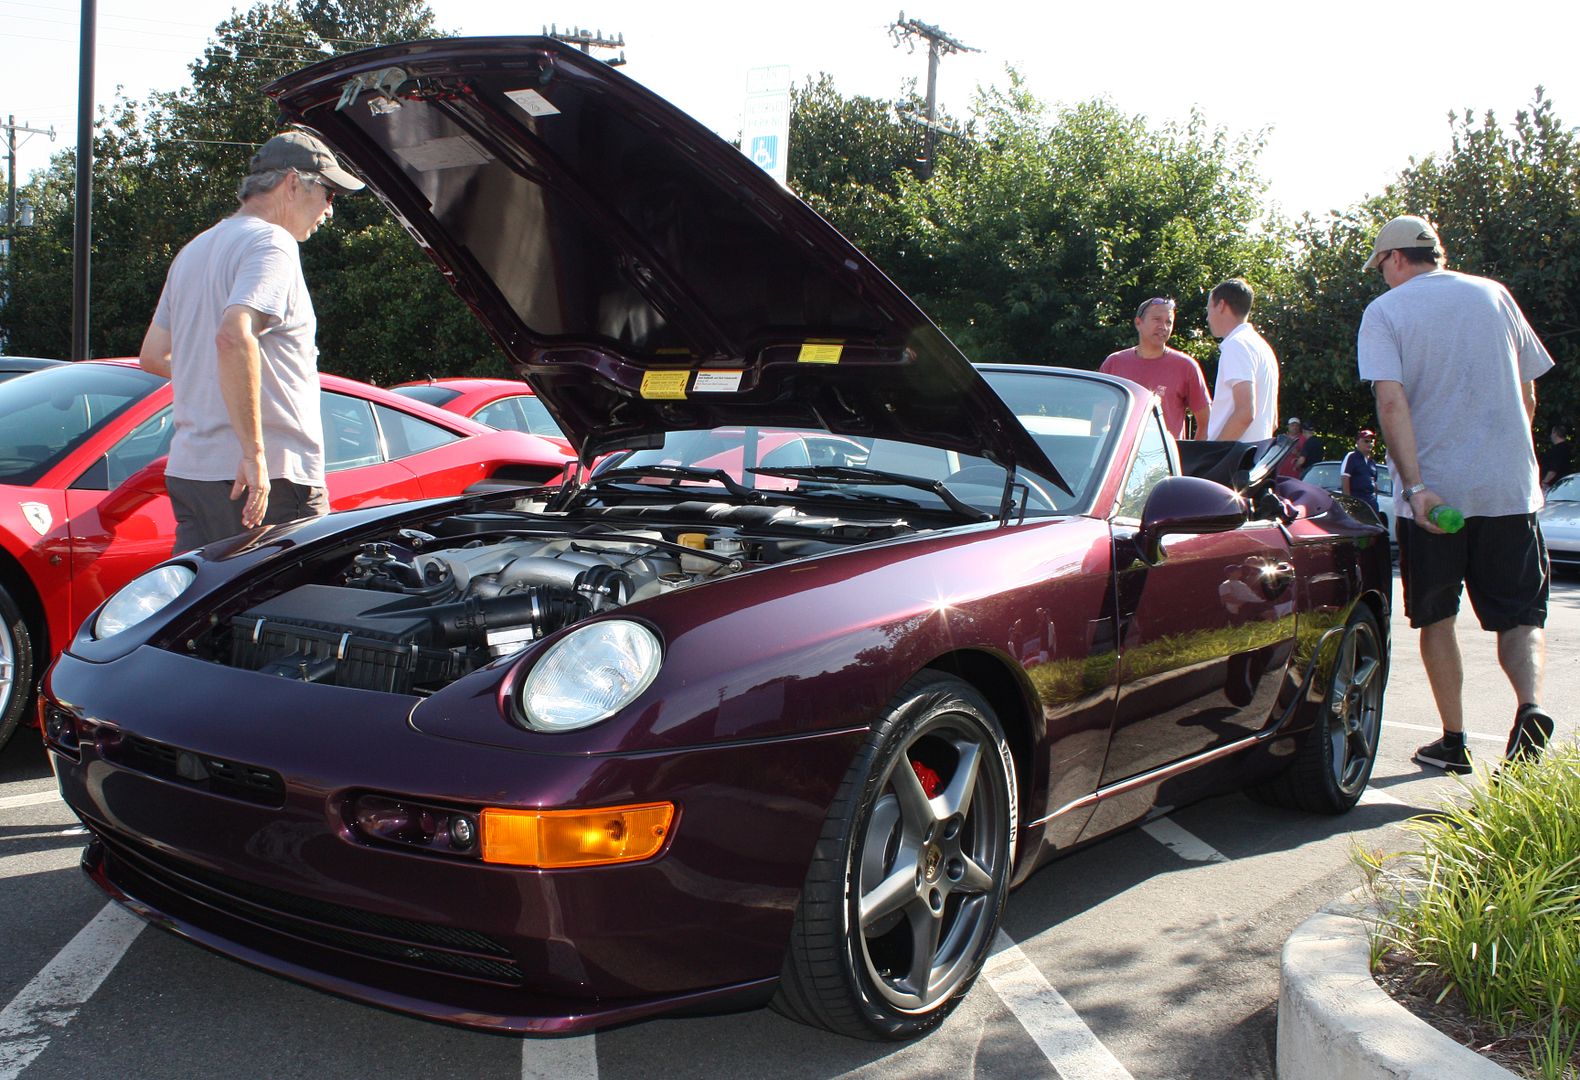
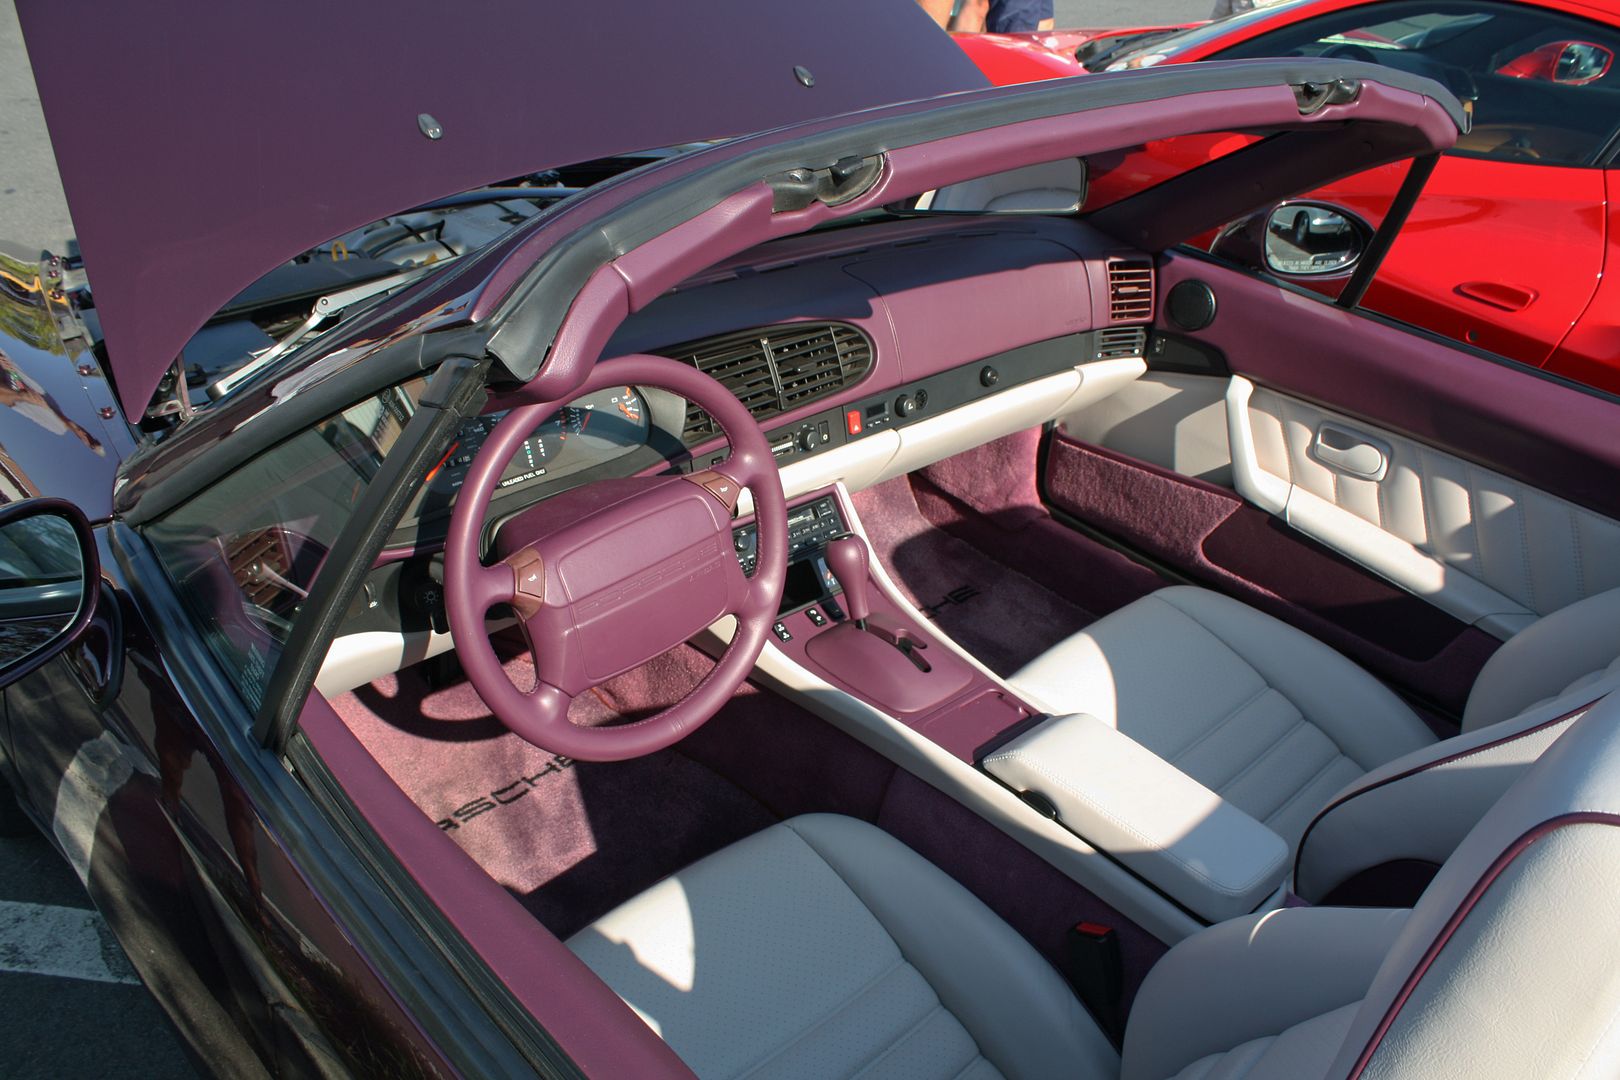
An unusual Porsche there was a 968 cab in a very purple exterior and interior. I had never seen this color combination before and the owner said it was one of three. Not sure I would have ordered a car in this combination but it was striking.
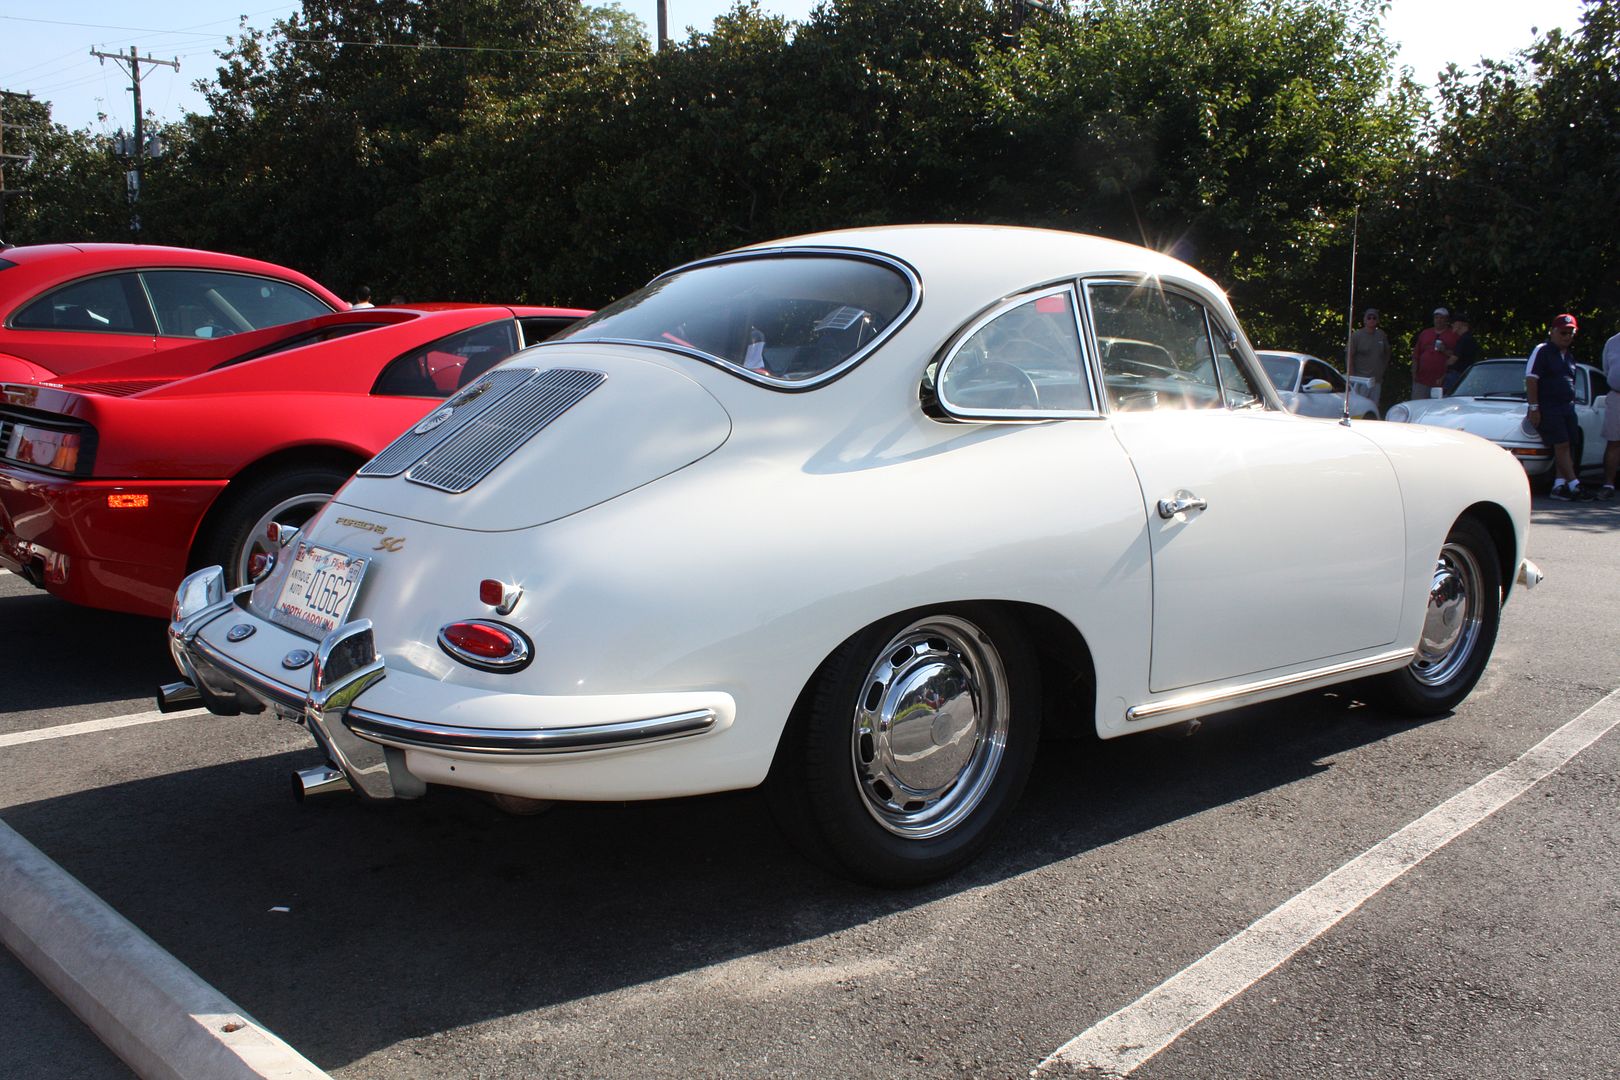
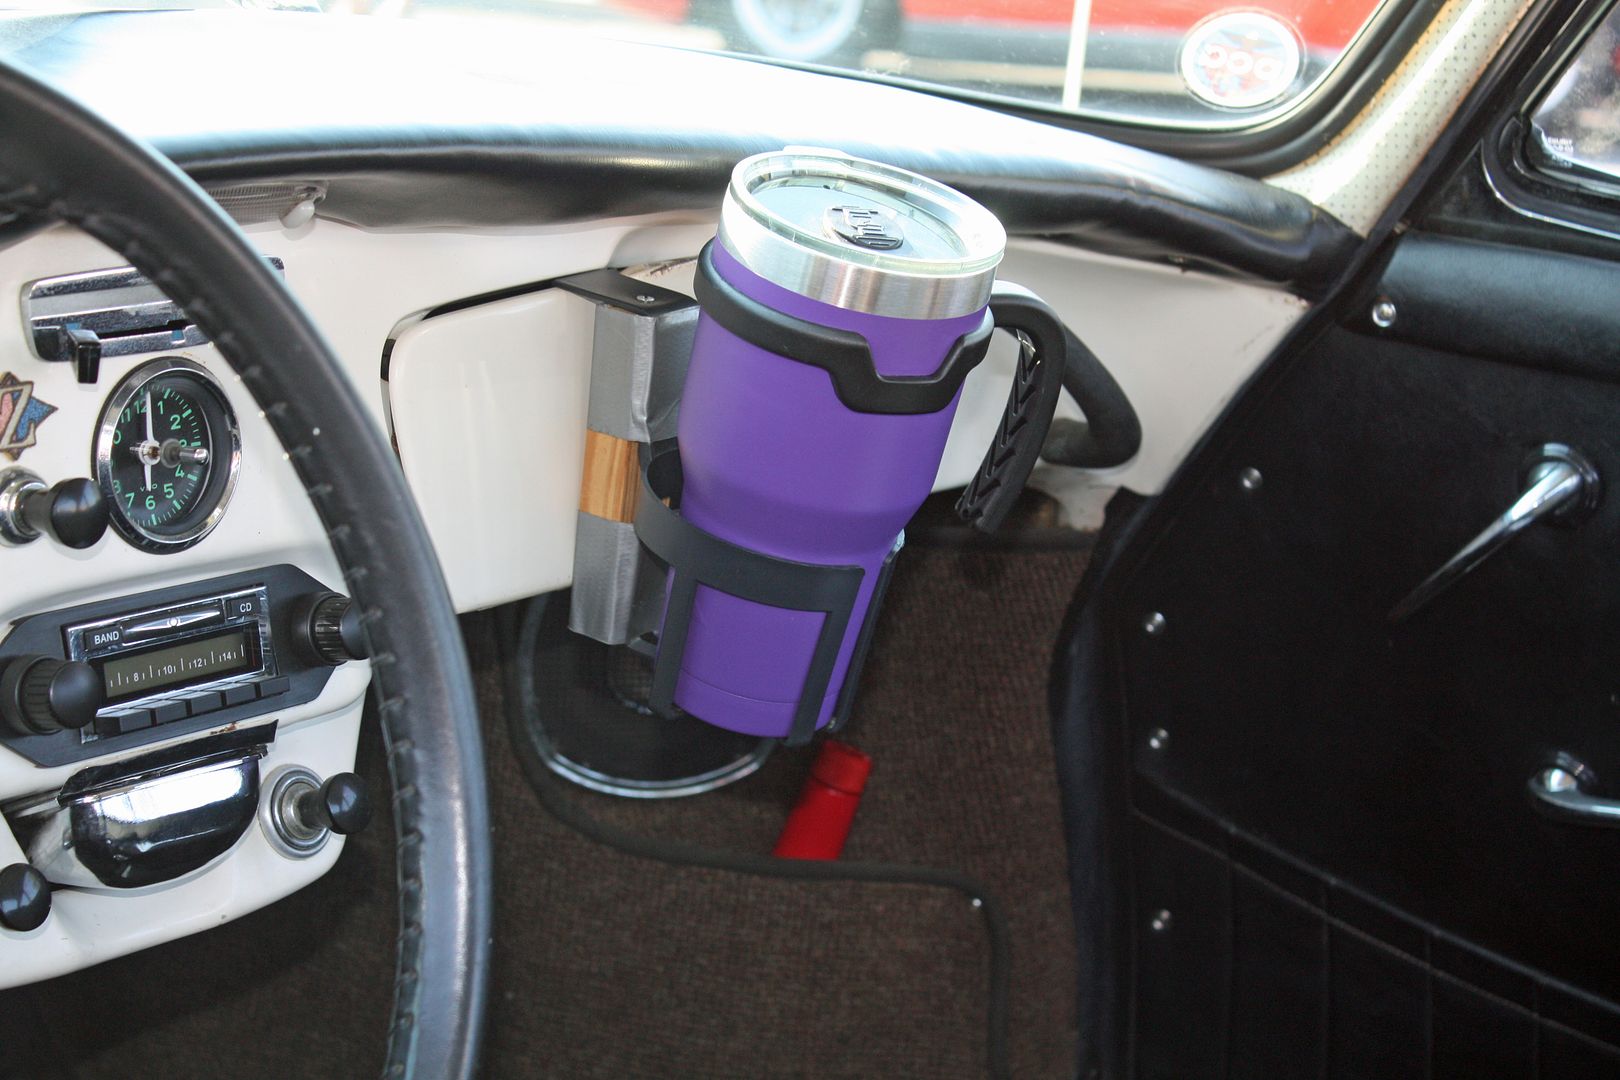
There was also a 356SC there with a 912 motor. It was for sale but I did not see the owner to get a price. It contained an early Porsche cup holder prototype!
A great time was had by all!!!
I left early this morning to drive to a Cars and Cappuccino in Charlotte, about a fifty mile drive one way. I take a twisty two lane road, with a 55 speed limit, over to the interstate that I typically set the cruise at 63mph. The cruise was very slow to engage but once I had it set, it worked great. Going up and down some hills wasn't as smooth as it should be. More adjustments needed.
Once I was on the interstate and had the cruise set, it worked great and kept the speed within two mph. Again, it was slow to engage.
One of my friends has a '90's Volvo two door coupe. When I first met him, he had a 5.0 Ford V8 in the car in a very professional installation. During the past year, he took that motor out and installed a Chevy LS3. He does great work and you would think that LS3 came in the car. On both of these engine conversions, he had used the same Rostra cruise that I used. He told me that he originally set his dip switches for V8 high. I set mine on V8 low as it does not have high horsepower. His didn't work the way he wanted either and he eventually set the dip switch for four cylinder low and it works great!! The setting was the exact opposite of what he thought he should be using. He told me to keep experimenting with the settings until I found the one that worked. His car is also beige so we created our own beige European car section.

Cars and Cappuccino is supposed to be for European cars only. More and more non-European cars were beginning to show up and about four months ago, a Corvette left the event with tires burning. The property owner said they did not want them back. So they did something unusual. On their Facebook page and on threads on various car sites, they said they were going to make the event invitational. If you wanted to attend, you were to send them a list of the cars you had to determine if you fit the bill. Then they sent those who had the correct type of cars an email with the location and you were asked to refrain from forwarding the email. You pay $20 per year and get a cling on sticker that can be used in a number of cars. This lets them know you have paid your dues.
I was gone on my RV trip for the first two events so today was my first time at the new venue. It worked out great as there were about forty very nice cars, they opened the restaurant early with a limited menu and everyone had a great time. Nobody created a scene when they left. It's a shame that car groups have to resort to these types of procedures to keep their venues.
Italian cars were well represented with a number of Ferrari's and a Lamborghini Miura.


There was a LeMans replica MGA there that was outstanding. More on this type of car possibly to come from me as there is a similar car for sale in my little town. I am going to look at it on Tuesday.

The Germans were well represented by Porsche and a E30 M5.

An unusual Porsche there was a 968 cab in a very purple exterior and interior. I had never seen this color combination before and the owner said it was one of three. Not sure I would have ordered a car in this combination but it was striking.


There was also a 356SC there with a 912 motor. It was for sale but I did not see the owner to get a price. It contained an early Porsche cup holder prototype!


A great time was had by all!!!
Last edited by jerhofer; 08-20-2017 at 05:19 PM.
08-26-2017, 10:32 PM
#88
Member
Thread Starter
I attended my first MB club event today in Dobson, NC at the Shelton Winery. I have been here once before for a car show and it is a wonderful venue with lots of shade trees, a good restaurant and good wine. I would guess there were nearly 75 cars there. This was my first chance to see other cars like mine and to talk to very knowledgeable people. I learned a lot. It was a very pleasant way to spend a day and we even had very moderate weather.
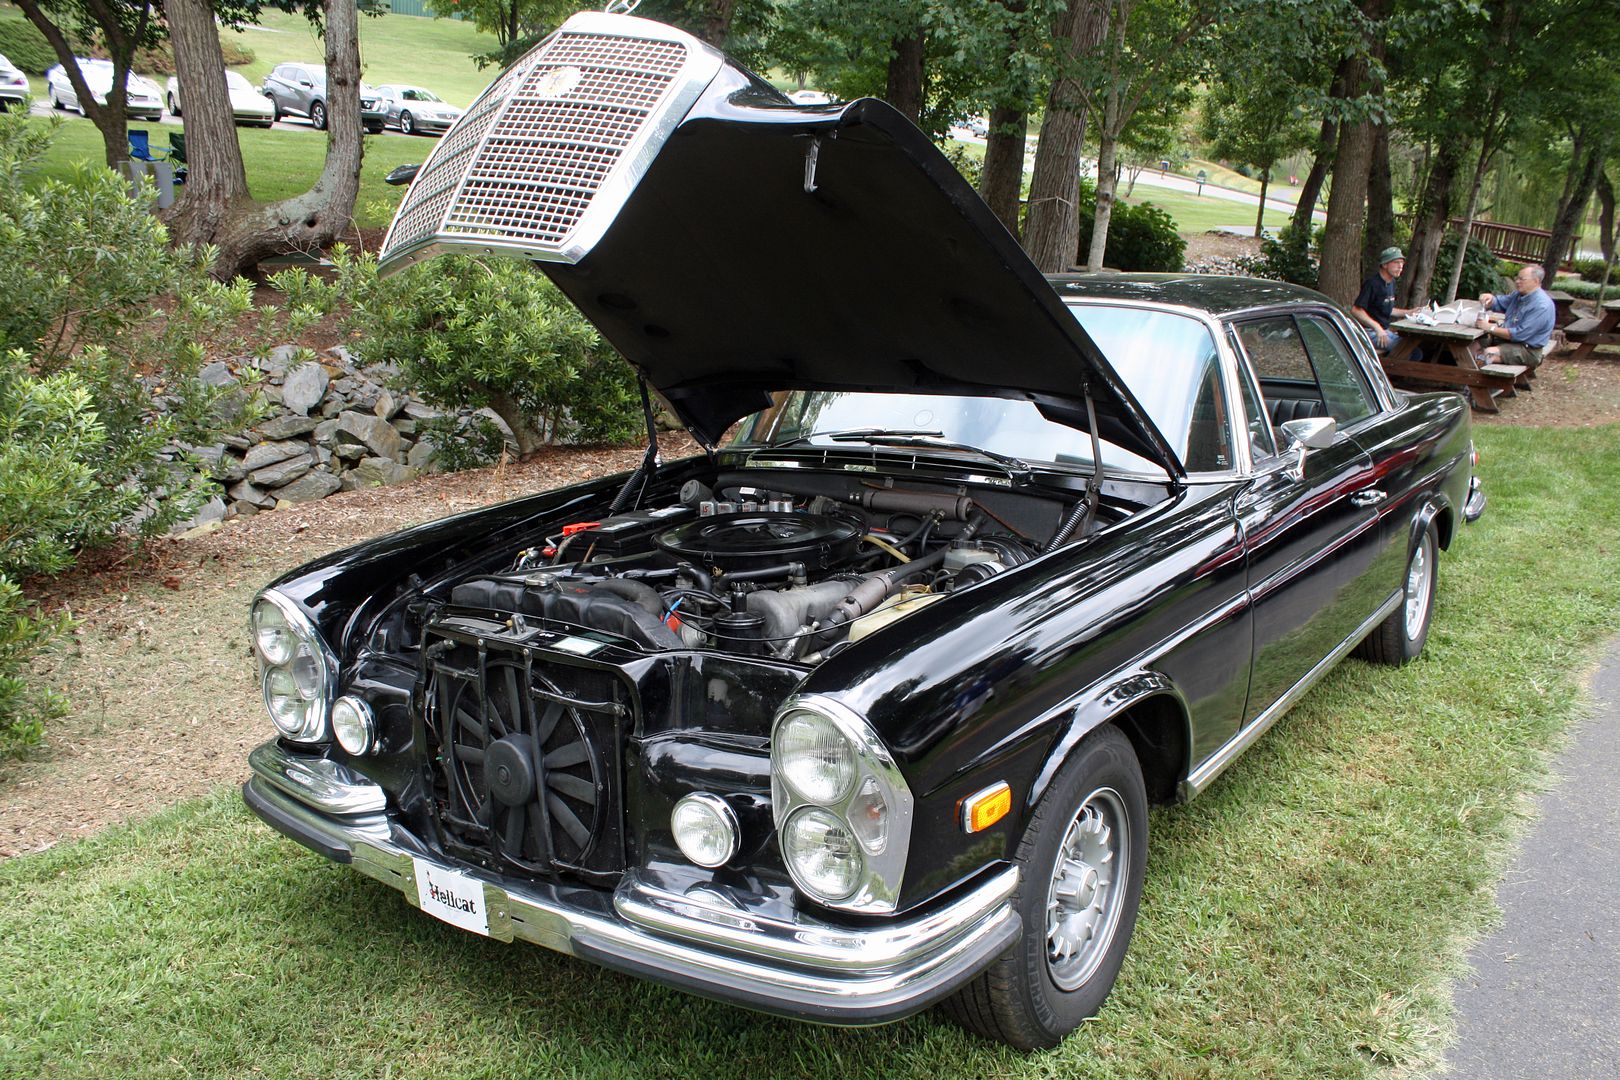
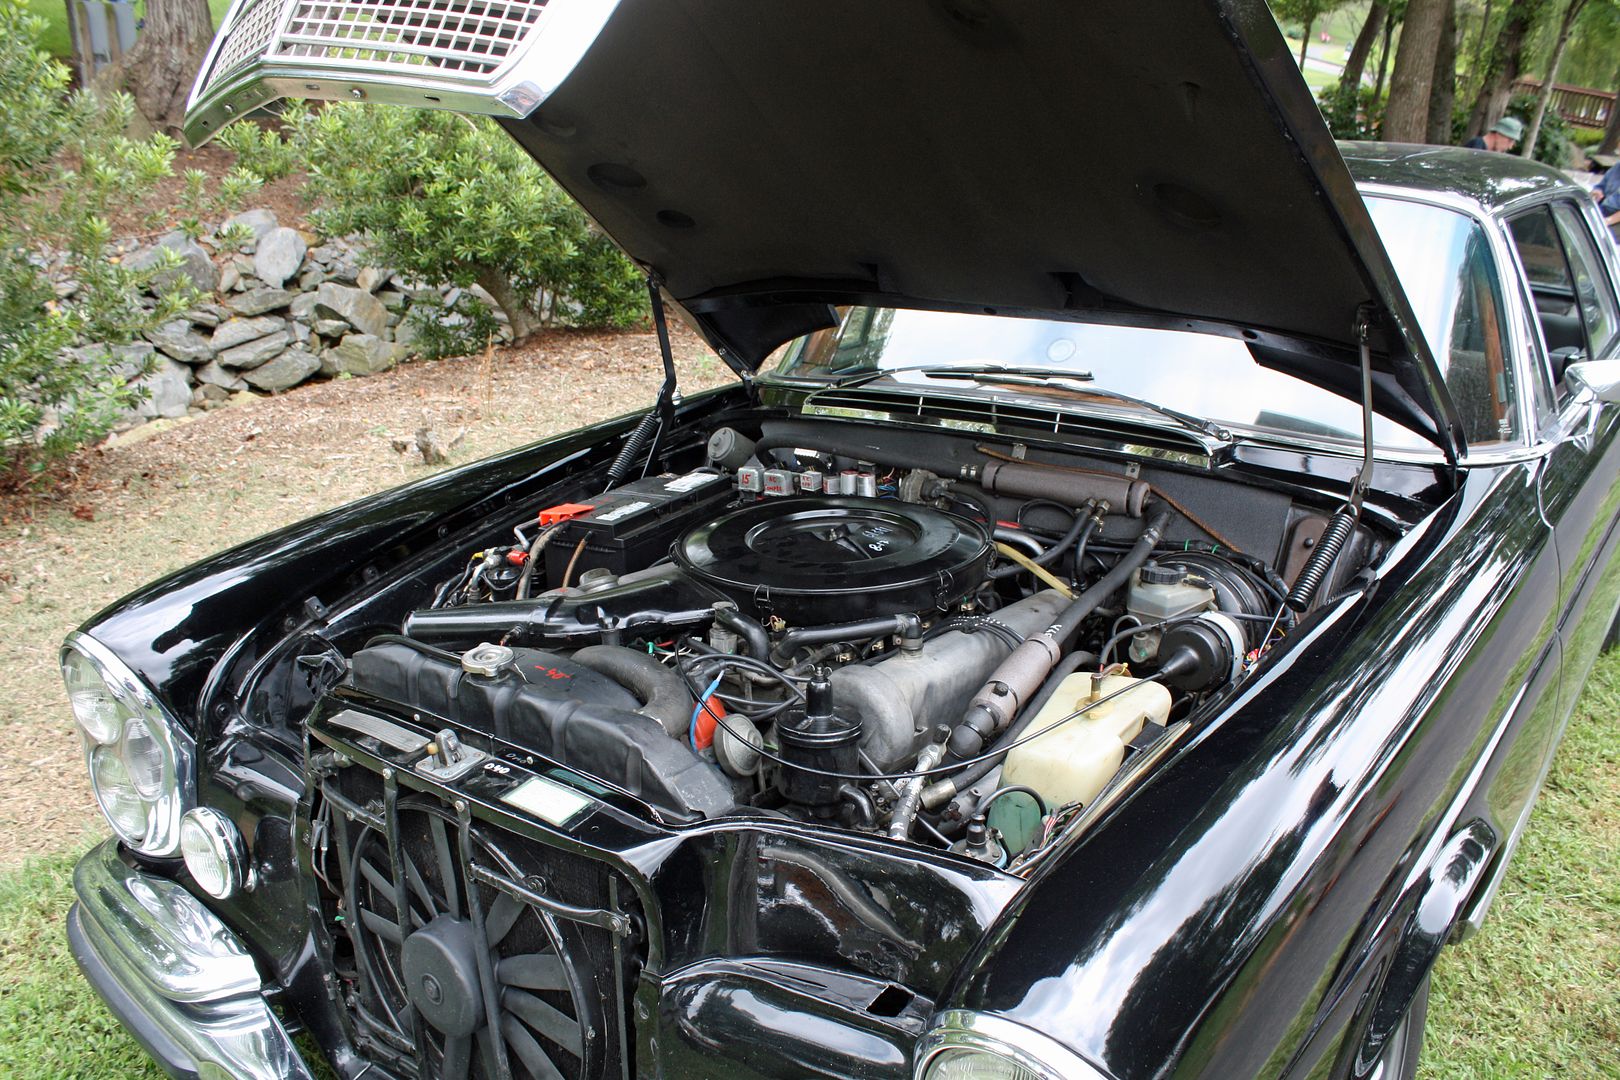
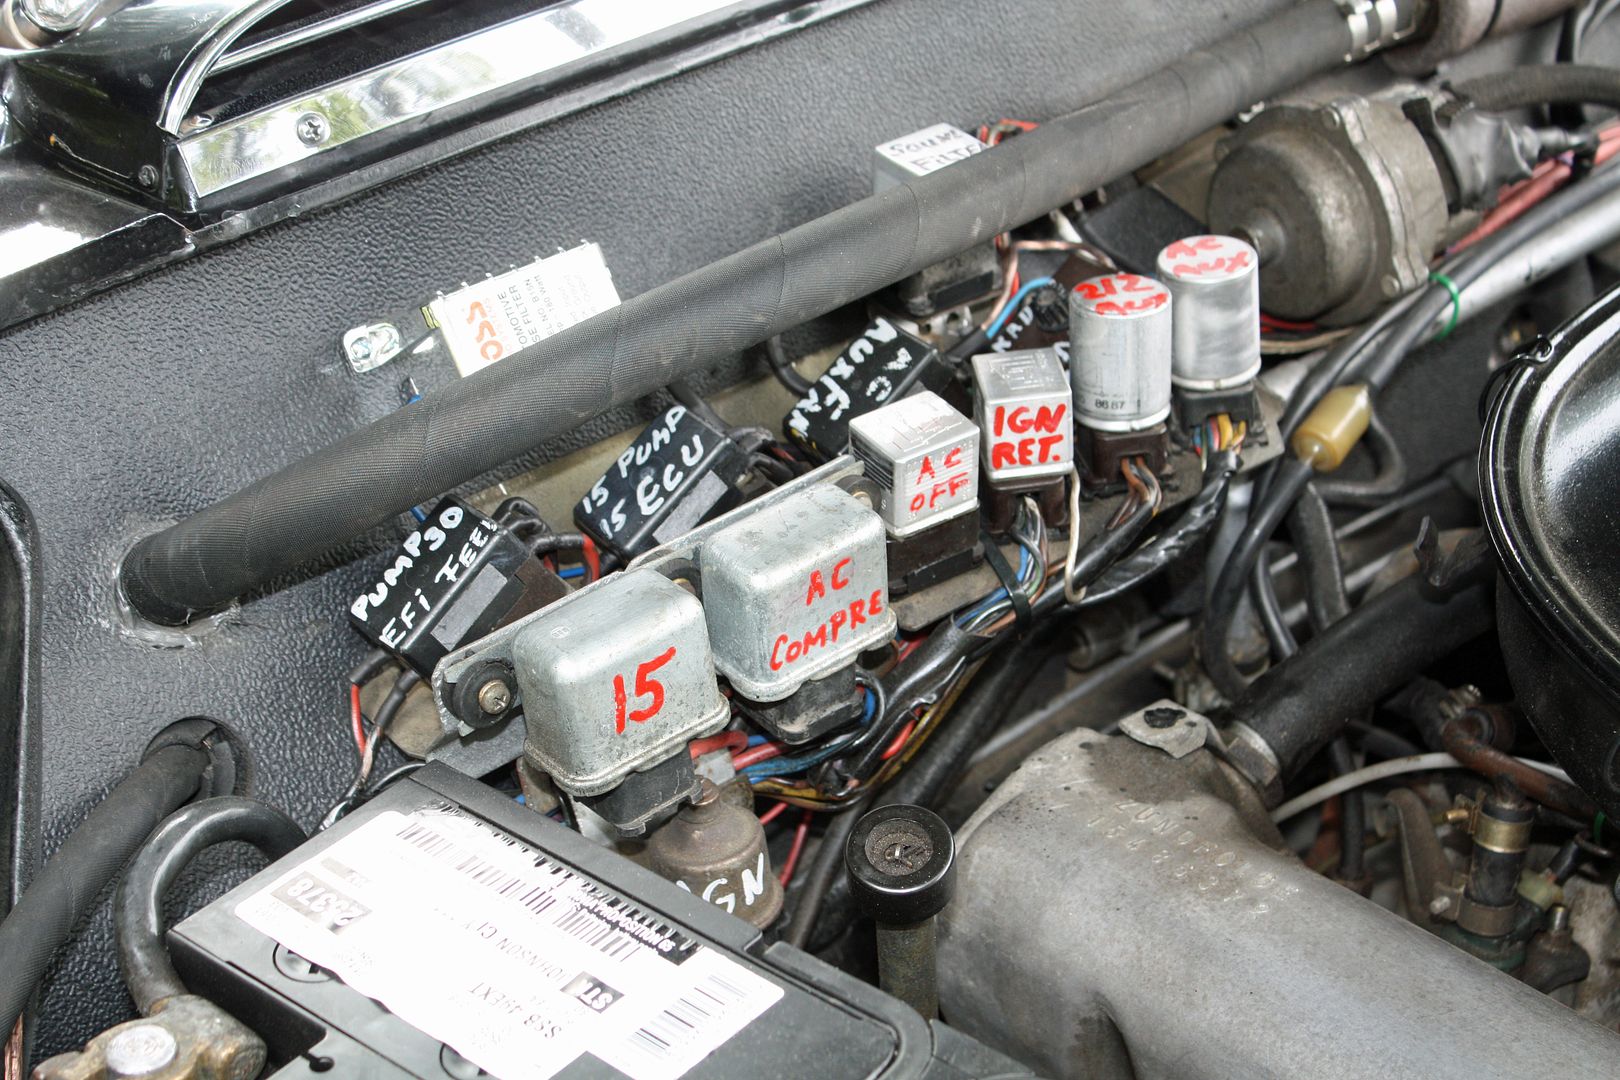
One guy there had transplanted a 4.5 motor into a 280SE coupe. He attributed marking every relay and fuse panel to being old and forgetful!!!
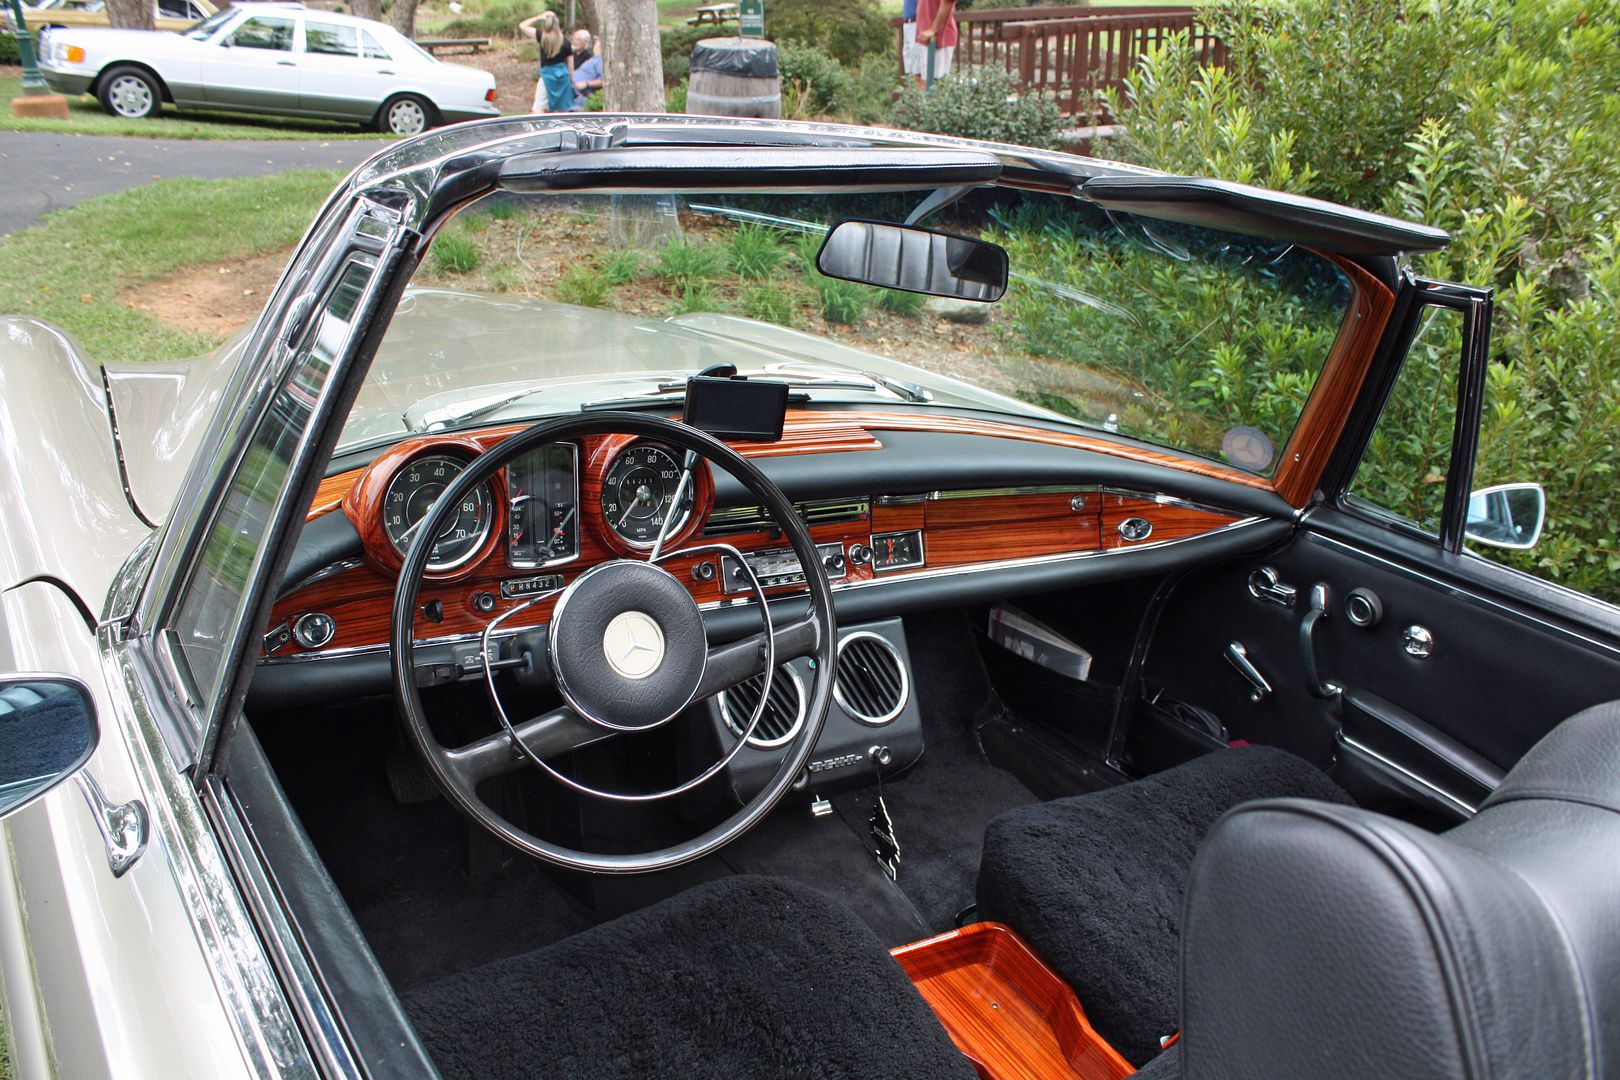
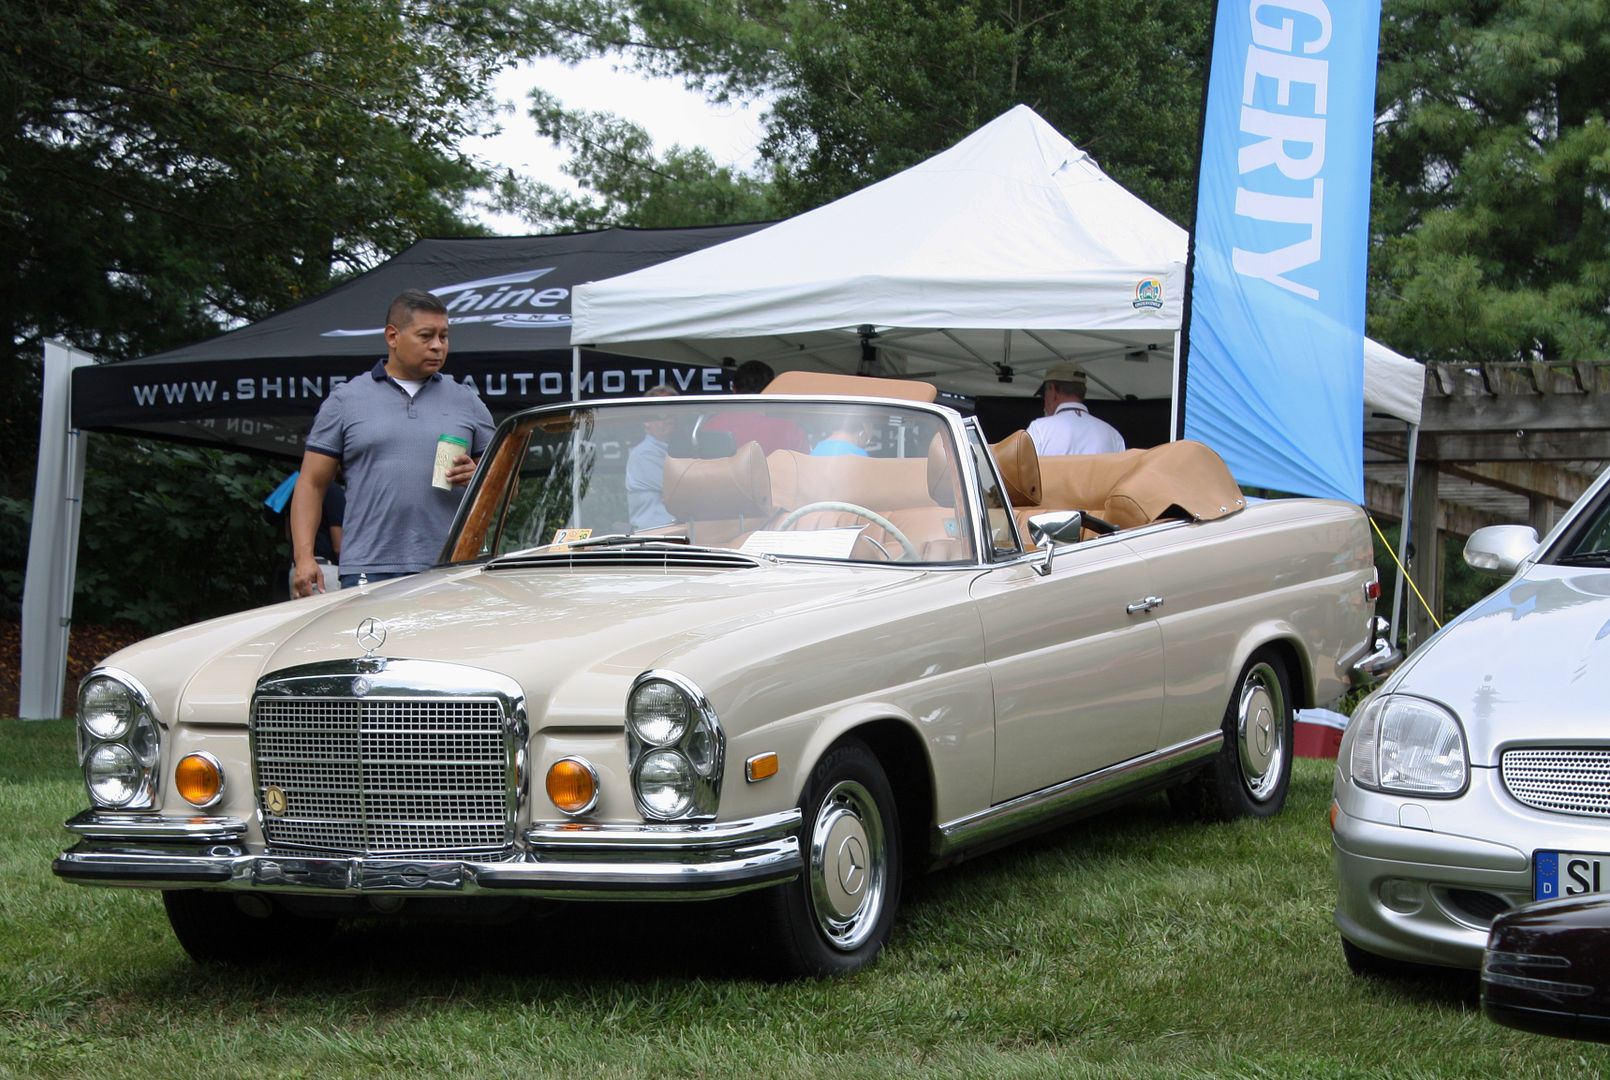
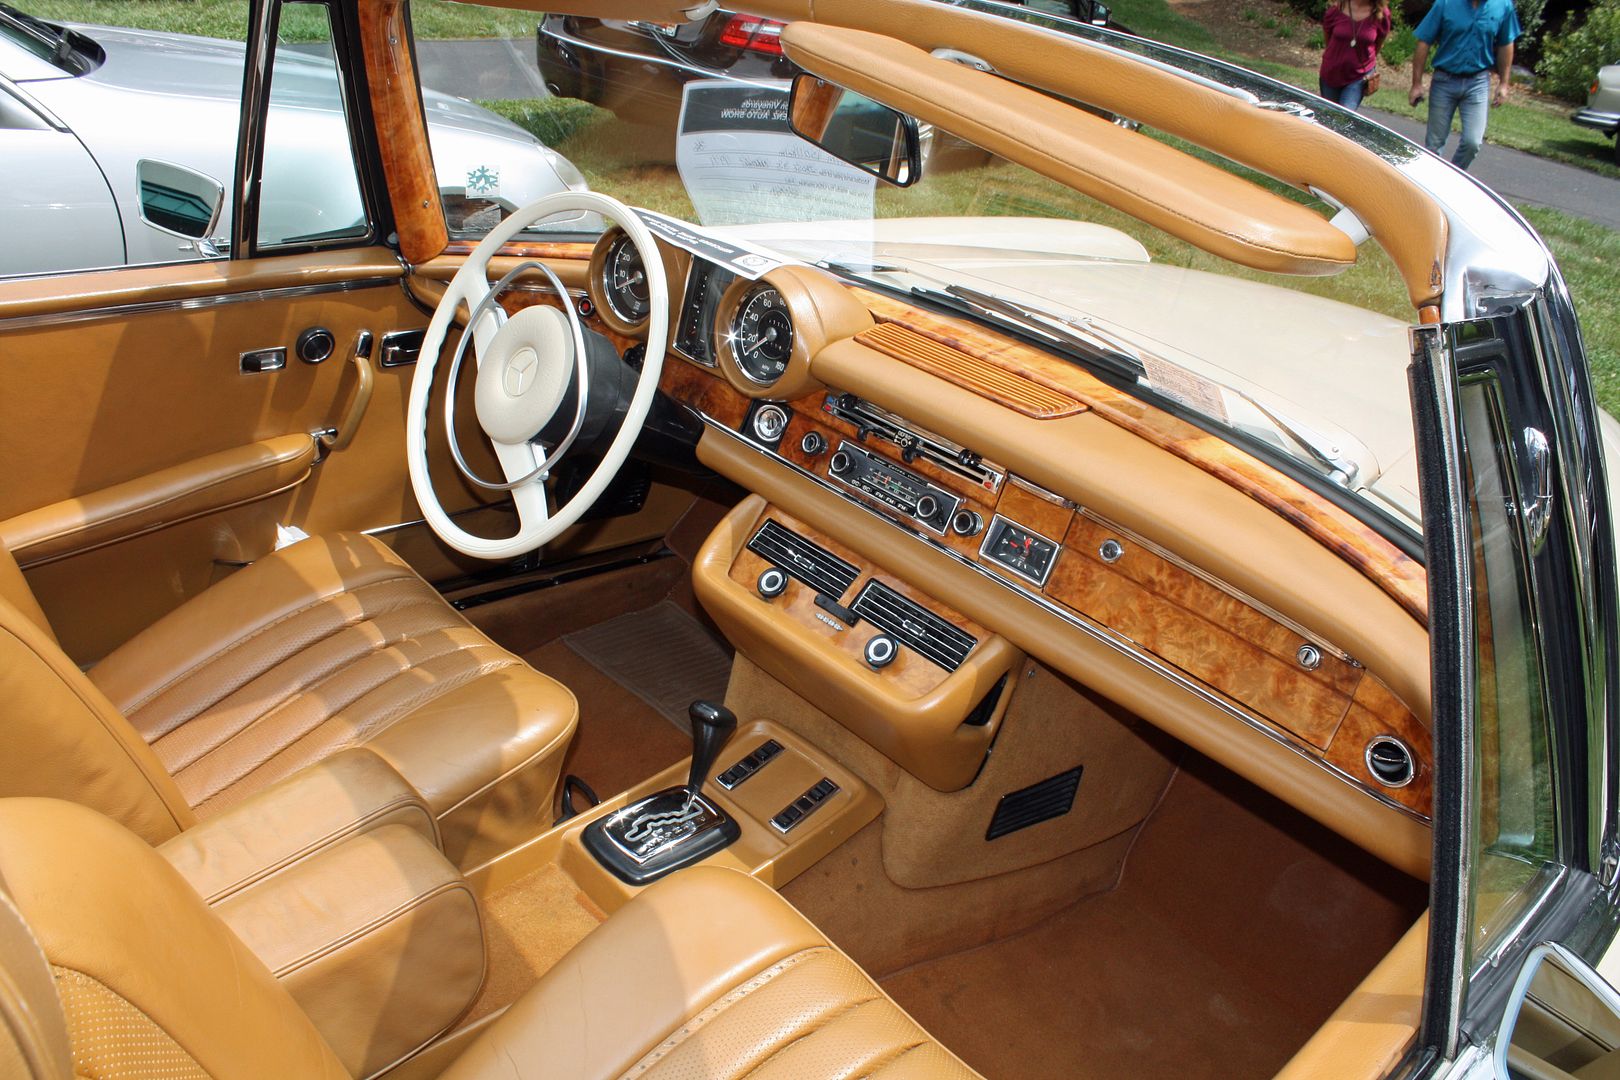
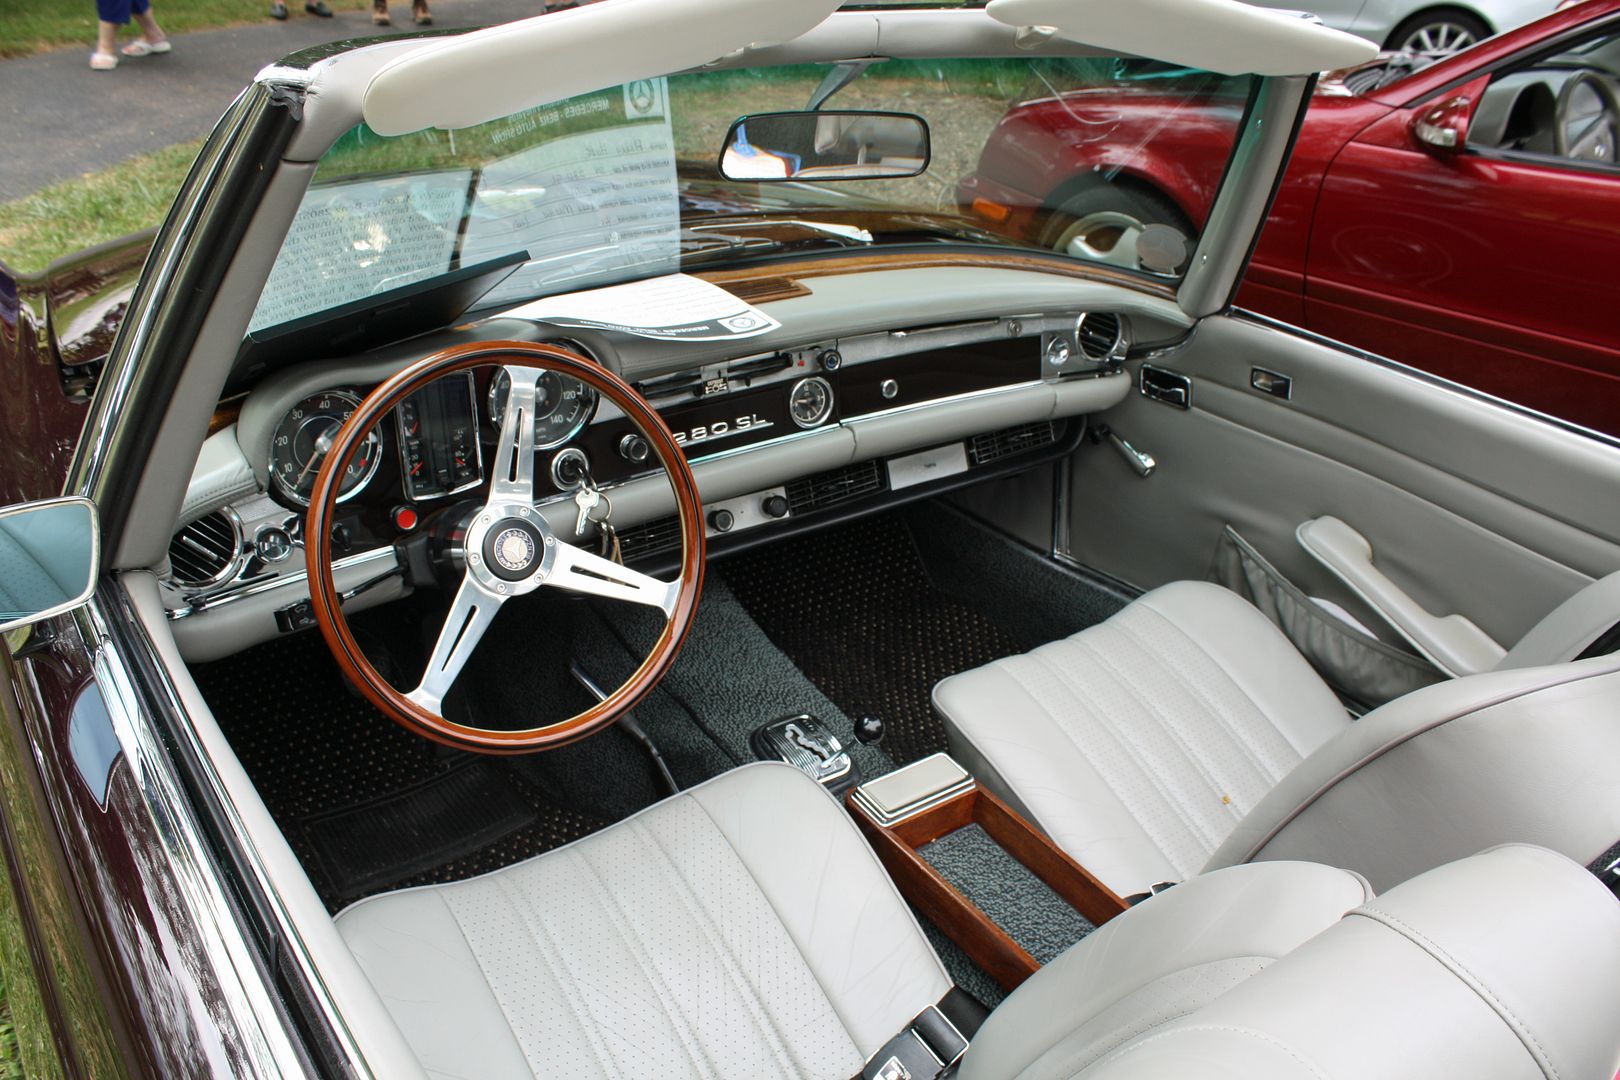
He also had this cabriolet. I really like the wood on these dashes.
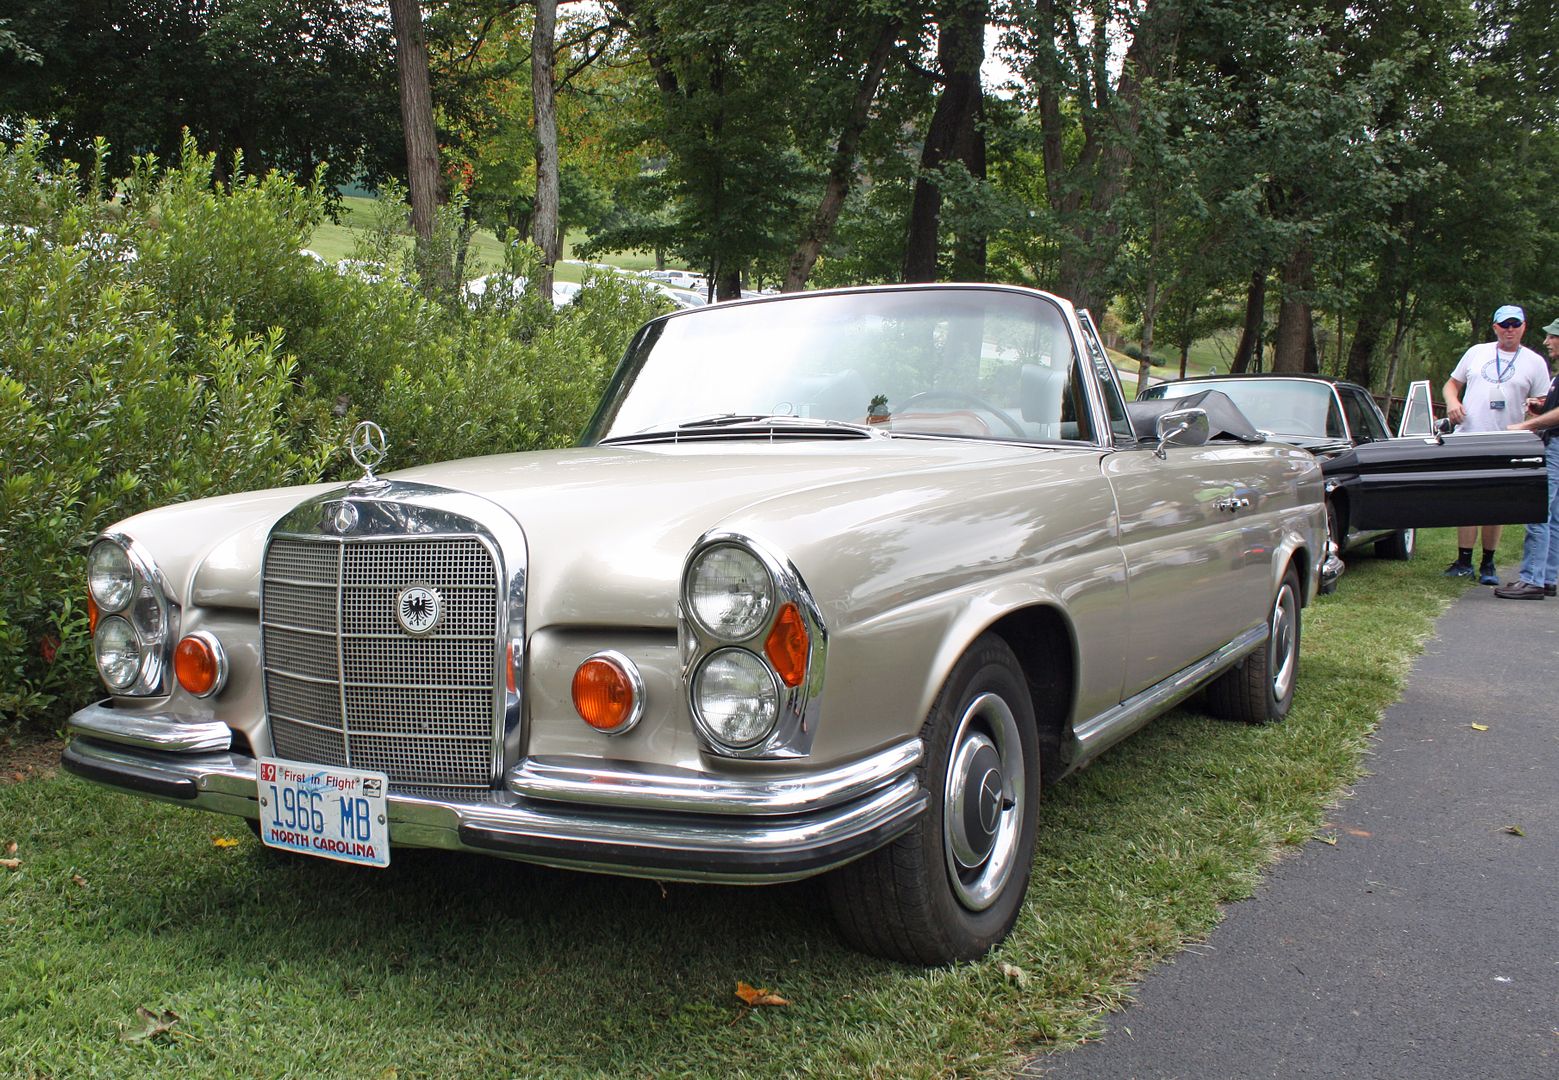
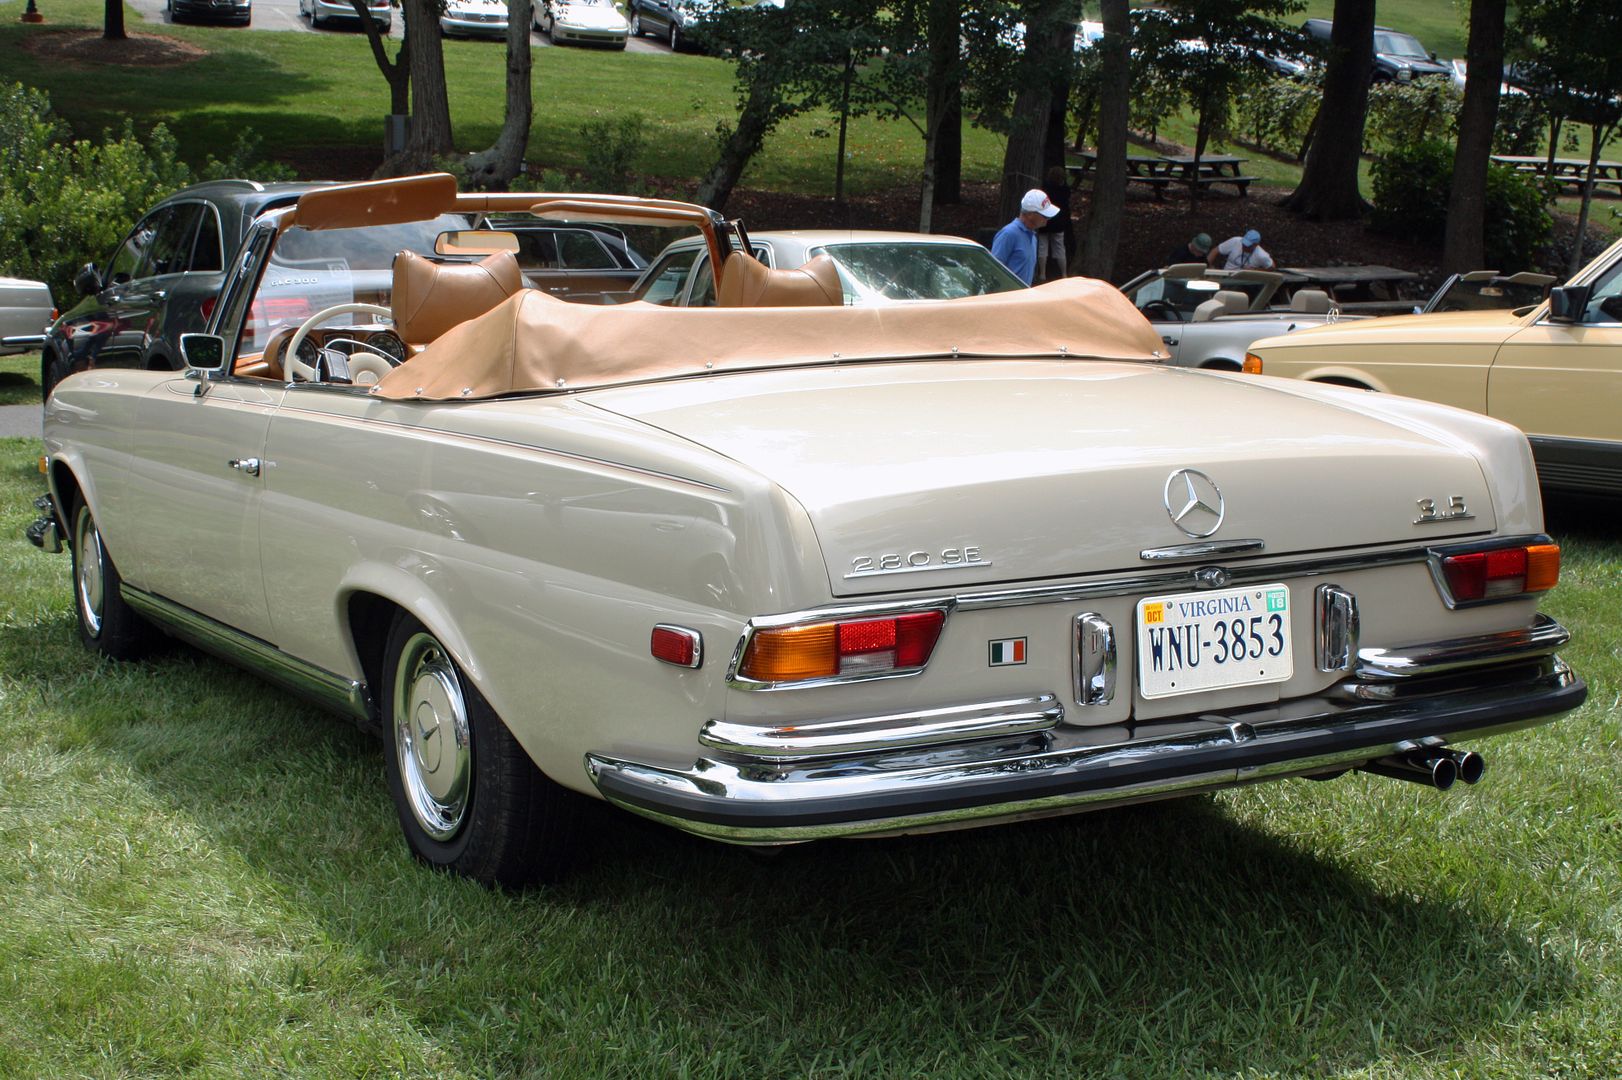
This cabriolet was even more spectacular.
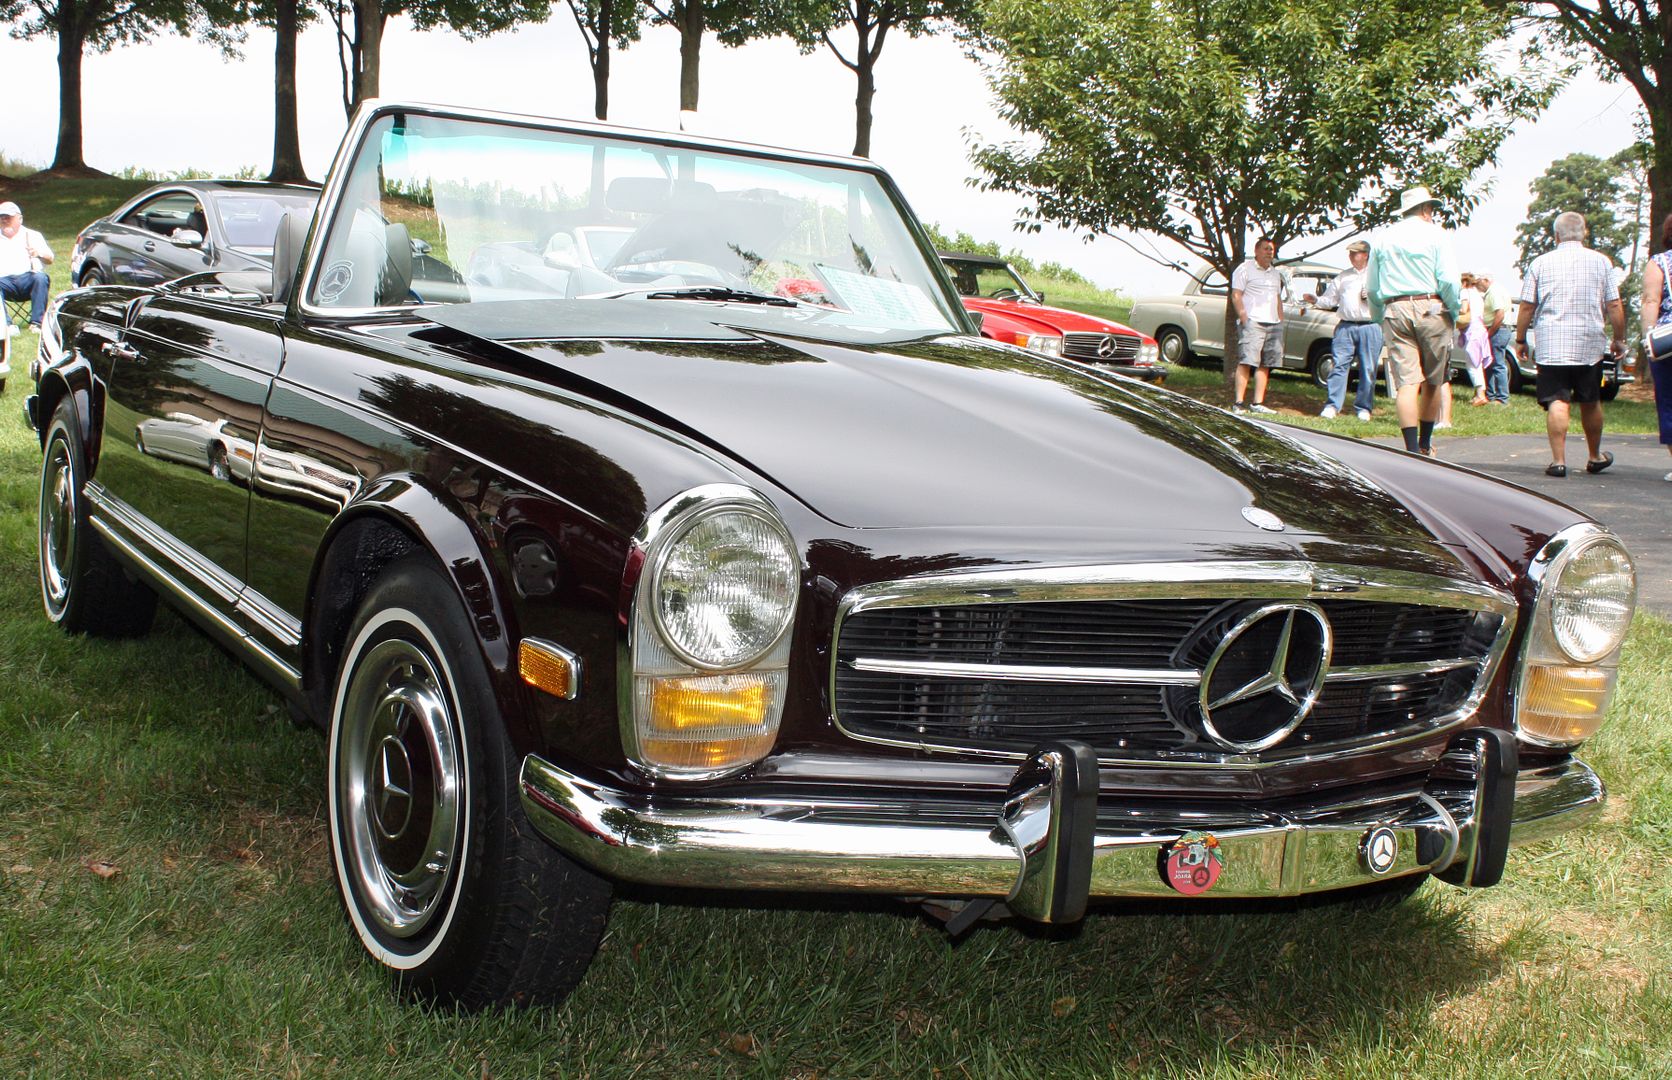
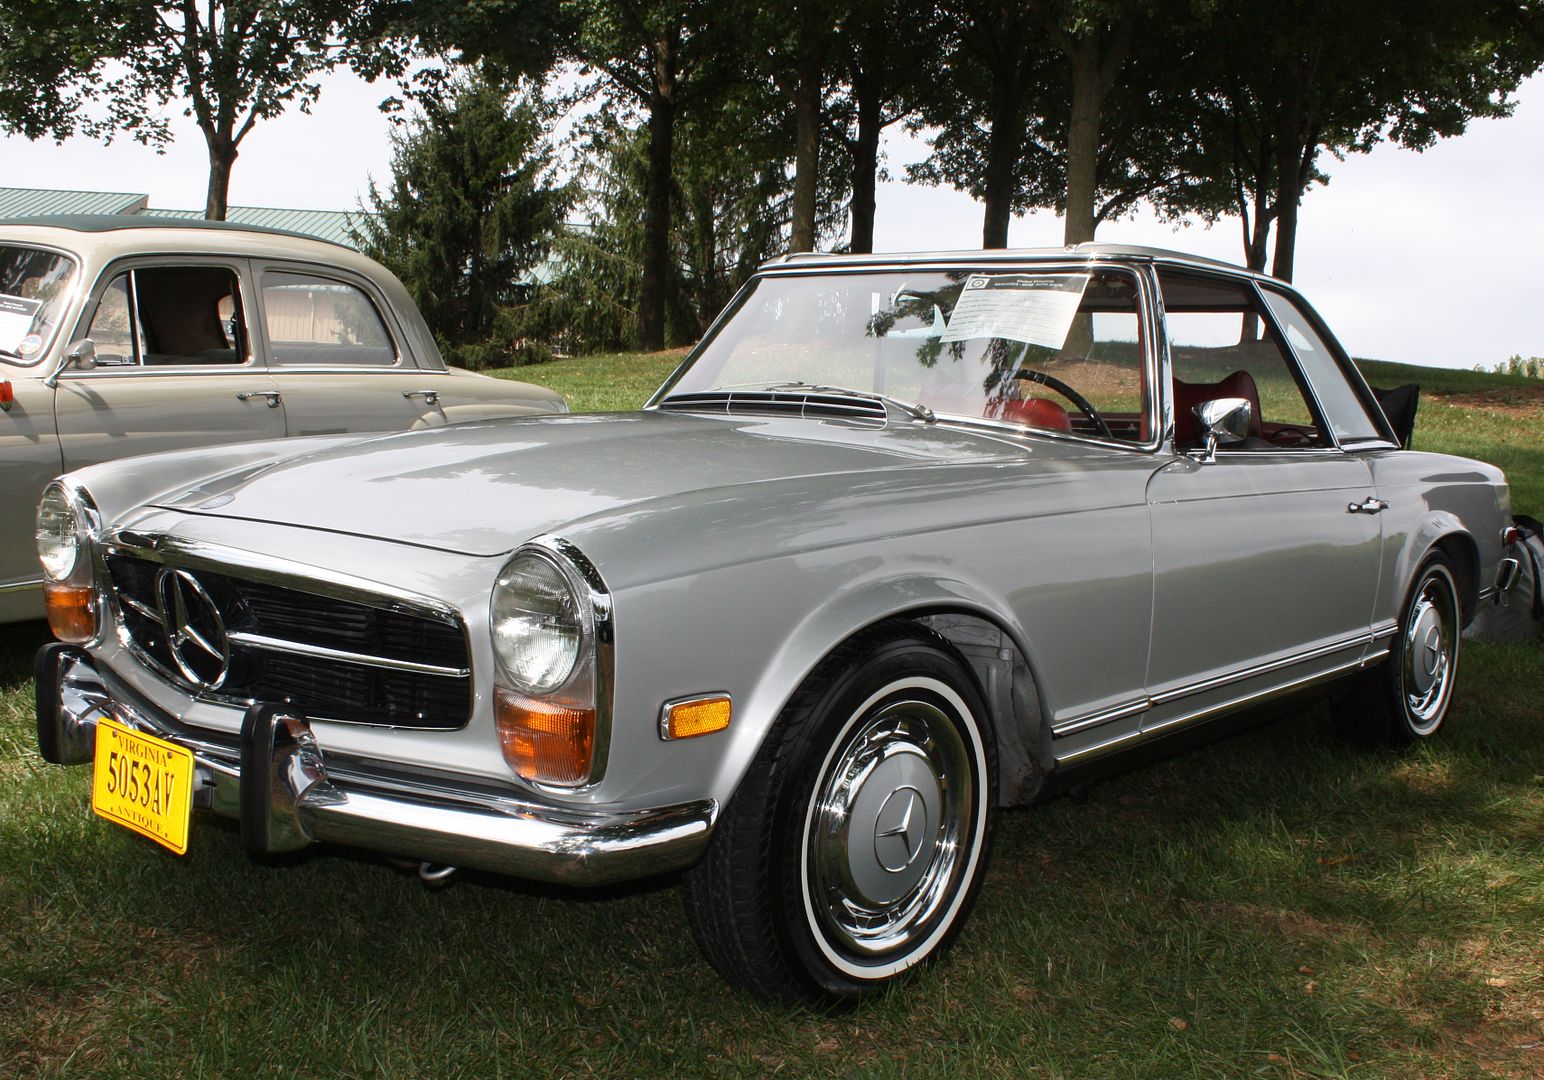
There were a number of pagoda SL's in attendance.
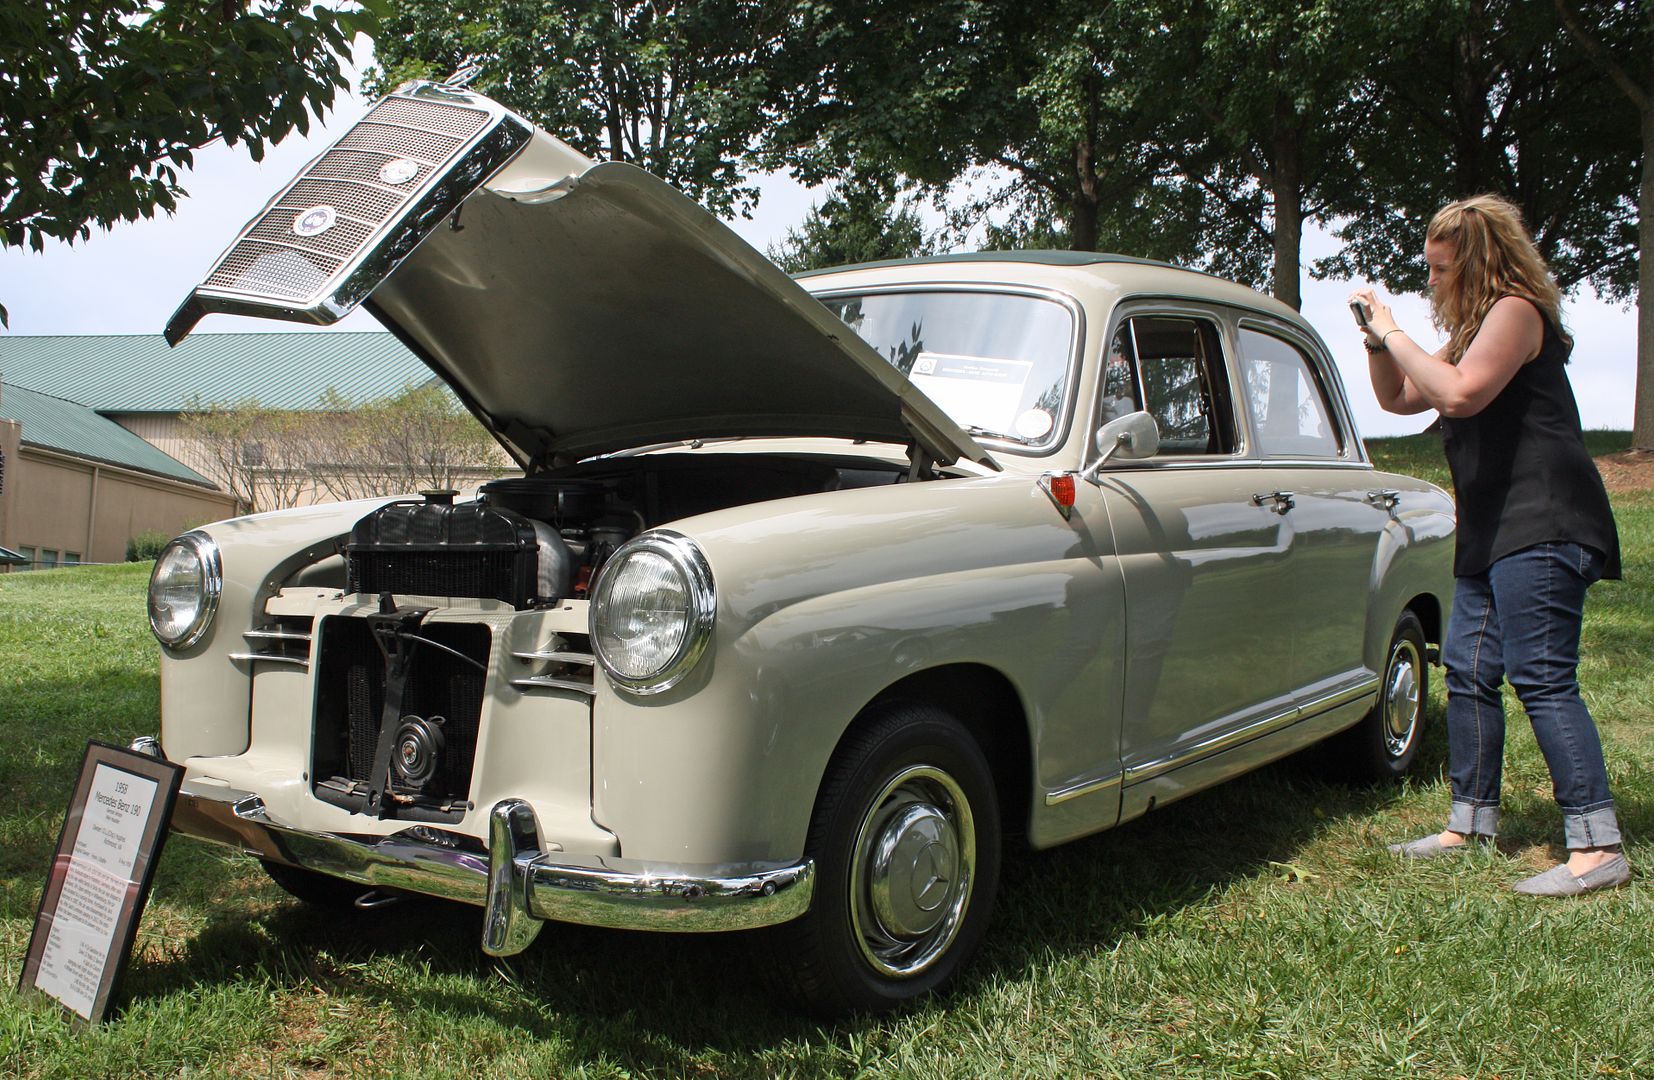
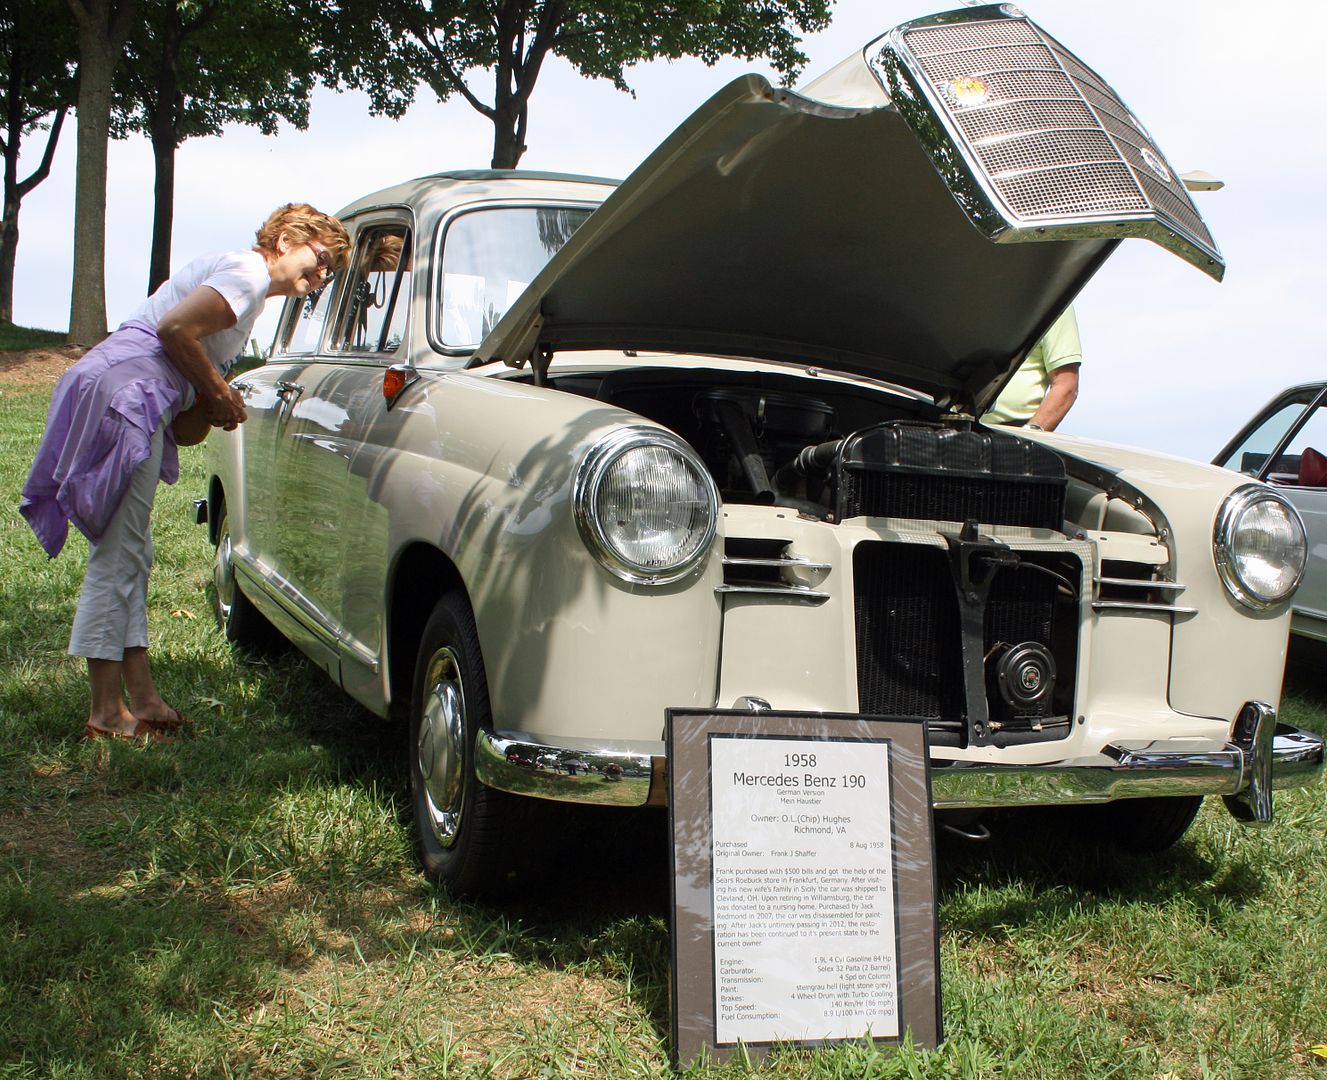
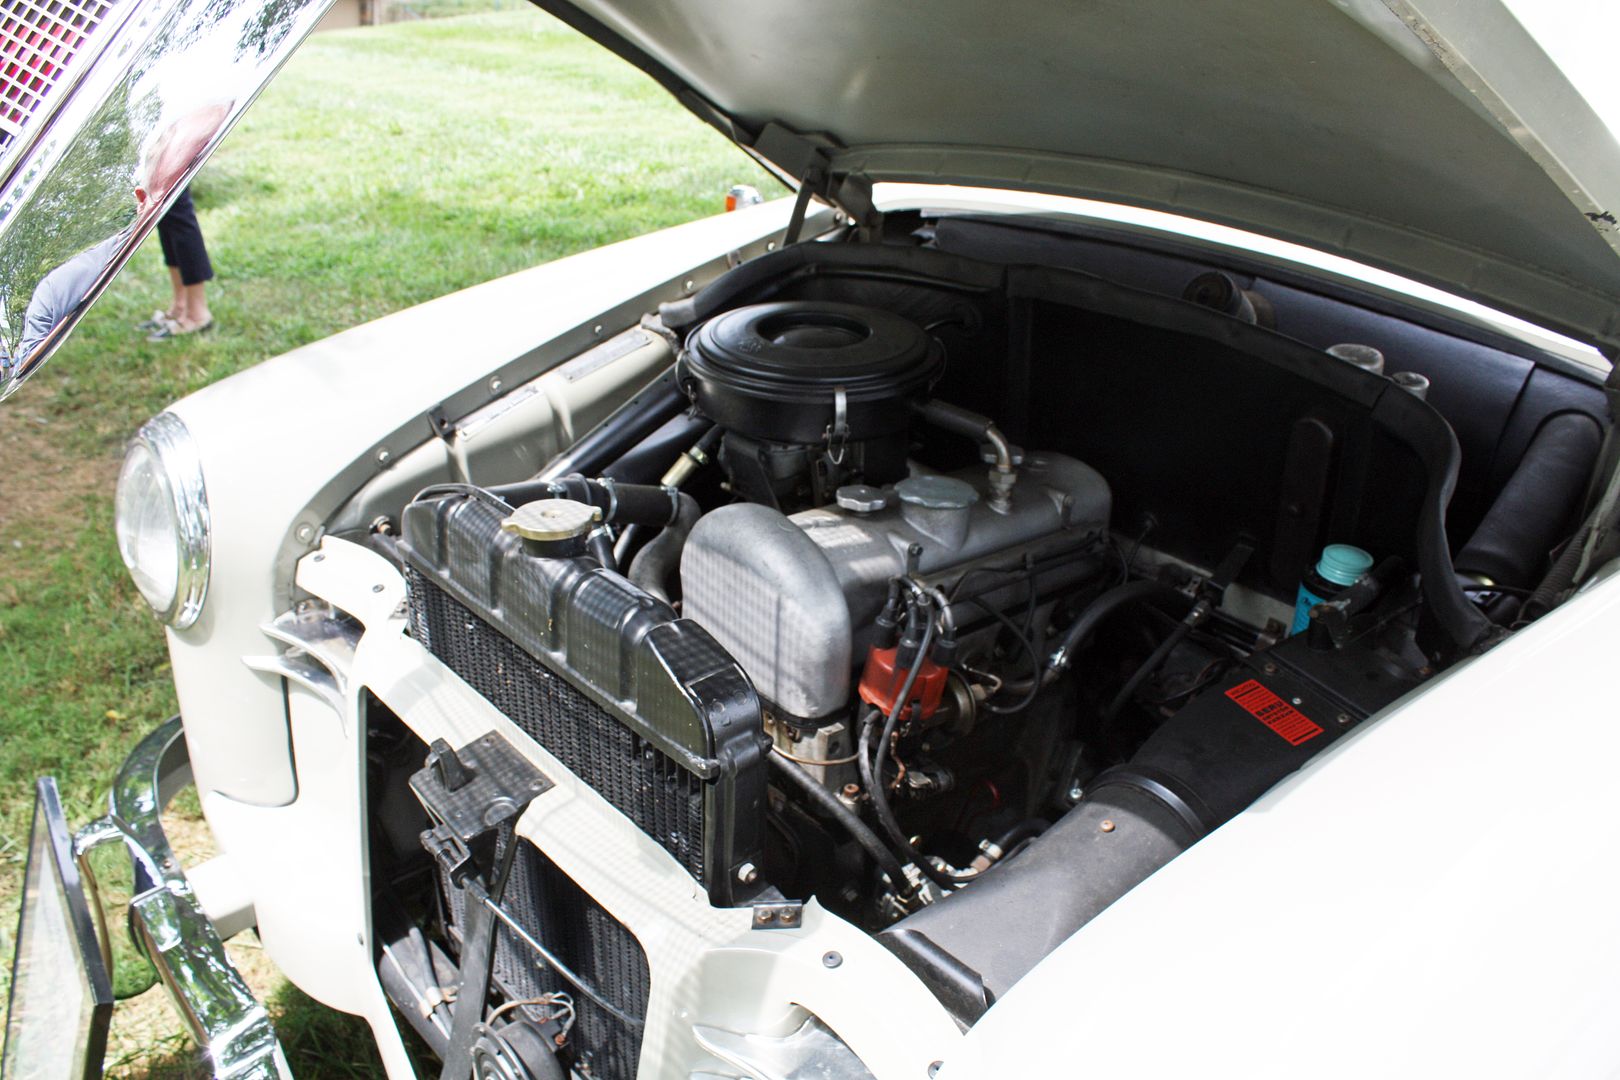
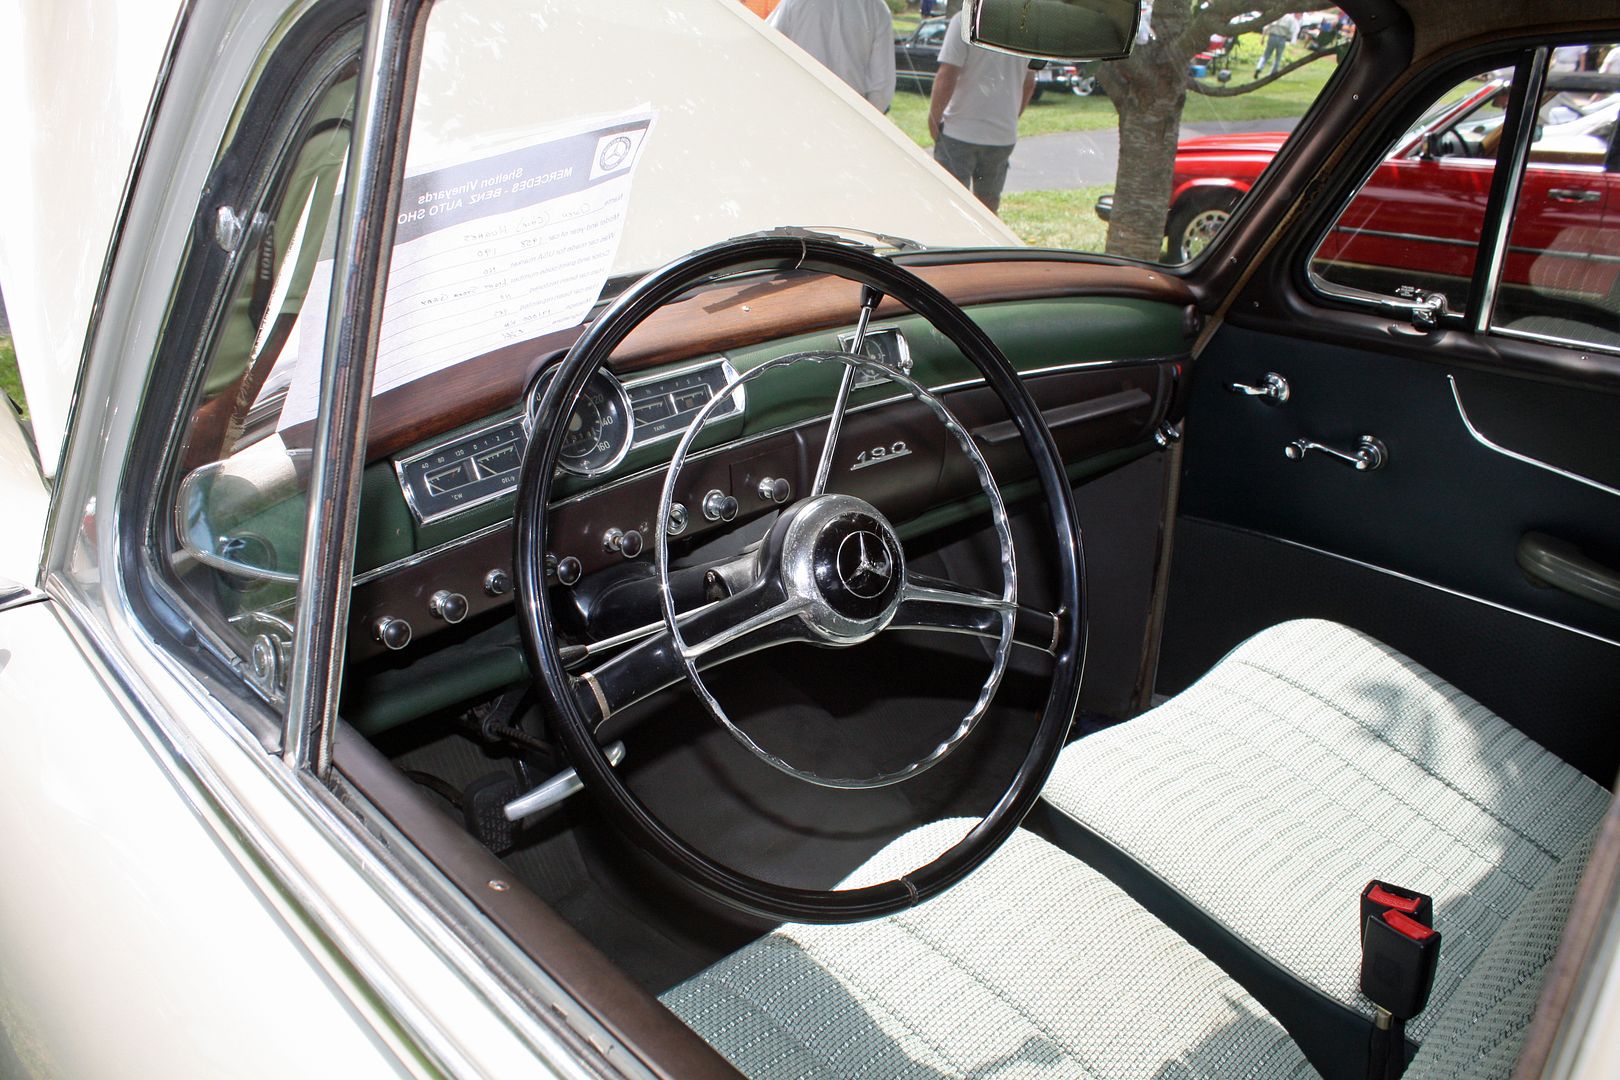
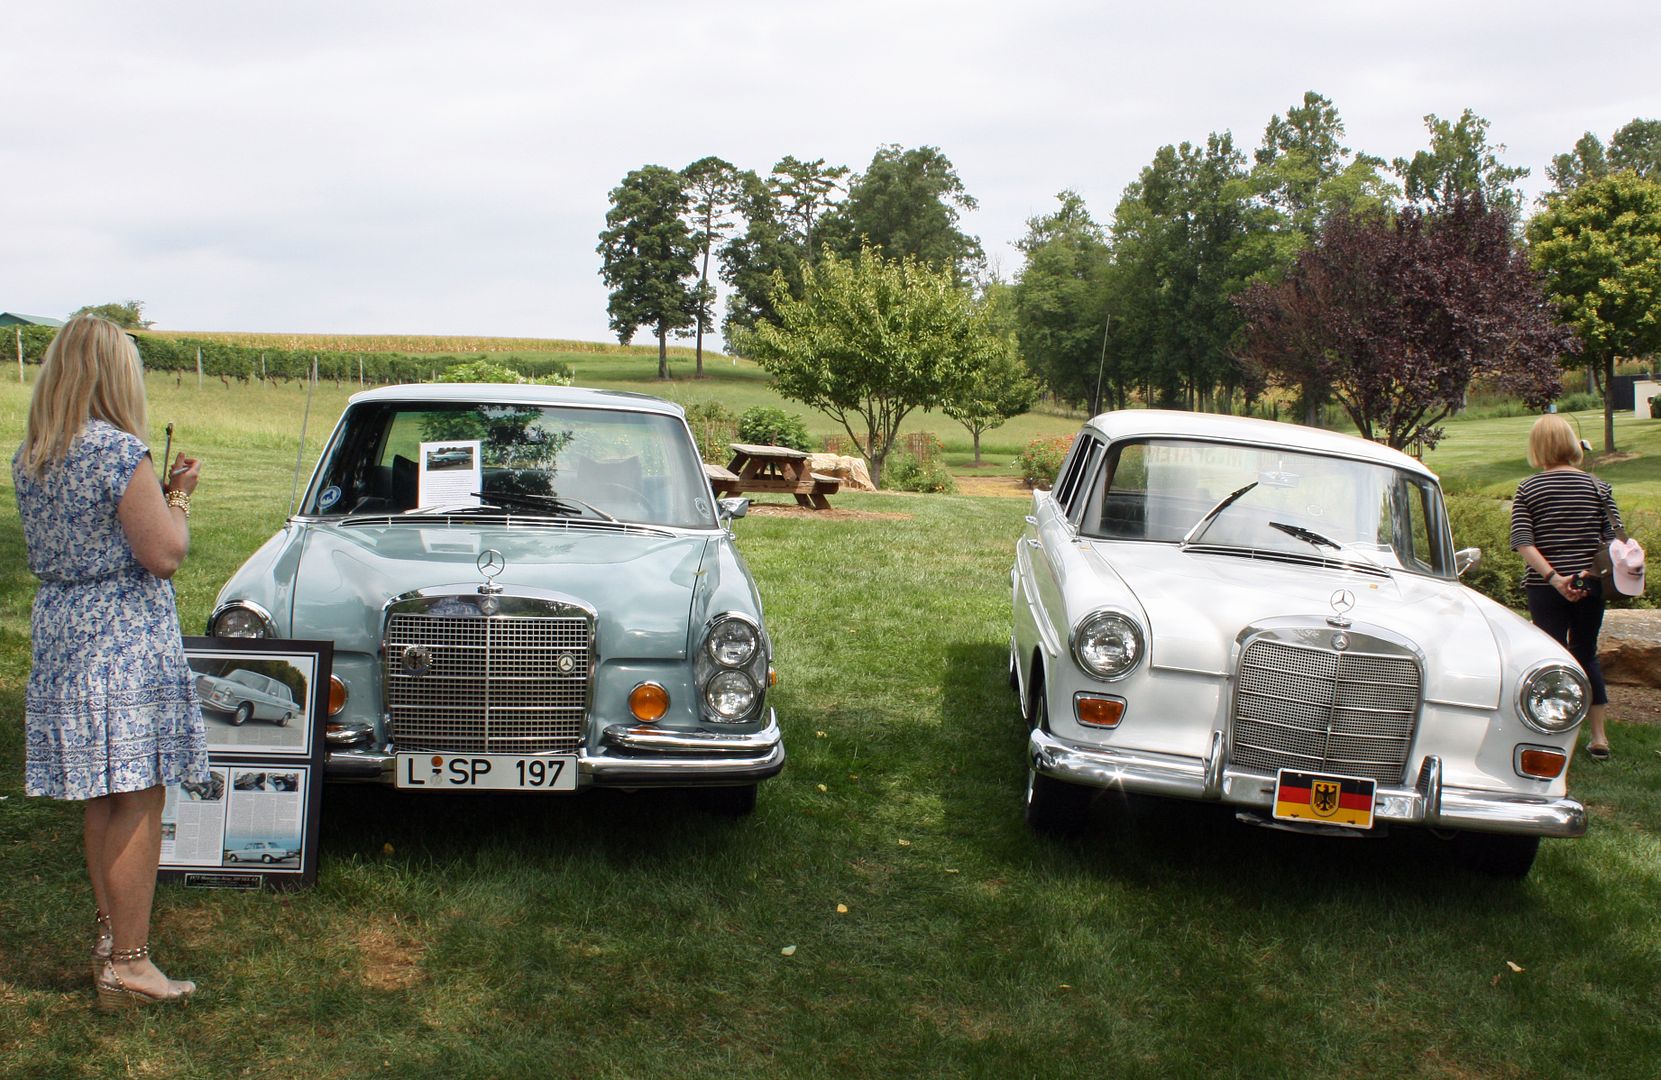
Only one Ponton but it was very nice and very original. The owner worked for 35 years as a Mercedes mechanic at a dealership in Richmond, VA. After spending some time with him, I wish he lived near me!!! Among other things, he knows how to make 4.5 engines make more power. I may have to go to Richmond.
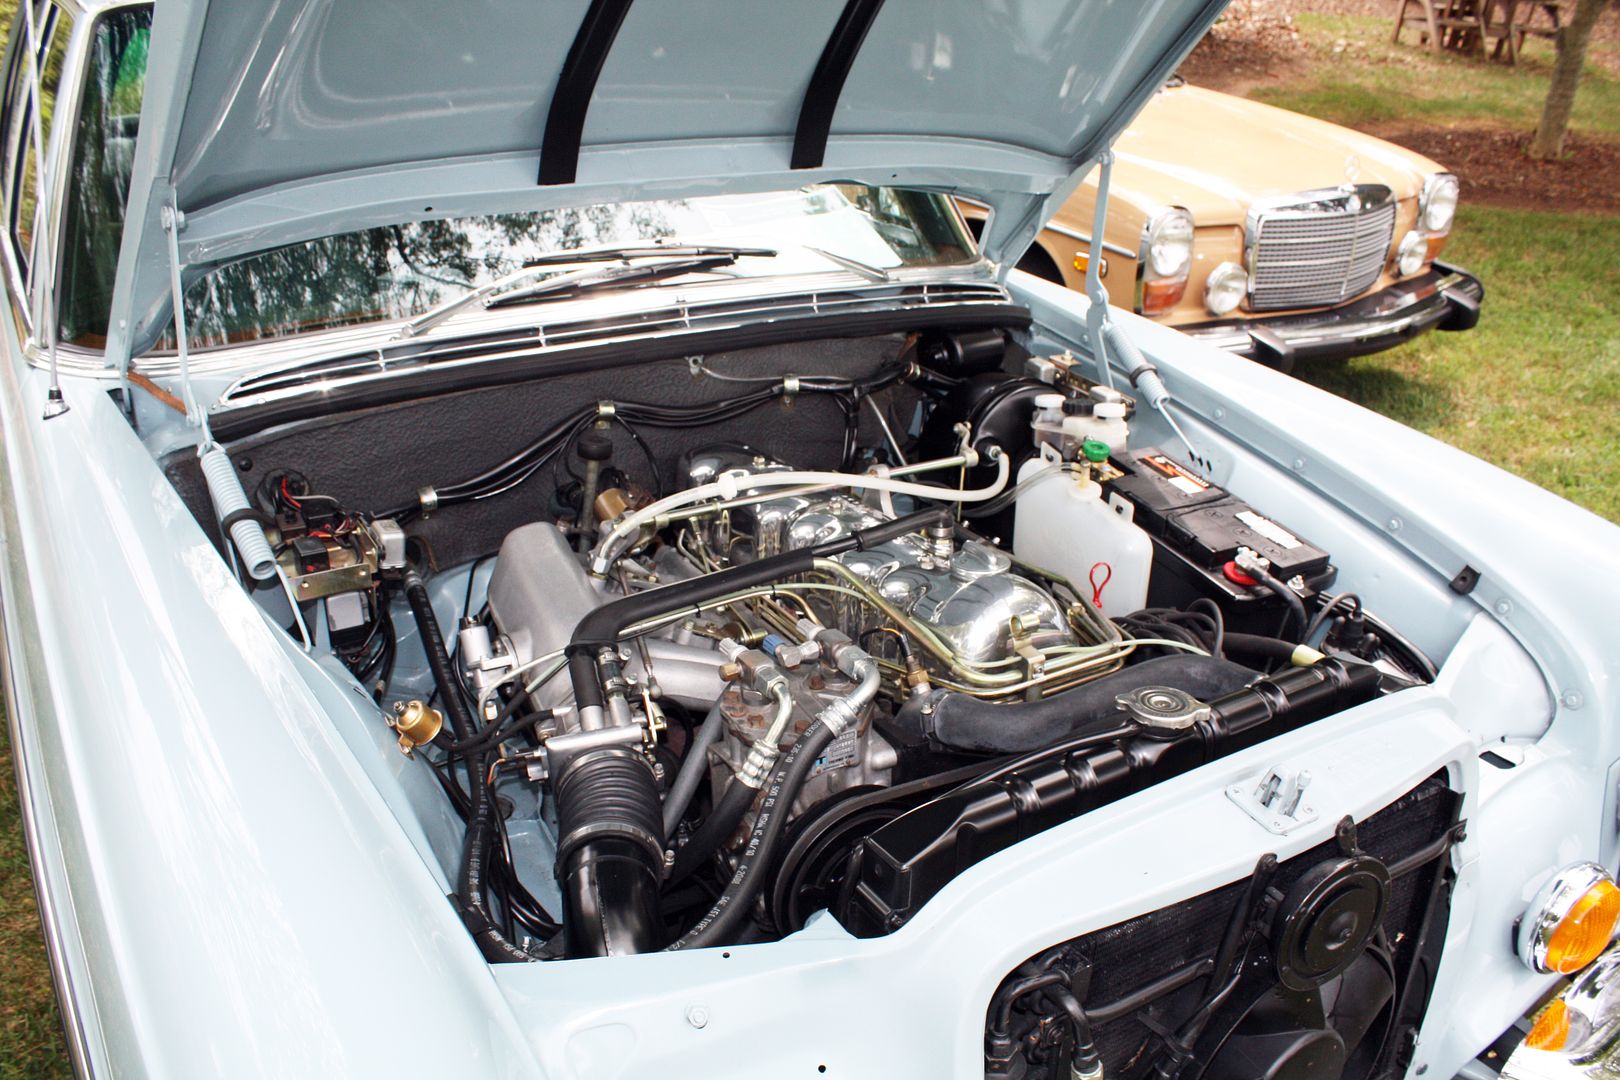
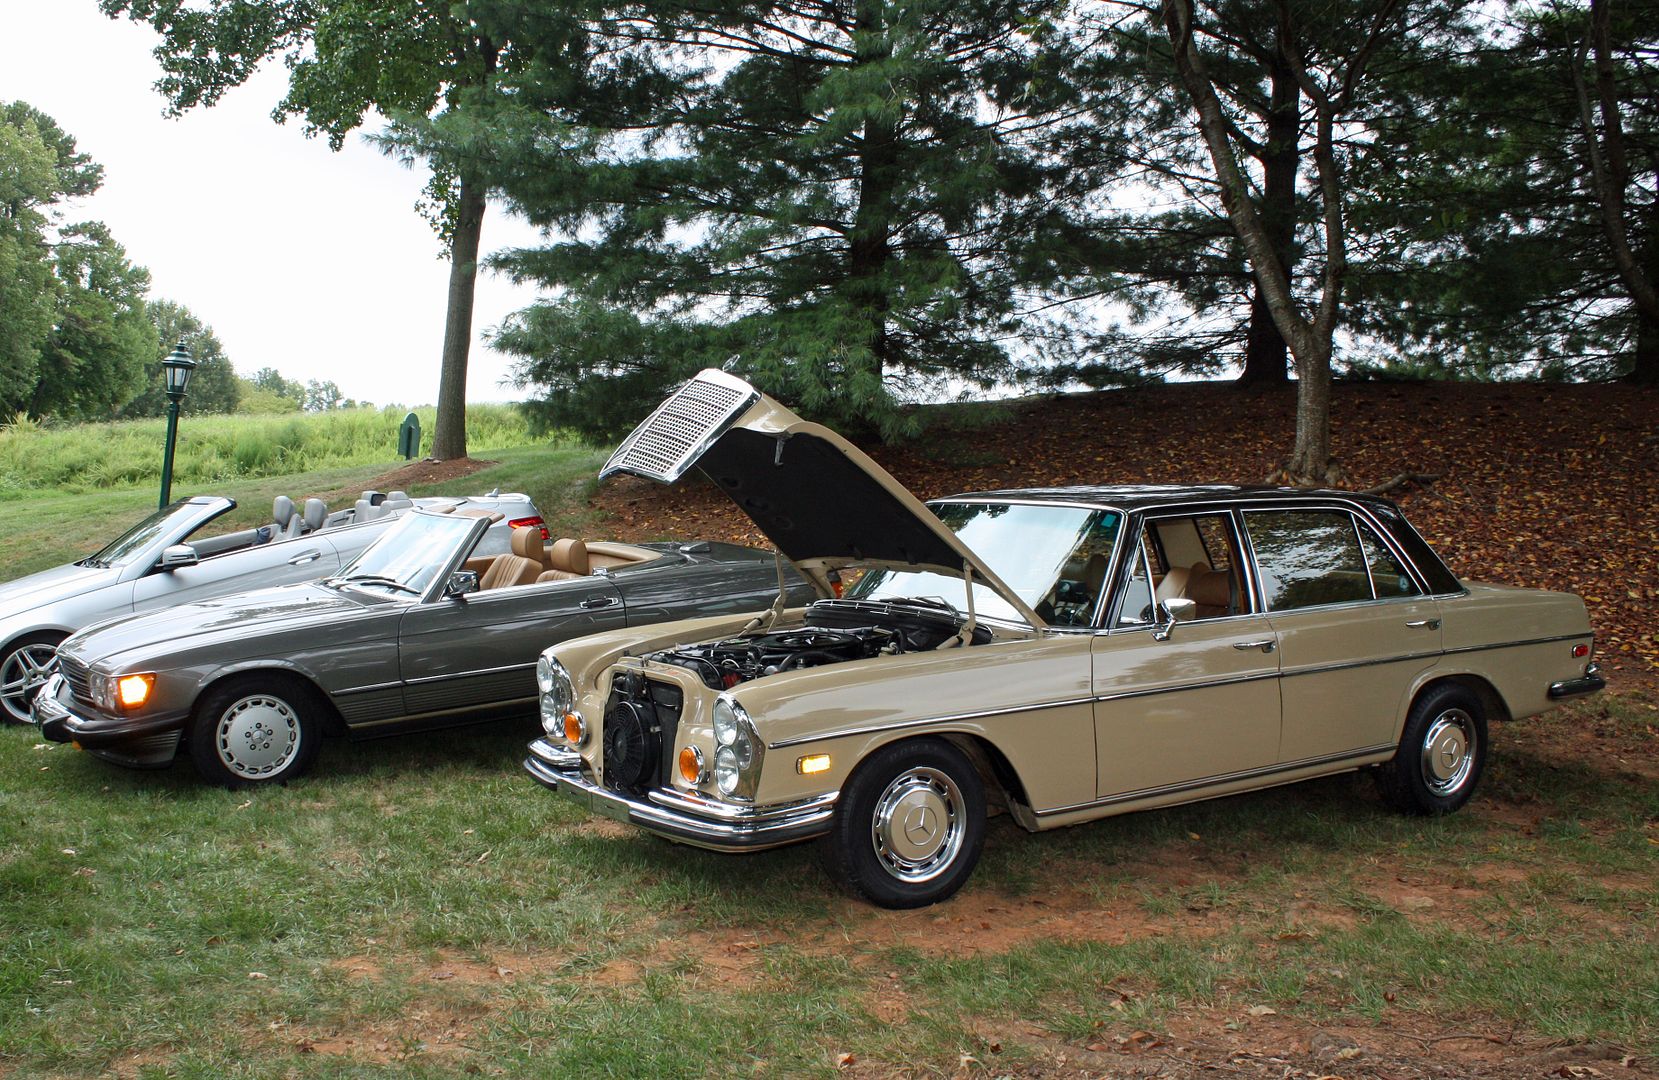
In my estimation, best engine bay went to this 280SE. The attention to detail was exacting. The car next to it was his as well. They are just two among many that he owns with the youngest one having been with him for 19 years.
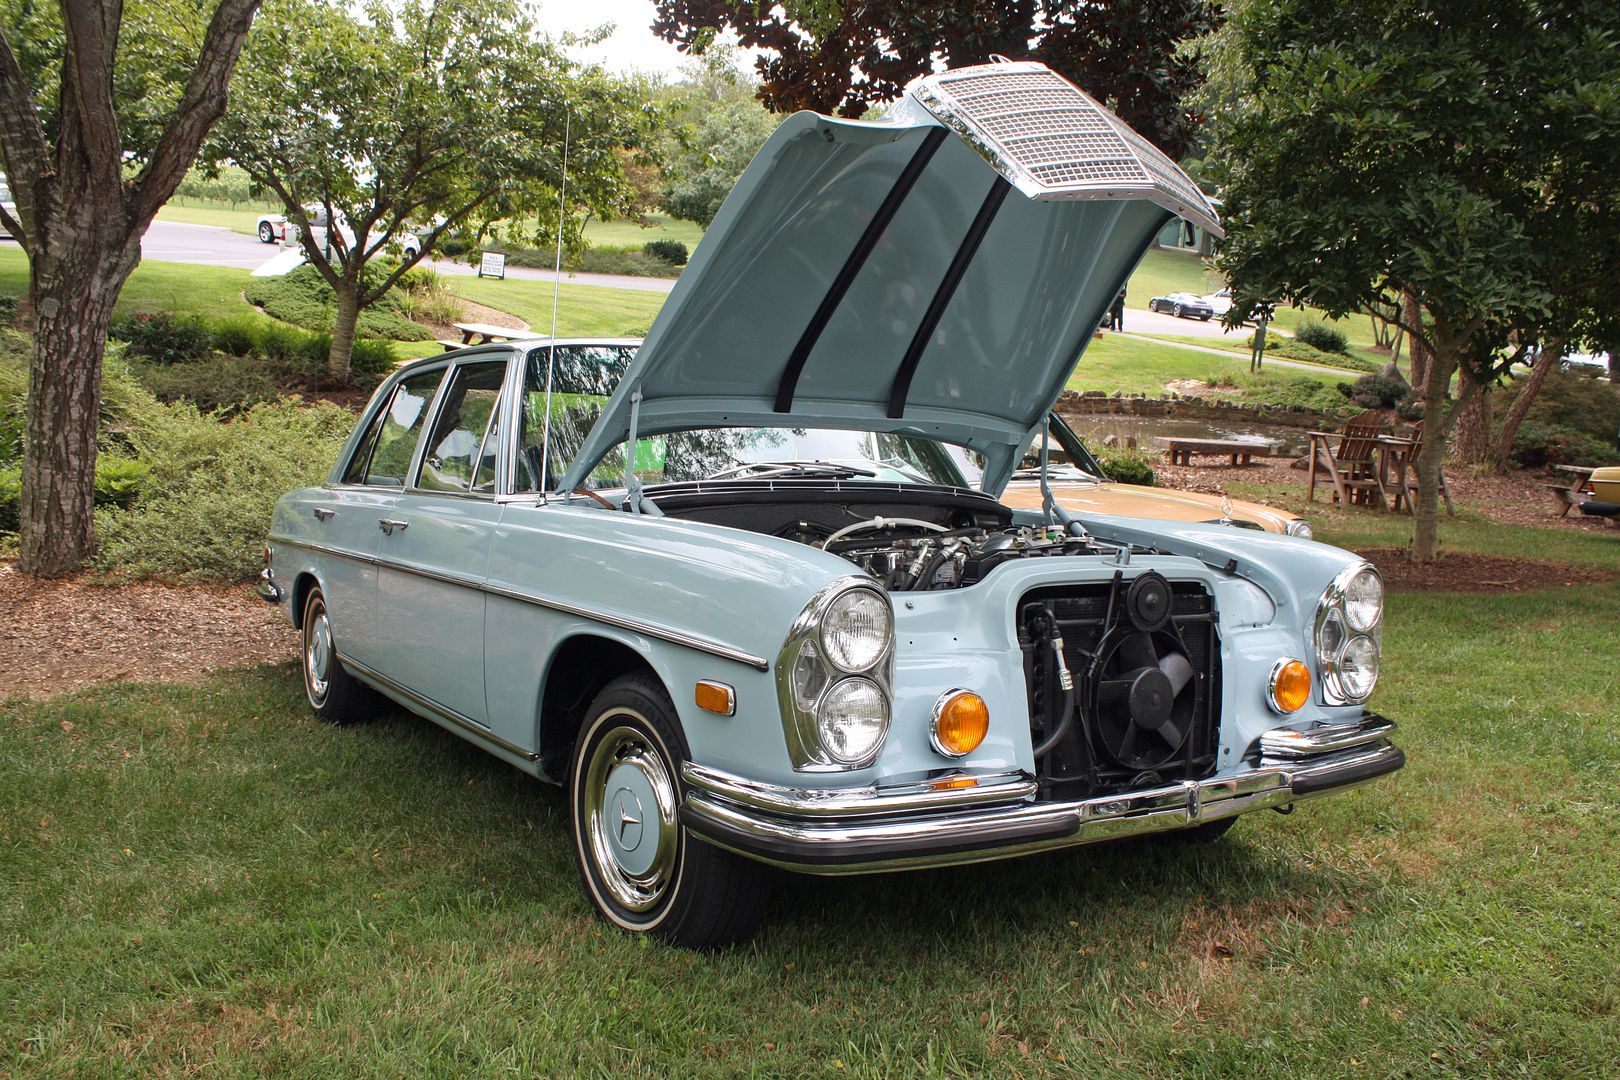
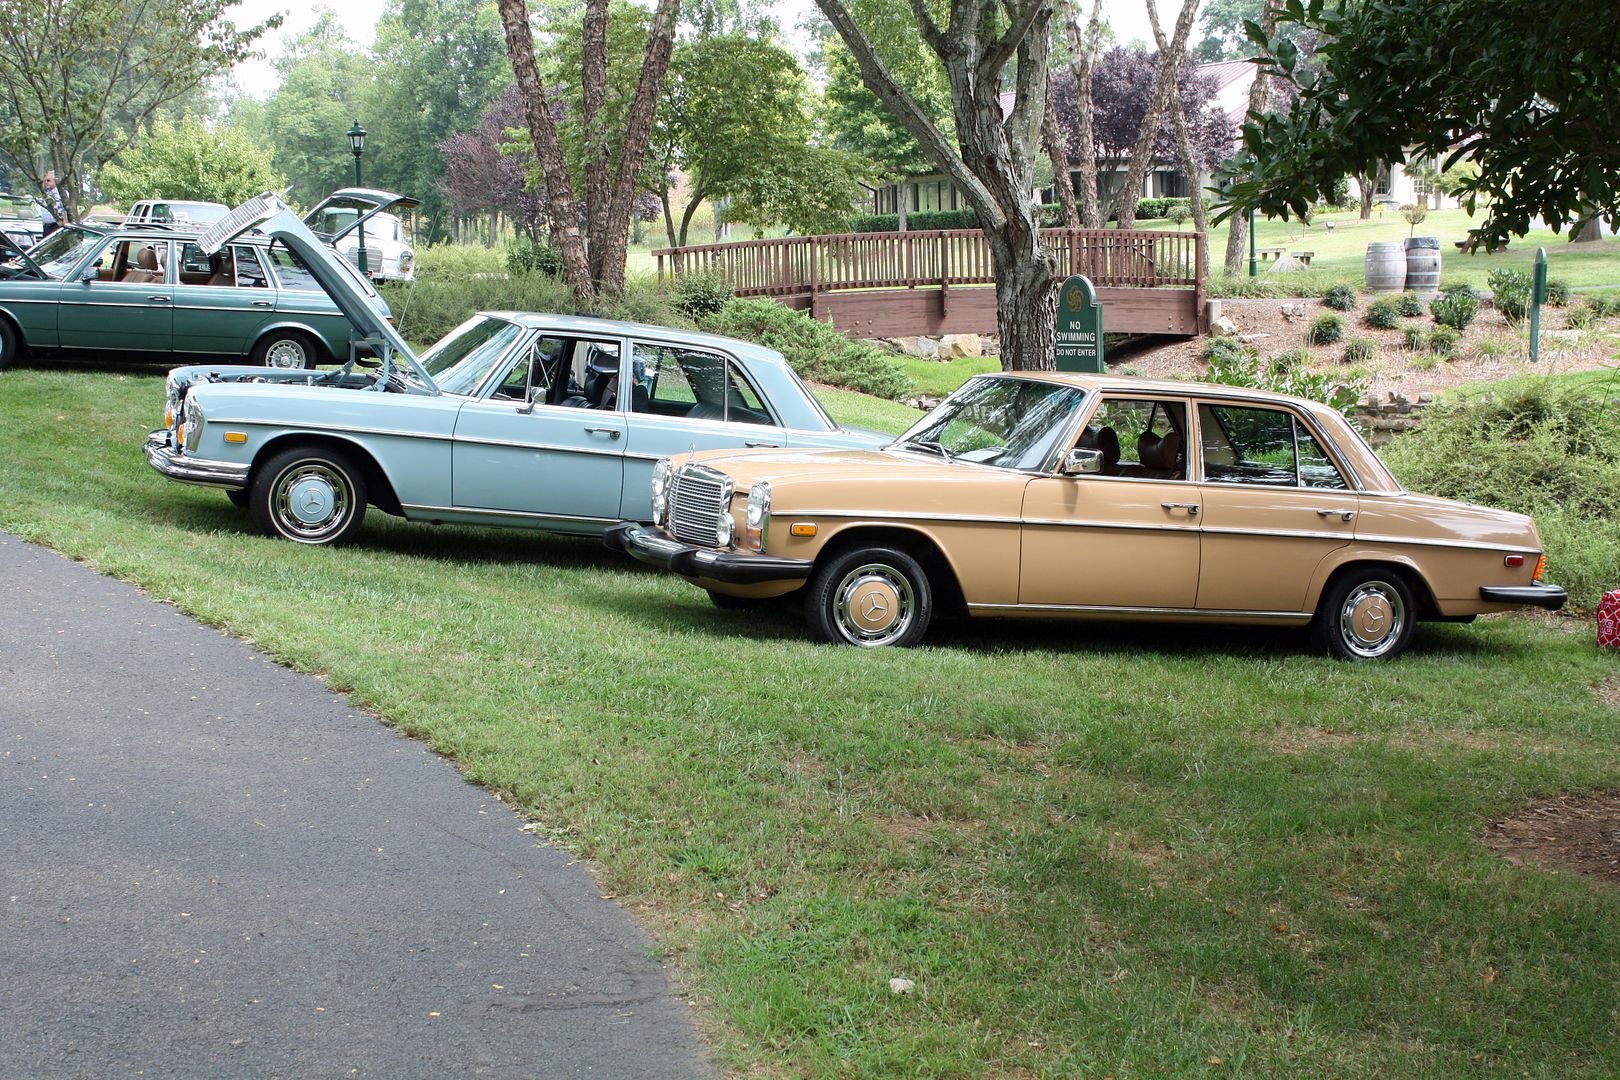
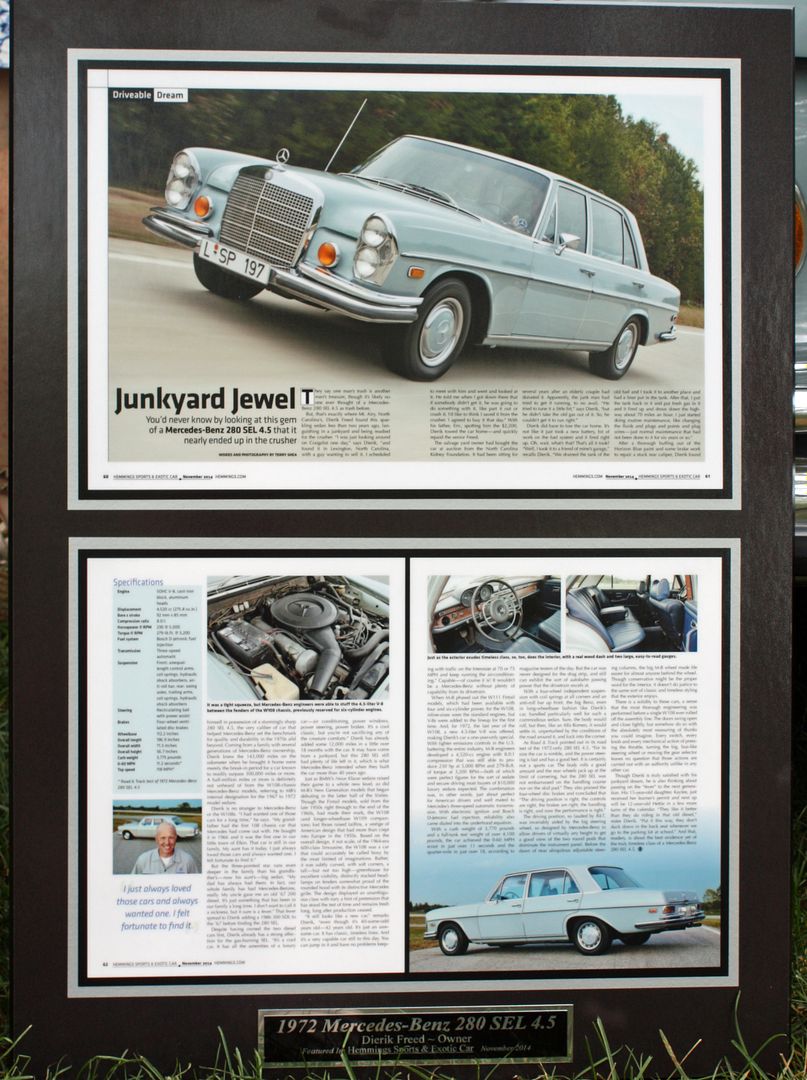
The owner of this car is president of the region and rescued this car from the crusher. It was one among a number of 280SE and SEL's there with 4.5's.

The background in this image shows a good view of the venue and the turnout.
One guy there had transplanted a 4.5 motor into a 280SE coupe. He attributed marking every relay and fuse panel to being old and forgetful!!!


He also had this cabriolet. I really like the wood on these dashes.


This cabriolet was even more spectacular.


There were a number of pagoda SL's in attendance.


Only one Ponton but it was very nice and very original. The owner worked for 35 years as a Mercedes mechanic at a dealership in Richmond, VA. After spending some time with him, I wish he lived near me!!! Among other things, he knows how to make 4.5 engines make more power. I may have to go to Richmond.


In my estimation, best engine bay went to this 280SE. The attention to detail was exacting. The car next to it was his as well. They are just two among many that he owns with the youngest one having been with him for 19 years.


The owner of this car is president of the region and rescued this car from the crusher. It was one among a number of 280SE and SEL's there with 4.5's.


The background in this image shows a good view of the venue and the turnout.
 08-31-2017, 05:00 PM
#89
Member
Thread Starter
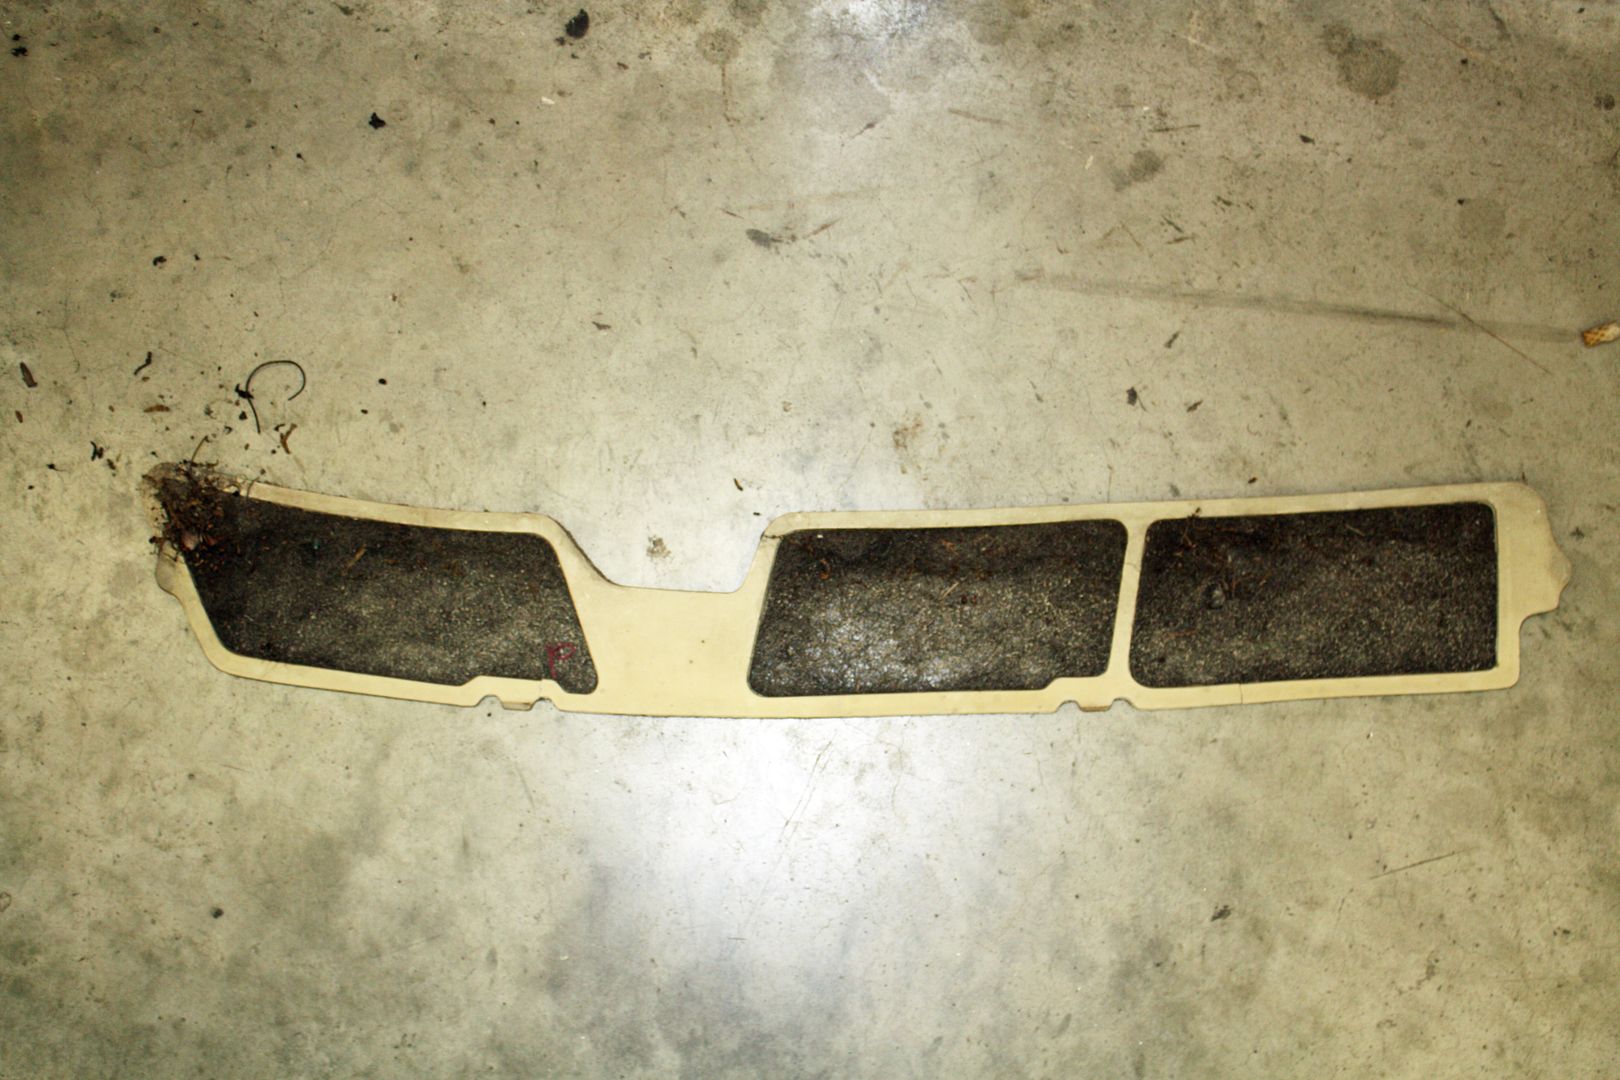
When I installed the cabin filters, I removed the cowl molding and noticed that it was very brittle and that parts of it had broken off. I ordered a new one and installed it just before going to the Mercedes show.
Yesterday I did the final adjustments to the cruise control. It is now working well. As I mentioned previously, there are a number of dip switches on the main control unit that determine how the cruise reacts to inputs. It is a matter of experimentation to determine the correct settings as every car reacts differently to the inputs.
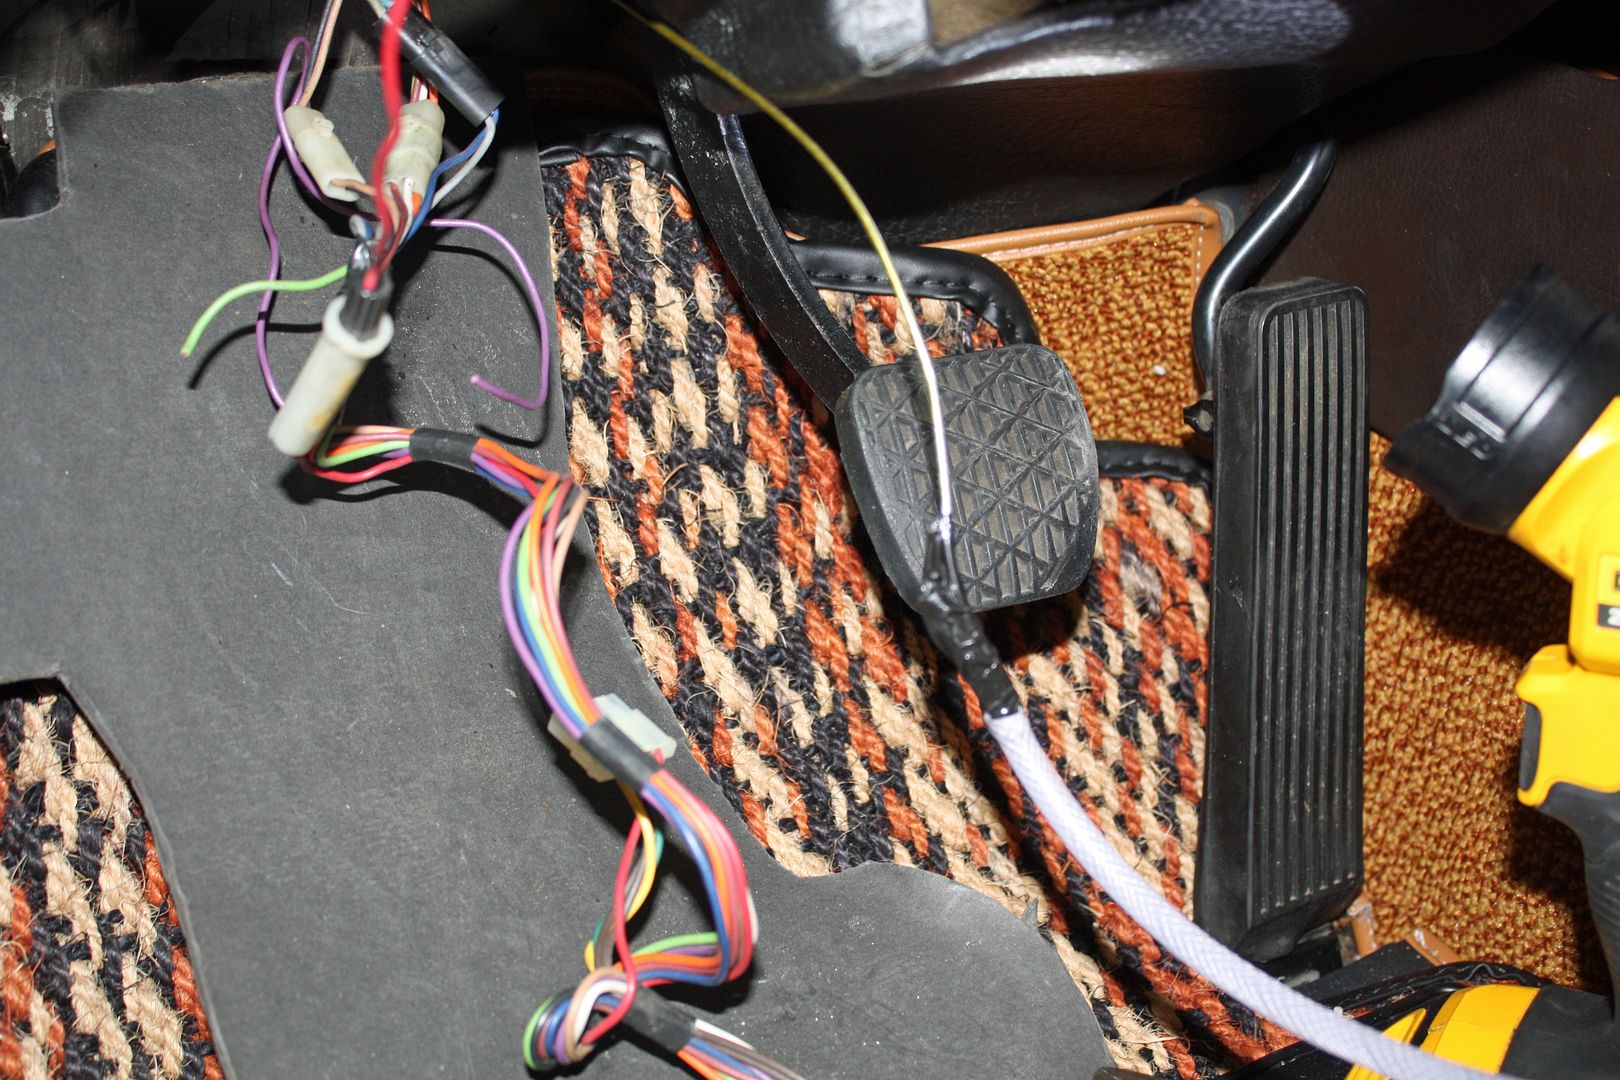
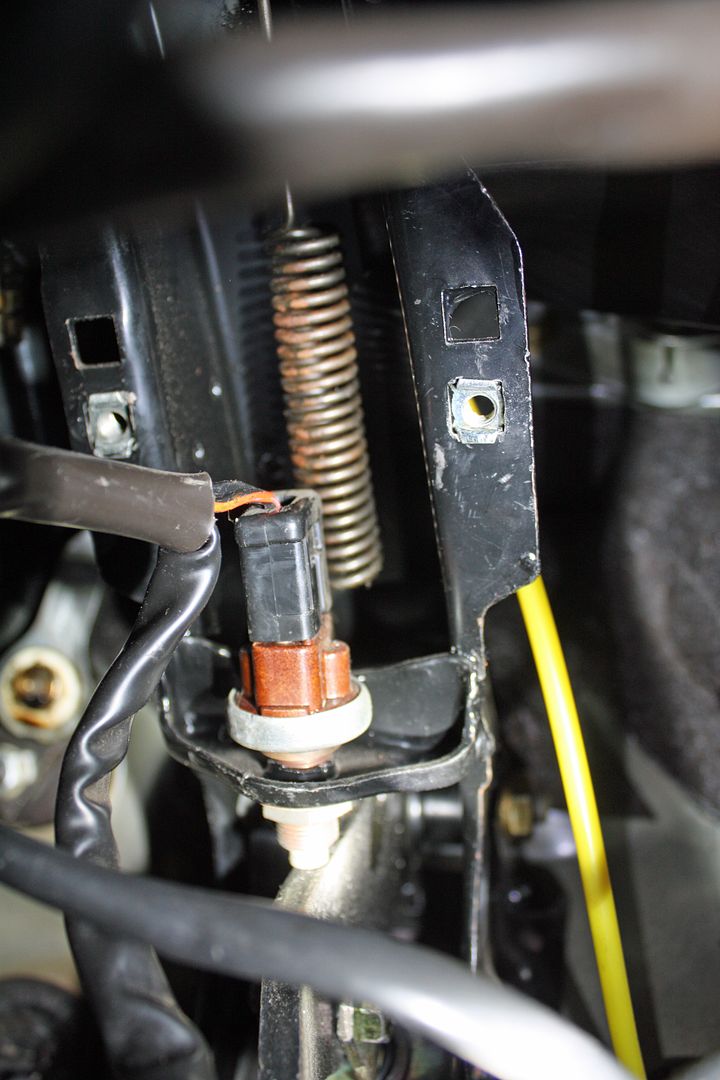
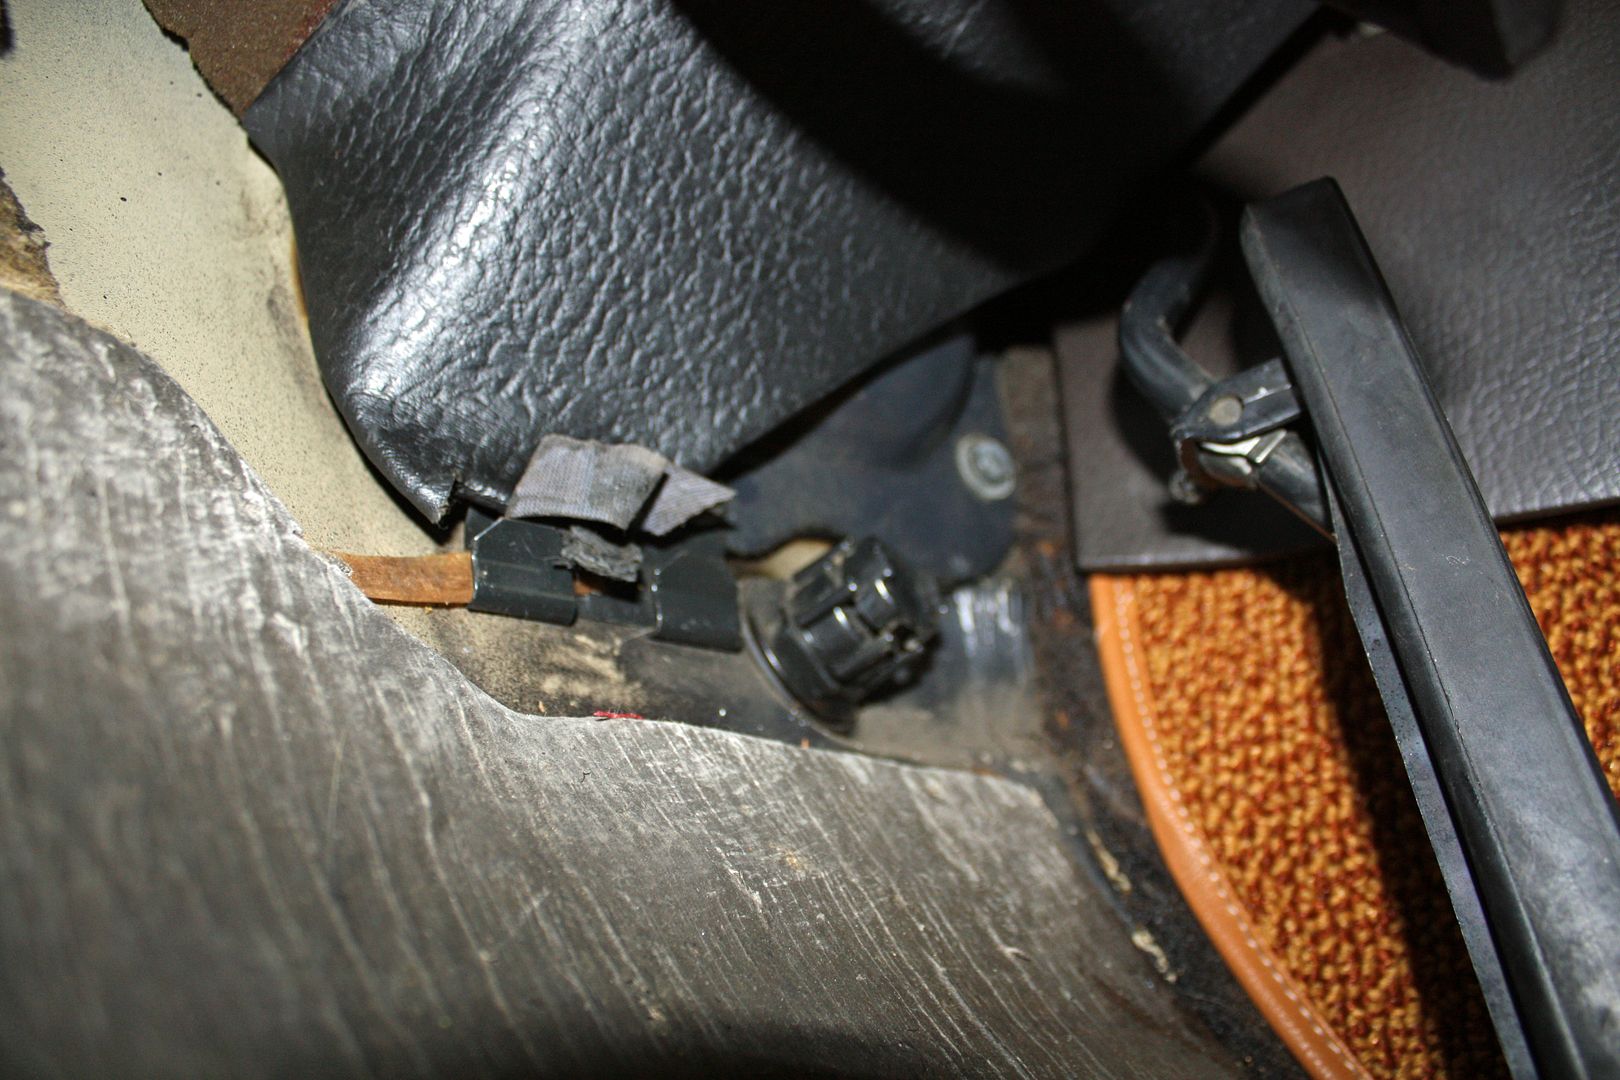
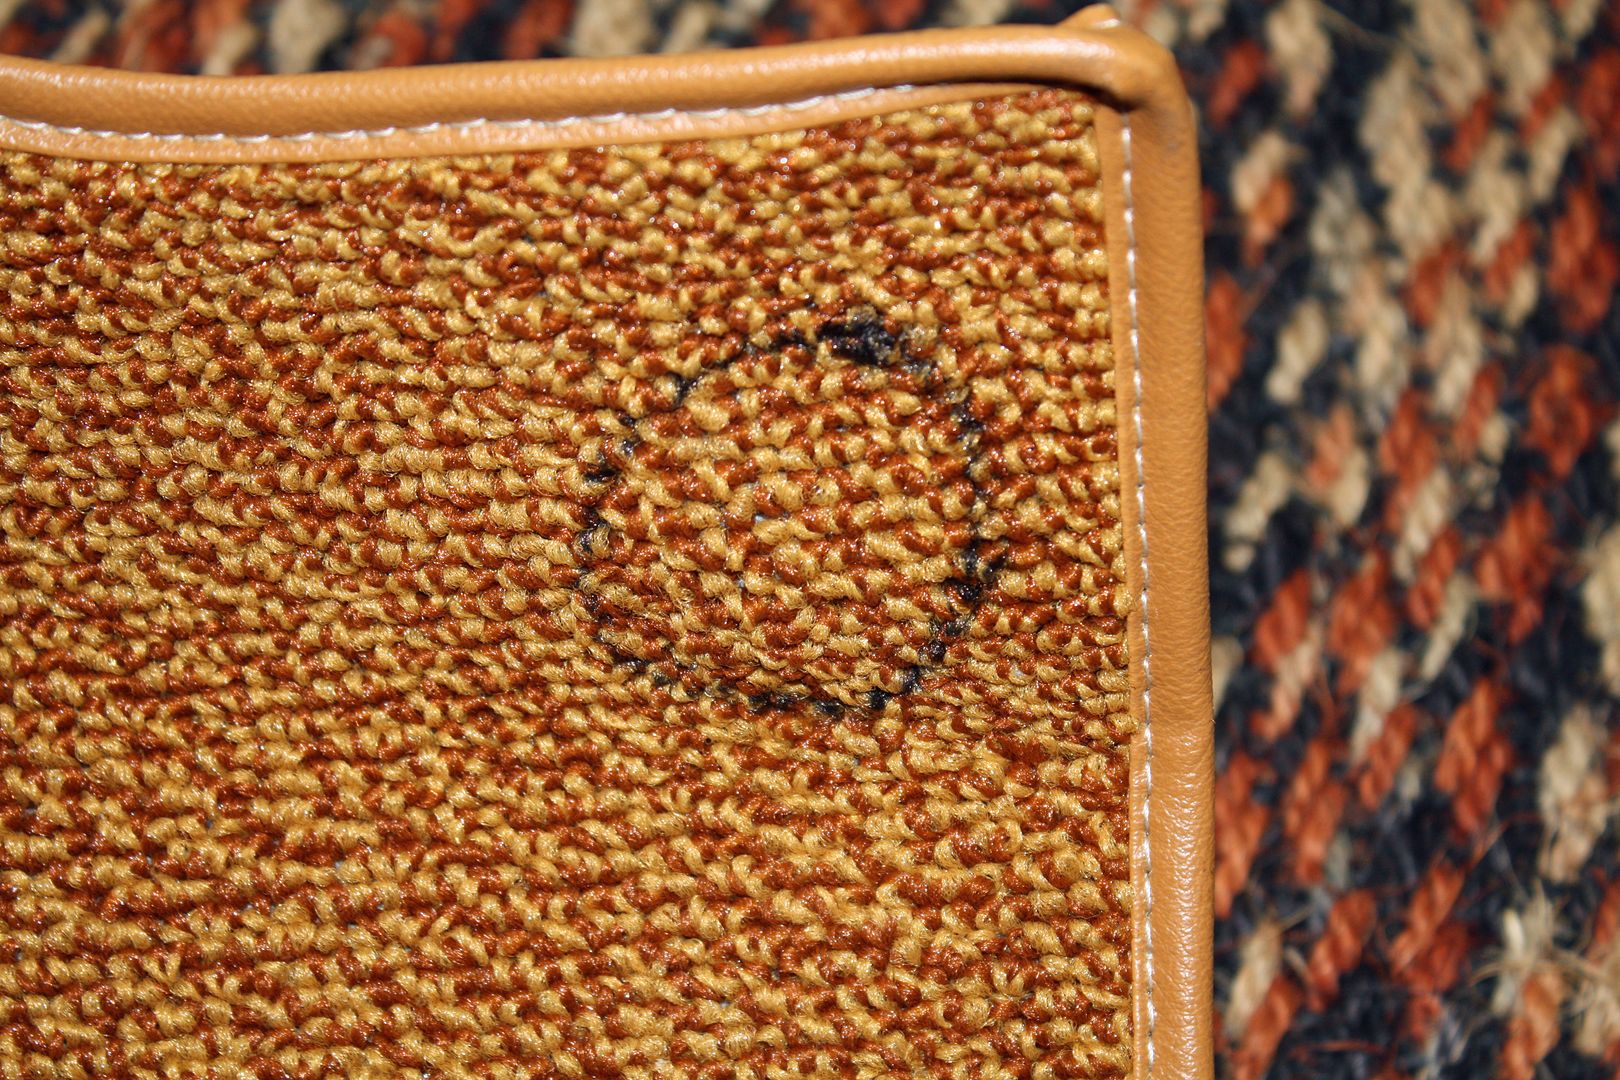
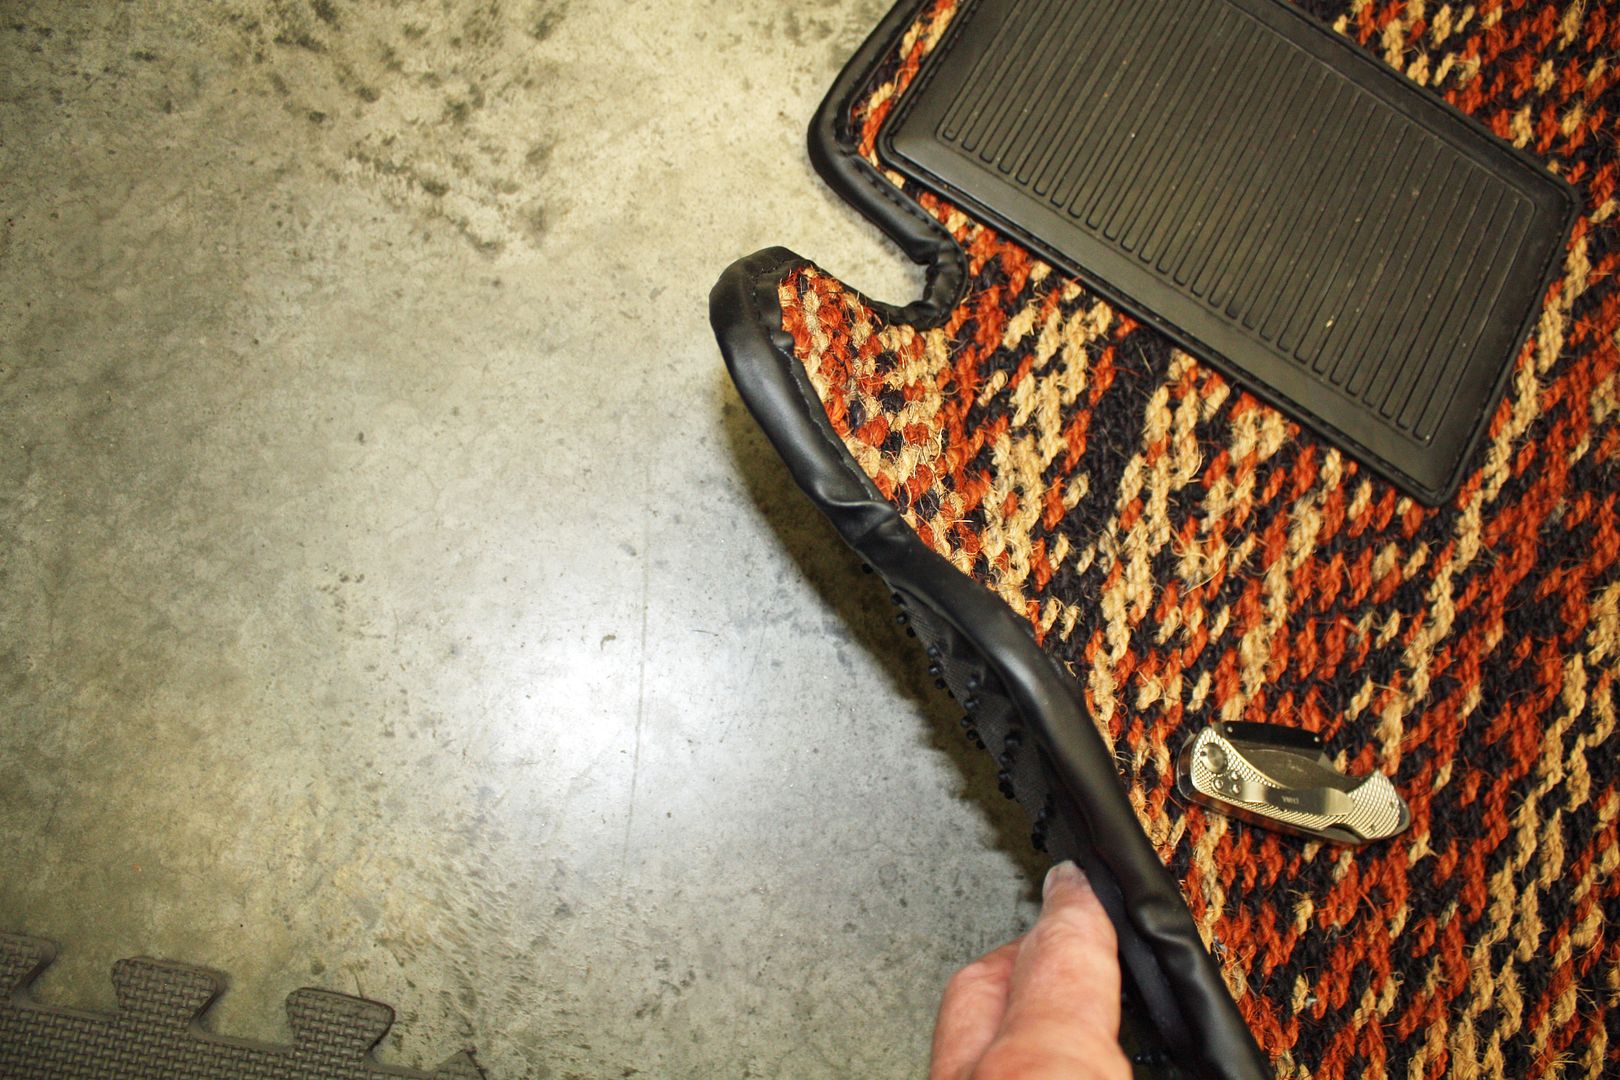
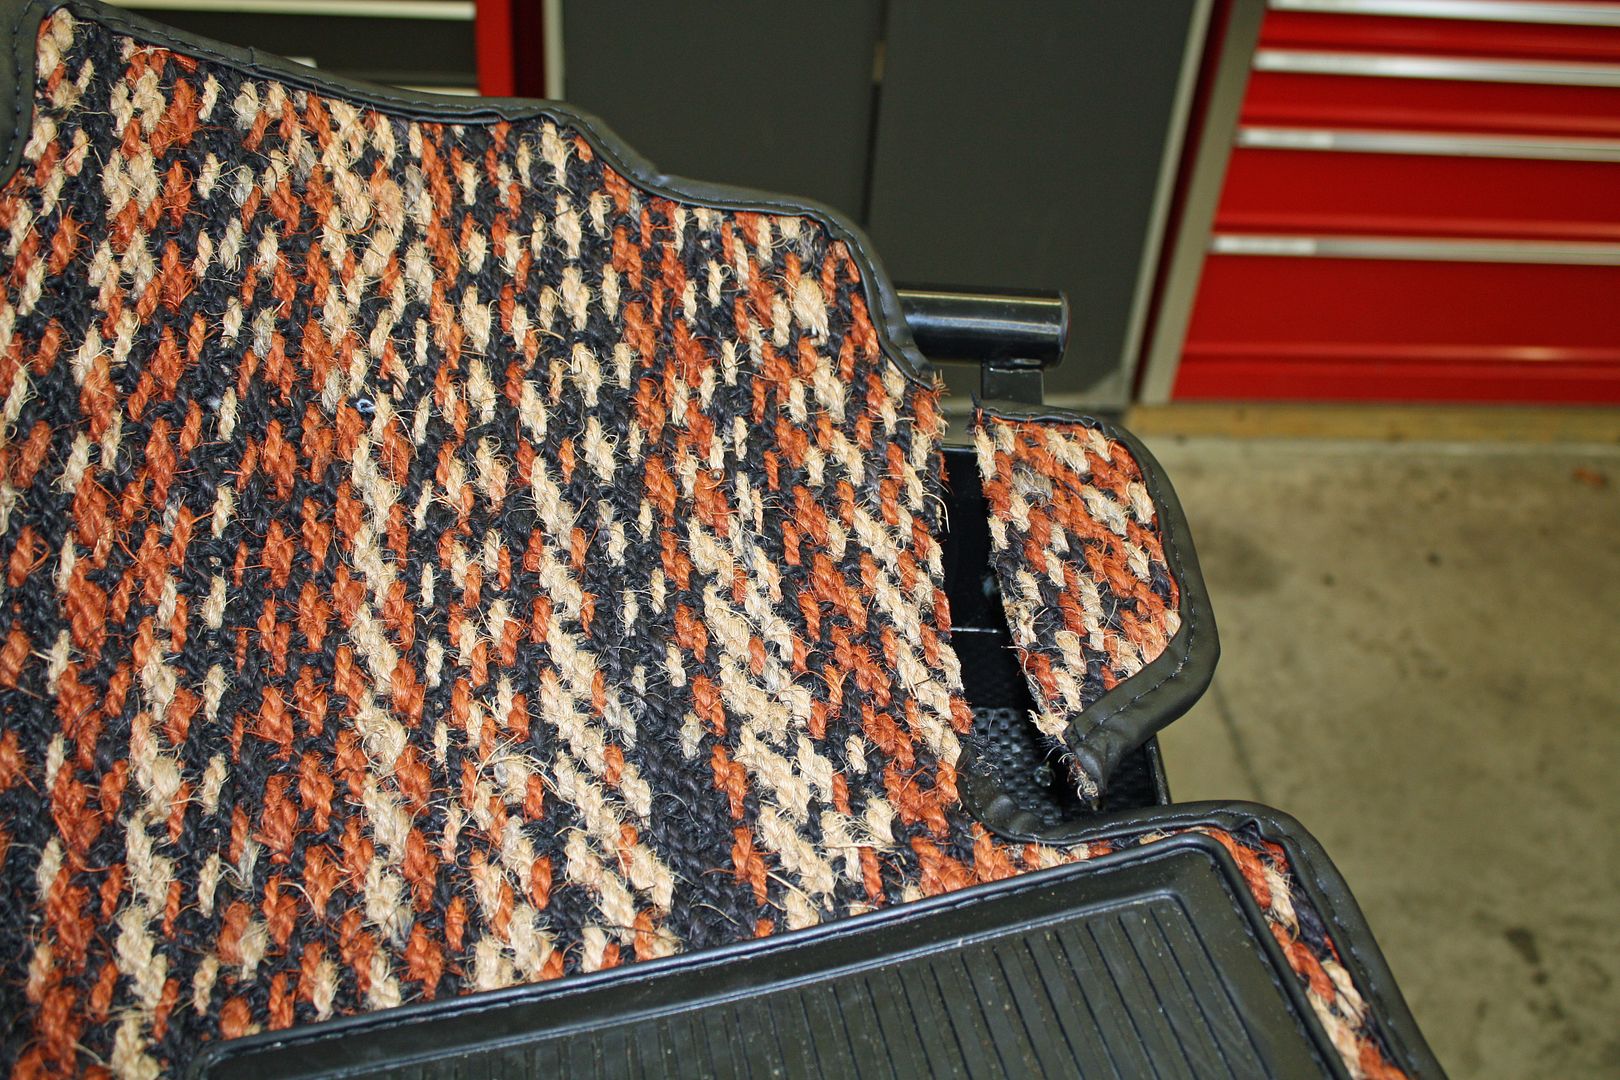
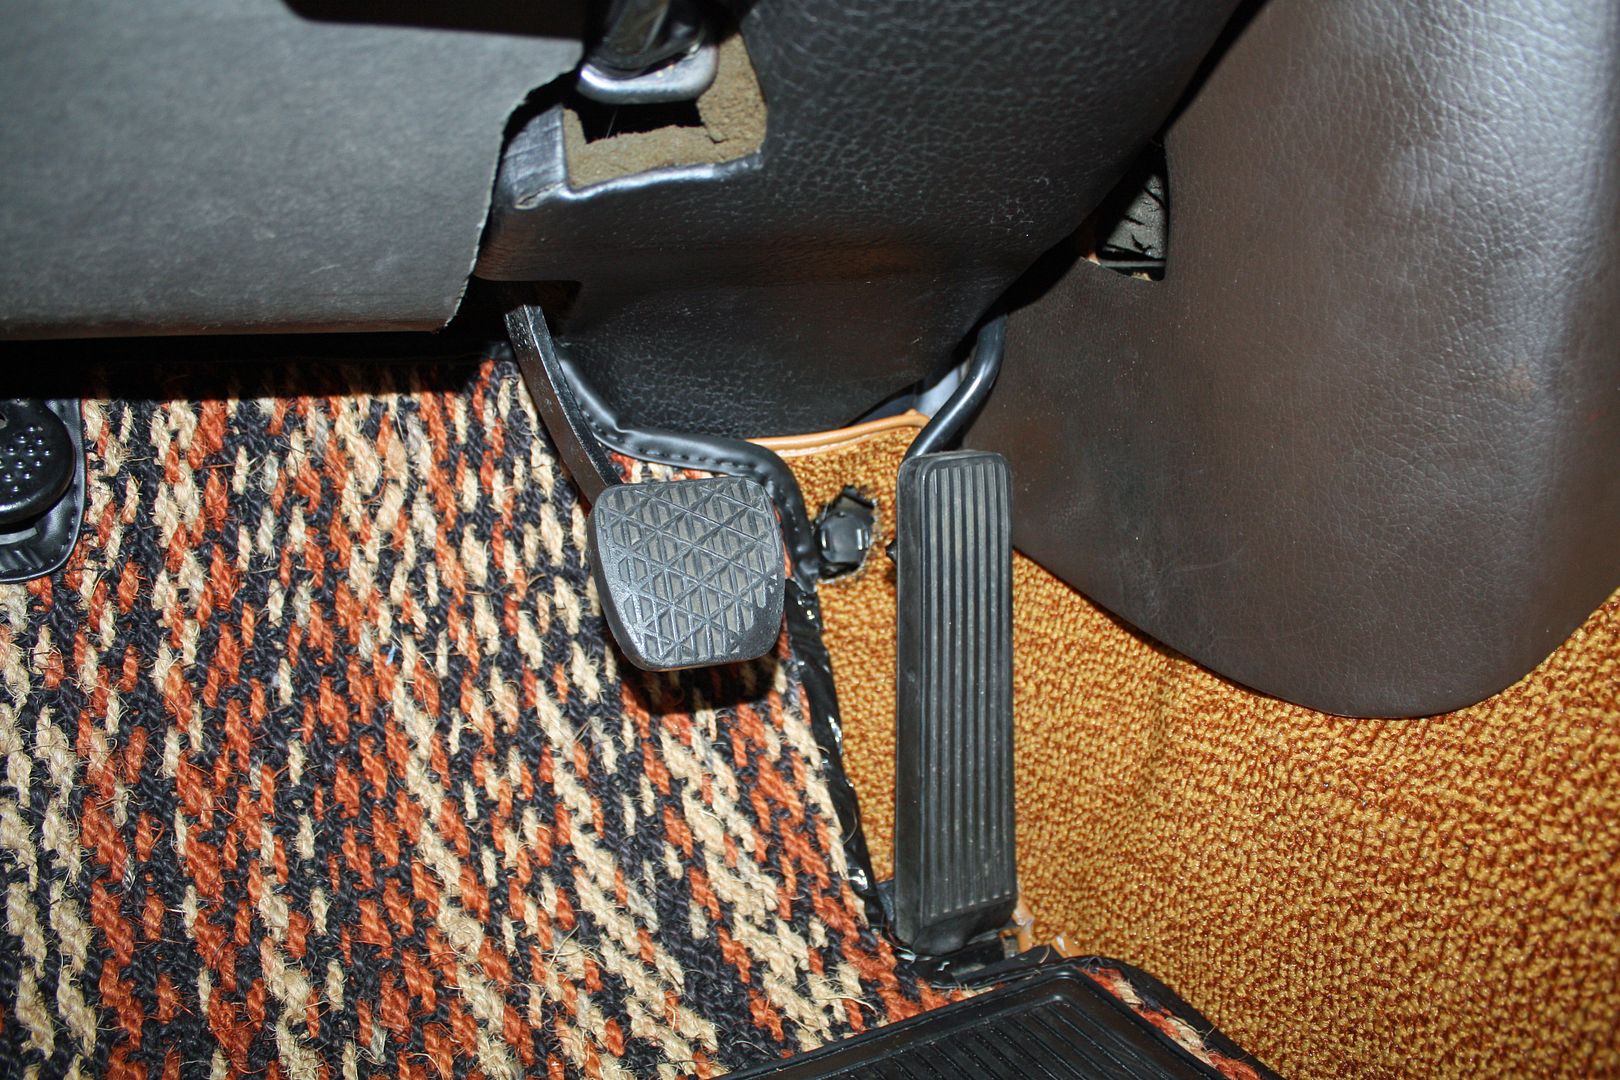
After receiving the comments about the kick down issue, I first made sure the accelerator pedal would make contact with the switch. My carpet kit did not include a cutout for the kick down switch, which i remedied by cutting a hole. Also, I had added the Coco mats which are very thick. After checking it out, I cut off a portion of the mat to make sure the pedal had full travel.
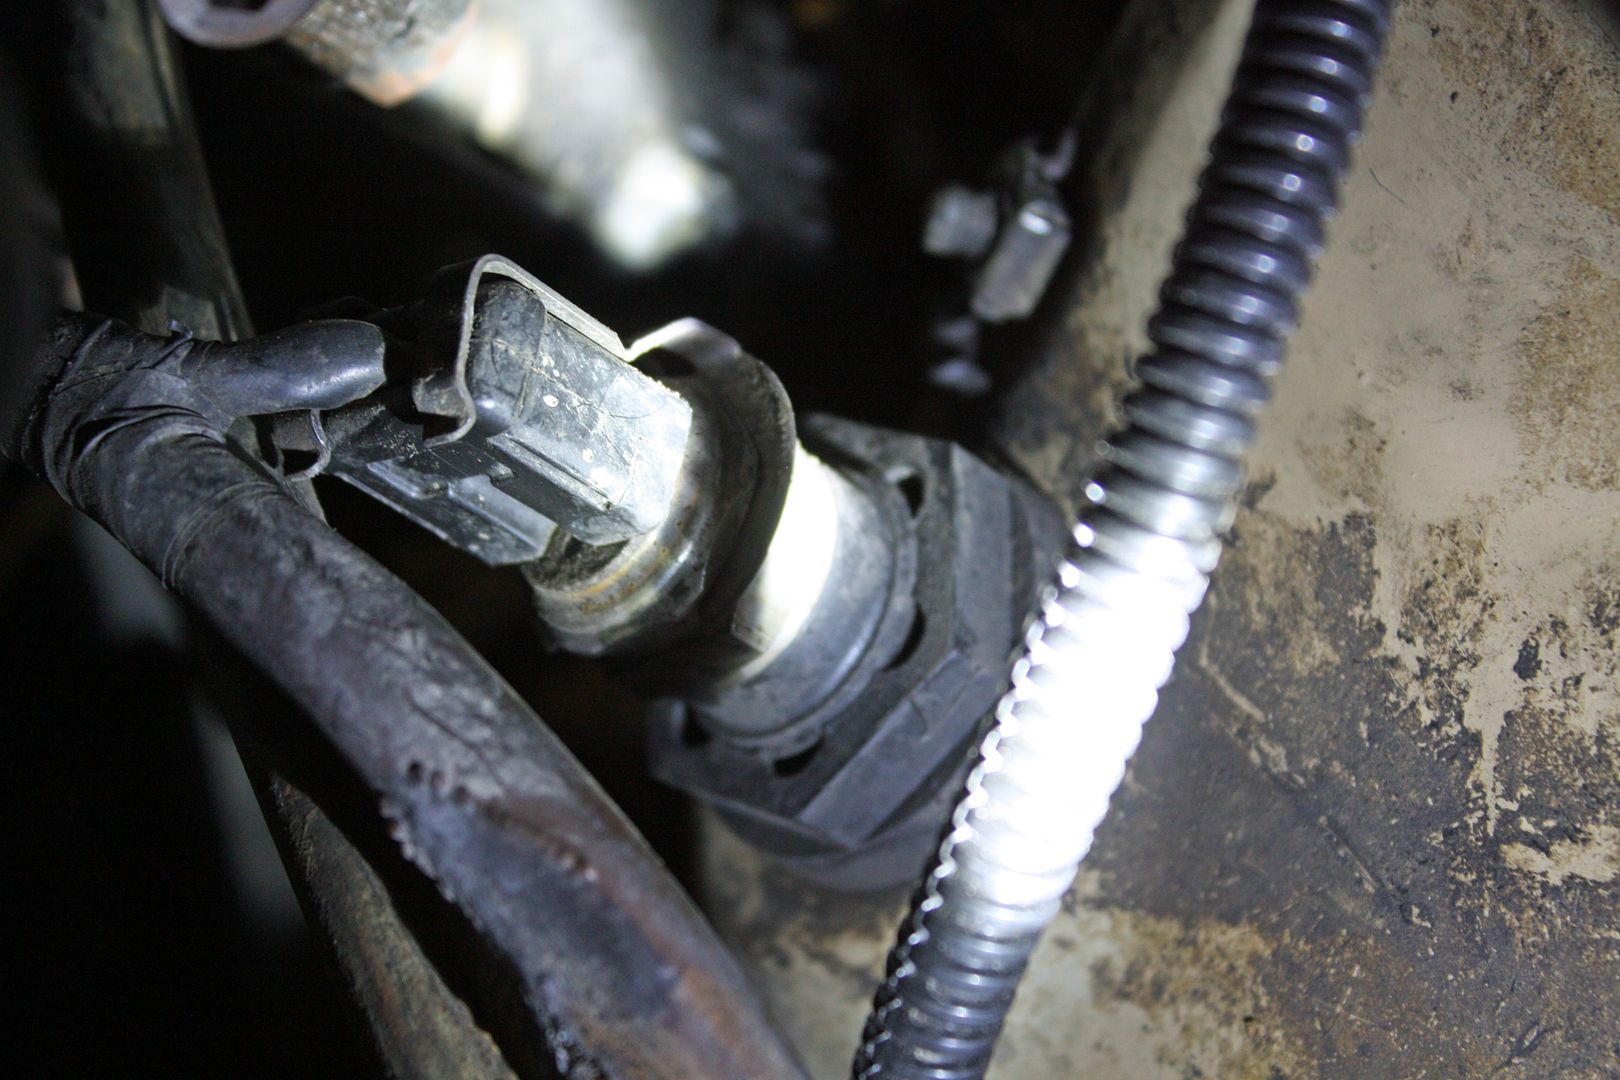
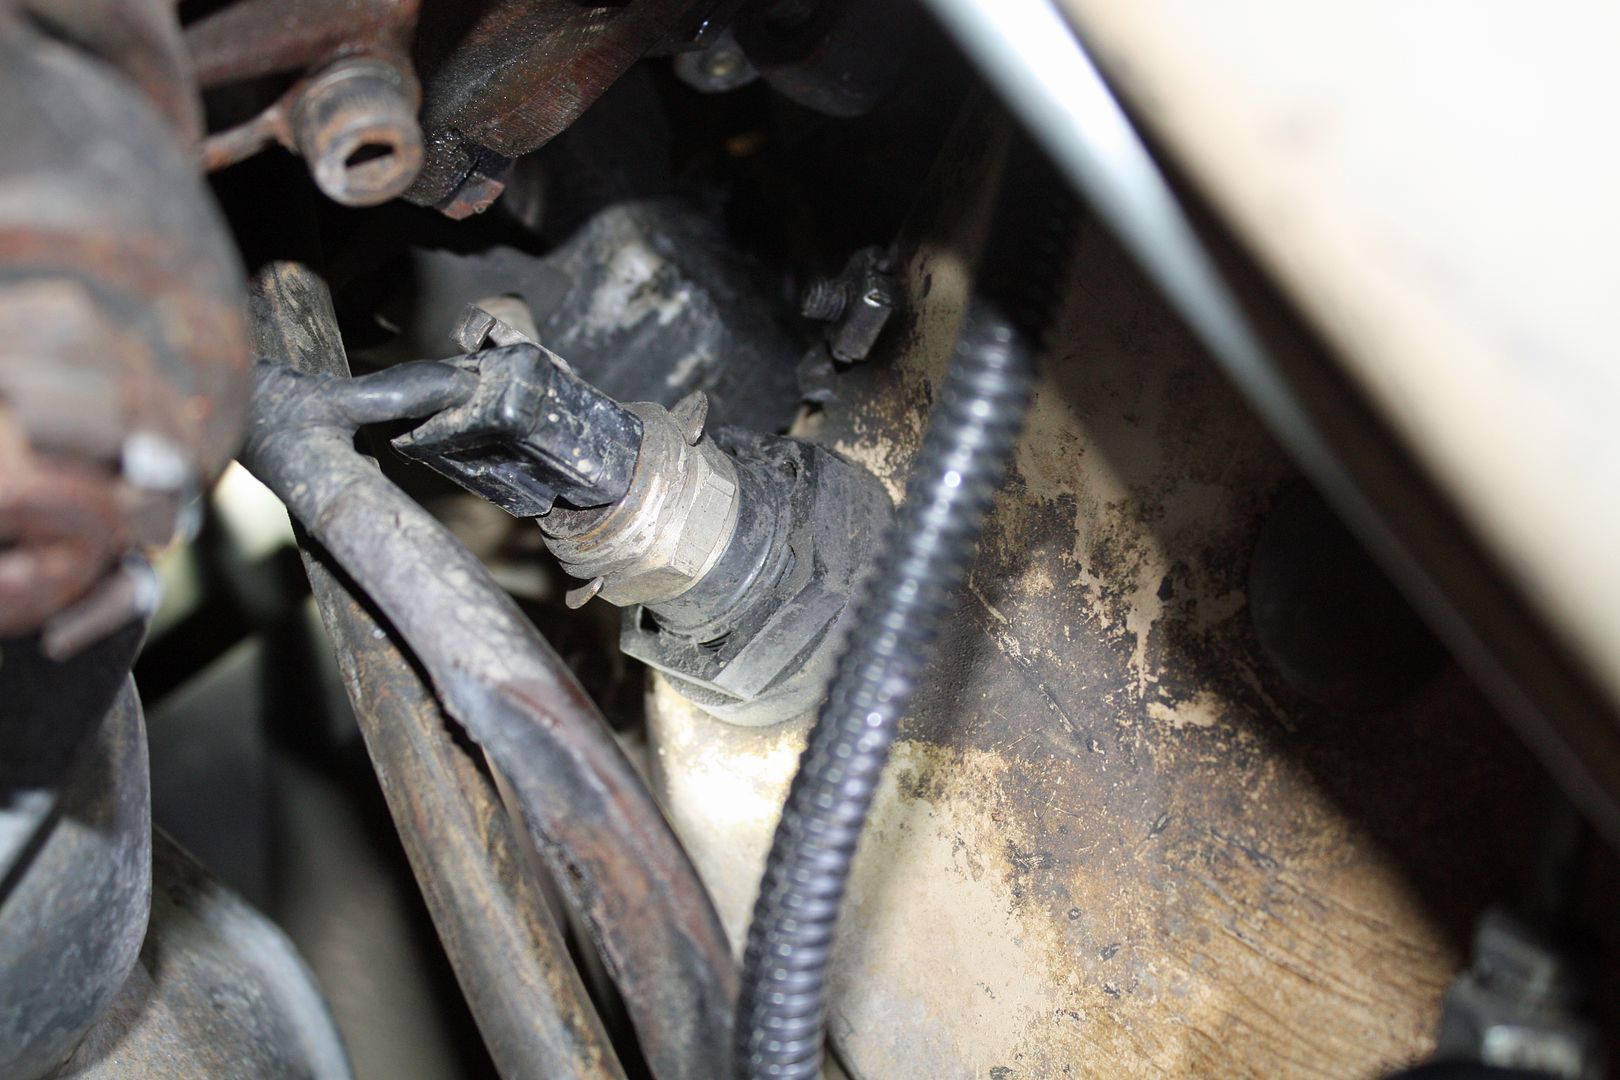
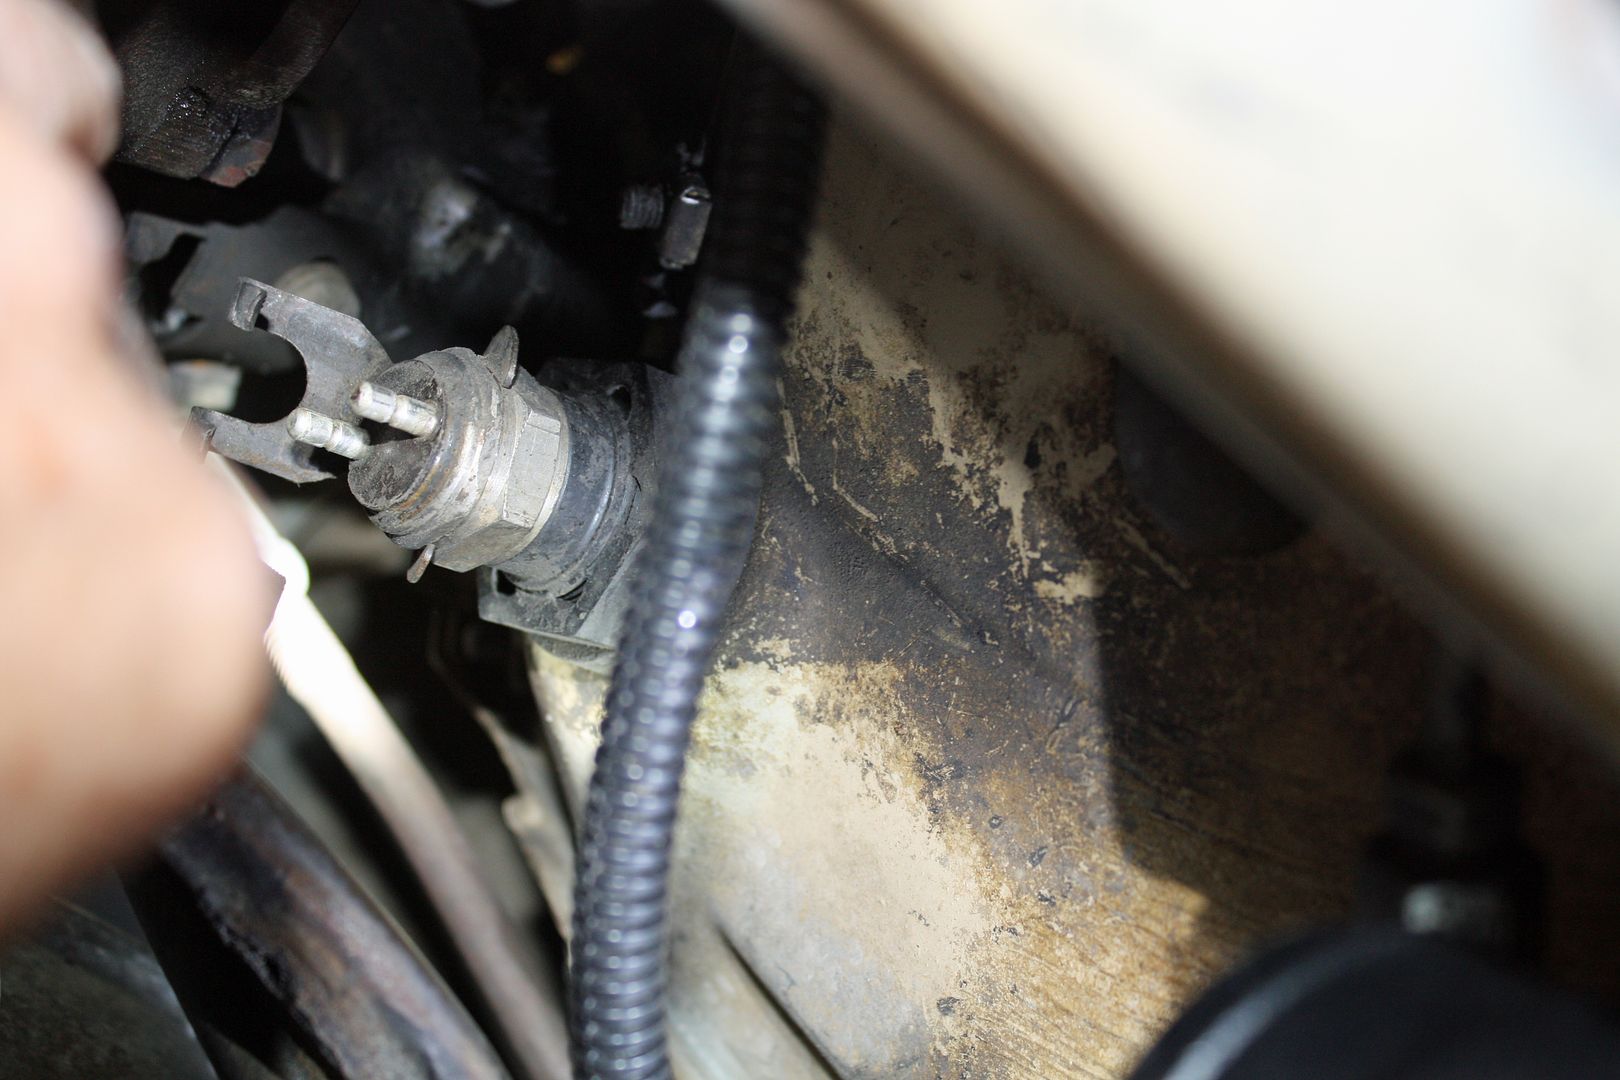
I then went under the car to locate the switch. After removing the plug, I checked to make sure I had 12V to one side of the switch. I did. I then found the solenoid connection on the passenger side of the transmission. I applied 12V to it and the solenoid clicked, so it appears to be working. Unfortunately, I did not have a helper to depress the gas pedal to see if I get 12 volts at the solenoid with the kick down switch engaged. At this point, I am guessing the switch has, as they say on Wheeler Dealers, perished.


Yesterday I did the final adjustments to the cruise control. It is now working well. As I mentioned previously, there are a number of dip switches on the main control unit that determine how the cruise reacts to inputs. It is a matter of experimentation to determine the correct settings as every car reacts differently to the inputs.


After receiving the comments about the kick down issue, I first made sure the accelerator pedal would make contact with the switch. My carpet kit did not include a cutout for the kick down switch, which i remedied by cutting a hole. Also, I had added the Coco mats which are very thick. After checking it out, I cut off a portion of the mat to make sure the pedal had full travel.


I then went under the car to locate the switch. After removing the plug, I checked to make sure I had 12V to one side of the switch. I did. I then found the solenoid connection on the passenger side of the transmission. I applied 12V to it and the solenoid clicked, so it appears to be working. Unfortunately, I did not have a helper to depress the gas pedal to see if I get 12 volts at the solenoid with the kick down switch engaged. At this point, I am guessing the switch has, as they say on Wheeler Dealers, perished.


 08-31-2017, 06:21 PM
#90
Member
Thread Starter
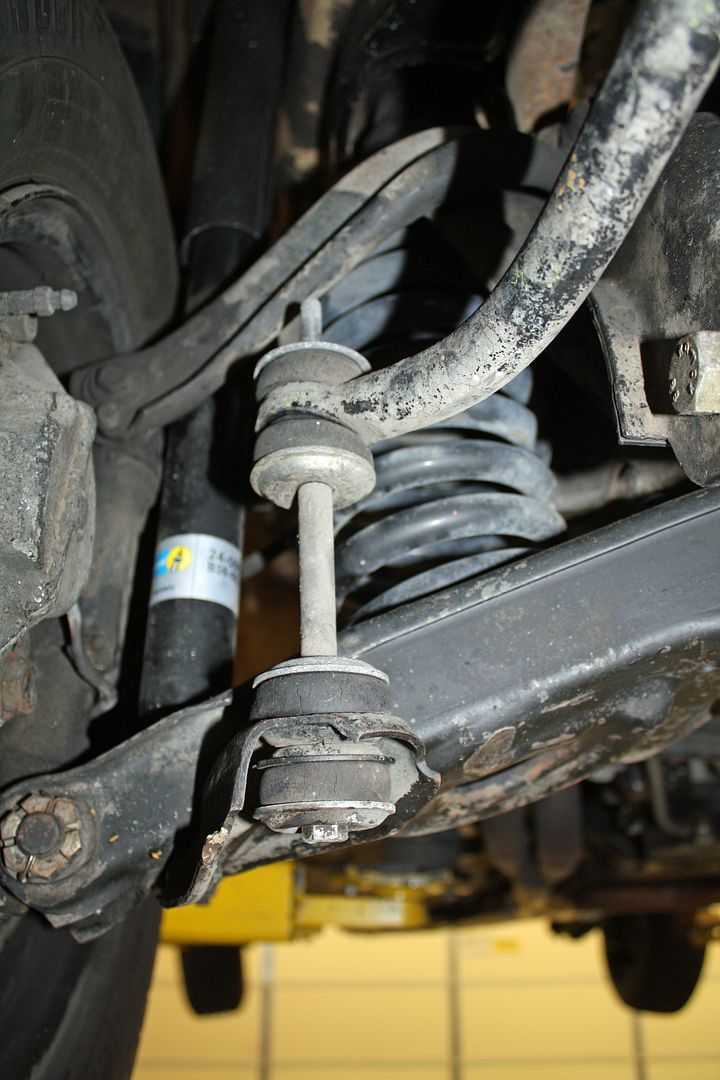
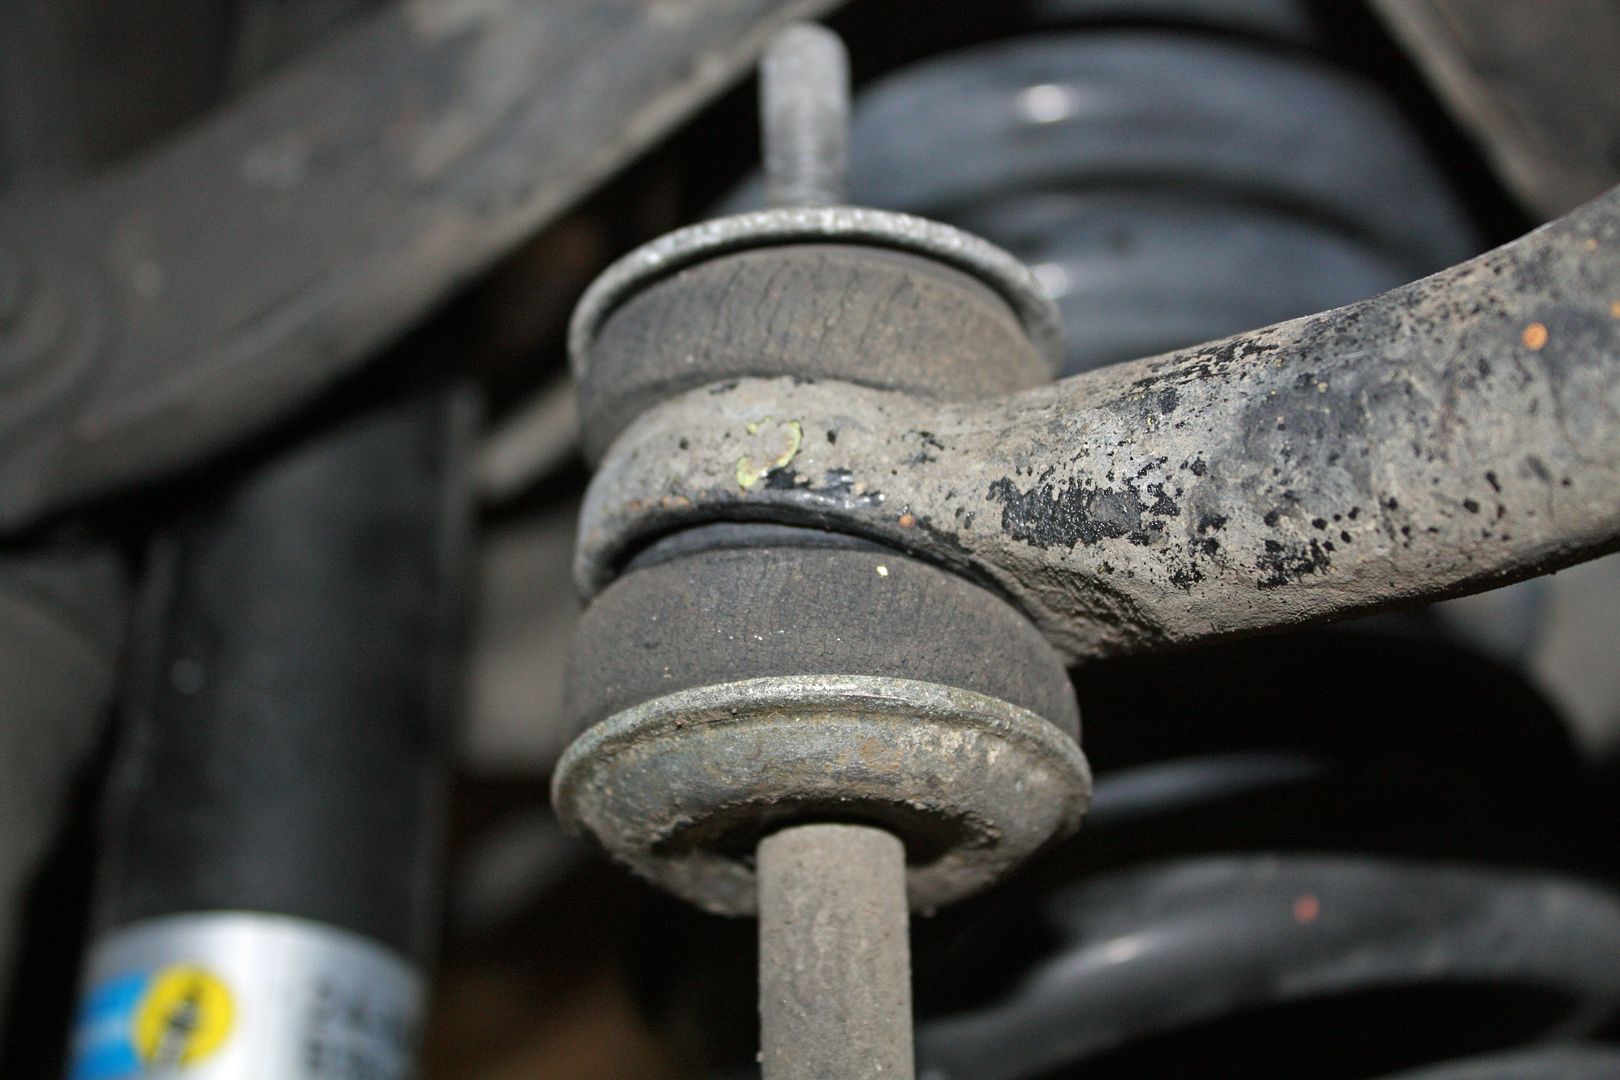
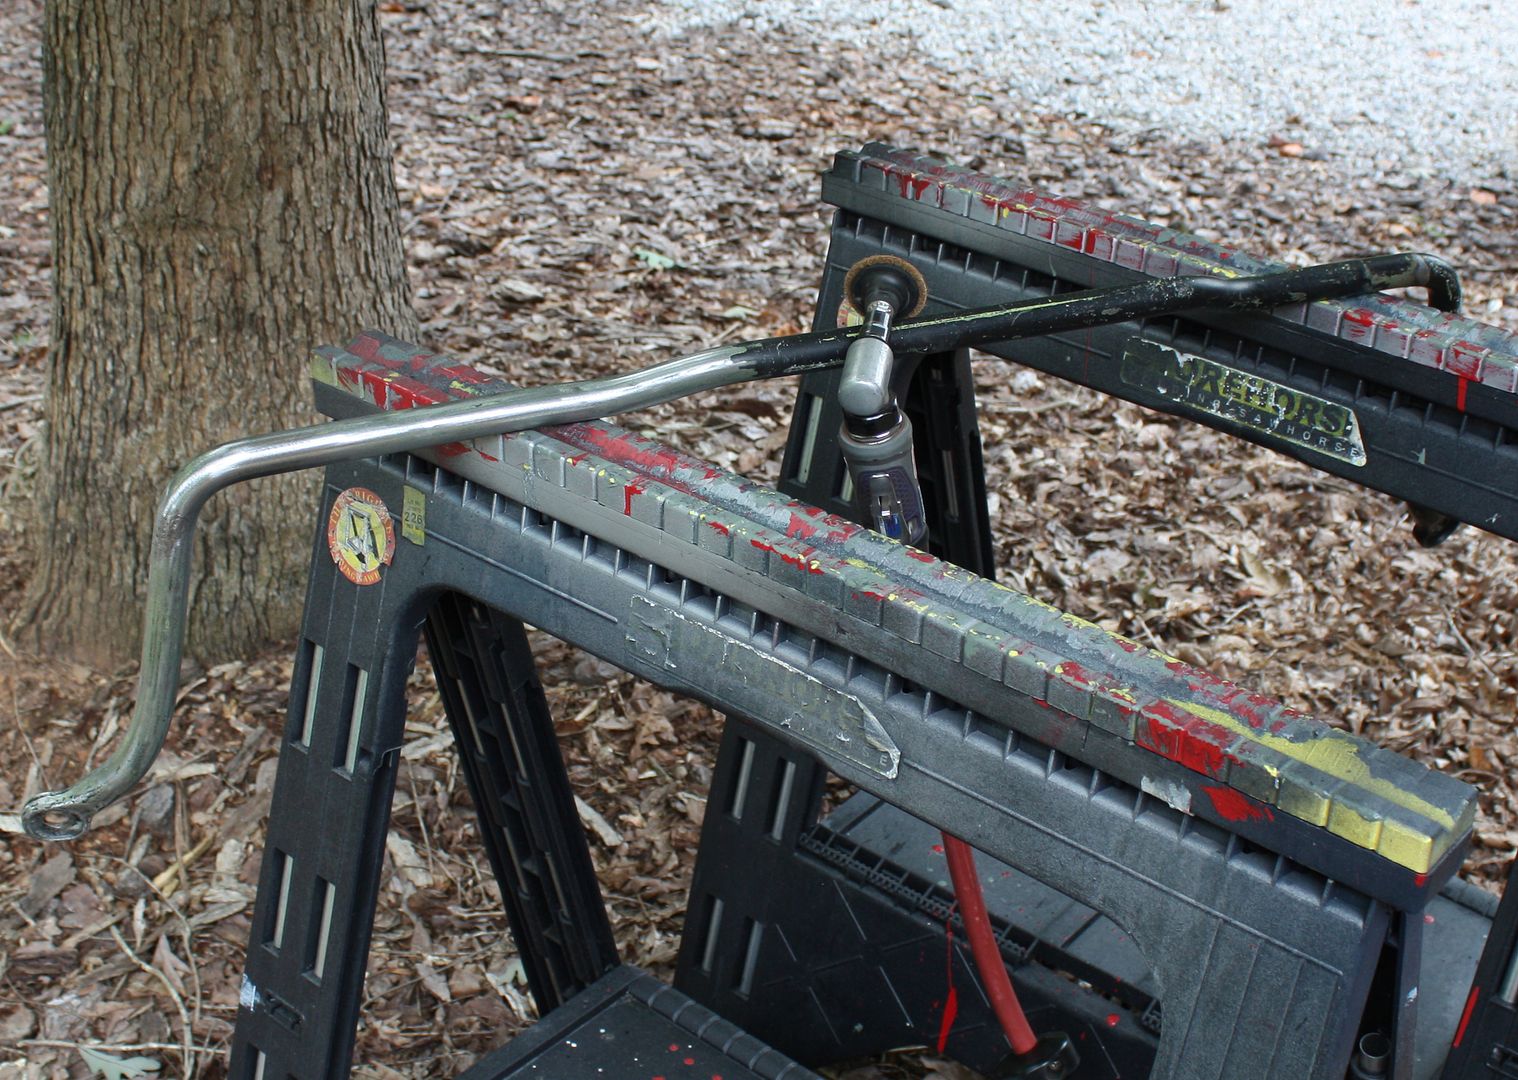
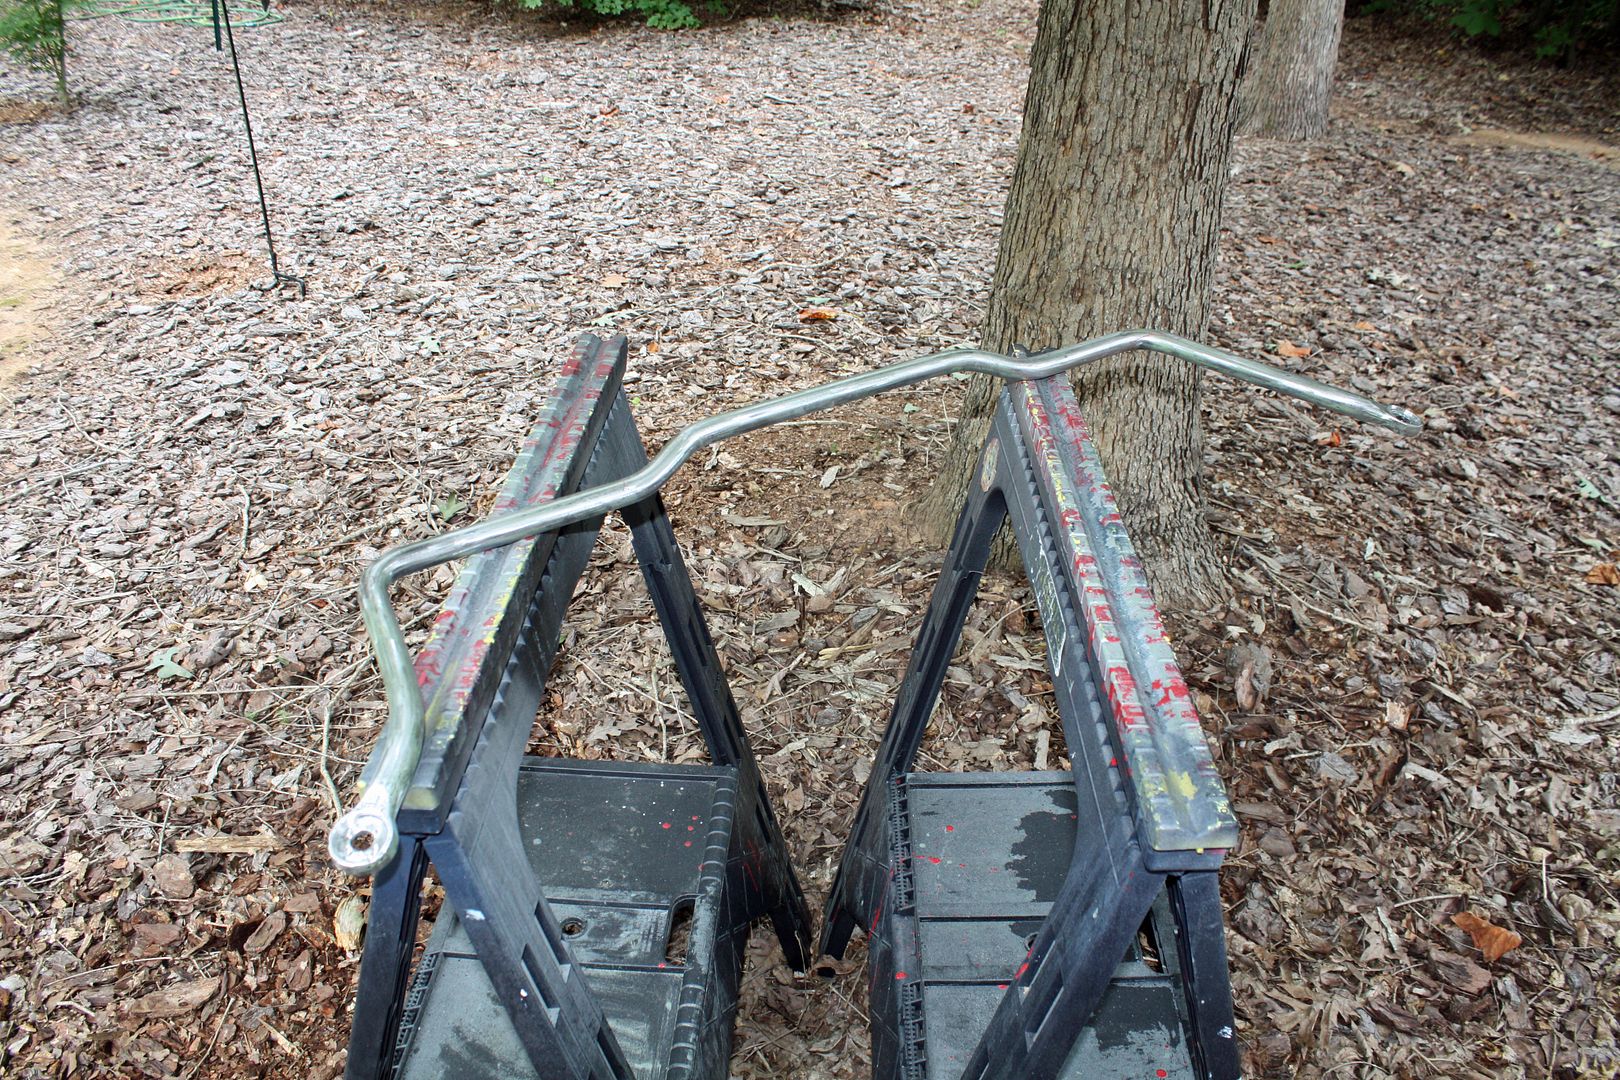
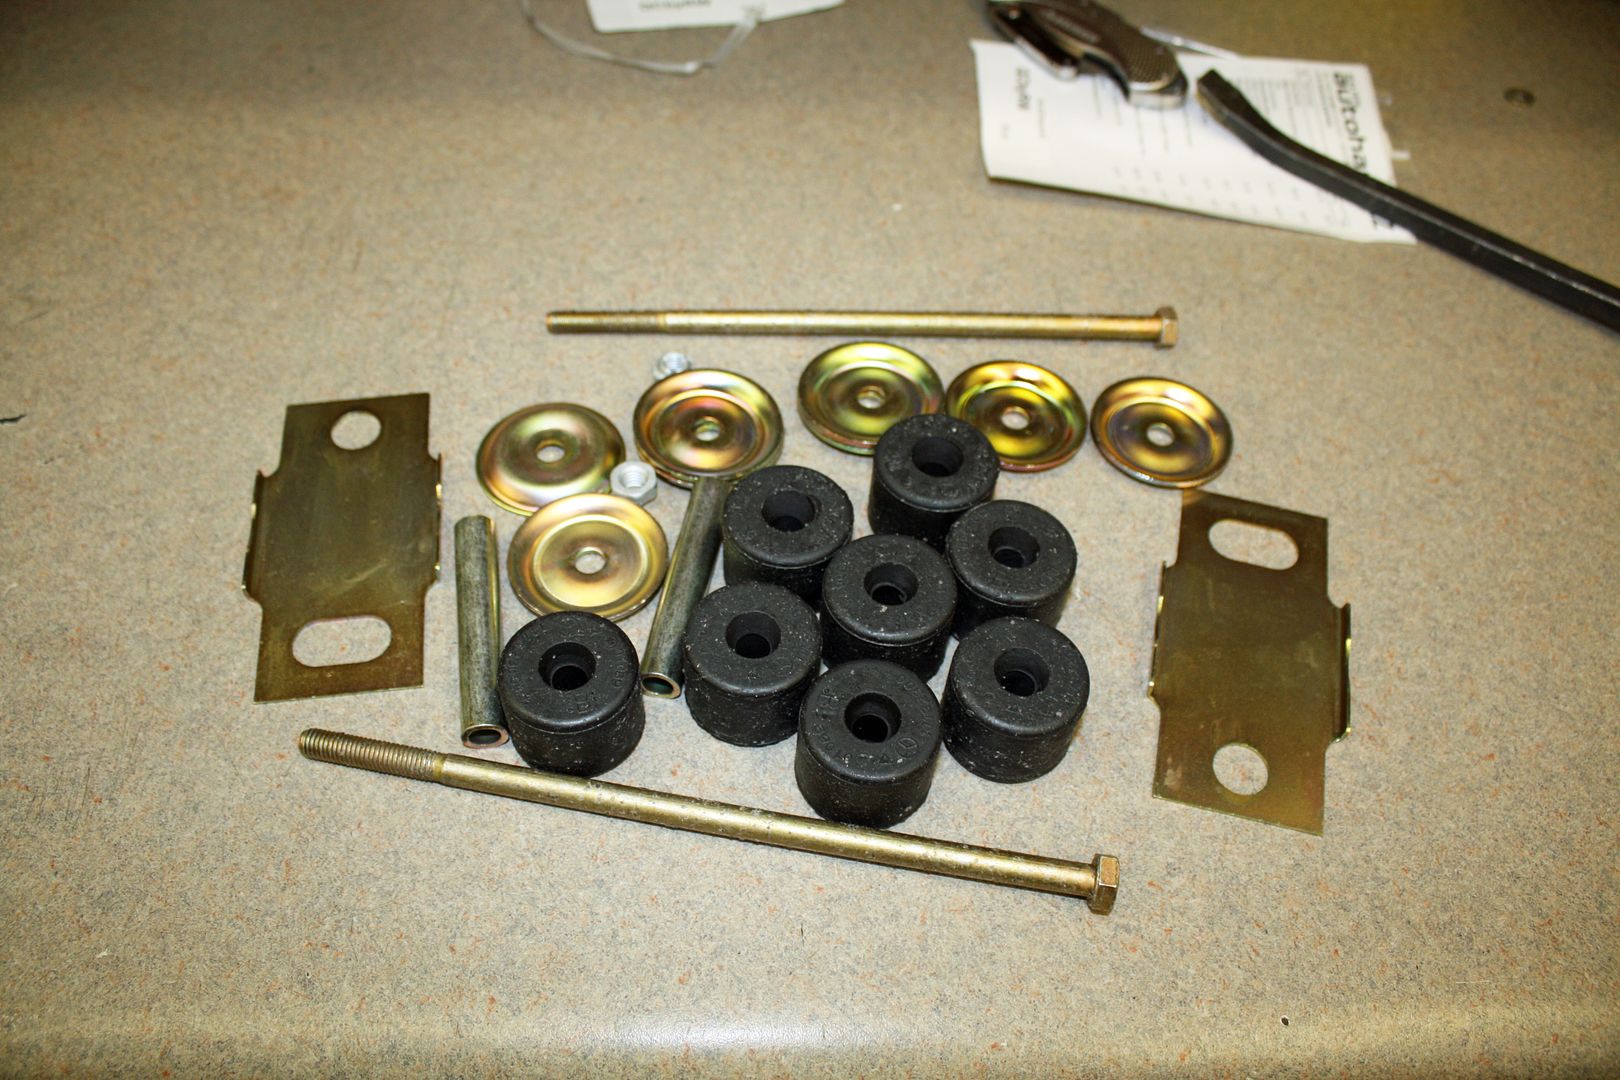
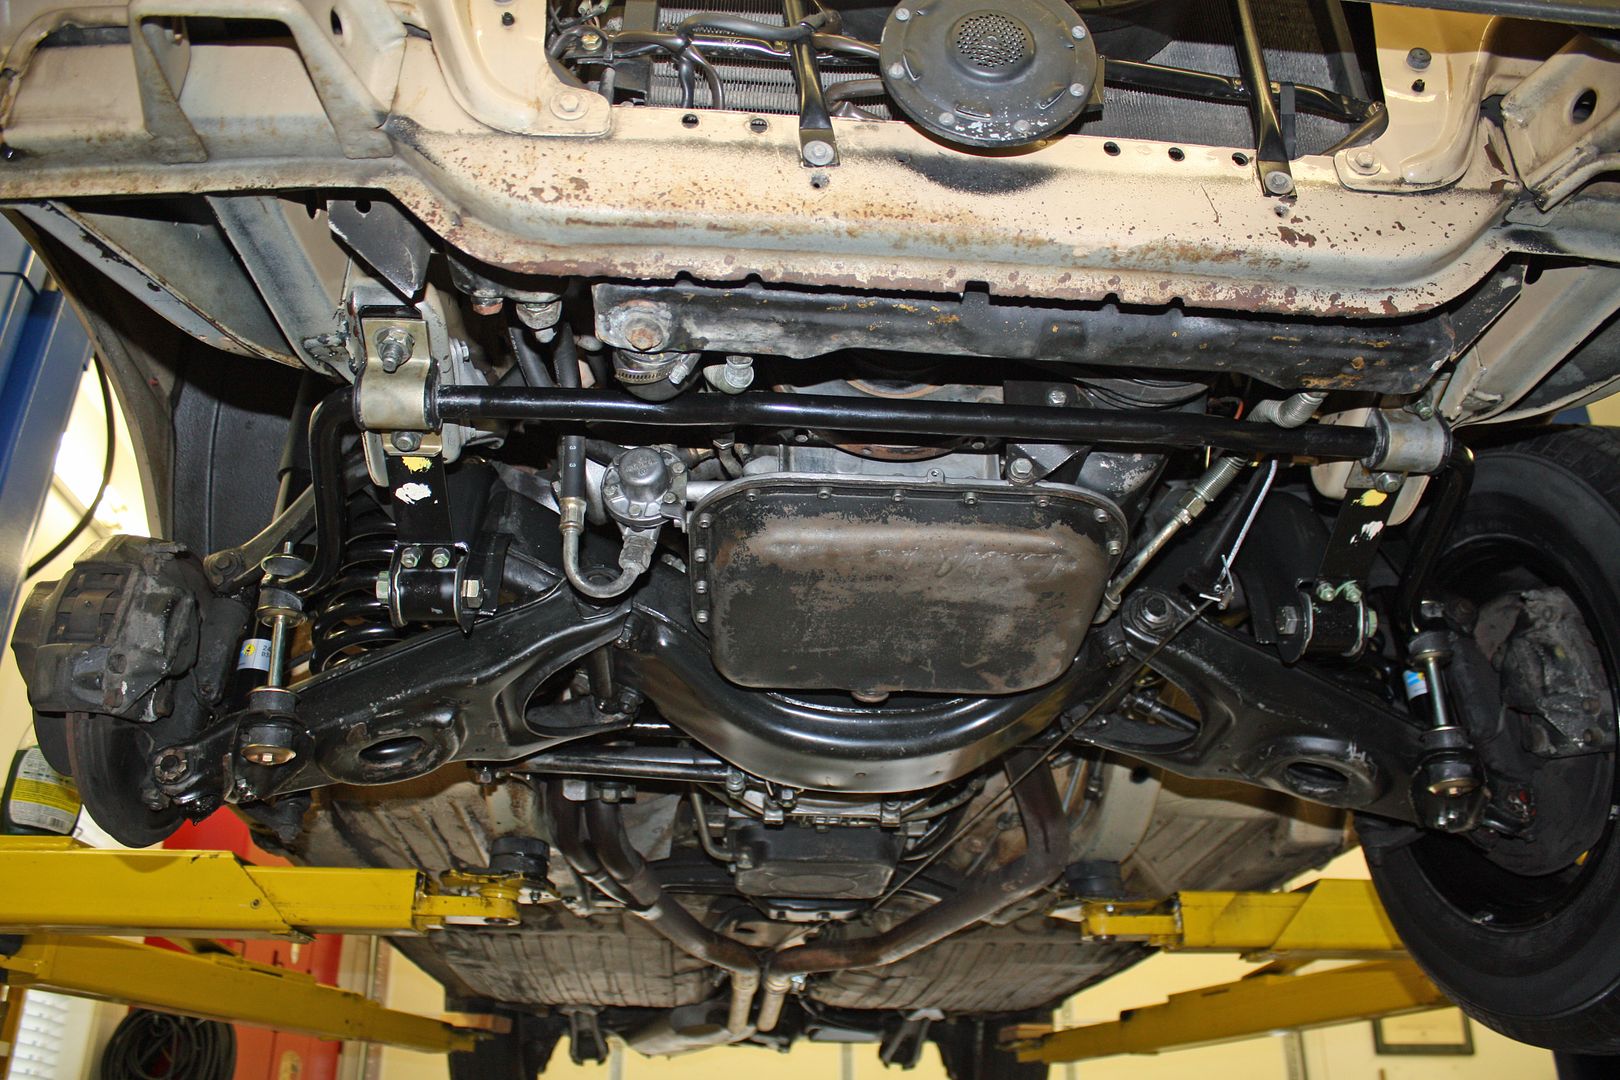
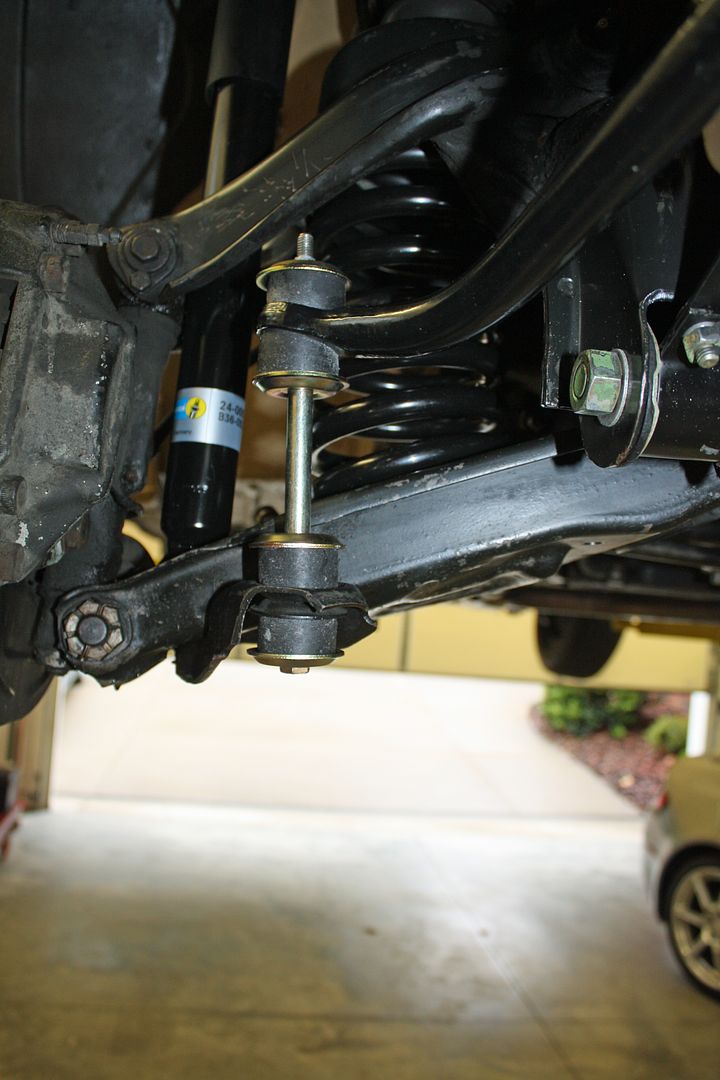
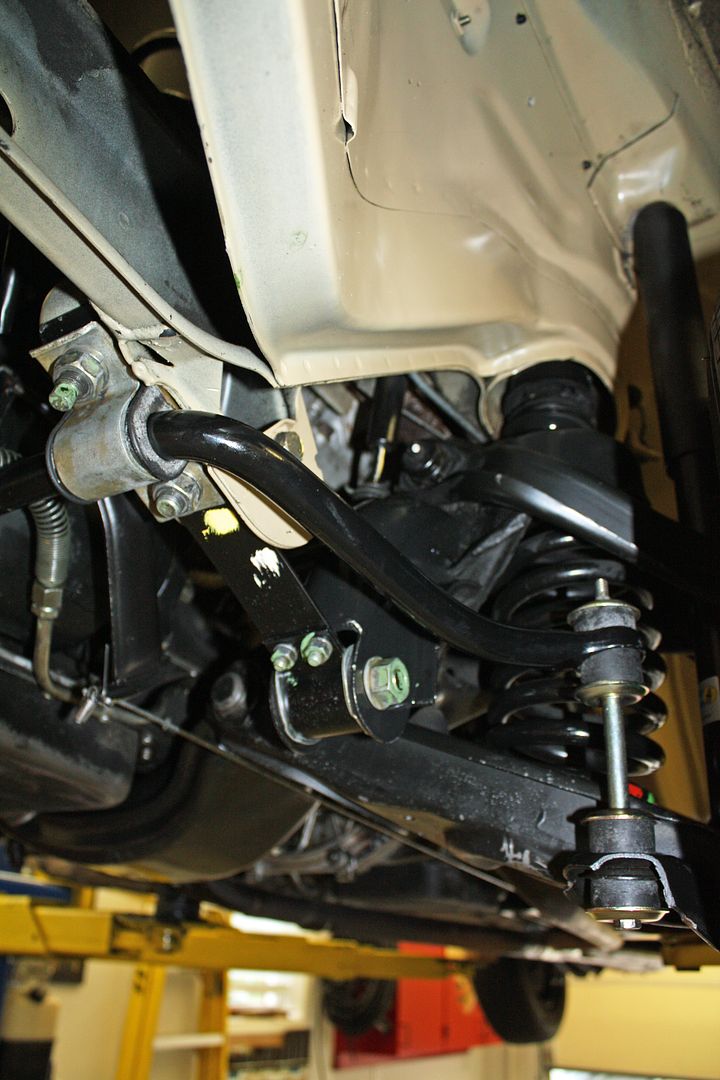
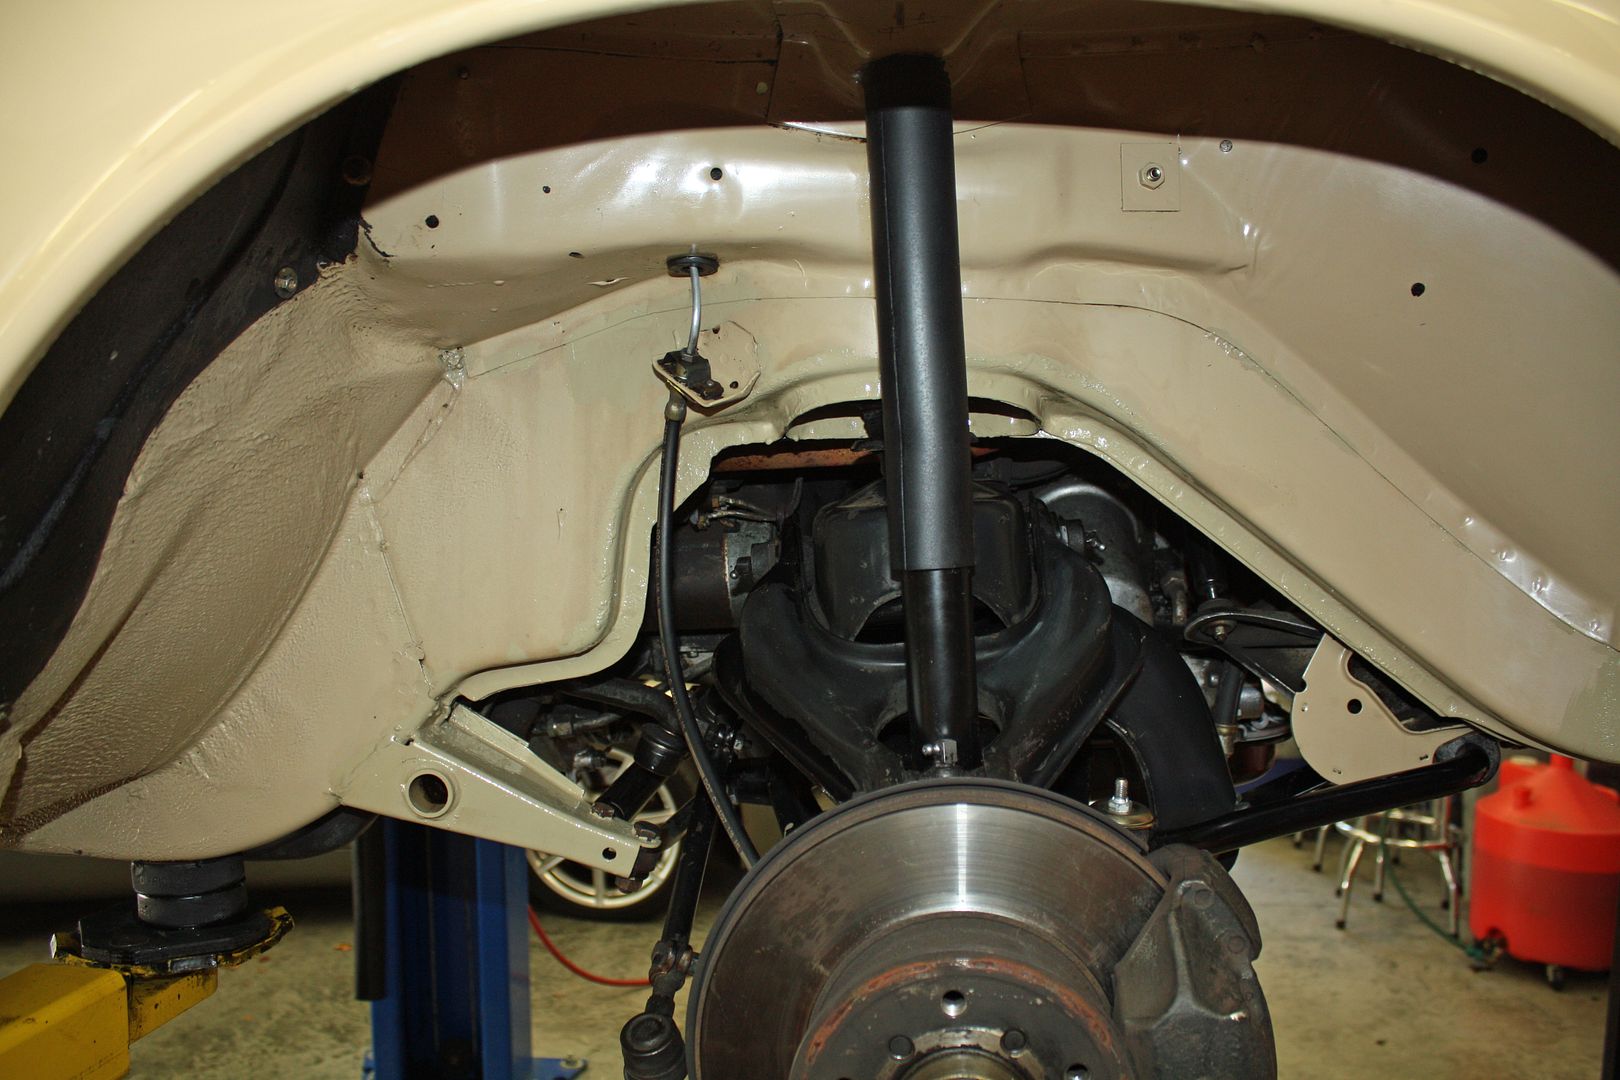
I have had new sway bar bushings for awhile and finally got around to working on them today. After taking the sway bar off, I noticed that it had a rusty area on the right side. I didn't feel comfortable with that rust so I used my angle grinder to take the paint off and to grind down the rusted area. It is now at the powder coater.
I had two embarrassing things happen at the Mercedes show. One of my new found friends was looking at my engine bay and asked if I had changed the power steering filter. I told him I didn't know it had one. For no apparent reason, I decided to remove the knurled nut on the PS reservoir and proceeded to drop it. It fell down next to the reservoir. After feeling around on the ground, we could not find it, even after backing my car up to reveal the ground better. Four guys and a woman are now looking all over the engine area with our phone flashlights trying to find it. To no avail. To secure the PS lid, we used the nut holding down the air cleaner.
I was upset that I dropped it and could not understand why we couldn't find it. Just before leaving, I decided to look one more time on the ground. A couple of passerby's asked what I was looking for. I now had another team looking on the ground and in the engine bay area. Suddenly, one of the guys said, "I see it!" He was looking down between the distributor cap and the radiator hose. I looked down in that same area and could not see it. He looked again and said he still saw it. I reached under the car to the area above the sump and, sure enough, it was there. The embarrassing part was that there was so much crud on top of the sump, that it captured the nut before it hit the ground. My now best friend will forever be called "Eagle Eye!"
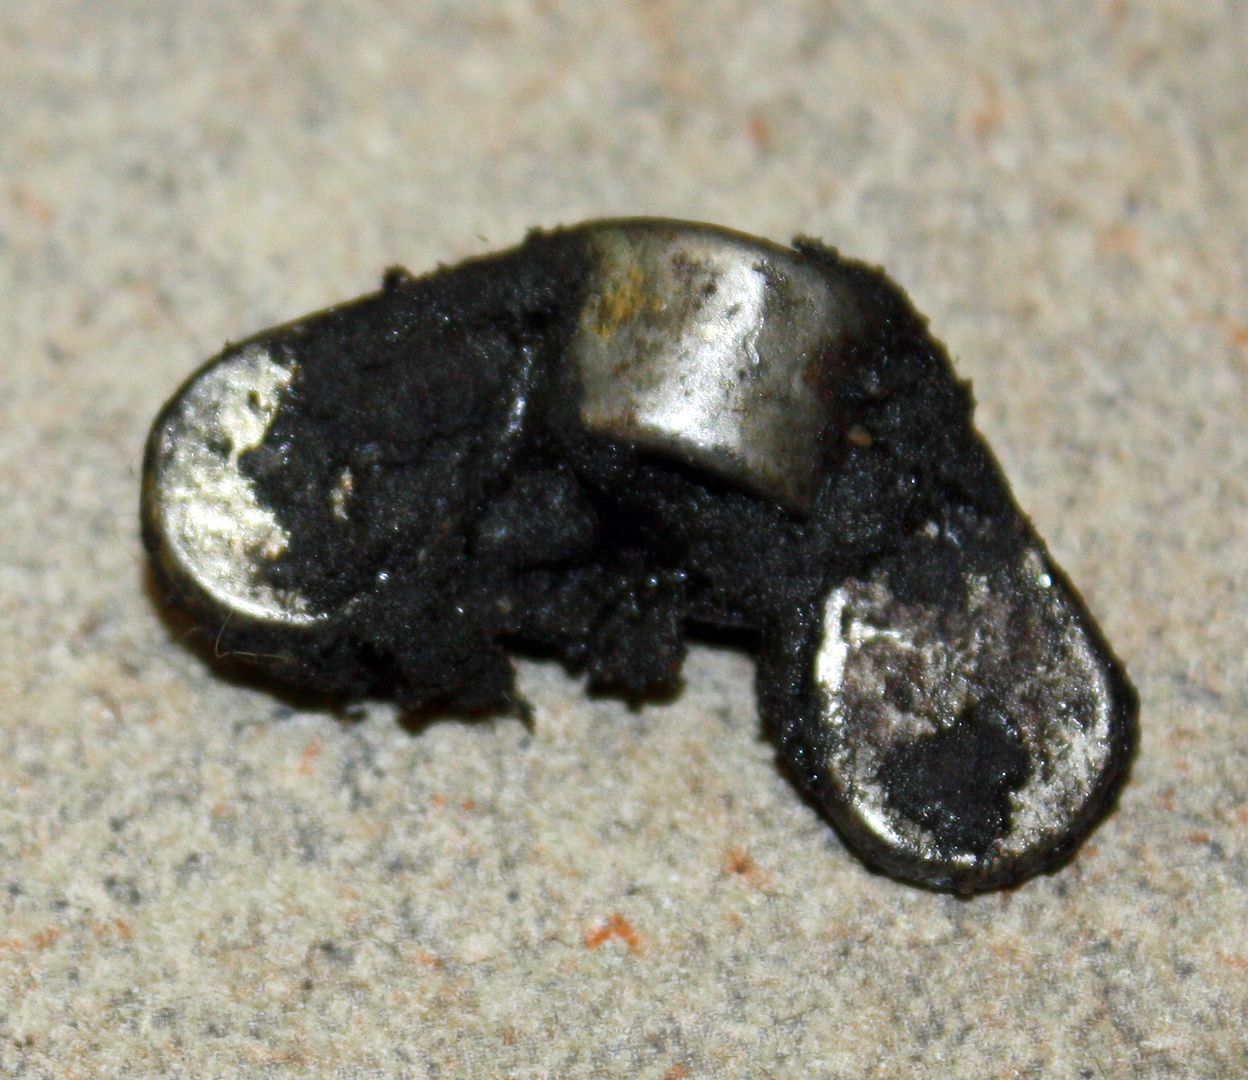
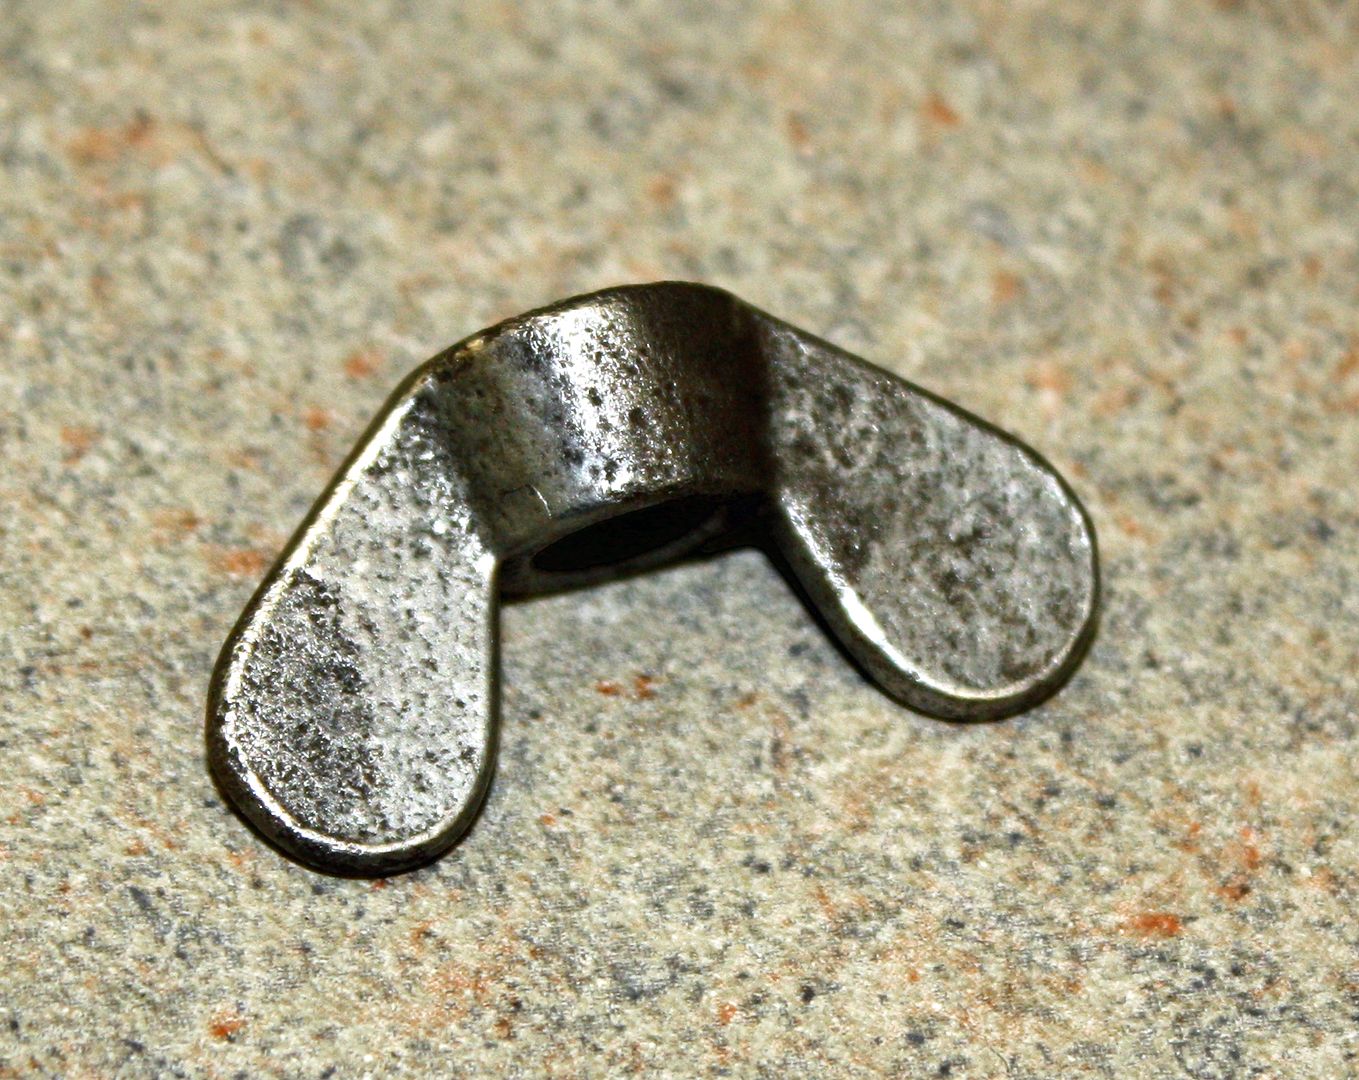
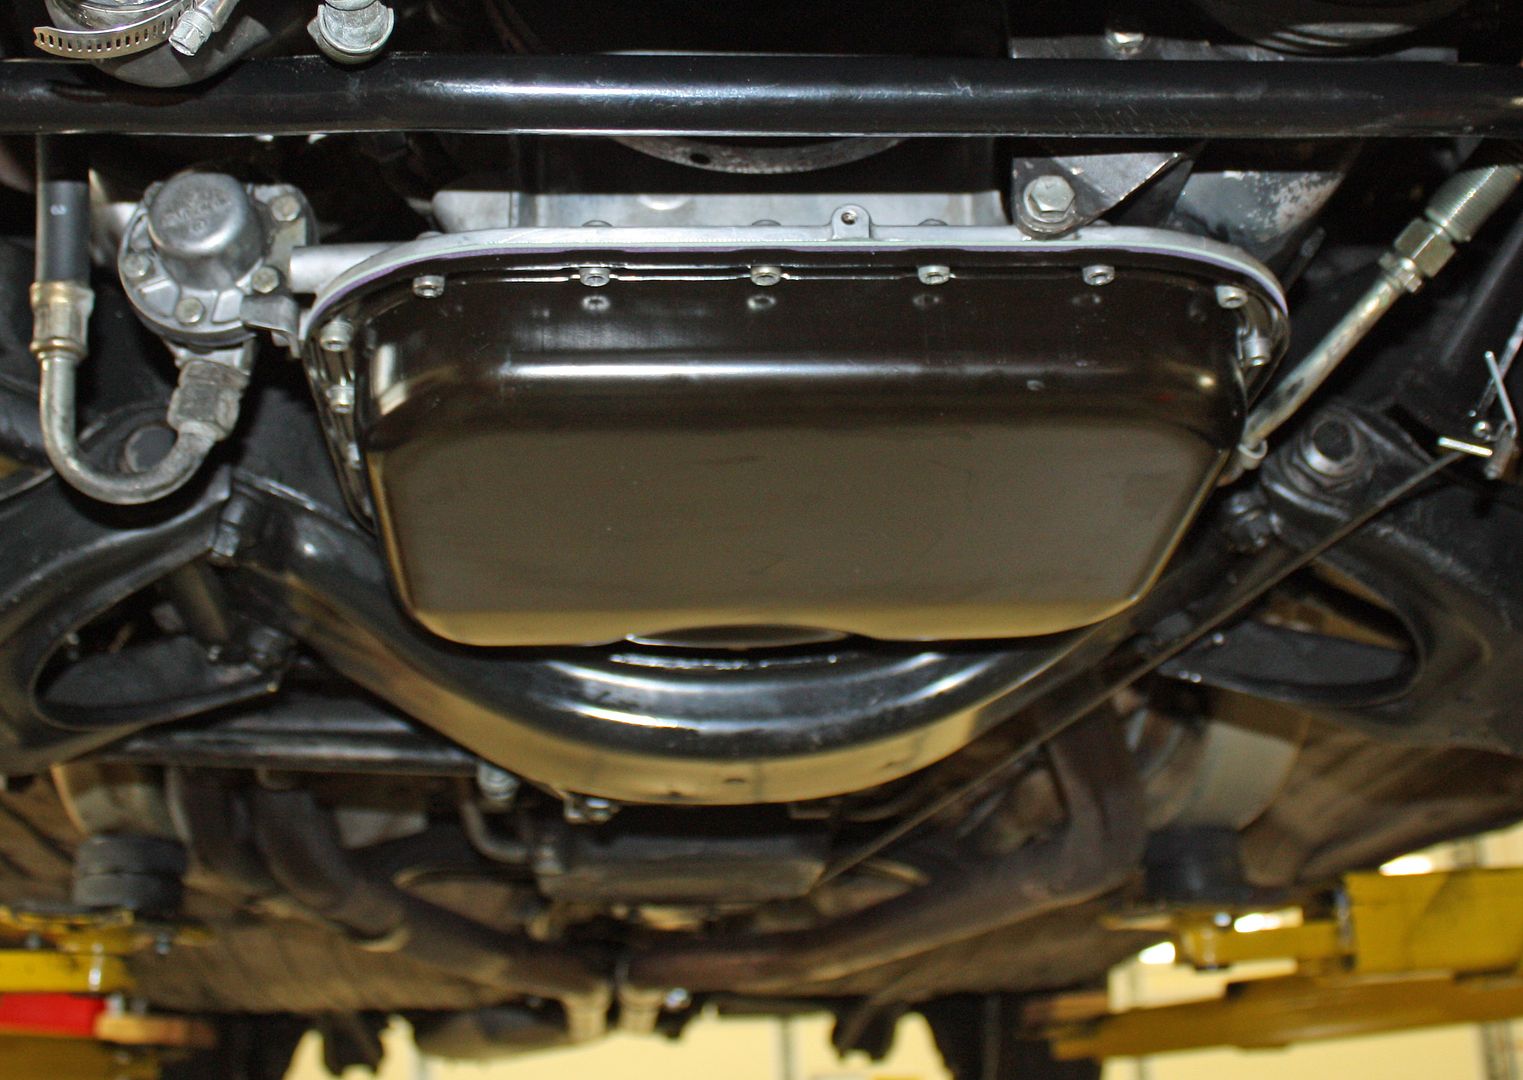
Now that I had the sway bar off, I decided it was time to clean the sump area. In the process, I discovered another treasure...the wing nut for the air cleaner!! It looks like it had been there for quite some time.
 [/U
[/U
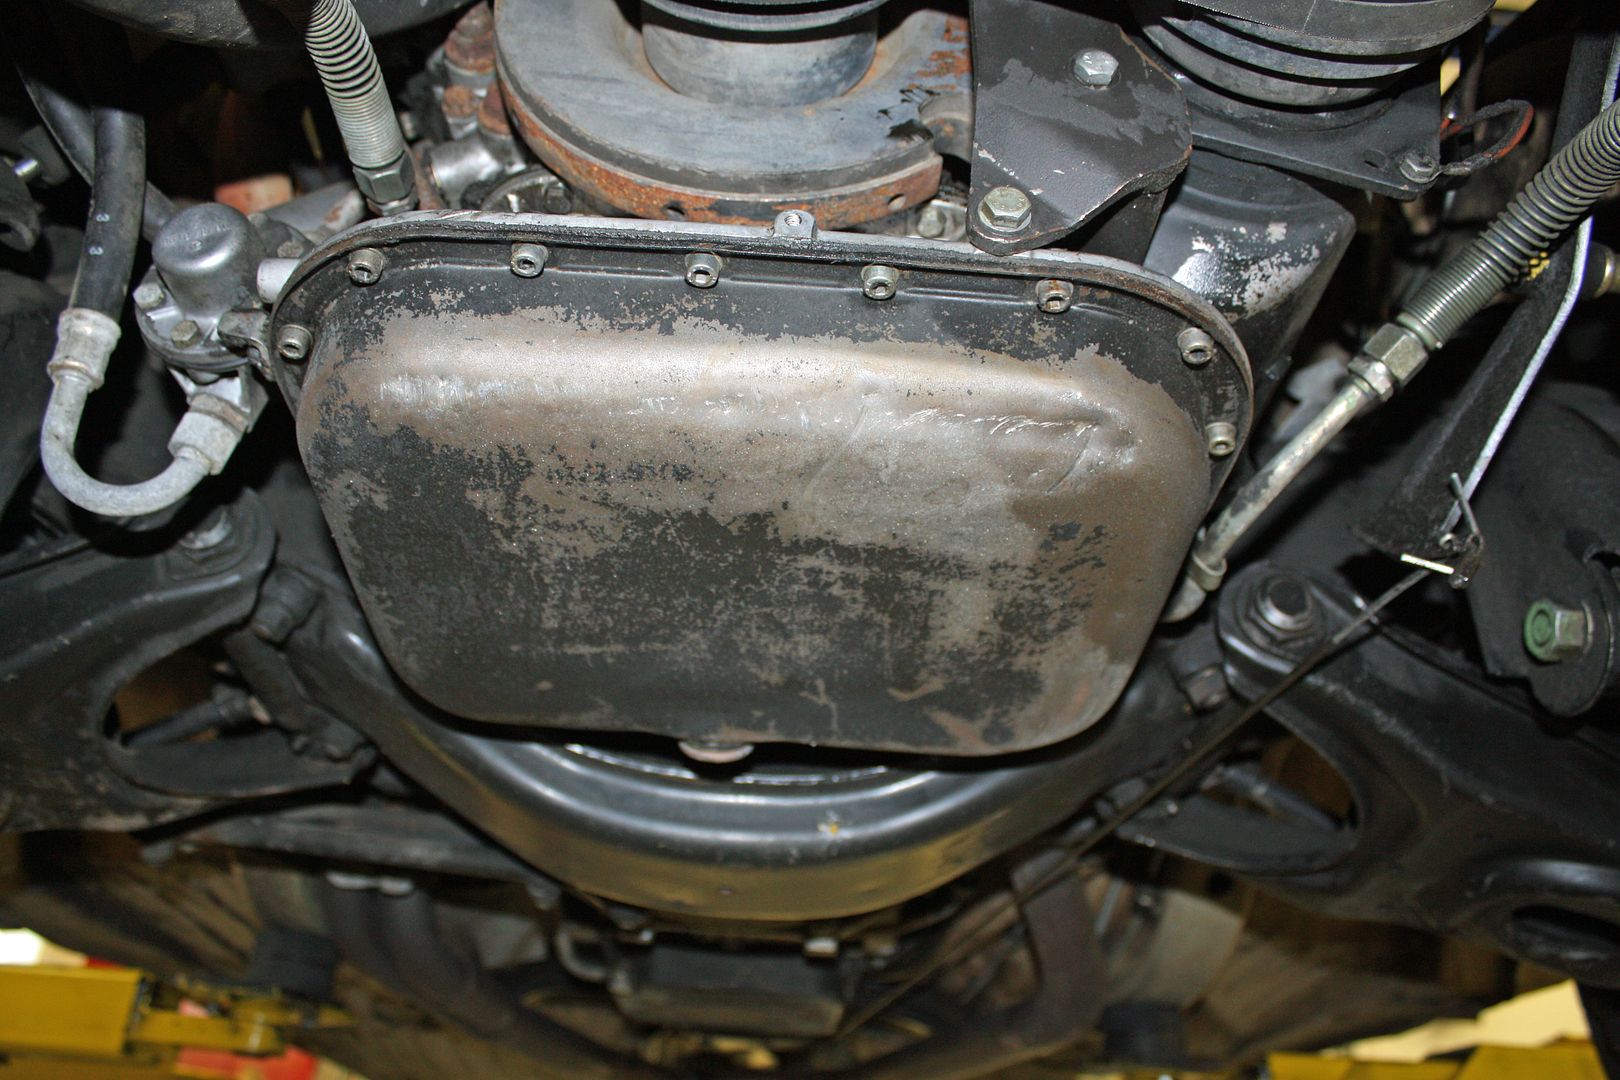
The 35 year Mercedes mechanic I met at the show noticed, while looking for my errant nut, that my oil pan had significant dents. He said the pickup was not far from the bottom and, if it was him, he would remove the oil pan to knock out the dents. I planned on doing that until I found that I could buy a new oil pan for $25. It is on the way.
He also noticed that I did not re-install the electric cooling fan correctly. It should have been installed so that the back of the fan housing was flush with the condenser. I corrected that yesterday.
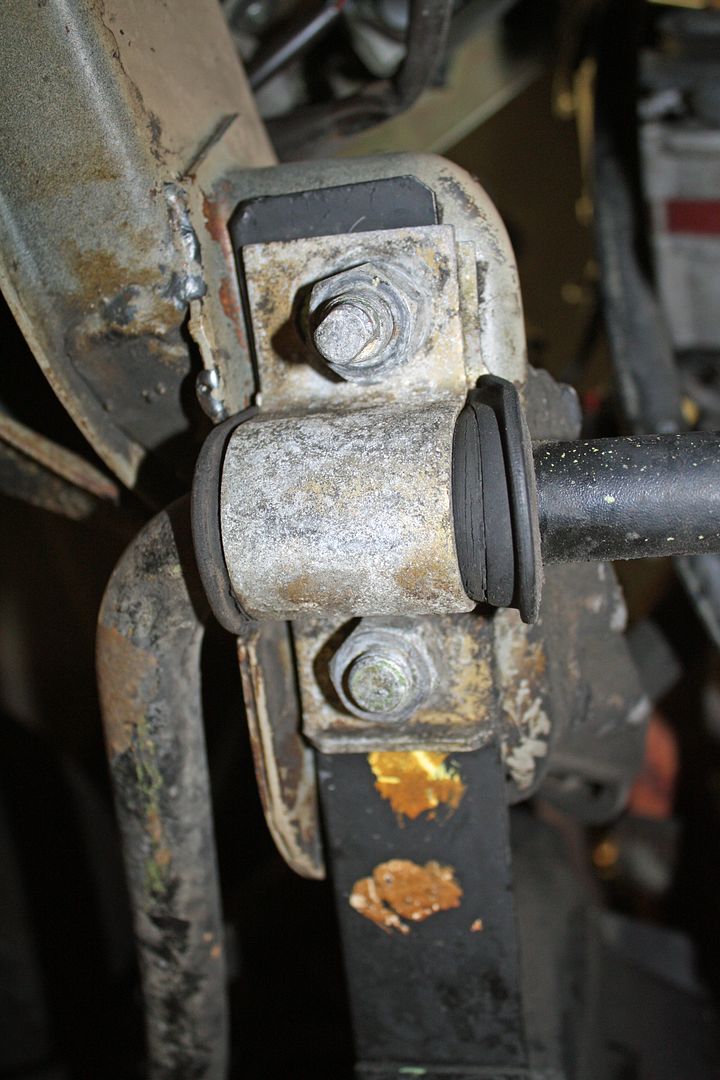
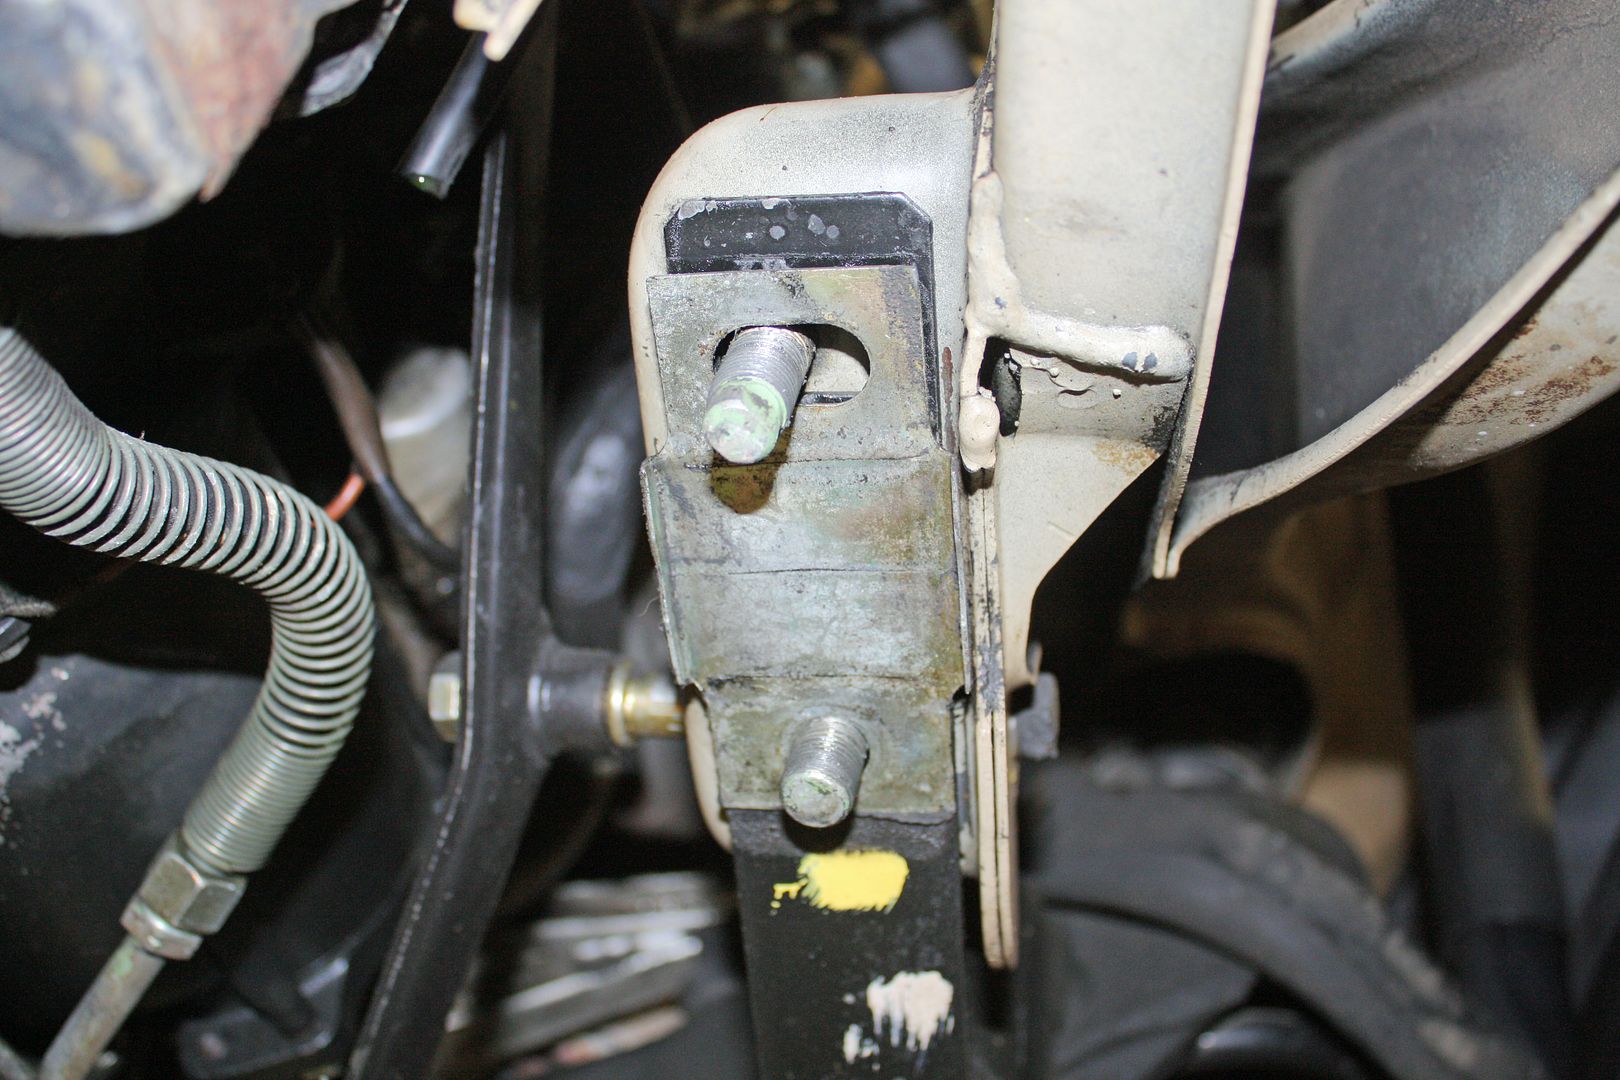
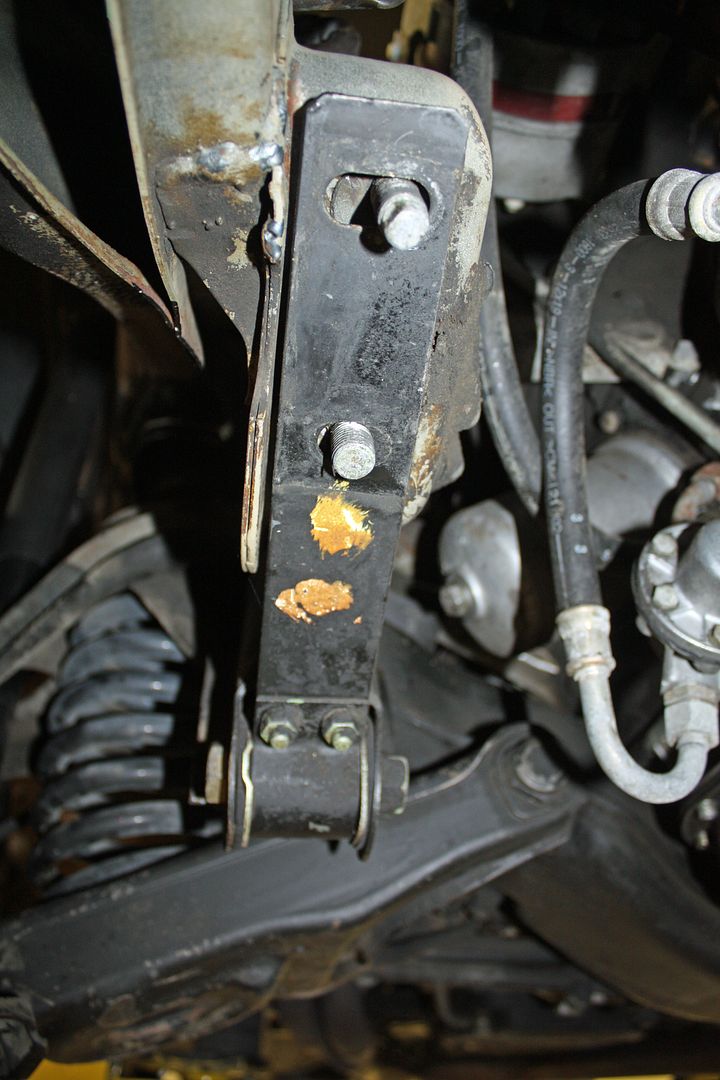
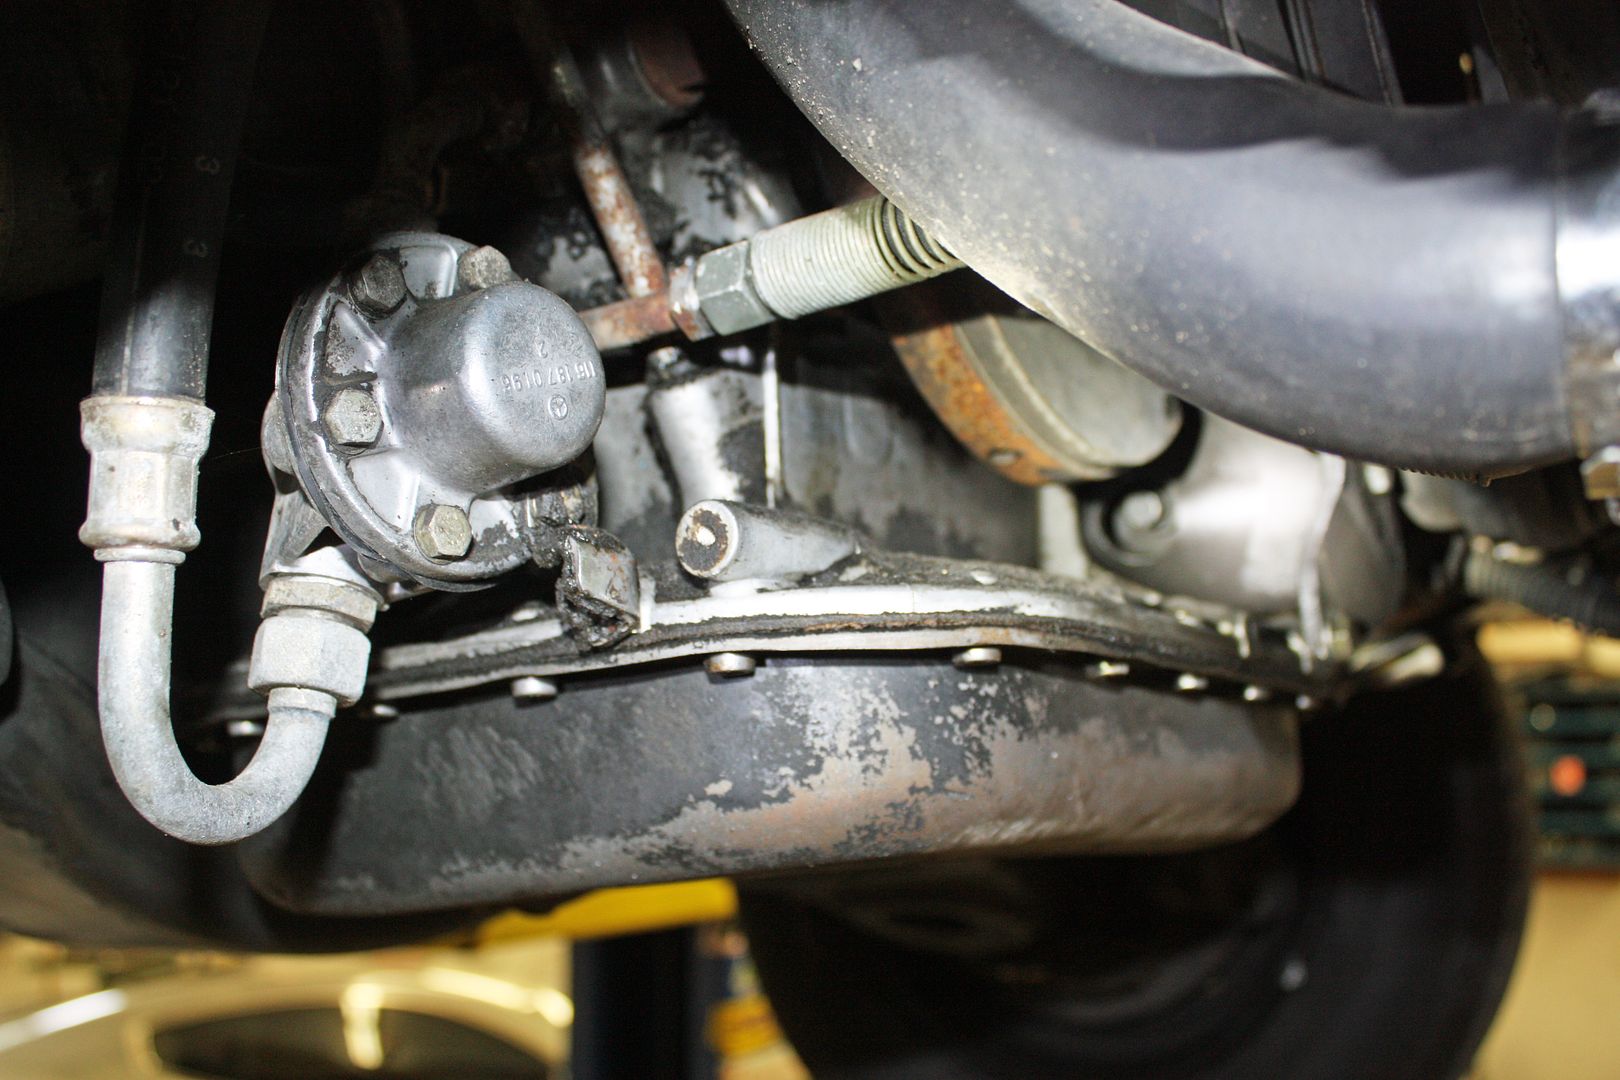
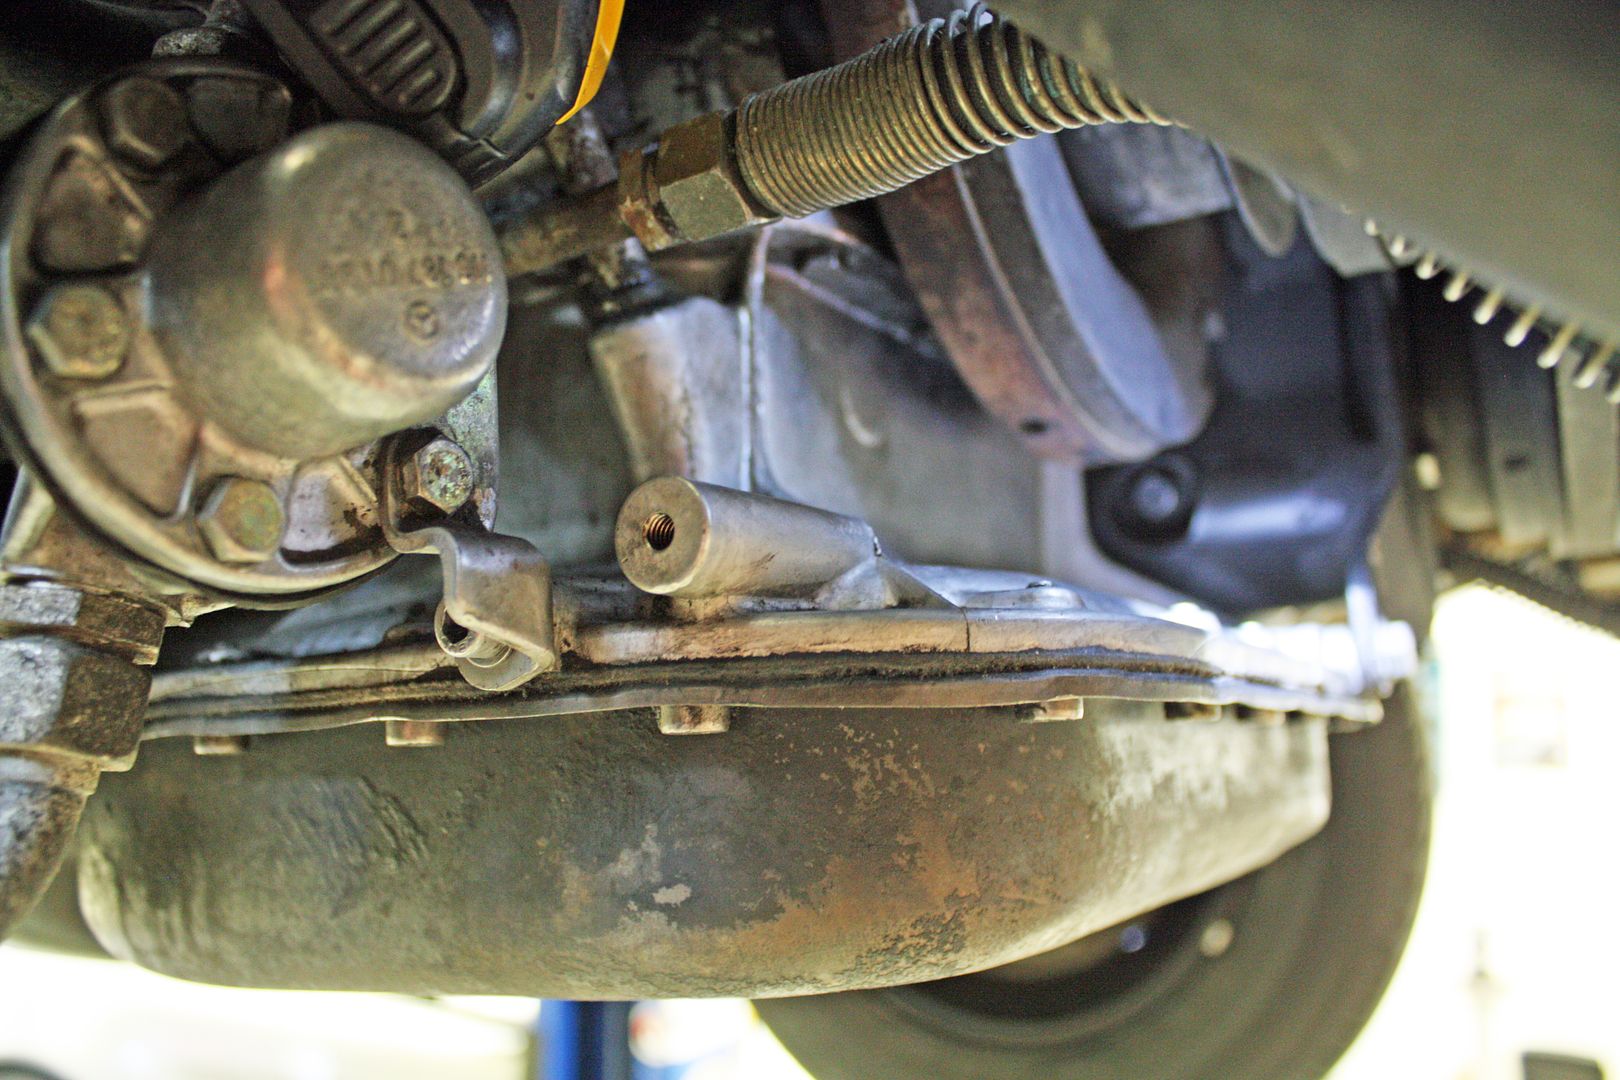
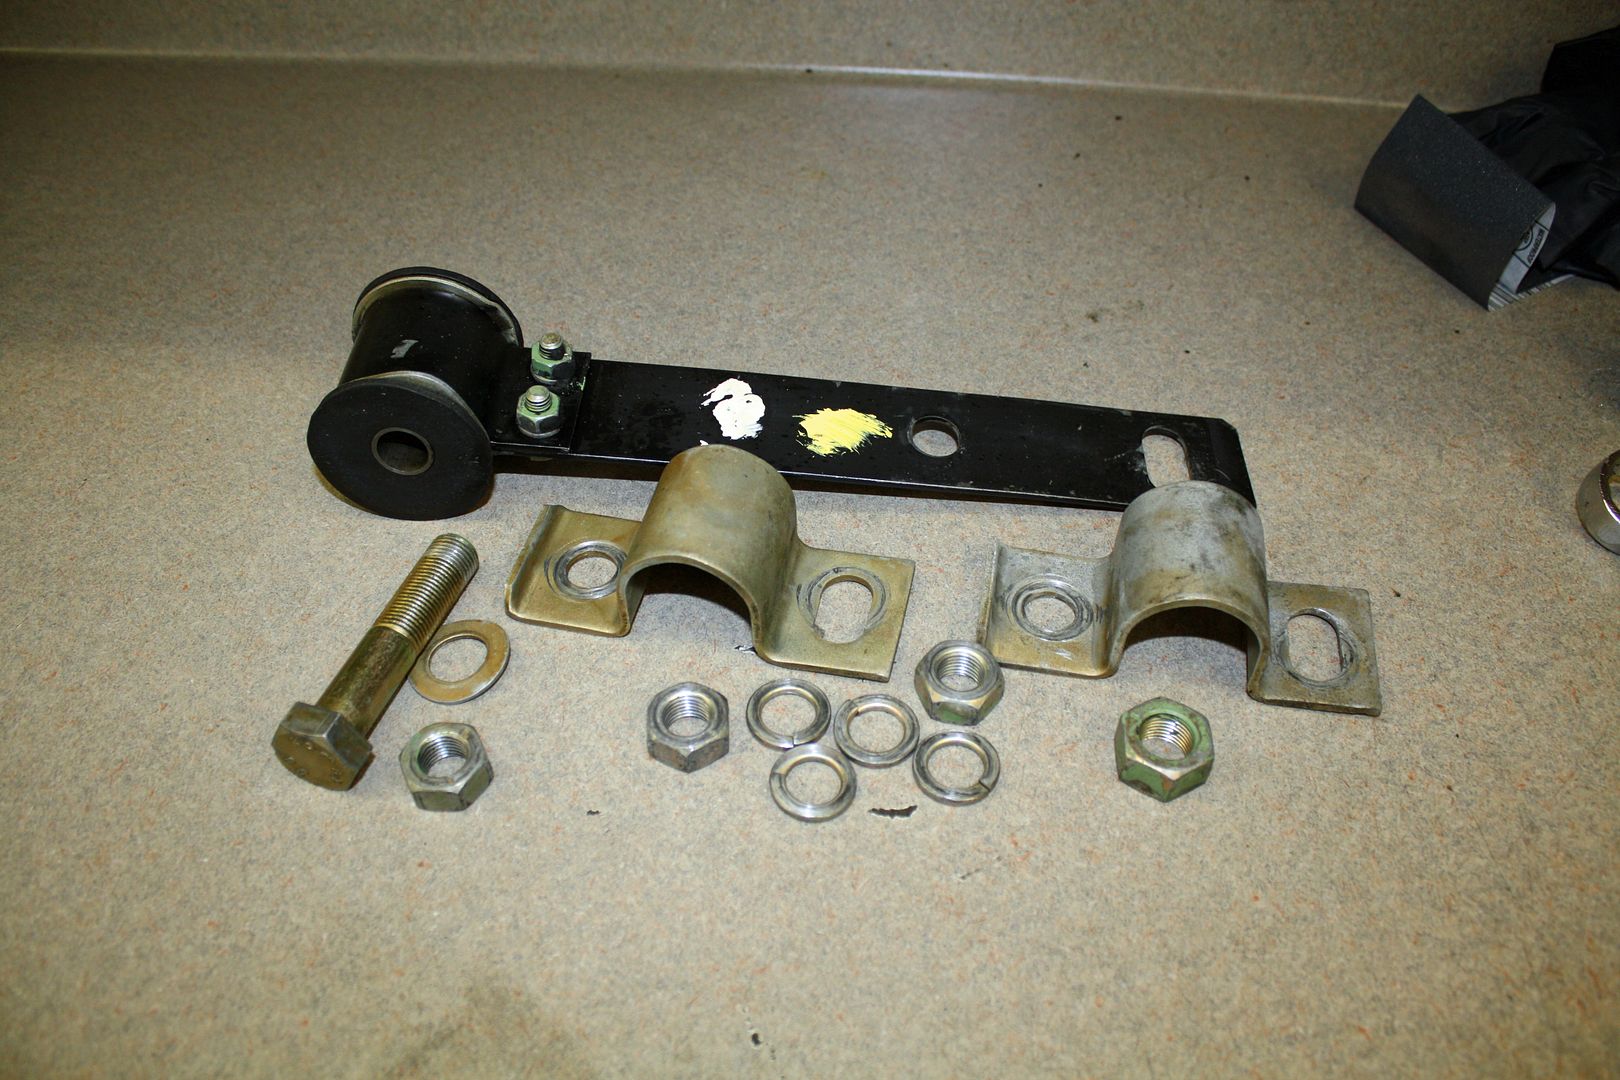
I was surprised when I removed the sway bar brackets that they were fastened with a 24mm nut. That is, by far, the heaviest fastener I have even seen on a sway bar mount. However, I assume the reason is that it also is the front mount for the suspension piece that I don't know the name of.
I removed this right one and cleaned it up along with the sway bar brackets and hardware. I also cleaned up the right suspension and the engine mount. Lots of dirt!!


I had two embarrassing things happen at the Mercedes show. One of my new found friends was looking at my engine bay and asked if I had changed the power steering filter. I told him I didn't know it had one. For no apparent reason, I decided to remove the knurled nut on the PS reservoir and proceeded to drop it. It fell down next to the reservoir. After feeling around on the ground, we could not find it, even after backing my car up to reveal the ground better. Four guys and a woman are now looking all over the engine area with our phone flashlights trying to find it. To no avail. To secure the PS lid, we used the nut holding down the air cleaner.
I was upset that I dropped it and could not understand why we couldn't find it. Just before leaving, I decided to look one more time on the ground. A couple of passerby's asked what I was looking for. I now had another team looking on the ground and in the engine bay area. Suddenly, one of the guys said, "I see it!" He was looking down between the distributor cap and the radiator hose. I looked down in that same area and could not see it. He looked again and said he still saw it. I reached under the car to the area above the sump and, sure enough, it was there. The embarrassing part was that there was so much crud on top of the sump, that it captured the nut before it hit the ground. My now best friend will forever be called "Eagle Eye!"
Now that I had the sway bar off, I decided it was time to clean the sump area. In the process, I discovered another treasure...the wing nut for the air cleaner!! It looks like it had been there for quite some time.
[/U


The 35 year Mercedes mechanic I met at the show noticed, while looking for my errant nut, that my oil pan had significant dents. He said the pickup was not far from the bottom and, if it was him, he would remove the oil pan to knock out the dents. I planned on doing that until I found that I could buy a new oil pan for $25. It is on the way.

He also noticed that I did not re-install the electric cooling fan correctly. It should have been installed so that the back of the fan housing was flush with the condenser. I corrected that yesterday.


I was surprised when I removed the sway bar brackets that they were fastened with a 24mm nut. That is, by far, the heaviest fastener I have even seen on a sway bar mount. However, I assume the reason is that it also is the front mount for the suspension piece that I don't know the name of.
I removed this right one and cleaned it up along with the sway bar brackets and hardware. I also cleaned up the right suspension and the engine mount. Lots of dirt!!

 09-05-2017, 03:38 PM
#91
Member
Thread Starter
I talked with the powder coater and he may have the sway bar done either today or tomorrow.
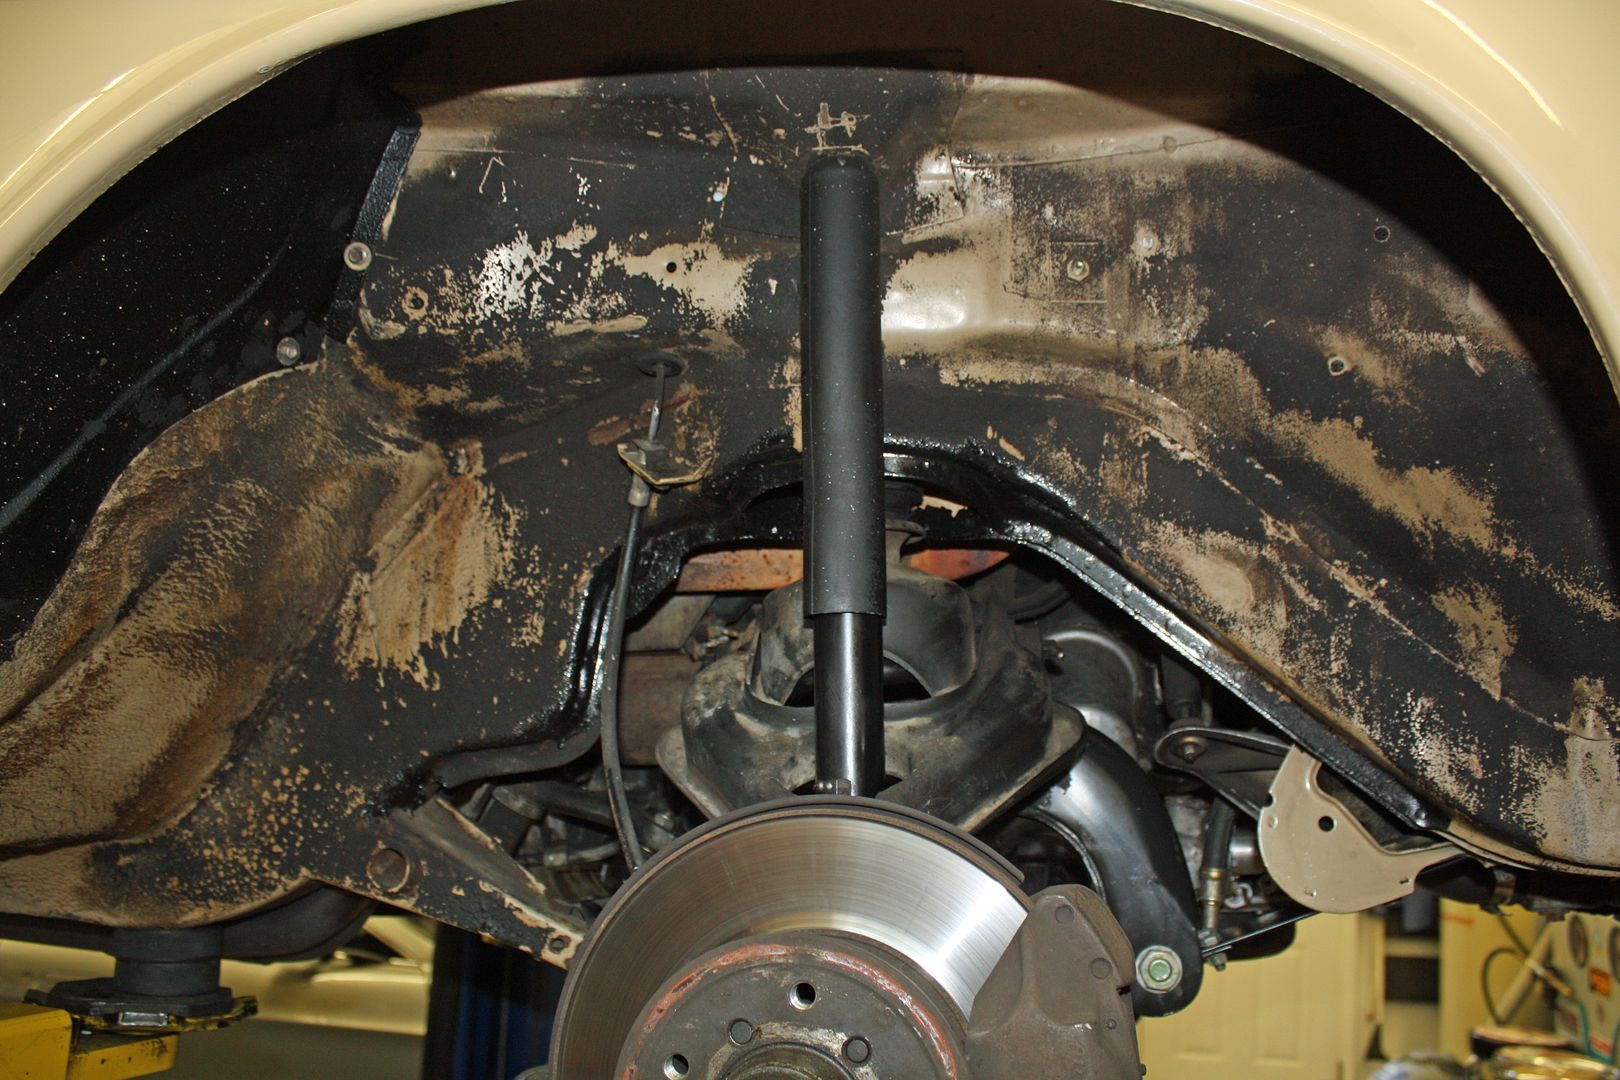
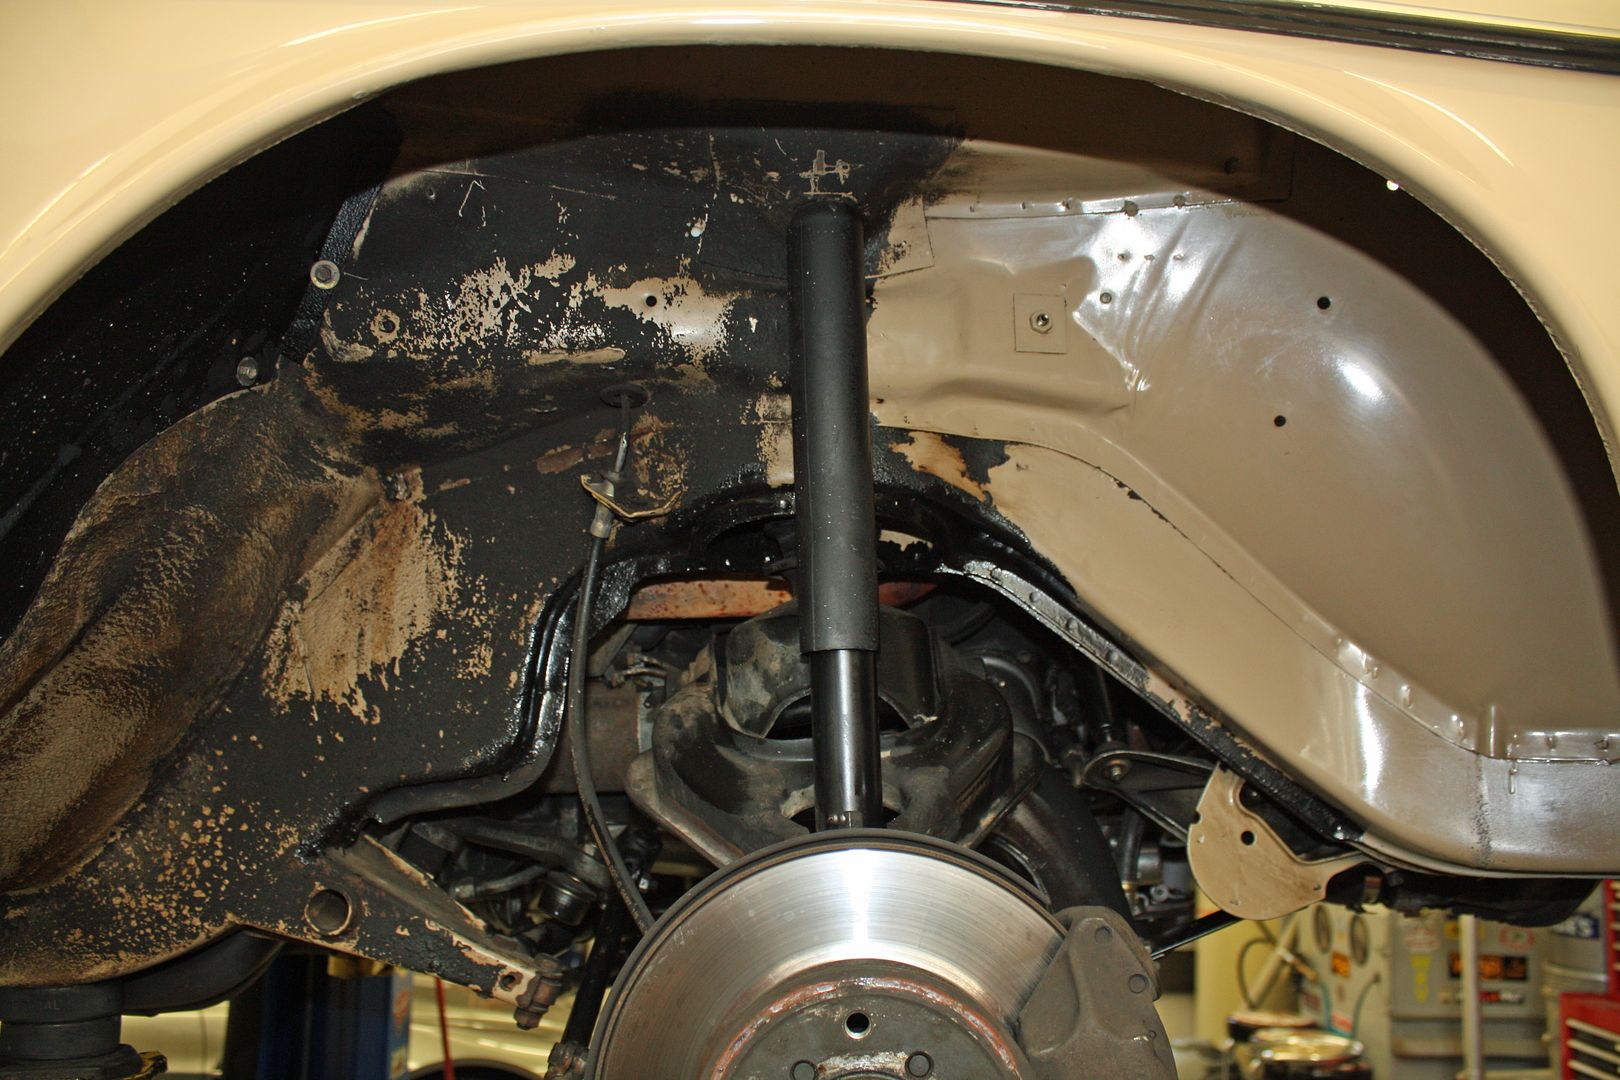
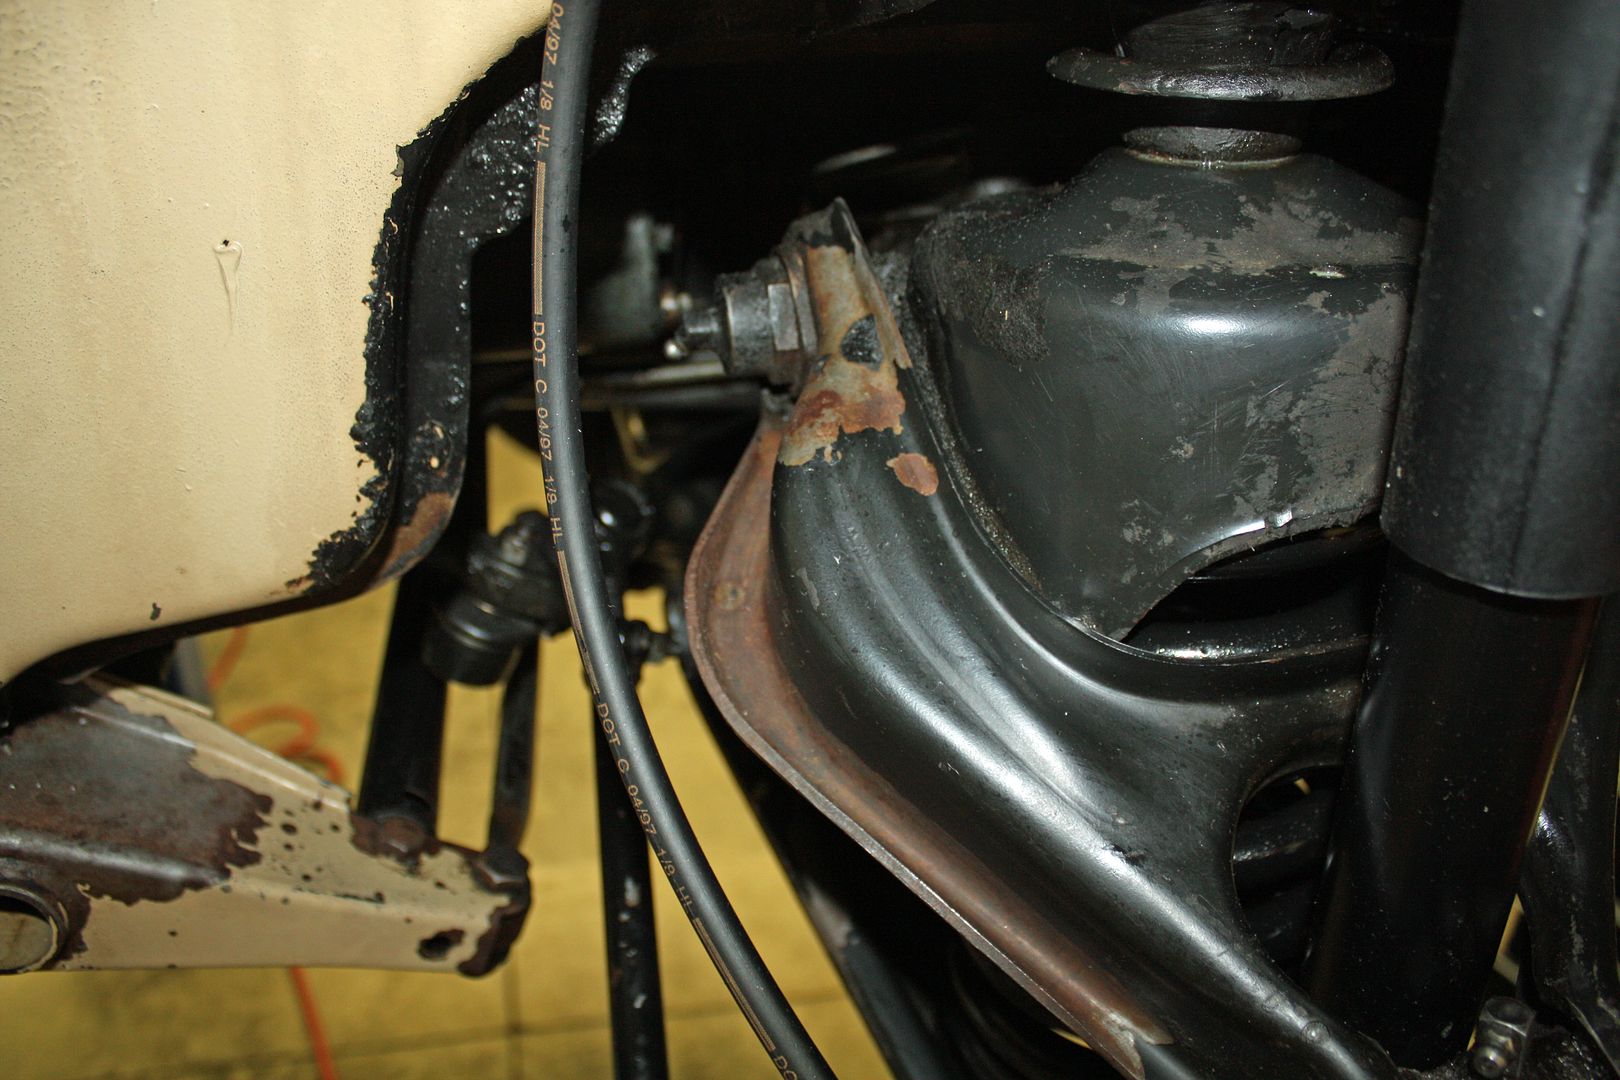
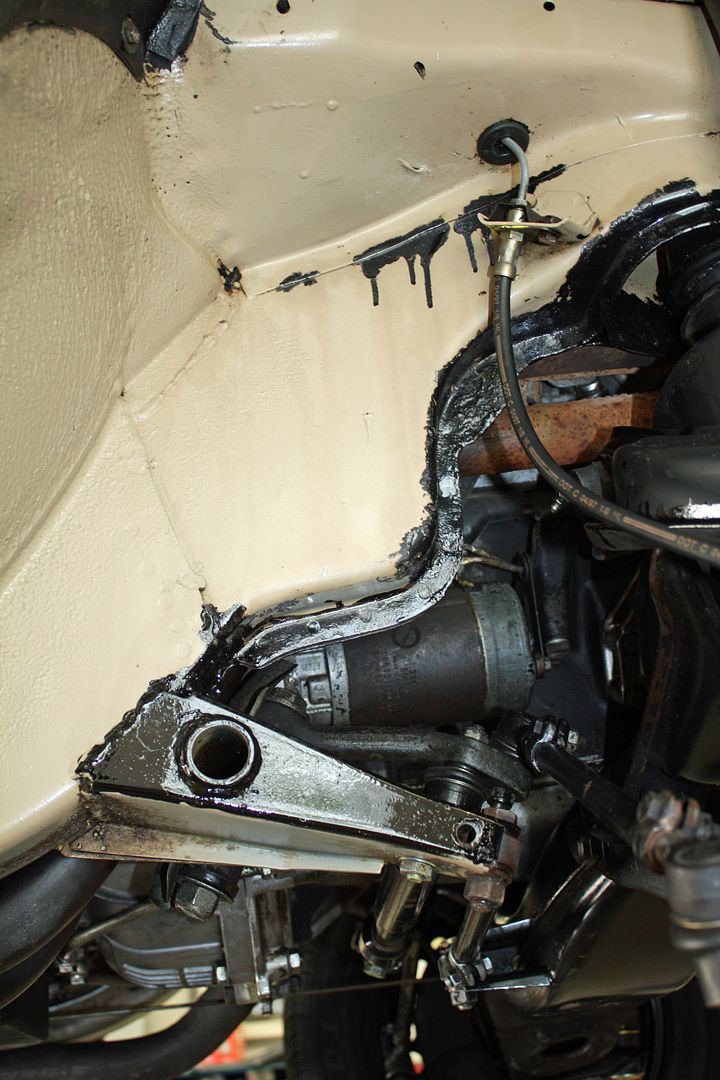
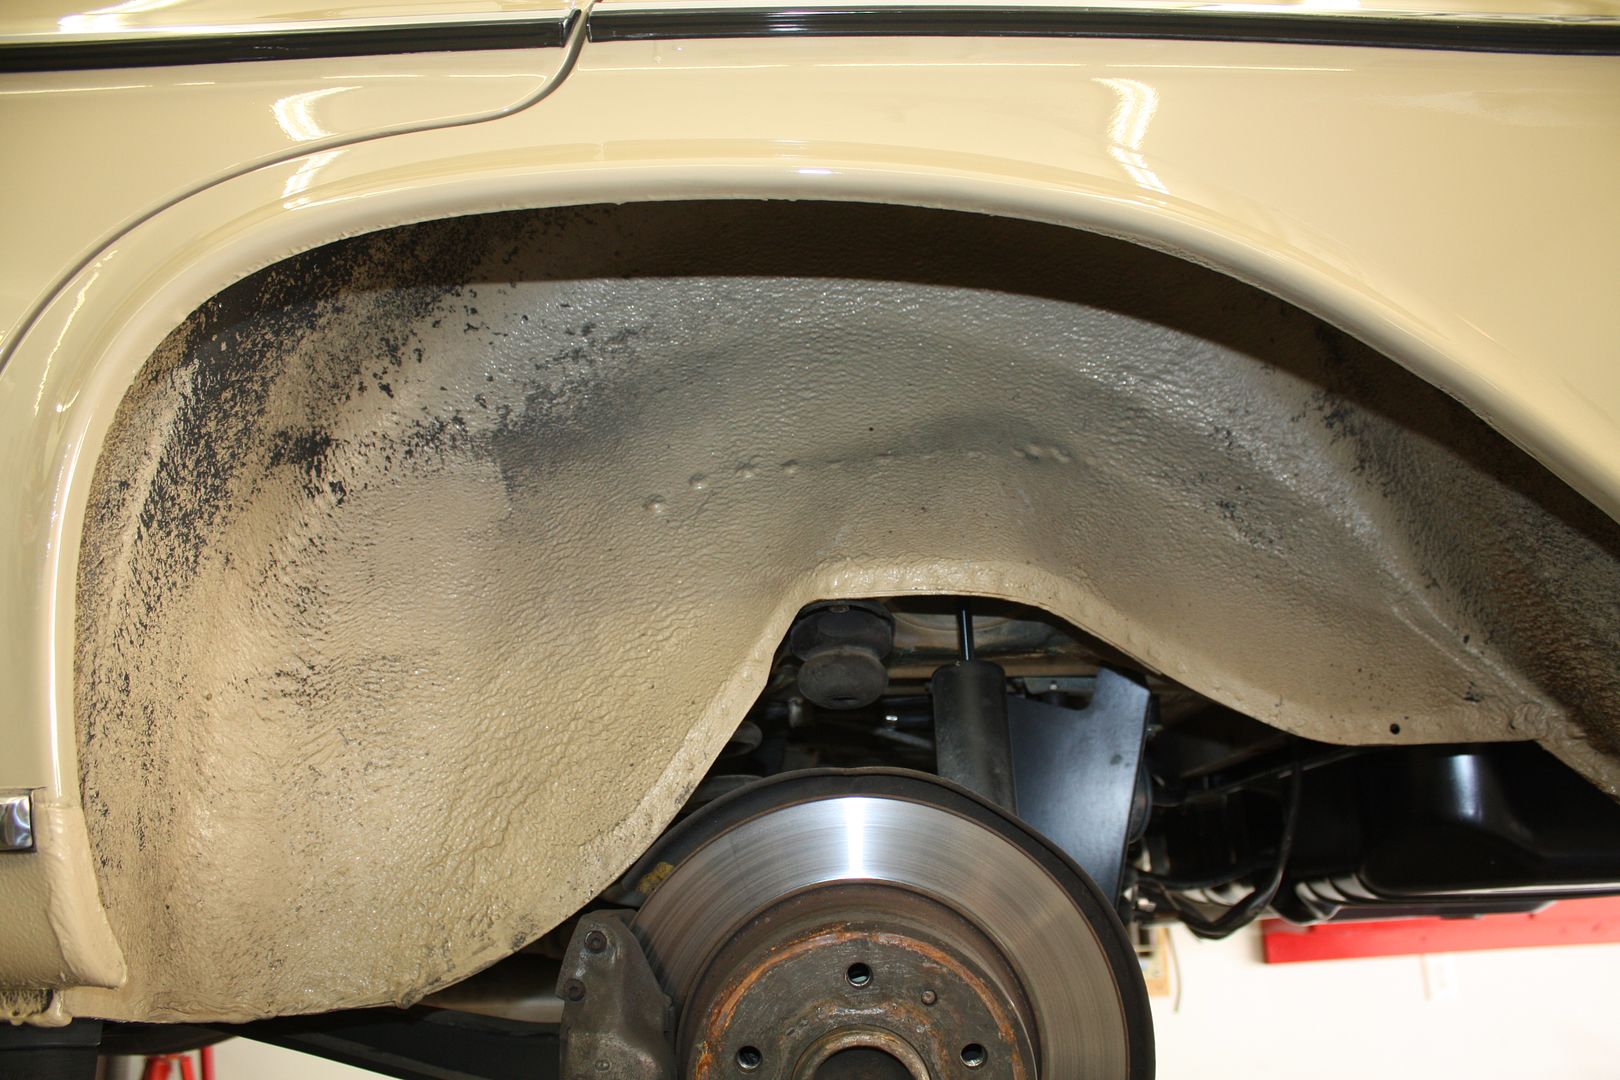
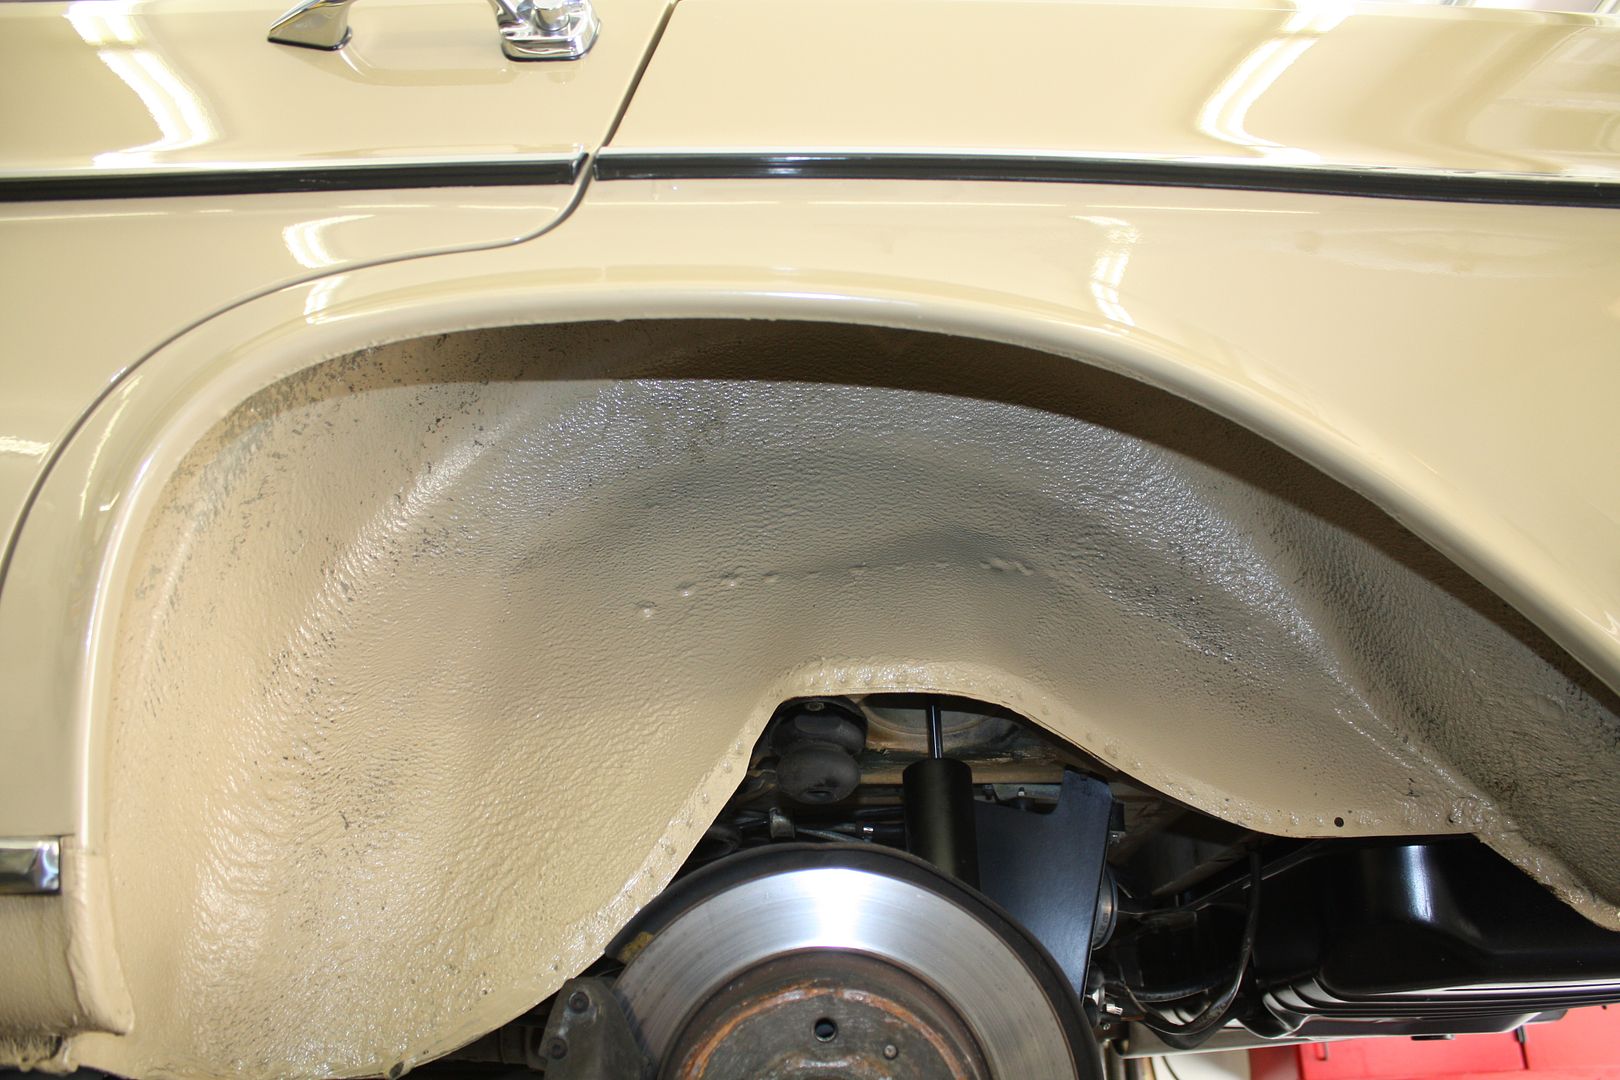
In the front wheelwells, there was a residue left after I had power washed them earlier this summer. When I was cleaning up the sway bar areas, I had overspray of the Simple Green on the left front wheelwell. When I wiped it off, I could see that the residue came off relatively easily. Today I worked on the wheelwell. The rear part is textured and the combination of Simple Green and a brush cleaned it up nicely. I also cleaned the topside of the upper control arm. Looks much better.
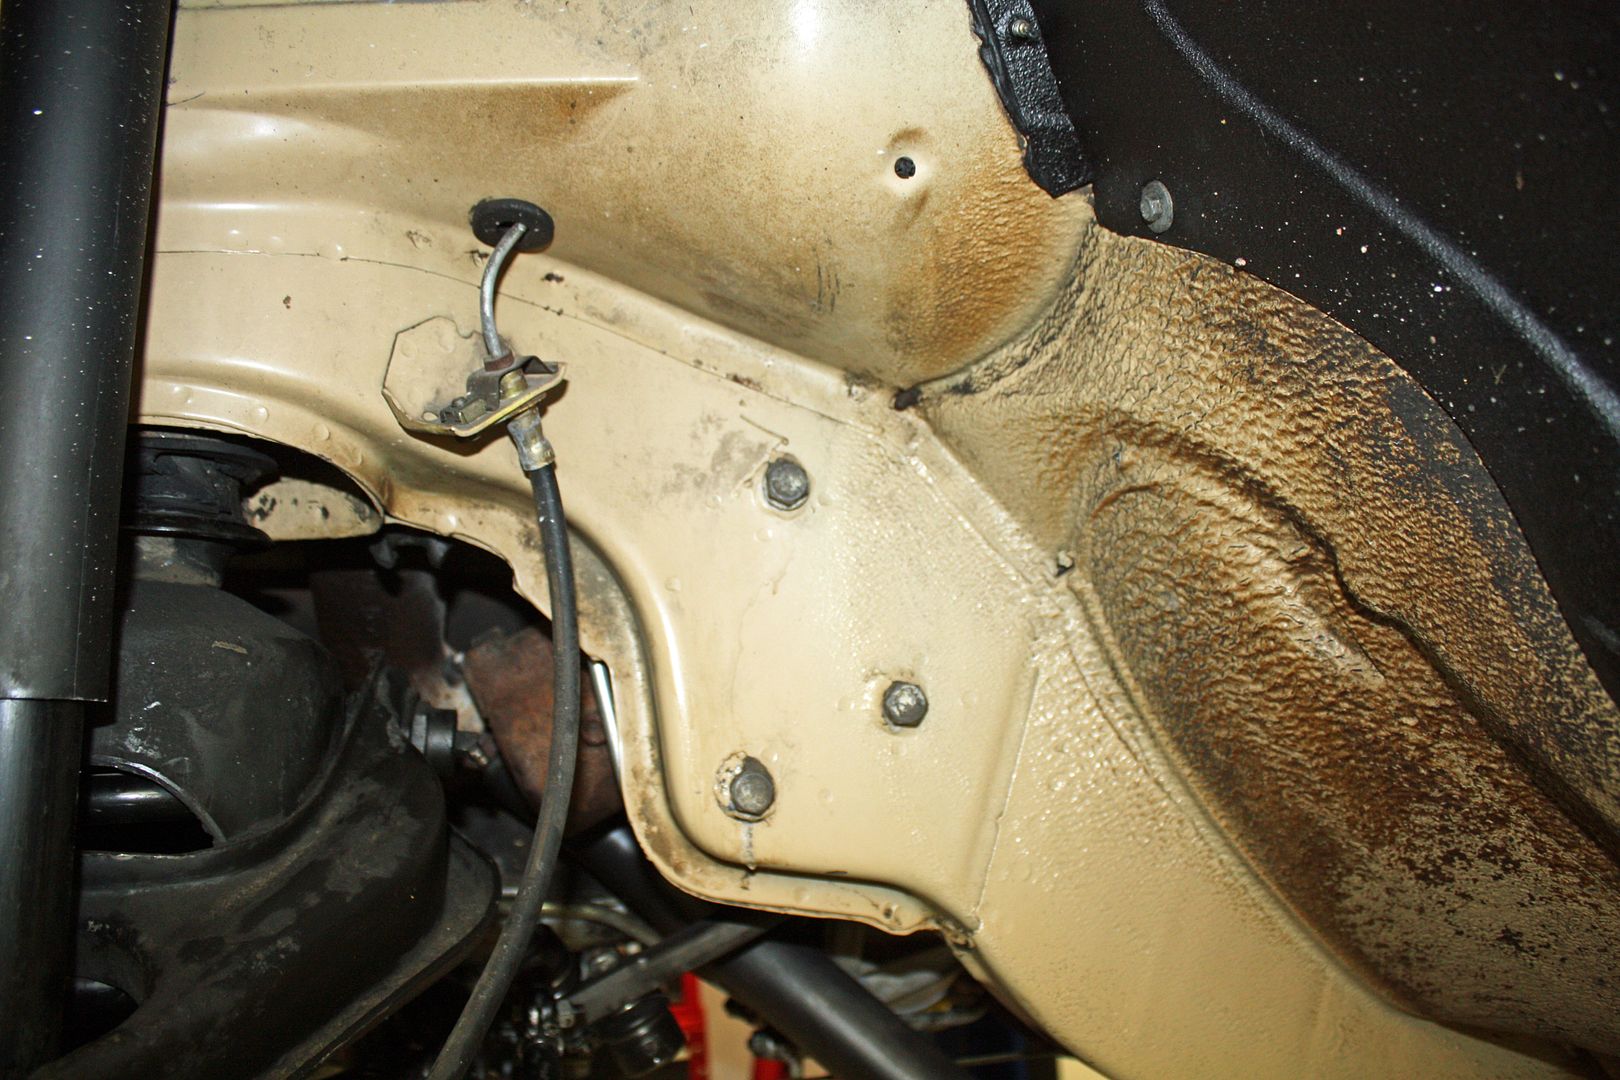
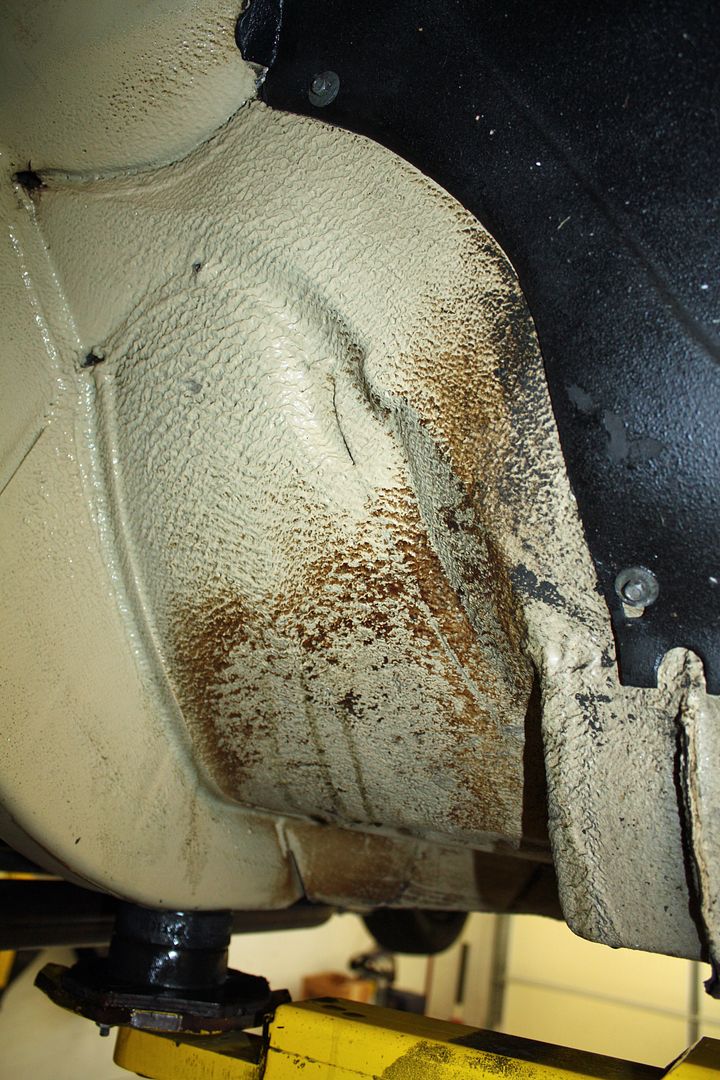
With that wheelwell finished, I moved over to the right one. Big difference here as there was a heavy black substance covering most of it. I ran out of time to complete it but did get a section clean.

 09-06-2017, 04:33 PM
#92
Member
Thread Starter
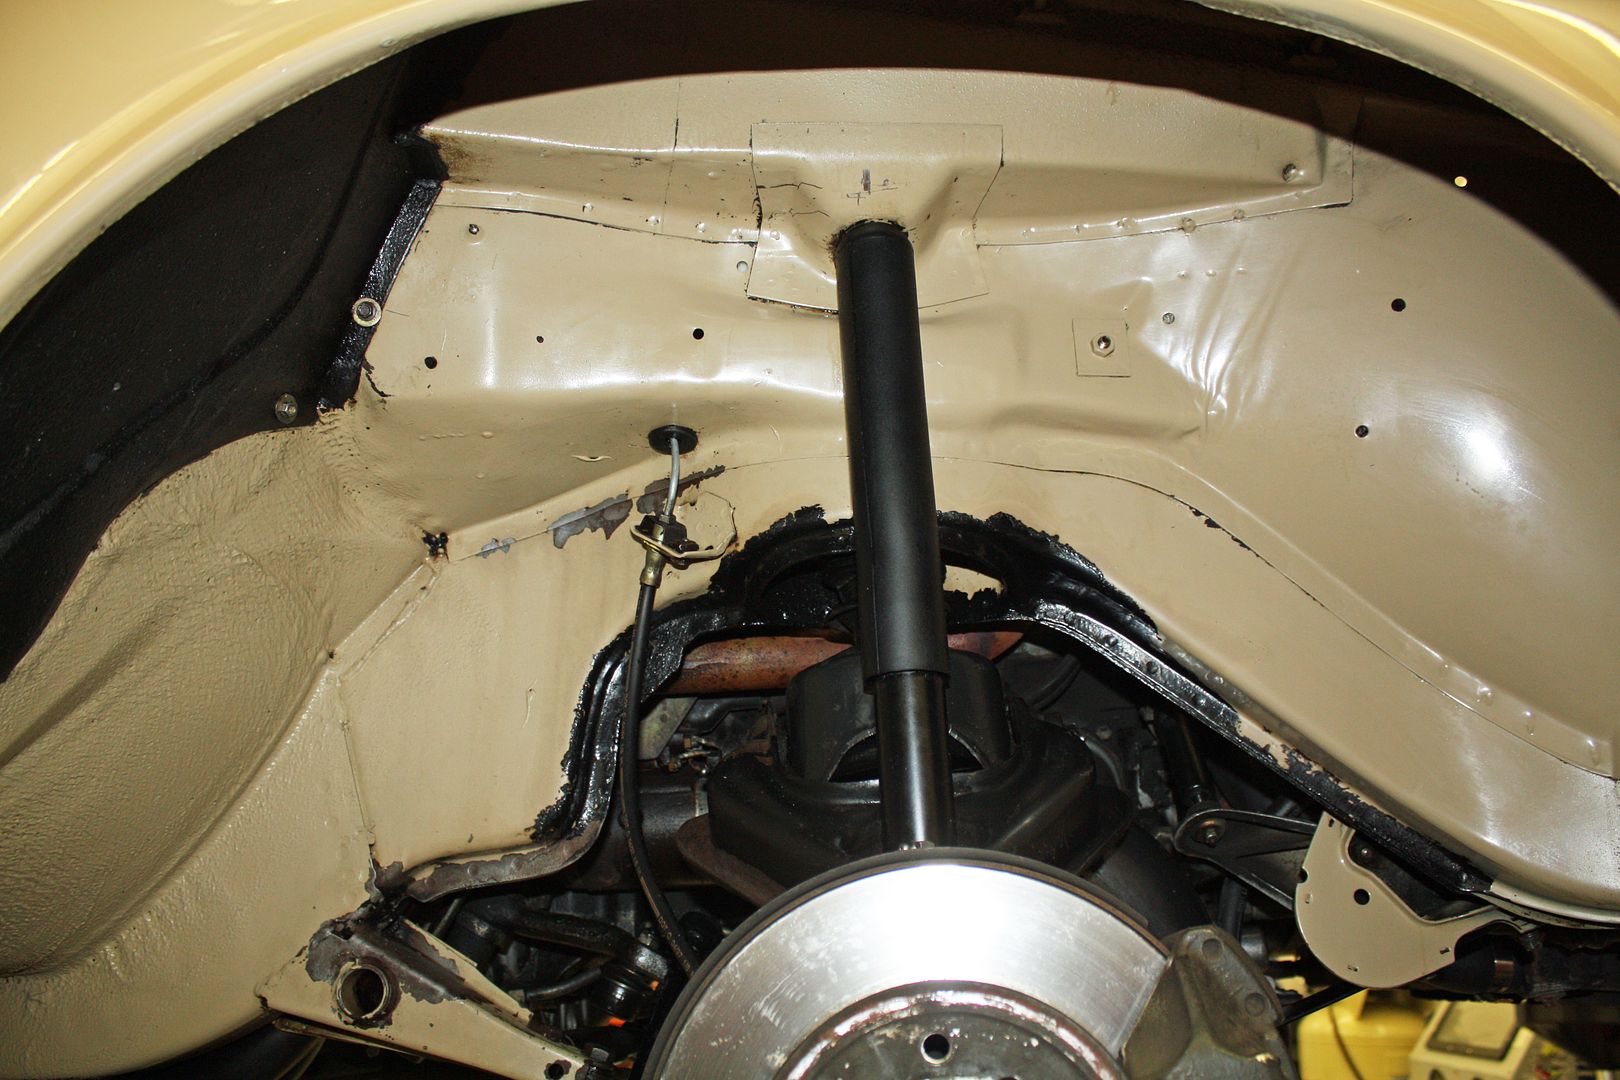
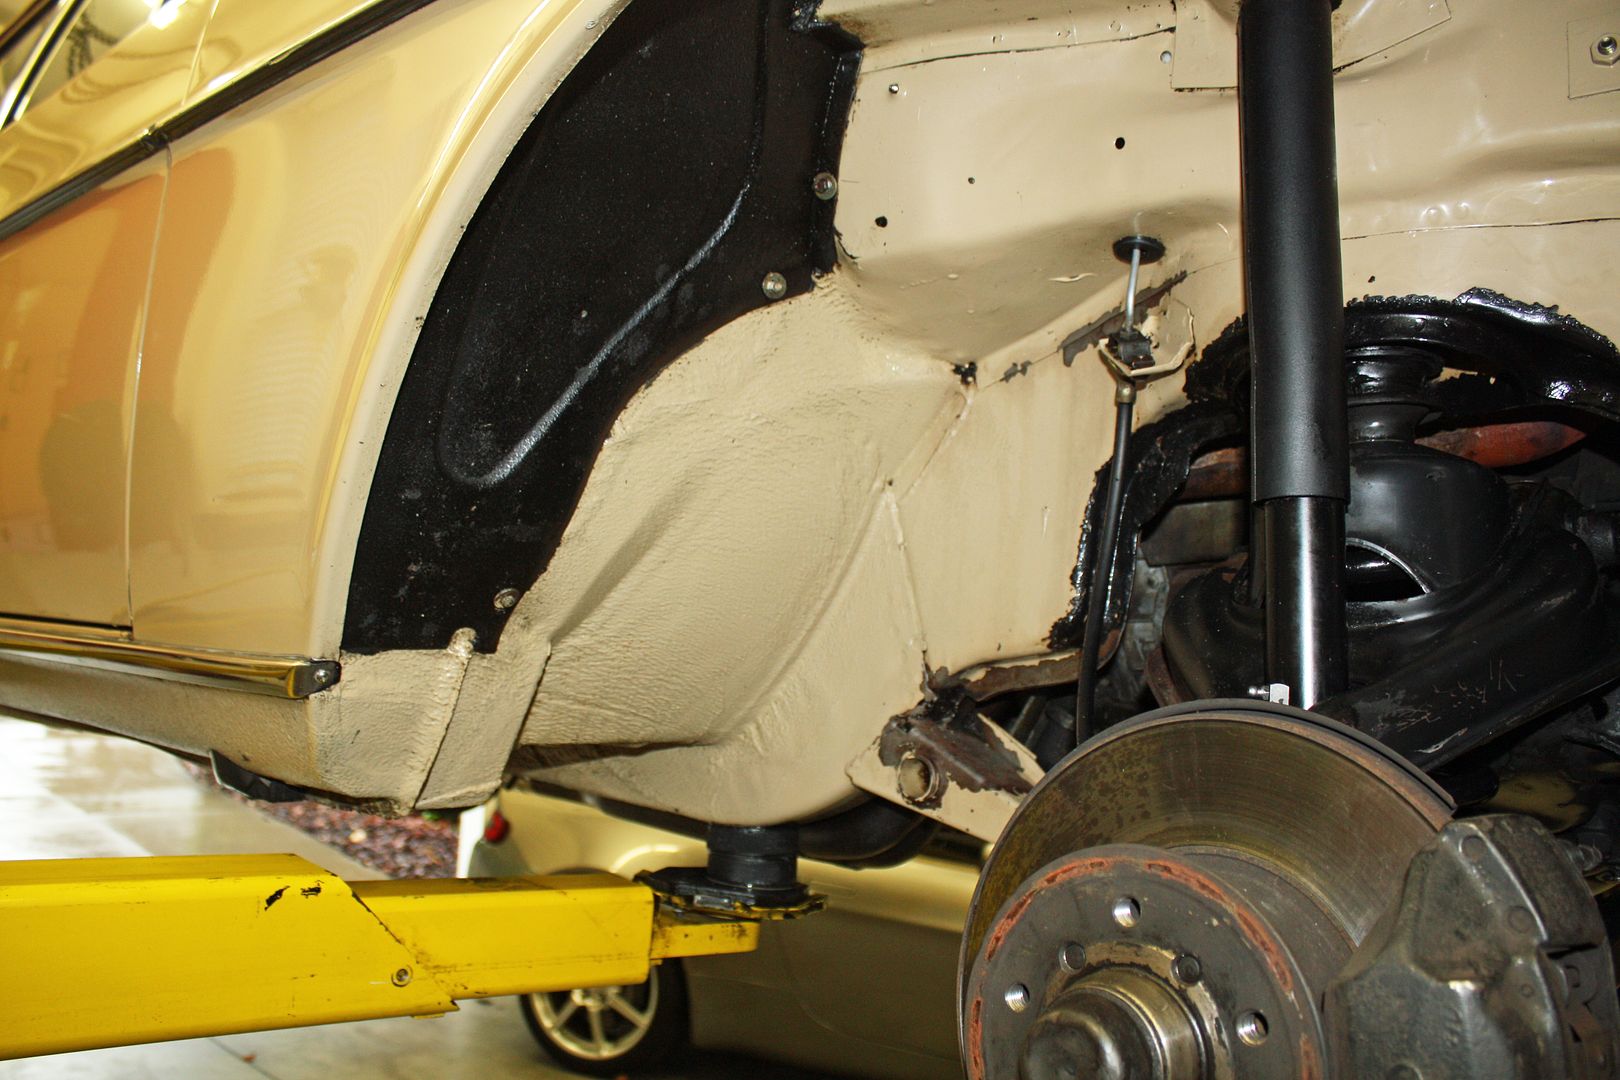
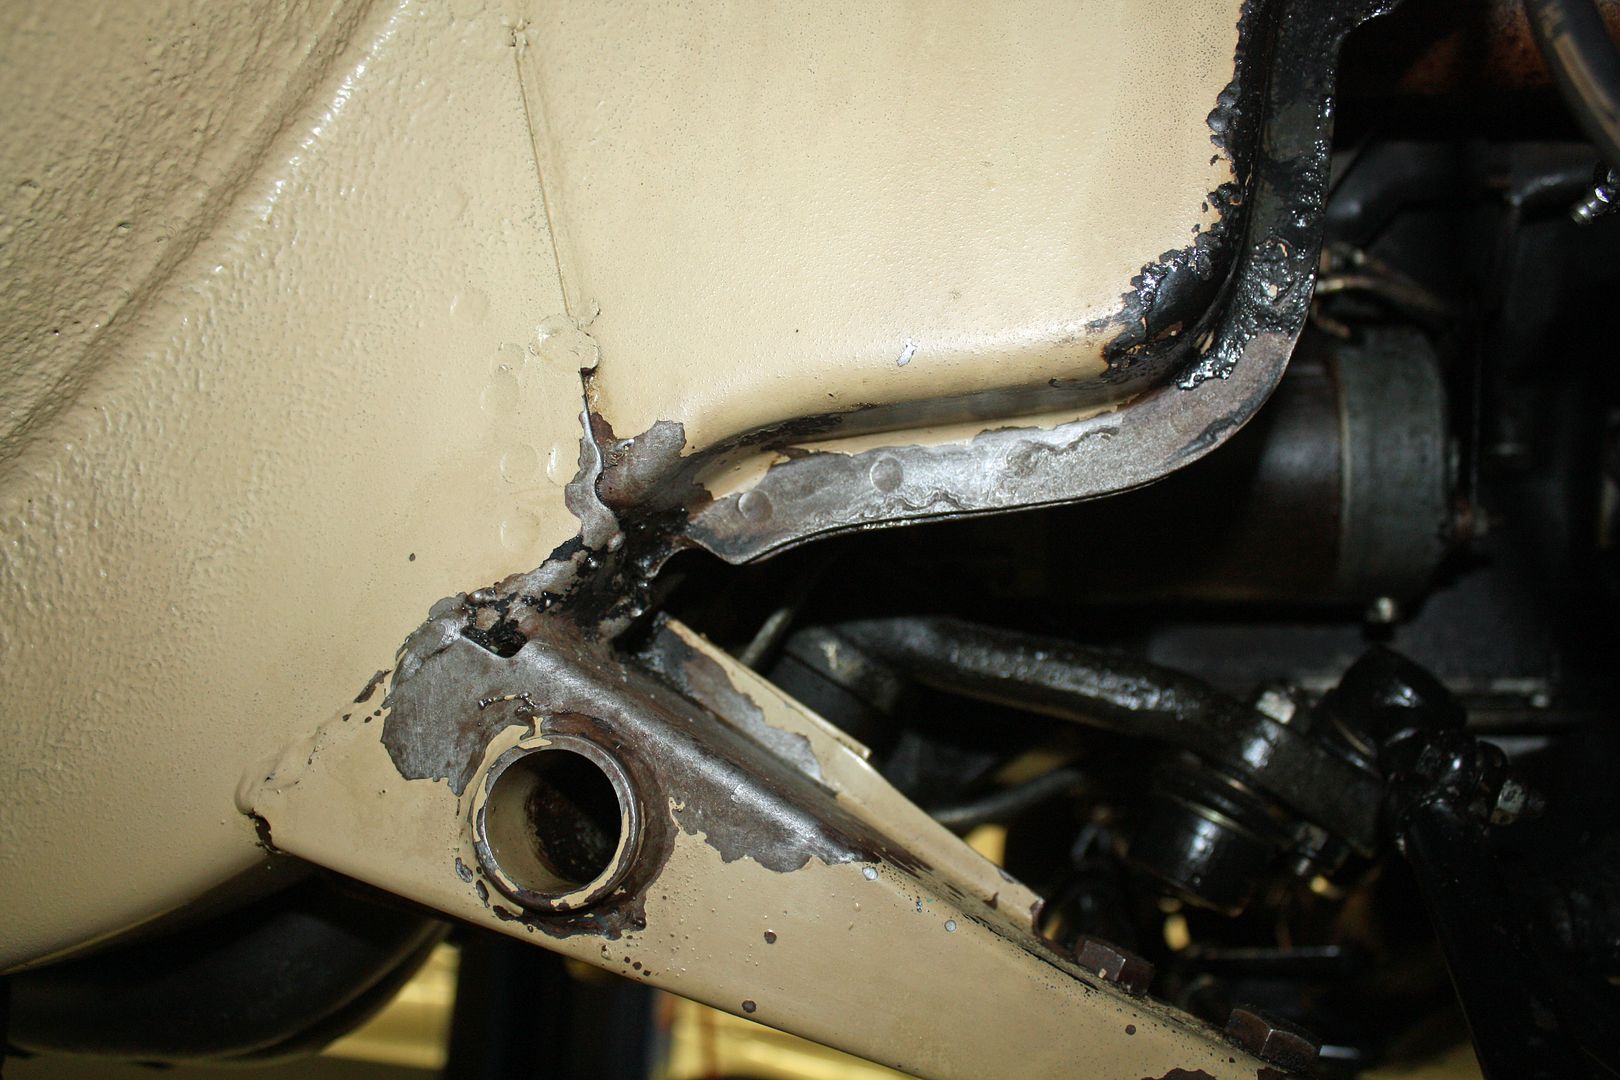
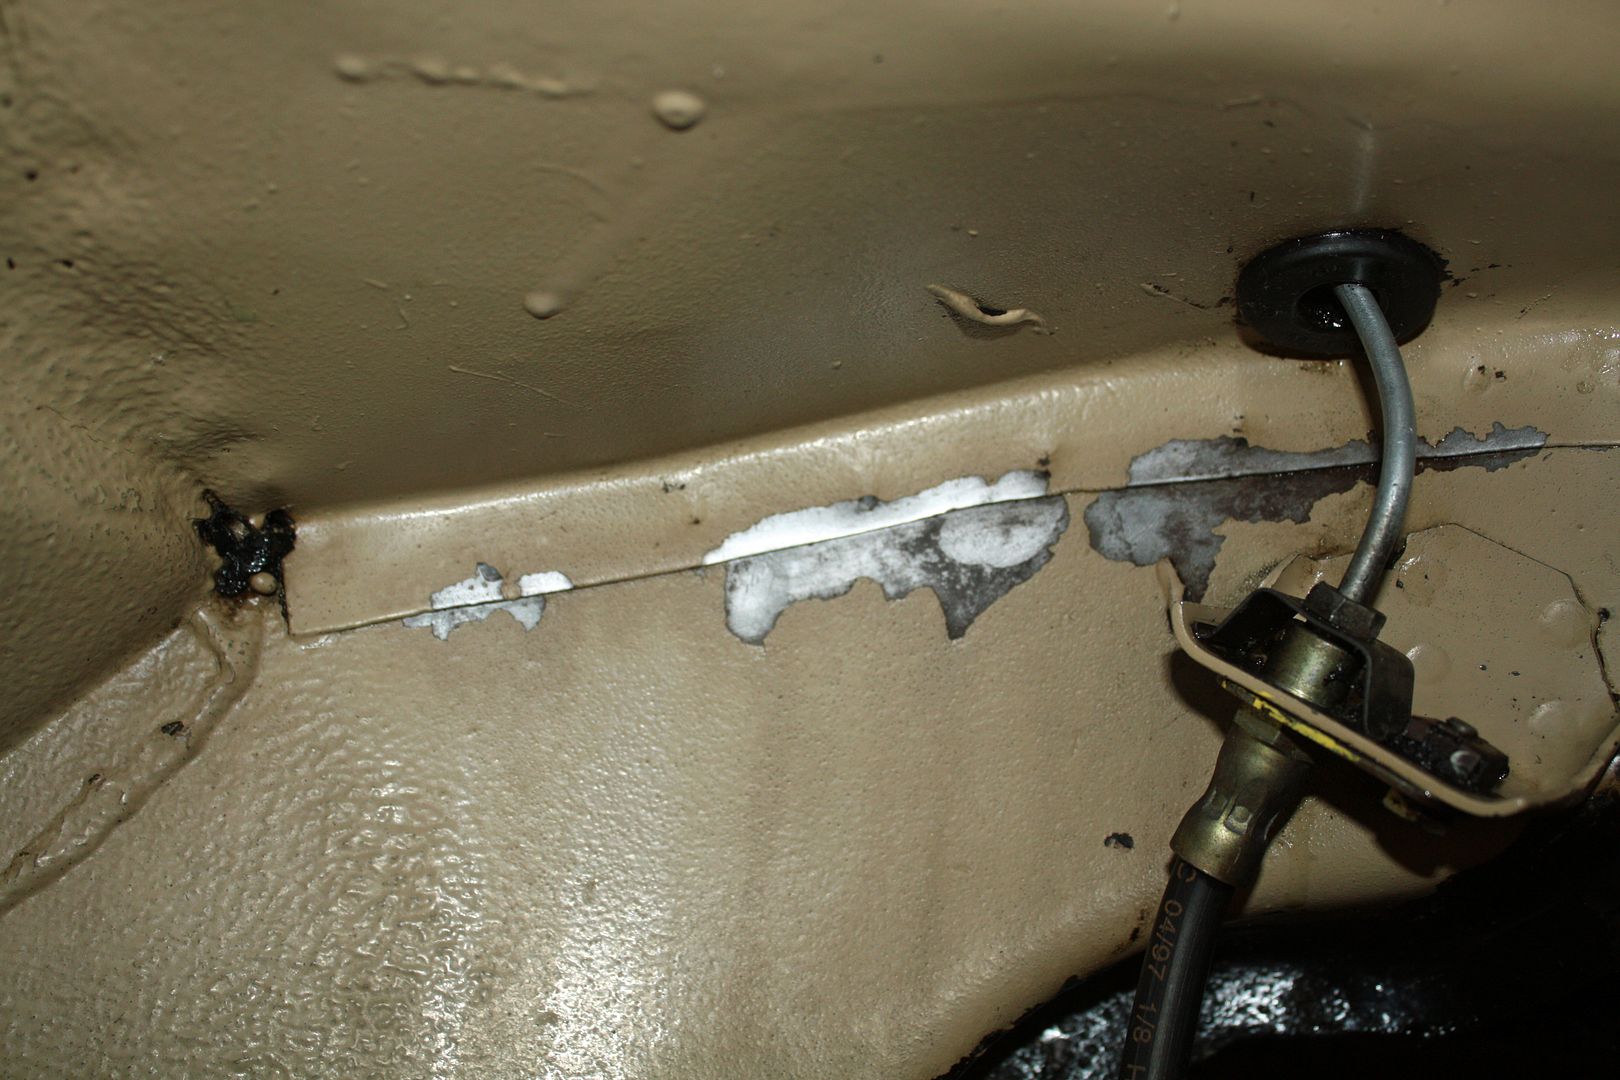
It took me about two hours to clean up the right front wheelwell. Upon doing so I discovered more issues caused by the battery. I had previously applied some POR15 to parts of this wheelwell. I now have some more areas to coat. Once it dries, I will paint it to match the body color.
I had run out of POR15. According to Google, the population of the town where I live, Rockwell, NC, is 2144. Would you believe that we have Autozone, Advance and NAPA auto parts stores with an O'Reilly's under construction. And none of them had POR15.
There is an old time parts store in Salisbury that caters more to the trade than to retail. A call to them found that they did have it in stock. My wife's gallery is across the street from them. So she had the honor of visiting an auto parts store. It is in a very old building near the train station. She thought the place would be a mess but was pleasantly surprised to see how organized it was.
I paid the powder coater his $10 for doing the sway bar and installed it this afternoon.
This project is a perfect example of how one thing leads to another when working on an old car. It began as a simple job of replacing the bushings. I expected to remove the sway bar, clean it up and re-install it. Discovering rust on the bar led to two trips to the powder coater. Cleaning up the area around the sway bar led to cleaning the wheelwells. Cleaning the wheelwells led to having to do some painting. Jobs on old car are rarely simple or quick.
I had run out of POR15. According to Google, the population of the town where I live, Rockwell, NC, is 2144. Would you believe that we have Autozone, Advance and NAPA auto parts stores with an O'Reilly's under construction. And none of them had POR15.
There is an old time parts store in Salisbury that caters more to the trade than to retail. A call to them found that they did have it in stock. My wife's gallery is across the street from them. So she had the honor of visiting an auto parts store. It is in a very old building near the train station. She thought the place would be a mess but was pleasantly surprised to see how organized it was.


I paid the powder coater his $10 for doing the sway bar and installed it this afternoon.


This project is a perfect example of how one thing leads to another when working on an old car. It began as a simple job of replacing the bushings. I expected to remove the sway bar, clean it up and re-install it. Discovering rust on the bar led to two trips to the powder coater. Cleaning up the area around the sway bar led to cleaning the wheelwells. Cleaning the wheelwells led to having to do some painting. Jobs on old car are rarely simple or quick.
09-07-2017, 04:29 PM
#93
Member
Thread Starter
First thing to do today was apply the POR15. After letting it dry overnight, I will paint those area with the body color paint tomorrow.
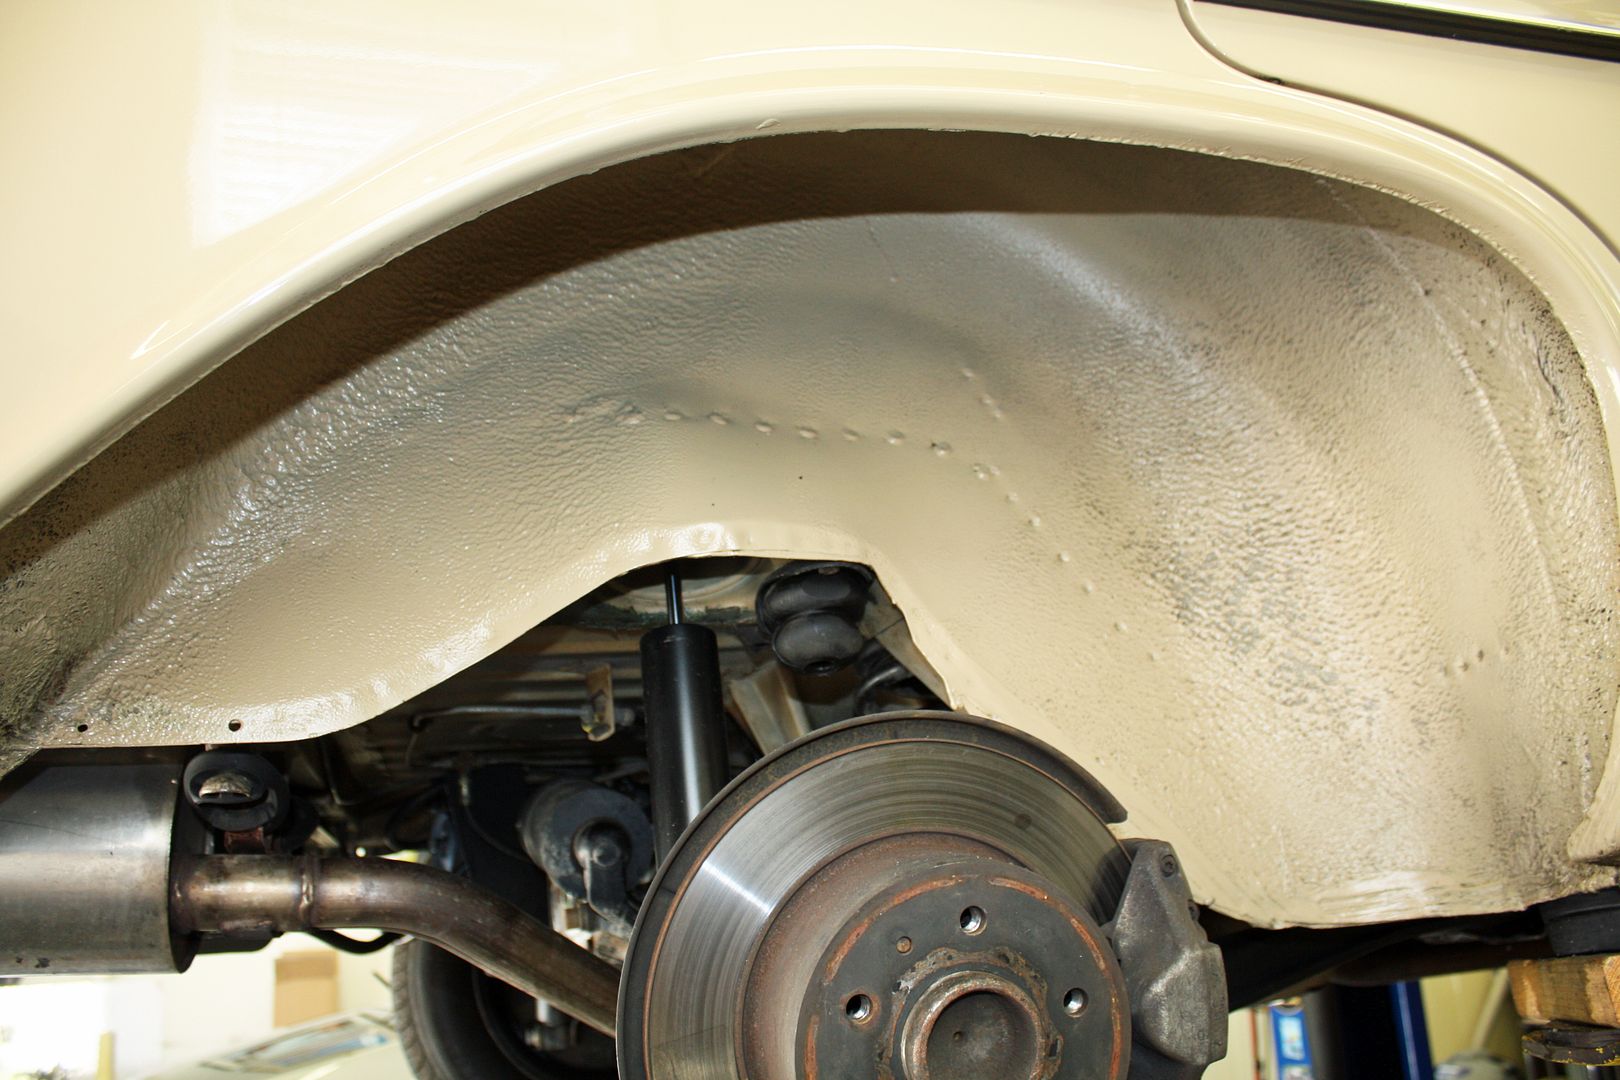
Next I cleaned the rear wheelwells. Neither of them had any of the undercoating that I found in the right front wheelwell. Cleaned up pretty good but I could not get everything out of the textured areas. Some of the areas that look dirty in the textured area are some spots that have the paint worn away caused by throwing up debris since the car was new.
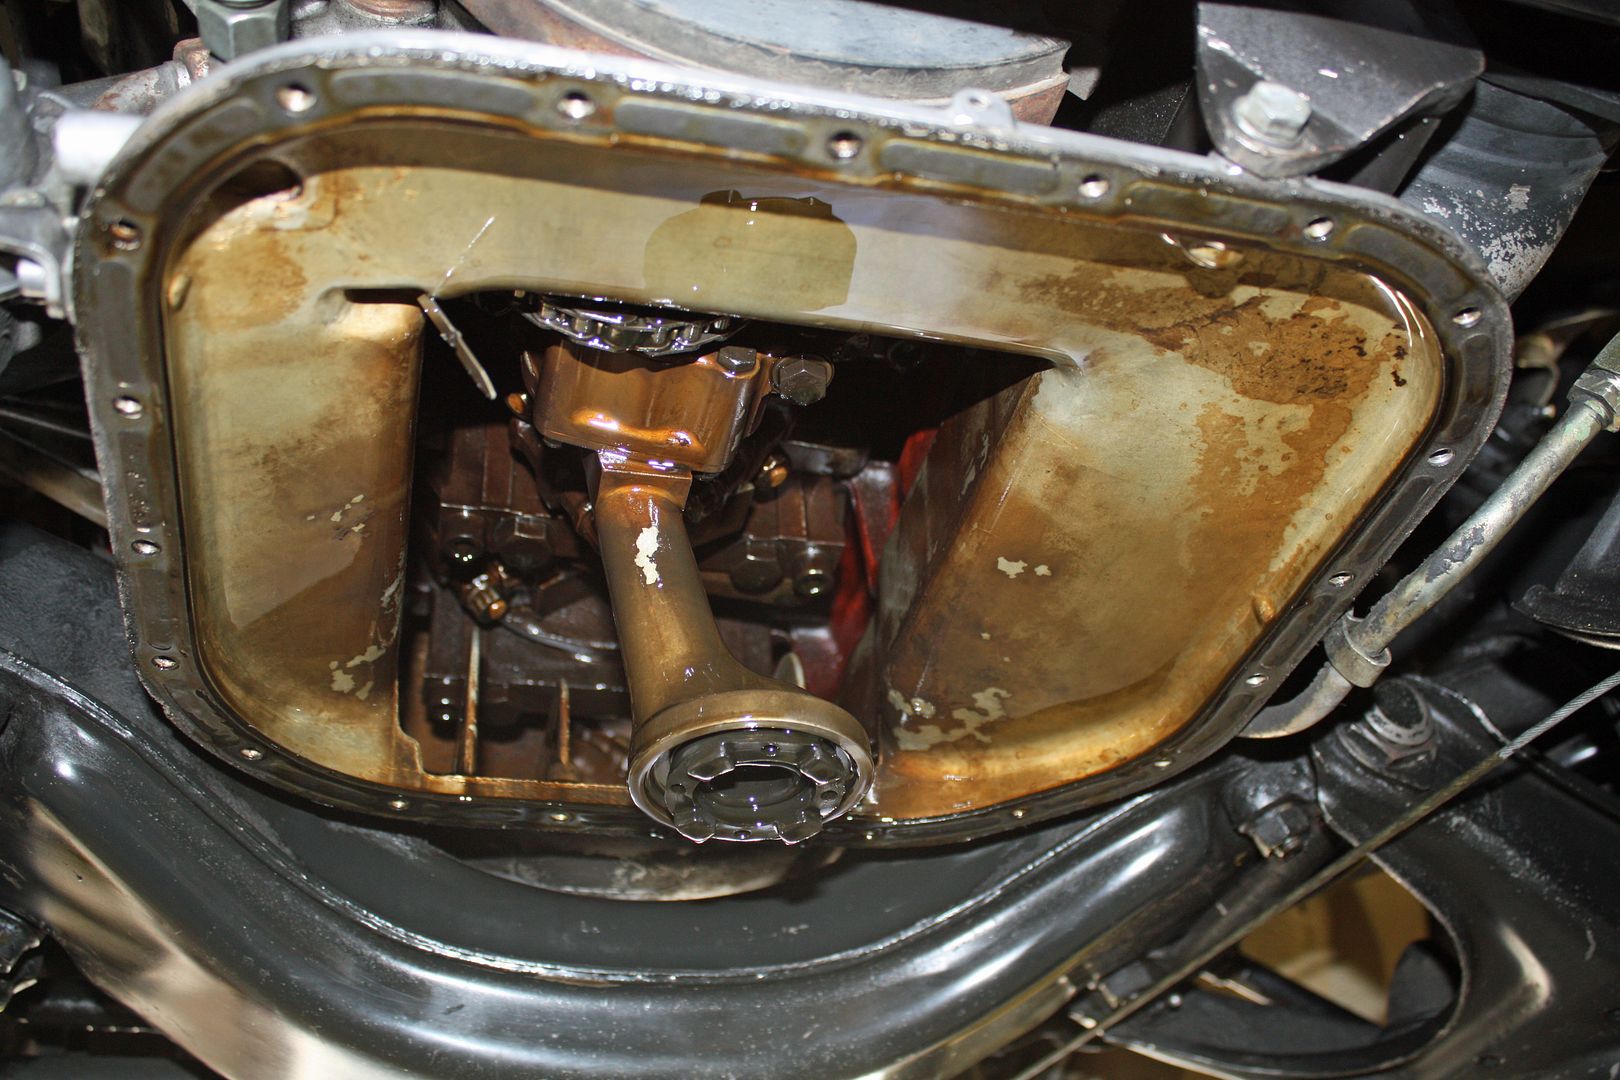
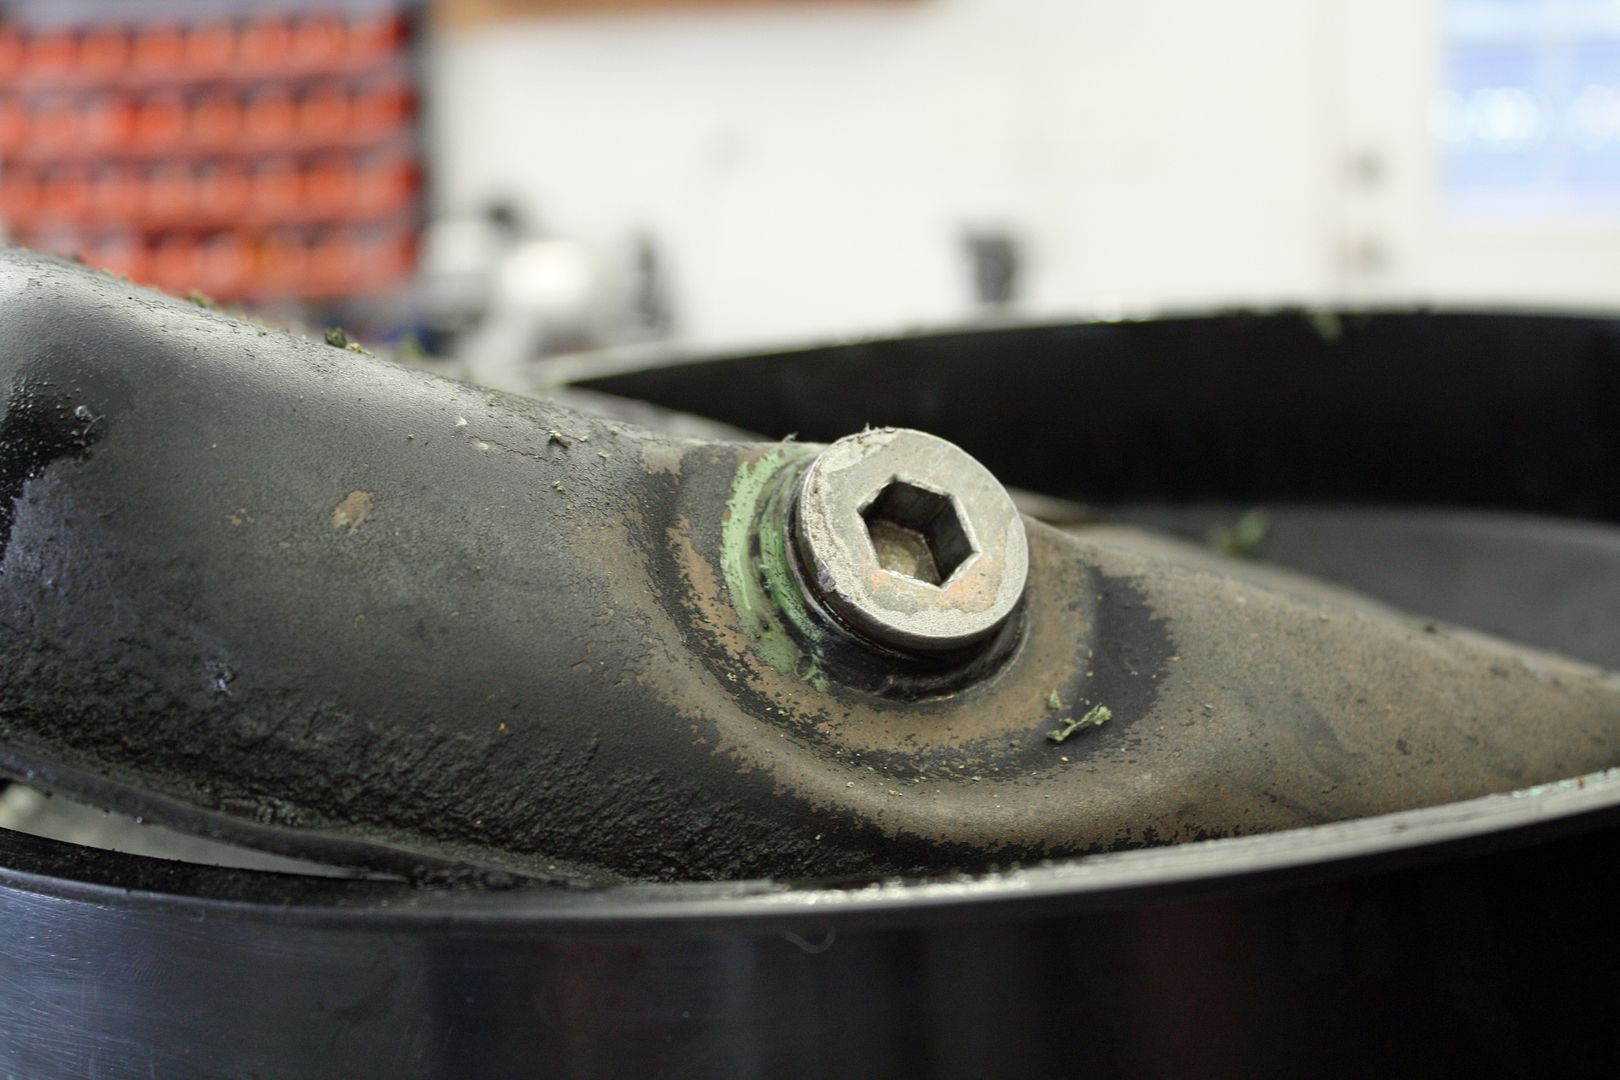
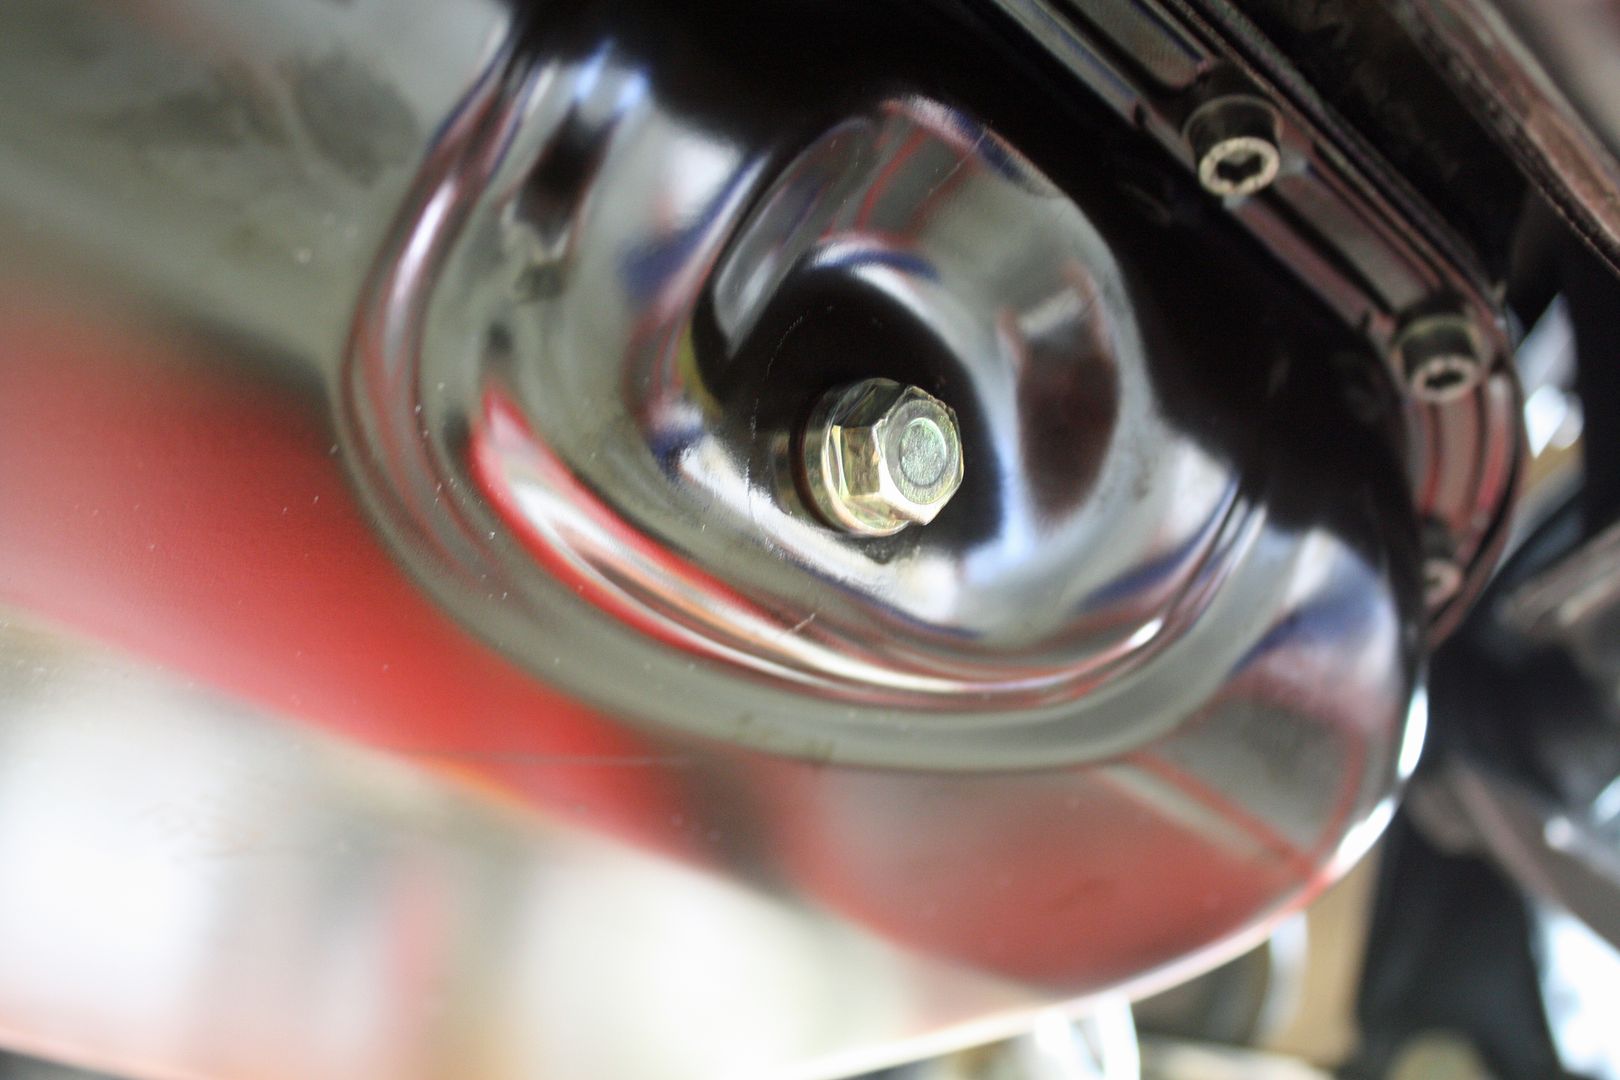
The new oil pan arrived the other day and I installed it today. I always love it when they place these stickers on the parts. Lots of fun to get them off. It is a Bilstein part made in Italy?? The new one has the smaller drain plug compared to the original one. The 35 year Mercedes dealer mechanic said the oil pickup was close to the bottom of the pan and I you can see that in the photo below. That is why he thought I should do something with the pan.


Next I cleaned the rear wheelwells. Neither of them had any of the undercoating that I found in the right front wheelwell. Cleaned up pretty good but I could not get everything out of the textured areas. Some of the areas that look dirty in the textured area are some spots that have the paint worn away caused by throwing up debris since the car was new.


The new oil pan arrived the other day and I installed it today. I always love it when they place these stickers on the parts. Lots of fun to get them off. It is a Bilstein part made in Italy?? The new one has the smaller drain plug compared to the original one. The 35 year Mercedes dealer mechanic said the oil pickup was close to the bottom of the pan and I you can see that in the photo below. That is why he thought I should do something with the pan.


 09-08-2017, 08:23 PM
#94
Member
Thread Starter
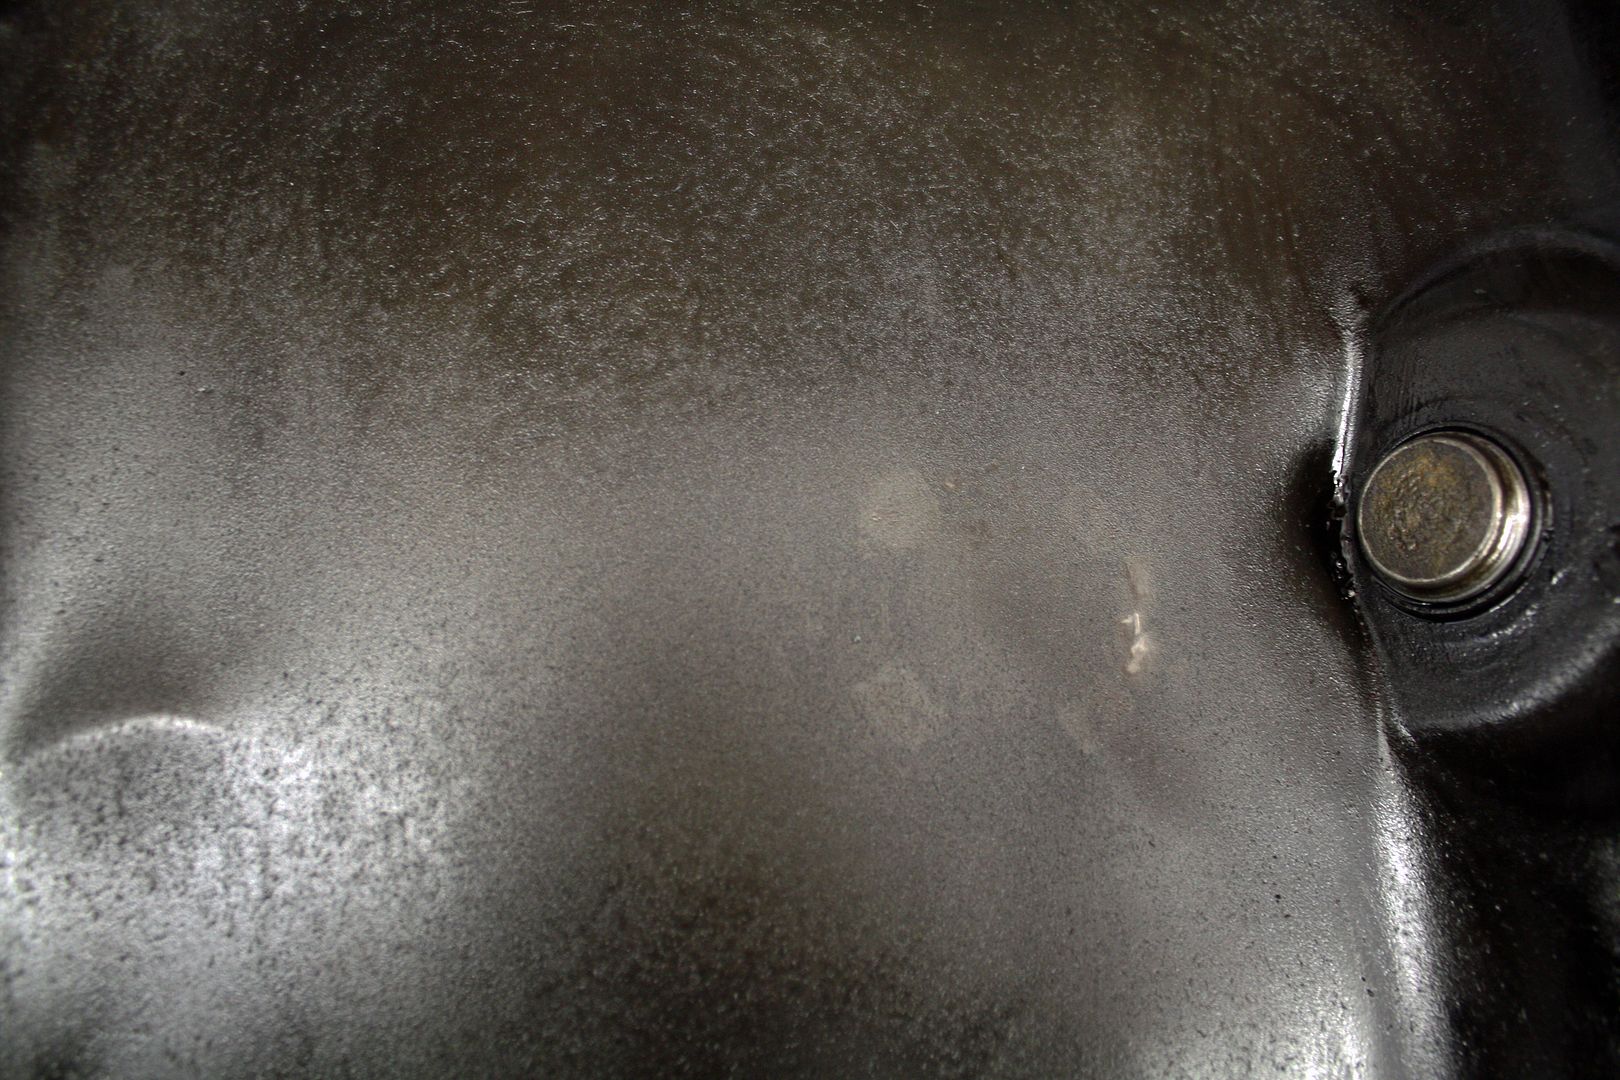
I did find something interesting today on the inside of the old oil pan. The 35 year mechanic I met was concerned that the old oil pan was dented because he said the pick-up was very low. There is a faint outline of the four feet on the pickup on the bottom of the oil pan. From day one this car has had great oil pressure. I didn't see any difference today when I drove the car.
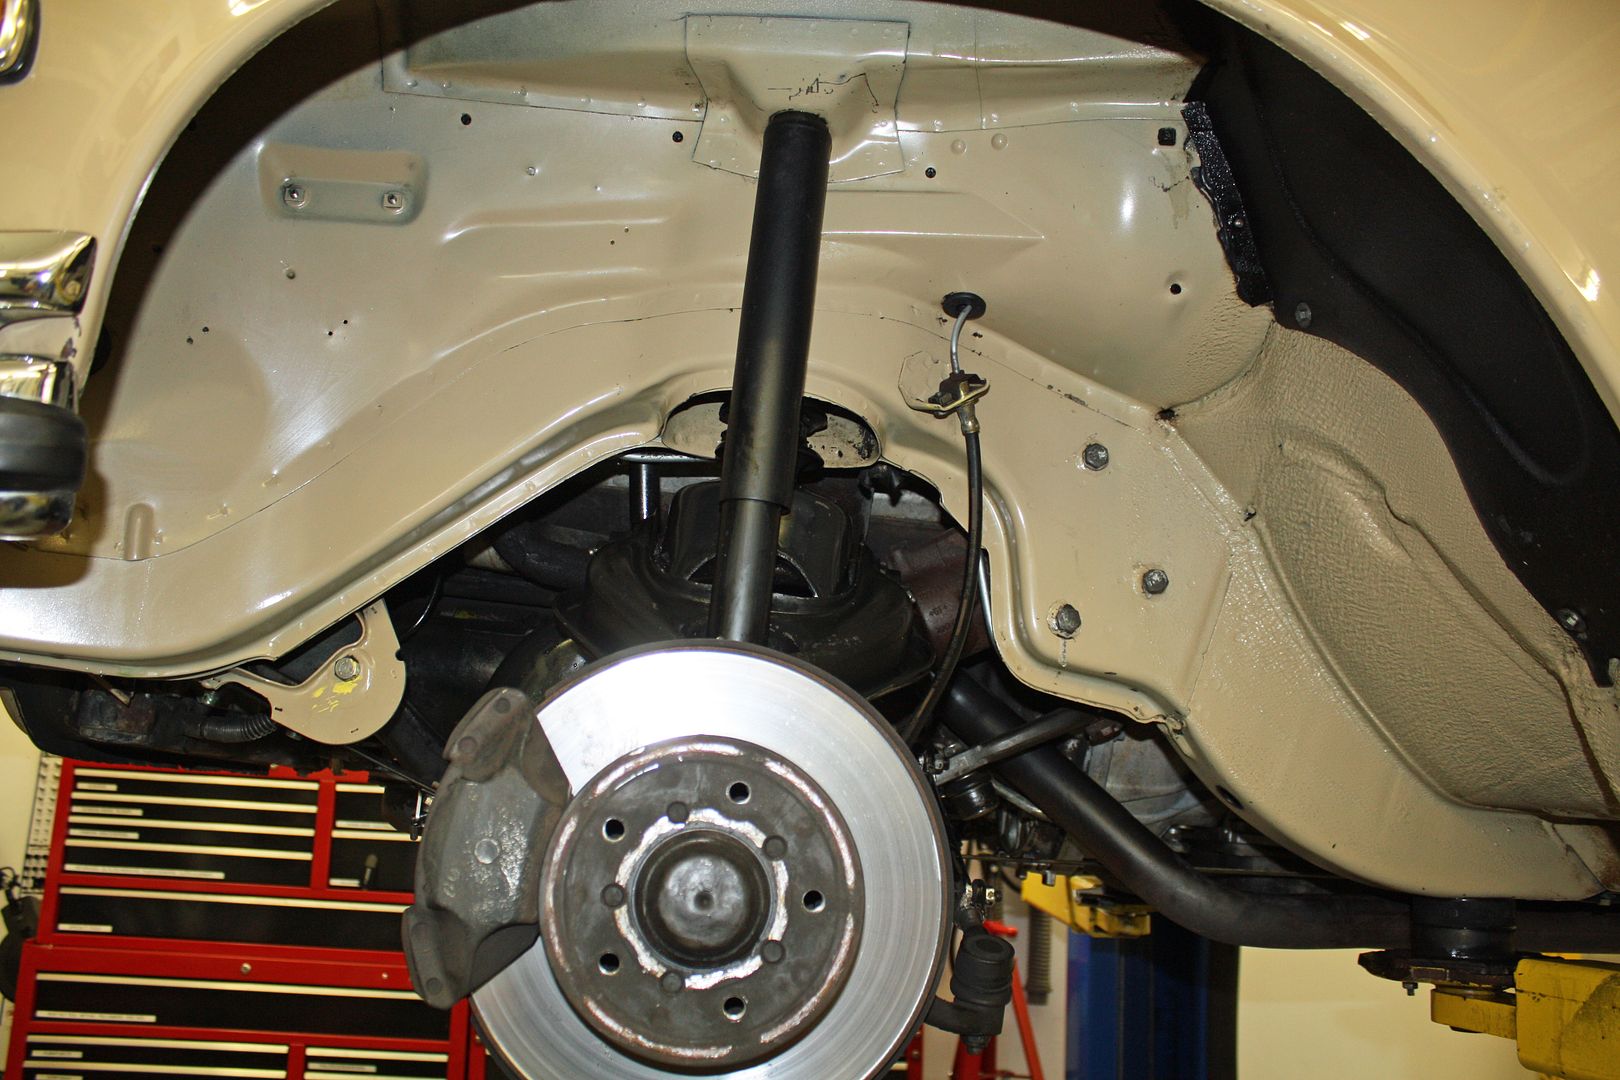
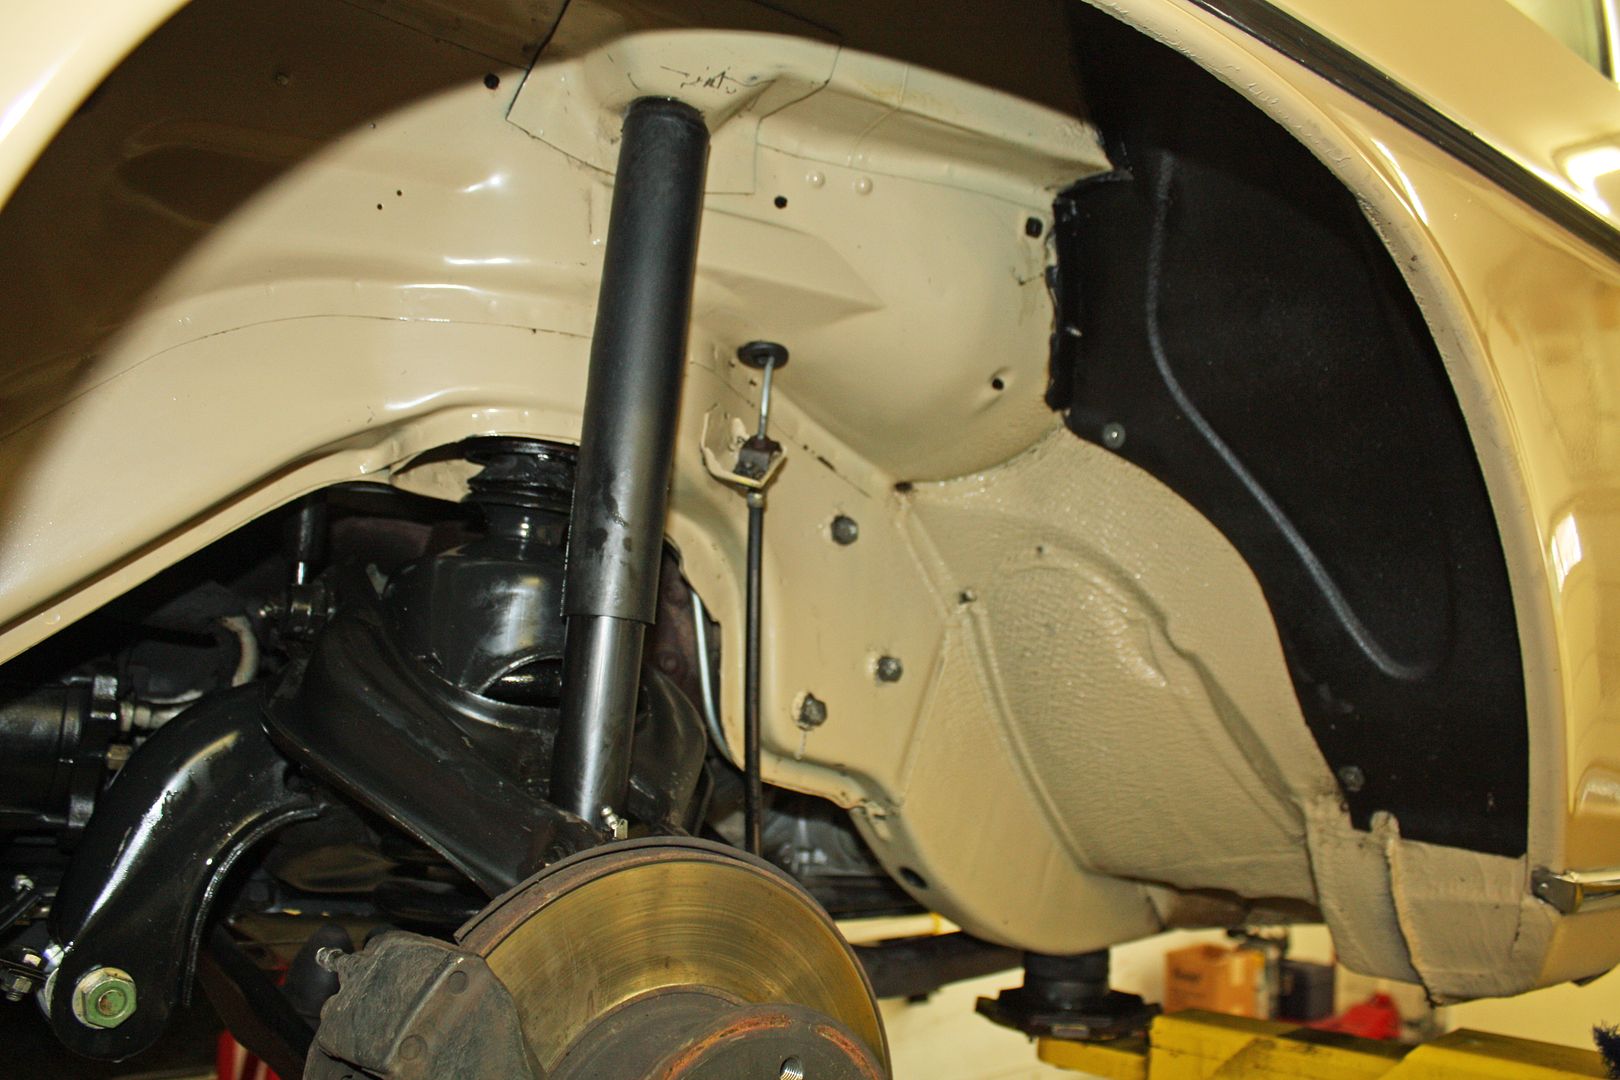
Yesterday evening I discovered that the POR15 had dried in the right front wheelwell. Using the same paint I had used in the engine compartment, I added a coat of body color paint. Not a perfect match but it looks much better than it did.

Yesterday evening I discovered that the POR15 had dried in the right front wheelwell. Using the same paint I had used in the engine compartment, I added a coat of body color paint. Not a perfect match but it looks much better than it did.
 09-09-2017, 04:55 PM
#95
Member
Thread Starter
Car Photo Day!!
I have been talking with a gentleman for the past week or so about a 1982 380SL. He lives in Winston-Salem, NC. Every second Saturday there is a Winston-Salem Cars & Coffee held at Reynolda Village. Reynolda is the name the Reynolds family, of tobacco fame, gave to their family home. It is now open to the public and is a beautiful home filled with period furniture and artwork. Reynolda Village is on the Reynolds property and houses unique shops. So it is a great place to take your wife to a car show!!!
We met, I looked over the car, drove it and decided it was not what i wanted. The price was attractive (asking $5300 OBO) but it had more needs than I want to address and he did not have any history on the car. One encouraging point in its favor was that it had been converted to the dual row chains. In the photo below you will see his car parked next to what turned out to be an '81 380SL that also happened to be for sale. It's owner was a gentleman I met a couple weeks ago at the Mercedes show. This one had a motor from a 500SL. I drove it and it was a better car than the blue one. Again no history but this one did have fewer needs and the body was better. I think i will keep looking for my next project car.
The owner of the blue car had never attended this event and we spent the next couple hours together looking at the cars. He has owned a Porsche 944 in his past and thinks he would like to buy an air cooled 911. Since I have had lots of experience with these cars, as we looked at the 911's there, I discussed the pros and cons to the various models. If he is going to get an air cooled 911, he better do it soon as the prices are still very high.
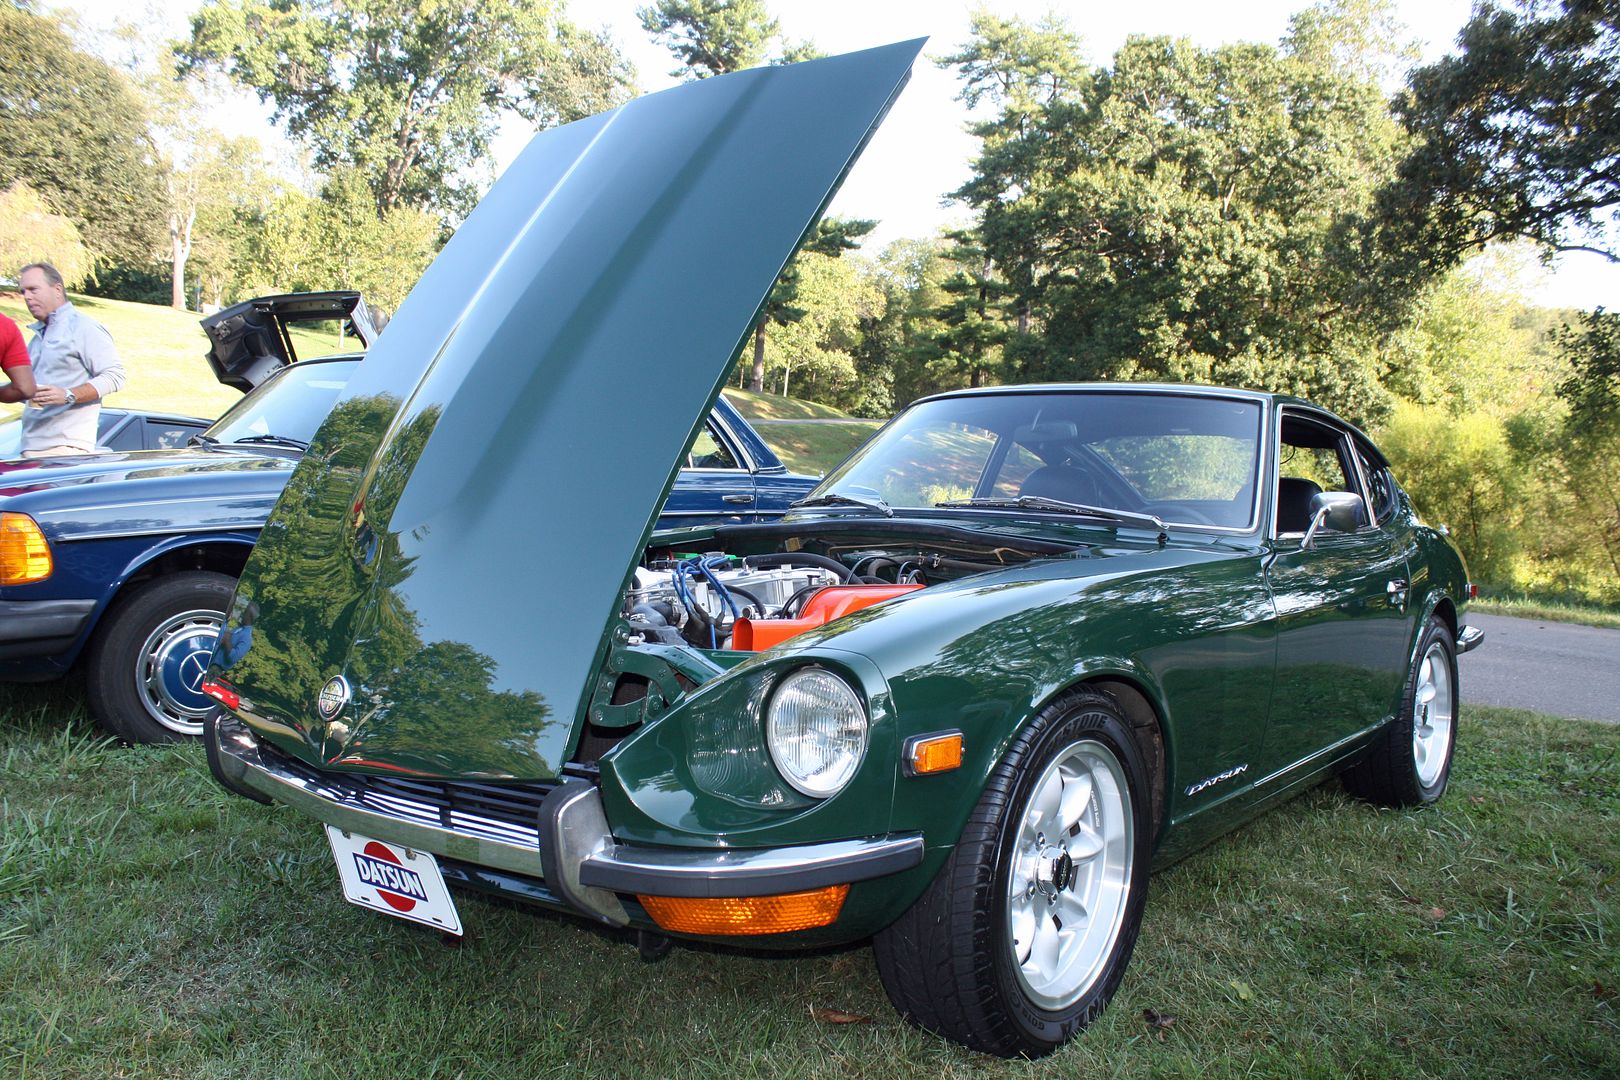
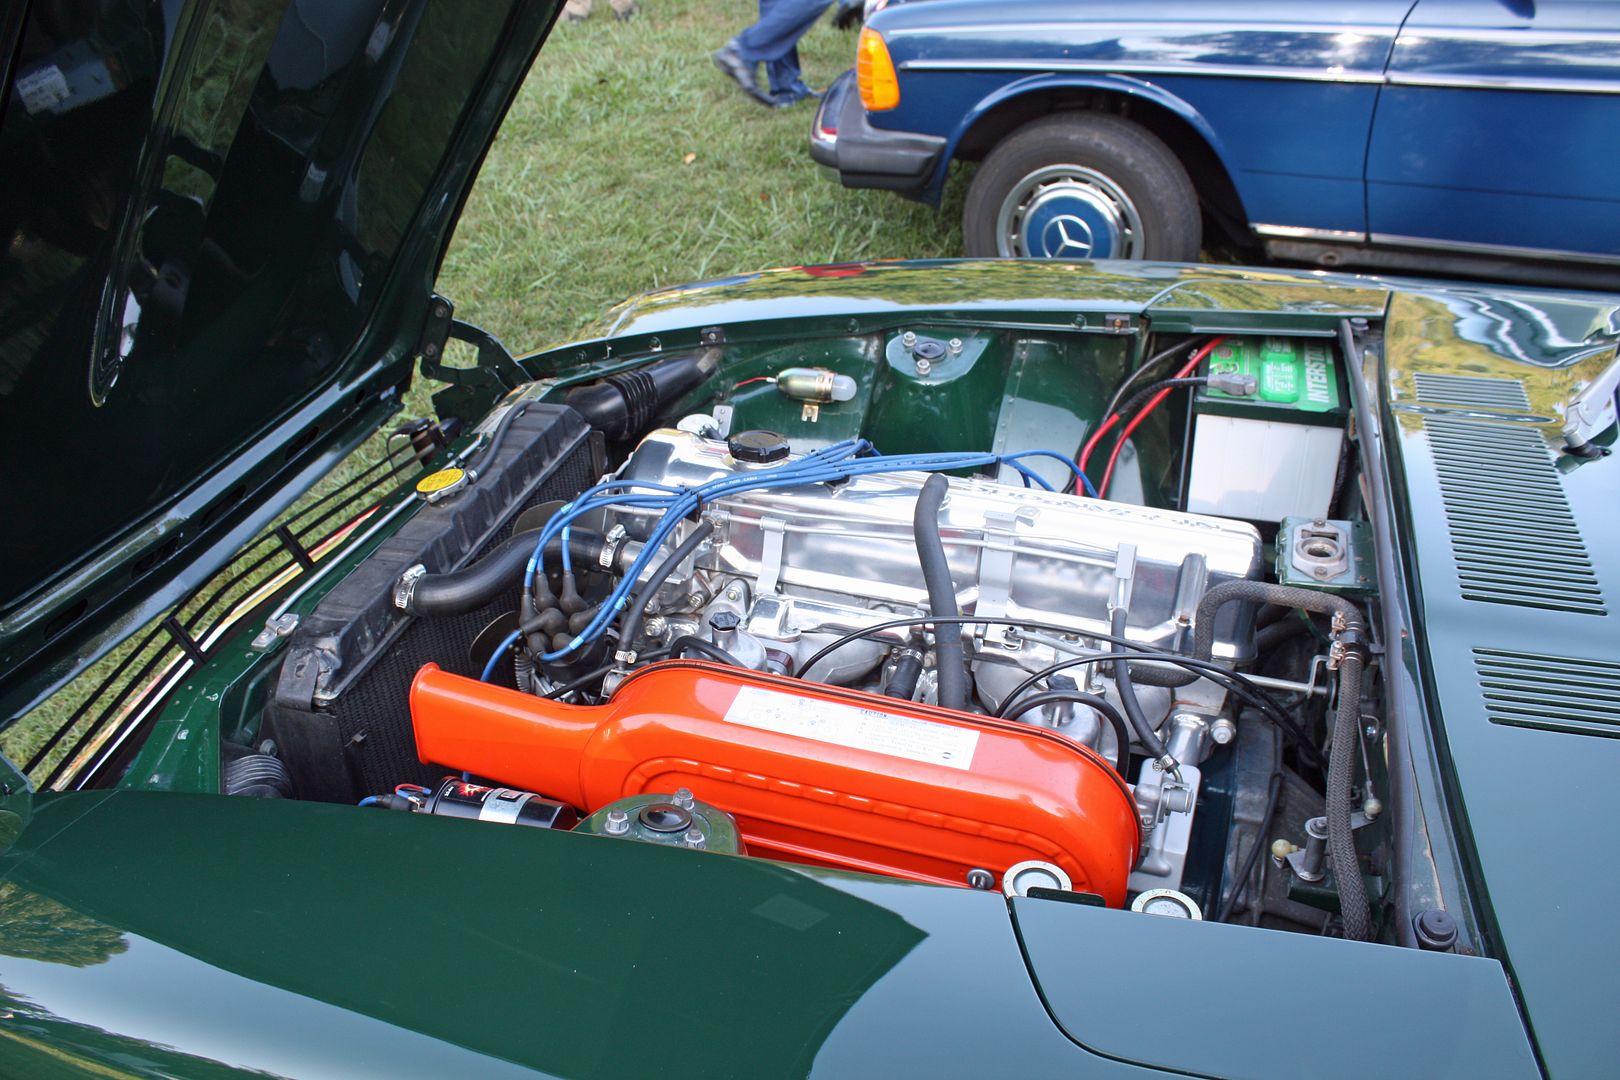
One of the first cars we came across was the 240Z. What a spectacular car. One of the best cars there.
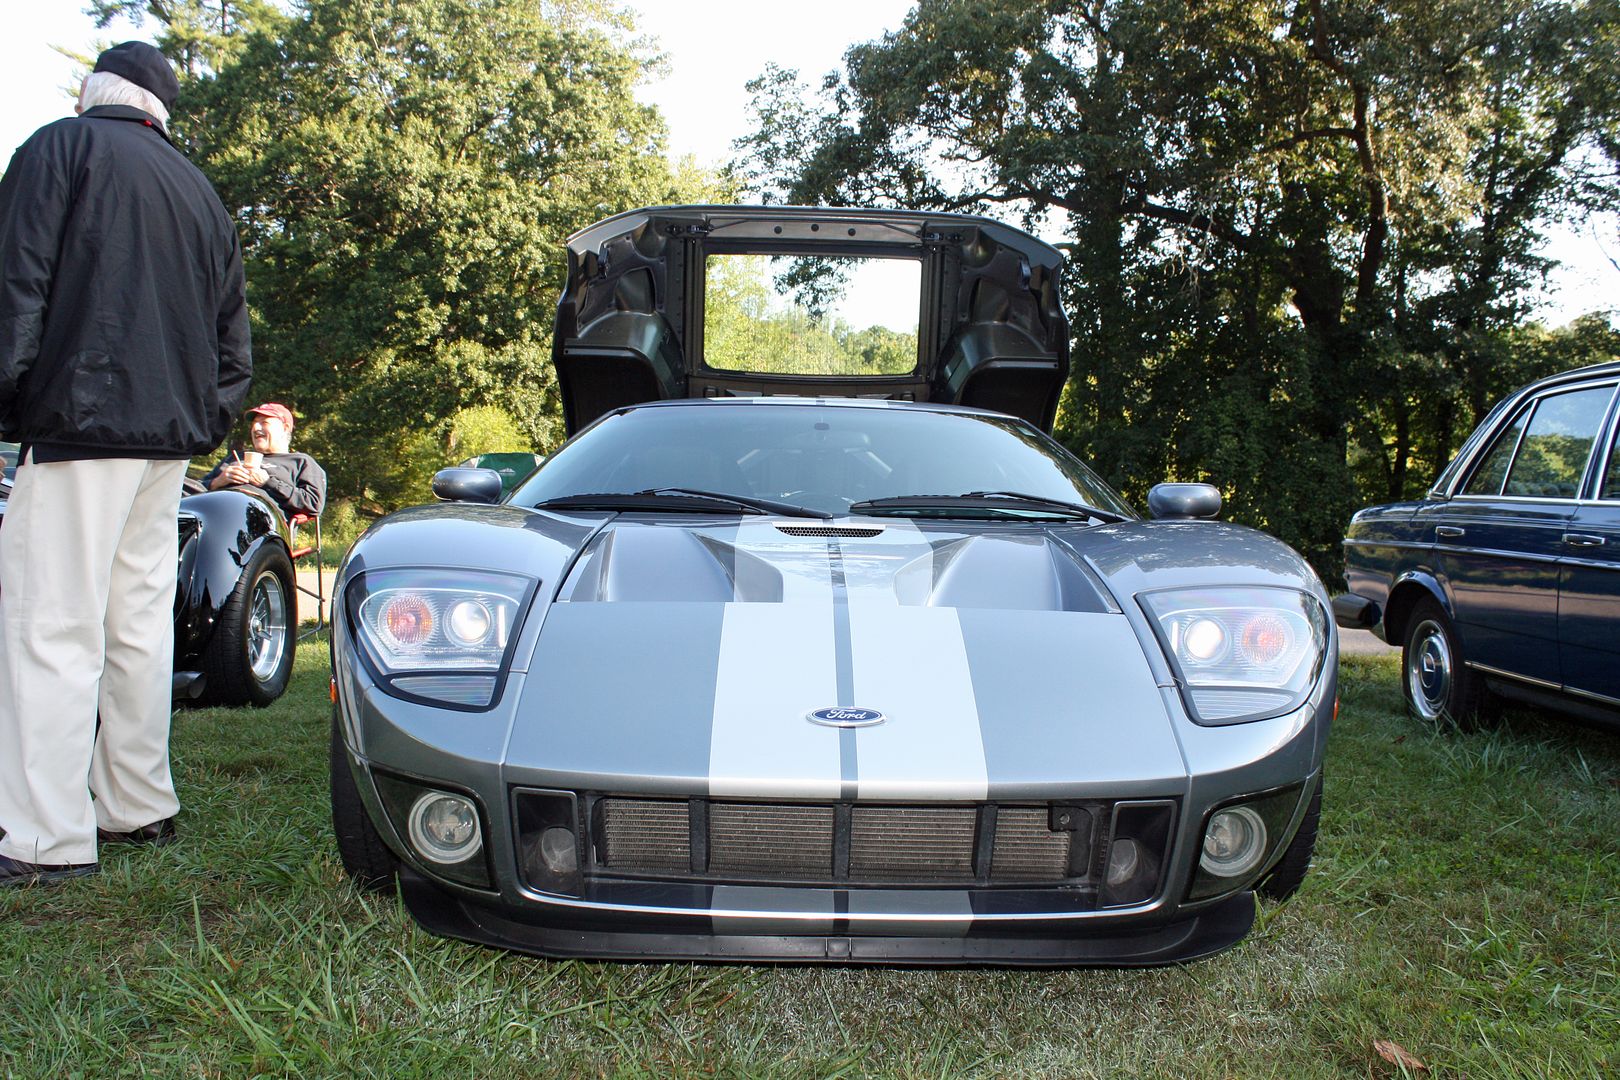
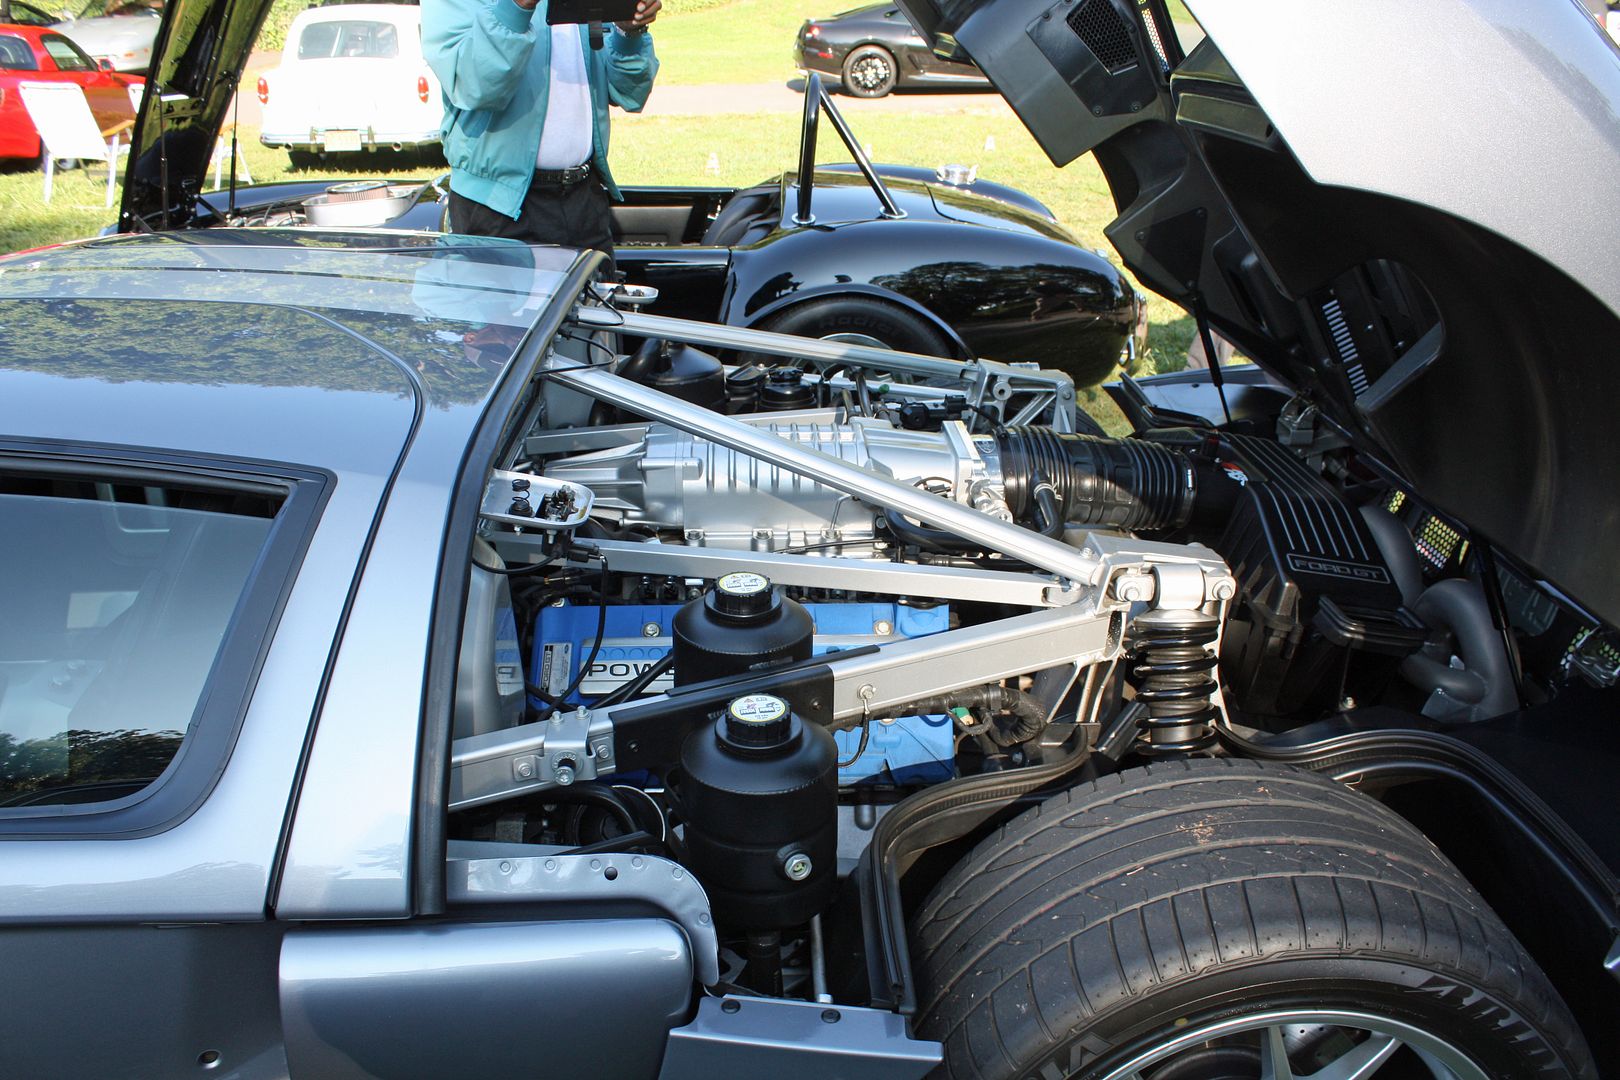
The 240D in these photos was sandwiched between the 240Z and the Ford GT.
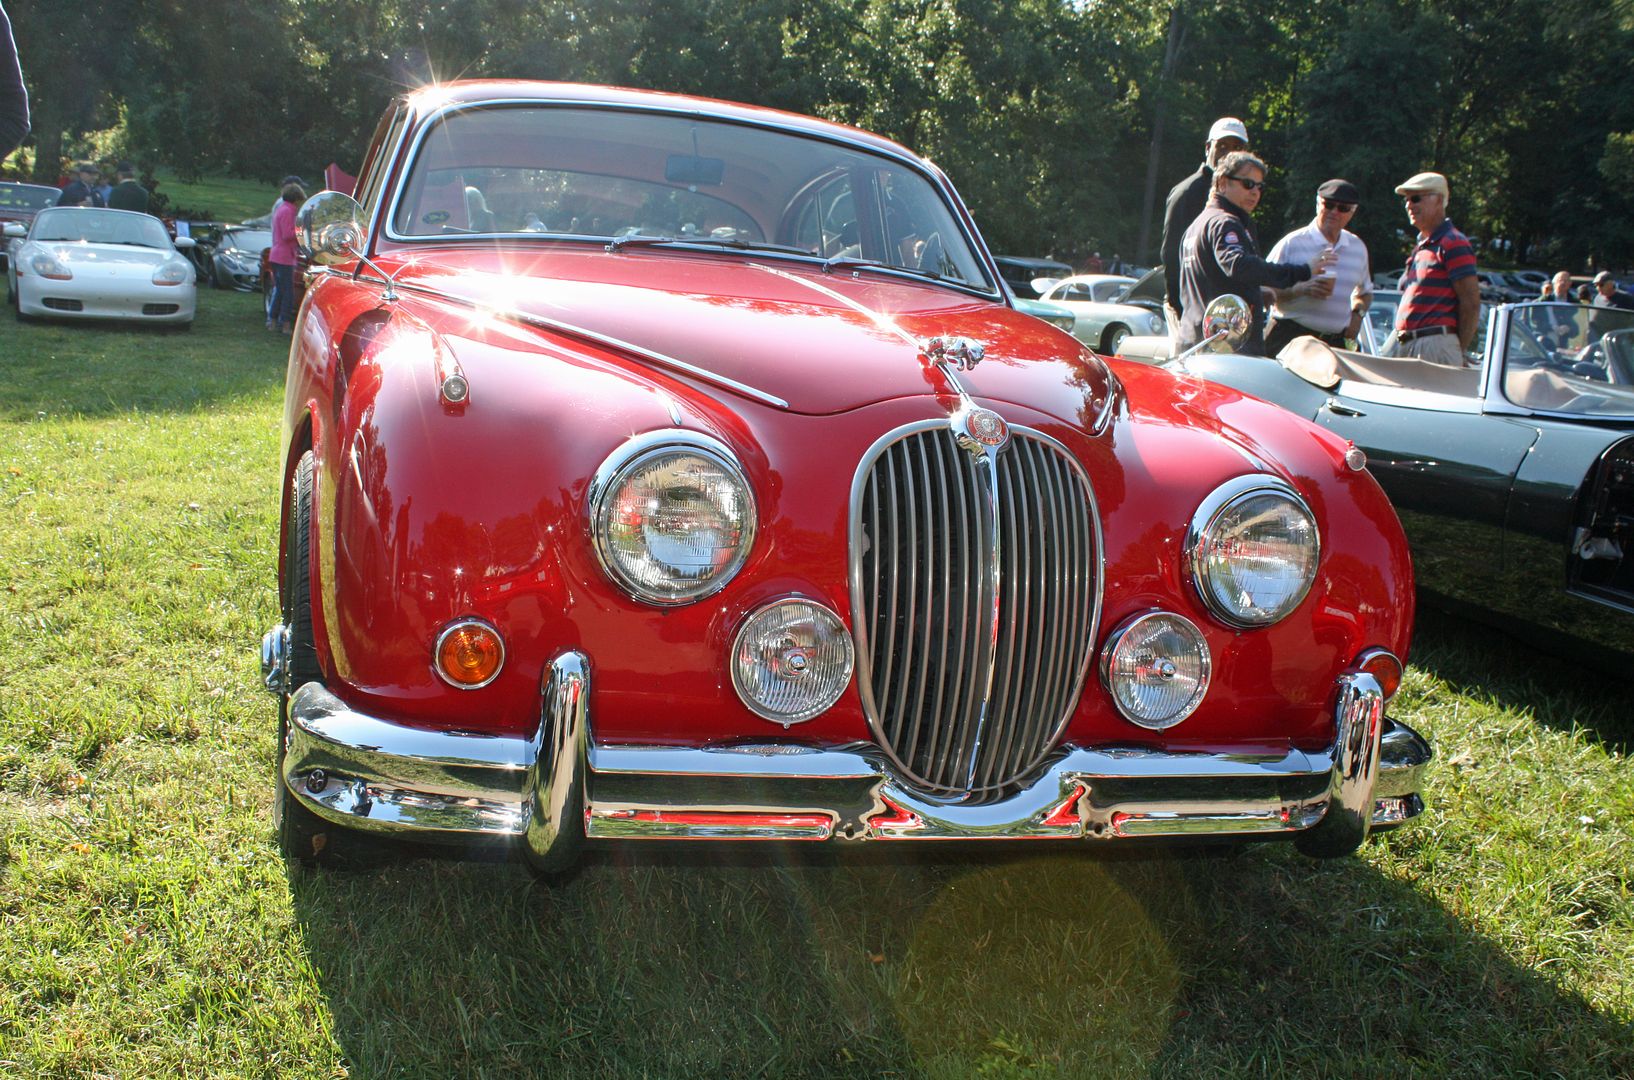
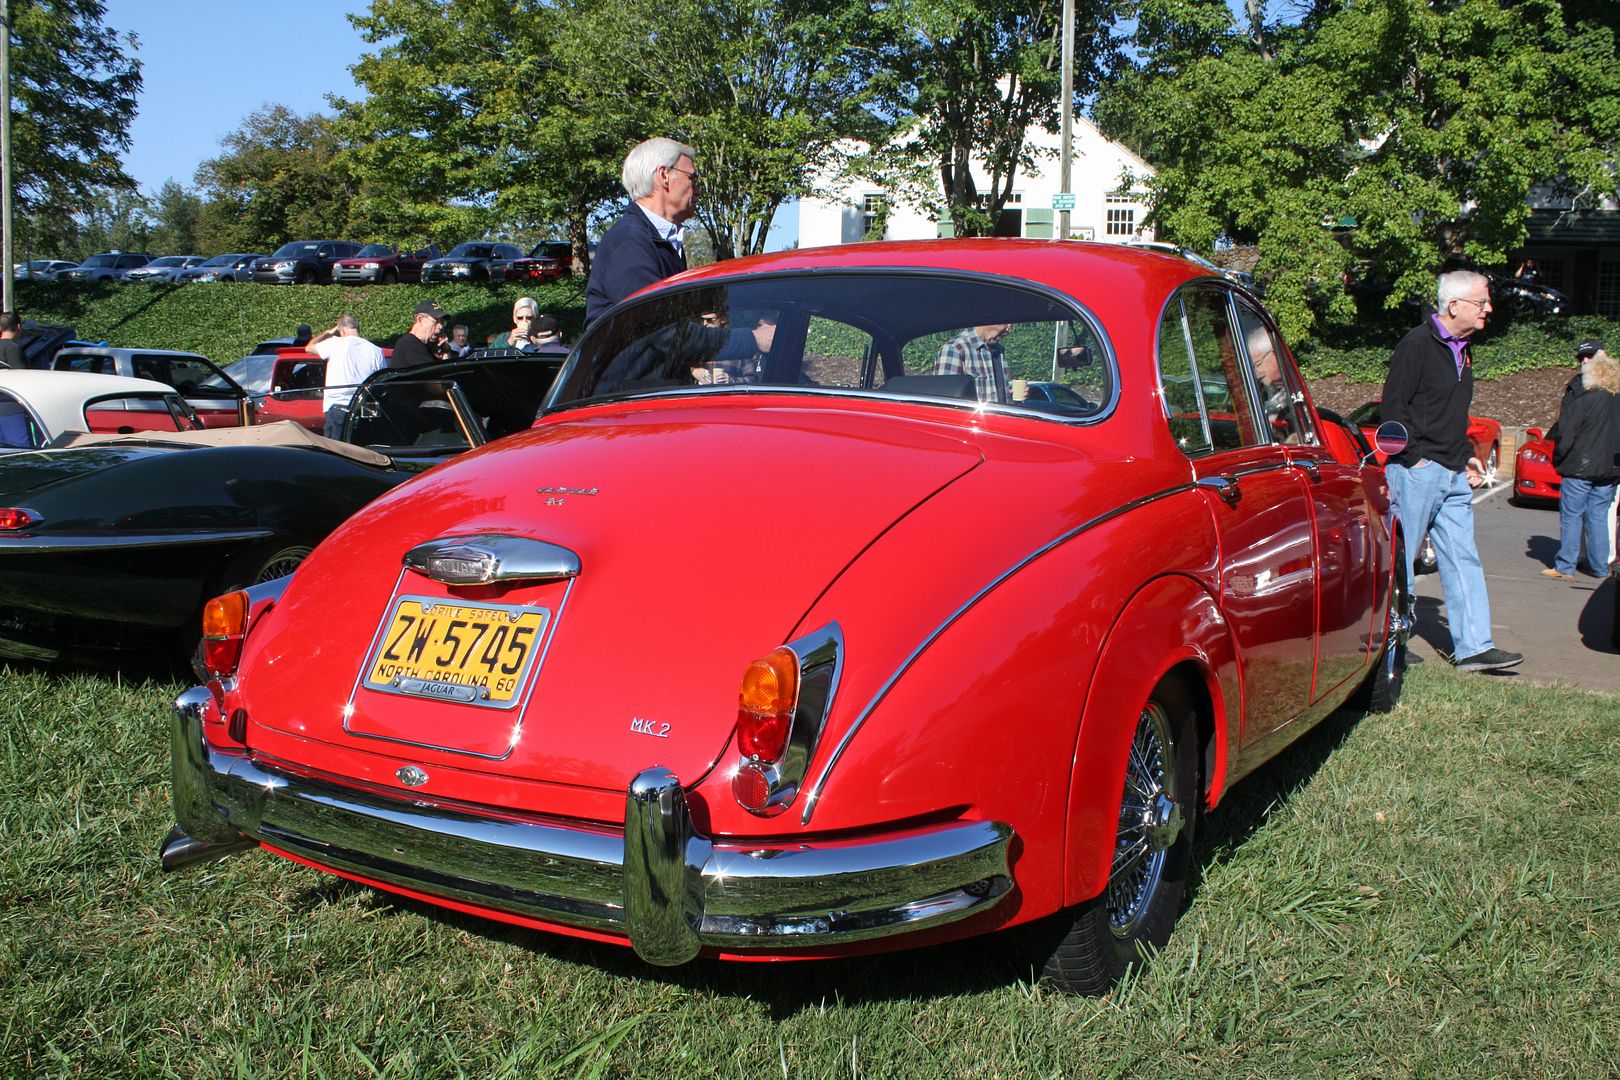
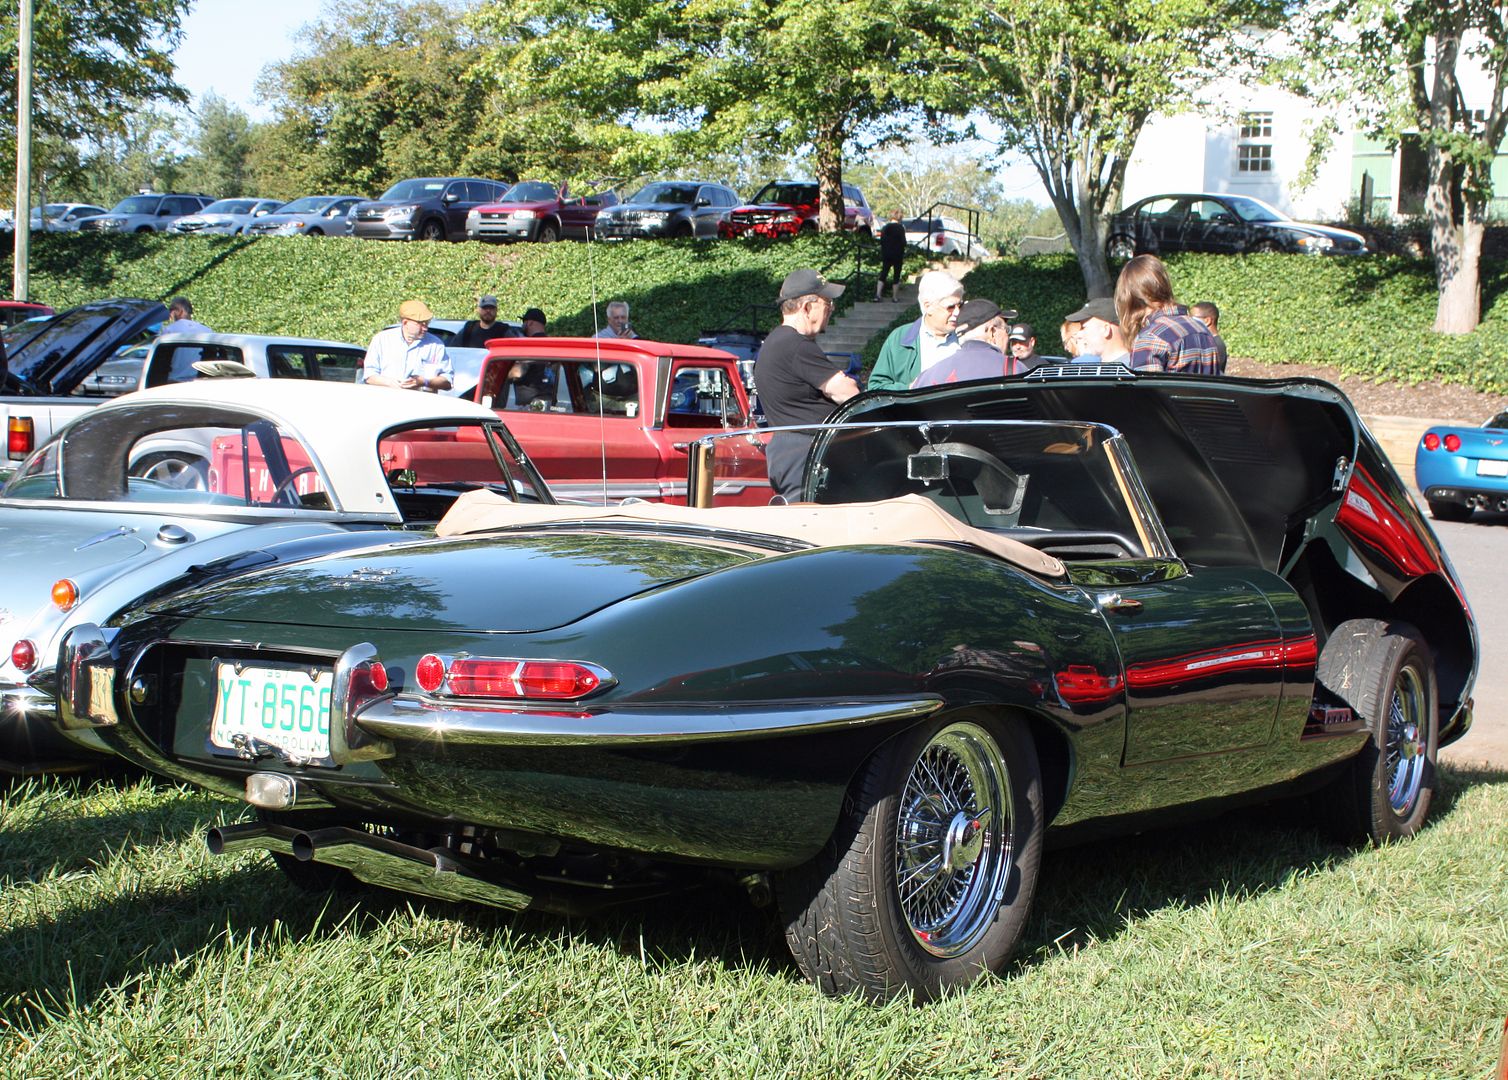
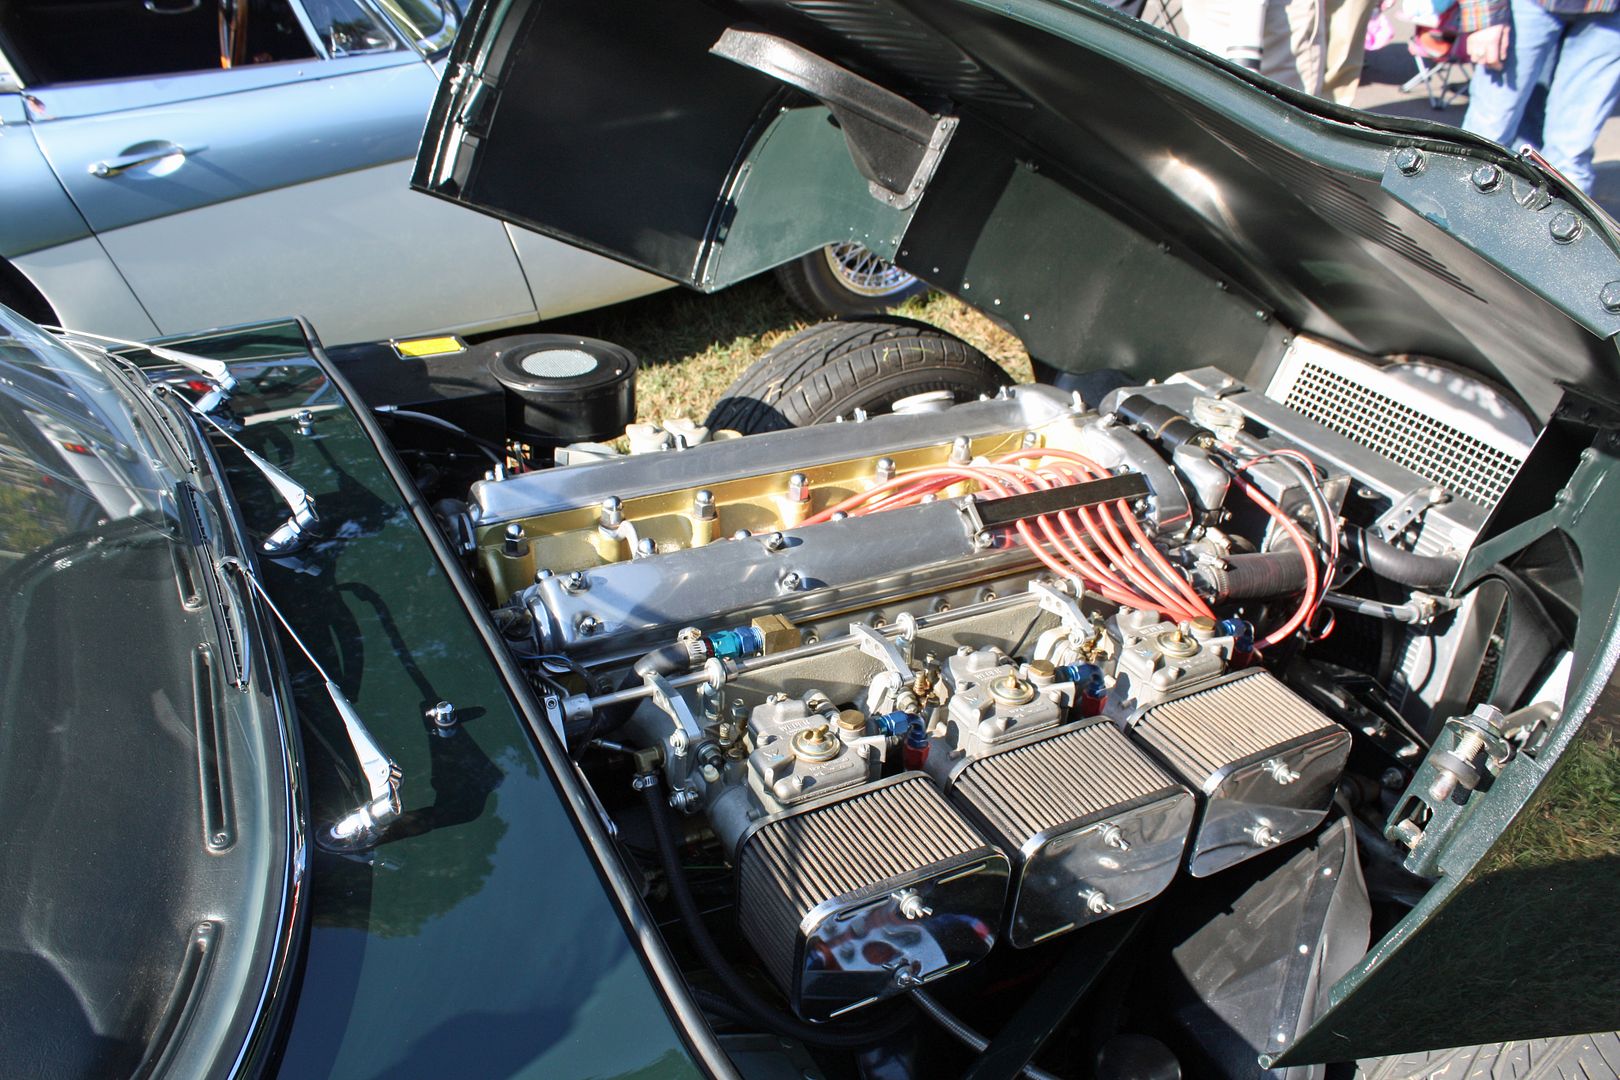
This 1960 Jag sedan was also very nice as was the XKE.
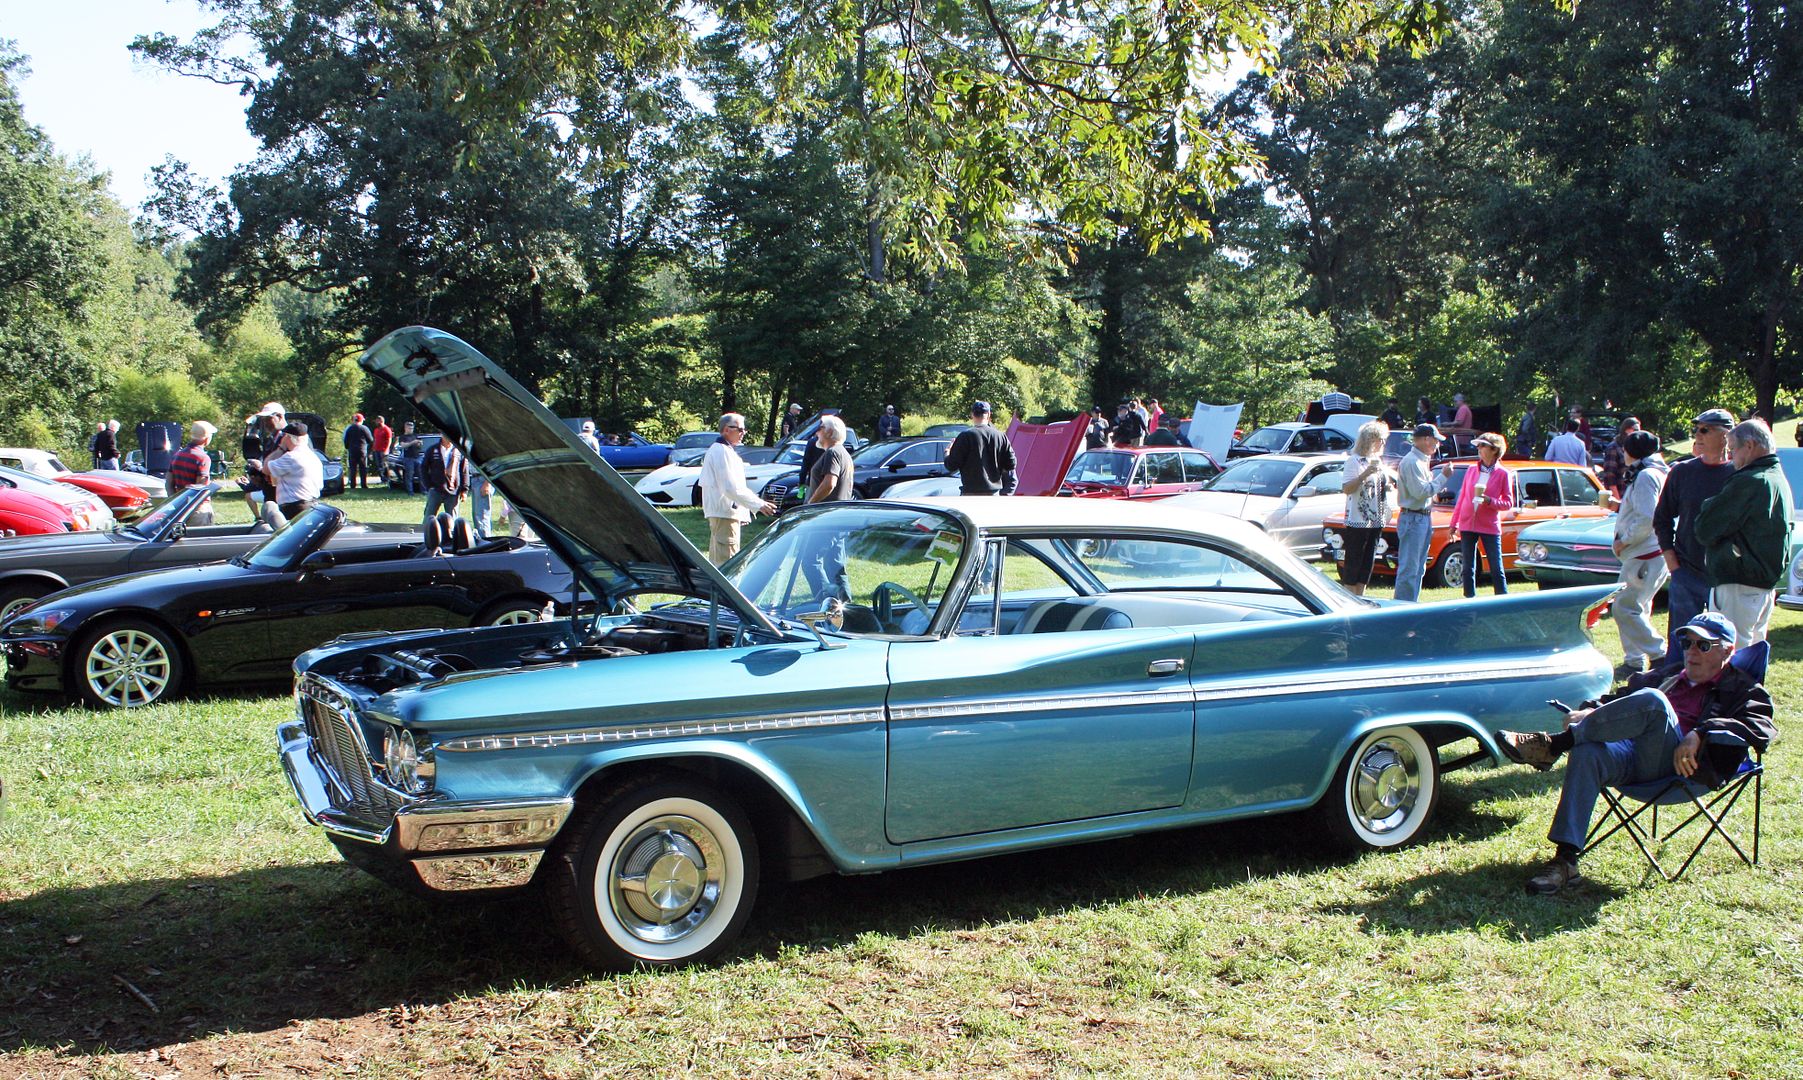
I asked the owner of this car why he didn't bring his "big" car!!! 1960 Desoto.
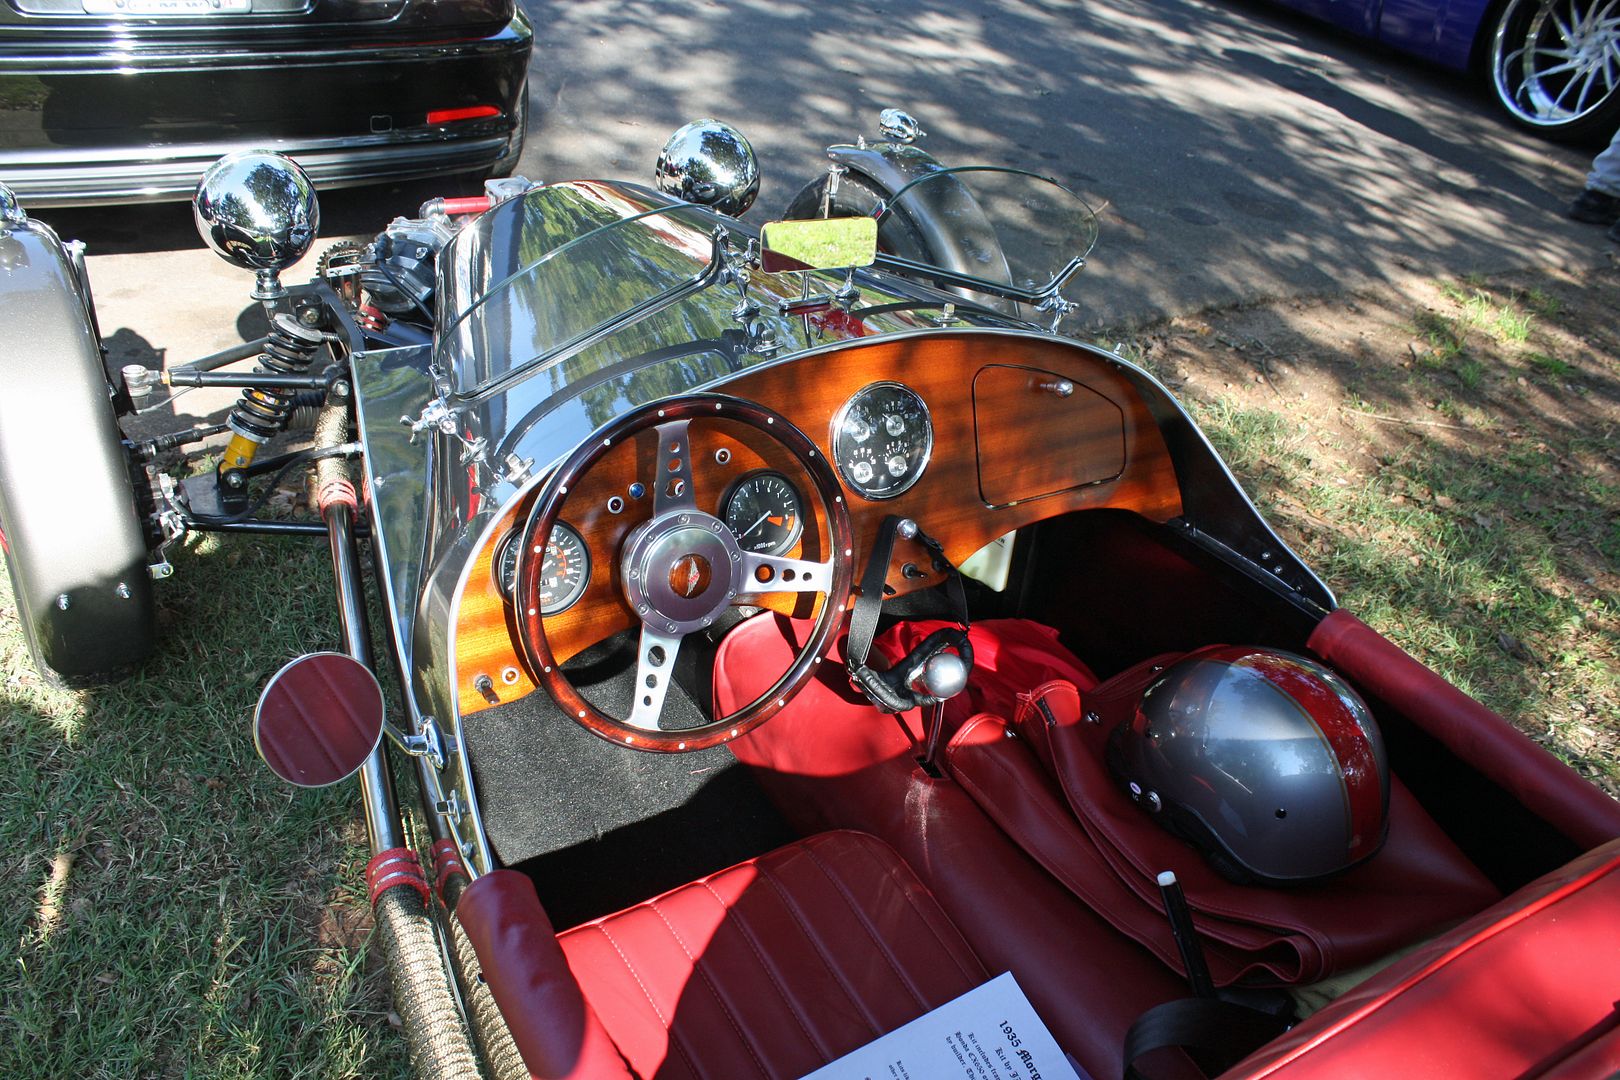
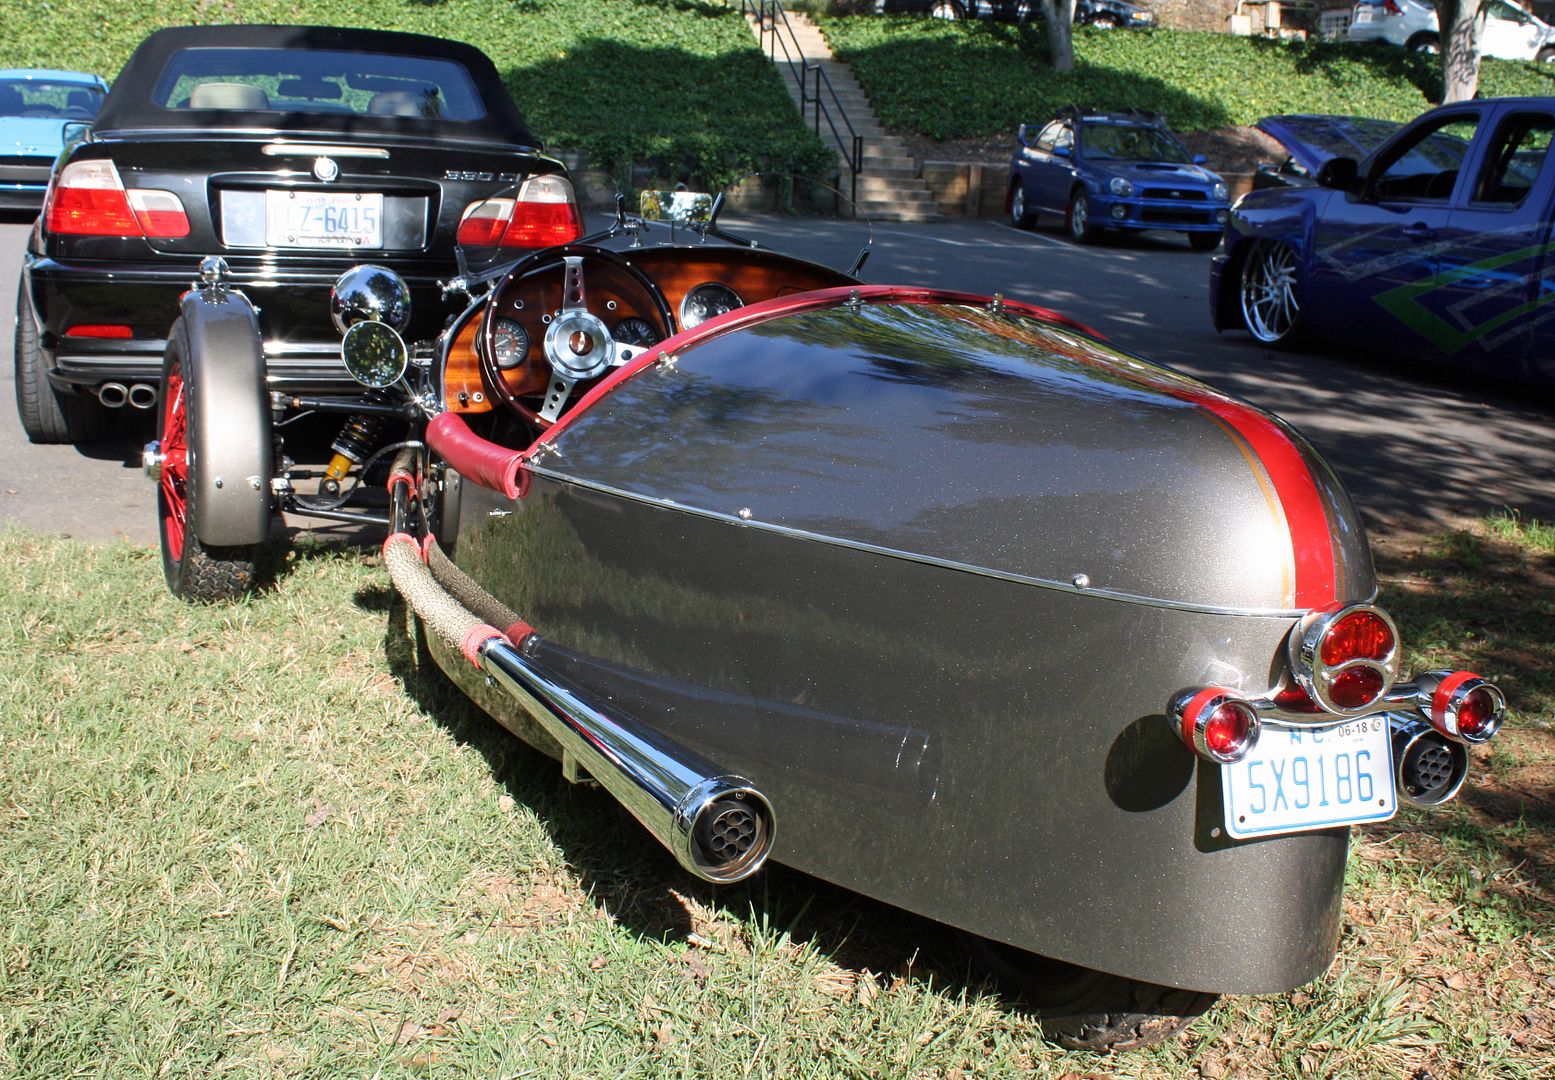
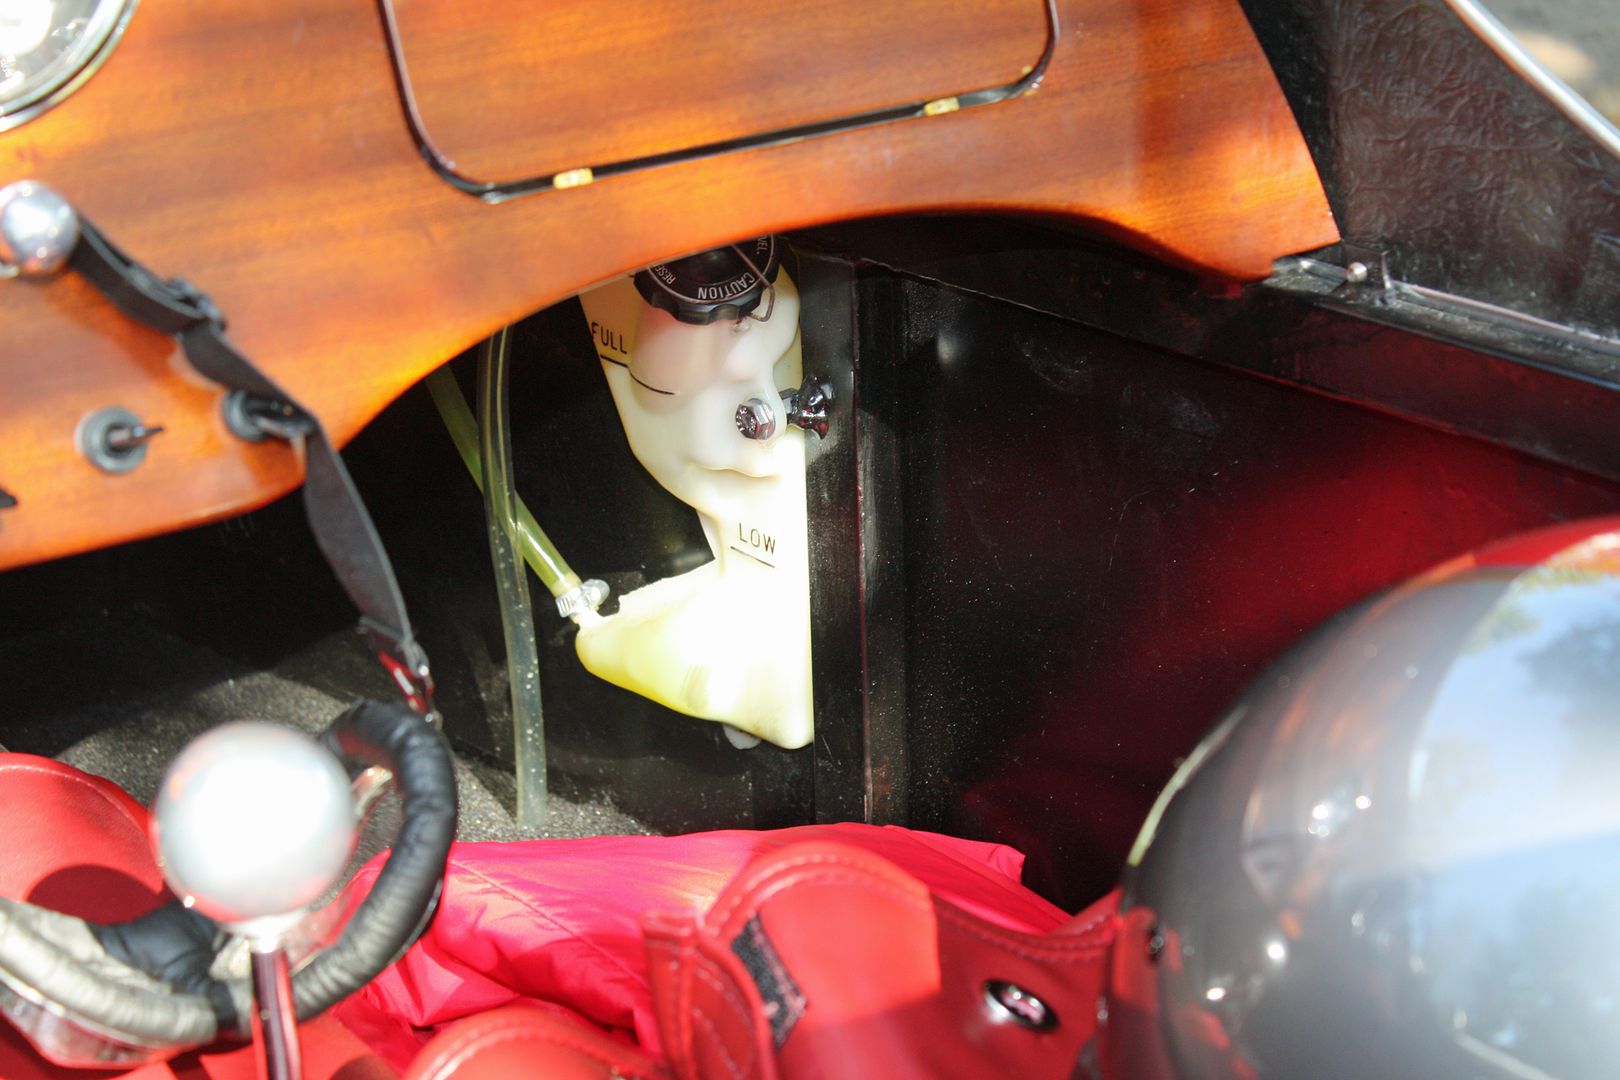
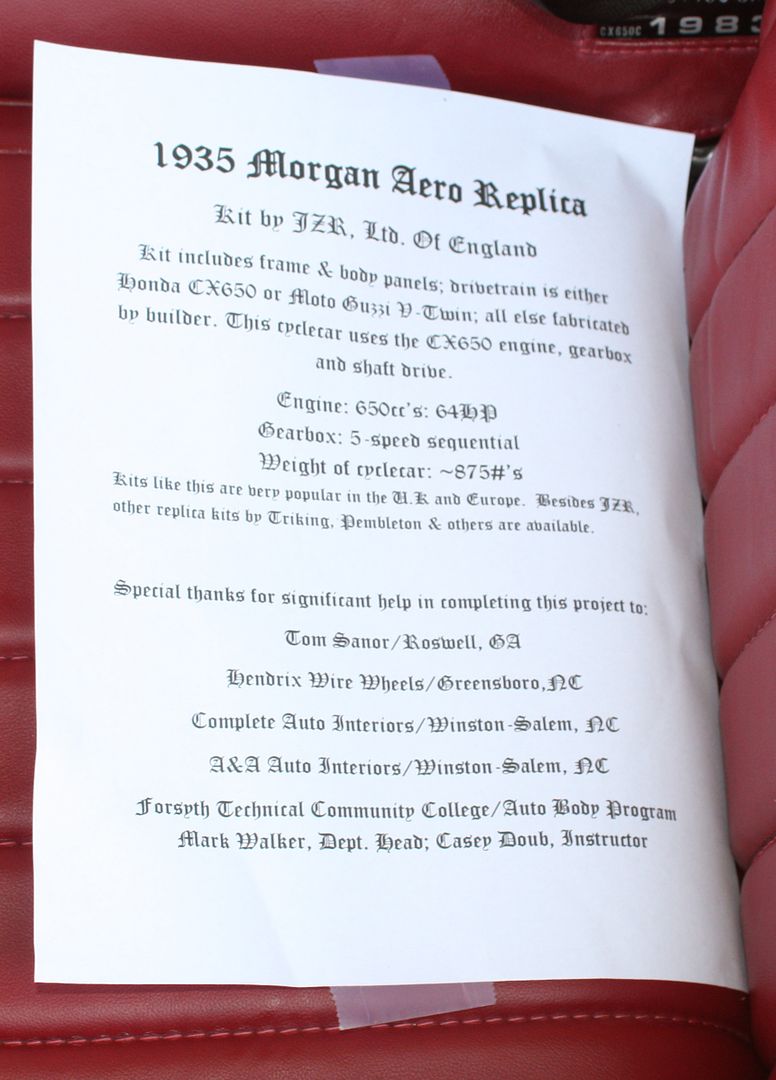
This was a replica of a 1935 Morgan but very nicely done. I would not be looking forward to adding coolant the reservoir was located in the passenger footwell.

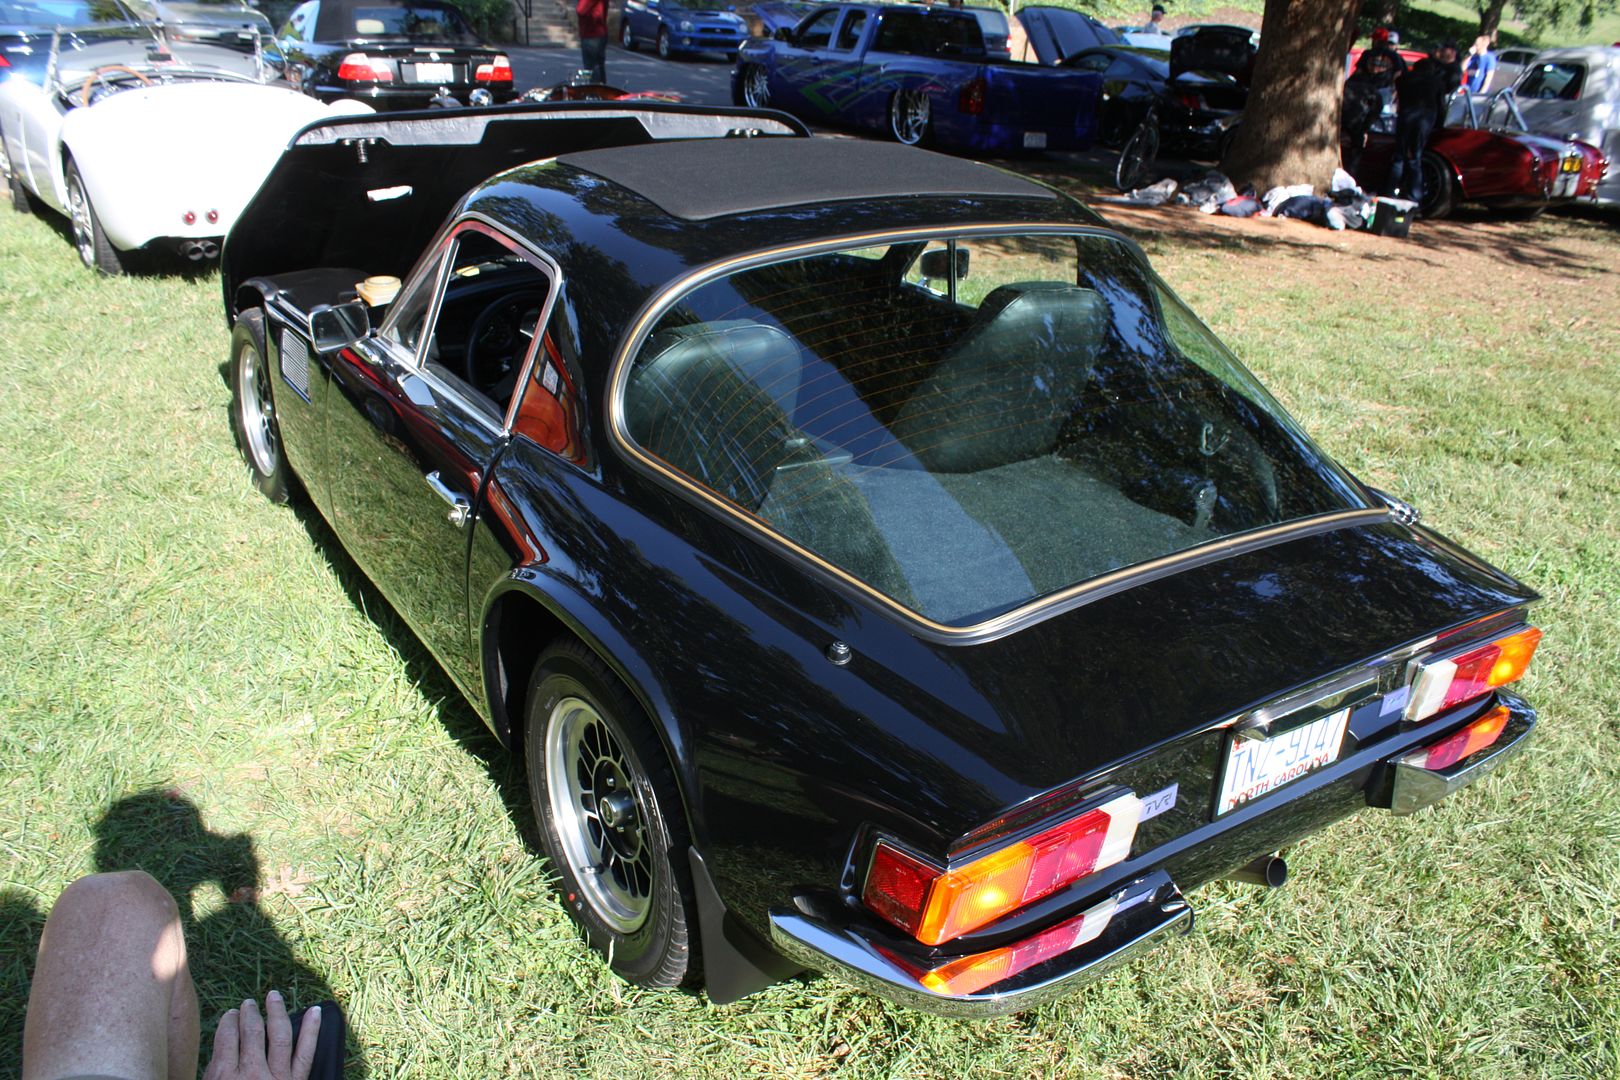
Very nice TVR.
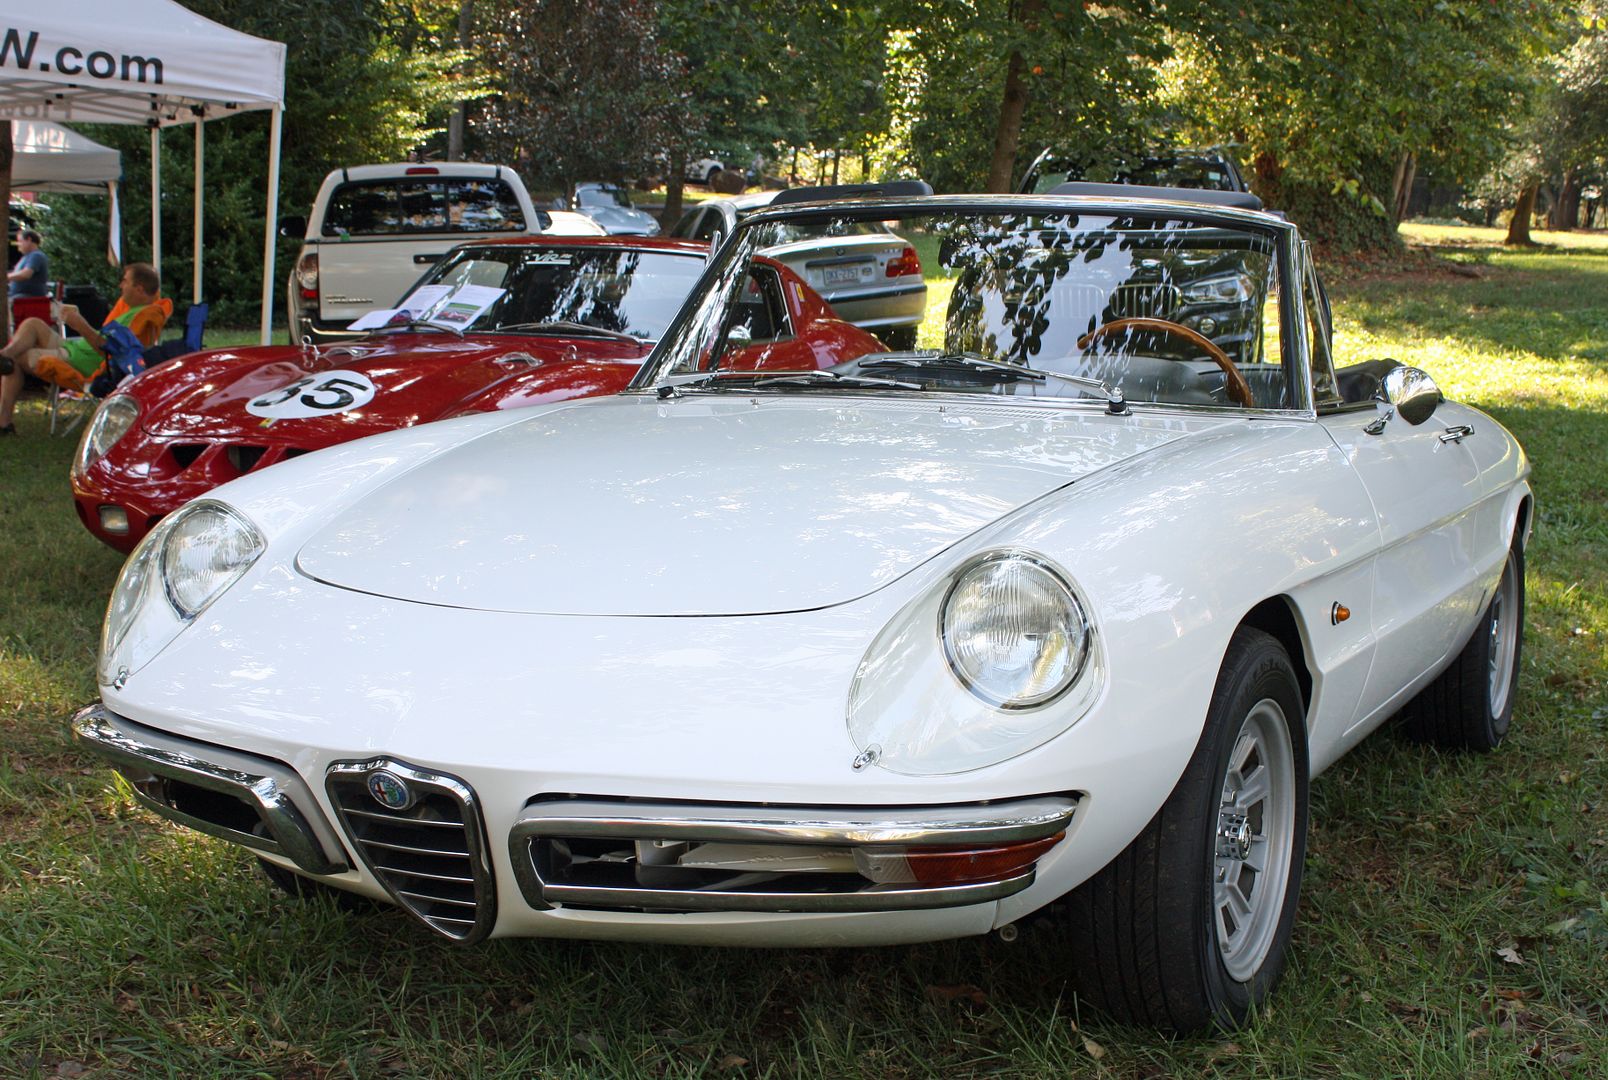
I love these Alfa Duetto's. I could see one of these in my garage someday. In case you are wondering why I don't have a closeup what looks like a Ferrari GTO in the background, it is because it is a replica on a Datsun 280Z chassis.

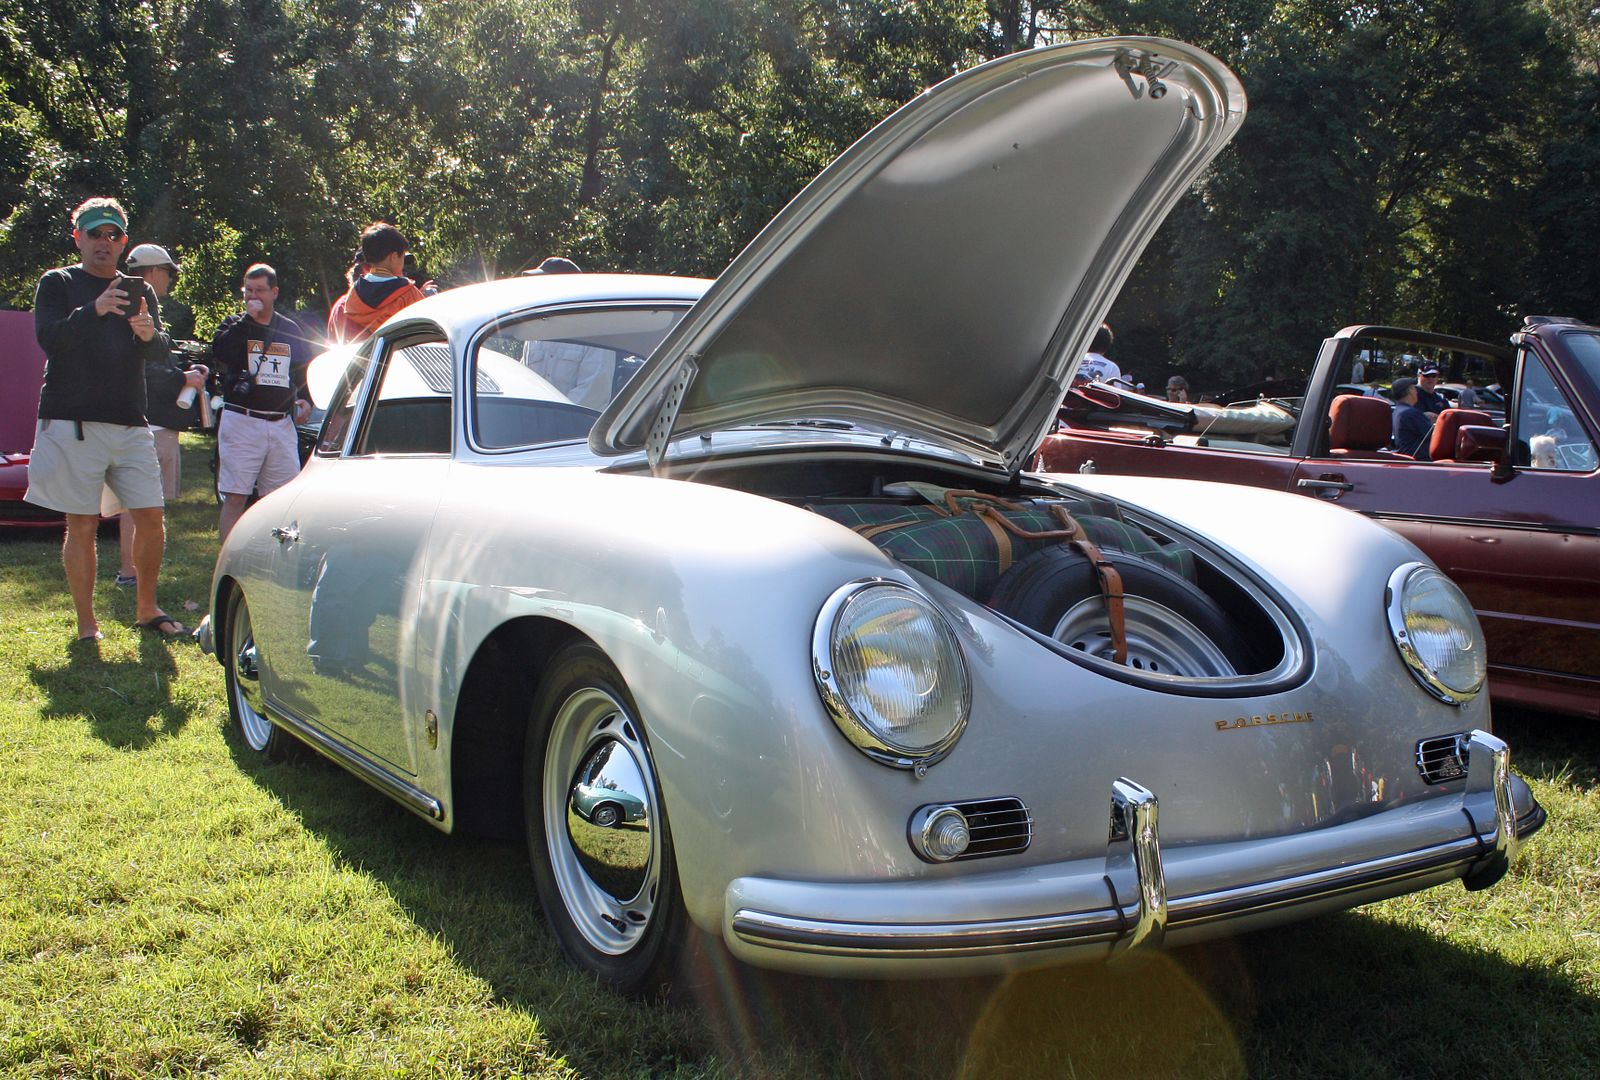
Among the many nice cars there, this 356A stood out. According to the card on the windshield, all of the restoration work was done by the owner. He is very skilled.
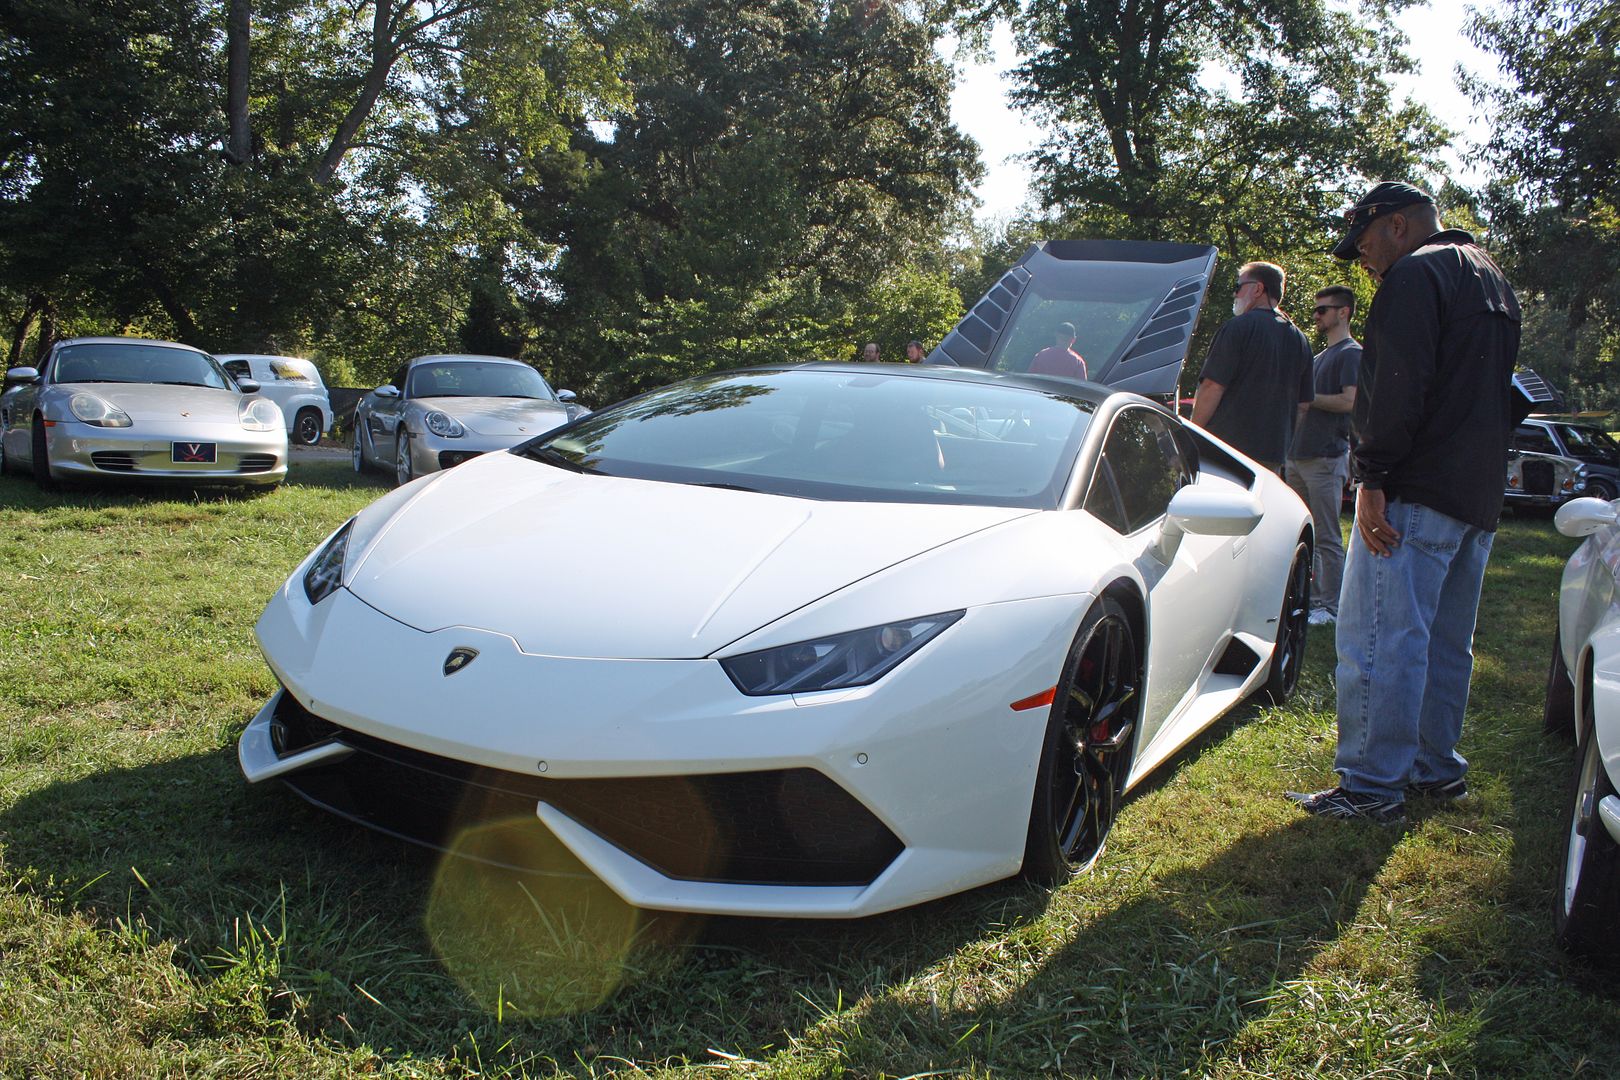
This Diablo was a good representative for the exotic Italian cars present.
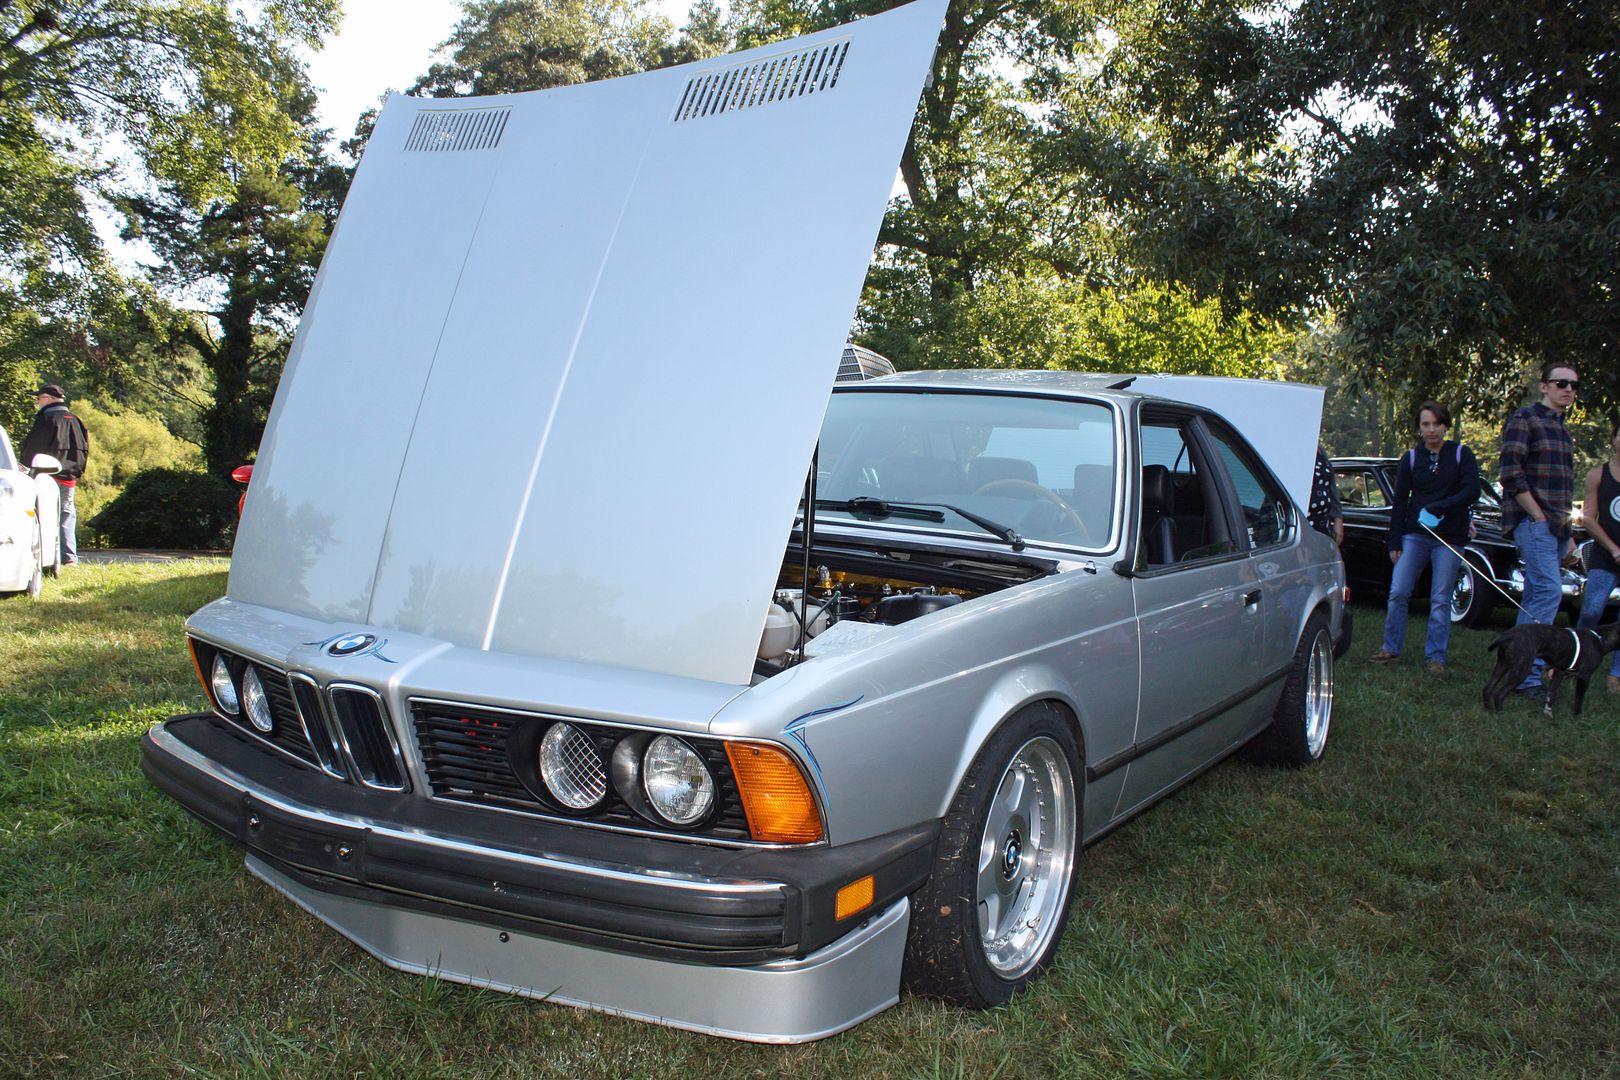
This 635 was very nice and had a number of performance mods including a fuel cell in the trunk.

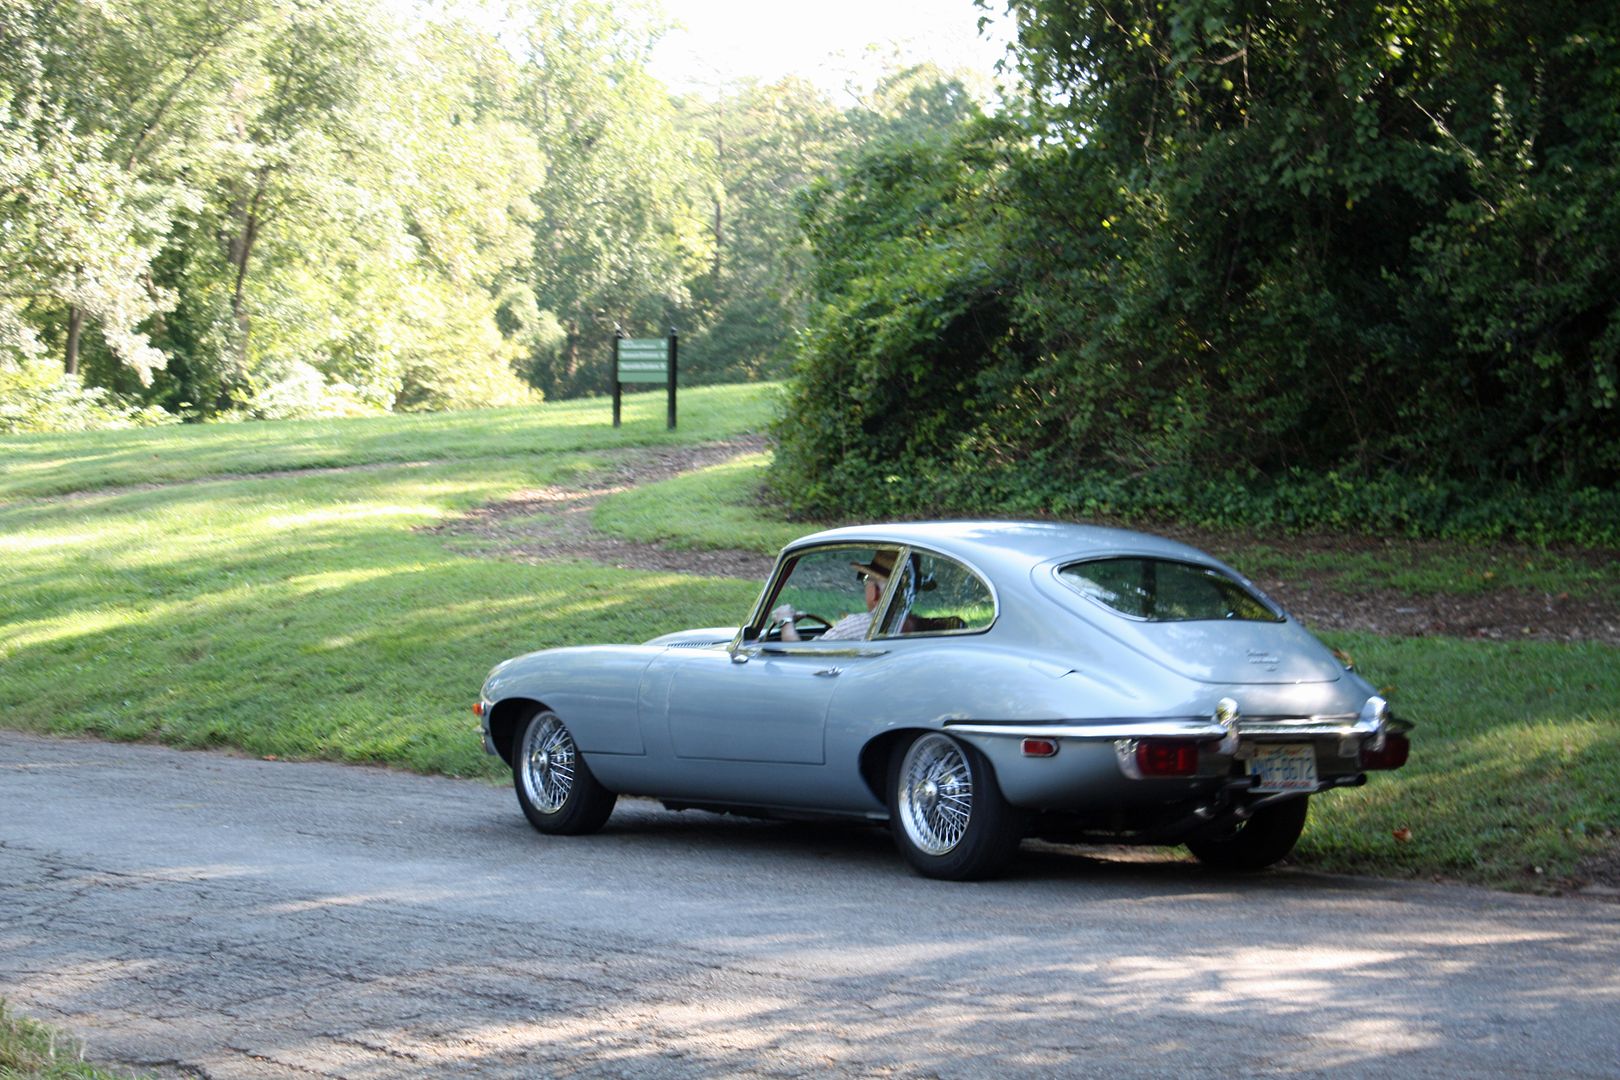
A beautiful XKE coupe leaving the venue.
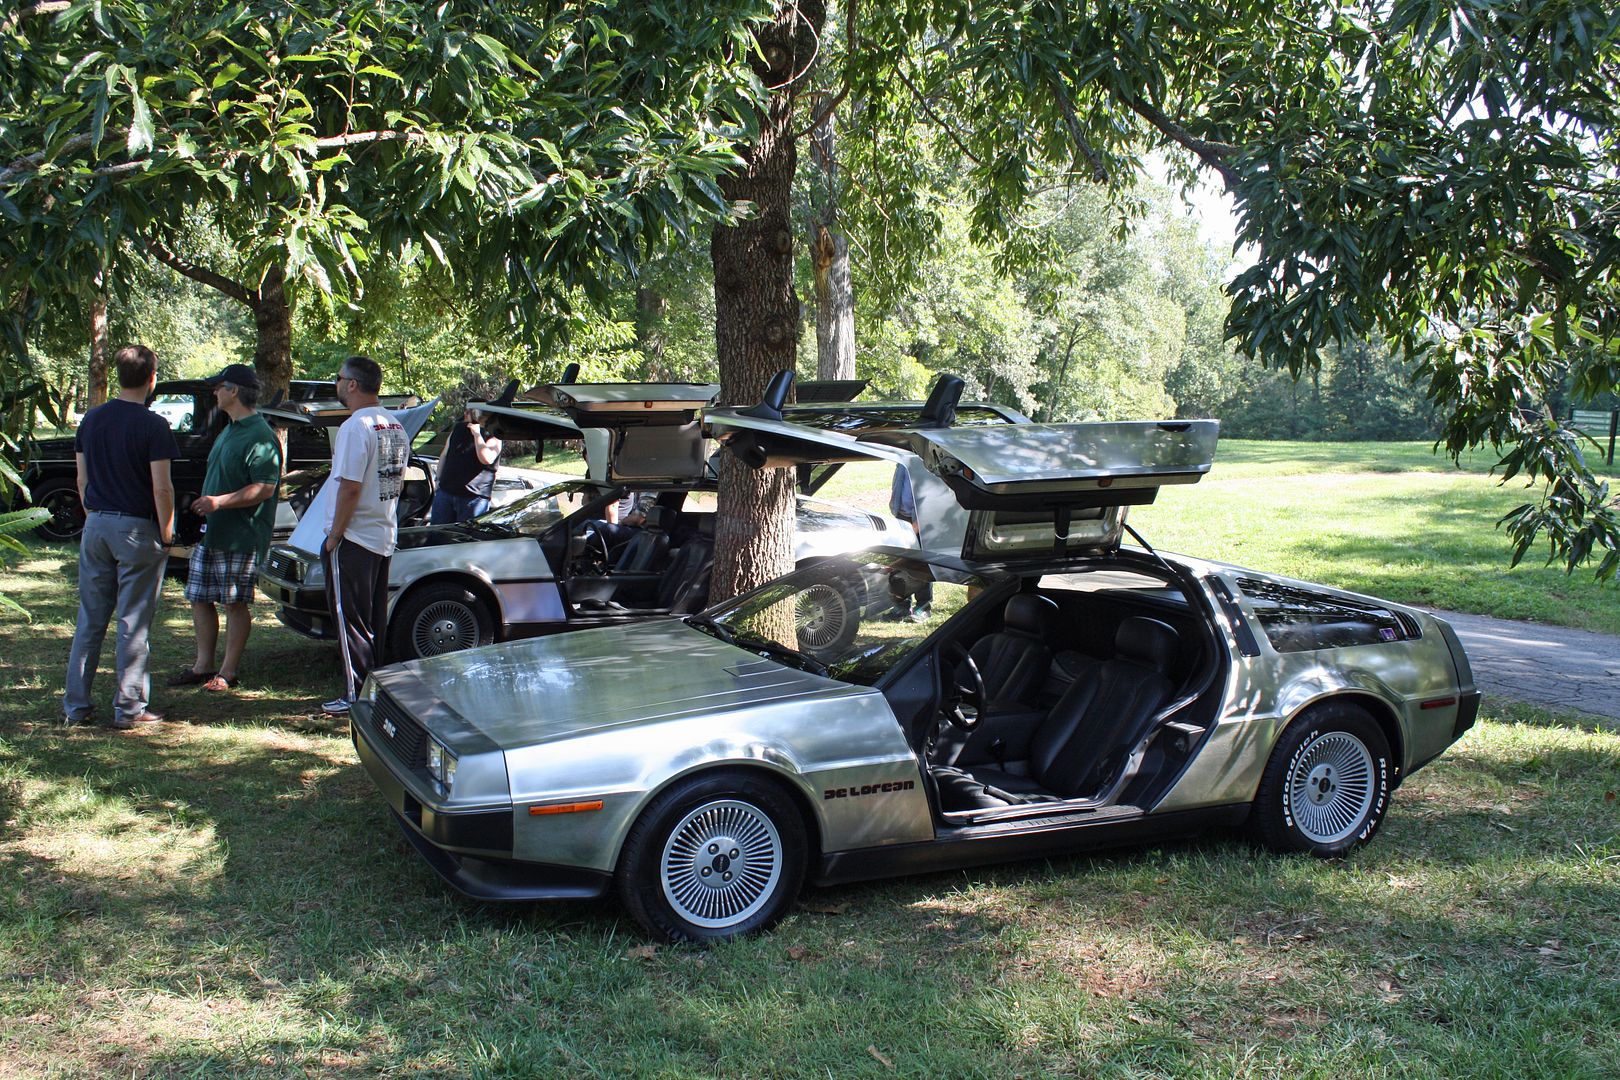
What kind of car show would it be it it did not have a contingent of three Delorean's.
It was well worth the 45 mile drive on a beautiful Saturday morning. Around 60 degrees when I arrived and mid 70's when I left. Windows down driving on the way back. By the way, those two 380SL owners would not want to run me for pink slips!!! With the new injectors and the throttle bushings, the car just purrs down the highway. My wife had a reception for an art show at her gallery last night. I parked the Mercedes in front and had a number of people ask about the car. One of them is a BMW guy doing a restoration on a E30 convertible for his wife. After looking it over, he told me he would like to have a ride in it someday. I replied that now would be a good time and we took a 20 minute drive through city streets, some backroads and a short stretch on an interstate. He was so impressed with how the car went down the road that he said if he had the garage space, he would make me an offer. I was glad he enjoyed the ride!!
I have been talking with a gentleman for the past week or so about a 1982 380SL. He lives in Winston-Salem, NC. Every second Saturday there is a Winston-Salem Cars & Coffee held at Reynolda Village. Reynolda is the name the Reynolds family, of tobacco fame, gave to their family home. It is now open to the public and is a beautiful home filled with period furniture and artwork. Reynolda Village is on the Reynolds property and houses unique shops. So it is a great place to take your wife to a car show!!!
We met, I looked over the car, drove it and decided it was not what i wanted. The price was attractive (asking $5300 OBO) but it had more needs than I want to address and he did not have any history on the car. One encouraging point in its favor was that it had been converted to the dual row chains. In the photo below you will see his car parked next to what turned out to be an '81 380SL that also happened to be for sale. It's owner was a gentleman I met a couple weeks ago at the Mercedes show. This one had a motor from a 500SL. I drove it and it was a better car than the blue one. Again no history but this one did have fewer needs and the body was better. I think i will keep looking for my next project car.

The owner of the blue car had never attended this event and we spent the next couple hours together looking at the cars. He has owned a Porsche 944 in his past and thinks he would like to buy an air cooled 911. Since I have had lots of experience with these cars, as we looked at the 911's there, I discussed the pros and cons to the various models. If he is going to get an air cooled 911, he better do it soon as the prices are still very high.
One of the first cars we came across was the 240Z. What a spectacular car. One of the best cars there.


The 240D in these photos was sandwiched between the 240Z and the Ford GT.


This 1960 Jag sedan was also very nice as was the XKE.


I asked the owner of this car why he didn't bring his "big" car!!! 1960 Desoto.

This was a replica of a 1935 Morgan but very nicely done. I would not be looking forward to adding coolant the reservoir was located in the passenger footwell.


Very nice TVR.

I love these Alfa Duetto's. I could see one of these in my garage someday. In case you are wondering why I don't have a closeup what looks like a Ferrari GTO in the background, it is because it is a replica on a Datsun 280Z chassis.


Among the many nice cars there, this 356A stood out. According to the card on the windshield, all of the restoration work was done by the owner. He is very skilled.


This Diablo was a good representative for the exotic Italian cars present.

This 635 was very nice and had a number of performance mods including a fuel cell in the trunk.


A beautiful XKE coupe leaving the venue.

What kind of car show would it be it it did not have a contingent of three Delorean's.

It was well worth the 45 mile drive on a beautiful Saturday morning. Around 60 degrees when I arrived and mid 70's when I left. Windows down driving on the way back. By the way, those two 380SL owners would not want to run me for pink slips!!! With the new injectors and the throttle bushings, the car just purrs down the highway. My wife had a reception for an art show at her gallery last night. I parked the Mercedes in front and had a number of people ask about the car. One of them is a BMW guy doing a restoration on a E30 convertible for his wife. After looking it over, he told me he would like to have a ride in it someday. I replied that now would be a good time and we took a 20 minute drive through city streets, some backroads and a short stretch on an interstate. He was so impressed with how the car went down the road that he said if he had the garage space, he would make me an offer. I was glad he enjoyed the ride!!
10-10-2017, 06:35 PM
#96
Member
Thread Starter
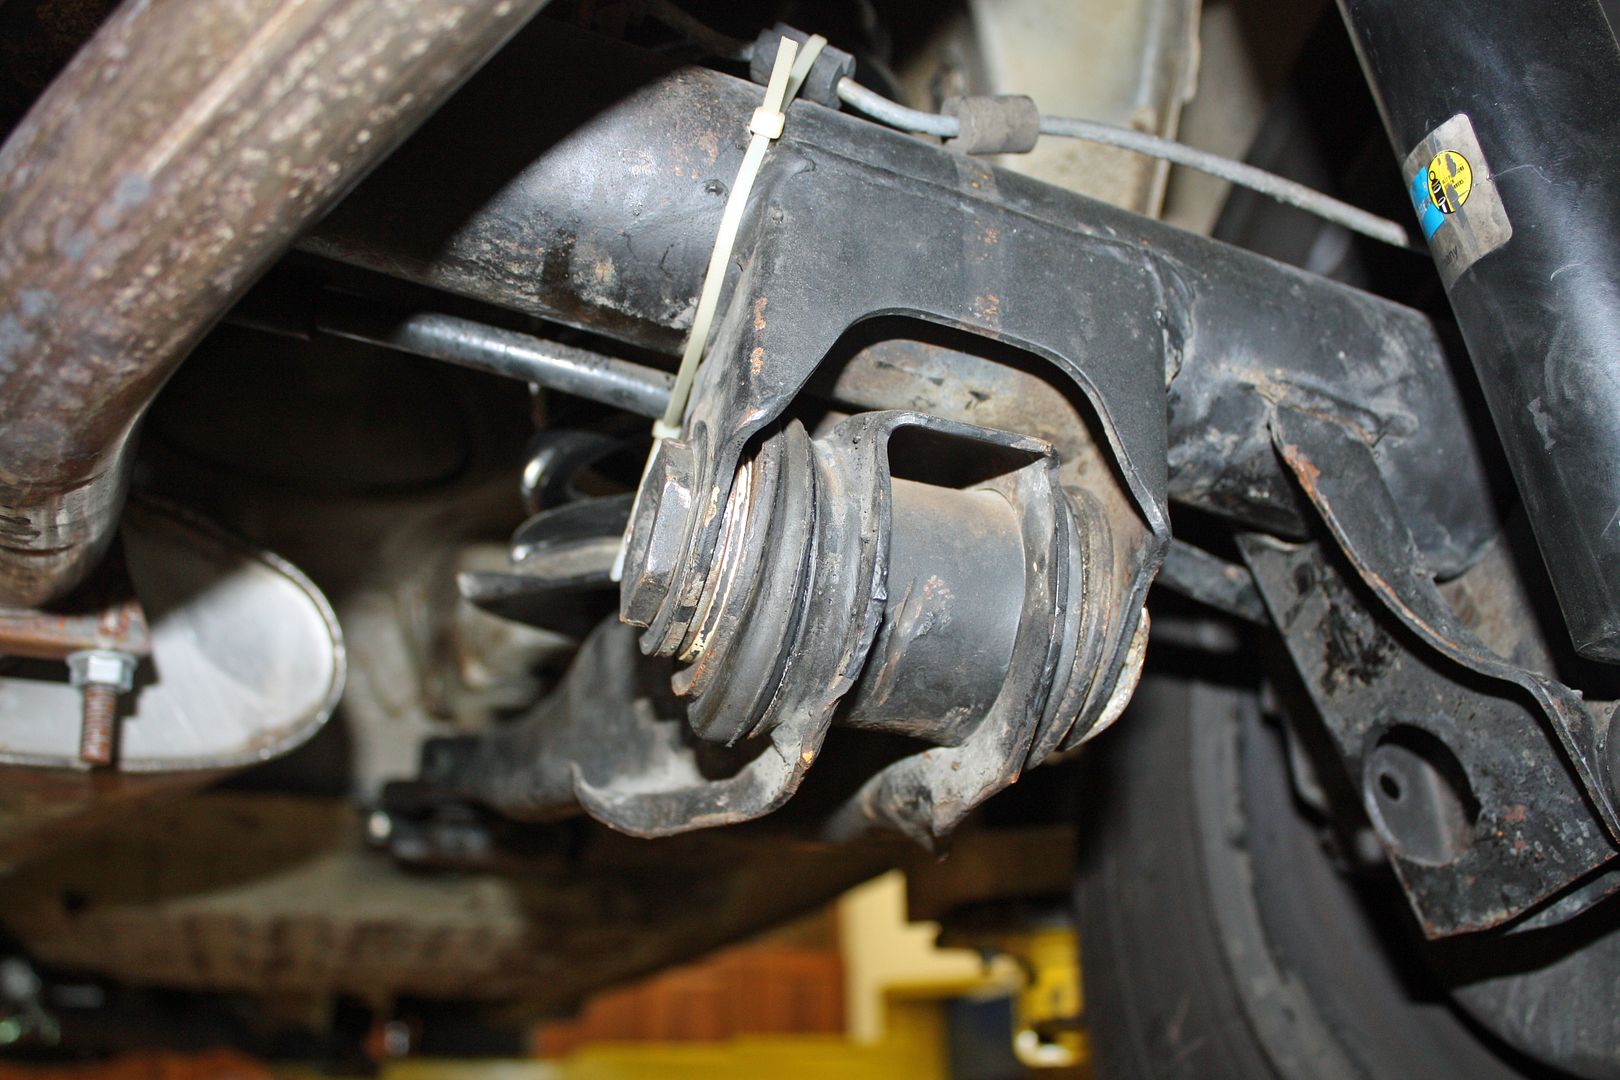
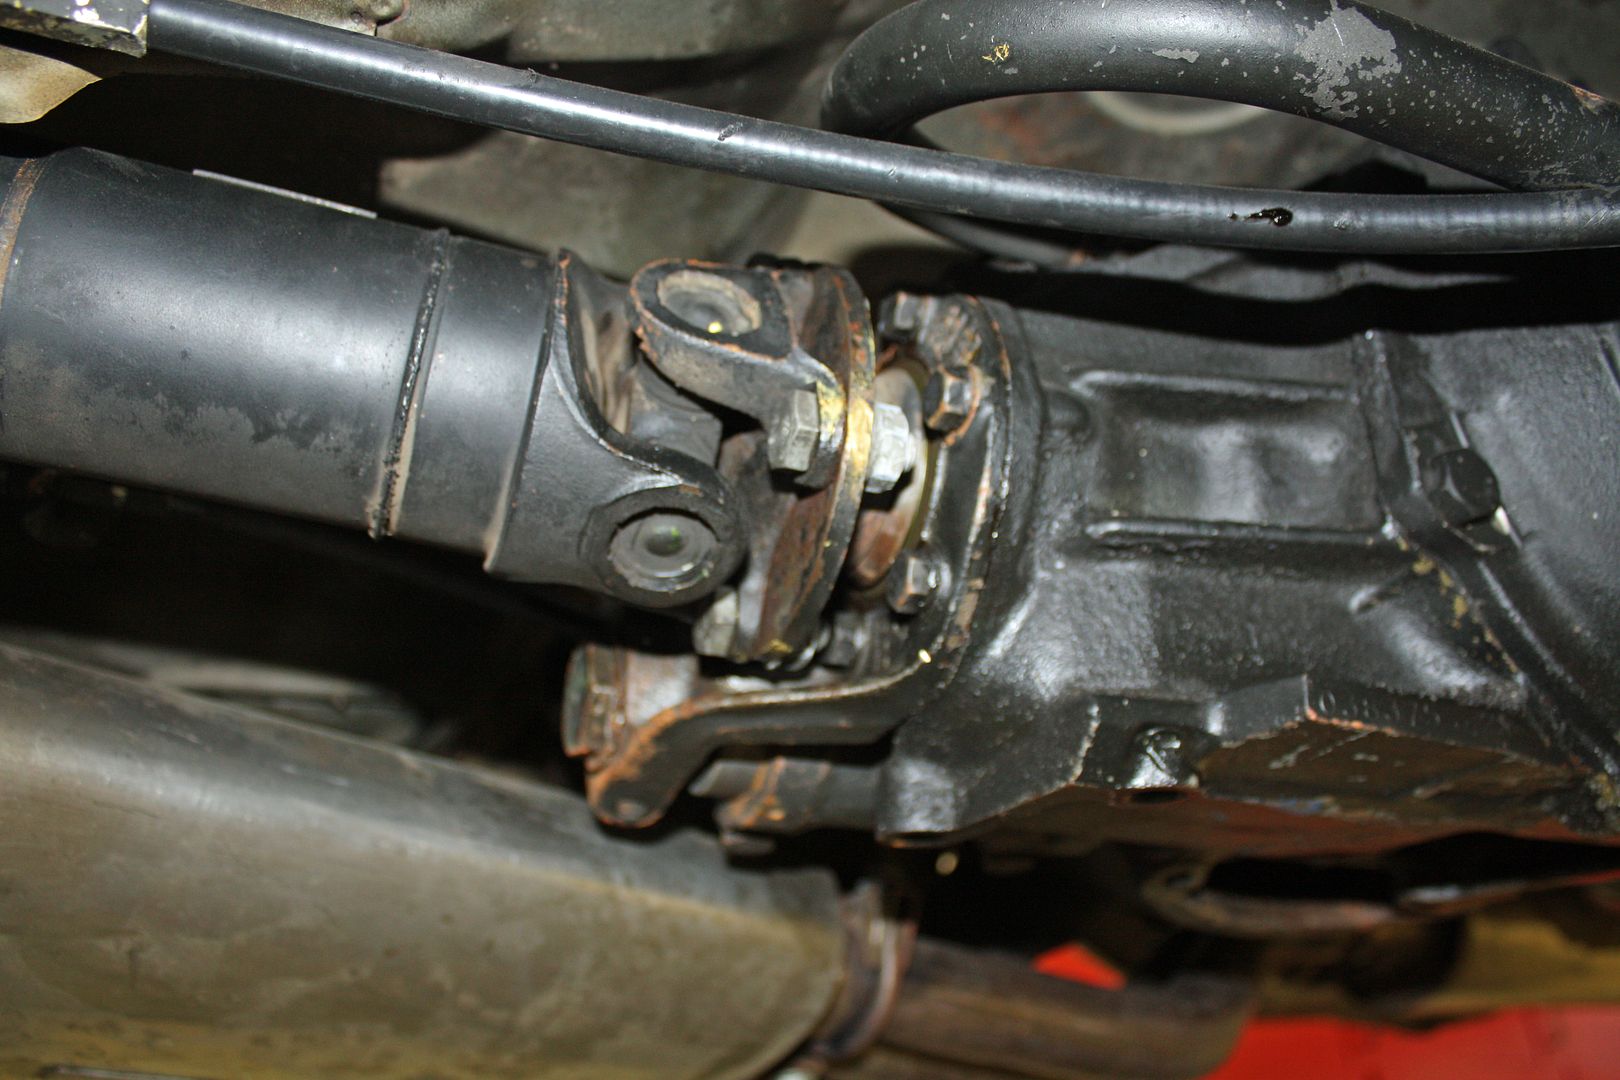
When I attended the Mercedes event at Shelton Winery a month or so ago, one of the fellows I met there gave me the name of a guy knew how to work on our vintage cars. I have had a rear end leak that I wanted to address. Also, I was concerned about the wedges in the rear springs. And I had a power steering leak I could not locate.
His name is Bobby Grimes and he is located in High Point, NC, about 50 miles from my house. I contacted him and took the car to him a couple weeks before we left on our trip. I had typed up a list of things I wanted him to look at.
Back in May I had taken the car to a shop near Charlotte that I had heard about. The guy had the car for three weeks and never had it on a lift to look at the issues, although he did store the car inside. I picked up the car just prior to our two month RV trip as I did not want the car there for that long of a period. Plus I had lost confidence in the shop.
I had been told by the guy I met at the Mercedes show that Bobby's shop was not the cleanest place but that he knew what he was doing. When I arrived at his shop, it was literally surrounded by Mercedes's of numerous vintages. It appeared that some of the cars were parts cars.
Bobby called me the next day to ask a question and he already had the car on a lift and had determined some of the parts he needed to order. He wanted me to come up and see what he was talking about but i was leaving the next day to go to Indiana for a funeral. I told him I wanted everything fixed and that I understood that he would not be doing it for free!! I think he was concerned that I might not understand how many hours the repairs required and thus how expensive the work might be.
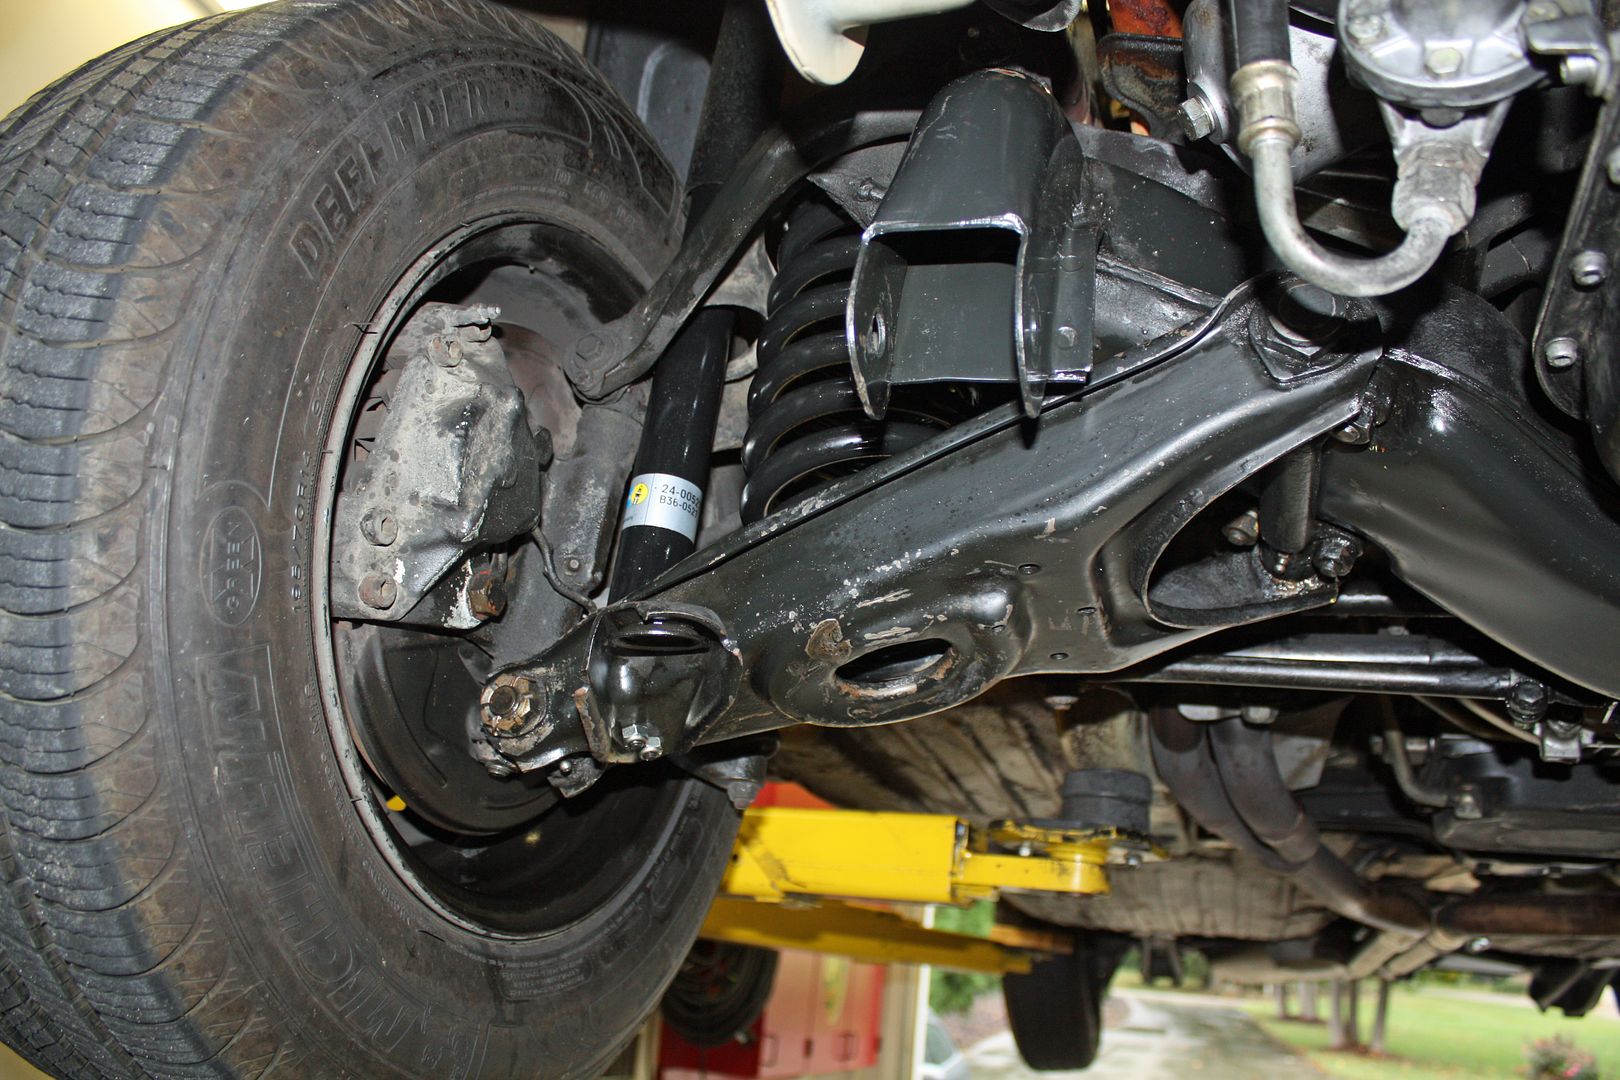
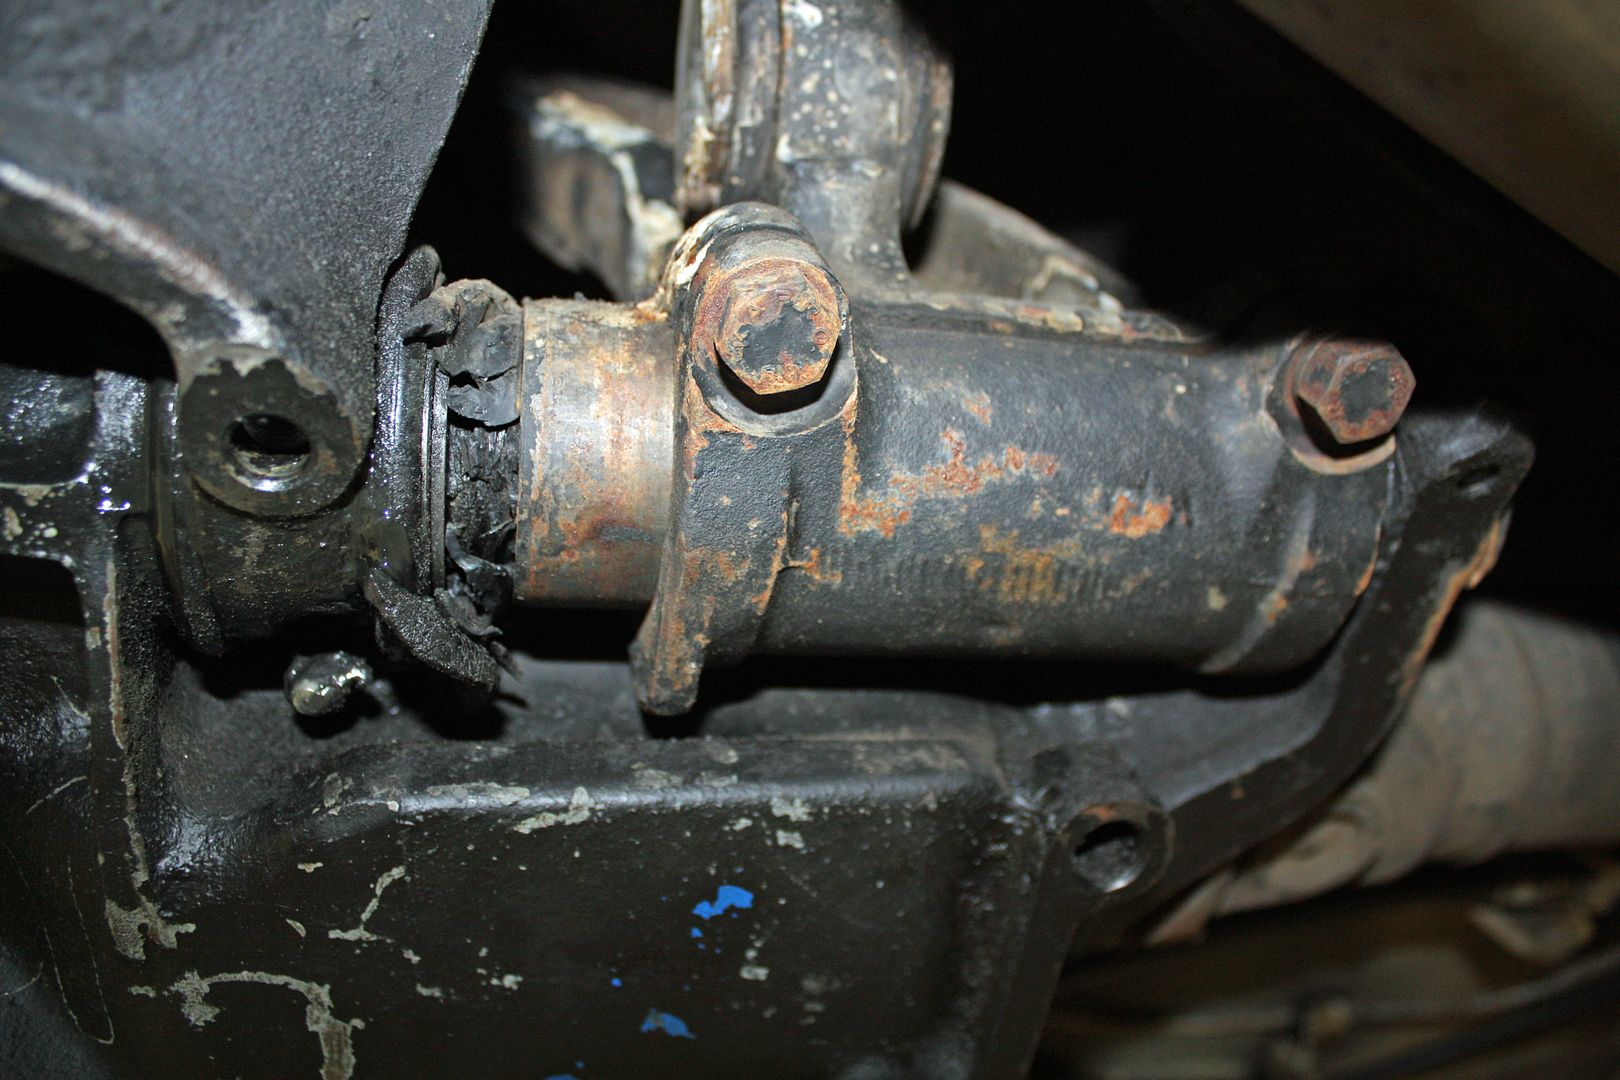
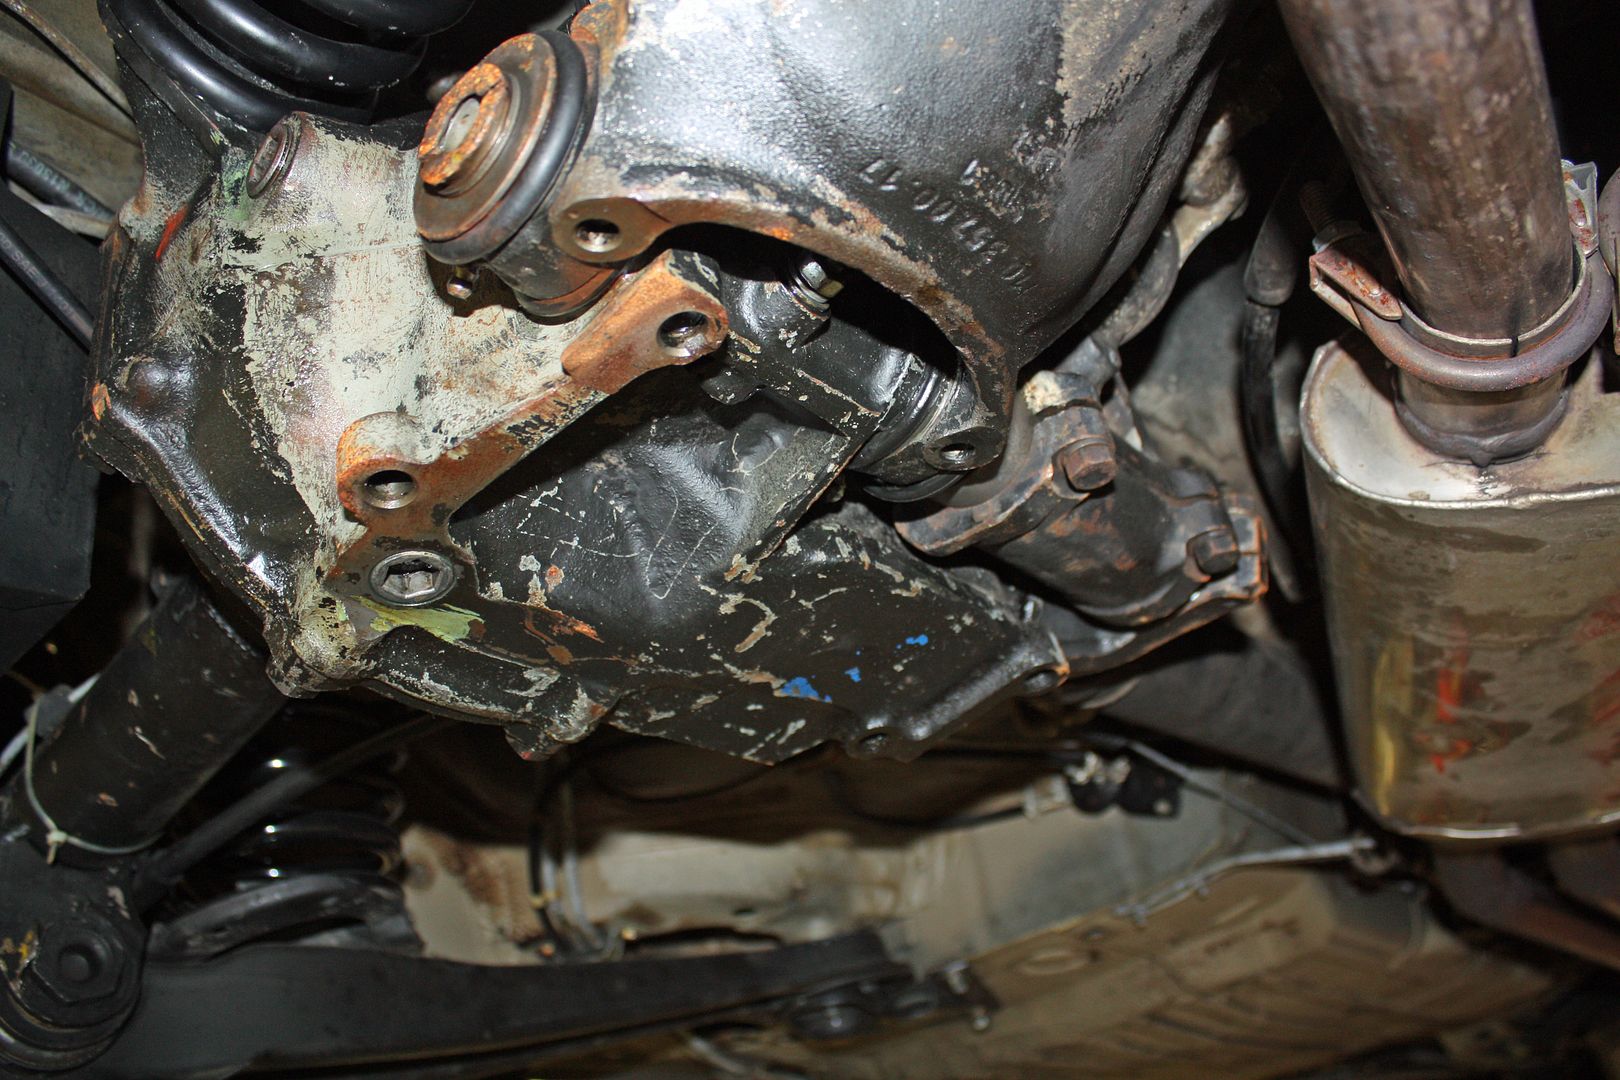
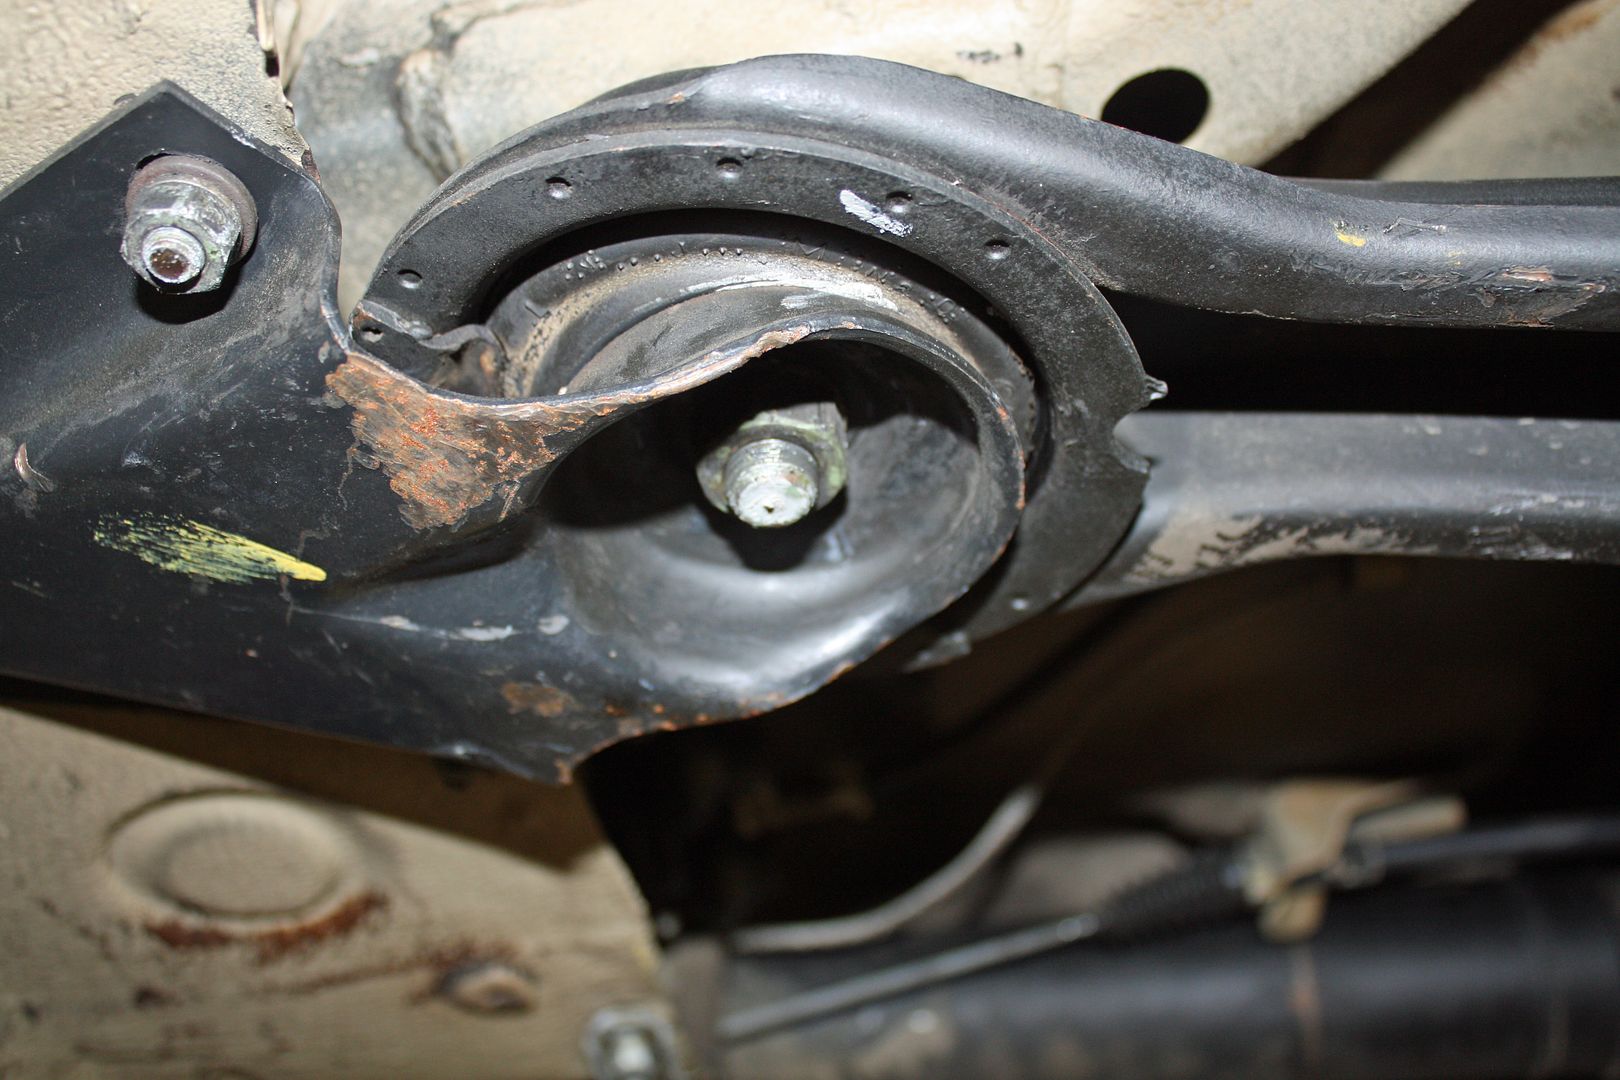
Since I was pretty sure the rear end leak was at the pinion seal, I had decided I did not want to attempt that repair. Also, there was a part that I did not know its function that had a seal that was not in good shape. Turns out is was for the bushing for the swing axle. When Bobby took it apart, the bushing fell out because it was broken on one end. I did not see the new part so I am not sure exactly what was broken but it needed to be replaced.
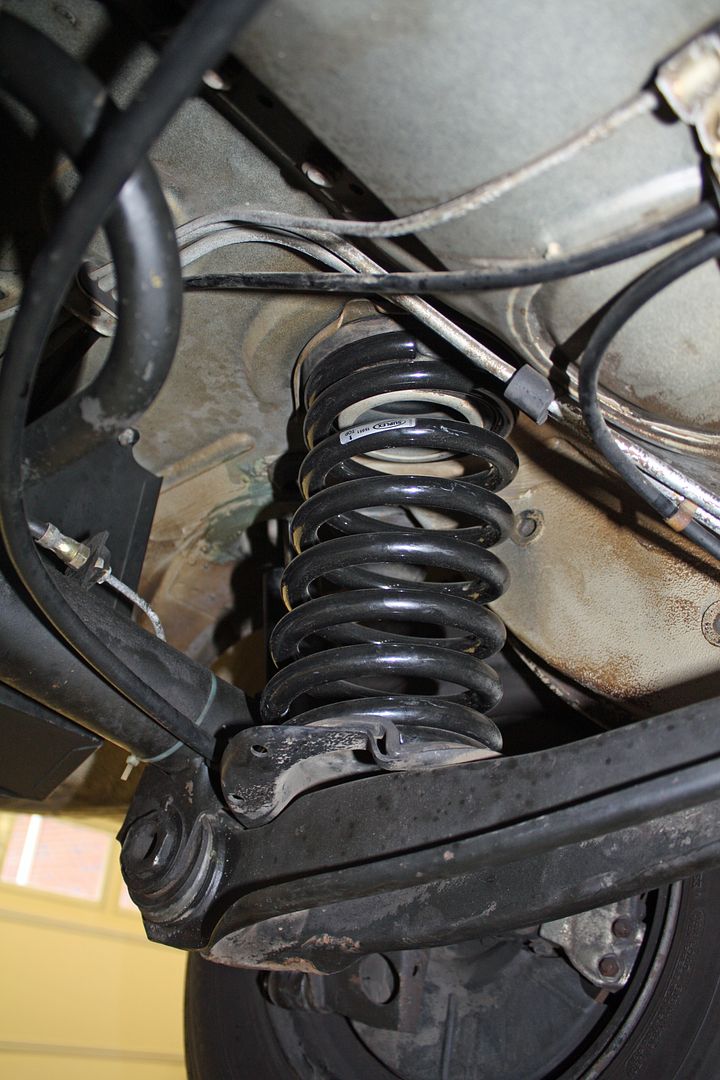
I had previously purchased new rear springs and a compensating spring and bracket to replace the pneumatic compensator. I had also bought the trailing arm bushings. All of those items were replaced and he replaced the pinion seal. The car also received an alignment.

As for the power steering leak, he determined that it was leaking at where the casings joined on the power steering pump. He rebuilt the pump. I called him the day before we were leaving on our Watkins Glen trip and he was waiting for the rebuild kit to arrive. He also installed all new belts when he re-installed the power steering pump.
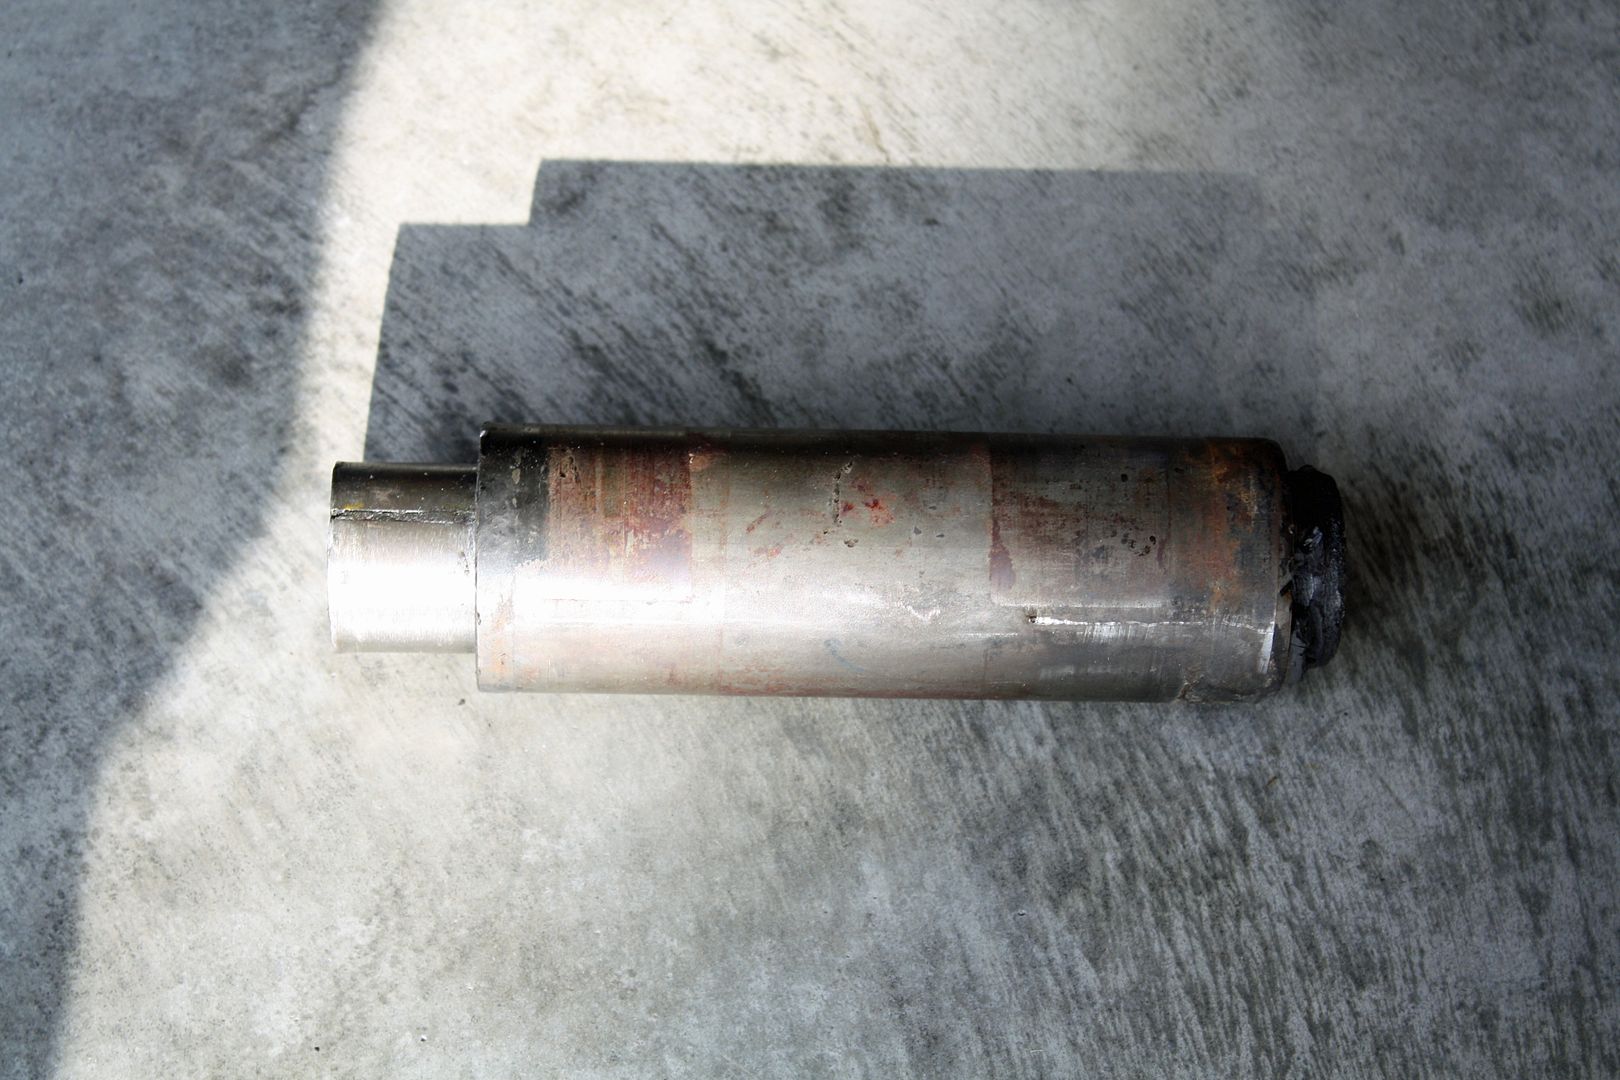
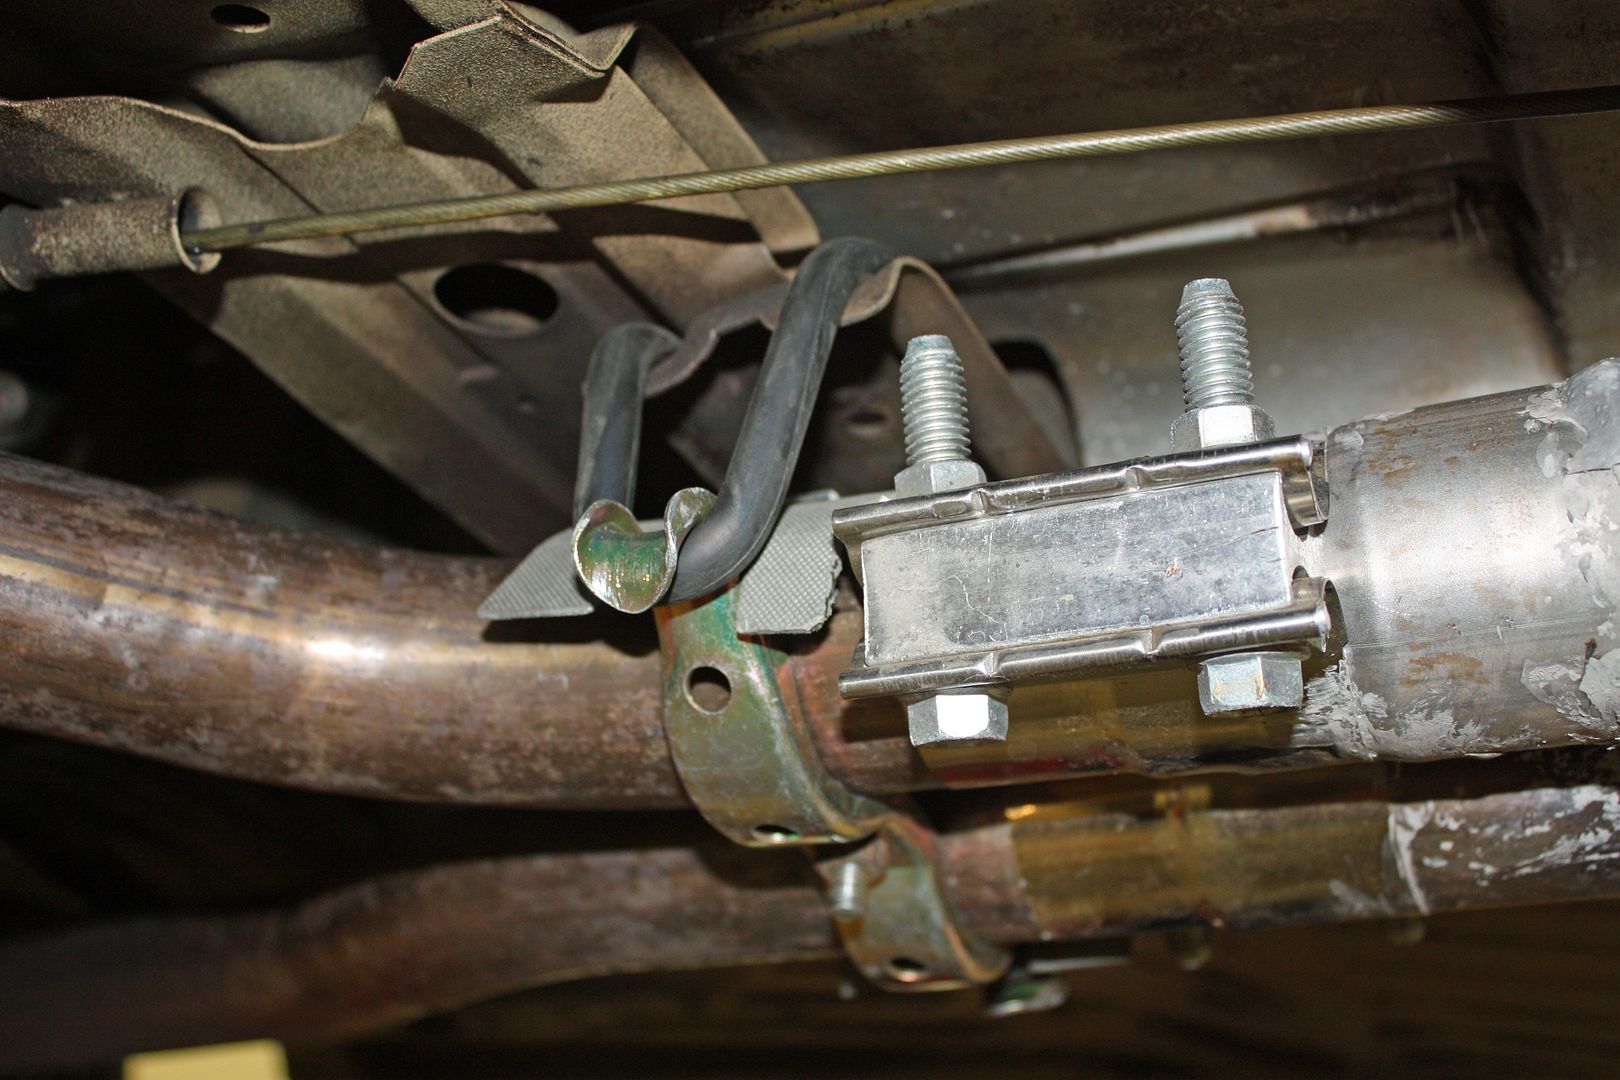
I had an exhaust leak that I wasn't able to pinpoint. While repairing that, he also noticed that there was no center support for the exhaust system. I wasn't aware that there was such a support as there was none on the system when I took it apart. He ordered the parts and did that repair as well.
I mentioned that upon start up the car would not idle properly for a few minutes. If you started it and just let it sit there for a bit, all would be well. He richened up the fuel injection a bit and it now is ready to go as soon as you start it.
We picked up the car today and it ran very well on the trip back. My only concern is that I now have positive camber on the rear wheels. I understand that is one of the negatives of installing the compensating spring in place of the pneumatic compensator. I an not wild about that situation and would like to get the compensator rebuilt. Does anyone know of a place that rebuilds them?
His name is Bobby Grimes and he is located in High Point, NC, about 50 miles from my house. I contacted him and took the car to him a couple weeks before we left on our trip. I had typed up a list of things I wanted him to look at.
Back in May I had taken the car to a shop near Charlotte that I had heard about. The guy had the car for three weeks and never had it on a lift to look at the issues, although he did store the car inside. I picked up the car just prior to our two month RV trip as I did not want the car there for that long of a period. Plus I had lost confidence in the shop.
I had been told by the guy I met at the Mercedes show that Bobby's shop was not the cleanest place but that he knew what he was doing. When I arrived at his shop, it was literally surrounded by Mercedes's of numerous vintages. It appeared that some of the cars were parts cars.
Bobby called me the next day to ask a question and he already had the car on a lift and had determined some of the parts he needed to order. He wanted me to come up and see what he was talking about but i was leaving the next day to go to Indiana for a funeral. I told him I wanted everything fixed and that I understood that he would not be doing it for free!! I think he was concerned that I might not understand how many hours the repairs required and thus how expensive the work might be.
Since I was pretty sure the rear end leak was at the pinion seal, I had decided I did not want to attempt that repair. Also, there was a part that I did not know its function that had a seal that was not in good shape. Turns out is was for the bushing for the swing axle. When Bobby took it apart, the bushing fell out because it was broken on one end. I did not see the new part so I am not sure exactly what was broken but it needed to be replaced.


I had previously purchased new rear springs and a compensating spring and bracket to replace the pneumatic compensator. I had also bought the trailing arm bushings. All of those items were replaced and he replaced the pinion seal. The car also received an alignment.


As for the power steering leak, he determined that it was leaking at where the casings joined on the power steering pump. He rebuilt the pump. I called him the day before we were leaving on our Watkins Glen trip and he was waiting for the rebuild kit to arrive. He also installed all new belts when he re-installed the power steering pump.
I had an exhaust leak that I wasn't able to pinpoint. While repairing that, he also noticed that there was no center support for the exhaust system. I wasn't aware that there was such a support as there was none on the system when I took it apart. He ordered the parts and did that repair as well.

I mentioned that upon start up the car would not idle properly for a few minutes. If you started it and just let it sit there for a bit, all would be well. He richened up the fuel injection a bit and it now is ready to go as soon as you start it.
We picked up the car today and it ran very well on the trip back. My only concern is that I now have positive camber on the rear wheels. I understand that is one of the negatives of installing the compensating spring in place of the pneumatic compensator. I an not wild about that situation and would like to get the compensator rebuilt. Does anyone know of a place that rebuilds them?
10-14-2017, 03:36 PM
#97
Member
Thread Starter
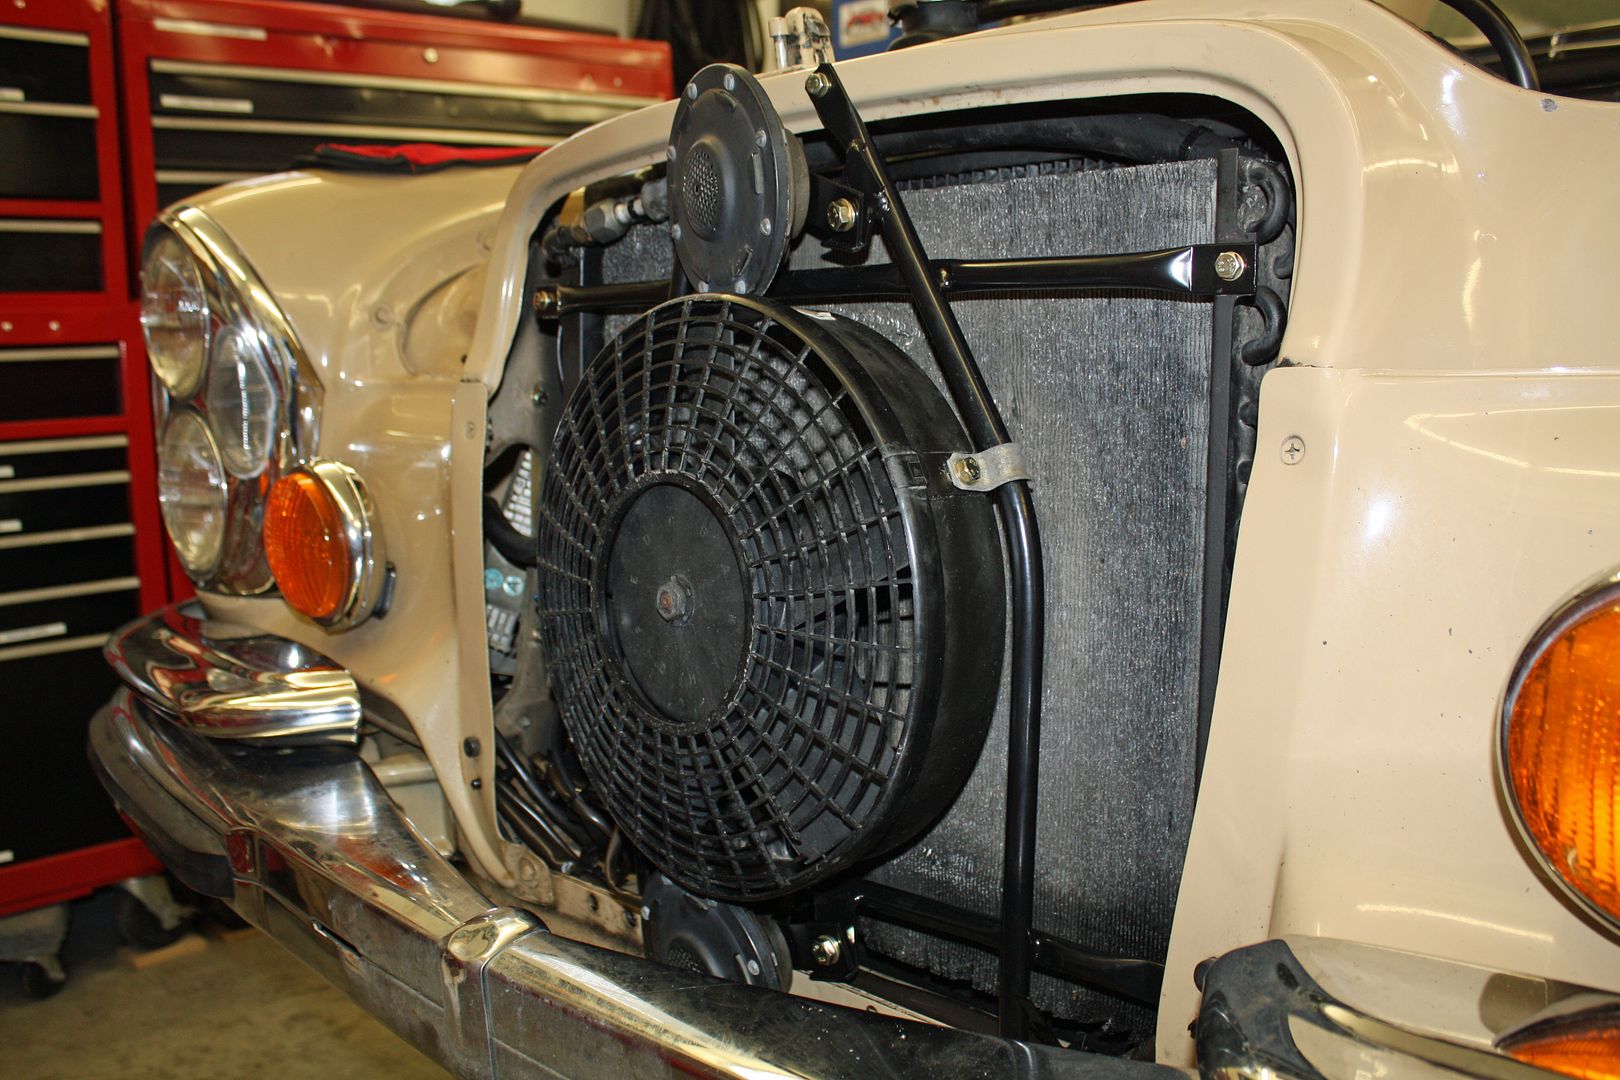
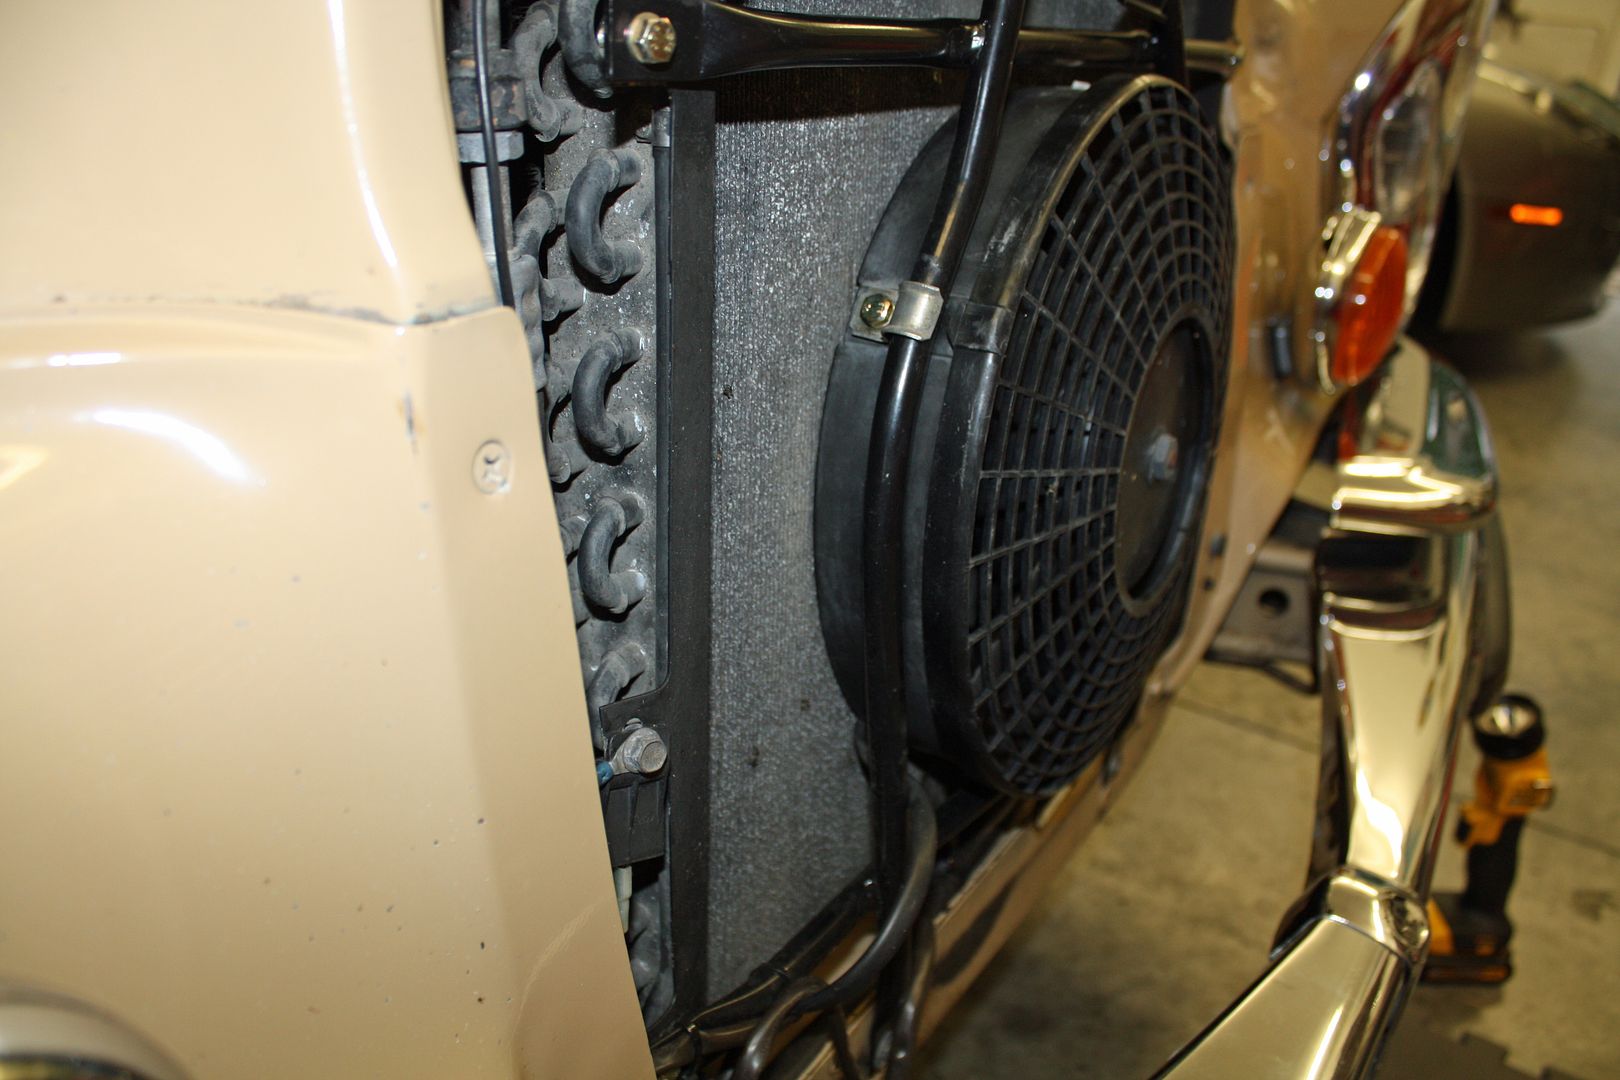
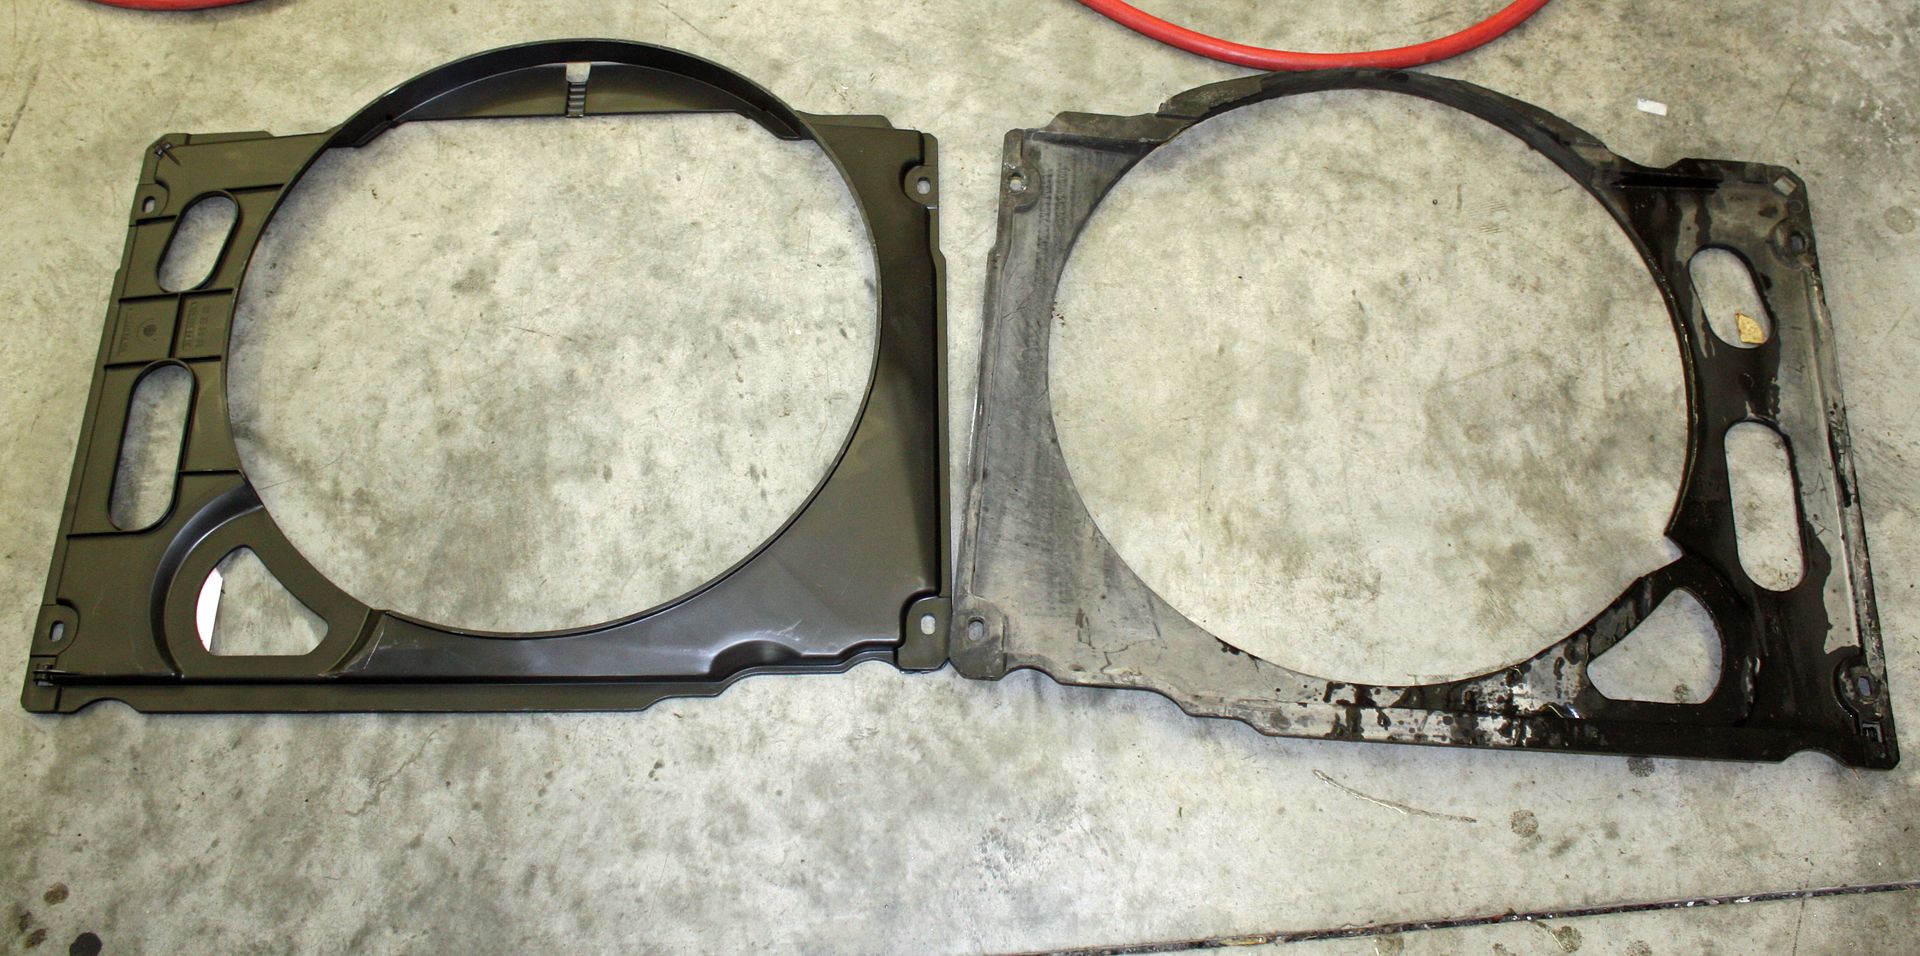
My fan shroud had a part of it broken off on the top side. A new one from Mercedes Classic Center was $68, a reasonable amount. To get the old one out, I had to also remove the cooling fan. There are four bolts that hold it on but not a lot of room to access them. I used a 10mm ratchet wrench but the bolts would not come loose without moving the fan. So I used a 10mm wrench to hold one of the other bolts while I loosened another bolt. I had to repeat the process for each bolt to remove them.
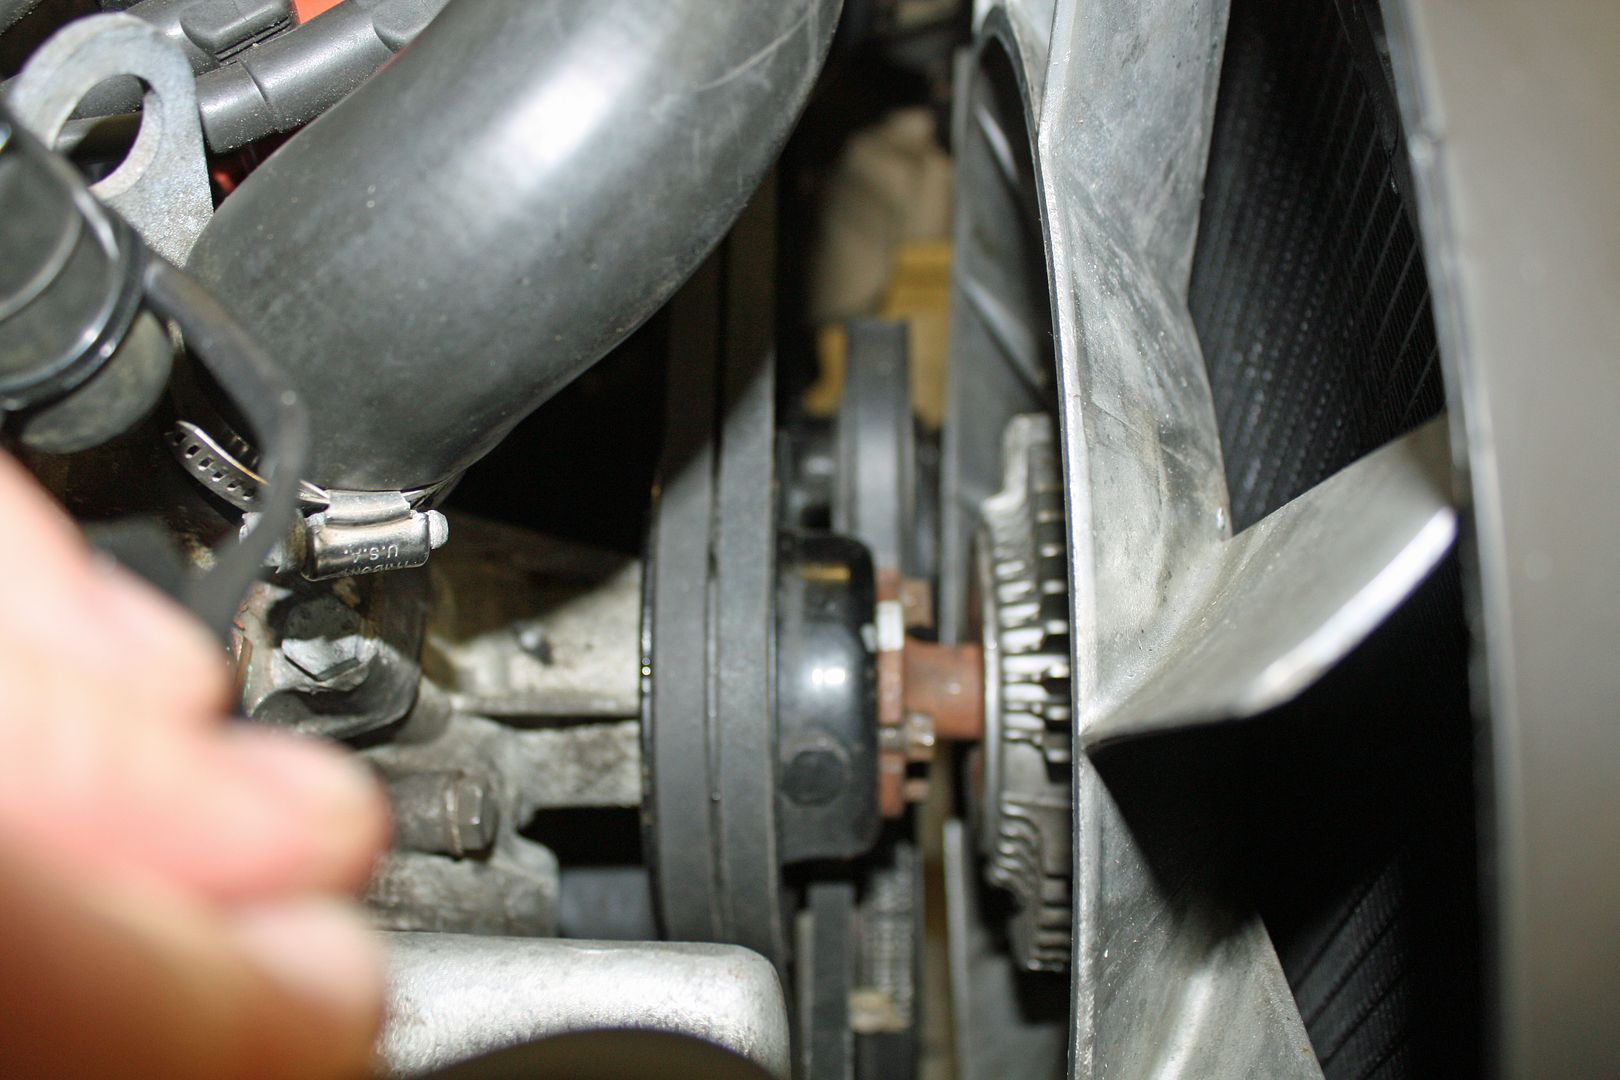
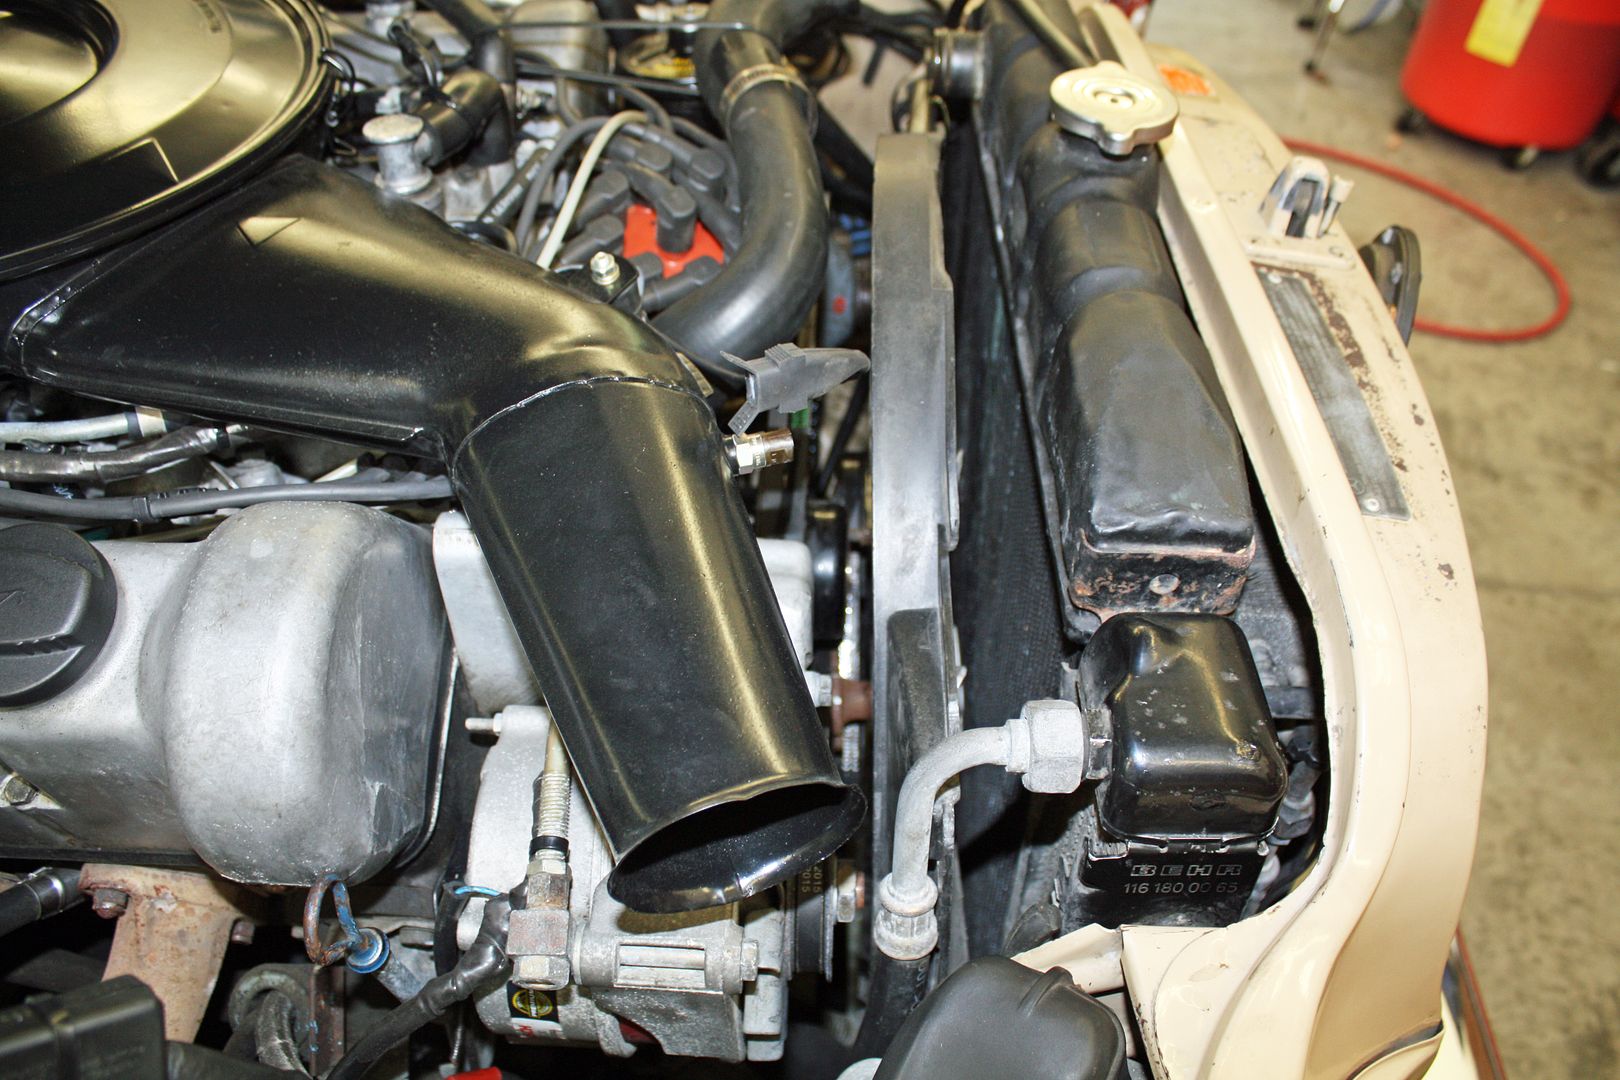
The upper radiator hose had to be removed. With it removed, I was able to maneuver the fan to the left (right as you look at the front of the car) to remove it. Once it was removed, the shroud also had to be moved to the left to remove it.
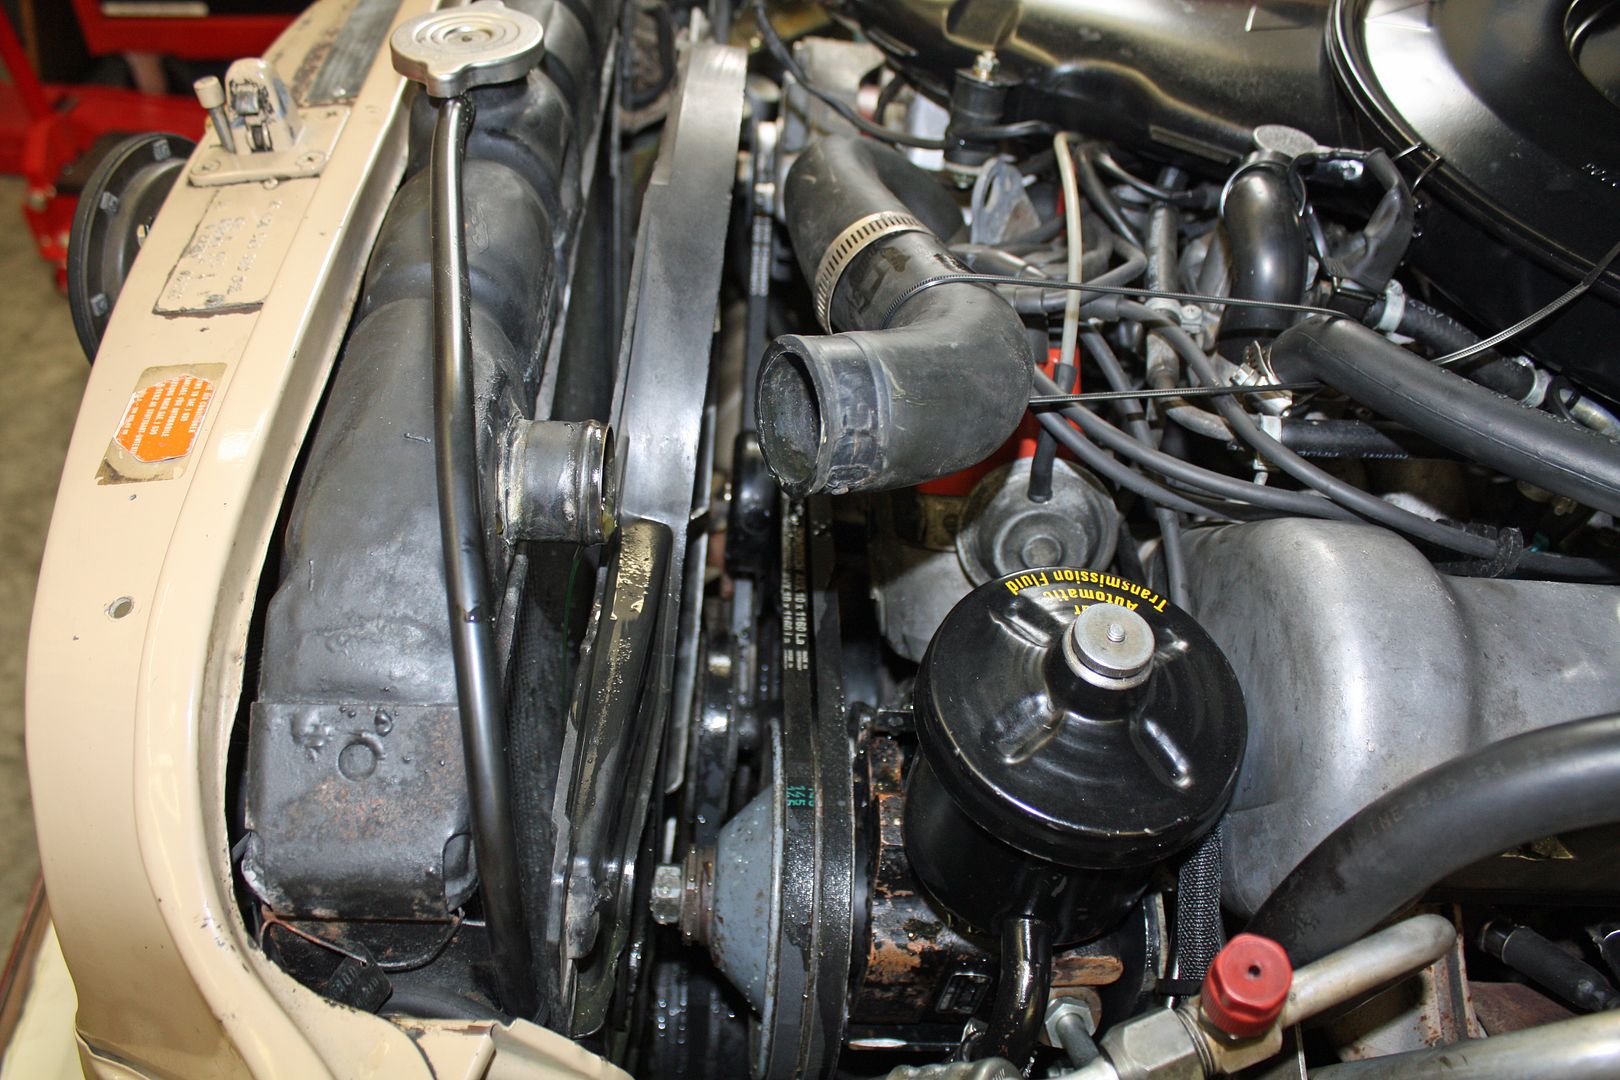
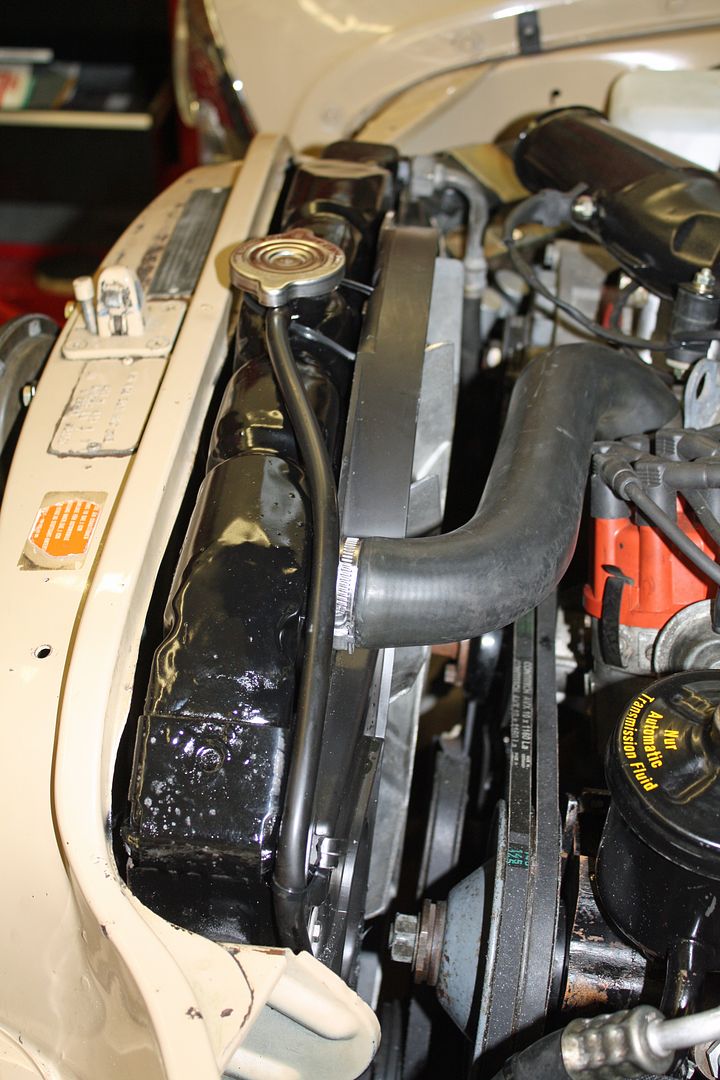
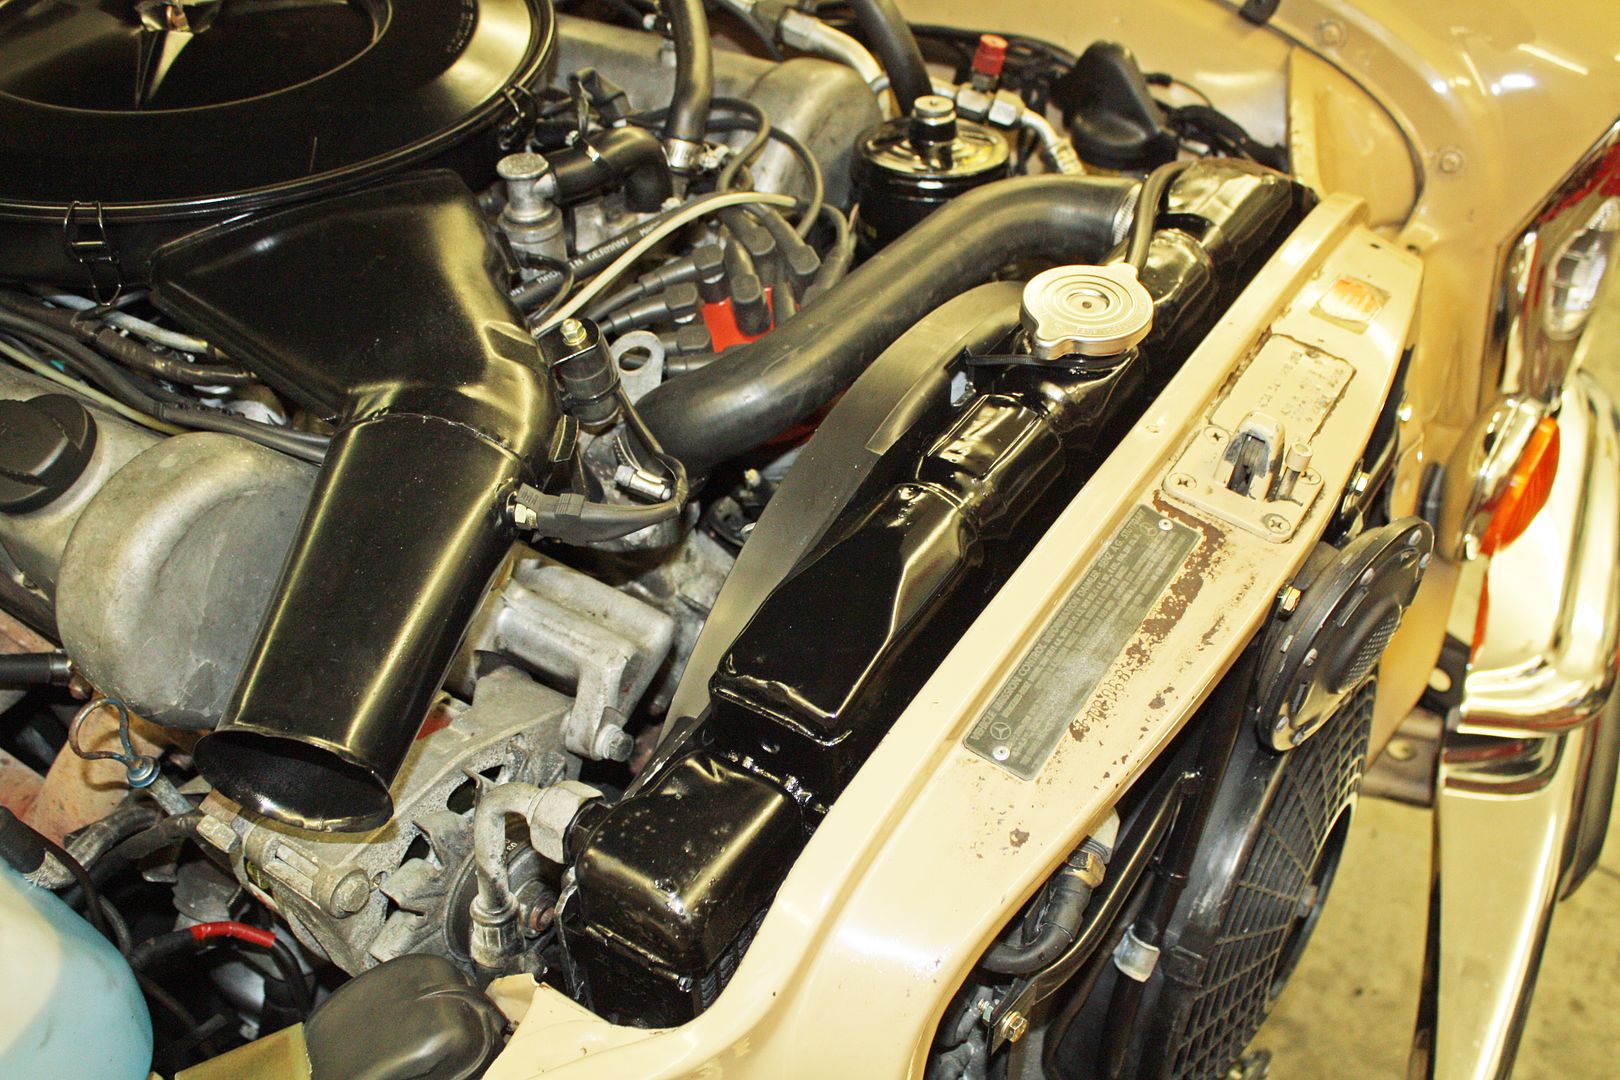
In another of those one thing leads to another, I now had the opportunity to refinish the top of the radiator. I used lacquer thinner to remove the old paint which revealed the brass top. At this point it was tempting to polish the brass top but I did paint it with some high temperature paint.
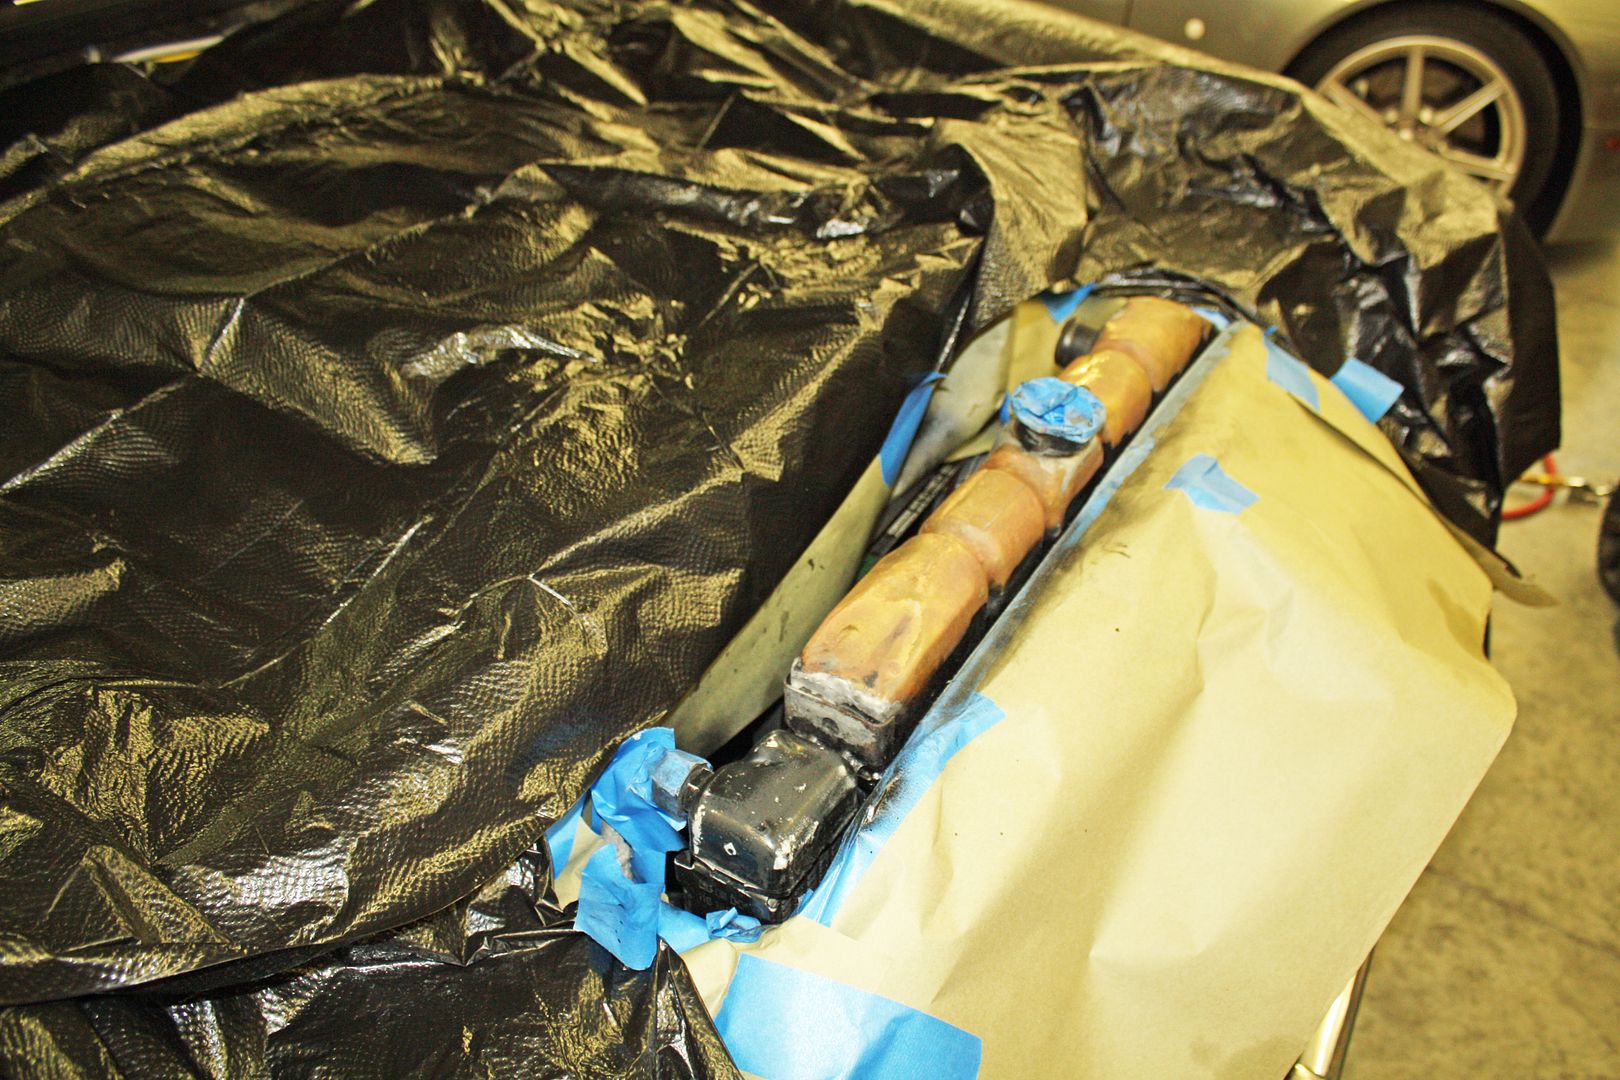
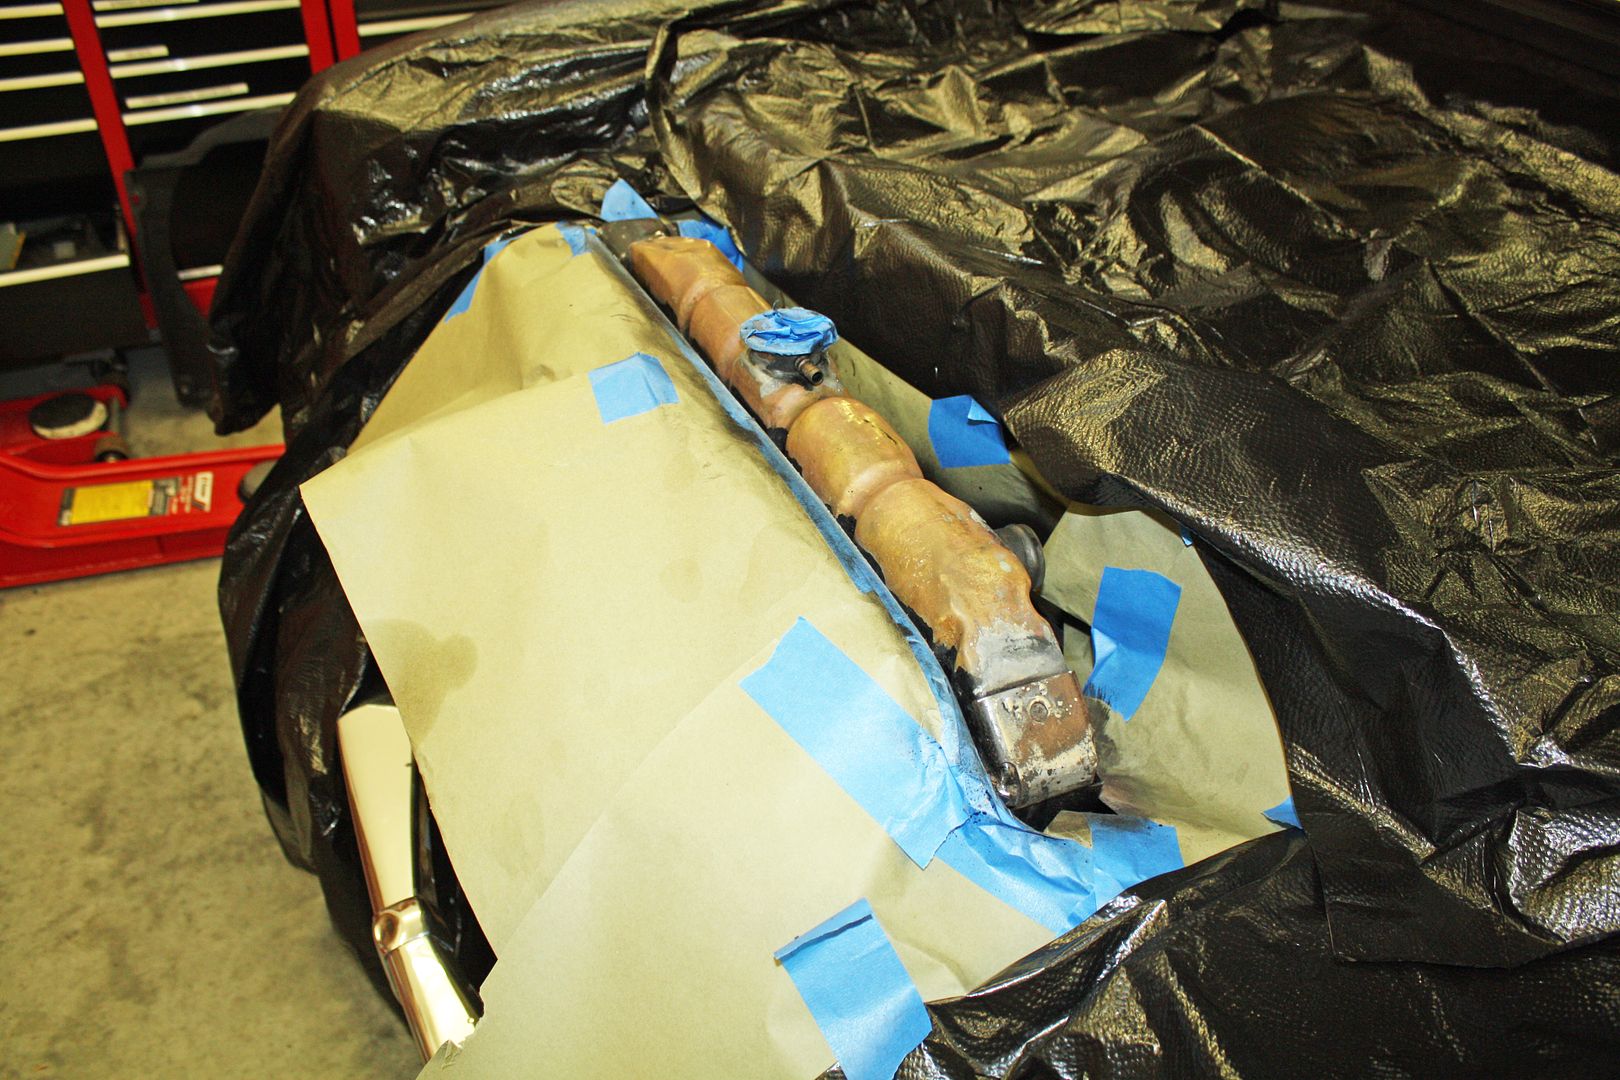
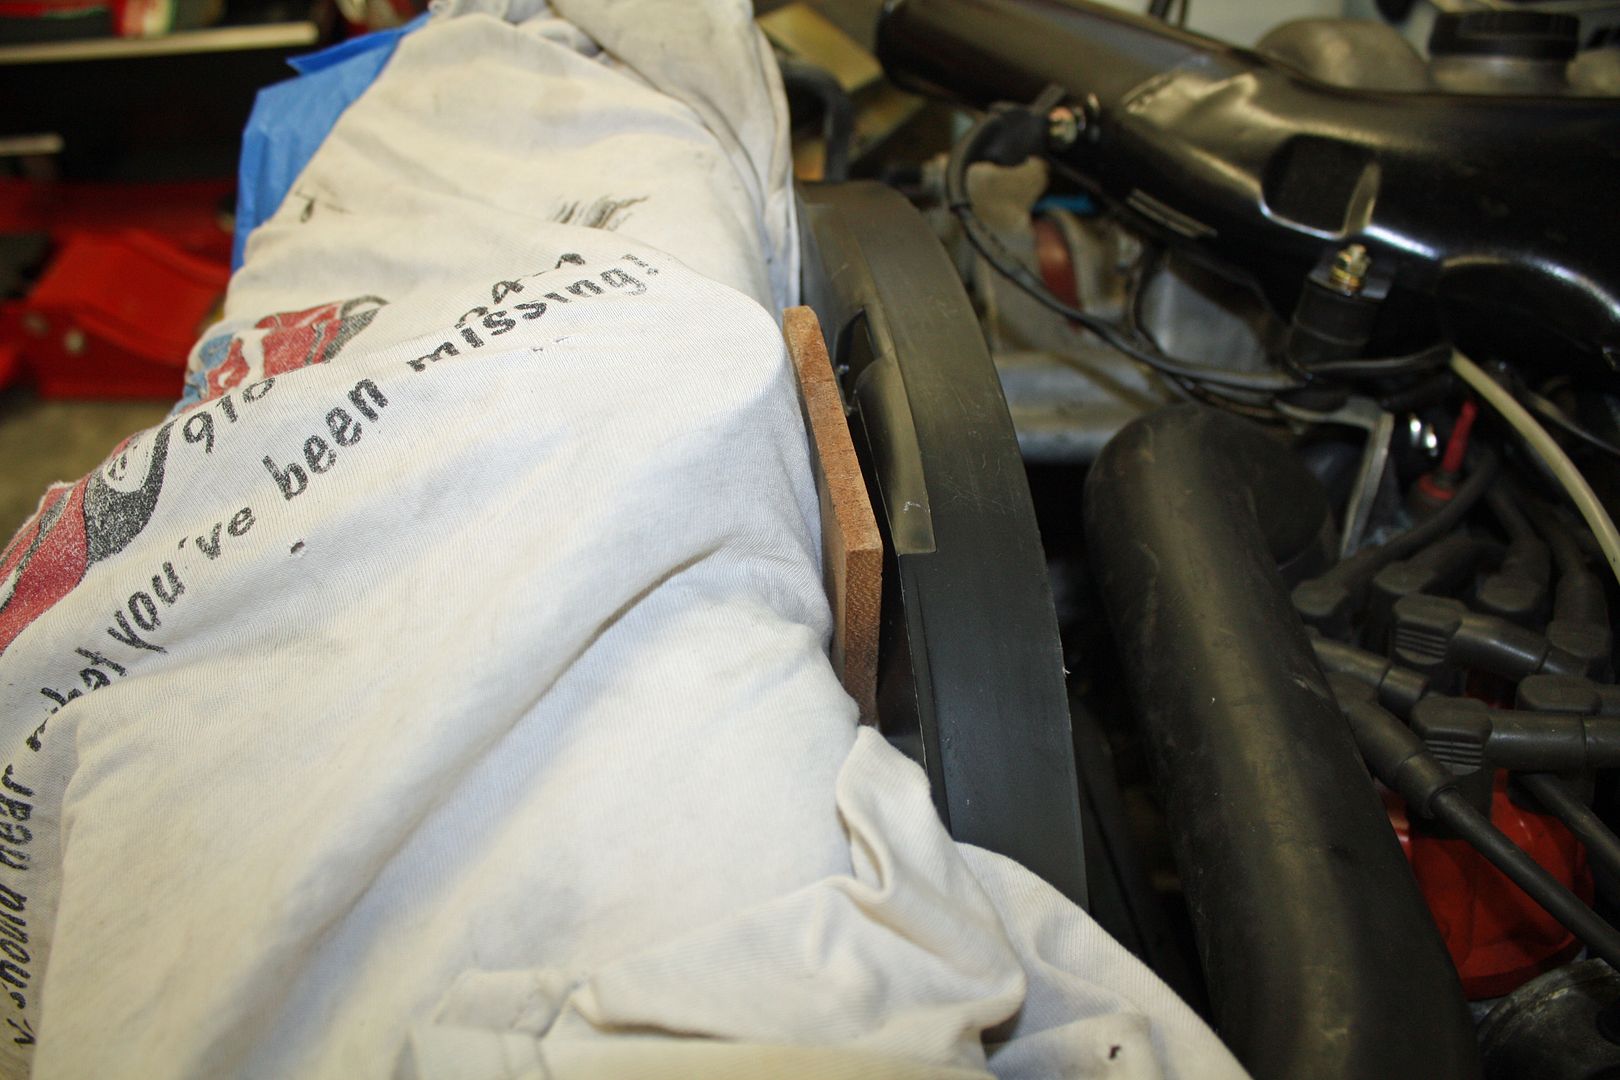
Once the paint was dry, I could replace the fan and shroud. Since the fan had slots rather than holes for the fan bolts, I installed one bolt and then placed one of the slots onto that bolt while rotating the fan to install another bolt. Once the second bolt was installed, it was simply a matter of installing the other bolts and then tightening them using two 10mm wrenches. The overflow hose for the radiator must be somewhat larger diameter than original as it was too large to fit into the retaining bracket built into the shroud. I had to use zip ties to mount it both at the upper and lower areas. I also had to use a zip tie to fasten the top part of the shroud to the radiator as it bulged out enough to create interference for the fan. To do that, I drilled a small hole and then used that hole along with the existing hole to pull the top of the shroud back against the radiator. To keep from damaging my new paint, I covered the top of the radiator with a cloth and inserted a block of wood between the cloth and the shroud.


The upper radiator hose had to be removed. With it removed, I was able to maneuver the fan to the left (right as you look at the front of the car) to remove it. Once it was removed, the shroud also had to be moved to the left to remove it.


In another of those one thing leads to another, I now had the opportunity to refinish the top of the radiator. I used lacquer thinner to remove the old paint which revealed the brass top. At this point it was tempting to polish the brass top but I did paint it with some high temperature paint.


Once the paint was dry, I could replace the fan and shroud. Since the fan had slots rather than holes for the fan bolts, I installed one bolt and then placed one of the slots onto that bolt while rotating the fan to install another bolt. Once the second bolt was installed, it was simply a matter of installing the other bolts and then tightening them using two 10mm wrenches. The overflow hose for the radiator must be somewhat larger diameter than original as it was too large to fit into the retaining bracket built into the shroud. I had to use zip ties to mount it both at the upper and lower areas. I also had to use a zip tie to fasten the top part of the shroud to the radiator as it bulged out enough to create interference for the fan. To do that, I drilled a small hole and then used that hole along with the existing hole to pull the top of the shroud back against the radiator. To keep from damaging my new paint, I covered the top of the radiator with a cloth and inserted a block of wood between the cloth and the shroud.


 10-22-2017, 03:30 PM
#98
Member
Thread Starter
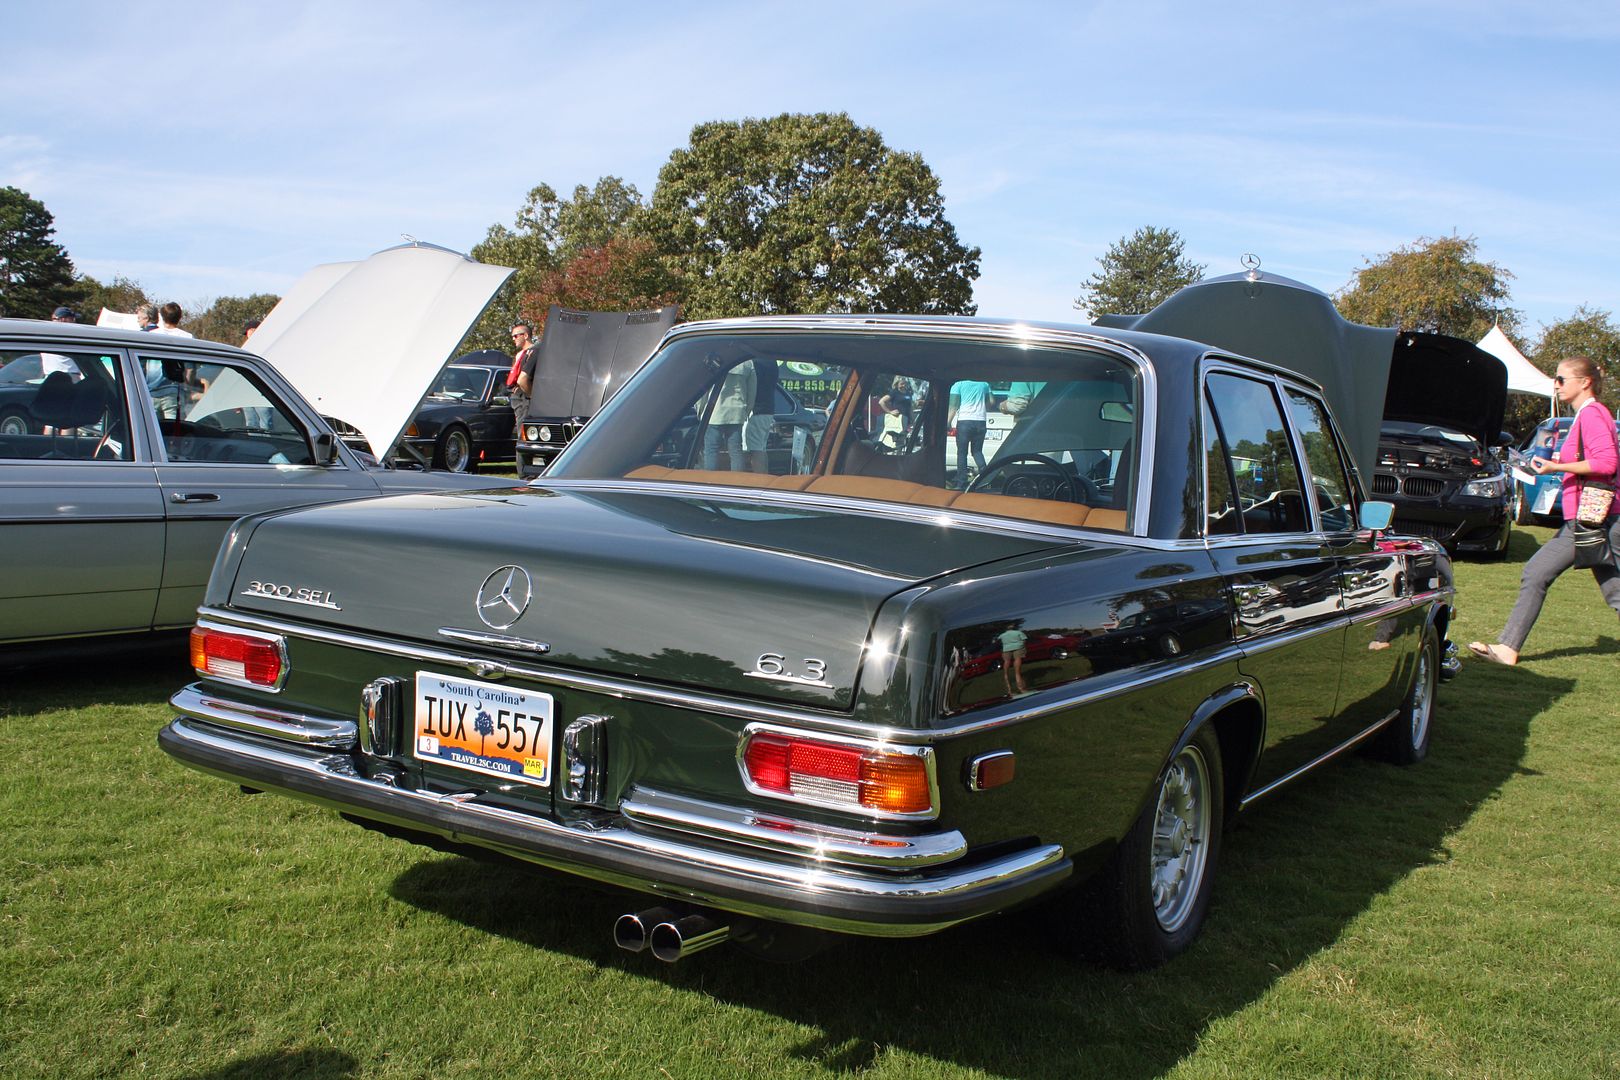
The Euro Auto Festival in Greenville, SC is one of the largest all European car shows on the east coast. It is held on the grounds of a golf course which makes for perfect location for the cars. Greenville is about 140 miles from my house so the Mercedes had some interstate driving time today. It ran great and I appreciated the heater this morning as I left early and it was in the 40's. This afternoon the AC was on during the trip home.
I arrived early to find my designated spot with the morning dew still on the grass. I had lots of positive comments with at least three or four of them saying that this was their favorite Mercedes model. Last Thursday I had lunch with my son and his boss after his boss learned that I had the car. It is also his favorite Mercedes. He is French and has a friend in France with a W108 and a photo of him with his arm resting on the window sill. My son took a photo of his boss resting his arm on the windowsill of my car so his boss can send it to his friend. Matt's boss has a 1948 Delahaye convertible that his father bought when new. It is currently being restored and he promised me a ride in it when it is finished. I am looking forward to that ride.
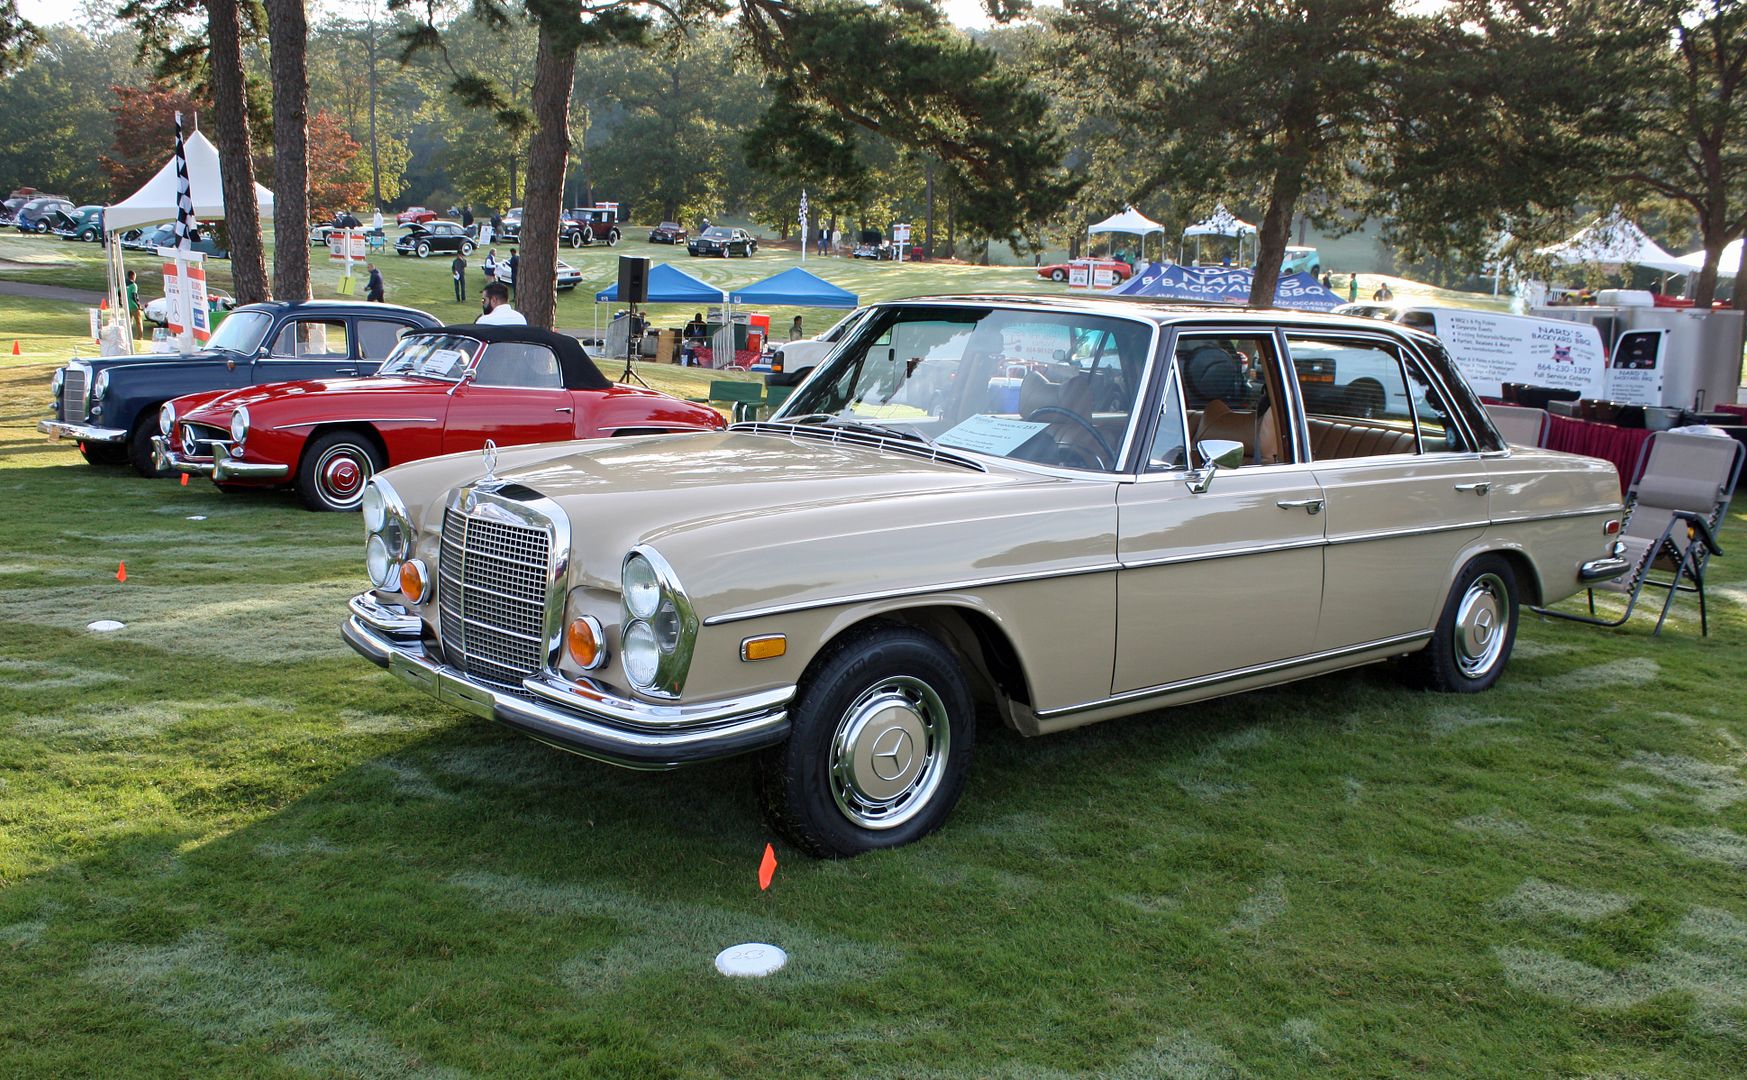
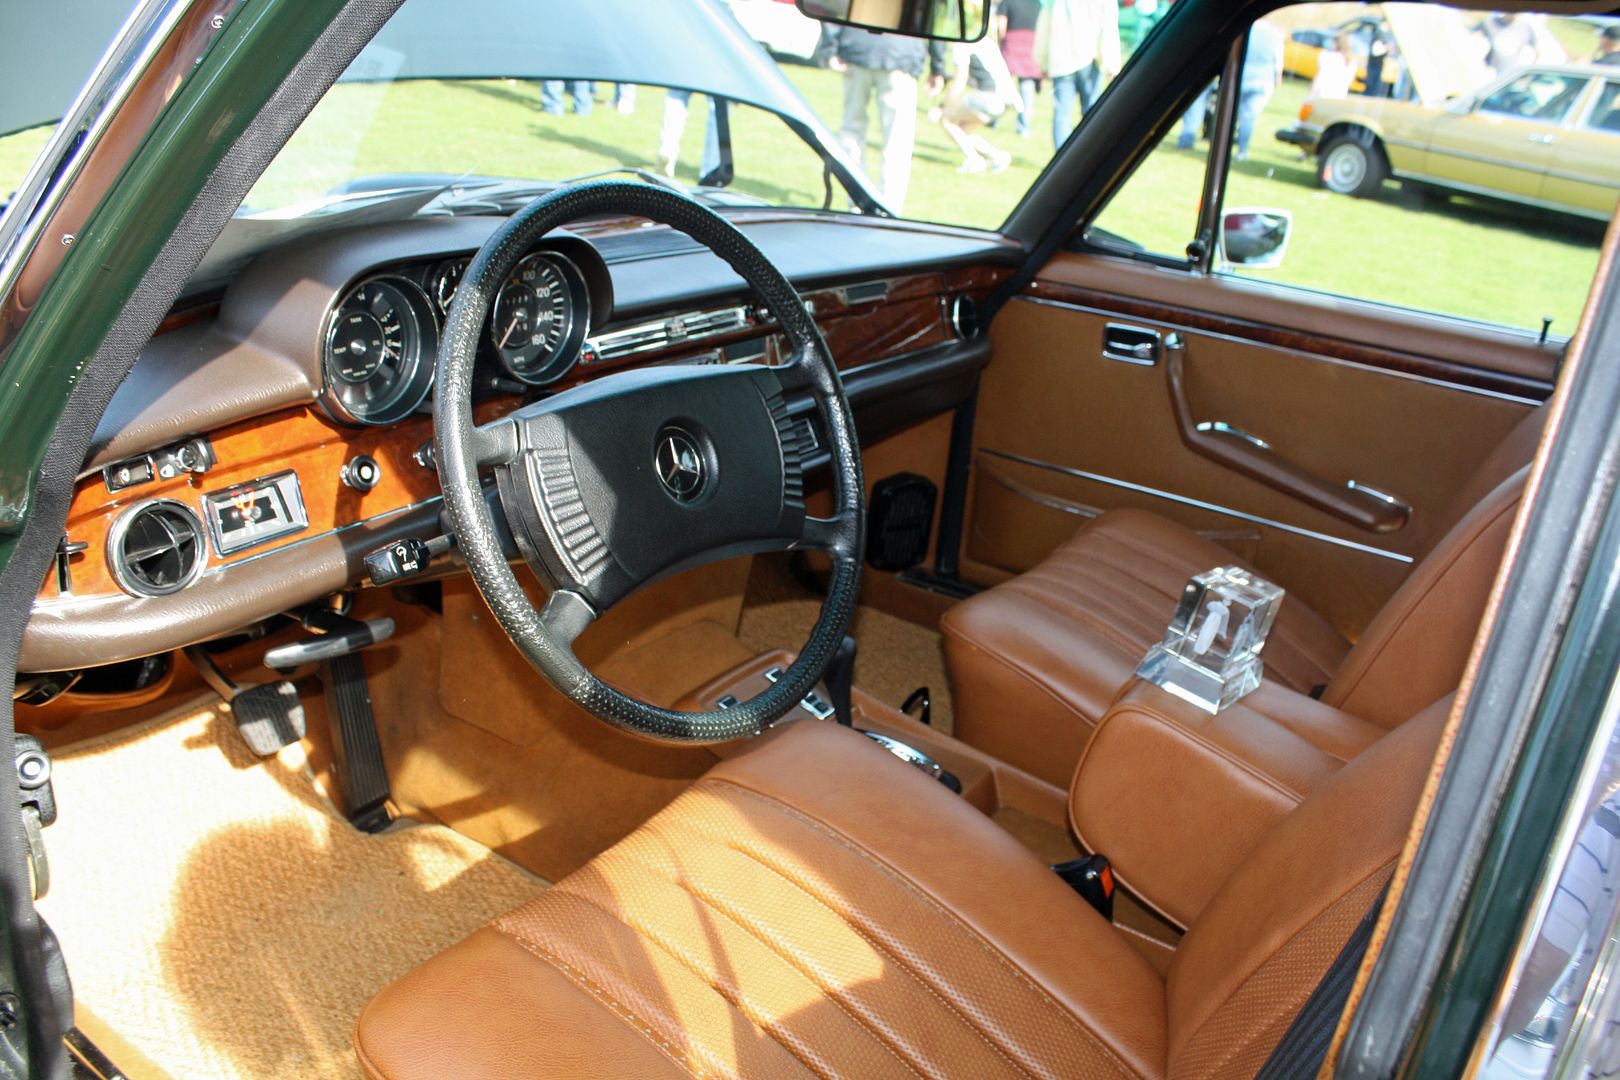
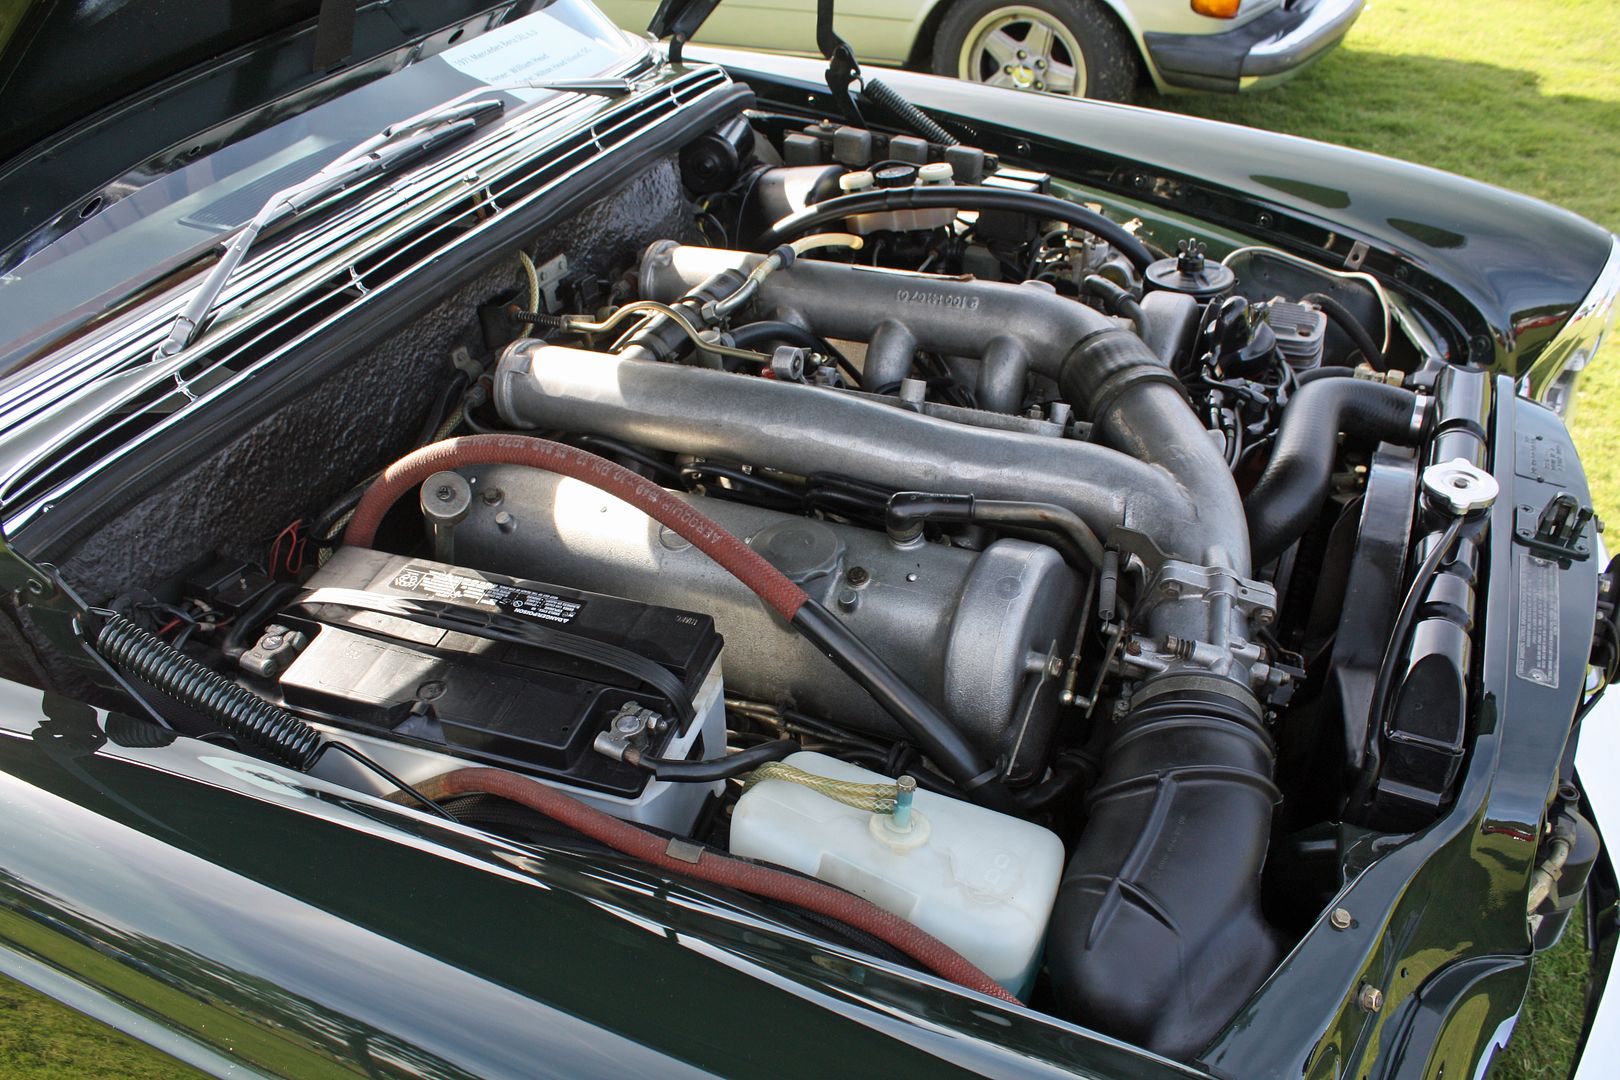
A 300SEL 6.3 was a couple cars down. What a spectacular car! Beautiful dark green color with tan interior.
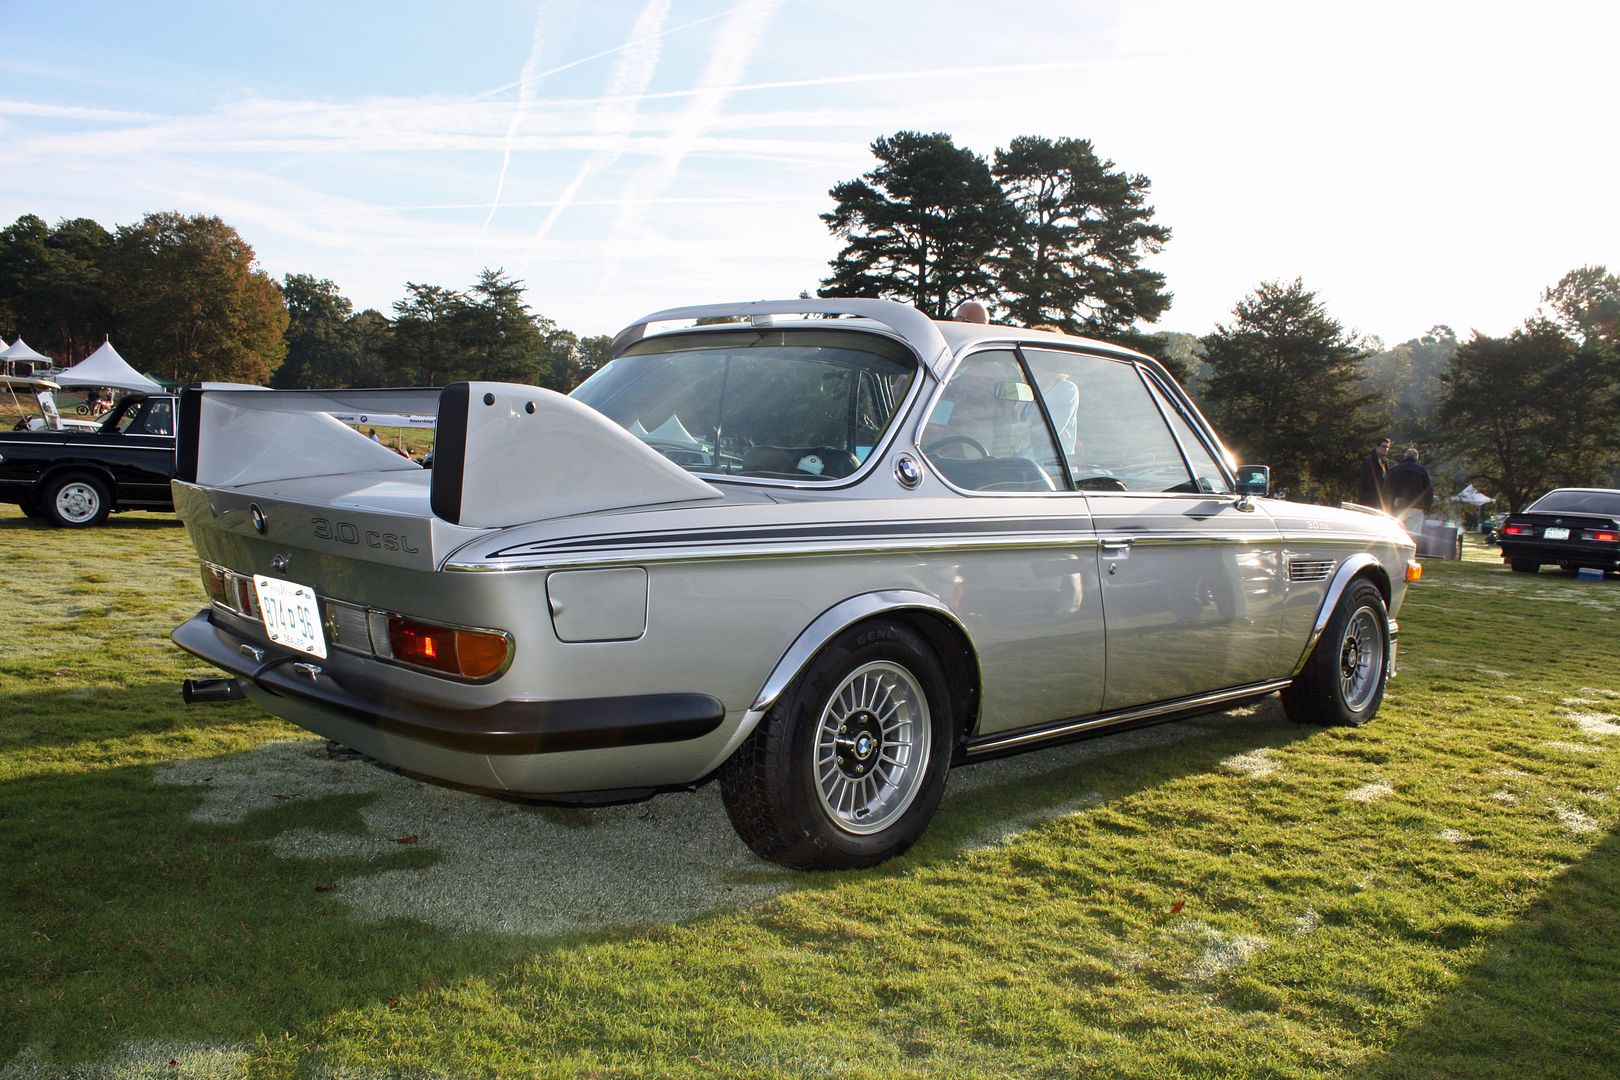
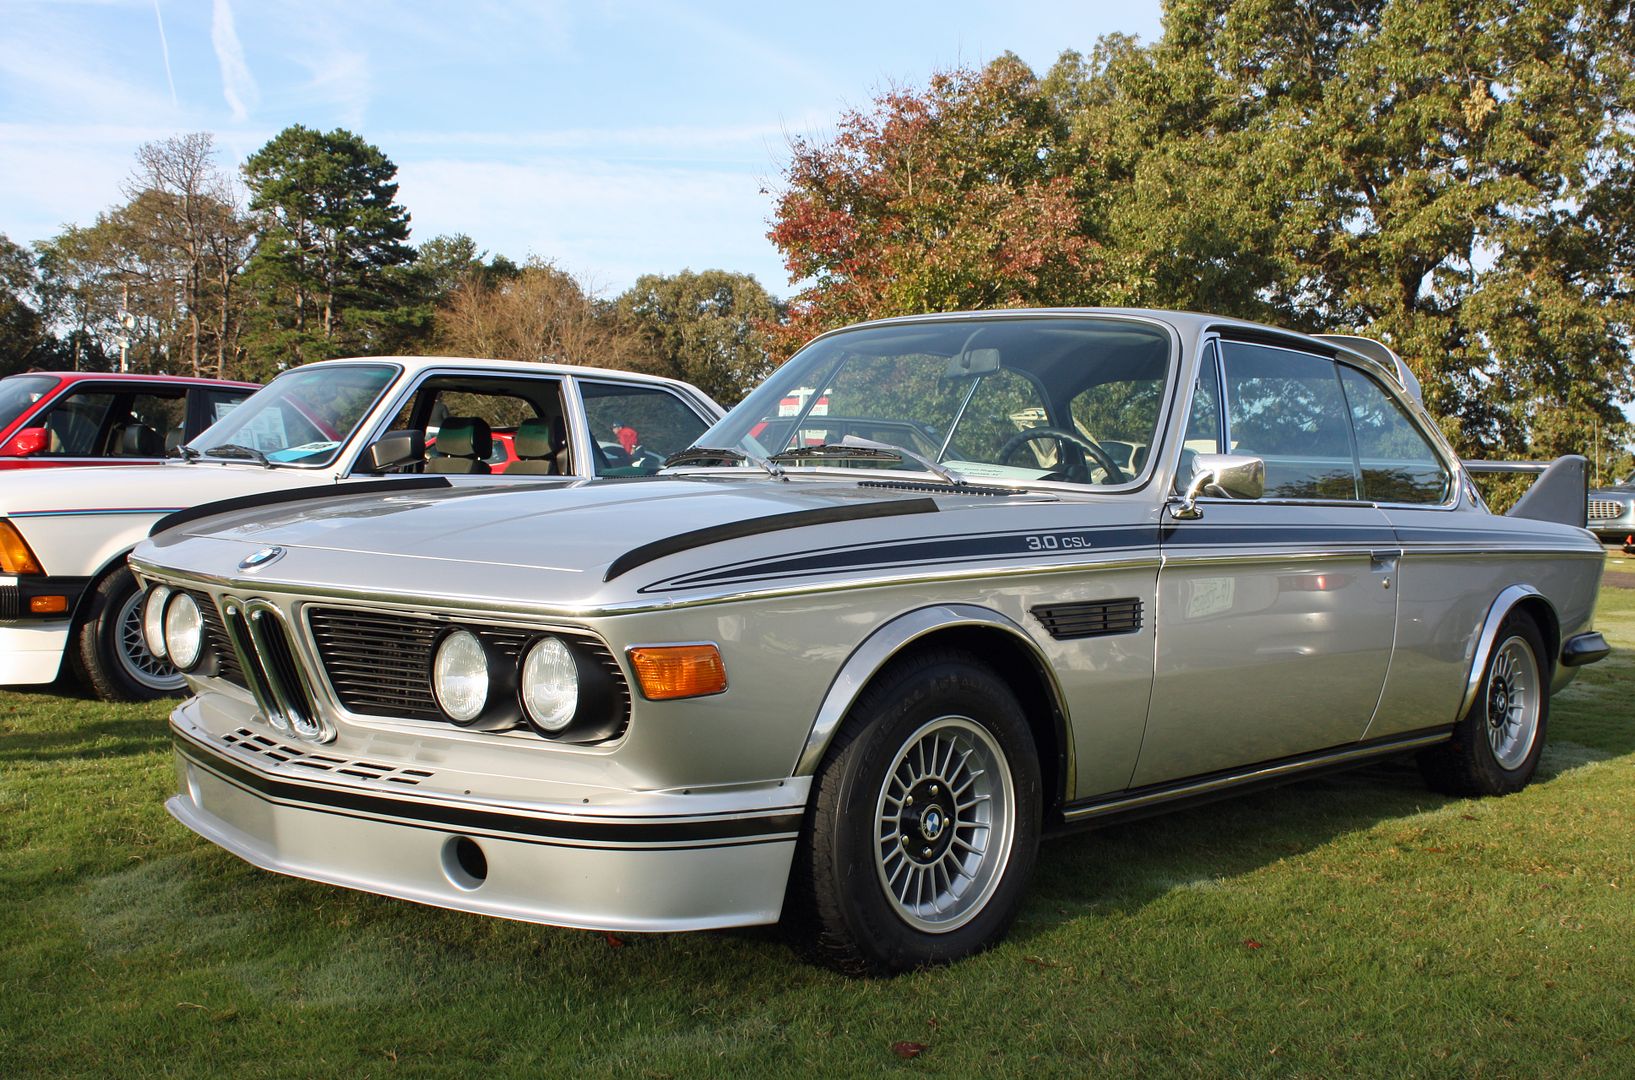
The BMW CSL was quite a sight.
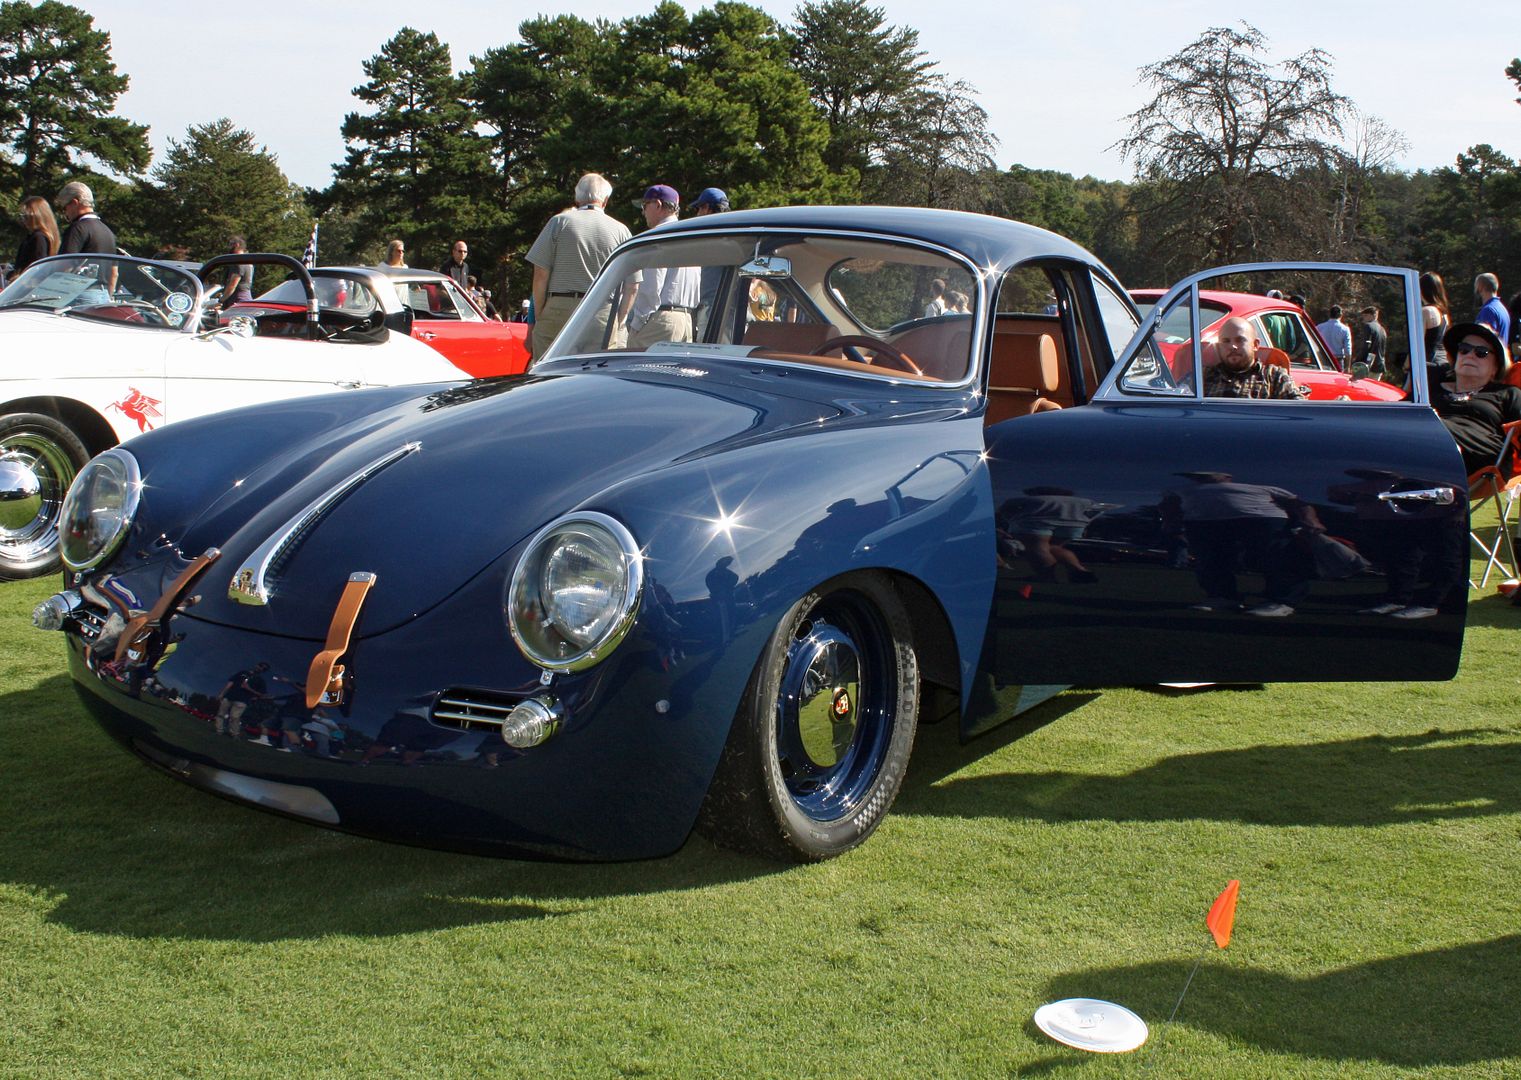
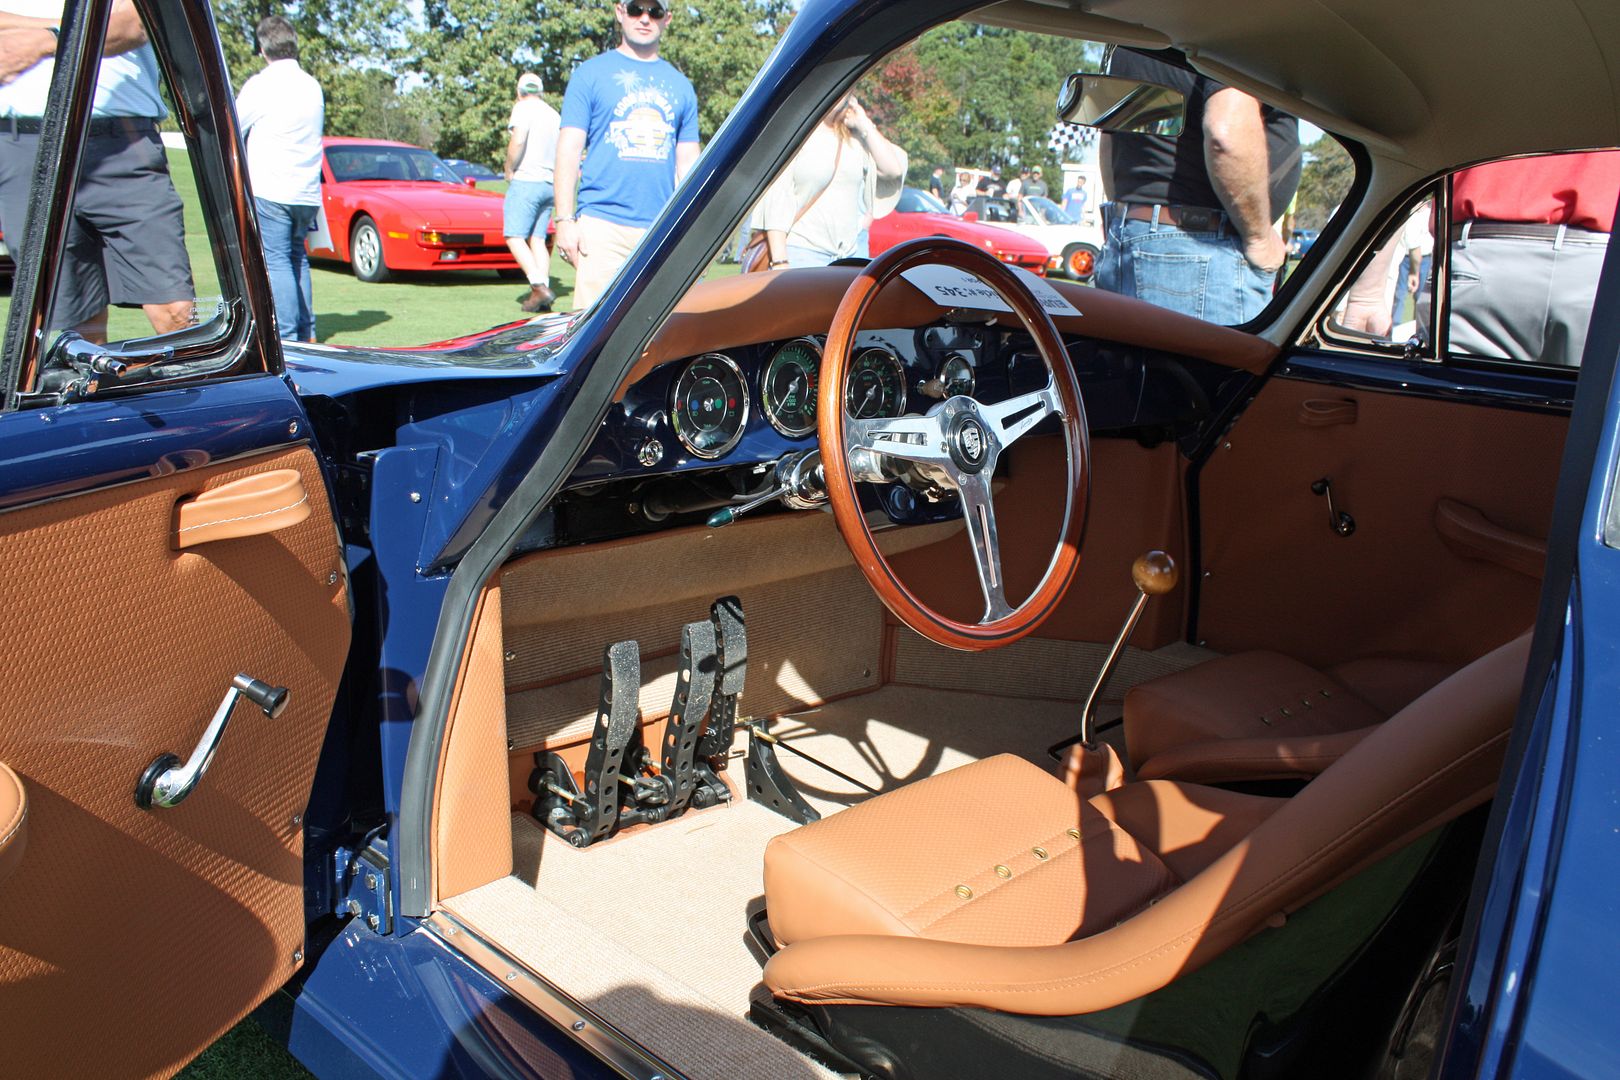
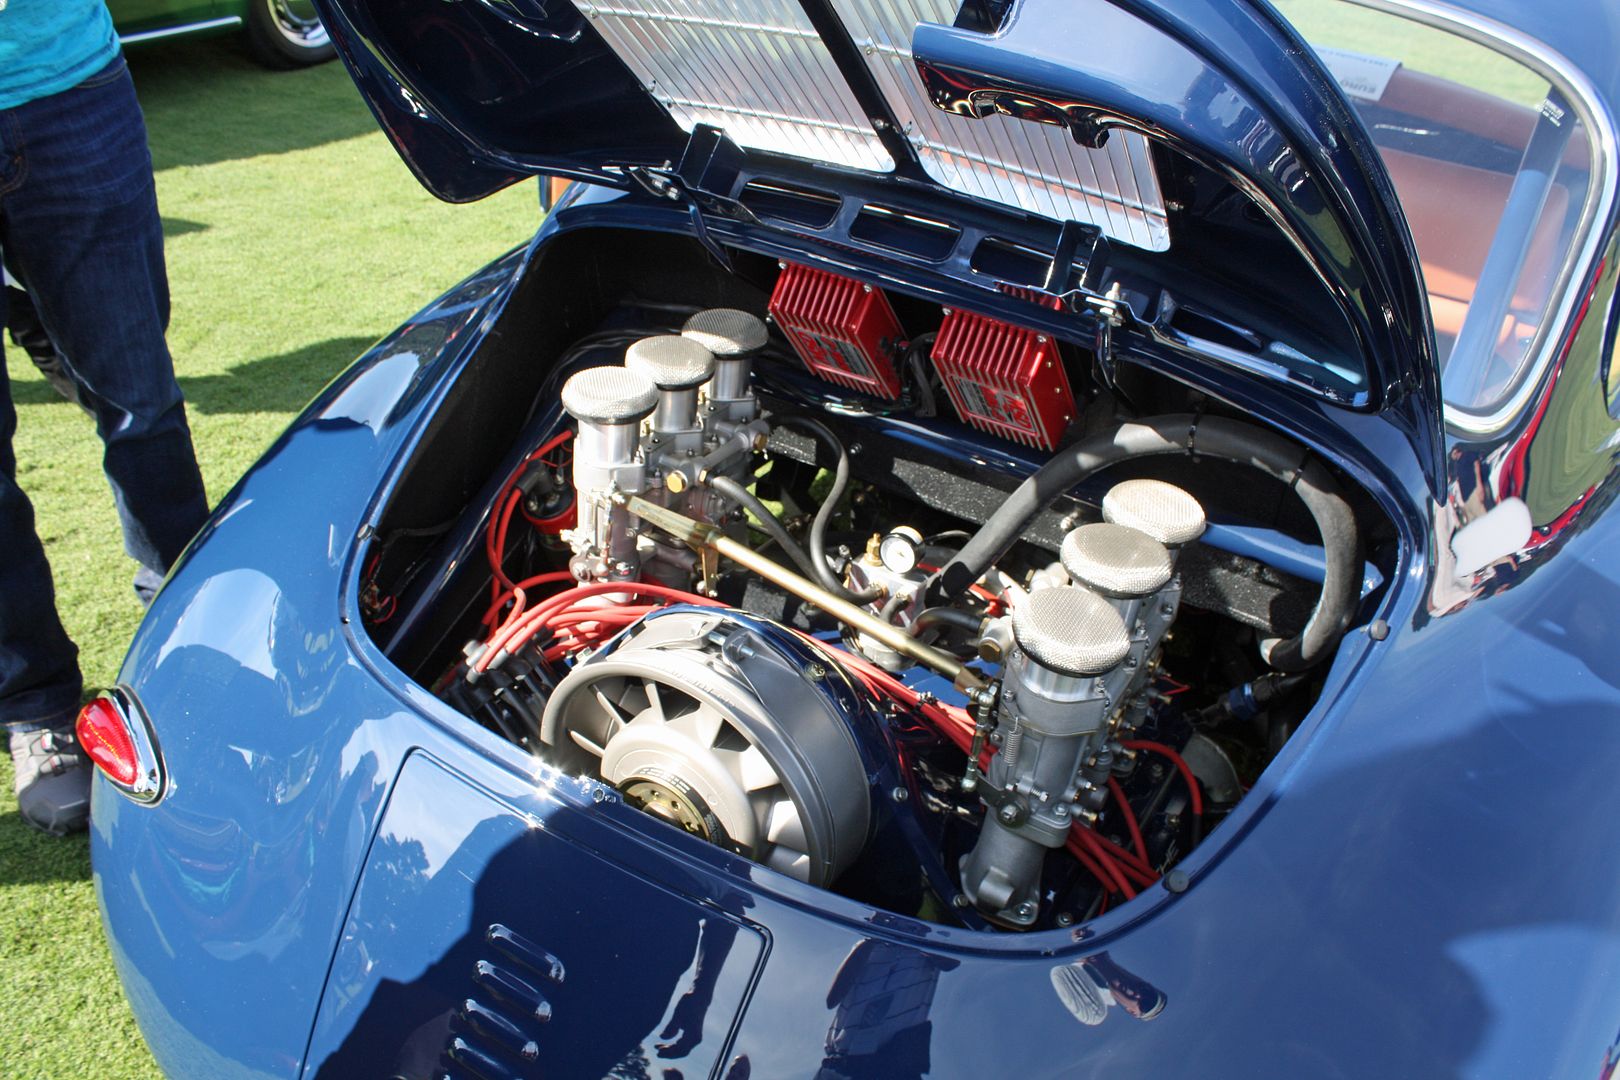
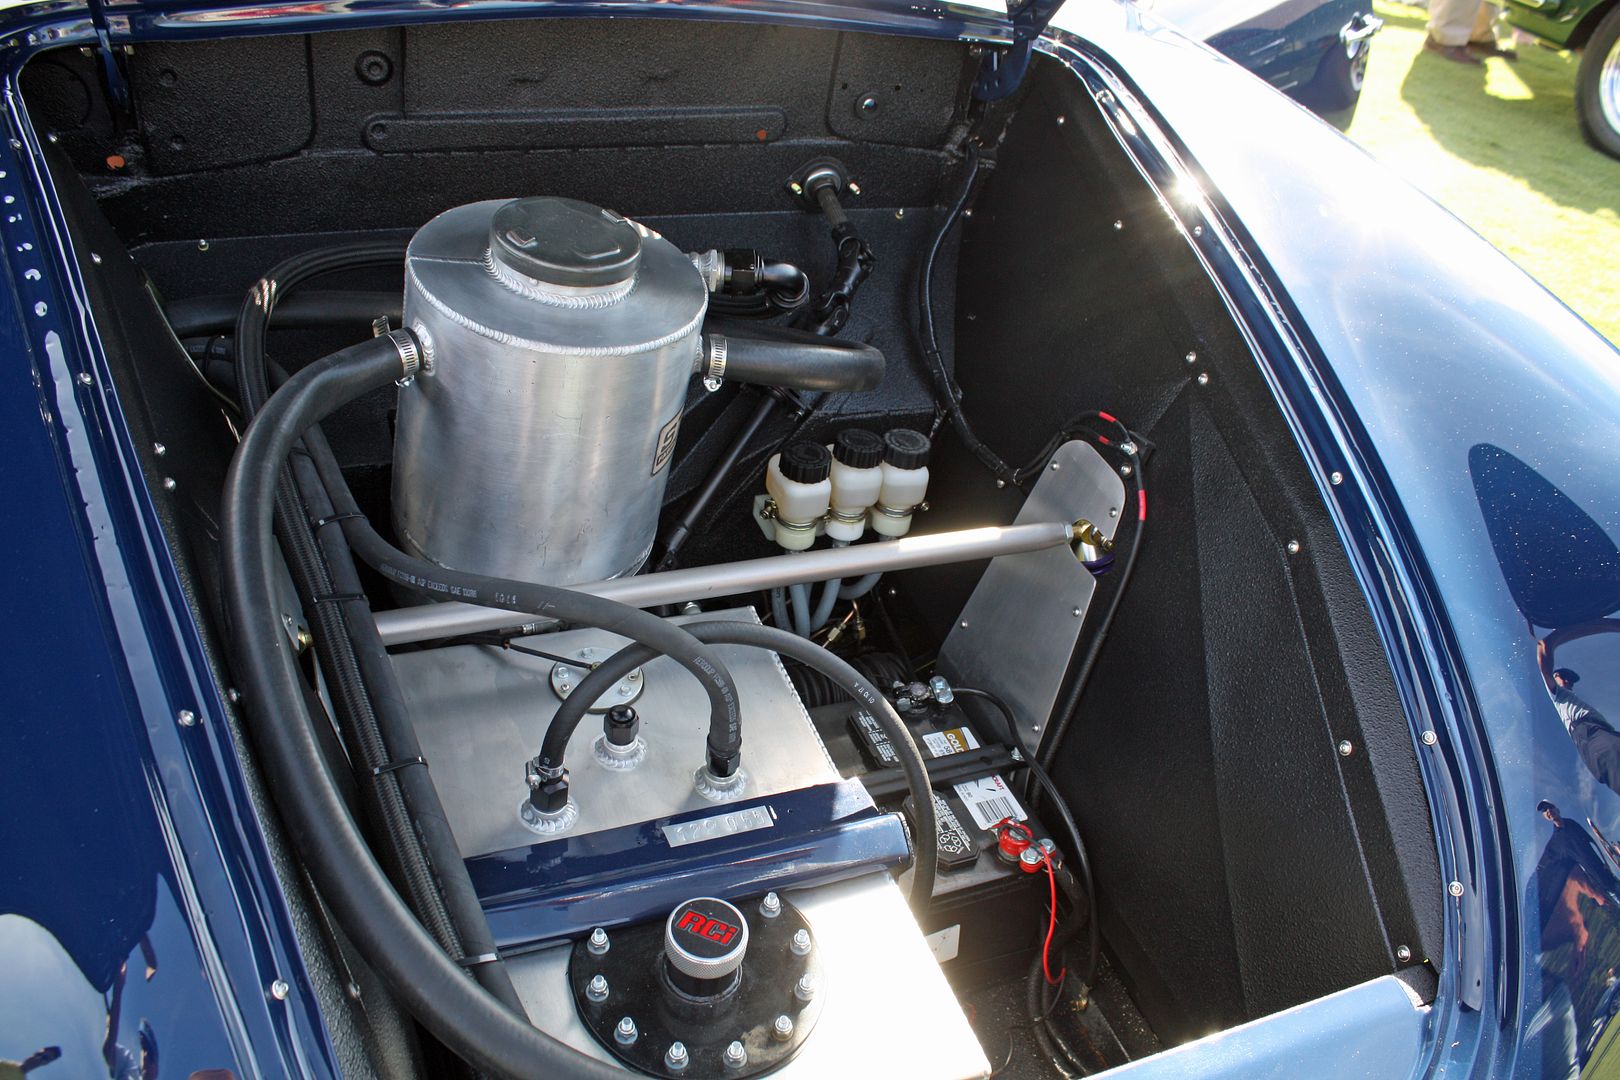
I really, really liked this 356 Outlaw. He installed a 2.8 twin plug 911 motor, upper and lower control arm front suspension, 911 rear suspension, Tilton pedals, etc. Outstanding finish work and execution.
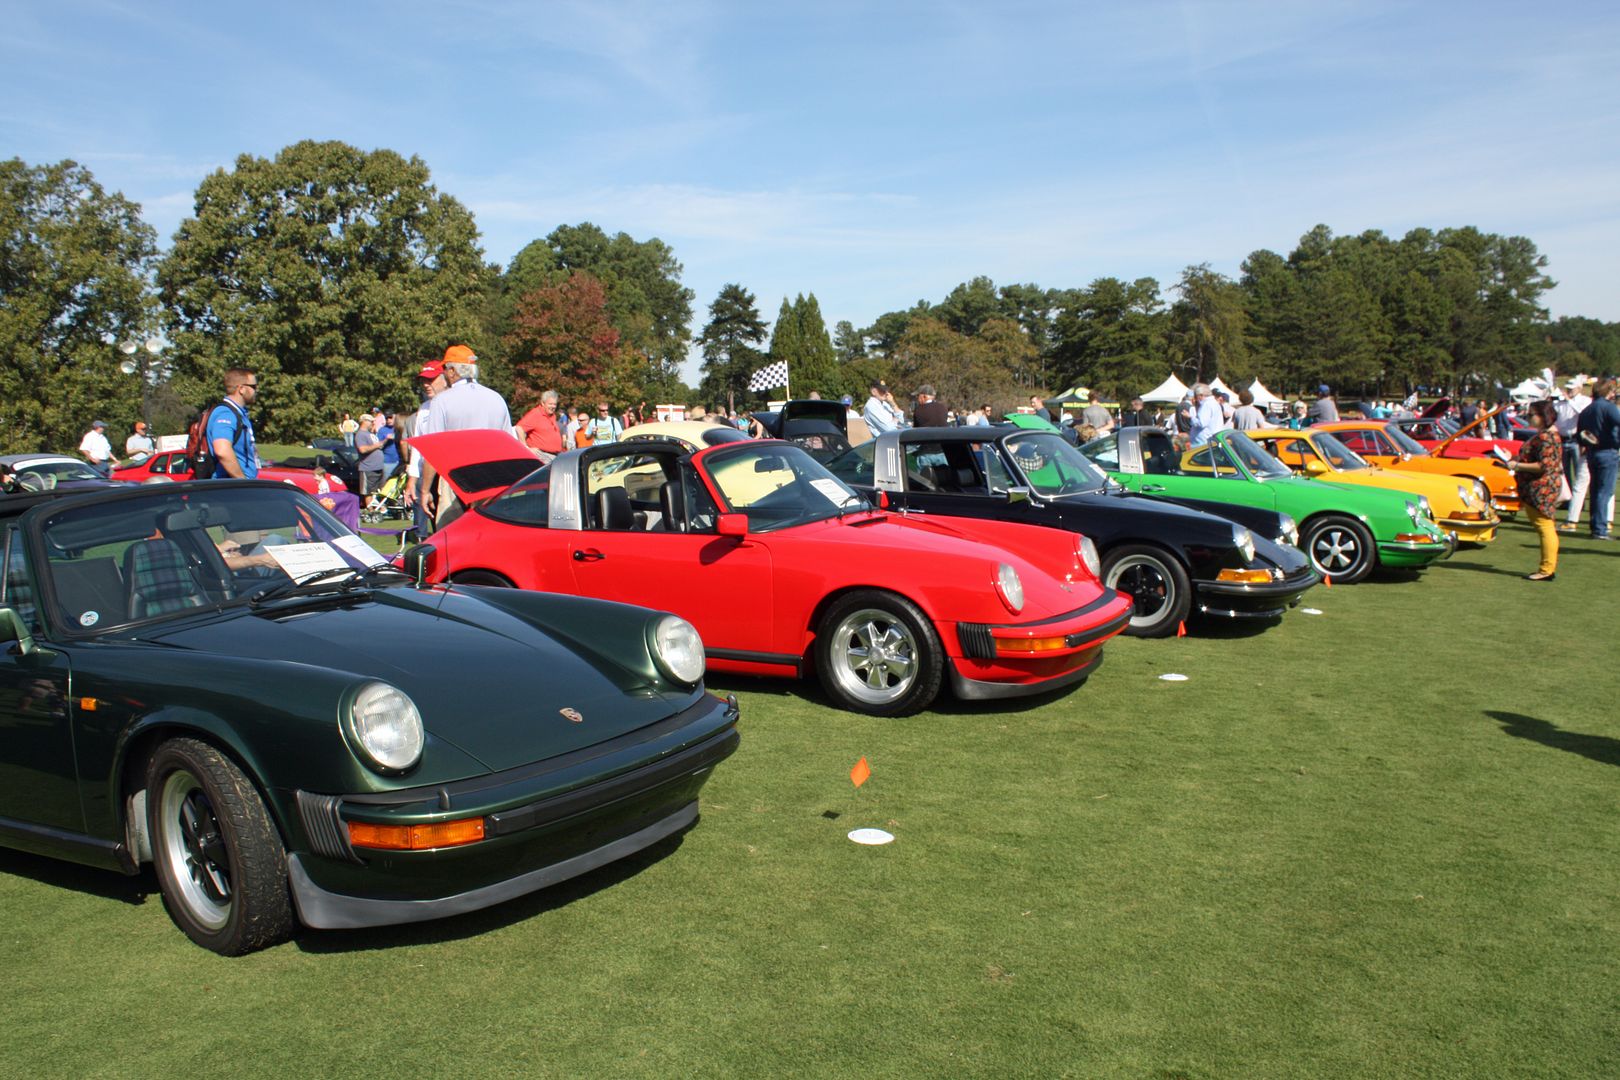
Lots of Porsche's!
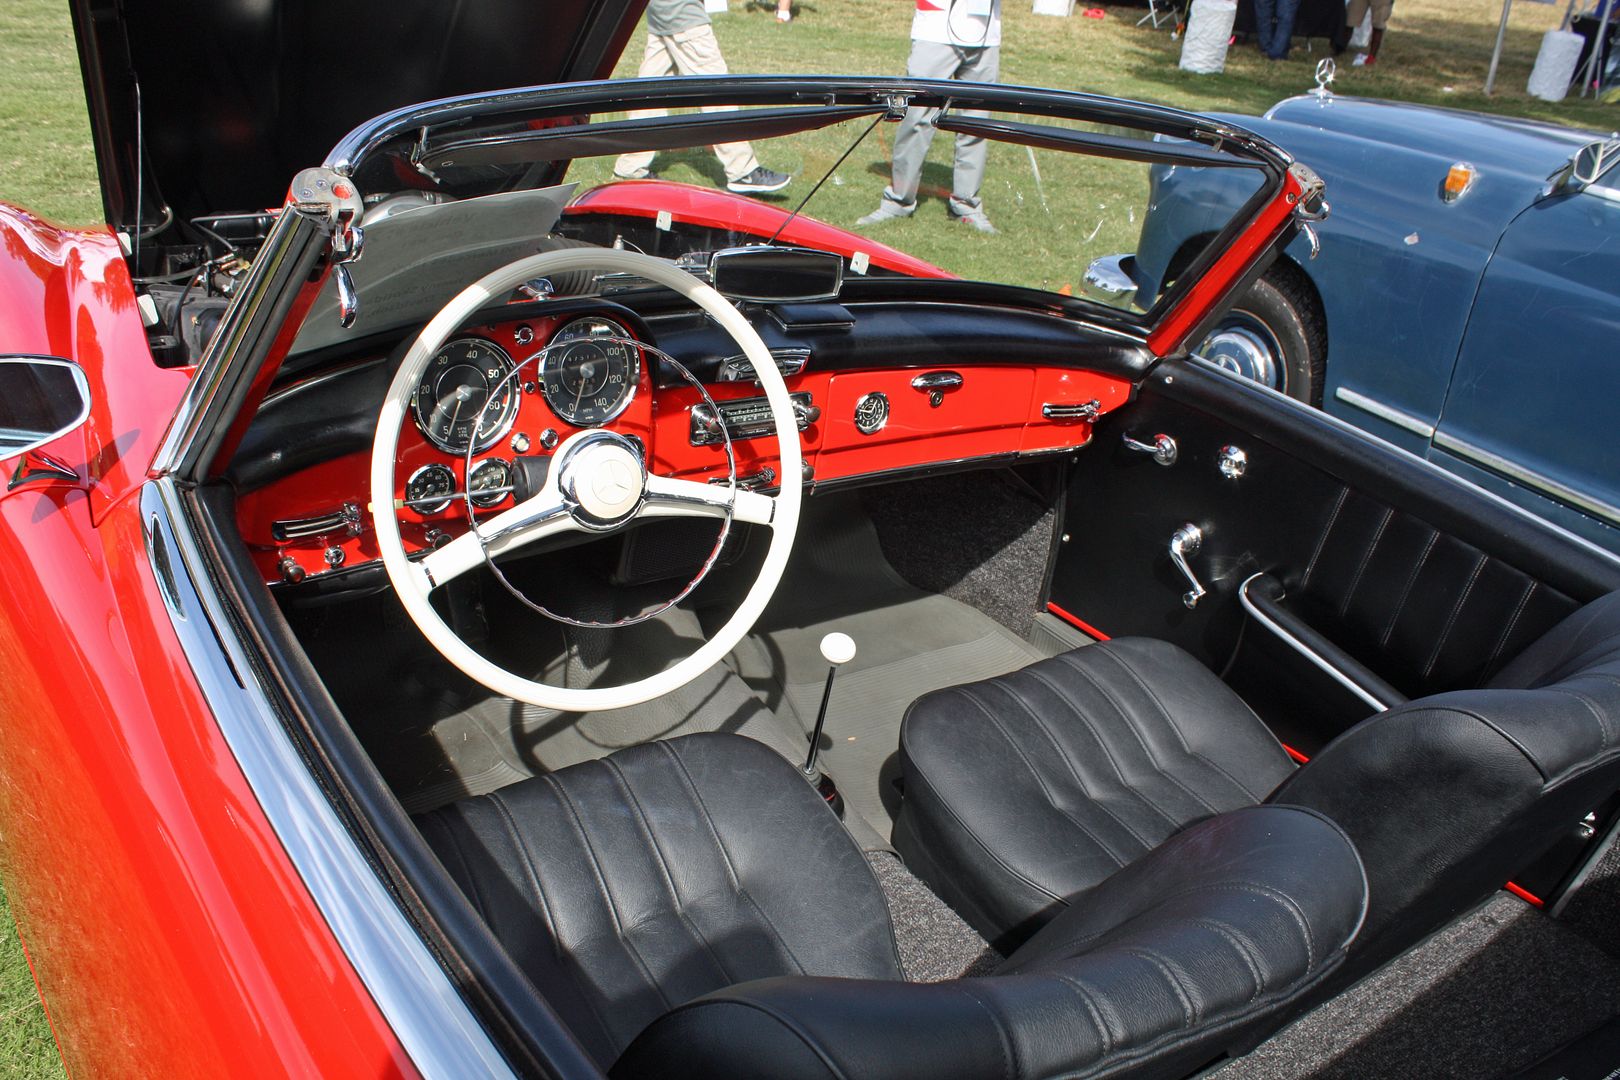
Trophy winning 190SL.

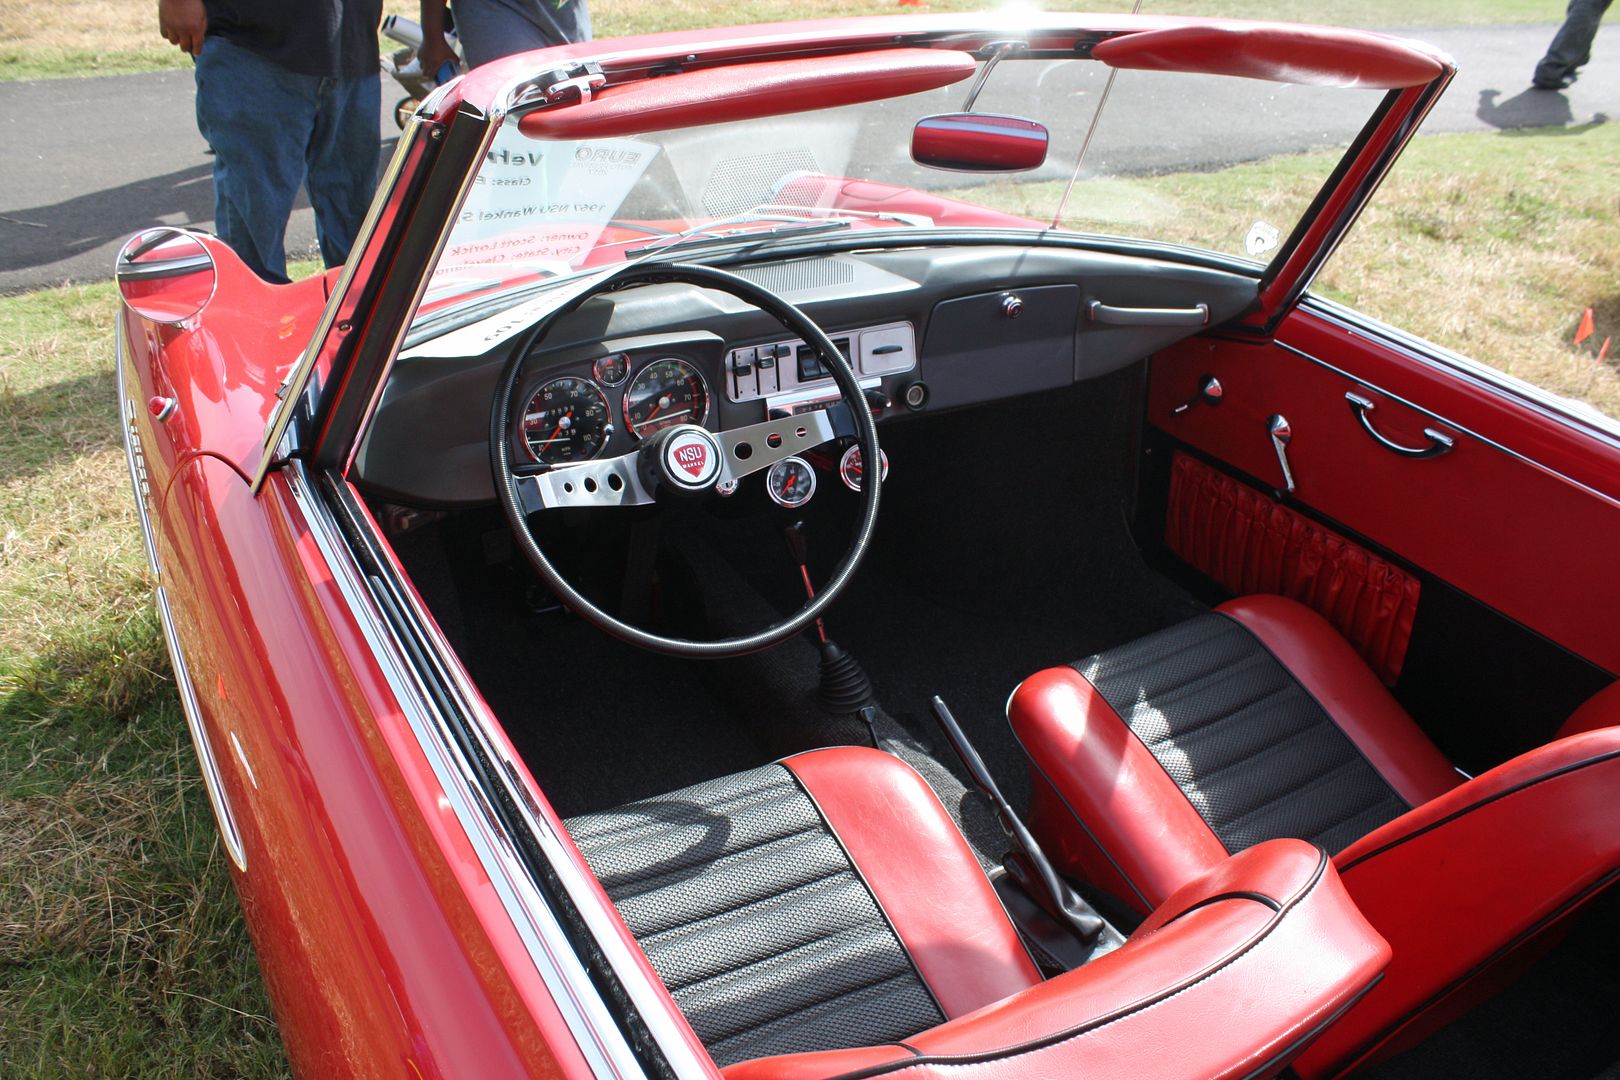
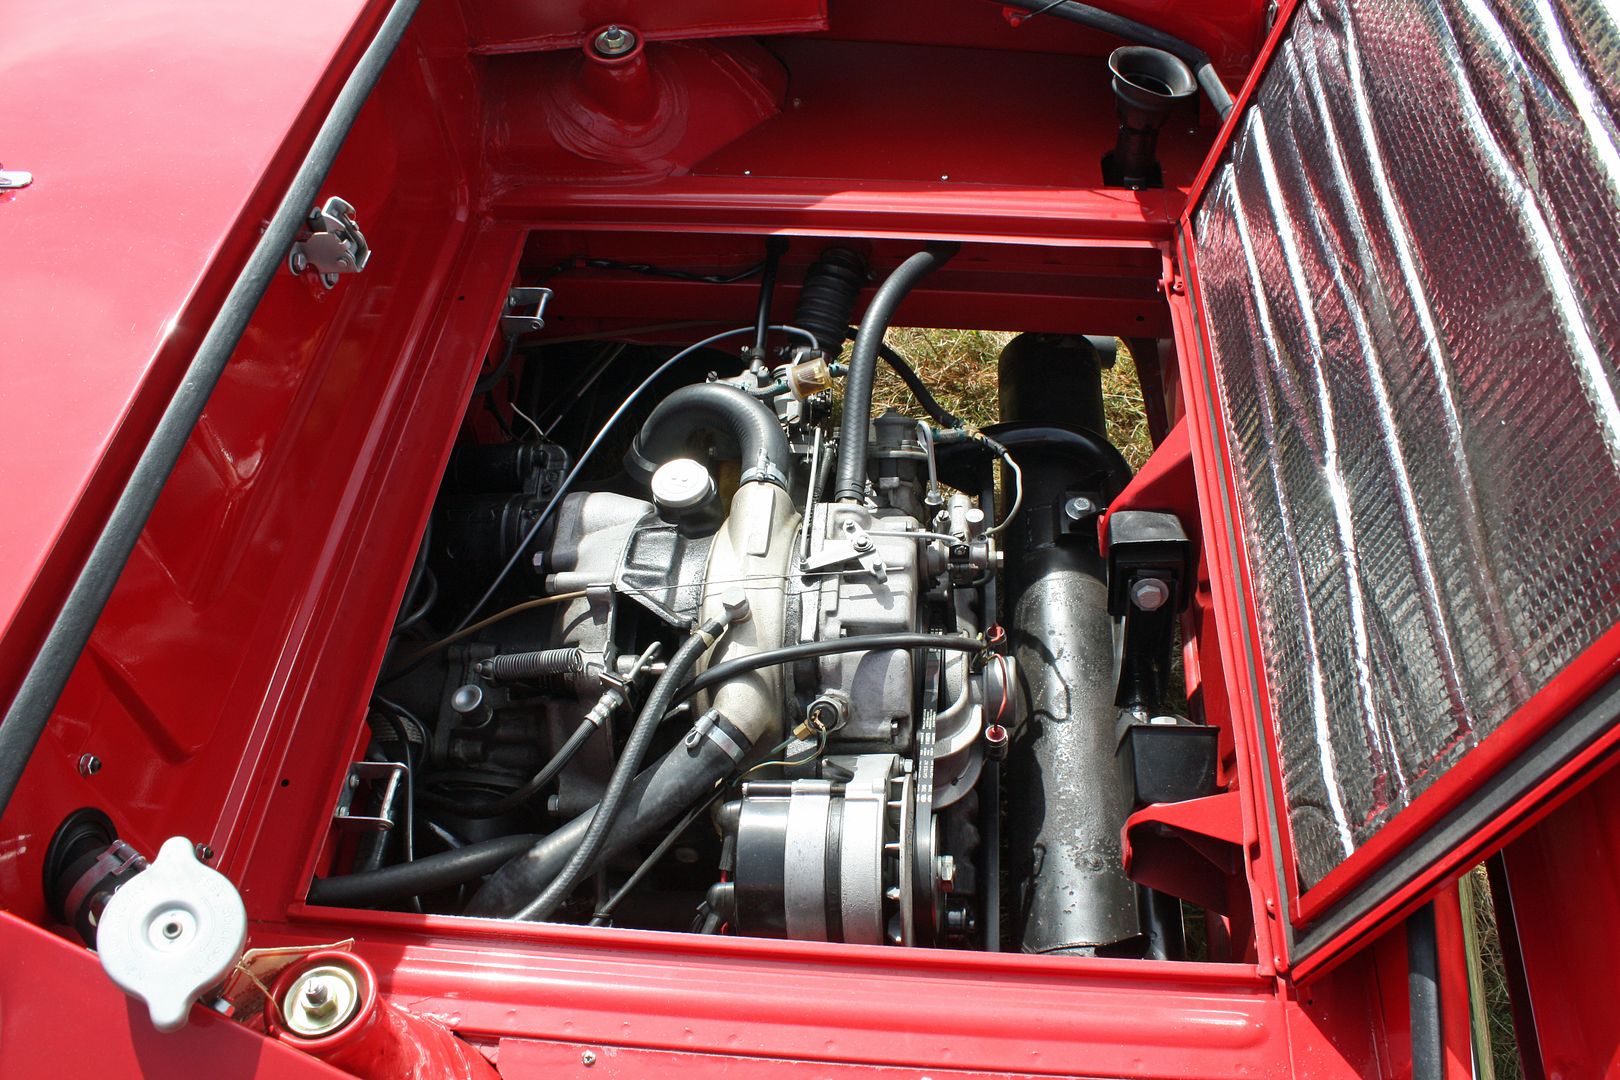
Very nice NSU Prinz with the Wankel engine. My lawn mower has a physically larger engine!!

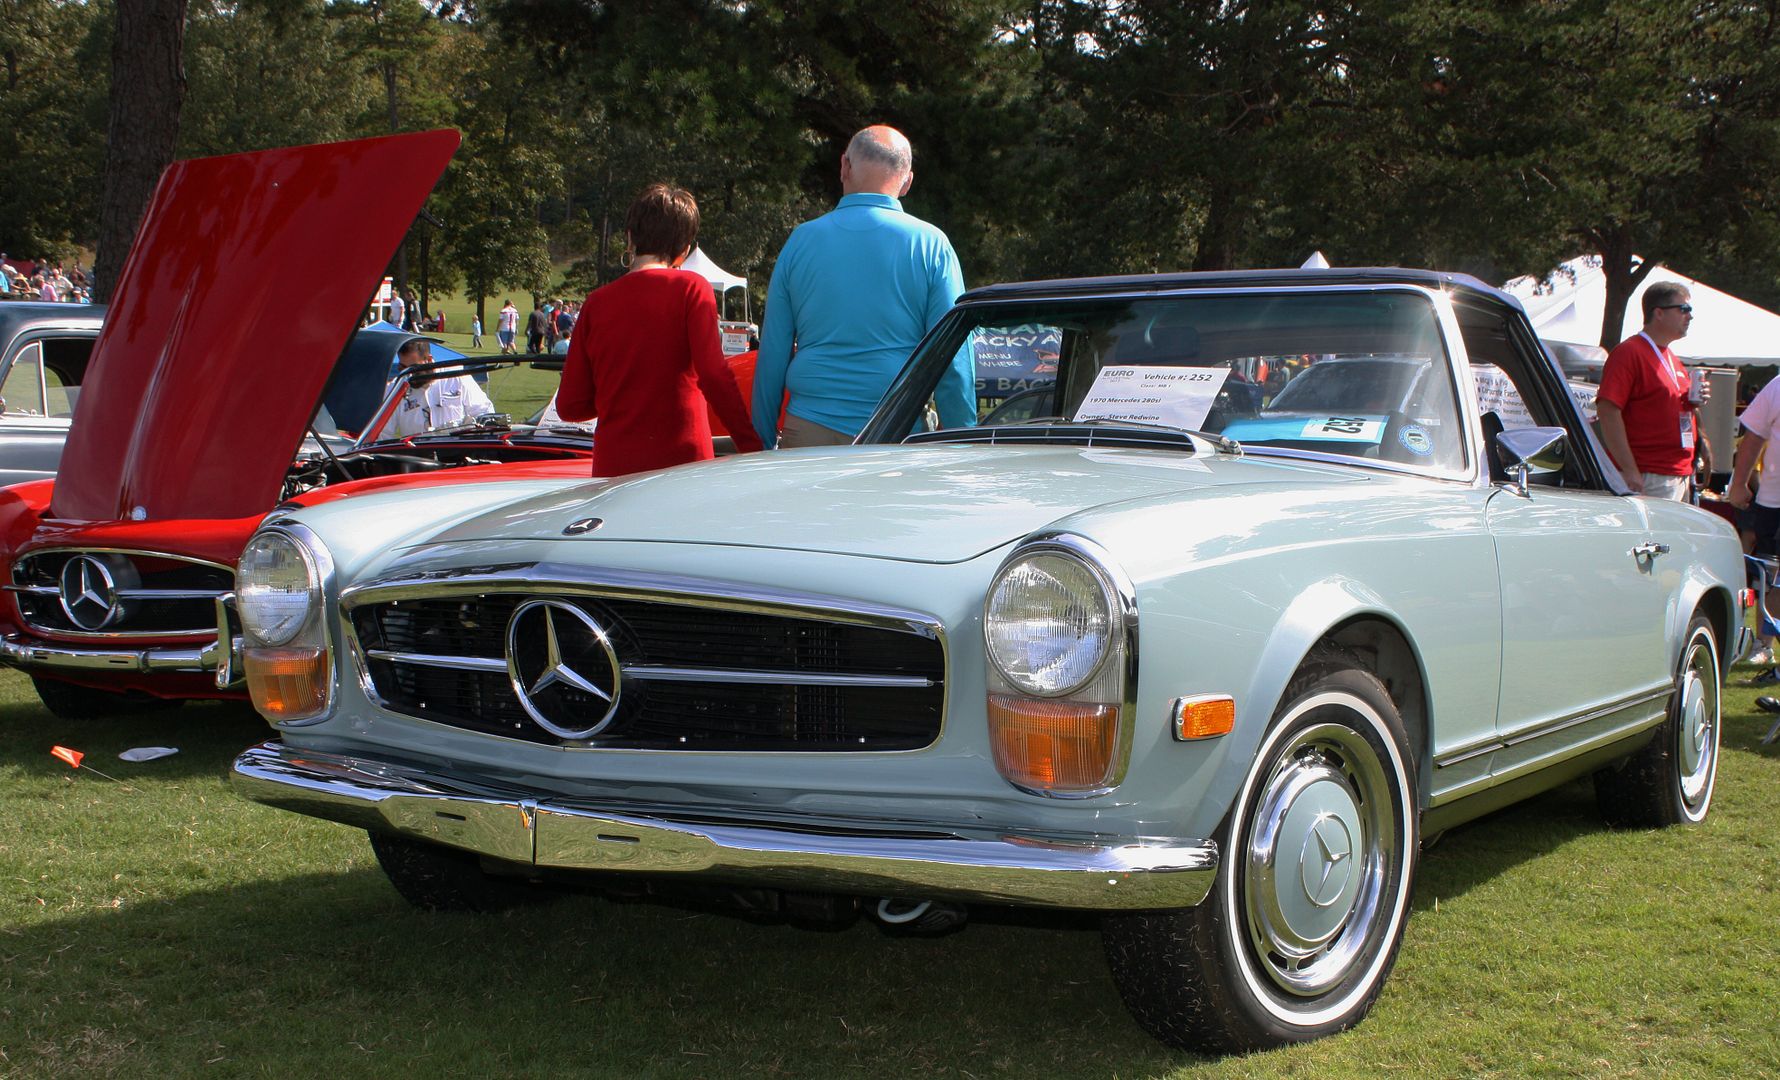
Baby Blue pagoda.
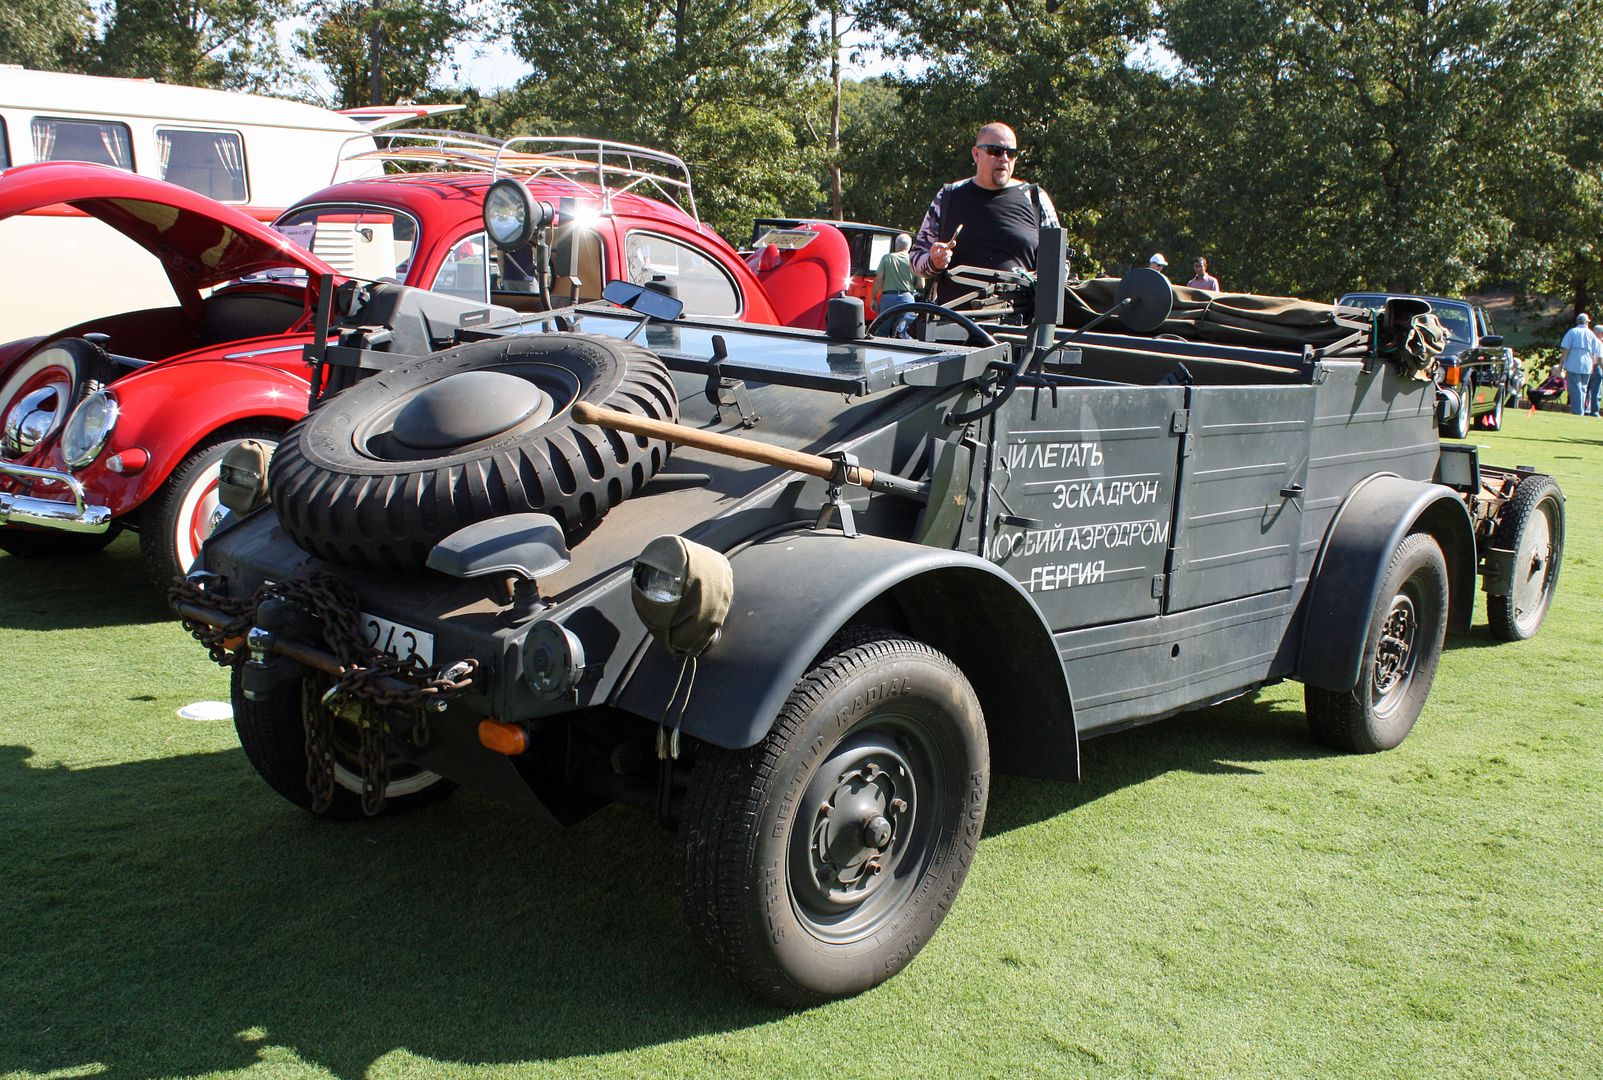
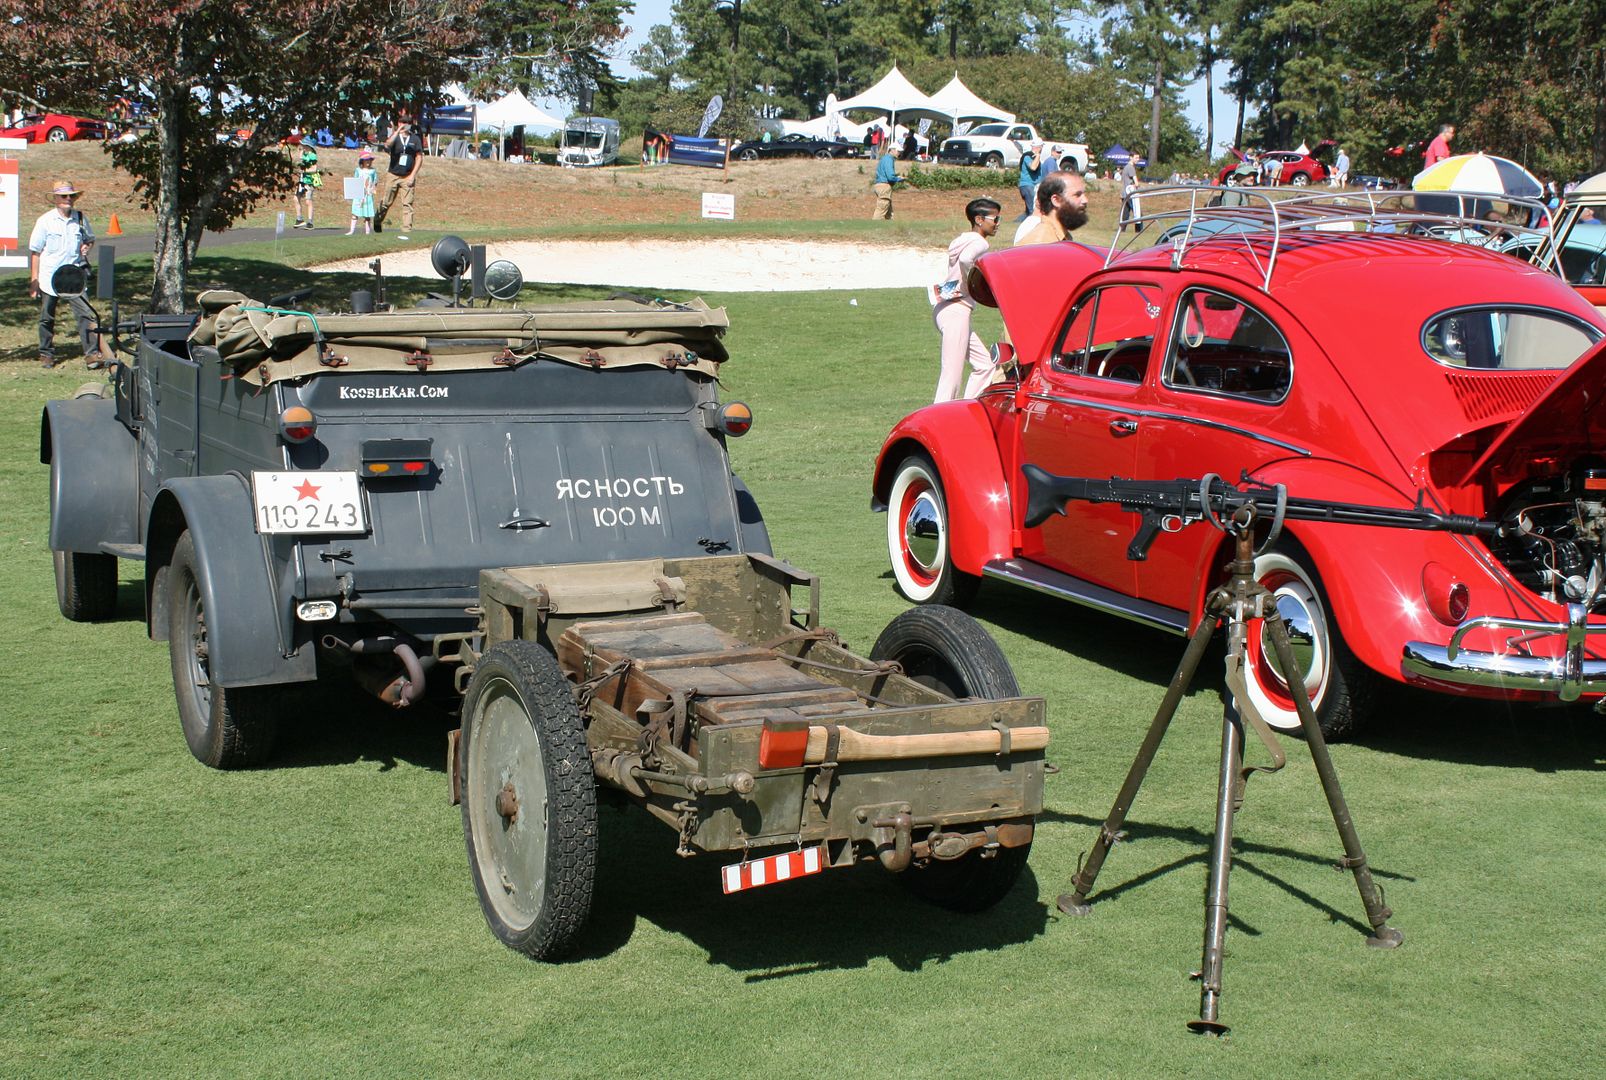
A real 1942 Kubelwagen.

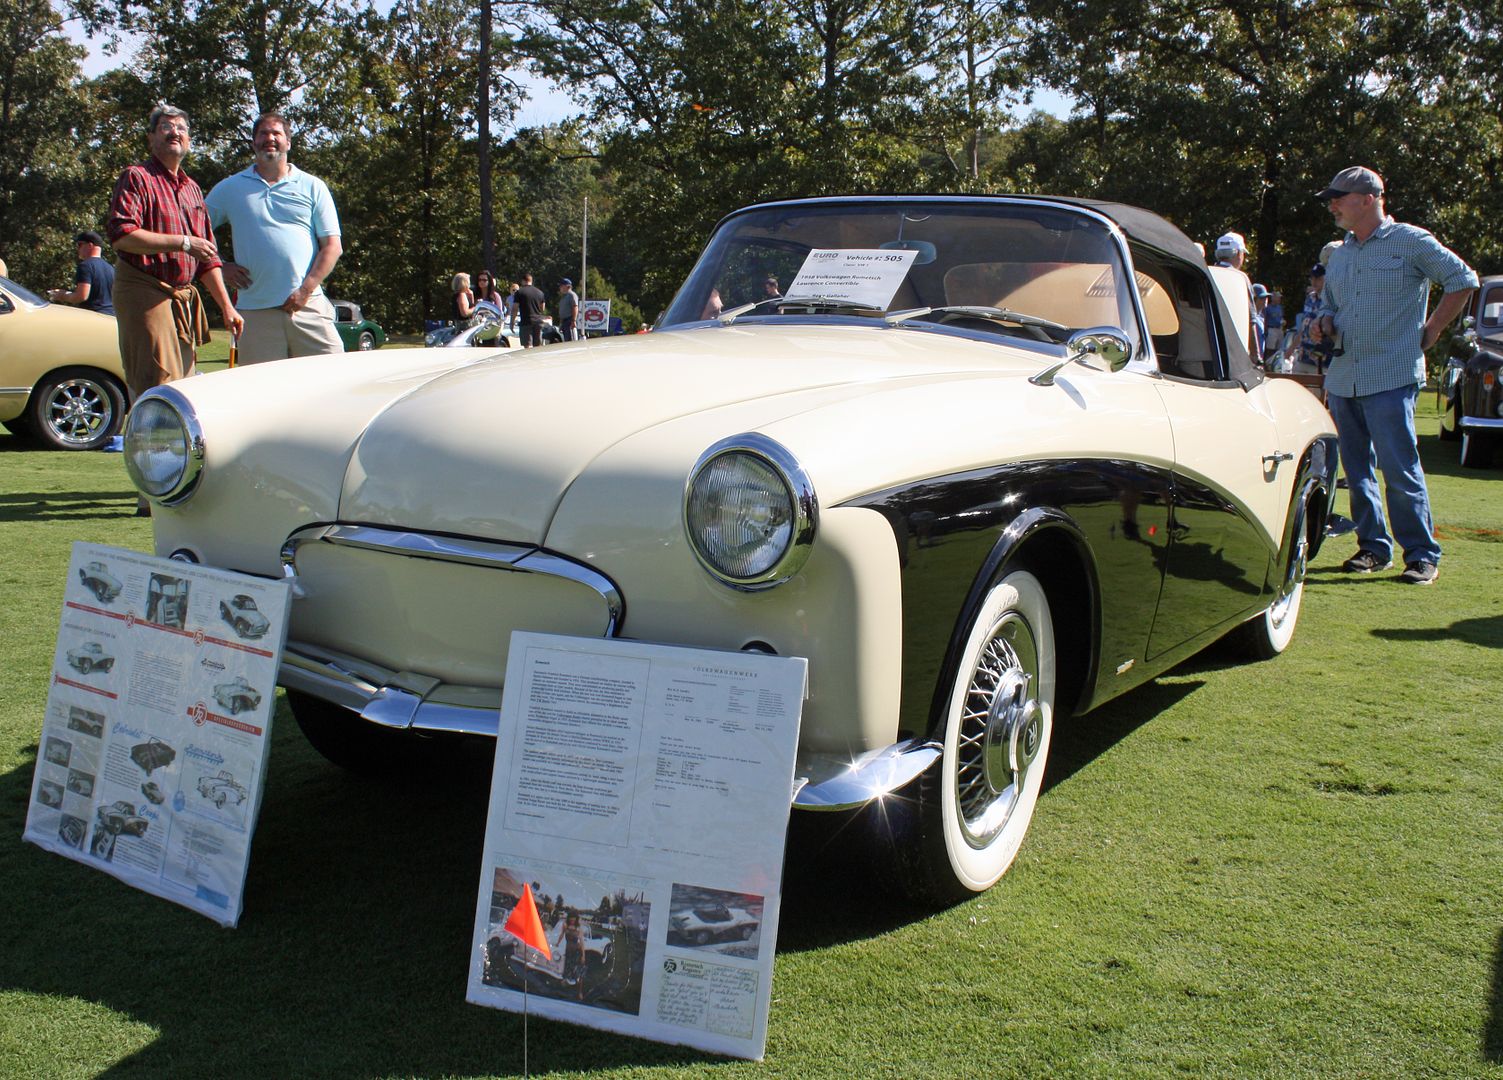
A very rare 1958 VW Rometsch Lawrence convertible.
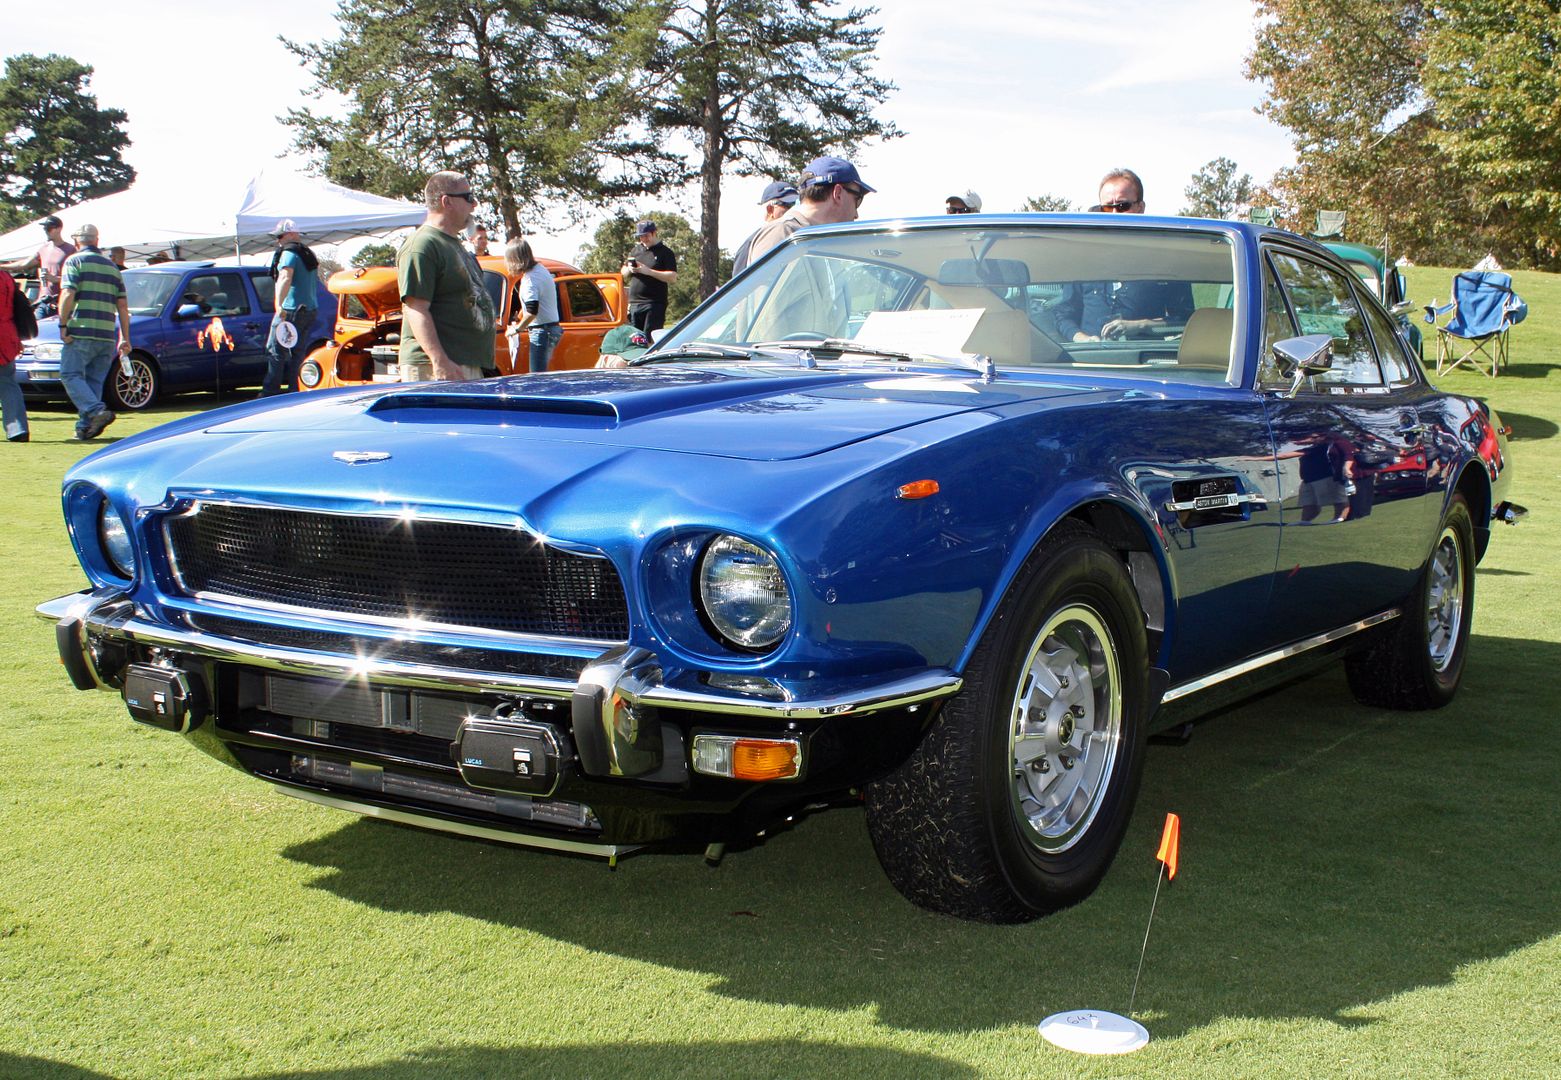
1973 Aston Martin AMV8.
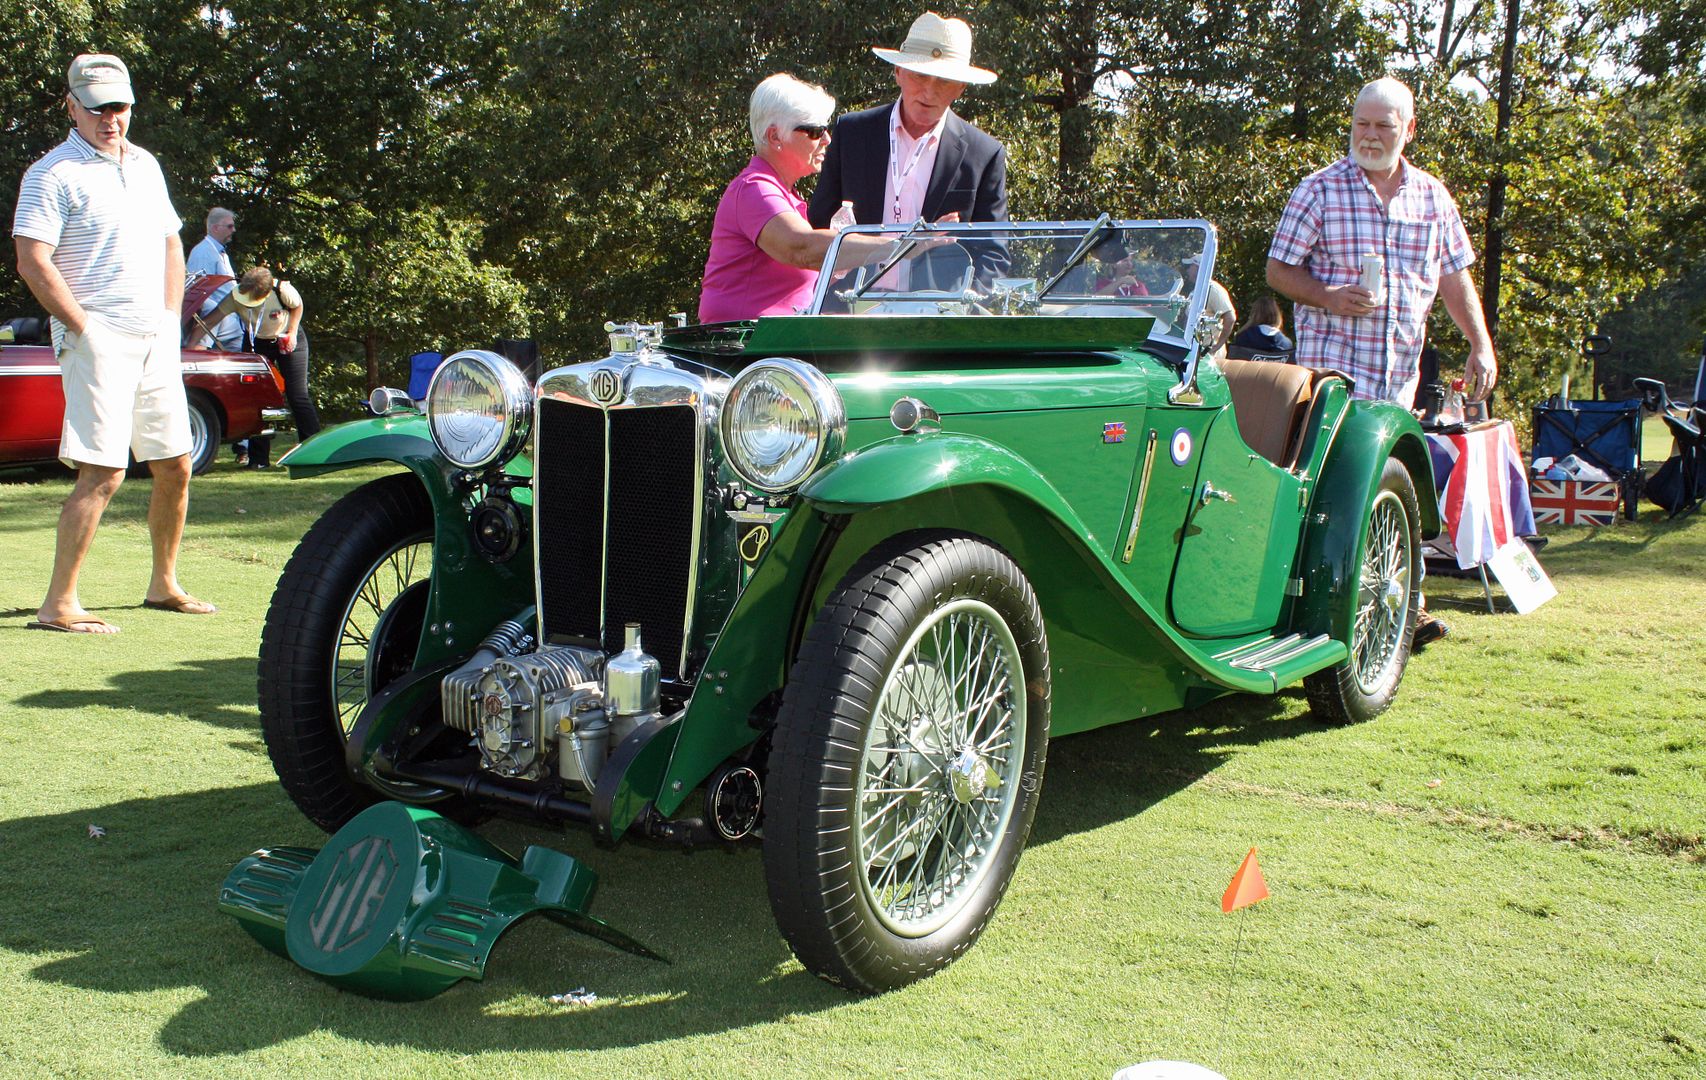
MG TD with a supercharger. The cover is off of the supercharger.
I arrived early to find my designated spot with the morning dew still on the grass. I had lots of positive comments with at least three or four of them saying that this was their favorite Mercedes model. Last Thursday I had lunch with my son and his boss after his boss learned that I had the car. It is also his favorite Mercedes. He is French and has a friend in France with a W108 and a photo of him with his arm resting on the window sill. My son took a photo of his boss resting his arm on the windowsill of my car so his boss can send it to his friend. Matt's boss has a 1948 Delahaye convertible that his father bought when new. It is currently being restored and he promised me a ride in it when it is finished. I am looking forward to that ride.

A 300SEL 6.3 was a couple cars down. What a spectacular car! Beautiful dark green color with tan interior.


The BMW CSL was quite a sight.


I really, really liked this 356 Outlaw. He installed a 2.8 twin plug 911 motor, upper and lower control arm front suspension, 911 rear suspension, Tilton pedals, etc. Outstanding finish work and execution.


Lots of Porsche's!

Trophy winning 190SL.


Very nice NSU Prinz with the Wankel engine. My lawn mower has a physically larger engine!!


Baby Blue pagoda.

A real 1942 Kubelwagen.


A very rare 1958 VW Rometsch Lawrence convertible.

1973 Aston Martin AMV8.

MG TD with a supercharger. The cover is off of the supercharger.
 10-26-2017, 04:46 PM
#99
Member
Thread Starter
My hubcaps have some curb rash. I took them to a chrome plating company I have used before. Beside plating, they also polish items. They will polish only the entire hubcap and remove the center paint in the process. I have the car scheduled to go to a body shop after Thanksgiving to do some paint work on the radiator support and the lower part of the left rear quarter. I will have them paint the hub cap centers as well.
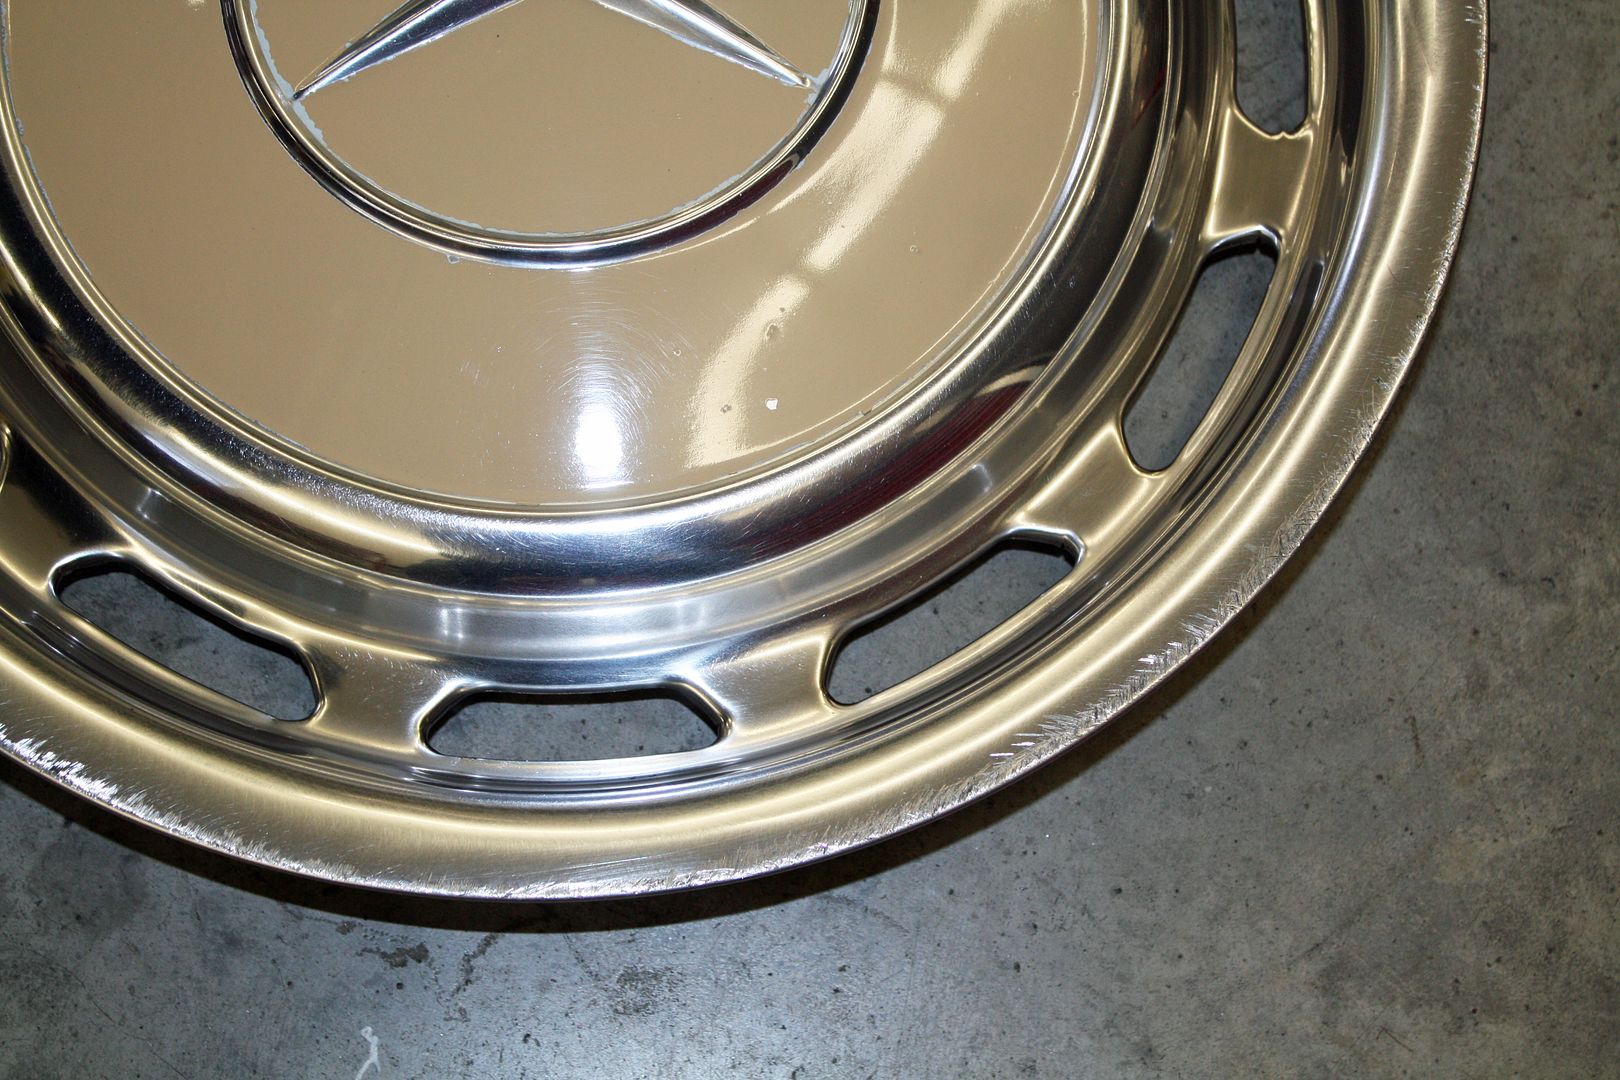
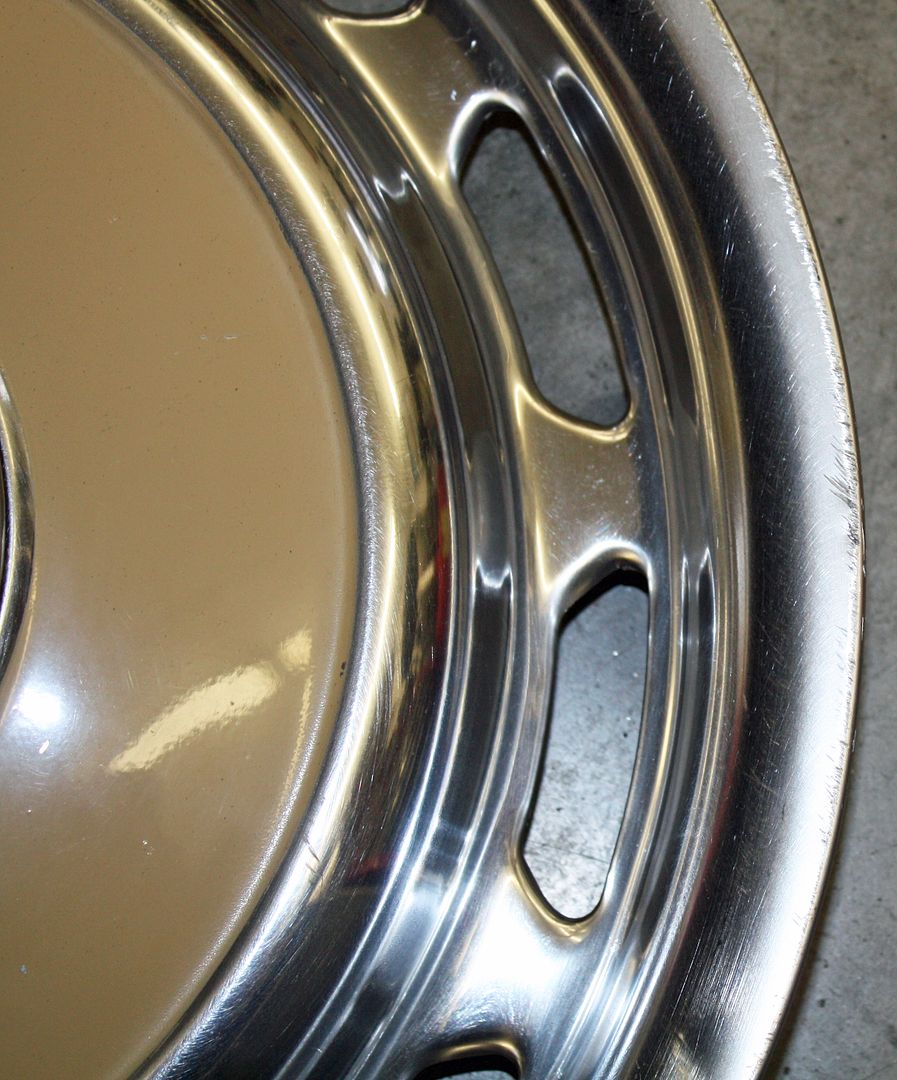
When I did the body off restoration of the '64 Corvette about five years ago, I discovered a product called "Hot Stuff". It is a manifold dressing. It worked great on the Corvette manifolds so I decided to give it a try on the Mercedes. First I removed the heat shields. I bead blasted them and took them to my powder coater who will make them an aluminum color using a high temp finish.
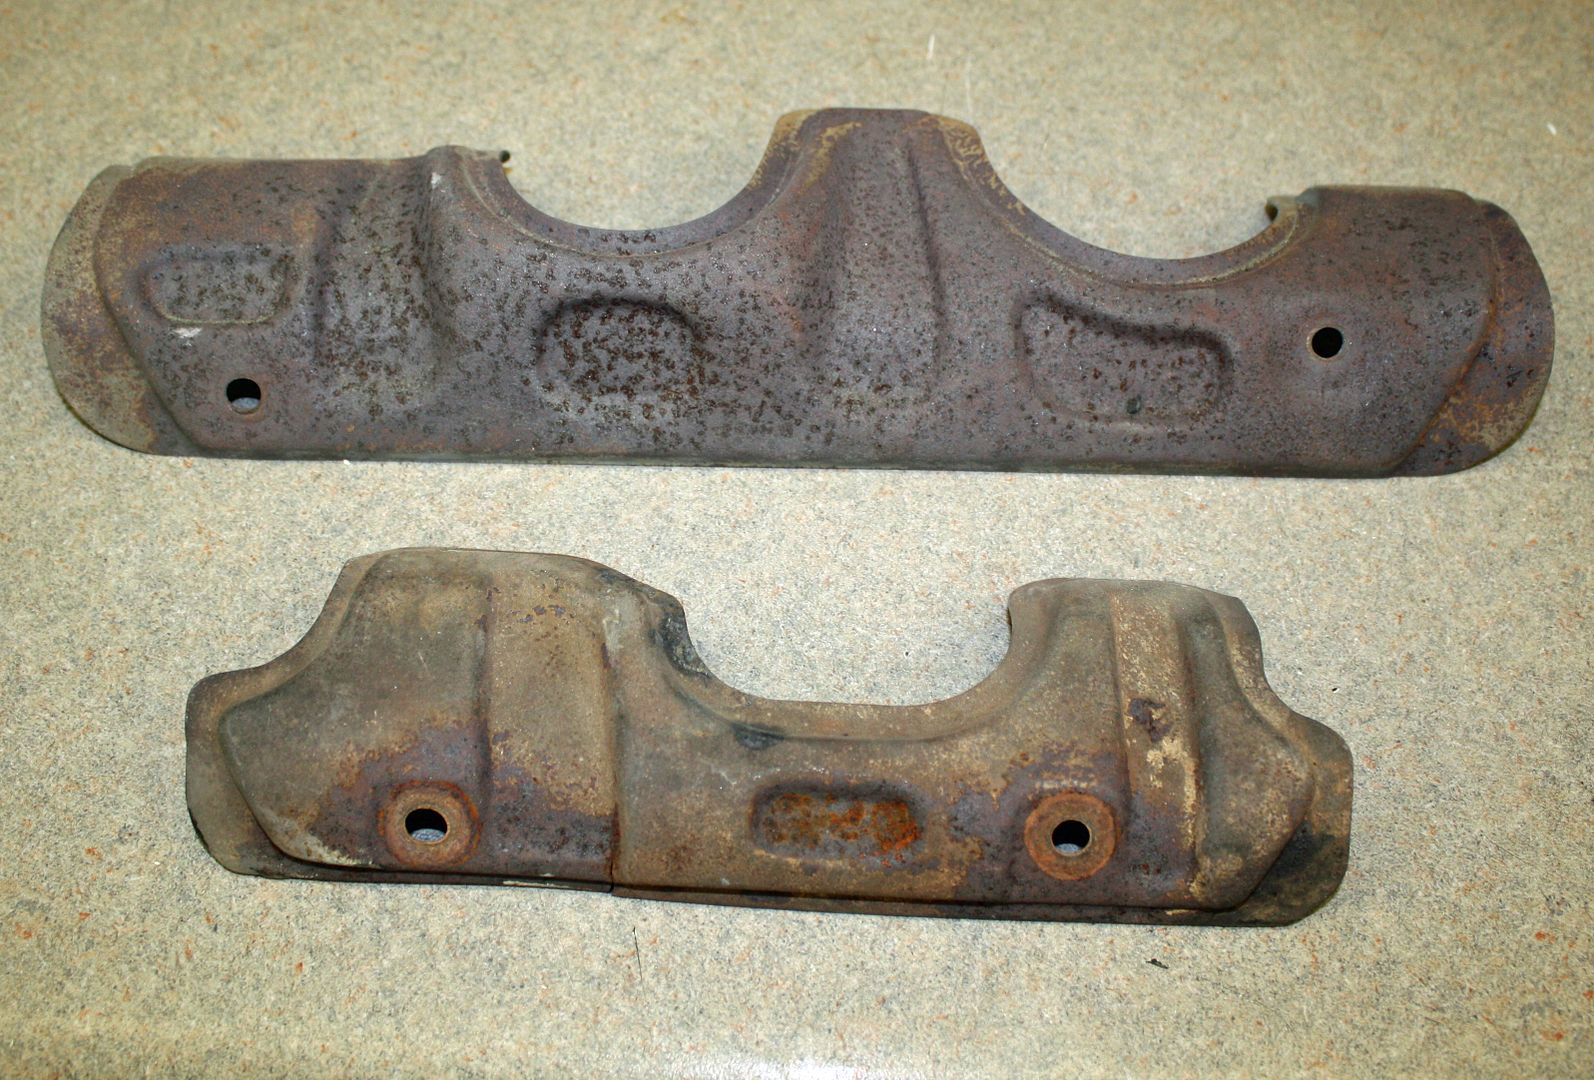
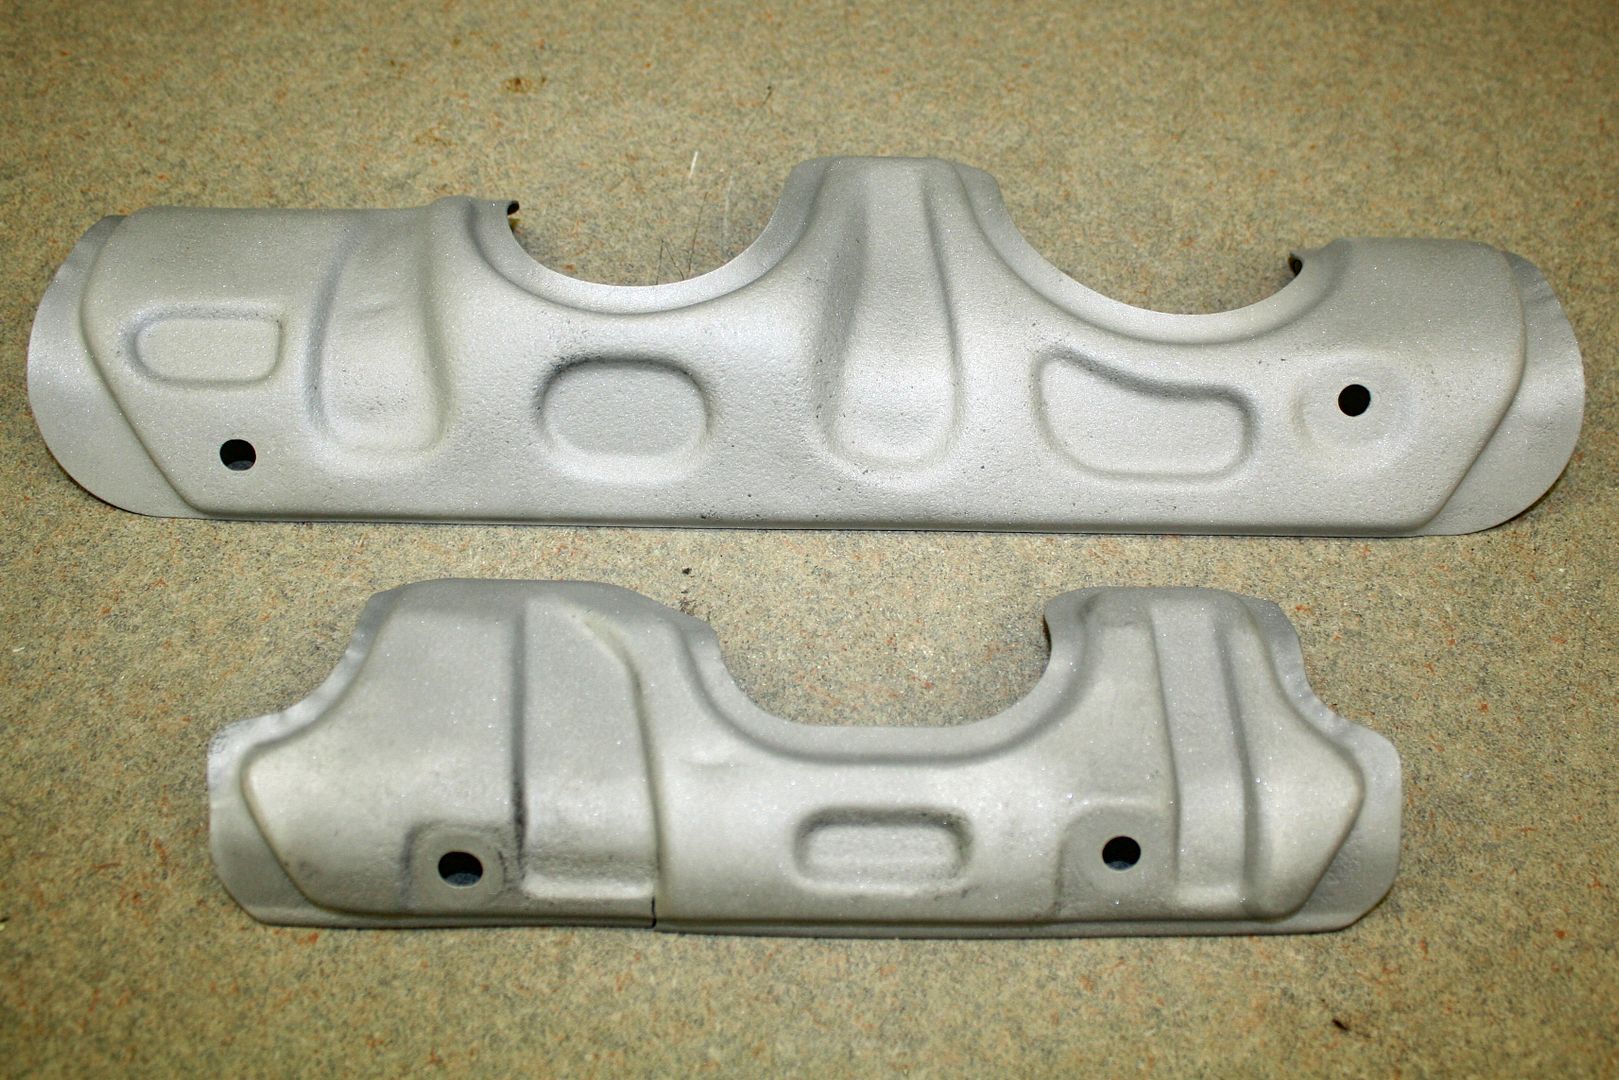
After mixing the Hot Stuff solution, I applied it with my wife's hand-me-down artist brushes. To reach the sides and bottom, I used my latex gloved finger.
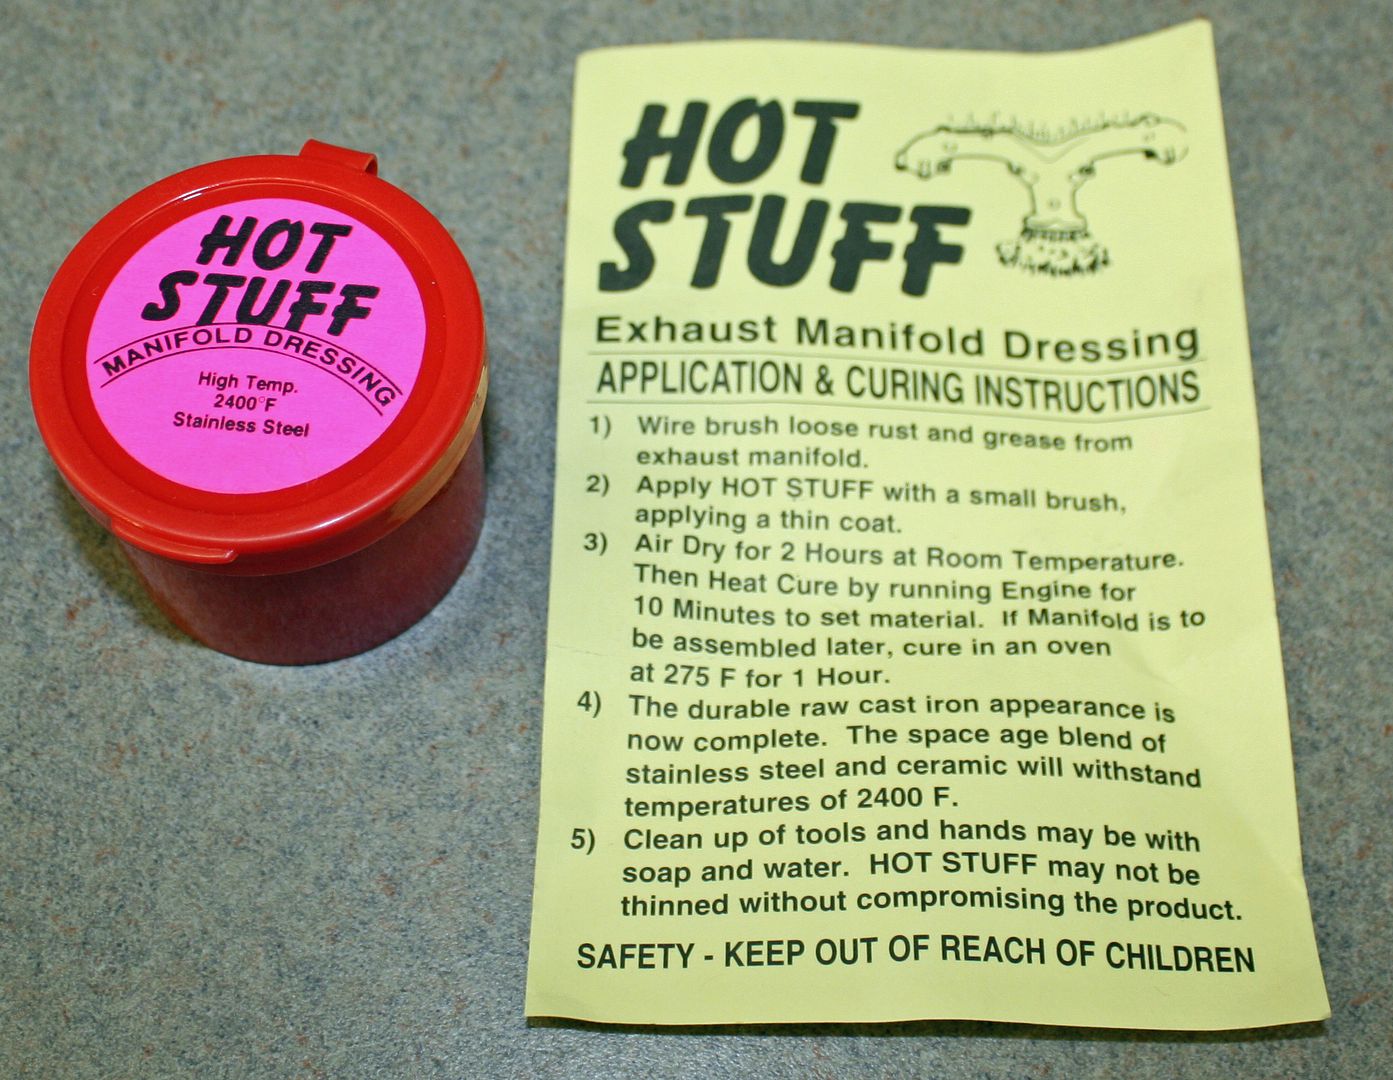
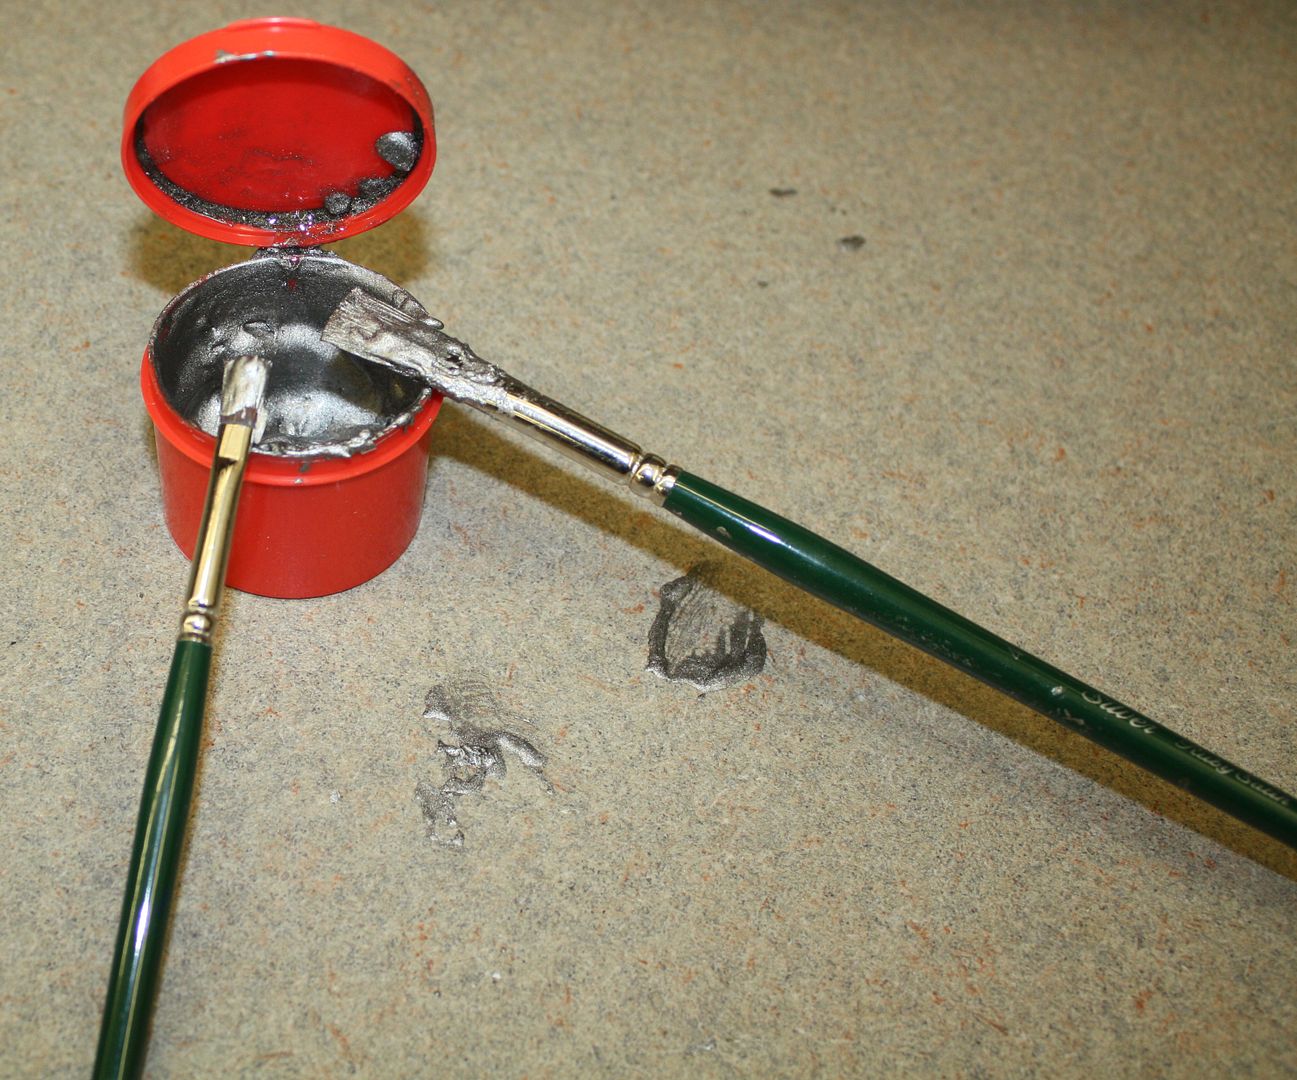
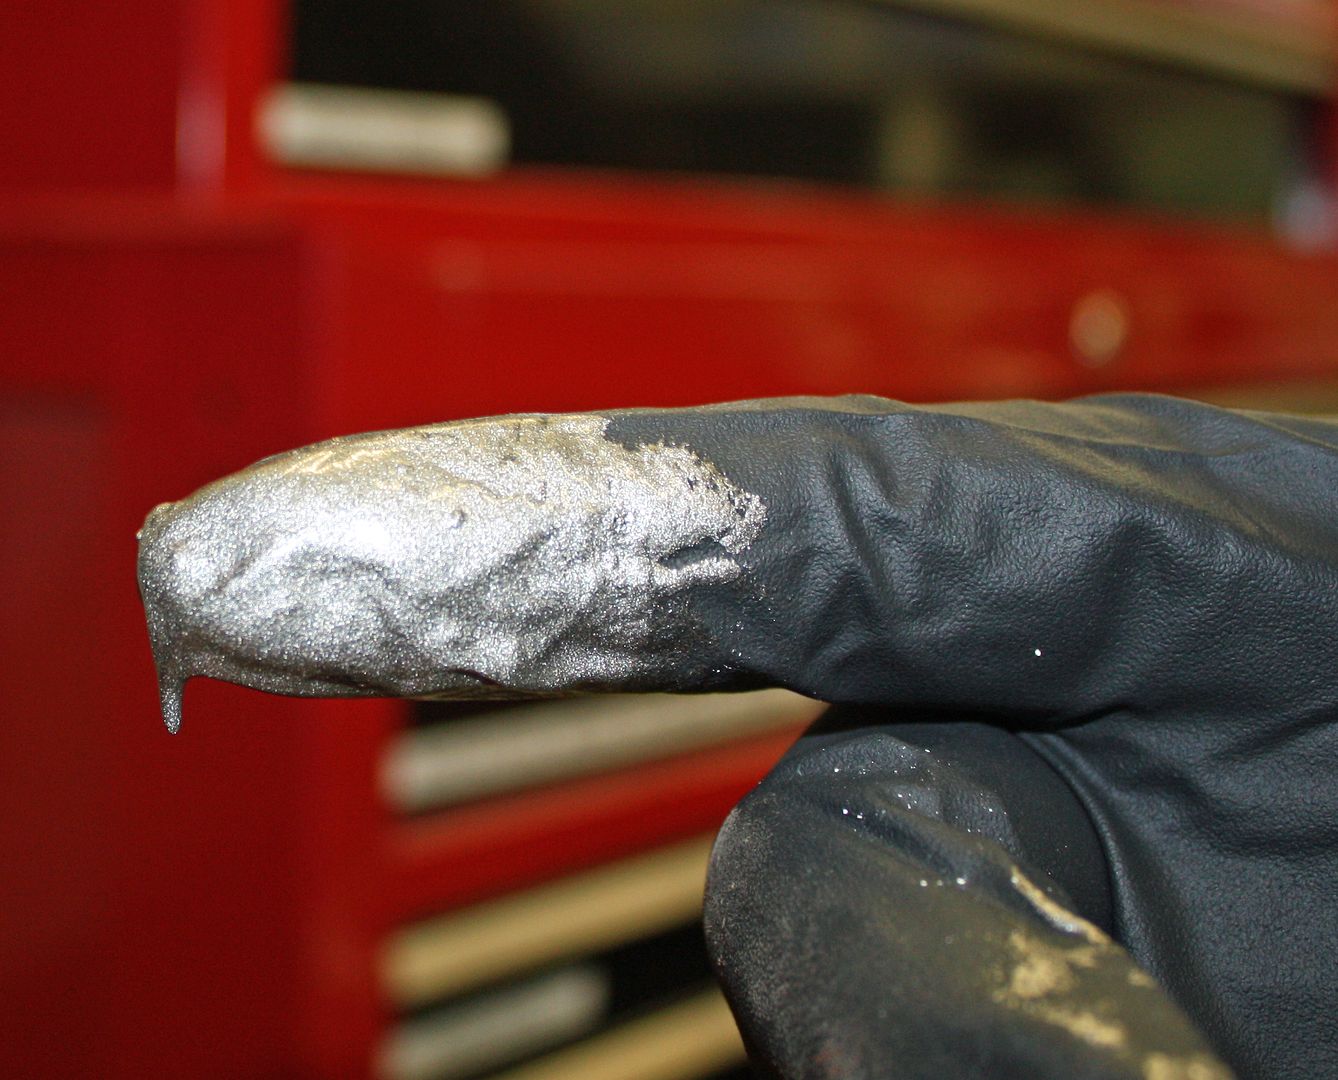
The instructions say to let it dry for two hours and then run the engine for 10 minutes or put them in an oven at 375 degrees. Which is what I did with the Corvette manifolds since I had the engine out of the car. My wife happened to be out of town and was none the wiser.
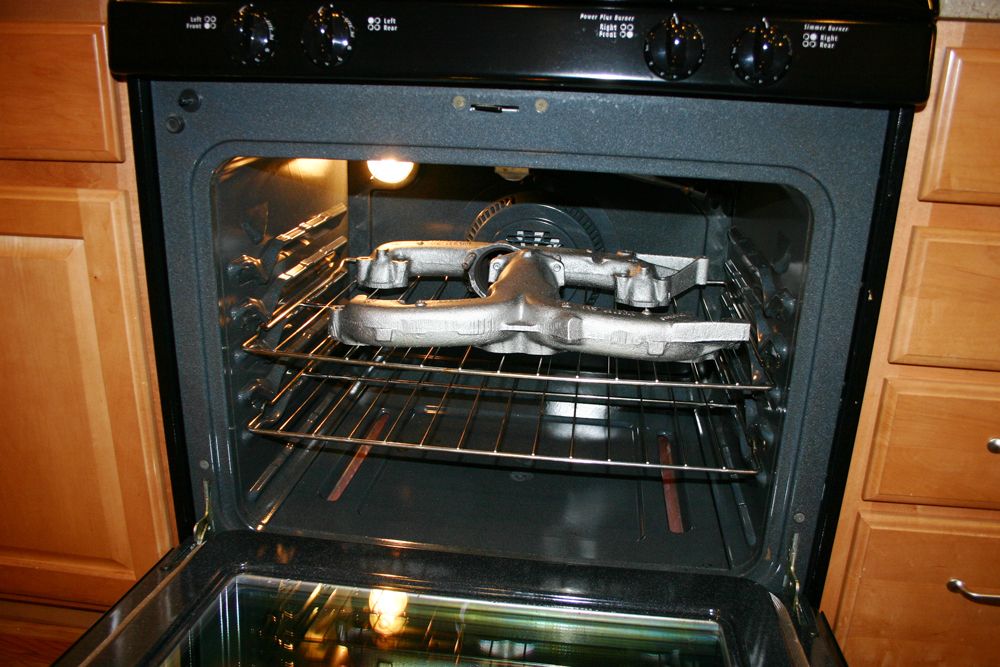
Here are some before and after photos.
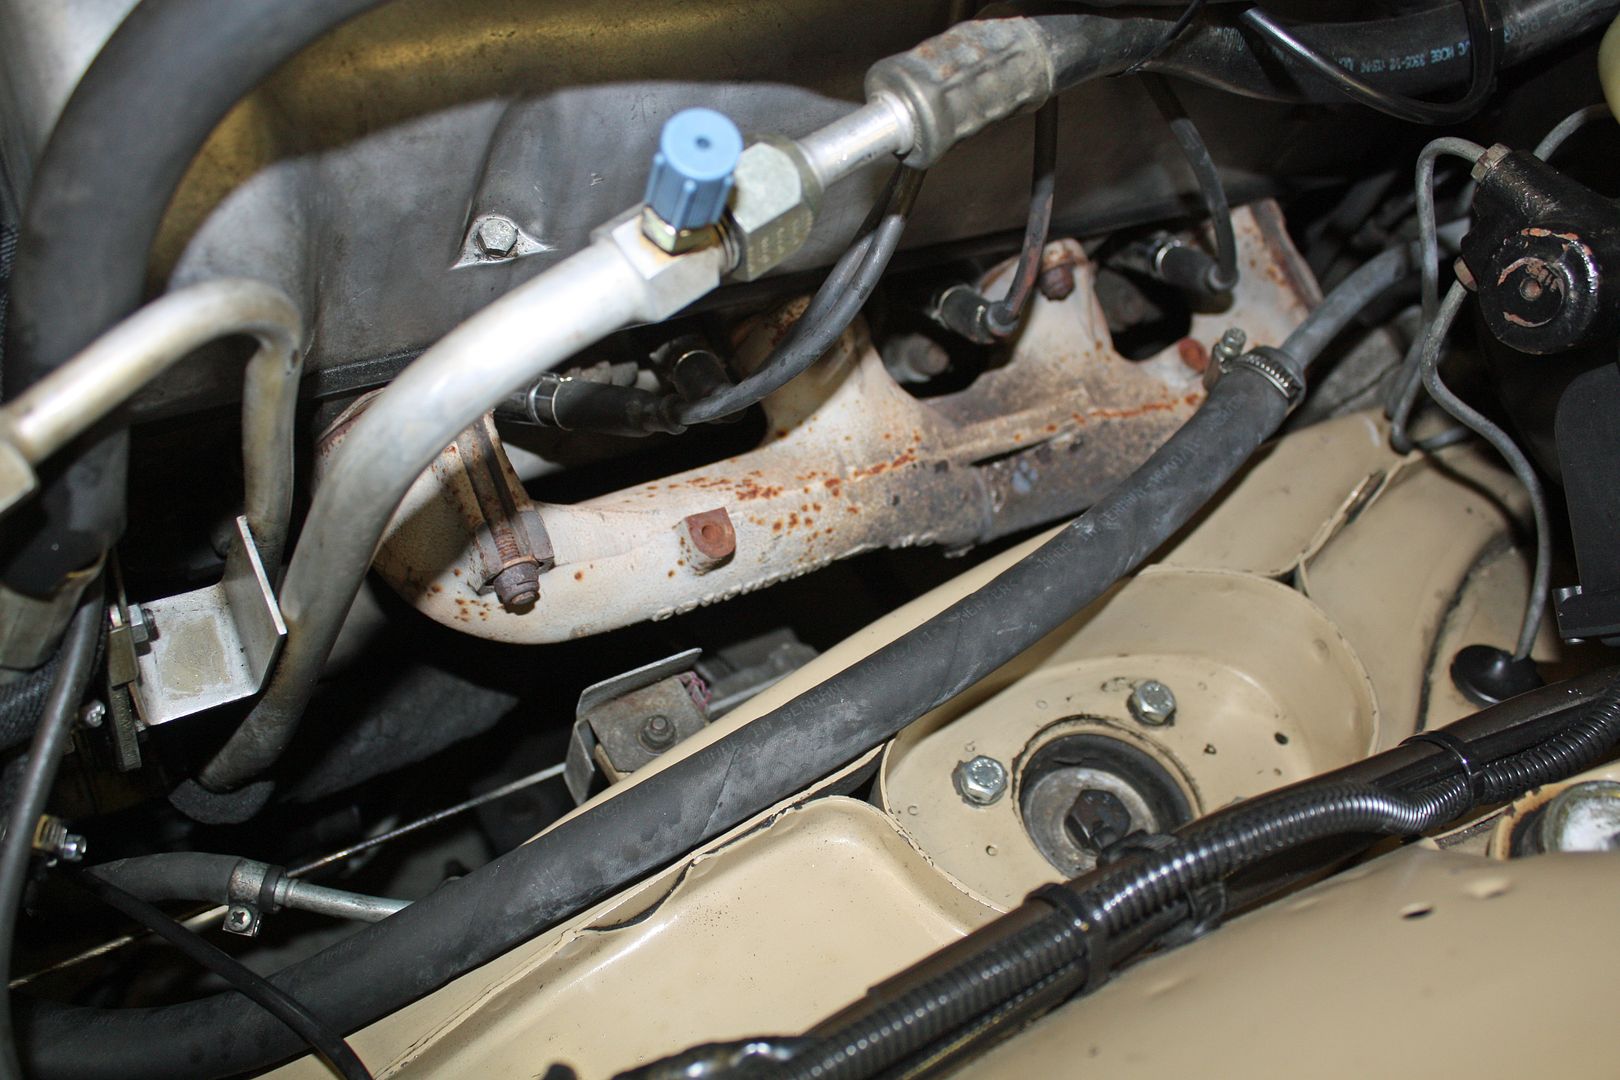
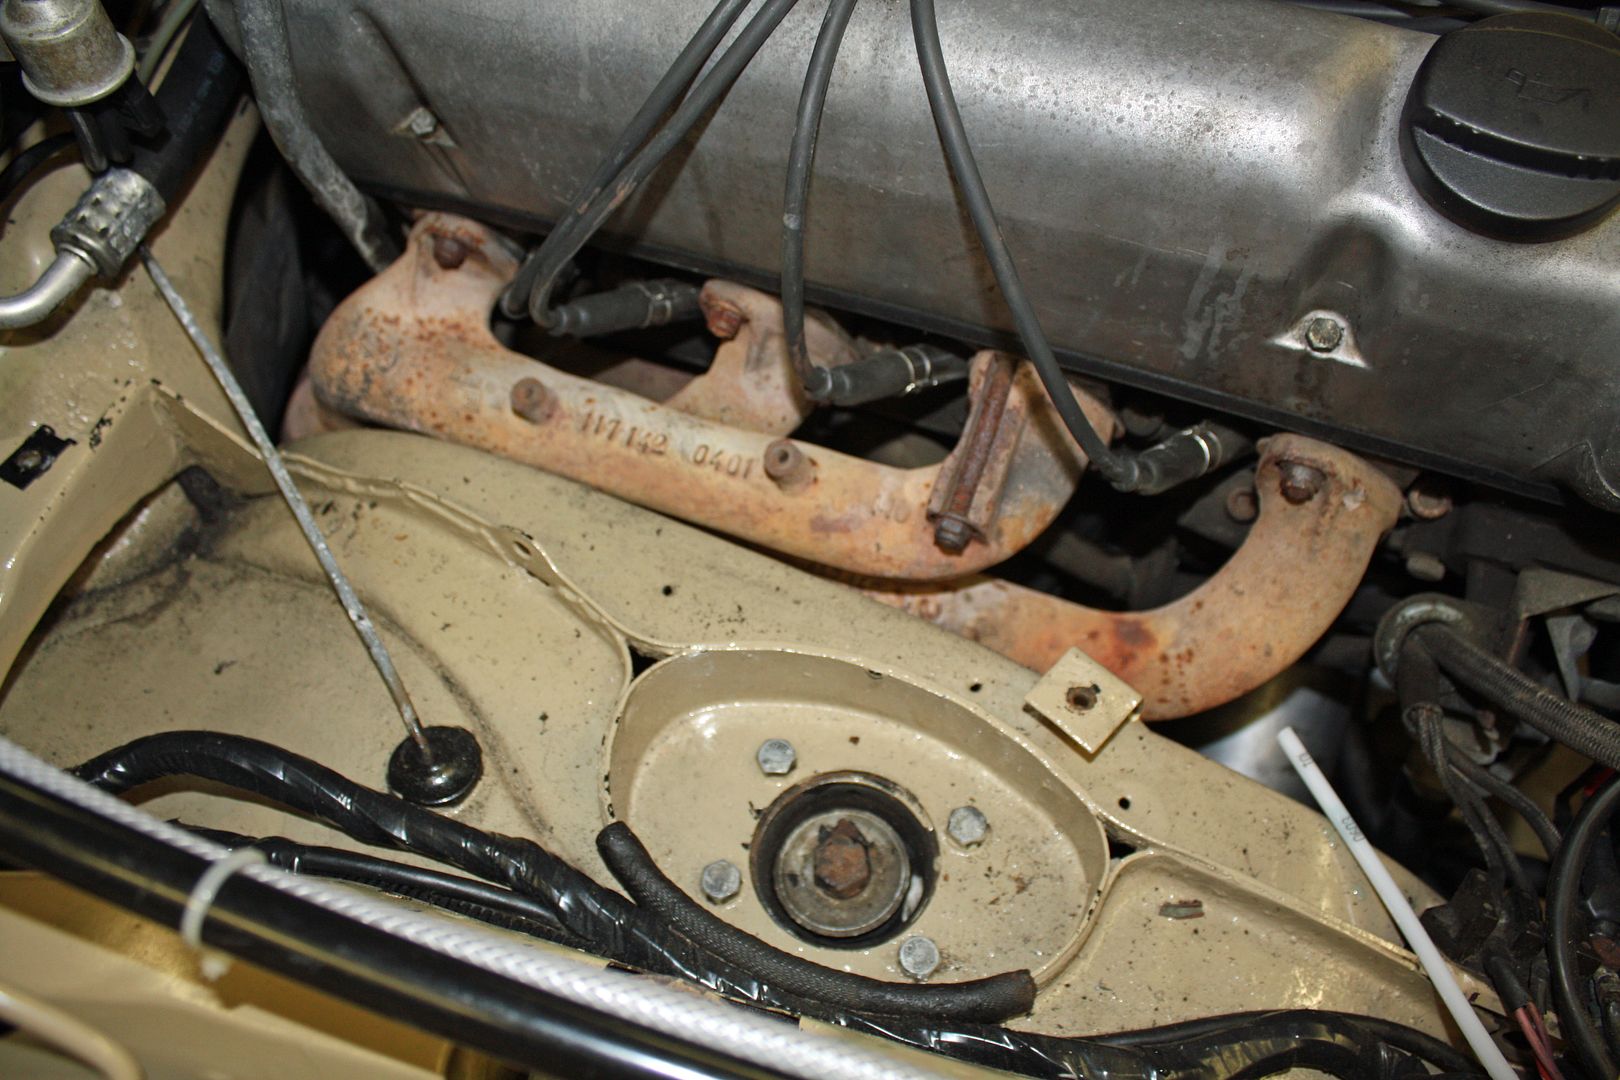
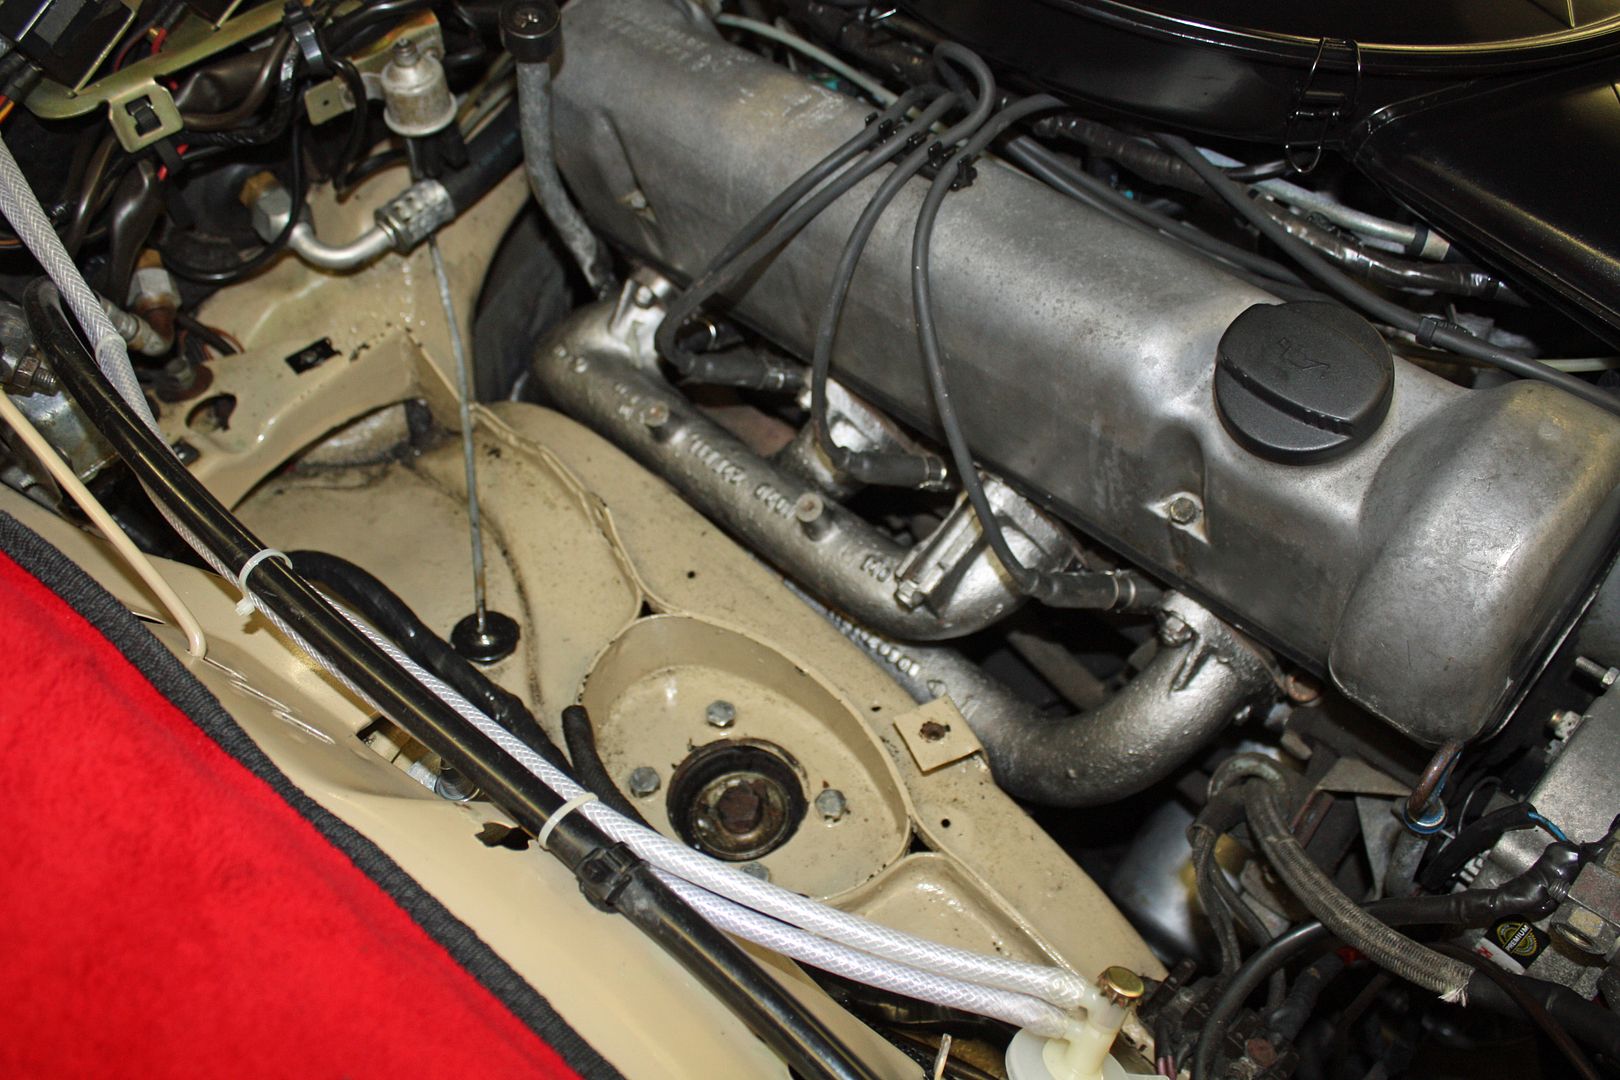
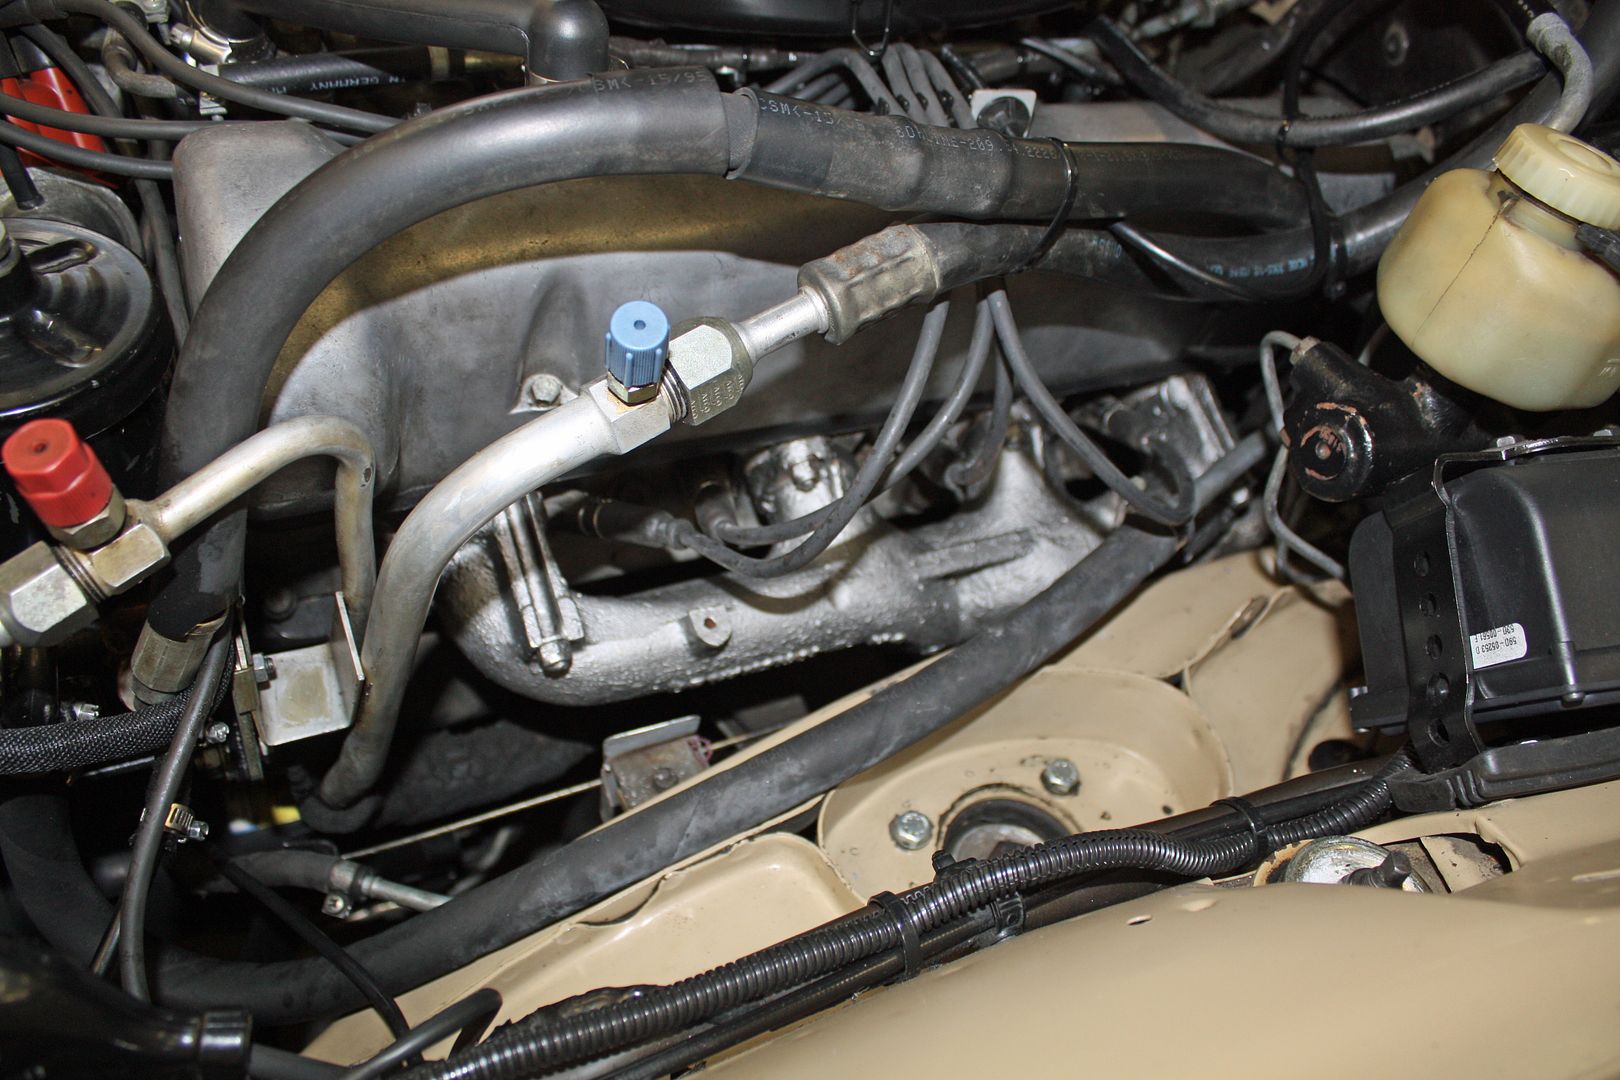


When I did the body off restoration of the '64 Corvette about five years ago, I discovered a product called "Hot Stuff". It is a manifold dressing. It worked great on the Corvette manifolds so I decided to give it a try on the Mercedes. First I removed the heat shields. I bead blasted them and took them to my powder coater who will make them an aluminum color using a high temp finish.


After mixing the Hot Stuff solution, I applied it with my wife's hand-me-down artist brushes. To reach the sides and bottom, I used my latex gloved finger.


The instructions say to let it dry for two hours and then run the engine for 10 minutes or put them in an oven at 375 degrees. Which is what I did with the Corvette manifolds since I had the engine out of the car. My wife happened to be out of town and was none the wiser.

Here are some before and after photos.


 11-02-2017, 06:54 PM
#100
Member
Thread Starter
Less than two weeks ago, Mercedes Benz Classic told me it would be eight weeks before I would receive a rebuilt Hydro Compensator. It arrived today!! It came with instructions in German which will not be of any help to me. Since the instructions have the ZF logo, I would assume they rebuilt the compensator.