GLA 45 Brake Job Instructions
 02-05-2019, 03:34 PM
#1
Newbie
Thread Starter

GLA 45 Brake Job Instructions
I haven't found a good guide anywhere that describes how to do the brakes on the GLA45 so I decided to make one. This brake job is just like any brake job with two notable exceptions:
Notes:
Weird Tools:
Normal Tools:
Process:
Access the Brake Service Menu to release the pressure in the rear calipers.
Removing the rear calipers & pads:
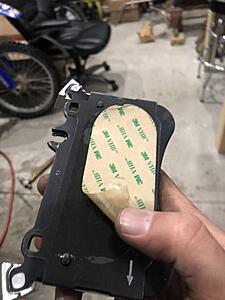
The pads are asymmetrical. Do not mix the inner and outer up. The inner pad that the piston touches has a semi circle protuding from it.
Make sure the shims are clean and that there is no rust caked up underneath them which could cause the pads to bind up.
Removing the front calipers, pads and rotors
- Mercedes uses E Torx, which not everyone has in their toolbox
- The electronic parking brake has to be released from the multifunction display
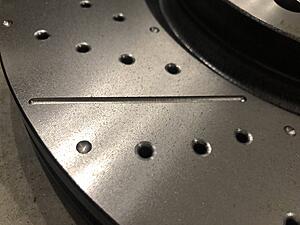
- The front brembo brake calipers are fixed (not floating like on most cars). This means that any runout in the rotor will be transfered to the hydraulics and will make the car shudder. Long story short - make sure your hubs are clean!
Notes:
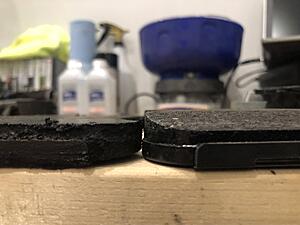
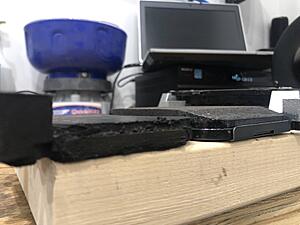
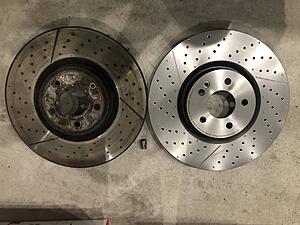
- When the brake pad wear indicator comes on in the car, there is still 40% of the pad left (see picture). Mine came on at 59,000 miles.
- The rear calipers do not require the special caliper tool which rotates the piston in order to compress it. Because the car has an electronic parking brake, there is no need for a ratcheting/rotating piston like there is on most other cars that have mechanical parking brake.
- The rear rotors can be changed WITHOUT removing the caliper carrier.
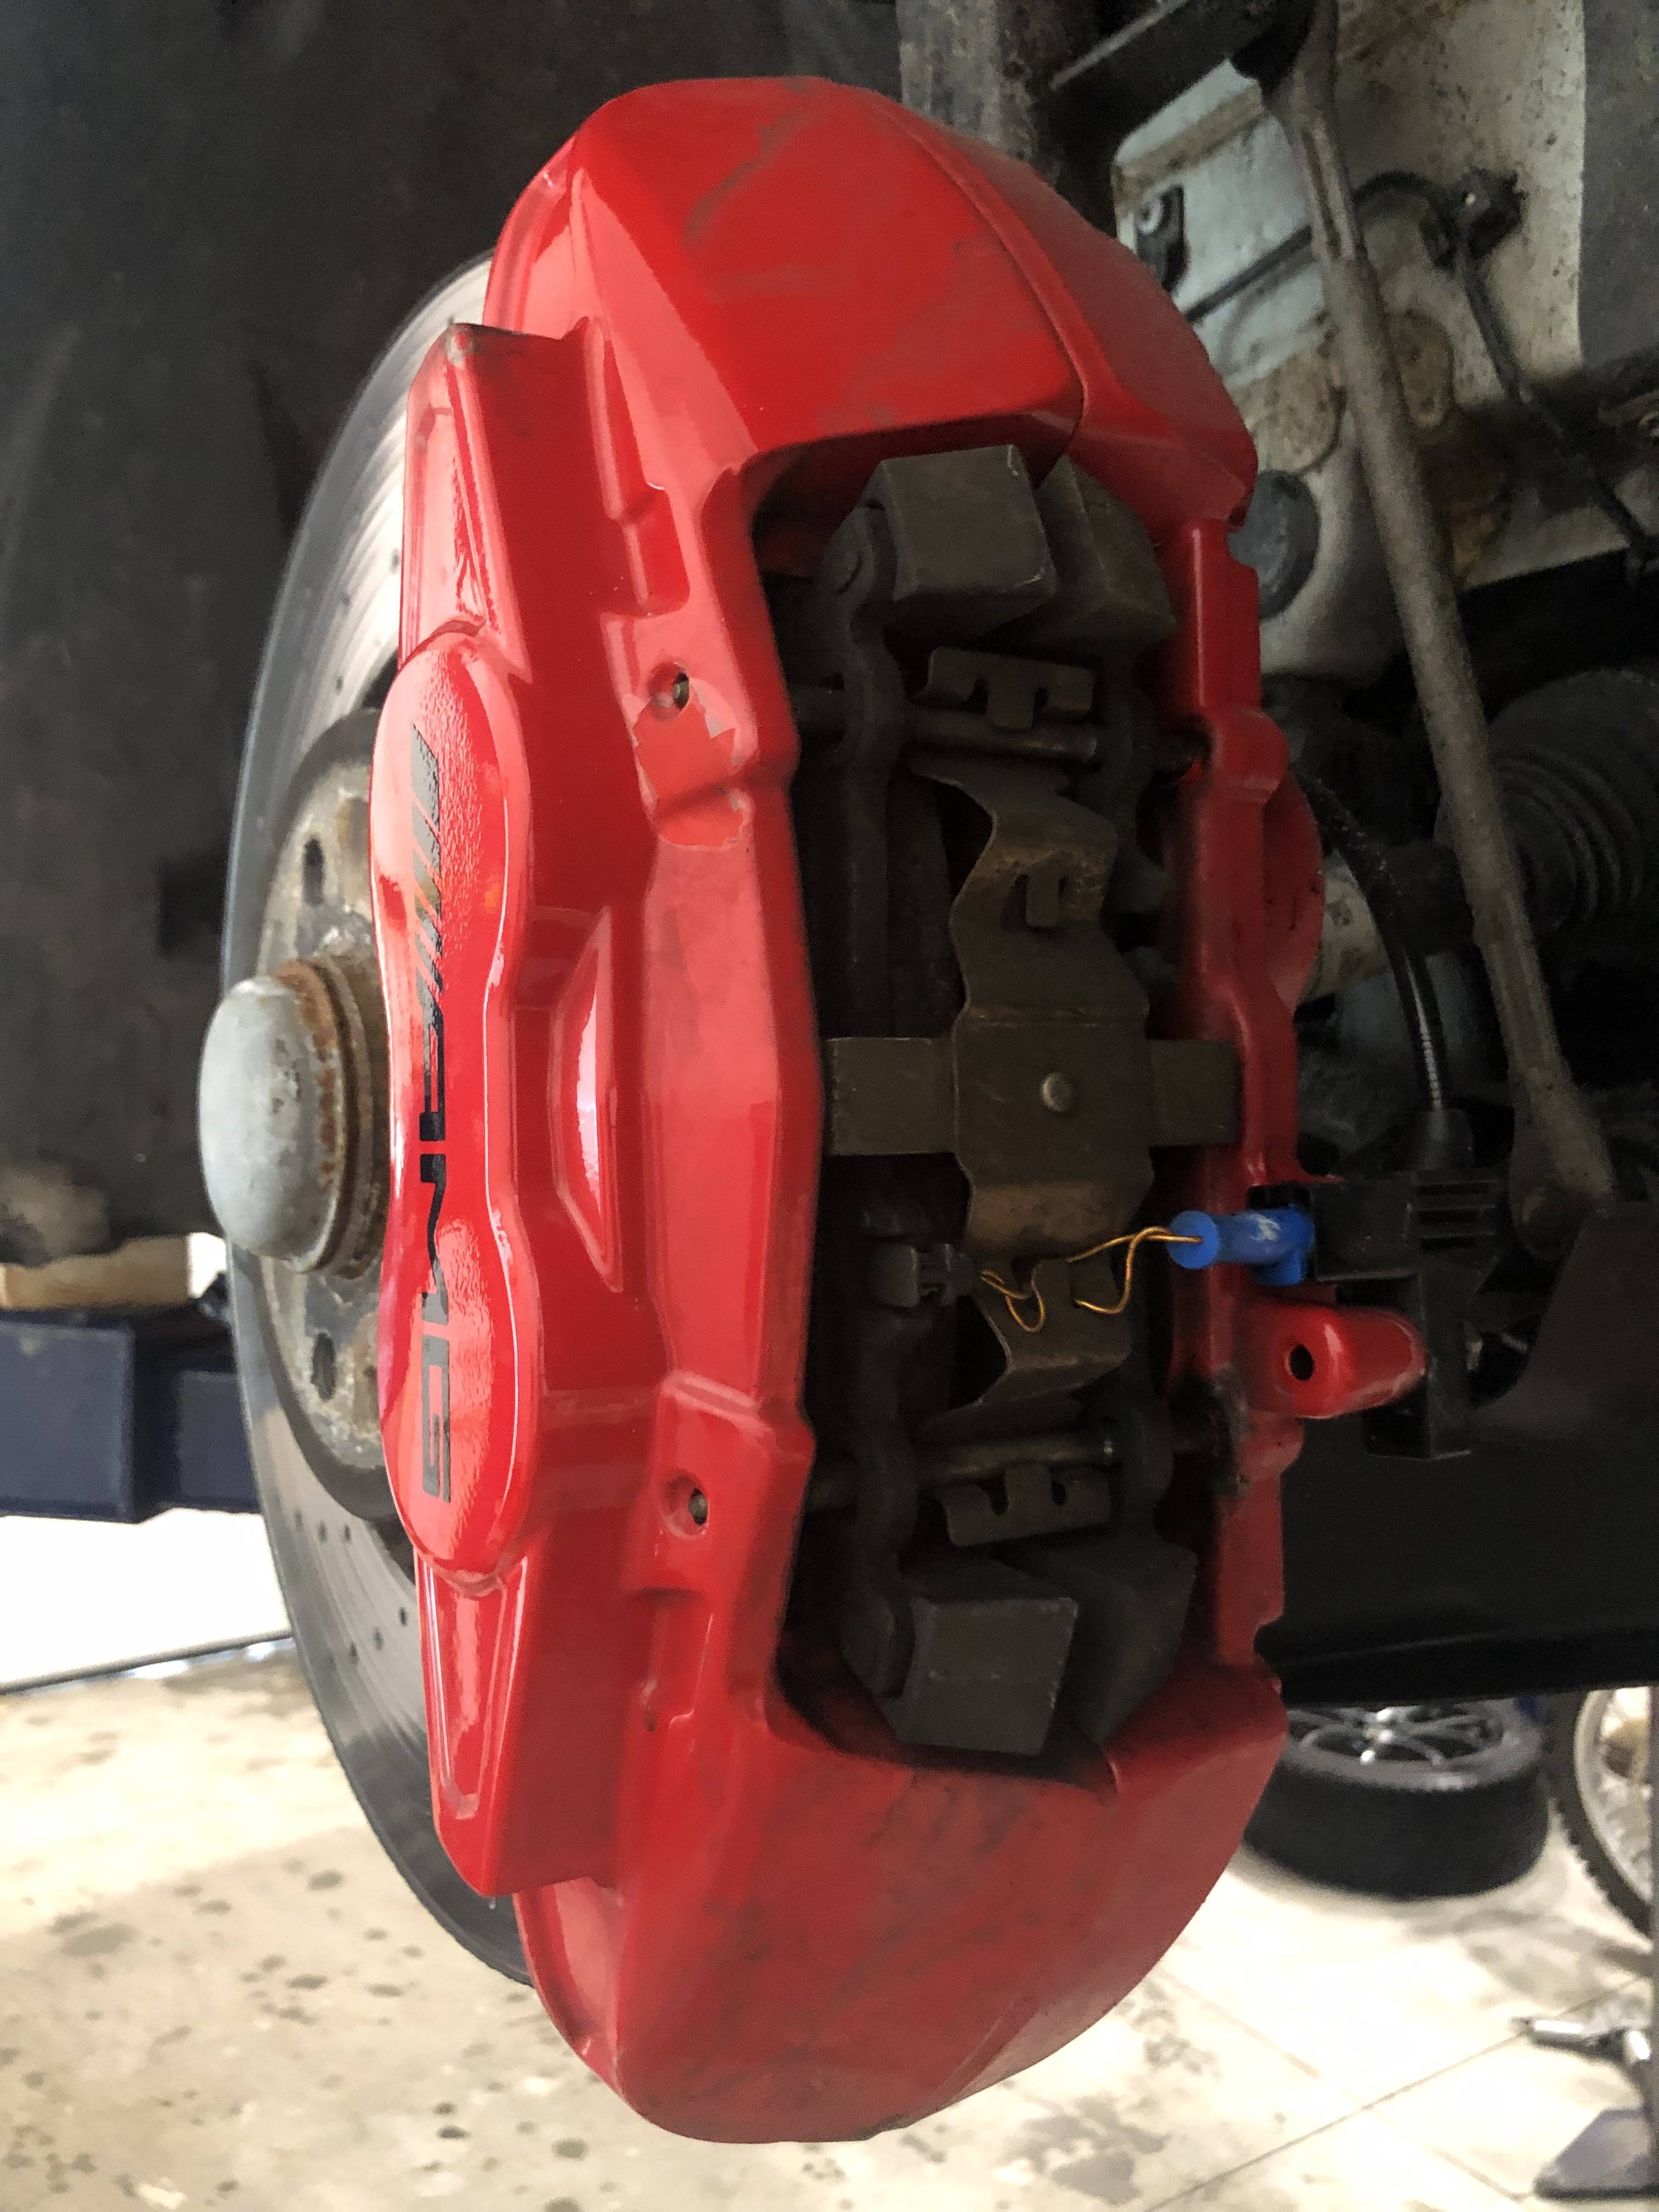
- The front calipers are quad piston front load style (the pad slides in from the front of the caliper)
- I am 100% certain that the OEM front brake pads and calipers are manufactured by Brembo because both had stamp/casting marks. I am 98% certain that the OEM rotors are also Brembo. I bought Brembo rotors for less than 1/2 the cost of rotors from the dealer and from what I can tell they are identical to the OEM ones. The only thing I am not sure about is whether they use a different coating from Brembo's "Green" UV coating. Time will tell how well the Brembo coating holds up.


Weird Tools:
- 10mm External Torx bit (E10) (wear sensor holder)
- 18mm External Torx Bit (E18) (caliper carrier bolts)
- Torx bit/driver (forgot to note which size - needed to remove the rotor retaining screw)
- Skinny 17mm Box Wrench (Optional - for rear caliper pins)
- Dial indicator (if you want to check the runout on the rotor)
Normal Tools:
- Small mallet/hammer
- Small drift pin to drive the front brake pad pins out
- Small Pry bar
- Ratchet
- Flat screw driver
- 13mm Socket
- 17mm Socket
- Large Channel Locks
- Some wire or zip ties to support the calipers while you install new rotors
- scotch brite hub cleaning discs
Process:
Access the Brake Service Menu to release the pressure in the rear calipers.
- key in accessory position
- all doors and hood closed
- Go to trip menu
- before trip dissapears, press and hold call button
- then press and hold OK button
- hold both buttons down for 5+ seconds
- The service menu should appear
- Find the brake service line in the menu
- Press OK to enter service mode
- If it says "Conditions not correct" make sure your foot is off of the brake pedal, and possibly release the parking brake (pull the parking brake lever on the left bottom side of the dash)
- When you are finished installing the rear brakes, you have to use this same menu to exit the fitting position.
Removing the rear calipers & pads:
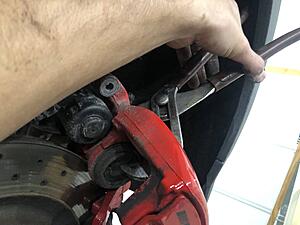
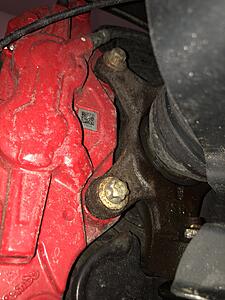
- The caliper slide pin bolts are removed first
- The slide pins have a 17mm nut, but there is not enough space for a normal thickness box wrench. To get around this, I used a flat screw driver and wedged it against the bolt - by prying down I could achieve enough friction to hold the pin still while I loosened the bolt. An air ratchet makes doing it this way much easier.
- After the slide pins are out, use your pry bar to pry between the caliper and the carrier to remove the caliper.
- The pads should stay in the carrier (pry them out too)
- Use channel locks to squeeze the piston back into the caliper. DONT PRY/SQUEEZE ON THE PASTIC part of the caliper.

The pads are asymmetrical. Do not mix the inner and outer up. The inner pad that the piston touches has a semi circle protuding from it.
Make sure the shims are clean and that there is no rust caked up underneath them which could cause the pads to bind up.
Removing the front calipers, pads and rotors
- The passenger side has the wear sensor - use the E10 bit to remove the sensor holder. Unplug the old sensor and move the wire out of the way so it doesn't get damaged.


- Using a drift pin and your hammer, carefully drive the two brake pad retaining pins out. The push from the outside toward the inside. Once both pins are out, the spring clip will be free - save the pins and spring for re-installation.
- Wedge a small pry bar or flat screwdriver in between the brake pad and the rotor, then pry in order to push the pistons back into the caliper.
- After the pistons are collapsed, remove the pads
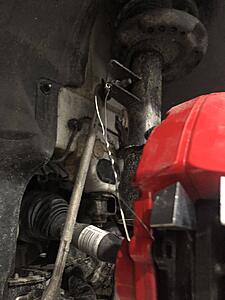
- Using a piece of wire or zip ties, wire the caliper to the shock tower so it won't hang on the brake hose
- Using the E18 bit, remove the two bolts holding the caliper to the steering knuckle.
- With the caliper removed, you can now remove the torx screw holding the brake rotor to the hub. My new rotors came with allen drive screws - which are awful to deal with once they are rusted. I re-used my torx screws since torx is less likely to strip.
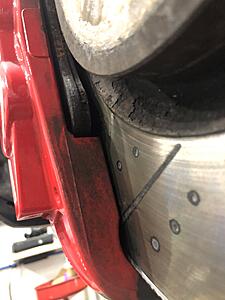
- CLEAN all the rust off of the hub. Due to the size of the rotors, even a tiny bit of rust will cause a runout on the rotor which will make the brake pedal throb like crazy.
- Put the new rotor on and install the retaining screw
- Bolt the caliper back to the steering knuckle. I don't have the torque specs - but tight is good and loose is NFG.
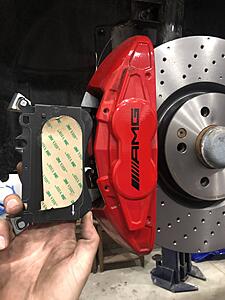
- Install the new sensor into the hole in the out side passenger side front brake pad. The Pagid pads I bought were directional - they had to be installed with the arrows pointing down (read the instructions for whichever pads you buy)
- Remove the sticky back from the pad and slide them into the front of the caliper
- Re-install the retaining pins - use a small hammer to tap them in. The spring will put tension on the second pin, I had to use my screw driver the push down & in on the pin as I tapped it into place.


Last edited by fahrvergnuugen; 04-30-2019 at 09:01 AM. Reason: Added missing step

The following 3 users liked this post by fahrvergnuugen:

 04-13-2019, 10:25 AM
#4
Newbie
Thread Starter
total cost was around $800 if memory serves.
 04-29-2019, 02:00 PM
#6
Junior Member

Thanks for a great write up.
I'm due for a break fluid flush on mine, does anyone know if I can just use a power bleeder to push the fluid out without having to open any valves via Star Diagnostics? That would be starting at Right-Rear, Left-rear, Right-Front and Left Front Caliper bleed nipples.
I'm due for a break fluid flush on mine, does anyone know if I can just use a power bleeder to push the fluid out without having to open any valves via Star Diagnostics? That would be starting at Right-Rear, Left-rear, Right-Front and Left Front Caliper bleed nipples.
05-06-2020, 02:22 PM
#7

Cheers, I was looking at purchasing some pads and I noticed a note on one of the websites which said that the pads for my 16 A45 or not for the "red calipers" .. Are there different size pads for the GLA45? I do have the red calipers... Was that an option compared to a smaller caliper for the A45?
Trending Topics
06-04-2020, 09:27 AM
#8
Member

Really appreciate the pics and writeup
May I ask,.....
What the **** do you drive thru?????
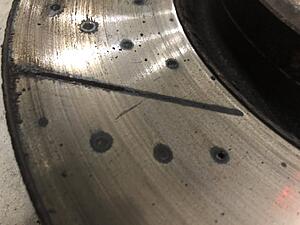
It looks like you've got carbonized grease packed into the rotor vents
May I ask,.....
What the **** do you drive thru?????
It looks like you've got carbonized grease packed into the rotor vents


