

 06-15-2015, 07:50 PM
Last edit by: IB Advertising
See related guides and technical advice from our community experts:
- Mercedes Benz E Class AMG: How to Replace Spark Plug Wires
Step by step instructions for do-it-yourself repairs

DIY Valve Cover Gaskets, Plugs, and Plug Wires
02-09-2009, 12:57 AM
#1
Senior Member
Thread Starter
DIY Valve Cover Gaskets, Plugs, and Plug Wires
My car has about 80K miles on it and was starting to leak a little oil at the driver's side valve cover. I decided to replace both valve cover gaskets, as well as, the plugs, and a new set of Evosport wires.
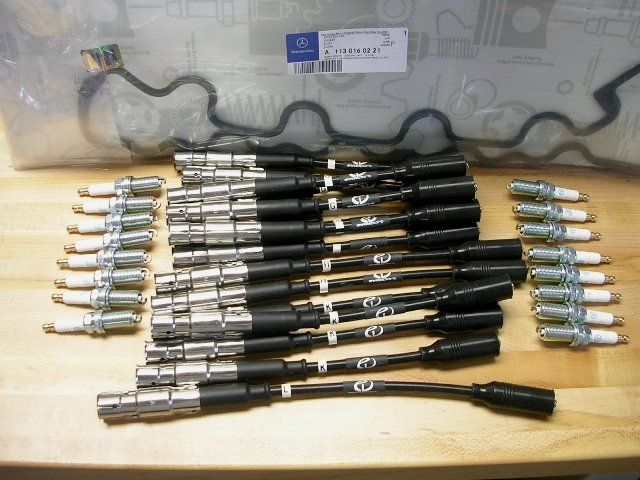
Here's the supplies. Two valve cover gaskets, sixteen plugs, and a set of Evosport wires. I removed all the plugs and checked the gap (0.8mm) prior to installation. Some needed closing but most were preset correctly.
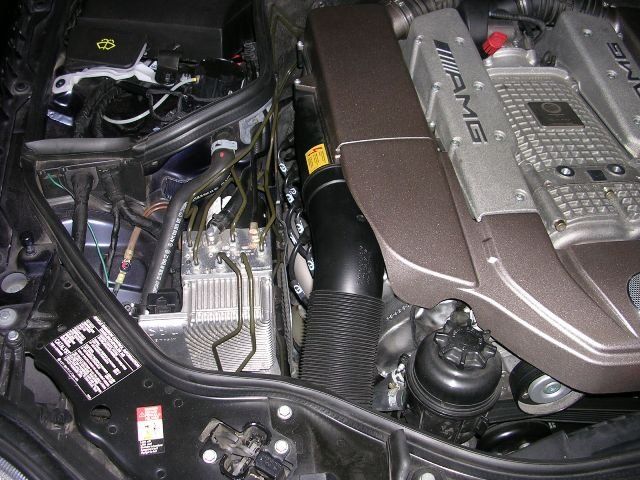
Remove the front cover and air filter housings. These pop right off.
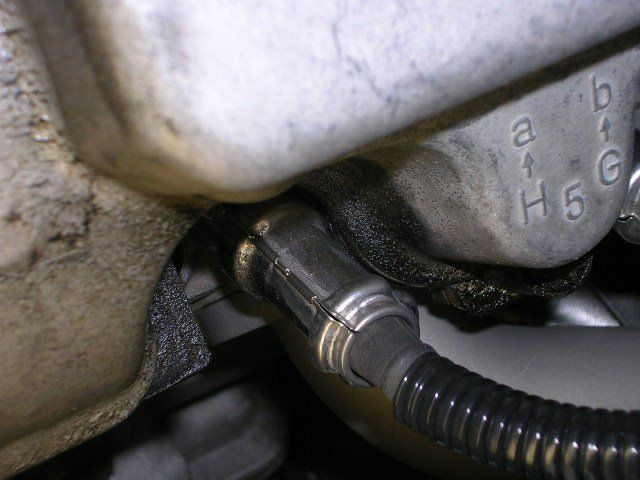
Leak area. I actually had a few spots like this.
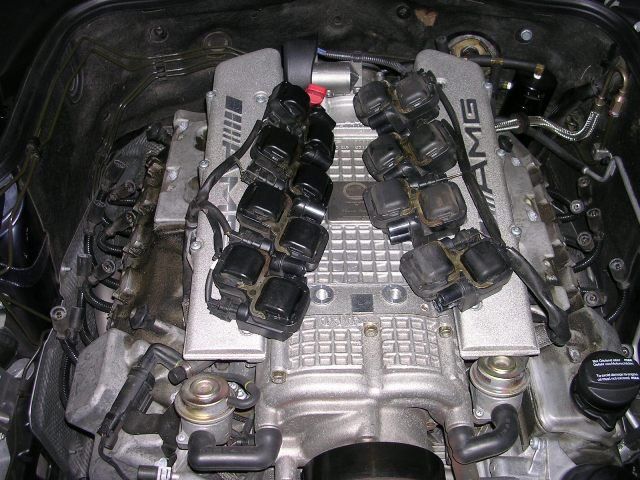
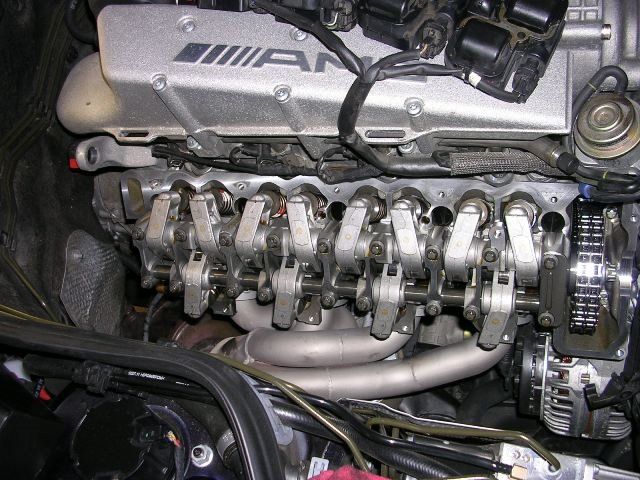
Disconnect plug wires from the ignition coils, unbolt them from the valve covers, and swing them up to rest them on top of the engine. No need to unplug the harness. Remove the plug wires after the coils are out of the way. An open end 17mm wrench will be your friend here. Use it as leverage to pry the spark plug boots off the plugs.
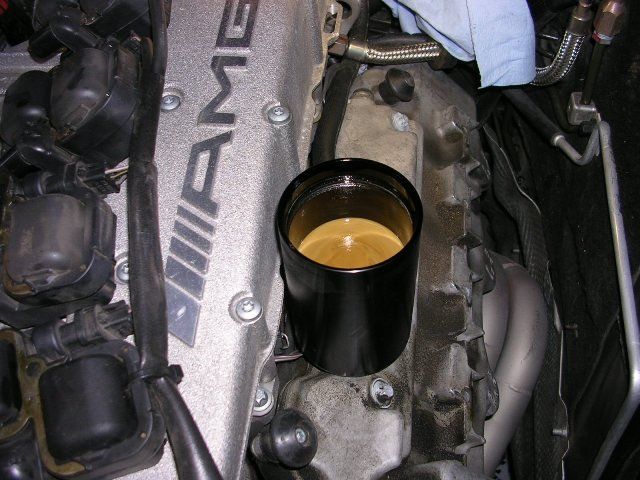
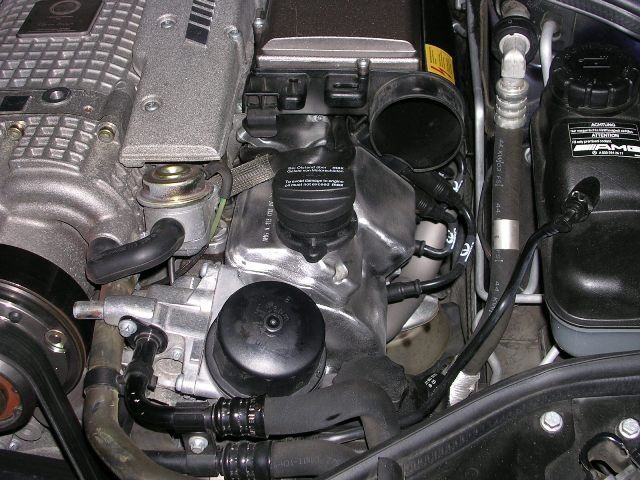
If you've installed an aftermarket oil catch can, now's a good time to drain it.
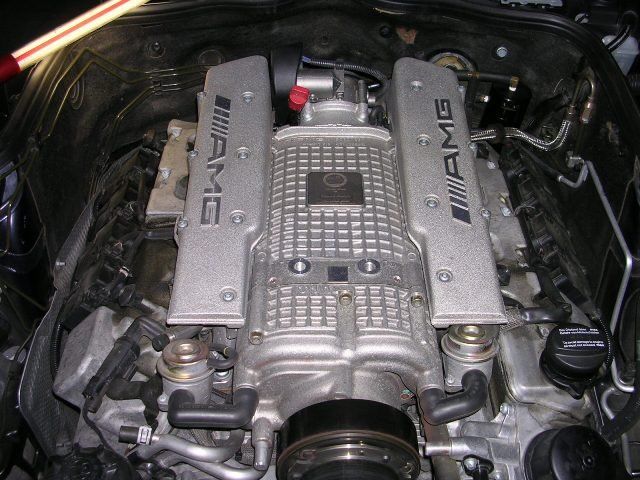
Remove the valve covers. They come off with very little effort. Looks pretty clean for 80K miles.
The bottom of the valve cover has a groove cast into it so the new gasket will seat in and hold. Your choice if you want to clean the valve cover but mine came out great with some elbow grease and a soft wire brush. I also resealed the vent chamber on top of the valve covers. Bolt the valve covers down to spec (72in-lbs.).
Before installing the plugs I put a little anti-seize compound on all the threads to make sure extracting them is easier in the future than the stock ones. Install new plugs and torque to spec. I torqued each one to 20ft-lbs. Bolt the ignition coils onto your freshly cleaned valve covers, and install the wires. All the coding you need in on the valve cover and coils to remind you which wire goes where. Be sure to pay attention.
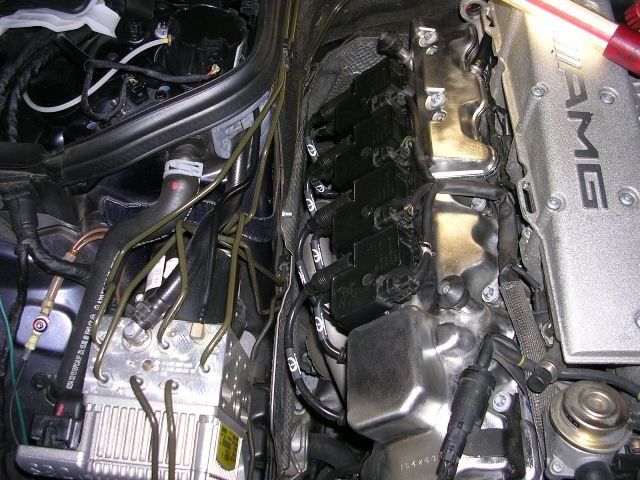
Driver's side installed.
Done. Fire it up and take it for test drive.
I noticed an immediate improve in performance. The car started faster and idled smoother than it ever has so I'm very pleased. I can't say if the Evosport wires perfom better than stock or not because I replaced the plugs too, but they sure do look great.
Here's the supplies. Two valve cover gaskets, sixteen plugs, and a set of Evosport wires. I removed all the plugs and checked the gap (0.8mm) prior to installation. Some needed closing but most were preset correctly.
Remove the front cover and air filter housings. These pop right off.
Leak area. I actually had a few spots like this.
Disconnect plug wires from the ignition coils, unbolt them from the valve covers, and swing them up to rest them on top of the engine. No need to unplug the harness. Remove the plug wires after the coils are out of the way. An open end 17mm wrench will be your friend here. Use it as leverage to pry the spark plug boots off the plugs.
If you've installed an aftermarket oil catch can, now's a good time to drain it.
Remove the valve covers. They come off with very little effort. Looks pretty clean for 80K miles.
The bottom of the valve cover has a groove cast into it so the new gasket will seat in and hold. Your choice if you want to clean the valve cover but mine came out great with some elbow grease and a soft wire brush. I also resealed the vent chamber on top of the valve covers. Bolt the valve covers down to spec (72in-lbs.).
Before installing the plugs I put a little anti-seize compound on all the threads to make sure extracting them is easier in the future than the stock ones. Install new plugs and torque to spec. I torqued each one to 20ft-lbs. Bolt the ignition coils onto your freshly cleaned valve covers, and install the wires. All the coding you need in on the valve cover and coils to remind you which wire goes where. Be sure to pay attention.
Driver's side installed.
Done. Fire it up and take it for test drive.
I noticed an immediate improve in performance. The car started faster and idled smoother than it ever has so I'm very pleased. I can't say if the Evosport wires perfom better than stock or not because I replaced the plugs too, but they sure do look great.
Last edited by BrianS; 04-08-2015 at 10:48 AM. Reason: Post new links to pics

The following users liked this post:
forcedawd (05-01-2017)
02-09-2009, 09:38 AM
#4
Super Moderator
Another excellent DIY from BrianS. You make it look so easy.
I�ve linked them and �borrowed� your pics on occasion - with credit of course.
Incidentally, your engine bay looks especially purposeful with those headers snaking about.
I�ve linked them and �borrowed� your pics on occasion - with credit of course.
Incidentally, your engine bay looks especially purposeful with those headers snaking about.
02-09-2009, 09:45 AM
#5
MBWorld Fanatic!
Join Date: Oct 2006
Location: Caribbean/Florida/Colorado
Posts: 3,642
Likes: 0
Received 11 Likes
on
11 Posts
E-ZGO 53hp., 1999 E 430 sport, 2004 E 55, 2008 Tahoe LTZ on 24"s
Thanks Brian, you are one (if not the foremost) of the real contributors here and I have a great respect for you and your efforts to make MBWorld W211 AMG board a source of valuable information.
I nominate for stickie!
I nominate for stickie!

Trending Topics
 02-09-2009, 03:26 PM
#11
Moderator Alumni
Brian... I am intending to do something similar to my car soon. I was curious if you were worried about tarnishing that may occur now that you have likely stripped off a top coating on the valve covers.
Thanks!
edit: could you also post a few pix of where you installed your catch can? TIA
Thanks!
edit: could you also post a few pix of where you installed your catch can? TIA
02-09-2009, 04:50 PM
#12
Senior Member
Thread Starter
Brian... I am intending to do something similar to my car soon. I was curious if you were worried about tarnishing that may occur now that you have likely stripped off a top coating on the valve covers.
Thanks!
edit: could you also post a few pix of where you installed your catch can? TIA
Thanks!
edit: could you also post a few pix of where you installed your catch can? TIA
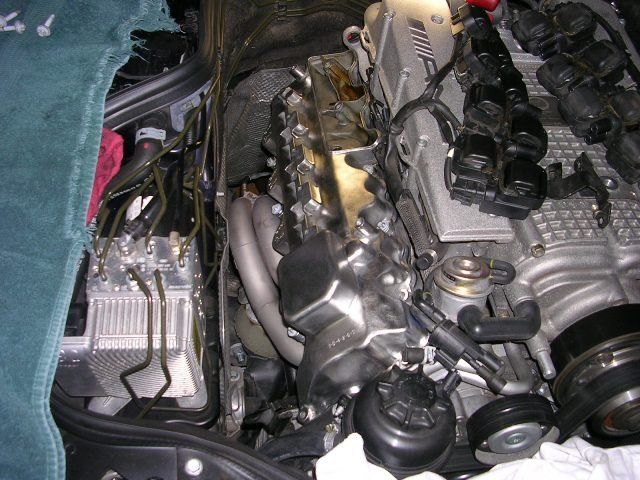
The catch can is resting behind the driver's side valve cover. You can see it in the pic above just behind the steel braide fuel line.
02-09-2009, 10:24 PM
#13
Administrator

Join Date: Nov 2001
Location: THE Orange County, California
Posts: 11,921
Received 795 Likes
on
495 Posts
2020 Audi R8 V10, 2016 AMG GTS, 2018 E63S Edition 1, 2018 Porsche GTS Cab, 2012 C63 BS
Added to the DIY sticky, thanks Brian for the great write up and Yachtmaster for the referral!!!!


 03-14-2010, 02:22 PM
#20
Junior Member

Join Date: Dec 2009
Location: Georgia, USA
Posts: 38
Likes: 0
Received 2 Likes
on
2 Posts
2008 GL320 CDI, 2007 E320, 2005 Passat TDI
I changed my plugs and wires yesterday. I used a Snap On tool for pulling the plug boots. It is part number SBP3. Worked quite well. I ordered it online from Snap On. Pic attached.
The following users liked this post:
Nor Cal SL55 (07-09-2021)
05-17-2010, 03:59 AM
#21
Member

Join Date: Feb 2010
Location: New Zealand
Posts: 77
Likes: 0
Received 0 Likes
on
0 Posts
2012 E63 Bi Turbo
New owner :this question has probably been asked before but do the air tubes after the filter housing just pull out of the s/c housing or are they held by a clamp system?
I take it that there is a special tool for the hose clamps and that being the case is it easier to replace them with conventional clamps?
I am preparing myself for a rocker cover /spark plug change and dont want any surprises when I get into the job.
thanks
I take it that there is a special tool for the hose clamps and that being the case is it easier to replace them with conventional clamps?
I am preparing myself for a rocker cover /spark plug change and dont want any surprises when I get into the job.
thanks
08-07-2010, 12:11 PM
#25
Newbie

Join Date: May 2009
Posts: 11
Likes: 0
Received 0 Likes
on
0 Posts
99 E320, 05 E55
How to reseal the vent chamber?
I'm trying to do replace the valve cover gaskets. How do we reseal the vent chamber?. Is there a gasket?. -- I've called the dealer parts dept and they do not see any gasket for the vent chamber.
Thanks,
Thanks,


