When you click on links to various merchants on this site and make a purchase, this can result in this site earning a commission. Affiliate programs and affiliations include, but are not limited to, the eBay Partner Network.
Edit: (April 29, 2021) Forum member A-a-ron212 created an install video on his Bucks Garage YouTube channel that summarizes the install on his 2012 E550 with NTG 4.5.
Edit: (June 20, 2020) After using a next-gen box (Road Top) for a few weeks I would no longer recommend purchasing the current Joyeauto hardware. The new units are much easier to install and are more refined in operation.
These units are available from several sources and also appear to be identical hardware.
In no particular order they are available from:
Road Top (via aliexpress, here's the post about the unit I purchased) or Amazon.
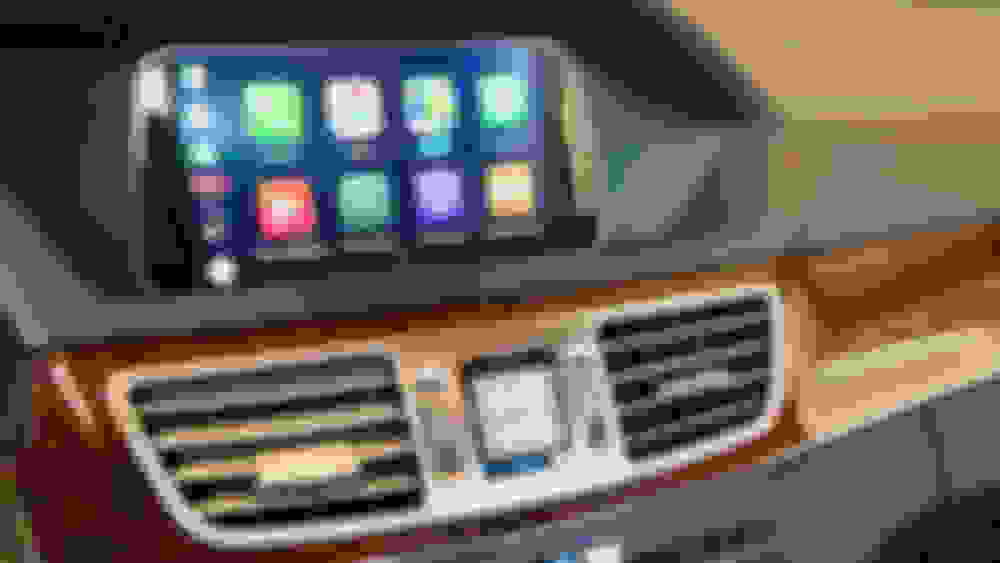
Here's a DIY for the install of a Joyeauto wireless CarPlay system for a W212 sedan. It will not include highly documented step-by-step instructions, but I have consolidated information from several sources that should enable a straighforward installation. I elected to install the unit on the upper shelf of the glovebox since I was not sure about its operation and was hesitant to install in a closed space not knowing in advance anything about its operating temperature. (Yea MB cooled glovebox!) I may move mine at a future point, but since I don't really use the glovebox I'm fine with it sitting in there for now. I'd love to know what other solutions folks use, but for now this DIY will focus on the glovebox.
I purchased the unit directly from Joyeauto and it was delivered in about a week via DHL with english pre-selected as default.
3) View the video below. Although it depicts a wired CarPlay installation in a X166, it uses a virtually identical wiring harness and provides a good overview of the next steps. Important: take note of the optical data cables for the external amp (if installed) and the necessity to move them to the new harness.
The Joyeauto unit largely works by inserting itself into the video chain between the MB Comand unit and the MB LCD screen.. This enables the Joyeauto unit to output bit-perfect digital video to the MB's LCD screen and quickly switch sources between itself and the Comand's output. Meanwhile audio is input via the Comand's AUX input.
On my 2014 USA spec W212 w/ Harmon Kardon audio I had to manually enable the AUX input in the Comand Engineering Mode. So this step may not be necessary for W212s with factory AUX inputs.
Enter the Engineering Mode by pressing and holding "red phone" and "1" and "#" all at once on the front of the Comand unit until the Engineering Mode appears.
You will see this screen:
Go to 7 (HW Setting) and verify that Audio AUX is "on."
If Audio AUX is 'on', you are done here.
Otherwise, back up to the previous screen and go to menu 7.5 and turn MOST "OFF".
Once MOST is off, you can go back to 7.7 and enable Audio AUX.
Then go back to 7.5 and turn MOST "ON" and(2) Audio Source: External AMP. The HK system uses an external AMP and without this on, it won't work. I don't know if non-HK cars use an external amp or not, so one my have to try both options.
IF, and only IF, you are installing a next-gen unit and want the "Voice" button on the steering wheel to work with Siri without interference of the MB voice control, see this post.
Reboot Comand by pressing and holding the center "ON" button on the front of the unit.
Last edited by cadetdrivr; 07-12-2021 at 09:56 AM.
I'd recommend disconnecting the main battery at this point. I did not, things worked out fine, but it's certainly a good idea.
Now it's time to open up the dash. Start with the large dash trim piece, and then the glove box. Every screw involved is a T20 and you will need to use the pick on a couple clips on the trim.
Follow the instructions, take your time with the trim and it will come out without too much drama. The glove box is all screws and goes quickly. The glove box is designed to remain in place when the screws are removed, which helps the removal and re-installation greatly.
While the glovebox was removed, I took the opportunity to remove a small plastic cutout in the rear top of the glovebox to enable routing the wiring. (The photo is before it was removed.)
Last edited by cadetdrivr; 07-19-2019 at 02:29 PM.
Now that the dash is opened up, it's time slide out the Comand unit.
1) Place a soft towel on the center console for protection
2) Remove the 2 T20 screws on the top of the Comand unit
3) Carefully start to slide the Command unit out until you can see the small wire harness attached on the right side. Disconnect the harness.
4) Slide the Command unit all the way out. Once out, I found that rotating the unit 90-180 degrees made the harnesses in the back easier to remove.
5) Remove both the MAIN (large black) harness and the blue LVDS (video) cable from the rear of the Comand unit.
6) Plug the blue Joyeauto LVDS IN cable into the back of the Comand unit (There are two LVDS cables, it's the one with a 90 degree connection)
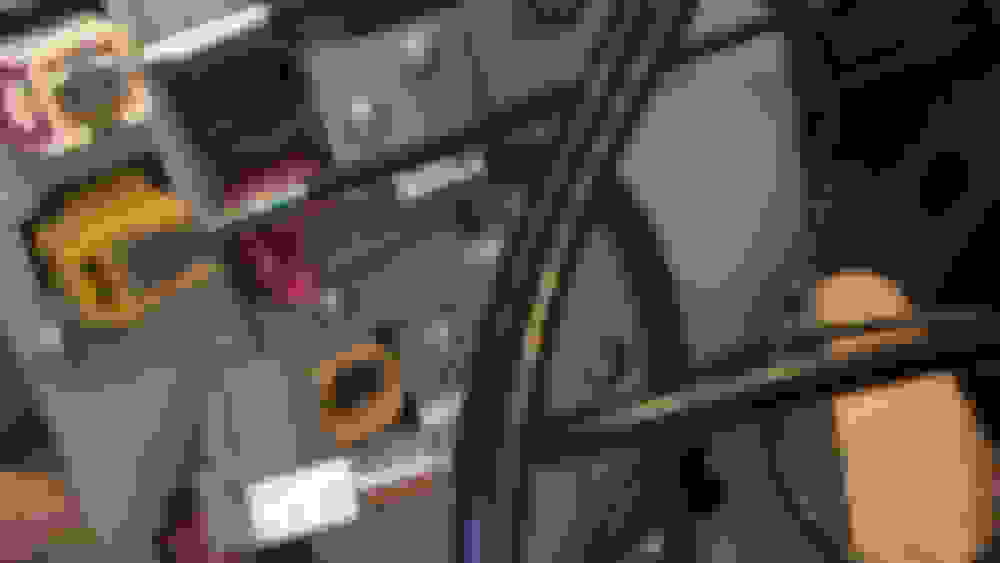
7) Remove the optical cables from the MB harness. Be VERY CAREFUL with these optical cables. Do not bend or force them at any time as they can break. I found that I had to strip away a few inches of the wrap around the MB wire harness bundle to free the optical cables.
8) Plug the large black MB harness into one end of the Joyeauto harness
9) Attach the Joyeauto power cable to the Joyeauto harness
10) Plug the other end of the black Joyeauto harness into the Comand unit
11) Plug the optical cables into the rear of the new Joyeauto harness at the rear of the Comand unit
12) Attach one end of the Joyeauto audio cable to the Joyeauto harness AUX IN
13) Attach the Joyeauto LVDS out cable to the MB blue monitor cable
14) Fish all the above cables that will attach to the main Joyeauto unit behind and to the right inside the dashboard as necessary making room to reinstall the Comand unit. Since I was going to install the unit in the glove box, I positioned them in that direction around the interior components of the dash.
15) Now we will slowly start to put the Comand back in place. Even with all the new cables moved out of position, it will be VERY DIFFICULT to get the Comand unit to fit back due to the new harness. It will take some trial and error, but CAREFULLY move the wiring harness to a least bad location while ensuring that everything remains connected. I found success with the large black harness connector forward, up, and toward the driver side. YMMV.
16) Before sliding the Comand unit all the way back in, reattach the small harness on the right side
17) Once the Comand unit is back in place, install the two T20 screws. Whew!
Last edited by cadetdrivr; 07-19-2019 at 03:08 PM.
Now that the Comand unit is back in place, this is a great time to check the operation of everything before closing things up.
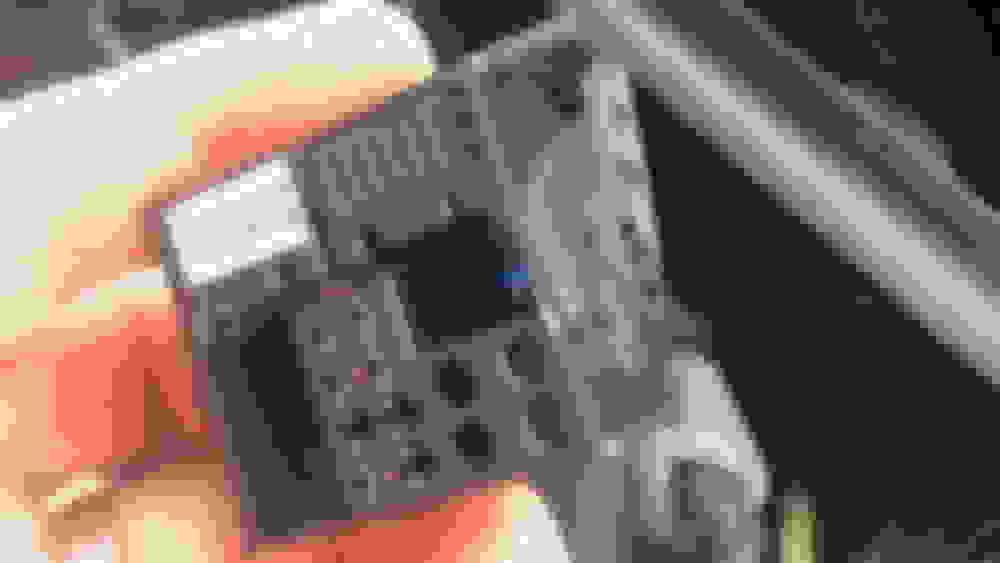
1) Verify the DIP switches on the side of the Joyeauto unit. I had to flip one on the dip switches to reflect that I have the NTG 7" screen (800x480). Since i have the factory rear camera, I left that dip in the default position.
2) Temporarily connect all the cables to the Joyeauto unit, including the mic and wifi antennas using the Joyeauto diagram.
3) Reconnect the main battery if necessary, and power things up.
4) Select Audio AUX in Comand
5) In your iPhone's bluetooth settings, remove the existing Mercedes pairing ('Forget This Device')
A LONG press of the "Back" button next to the Comand control wheel will switch between displaying Comand and the Joyeauto interface.
Here's the Joyeauto main screen:
If you don't see the Joyeauto screen, double check all your work against the Joyeauto diagram. If you can't see the Comand screen it's possible that a cable has become disconnected or the LVDS cables have been reversed.
If things look good, it's time to pair the phone with the unit to enable CarPlay.
First, make sure your iPhone's wifi and bluetooth are both enabled. Do not connect your phone via lightning cable to the Joyeauto USB extension.
Go to the iPhone's bluetooth settings and connect to "IDCORE." It will cycle though the usual bluetooth pairing screens (say yes to everything) that you've seen before except for the magic last one where it will ask if you want to use this connection for CarPlay (hint: say yes). The phone will automagically receive the wifi network info and switch over to wifi.
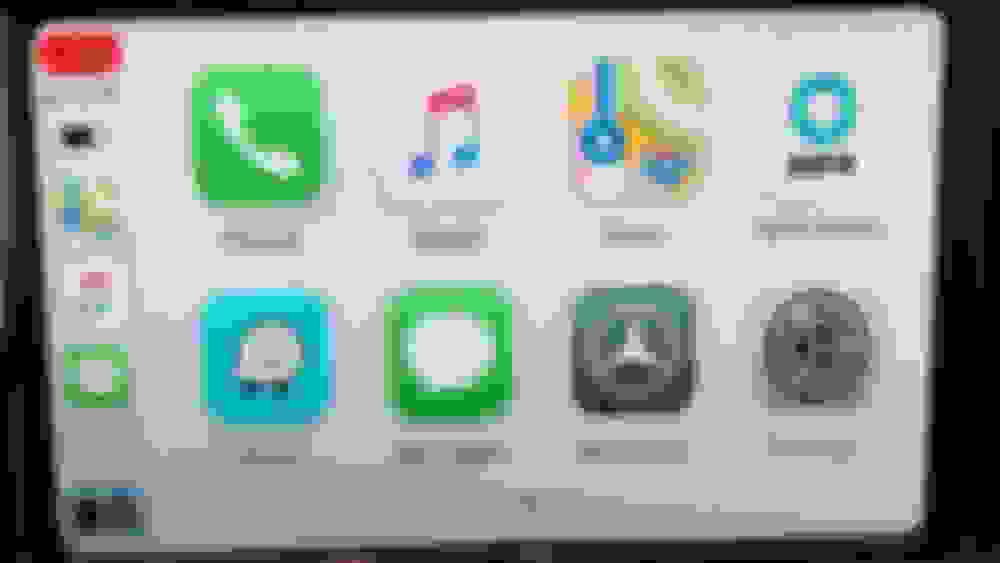
You should be seeing and controlling CarPlay now.
CarPlay on iOS 13 Beta
NOTE THAT THE "MERCEDES" APP IS REALLY JUST THE LINK TO THE JOYEAUTO MAIN SCREEN.
Now that the operation has been verified, power down and disconnect the cables from the main unit in prep for re-assembly.
1) Mount the mike in the desired location temporarily with some removable tape. Then continue the process by gently pulling off the door gasket next to the dashboard and work up. Only remove the area required, as it will easily top back into place. Run the mike wire along the opening and up to the top of the A pillar. Use a plastic trim tool to tuck the wire into the top of the A pillar trim and up behind the headliner.
2) Find a mounting location for the Antenna, remove the backing, and press to attach. FWIW, I attached to the metal cross-member inside the dash facing the cabin.
3) Wire the USB extension cable as desired. I did not do this since I have access in the glove box, but you will want this cable installed for firmware updates, wired CarPlay, or wired Android Auto if the unit is mounted in an inaccessible location.
4) Collect all the cables and tuck them through the opening in the back of the glove box and place the glovebox back in position (no screws).
5) Hook all the wires back up to the main unit in the glove box and test the operation one last time.
6) If successful, reinstall all the screws for the glove box and then install the interior trim using the opposite process as the removal.
DONE!
Last edited by cadetdrivr; 07-29-2019 at 08:03 AM.
Here's the Joyeauto instructions for daily use. Pretty simple.
In use, it seems like the Comand control wheel takes a slightly longer press in CarPlay than in Comand, but it does not take long to get used to it.
The long-press BACK toggles between CarPlay and Comand.
When you press C (or CLR) Siri pops up immediately, no need to say "Hey Siri"
TROUBLESHOOTING
No audio: Verify that Comand's audio source is AUX Audio
No Audio: If a USB cord is being used for power, verify that it's connected to the CarPlay unit's USB extension or the regular MB USB port and NOT the MB Multi-Media port
Problems with phone calls: Verify that the iPhone is not connected to the Mercedes bluetooth and the Joyeauto bluetooth at the same time. FWIW, I simply removed the pairing with the car on my phone.
Comand knob not responsive in CarPlay (It will not "rotate" more than two icons in CarPlay): return to Comand, rotate the dial, then return to CarPlay. I have had this happen more than once--- I don't know if it's because I'm using the beta for iOS 13 but this always clears it up and it does not reoccur on the same trip.
iPhone does not automatically wirelessly connect to CarPlay: In the iPhone's bluetooth settings, manually select the Joyeauto unit (IDCORE). The phone will then initially pair via BT and then switch to wifi.
Reboot Joyeauto Unit: Joyeauto Main Screen ==> Setup ==> Smart Phone ==> Reboot (Yes, that seems like a strange place for it)
ADVANCED
One can change the bluetooth name of the Joyeauto Unit from IDCORE to anything you want. (I changed mine to the car type so I could tell our two MB vehicles with Joyeauto apart.) Note that you can't change the name while a device is paired.
Last edited by cadetdrivr; 07-24-2019 at 09:18 PM.
Looks great, but not for NTG 4, correct? (2010 E350)
I dunno, but I presume not since it said it�s for NTG 4.5 and 4.7. Joyeauto may have more info, or perhaps another company has a wired CarPlay solution for NTG 4?
W212 M276 DELA 30 ; W211 OM642 ; R107 M117, Sierra 1500 LZ0
This is great information and I intend to use it when i get the nerve up to try this myself. Thank you for taking the time to compile it and Joyauto should pay you a documentation fee!
2012 E550 Cabriolet 2011 VW Eos 1985 Pininfarina Spider
Thanks for the write up. I've been in email contact with Joyeauto for a week or so. I asked for the installation instructions and was told they currently do not have those, which would imply they either had them or will have them in the future. I have my doubts on either. I think I am going to order anyway. I think I may buy a NTSC camera to try and install as a front camera. I was told by Joyeauto this was possible and would stay on for 10s when shifted into drive. I would like to see if I can run a switched power wire to the camera to turn on when needed, i.e. to watch those pesky parking blocks. Quick question, I read somewhere that someone installed the box under the carpet in the passenger foot well. If that is a possibility, does the glove box need to be removed?
Quick question, I read somewhere that someone installed the box under the carpet in the passenger foot well. If that is a possibility, does the glove box need to be removed?
I think you **might** be able to get by with simply removing the cover above the passenger footwell (several T20 screws) without removing the glovebox. Removing the glovebox, however, is really not a big deal--there's about 8-10 screws and a couple wire connections. It hangs on some mounts so even with the screws removed it remains in place--it's a one person job to remove or install.
I thought about it mounting in the footwell, and Joyeauto previously had a video posted of a W212 that looked that that's what they were gonna do--in the video the main unit was hanging down there but they never showed the final result. I also almost mounted it inside between the footwell cover and the glovebox.
But in both cases of mounting below the carpeting and sandwiched inside the dash I was concerned about heat. There are several vents on the unit and I figured they are there for a reason.
Last edited by cadetdrivr; 07-20-2019 at 07:32 PM.
This DIY is now largely complete. If anybody else has any suggestions I'd be happy to incorporate them into the main body of instructions.
Excellent write-up! BTW, did you adjust the volume level in the Joyeauto settings? I found that leaving it on max distorted sound a bit. I turned my volume down to about 75% and no distortion. I use the Tune-In app for radio, which allows me to get more than local stations and I also discovered the Sirius app actually sounds good with music, unlike the SAT radio on the OEM HU. I don't use the OEM HU for music now, so leaving the audio in AUX is not a big deal.
The sound level with phone calls is lower, as you had mentioned, which is a little annoying that you have to turn up the volume for phone calls, but once you do that, sound is fine.
I did not adjust the volume in the Joyeauto settings and have not noticed distortion at MAX. I dunno if it's a different MB amp between the sedan and coupe/conv chasis, an update in the Joyeauto firmware, or my aging ears.
I agree that listening to audio via IP regardless of source (radio or SAT) sounds better than the broadcast version across the board.
In reference to phone calls, yeah it's fine inside the car, but I should have been more specific and said that when calling the car when my wife is driving I notice more background noise and slight echo than with the MB bluetooth. It still works, but there is a noticeable difference.
Last edited by cadetdrivr; 07-29-2019 at 10:53 AM.
Comand knob not responsive in CarPlay (It will not "rotate" more than two icons in CarPlay): return to Comand, rotate the dial, then return to CarPlay. I have had this happen more than once--- I don't know if it's because I'm using the beta for iOS 13...
I just saw that you're using the iOS13 Beta, so the Comand dial issue is the only thing you've noticed so far? I was wondering how the iOS13 might impact the Joyeauto unit without a firmware update. Glad to hear that 13 seems to be working.
I just saw that you're using the iOS13 Beta, so the Comand dial issue is the only thing you've noticed so far? I was wondering how the iOS13 might impact the Joyeauto unit without a firmware update. Glad to hear that 13 seems to be working.
I don't think the Comand dial issue is a iOS 13 thing as my wife told me she had the same thing happen with her phone on iOS 12. It's a nuisance for sure, but it's also a 5 second fix.
I also noticed last night that Google maps went into a "dark" mode but Apple maps did not. I don't know if that's an iOS 13 beta thing or not.
Considering that Carplay is really just "screen mirroring" with the phone creating an alternate UI for a video stream which the car then simply displays, I would expect few issues with iOS updates as long as the CarPlay unit met specs in the first place.
Last edited by cadetdrivr; 07-30-2019 at 07:30 AM.
2012 E550 Cabriolet 2011 VW Eos 1985 Pininfarina Spider
I started my install tonight and wanted to ask a few questions.
I didn't go into the engineering mode and adjust the settings prior to starting. Should I go back and do that or can it wait until after the install?
6) Plug the blue Joyeauto LVDS IN cable into the back of the Comand unit (There are two LVDS cables, it's the one with a 90 degree connection) My Joyeauto LVDS cable with a 90 degree angle is purple.
7) Remove the optical cables from the MB harness. Be VERY CAREFUL with these optical cables. Do not bend or force them at any time as they can break. I found that I had to strip away a few inches of the wrap around the MB wire harness bundle to free the optical cables. The install video from Joyeauto does not do this. I did not realize I have the Harmon Kardon system. I assume this is required of the HK system and in the video they did not have the HK system? If so, I will need to go back and do this.
12) Attach one end of the Joyeauto audio cable to the Joyeauto harness AUX IN I assume this should be "Joyeauto harness AUDIO IN". I could not find an "AUX IN".
Thanks for all your help.
1) Yes, you must verify the Audio AUX is ON in the engineering menu or enable it, if required. This can be done any time but you won't have audio until done.
2) I cannot explain the purple cable. Both of my Joyeauto kits are blue, as is the blue MB LVDS cable. If memory serves, the USB extension cable connector may be purple and it has the same connector as the LVDS.
3) Yup, if you have the HK system with an external amp you must move the optical cables. These feed the external AMP so you won't have sound from either Comand or CarPlay until you do. The video for the X166 Unichip install in the 2nd post shows this clearly.
4) Yes, it should say "Joyeauto harness Audio IN". (This harness is connected to the MB Audio AUX)
Last edited by cadetdrivr; 07-31-2019 at 08:55 PM.
2012 E550 Cabriolet 2011 VW Eos 1985 Pininfarina Spider
I switched the optical connection and fished the wires through to the passenger foot well. Unfortunately, I am unable to get the HU back in the dash. It lacks about one inch and I'm not sure if it's the Joyeauto harness or something else. Did you have any issues re-installing the HU? Was there a specific way you positioned the Joyeauto harness?
I switched the optical connection and fished the wires through to the passenger foot well. Unfortunately, I am unable to get the HU back in the dash. It lacks about one inch and I'm not sure if it's the Joyeauto harness or something else. Did you have any issues re-installing the HU? Was there a specific way you positioned the Joyeauto harness?
Yes, that is worst part of the entire process and it's the harness. There is very little room back there and it's a PITA.
Quick question: Is everything working when powered up before you get Comand unit all the way back in? I ask because you don't want to do this twice.
Originally Posted by cadetdrivr
15) Now we will slowly start to put the Comand back in place. Even with all the new cables moved out of position, it will be VERY DIFFICULT to get the Comand unit to fit back due to the new harness. It will take some trial and error, but CAREFULLY move the wiring harness to a least bad location while ensuring that everything remains connected. I found success with the large black harness connector forward, up, and toward the driver side. YMMV.
As you slide the Comand unit back in, try gently shaking it as you slide it back it.
2012 E550 Cabriolet 2011 VW Eos 1985 Pininfarina Spider
Originally Posted by cadetdrivr
Yes, that is worst part of the entire process and it's the harness. There is very little room back there and it's a PITA.
Quick question: Is everything working when powered up before you get Comand unit all the way back in? I ask because you don't want to do this twice.
As you slide the Comand unit back in, try gently shaking it as you slide it back it.
I thought of that also. I went ahead and connected all the cables before working on sliding the HU back in. I paired my iphone and allowed it to access contacts, but the question "Use CarPlay with IDCORE" never appeared. The iphone connected via bluetooth, but no CarPlay. It looks like it is to automatically connect to the Joyeauto wifi also, but it does not. I can see the WiFi-AP signal, but it is password protected. I can connect to Carplay via a lightning cable and it seems to work. Ideas?
I thought of that also. I went ahead and connected all the cables before working on sliding the HU back in. I paired my iphone and allowed it to access contacts, but the question "Use CarPlay with IDCORE" never appeared. The iphone connected via bluetooth, but no CarPlay. It looks like it is to automatically connect to the Joyeauto wifi also, but it does not. I can see the WiFi-AP signal, but it is password protected. I can connect to Carplay via a lightning cable and it seems to work. Ideas?
My only idea is the most obvious one.
In the iPhone, make sure the bluetooth connection for the MB is deleted and then delete the IDCORE connection. In the Joyeauto settings, also delete the pairing to your phone. Reboot both the phone and the Joyeauto unit. Disconnect the lightning cable.
Then try again.
When it all works you will see a pop-up on the iPhone for CarPlay. The password for the WiFi will be automatically transferred to the iPhone in the background and the connection will switch to WiFi.
EDIT: FWIW, I have never used the Joyeauto USB/Lightning connection on either of our cars. Not even plugged in once.
Last edited by cadetdrivr; 08-01-2019 at 11:49 AM.
2012 E550 Cabriolet 2011 VW Eos 1985 Pininfarina Spider
Originally Posted by cadetdrivr
My only idea is the most obvious one.
In the iPhone, make sure the bluetooth connection for the MB is deleted and then delete the IDCORE connection. In the Joyeauto settings, also delete the pairing to your phone. Reboot both the phone and the Joyeauto unit. Disconnect the lightning cable.
Then try again.
When it all works you will see a pop-up on the iPhone for CarPlay. The password for the WiFi will be automatically transferred to the iPhone in the background and the connection will switch to WiFi.
EDIT: FWIW, I have never used the Joyeauto USB/Lightning connection on either of our cars. Not even plugged in once.
I finally got it working. It seems I needed to go into the Joyeauto settings and select BT. Now I just need to get the HU back in.
2012 E550 Cabriolet 2011 VW Eos 1985 Pininfarina Spider
Thanks for all your help, there is no way I could have gotten this far without this write up. It's been a long day, I spent a couple of hours trying to get the HU back in. I finally unplugged the cables and re-routed them to the passenger foot well. That seemed to work, as I got the HU back in. Unfortunately, while all the speakers are working when I play music via a SD card in CarPlay mode only part of the speakers are working. I'm thinking the optical connection was damaged, as it doesn't seem to be locking in as before and comes out when I put the HU back in. It may have been damaged trying to get the HU to fit. I wrapped some tape around the connection to try and wedge the optical connection plug into the socket. I'm not sure it is working. I guess it's also possible the Joyeauto audio cable has come loose.
Is the optical connection used on all audio? If so then since it works on an SD card, it's not the optical connection.
Could the audio cable have come partially loose?
I'm hesitant about taking the HU back out, but I doubt these is a choice. Suggestions? Ideas? Joyeauto has not responded to my inquiries. It's interesting the Joyeauto website has tech support, but it's only accessible with a password. If this is truly tech support, they should probably give out the password to access this.
Last edited by Davery; 08-02-2019 at 12:31 AM.
Reason: clarity

 07-19-2019, 11:31 AM