
How to : restore your factory MB headlights using Depo headlights
 12-17-2012, 01:20 AM
#1
Junior Member
Thread Starter

Join Date: Nov 2012
Location: Huntington Beach, CA
Posts: 21
Likes: 0
Received 1 Like
on
1 Post
08 S63 AMG, 05 E55 AMG sold
How to : restore your factory MB headlights using Depo headlights
Hello everyone, im new here and have been spending a lot of time reading up on my new e55. I did a little DIY project and figured I would share with anyone interested.
I got my 05 e55 a few weeks ago and I immediately started buying a bunch of stuff to mod it. One thing I bought was a set of the Depo brand facelift style headlights. I had tried sanding and polishing my original ones and they still looked terrible. I went to install them last weekend and after pulling my bumper and headlights I realized my car had the Adaptive Front light System (projector turns with steering wheel).
None of the aftermarket lights are available with this option and new Mercedes lights are super expensive. I could not return the lights and the foggy original lights made the car look like crap so I figured I would try to find a way to use the "facelift" style chrome inserts and clear lenses off the Depo lights and keep my original Mercedes housings and projectors, it worked !!
1. Once I had my lights out of the car pulled all the bulbs and ballasts off the lights to be safe and stuck them on a cookie sheet with a folded over towel. There are 4 metal clips that help secure the lens to the housing that have to be popped off also.
2. I baked it at 250 degrees for about 15 minutes to melt the glue.
3. Wearing thick gloves remove it from the oven and start to pry the lens off the housing carefully. The glue will be stringy and its important to keep it from getting on any of the chrome pieces.
4. locate the screw at the 6 o'clock position that holds the chrome insert in place... it will be hidden under all the glue. It is a Torx head on the MB light and phillips on the Depo light.
5. The facelift insert is 2 seperate pieces, on the Depo light the turn signal reflective insert clips in place, on the MB light there is no place for it to clip into. What I did is used a strong silicone/gasket maker and glued it in position. I used some blue tape to hold it in place while it tacked up. It will sit in the position easy and the bulb socket works as a guide.
6. Put the Depo insert in place over the MB projector and put the screw back in at the 6 o'clock position.
7. I added a bead of gasket sealer around the housing and pressed the Depo lens on lightly. Stick it back in the oven for another 15 minutes to melt the glue again.
8. Take the light out and press everyhthing together tight. Re-install the 4 metal clips to secure the lens... use the Depo ones because they fit tighter.
9. Let it cool down for a while an put back your bulbs and ballasts. I used the outter headlight to body seals that the Depo lights came with and they clip right in to the MB housings.
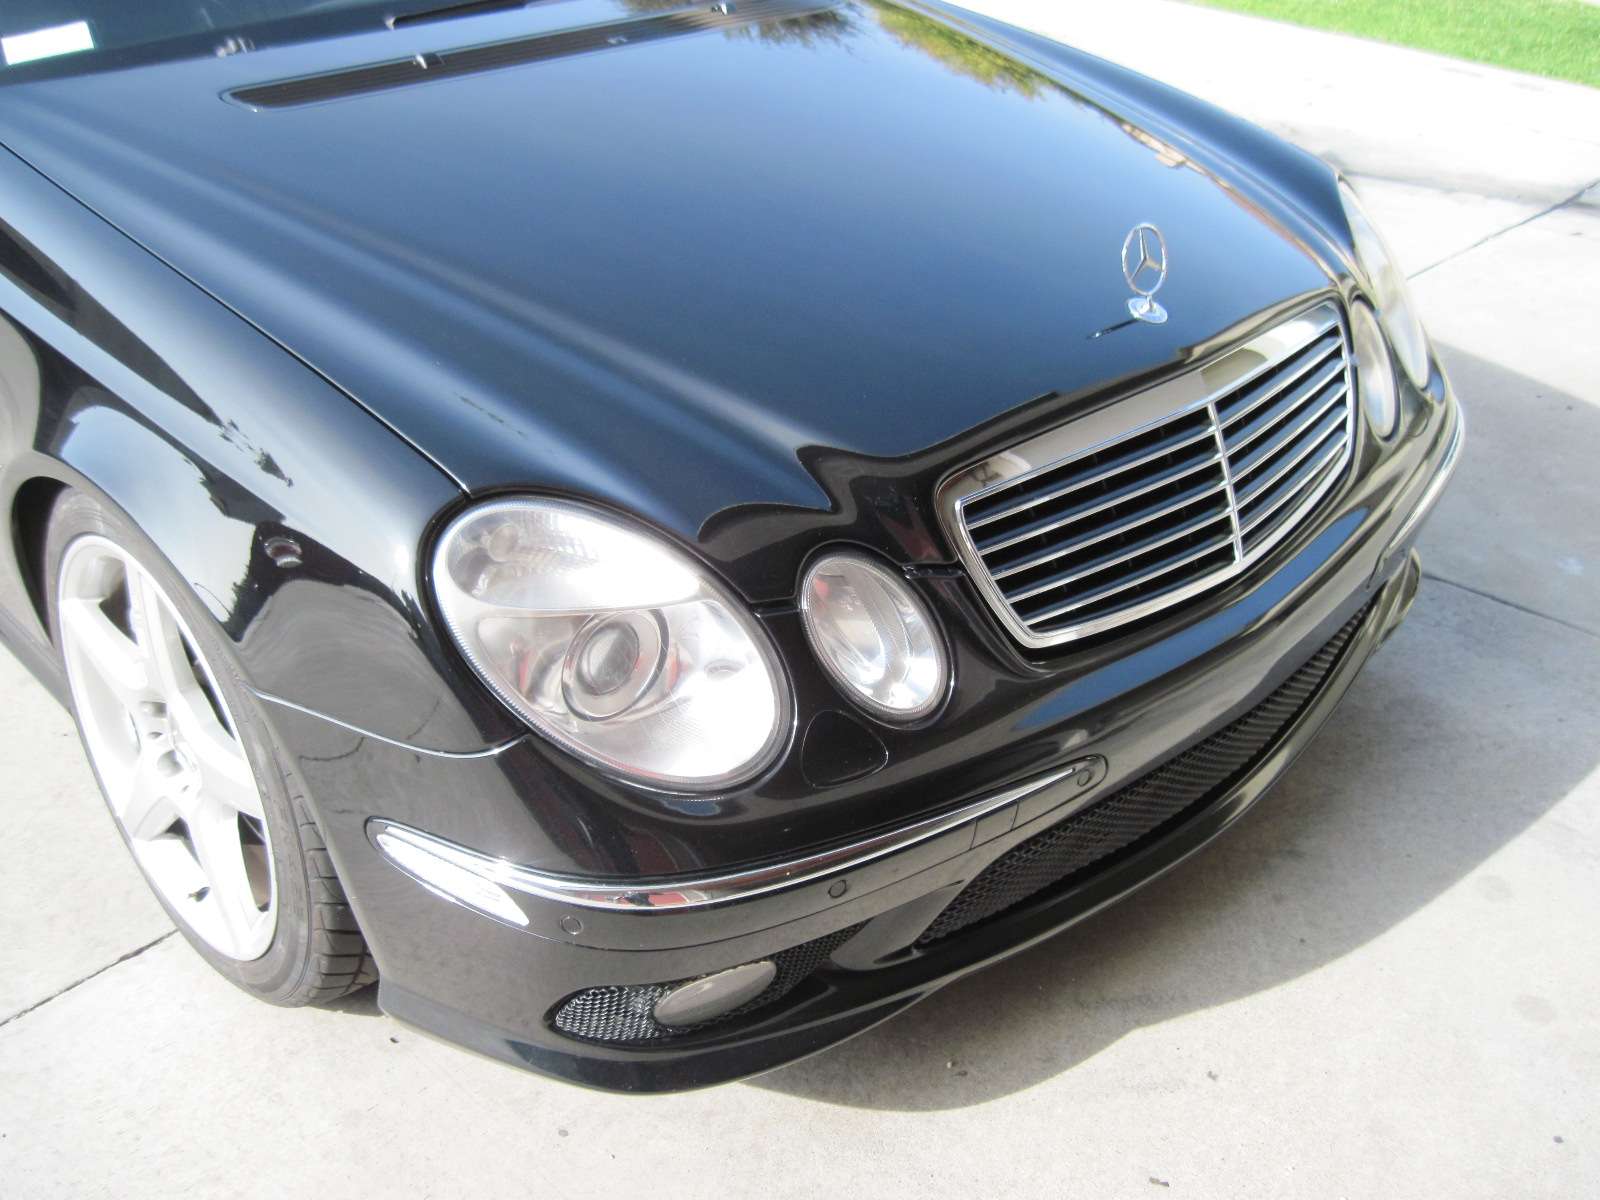
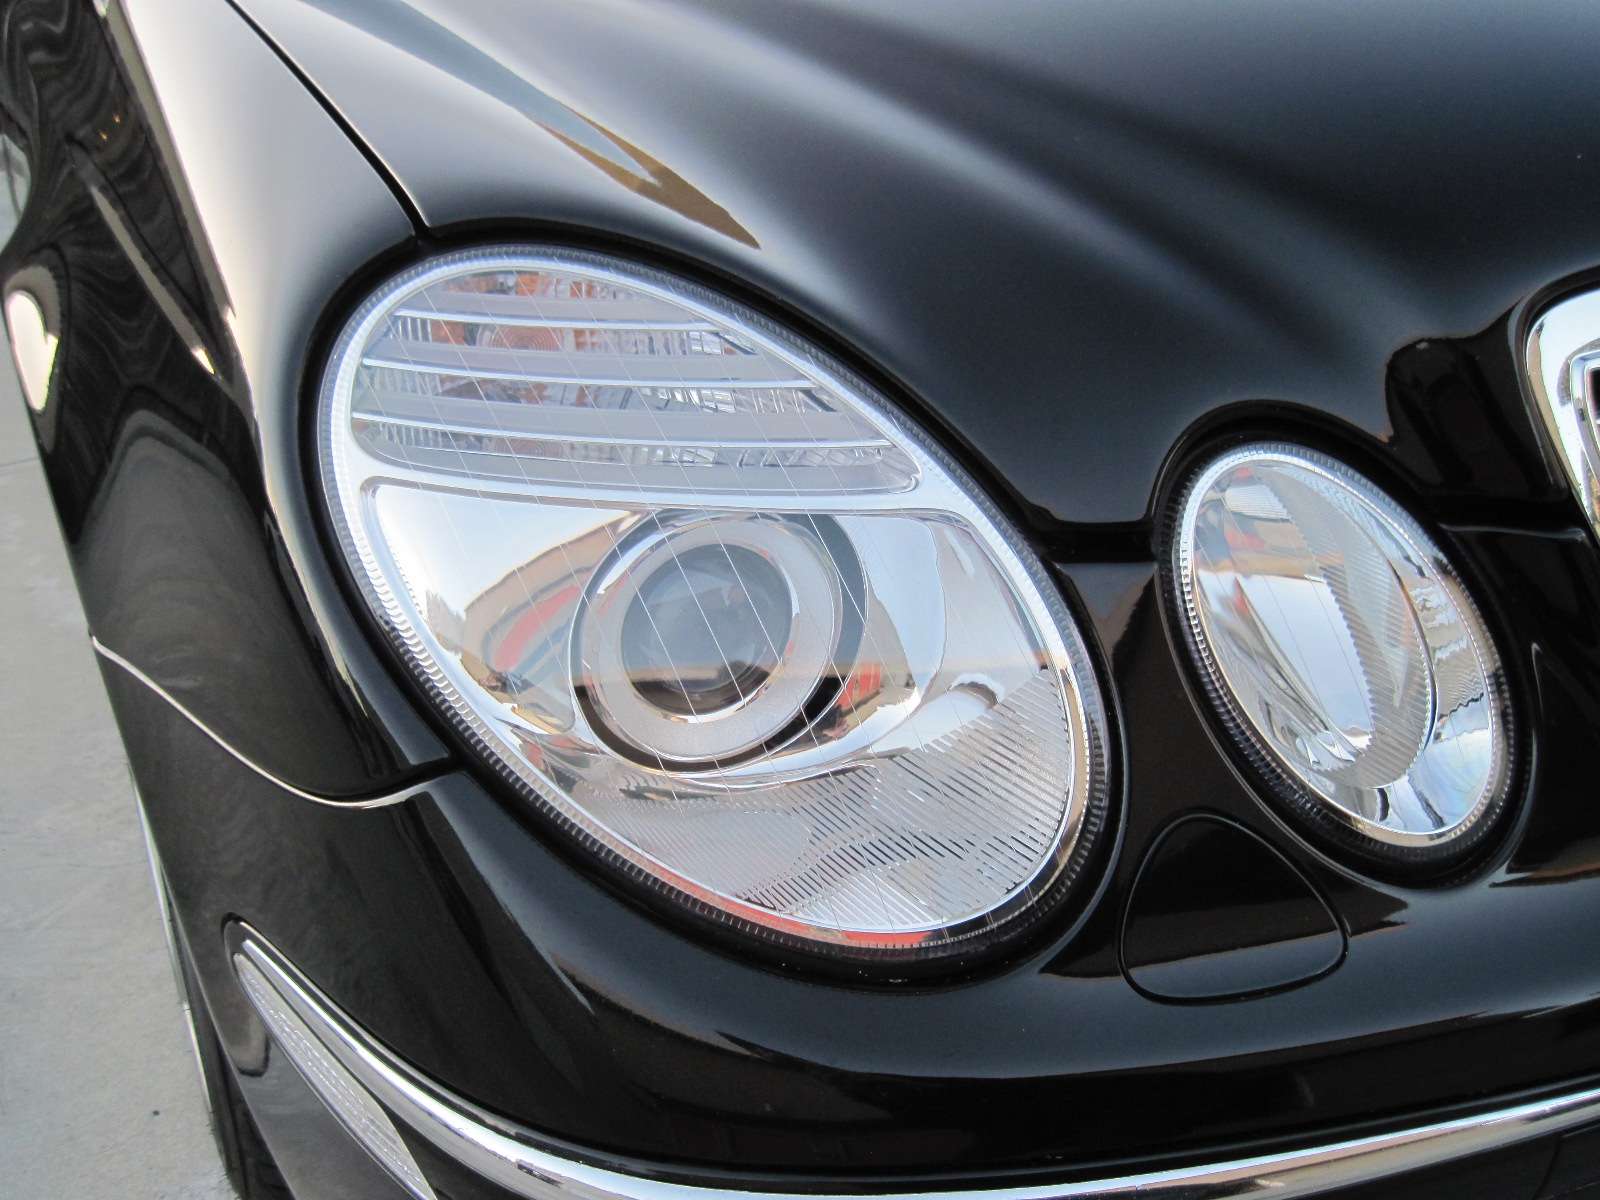
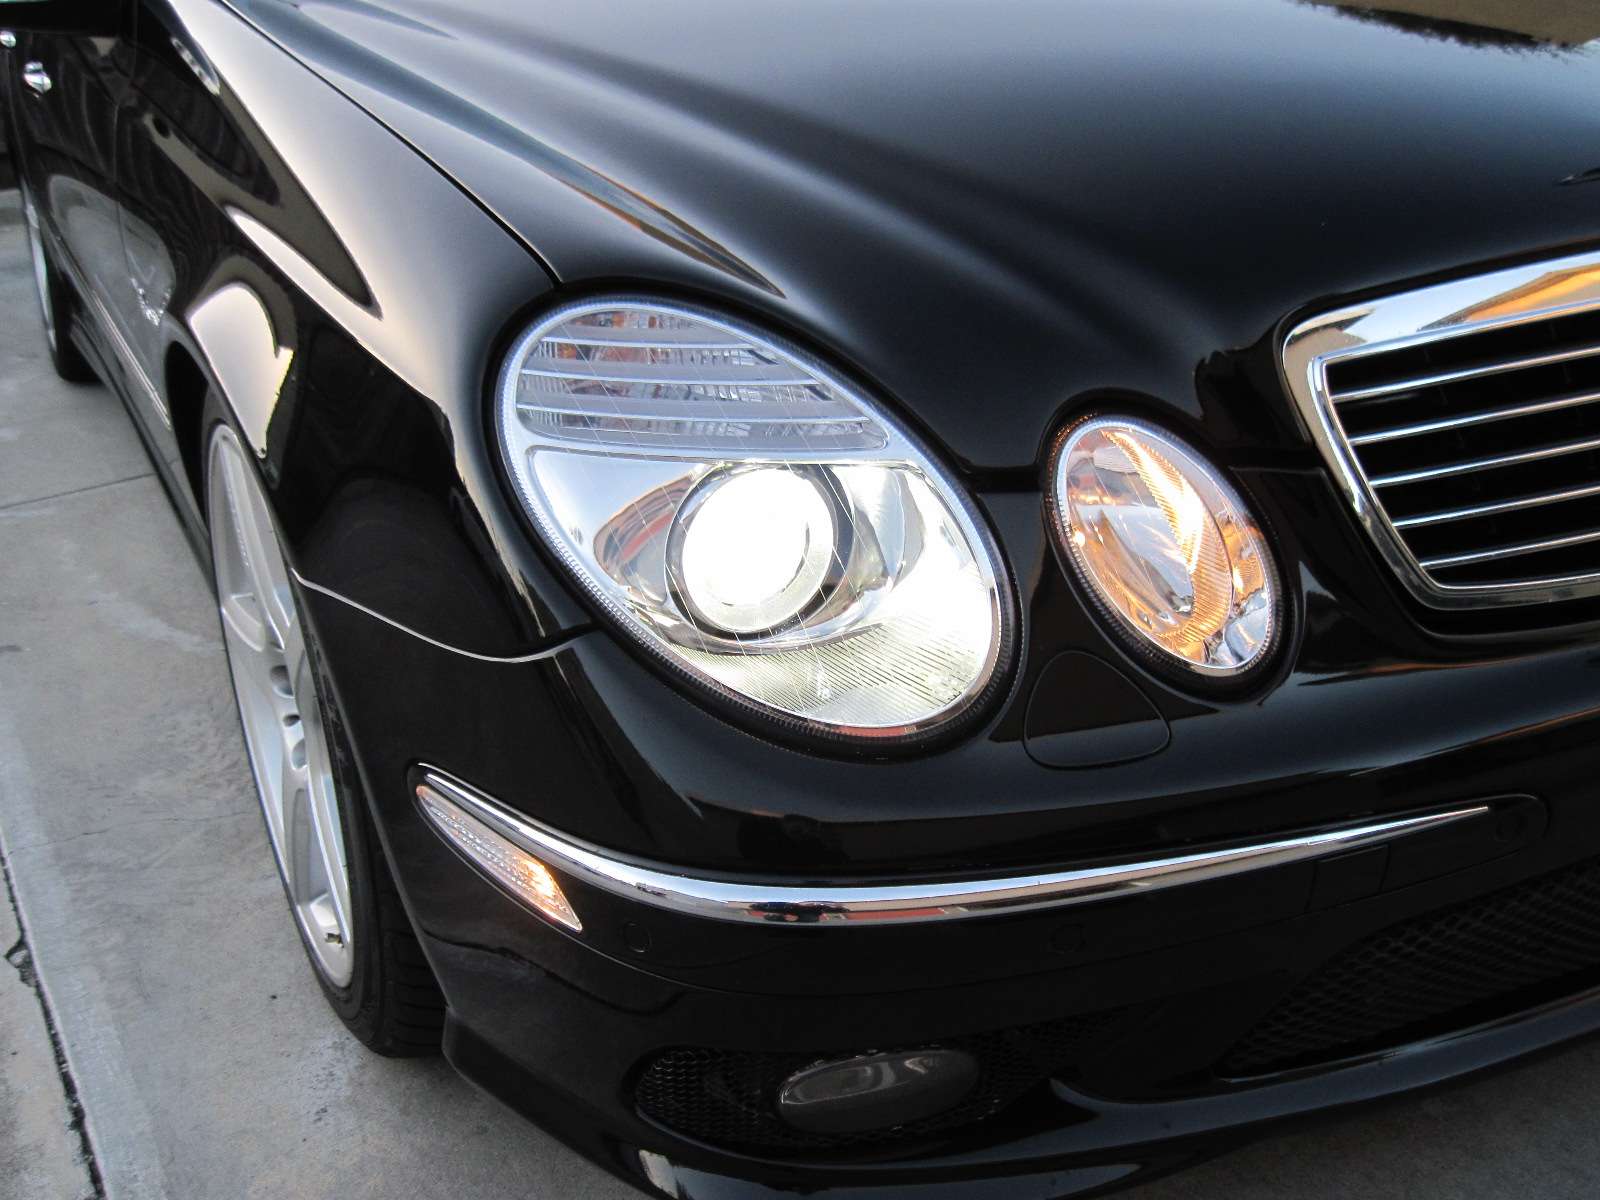
10. For under 400 bucks and a few hours of work you now have your factory Mercedes headlight housings, projectors and guts with the "facelift" look and brand new lenses .
.
Before
Original MB light next to the Depo light


Baking the headlight (best to do this when your wife is not home to yell at you for putting car parts in the oven)

Prying the lens away from the housing

Hidden screw holding the chrome insert in place

Everything apart (depo light)

Tabs that hold turn signal reflectors that the factory MB housing do not have

silicone glue the tabs and tape them in place on the MB housings

Depo insert installed on the MB housing and projector (factory high beam housing)

Depo lens glued on the MB housing with the Depo outter seal installed

All done

Pics installed
I got my 05 e55 a few weeks ago and I immediately started buying a bunch of stuff to mod it. One thing I bought was a set of the Depo brand facelift style headlights. I had tried sanding and polishing my original ones and they still looked terrible. I went to install them last weekend and after pulling my bumper and headlights I realized my car had the Adaptive Front light System (projector turns with steering wheel).
None of the aftermarket lights are available with this option and new Mercedes lights are super expensive. I could not return the lights and the foggy original lights made the car look like crap so I figured I would try to find a way to use the "facelift" style chrome inserts and clear lenses off the Depo lights and keep my original Mercedes housings and projectors, it worked !!
1. Once I had my lights out of the car pulled all the bulbs and ballasts off the lights to be safe and stuck them on a cookie sheet with a folded over towel. There are 4 metal clips that help secure the lens to the housing that have to be popped off also.
2. I baked it at 250 degrees for about 15 minutes to melt the glue.
3. Wearing thick gloves remove it from the oven and start to pry the lens off the housing carefully. The glue will be stringy and its important to keep it from getting on any of the chrome pieces.
4. locate the screw at the 6 o'clock position that holds the chrome insert in place... it will be hidden under all the glue. It is a Torx head on the MB light and phillips on the Depo light.
5. The facelift insert is 2 seperate pieces, on the Depo light the turn signal reflective insert clips in place, on the MB light there is no place for it to clip into. What I did is used a strong silicone/gasket maker and glued it in position. I used some blue tape to hold it in place while it tacked up. It will sit in the position easy and the bulb socket works as a guide.
6. Put the Depo insert in place over the MB projector and put the screw back in at the 6 o'clock position.
7. I added a bead of gasket sealer around the housing and pressed the Depo lens on lightly. Stick it back in the oven for another 15 minutes to melt the glue again.
8. Take the light out and press everyhthing together tight. Re-install the 4 metal clips to secure the lens... use the Depo ones because they fit tighter.
9. Let it cool down for a while an put back your bulbs and ballasts. I used the outter headlight to body seals that the Depo lights came with and they clip right in to the MB housings.
10. For under 400 bucks and a few hours of work you now have your factory Mercedes headlight housings, projectors and guts with the "facelift" look and brand new lenses
. Before

Original MB light next to the Depo light


Baking the headlight (best to do this when your wife is not home to yell at you for putting car parts in the oven)

Prying the lens away from the housing

Hidden screw holding the chrome insert in place

Everything apart (depo light)

Tabs that hold turn signal reflectors that the factory MB housing do not have

silicone glue the tabs and tape them in place on the MB housings

Depo insert installed on the MB housing and projector (factory high beam housing)

Depo lens glued on the MB housing with the Depo outter seal installed

All done

Pics installed


 12-17-2012, 01:26 AM
#2
MBWorld Fanatic!

It's so sick that you guys can do so much **** at home by yourself. I had to think twice before using a sand paper on the headlights to restore them, was considering spending 5 times the money to get them professionally done.
Awesome Job !!!
Awesome Job !!!
12-17-2012, 09:41 AM
#6

nice work. they look great. I have been thinking about this for about a year now. my headlights are starting to look aged. I did try to restore them but the look aged again. This is what I will do when I need to.

Trending Topics
12-17-2012, 10:31 AM
#9
Out Of Control!!
Hmm I wanted to paint my headlights, might see if I can source some busted up Headlights for this project


