W211 AMG Discuss the W211 AMG's such as the E55 and the E63
Sponsored by:
Sponsored by:

Coilover conversion with pics and....

Thread Tools
 
Search this Thread
 
Rate Thread
 
Old 06-06-2016, 07:52 PM
  #51  
MBWorld Fanatic!
Thread Starter
 
BC928's Avatar
 
Join Date: Mar 2013
Location: SoCal
Posts: 1,074
Received 63 Likes on 54 Posts
E55 and several 928s
I am really going to try and be aware of taking pics during this and to document everything because I feel that MBworld is too full (on the AMG side, at least) of "Bought parts, (one pic) Part installed (probably by someone else while he had a latte, (second pic) End of thread.

Where I come from, its pics or it didn't happen (well, pics or you didn't do it).

So with that -

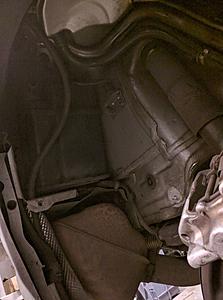
I pulled the wheel well liners in my normal reveal-process work so I can focus. I found some interesting complexities:

Coilover conversion with pics and....-img_20160605_122650_zpsfqcie4zm.jpg

Coilover conversion with pics and....-img_20160605_122700_zpsuxp6qlnd.jpg

Coilover conversion with pics and....-img_20160605_135735_zps6djolqaj.jpg

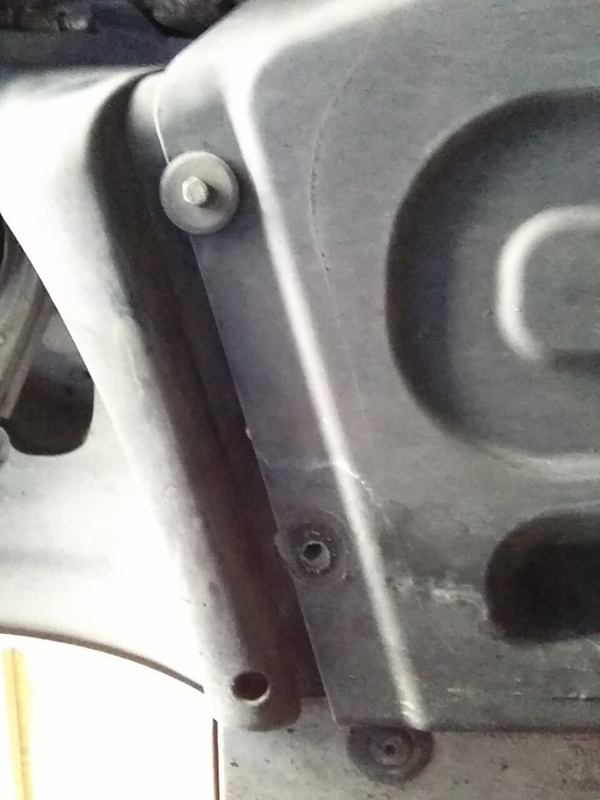
Some gotchas on the wheel well liners are that there are many bolts where you may not see them if the car is not above your head.

So I made some record of less obvious areas:

Coilover conversion with pics and....-img_20160605_140126_zpsp1wg0t5g.jpg

Coilover conversion with pics and....-img_20160605_135550_zps1zifzzno.jpg

Underneath at the front:

Coilover conversion with pics and....-img_20160605_135526_zpsmlh0e1ra.jpg
Old 06-06-2016, 07:56 PM
  #52  
MBWorld Fanatic!
Thread Starter
 
BC928's Avatar
 
Join Date: Mar 2013
Location: SoCal
Posts: 1,074
Received 63 Likes on 54 Posts
E55 and several 928s
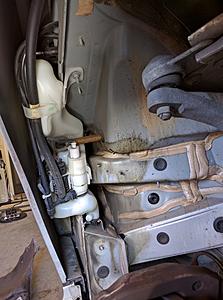
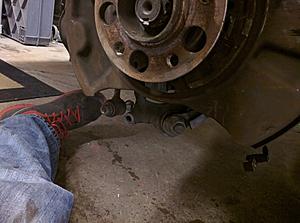
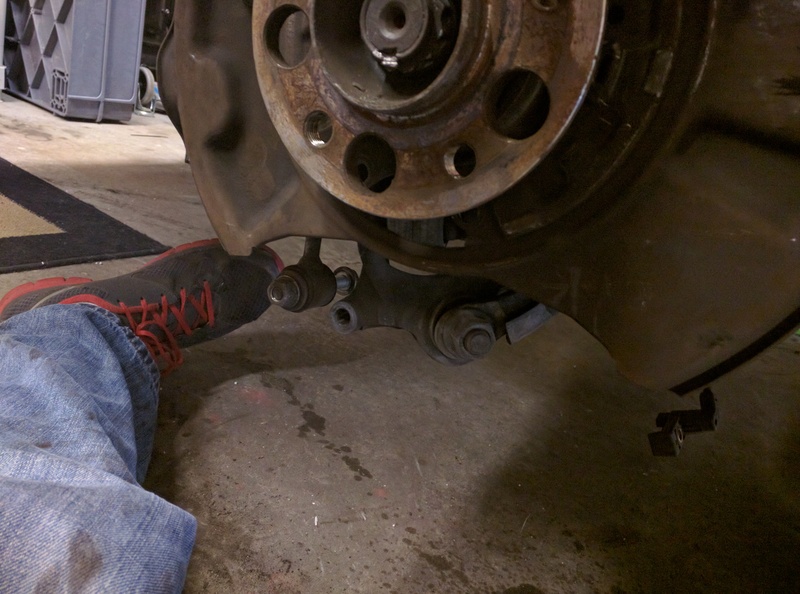
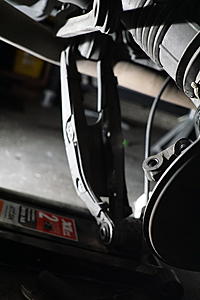
When I started disassembling the rear suspension, or at least got the calipers off (which I understood, and on a friends E55, experienced very tight caliper bolts - but mine were... not tight) and the old rotors off - I found that its easier (though not called out) to get the brake shield loose so it can be pivoted around to get to the suspension bolts.

Coilover conversion with pics and....-img_20160605_191626_zpsmvkmsei8.jpg

Coilover conversion with pics and....-img_20160605_191615_zps5jmxnogc.jpg


Coilover conversion with pics and....-img_20160605_191637_zpsgo6bsqho.jpg

You can see me pivoting it around to show the much better access to the bolts for a garage - jack stands - not-on-a-lift mechanic.
Old 06-06-2016, 07:59 PM
  #53  
MBWorld Fanatic!
Thread Starter
 
BC928's Avatar
 
Join Date: Mar 2013
Location: SoCal
Posts: 1,074
Received 63 Likes on 54 Posts
E55 and several 928s
This coilover piece of the work is going to be complete - a complete mod to the car - not a rip out. No proof the car was de-contented will be aparent as that's just not classy.

So the buttons in the interior, the headlights that adjust (maybe), the wiring and air lines, as well as the (spring mounted!) air pump - all will be removed.

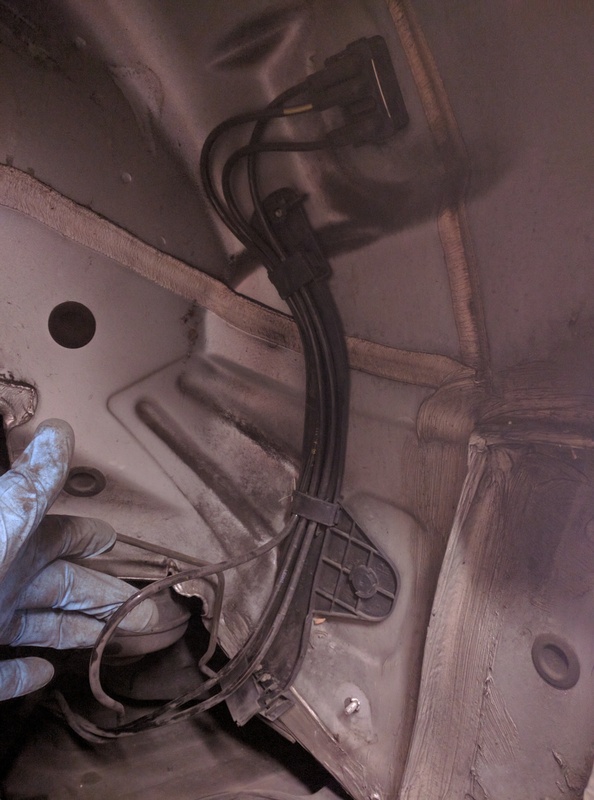
I found some wire routing for the system for the control of the air shocks to attack:
Coilover conversion with pics and....-img_20160605_191743_zpsqf9aw7an.jpg

All of this will be cleaned extensively once disassembled, including the wheel wells
Old 06-06-2016, 08:03 PM
  #54  
MBWorld Fanatic!
Thread Starter
 
BC928's Avatar
 
Join Date: Mar 2013
Location: SoCal
Posts: 1,074
Received 63 Likes on 54 Posts
E55 and several 928s
At this point, I knew I had to stop because I needed to order a lisle 30mm 12 point socket so I could get the axle nut off.

Amazon.com: Lisle 39510 30mm Axle Nut Socket: Automotive Amazon.com: Lisle 39510 30mm Axle Nut Socket: Automotive

If its the wrong size (I think 30mm is correct) then I will need to get over to harborfrieght or chase down a snap-on truck here in Sandy.
Old 06-06-2016, 08:04 PM
  #55  
MBWorld Fanatic!
Thread Starter
 
BC928's Avatar
 
Join Date: Mar 2013
Location: SoCal
Posts: 1,074
Received 63 Likes on 54 Posts
E55 and several 928s
The BOM is still growing for the job at hand. Things like Rotors, pads, axle nuts, and motor/trans mounts are being added and removed from shopping carts daily.
Old 06-08-2016, 09:01 PM
  #56  
MBWorld Fanatic!
Thread Starter
 
BC928's Avatar
 
Join Date: Mar 2013
Location: SoCal
Posts: 1,074
Received 63 Likes on 54 Posts
E55 and several 928s
Nope. 30mm is not correct. Going to see if 32mm works. Measuring a star size is not super posable.
Originally Posted by BC928
At this point, I knew I had to stop because I needed to order a lisle 30mm 12 point socket so I could get the axle nut off.

Amazon.com: Lisle 39510 30mm Axle Nut Socket: Automotive

If its the wrong size (I think 30mm is correct) then I will need to get over to harborfrieght or chase down a snap-on truck here in Sandy.
Old 06-09-2016, 07:22 AM
  #57  
MBWorld Fanatic!
 
StarvingArtist's Avatar
 
Join Date: Aug 2012
Location: DownEast Maine
Posts: 1,780
Received 105 Likes on 99 Posts
CLS 55 AMG E500 99 ML320
I like the detail. I'm waiting to see how you unplug the wires on the shocks.
Old 06-09-2016, 02:54 PM
  #58  
MBWorld Fanatic!
Thread Starter
 
BC928's Avatar
 
Join Date: Mar 2013
Location: SoCal
Posts: 1,074
Received 63 Likes on 54 Posts
E55 and several 928s
The body side or the shock side?

I have not attacked the front as of yet (that will be this weekend).

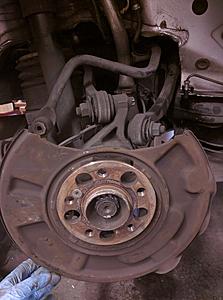
The rears are plugged in, as you can see, to the wheel well "BUS" and I just pulled it out after removing the clip. The other two wires per wheel well are of course ABS/TRAC and, at least on the passenger side, the brake wear sensor.

I even bought a camera with a good macro lens for my birthday so I can get good close ups.
Old 06-10-2016, 06:22 AM
  #59  
MBWorld Fanatic!
 
StarvingArtist's Avatar
 
Join Date: Aug 2012
Location: DownEast Maine
Posts: 1,780
Received 105 Likes on 99 Posts
CLS 55 AMG E500 99 ML320
I don't remember what it looked like, but when I pulled the front sub-frame I had to work it around the shock wires because they weren't coming out, and I didn't wan't to break them.
Old 06-10-2016, 01:16 PM
  #60  
MBWorld Fanatic!
Thread Starter
 
BC928's Avatar
 
Join Date: Mar 2013
Location: SoCal
Posts: 1,074
Received 63 Likes on 54 Posts
E55 and several 928s
Okay cool. I'll take more pictures when I get there. I'll be removing any semblance of the air tragic.
Originally Posted by StarvingArtist
I don't remember what it looked like, but when I pulled the front sub-frame I had to work it around the shock wires because they weren't coming out, and I didn't wan't to break them.
Old 06-10-2016, 04:15 PM
  #61  
MBWorld Fanatic!
 
Hammer Down's Avatar
 
Join Date: Jan 2005
Location: Bay Area
Posts: 4,275
Received 28 Likes on 25 Posts
2015 E63S, 2018 E63S
Maybe I missed it but are you removing the air compressor as well? Also can you compare the weight of the whole air matic system vs the coil overs?
Old 06-10-2016, 05:44 PM
  #62  
MBWorld Fanatic!
Thread Starter
 
BC928's Avatar
 
Join Date: Mar 2013
Location: SoCal
Posts: 1,074
Received 63 Likes on 54 Posts
E55 and several 928s
I will remove the air compressor as well. I will take pictures of that this weekend, hopefully. It sits on rubber isolated springs - simply so genius.
The following users liked this post:
Hammer Down (06-10-2016)
Old 06-11-2016, 12:24 AM
  #63  
MBWorld Fanatic!
Thread Starter
 
BC928's Avatar
 
Join Date: Mar 2013
Location: SoCal
Posts: 1,074
Received 63 Likes on 54 Posts
E55 and several 928s
The rear axle nut for the w211 e55 is 32mm and as long as it's counter held, is very easy to remove.
The following users liked this post:
Hammer Down (06-12-2016)
Old 06-12-2016, 04:11 PM
  #64  
MBWorld Fanatic!
Thread Starter
 
BC928's Avatar
 
Join Date: Mar 2013
Location: SoCal
Posts: 1,074
Received 63 Likes on 54 Posts
E55 and several 928s
So on and off, yesterday, I went at the right rear suspension. Instead of alternating both sides for each part of the job, I just went at one corner to learn what to do.

The WIS is completely ****ing useless. Sure, there are directions, when you can find them, but there is so much detritus in between "How do I do this" and "This is the step you need to do" that it verges on the ridiculous.

I am sure someone will come on here and say its fine. That's great. Use a PDF Porsche manual, or a GM maintenance program and come back to this. You will agree with me.

Another observation is that Mercedes is strange about how many different types of bolts are used on one subsystem. Why do I need 5 different sizes/types of tool bits to be able to take one corner off the car? Male 12 point this, 6 sided socket that, Female 12 point that....

The bolts are all combinations of 17s, 22s, some 10mm femal allens, and a 12 point male tool you can substitute a 3/8 inch female socket extension in a pinch. There are more of those, so I will buy the pieces and inform those watching what size they turned out to be.


Anyway. To the pics:

Coilover conversion with pics and....-dsc00046_zpsqwivvkcn.jpg

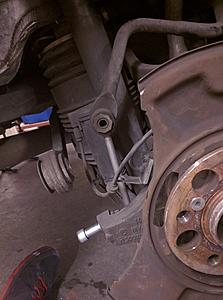
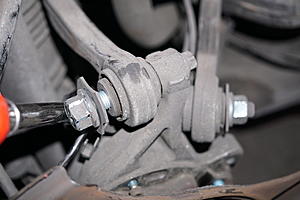
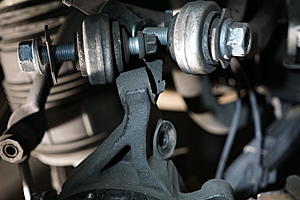
Top links are easy. Just, like I said, need to take the brake shield off so you can pivot it around to get to each set of bolts.

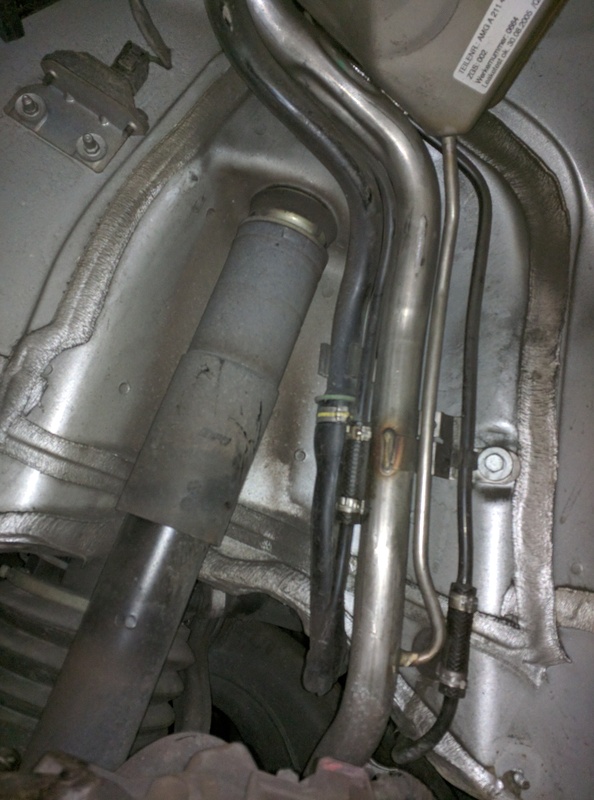
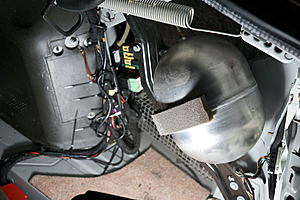
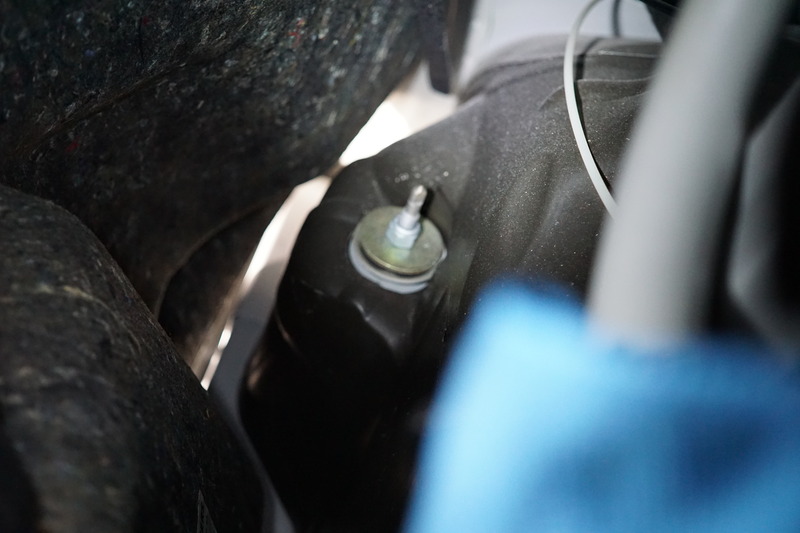
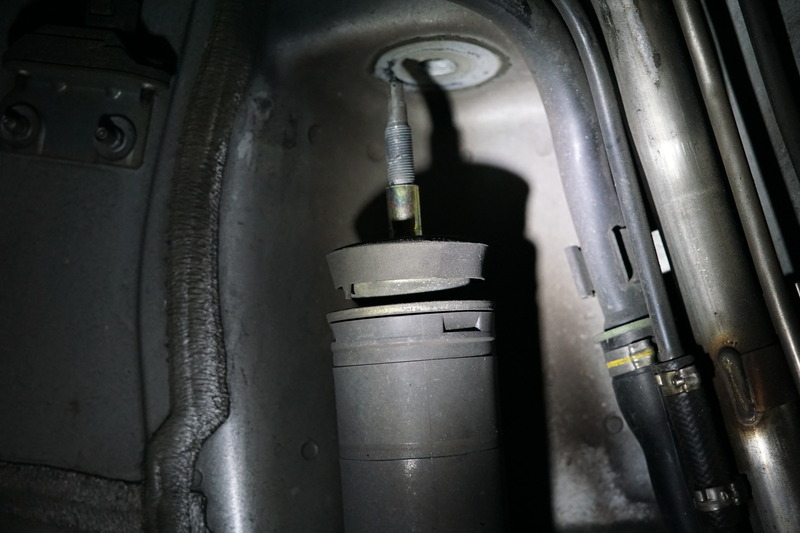
To get to the top of the shock (the skinny one) you need to get into the trunk, and get the sound deadening out.

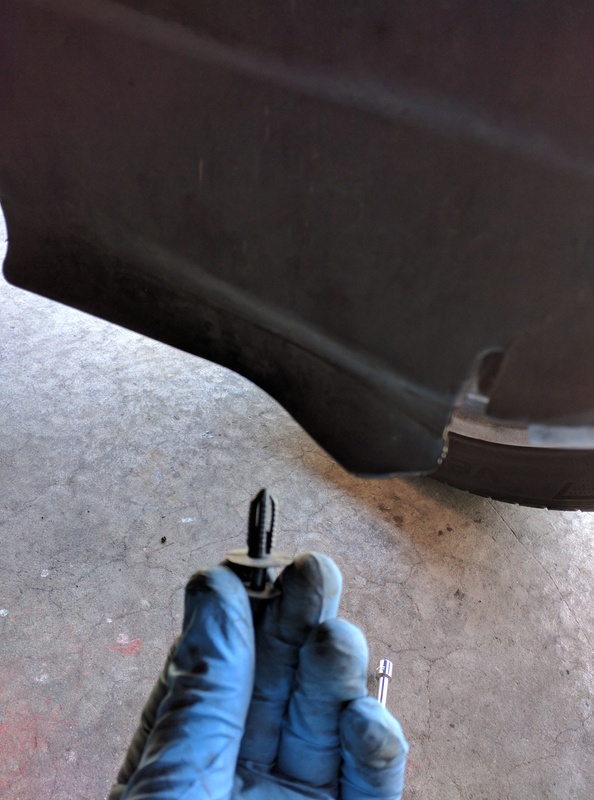
To do this, you need to take a bunch of plastic clips out - these are the two piece compression clips that are similar to what is used throughout the car, but you have round AND square ones.

Coilover conversion with pics and....-dsc00050_zpsv1x4fyzt.jpg

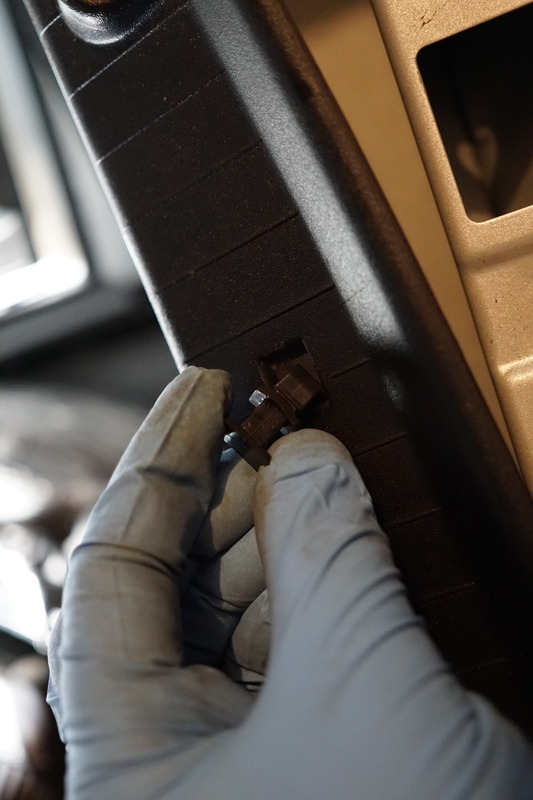
The net anchors in the side of the trunk bottom are also on the remove list.

Coilover conversion with pics and....-dsc00051_zps7huli1s1.jpg

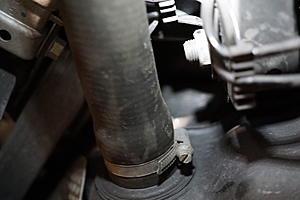
Don't go too fast and yank the wires on this:

Coilover conversion with pics and....-dsc00052_zpsxmysupfl.jpg

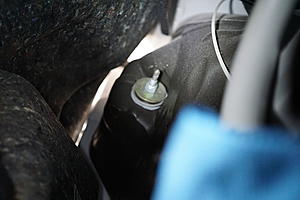
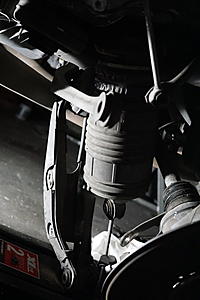
Aha! Here is the top of the shock:

Coilover conversion with pics and....-dsc00053_zpssahutj5k.jpg

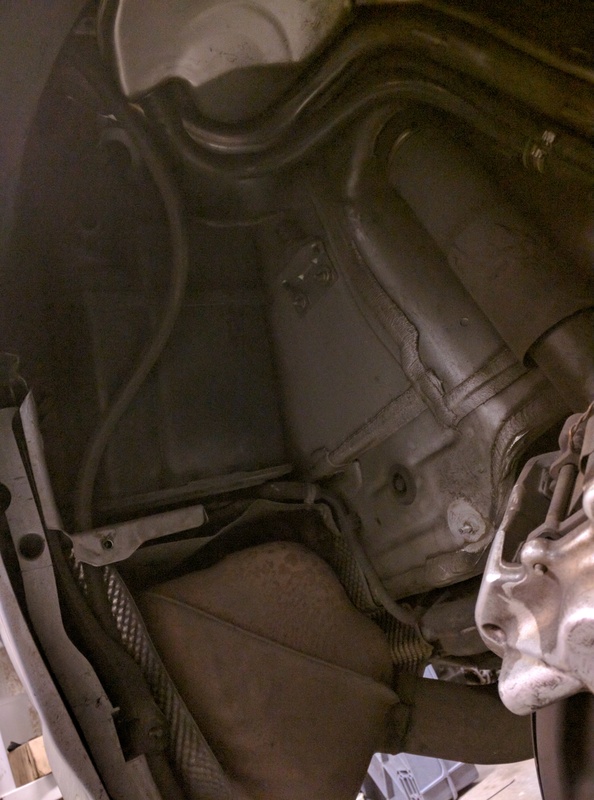
Oh - one thing I learned was that no one has EVER, that I have personally read, mentioned the central reserviour for the shocks being in the trunk. Everyone always mentions the canister that is attached to the rear air springs - which come out when you take the subframe down to remove the air shock and tubes.

But this is beautiful - and was still full of air:

Coilover conversion with pics and....-dsc00055_zpsfpwplbzl.jpg

That will be removed for a clean uninstall.


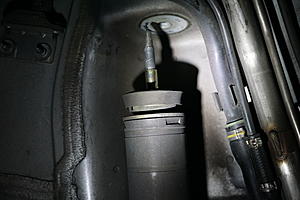
Shock drops nicely down.

Coilover conversion with pics and....-dsc00056_zpsro8ji53t.jpg

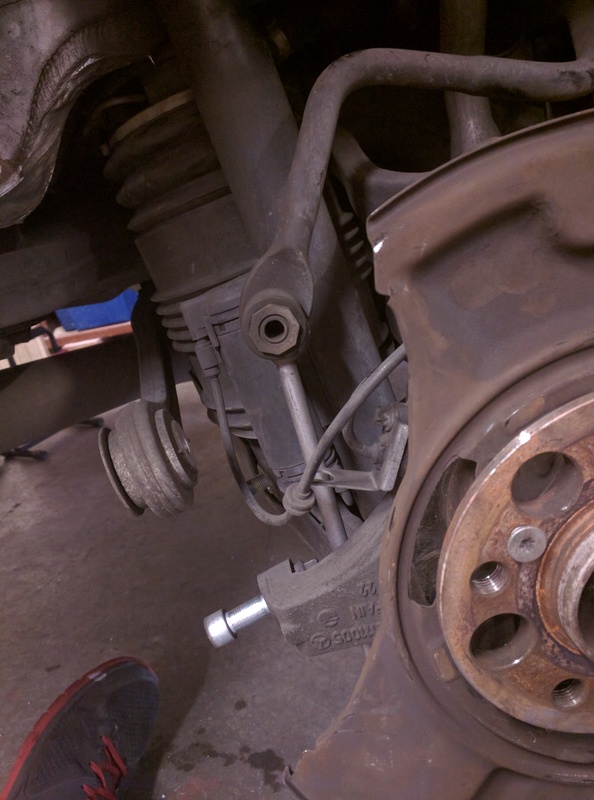
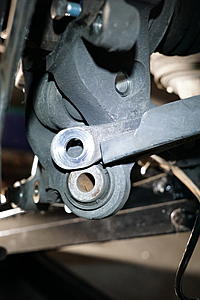
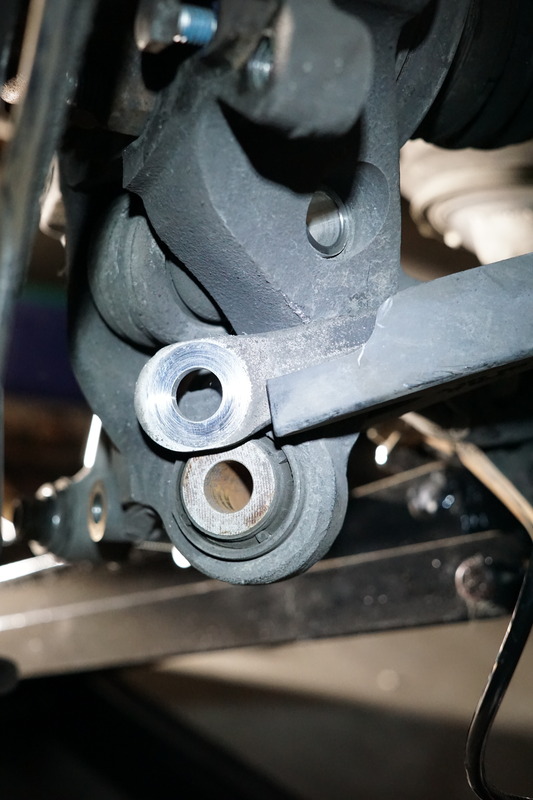
I had all the links off, and though innitially that this was keeping me from separating the hub carrier from the lower arm press fit.

Coilover conversion with pics and....-dsc00059_zpsgurtyj5n.jpg

It was not. The bottom a-arm just is really in there nice and tight between the two inner surfaces of the hub carrier.

You can see it in the picture above just where a bushing like rubber area is peeking out.

That is very loose rubber bushing by the way. I am not sure how this hub will mate to the E320/E500 non air spring arms, but I'll show it when I get there.

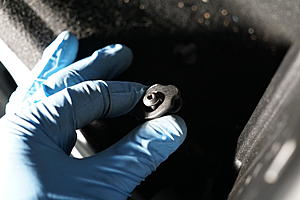
Don't know if I posted this one:

Coilover conversion with pics and....-dsc00061_zpsdi7lwcde.jpg

This is a ****er. Right next to the gas filler line. I think it is a 20mm, and since I come from Porsche, I have never had a 20 in my tool set. The other side is a 12point female bolt. I don't get it.

Coilover conversion with pics and....-dsc00062_zpshwjelhmu.jpg

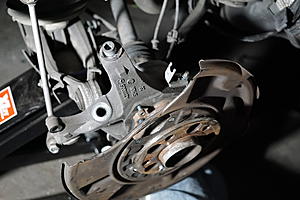
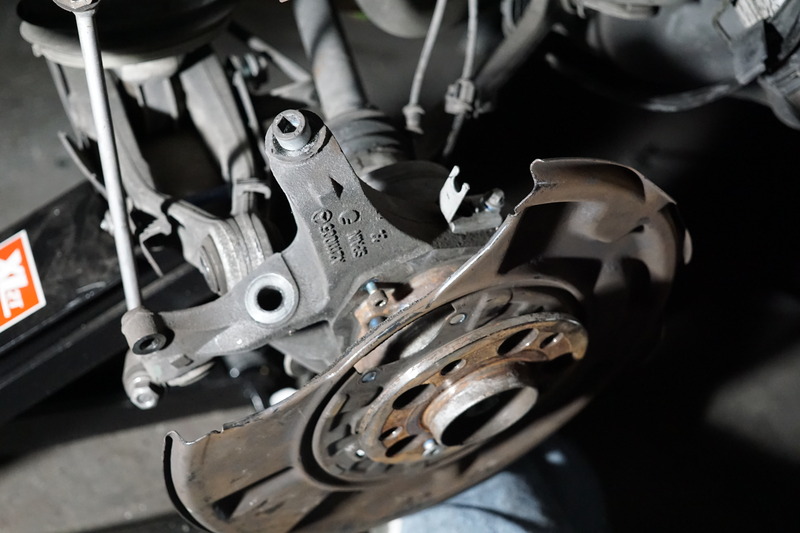
Hub carrier is free here in the pic below. You can see the end of the lower a-arm in the left mid area of the pic. It had to be pried out of the carrier

Coilover conversion with pics and....-dsc00063_zpsoi2ls3c0.jpg

Better pic:
Coilover conversion with pics and....-dsc00065_zpscrmqvnhq.jpg

I loosened the inboard bolt of the a-arm and pushed it down to get to the air spring:

Coilover conversion with pics and....-dsc00066_zpslgfdr7ht.jpg


Much of this may be easier to do if you have a jack and make the half shaft about level with the ground.

Air shock just hanging. It never did get as loose as they show on youtube. It is at full extention but can be compressed. Maybe when I take the line off, it will let the air out. I believe that is an electric valve though. It will hang there, (unless I get irritated and cut it out), until I release the subframe a bit to get it and the air canister out.

Coilover conversion with pics and....-dsc00068_zpsnvbuatzu.jpg


Thats it for now. I pressed out the half shaft this morning from the hub - not a tight fit - just used a weak thread bearing/flange press. I will try and get a pic from the other side when I do that.
Old 06-12-2016, 04:14 PM
  #65  
MBWorld Fanatic!
Thread Starter
 
BC928's Avatar
 
Join Date: Mar 2013
Location: SoCal
Posts: 1,074
Received 63 Likes on 54 Posts
E55 and several 928s
BTW - as part of this refresh, I will just get the rear bearing assemblies complete - possibly even a new hub flange. No reason to use old stuff with these reasonable prices:

https://www.ecstuning.com/ES1771657/...uFnxoCuELw_wcB


http://www.new-part.com/product/merc...OQ8xoCGajw_wcB


Old 06-13-2016, 05:53 AM
  #66  
MBWorld Fanatic!
 
StarvingArtist's Avatar
 
Join Date: Aug 2012
Location: DownEast Maine
Posts: 1,780
Received 105 Likes on 99 Posts
CLS 55 AMG E500 99 ML320
If you're going to loosen the subframe, buy new bolts for it. Maybe do the bigger bolt mod.
Old 06-13-2016, 05:23 PM
  #67  
MBWorld Fanatic!
Thread Starter
 
BC928's Avatar
 
Join Date: Mar 2013
Location: SoCal
Posts: 1,074
Received 63 Likes on 54 Posts
E55 and several 928s
I was aware of some people opening the subframe - so create the space to nut the top.

Bigger bolt would involve drilling out the current fixed threads?
Old 06-13-2016, 07:48 PM
  #68  
MBWorld Fanatic!
Thread Starter
 
BC928's Avatar
 
Join Date: Mar 2013
Location: SoCal
Posts: 1,074
Received 63 Likes on 54 Posts
E55 and several 928s
This thread about the UPD arms has a great post by our resident shakespeare - Denroll - about all the sizes of bits needed to get the rear apart:

https://mbworld.org/forums/w211-amg/...its-stock.html

Post: https://mbworld.org/forums/w211-amg/...ml#post6173027
Old 05-24-2017, 02:36 PM
  #69  
MBWorld Fanatic!
 
MACEDON's Avatar
 
Join Date: Apr 2017
Location: Tampa Bay, FL
Posts: 1,116
Received 78 Likes on 68 Posts
05 E55, 98 CLK320
How come no update
Old 05-24-2017, 02:40 PM
  #70  
MBWorld Fanatic!
Thread Starter
 
BC928's Avatar
 
Join Date: Mar 2013
Location: SoCal
Posts: 1,074
Received 63 Likes on 54 Posts
E55 and several 928s
I decided to go much further on the project since I had the car "down". I then bought a few other cars. So two cars are now in front of this one in the production line. I have since purchased a one pass intercooler, a 175mm crank pulley, and an interesting intake.

I will also be getting some form of LSD so I can put that in "while I am in there" and hopefully get it back on the road... in 2018 if I am being at least somewhat realistic. I have restored an 88 928S4 and purchased a 79 and 86.5 in the mean time. Bought a truck and leased a KIA. I don't like the threads with no updates, but I didn't go anywhere, and as the project gets on, I will continue to post informative, clear pictures.
The following users liked this post:
MACEDON (05-24-2017)
Old 05-24-2017, 09:04 PM
  #71  
Super Member
 
jumph4x's Avatar
 
Join Date: Aug 2009
Location: Oakland
Posts: 998
Received 70 Likes on 54 Posts
W210 DRFT BNZ
Just got done with the suspension bits myself a week or two ago and also thinking about the LSD. Dreading it though, it's not simple...
Old 05-24-2017, 10:07 PM
  #72  
MBWorld Fanatic!
Thread Starter
 
BC928's Avatar
 
Join Date: Mar 2013
Location: SoCal
Posts: 1,074
Received 63 Likes on 54 Posts
E55 and several 928s
Originally Posted by jumph4x
Just got done with the suspension bits myself a week or two ago and also thinking about the LSD. Dreading it though, it's not simple...
i am going way into the bushings and suspension arms. Seems a short jump to taking that pumpkin out and swapping.

BC
Old 05-25-2017, 12:00 AM
  #73  
Super Member
 
jumph4x's Avatar
 
Join Date: Aug 2009
Location: Oakland
Posts: 998
Received 70 Likes on 54 Posts
W210 DRFT BNZ
Originally Posted by BC928
i am going way into the bushings and suspension arms. Seems a short jump to taking that pumpkin out and swapping.

BC
Swapping the pumpkin - perhaps. Do you have another pumpkin ready with LSD internals?

Working inside of those things is no party, either. Maybe I'm just stressing for no reason...
Old 05-25-2017, 02:44 PM
  #74  
Super Member
 
BoostedAero's Avatar
 
Join Date: Jan 2016
Posts: 599
Received 120 Likes on 96 Posts
2004 E55
Originally Posted by jumph4x
Swapping the pumpkin - perhaps. Do you have another pumpkin ready with LSD internals?

Working inside of those things is no party, either. Maybe I'm just stressing for no reason...
Every quaife install I have read about mated right up with no shims needed... I will go that route eventually

I probably will go gutted factory IC/fab'd up dual intercoolers first just bc yea that thing looks like a complete PITA to remove. I do not hard launch my car often for fear of destroying another transmission... post rebuild of this one I will probably be even more skeeeered todo so
Old 05-25-2017, 08:18 PM
  #75  
MBWorld Fanatic!
Thread Starter
 
BC928's Avatar
 
Join Date: Mar 2013
Location: SoCal
Posts: 1,074
Received 63 Likes on 54 Posts
E55 and several 928s
Originally Posted by jumph4x
Swapping the pumpkin - perhaps. Do you have another pumpkin ready with LSD internals?

Working inside of those things is no party, either. Maybe I'm just stressing for no reason...
I have done that shimming before, but would probably buy another to build up as an LSD. I don't see many failures here so there should be some out there.


You have already rated this thread Rating: Thread Rating: 1 votes, 5.00 average.

Quick Reply: Coilover conversion with pics and....


All times are GMT -4. The time now is 01:55 PM.