
4000lb Sideways


 05-23-2017, 03:57 PM
#102
Super Member
Thread Starter
If you're talking about the hydro rear, I'm taking on extra complexity by running dual master cylinders so the ABS/ESP function of the car is preserved. In fact, theory has it that the handbrake will be entirely functional with ABS+ESP on and the car won't have a way of throwing codes/detecting it. These inline master cylinder are design such that the very first stage of engagement seals the pre-inline-MC circuit off completely before building pressure to the rear wheels. In the worst case this means I won't be able to apply the foot brake after the rear brake has already been engaged.
But realistically even that might work without any issues.
Last edited by jumph4x; 05-23-2017 at 04:10 PM.
05-23-2017, 06:36 PM
#103
MBWorld Fanatic!

Join Date: Sep 2005
Location: Sacramento, CA
Posts: 1,558
Likes: 0
Received 8 Likes
on
7 Posts
Ducati
If you mean drifting events in general, JoeJErnst's answer is the current plan. AKA Circuit 15.
If you're talking about the hydro rear, I'm taking on extra complexity by running dual master cylinders so the ABS/ESP function of the car is preserved. In fact, theory has it that the handbrake will be entirely functional with ABS+ESP on and the car won't have a way of throwing codes/detecting it. These inline master cylinder are design such that the very first stage of engagement seals the pre-inline-MC circuit off completely before building pressure to the rear wheels. In the worst case this means I won't be able to apply the foot brake after the rear brake has already been engaged.
But realistically even that might work without any issues.
 Happened on my 03 E55 and a buddies 06 E55. Happened to some friends with a V12TT (both a 600 and 65) and an NA 6.3. There's also reports on the forum of it happening to a few folks, though no one has been able to really point out what triggers limp mode.
05-23-2017, 06:52 PM
Happened on my 03 E55 and a buddies 06 E55. Happened to some friends with a V12TT (both a 600 and 65) and an NA 6.3. There's also reports on the forum of it happening to a few folks, though no one has been able to really point out what triggers limp mode.
05-23-2017, 06:52 PM
#104
MBWorld Fanatic!
That's interesting. I put mine in dyno mode last time I was at the track and it worked great all day long, but I was turning the car off between rounds. It's great for drag racing because it lets you do awesome burnouts!
05-23-2017, 10:01 PM
#105
Super Member
Thread Starter
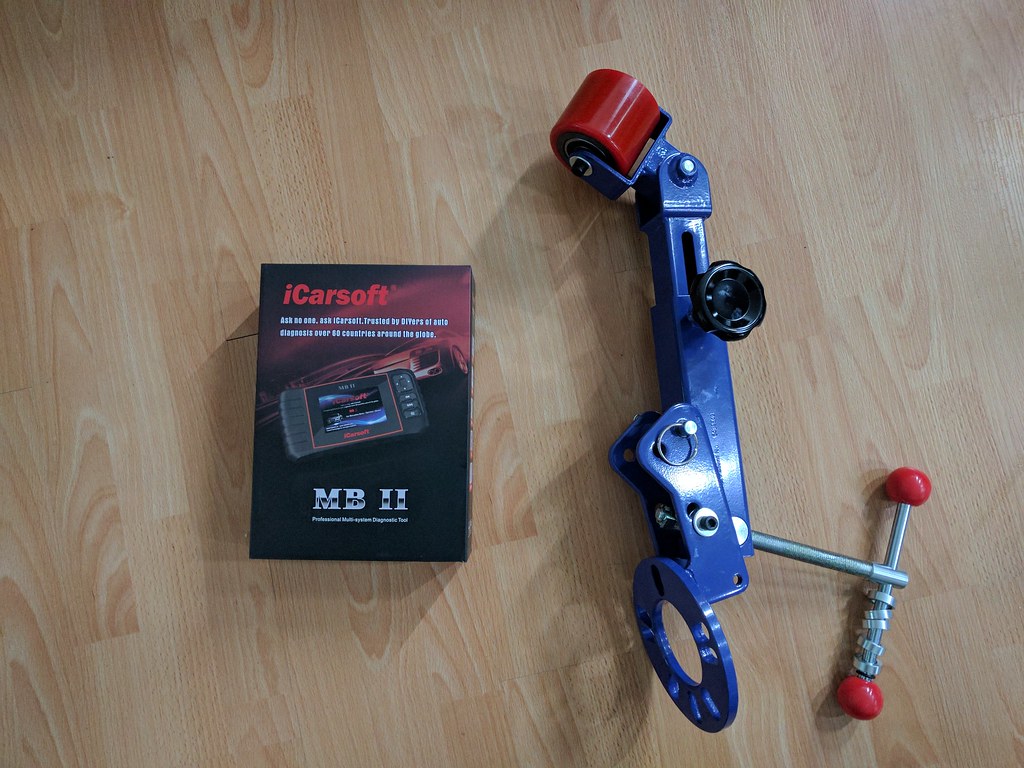
Dyno Mode (at least with the cars I played with) let you mess around for a good bit, but would eventually wind up in limp mode with check engine light if you're in dyno mode for more than a few miles. I never could figure out what the trigger for limp mode was, but would hit it after a few good pulls... Happened on my 03 E55 and a buddies 06 E55. Happened to some friends with a V12TT (both a 600 and 65) and an NA 6.3. There's also reports on the forum of it happening to a few folks, though no one has been able to really point out what triggers limp mode.
Happened on my 03 E55 and a buddies 06 E55. Happened to some friends with a V12TT (both a 600 and 65) and an NA 6.3. There's also reports on the forum of it happening to a few folks, though no one has been able to really point out what triggers limp mode.Obviously, the hope is that it doesn't happen to me. But if it does, we have a Carsoft MBII in the mail to make sure we can get in there and see what the fuss is all about. If nothing else, I hope we can track down the real reason.
05-23-2017, 11:35 PM
#106
Super Member
Thread Starter
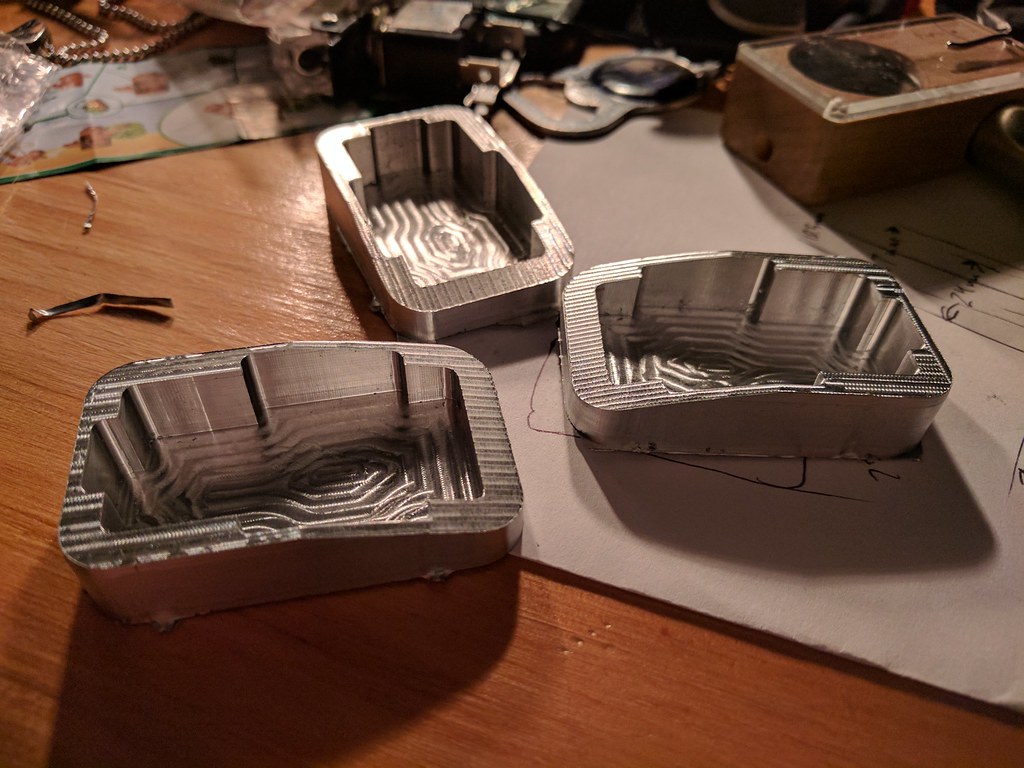
Brake assembly base slash mounting plate:
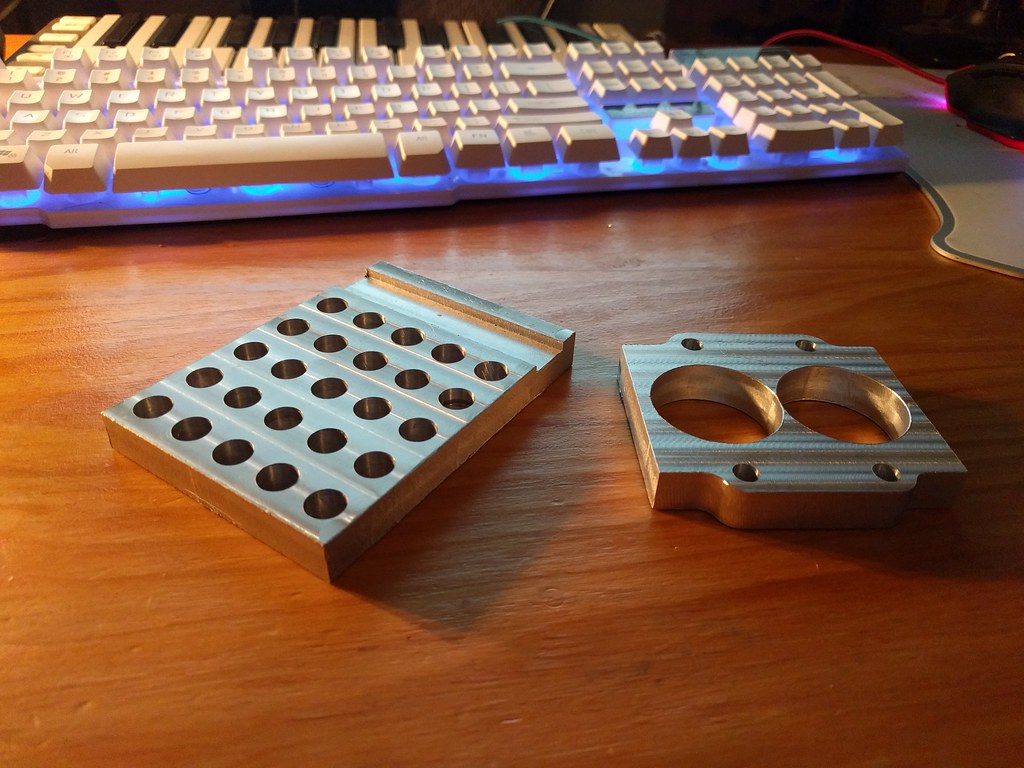
Definitely not the cleanest, this was a 3/8" 4 flute end mill experiment. The lesson is: the less material you are removing - the better. I definitely need to find a way to acquire CNC common wisdom somehow. YouTube time...
Also I need to clone myself, this isn't going anywhere near as fast as it needs to.
Last edited by jumph4x; 05-24-2017 at 01:31 AM.
05-24-2017, 10:07 AM
#108
Hopefully you have some software to log the full can network and figure out what calls are being made and what shuts it down into limp mode and then stop the signal from being sent...
Hmmm wondering if you can use this as a trial off a .tor network... not like I am advocating such a thing but could be an interesting trial and error thing:
https://store.intrepidcs.com/Vehicle...vspy-3-pro.htm
05-24-2017, 08:34 PM
#109
Super Member
Thread Starter
That's the general idea. We will cross that bridge when and if we get to it.
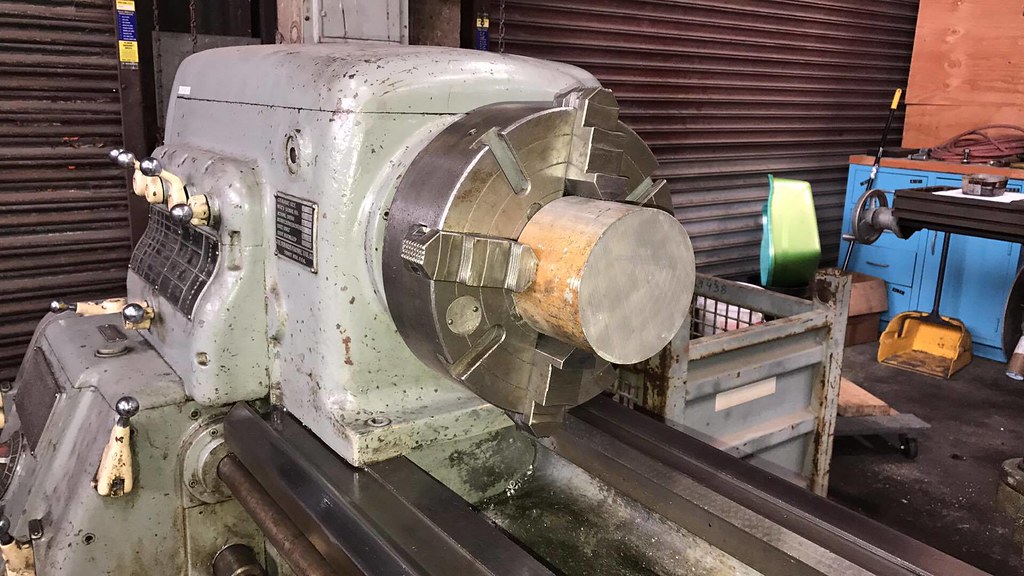
Meanwhile I have the hydro rear assembly almost finished, tight tolerances and overall as reasonably compact as it could be done:
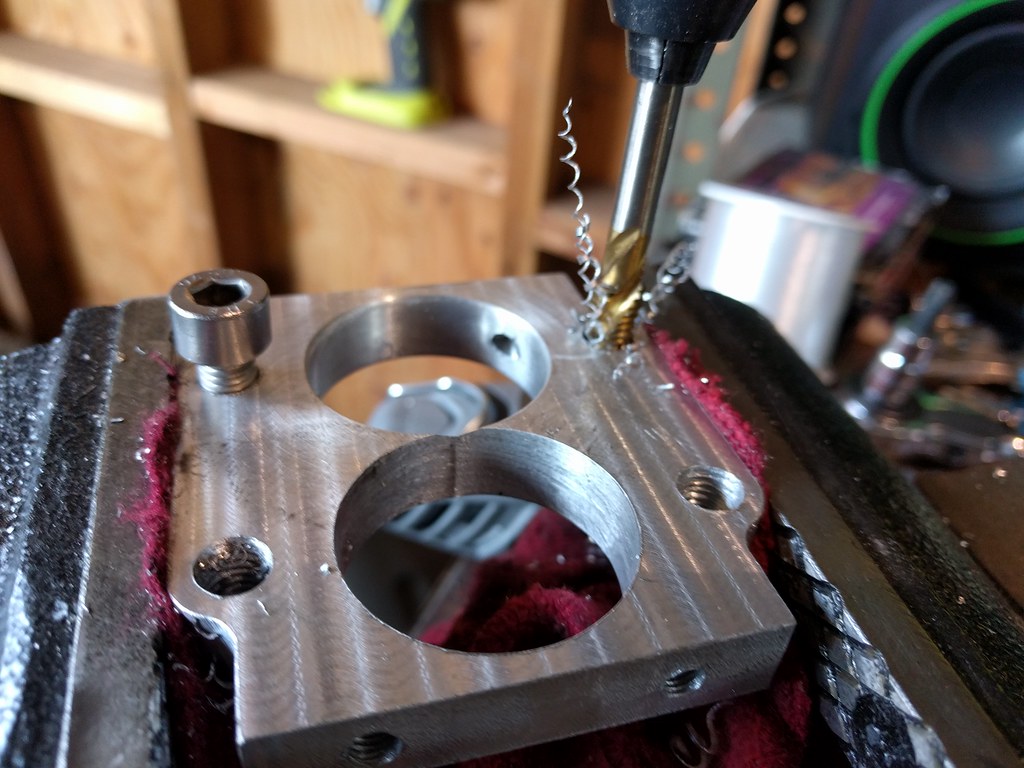
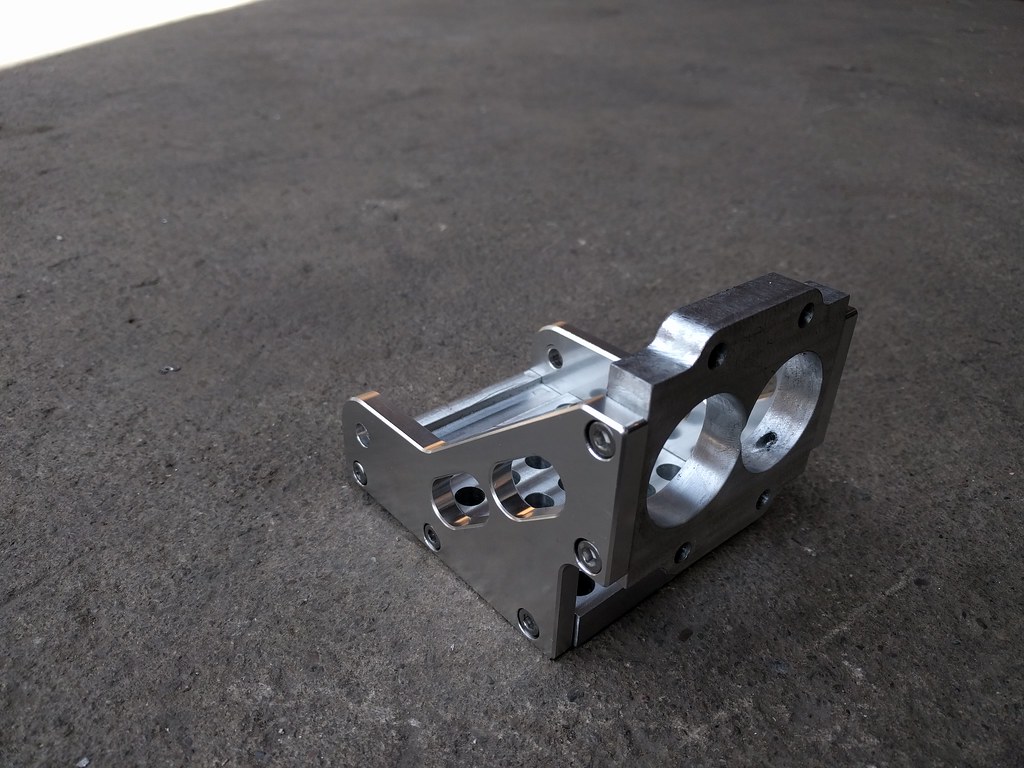
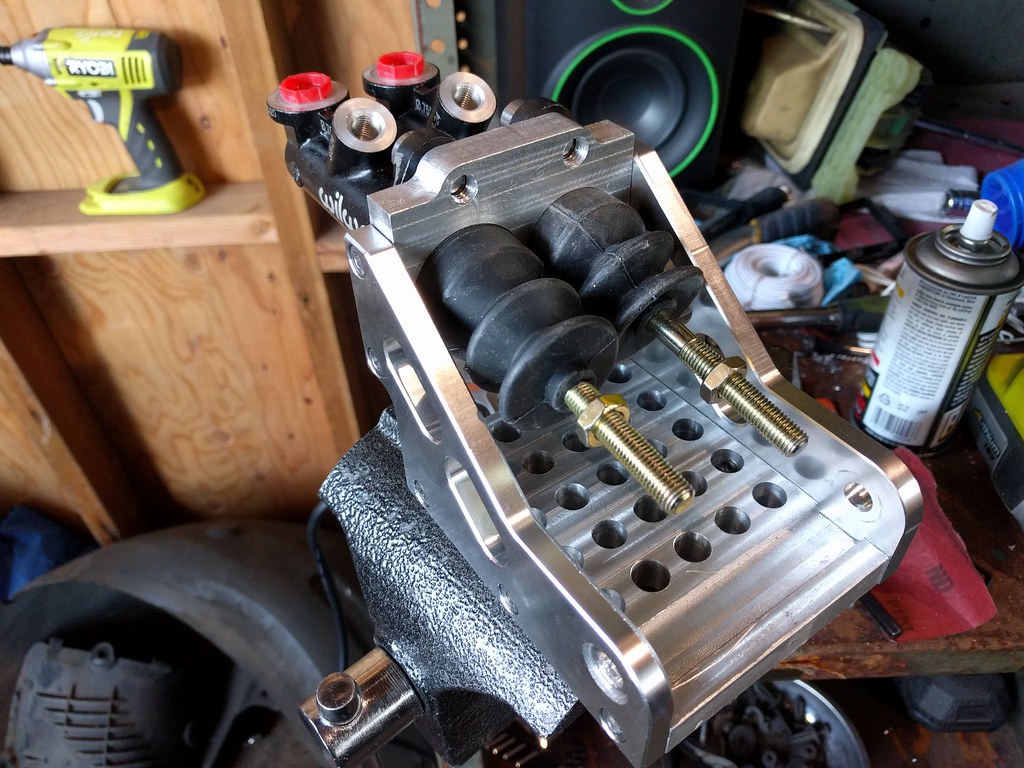
Tapping and drilling manually certainly adds to the pressure...
Meanwhile I have the hydro rear assembly almost finished, tight tolerances and overall as reasonably compact as it could be done:
Tapping and drilling manually certainly adds to the pressure...
05-25-2017, 03:55 AM
#110
Super Member
Thread Starter
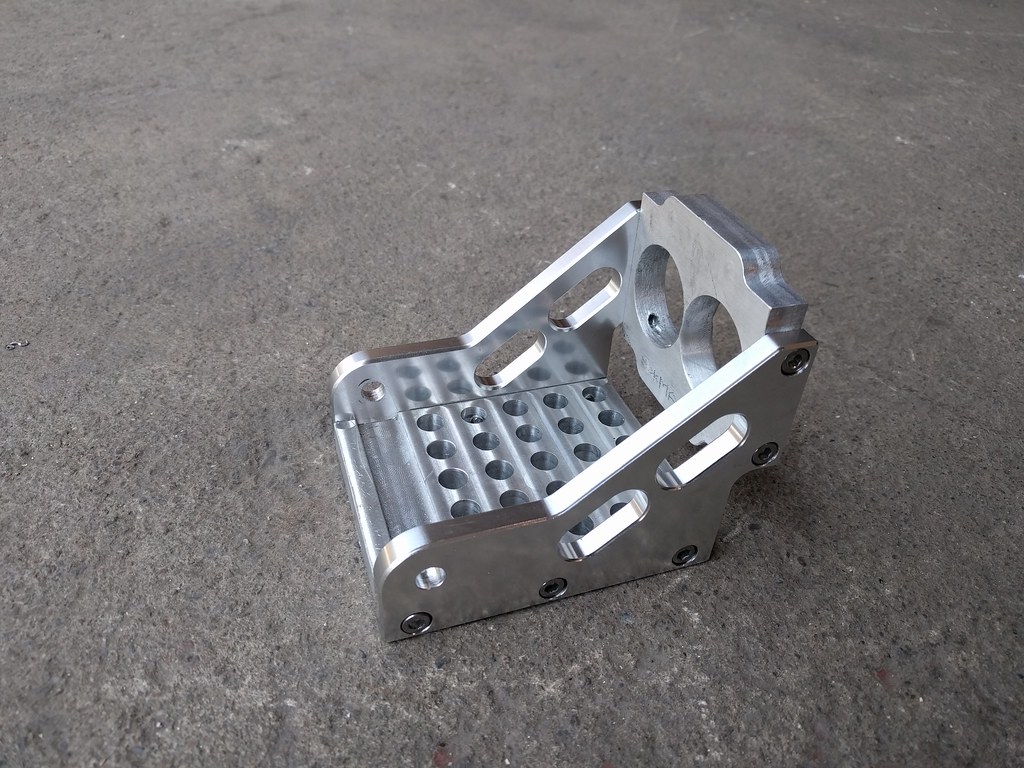
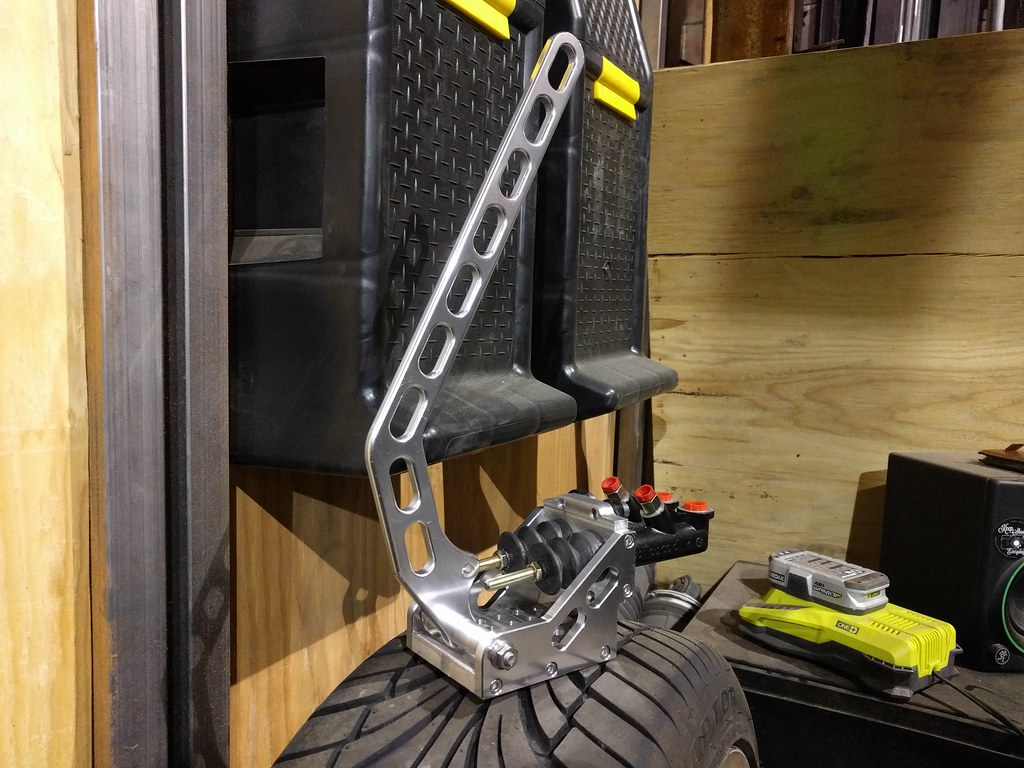
Made the spacers happen, found a 4" bolt, all that's left is to wait on the heim joints to arrive in the mail.
Bought some rope today to start planning brake line routing and lengths.
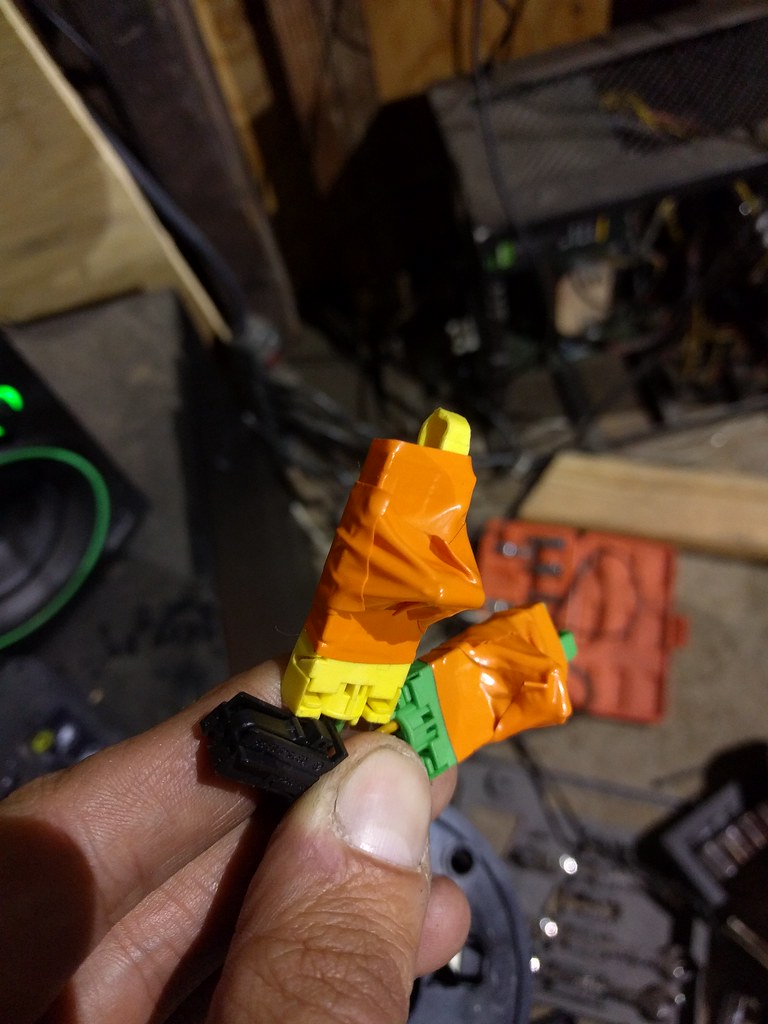
Meanwhile, since the 3.3 Ohm resistors have arrived a while ago I went ahead and patched the harness:
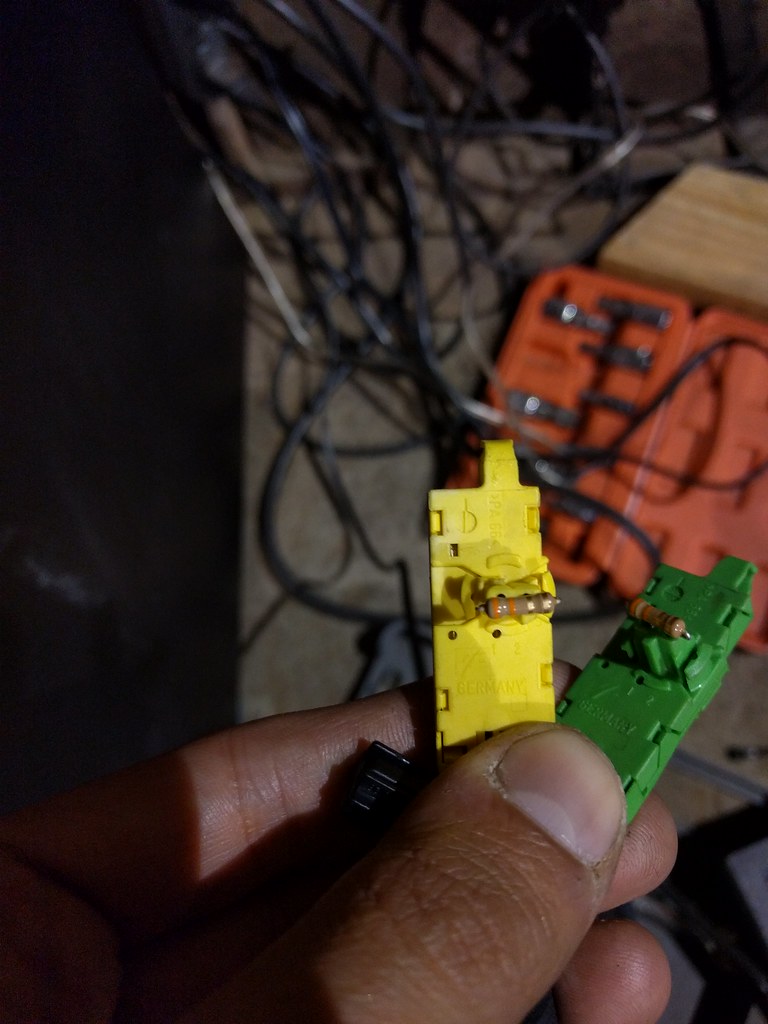
Also installed aluminum door pins. James hasn't started on the hub adapter yet because he got 5.5" aluminum round stock instead of 6". He was supposed to grab the right size today, so hoping to see some progress on that end of this week.
Next is up is modeling the gear shift buttons seats and slicing into the trunk speaker wiring harness for the amp.
Steady progress on all fronts!
Bought some rope today to start planning brake line routing and lengths.
Meanwhile, since the 3.3 Ohm resistors have arrived a while ago I went ahead and patched the harness:
Also installed aluminum door pins. James hasn't started on the hub adapter yet because he got 5.5" aluminum round stock instead of 6". He was supposed to grab the right size today, so hoping to see some progress on that end of this week.
Next is up is modeling the gear shift buttons seats and slicing into the trunk speaker wiring harness for the amp.
Steady progress on all fronts!
05-25-2017, 04:03 AM
#111
Super Member
Thread Starter
Although I won't start on cooling mods until the current pending projects are completed and tested (steering wheel swap, hydraulic rear brake, coilover project, new headunit + amp), I have already started gathering parts for the cooling project.
Version one will include the ZZP Cobalt SS heat exchanger, the Bosch 010 updated pump and splitting off the plumbing away from the main circuit. On top of this, the pump will be either wired to run whenever ignition is on or I will have an override SPST switch in the cabin.
Version one will include the ZZP Cobalt SS heat exchanger, the Bosch 010 updated pump and splitting off the plumbing away from the main circuit. On top of this, the pump will be either wired to run whenever ignition is on or I will have an override SPST switch in the cabin.
05-25-2017, 03:29 PM
#113
Super Member
Thread Starter
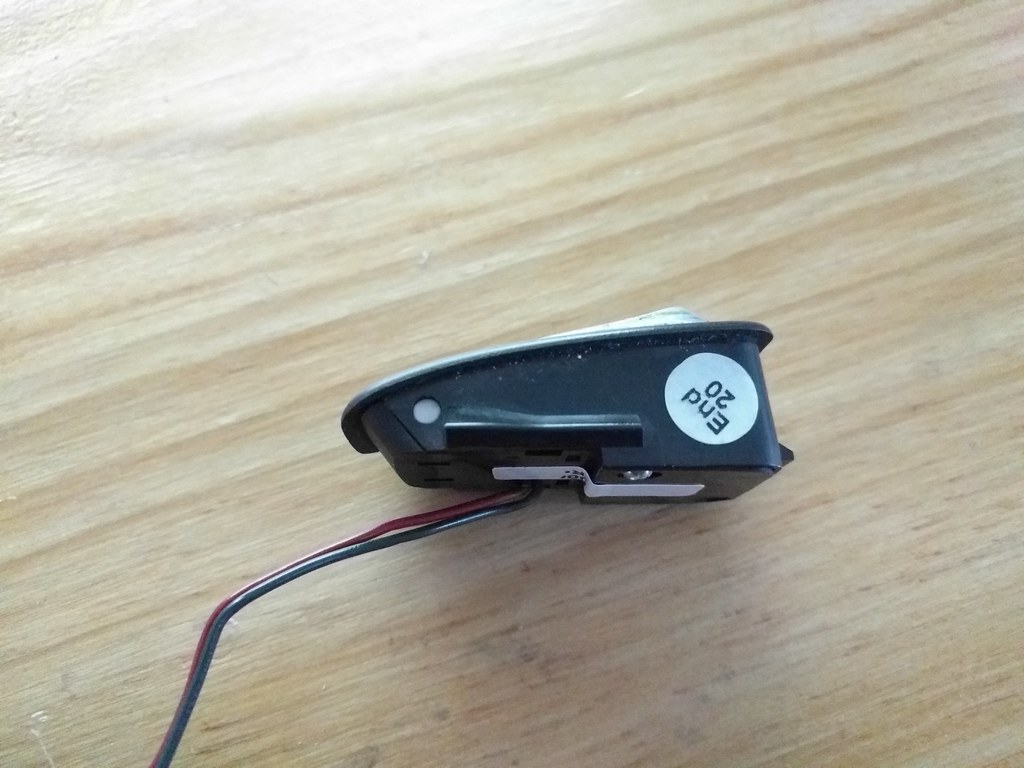
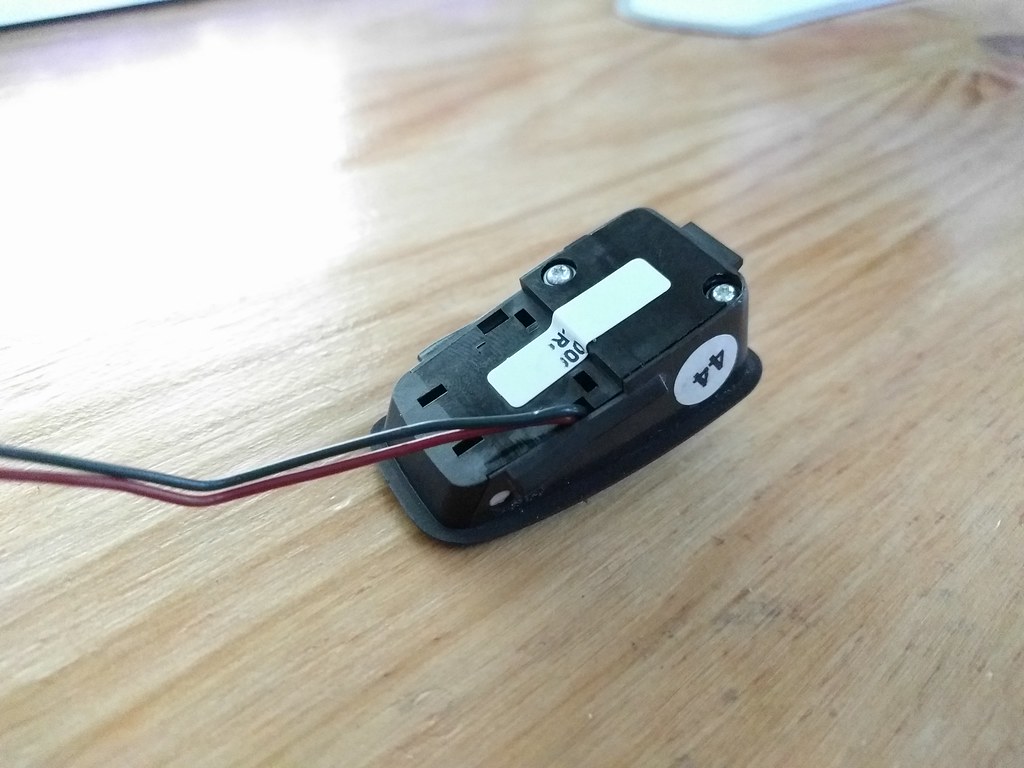
Started modeling the button seats to graft the gear selector buttons onto the Momo Prototipo.
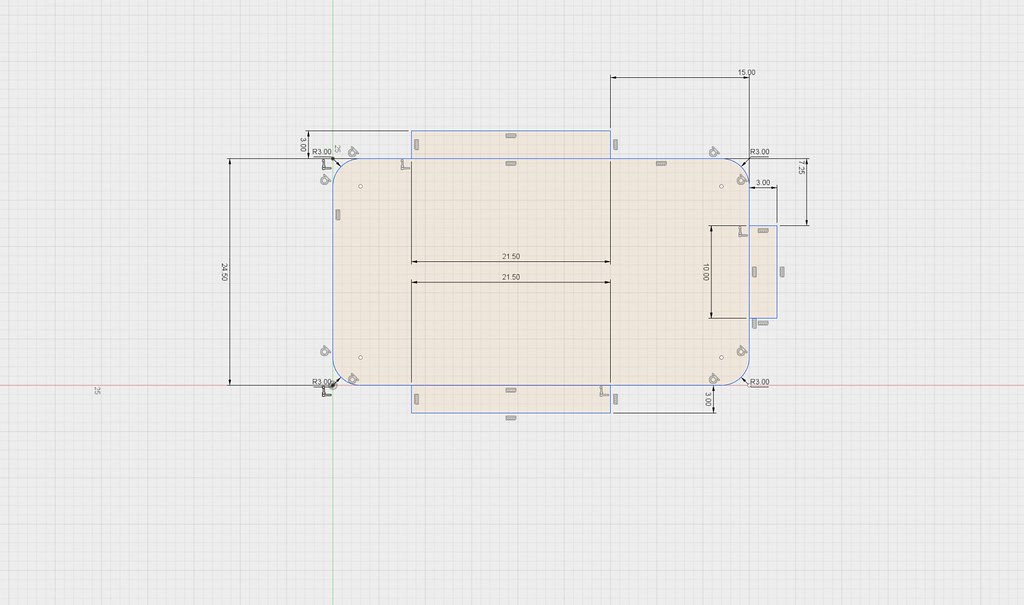
This is the button and it's housing's footprint. The three tabs that stick out normally just inset into the rubber factory steering wheel mold, but I'm thinking I will just pocket a thing piece of aluminum to orient the platform and tap small holes for 3 set-screws.
This is the button and it's housing's footprint. The three tabs that stick out normally just inset into the rubber factory steering wheel mold, but I'm thinking I will just pocket a thing piece of aluminum to orient the platform and tap small holes for 3 set-screws.
05-25-2017, 08:21 PM
#114
MBWorld Fanatic!

I am sure you figured this out, but:
Once you ditch the airtragic, correctly, and remove the air lines, tank(s), and the pump and requisite bracketry from the driver side front fender - POOF, you have a spot for a second heat exchanger.
Once you ditch the airtragic, correctly, and remove the air lines, tank(s), and the pump and requisite bracketry from the driver side front fender - POOF, you have a spot for a second heat exchanger.
The following users liked this post:
jumph4x (05-25-2017)
05-25-2017, 08:37 PM
#115
Super Member
Thread Starter
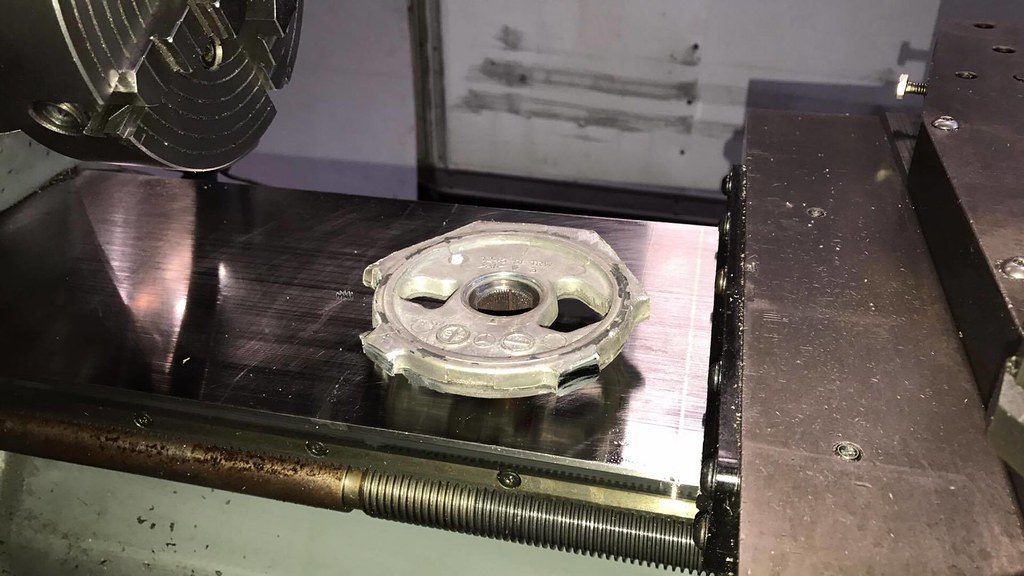
Here is what we're working with, pretty strange shape that only makes sense if inserted into a rubber mold:
Here is the 3D model and the path operations. We begin by clearing the 3D pocket with a roughing operation:

After that comes parallel mid-finish:

Finally, we 2D contour leaving 4 tabs:
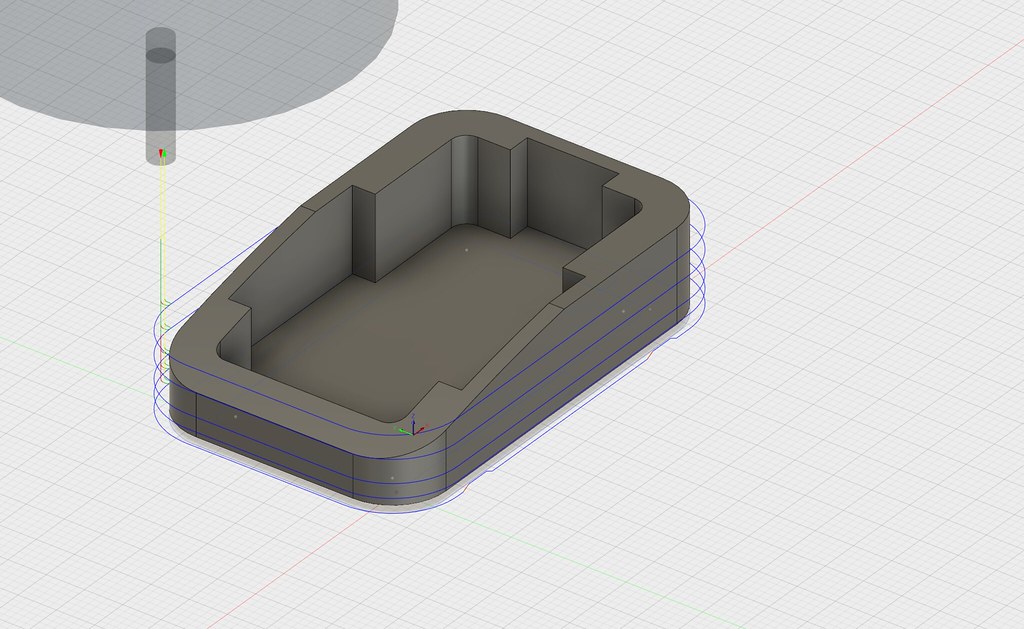
Holes for mounting, releasing the wire, countersinking and finish to be done by hand.
Here is the 3D model and the path operations. We begin by clearing the 3D pocket with a roughing operation:
After that comes parallel mid-finish:
Finally, we 2D contour leaving 4 tabs:
Holes for mounting, releasing the wire, countersinking and finish to be done by hand.
05-26-2017, 04:34 AM
#116
Super Member
Thread Starter
Did a test run today, got hyphy and was running 250% of the feed rate, broke the end mill on the second to last contouring run, haha. Now I have to wait until Saturday for more end mills to show up.
But I learned some things. Firstly, the finish on this piece will be ridiculously pretty. Secondly, I can tighten down X-axis tolerances by 0.5mm. I also shaved about 30 minutes from the machining time down to about 52 minutes per piece. If I really tried I could probably get this one down to high thirties, but what the hell, I want that super plush finish.
For those keeping tabs on my journey, there is a great CNC milling helper to be more deterministic about feed rates and it is called FSWizard. The free version does everything I need it to do. The creator has an overview/tutorial on YouTube, immensely helpful calculator.
EDIT: Down to 41 minutes, I'm happy with that. Going to bust out my full on photo rig to show the final version off, it will be glorious.
Last edited by jumph4x; 05-26-2017 at 04:45 AM.
05-27-2017, 01:47 AM
#117
Super Member
Thread Starter
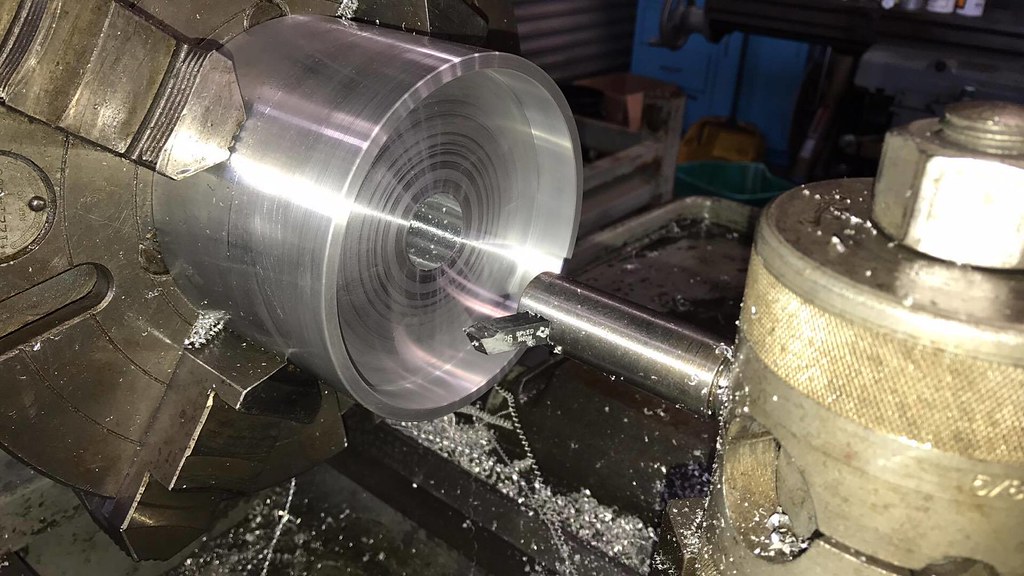
Look what's hanging out in the kitchen!

Aaaaaand, finally, on attempt #3, I made these three without breaking any bits or causing any drama. The photo does them no justice, they are beautiful to look at and to touch.
Machining time for each a little over half an hour with some feedrate babysitting here and there. Just in time to leave room for some Friday night partying.
The following users liked this post:
jumph4x (05-29-2017)
05-29-2017, 07:22 PM
#120
Super Member
Thread Starter
 05-30-2017, 07:37 PM
#122
MBWorld Fanatic!

Join Date: Jan 2010
Location: Richmond, CA
Posts: 3,250
Received 255 Likes
on
233 Posts
2001 E320 Wagon, 2006 LBZ Silverado, 2007 E63 (sold), 2001 E55 (sold)
https://www.yelp.com/biz/all-flow-mu...epair-martinez
05-30-2017, 10:55 PM
#123
Super Member
Thread Starter
I had All Flow Muffler in Martinez do it. Paid $150 and they just replaced it with straight pipes. They're not too far from my house and had good Yelp reviews so I went with them. They're a bit flaky, but other than that no complaints (had to reschedule after they didn't call saying they couldn't do it one day).
https://www.yelp.com/biz/all-flow-mu...epair-martinez
https://www.yelp.com/biz/all-flow-mu...epair-martinez
05-31-2017, 01:26 AM
#124
MBWorld Fanatic!
Join Date: Jan 2010
Location: Richmond, CA
Posts: 3,250
Received 255 Likes
on
233 Posts
2001 E320 Wagon, 2006 LBZ Silverado, 2007 E63 (sold), 2001 E55 (sold)
I don't have anything that would record audio well. Mine pretty much sounds like this one except I haven't noticed the "fluttery" sound when revving.
https://www.youtube.com/watch?v=WFzMFOJlQ74I
https://www.youtube.com/watch?v=WFzMFOJlQ74I
05-31-2017, 01:27 AM
#125
Super Member
Thread Starter
I don't have anything that would record audio well. Mine pretty much sounds like this one except I haven't noticed the "fluttery" sound when revving.
https://www.youtube.com/watch?v=WFzMFOJlQ74I
https://www.youtube.com/watch?v=WFzMFOJlQ74I


