Engine Rebuild on CLS55 M113k
#1
Member
Thread Starter
So I've posted alot on here about oil pressure issues and ticking hydraulic lifters/rocker arms. After installing an oil gauge and having it read 10-6 psi, I figured the oil pump was bad so I then replaced the oil pump and what I found was a ton of rtv and other plastic in the pump and pickup tubes. After cleaning that out and replacing the pump, I drove the car for 2 days the sound was slightly lower but still ticked, the oil psi reading was the same 10-6 psi, then the 2nd day on my way only a mile from my home it slowly got lower and lower and eventually i was idleing at 1psi. After that I took the car home and stopped driving it all together.
Now heres where the rebuild starts. After consulting with friends we decided the heads and the block need to be cleaned out. We figured for the psi to drop to 1 psi, with the new pump some of the plastic must have clogged one of the oil ports even more. So now the entire engine was pulled about a week ago and the heads and block are at a machining shop and are getting ported and polished. I will also provide pics of the before and after*.
So now heres where im at, I am going to be replacing all the gaskets and seals and old parts on this engine including the water pump, timing chain assembly, and more. I know theres some people that have done this job more than once. If theres anyone out there that has a full list of everything I would need to replace. I currently have been getting all my parts from FCP Euro, but they dont carry all the parts I need, and when I order I want to order everything all at once so I dont have to pay shipping costs multiple times. Checking out sites like MBpartsexpress.com shows me a diagram of the engine but still I feel it is not including everything.
If someone has a full list of items that should be replaced to renew my 100k mile m113k engine that would be great! Thanks again for reading, ill be providing Pics showing the initial pull of the heads and block before we dropped them off at the machine shop. And ill privide the pics after we get them back and put them back in.
This is a link to a short clip of us pulling the block out of the engine bay.
https://www.youtube.com/watch?v=krRh...ature=youtu.be
Last edited by Rpkxnoscope; 01-24-2020 at 03:40 PM.
The following users liked this post:
boss53177 (09-12-2023)
#2
Member
Thread Starter
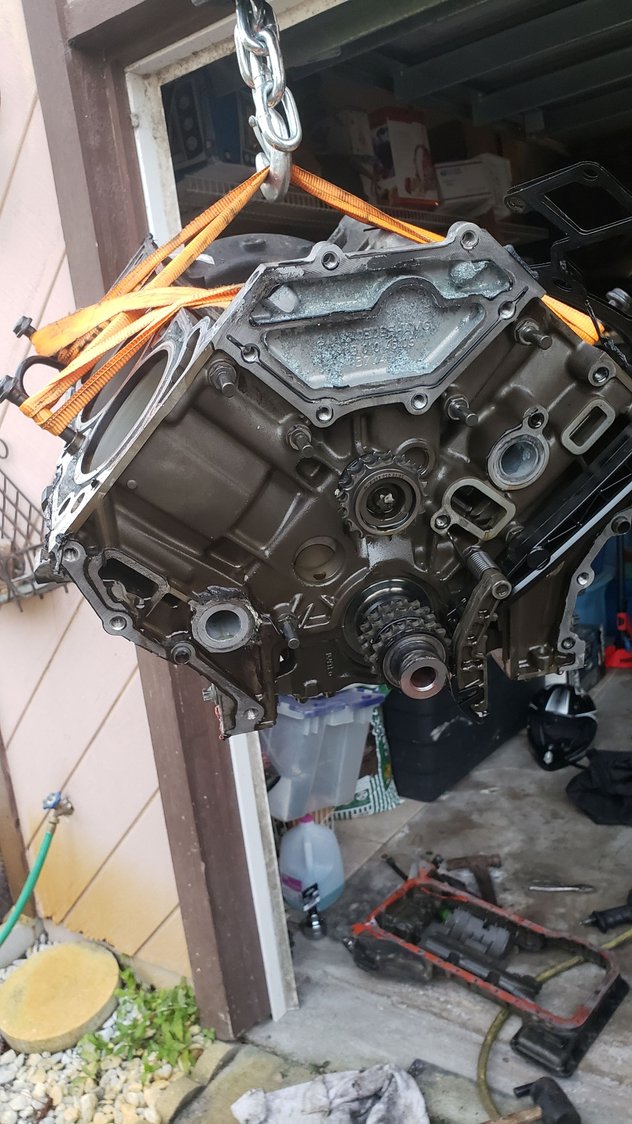

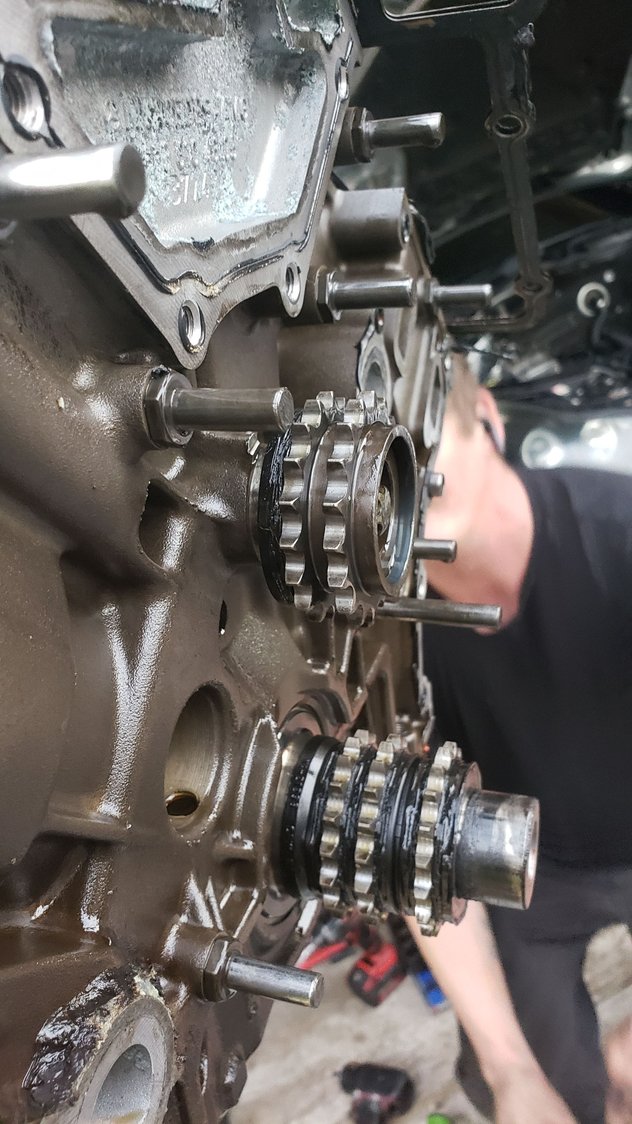
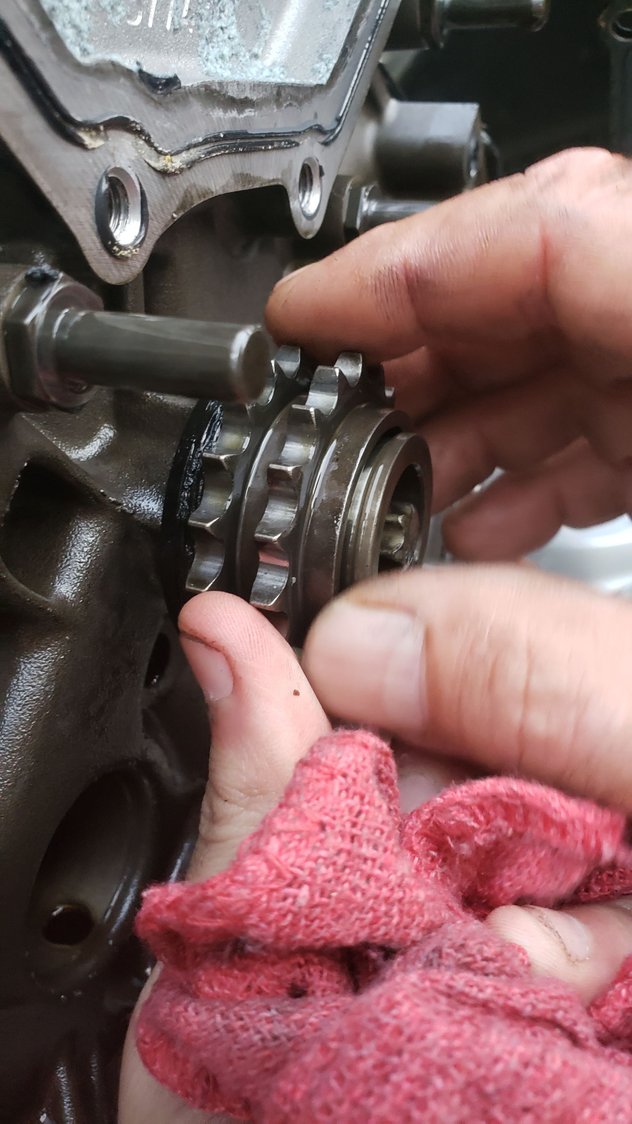
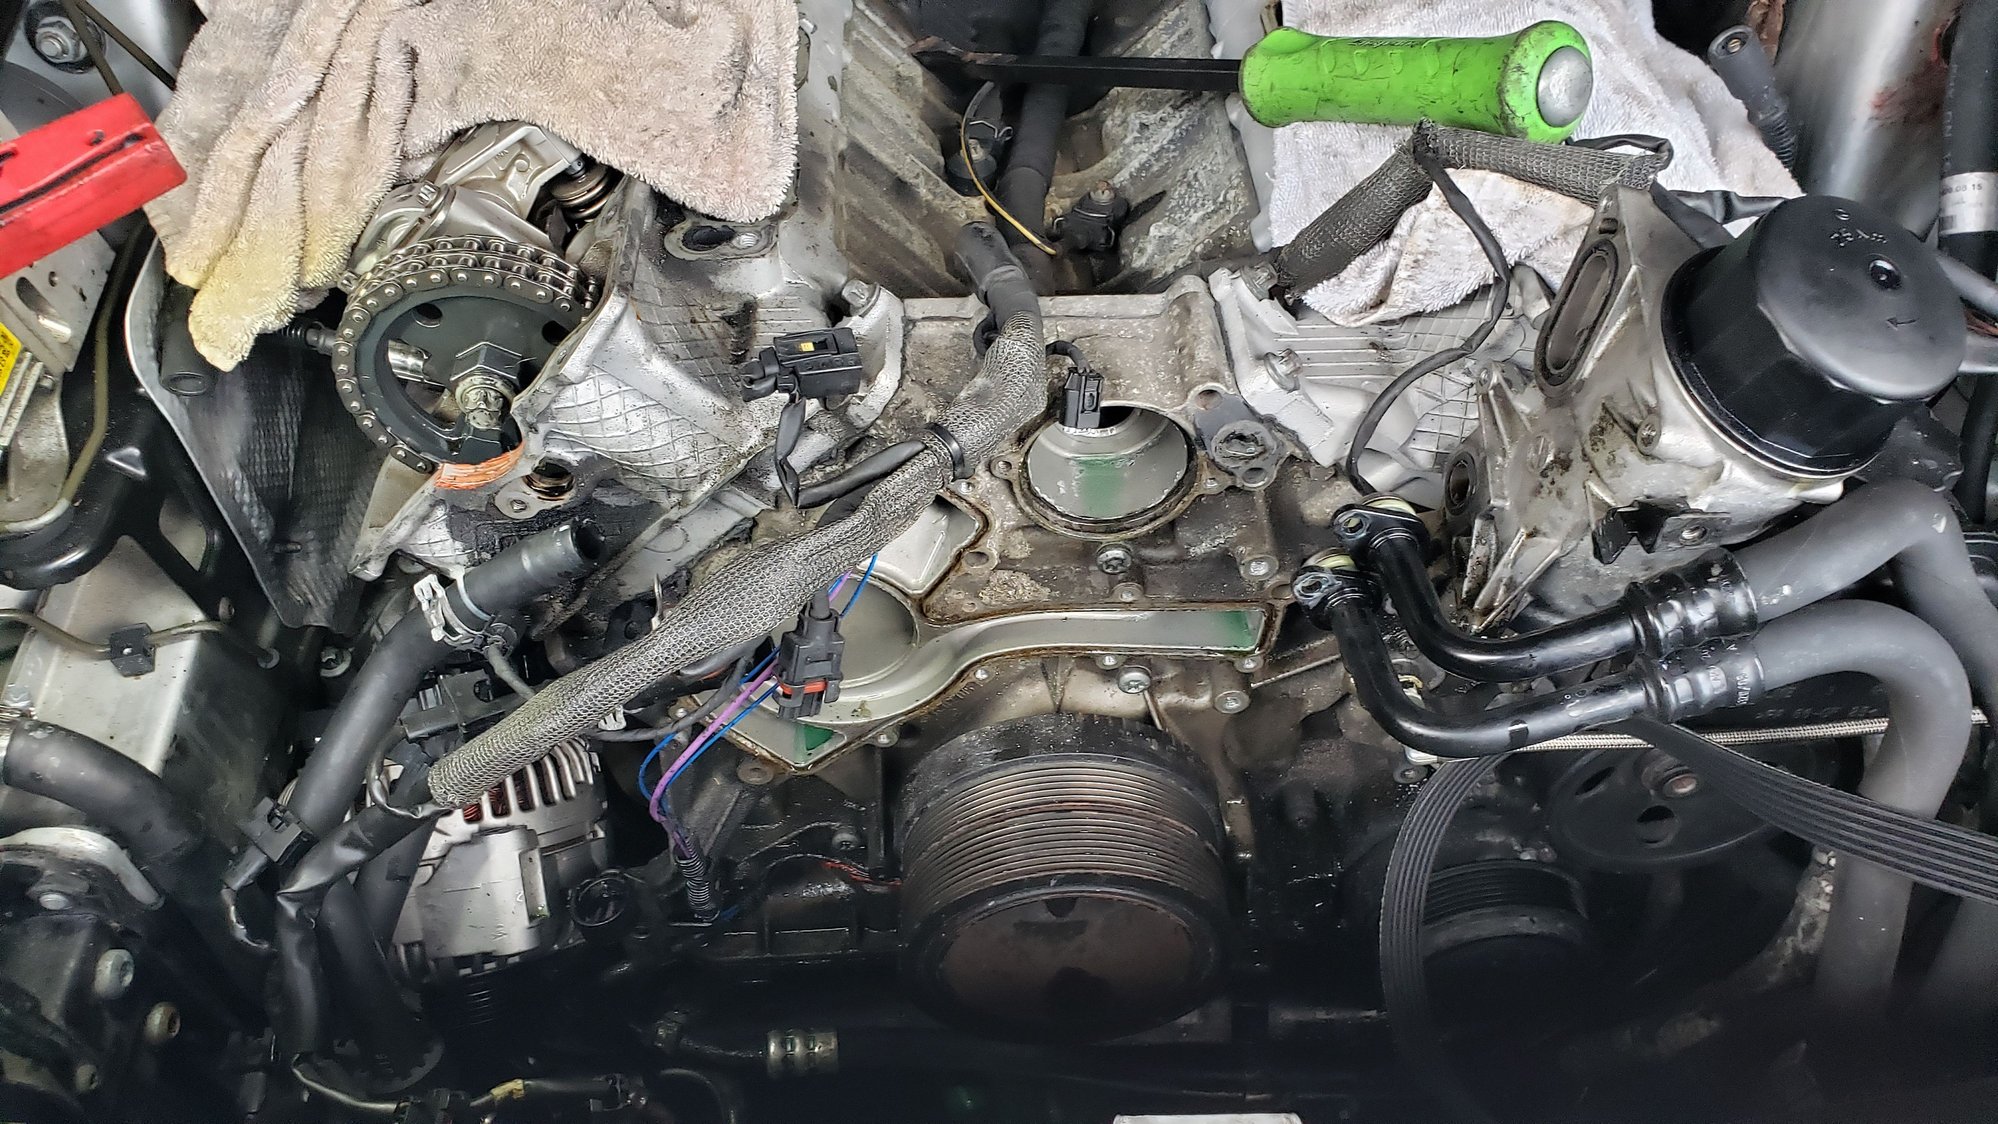
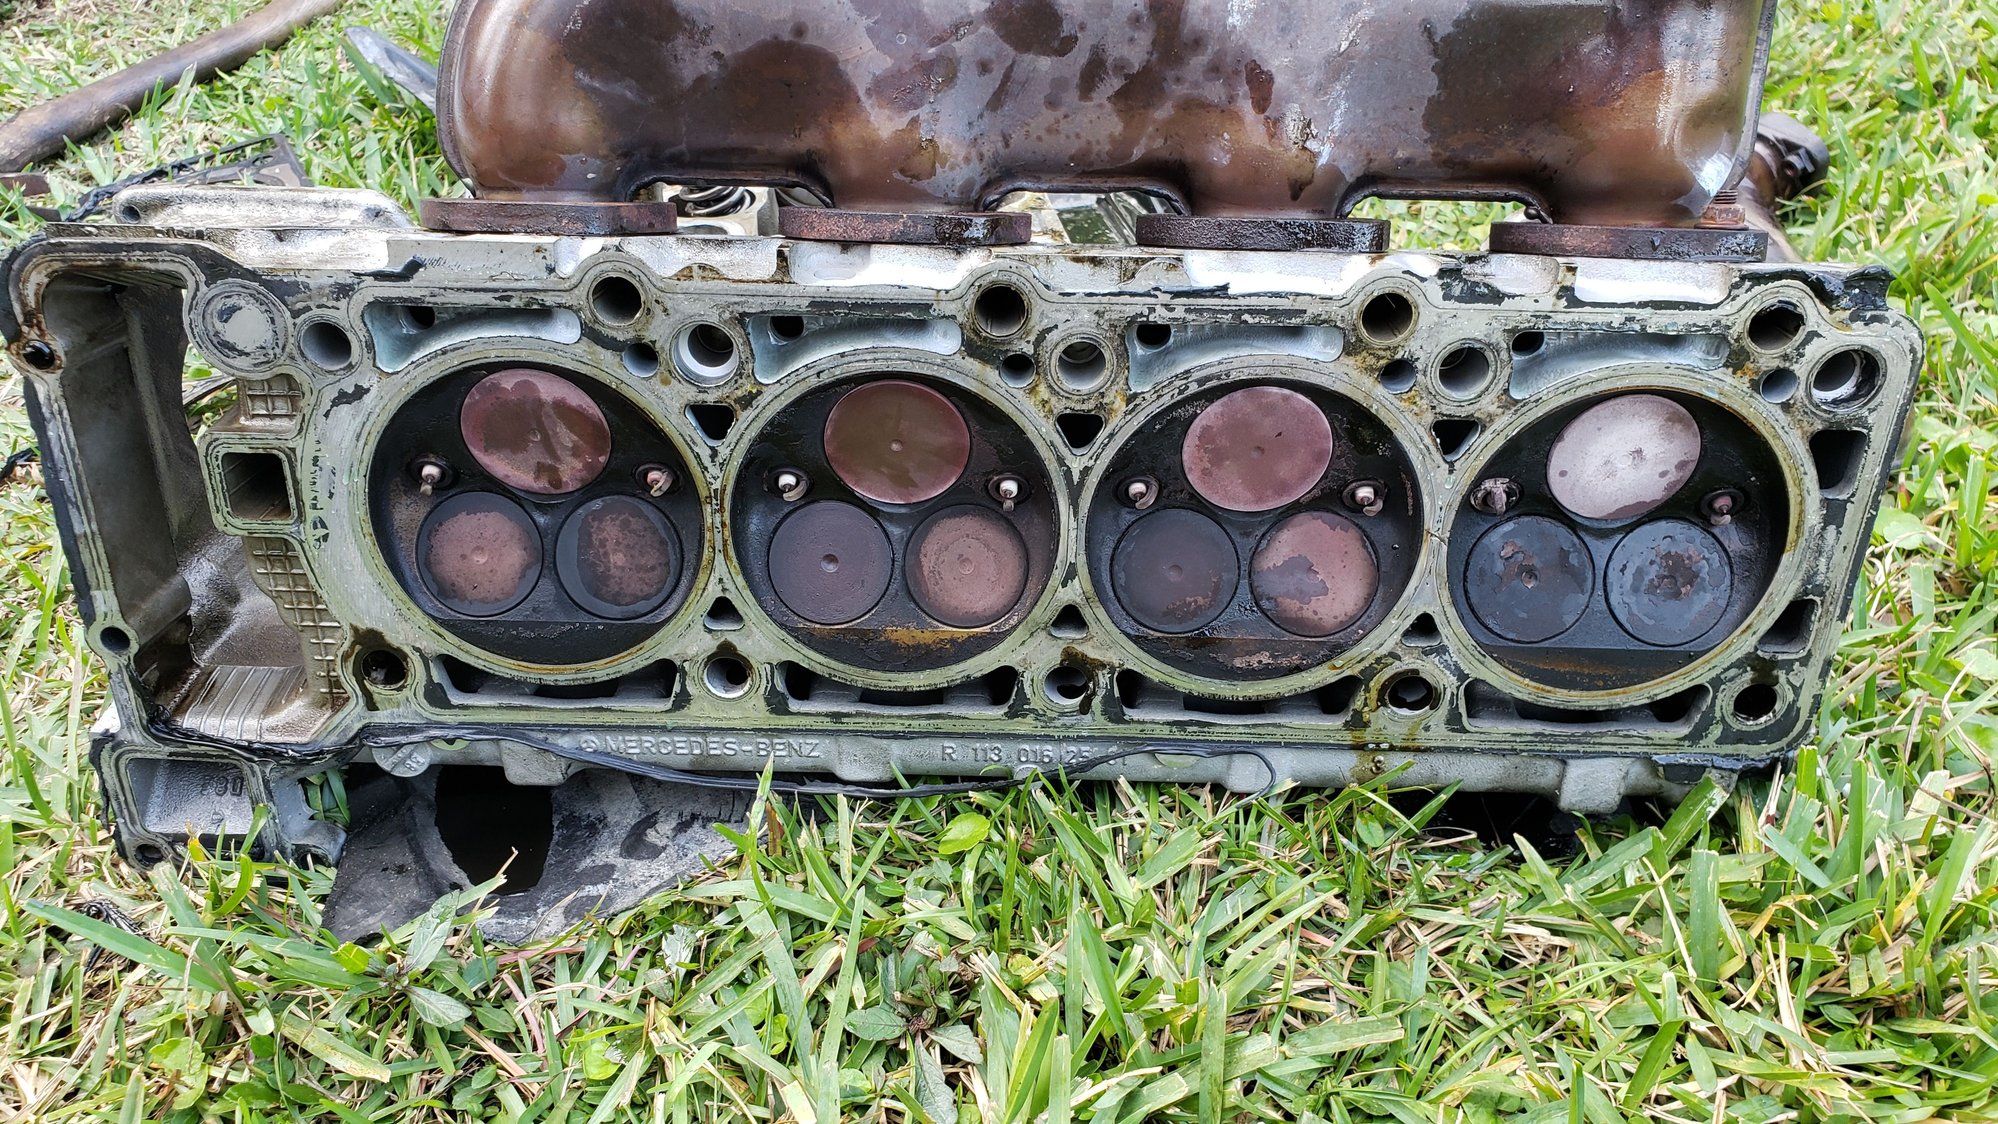
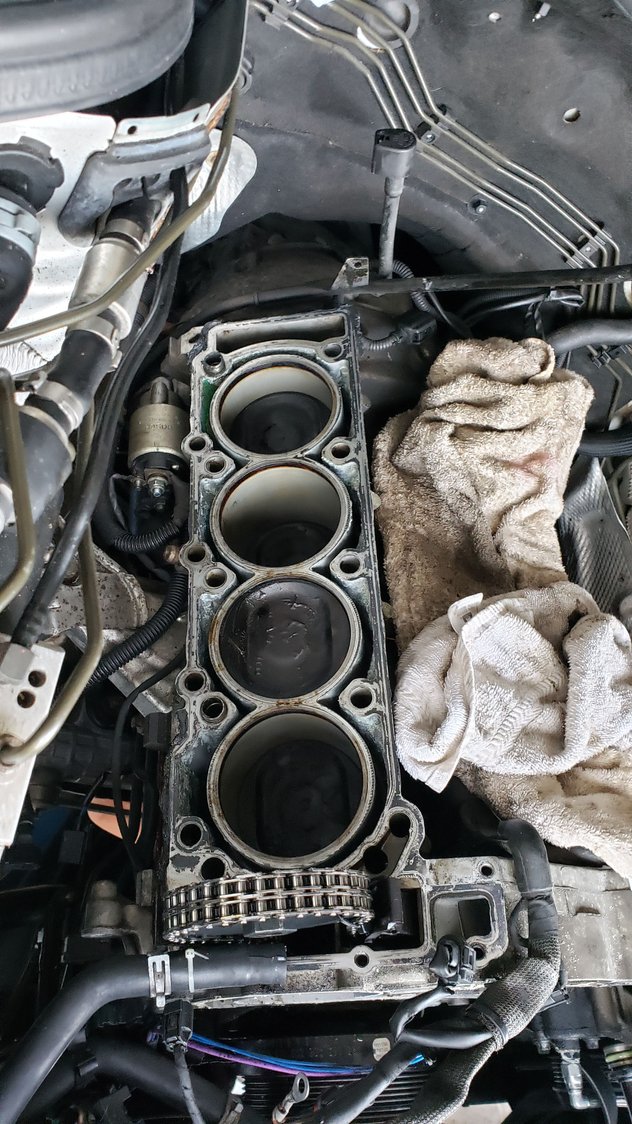
the gears on this part of the timing chain moved in and out and had a hard plastic ring behind it that was very worn, not sure if this was install incorrectly

The heads were not too clean
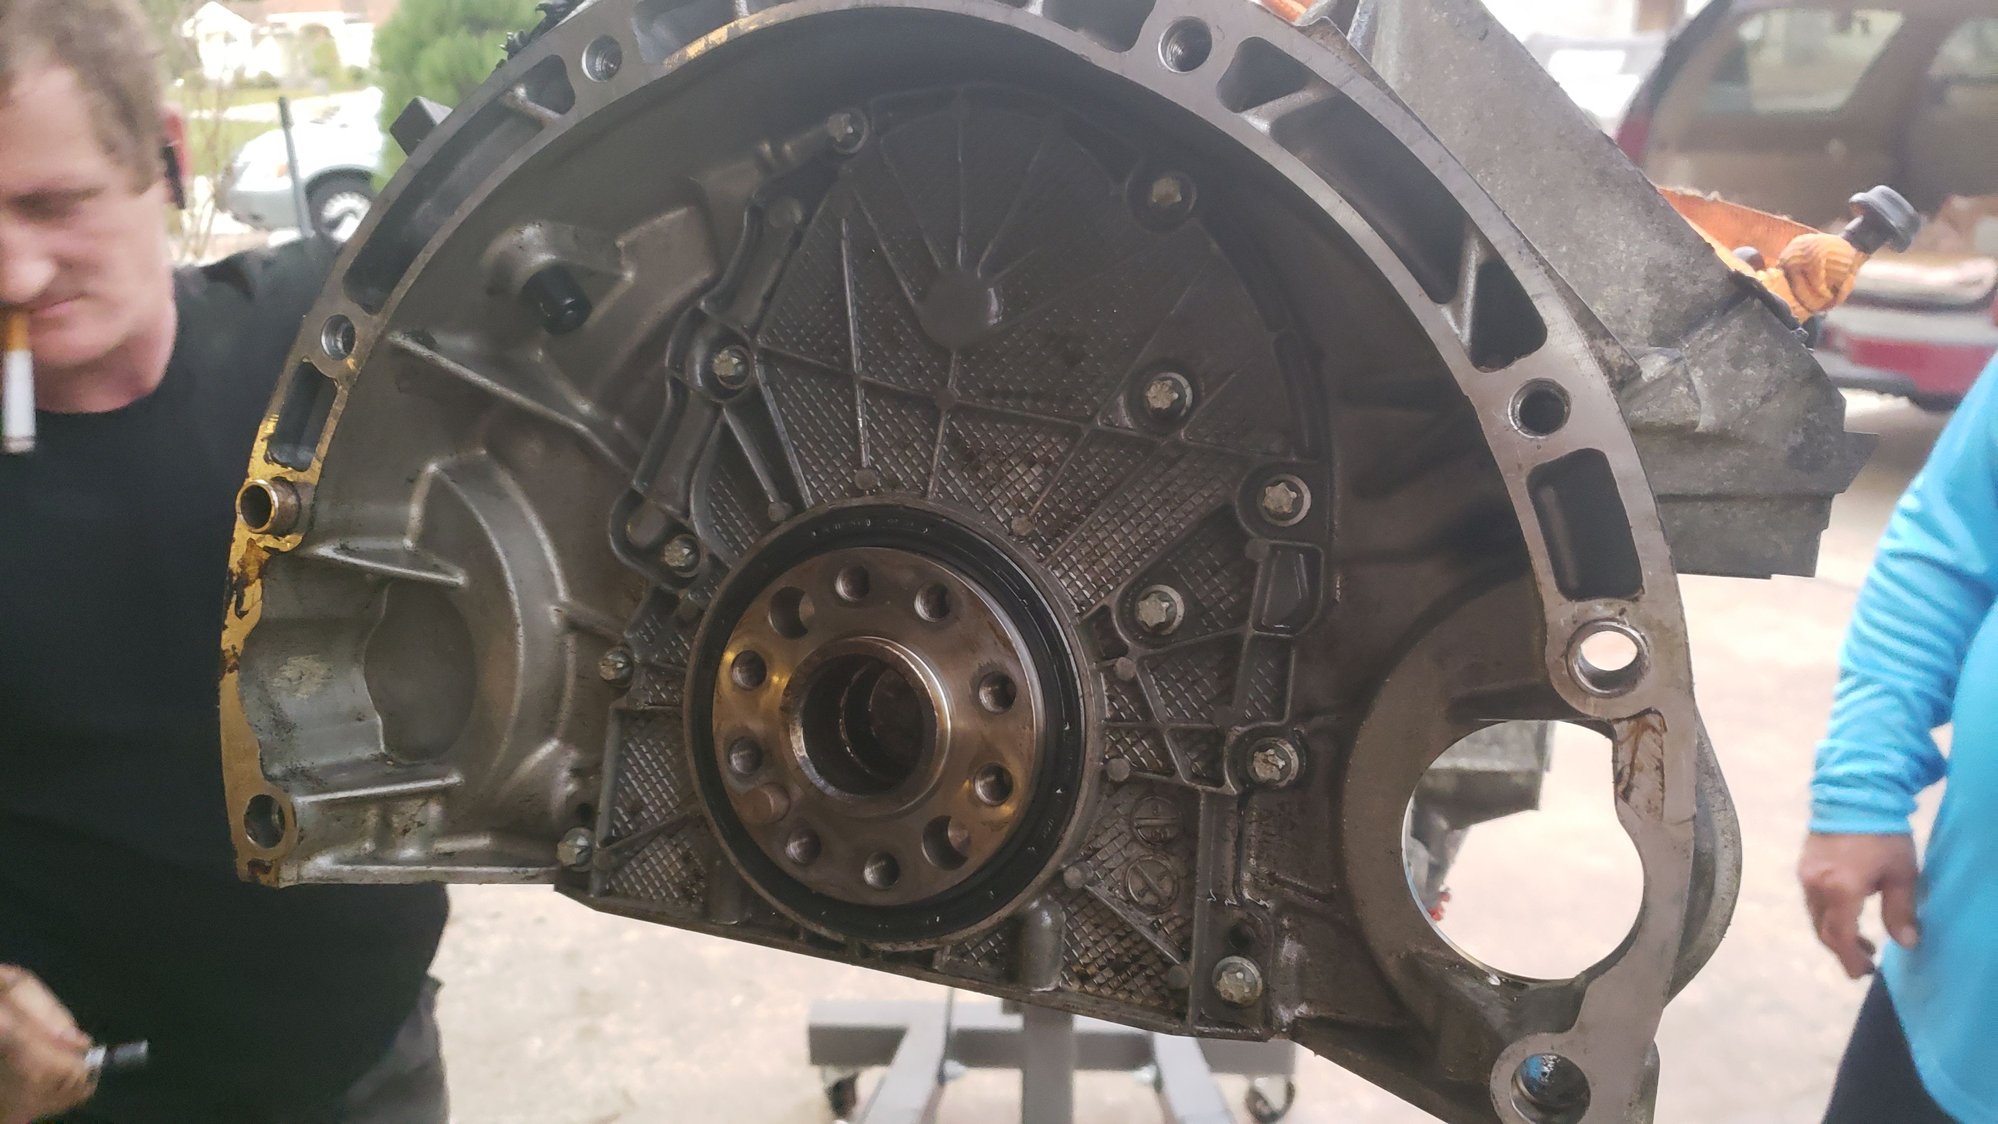
rear manin seal has a slight leak


the rods moved left and right alot

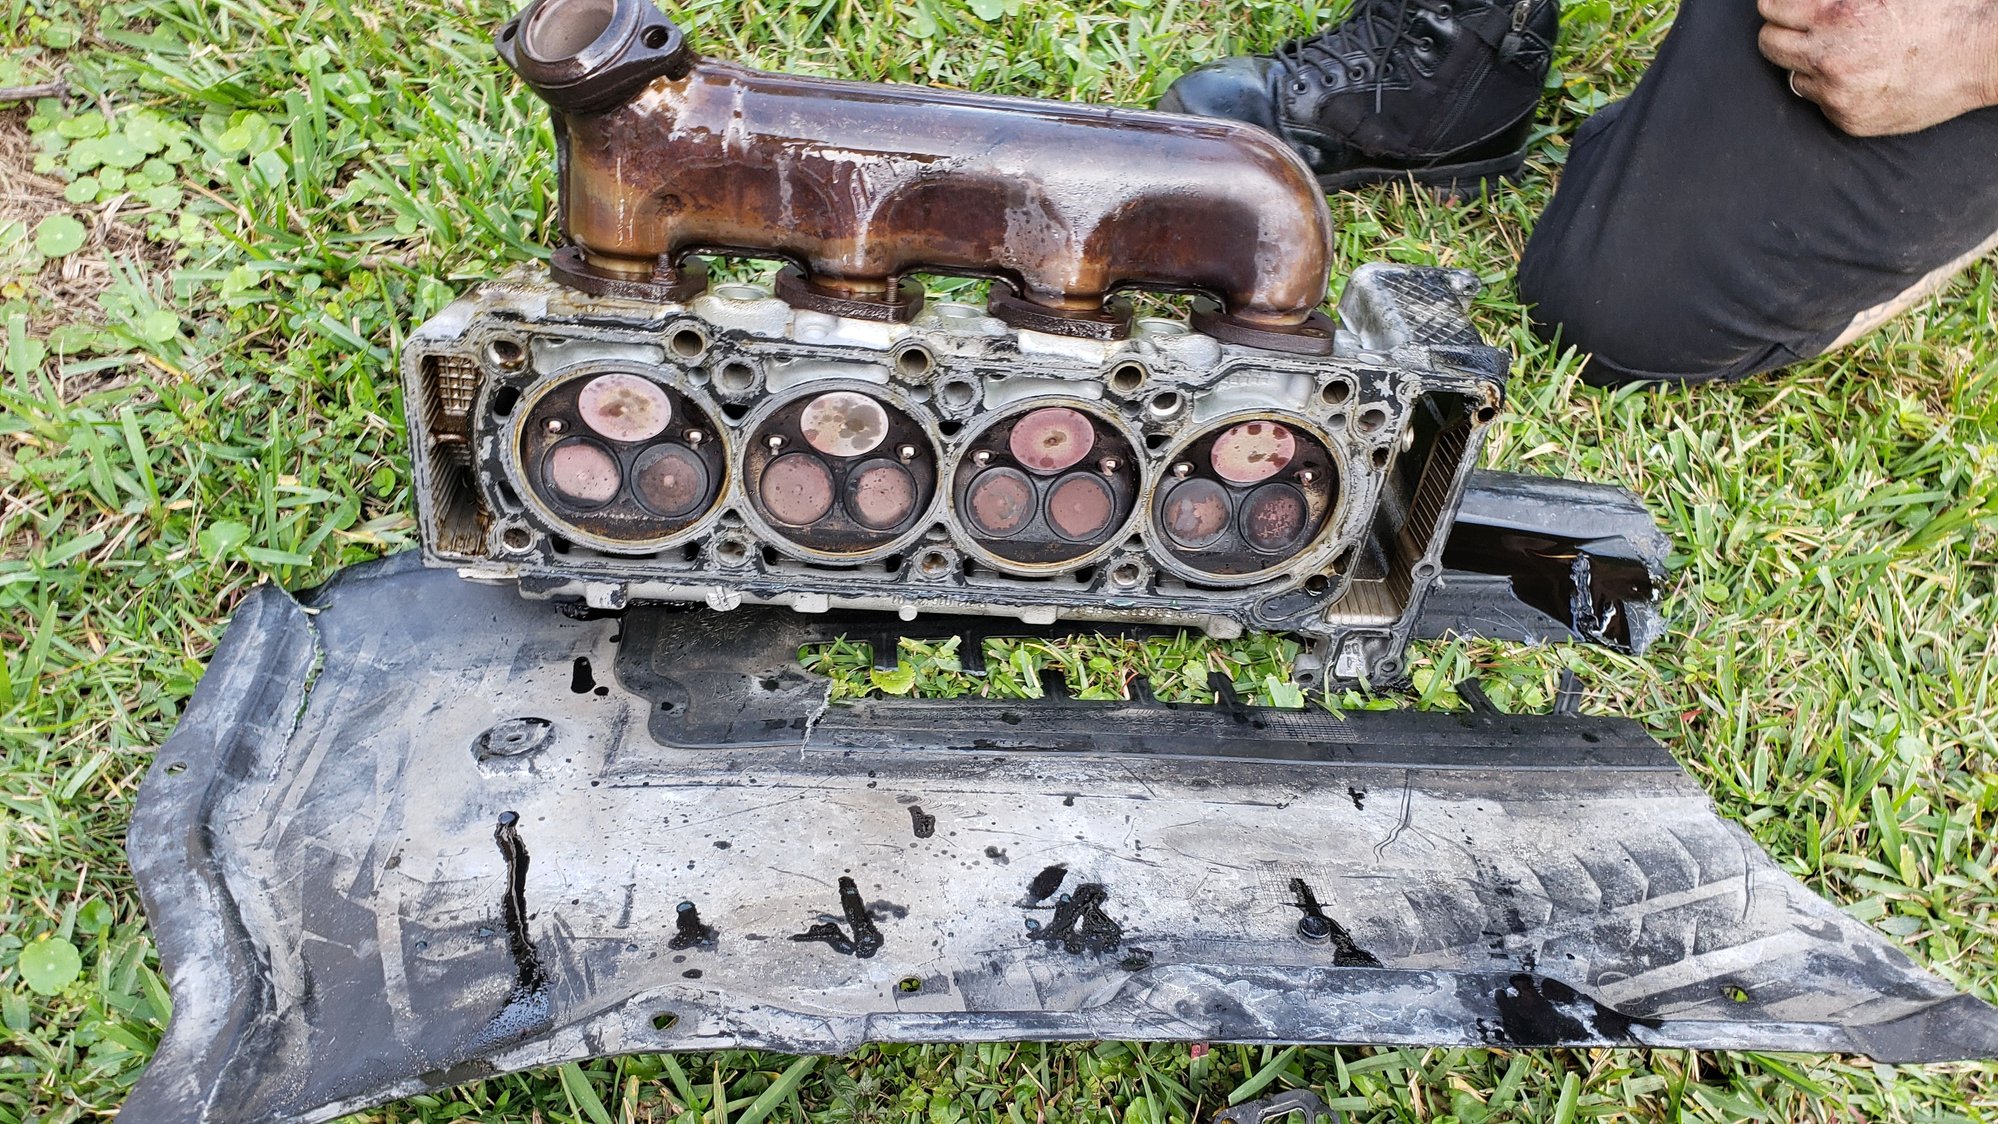
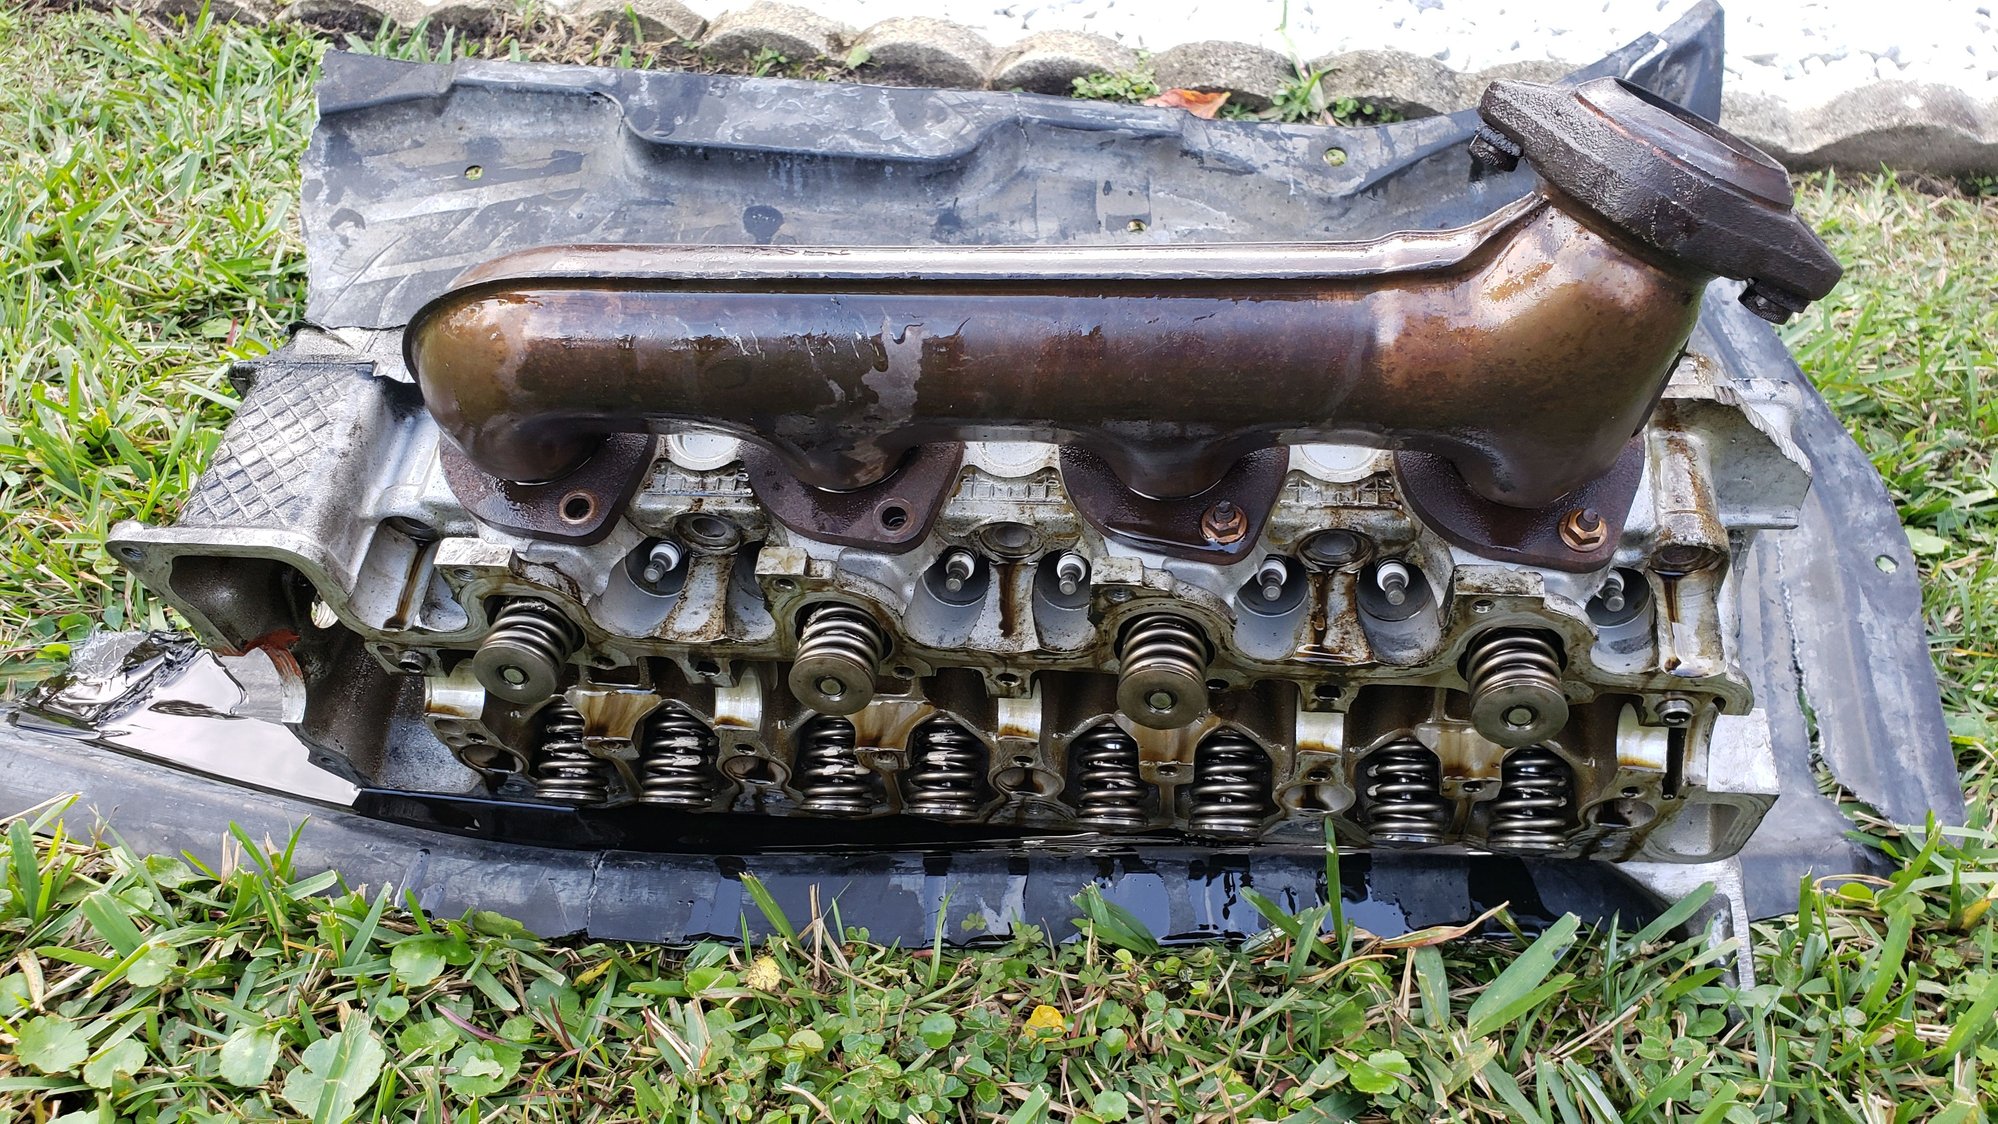
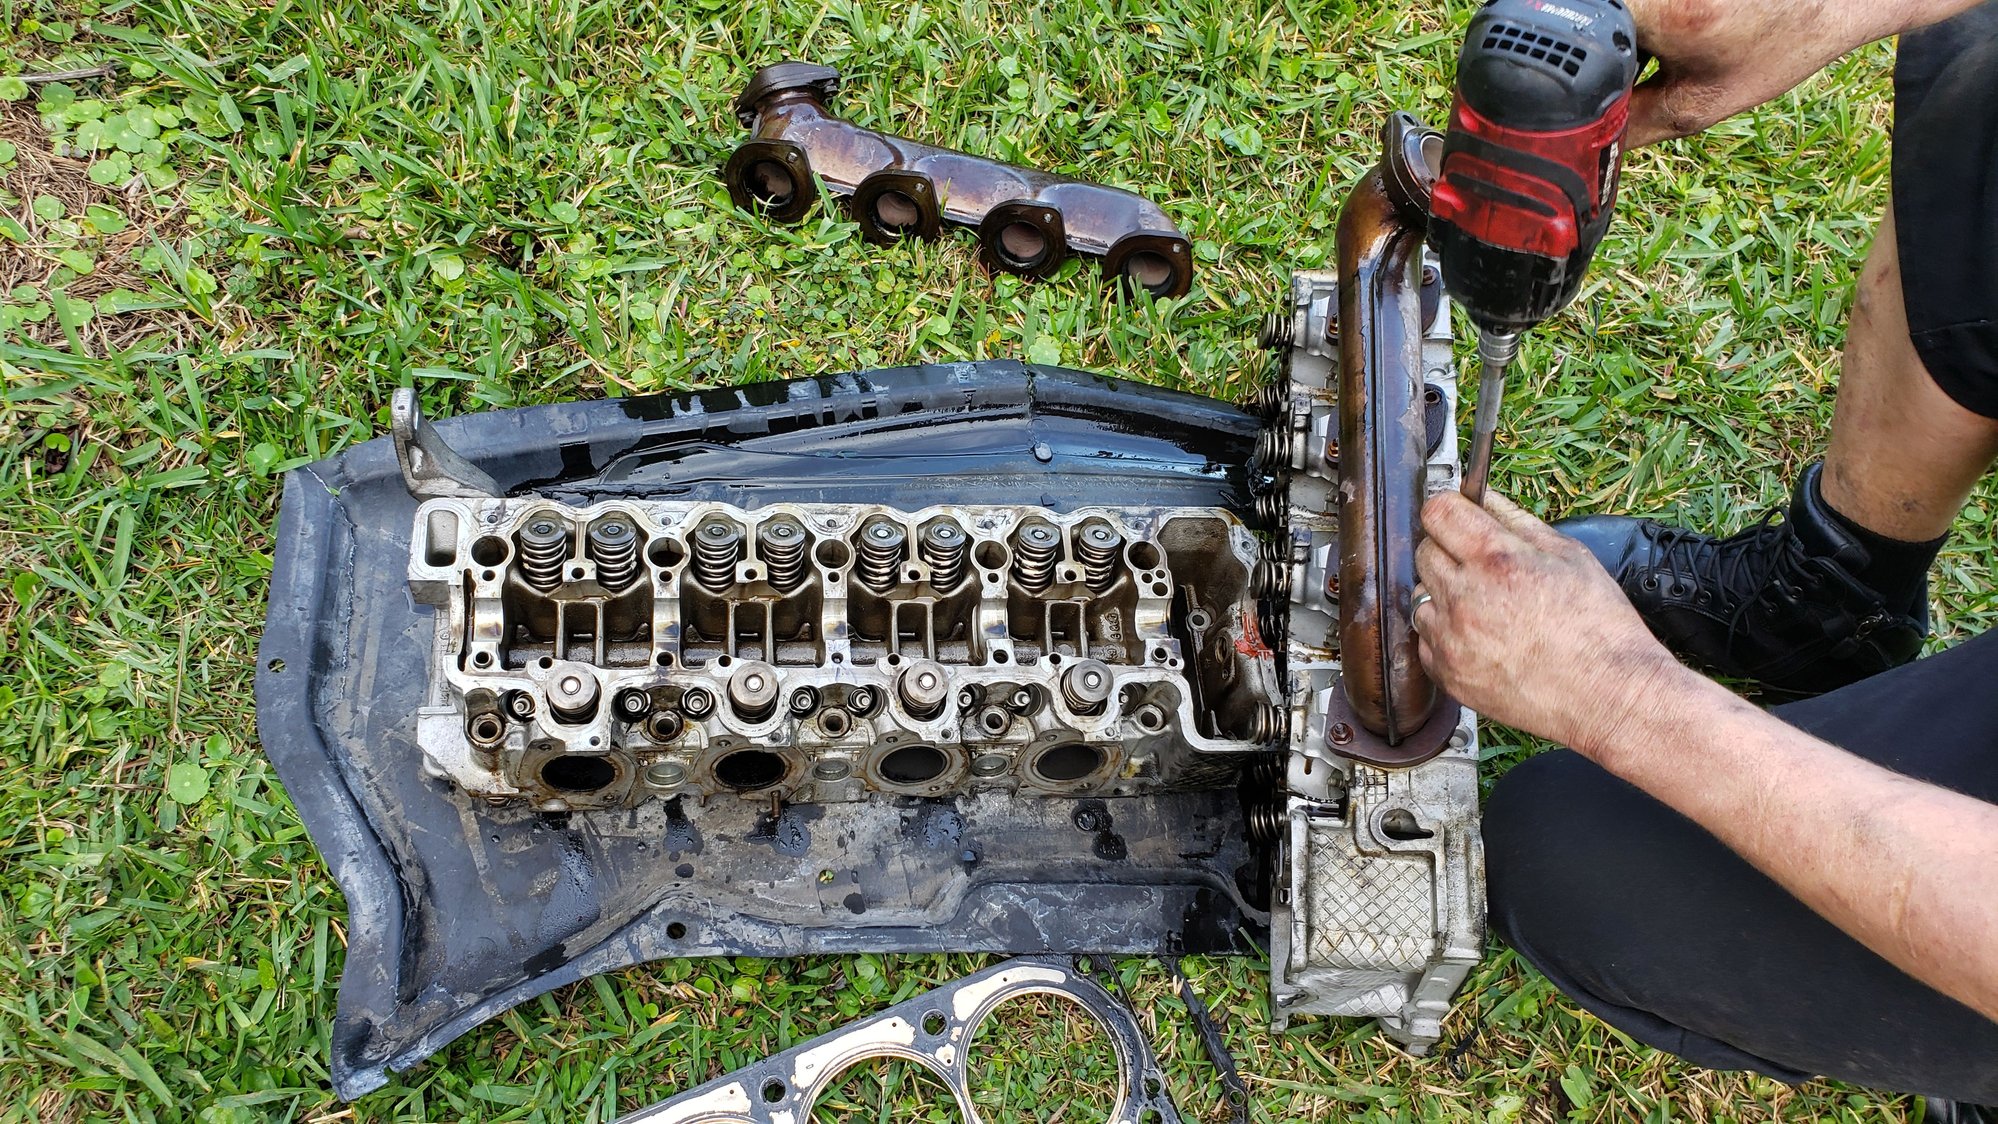
the valves did not look great


#3
MBWorld Fanatic!
iTrader: (1)
Hopefully you didn’t tear down that engine for nothing.
With all due respect, you really need somebody who knows this platform well to be working on this or you’re going to spend a bunch of time and money making an even bigger mess out of it.
The plastic bits you saw in the oil pan and stuck to the oil pickup were from the harmonic rubber coating that’s formed around the timing chain’s driven gear on the crank, and the idler gear just above it. That coating flaking off is typical, and the big pieces are stopped by the pickup screen, and any tiny pieces that get past are caught by the oil filter, so you aren’t losing oil pressure from oil ports getting clogged by that rubber stuff. The timing chain idler gear is supposed to slide fore and aft by 7-8mm or so, that’s normal. And heads up- that bolt retaining the timing chain idler gear is reverse thread.
The rods are piston guided, so the lateral movement on the crank pin is normal.
Did you pop off a connecting rod cap and see what the bearings looked like? That’s a good indicator if there was an oiling problem. The rod bearing will look gouged up and probably have lost its tension in its bore.
Your heads look okay (from what I could make out) #8 might have either been running a little lean or have been burning a little coolant. I dont suppose you did a compression test before pulling it, did you?
Back to your original oil pressure problem.... changing the oil pump did nothing for you, but what else did you change while you had it apart for the pump swap? Did you have the front cover off? Did you replace the O-ring under the oil pump around the check valve? What about the pump chain tensioner and guide?
What oil and oil filter were you running before all this?
For starters with your rebuild-
Many of the internal bolts are one time use.
-main caps bolts
-connecting rod cap bolts
-cam gear retaining bolts
-crank pulley bolts
-cam bridge (rockers) bolts
-head bolts
Unless the shop is familiar with this engine , don’t have them port the heads.
Definitely replace the valve seals and maybe do a performance valve job.
Shim the valve spring seats for a little more seat pressure.
Definitely open up the piston ring gaps to .018/.020
or .022/.024 if you’re planning on heavy boost/nitrous down the road.
Definitely replace the rod and main bearings. Maybe do the blue or purple rod bearings (assuming yours are yellow) if you want more clearance and are planning on racing it. Leave the clearance on the mains alone (replace with identical OEM bearings)
Replace the timing chain guides, and the chain if you want ,but the chain is probably fine. Heads up, you’ll need a factory crimping tool for the new chain, they come open.
Outside the engine- replace all the serpentine belt idler pulleys if you haven’t already.
Replace every gasket you’ve removed associated with the supercharger or you’ll be chasing Vaccum/boost leaks.
Thats just off the top of my head, I’ll post more when I get a minute.
Last edited by Sir-Boost-a-Lot; 01-25-2020 at 10:32 AM.
The following 6 users liked this post by Sir-Boost-a-Lot:
Code510 (06-08-2022),
Fountain35 (01-25-2020),
Hooblah (01-26-2020),
HubTraum (07-11-2023),
Ls1toAMG (01-26-2020),
and 1 others liked this post.
#6
MBWorld Fanatic!
Join Date: Jul 2012
Location: Orbiting the planet
Posts: 4,478
Received 1,490 Likes
on
986 Posts
This place is a joke.
Are you aware of the "alleged" oil transfer tube o-ring that gets hardened and supposedly causes low oil pressure? Did you replace that o-ring when you replaced the oil pump?
Pay attention to SirBoostaLot's post. He really knows what he's talking about.
Pay attention to SirBoostaLot's post. He really knows what he's talking about.
The following users liked this post:
HubTraum (07-11-2023)
#8
Member
Thread Starter
The machine shop currently has the heads and we are replacing all 3 bearings on the pistons, Ill ask if they were gunked, the main issue is definitely from one of the oil port being clogged.
#9
Member
Thread Starter
After finding a ton of plastic and other plastic bits in the oilpan I assume its from it being clogged since the camshaft and rocker arms and lifters got cleaned/replaced and that did not fix the issue. The heads and black are at a machining shop rn and are clearing all the ports so only they will know atm.
#11
Member
Thread Starter
Hopefully you didnít tear down that engine for nothing.
With all due respect, you really need somebody who knows this platform well to be working on this or youíre going to spend a bunch of time and money making an even bigger mess out of it.
The plastic bits you saw in the oil pan and stuck to the oil pickup were from the harmonic rubber coating thatís formed around the timing chainís driven gear on the crank, and the idler gear just above it. That coating flaking off is typical, and the big pieces are stopped by the pickup screen, and any tiny pieces that get past are caught by the oil filter, so you arenít losing oil pressure from oil ports getting clogged by that rubber stuff. The timing chain idler gear is supposed to slide fore and aft by 7-8mm or so, thatís normal. And heads up- that bolt retaining the timing chain idler gear is reverse thread.
The rods are piston guided, so the lateral movement on the crank pin is normal.
Did you pop off a connecting rod cap and see what the bearings looked like? Thatís a good indicator if there was an oiling problem. The rod bearing will look gouged up and probably have lost its tension in its bore.
Your heads look okay (from what I could make out) #8 might have either been running a little lean or have been burning a little coolant. I dont suppose you did a compression test before pulling it, did you?
Back to your original oil pressure problem.... changing the oil pump did nothing for you, but what else did you change while you had it apart for the pump swap? Did you have the front cover off? Did you replace the O-ring under the oil pump around the check valve? What about the pump chain tensioner and guide?
What oil and oil filter were you running before all this?
For starters with your rebuild-
Many of the internal bolts are one time use.
-main caps bolts
-connecting rod cap bolts
-cam gear retaining bolts
-crank pulley bolts
-cam bridge (rockers) bolts
-head bolts
Unless the shop is familiar with this engine , donít have them port the heads.
Definitely replace the valve seals and maybe do a performance valve job.
Shim the valve spring seats for a little more seat pressure.
Definitely open up the piston ring gaps to .018/.020
or .022/.024 if youíre planning on heavy boost/nitrous down the road.
Definitely replace the rod and main bearings. Maybe do the blue or purple rod bearings (assuming yours are yellow) if you want more clearance and are planning on racing it. Leave the clearance on the mains alone (replace with identical OEM bearings)
Replace the timing chain guides, and the chain if you want ,but the chain is probably fine. Heads up, youíll need a factory crimping tool for the new chain, they come open.
Outside the engine- replace all the serpentine belt idler pulleys if you havenít already.
Replace every gasket youíve removed associated with the supercharger or youíll be chasing Vaccum/boost leaks.
Thats just off the top of my head, Iíll post more when I get a minute.
First the plastic I found in the oilpan was rtv sealant and some oil sludge, but mostly rtv sealant. This was probably left from the guy that had the car before me and it looked like he got the heads redone and had work done to them at some point and whoever worked on it left all that plastic behind for whatever reason. This is what I assume is clogging one of my oil ports since I clogged the pickup tube also.
I did not see the connecting rod cap bearings, I left all that in when I sent it to the machine shop. I plan on replacing all 3 bearing per cylinder though.
I used castrol/mobile 1 5w40 oil and a mann filter from fcp euro.
I plan on replacing all of those bolts, ty.
The will be porting the entire head and we are going to reuse the intake/exhaust valves we currently have after cleaning them and seeing if they checkout.
Reseating the valve springs seems complicated could you explain more what this would do, I see people do this and I dont even know what I would reseat them with, I may reuse these springs is the guy says they are fine.
For the piston ring gaps, I thought there was a special coating on the walls, there is only 1 cylinder that has a slight scratch the rest have no srratches, I really would like to keep the oem coating If I can, explain it more if you can ty.
The rod and main rod bearing I plan on replacing but the different colors are actually quit confusing the machine guy reccomended I get the widest ones, blue? I really am not sure atm Ill be calling mercedes on monday to see what they have as I cant find them online, but i am still looking.
the timing chain and assembly will be replaced, I want to replace the gears also since that black seal/gasket is really worn also in the one pic, I cant find it online though..
I plan on replacing all the gaskets and the pulleys are replaced and belts already, I have an aluminum double idler pulley coming in a few day i bought for 170 mine was rubbing slightly.
all in all im still looking for all the parts I need, it truely is a pain to find each inducidual part I nneed and pairing that with a part number, it will happen though.
#12
MBWorld Fanatic!
I have investigated the cylinder wall / piston ring thing with many shops and guys that have built these engines. With lower miles I am told to just install new rings and call it a day. with high miles , re hone to get the silica to "stand" so the rings will reseat.
Don't just install the widest bearing's you can with out giving it some thought as to how you will drive it. As a daily driver keep it simple and put it back the way it was. If it made it 100,000 miles than it will go another 100,000 with the same bearing clearance so no worry's there.
If you are running it hard, open her up a tad but then again these engines have a fantastic oiling system and work very well !!
Last edited by SICAMG; 01-26-2020 at 08:09 AM.
The following 3 users liked this post by SICAMG:
#13
MBWorld Fanatic!
Donít know what you mean by ďthree bearingsĒ. There are two rod bearings. There are three sets of rings in each piston. Top, 2nd, and oil. There are some tricks to making them seat, as well as them scratching the walls upon install.
The following users liked this post:
Sir-Boost-a-Lot (01-27-2020)
#14
MBWorld Fanatic!
iTrader: (1)
What makes you think the heads were off before you got the car? It’s not implausible but it’s unlikely at that mileage. I only say that because just about every single 55k that’s torn down for the first time has those chunks of rubber all over the pan and pickup from the timing gear coating. If you’re suspicious it’s something different, maybe you’re right. Anything’s possible.
Is your short block still together? If so, it’s probably best to leave it alone. Pull one rod cap and see what both sides of the bearings look like. If they’re not chewed up, put the cap back on (with new bolts) and wrap it up while you get everything else sorted out. Just clean the hell out of it without rotating the crank (specifically around the top edges of the pistons. Hose that area with solvent and blow it out multiple times before re-oiling the bores and turning it over. You’re going to gouge up the cylinders otherwise.
If you do tear the shortblock apart, you REALLY need somebody involved that’s familiar with the platform around if you want it to run at least as good as it did before you took it apart.
That oil/filter is fine. If you had some other non-fleece filter installed it could have been restricting your oil flow, but you were fine there.
I mentioned you should replace the valve seals, not reseat the heads. The valve stem seals are under each valve spring and are almost guaranteed to be in need of replacing by now. PN A 612 050 00 58 is for a pack of 5, and you’ll need 24 so get 5 packs.
Without knowing who you’re using, your local machine shop is likely to charge you a lot of $ for port work and give you back heads that perform worse than your stock heads in real world conditions. I strongly suggest simply a 5 angle intake and 3 angle exhaust performance valve job with new seals, and put them back on the engine. Or just buy a set from somebody who knows the nuances of this platform if you really need ported heads.
I see serious warning flags all over your posts , please don’t be offended. I’ve got no dog in your fight I’m just someone who has a lot of experience in exactly what you’re knee deep in, and hate to see you expel all your resources on an engine that can easily be worse after you put it back together if every single t isn’t crossed and every singe i isn’t dotted.
-I was going to say exactly what BC928 said about the bearings.
-Research on this forum about rod and main bearing colors and clearances. The coding for your engines specific bearings is etched into the crank snout under the timing gear and stamped into the block alongside each main cap. Definitely replace the mains with the exact ones it calls for , especially since you’re chasing oil pressure.
Piston ring gaps have nothing to do with coatings. Just open the gaps up on the rings you’ve already got to .018 top and .020 second if you plan to modify this engine with higher boost. Clean up the edges of the ring you’ve filed with 600-800 grit sandpaper because the cylinders scratch VERY easily. The rings are almost guaranteed to not be worn to the point of needing replacement, so just clean the pistons and cylinders to operating room levels and put the engine together in an immaculate environment or else particulate crap is going to scratch up your cylinder walls. You’re more likely to damage the stock Alusil cylinders during disassembly and reassembly than you are in 100k miles of driving it.
Here’s a few more part numbers
A 275 050 00 05 is the timing idler gear
A 112 181 00 59 is the oil pump tensioner guide (definitely replace)
A 003 997 88 94 is the oil pump chain (yours is probably ok)
A 112 993 02 20 is the oil pump tensioner spring (definitely change this)
A 023 997 84 47 is the front cover seal behind the crank pulley (definitely replace)
A 003 997 68 94 is the main timing chain (you probably don’t need that)
A 112 997 02 46 is the rear main seal (definitely replace)
A 000 990 02 00 crank pulley bolt (definitely replace)
Back to your original problem. I’ll reiterate- any crap you saw in the pan will be caught in the filter and won’t clog up the heads like you’re imagining. The oil valleys are big enough to stick your finger in, and the only place thats small enough to be restricted by particulate matter could be in the cam journals. The cams are hollow and supply oil to the valvetrain and have supply holes about 3-4mm, so those could be possibly clogged (unlikely) but that would have been easy to check while you had the cam bridges off.
First thx for the detailed reply and let me answer each point you bring up.
First the plastic I found in the oilpan was rtv sealant and some oil sludge, but mostly rtv sealant. This was probably left from the guy that had the car before me and it looked like he got the heads redone and had work done to them at some point and whoever worked on it left all that plastic behind for whatever reason. This is what I assume is clogging one of my oil ports since I clogged the pickup tube also.
I did not see the connecting rod cap bearings, I left all that in when I sent it to the machine shop. I plan on replacing all 3 bearing per cylinder though.
I used castrol/mobile 1 5w40 oil and a mann filter from fcp euro.
I plan on replacing all of those bolts, ty.
The will be porting the entire head and we are going to reuse the intake/exhaust valves we currently have after cleaning them and seeing if they checkout.
Reseating the valve springs seems complicated could you explain more what this would do, I see people do this and I dont even know what I would reseat them with, I may reuse these springs is the guy says they are fine.
For the piston ring gaps, I thought there was a special coating on the walls, there is only 1 cylinder that has a slight scratch the rest have no srratches, I really would like to keep the oem coating If I can, explain it more if you can ty.
The rod and main rod bearing I plan on replacing but the different colors are actually quit confusing the machine guy reccomended I get the widest ones, blue? I really am not sure atm Ill be calling mercedes on monday to see what they have as I cant find them online, but i am still looking.
the timing chain and assembly will be replaced, I want to replace the gears also since that black seal/gasket is really worn also in the one pic, I cant find it online though..
I plan on replacing all the gaskets and the pulleys are replaced and belts already, I have an aluminum double idler pulley coming in a few day i bought for 170 mine was rubbing slightly.
all in all im still looking for all the parts I need, it truely is a pain to find each inducidual part I nneed and pairing that with a part number, it will happen though.
Last edited by Sir-Boost-a-Lot; 01-27-2020 at 08:30 AM.
The following 2 users liked this post by Sir-Boost-a-Lot:
cshore (04-19-2020),
Rpkxnoscope (01-28-2020)
#16
PLATINUM SPONSOR
Having an updated STAR service manual (electronic version) was always a big help for me when rebuilding the M113k. Pretty easy engine to work on, just looks daunting at first while sitting in the engine bay.
__________________

E63 Biturbo, UPD Cold Air induction kit, UPD performance crank pulley and UPD adjustable rear suspension with ride height adjustment.
CL55 UPD Cold Air Boost kit, UPD 3000 stall converter, UPD 77mm SC clutched pulley and beltwrap kit, Custom long tubes, UPD crank pulley , UPD suspension kit, UPD SC pulley, Aux. HE, Trunk tank w/rule 2000 pump, Mezeire pump, UPD 5pc idler set, Aluminum rotor hats.
www.ultimatepd.com
instagram @ultimate_pd
facebook.com/ultimatepd
#17
MBWorld Fanatic!
I agree with Exotic. I am a true blue American v-8 engine builder and when I first bought this cat it really scared me to think about doing any work on it.
But they are awesome and very easy to work on. I have had the whole car apart with no issues and the engine is really easy to pull as well.
But they are awesome and very easy to work on. I have had the whole car apart with no issues and the engine is really easy to pull as well.
#19
MBWorld Fanatic!
Rule #1...... Don't start a project that is above your pay grade!
Perhaps a betting pool is in order....
1) Never got reassembled.
2) Got reassembled. Burned oil big time.
3) Got reassembled. Burned coolant.
4) Got reassembled. Lost track of a few mission critical parts and is hiding the whole mess from her.
5) She divorced him; the car is mothballed with a disassembled engine in the trunk.
This prolly needs more pole but I'm unaware of how that would happen within a thread.
In all seriousness..... I hope that OP gets his car up and running well..... That she is OK with it.... He took a few lumps but learned a lot.
'Sir Boost a Lot'
Very kind of you to post up all that information. This will no doubt be invaluable to others in the future via the 'Search' function.
Last edited by JohnLane; 07-24-2020 at 01:30 PM.
#20
MBWorld Fanatic!
For anyone wondering please see my m113k rebuild thread in the w215 section, it has pages and pages of info and my opinions on things as Iíve torn them apart and rebuilding the engine for twin turbos.
Even with my employee discount it was still pretty expensive to replace all wear items on this engine. Took about a year from the start of tear down and assembling a parts list, to today where I am finally dropping in my pistons. Didnít help my last dealership would skim money off the top of my paychecks but karma has an interesting way of working itself out, my new dealership has been taking much better care of me and investing in sending me to training, etc
i mention to see my thread because when you Google search m113k rebuild, this thread comes up and mine is nowhere to be seen lol even though Iíve measured dimensions of these oem pistons nobody has done before, etc
#24
Senior Member


