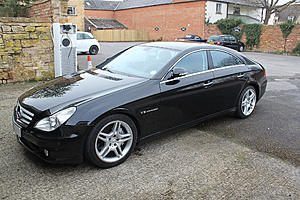
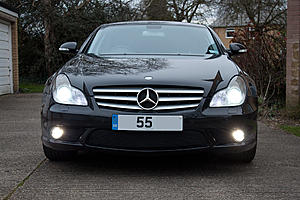
2005 CLS55 AMG - Ongoing Modifications

Thread Starter
Senior Member


Joined: May 2003
Posts: 301
Likes: 66
From: Englandshire
2013 SL63 AMG
2005 CLS55 AMG - Ongoing Modifications
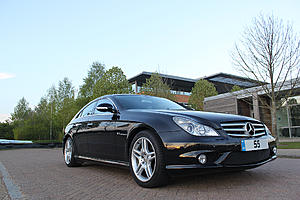
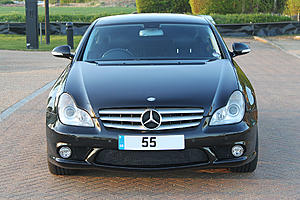
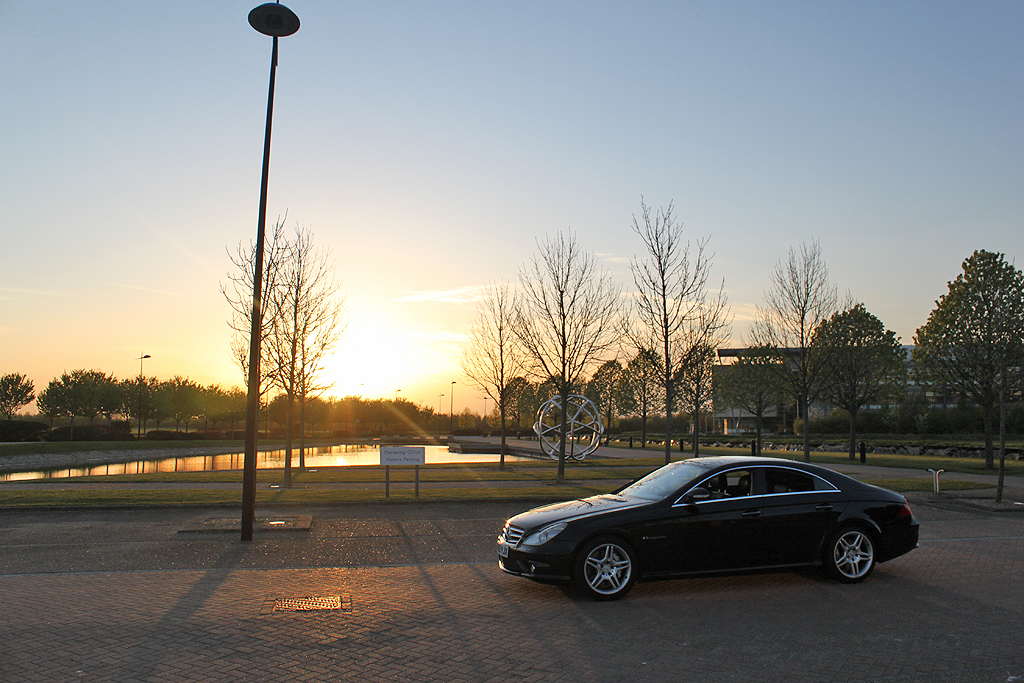
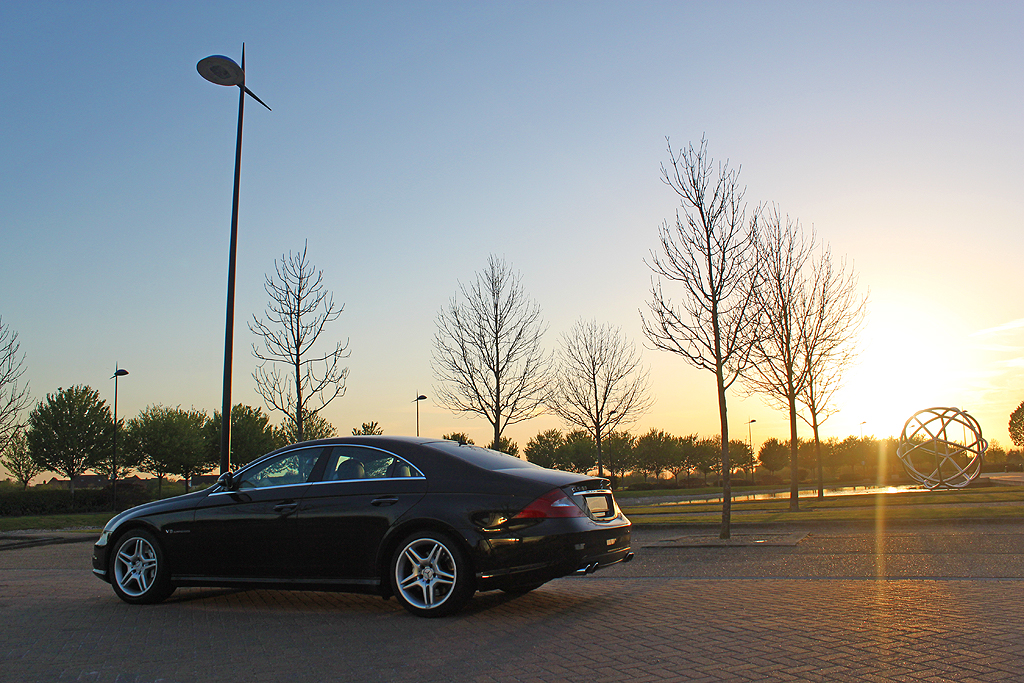
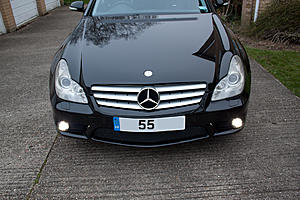
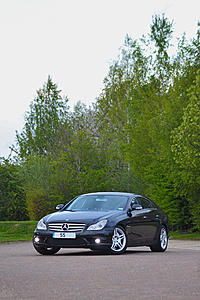
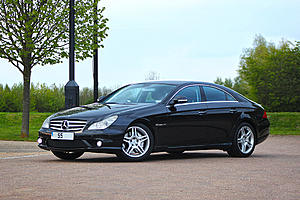
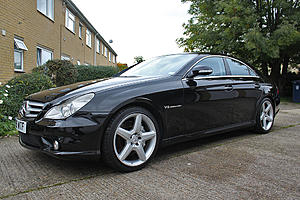
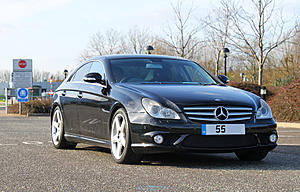
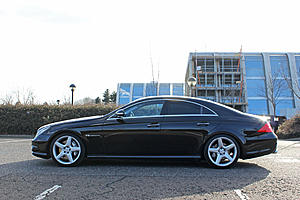
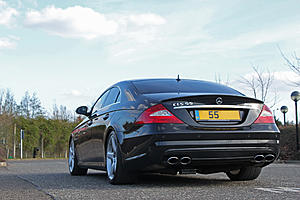
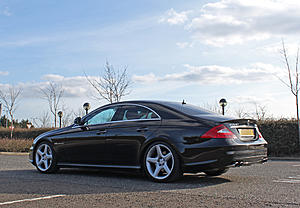
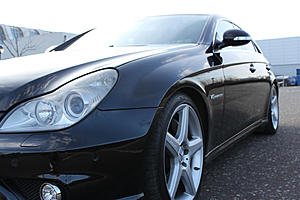
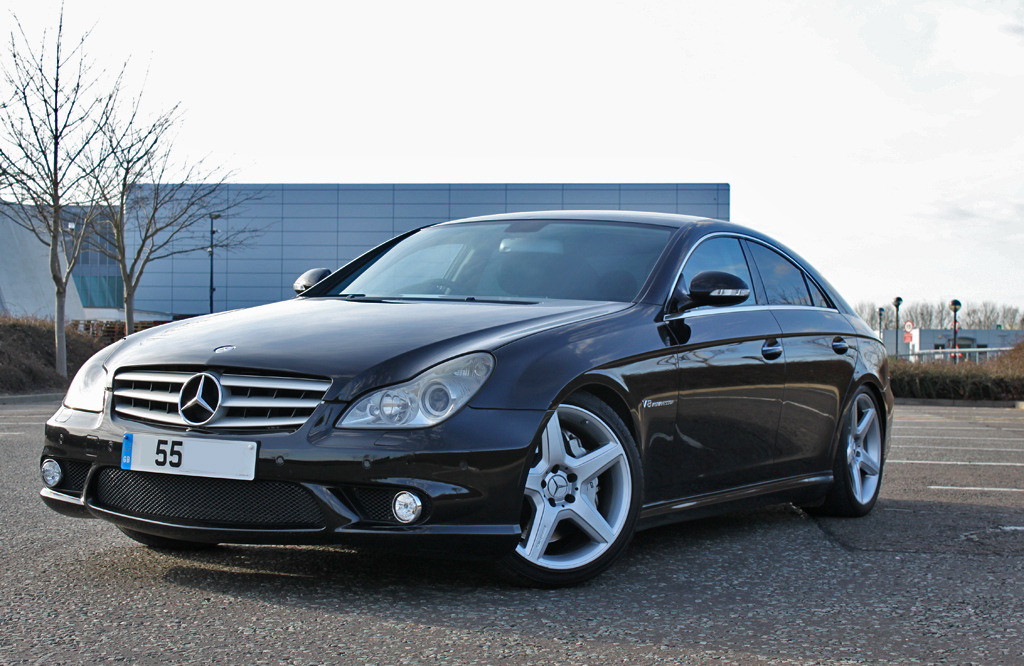
Had it just over a year now.
When I 1st bought it:
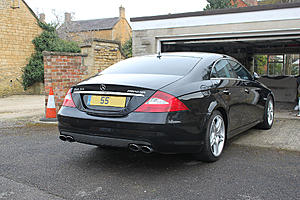

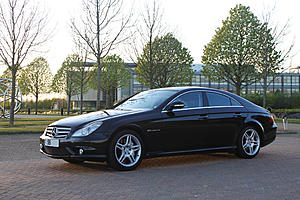
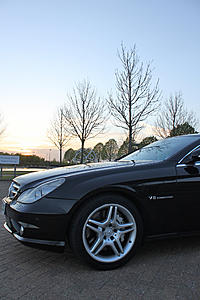
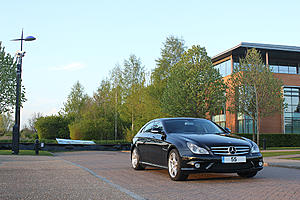
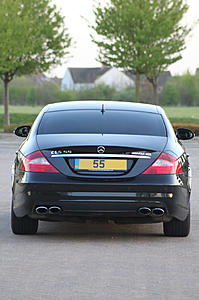
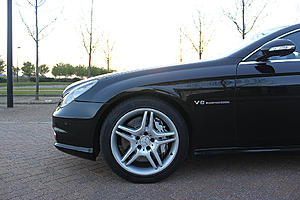
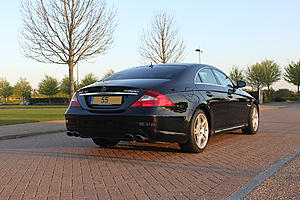
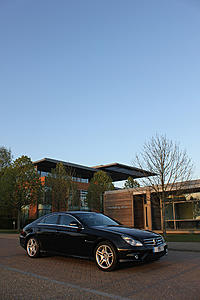
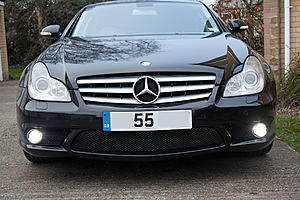
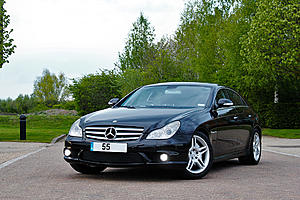
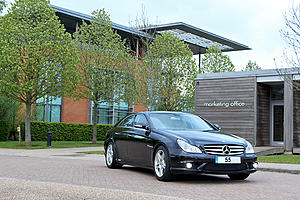
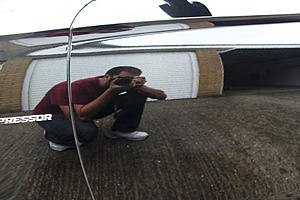
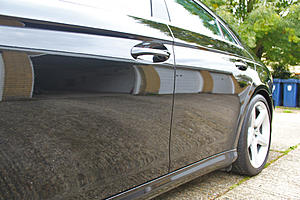
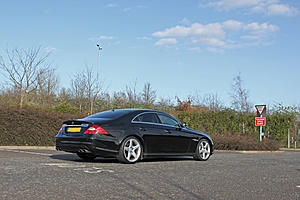
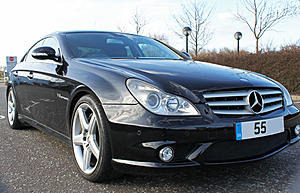
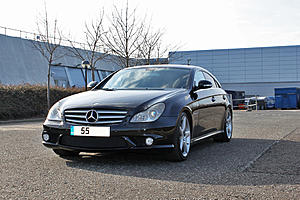
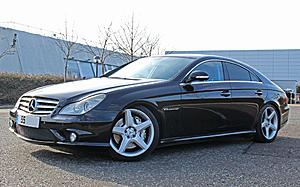
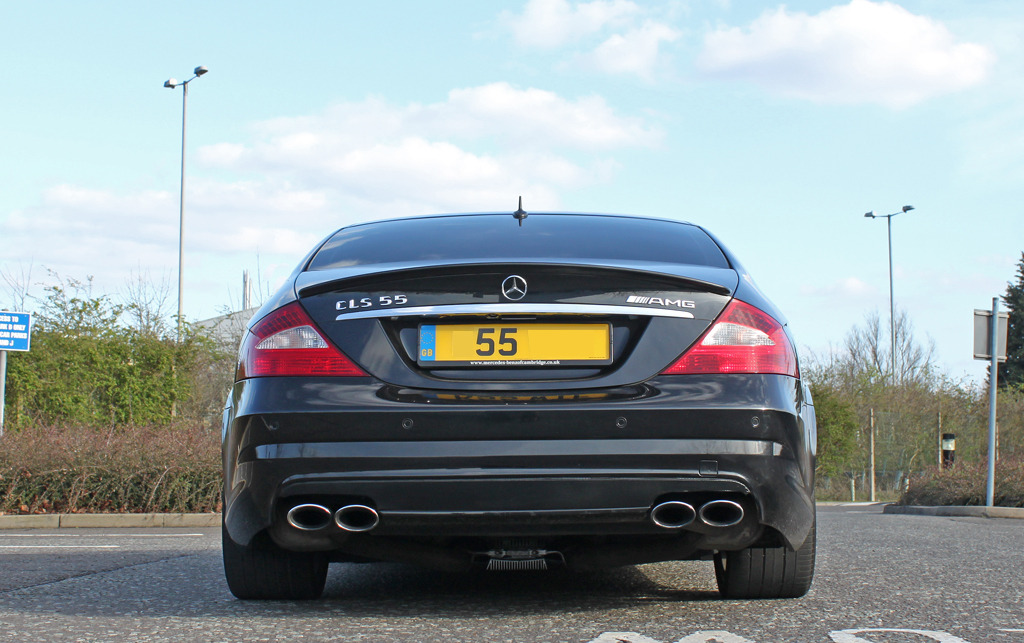
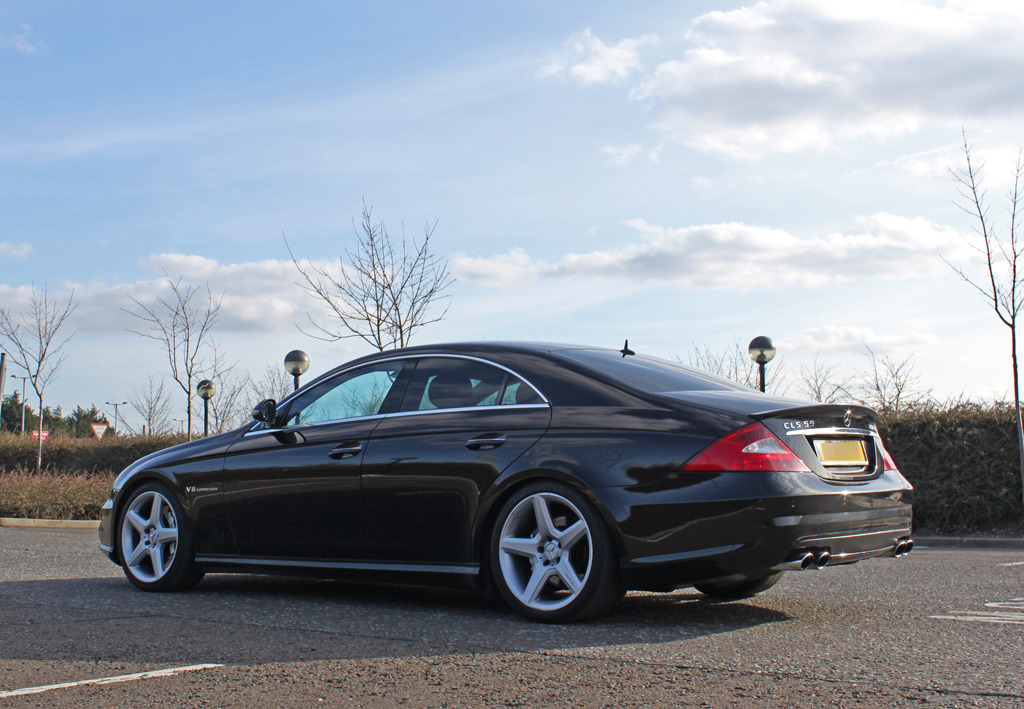
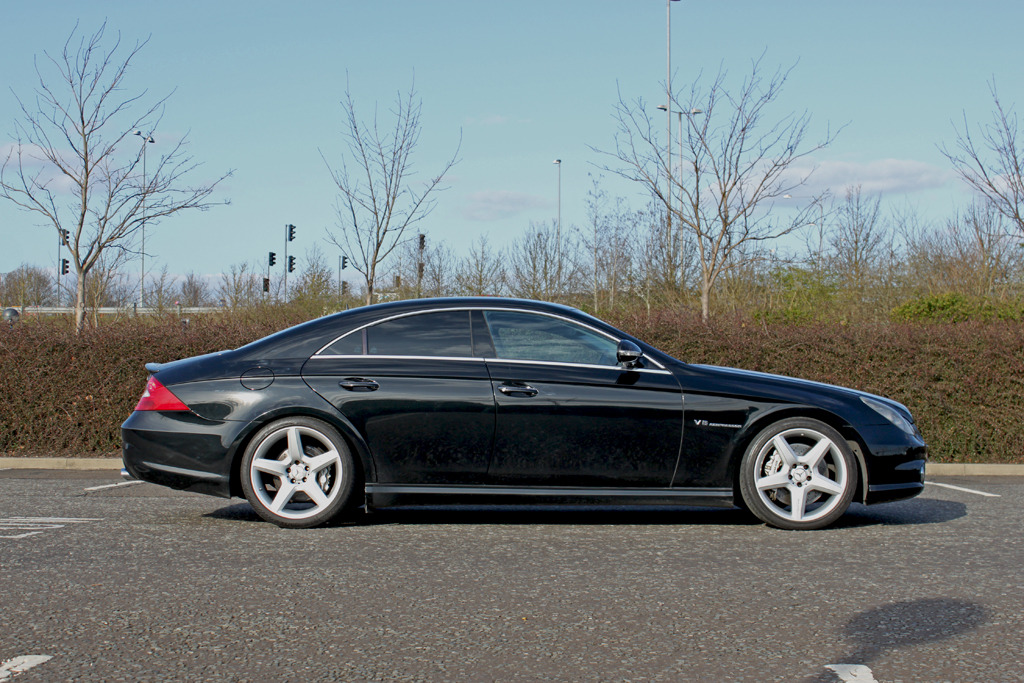
Quick photoshoot:

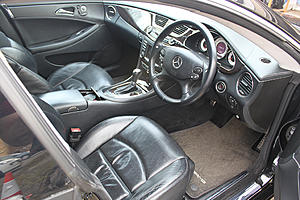
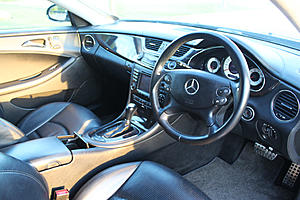
Interior:


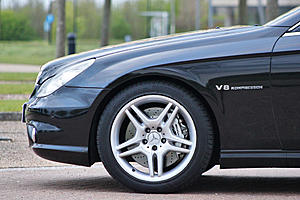
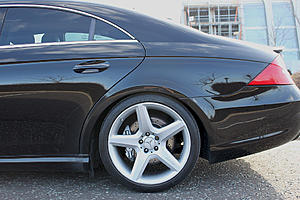
8 Piston Calipers with drilled discs:
Carbon Fibre wrap for rear diffuser:


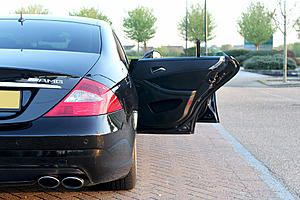
4x Frameless windows:

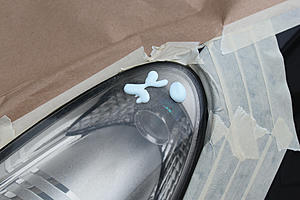
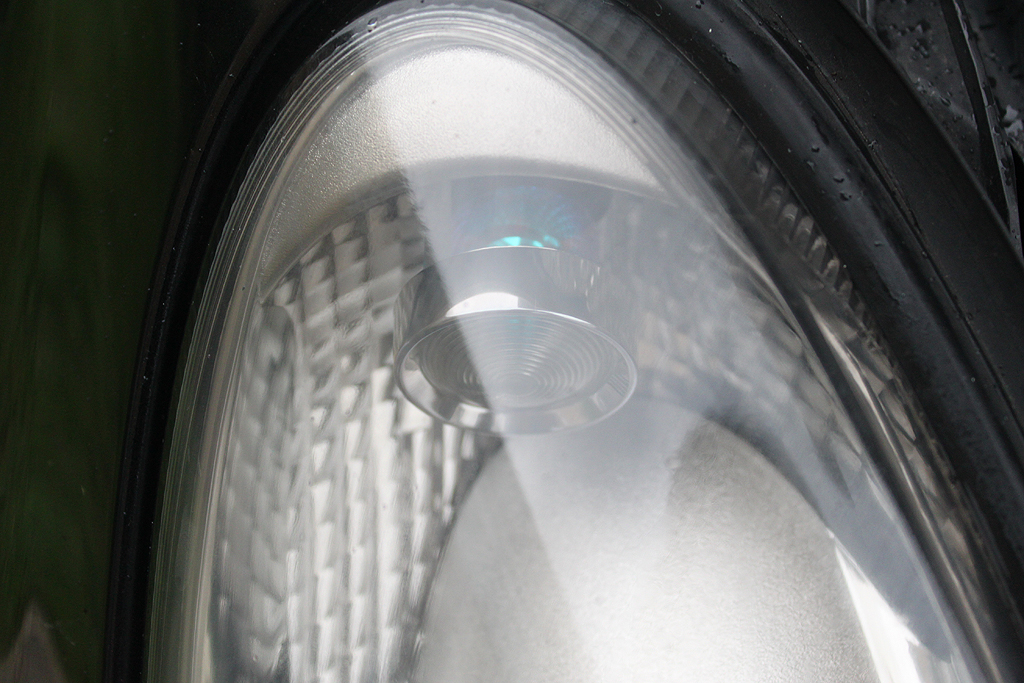
Had a go at restoring both my headlights tonight as the very top sections had UV/Sun damaged:
Before:
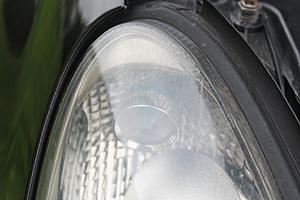
After:
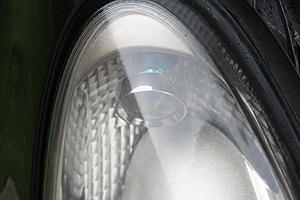
I used the Meguiars headlight restoration kit which attaches to a standard drill, impressive eh?
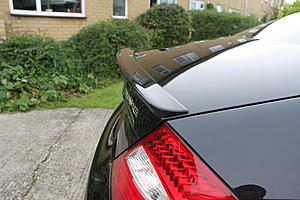
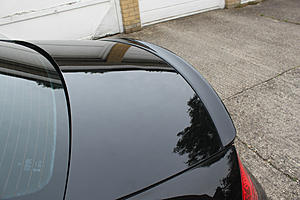
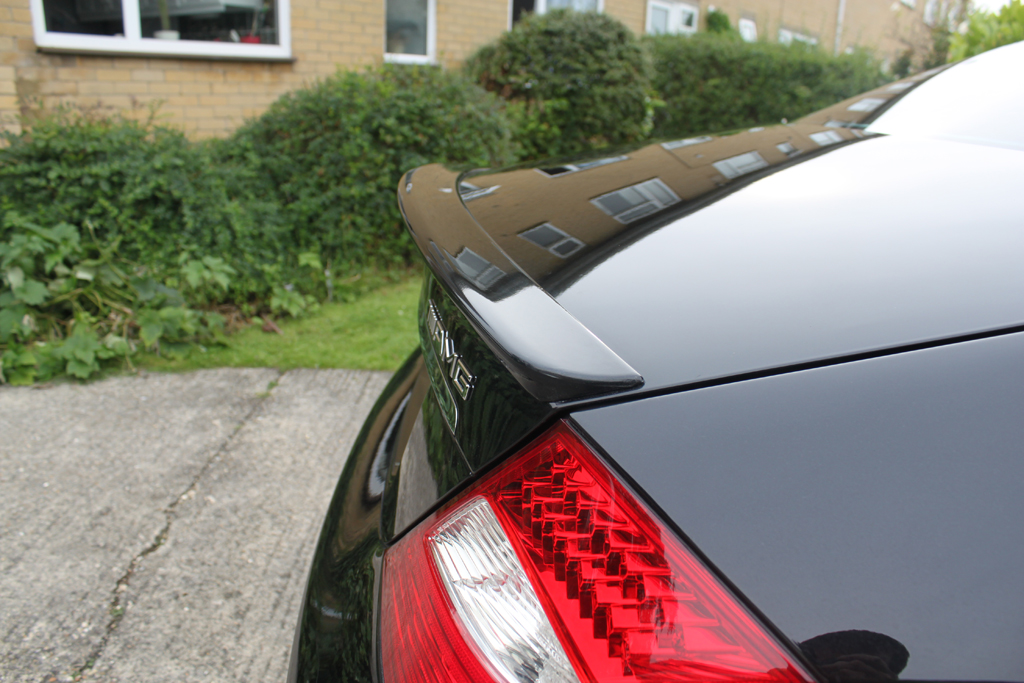
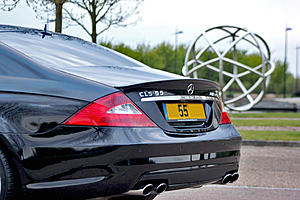
Bootlip spoiler: Sprayed it myself with rattle cans, then laquered. After 3 days T-Cutted the hell out of it until it had a hard polished finish.
Loads of grief fitting the Lip spoiler. Started off with 3M tape which came off once it became hot in direct sunlight. Then bought a tube of StikaFlex which worked for nearly a month until it came off, again in direct sunlight!
Final attempt, I had my local bodyshop apply an industrial bonding sealant aswell as rivet the 2 ends to the bootlid so it wont move.
Job done!
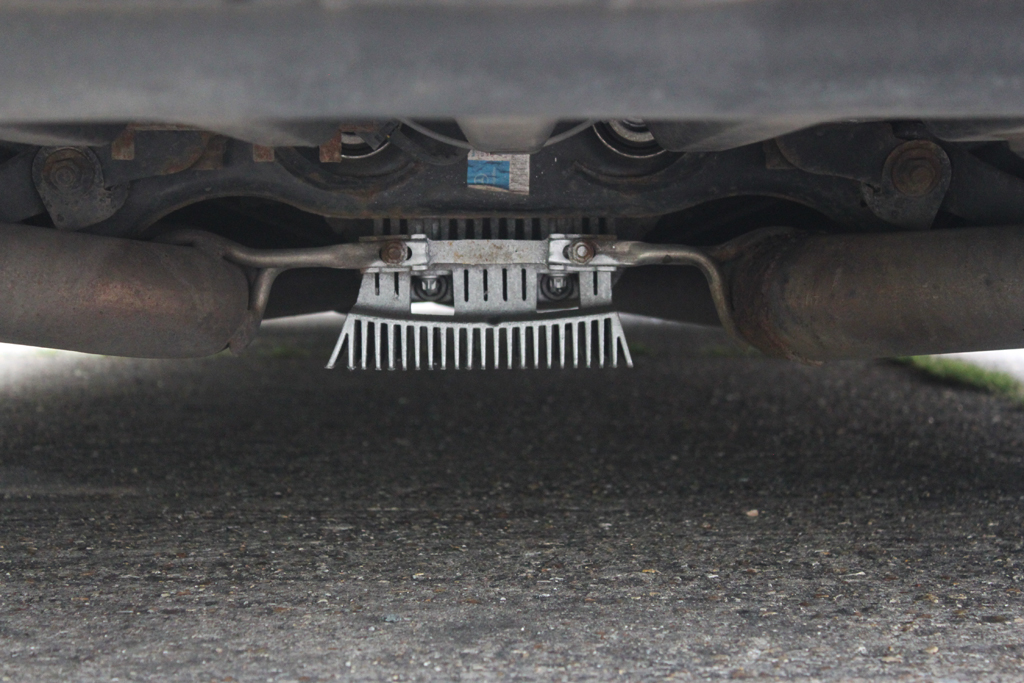
Noticed that my Diff heat sink was looking a bit shabby, so with an ever-so-light spraying of (744 Brilliant Sliver) on the rear cross-section (only) it looks as good as new:
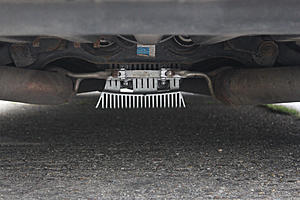
From a distance:
Discovered that I can play DVDs on the move! - I guess one of the previous owners had the systems automatic cut out at 5mph disabled. However, I wouldnt recommend having this done, I tried driving in slow traffic while the G/F put a film on only to find its impossible not to look down! Never use it in motion now.
Obligatory AMG members lounge sticker (new style)

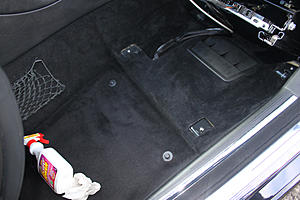
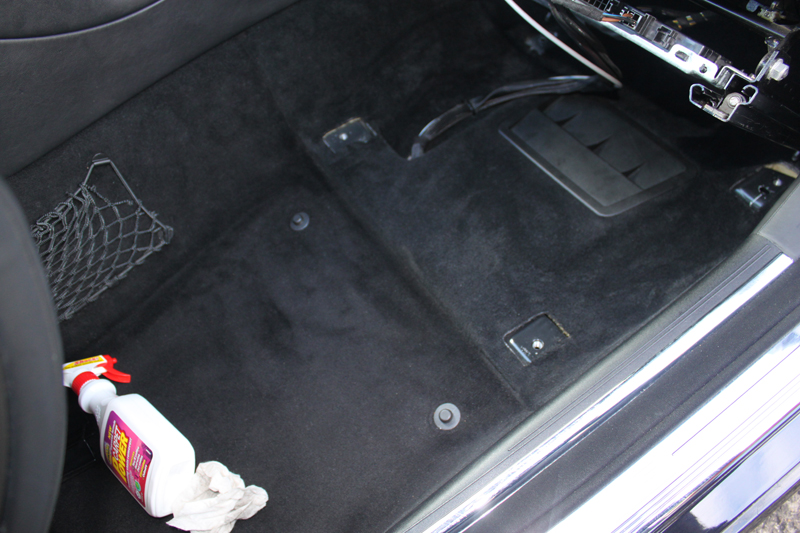
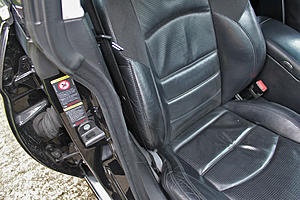
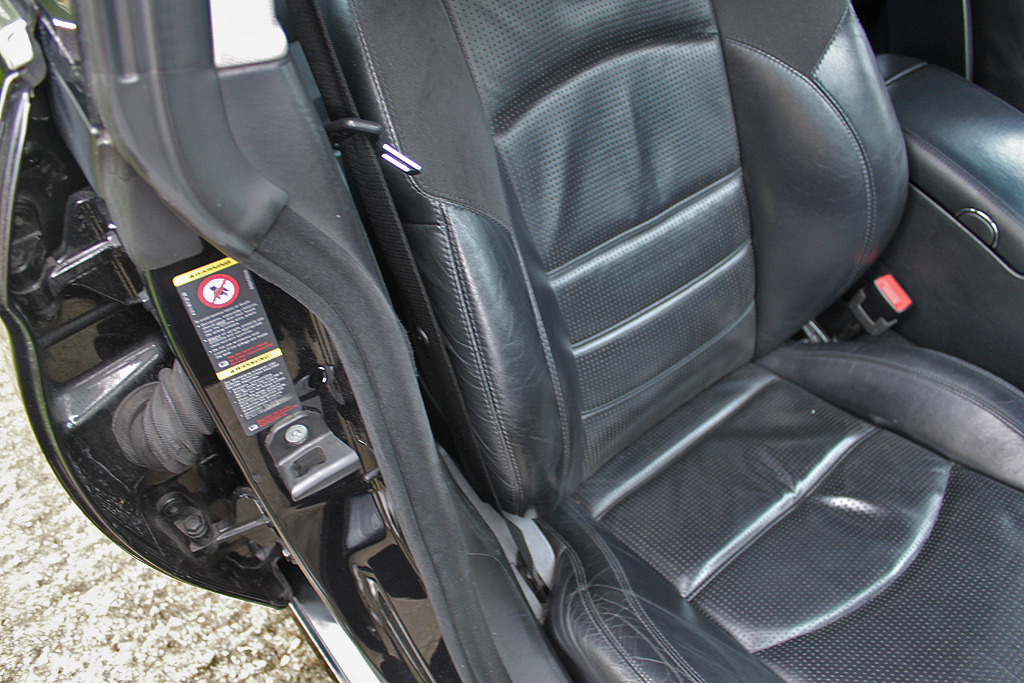
Seats removed and hoovered/carpet cleaned:
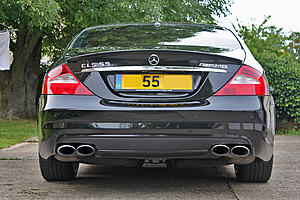
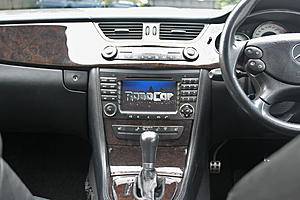
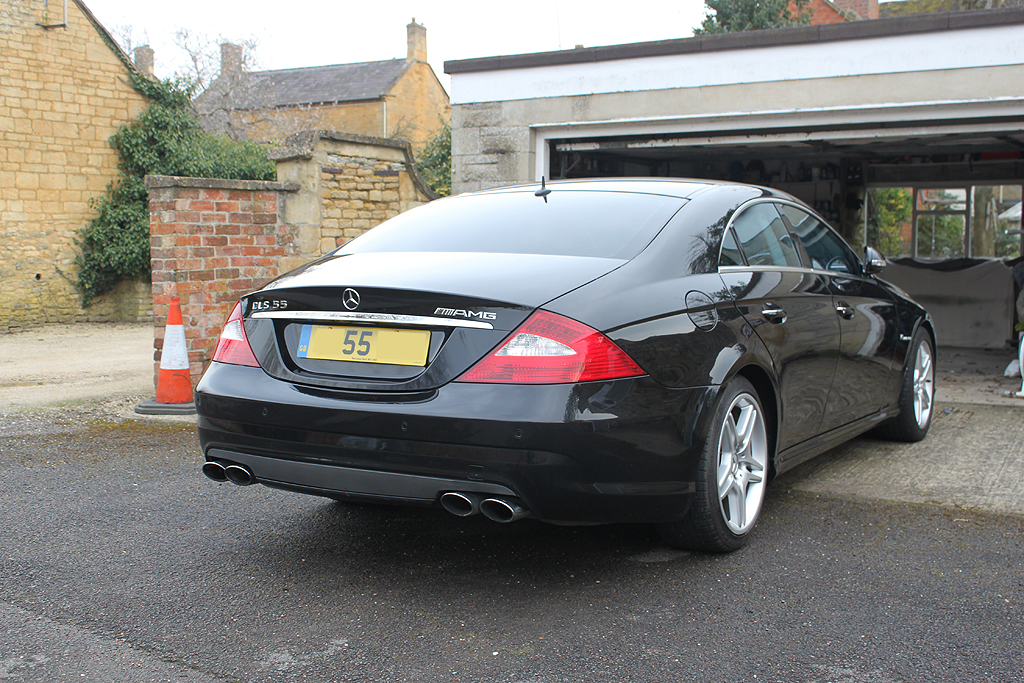
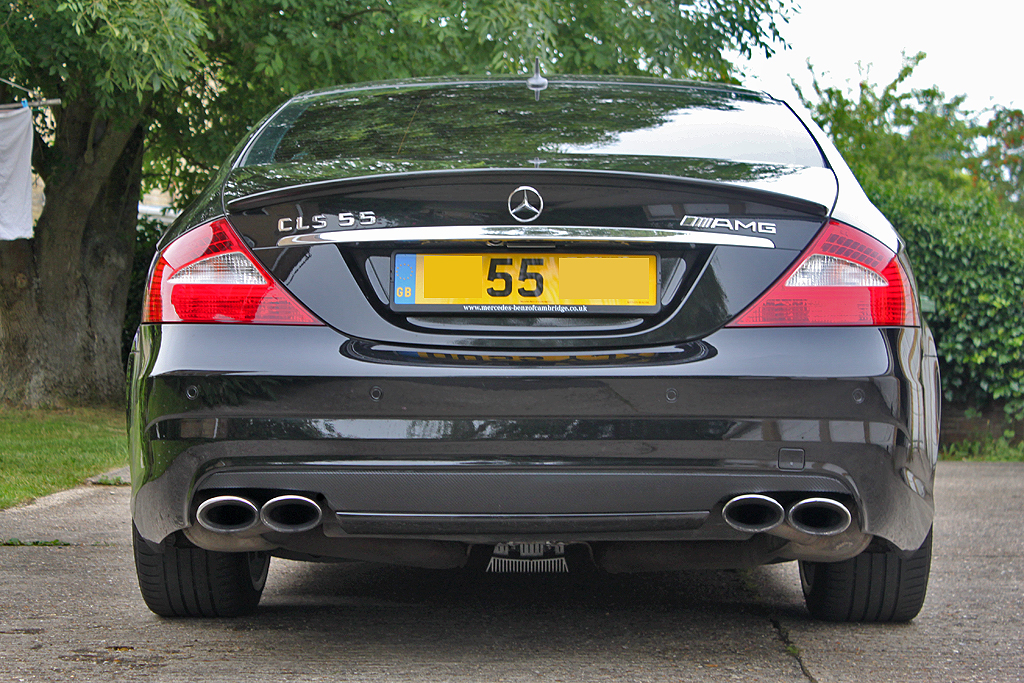
had the centre resonator removed to get a better sound upon acceleration.
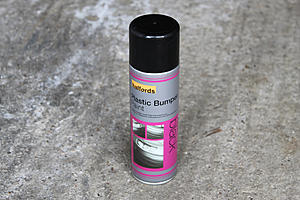
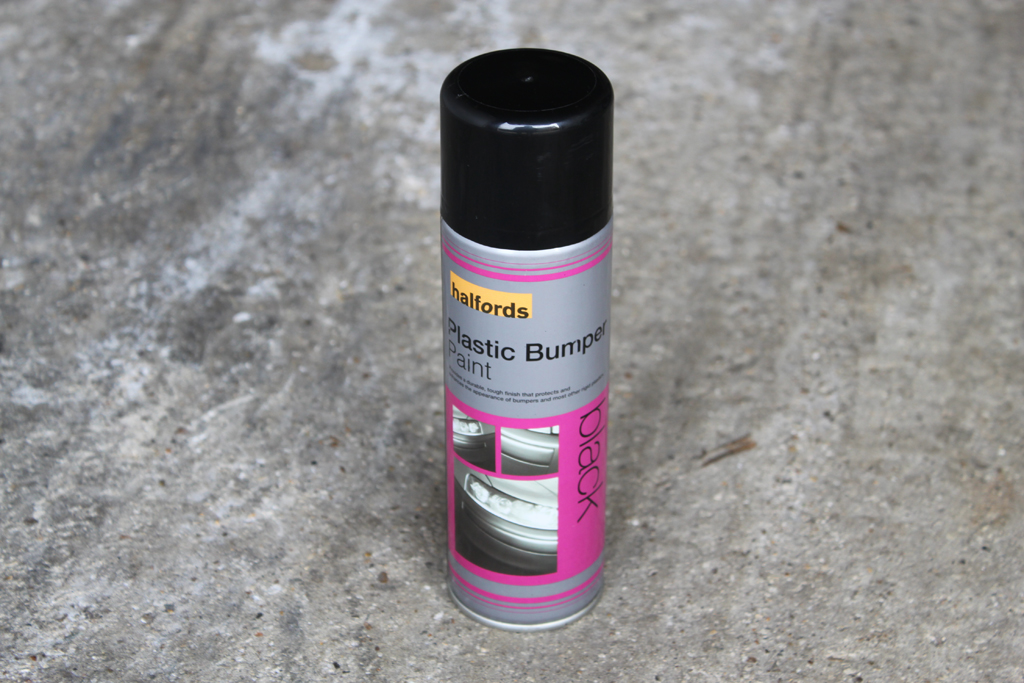
Latest work on my car has been refreshing some of the trim with the help of Halfords plastic bumper paint (satin black).
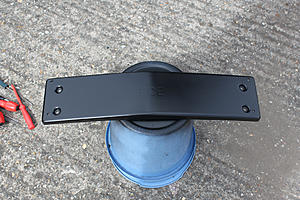
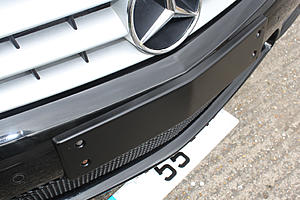
1) Front numberplate plinth. As these cost around �80+ new from Mercedes, I decided to spray this as it had faded and become grey:
When I 1st bought it:


Quick photoshoot:


Interior:


8 Piston Calipers with drilled discs:

Carbon Fibre wrap for rear diffuser:


4x Frameless windows:


Had a go at restoring both my headlights tonight as the very top sections had UV/Sun damaged:
Before:


After:
I used the Meguiars headlight restoration kit which attaches to a standard drill, impressive eh?
Bootlip spoiler: Sprayed it myself with rattle cans, then laquered. After 3 days T-Cutted the hell out of it until it had a hard polished finish.
Loads of grief fitting the Lip spoiler. Started off with 3M tape which came off once it became hot in direct sunlight. Then bought a tube of StikaFlex which worked for nearly a month until it came off, again in direct sunlight!
Final attempt, I had my local bodyshop apply an industrial bonding sealant aswell as rivet the 2 ends to the bootlid
so it wont move. Job done!


Noticed that my Diff heat sink was looking a bit shabby, so with an ever-so-light spraying of (744 Brilliant Sliver) on the rear cross-section (only) it looks as good as new:
From a distance:
Discovered that I can play DVDs on the move! - I guess one of the previous owners had the systems automatic cut out at 5mph disabled. However, I wouldnt recommend having this done, I tried driving in slow traffic while the G/F put a film on only to find its impossible not to look down! Never use it in motion now.

Obligatory AMG members lounge sticker (new style)

Seats removed and hoovered/carpet cleaned:
had the centre resonator removed to get a better sound upon acceleration.
Latest work on my car has been refreshing some of the trim with the help of Halfords plastic bumper paint (satin black).
1) Front numberplate plinth. As these cost around �80+ new from Mercedes, I decided to spray this as it had faded and become grey:


Last edited by KILLERHERTZ; May 3, 2015 at 04:48 PM.
Thread Starter
Senior Member
Joined: May 2003
Posts: 301
Likes: 66
From: Englandshire
2013 SL63 AMG
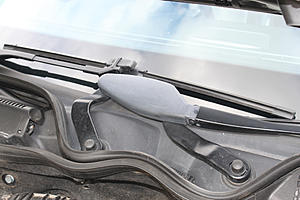
2) The plastic cover of the passenger Windscreen wiper was also extremely grey and let down the look of the front of the car.
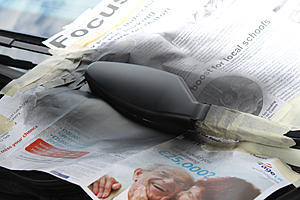
Masked up:
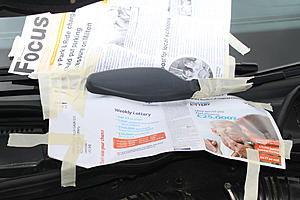
1st coat:
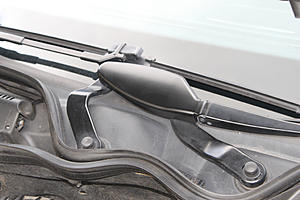
Finished, looks as good as new:
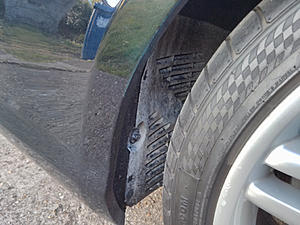
3) Inside the rear wheel arches are plastic vents, as the previous owner had lived down a gravel/sand track. over time this had discoloured considerably, after a couple of coats of the paint again, looked as good as new:
Before:
After: (Was still wet in this shot, dried completely 'Matt' black)
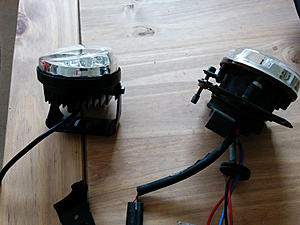
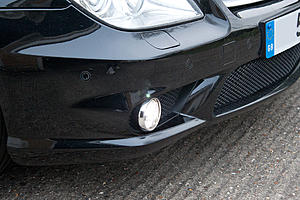
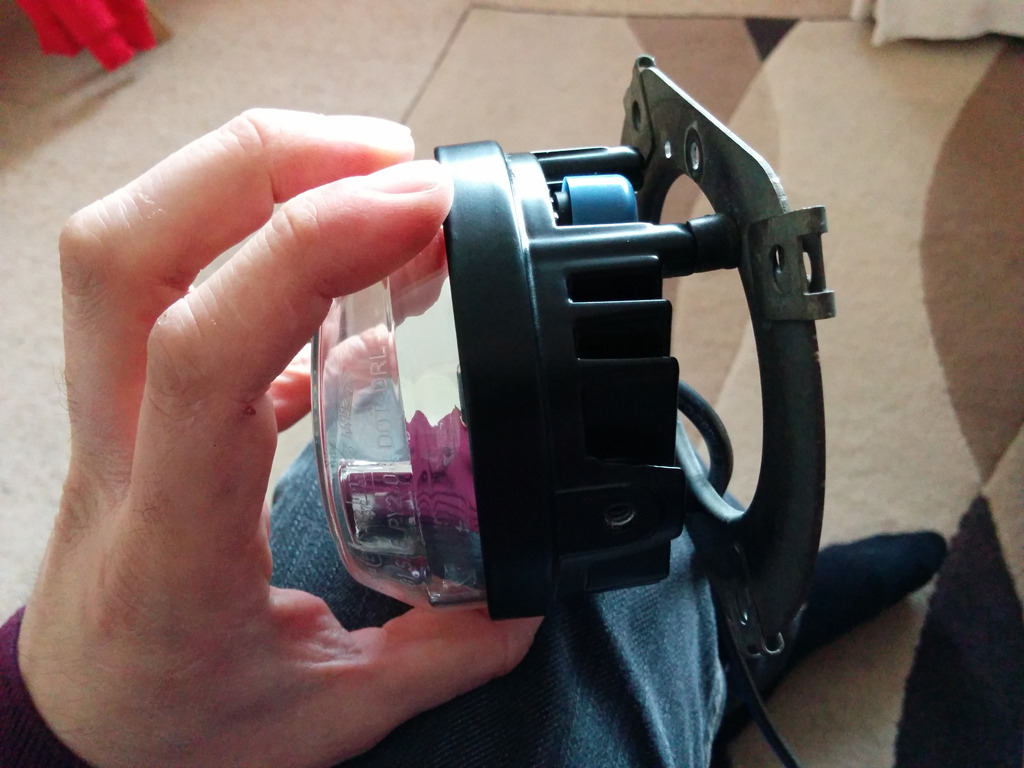
Since owning my W209 CLS I have wanted to update the front of my car with some OEM style DRL's. As with all my mods (well, ignoring the recent Brabus front grill) I try to keep them looking as if they possibly came out of the factory with the modified included, with DRLs this isnt straightforward as most of you will have seen.
Aftermarket DRLs come in two flavours, 1st are the eBay cheap 'n' cheerful 'White' LED lights which are never white, but more of a purpley UV style output. As seen on Mk2 Vectra's, MK3 Mondeos and Corsa's around your local McDonalds Drive Tru's on a Saturday night.
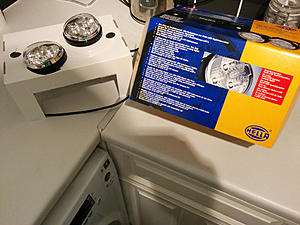
The second version are the very expensive OEM supplier branded products from manufactures such as Hella, Philips and Osram (ignore Ring units as they arent white enough).
After alot of research, I opted for the 9" Hella circle model which were produced around 2-3 years ago. These units are rarer, dont appear to have been sold through your normal Auto parts suppliers (Hella themselves couldnt provide me with a UK supplier!) and only come with very basic installation instructions. I managed to source a set via eBay �170 delivered.
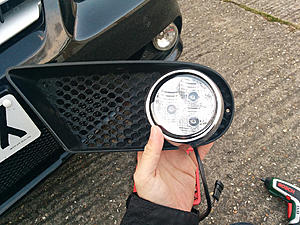
I took a slight risk as I didnt know for sure that they would fit, I measured the foglight surrounds on my CLS and they were the same, but you never can be sure.
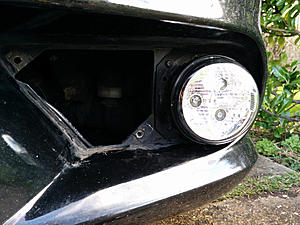
They fit!
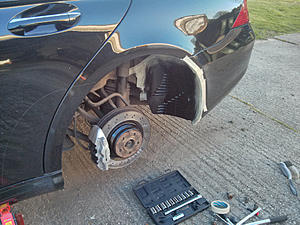
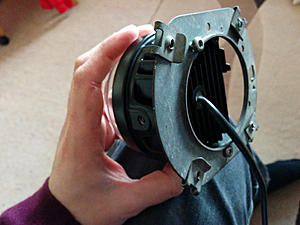
The previous owner of my CLS decided to fit some aftermarket Xenons to my foglights, meaning when the follow me home lighting comes on it looks like a small Nutron bomb has gone off each time. First up I had to remove all these aftermarket gubbins but removing both from wheels and their surrounding wheel arch liners.
With the liners off, I removed all the wiring and left just the original connectors, which I bagged up (in coin bags from my local bank!) together with cable ties to make them water tight.
Now, onto fitting the LED DRLs.
First up I had to find a way to fit them to my car, using the supplied brackets wasnt going to happen as my bumpers dont feel strong enough to support the weight of the DRLs, (they have a rear glass lense on each), so I took a look at the exisiting frames from the fogs. These include a dial for manually adjusting their height. Once I had removed this dial and untightened the torx screws the frame was free. luckly the DRLs had screw holes in on their backs which arent mentioned in the instructions. with the help of a drill, I was able to fabricate holes to fit the frames on snug.

The DRLs are a slight wedge shape (by looking from above) as a result they dont fit 100% snug and cause the bumper grill/surround to bend ever so slightly, you can only see this if you get on your hands & knees. I will work on this and report back.
With both DRLs screwed into place on the front bumper and the surrounds fitting as plush as I can currently make them fit, its time to start with the supplied wiring loom fitment.
Passenger side of the car was a doddle, you simpley dangle the loom down and grab it from the foglight hole. Once there connect the connectors and use some cable ties to make sure the wires dont touch anything hot, or any moving parts. This is very important!
Over to the drivers side, it is so, so, cramped! I actually got my hand stuck at one point, upon rescuing it I managed to find a spare headlight rear cover which a previous owner must have dropped long ago, only to have re-ordered it from MB!
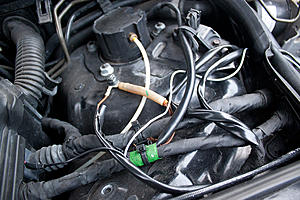
With both units connected up to the loom, its a case of working around the engine bay ensuring that the loom is safely tucked away with cable ties making it look as OEM as possible:
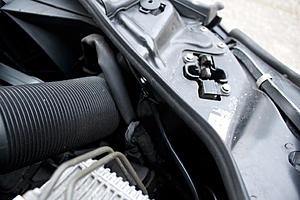
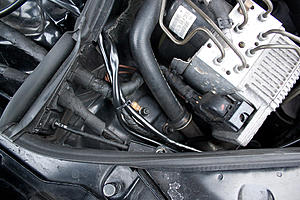
Until you reach the fuse box. The chassis covers the way to it, apart from there was 1 free small grommet available for some un-selected option at time of purchase. removing the grommet confirmed that the hole was far too small for the fat loom. So out once again with the Dremmel, filed it down until it was double the width (sparks flying everywhere at this point!). and eventually popped the loom through:
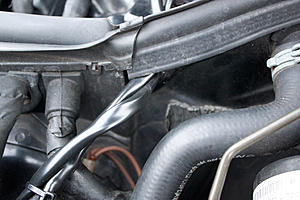
At this point, I realised that I needed to double back with the sidelight cabled, so that was pushed back through (the grey wire).
Earthed the brown wire to the local chassis earth point (as above) and then I was stuck with the actual live cable. How do I actually connect this to the fuse box I was wondering?
After searching online I decided to PM member: Ted who had been offering me wiring advice over the past week. He suggested I use a 'Piggyback Extrafuse' which were available off eBay for cheap. as its late Wednesday & Bank Holiday looming (no pun intended) I decided to take a look down Halfords.
They didnt stock these, but had the next best thing:
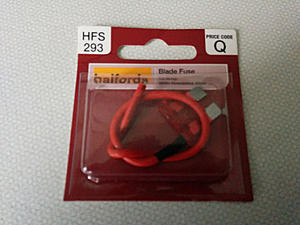
And it worked!!! - Difficult to photo im afraid

Note the Hella logo in the glass
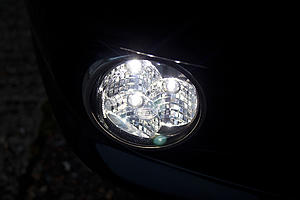
Whiter then my OEM Xenons:
Very happy with the final result, in my eyes they look completely OEM, correct whiteness/brightness, position is correct and modenise the front of the W219.
Closest comparision are the Volvo's from around 1-2 years ago, before they started 'smoothing out' LED light lenses.
Video's here on my YouTube channel:
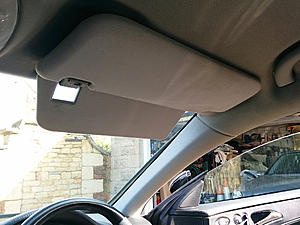
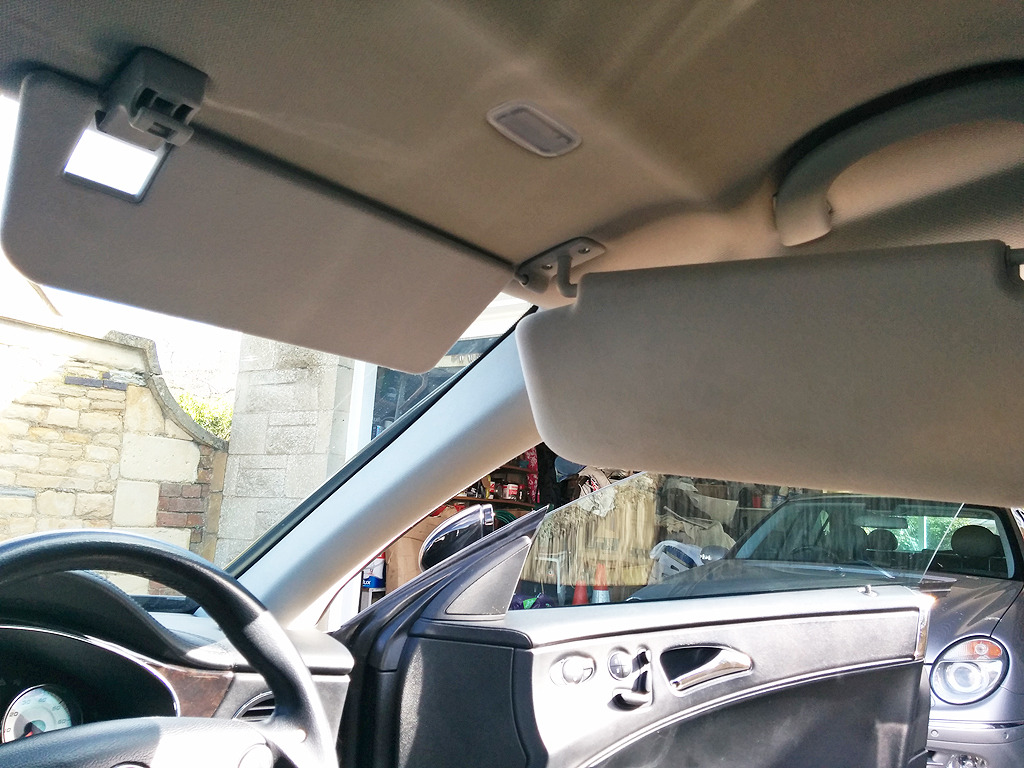
W211 Dual Sunvisors (nicked from my old mans E240 Avantgarde):

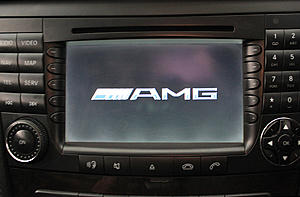
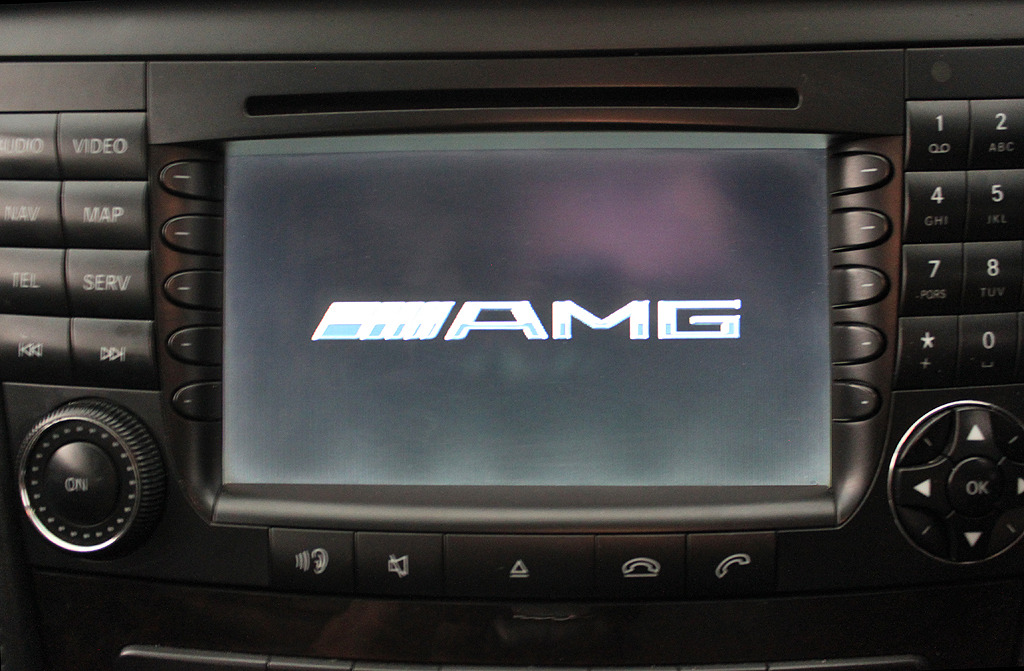
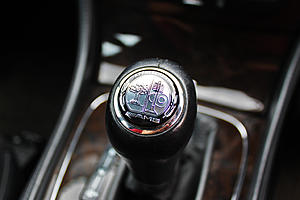
AMG startup logo for COMAND:
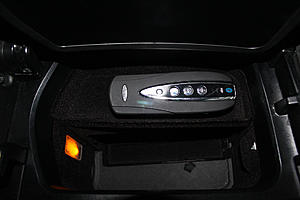
Viseeo Bluetooth Module:

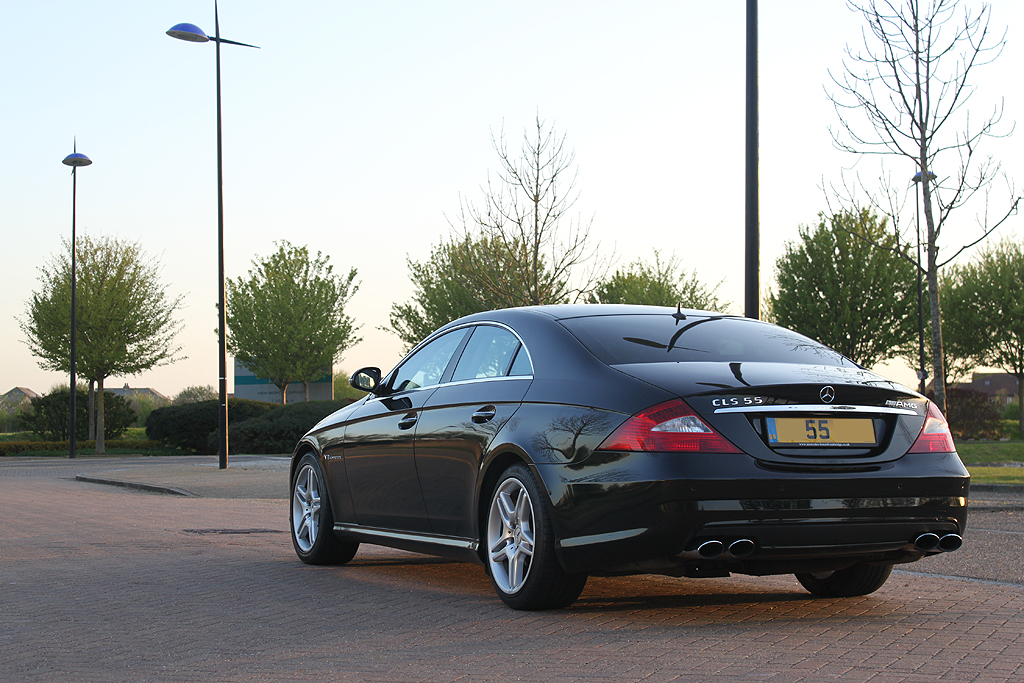
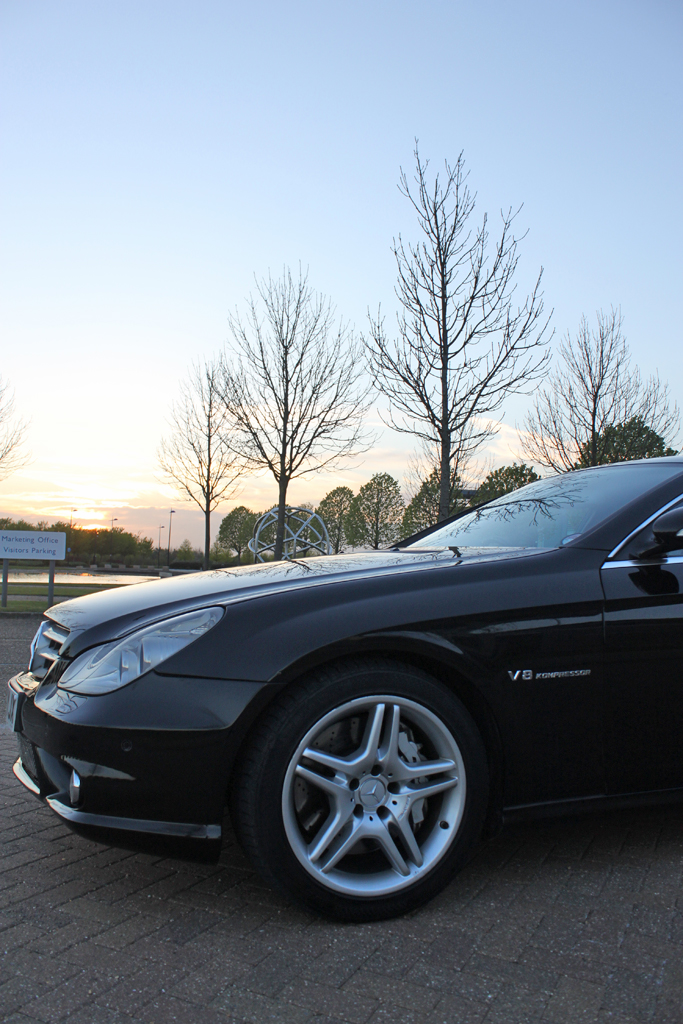
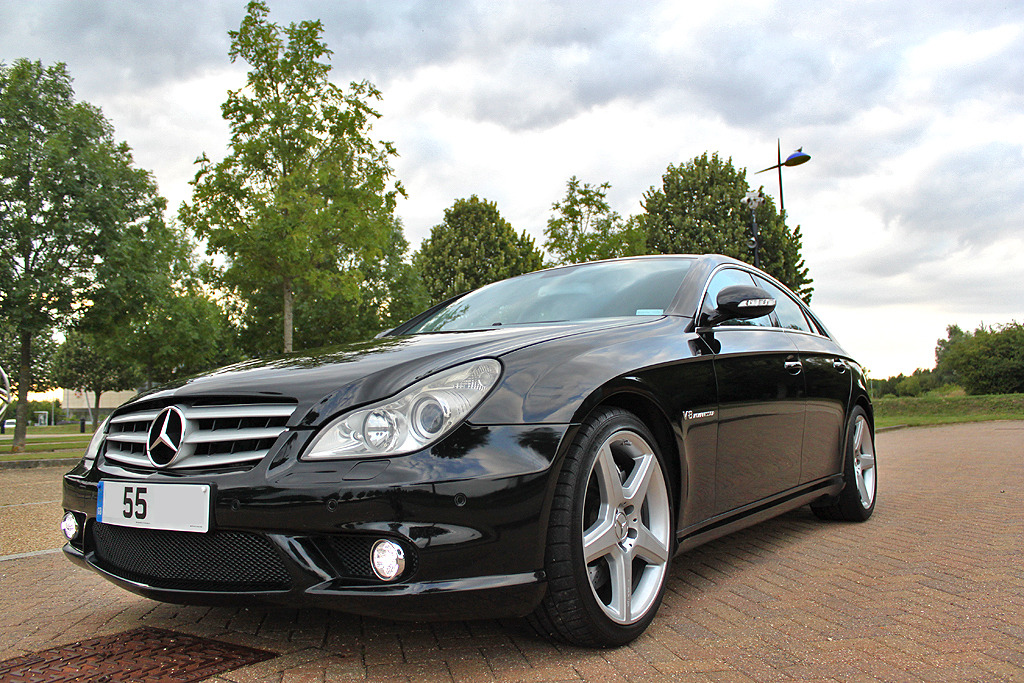
Assorted photos after a year of ownership:
Check out my Youtube channel for more mods:
https://www.youtube.com/channel/UCgA...whUsa7HiQyu9iQ

Masked up:

1st coat:

Finished, looks as good as new:

3) Inside the rear wheel arches are plastic vents, as the previous owner had lived down a gravel/sand track. over time this had discoloured considerably, after a couple of coats of the paint again, looked as good as new:
Before:
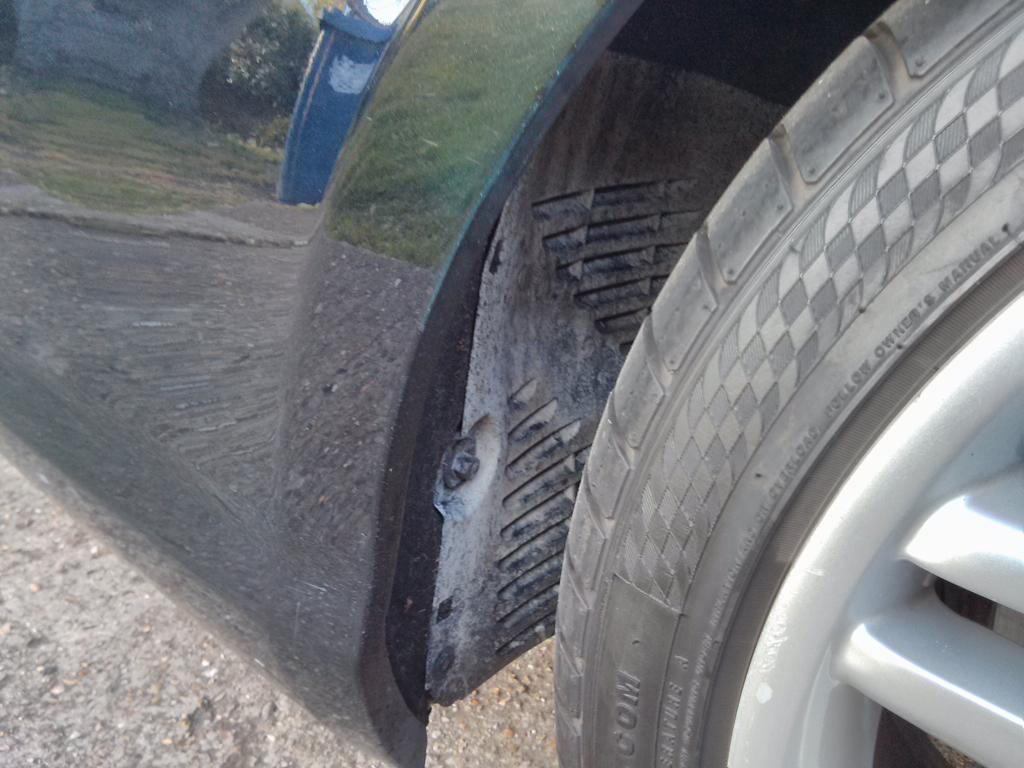
After: (Was still wet in this shot, dried completely 'Matt' black)

Since owning my W209 CLS I have wanted to update the front of my car with some OEM style DRL's. As with all my mods (well, ignoring the recent Brabus front grill) I try to keep them looking as if they possibly came out of the factory with the modified included, with DRLs this isnt straightforward as most of you will have seen.
Aftermarket DRLs come in two flavours, 1st are the eBay cheap 'n' cheerful 'White' LED lights which are never white, but more of a purpley UV style output. As seen on Mk2 Vectra's, MK3 Mondeos and Corsa's around your local McDonalds Drive Tru's on a Saturday night.
The second version are the very expensive OEM supplier branded products from manufactures such as Hella, Philips and Osram (ignore Ring units as they arent white enough).
After alot of research, I opted for the 9" Hella circle model which were produced around 2-3 years ago. These units are rarer, dont appear to have been sold through your normal Auto parts suppliers (Hella themselves couldnt provide me with a UK supplier!) and only come with very basic installation instructions. I managed to source a set via eBay �170 delivered.

I took a slight risk as I didnt know for sure that they would fit, I measured the foglight surrounds on my CLS and they were the same, but you never can be sure.
They fit!

The previous owner of my CLS decided to fit some aftermarket Xenons to my foglights, meaning when the follow me home lighting comes on it looks like a small Nutron bomb has gone off each time. First up I had to remove all these aftermarket gubbins but removing both from wheels and their surrounding wheel arch liners.
With the liners off, I removed all the wiring and left just the original connectors, which I bagged up (in coin bags from my local bank!) together with cable ties to make them water tight.
Now, onto fitting the LED DRLs.
First up I had to find a way to fit them to my car, using the supplied brackets wasnt going to happen as my bumpers dont feel strong enough to support the weight of the DRLs, (they have a rear glass lense on each), so I took a look at the exisiting frames from the fogs. These include a dial for manually adjusting their height. Once I had removed this dial and untightened the torx screws the frame was free. luckly the DRLs had screw holes in on their backs which arent mentioned in the instructions. with the help of a drill, I was able to fabricate holes to fit the frames on snug.

The DRLs are a slight wedge shape (by looking from above) as a result they dont fit 100% snug and cause the bumper grill/surround to bend ever so slightly, you can only see this if you get on your hands & knees. I will work on this and report back.

With both DRLs screwed into place on the front bumper and the surrounds fitting as plush as I can currently make them fit, its time to start with the supplied wiring loom fitment.

Passenger side of the car was a doddle, you simpley dangle the loom down and grab it from the foglight hole. Once there connect the connectors and use some cable ties to make sure the wires dont touch anything hot, or any moving parts. This is very important!
Over to the drivers side, it is so, so, cramped! I actually got my hand stuck at one point, upon rescuing it I managed to find a spare headlight rear cover which a previous owner must have dropped long ago, only to have re-ordered it from MB!
With both units connected up to the loom, its a case of working around the engine bay ensuring that the loom is safely tucked away with cable ties making it look as OEM as possible:


Until you reach the fuse box. The chassis covers the way to it, apart from there was 1 free small grommet available for some un-selected option at time of purchase. removing the grommet confirmed that the hole was far too small for the fat loom. So out once again with the Dremmel, filed it down until it was double the width (sparks flying everywhere at this point!). and eventually popped the loom through:

At this point, I realised that I needed to double back with the sidelight cabled, so that was pushed back through (the grey wire).

Earthed the brown wire to the local chassis earth point (as above) and then I was stuck with the actual live cable. How do I actually connect this to the fuse box I was wondering?
After searching online I decided to PM member: Ted who had been offering me wiring advice over the past week. He suggested I use a 'Piggyback Extrafuse' which were available off eBay for cheap. as its late Wednesday & Bank Holiday looming (no pun intended) I decided to take a look down Halfords.
They didnt stock these, but had the next best thing:

And it worked!!! - Difficult to photo im afraid


Note the Hella logo in the glass

Whiter then my OEM Xenons:

Very happy with the final result, in my eyes they look completely OEM, correct whiteness/brightness, position is correct and modenise the front of the W219.
Closest comparision are the Volvo's from around 1-2 years ago, before they started 'smoothing out' LED light lenses.
Video's here on my YouTube channel:
W211 Dual Sunvisors (nicked from my old mans E240 Avantgarde):

AMG startup logo for COMAND:
Viseeo Bluetooth Module:


Assorted photos after a year of ownership:


Check out my Youtube channel for more mods:
https://www.youtube.com/channel/UCgA...whUsa7HiQyu9iQ
Last edited by KILLERHERTZ; May 3, 2015 at 04:50 PM.
Trending Topics
MB World Stories
The Best of Mercedes & AMG

6 Mercedes Models That Did NOT Age Well (But Are Somehow Still Cool)
Verdad Gallardo
Manual Mercedes? 6 Times Sindelfingen Let Drivers Have All The Fun
Verdad Gallardo
Mercedes SLR McLaren 722 S Is Extremely Rare Example Modified by McLaren
Verdad Gallardo
8 Classic Boxy Mercedes Designs That Have Aged Like Fine Wine
Verdad Gallardo
Flawlessly Restored Mercedes 190E Evo II Heads to Auction
Verdad Gallardo
Electric Mercedes C-Class Unveiled: 11 Things You Need to Know
Verdad Gallardo
Mercedes EQS Gets A Major Update: Everything You Need to Know
Verdad Gallardo
5 Underrated Mercedes-Benz Models That Don't Get the Love They Deserve
Verdad Gallardo
Mercedes 300D Has Pushed Well Past 1 Million Miles and It Ain't Stopping
Verdad Gallardo


Member
Joined: Oct 2013
Posts: 89
Likes: 0
I like your mods
Especially the paddle shifters -- P/N you can share please?
I saw what you did with the differential cooling fins. I have to look at mine again to see if I even have that. hmmmm
Please share how you got the Command to show the AMG logo instead of the Mercedes one????
I do think the best mod of all was the swap to the AMD wheels though. Looks great now.
I saw what you did with the differential cooling fins. I have to look at mine again to see if I even have that. hmmmm
Please share how you got the Command to show the AMG logo instead of the Mercedes one????
I do think the best mod of all was the swap to the AMD wheels though. Looks great now.
Thread Starter
Senior Member
Joined: May 2003
Posts: 301
Likes: 66
From: Englandshire
2013 SL63 AMG
Especially the paddle shifters -- P/N you can share please?
I saw what you did with the differential cooling fins. I have to look at mine again to see if I even have that. hmmmm
Please share how you got the Command to show the AMG logo instead of the Mercedes one????
I do think the best mod of all was the swap to the AMD wheels though. Looks great now.
I saw what you did with the differential cooling fins. I have to look at mine again to see if I even have that. hmmmm
Please share how you got the Command to show the AMG logo instead of the Mercedes one????
I do think the best mod of all was the swap to the AMD wheels though. Looks great now.
-Paddle part number is in the photo
- the parts guy will find the other side with the next serial number in sequence.-All CLS55's should have the diff coolers as standard
-AMG startup screen
Press keys 7+5+3 simultaneously and turn the Comand on and off until you are in the service menu.
choose AMG_W211_EU as a setting, careful with the other options as you can lock your COMAND...!
Few more pics of the paddle mod:
That steering bolt was a nightmare to untighten, it took 2 of us about 10 mins to get off.
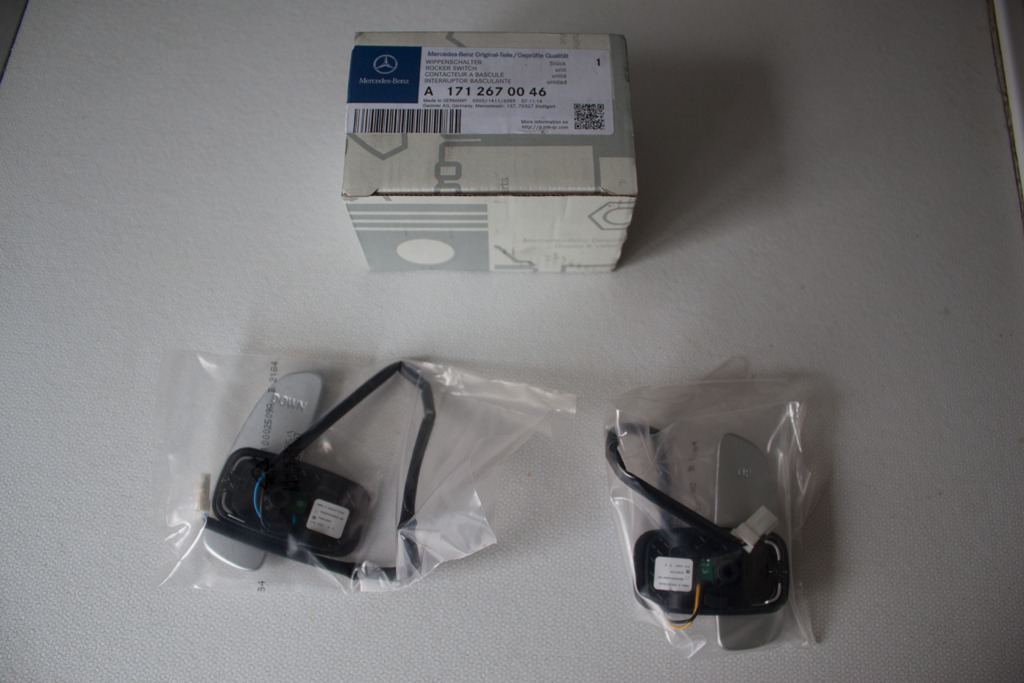
Here you can see the difference between the orignal button and the new shifter:

With the old button dismantled, I set to work with the Dremel filing it down until it looked like so:

Fit the new shifter into the old buttons housing:

Alot of Steering wheel rubber removed and hey presto:

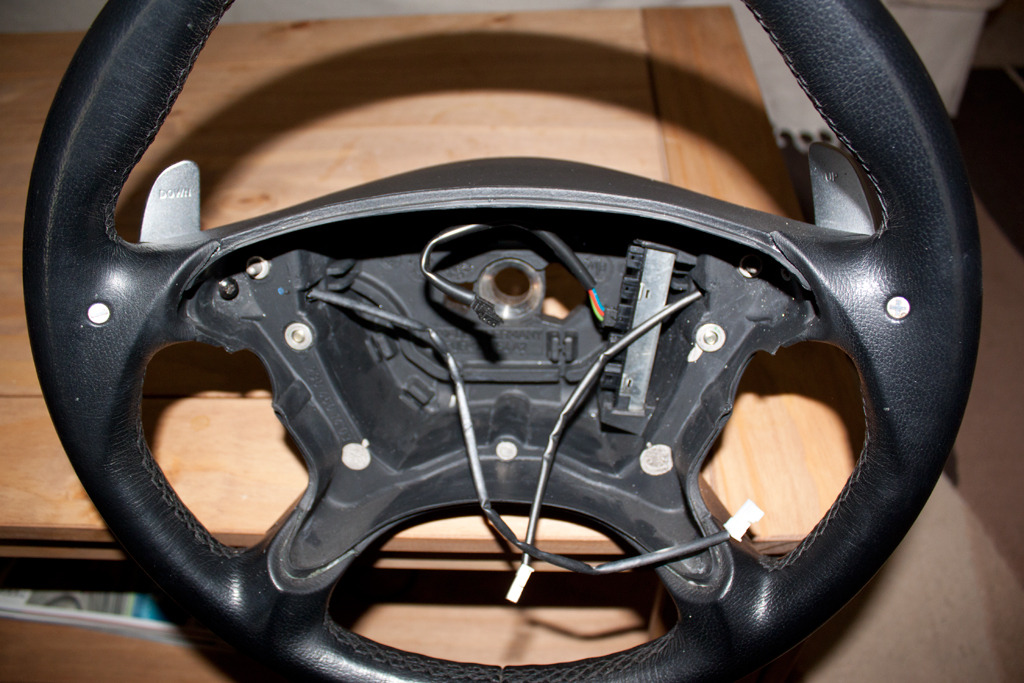
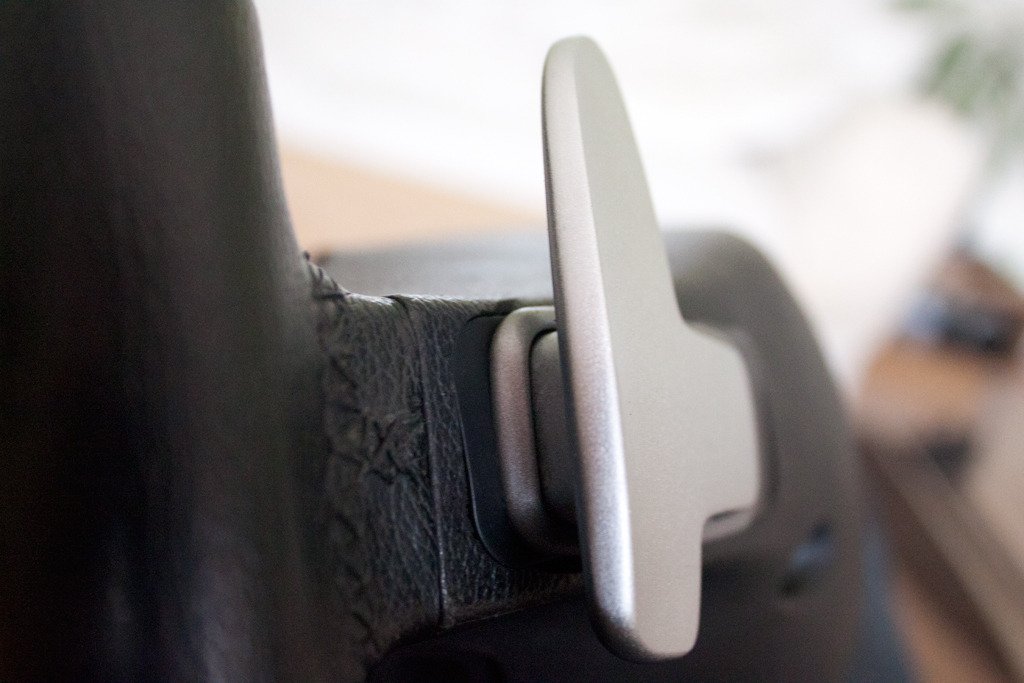
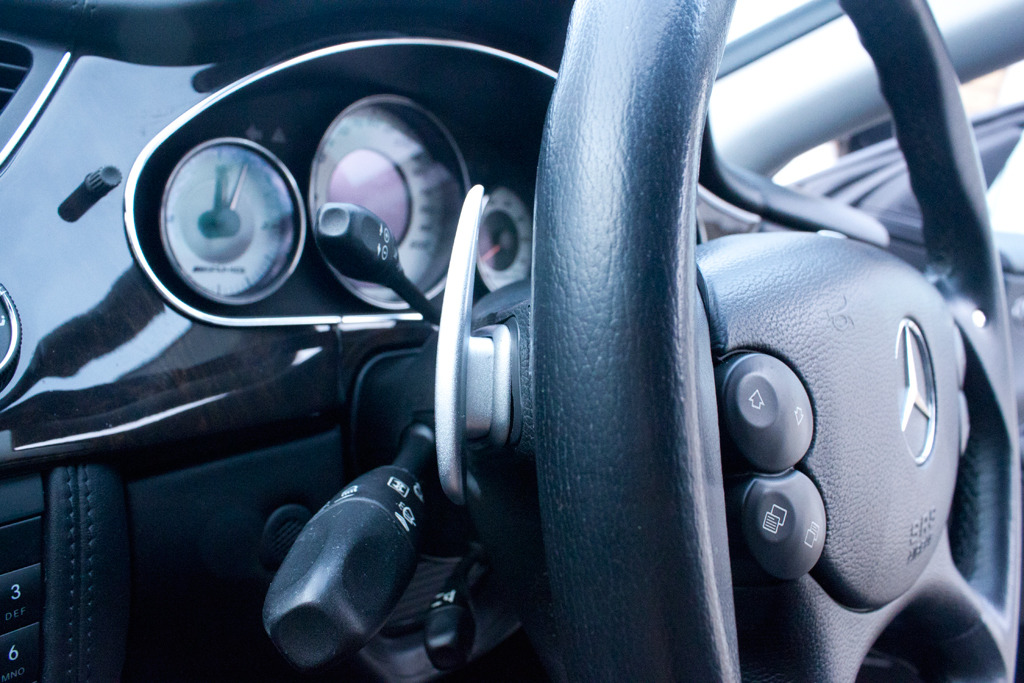
Now fitted in the car:

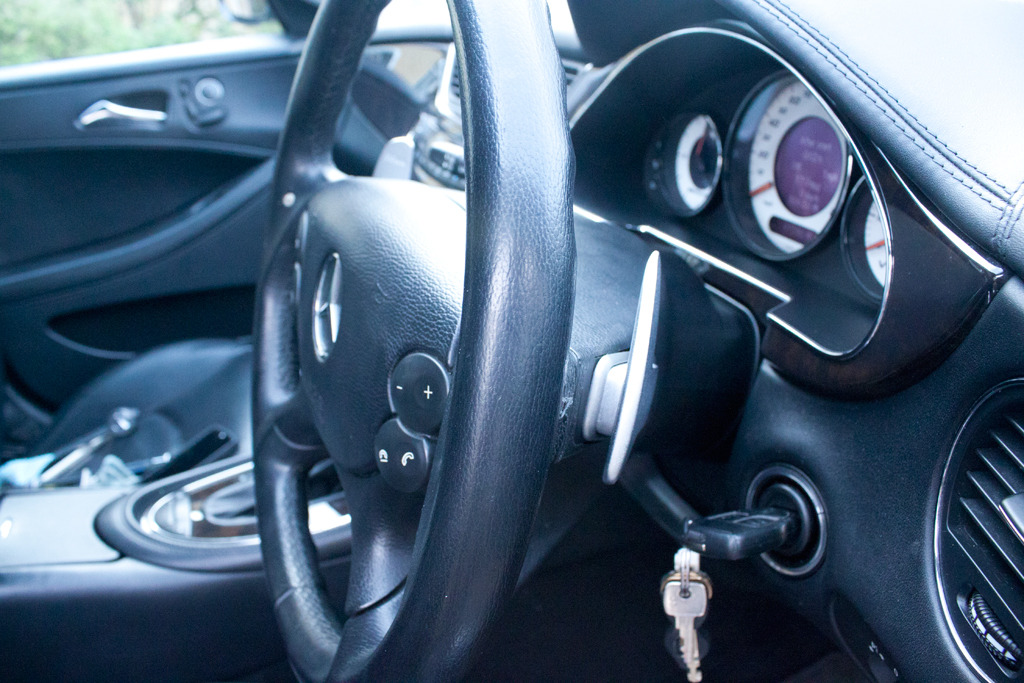
As you can see, this one isnt quiet right with its appearance, I will tidy it up tomorrow:
Thread Starter
Senior Member
Joined: May 2003
Posts: 301
Likes: 66
From: Englandshire
2013 SL63 AMG
Update for late 2015:
Affalterbach logo for the gear selector. I always thought it looked odd on the non-keyless go models to have no logo on it:
Got myself a DAS-6 DA Polisher, I think the results speak for themselves. Amazing considering I dont really know what im doing:
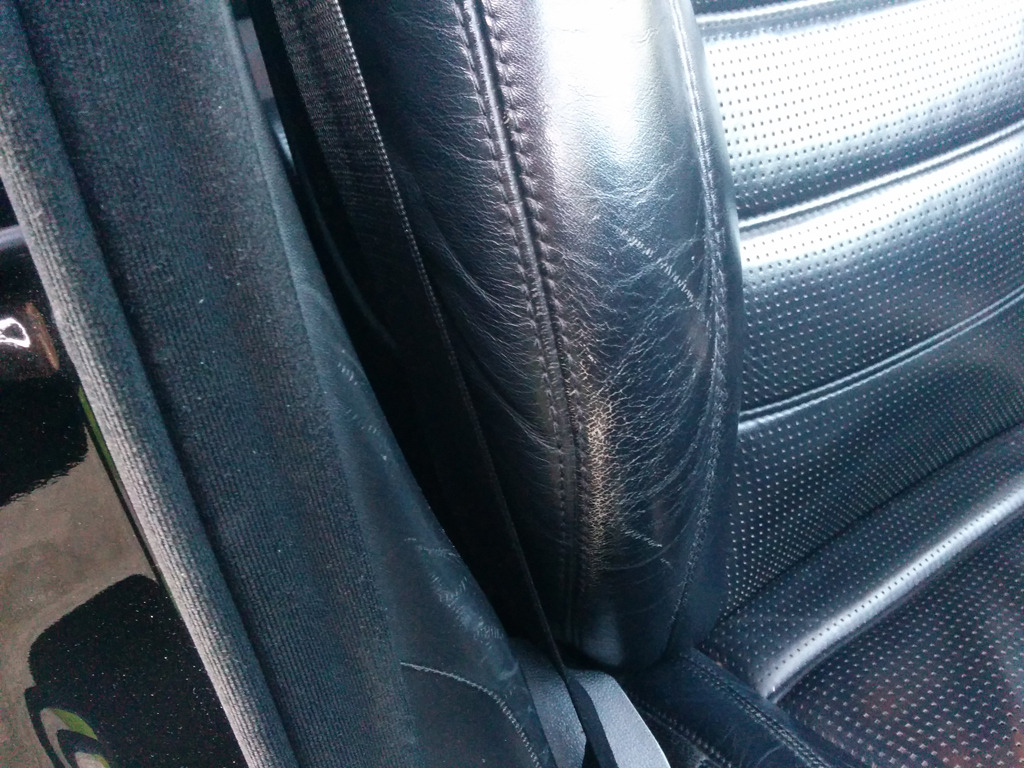
A 10 year old car with leather seats is bound to have the odd scuffs. Bought a kit off eBay which dyes the scuffed areas making it look as good as new (apart from the creasing which I have stopped in its cracks now with various products)
Before:

Affalterbach logo for the gear selector. I always thought it looked odd on the non-keyless go models to have no logo on it:

Got myself a DAS-6 DA Polisher, I think the results speak for themselves. Amazing considering I dont really know what im doing:


A 10 year old car with leather seats is bound to have the odd scuffs. Bought a kit off eBay which dyes the scuffed areas making it look as good as new (apart from the creasing which I have stopped in its cracks now with various products)
Before:
Thread Starter
Senior Member
Joined: May 2003
Posts: 301
Likes: 66
From: Englandshire
2013 SL63 AMG
March 2016 - Owned the car for 2 years now :thumb:
Latest mods:
-Dropped Suspension by 1" via STAR Diagnosis system (at COMAND.co.uk):
-Rear Tinted Windows
-Cluster Features added by STAR Diagnosis system
-Private Plate


-Tank Content:
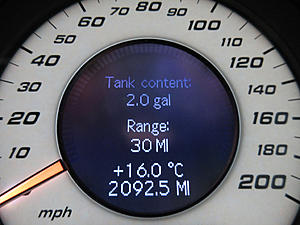
-Temp display on all screens:
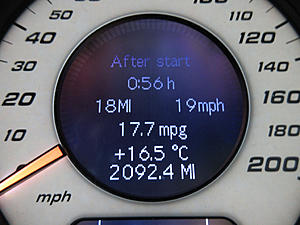
The cars looking near perfect now in my opinion, hope you agree!
Latest mods:
-Dropped Suspension by 1" via STAR Diagnosis system (at COMAND.co.uk):
-Rear Tinted Windows
-Cluster Features added by STAR Diagnosis system
-Private Plate


-Tank Content:

-Temp display on all screens:

The cars looking near perfect now in my opinion, hope you agree!
Super Member

Joined: Jan 2007
Posts: 979
Likes: 38
From: South Africa
2018 E63s AMG (Current) 2011 CL63 AMG (Sold) 2005 CLS55 AMG (Sold) 2004 C32 AMG (Sold)
Wow man, can never tell the age of this car, simply gorgeous.. How did you get the tank content through star. Is there a procedure for this and also can you point me to the leather care treatment kit you bought off eBay for your scuffs on the seats. Looking awesome bud
Thread Starter
Senior Member
Joined: May 2003
Posts: 301
Likes: 66
From: Englandshire
2013 SL63 AMG
August 2016
When for a short drive to a place in Germany, you might have heard of it?


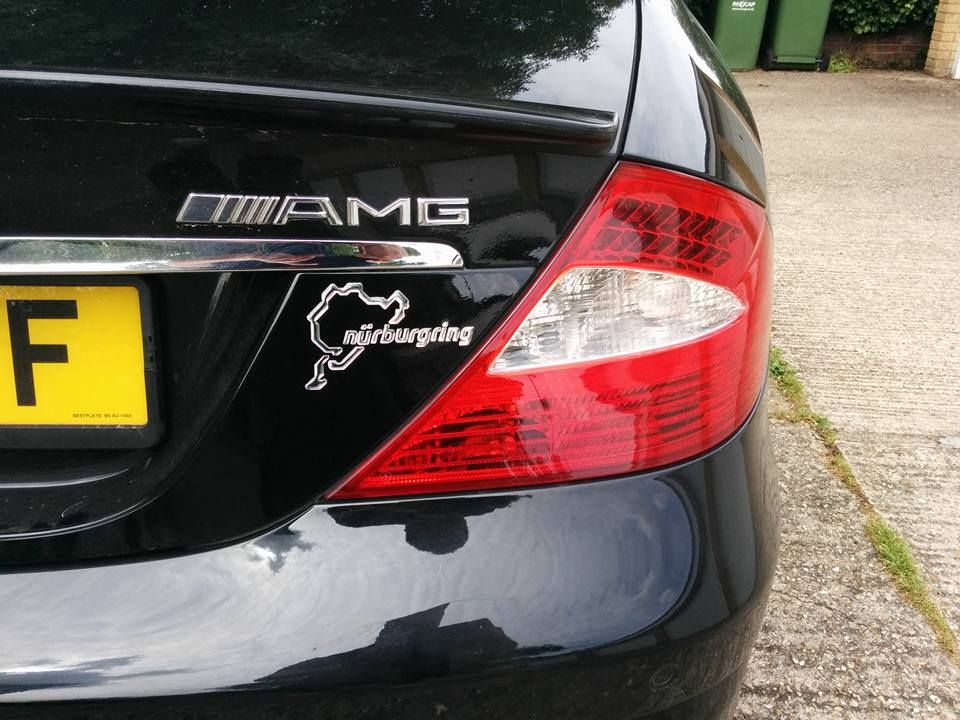
Earned the badge :thumb:

Managed it on 1 tank of Fuel which I was amazed at:

Wasnt a quick lap, it had been raining extremely heavy for nearly 10 hours before. One thing is for sure, the CLS55 AMG is no track car - far too heavy!
When for a short drive to a place in Germany, you might have heard of it?


Earned the badge :thumb:

Managed it on 1 tank of Fuel which I was amazed at:

Wasnt a quick lap, it had been raining extremely heavy for nearly 10 hours before. One thing is for sure, the CLS55 AMG is no track car - far too heavy!
Last edited by KILLERHERTZ; Aug 22, 2016 at 07:33 PM.
SPONSOR
Joined: Jan 2005
Posts: 2,395
Likes: 246
From: MIAMI, FL
www.wheelsboutique.com
August 2016
When for a short drive to a place in Germany, you might have heard of it?


Earned the badge :thumb:
Managed it on 1 tank of Fuel which I was amazed at:
Wasnt a quick lap, it had been raining extremely heavy for nearly 10 hours before. One thing is for sure, the CLS55 AMG is no track car - far too heavy!
When for a short drive to a place in Germany, you might have heard of it?
Earned the badge :thumb:
Managed it on 1 tank of Fuel which I was amazed at:
Wasnt a quick lap, it had been raining extremely heavy for nearly 10 hours before. One thing is for sure, the CLS55 AMG is no track car - far too heavy!
I am so envious of you! I hope to be there one day. No performance wheels for your babe in the near future? - shaves some seconds off that lap time 

Thread Starter
Senior Member
Joined: May 2003
Posts: 301
Likes: 66
From: Englandshire
2013 SL63 AMG
Apologies for the delay in getting the photos uploaded, I have been completely renovating my bathroom by myself! + Photobucket is appallingly slow these days?!?
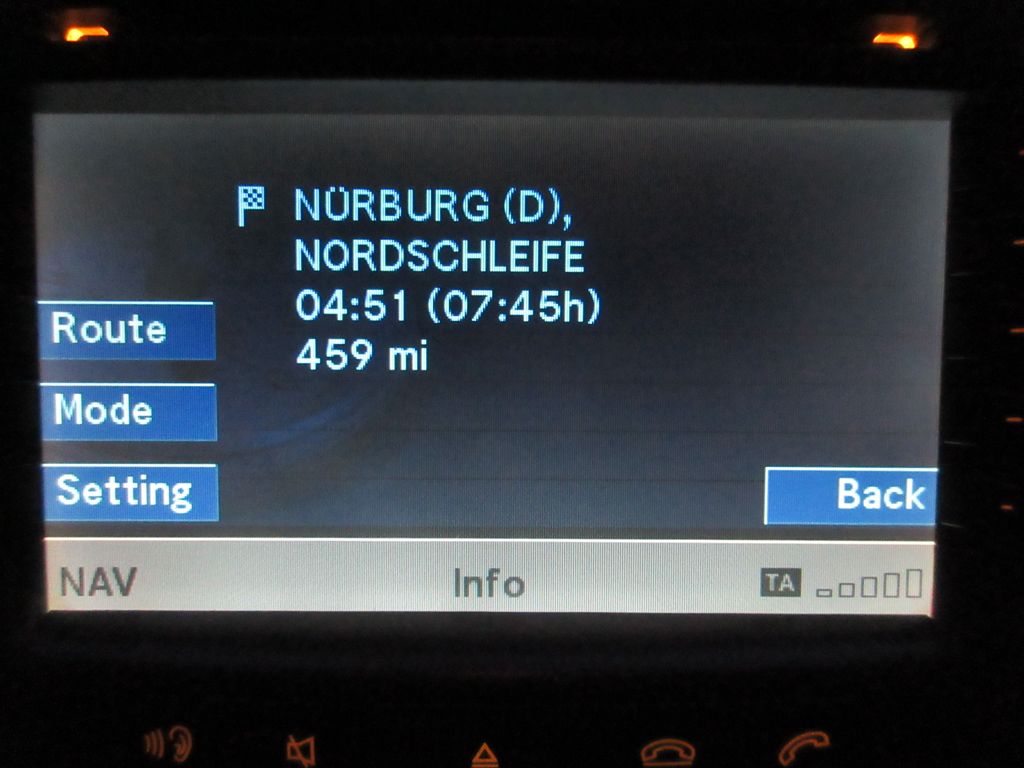
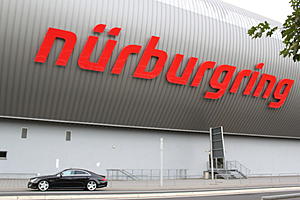
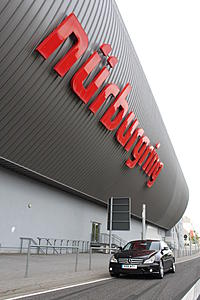
August 2016.
Cambridge to the Nurburgring, via Ferry from Dover to Dunkirk. I managed the entire trip on 1 tank of fuel, 460 miles (plus another 20 or so, getting lost/looking for places to eat etc). Amazing I thought for the car!
So, as you can see we left early, left around 4:50am to catch the 10am Ferry.
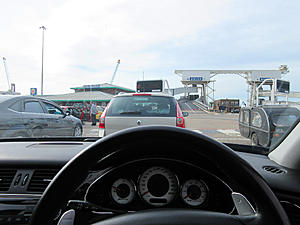
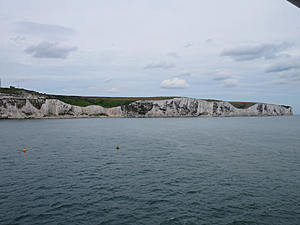
Ferry was around 2hours, fairly boring! - Seeya later Englandshire!
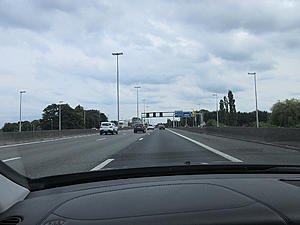
So, over in France the first time I have ever driven abroad, junctions were a total headache for the first 10mins then strangely you get used to it. French Motorways speed limits seem to change every half mile - 50 - 70 - 40- 80 - 50.
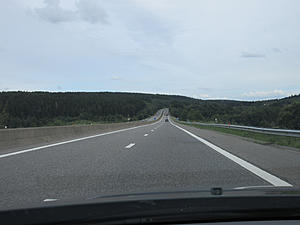
Fast forward 3 hours until we enter Germany. I have never seen such smooth, litter free, non-pot holed roads. we actually played 'Eye-Spy' looking for litter. Amazing. puts us to shame.
Wasnt long until evidence of the Promised land started to show in the rear view mirror:
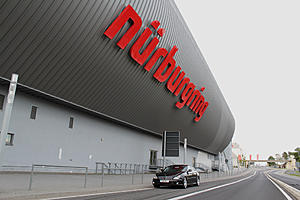
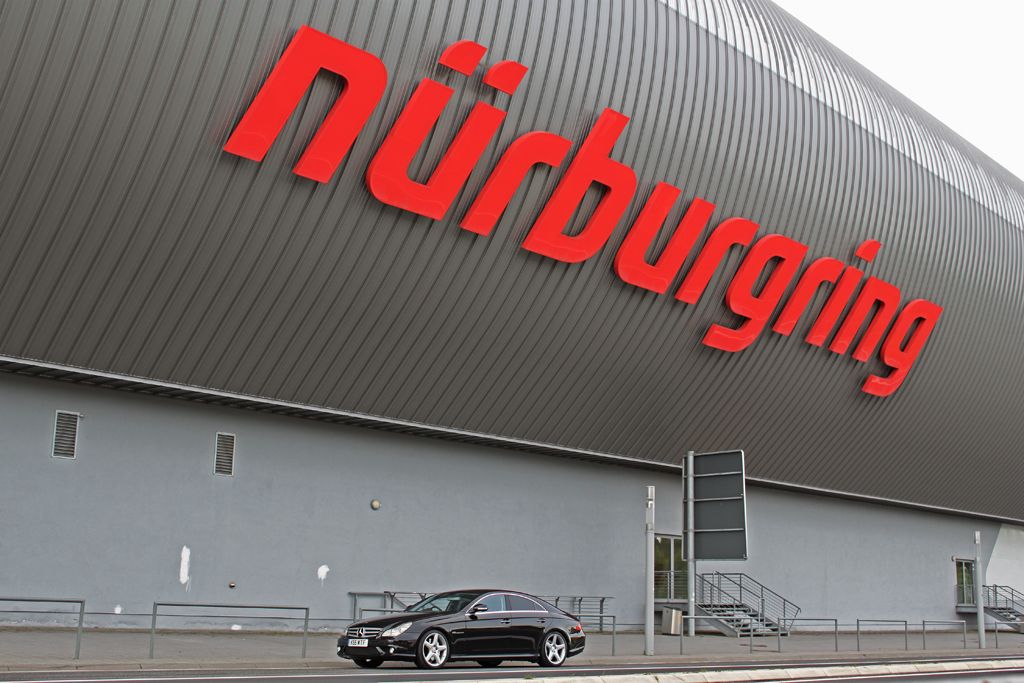
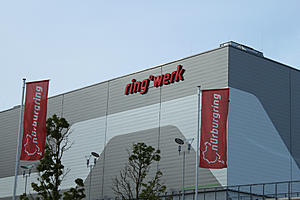
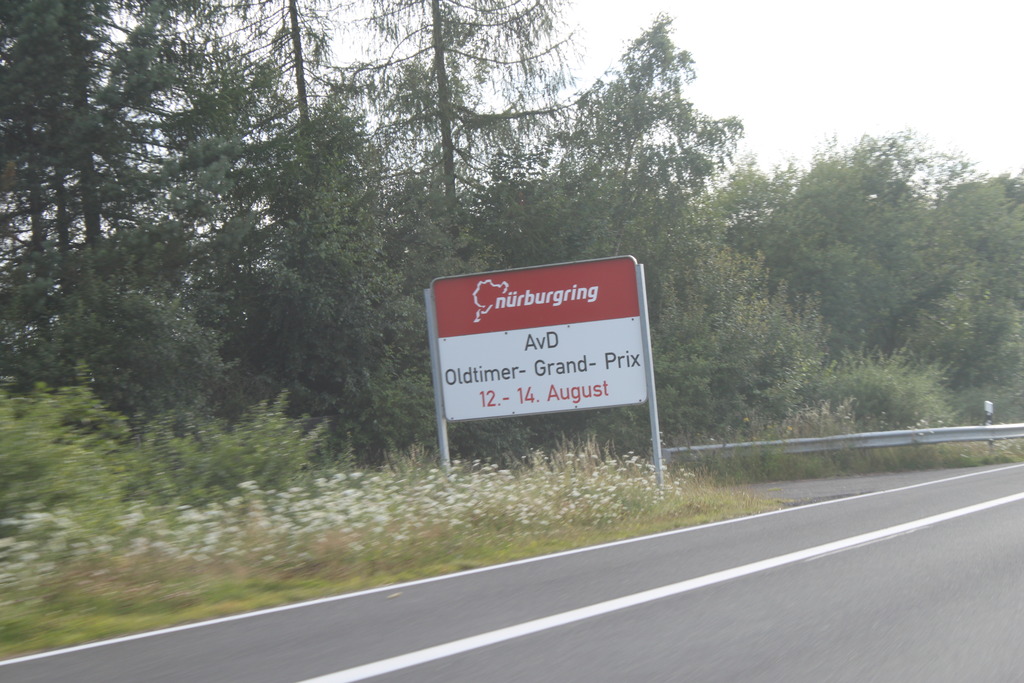
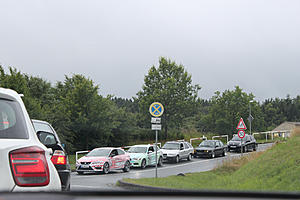
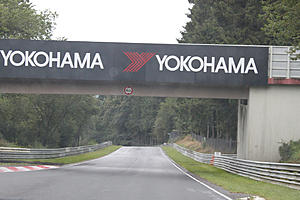
Aware of the time, the rush was now on to get there in time for the 'Touristenfahrten' - 5pm - 7pm. Car was reporting we would get there for 6:10pm.
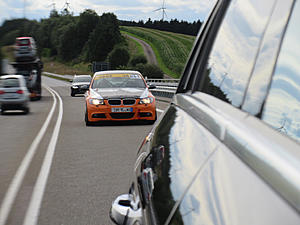
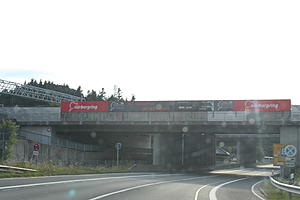
As the video I posted earlier in the thread mentions, the Nordshlefe (North loop) entrance is about 4miles away from the actual Nurburgring entrance. and we had to drive past the main complex:
Adrenalin is starting to pump now:
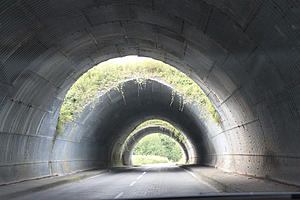
The famous triple tunnel/bridge - anyone visiting here, windows down, rev your engine sounds amazing!
We arrive in the carpark, leg it into the office as its 6:40 and time isnt on our side. The staff tell me that the track has just been closed due to a large crash. The weekend prior to my visit 2 guys were killed when there car hit another that had crashed. Suddenly things start hitting home that you dont mess around on the Green Hell...
August 2016.
Cambridge to the Nurburgring, via Ferry from Dover to Dunkirk. I managed the entire trip on 1 tank of fuel, 460 miles (plus another 20 or so, getting lost/looking for places to eat etc). Amazing I thought for the car!

So, as you can see we left early, left around 4:50am to catch the 10am Ferry.

Ferry was around 2hours, fairly boring! - Seeya later Englandshire!

So, over in France the first time I have ever driven abroad, junctions were a total headache for the first 10mins then strangely you get used to it. French Motorways speed limits seem to change every half mile - 50 - 70 - 40- 80 - 50.

Fast forward 3 hours until we enter Germany. I have never seen such smooth, litter free, non-pot holed roads. we actually played 'Eye-Spy' looking for litter. Amazing. puts us to shame.

Wasnt long until evidence of the Promised land started to show in the rear view mirror:

Aware of the time, the rush was now on to get there in time for the 'Touristenfahrten' - 5pm - 7pm. Car was reporting we would get there for 6:10pm.
As the video I posted earlier in the thread mentions, the Nordshlefe (North loop) entrance is about 4miles away from the actual Nurburgring entrance. and we had to drive past the main complex:


Adrenalin is starting to pump now:

The famous triple tunnel/bridge - anyone visiting here, windows down, rev your engine sounds amazing!

We arrive in the carpark, leg it into the office as its 6:40 and time isnt on our side. The staff tell me that the track has just been closed due to a large crash. The weekend prior to my visit 2 guys were killed when there car hit another that had crashed. Suddenly things start hitting home that you dont mess around on the Green Hell...

Thread Starter
Senior Member
Joined: May 2003
Posts: 301
Likes: 66
From: Englandshire
2013 SL63 AMG
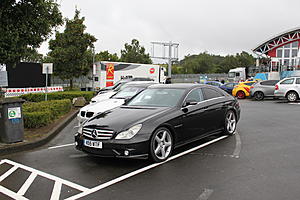
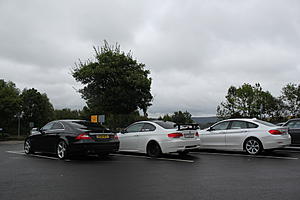
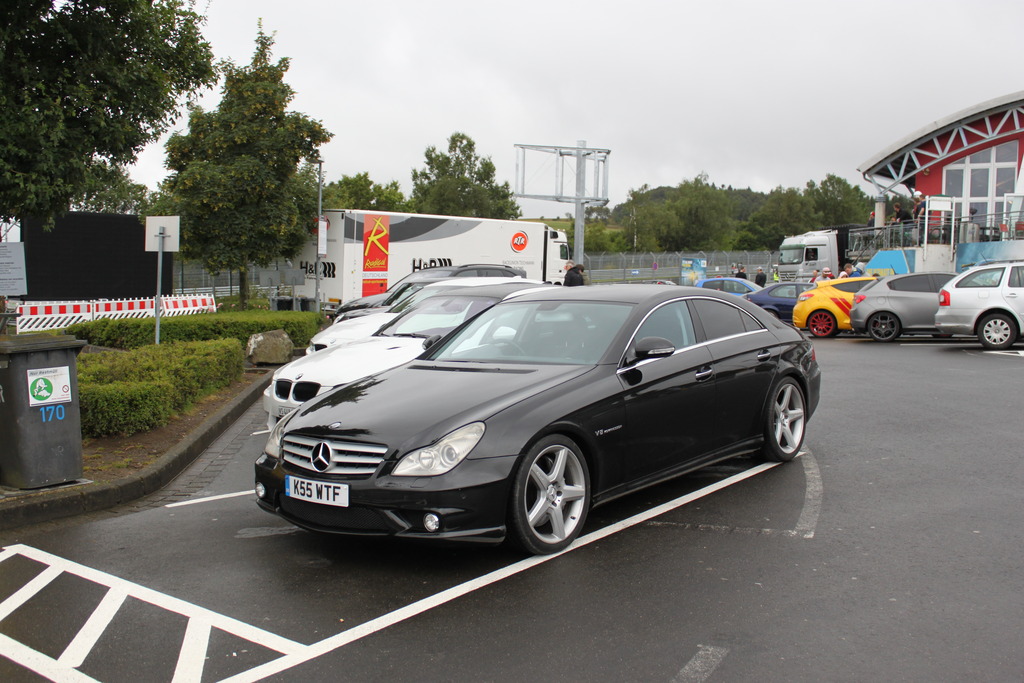
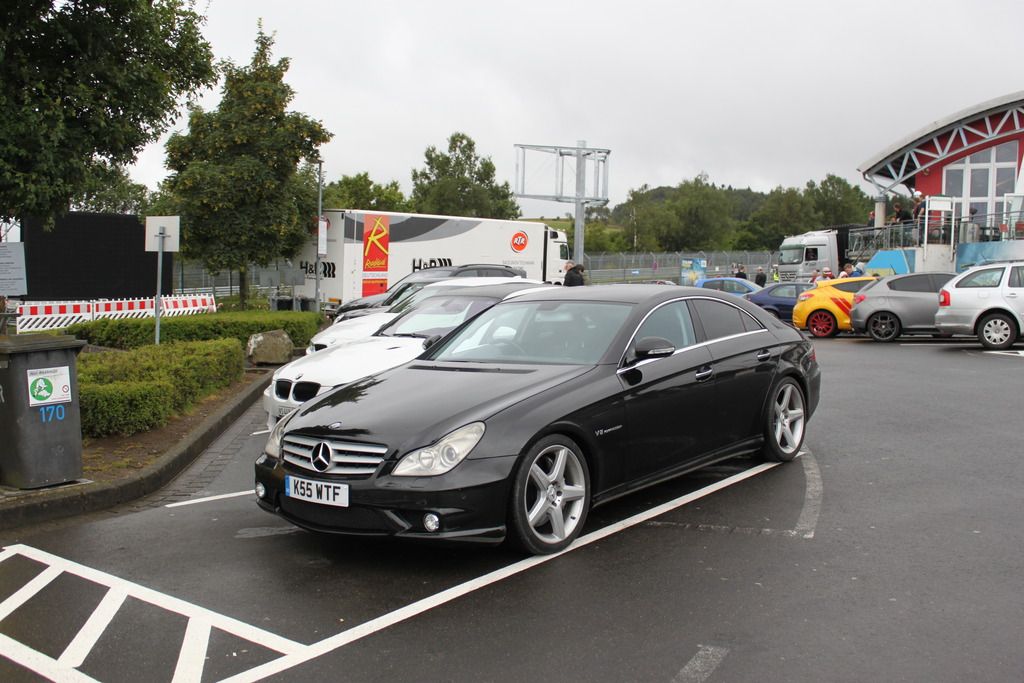
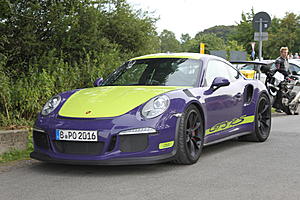
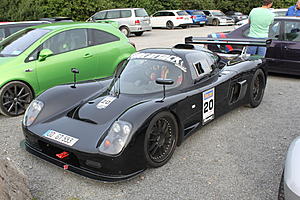
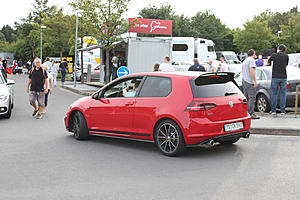
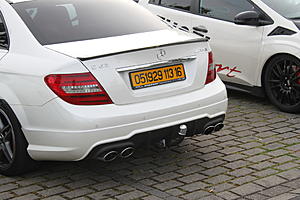
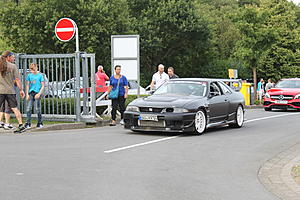
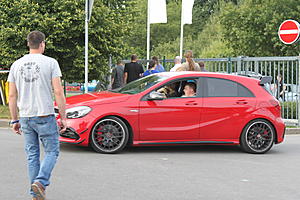
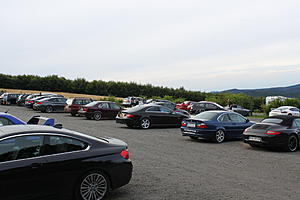
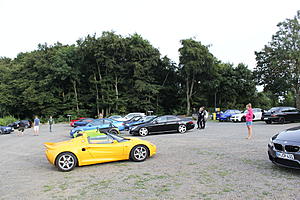
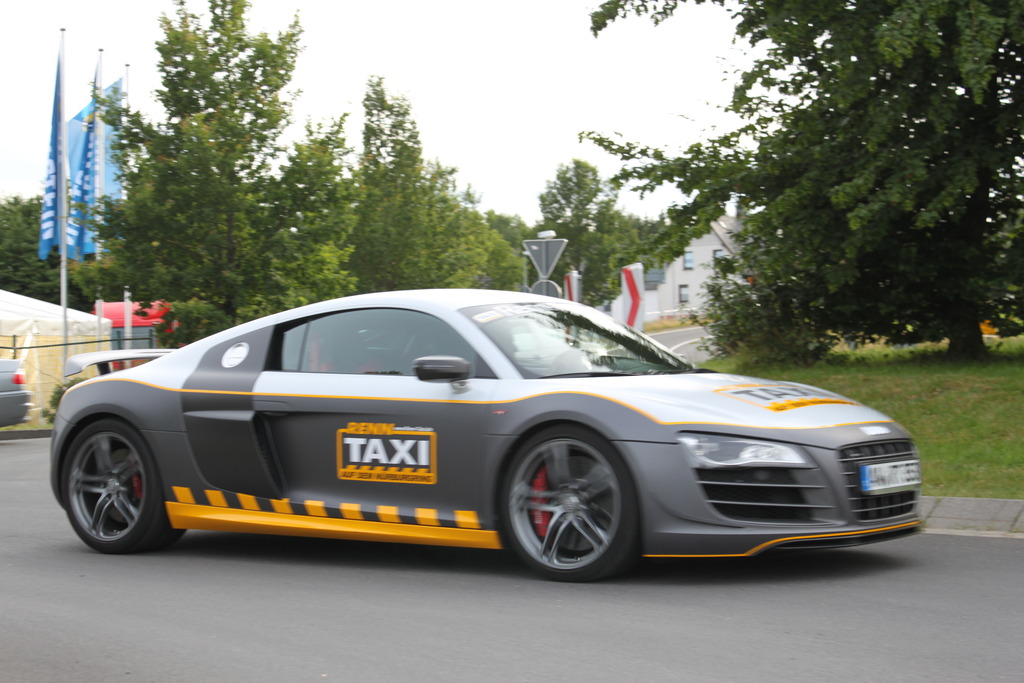
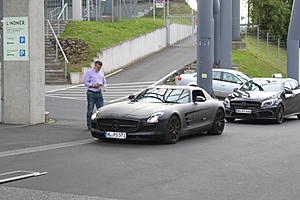
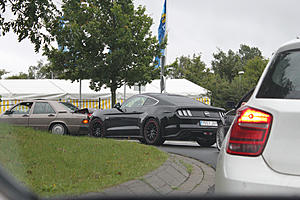
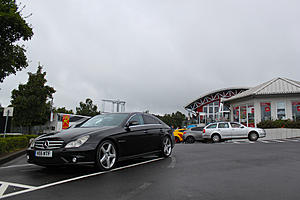
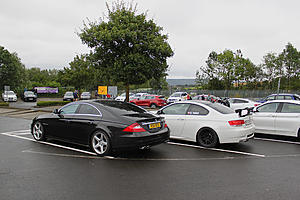
Without a track to drive on, we had a look around the various carparks at the carp0rn:

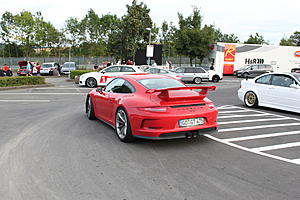

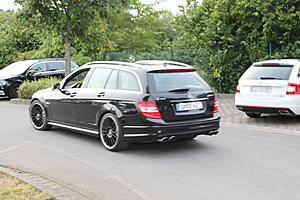
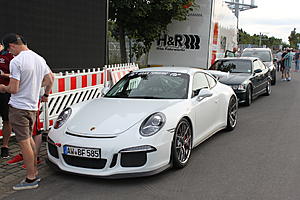
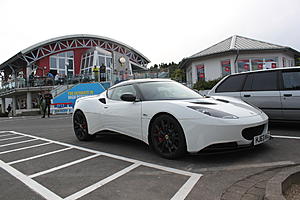


Yes, this really is a W204 C63 AMG with a towbar cut into the Diffuser:

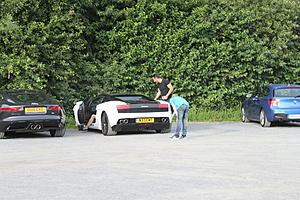
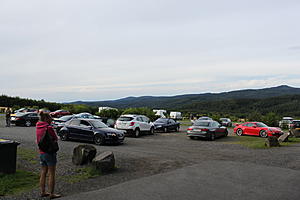
My car sort-of fit in, apart from being huge compared to everything else there!
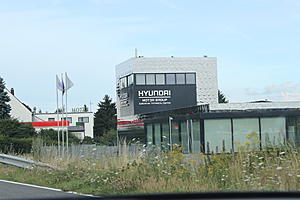
My other half has a Hyundai and was amazed to see this there:
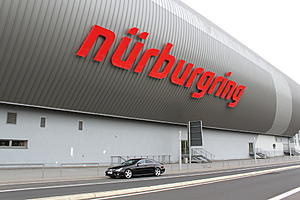
Then off to look for a Hotel, not before passing the main entrance complex:


Yes, this really is a W204 C63 AMG with a towbar cut into the Diffuser:


My car sort-of fit in, apart from being huge compared to everything else there!


My other half has a Hyundai and was amazed to see this there:

Then off to look for a Hotel, not before passing the main entrance complex:


Thread Starter
Senior Member
Joined: May 2003
Posts: 301
Likes: 66
From: Englandshire
2013 SL63 AMG
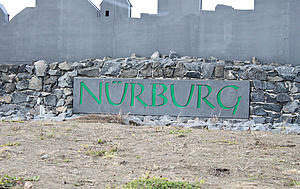
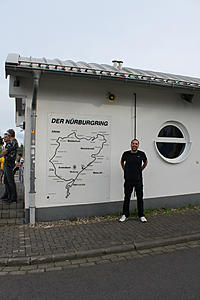
Everyone must take a photo of your car by the sign. I had no idea it was that large however!
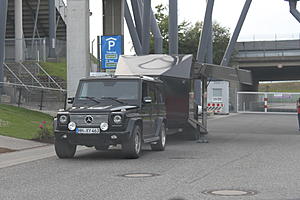
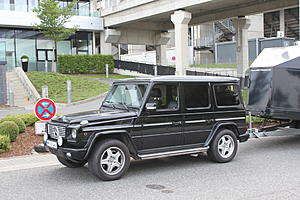
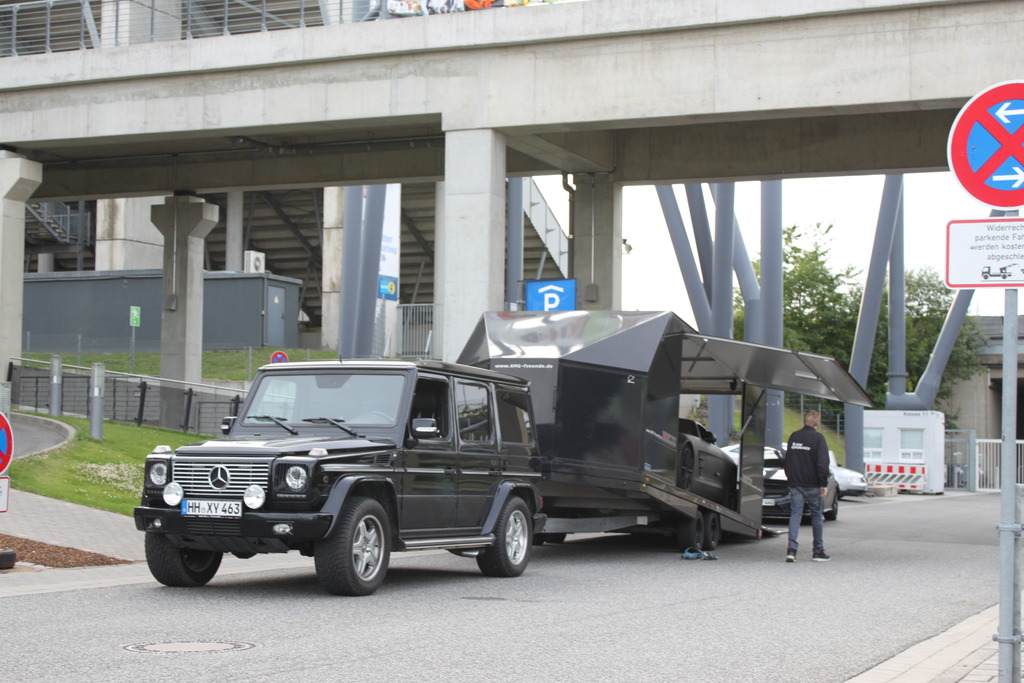
Then somthing you dont see everyday. A G55 AMG towing a SLS AMG - Only at the 'Ring:


Back to the hotel to have a 1ltr glass of BitBurger (standard size to the right):


Then somthing you dont see everyday. A G55 AMG towing a SLS AMG - Only at the 'Ring:


Back to the hotel to have a 1ltr glass of BitBurger (standard size to the right):

Thread Starter
Senior Member
Joined: May 2003
Posts: 301
Likes: 66
From: Englandshire
2013 SL63 AMG
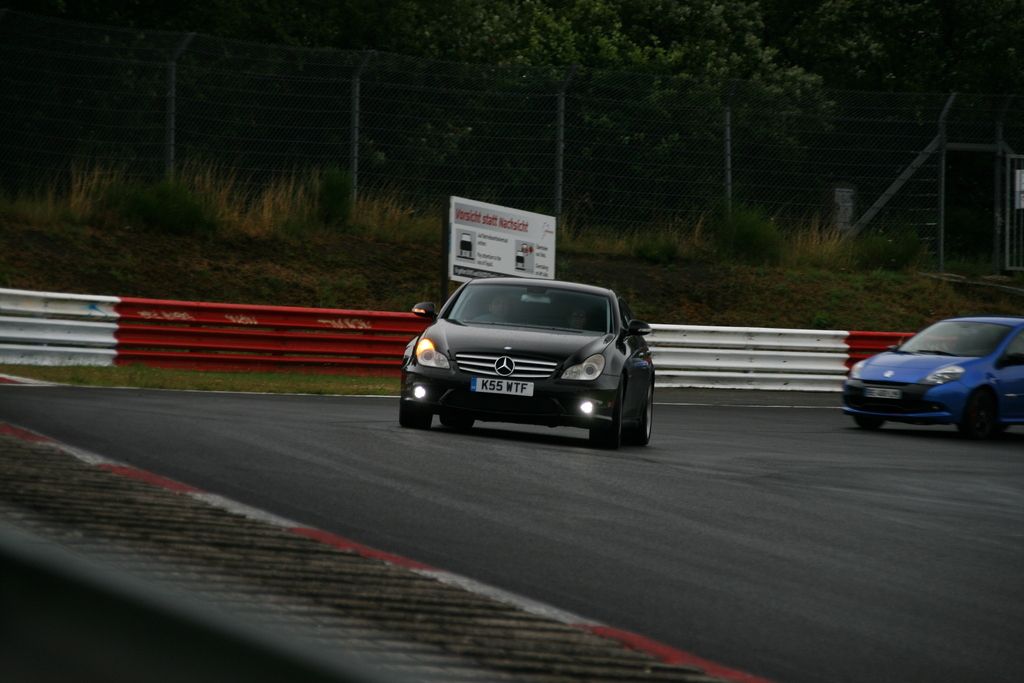
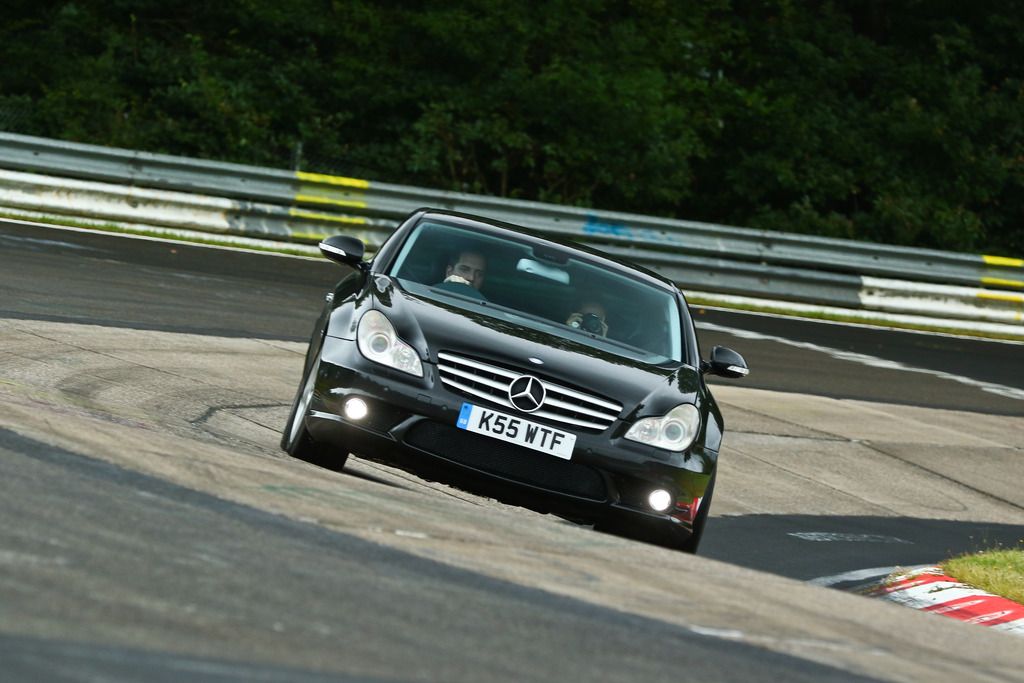
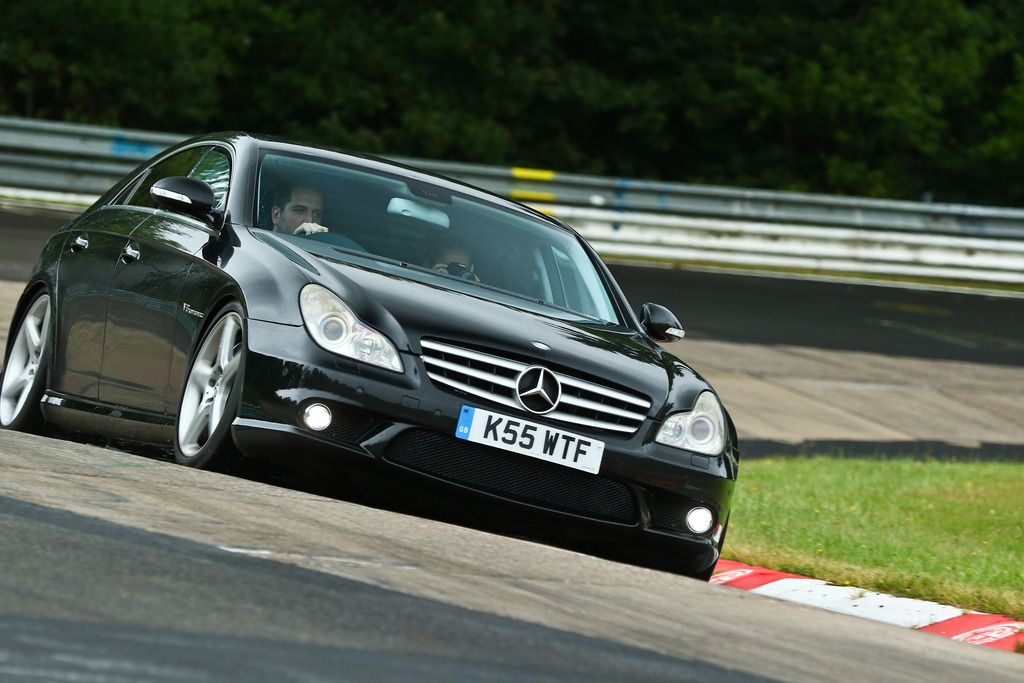
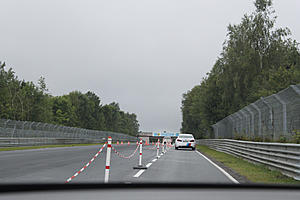
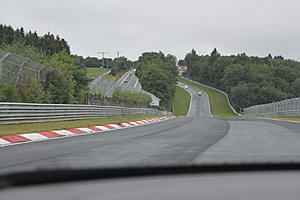
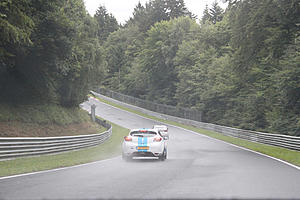
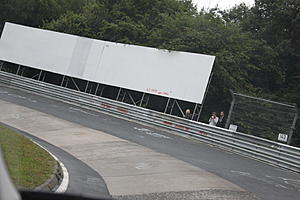
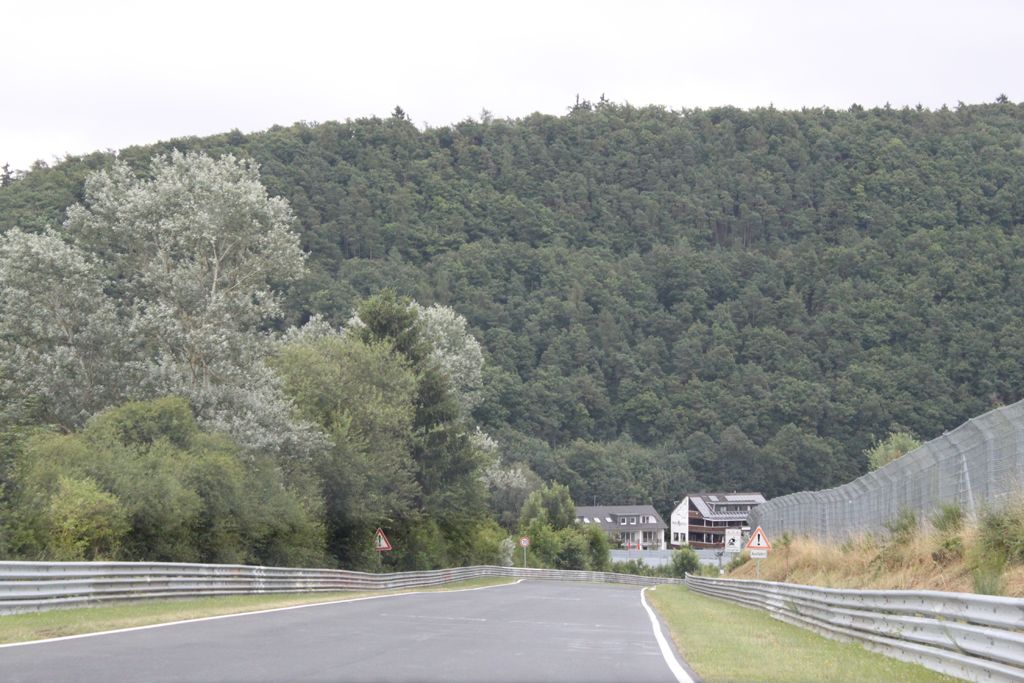
Following evening after a full day of torrential rain:
Ticket purchased, 10mins before opening time the queues were building:
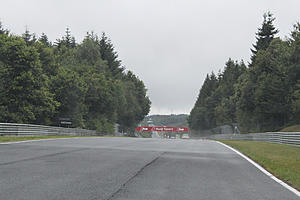
Off we go, at this point I have brown trousers. I have read the horror stories of �40k bills when you crash, added to which standing water everywhere.
Instantly it becomes apparent, ignore everything you know about the Video game versions, the dips and height changes are immense. you constantly feel the same as in a lift when it drops, a sense of weightlessness. Think a rollercoster.

Ticket purchased, 10mins before opening time the queues were building:


Off we go, at this point I have brown trousers. I have read the horror stories of �40k bills when you crash, added to which standing water everywhere.


Instantly it becomes apparent, ignore everything you know about the Video game versions, the dips and height changes are immense. you constantly feel the same as in a lift when it drops, a sense of weightlessness. Think a rollercoster.


Thread Starter
Senior Member
Joined: May 2003
Posts: 301
Likes: 66
From: Englandshire
2013 SL63 AMG
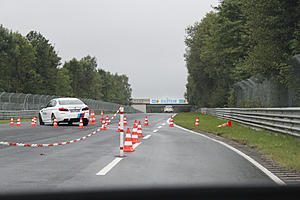
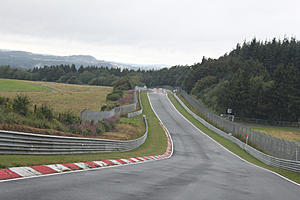
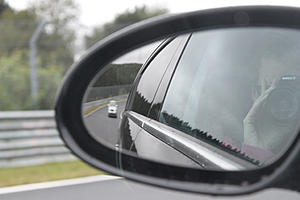
Yep, thats right I was overtaken by a Pink Suzuki Swift  (it was kitted out with roll cage etc)

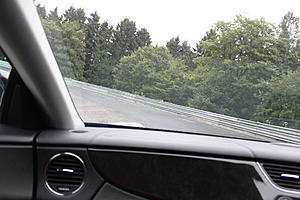
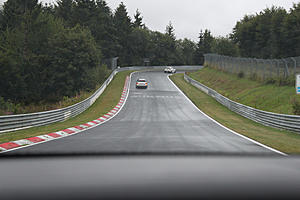
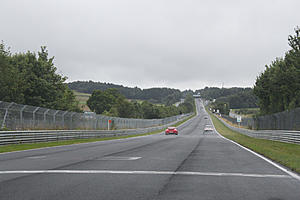
A good example of the height differences:
The Carousel!

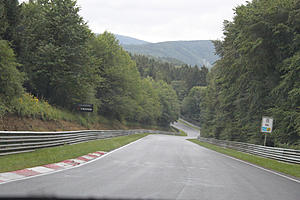
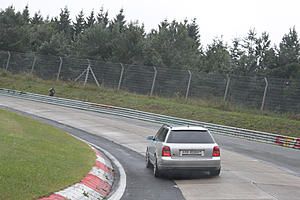
RS6 Wagon:
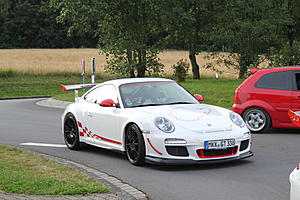
This GT3 RS was out of the loudest cars ive ever heard:
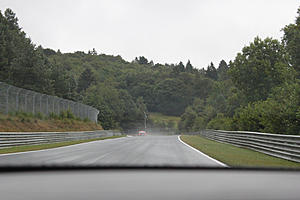
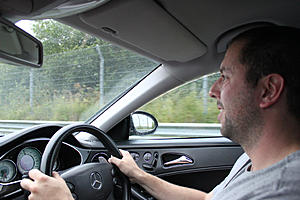
Lap complete and I didnt crash!
Parked up at the Ring Cafe:
So, completed a lap without crashing. Had a great time even if my lap was very slow - I reckon about 13mins. standing water everywhere, im no racing driver. I managed 110Mph on some of the straighter sections, however the corners I was looking at around 50Mph. One thing is for sure, the CLS55 is no track car! far to heavy
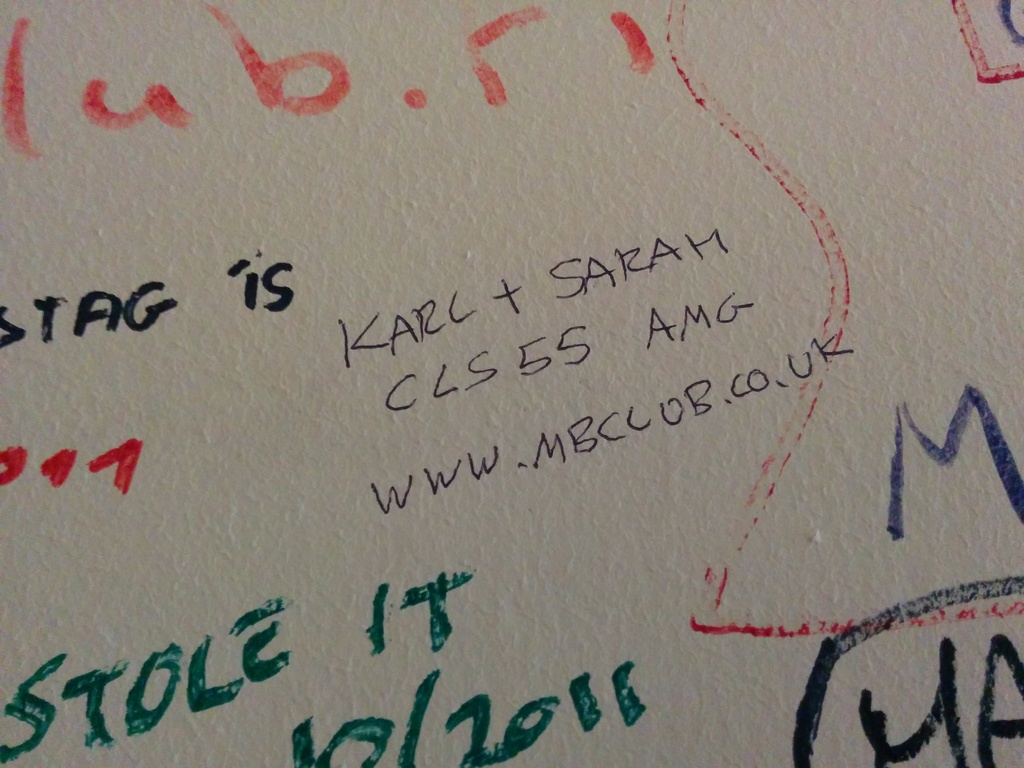
Should anyone go into the Ring cafe, ive marked the wall, high up between the gents & ladies toilet doors:

(it was kitted out with roll cage etc)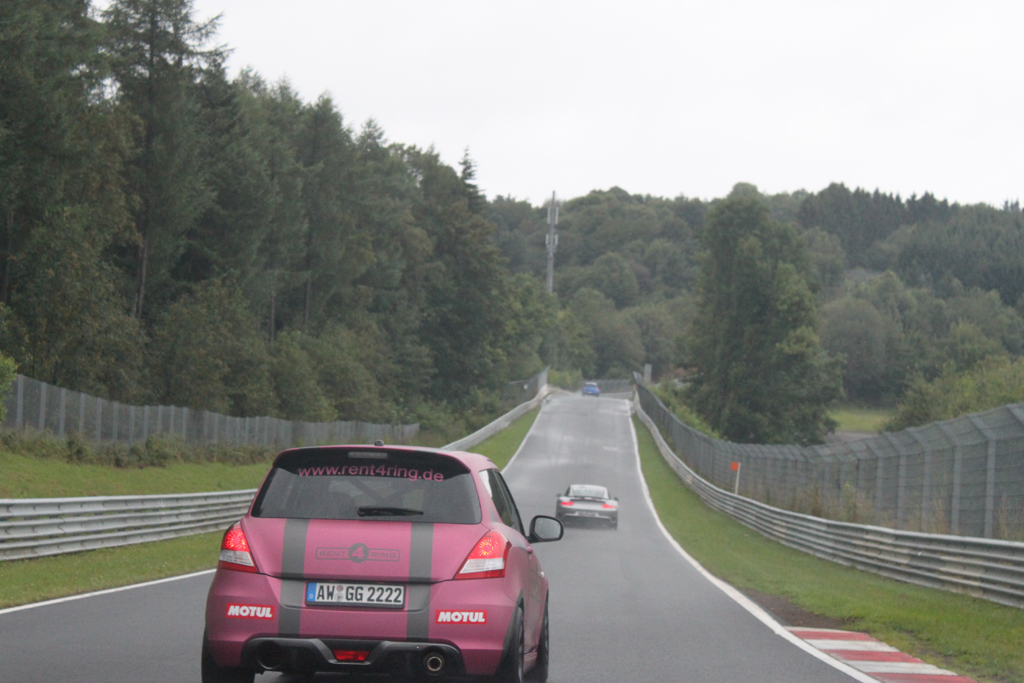
A good example of the height differences:


The Carousel!


RS6 Wagon:


This GT3 RS was out of the loudest cars ive ever heard:

Lap complete and I didnt crash!


Parked up at the Ring Cafe:


So, completed a lap without crashing. Had a great time even if my lap was very slow - I reckon about 13mins. standing water everywhere, im no racing driver. I managed 110Mph on some of the straighter sections, however the corners I was looking at around 50Mph. One thing is for sure, the CLS55 is no track car! far to heavy
Should anyone go into the Ring cafe, ive marked the wall, high up between the gents & ladies toilet doors: