Head removal on CLS63 M156 engine – FYI/DYI
 03-16-2017, 11:13 PM
#1
Junior Member
Thread Starter

Join Date: Mar 2017
Posts: 28
Likes: 0
Received 2 Likes
on
2 Posts
CLS63, SL65, GLK350, 360CS, MCS GP2 clone
Head removal on CLS63 M156 engine – FYI/DYI
Newbie to this forum. We have owned a ’07 CLS63 for several years, the car has been my wife's daily driver/kid/grocery getter and has covered almost 70k miles. While a good car, it has had its fair share of problems including air shock failure, and transmission ECU conductor plate. We have also gone through a full set of rims (easily bent) and several sets of tires and brake pads ☺. Over the last year we felt is was time to trade it in for a small SUV (LR or Porsche) but after underwhelming test drives she opted to keep it and drive it is till it fell apart…so as fate would have it, that didn’t take too long and the car started acting up a couple of weeks ago with sudden loss of power and very rough running.
The CEL Codes showed several cylinder misfire. No loss of coolant and after hunting around decided to do a compression test and all cylinders had great numbers but for cylinder 6 which didn't register. Subsequent leak down test showed number 6 at 100% leak with exhaust valves the suspect. Considering the problem happened at start up of it seems reasonable to assume an exhaust valve(s) got tagged or stuck open.
The quote for the repair was about half what the car is worth (thx MB depreciation) so the my option is trading it in with a bad engine and get pennies on the dollar or bite the bullet and potentially end up with a 5 digit bill (head bolts, valve buckets, cams, head work, or worst) and have a car that is still worth less than new Civic!!
So after some consideration I decided to pursue a third option and do a DYI. I researched the M156 engine and found a lot of information about replacing head bolts on the M156 and tappets/cam follower but couldn’t find a thread that covered pulling the heads. So I have decided to document the head removal process for future reference…and potential comedic relief especially if I fail ☺.
I have ordered a WIS off eBay and the timing toolset that just got delivered…. Actually don’t care about the WIS other than torque values… few days left in the Spring break - so going to get going right away!
NB; usual disclaimer - this is meant to be more an FYI vs a detailed step by step DYI since it does require basic mechanical skills and some of the pics may be out of sequence (LOL). I'll try to keep time that I spent for each step (excluding the online research and parts order) as a reference for what the book recommends.

The following users liked this post:
Tomsti (12-01-2018)
03-17-2017, 08:52 PM
#2
Junior Member
Thread Starter
Join Date: Mar 2017
Posts: 28
Likes: 0
Received 2 Likes
on
2 Posts
CLS63, SL65, GLK350, 360CS, MCS GP2 clone
Prep
First step requires removing all the fluids (oil and coolant) after cleaning the engine. There is a drain valve on the driver side of the radiator and the block drain bolt is behind the alternator (6mm Allen IIRC) on the passenger side. My radiator drain for some reason did not work…hate draining coolant as no matter what you it will spill, so ended using the block drain and pulling the main hose.
Now the tedious but easy stuff, remove air intake, filters, after disconnecting the MAF. There are a couple of clips that lock the back intake hose – one is accessible on the driver side and you can wiggle the hose out. Remove the coils, spark plugs and wiring, clip the zip ties to free up the wires. Drain the steering pump reservoir, remove hoses and pull reservoir (even if you think you drained it…it will spill oil so plug the lines and set them aside with a zip tie). Remove the air control valves, (the driver side one is a little challenging) and other related parts. Whenever there two of the same (ie cam solenoids I match the connectors with yellow dots - helps with reassembly especially when projects take severals months). Remove the serpentine belt (17 mm socket, use an large nail to keep the tensioner in tension). 1-1.5 hours
Now the tedious but easy stuff, remove air intake, filters, after disconnecting the MAF. There are a couple of clips that lock the back intake hose – one is accessible on the driver side and you can wiggle the hose out. Remove the coils, spark plugs and wiring, clip the zip ties to free up the wires. Drain the steering pump reservoir, remove hoses and pull reservoir (even if you think you drained it…it will spill oil so plug the lines and set them aside with a zip tie). Remove the air control valves, (the driver side one is a little challenging) and other related parts. Whenever there two of the same (ie cam solenoids I match the connectors with yellow dots - helps with reassembly especially when projects take severals months). Remove the serpentine belt (17 mm socket, use an large nail to keep the tensioner in tension). 1-1.5 hours
03-18-2017, 10:19 AM
#3
Junior Member
Thread Starter
Join Date: Mar 2017
Posts: 28
Likes: 0
Received 2 Likes
on
2 Posts
CLS63, SL65, GLK350, 360CS, MCS GP2 clone
...been trying to update this thread but apparently requires approval from mods! Is it because I am a newbie to the forum? Also pics show up as thumbnails - how do you embed within thread - do I have to host my photo and ref them within the body of the text?
Last edited by 360CS; 03-18-2017 at 10:24 AM.
 03-23-2017, 10:11 PM
#6
Junior Member
Thread Starter
Join Date: Mar 2017
Posts: 28
Likes: 0
Received 2 Likes
on
2 Posts
CLS63, SL65, GLK350, 360CS, MCS GP2 clone
Progress
Took advantage of spring break to make significant progress...actually completed the whole process successfully in a handful of days and will post the process over the next few days for those who are interested (honestly quite straightforward). Considering the price of those cars vs cost of repairs, I think DYI will become more relevant in the coming years!
Now back to my other projects
Now back to my other projects
03-24-2017, 12:49 AM
#7
Junior Member
Thread Starter
Join Date: Mar 2017
Posts: 28
Likes: 0
Received 2 Likes
on
2 Posts
CLS63, SL65, GLK350, 360CS, MCS GP2 clone
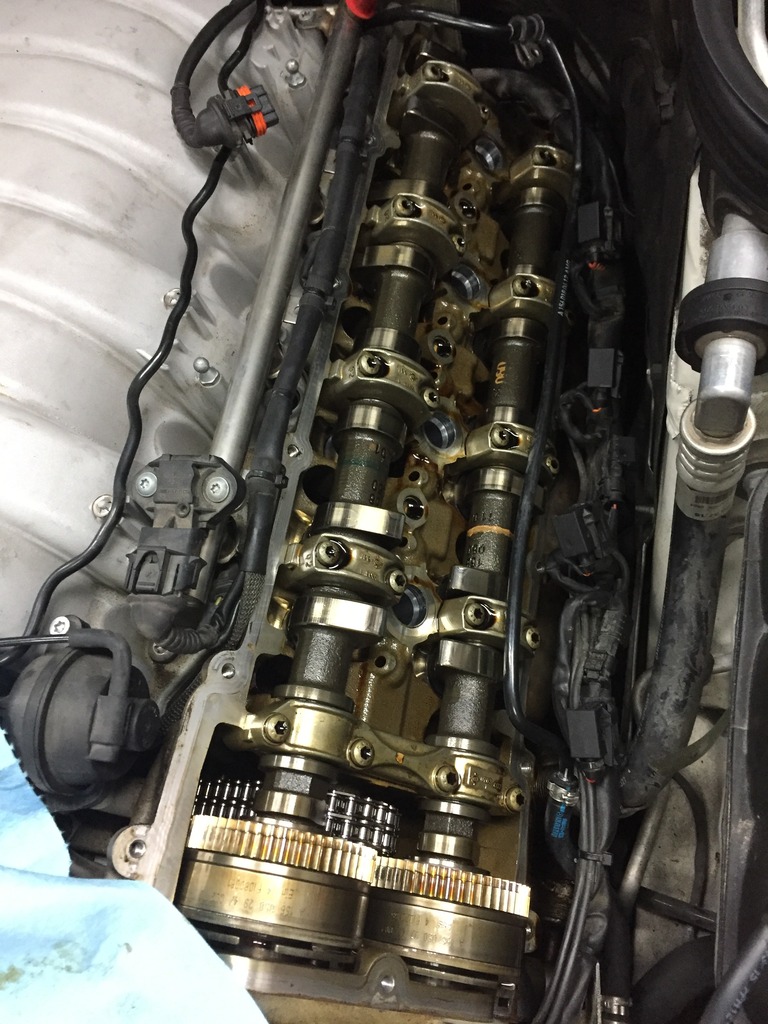
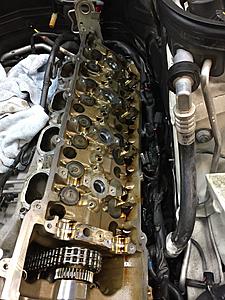
Valve covers
Removing the covers is straightforward stuff all T30 Torx and easy access. Clip the zip ties that hold down the wiring harness (mine were very brittle). Pull the covers and expect some oil is going to drip out (especially is you turn the engine over). Then remove the front covers (note the grounding wire) – put a cloth towel to collect the excess or your alternator and steering pump will get soaked (…too late for me). Remove the temp sensor connector.
The front covers have a ground that you need to remove as well as the phasor solenoids (make sure to label the intake and exhaust)
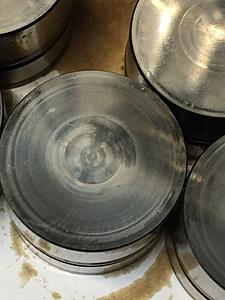
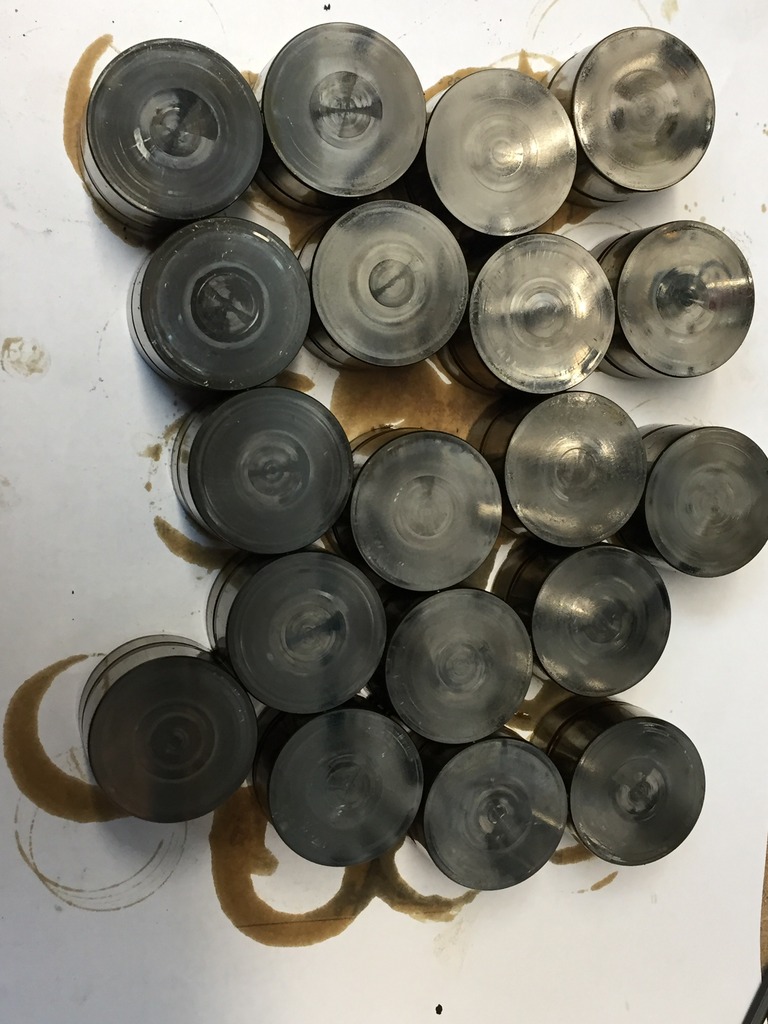
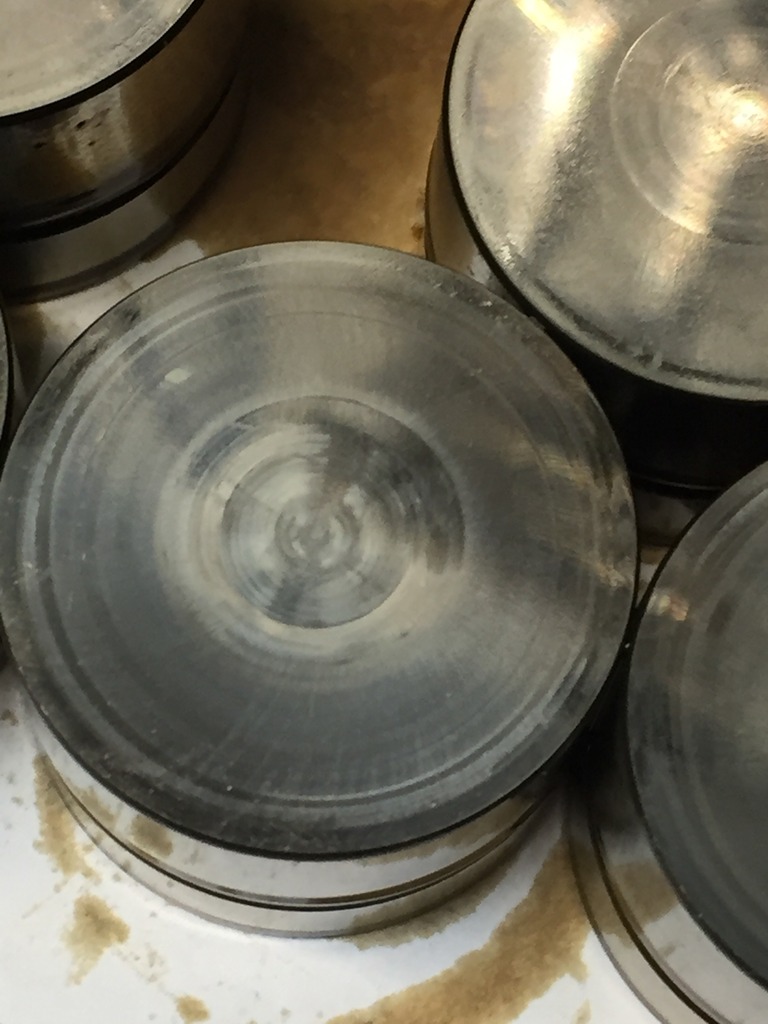
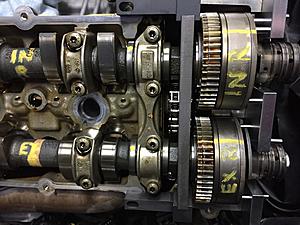
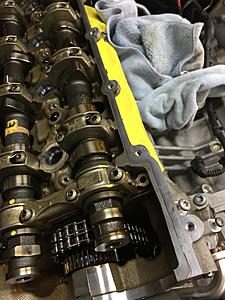
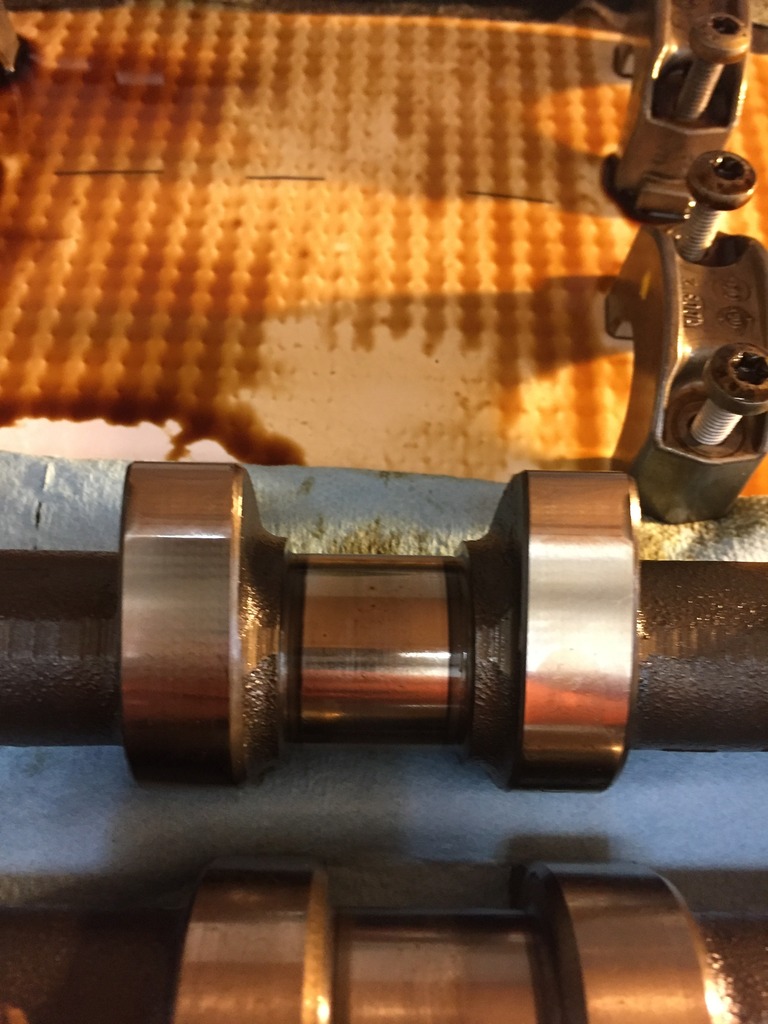
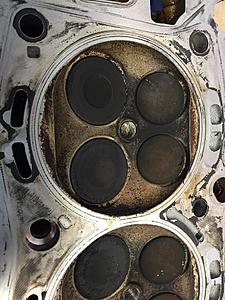
Cams look in good shape with no abnormal wear on the lobs

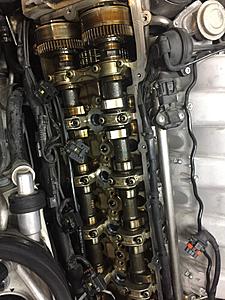
with some of the valve buckets displaying uneven wear (picture taken after disassembly...obviously)


The front covers have a ground that you need to remove as well as the phasor solenoids (make sure to label the intake and exhaust)

Cams look in good shape with no abnormal wear on the lobs

with some of the valve buckets displaying uneven wear (picture taken after disassembly...obviously)
Trending Topics
03-24-2017, 12:54 AM
#8
Junior Member
Thread Starter
Join Date: Mar 2017
Posts: 28
Likes: 0
Received 2 Likes
on
2 Posts
CLS63, SL65, GLK350, 360CS, MCS GP2 clone
...The problem
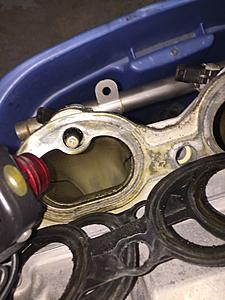
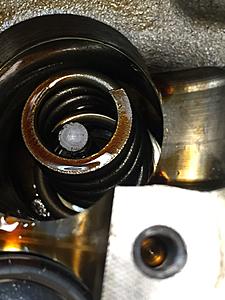
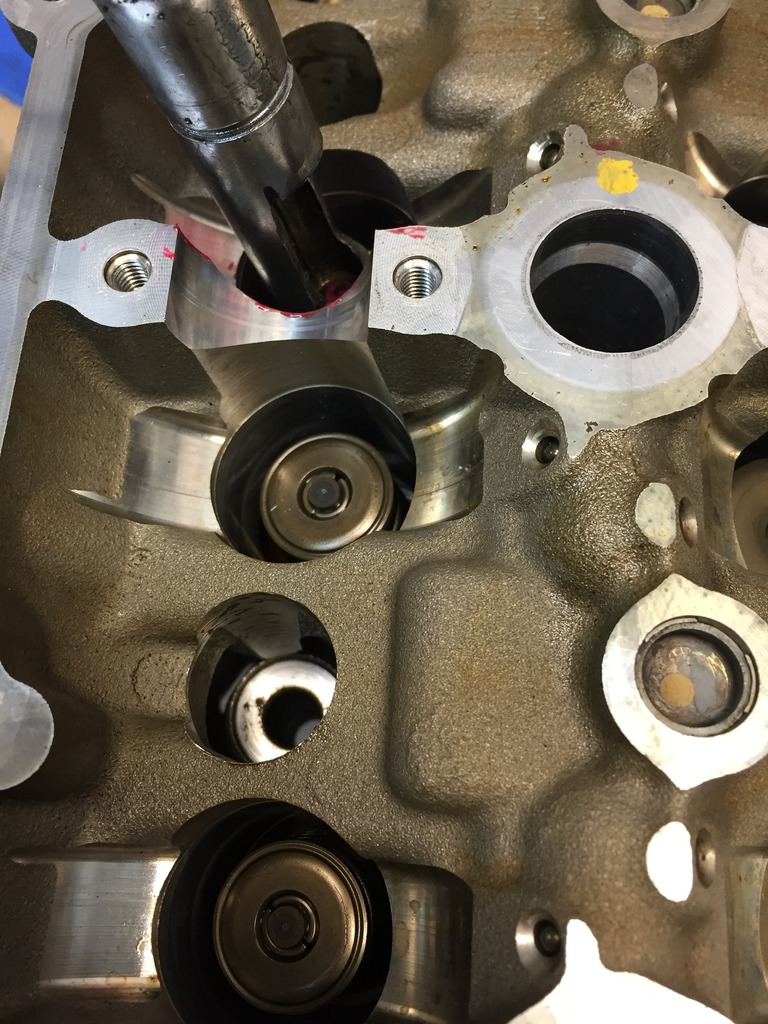
With the cover off, I get to check number 6 cylinder more closely. I was expecting one or both of the exhaust buckets to sit lower than the rest especially if the valves are stuck open, but not so.
Rooting around and further investigation show one of the buckets is super easy to push down (I use a brass tool not to damage the cams).
So broken valve spring? This seems highly probable as the cause – spring breaks, valve gets tagged, and compression goes to zero… 1 hour to remove the covers, another 1 hr rooting around and deciding what to do next!

Rooting around and further investigation show one of the buckets is super easy to push down (I use a brass tool not to damage the cams).

So broken valve spring? This seems highly probable as the cause – spring breaks, valve gets tagged, and compression goes to zero… 1 hour to remove the covers, another 1 hr rooting around and deciding what to do next!
Last edited by 360CS; 03-24-2017 at 09:03 AM.
03-24-2017, 04:38 AM
#9

I have a neighbor that is working on his Mercedes suv, and has the heads off. I'm curious what keeps the timing chain from falling off the crank sprocket when its let loose from the cams. Not a very good design. Not sure if your engine is the same or not. Do you know if it has a balance shaft? If so same problem with the chain and timing marks etc.
03-24-2017, 08:57 AM
#10
Junior Member
Thread Starter
Join Date: Mar 2017
Posts: 28
Likes: 0
Received 2 Likes
on
2 Posts
CLS63, SL65, GLK350, 360CS, MCS GP2 clone
I have a neighbor that is working on his Mercedes suv, and has the heads off. I'm curious what keeps the timing chain from falling off the crank sprocket when its let loose from the cams. Not a very good design. Not sure if your engine is the same or not. Do you know if it has a balance shaft? If so same problem with the chain and timing marks etc.
03-24-2017, 09:02 AM
#11
Junior Member
Thread Starter
Join Date: Mar 2017
Posts: 28
Likes: 0
Received 2 Likes
on
2 Posts
CLS63, SL65, GLK350, 360CS, MCS GP2 clone
BTW, I don't know what's up with this forum...I'll post a thread and it doesn't show up. So I'll repost and the post immediately shows up...then a couple of hours later the first post is added! Confusing for everyone!
03-24-2017, 07:34 PM
#12
I haven't seen it in person yet with the front cover off. But looking at factory assembly videos and photos, it just looks like the chain would sag or fall down and loose position with the 2 important gears the crank gear likely not much of a problem until you try lining up the marked links ?(marked links ? does that depend on model of engine?) and then there is that balance shaft if the engine has one, that is then hidden by the cover.
I'll have to wait till I see it in person to determine if this is all a problem or not.
I'll have to wait till I see it in person to determine if this is all a problem or not.
The following users liked this post:
adl320 (04-21-2017)
03-24-2017, 11:10 PM
#13
Junior Member
Thread Starter
Join Date: Mar 2017
Posts: 28
Likes: 0
Received 2 Likes
on
2 Posts
CLS63, SL65, GLK350, 360CS, MCS GP2 clone
I haven't seen it in person yet with the front cover off. But looking at factory assembly videos and photos, it just looks like the chain would sag or fall down and loose position with the 2 important gears the crank gear likely not much of a problem until you try lining up the marked links ?(marked links ? does that depend on model of engine?) and then there is that balance shaft if the engine has one, that is then hidden by the cover.
I'll have to wait till I see it in person to determine if this is all a problem or not.
I'll have to wait till I see it in person to determine if this is all a problem or not.
03-24-2017, 11:29 PM
#14
Junior Member
Thread Starter
Join Date: Mar 2017
Posts: 28
Likes: 0
Received 2 Likes
on
2 Posts
CLS63, SL65, GLK350, 360CS, MCS GP2 clone
Intake manifold removal
So I am going to pull the head, technically a broken spring doesn’t mean bent valve, but the odds are against me…I could do the special (rope) trick and replace just the spring but by the time I reassemble everything and the valve did in fact get tagged, it’s easier to just bite the bullet. So we forge on. Disconnect the injector connectors but leave the fuel rails alone other than the feed line

Use a rag to collect fuel that will spill when removed…use that rag to wipe down the oil that spilled when you pulled the valve covers.
Disconnect back PVC hose (just replaced mine but if the car is older it will probably crumble) and vacuum line.
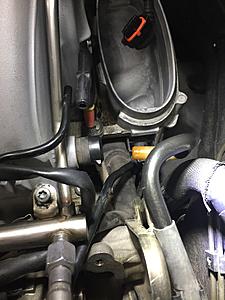
Disconnect intake temp sensor (I broke the clip on mine).

I recommend removing oetiker clamp for the vacuum the tube near the pass headlight since the other side is difficult to reach with manifold in situ.
Pull the intake manifold, now is a good idea to vacuum up any debris in the V before proceeding. The bolts are aluminum one time use so add the to order list.

The intake manifold looks clean despite 70k miles of mostly city driving.
Time, about 20 mins

Use a rag to collect fuel that will spill when removed…use that rag to wipe down the oil that spilled when you pulled the valve covers.

Disconnect back PVC hose (just replaced mine but if the car is older it will probably crumble) and vacuum line.

Disconnect intake temp sensor (I broke the clip on mine).

I recommend removing oetiker clamp for the vacuum the tube near the pass headlight since the other side is difficult to reach with manifold in situ.
Pull the intake manifold, now is a good idea to vacuum up any debris in the V before proceeding. The bolts are aluminum one time use so add the to order list.
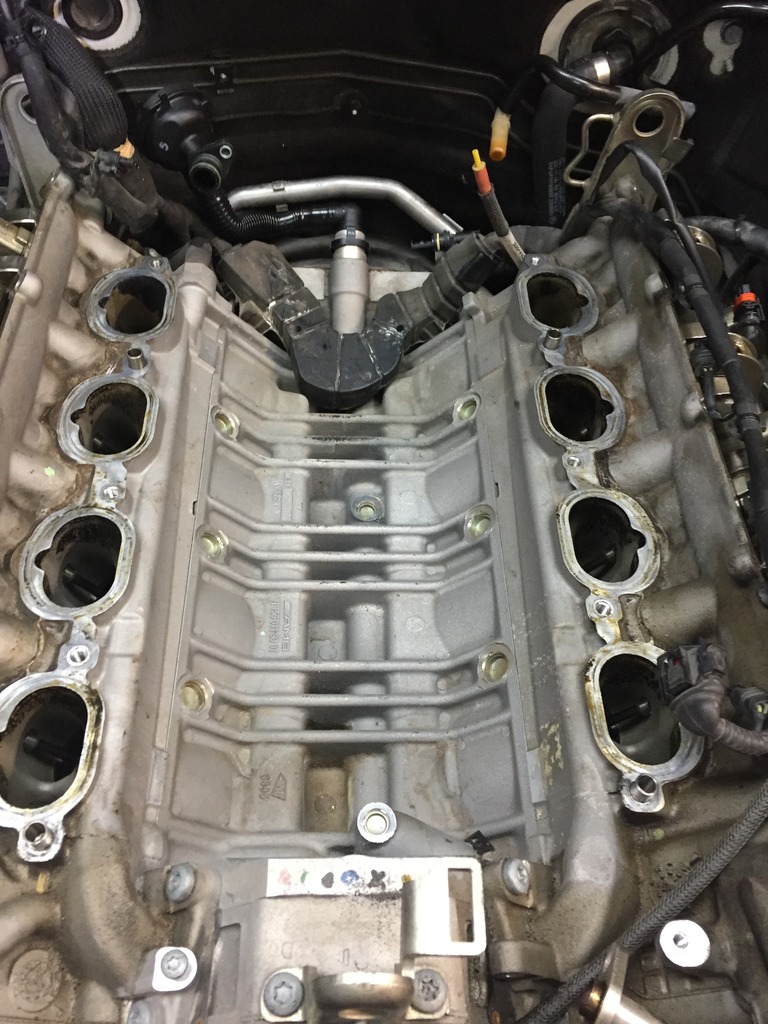
The intake manifold looks clean despite 70k miles of mostly city driving.

Time, about 20 mins
03-24-2017, 11:33 PM
#15
Junior Member
Thread Starter
Join Date: Mar 2017
Posts: 28
Likes: 0
Received 2 Likes
on
2 Posts
CLS63, SL65, GLK350, 360CS, MCS GP2 clone
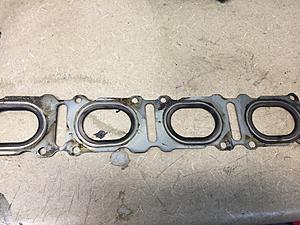
Exhaust manifold removal!
Exhaust manifold is an easy job (by exhaust standards) as all 8 bolts are accessible from the top of the engine with reasonable dexterity – in my case 7 of the 8 studs came out with the bolts.

To remove manifold from head, you will need to disconnect from down pipe – two bolts (E12 torx) – again the accessibility is surprising good from under the car.
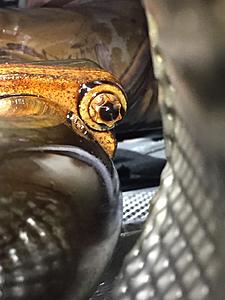
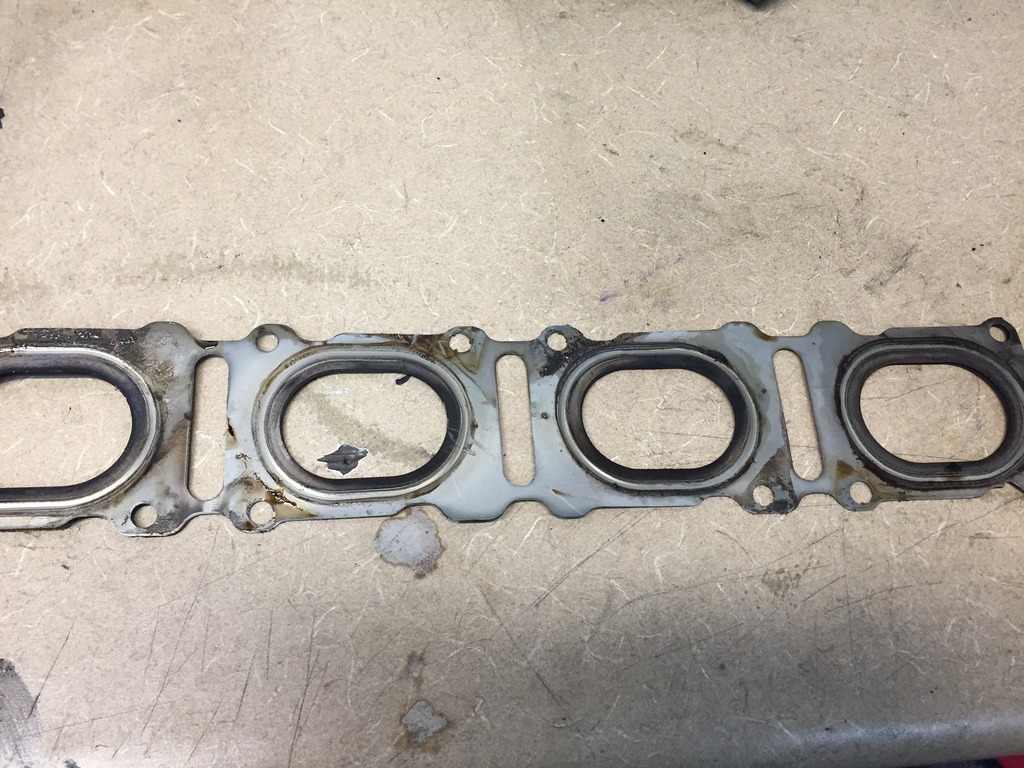
Once those are removed, gasket comes out and the manifold can be laid on its side for better clearance (once the head is off I will put it a clean off the oil that spilled).
1hr
To remove manifold from head, you will need to disconnect from down pipe – two bolts (E12 torx) – again the accessibility is surprising good from under the car.

Once those are removed, gasket comes out and the manifold can be laid on its side for better clearance (once the head is off I will put it a clean off the oil that spilled).

1hr
03-24-2017, 11:54 PM
#16
Junior Member
Thread Starter
Join Date: Mar 2017
Posts: 28
Likes: 0
Received 2 Likes
on
2 Posts
CLS63, SL65, GLK350, 360CS, MCS GP2 clone
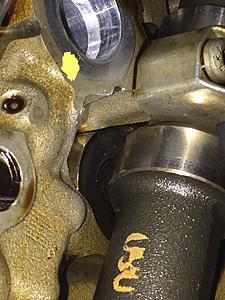
Removing cams
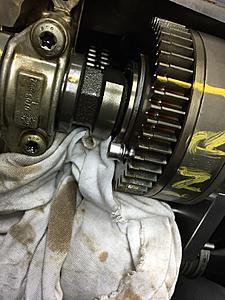
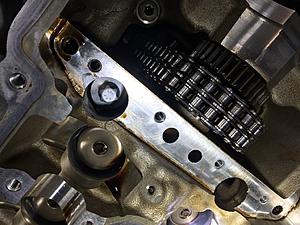
Time to pull the cams. This requires a special that locks the cams in place (pretty common BMW and Minis have this set up) when the crank is indexed at a specific place. Rotate crank to the 40 mark after TDC on the damper and make sure the cams have the threaded holes to lock the phaser in the correct place (the part number codes should be visible on the phaser body and the locking tool should easy slide in.
.. Use M4 8mm to lock the narrower gear in place - if it’s longer than that, it will bottom out and you won’t have the narrower gear secured properly (Put a rag under to avoid dropping the bolt in the block!)
Stop take a breather and get on favorite paint pen color (I like yellow), mark each cam, Exh vs Int and left or right. Do the same with the phaser and reference the front part of the phaser (notched disks) in relation to the body.. I inserted the timing tool (silver) to make sure everything was aligned. Insert the locking tools (front and back of cam) and use the cam cover bolts to secure in place.
Now the phaser bolts come off and the phaser are removed.
Mind the very thin washer btw the cams and the phaser – expect a fair amount of oil to seep out. Now the only thread on MBWorld I was able to find showed the contributor (working on a C63) pulling the cams with the phaser in place…honestly I am not sure how that works since you can’t release the cam loading prior to removing the bearing caps (not sure how the cams get put back in place – contributor doesn’t show how it was reassembled.
After removing the phasers, remove the locking tool and rotate the cams until the cams are “loose”, i.e. not loading a valve spring.
Now unbolt the caps and make sure you keep everything in order as you can’t switch them around. I take a marker and put a dot on the cam caps towards the front of the engine to make it easier to ID.
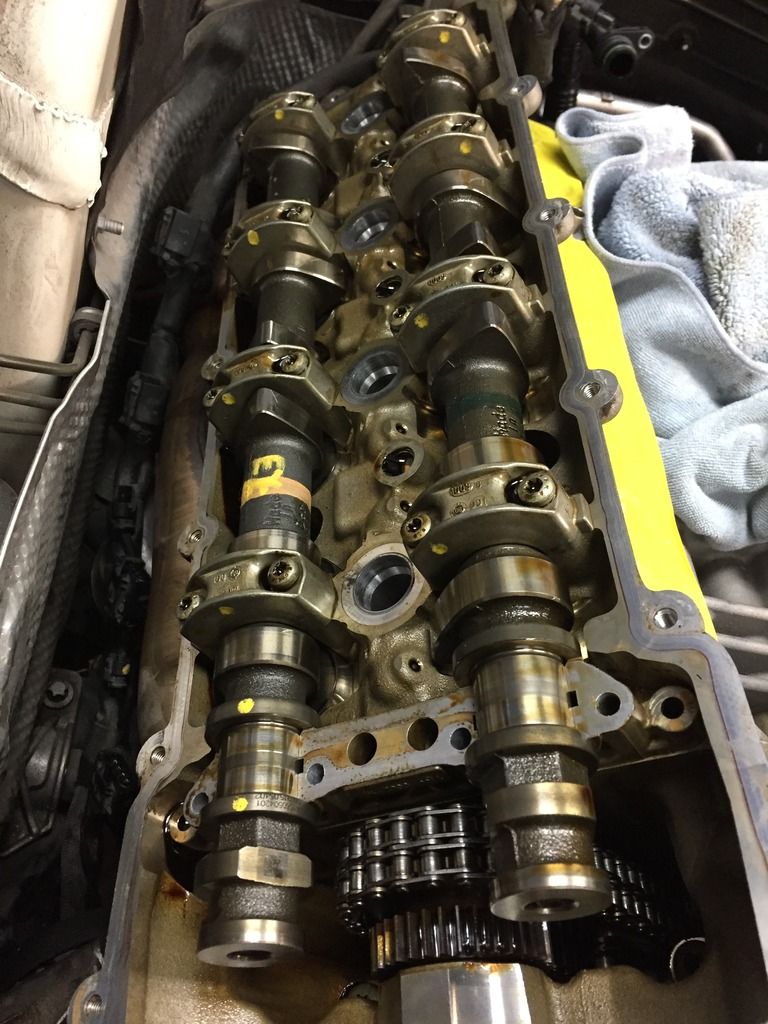
The cams look quite good, so will not need replacement, though may send out for polishing…valve buckets do show wear with over half needing replacement IMHO.

2 hrs


.. Use M4 8mm to lock the narrower gear in place - if it’s longer than that, it will bottom out and you won’t have the narrower gear secured properly (Put a rag under to avoid dropping the bolt in the block!)

Stop take a breather and get on favorite paint pen color (I like yellow), mark each cam, Exh vs Int and left or right. Do the same with the phaser and reference the front part of the phaser (notched disks) in relation to the body.. I inserted the timing tool (silver) to make sure everything was aligned. Insert the locking tools (front and back of cam) and use the cam cover bolts to secure in place.
Now the phaser bolts come off and the phaser are removed.

Mind the very thin washer btw the cams and the phaser – expect a fair amount of oil to seep out. Now the only thread on MBWorld I was able to find showed the contributor (working on a C63) pulling the cams with the phaser in place…honestly I am not sure how that works since you can’t release the cam loading prior to removing the bearing caps (not sure how the cams get put back in place – contributor doesn’t show how it was reassembled.
After removing the phasers, remove the locking tool and rotate the cams until the cams are “loose”, i.e. not loading a valve spring.

Now unbolt the caps and make sure you keep everything in order as you can’t switch them around. I take a marker and put a dot on the cam caps towards the front of the engine to make it easier to ID.


The cams look quite good, so will not need replacement, though may send out for polishing…valve buckets do show wear with over half needing replacement IMHO.
2 hrs
03-25-2017, 12:12 AM
#17
Junior Member
Thread Starter
Join Date: Mar 2017
Posts: 28
Likes: 0
Received 2 Likes
on
2 Posts
CLS63, SL65, GLK350, 360CS, MCS GP2 clone
Removing timing gears and chain
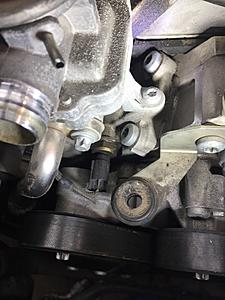
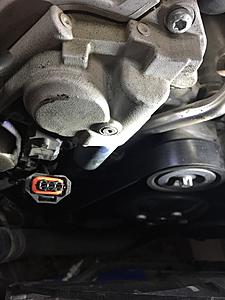
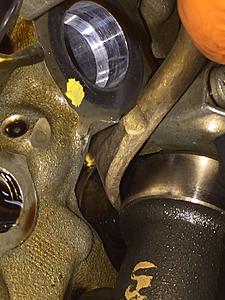
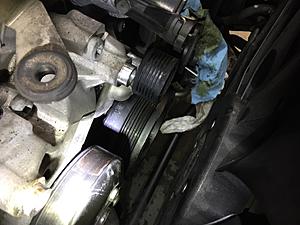
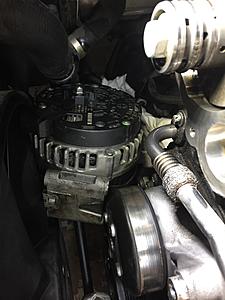
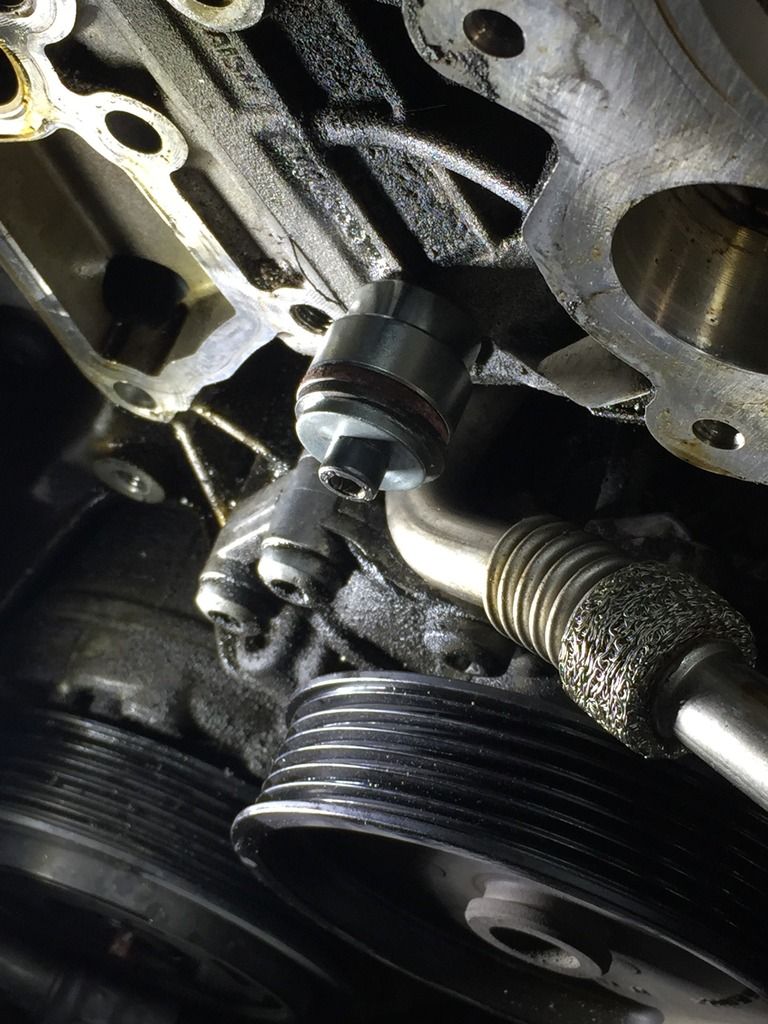
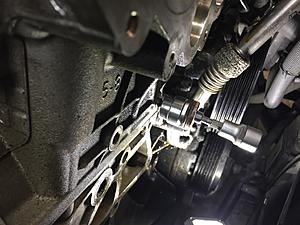
Remove the alternator to access the chain tensioner. Start by disconnecting the connector and main lead to the alternator (obviously the battery as been disconnected) with a 13 mm, then 4 E12 Torx bolts holding it in place. You don’t need to pull it – in my case I moved it forward to provide clearance to the tensioner.
Tensioner access isn’t great but a 24mm socket will extension and breaker bar will get it moving. Again there will be oil…so have rag ready (bad pics).
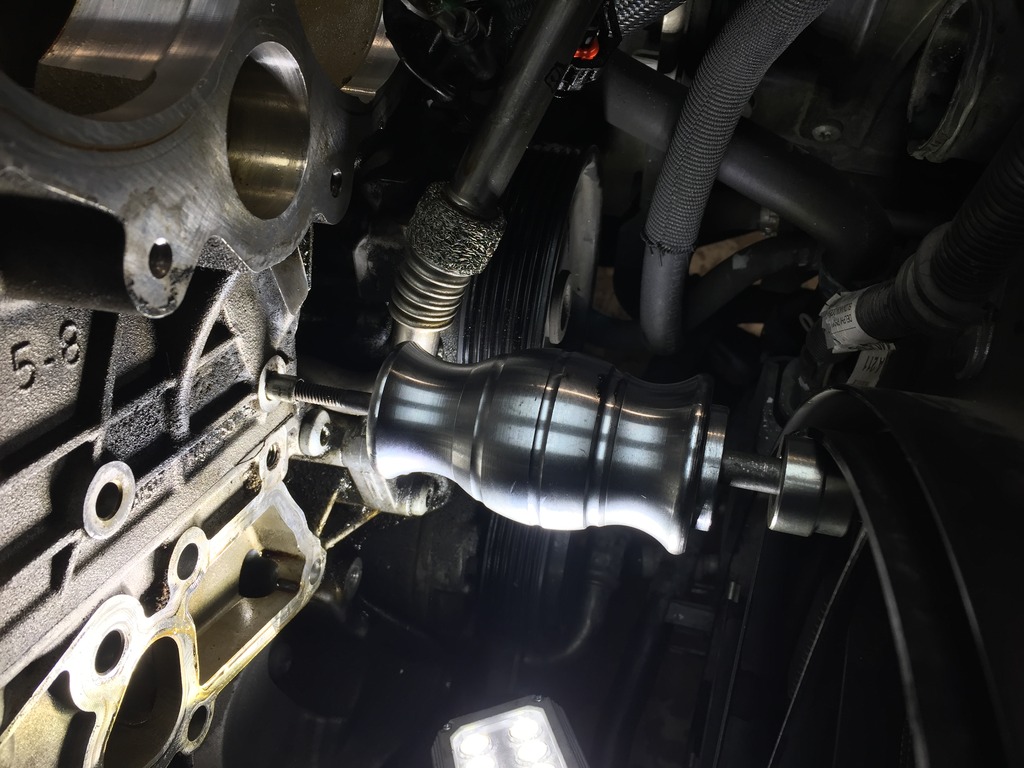
This loosens the upper timing chain and allows the upper sprockets to be removed. You will need another timing tool part # 156-589003400 and the recommended puller which looks like $300 paperweight so I decided to pass and improvise as needed. Bolt handle is not MB part
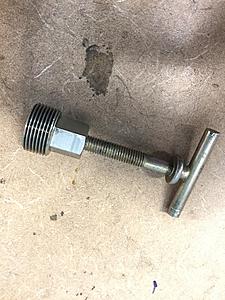
Remove allens that hold the shaft in place and insert the socket.
Good news was that I was able to remove the shaft of the left head with just the hand puller. The right didn’t want to budge so I decided to wait and see if I really needed it to come out (the head is ok and don't plan to pull off).
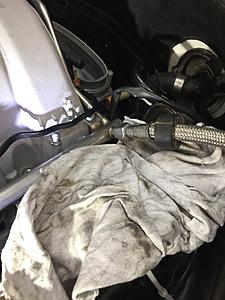
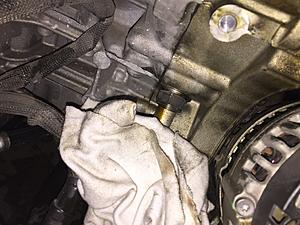
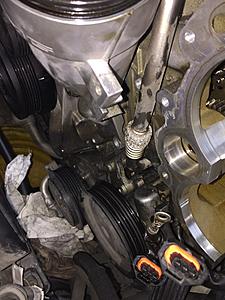
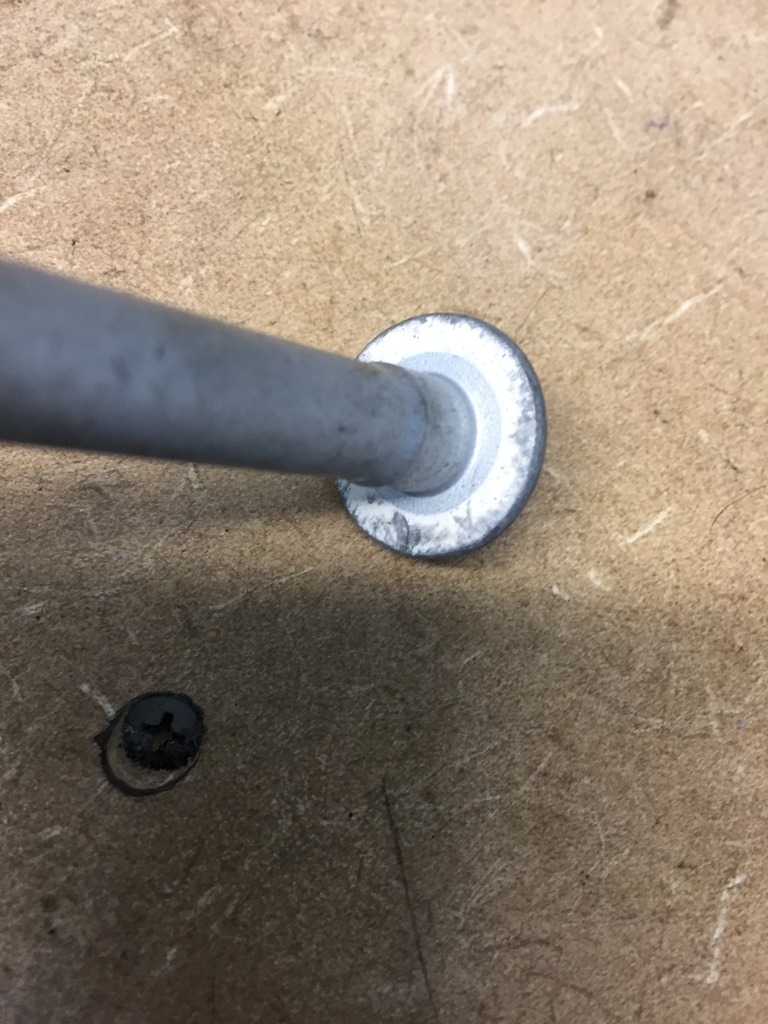
On to the timing rail pins (2 per side) and both are obstructed by something, upper one required removal of the oil filter mount, which requires removal of the belt tension since one of the lower is obstructed. The lower pin requires pulling the metal hose – access is under the head and "fiddly".
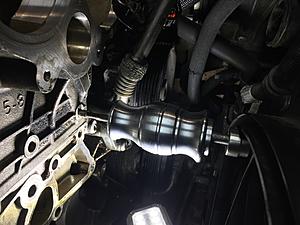
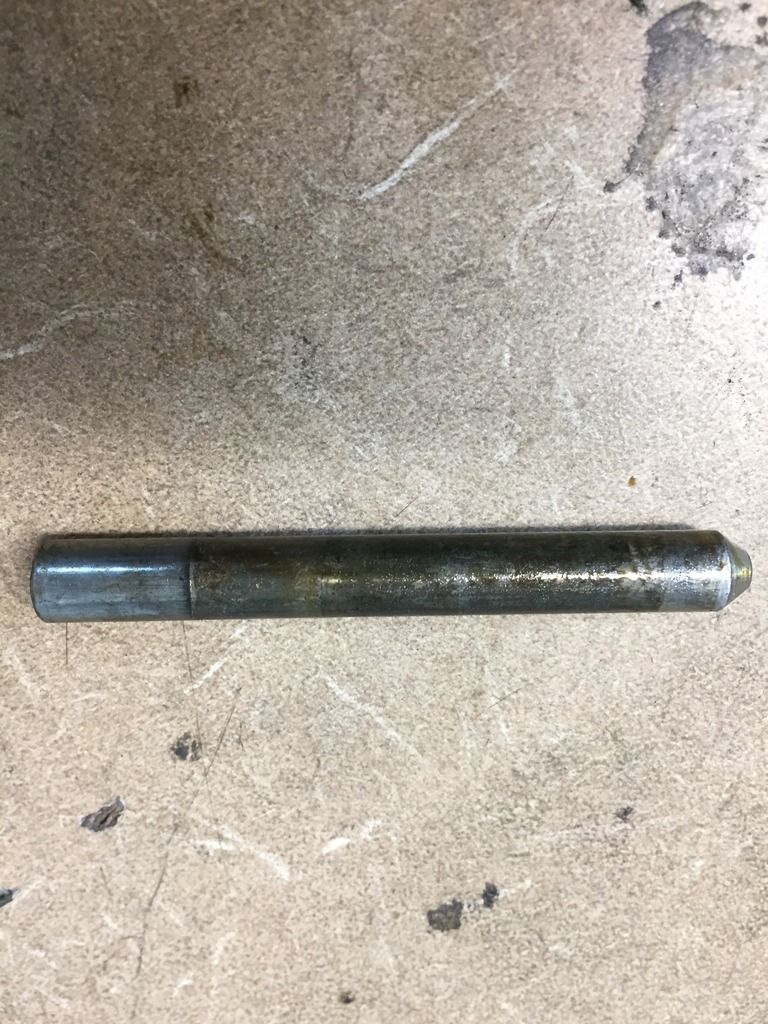
Now with pins exposed you need a m4 stud to insert in the end of the pin and the magical $300 paperweight puller that I don’t have… This turns out to be my biggest headache to date. So I improvise and take my blind hole bearing puller apart to use the slider weight and a long bolt to which I weld and M4 bolt – Voila! – shady tree mechanic version of the tool.
So I spend 10-15 minutes whacking at the pin with no success. I am thinking this is going to end up in tears and the bolt or the treads in the pin are going to strip and I will be SOL. Approach version 1.5, I take another M4 and large washer and thread into the pin
Bingo – after a little nudge the pin moves
…I add washers and am able to finish pulling it with my awesome puller. On to the bottom pin where I used a similar approach. 3 hrs because of the headaches!
Pin one of two out (will replace with new one)
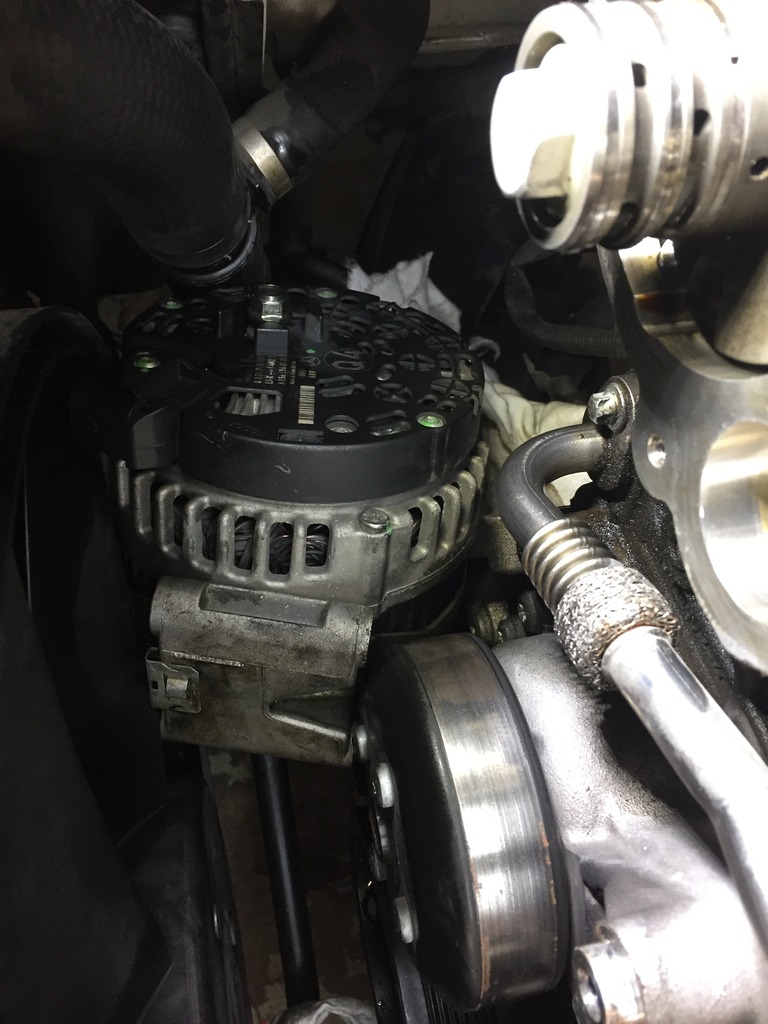
Tensioner access isn’t great but a 24mm socket will extension and breaker bar will get it moving. Again there will be oil…so have rag ready (bad pics).

This loosens the upper timing chain and allows the upper sprockets to be removed. You will need another timing tool part # 156-589003400 and the recommended puller which looks like $300 paperweight so I decided to pass and improvise as needed. Bolt handle is not MB part

Remove allens that hold the shaft in place and insert the socket.

Good news was that I was able to remove the shaft of the left head with just the hand puller. The right didn’t want to budge so I decided to wait and see if I really needed it to come out (the head is ok and don't plan to pull off).
On to the timing rail pins (2 per side) and both are obstructed by something, upper one required removal of the oil filter mount, which requires removal of the belt tension since one of the lower is obstructed. The lower pin requires pulling the metal hose – access is under the head and "fiddly".

Now with pins exposed you need a m4 stud to insert in the end of the pin and the magical $300 paperweight puller that I don’t have… This turns out to be my biggest headache to date. So I improvise and take my blind hole bearing puller apart to use the slider weight and a long bolt to which I weld and M4 bolt – Voila! – shady tree mechanic version of the tool.
So I spend 10-15 minutes whacking at the pin with no success. I am thinking this is going to end up in tears and the bolt or the treads in the pin are going to strip and I will be SOL. Approach version 1.5, I take another M4 and large washer and thread into the pin

Bingo – after a little nudge the pin moves

…I add washers and am able to finish pulling it with my awesome puller. On to the bottom pin where I used a similar approach. 3 hrs because of the headaches!
Pin one of two out (will replace with new one)
 03-25-2017, 12:19 AM
#18
Junior Member
Thread Starter
Join Date: Mar 2017
Posts: 28
Likes: 0
Received 2 Likes
on
2 Posts
CLS63, SL65, GLK350, 360CS, MCS GP2 clone
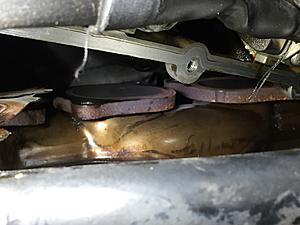
Head removal
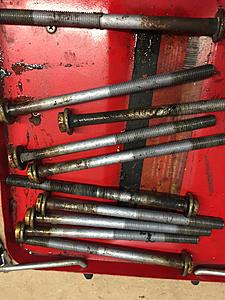
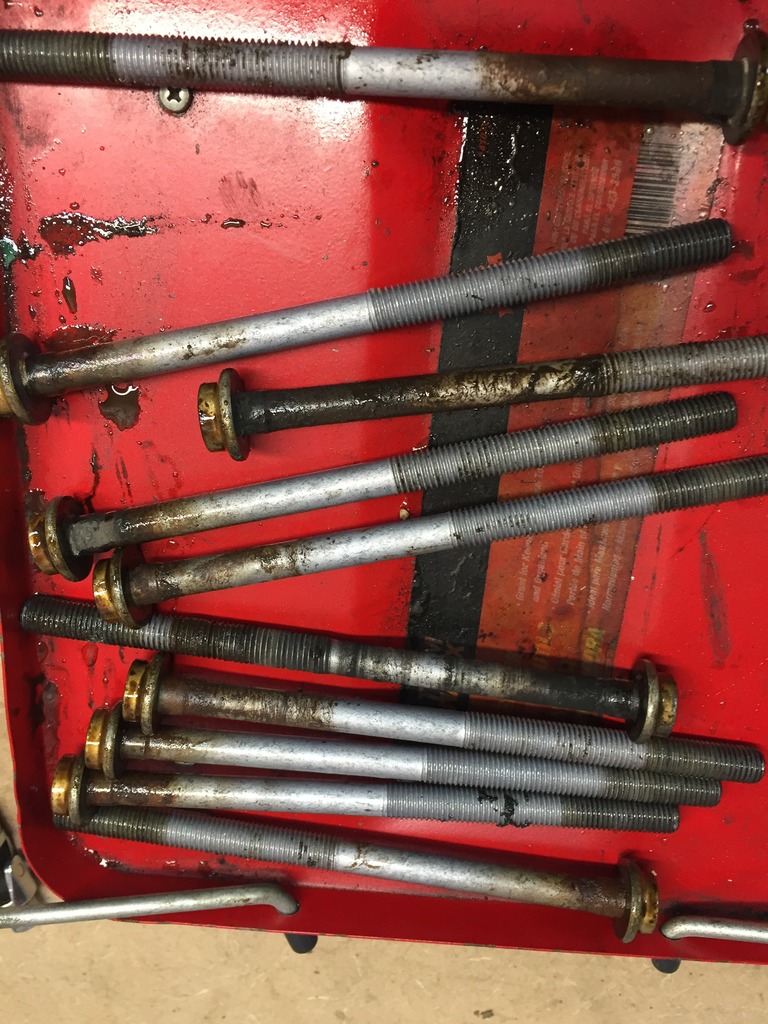
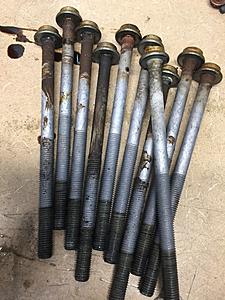
I am only pulling the driver side head which has the problem though I will be replacing all the head bolts. By all accounts the driver is the more “tricky” side as the steering pump is in the way so if you have to do the other side, it should be “easier”. Remove the front 4 bolts – Torx 45 and move to the headbolts. Follow the reverse removal sequence to loosen the headbolts (I started with 90 degree turn for all bolts and then another 90 degree before completely loosen. Only one bolt felt a tad easier than the others – but overall; no surprises. Bolts condition is ok – some surface rust but nothing to freak out about - will replace on both heads.
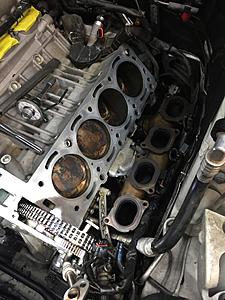
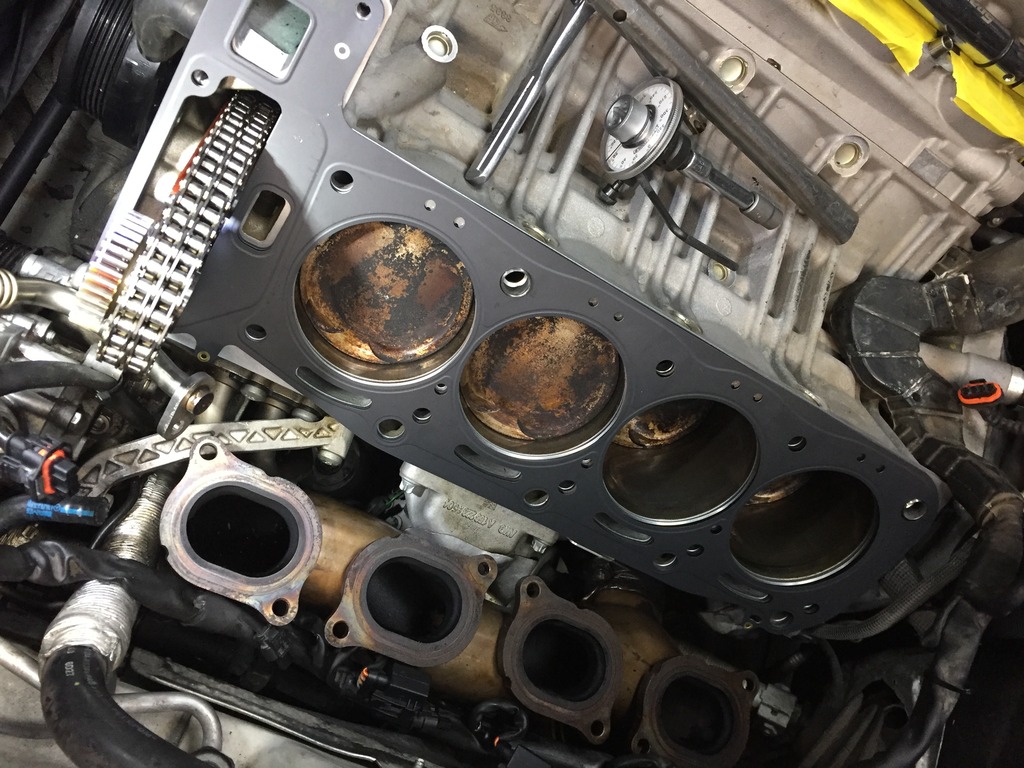
Now small nudge the head, expect some coolant to spill…
Success, head come off cleanly! 1 hour because I did a brief conference call.
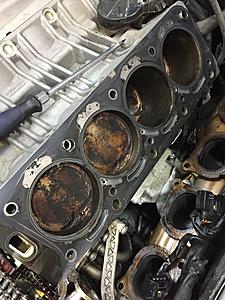
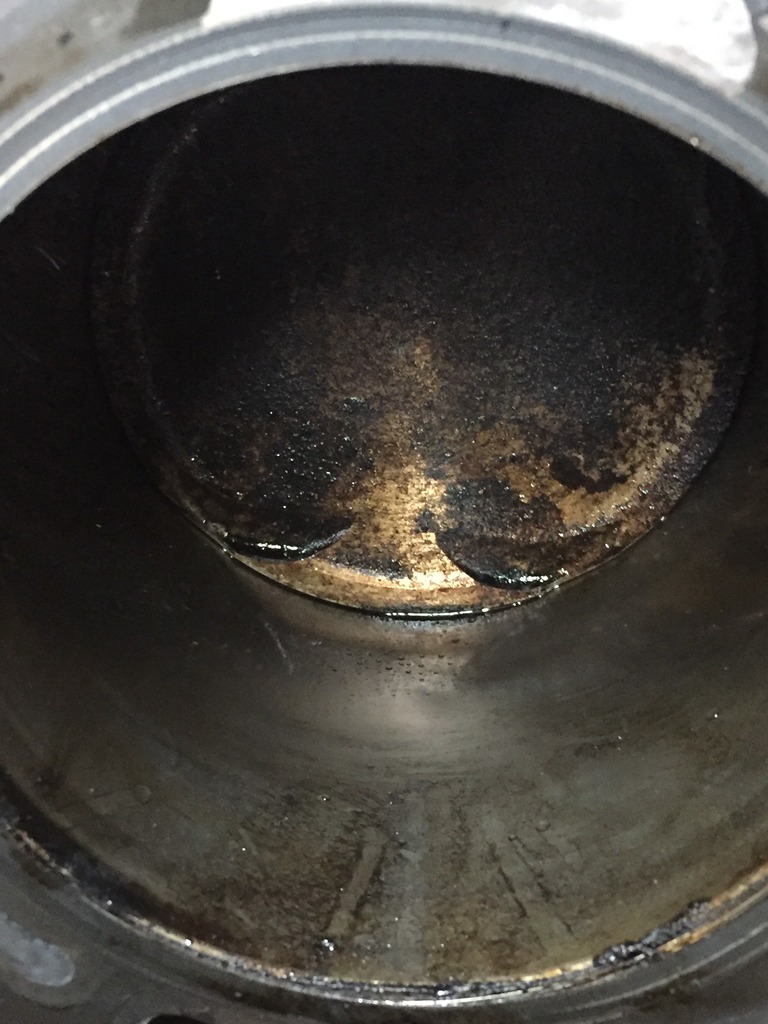
Pistons look good with expected carbon build up...strangely no marks on the piston...maybe some good news?

Now small nudge the head, expect some coolant to spill…

Success, head come off cleanly! 1 hour because I did a brief conference call.
Pistons look good with expected carbon build up...strangely no marks on the piston...maybe some good news?
 03-25-2017, 12:25 AM
#19
Junior Member
Thread Starter
Join Date: Mar 2017
Posts: 28
Likes: 0
Received 2 Likes
on
2 Posts
CLS63, SL65, GLK350, 360CS, MCS GP2 clone
Culprit
Considering the mileage (mostly city driving), the head and pistons looks very clean with nominal carbon build up.
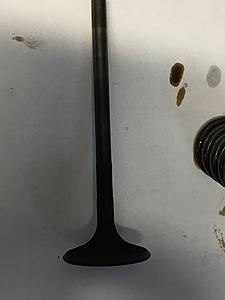
My first assessment of a broken spring and bent exhaust valve is partially correct, valve looks good.
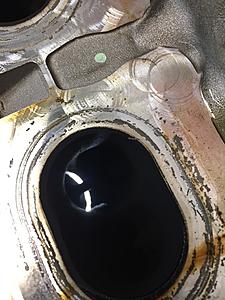
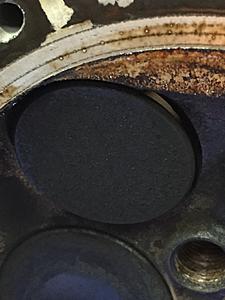
The spring is definitely broken but fortunately the valve did NOT get tagged…
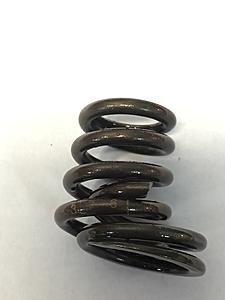
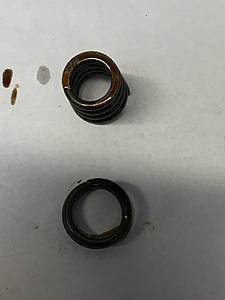
so will blue the valve but since the leak down of the other cylinder is excellent, I plan a simple clean up.

My first assessment of a broken spring and bent exhaust valve is partially correct, valve looks good.


The spring is definitely broken but fortunately the valve did NOT get tagged…


so will blue the valve but since the leak down of the other cylinder is excellent, I plan a simple clean up.
 03-25-2017, 12:30 AM
#20
Junior Member
Thread Starter
Join Date: Mar 2017
Posts: 28
Likes: 0
Received 2 Likes
on
2 Posts
CLS63, SL65, GLK350, 360CS, MCS GP2 clone
..time to start a polemic, word is that dealers are seeing this kind of failure on a regular basis, so after the head bolts...valve springs failure is the next sword of Damocles hanging over the M156 engine owner
03-25-2017, 08:36 AM
#21
Super Member

Join Date: Dec 2009
Location: Dhahran, KSA
Posts: 743
Received 91 Likes
on
73 Posts
2020 E 300 Coupe and 2019 GLS 400
Amazing! Kudos for not only doing this job but also taking HQ pics of every step.
Regarding the removal of the cams with the adjusters together, I have seen at least three guys who did that with no issues. Only thing is you need to remove the bridges holding the cams slowly/very carefully so the pressure will no break the cams.
TBH I don't know how they managed Installing the cams with the adjusters in place, one bloke said it was very hard and took him longer time, so he removed the adjuster on the other side when he started working on it.
Well, it looks like defective camshafts, camshaft adjusters, valve tappets(bucket) and headbolts are not enough of a headache/nightmare on the M156 we are now hearing of broke valve springs..... No wonder the M157 is based on Mercedes M278 engine, and tuned by AMG (same as the M113)
Good luck mate!
Last edited by Solo wing; 03-25-2017 at 08:41 AM.
03-25-2017, 02:55 PM
#22
Junior Member
Thread Starter
Join Date: Mar 2017
Posts: 28
Likes: 0
Received 2 Likes
on
2 Posts
CLS63, SL65, GLK350, 360CS, MCS GP2 clone
Amazing! Kudos for not only doing this job but also taking HQ pics of every step.
Regarding the removal of the cams with the adjusters together, I have seen at least three guys who did that with no issues. Only thing is you need to remove the bridges holding the cams slowly/very carefully so the pressure will no break the cams.
TBH I don't know how they managed Installing the cams with the adjusters in place, one bloke said it was very hard and took him longer time, so he removed the adjuster on the other side when he started working on it.
Well, it looks like defective camshafts, camshaft adjusters, valve tappets(bucket) and headbolts are not enough of a headache/nightmare on the M156 we are now hearing of broke valve springs..... No wonder the M157 is based on Mercedes M278 engine, and tuned by AMG (same as the M113)
Good luck mate!
Regarding the removal of the cams with the adjusters together, I have seen at least three guys who did that with no issues. Only thing is you need to remove the bridges holding the cams slowly/very carefully so the pressure will no break the cams.
TBH I don't know how they managed Installing the cams with the adjusters in place, one bloke said it was very hard and took him longer time, so he removed the adjuster on the other side when he started working on it.
Well, it looks like defective camshafts, camshaft adjusters, valve tappets(bucket) and headbolts are not enough of a headache/nightmare on the M156 we are now hearing of broke valve springs..... No wonder the M157 is based on Mercedes M278 engine, and tuned by AMG (same as the M113)
Good luck mate!
03-25-2017, 03:26 PM
#23
Junior Member
Thread Starter
Join Date: Mar 2017
Posts: 28
Likes: 0
Received 2 Likes
on
2 Posts
CLS63, SL65, GLK350, 360CS, MCS GP2 clone
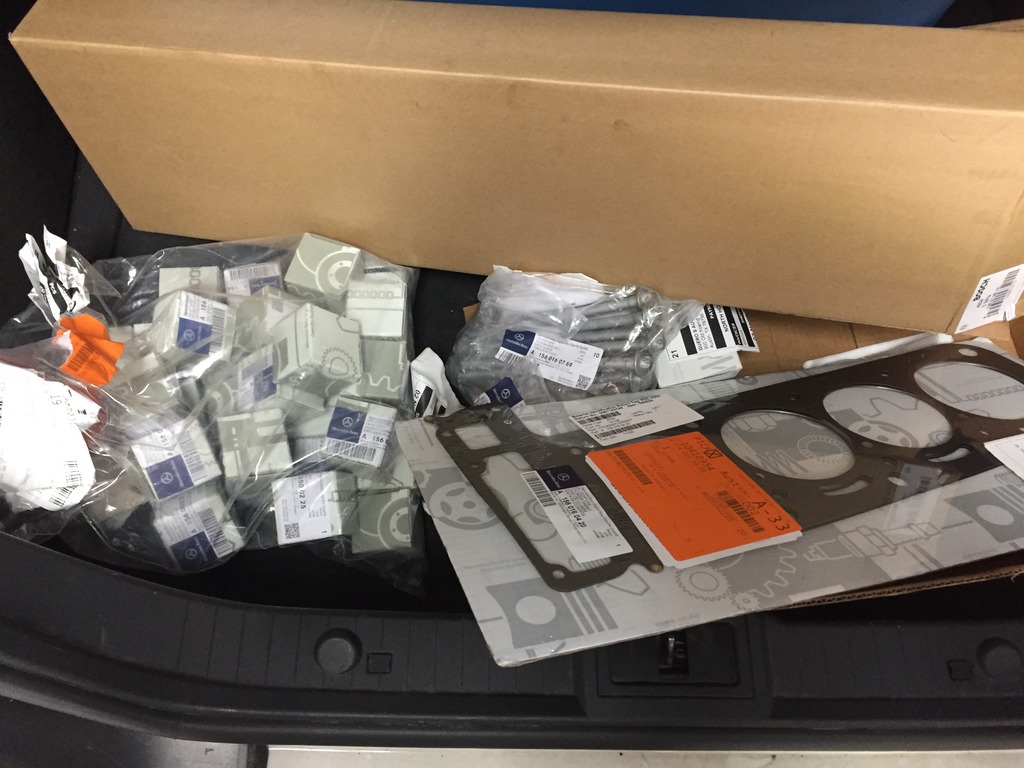
Parts list
I decided to go with MB head bolts since it the car is use primarily as a DD and no performance upgrades are planned. Bolts have been superseded 4 times so I hope the latest iteration is good (My car didn’t have the leaking coolant issue). Also decided to replace all the valve buckets with MB part, the M156 part has been superseded and is actually the SLS version...though I didn’t spring for the special friction coating for another $400! Also add to the list the phasor bolts (not sure if they are one time use but better safe than sorry), intake manifold bolts, rail pins… gaskets etc… Only hitch...spring has to be shipped from Germany so 2 weeks delay- but magically it appeared less than 48 hours later!

So only missing piece is the WIS!
So only missing piece is the WIS!
03-25-2017, 03:28 PM
#24
Junior Member
Thread Starter
Join Date: Mar 2017
Posts: 28
Likes: 0
Received 2 Likes
on
2 Posts
CLS63, SL65, GLK350, 360CS, MCS GP2 clone
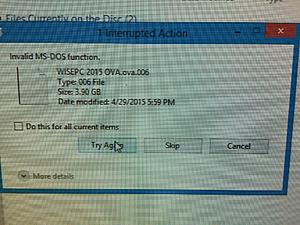
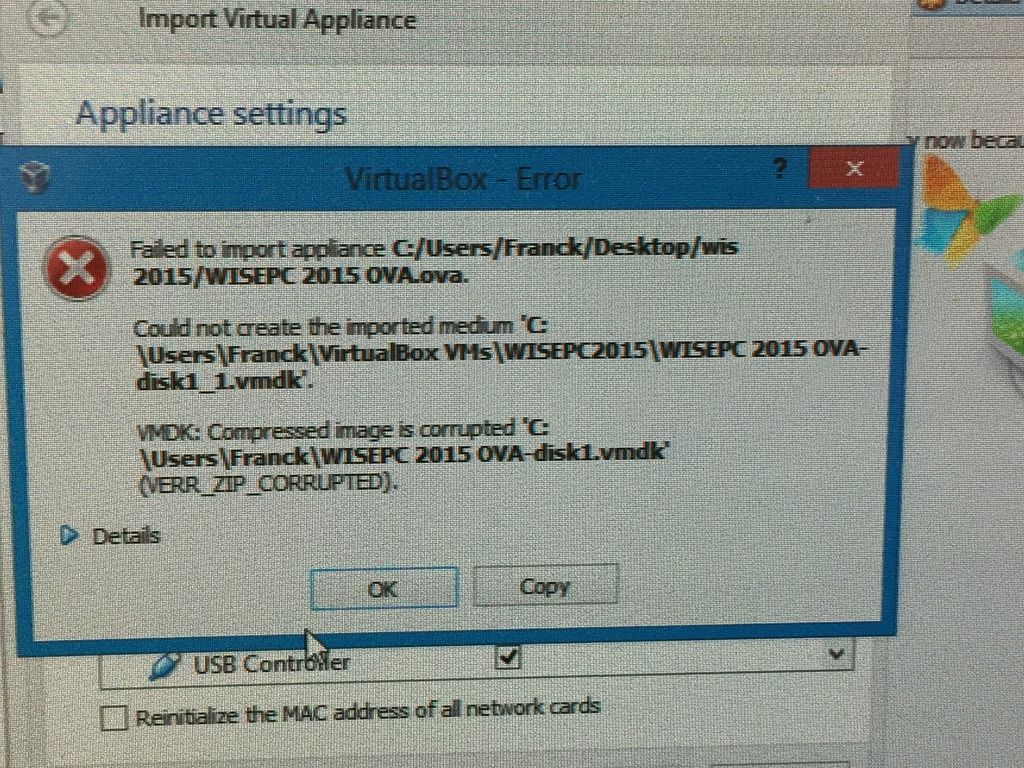
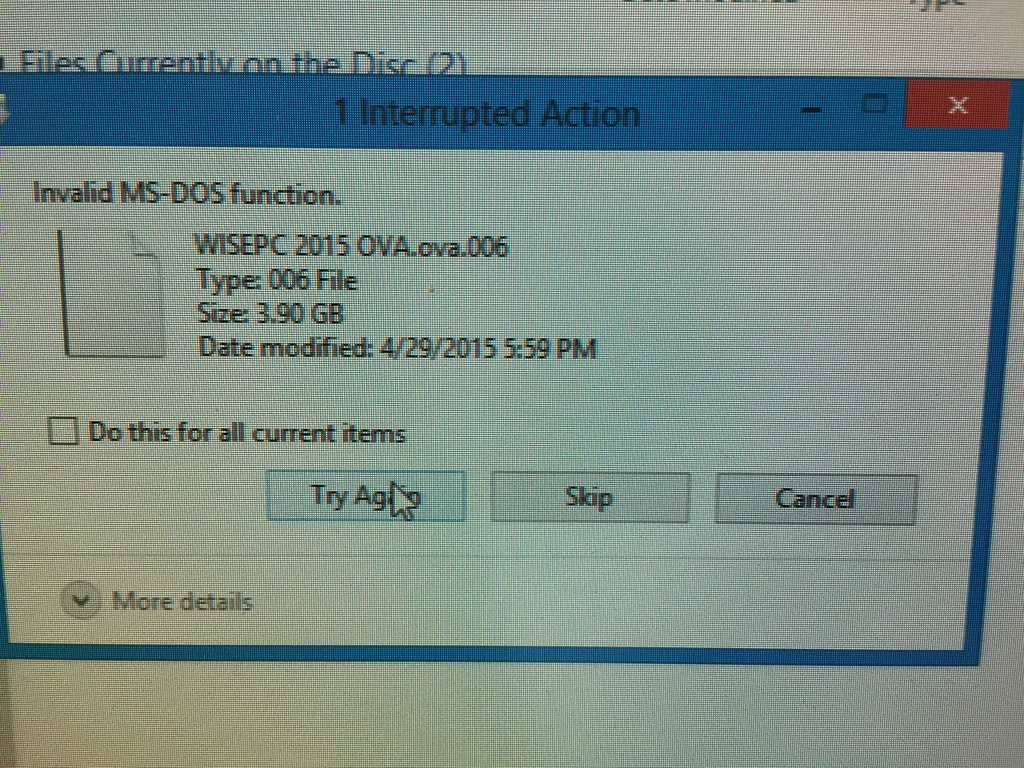
WIS
I ordered (off Ebay) the WIS to get the correct torque values and any special prep of the parts. Honestly that proved to be the most frustrating and time consuming part of the whole project. First, one the disks was bad, then the Virtual machine would load the files on and on…finally got to run on my Mac after clearing up space (major space hog). That said, the software is pretty cool, enter your VIN and it give step by step instruction for everything! 4 hours wasted!
 03-25-2017, 06:44 PM
#25
Junior Member
Thread Starter
Join Date: Mar 2017
Posts: 28
Likes: 0
Received 2 Likes
on
2 Posts
CLS63, SL65, GLK350, 360CS, MCS GP2 clone
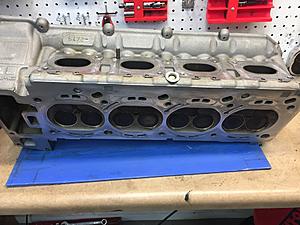
Clean and Reassemble
Standard stuff, blue and lap the valve and reassemble (always fun to slide those keepers…, fortunately I am only doing one!)
Head gets cleaned as does the block
Time to drop the exhaust manifold back in and the metal hose the go to the air valve. Real PITA to reinstall as the bolt to secure is out of sight under the head. DO NOT tighten until the chain rail pins are in place (see below - hose is in the way of one the pins).
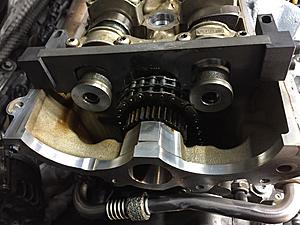
NB the upper chain socket is not touched or removed during the head removal process, it stays in place (prevents the chain from falling) as the head slides out, so installing the head back on is the reverse process – it’s a tight fit but easy to do with a little patience.

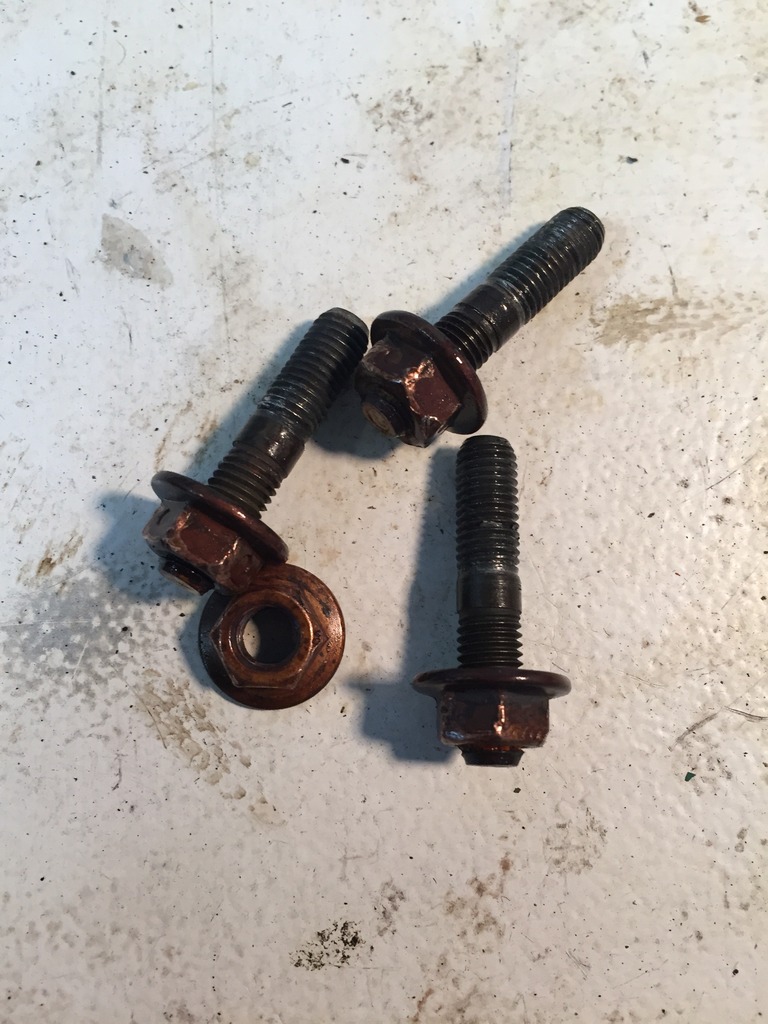
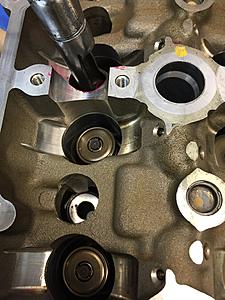
The revised head bolts look different and have special coating on the load bearing side.

Head bolts had a specific tightening sequence and a 5 stage loading
10NM – 50NM – 90 degrees plus 90 plus 90. I have a simple torque angle gauge for that.
The passenger side bolts get replaced, one at a time (confirmed that is was ok). I use brake cleaner to make sure everything is clean where the bolt loads up the head.
again the bolts look OK.
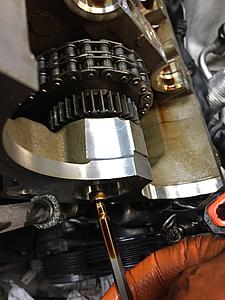
Now the head is in place, reinsert the chain socket shaft and tighten the M4 Allen bolt that keeps it in place and tap in the new chain rail pins till they are flush. Time to load up the chain by installing the tensioner, good time too to check that crank is still at the 40 degree mark.
Head gets cleaned as does the block


Time to drop the exhaust manifold back in and the metal hose the go to the air valve. Real PITA to reinstall as the bolt to secure is out of sight under the head. DO NOT tighten until the chain rail pins are in place (see below - hose is in the way of one the pins).
NB the upper chain socket is not touched or removed during the head removal process, it stays in place (prevents the chain from falling) as the head slides out, so installing the head back on is the reverse process – it’s a tight fit but easy to do with a little patience.
The revised head bolts look different and have special coating on the load bearing side.
Head bolts had a specific tightening sequence and a 5 stage loading
10NM – 50NM – 90 degrees plus 90 plus 90. I have a simple torque angle gauge for that.

The passenger side bolts get replaced, one at a time (confirmed that is was ok). I use brake cleaner to make sure everything is clean where the bolt loads up the head.

again the bolts look OK.

Now the head is in place, reinsert the chain socket shaft and tighten the M4 Allen bolt that keeps it in place and tap in the new chain rail pins till they are flush. Time to load up the chain by installing the tensioner, good time too to check that crank is still at the 40 degree mark.


