Mercedes-Benz C-Class AMG: How to Replace Crankshaft Position Sensor
The crankshaft position sensor has been known to be a common fault on the C-Class AMG. Its position on the engine makes it susceptible to high levels of heat. Fortunately, replacement is simple, even for the inexperienced.
This article applies to the Mercedes-Benz C-Class AMG (2007-2014).
The crankshaft position sensor is known as a hall-effect sensor. It works by reacting to changes in the magnetic field between the sensor and the reluctor wheel on the crankshaft. While these changes occur, a voltage level is supplied to the computer which is used to identify where the position of the piston is at. The sensor itself is fragile and can be broken by vibration as well as extreme temperature fluctuations. A cracked sensor will disrupt the magnetic field and may result in your C-Class AMG engine failing to start. Learn how to replace the crank position sensor in a few easy steps.

Materials Needed
- 3/8" ratchet
- 8" extension
- E8 external Torx socket
- Towel
Step 1 – Verify you have the correct part
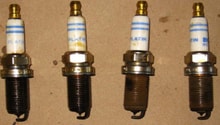
Mix-ups happen. Verify you have the correct part by matching it up with the sensors in Figure 1.

Step 2 – Remove the engine covers
- The engine cover is two pieces. The smaller one (with the Mercedes symbol at the front) is removed by pulling upwards on both sides.
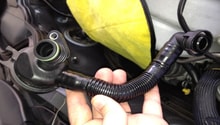
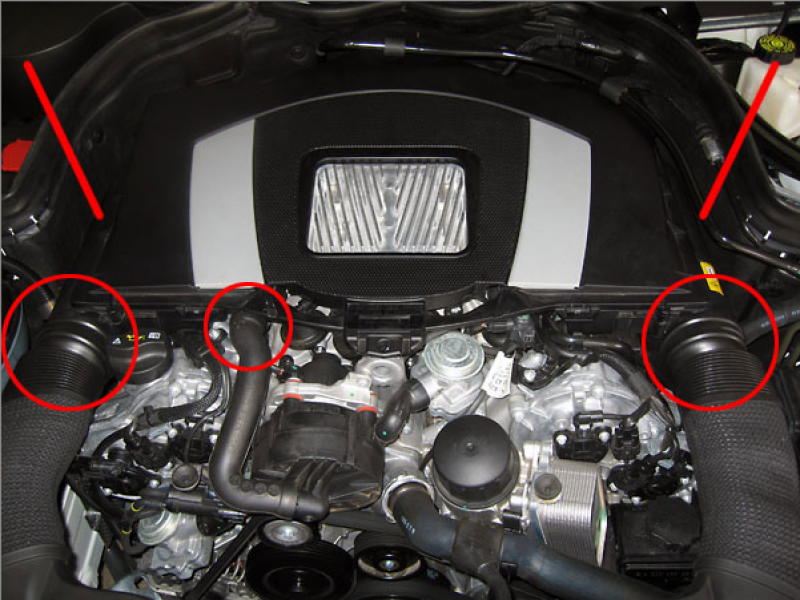
- Now remove the two flexible intake tubes as well as a rubber hose that is pictured in Figure 2. Pull them towards the front of the vehicle to remove them.
- Remove the rear engine cover by grasping the sides and pulling upwards.
Step 3 – Remove the y-pipe/air boxes
- Now begin removing the air boxes by disconnecting the MAF sensor wiring harness connectors.
- The base of the rubber y-pipe is secured onto the intake by two clips. Remove the y-pipe from the intake by creating space between the intake and clips then pulling the y-pipe off of the intake. Both air boxes will come off with the y-pipe.
- Place a towel over the open intake so nothing is dropped inside.
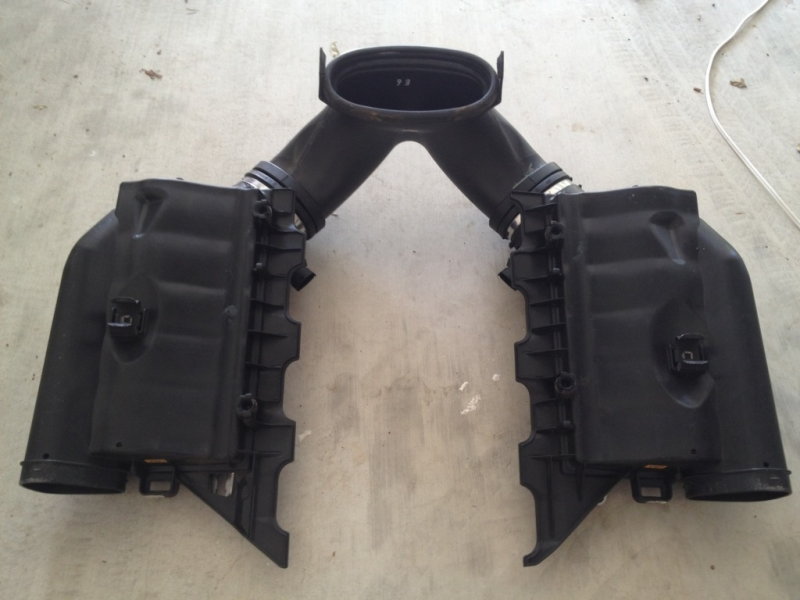
Figure 3. The bottom side of the y-pipe/air boxes. 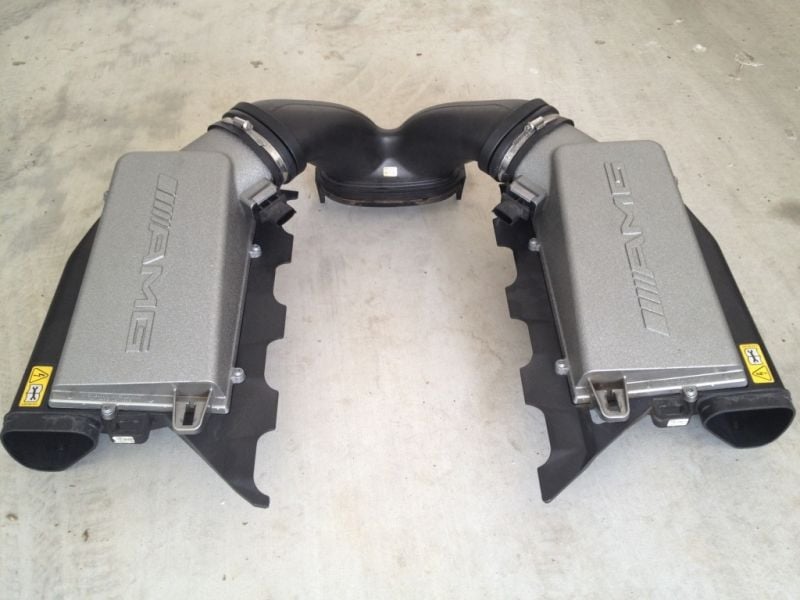
Figure 4. The top of the y-pipe/air box.
Step 4 – Remove/Install the crankshaft position sensor
- Locate the sensor at the rear of the engine above the transmission. There is heat shield wrap surrounding the wiring connector. Lift the wrap up and squeeze the flexible tab on the connector while pulling it up towards you.
- Now grab your tools and remove the E8 bolt holding the sensor in place.
- Once the bolt is removed, the sensor will lift out of the hole.
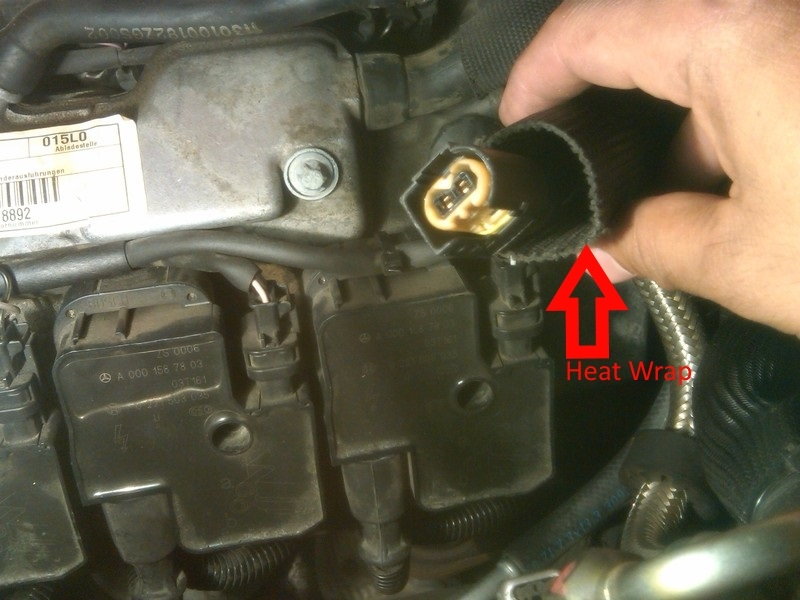
Figure 5. The heat shield wrap around the wiring. 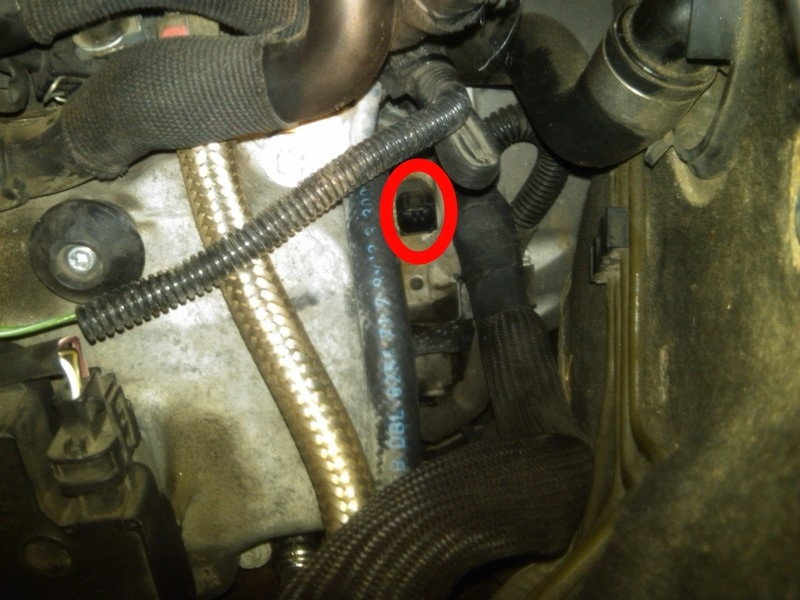
Figure 6. The red circle identifies the location of the crankshaft position sensor. 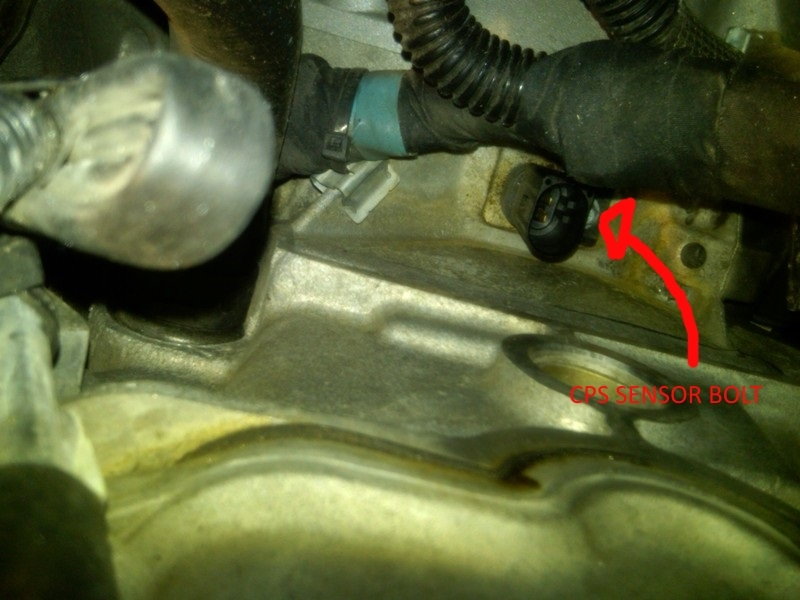
Figure 7. The CPS sensor bolt is identified by the arrow.
Lastly, install the sensor, and check that it is secured snugly.
- Reconnect all of the electrical connections.
- Reinstall the airbox.
- Refit the engine covers.
Start the car, check for error codes left by the old sensor or its removal, and clear them with a STAR diagnostic tool.
Related Discussions
- Crank Position Sensor DIY - MBWorld.org
- Symptoms of Faulty CPS - MBWorld.org
- M156 Engine Not Timed Right - MBWorld.org