Mercedes-Benz E-Class AMG: How to Replace Engine Air Filter
Hesitation off the line or a bit of stutter under wide-open-throttle can be signs of a clogged engine air filter. Read on to see how easily accessible the Mercedes-Benz E-Class AMG air filters are.
This article applies to the Mercedes-Benz E-Class AMG (2002-2009).
Your Mercedes-Benz E-Class AMG is an efficient and powerful car. It draws cold air from the outside through inlets in the front grill, mixes that air with gasoline and then compresses and burns the volatile mixture. The vigorous combustion force puts upwards of 500 stallions on the street, and the hot air/gas mixture is cleaned of contaminants and pumped out the quad exhaust.
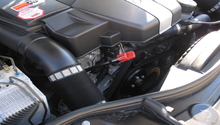
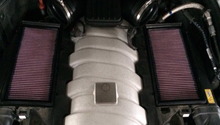
The engine air filter components sit on top of the engine within easy reach. The dual air intake ducts carry cold air from the grille to the air filter housing. Dual air filters protect your engine, and when those filters begin to clog, they choke off some of the incoming air. The computer's fuel and combustion force is reduced. The Mercedes Maintenance Manual recommends changing the engine air filters at 40,000 miles.

Materials Needed
- Two engine air filters, as specified for your car
- Torx T-25 driver
- Mechanic's gloves
- Blanket
- Shop vacuum
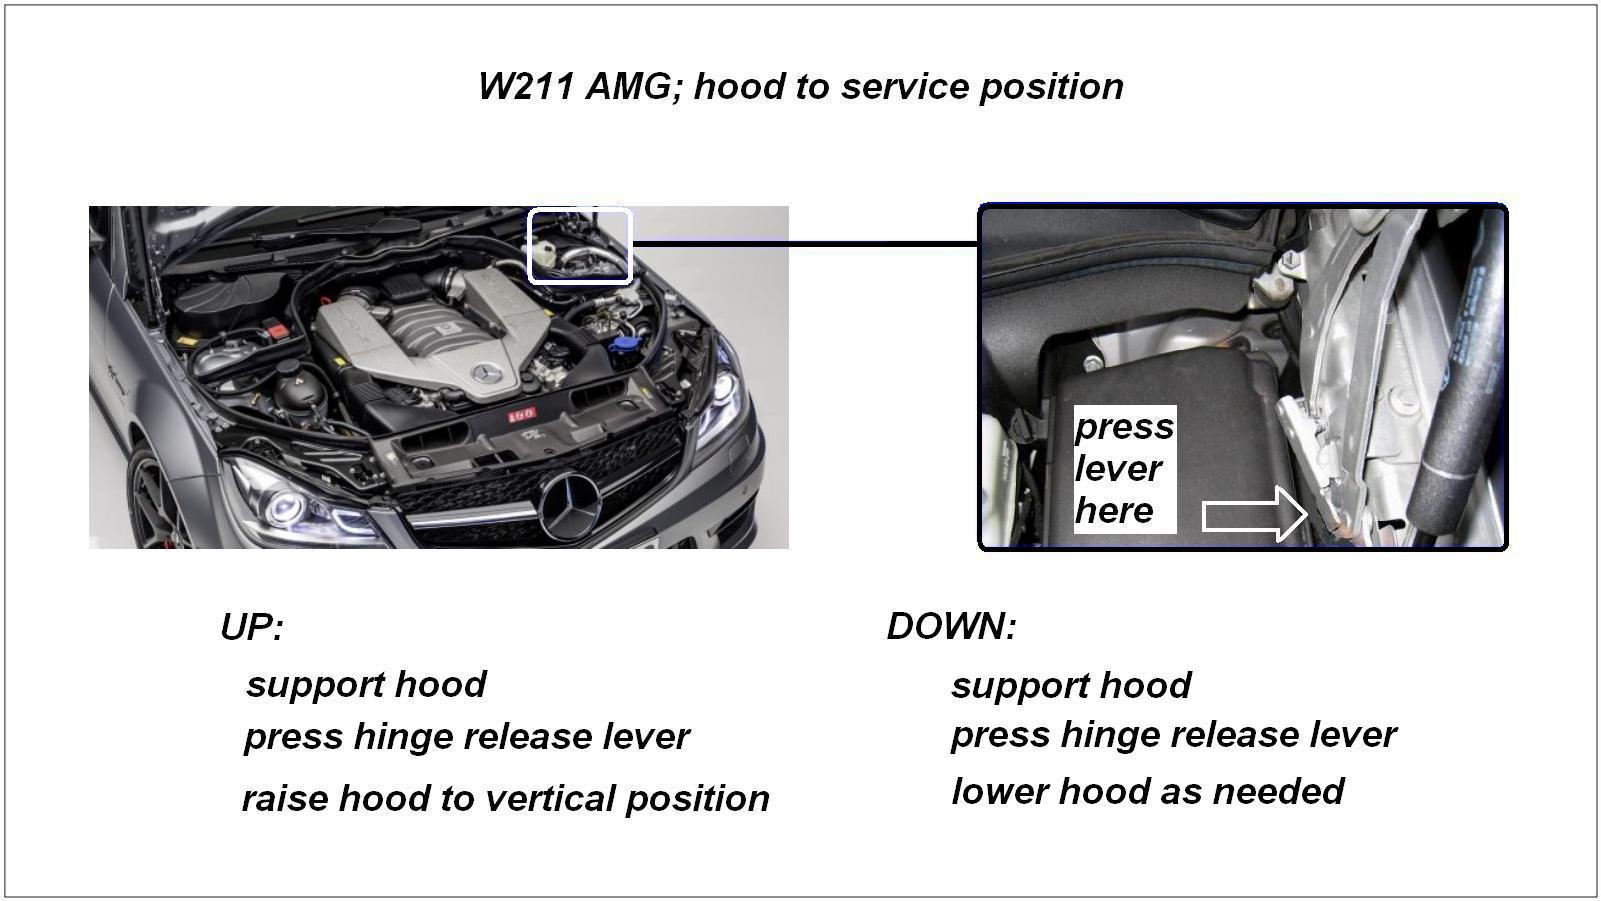
Step 1 – Raise the hood
- Raise the hood to the open position.
- On the left hood hinge, press the front of the spring-loaded hinge release lever to release the hinge limiter.
- Raise the hood to the vertical position. The hinge release lever will click back into position.
To lower the hood from the service position:
- Lift the hood just enough to take its weight off the hinge release lever.
- Press the hinge release lever and lower the hood. You may have to pull down a bit to get it started.
- As the hood comes down, the hinge release lever will click back into the normal position.
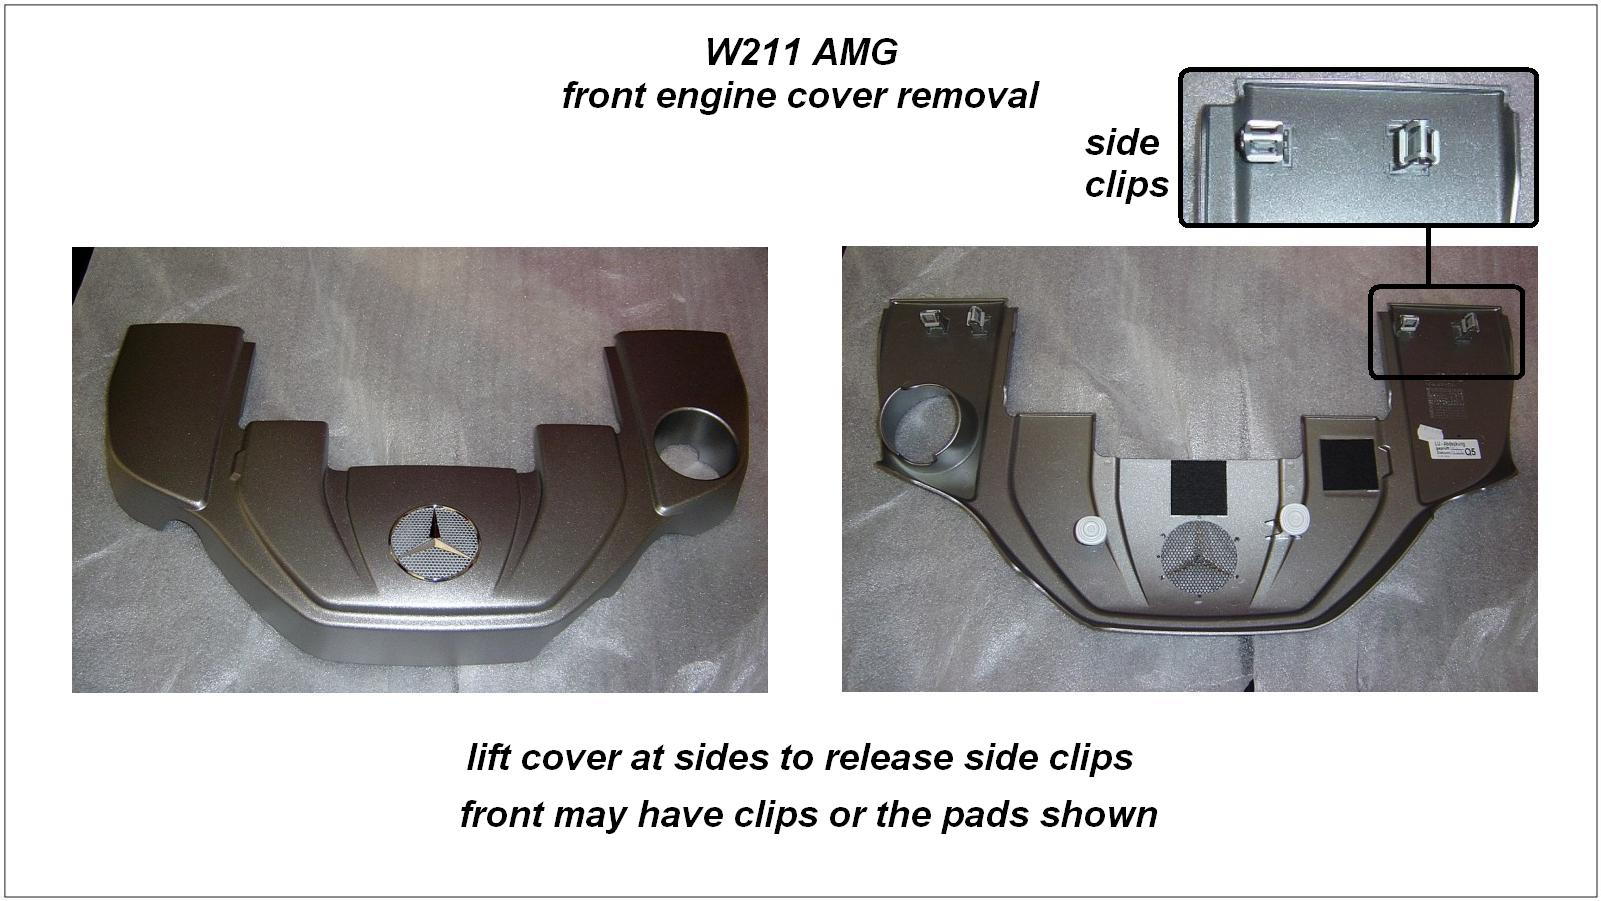
Step 2 – Remove the front engine cover
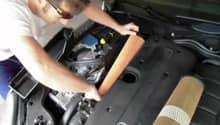
Grasp the front engine cover by the sides and tug gently to free the side clips. Then lift at the front to release the front clips (some models may have front pads instead of clips). Lay the engine cover on the blanket to protect the finish.
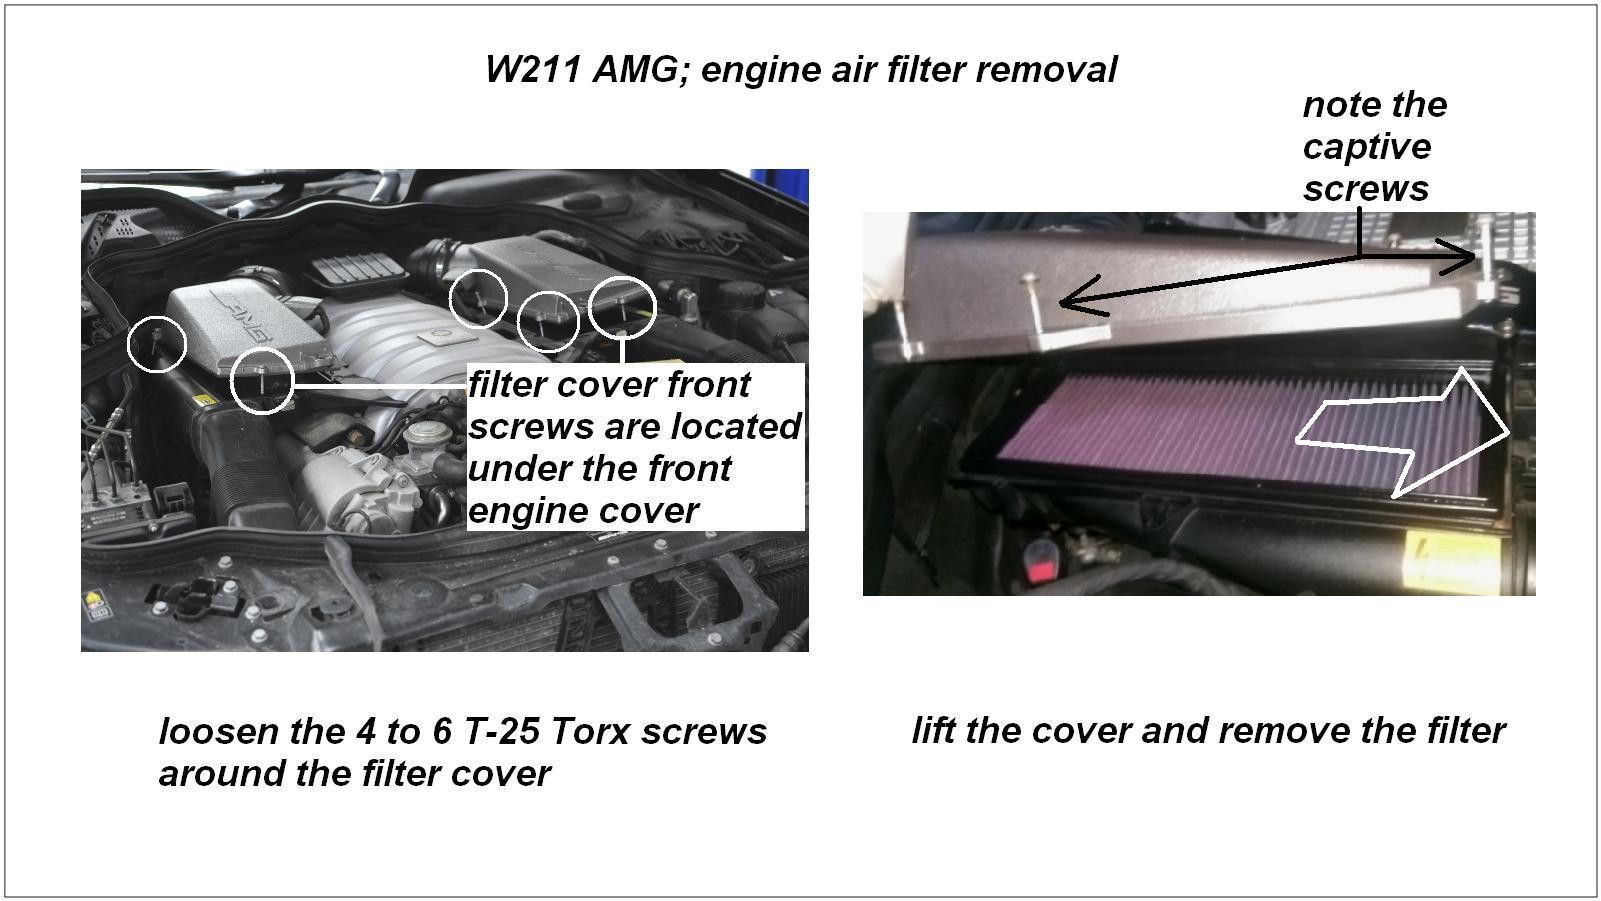
Step 3 – Remove the air filter covers and filter elements
- Using the Torx T-25 driver, unscrew the 4 to 6 Torx screws (depending on model) around the edge of each cover as shown. The screws are captive and will loosen but will not come entirely out.
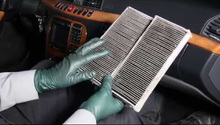
- Lift the cover up enough to pull out the old air filter.
- Use the vacuum to clean up dirt/debris in the filter element tray.
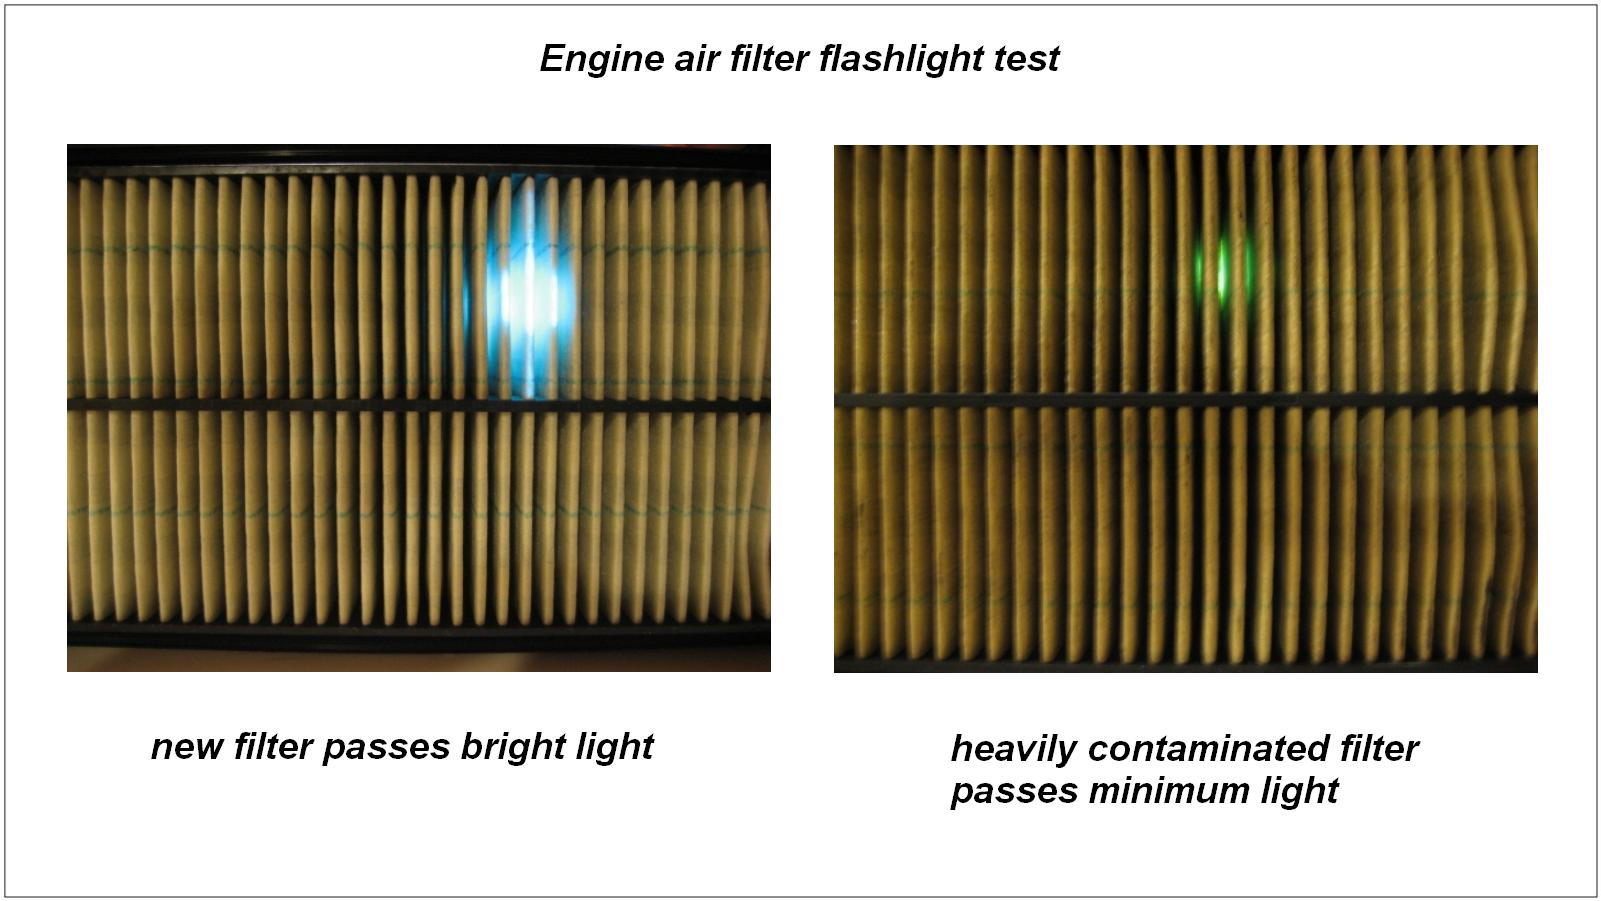
Step 4 – The air filter contamination flashlight test (optional)
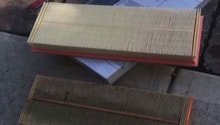
Hold a bright LED flashlight under the new air filter and note the brightness of the light it passes. Then do the same with the old filter and see how it restricts light passage. The light restriction is a fair comparison to the airflow it restricts and helps in judging filter contamination. In the picture below, compare a new filter to a very dirty filter. Note how the dirt and crankcase breather vapor changes the bright, blue-white LED to dim green.
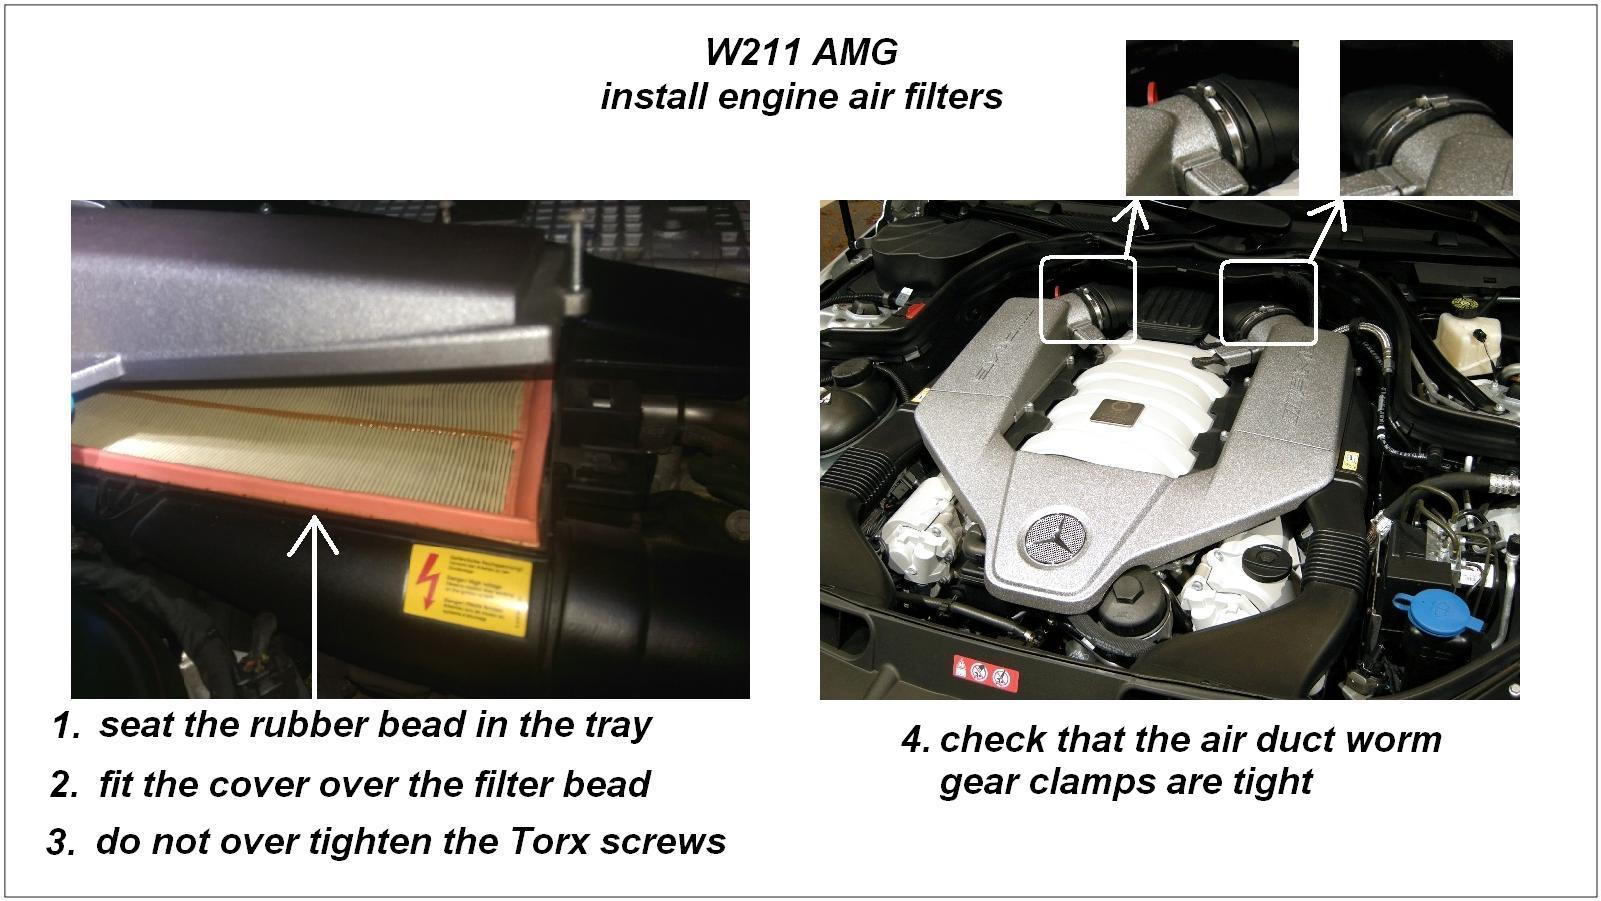
Step 5 – Install the new engine air filters
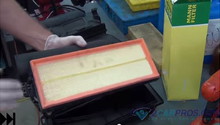
- Place each filter into its tray with the pleated vanes down and seat the rubber bead around the edge of the tray.
- Fit each cover in place and tighten the 4 to 6 Torx screws. Keep in mind that the filter housing is plastic, so do not over tighten the Torx screws.
- Check the security of the connection to the air ducts at the rear of the filter covers. If needed, tighten the worm gear clamps shown in Figure 5.
Pro Tip
Make sure that you don't leave any tools, parts, or hardware laying in the engine bay.
Step 6 – Replace the front engine cover
Position the cover and push down directly above the clip locations to seat the clips.
Step 7 – Air leak check and MIL fault check
Start the engine and ensure the multi-function indicator lamp (MIL) is out. Let the engine idle and listen near the air filter housing and ducts for the tell-tale whistling or hissing of an air leak. If you detect an air leak, recheck the seating of the filter rubber beads on the air box trays and that the covers are fitted correctly and tight. Also, ensure that the 2 worm gear clamps are tight.
Featured Video: How to Replace Engine Air Filter
Related Discussion
- How to Replace W211 Air Filter- MBWorld.org