Mercedes-Benz E-Class and E-Class AMG: How to Replace Engine Oil
Replacing the engine oil in your Mercedes-Benz E-Class is a fairly simple task that can be done at home. Here's how to do it yourself.
This article applies to the Mercedes-Benz E-Class and E-Class AMG (2002-2009).
Many DIYers are fond of using oil extraction pumps that vacuum the oil out through the dipstick tube. Oil extraction eliminates the need to lift the car, but it can leave a quart or more of dirty oil in the sump. Some dealers reportedly use oil extraction as well, so it is an accepted practice.
Draining from the oil pan ensures that all of the dirty oil is removed, but it is important to note that various Mercedes-Benz E-Class AMG models may have 2 engine pump drains and also have an oil cooler in the front bumper with its own drain. One or two cups may remain in the oil cooler if it is not drained.
Materials Needed
- Up to 9 quarts of synthetic oil, 0W-40 or 5W-40 as specified for your AMG
- 1 engine oil filter as specified for your AMG
- 1 sealing washer for each oil drain plug
- 10 quart oil drain pan
- Floor jack and jack stands - OR - a vacuum oil extractor
- 8 mm and 13 mm socket wrenches
- Oil filter wrench
- Torque wrench
- O-ring pick set
- Blanket
- Lots of rags
Step 1 – Lift the car and place it on jack stands
Raise your Mercedes using your jack on level ground, and secure it on jack stands.
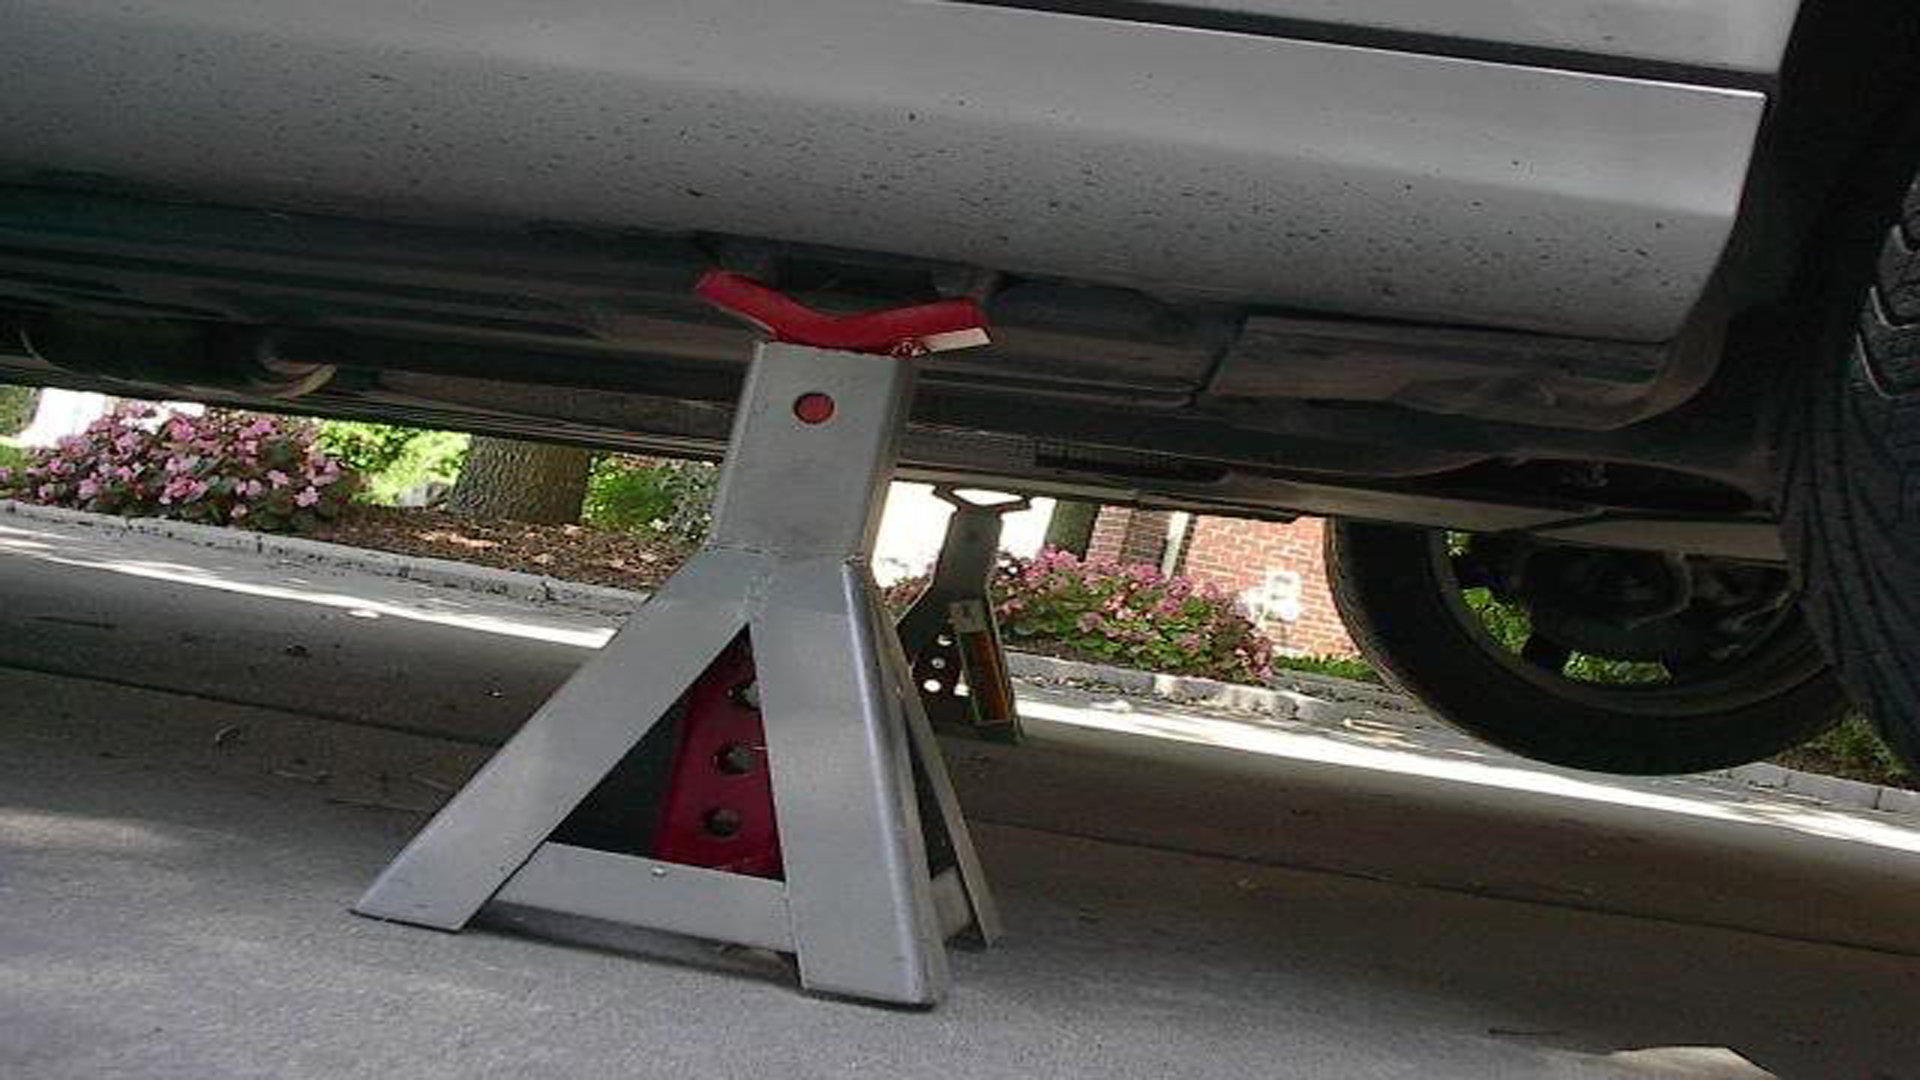
(Related Article: How to Jack Up Your Car - Mbworld.com)
Pro Tip
If you are using an extractor, do not lift the car. Simply vacuum oil through the dipstick tube.
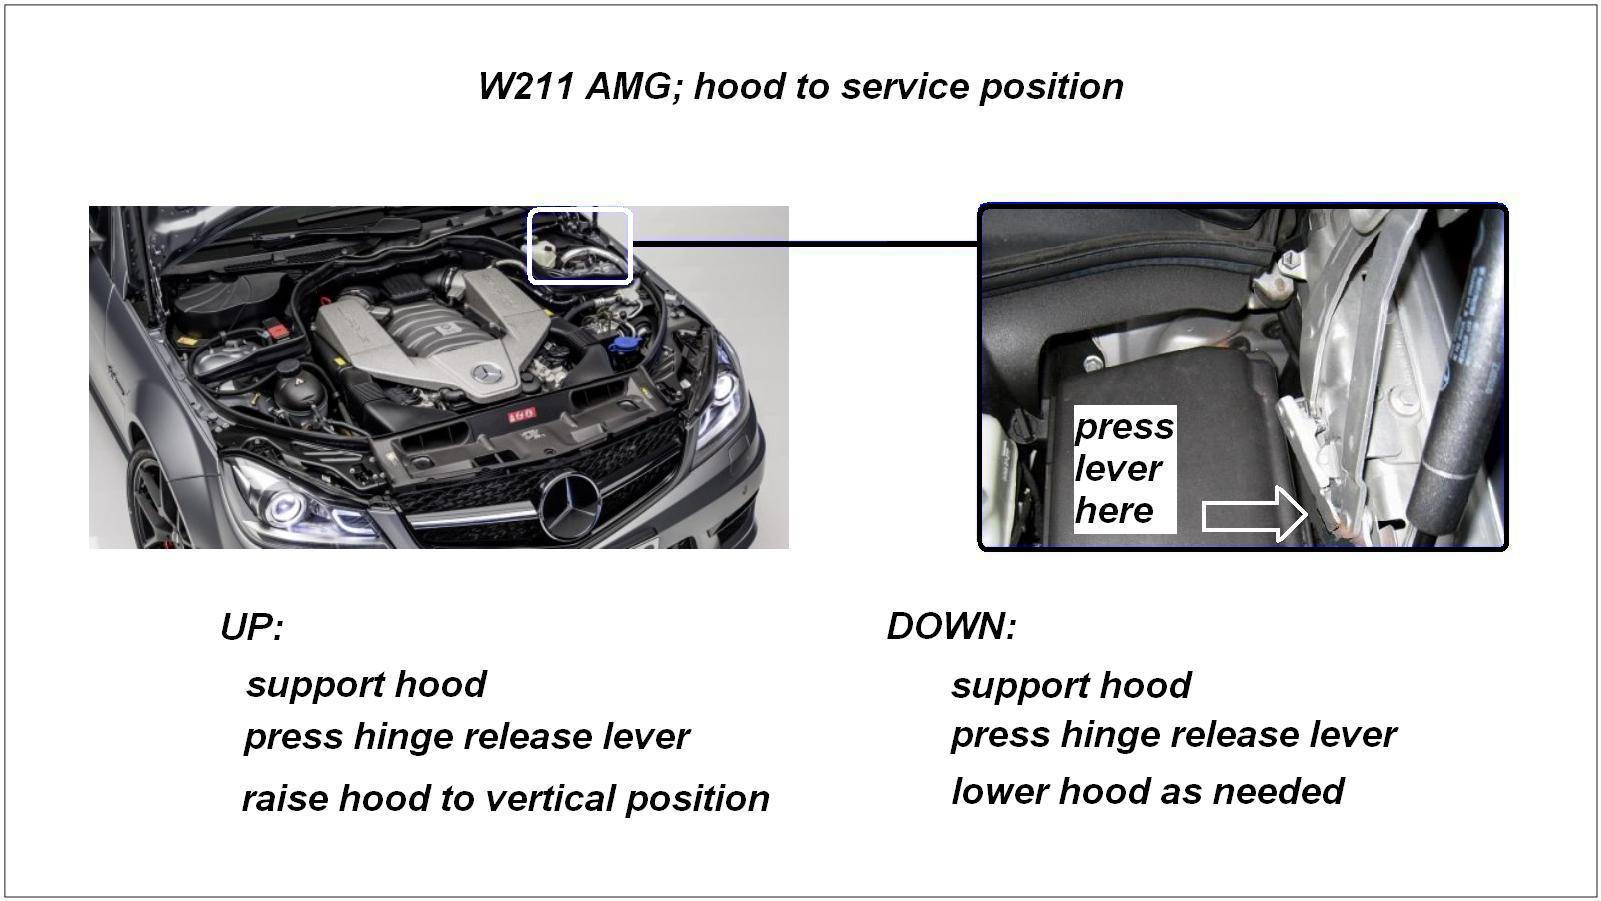
Step 2 – Raise the hood to the service position
The hood service position is vertical and it gives you much more room to work with:
- Raise the hood to the normal position.
- On the left hood hinge, press the front of the spring-loaded hinge release lever to release the hinge limiter.
- Raise the hood to the vertical position. The hinge release lever will click back into position.
To lower the hood from the service position:
- Lift the hood just enough to take weight off the hinge release lever.
- Press the hinge release lever and lower the hood. You may have to pull down a bit to get it started.
- As the hood comes down, the hinge release lever will click back into the normal position.
Step 3 – Remove the front engine cover
Grasp the front engine cover by the sides and tug gently to free the side clips. Then lift at the front to release the front clips (some models may have front pads as shown). Lay the engine cover on the blanket to protect the finish.

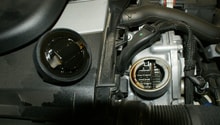
Step 4 – Remove the oil cap and dipstick
Remove the oil cap and the dipstick to allow air entry into the engine so the oil drains better.

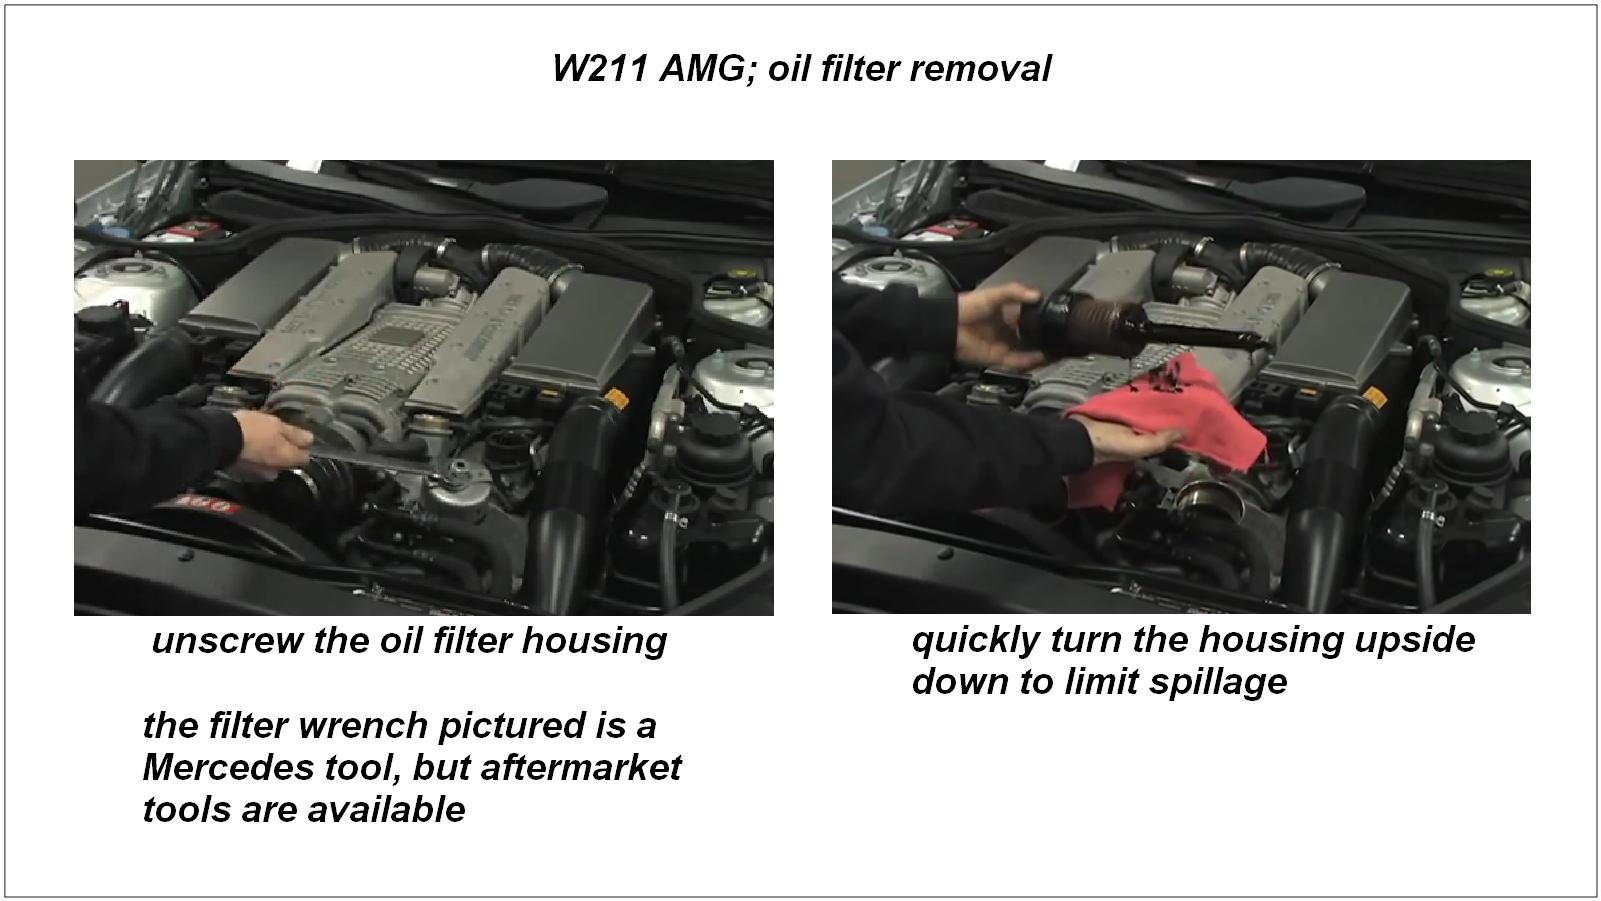
Step 5 – Remove the oil filter housing
- Use the oil filter wrench to remove the oil filter housing and catch the drips with a rag.
- Turn the housing upside down as it comes out to minimize spillage.
- Wipe up any drips or spills.
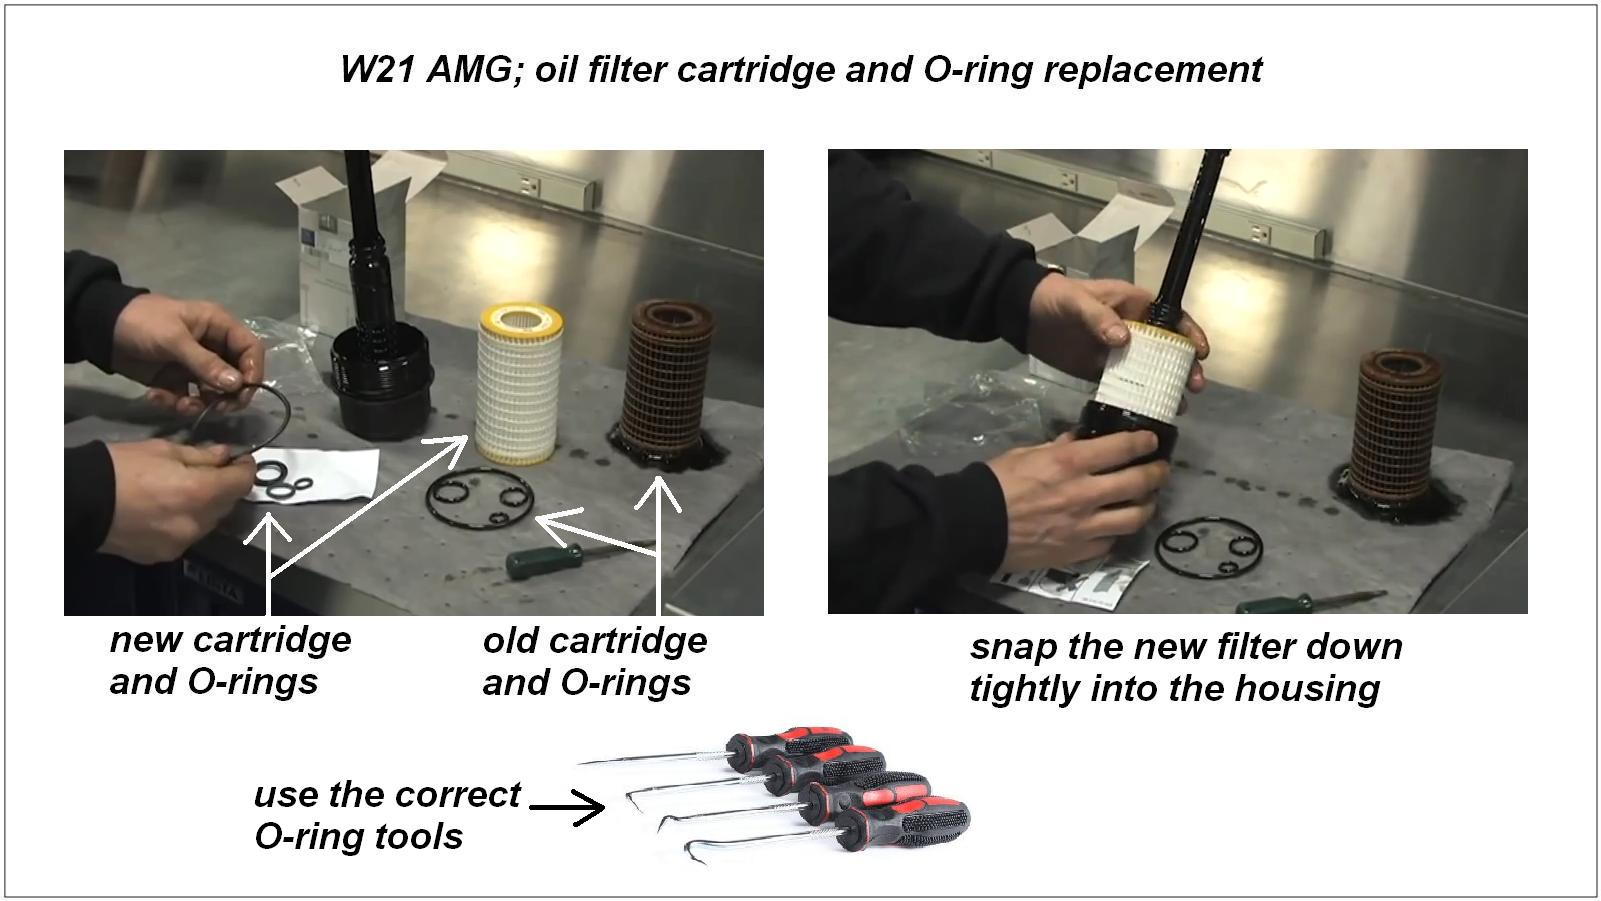
Step 6 – Replace the filter cartridge and O-rings
- Pull the old filter cartridge off the housing.
- Use the O-ring picks to replace the large O-ring on the main housing and the 3 smaller O-rings on the shaft.
- Push the new filter cartridge down tightly into the housing.
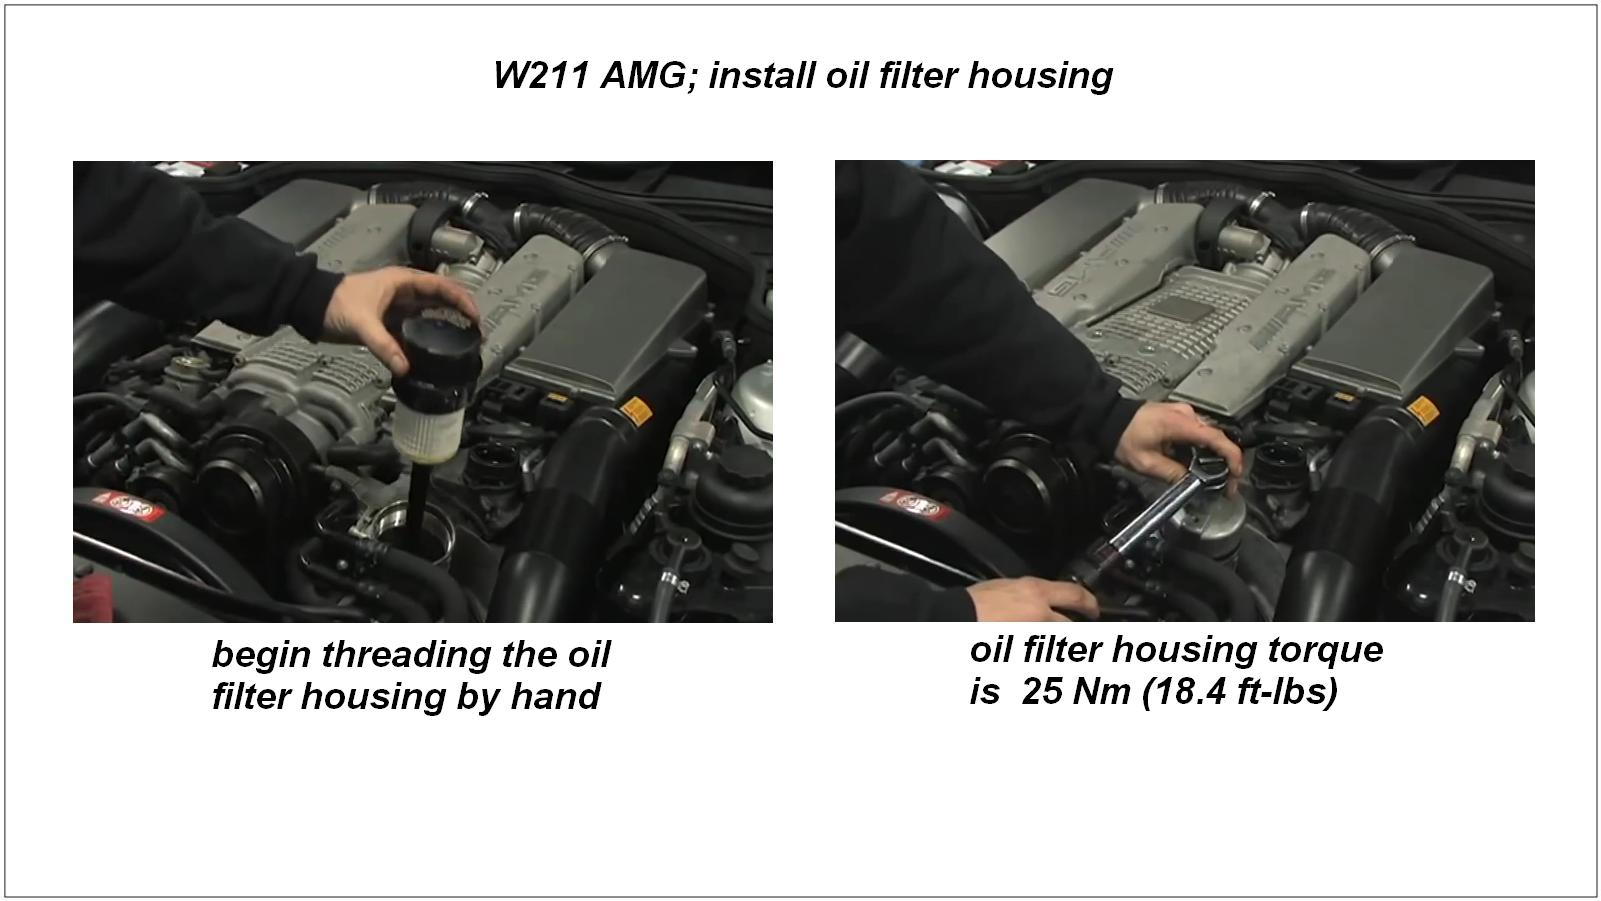
Step 7 – Install the oil filter housing
- Lightly coat the new O-rings with clean engine oil.
- Insert the oil filter assembly and begin threading it by hand to avoid cross-threading.
- Use the torque wrench to tighten it to 25 Newton-meters (18.4 ft-lbs).
- Wipe the oil filter housing and vicinity clean and dry.
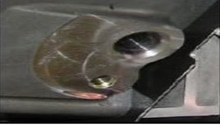
Step 8 – Remove the engine splash pan
Use the 8 mm socket wrench to remove the 4 bolts holding the plastic splash pan under the vehicle and take it down.
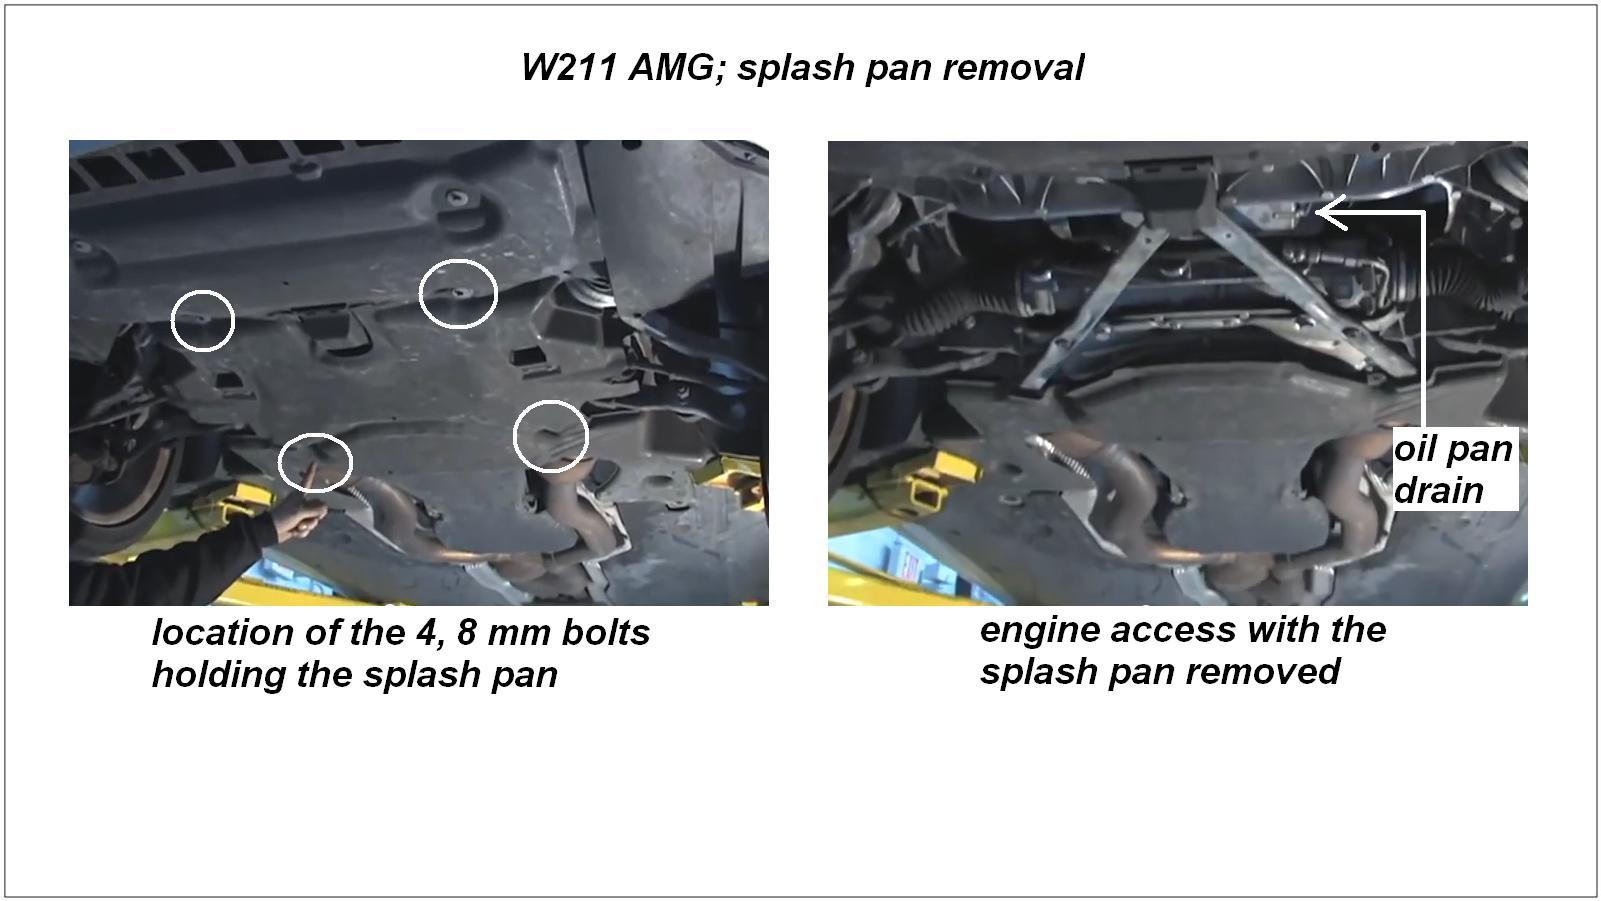
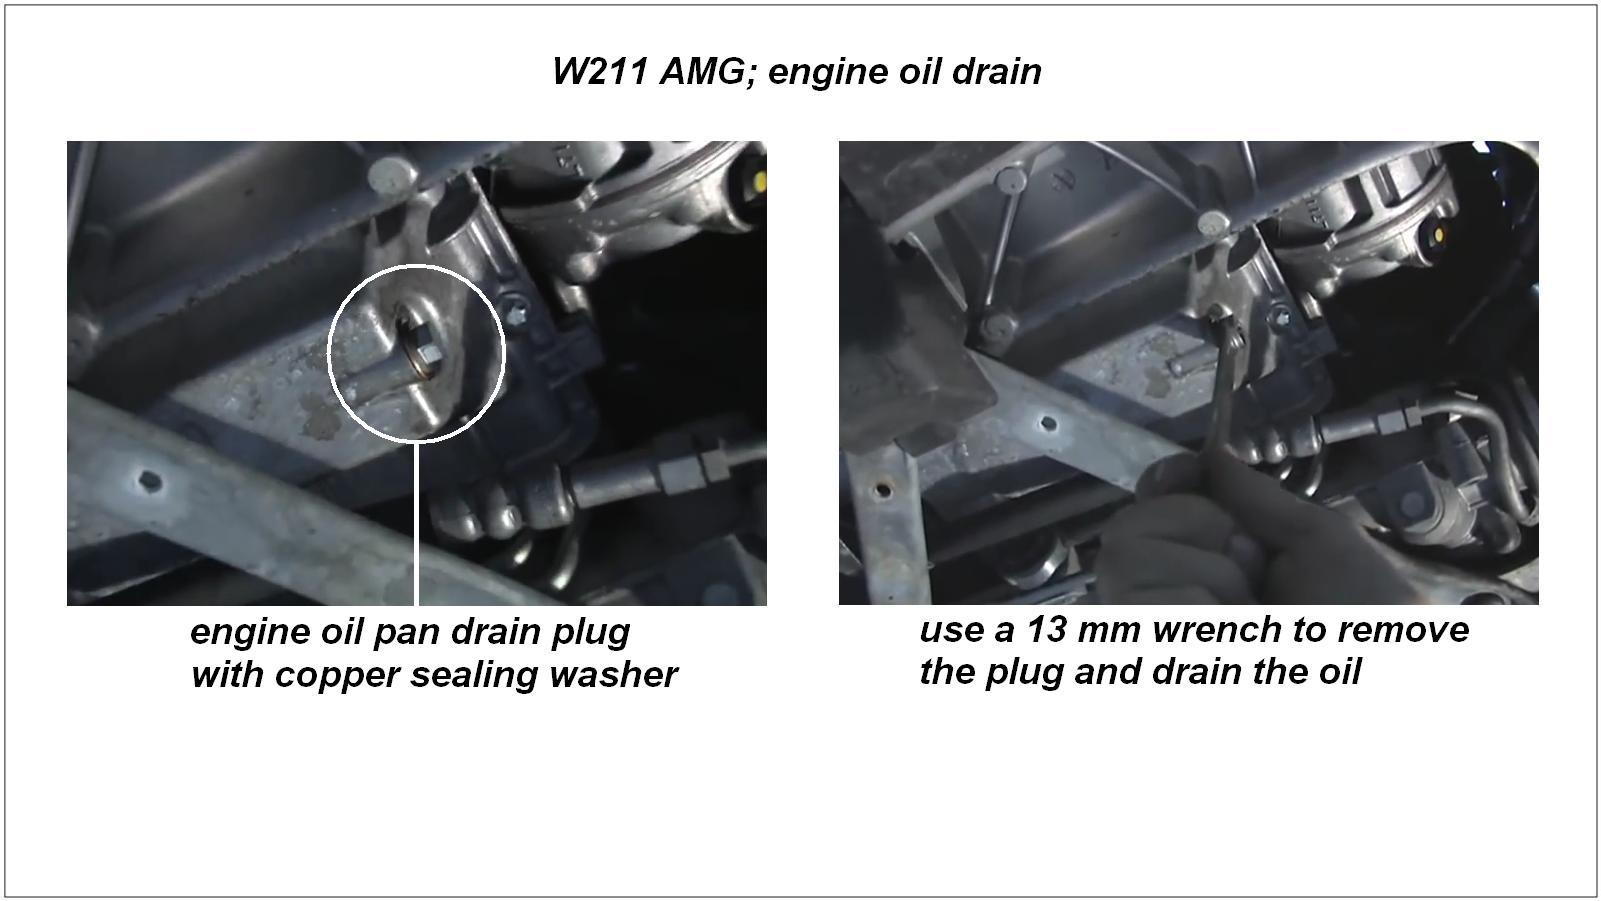
Step 9 – Drain the engine oil
- Use a 13 mm wrench to remove the oil pan drain plug. Expect to drain up to 9 quarts of oil.
- When the oil drain is complete, replace the sealing washer and tighten the drain plug to 30 Nm (22 ft-lbs).
- Wipe the drain plug and oil pan clean and dry.
Caution
Be careful not to over tighten the oil drain plug. With too much torque, the steel drain plug will damage the aluminum oil pan threads.
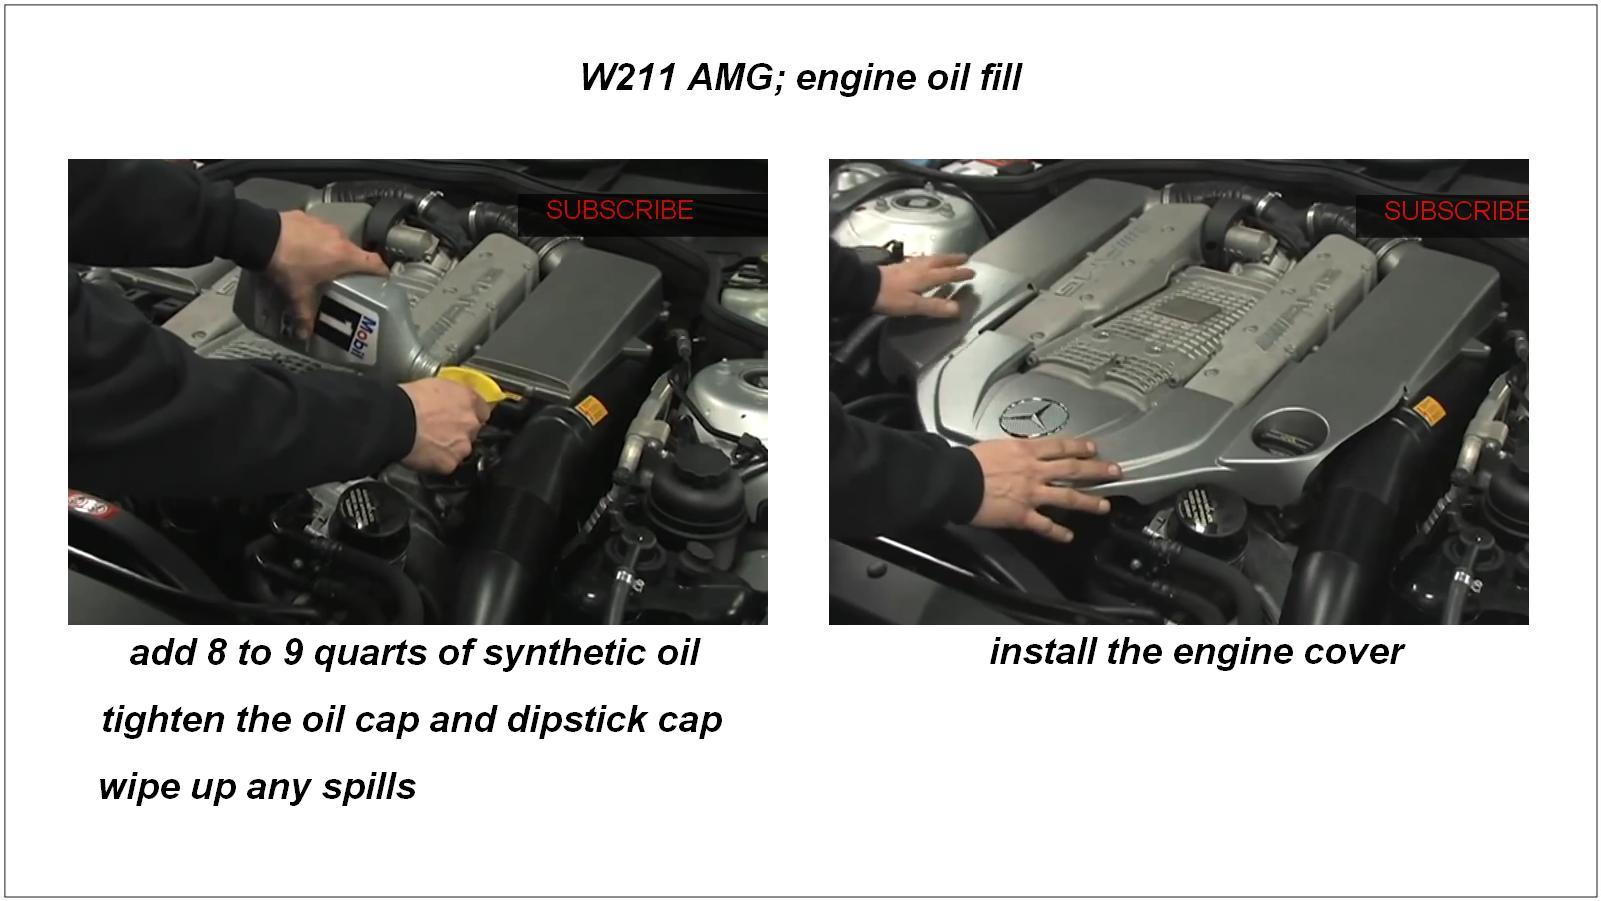
Step 10 – Fill the engine oil
- Place a funnel in the oil cap port and fill the engine with the specified amount and viscosity of synthetic oil.
- Replace the oil cap and dipstick.
- Wipe the oil fill area clean and dry.
Step 11 – Leak check
- Start the engine and confirm that the oil pressure light goes out within a few seconds.
- Let the engine run for several minutes, then shut it off.
- Check the drain plug, oil pan, oil filter and oil fill areas for leakage.
- If any leakage is found, carefully tighten the item and leak check again.
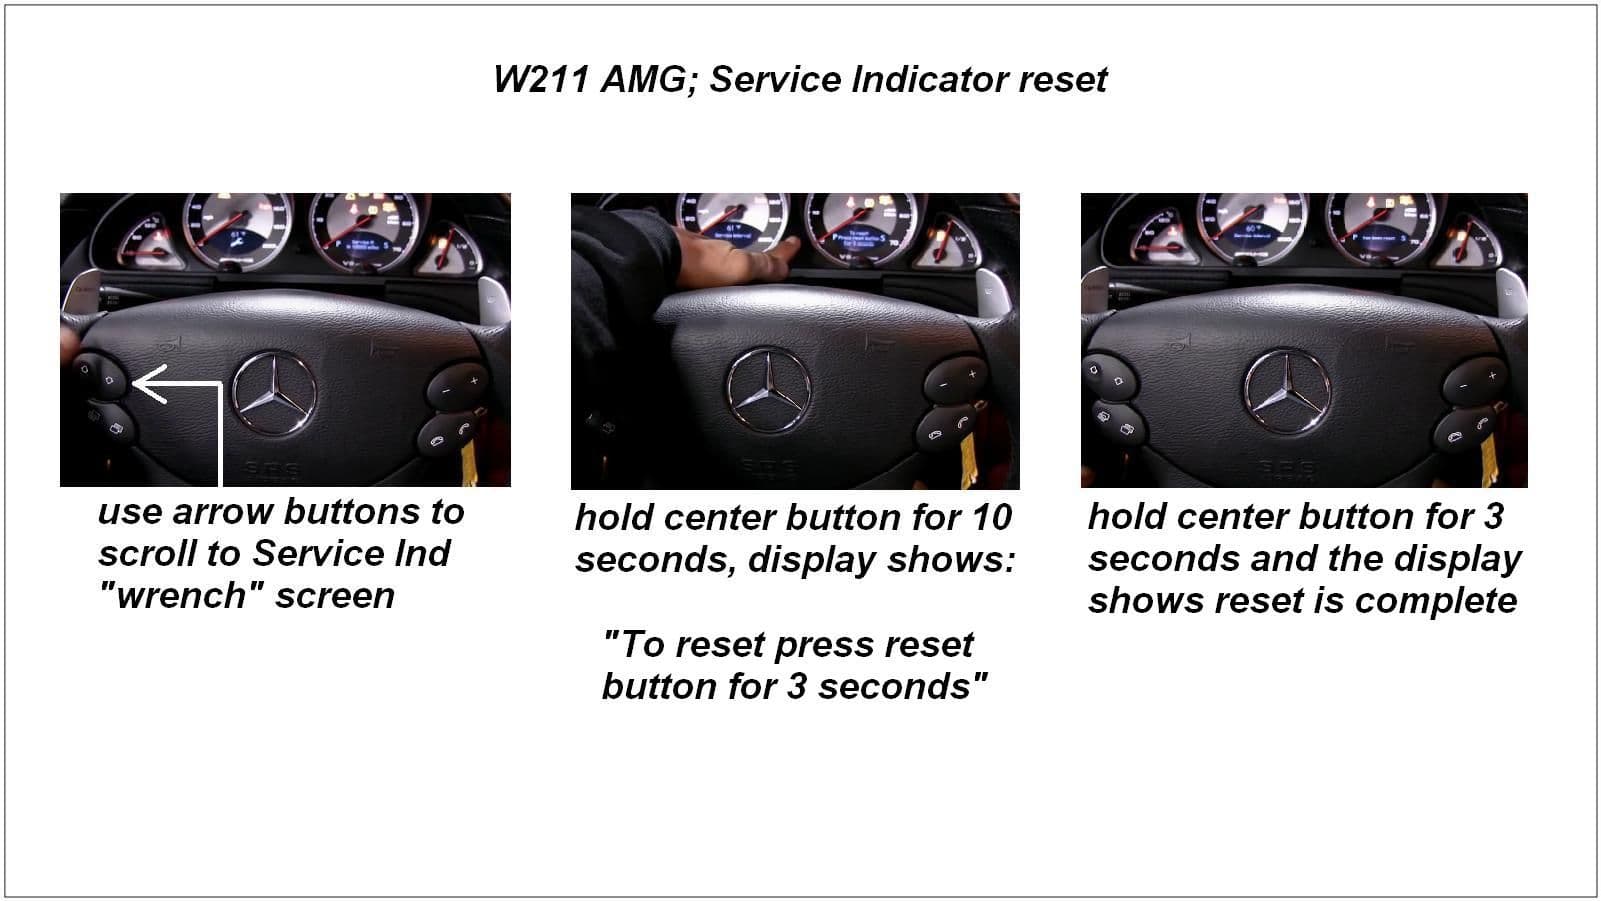
Step 12 – Reset the Service Monitor
- Turn the key to Ignition 2 but do not start the car.
- Use the upper left arrow buttons to scroll to the Service Due "wrench" screen.
- Press and hold the center button on the instrument cluster for 10 seconds and the display will show "To reset press reset button for 3 seconds."
- Release the center button and then hold it again for 3 seconds and the display will show that the reset is done.
Featured Video: Benzwerks AMG Mercedes Oil Change
Featured Video: Benzwerks AMG Reset Service Indicator
Related Discussion
- w211 DIY Oil Change-MBWorld.org