Mercedes-Benz E-Class: How to Replace Alternator
Notice your gauges flickering or headlights dimming? It might be time to replace the alternator in your Mercedes-Benz E-Class.
This article applies to the Mercedes-Benz E-Class (2002-2009).
All vehicles are equipped with an alternator. Essentially, this is a generator that maintains the alternating current. Electricity is needed to power and run several different components with varying voltages throughout your vehicle. The alternator's job is to maintain the balance between all of these components; It works closely with your vehicle's battery to achieve the balance. When this part begins to fail, there are tell tale signs that it is on its last breath. Fortunately, this write-up will explain how to replace the alternator in the Mercedes-Benz E-Class should this be happening.

Materials Needed
- Socket wrench with extensions and various sockets (15mm, 13mm, 11mm)
- Pry bar
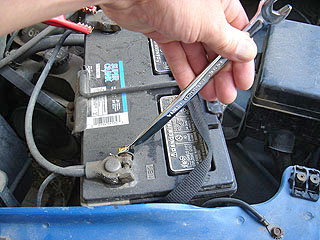
Step 1 – Disconnect battery
Before you can service an alternator or replace it, the battery needs to be disconnected or else you risk shorting the battery.
- Disconnect negative battery terminal.
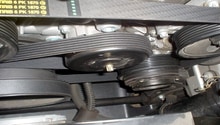
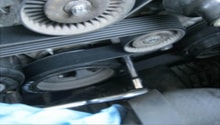
Step 2 – Remove drive belt
The alternator is constantly "charging" when the vehicle runs by way of a pulley and drive belt. The belt will need to be removed before the alternator can come off.
- Using the 15mm socket, move the pulley to release tension on belt.
- Remove belt.
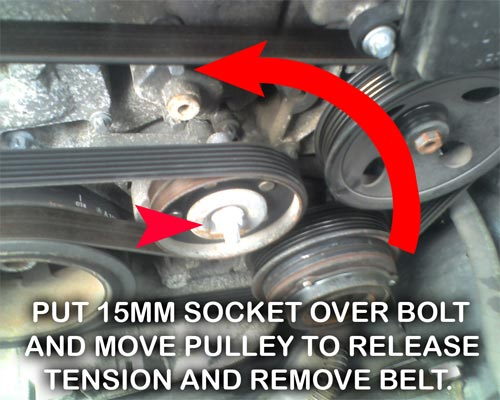
Pro Tip
Neither the bolt nor the pulley need to be removed.
Step 3 – Remove two bolts
The alternator is held onto a bracket via two long bolts. They will need to be removed prior to removing the alternator as a unit.
- Use 11mm socket to remove bolts.
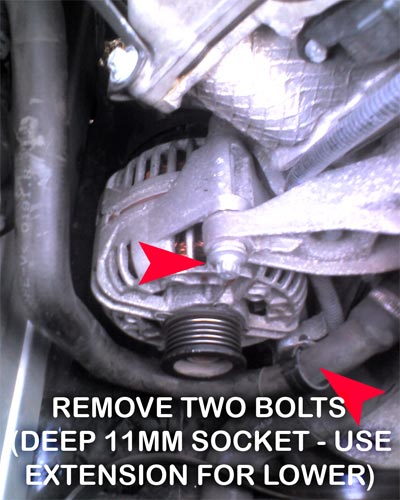
Pro Tip
The lower bolt may be better removed using an extension.
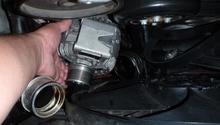
Step 4 – Remove alternator from mounting brackets
The alternator will need to come off the mounting brackets before replacement.
- Use the prybar to swing the alternator as a unit off of the mounting brackets.

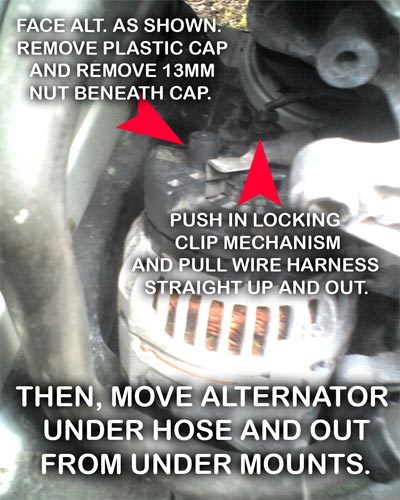
Step 5 – Disconnect harness
The harness that powers the alternator needs to be unplugged to free the alternator from the system before replacement.
- Orient the alternator on its side.
- Remove 13mm nut with socket or wrench after removing plastic cap.
- Press the clip and pull the plug straight out to disconnect the harness.
Step 6 – Installation is reverse of removal
Now that the old alternator is out, it can be replaced.
- Tighten down 13mm nut and replace cap.
- Plug harness back in.
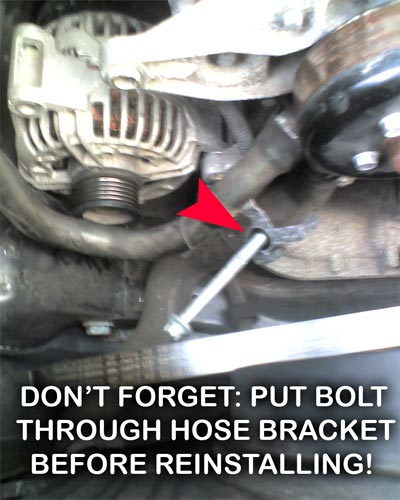
- Orient alternator onto mounting bracket.
- Insert long bolt through hose bracket first.
- Re-install second bolt and tighten both down.
- Using 15mm socket wrench, pull pulley back to release tension on pulley and re-install belt.
- Remember to reconnect the negative battery terminal once finished.
Pro Tip
Inserting this bolt first will aid in lining the alternator up to the mounting bracket and allow for easier re-installation.
Related Discussion and Site
- DIY: Replace Alternator - Benzworld.org
- DIY: Changing out Alternator - MBWorld.org