Mercedes-Benz: How to Repair Paint Chips and Scratches
Don't let paint chips and scratches cause further damage to your Mercedes-Benz C-Class or E-Class. Repair them with these handy tips.
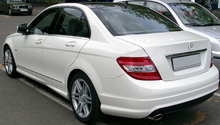
This article applies to the Mercedes-Benz C-Class w204/w205 (2007-Present), and E-Class w211/w212 (2002-Present).
Repairing paint chips and scratches on your Mercedes-Benz C-Class or E-Class is important for a number of reasons. First, these unsightly blemishes could lead to further corrosion, damage, and peeling, especially if the exposed metal underneath begins to rust. Second, paint chips and scratches take away from your paint's natural allure, causing your vehicle to appear unattractive and cheap. If you are planning to sell your Mercedes-Benz or you will need to return the vehicle to a local dealer once your lease is up, you will want to repair unsightly paint chips and scratches using these helpful tips. Doing so will not only increase the retail value of your vehicle, but restore your paint's original smooth, sleek finish. Let's get started!

Materials Needed
- Isopropyl alcohol
- Q-Tip
- Microfiber cloths
- Utility knife
- Masking tape
- Nikkens™ 3000 grit finishing paper
- Meguiar's Unigrit Sanding Block
- AutoSharp Pen (with exact color match)
- Car shampoo or Woolite Upholstery Cleaner
- Car polish and car wax
Step 1 – Dry out the scratch or paint chip
Wet a Q-Tip with isopropyl alcohol, and then apply it directly to the scratch or paint chip. Repeat several times, and then dry the paint chip or scratch using a clean microfiber cloth.
Step 2 – Identify signs of erosion
Survey the entire area around the scratch or paint chip for signs of peeling, exposed metal, and/or unevenness. Cut away any chips that have become separated from the metal or that are starting to erode due to corrosion, which might be causing slight to significant unevenness along the surface.

Step 3 – Cut away damaged pieces
Using a utility knife, cut along the center of the chip and press down gently as you work to slowly remove each individual piece. Once all the material (and there may NOT be a lot) is removed, clean the area once more by dabbing isopropyl alcohol onto it. Allow the area to dry completely before proceeding to the next step.
Step 4 – Section off the damage
Section off the area that needs repair using a few strips of masking tape. This will allow you to easily repair the damaged paint and protect the rest of your vehicle from damage during the sanding process. Use Nikkens™ 3000 grit finishing paper and Meguiar's Unigrit Sanding Block to completely remove blemishes, such as rust. Focus on making the surface of the paint even, so you can apply a new coat of paint in the next step.
Step 5 – Apply new paint
Using an AutoSharp Pen that is an exact color match, paint the damaged area using a steady side to side motion. For the best results possible, apply multiple coats until the paint chips and scratches are repaired. It is recommended applying several coats over several days. Allow each coat to dry before adding a new one.
Step 6 – Smooth out the surface
Soak your Meguiar's Unigrit Sanding Block in water for a minimum of four hours. Using it and the Nikkens™ 3000 grit finishing paper, smooth the newly painted area until it evenly matches the surrounding paint surface.
Step 7 – Add a lubricant
Clean and add lubrication to the surface of your vehicle using a car shampoo or Woolite Upholstery Cleaner. While the surface is still lubricated, run the sanding block in a single direction over the damaged area, applying minimum pressure as you proceed from one spot to the next. Alternate with the Nikkens™ 3000 grit finishing paper for the smoothest finish. Apply more lubrication as needed to ensure the sanding block remains wet.

Step 8 – Dry the area
Wipe away excess water, and then inspect the area. If you still notice high spots, repeat the sanding process. Otherwise, it is recommended completing this DIY job by applying a premium quality car polish (such as Menzerna Intensive Polish or Menzerna Final Polish II), and finishing things off by applying a car wax.
Related Articles
- How to Wash and Wax Your Car - MBWorld.org
- How to Make Your Own Car Wax - MBWorld.org
Related Discussion
- Ideas to Repair Paint Chips - MBWorld.org