
Vu's White W203

 05-31-2015, 03:56 PM
#102
Senior Member
Thread Starter
Join Date: Jul 2011
Location: Sacramento, CA
Posts: 426
Likes: 0
Received 4 Likes
on
3 Posts
2005 Granite Gray C55
Here is the link,
http://www.ebay.com/itm/REAL-CARBON-FIBER-REAR-DIFFUSER-4TIPS-FOR-BENZ-W203-C-CLASS-AMG-BUMPER-/171746719534?hash=item27fce6f72e&vxp=mtr
05-31-2015, 04:14 PM
#103
Newbie

Join Date: May 2015
Posts: 6
Likes: 0
Received 0 Likes
on
0 Posts
2007 C230
This is probably a stupid question. The description says it fits W203 2002-2006 with AMG bumper package, will it fit a 2007 C230 stock bumper? And is the exhaust tip opening already cut out on the right side too?
05-31-2015, 04:16 PM
#104
Senior Member
Thread Starter
Join Date: Jul 2011
Location: Sacramento, CA
Posts: 426
Likes: 0
Received 4 Likes
on
3 Posts
2005 Granite Gray C55
 06-01-2015, 12:40 AM
#108
Senior Member
Thread Starter
Join Date: Jul 2011
Location: Sacramento, CA
Posts: 426
Likes: 0
Received 4 Likes
on
3 Posts
2005 Granite Gray C55
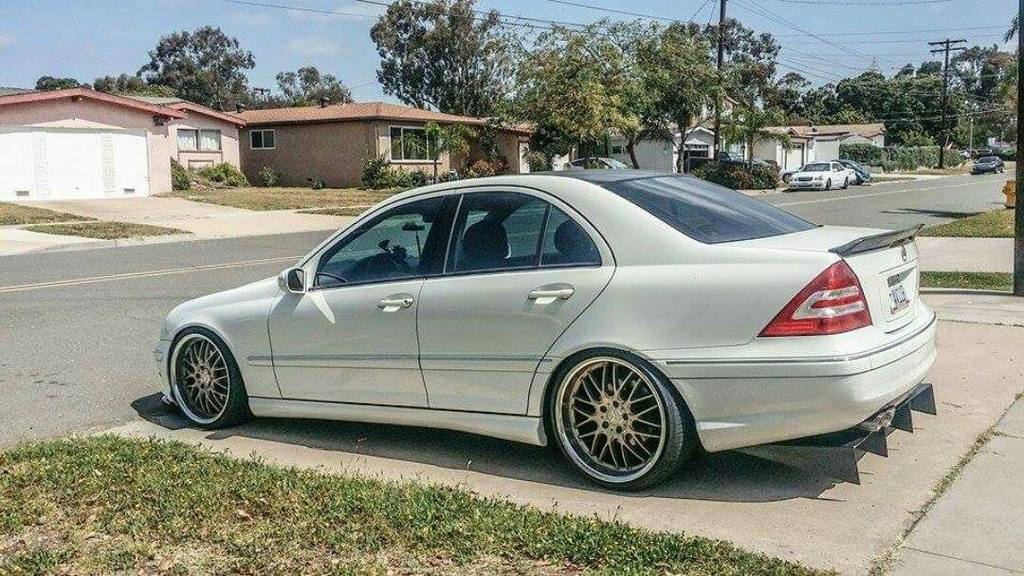
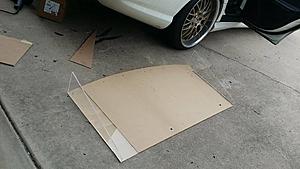
I might be selling my brand new cf diffuser since I am planning on running a custom functional one.
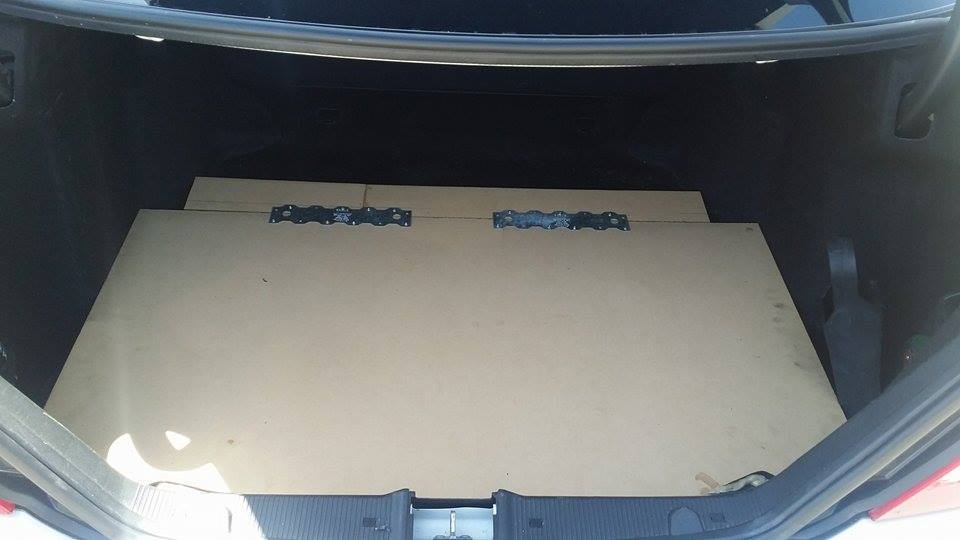
Here is a template I made and test fitted.

Just a test fit, the quad exhaust tips will sit in between the fins when ever I finish it.
Here is a template I made and test fitted.
Just a test fit, the quad exhaust tips will sit in between the fins when ever I finish it.
06-22-2015, 07:20 PM
#109
Senior Member
Thread Starter
Join Date: Jul 2011
Location: Sacramento, CA
Posts: 426
Likes: 0
Received 4 Likes
on
3 Posts
2005 Granite Gray C55
Hello everybody.
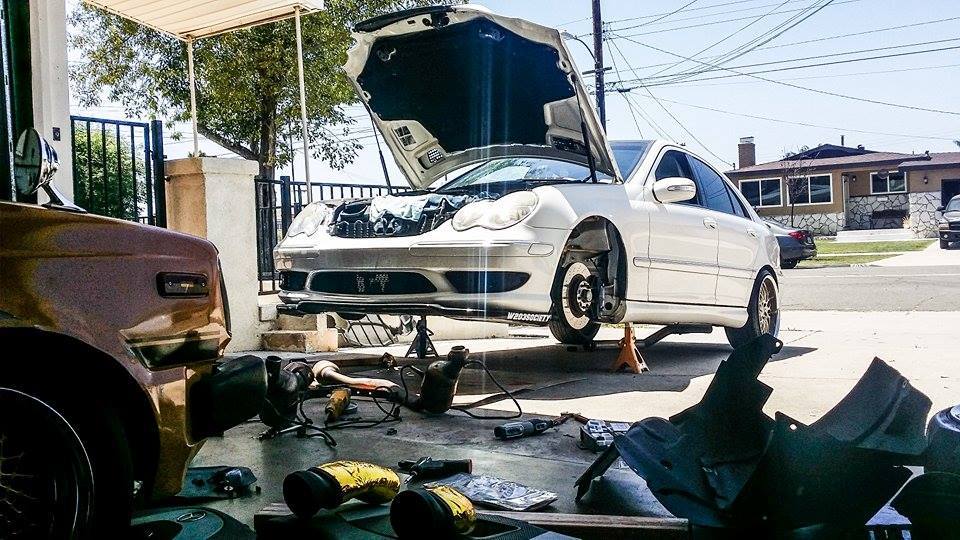
The past weekend has been a busy and productive one!
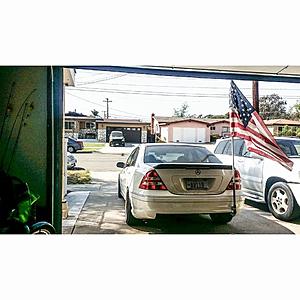
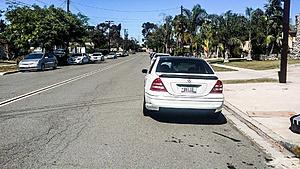
Made a custom flagpole from the factory tow hook for Fourth of July, cut my spare tire tub to make room, the bumper diffuser indent, and installed headers on the car.
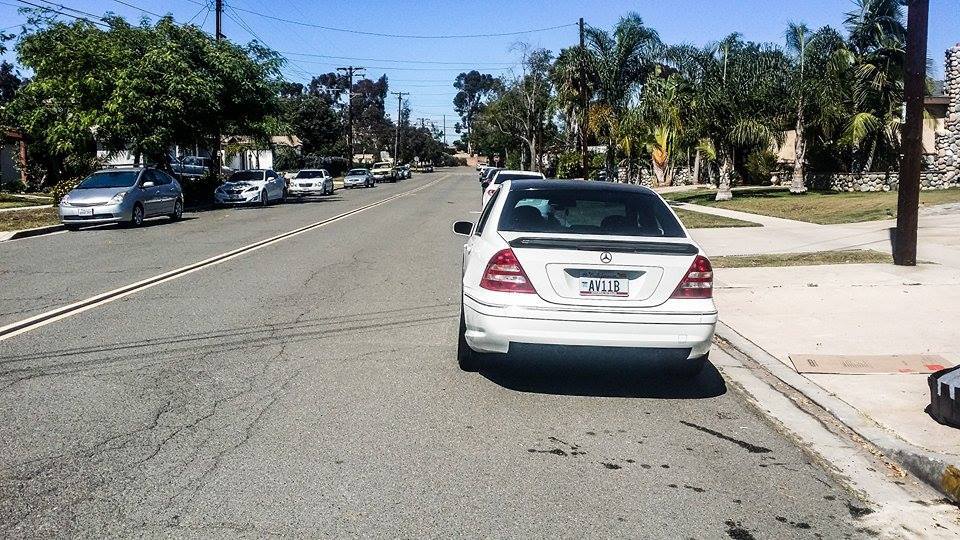
I am ready.
Not for the faint of heart.
Came out nice and even.

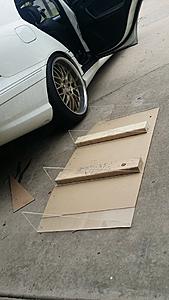
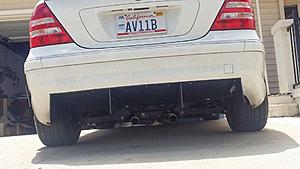
Fitting diffuser template to position.

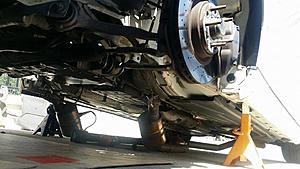
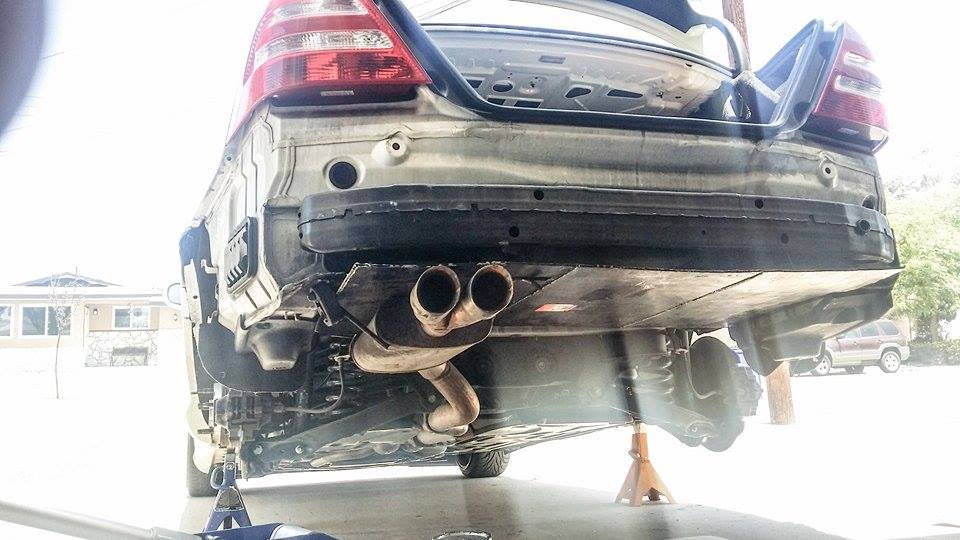
Cut the pipe/w muffler right after the sway bar to fit better then work the quad exhaust around the diffuser. This is a naked picture.
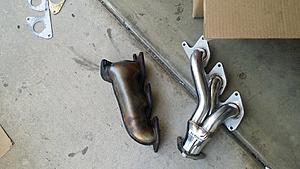
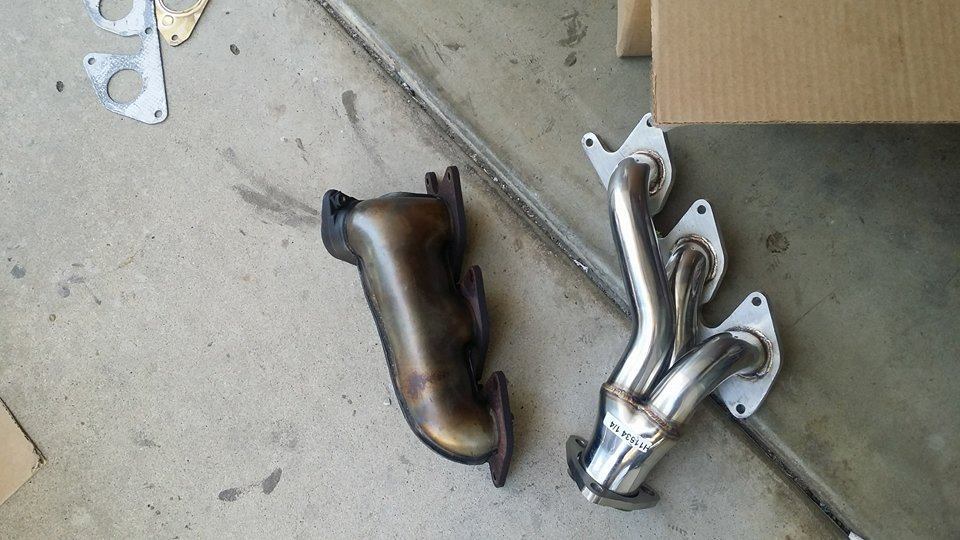
Finally I gotten around to installing the OBX headers, because honestly... Who wants to spend that much on Kleemans. We did this in the driveway of my house. Took about 4 hours for install and 4 more hours to figure out how to mount it back in with the cats. Long story short, headers installed, taking it to the exhaust shop Thursday morning to get the collector welded to the cats.
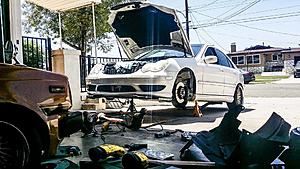
Dropped the exhaust.
Out with the old and in with the new!
Installed!
Here is a start up video running open headers. No, I will never run my car like this. This video does absolutely no justice in how LOUD it is.
The past weekend has been a busy and productive one!
Made a custom flagpole from the factory tow hook for Fourth of July, cut my spare tire tub to make room, the bumper diffuser indent, and installed headers on the car.
I am ready.

Not for the faint of heart.

Came out nice and even.

Fitting diffuser template to position.
Cut the pipe/w muffler right after the sway bar to fit better then work the quad exhaust around the diffuser. This is a naked picture.
Finally I gotten around to installing the OBX headers, because honestly... Who wants to spend that much on Kleemans. We did this in the driveway of my house. Took about 4 hours for install and 4 more hours to figure out how to mount it back in with the cats. Long story short, headers installed, taking it to the exhaust shop Thursday morning to get the collector welded to the cats.
Dropped the exhaust.
Out with the old and in with the new!
Installed!

Here is a start up video running open headers. No, I will never run my car like this.
This video does absolutely no justice in how LOUD it is.
06-23-2015, 01:05 PM
#111
Moderator Alumni
Dude. I wanna see what the inside of your trunk looks like now that you've cut out the spare tub. Got pix of the trunk floor? :x
Also - stoked to see the final product w/ that diffuser.
Also - stoked to see the final product w/ that diffuser.
 06-23-2015, 02:19 PM
#113
Senior Member
Thread Starter
Join Date: Jul 2011
Location: Sacramento, CA
Posts: 426
Likes: 0
Received 4 Likes
on
3 Posts
2005 Granite Gray C55
Yeah, I'm getting the Magnaflow 12468 in place of the xpipe and keeping it true dual. Might run mufflers or just tips not sure yet.
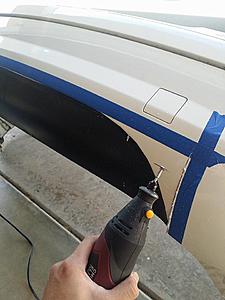
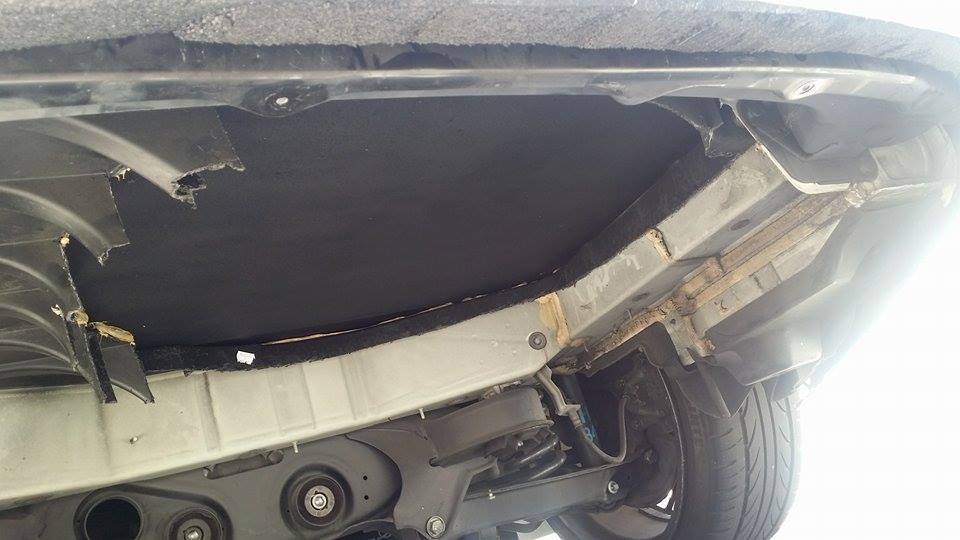
Here is the cut out I made using a dremel tool, I left the support on because it was just way too much to cut away and it didn't interfere with the diffuser template so I didn't want to bother dealing with more plastic shavings in my face lol.
I sprayed the exposed side with Rustroleum Bedliner, and sealed the edges on top and the bottom with general purpose cement or any other sealers you want to use.
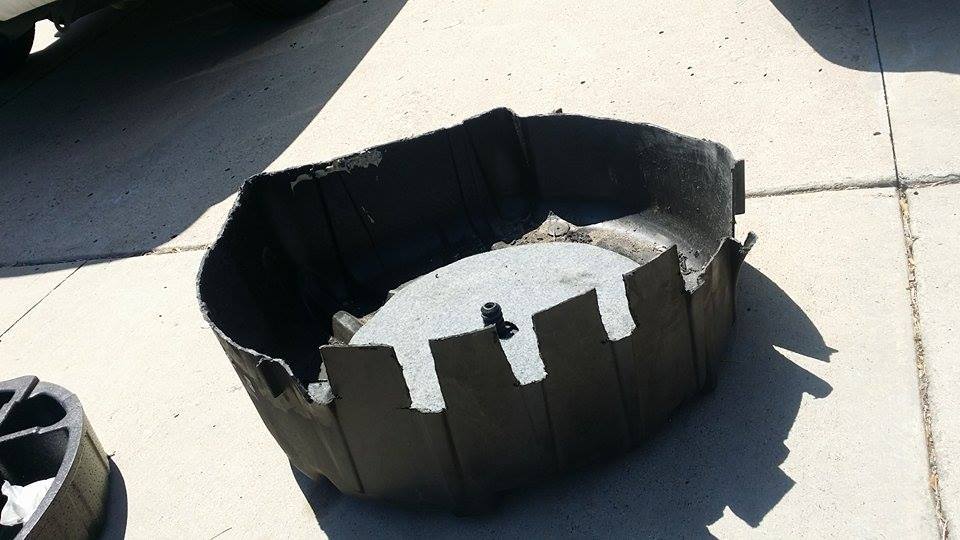
Here is the tub. Ta Daaaa!
")
Of course! Thank you.
06-23-2015, 06:48 PM
#114
Moderator Alumni
Wow. That tub structure is no joke. Looks like its super well built.
I've always imagined removing the rear tub + creating a new space for the battery back there + legit space for dual exhaust + functional diffuser. So... Im really interested in seeing how your project turns out
I've always imagined removing the rear tub + creating a new space for the battery back there + legit space for dual exhaust + functional diffuser. So... Im really interested in seeing how your project turns out
06-23-2015, 07:44 PM
#115
Senior Member
Thread Starter
Join Date: Jul 2011
Location: Sacramento, CA
Posts: 426
Likes: 0
Received 4 Likes
on
3 Posts
2005 Granite Gray C55
Wow. That tub structure is no joke. Looks like its super well built.
I've always imagined removing the rear tub + creating a new space for the battery back there + legit space for dual exhaust + functional diffuser. So... Im really interested in seeing how your project turns out
I've always imagined removing the rear tub + creating a new space for the battery back there + legit space for dual exhaust + functional diffuser. So... Im really interested in seeing how your project turns out
It'll be going to the exhaust shop Thursday morning to get finished up with the headers and cat section. Then I'll resume the diffuser build. I am still debating on running just the magnaflow 12468 in place as an xpipe or run that and mufflers as well. I'll have to ask a knowledgeable person on this issue.
07-02-2015, 01:34 AM
#116
Senior Member
Thread Starter
Join Date: Jul 2011
Location: Sacramento, CA
Posts: 426
Likes: 0
Received 4 Likes
on
3 Posts
2005 Granite Gray C55
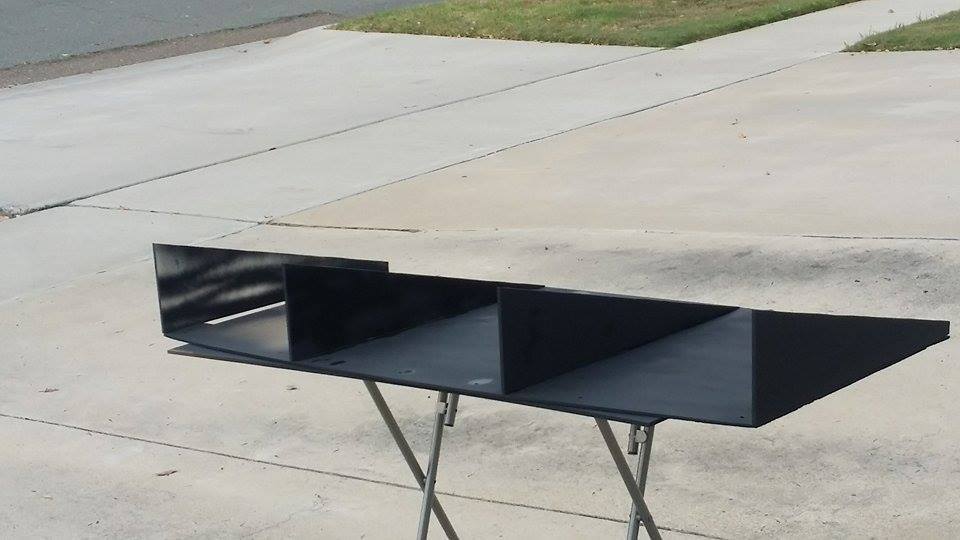
Finished up the 4 fin diffuser. Made the tray from 3/16 plexisglass and fins with 1/4,
the total cost was about $110. Before I started this project I bought a sampler set with different sizes and thickness, I would test the durability with a blow torch to some samples with no high temperature paint , to high temperature paint, and high temperature with thermal tape.
The blow torch test were pretty exaggerated as I stuck the torch literally right in front of the pieces. Then did a realistic test of heating it from a distance and making note that air would cool it down.
Simple enough, I liked what I saw and felt pretty confident about running a plexiglass diffuser.


Applied 3 layers of rustroleum high heat and ultra high heat paint rated for up to 1200 degrees.

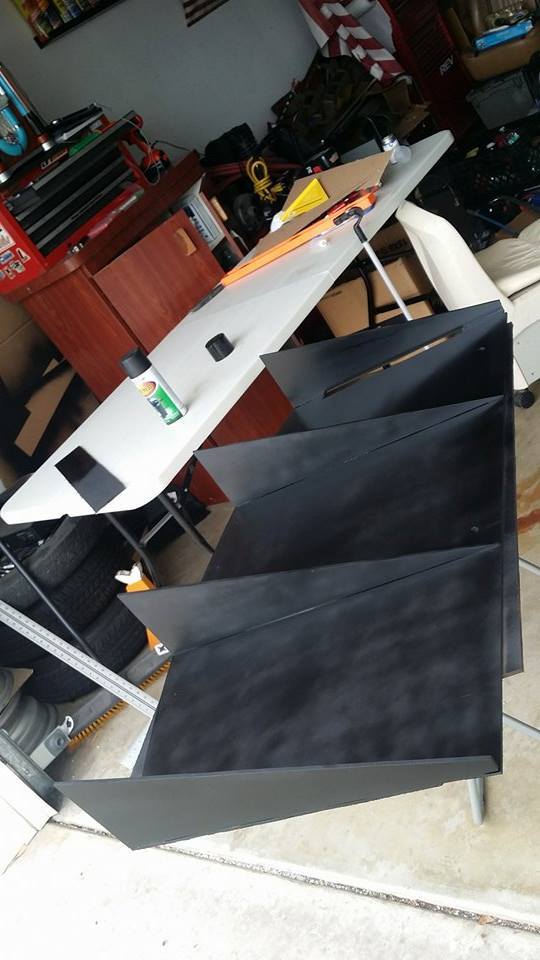
I'll get a better picture up soon.

Then I ordered the Magnaflow 12468 yesterday and should be arriving tomorrow.
All that is needed to be done now is install the magnaflow 12468 where the secondaries are and run dual pipes back into a quad. Then I can go get an OE Tuning.
the total cost was about $110. Before I started this project I bought a sampler set with different sizes and thickness, I would test the durability with a blow torch to some samples with no high temperature paint , to high temperature paint, and high temperature with thermal tape.
The blow torch test were pretty exaggerated as I stuck the torch literally right in front of the pieces. Then did a realistic test of heating it from a distance and making note that air would cool it down.
Simple enough, I liked what I saw and felt pretty confident about running a plexiglass diffuser.


Applied 3 layers of rustroleum high heat and ultra high heat paint rated for up to 1200 degrees.

I'll get a better picture up soon.
Then I ordered the Magnaflow 12468 yesterday and should be arriving tomorrow.
All that is needed to be done now is install the magnaflow 12468 where the secondaries are and run dual pipes back into a quad. Then I can go get an OE Tuning.

 07-03-2015, 06:01 AM
#120
Senior Member
Thread Starter
Join Date: Jul 2011
Location: Sacramento, CA
Posts: 426
Likes: 0
Received 4 Likes
on
3 Posts
2005 Granite Gray C55
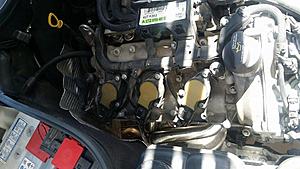
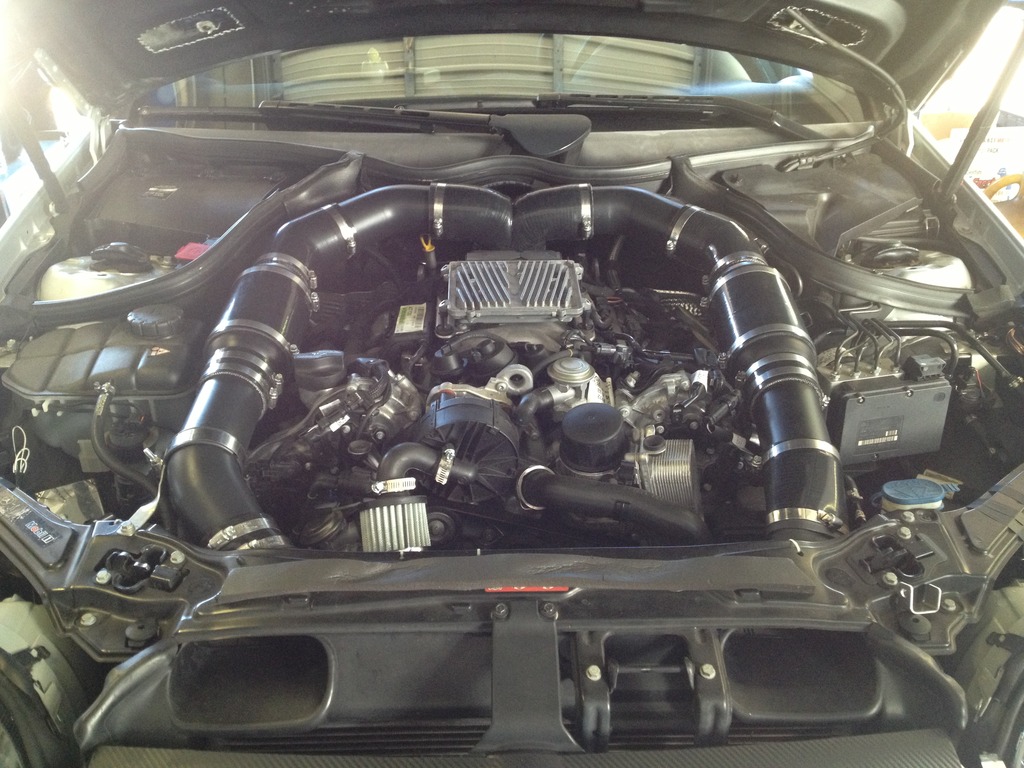
It is part of the NeedSwings kit. It basically comes from the C32 design but with some altering to it. Such as the crankcase vent hose is shorter and gets a filter in place of the missing air box.
I'm currently talking to Rob from NeedSwings right now, great guy. That was a picture he showed me.
Cost a whooping $800. Gotta pay to play lol
I'm currently talking to Rob from NeedSwings right now, great guy. That was a picture he showed me.
Cost a whooping $800. Gotta pay to play lol
07-08-2015, 12:57 AM
#121
Senior Member
Thread Starter
Join Date: Jul 2011
Location: Sacramento, CA
Posts: 426
Likes: 0
Received 4 Likes
on
3 Posts
2005 Granite Gray C55
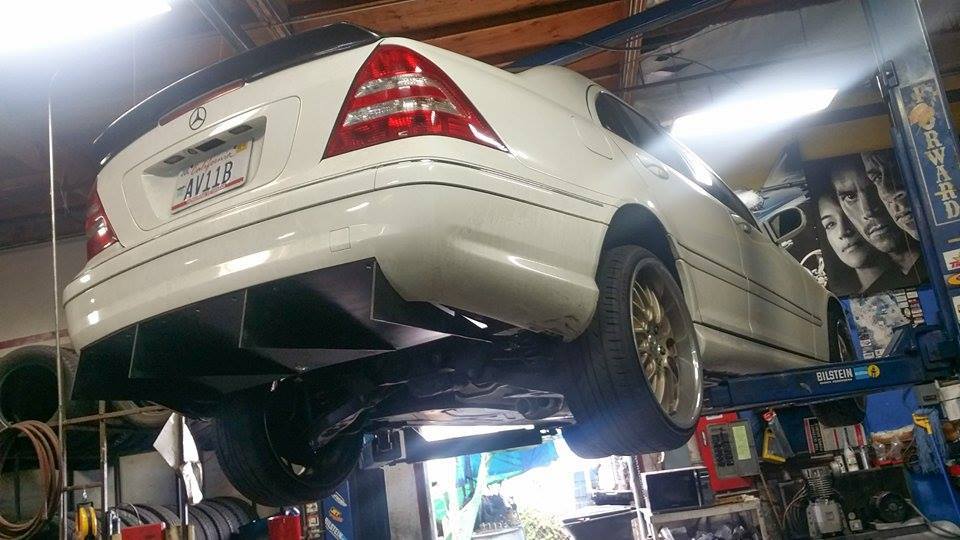
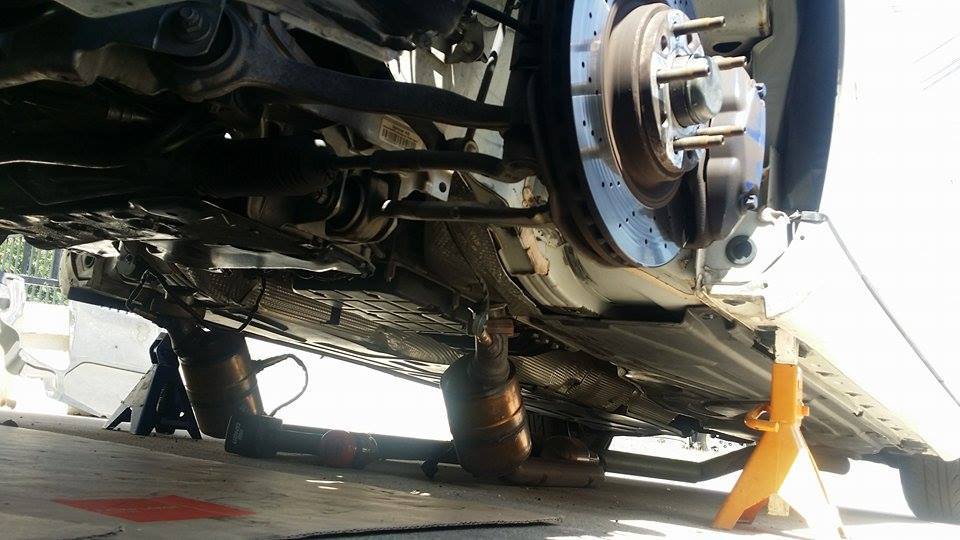
Cars on the lift getting the Magnaflow muffler/xpipe fitted. Question now is Quads or turn down exhaust?
Also, such a great difference in performance. Even on 19s I can feel a significant gain and my MPG hasn't dropped below 19, on the streets and highway. As oppose to before when I only got 13, 14, 15s. So I can't wait to be picking up the 17x9 Forgestar set up this week!
Still need a tune, AFR is off and gas smell to starting to kill me a little.
07-08-2015, 03:13 PM
#123
Senior Member
Thread Starter
Join Date: Jul 2011
Location: Sacramento, CA
Posts: 426
Likes: 0
Received 4 Likes
on
3 Posts
2005 Granite Gray C55
It is pretty good, the magnaflow is as close as it can be to the headers collector without removing the secondaries. My primaries are out and since the secondaries aren't honeycombed from what some sources told me, I'd figure I would just leave them in as a "hey those are my cats" reason lol.
You feel some big benefits from running the dual set ups with an X pipe as oppose to Y pipe into a slightly larger pipe like how it was stock.

The way our sway bars are, you can only run one pipe through the notch so I ran 2 pipes that went around the differential to set up for the quad when ever I get the tips in. As right now, the lowest point on my car is the pipes that run under the sway bars, but I am raising the car up a bit when coilovers come in, so not even worried lol
You feel some big benefits from running the dual set ups with an X pipe as oppose to Y pipe into a slightly larger pipe like how it was stock.

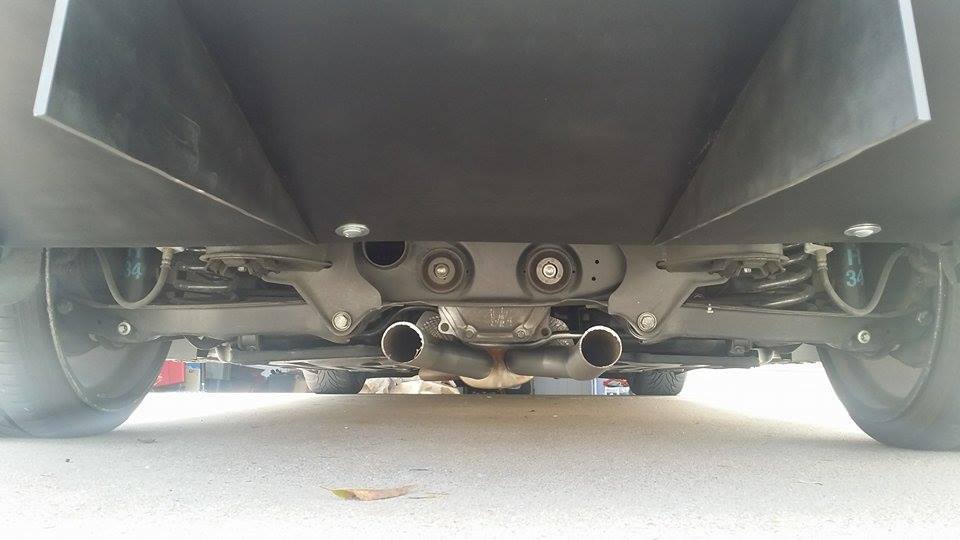
The way our sway bars are, you can only run one pipe through the notch so I ran 2 pipes that went around the differential to set up for the quad when ever I get the tips in. As right now, the lowest point on my car is the pipes that run under the sway bars, but I am raising the car up a bit when coilovers come in, so not even worried lol
07-08-2015, 07:16 PM
#124
Moderator Alumni
Im pretty sure i've seen people run both pipes to the left where the sway bar has space for the exhaust, you just have to run them close together. That way you dont need to raise the car or worry about scraping the swaybar.
Also - holy ****, no primaries?! haha. Need sound clip w/o axle back and primaries!
Also - holy ****, no primaries?! haha. Need sound clip w/o axle back and primaries!


