New C32 24hr modification marathon WOW it's totally transformed
 01-27-2016, 01:15 PM
#1
Junior Member
Thread Starter

Join Date: Jan 2012
Location: Royston, UK
Posts: 28
Likes: 0
Received 0 Likes
on
0 Posts
C32 AMG
New C32 24hr modification marathon WOW it's totally transformed
Hi all
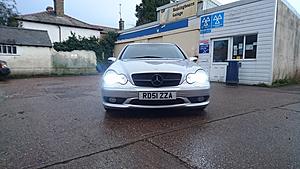
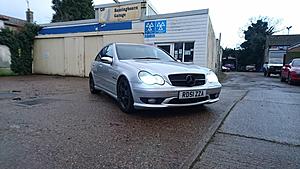
I'm back in a Mercedes my last being a CL55 about 18 months ago and last Sunday I picked up a C32 AMG.
Here's a few pictures of how it looked when I got it home:
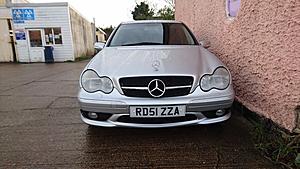

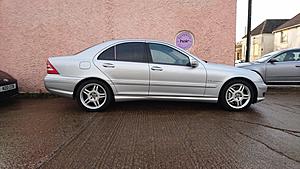

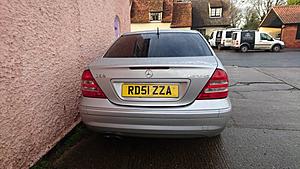
My wife said it's very plain and very grandad'ish which made me sulk
So I immediately started planning what I will do to it to make it my own and more aggressive looking and through the week I ordered a few bits then Friday at 5pm when I clocked off work I got the C32 up on the ramp and I started the huge amount of work I had set my self to transform the car in a day.
Here's what I did and how I did it with some pictures along the way.
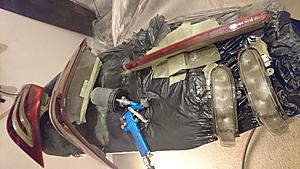
First job was to strip a load of parts:
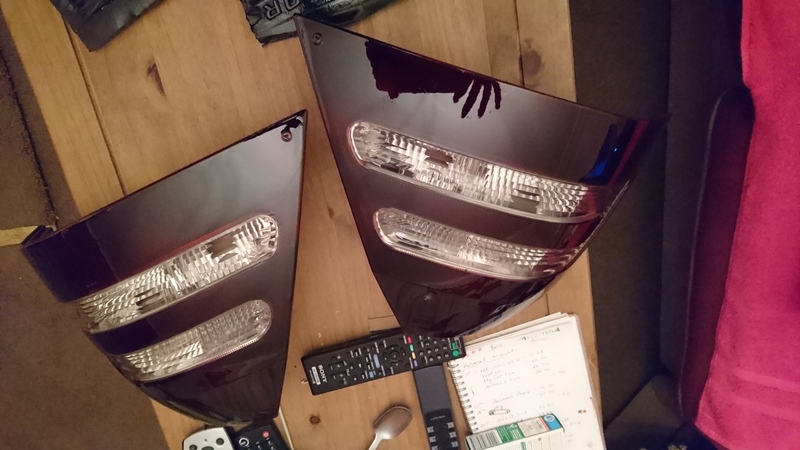
-the rear lights
-centre brake light
-wing mirror indicator lights,
-all the badges form the back and sides
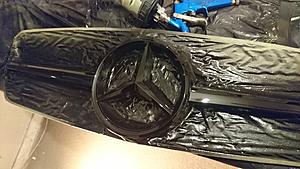
-front grill
-grill at the top of the bonnet
-wheels
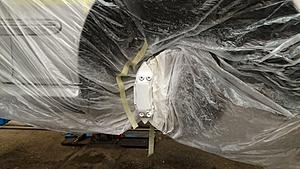
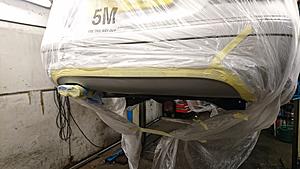
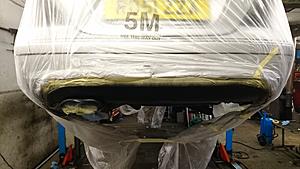
Once all this lot was off the car I whacked it all in the work truck and carted it all home before going back into work and using masking sheet I covered the entire car and then masked off the brake calipers to freshen them up with a very left field colour,
masked up:
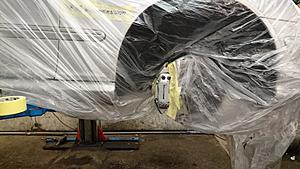
primed and white base coat:
Sprayed neon toxic green:
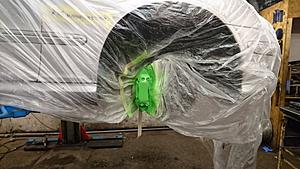
then lacquered:
unmasked:
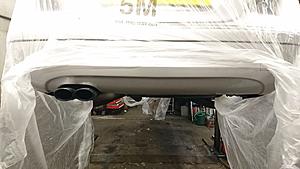
But before I unmasked I decided to paint the rear diffuser section on the rear bumper satin black
At this point it was now about 9pm so I called it a night at work and went home to spray all the parts I took home earlier.
I powered up the compressor and got out my small touch up spray gun fortunately I live in the middle of nowhere so I have no neighbours to annoy with the compressor firing up
I started by tinting the lights I do this by a process of adding standard base coat black to normal car lacquer and than applying coats till the desired effect is reached, done this way gives you a great high gloss finish and the tint is very translucent.
One coat:
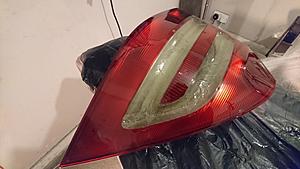
unmasked and three coats:

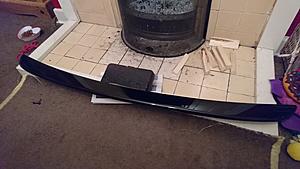
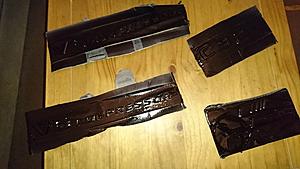
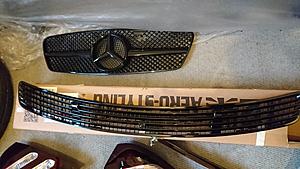
Next I sprayed all the high gloss black parts that's the badges, front grill, newly purchased boot spoiler and upper bonnet grill:

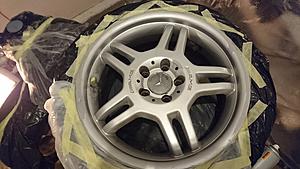
By this point it was now around 12am and I was getting tried but I still had the wheels to prep and paint satin black so I just got on with it.
masked up and about to prime (as I'm spraying satin black they done have to be perfect as imperfections don't show as bad)
at this point I just got on with it and didn't take any more pictures as i just forgot because I was so tired, I finally finished painting a 3am and went to bed.
But I was up again at 8am to start again.
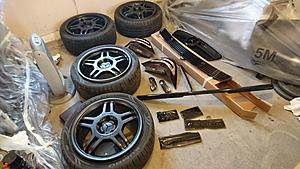
Here's everything unmasked and ready to load back ito the truck to take back into work:

I'm back in a Mercedes my last being a CL55 about 18 months ago and last Sunday I picked up a C32 AMG.
Here's a few pictures of how it looked when I got it home:


My wife said it's very plain and very grandad'ish which made me sulk
So I immediately started planning what I will do to it to make it my own and more aggressive looking and through the week I ordered a few bits then Friday at 5pm when I clocked off work I got the C32 up on the ramp and I started the huge amount of work I had set my self to transform the car in a day.
Here's what I did and how I did it with some pictures along the way.
First job was to strip a load of parts:
-the rear lights
-centre brake light
-wing mirror indicator lights,
-all the badges form the back and sides
-front grill
-grill at the top of the bonnet
-wheels
Once all this lot was off the car I whacked it all in the work truck and carted it all home before going back into work and using masking sheet I covered the entire car and then masked off the brake calipers to freshen them up with a very left field colour,
masked up:

primed and white base coat:

Sprayed neon toxic green:

then lacquered:

unmasked:

But before I unmasked I decided to paint the rear diffuser section on the rear bumper satin black


At this point it was now about 9pm so I called it a night at work and went home to spray all the parts I took home earlier.
I powered up the compressor and got out my small touch up spray gun fortunately I live in the middle of nowhere so I have no neighbours to annoy with the compressor firing up
I started by tinting the lights I do this by a process of adding standard base coat black to normal car lacquer and than applying coats till the desired effect is reached, done this way gives you a great high gloss finish and the tint is very translucent.
One coat:


unmasked and three coats:
Next I sprayed all the high gloss black parts that's the badges, front grill, newly purchased boot spoiler and upper bonnet grill:


By this point it was now around 12am and I was getting tried but I still had the wheels to prep and paint satin black so I just got on with it.
masked up and about to prime (as I'm spraying satin black they done have to be perfect as imperfections don't show as bad)

at this point I just got on with it and didn't take any more pictures as i just forgot because I was so tired, I finally finished painting a 3am and went to bed.
But I was up again at 8am to start again.
Here's everything unmasked and ready to load back ito the truck to take back into work:


Last edited by dpbayly; 01-27-2016 at 02:45 PM.
 01-27-2016, 01:15 PM
#2
Junior Member
Thread Starter
Join Date: Jan 2012
Location: Royston, UK
Posts: 28
Likes: 0
Received 0 Likes
on
0 Posts
C32 AMG
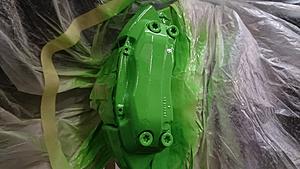
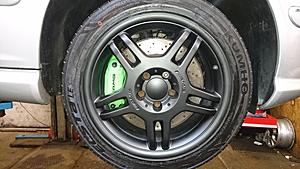
Once back at work a carried on with finishing the calipers now there dry, first I fitted the AMG graphics:
Ignore the ropey discs there to be changed
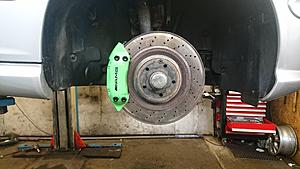
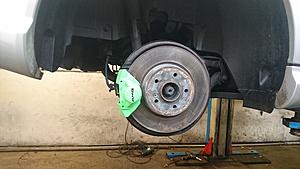
I then finalized with the finishing touch by picking out the bolts in black:
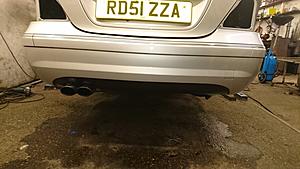
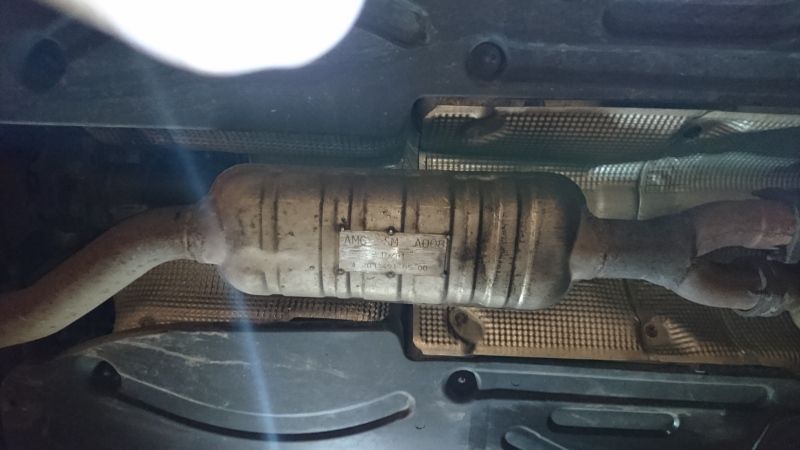
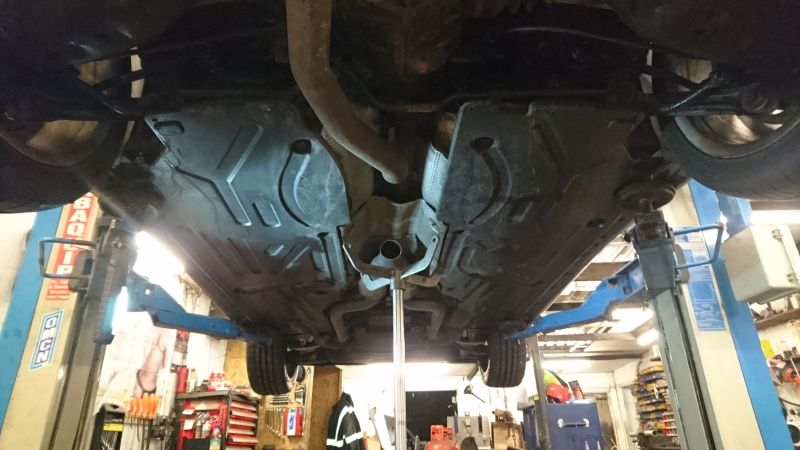
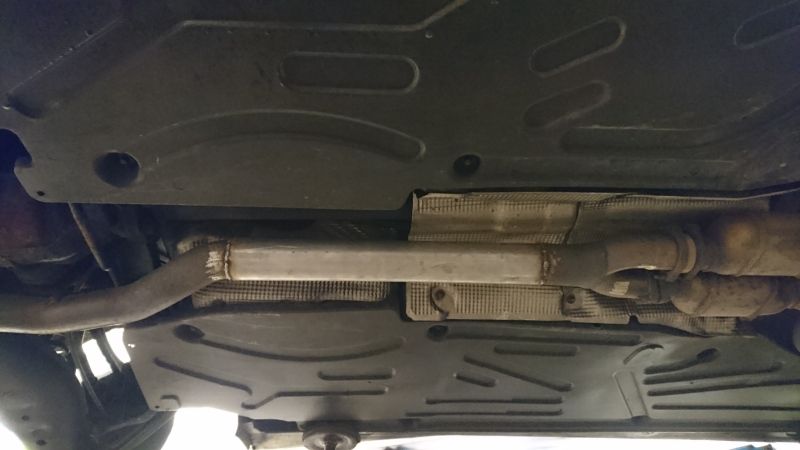
next little job was to remove the centre resonator from the exhaust (I left the secondary cats as I think it sounds to raspy with them removed) I replaced the box with a piece of pipe of the exact same diameter:
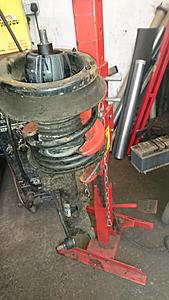
Next job was to fit the 40mm lowering springs:
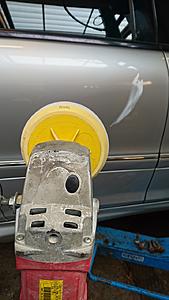
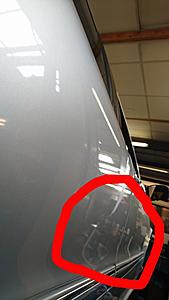
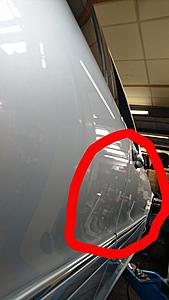
Then came the machine polishing, the paint felt smooth it may have been clay bar'ed recently but the MOP greatly improved the shine and made it even smoother.
Silver has to be the least rewarding colour to mop but if you look close at these two pics where I've circled you can see the after pic the reflection is more defined:
Before:
After:
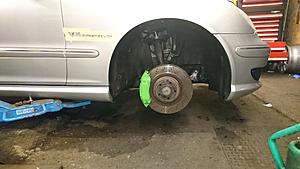
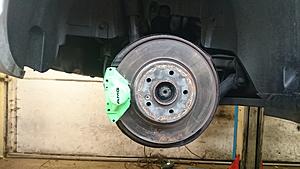
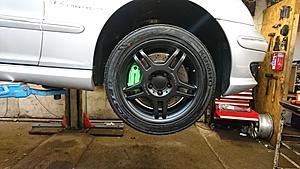
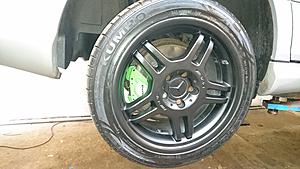
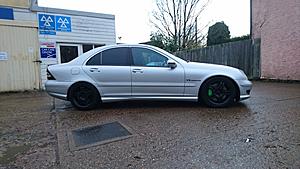
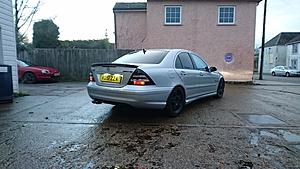
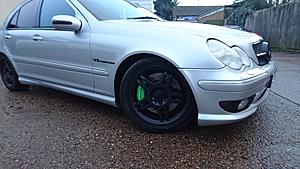
After mopping I refitted the wheels and with them being satin black they really make the brakes pop:
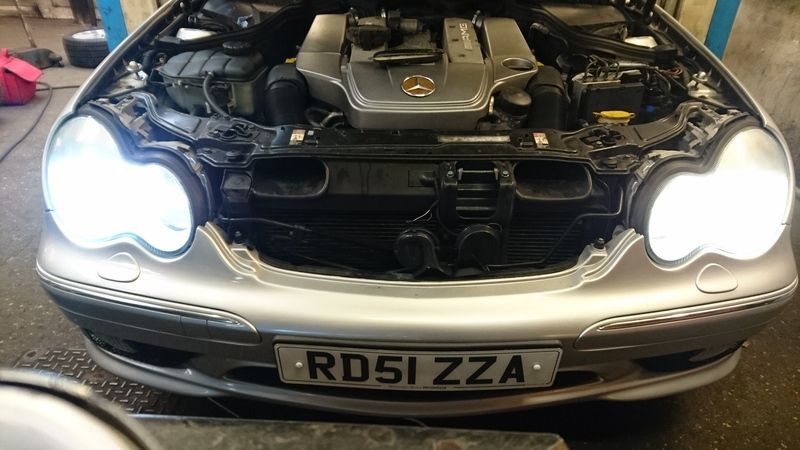
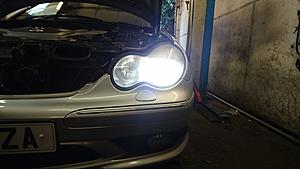
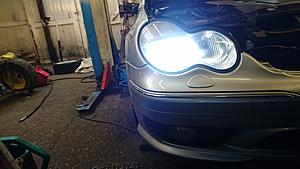
I then fitted the new 8K D2R Xenon bulbs in place of the stock ones:
New left old right:
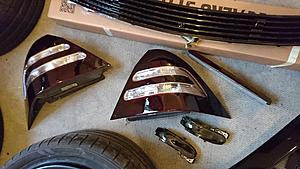
I then bonded on the new spoiler, refitted the badges, front grill, front grilll, upper bonnet grill and all the tinted lights.
Then a couple of other new additions with new 18 led number plate light units and new GPS antenna.
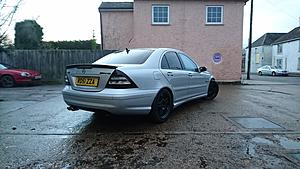
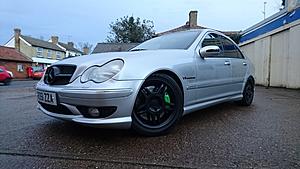
Then finally a quick coat of wax over the freshly reviled layer of paint and I was done by this time it was 4pm so 23hrs after I began I was finished and the transformation from "granddad mobil" to mean "get out my way I'm coming through" was done and looked amazing IMO.
here's a few pics the first 2 are reminders of how it looked:
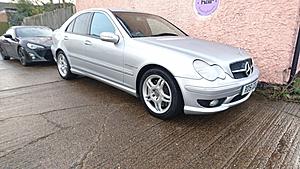
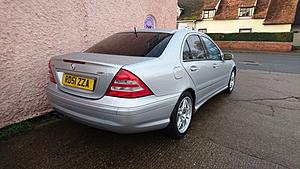
And NOW.....
Next job for another day is to roll the arches/fenders and fit front and rear spacers and to swap the fog light bulbs out for LED's and to rewire them as DRL's which I would have done today but I had ordered the wrong bulbs.
Well that's it hope you enjoyed the read.
Ignore the ropey discs there to be changed


I then finalized with the finishing touch by picking out the bolts in black:

next little job was to remove the centre resonator from the exhaust (I left the secondary cats as I think it sounds to raspy with them removed) I replaced the box with a piece of pipe of the exact same diameter:


Next job was to fit the 40mm lowering springs:

Then came the machine polishing, the paint felt smooth it may have been clay bar'ed recently but the MOP greatly improved the shine and made it even smoother.

Silver has to be the least rewarding colour to mop but if you look close at these two pics where I've circled you can see the after pic the reflection is more defined:
Before:

After:

After mopping I refitted the wheels and with them being satin black they really make the brakes pop:


I then fitted the new 8K D2R Xenon bulbs in place of the stock ones:
New left old right:


I then bonded on the new spoiler, refitted the badges, front grill, front grilll, upper bonnet grill and all the tinted lights.
Then a couple of other new additions with new 18 led number plate light units and new GPS antenna.
Then finally a quick coat of wax over the freshly reviled layer of paint and I was done by this time it was 4pm so 23hrs after I began I was finished and the transformation from "granddad mobil" to mean "get out my way I'm coming through" was done and looked amazing IMO.
here's a few pics the first 2 are reminders of how it looked:


And NOW.....


Next job for another day is to roll the arches/fenders and fit front and rear spacers and to swap the fog light bulbs out for LED's and to rewire them as DRL's which I would have done today but I had ordered the wrong bulbs.
Well that's it hope you enjoyed the read.
01-27-2016, 01:19 PM
#3
Junior Member
Thread Starter
Join Date: Jan 2012
Location: Royston, UK
Posts: 28
Likes: 0
Received 0 Likes
on
0 Posts
C32 AMG
Another little modification I carried out Monday after I looked into increasing the whine volume and stumbled across a thread about a DIY copy of the Code 3 intake mod and once I got into work I searched through the stores and found a perfect air filter with every thing I needed to carry out the mod:
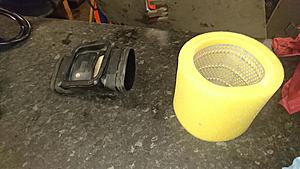
once the air filter was stripped down to it's components I fount I had the metal grill base then the fine and coarse foam filter:
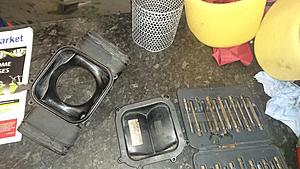
next I trimmed the plate down:
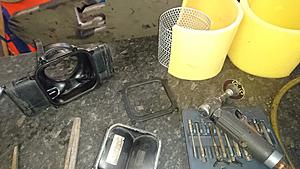
Then trimmed the metal grill to size;
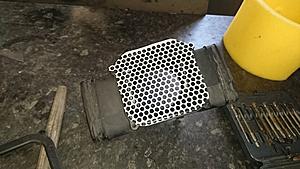
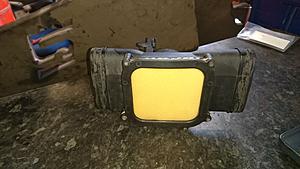
and here it is foam trimmed and back together and looks very professional IMO and it certainly dose what I want it do the whine is awesome:
Then at lunch time I called Eurocharged and spoke with Michael and spoke about a pulley and map upgrade and he told me to check the IAT as he said almost all the C32's he see's have a faulty ic pump and sure enough pushing it hard the temps crept up so I ordered a new pump which I'll get tomorrow and I also investigated it after work just to make sure it was going to be a straight forward fix and low and behold I had no power at the pump and the fuse 5 was fine and the relay when I unplugged it and plugged it back in clicked so I though that was working but after looking further it seemed even though the relay latched it wasn't working so replaced that and the pump fired up and I though bugger I've just ordered a non returnable pump but on road test the IAT still didn't come down so back into work I went and stripped it and the pump motor was working but the impeller doesn't move so happy days the power issue is now fixed
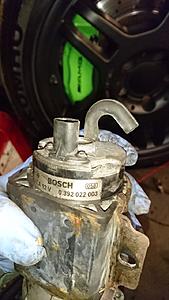
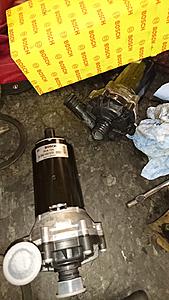
Well the new pump turned up the following day but before I fitted it I parked the car over the wash pad at work and flushed the heat exchanger to make sure it was free flowing as I had no idea how long it hadn't been working so I guess coolant and sediment has sat and built up but after 60 seconds flushing it through it flowed clear, clean and fast so I went ahead and fitted the pump and bled it via the instructions found on the crossfire forum which were very easy and then on road test HAPPY DAYS the IAT never went above 27 degrees.
AND
My god there must be a good 60-70 or more BHP (does anyone know how much it's reined in?) I had no idea when I collected it 2 Sunday's ago that there was anything wrong mainly as I had nothing to compare it too so I thought it went well but now the IC pumps changed its allowing it to run at full power with it's lower intake temps and it's amazing, the difference is night and day.
I'm looking into hooking up and wiring in a IAT gauge so I can always see what's going on.
New pump:

once the air filter was stripped down to it's components I fount I had the metal grill base then the fine and coarse foam filter:

next I trimmed the plate down:

Then trimmed the metal grill to size;

and here it is foam trimmed and back together and looks very professional IMO and it certainly dose what I want it do the whine is awesome:

Then at lunch time I called Eurocharged and spoke with Michael and spoke about a pulley and map upgrade and he told me to check the IAT as he said almost all the C32's he see's have a faulty ic pump and sure enough pushing it hard the temps crept up so I ordered a new pump which I'll get tomorrow and I also investigated it after work just to make sure it was going to be a straight forward fix and low and behold I had no power at the pump and the fuse 5 was fine and the relay when I unplugged it and plugged it back in clicked so I though that was working but after looking further it seemed even though the relay latched it wasn't working so replaced that and the pump fired up and I though bugger I've just ordered a non returnable pump but on road test the IAT still didn't come down so back into work I went and stripped it and the pump motor was working but the impeller doesn't move so happy days the power issue is now fixed

Well the new pump turned up the following day but before I fitted it I parked the car over the wash pad at work and flushed the heat exchanger to make sure it was free flowing as I had no idea how long it hadn't been working so I guess coolant and sediment has sat and built up but after 60 seconds flushing it through it flowed clear, clean and fast so I went ahead and fitted the pump and bled it via the instructions found on the crossfire forum which were very easy and then on road test HAPPY DAYS the IAT never went above 27 degrees.
AND
My god there must be a good 60-70 or more BHP (does anyone know how much it's reined in?) I had no idea when I collected it 2 Sunday's ago that there was anything wrong mainly as I had nothing to compare it too so I thought it went well but now the IC pumps changed its allowing it to run at full power with it's lower intake temps and it's amazing, the difference is night and day.
I'm looking into hooking up and wiring in a IAT gauge so I can always see what's going on.
New pump:

Last edited by dpbayly; 01-27-2016 at 01:21 PM.

 01-27-2016, 02:47 PM
#5
Junior Member
Thread Starter
Join Date: Jan 2012
Location: Royston, UK
Posts: 28
Likes: 0
Received 0 Likes
on
0 Posts
C32 AMG
01-27-2016, 03:12 PM
#6
MBWorld Fanatic!
I'm looking into hooking up and wiring in a IAT gauge so I can always see what's going on.
01-27-2016, 03:34 PM
#7
Junior Member
Thread Starter
Join Date: Jan 2012
Location: Royston, UK
Posts: 28
Likes: 0
Received 0 Likes
on
0 Posts
C32 AMG
Funny that I actually plugged in the ELM27 Bluetooth transmitter into the OBD socket the night I finished swapping out the pump and it worked great on the Full Torque app I have on the phone.
Actually while on the subject dose anyone know if you can just leave the ELM27 transmitter plugged in only reason I ask is the OBD socket stays live even when switched off so there still powered up although I don't know what they draw power wise?
Actually while on the subject dose anyone know if you can just leave the ELM27 transmitter plugged in only reason I ask is the OBD socket stays live even when switched off so there still powered up although I don't know what they draw power wise?
Trending Topics
01-28-2016, 05:34 PM
#8
Funny that I actually plugged in the ELM27 Bluetooth transmitter into the OBD socket the night I finished swapping out the pump and it worked great on the Full Torque app I have on the phone.
Actually while on the subject dose anyone know if you can just leave the ELM27 transmitter plugged in only reason I ask is the OBD socket stays live even when switched off so there still powered up although I don't know what they draw power wise?
Actually while on the subject dose anyone know if you can just leave the ELM27 transmitter plugged in only reason I ask is the OBD socket stays live even when switched off so there still powered up although I don't know what they draw power wise?
01-29-2016, 05:28 PM
#13
Junior Member
Thread Starter
Join Date: Jan 2012
Location: Royston, UK
Posts: 28
Likes: 0
Received 0 Likes
on
0 Posts
C32 AMG
The correct LED bulbs were supposed to be with me today but they didn't turn up so hopefully I'll get them Monday and I'll do a write up of how I rewire the fogs as DRL's
01-30-2016, 08:51 AM
#14


