DIY Quad Bi-Xenon Projector Setup on GLK 350 Picture Heavy (59 pics)
 02-27-2014, 03:12 PM
#1
Junior Member
Thread Starter

Join Date: Nov 2012
Posts: 71
Likes: 0
Received 0 Likes
on
0 Posts
2008 Mercedes C300 4Matic Sport Sedan
DIY Quad Bi-Xenon Projector Setup on GLK 350 Picture Heavy (59 pics)
Hello everyone! I am posting a how to for my recent projector retrofit on the wife’s GLK.
All parts we sourced from www.theretrofitsource.com.
I have done quite a few retrofits, and I would rate this one as moderate on my own difficulty scale. It takes a little extra elbow grease than some, but I never reached a point that I wanted to throw them against the wall, so I’d do it again.
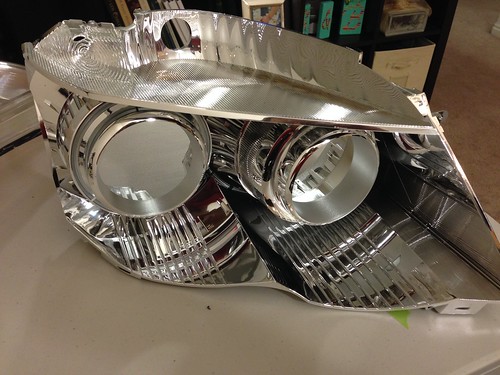
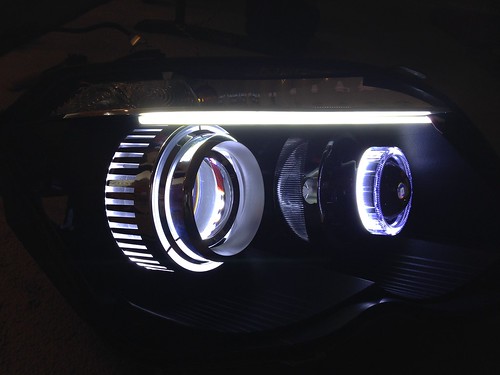
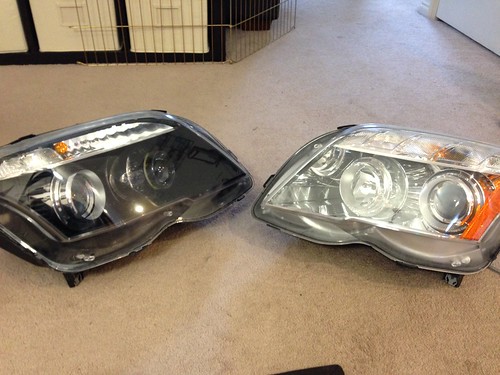
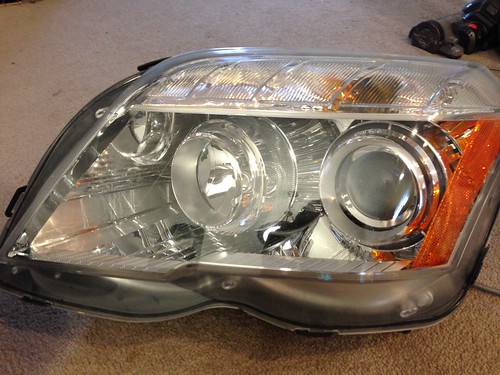
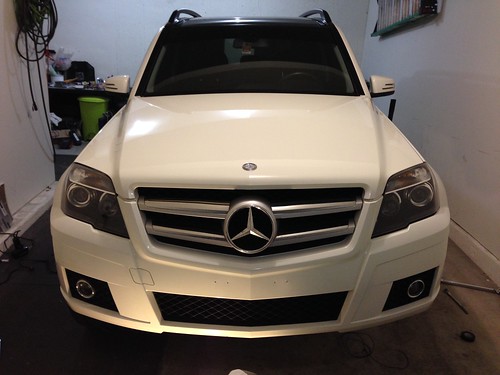
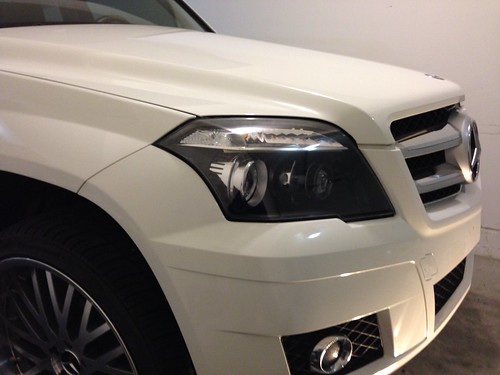
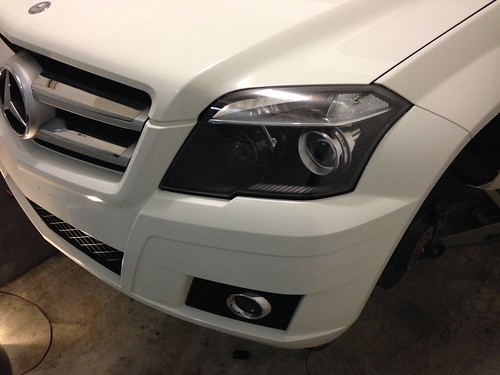
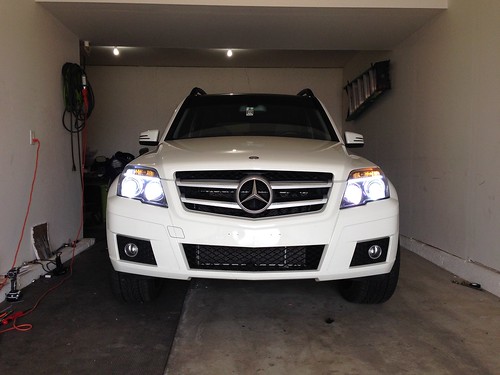
Here’s a spoiler for how they turned out:

Before:

Now I’ll go into the steps that I took to do it. First things first. Planning.
I know that the GLK projectors are 3” and assumed they were Hella E55 Projectors as are most Mercedes are. They are very close, but my assumption was wrong. It didn’t really cause too much of a headache to make them fit. The inner lights for the high beams are H7 reflector housings so I decided to do the Morimoto 2.5” Mini H1 projectors. This is because they can mount in with no cutting of the factory reflector.
My wife liked the LED DRLs that I had installed in my C-Class, so we did something similar on hers. I ordered a 12” LED for the top portion of the light, and an LED ring for the 2.5” projector (I think it was an 80mm). I had one E46 Halo ring left over from the C-Class install, so I used that around the low beam projector.
Because of the car’s CANBUS system, I also ordered harnesses for the low beams to not flash or trigger a bulb out warning. I got a relay harness for the “high beam” ballasts, as I intended to have all 4 lights on at the same time in the low beam mode. Flipping on the highs just moves a plate inside the projector moving the cutoff line and shining as a high beam.
I ordered 5000K bulbs and 35W ballasts. I prefer the white light without any hint of blue. 35W ballasts are what come stock on the cars with the lighting package, and any other time I’ve had 50W ballasts, I can’t tell a difference in the output anyway.
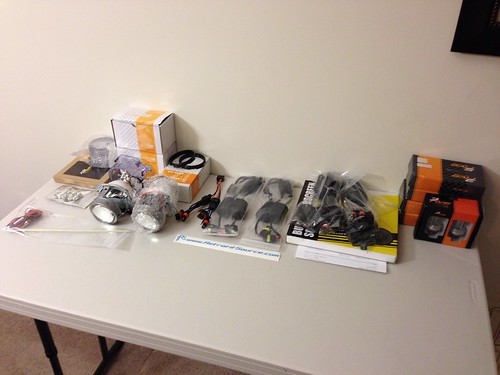
Here’s everything it took to do the project:
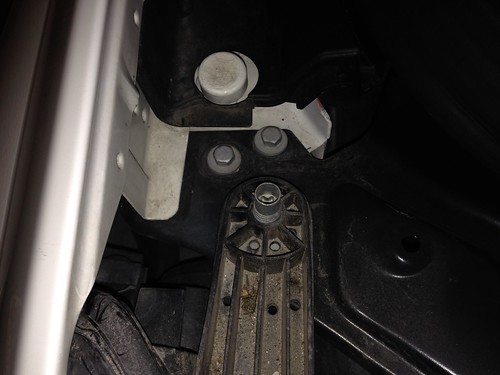
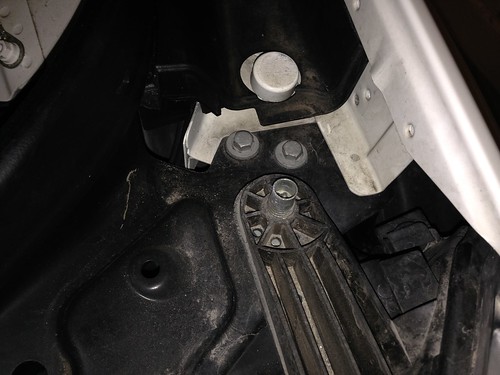
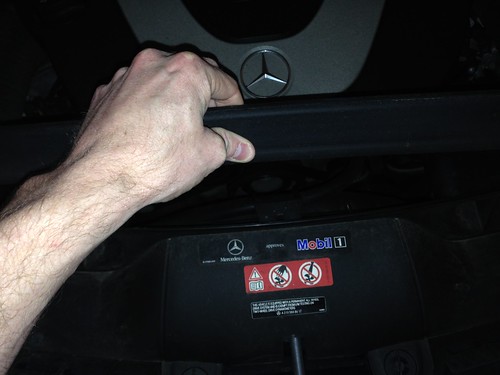
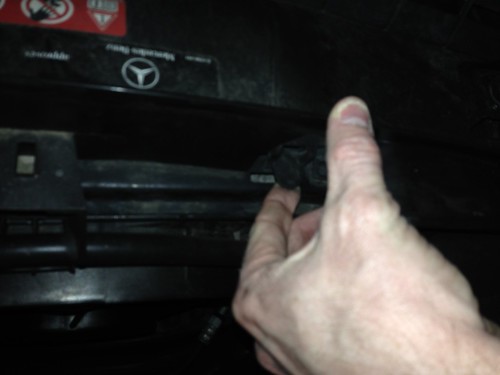
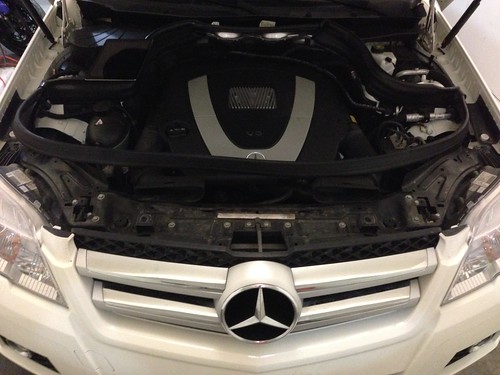
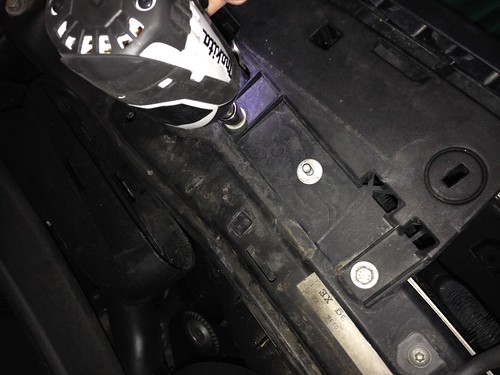
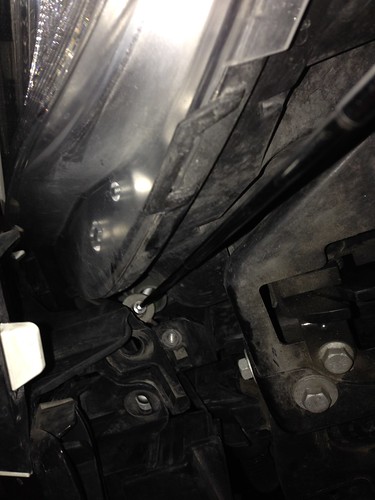
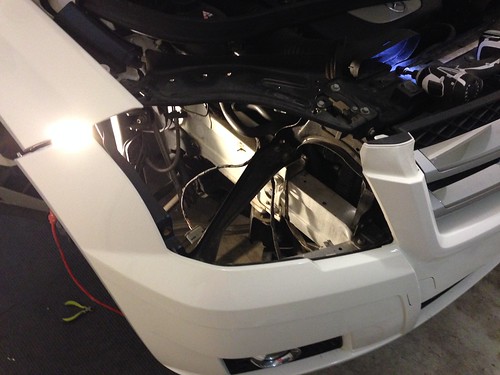
To begin, I had to take the bumper down. I removed the inner fender liner, but you can probably do it without removing it. I just didn’t want to have to pry it away to reach everything. There are just a few plastic clips holding it in, and a bolt or 2. The bumper is held on by 2 bolts attaching it to the fender at the joint, and a bunch of 10mm bolts across the front in between the headlights.
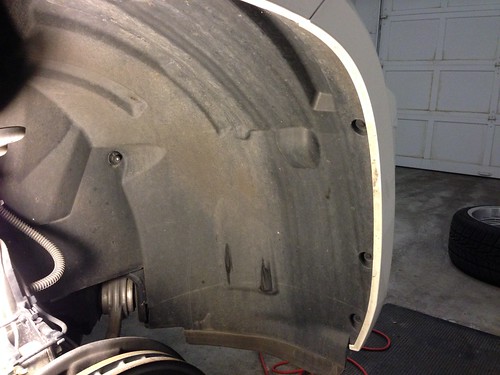
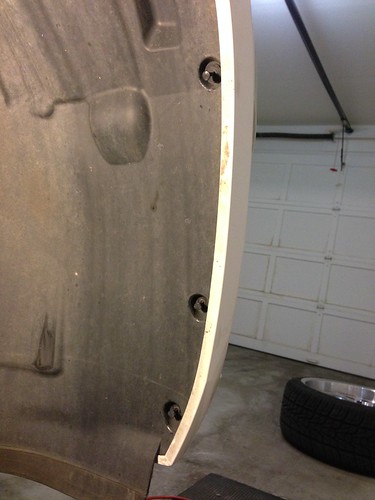
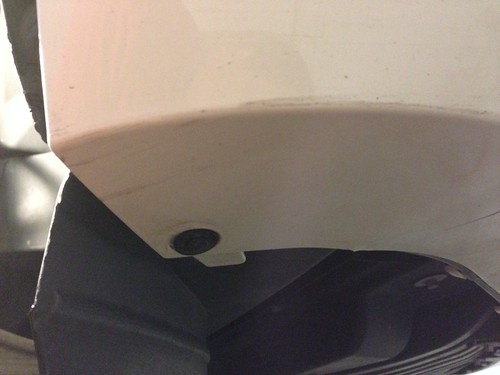
The only bolt you can see in this picture underneath is the one that holds the fender liner in.
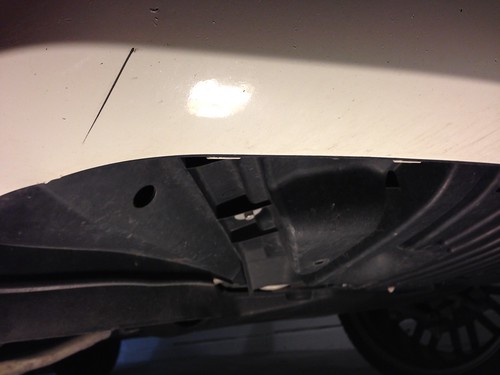
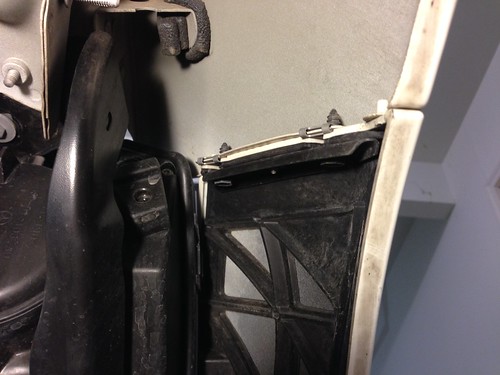
Here’s what the lights look like from the back side with the liner removed.
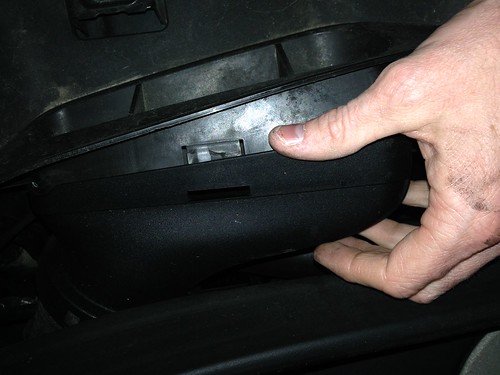
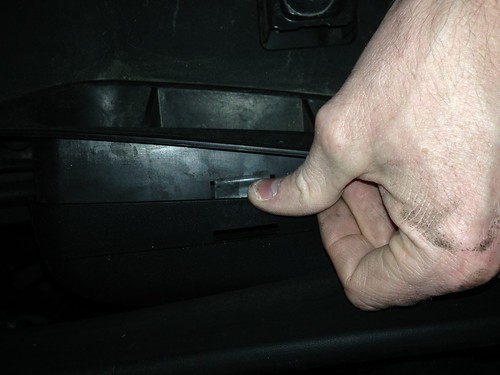
To access the bolts across the front I just needed to remove the plastic covers.
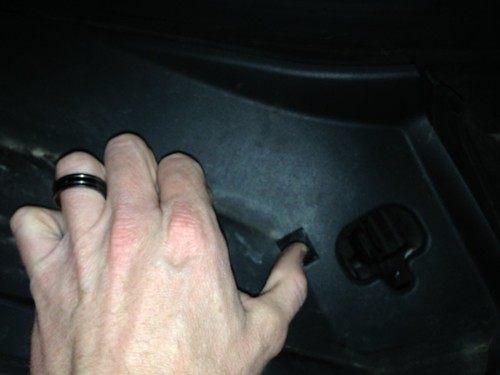
Take these 2 little plastic clips and twist to get them off:
Pull the rubber seal
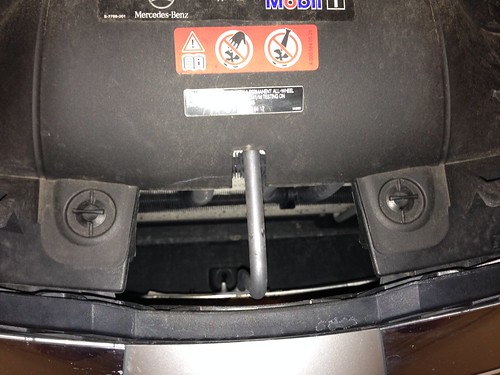
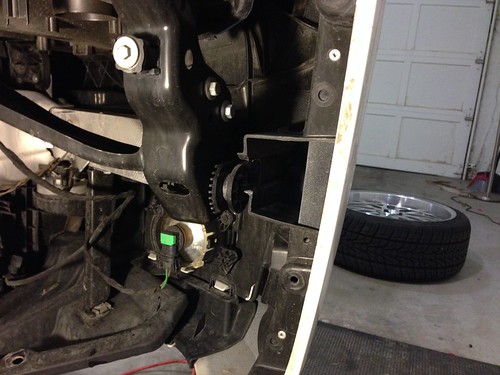
Remove the air intake hoses
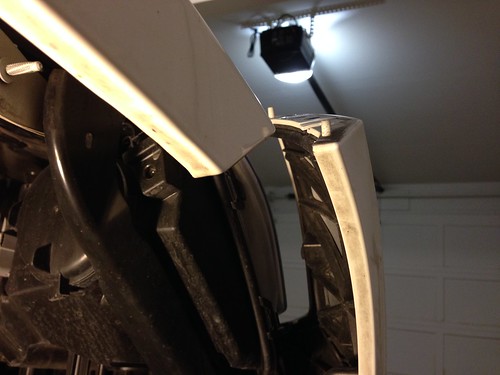
Lift up the whole center plastic by removing the last 2 clips on each side:
All off!
Now take off all of the bolts across the front that hold the grill and bumper cover on:
Here are the 2 bolts I was talking about before, that hold the bumper to the fenders. Take them out with a 10mm wrench.
Slide the bumper out and only slightly down to unattach it.
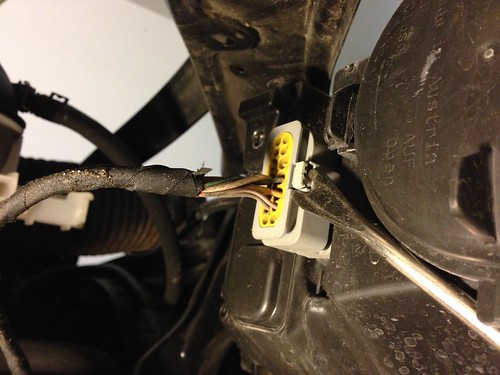
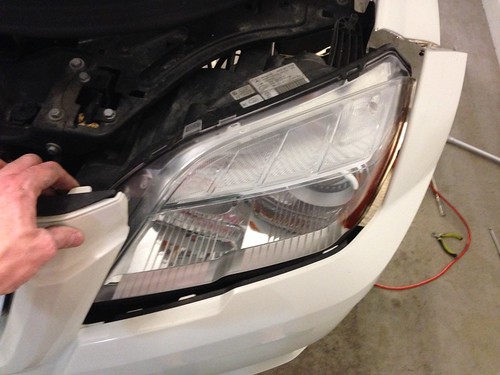
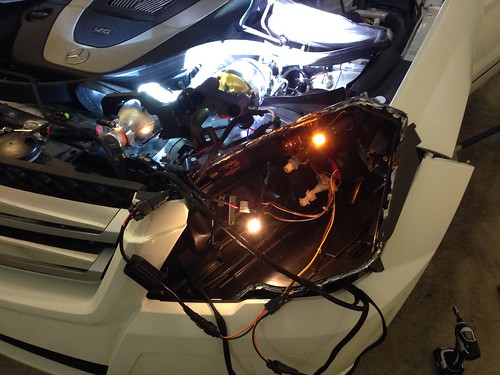
I then took off the 3-8mm bolts on each headlight and unclipped the plug to the back of the headlight.
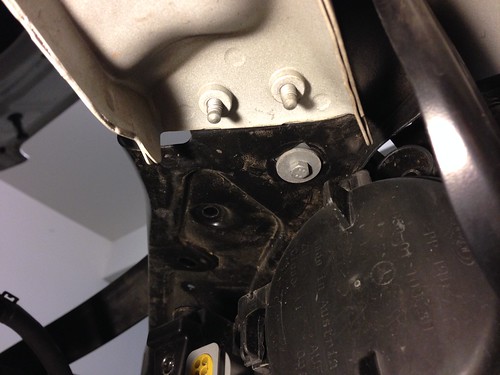
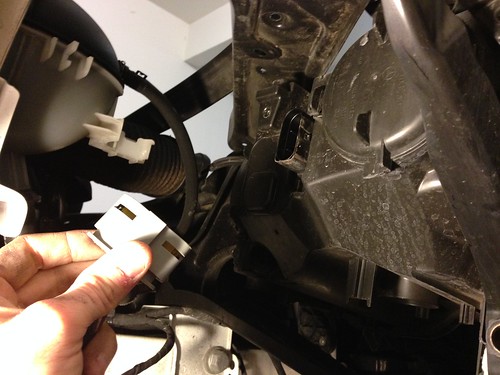
Pull the bumper away a bit and wiggle until you get the light out. Boom!
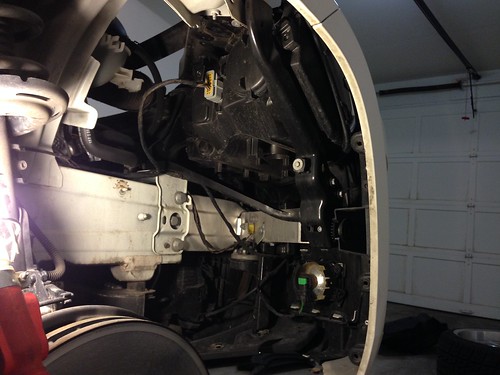
As you can see, the bumper flexes quite a bit to allow you to pull the headlight:
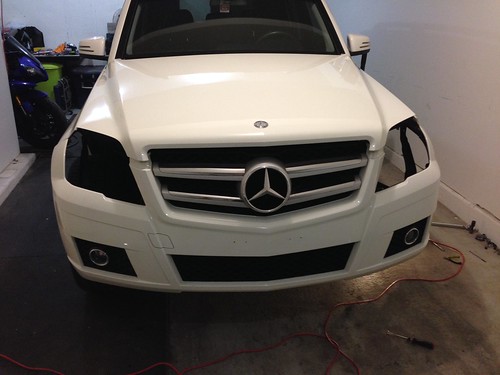
It only took about an hour and a half to remove the headlights from the car, and I was finding out where things were connected along the way. It wasn’t too different from the C-Class, but there were some differences in the process.
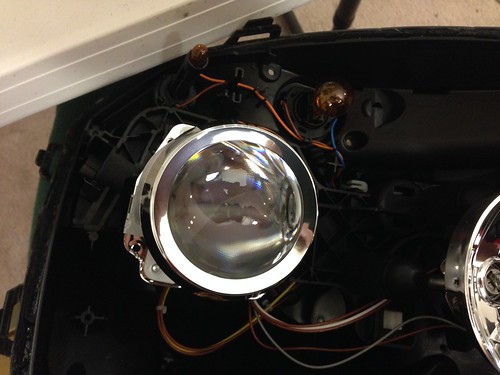
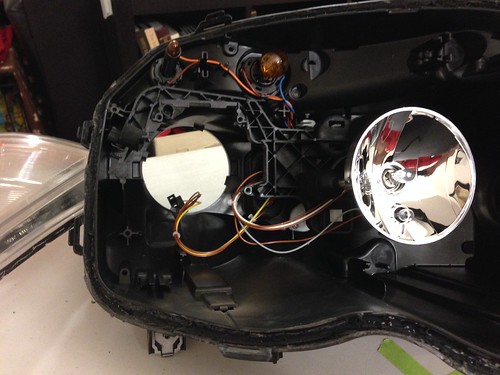
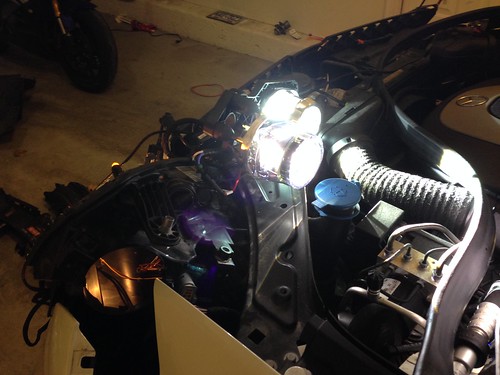
Once the headlights were out, I continued under the assumption that these were like the ones on the C-Class and would release with a little heat. That’s not the case so don’t try to oven bake these lights. They use a rubber kind of adhesive that heat doesn’t work on. You’ll melt the plastic before the rubber adhesive breaks down. Instead the tear down turned into a scrape and pry job. Luckily the black plastic is pliable enough that it didn’t crack all along the seam as I was prying under it. I used a hook tool in a few of the tighter places to get under the channel of adhesive. Eventually the light starts showing real progress and I was able to separate the two halves.

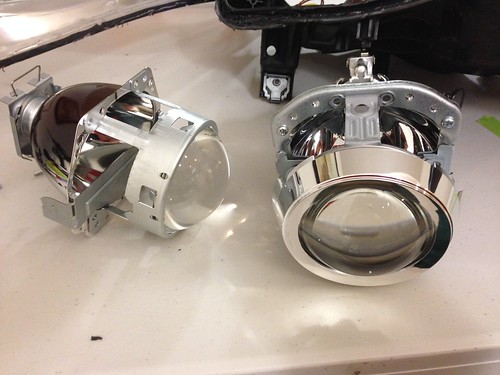
I removed the 3 Torx screws on the back of the light and that was enough to release the chrome housing from the front of the housing.
I then took off the halogen projector with the 3 screws that hold it in, and replaced that with the E55-R projector from TRS.
I guess there's a limit to number of images, so I have to do a second post here for the rest:
All parts we sourced from www.theretrofitsource.com.
I have done quite a few retrofits, and I would rate this one as moderate on my own difficulty scale. It takes a little extra elbow grease than some, but I never reached a point that I wanted to throw them against the wall, so I’d do it again.
Here’s a spoiler for how they turned out:
Before:
Now I’ll go into the steps that I took to do it. First things first. Planning.
I know that the GLK projectors are 3” and assumed they were Hella E55 Projectors as are most Mercedes are. They are very close, but my assumption was wrong. It didn’t really cause too much of a headache to make them fit. The inner lights for the high beams are H7 reflector housings so I decided to do the Morimoto 2.5” Mini H1 projectors. This is because they can mount in with no cutting of the factory reflector.
My wife liked the LED DRLs that I had installed in my C-Class, so we did something similar on hers. I ordered a 12” LED for the top portion of the light, and an LED ring for the 2.5” projector (I think it was an 80mm). I had one E46 Halo ring left over from the C-Class install, so I used that around the low beam projector.
Because of the car’s CANBUS system, I also ordered harnesses for the low beams to not flash or trigger a bulb out warning. I got a relay harness for the “high beam” ballasts, as I intended to have all 4 lights on at the same time in the low beam mode. Flipping on the highs just moves a plate inside the projector moving the cutoff line and shining as a high beam.
I ordered 5000K bulbs and 35W ballasts. I prefer the white light without any hint of blue. 35W ballasts are what come stock on the cars with the lighting package, and any other time I’ve had 50W ballasts, I can’t tell a difference in the output anyway.
Here’s everything it took to do the project:
To begin, I had to take the bumper down. I removed the inner fender liner, but you can probably do it without removing it. I just didn’t want to have to pry it away to reach everything. There are just a few plastic clips holding it in, and a bolt or 2. The bumper is held on by 2 bolts attaching it to the fender at the joint, and a bunch of 10mm bolts across the front in between the headlights.
The only bolt you can see in this picture underneath is the one that holds the fender liner in.
Here’s what the lights look like from the back side with the liner removed.
To access the bolts across the front I just needed to remove the plastic covers.
Take these 2 little plastic clips and twist to get them off:
Pull the rubber seal
Remove the air intake hoses
Lift up the whole center plastic by removing the last 2 clips on each side:
All off!
Now take off all of the bolts across the front that hold the grill and bumper cover on:
Here are the 2 bolts I was talking about before, that hold the bumper to the fenders. Take them out with a 10mm wrench.
Slide the bumper out and only slightly down to unattach it.
I then took off the 3-8mm bolts on each headlight and unclipped the plug to the back of the headlight.
Pull the bumper away a bit and wiggle until you get the light out. Boom!
As you can see, the bumper flexes quite a bit to allow you to pull the headlight:
It only took about an hour and a half to remove the headlights from the car, and I was finding out where things were connected along the way. It wasn’t too different from the C-Class, but there were some differences in the process.
Once the headlights were out, I continued under the assumption that these were like the ones on the C-Class and would release with a little heat. That’s not the case so don’t try to oven bake these lights. They use a rubber kind of adhesive that heat doesn’t work on. You’ll melt the plastic before the rubber adhesive breaks down. Instead the tear down turned into a scrape and pry job. Luckily the black plastic is pliable enough that it didn’t crack all along the seam as I was prying under it. I used a hook tool in a few of the tighter places to get under the channel of adhesive. Eventually the light starts showing real progress and I was able to separate the two halves.
I removed the 3 Torx screws on the back of the light and that was enough to release the chrome housing from the front of the housing.
I then took off the halogen projector with the 3 screws that hold it in, and replaced that with the E55-R projector from TRS.
I guess there's a limit to number of images, so I have to do a second post here for the rest:
 02-27-2014, 03:12 PM
#2
Junior Member
Thread Starter
Join Date: Nov 2012
Posts: 71
Likes: 0
Received 0 Likes
on
0 Posts
2008 Mercedes C300 4Matic Sport Sedan
Continuation:
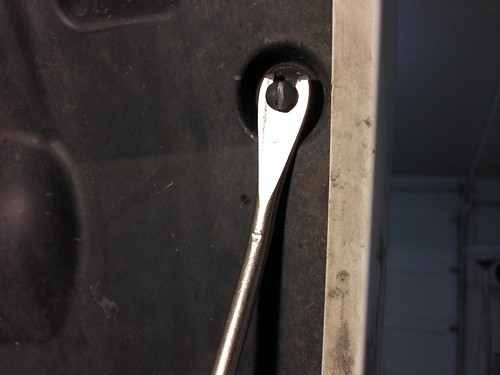
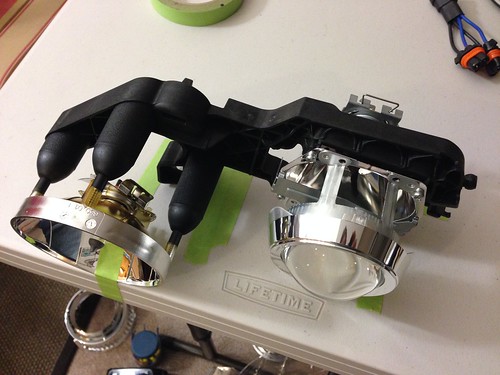
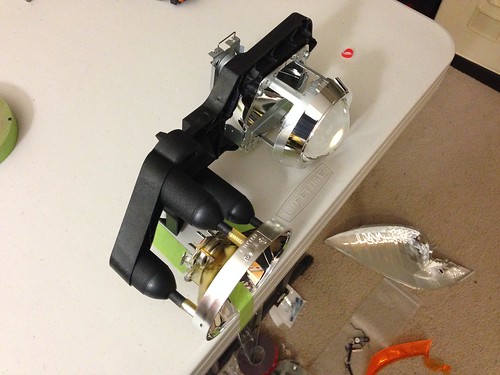
In hindsight, it’s easier to remove the whole bracket that aims the light. It’s connected in 3 places. There’s a screw on the outside edge, and then 2 clips in the middle that you can access with a screwdriver/hook tool. I did this on the second light when I was doing it, and it was much simpler having access to everything (especially when it came to aiming). Here’s what that looked like:
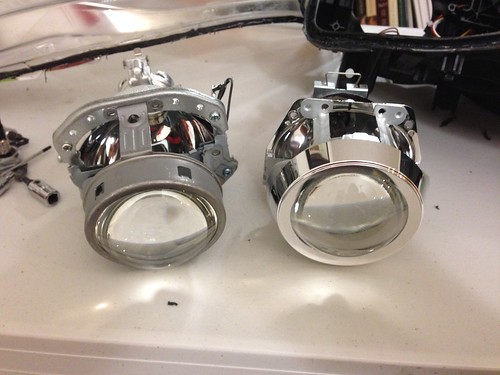
When mounting the E55R projector the bolt holes didn’t quite line up how I expected. Obviously in the GLK they didn’t use the same old housing as usual.
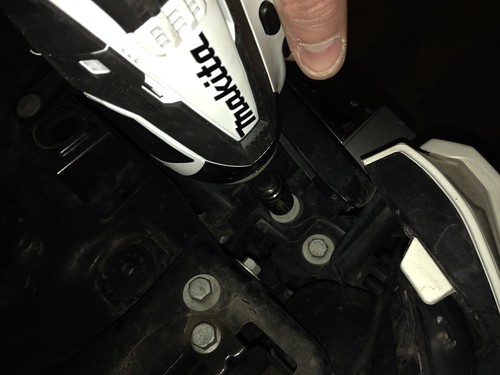
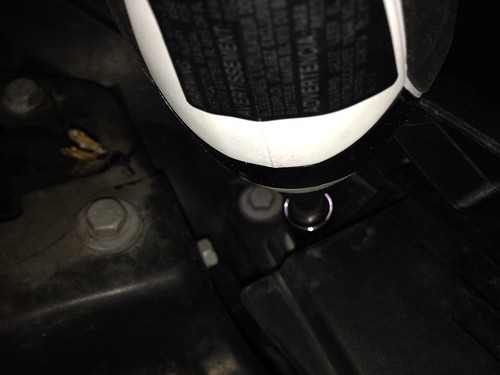
It was pretty close, and with a little bit of coaxing I was able to use 2 of the original screws and their pre-tapped holes. On the other I used a long self-tapping screw to drill into the bracket and attach the projector.
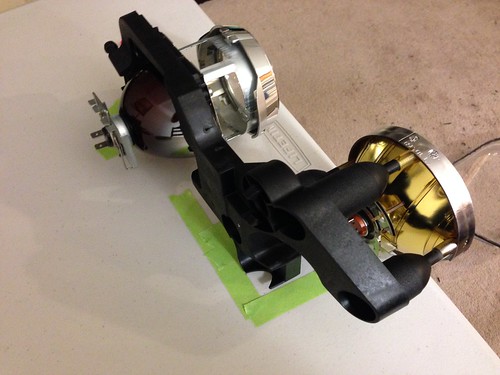
Next I installed the Morimoto projector in place of the high beam. I had to remove the reflector bowl entirely by taking out the 3 screws holding it in place. The Morimoto projector is cake to install at this point, and all it takes is sliding it through the h7 hole and screwing it in place with the supplied nut.
Aiming. I taped on the table where the bracket sat and lit up the halogen. I’m giving instructions for future users to pull the bracket and then shine the light on a wall to mark the aim and then remove the projector/bulbs. I taped on the wall the where the cutoff of the light was shining and also a vertical tape line marking where the light shifts up diagonally (should be the center line).
I also made sure that both lights were straight. As the E55-R projector is fixed straight, I twisted the Morimoto until it sat perfectly straight too. I made the choice to aim the E55 projectors slightly cocked out and a tiny bit down. The idea behind this was to be able to give a wider beam pattern as my wife missed the turning function that her ML lights had when turning the steering wheel. This would light up the sides better and still not sacrifice front-line performance because the Morimotos are aimed dead straight.
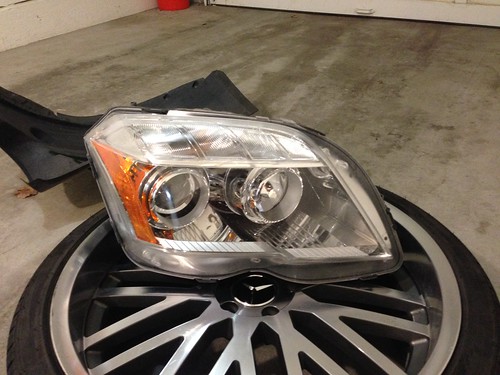
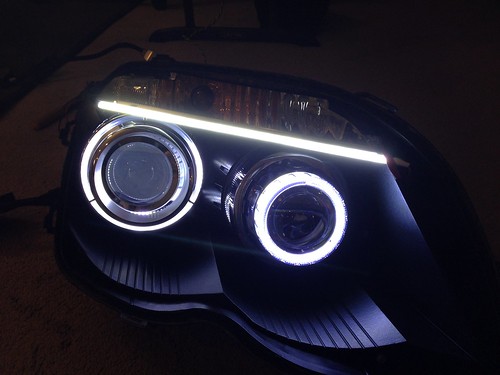
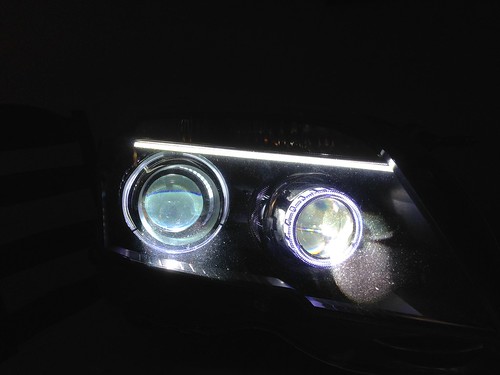
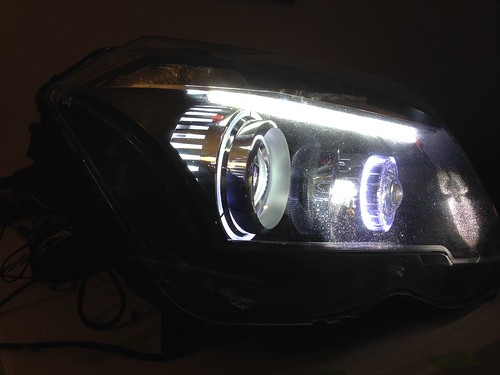
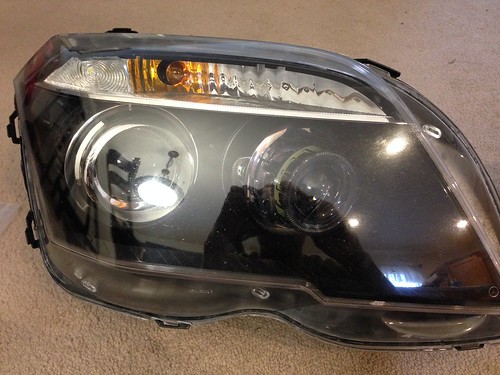
I painted the chrome housing black and in taking them apart realized that the low beam shroud had an opaque section, and I had a leftover “halo” from the C-Class and it fit right where I needed to in order to light up the whole shroud.
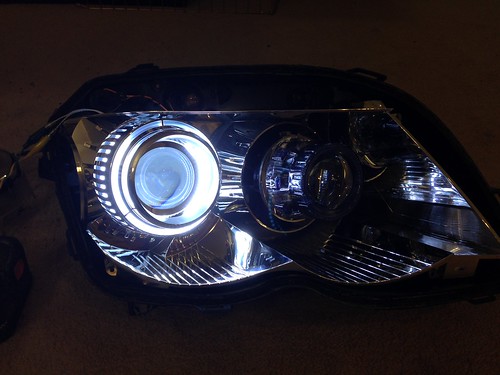
I installed the “Graphite” Morimoto shroud with the XB LED ring inside of it around the projector. I also got the 12” XB LED strip and used 3M adhesive across the whole top to secure it to the top of the shroud.
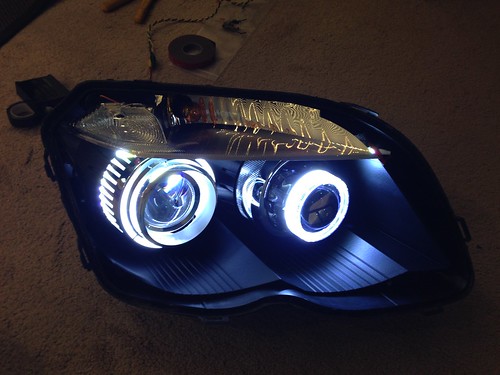
Last thing left was to put it all back together, wire it up, and aim the lights with them in the car just to make sure they were perfect. When aiming them, they were almost exactly where they should be, except that the passenger side was a half turn too high. It was no big deal and fixed in seconds.
I hit one little hiccup in the wiring with the CANBUS harness, and that’s that they kept on shutting off and then back on again. They didn’t work when all that they had running off of them was the relay. I had to have 1 ballast running off of them too, so the wiring got a little more complex. I had to undo both of them and test everything with the projectors out so I could easily access the wires again.
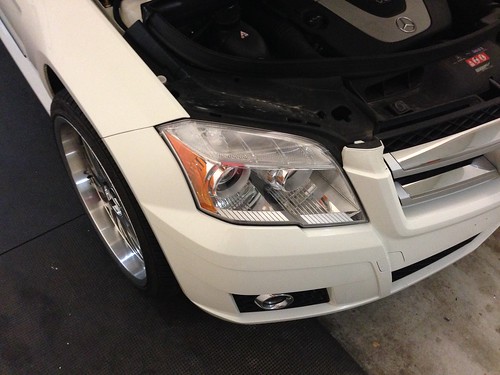
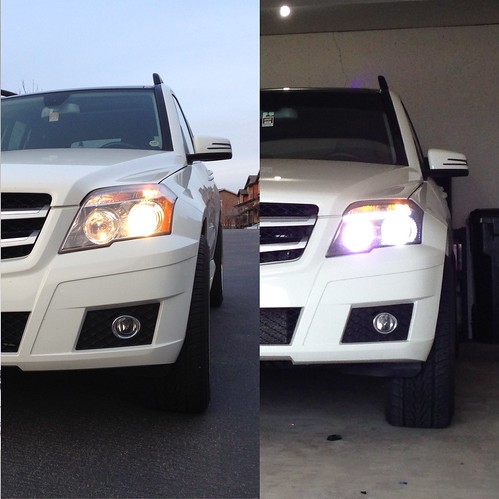
Here’s the end result. I wish I had better before pictures for comparison, but I do have a before and after for the headlights off the car. Here’s what I have.
In hindsight, it’s easier to remove the whole bracket that aims the light. It’s connected in 3 places. There’s a screw on the outside edge, and then 2 clips in the middle that you can access with a screwdriver/hook tool. I did this on the second light when I was doing it, and it was much simpler having access to everything (especially when it came to aiming). Here’s what that looked like:
When mounting the E55R projector the bolt holes didn’t quite line up how I expected. Obviously in the GLK they didn’t use the same old housing as usual.
It was pretty close, and with a little bit of coaxing I was able to use 2 of the original screws and their pre-tapped holes. On the other I used a long self-tapping screw to drill into the bracket and attach the projector.
Next I installed the Morimoto projector in place of the high beam. I had to remove the reflector bowl entirely by taking out the 3 screws holding it in place. The Morimoto projector is cake to install at this point, and all it takes is sliding it through the h7 hole and screwing it in place with the supplied nut.
Aiming. I taped on the table where the bracket sat and lit up the halogen. I’m giving instructions for future users to pull the bracket and then shine the light on a wall to mark the aim and then remove the projector/bulbs. I taped on the wall the where the cutoff of the light was shining and also a vertical tape line marking where the light shifts up diagonally (should be the center line).
I also made sure that both lights were straight. As the E55-R projector is fixed straight, I twisted the Morimoto until it sat perfectly straight too. I made the choice to aim the E55 projectors slightly cocked out and a tiny bit down. The idea behind this was to be able to give a wider beam pattern as my wife missed the turning function that her ML lights had when turning the steering wheel. This would light up the sides better and still not sacrifice front-line performance because the Morimotos are aimed dead straight.
I painted the chrome housing black and in taking them apart realized that the low beam shroud had an opaque section, and I had a leftover “halo” from the C-Class and it fit right where I needed to in order to light up the whole shroud.
I installed the “Graphite” Morimoto shroud with the XB LED ring inside of it around the projector. I also got the 12” XB LED strip and used 3M adhesive across the whole top to secure it to the top of the shroud.
Last thing left was to put it all back together, wire it up, and aim the lights with them in the car just to make sure they were perfect. When aiming them, they were almost exactly where they should be, except that the passenger side was a half turn too high. It was no big deal and fixed in seconds.
I hit one little hiccup in the wiring with the CANBUS harness, and that’s that they kept on shutting off and then back on again. They didn’t work when all that they had running off of them was the relay. I had to have 1 ballast running off of them too, so the wiring got a little more complex. I had to undo both of them and test everything with the projectors out so I could easily access the wires again.
Here’s the end result. I wish I had better before pictures for comparison, but I do have a before and after for the headlights off the car. Here’s what I have.
02-27-2014, 08:41 PM
#3
Senior Member
OK, here's an opportunity to offer a project, for a price, that puts it all together.
I'm impressed with the project and know that for most of us, probably, it would be a bridge too far and would leave a healthy dent in the garage wall.
Nice work. I like it.
I'm impressed with the project and know that for most of us, probably, it would be a bridge too far and would leave a healthy dent in the garage wall.
Nice work. I like it.


 02-28-2014, 05:34 PM
#7
MBWorld Fanatic!
Very nice job!
No error codes from the new parts (or did I miss that part?)..?
No error codes from the new parts (or did I miss that part?)..?
Trending Topics
03-01-2014, 01:01 PM
#9
Senior Member

Join Date: Apr 2013
Location: Tucson AZ
Posts: 436
Likes: 0
Received 7 Likes
on
7 Posts
2010 Mercedes GLK 350, 2001 BMW Z3 3.0 Roadster, 1997 Cherokee XJ
How much improvement in the illumination over the standard lighting? The one thing I have missed with our 2010 is not having the bi-xenon lights. The vehicle the GLK replaced had them & I miss them.
03-03-2014, 04:43 PM
#10
Junior Member
Thread Starter
Join Date: Nov 2012
Posts: 71
Likes: 0
Received 0 Likes
on
0 Posts
2008 Mercedes C300 4Matic Sport Sedan
Yeah I got a kick out of your comment. I'll keep that out of my wife's head though.
Thank you. I was VERY pleased.
-Brad
03-04-2014, 01:44 PM
#11
Junior Member
Thread Starter
Join Date: Nov 2012
Posts: 71
Likes: 0
Received 0 Likes
on
0 Posts
2008 Mercedes C300 4Matic Sport Sedan
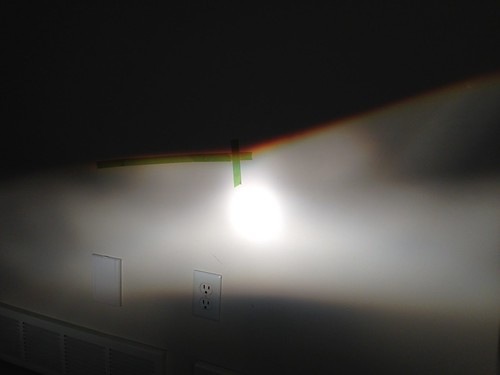
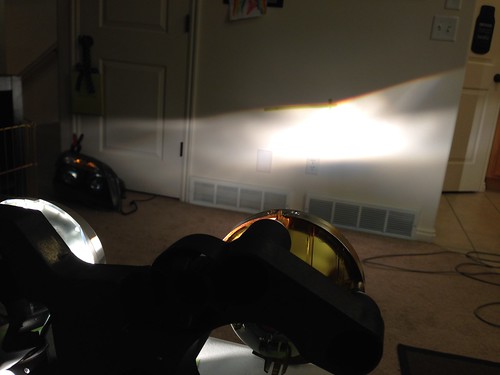
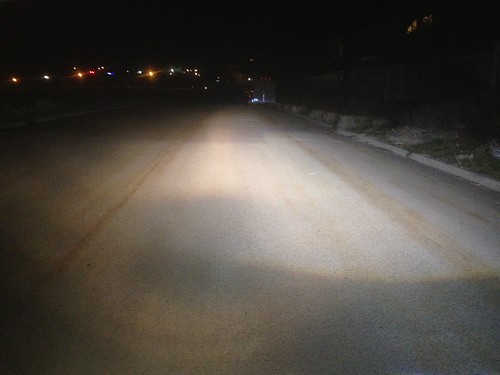
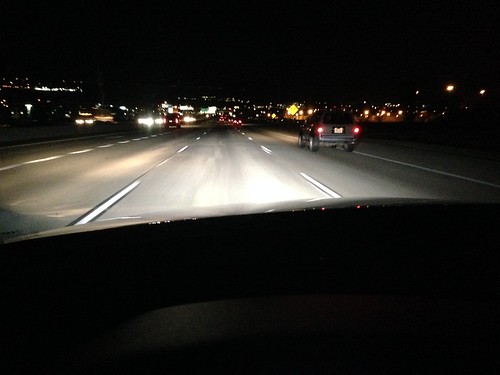
Alright, last night I got out to do a couple night shots and a comparison shot too. I covered up the driver's side light with a thick towel to block it, and then powered up the original halogen projector to give a truly accurate comparison. You always see the before and after pictures with lights and I swear they are Photoshopped most of the time. This way at least I could give a 100% accurate comparison of the light output side by side.
Left Side: Halogen - Right Side:HID (Note that there is ZERO light above the cutoff, so no glare to others)
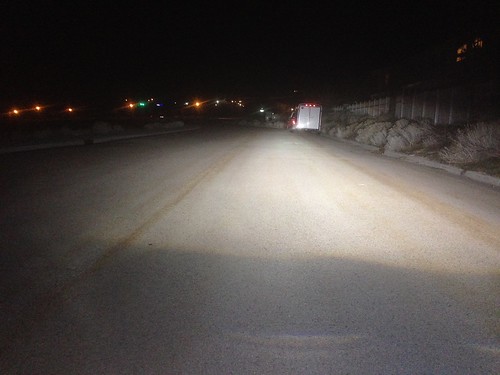
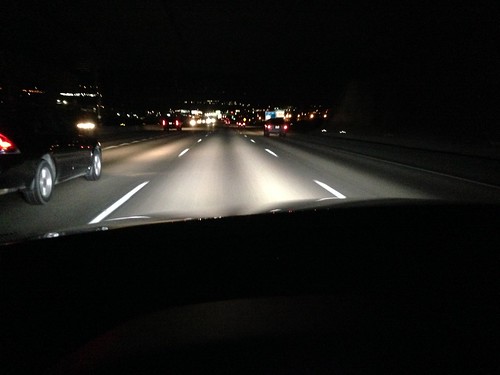
Both side Bi-Xenon:

And with the high beams on:
Last before and after:
Left Side: Halogen - Right Side:HID (Note that there is ZERO light above the cutoff, so no glare to others)
Both side Bi-Xenon:
And with the high beams on:
Last before and after:
Last edited by hondafan; 03-04-2014 at 02:31 PM.
03-05-2014, 12:15 AM
#12
Member

Join Date: Aug 2004
Location: Redondo Beach
Posts: 207
Likes: 0
Received 1 Like
on
1 Post
Z06, M3, Mini Cooper S. Sold: C55
Nice job! I just leased my 2014 GLK Bluetec and frankly I can't believe that MBZ sells vehicles over $50k that don't have the HID headlights. My dealer only had 1 in stock with them and it was a color I didn't want.
Has anybody priced out a retrofit using the factory adaptive lighting package parts?
Has anybody priced out a retrofit using the factory adaptive lighting package parts?
03-05-2014, 02:29 AM
#13
Junior Member
Thread Starter
Join Date: Nov 2012
Posts: 71
Likes: 0
Received 0 Likes
on
0 Posts
2008 Mercedes C300 4Matic Sport Sedan
Nice job! I just leased my 2014 GLK Bluetec and frankly I can't believe that MBZ sells vehicles over $50k that don't have the HID headlights. My dealer only had 1 in stock with them and it was a color I didn't want.
Has anybody priced out a retrofit using the factory adaptive lighting package parts?
Has anybody priced out a retrofit using the factory adaptive lighting package parts?
Since you lose the full function anyway, that's why I decided to do a custom retrofit. You can source the actual headlight housings on eBay for $700-1000 from what I've seen. My whole project cost around $700 and I feel like I got a superior output and a look no one else has. That's what I was going for in the first place though. If you just did the Morimoro Mini H1 projectors in your '14, you'd be able to do the complete solution for about $300 in total parts, and still get better performance than the factory HIDs. That's what I ended up doing in my dad's Porsche and he loves it.
TRS has local retrofitters they recommend for most places. The absolute most difficult part of this project is getting the housings separated from the lenses. Once that's done it goes very smoothly. If you know of a local shop that does custom work like mobile video, you can take in this thread to show the work involved and they can likely give you an estimate on labor to do it for you too.
I come from a background of car electronics from when I was a little younger, and Based on that experience I would truly see a fair price for this amount of work to be $350 in labor. That includes taking out the headlights. I'd drop $75-100 off that price if you're willing to bring them the headlight housings. That's what I would consider to be a good deal for the amount of work involved.
03-26-2014, 12:06 PM
#14
Junior Member
Thread Starter
Join Date: Nov 2012
Posts: 71
Likes: 0
Received 0 Likes
on
0 Posts
2008 Mercedes C300 4Matic Sport Sedan
I wanted to add one more post to this thread. I took a couple shots on the road at night after getting the fine tuning of aiming perfect. I had my wife hold the wheel while I took the picture near other cars on the road for a really true comparison of their light vs. these. Here's how they turned out:
PM me if you would like any help with anything headlight related on the GLK. I hope I can help.
PM me if you would like any help with anything headlight related on the GLK. I hope I can help.
 03-27-2014, 03:13 PM
#17
Junior Member
Thread Starter
Join Date: Nov 2012
Posts: 71
Likes: 0
Received 0 Likes
on
0 Posts
2008 Mercedes C300 4Matic Sport Sedan
Not off, but dropped down a bit. I didn't fully disconnect it and just moved it around until the right angles allowed the headlight to slide out. It might be just as easy to completely remove the bumper cover though.
04-10-2014, 06:01 PM
#18
Junior Member

Here you go!!! Let me/us know if these works out..
http://ecustomhitch.com/i-16327325-....FVKDfgodz7MAXA
http://ecustomhitch.com/i-16327325-....FVKDfgodz7MAXA
Last edited by Duals1ns; 04-10-2014 at 06:04 PM.
06-28-2014, 02:13 AM
#19
MBWorld Fanatic!
Join Date: Aug 2007
Posts: 1,914
Likes: 0
Received 5 Likes
on
4 Posts
LOADED 08' C350 & 14' GLK-350 Diamond White (P1, MM, AMG Pkg, Ln Trkng, Htd Sts, Keylss Go)
Ummmm ya - I have these same headlights and want to just buy the intelligent lighting parts and replace the whole light.
I want the LED strip on the inside too.
I am gonna call the dealer and parts department and ask them if possible and how much they would charge so I can get a baseline price
09-24-2014, 11:22 AM
#21
Junior Member
Thread Starter
Join Date: Nov 2012
Posts: 71
Likes: 0
Received 0 Likes
on
0 Posts
2008 Mercedes C300 4Matic Sport Sedan
It's a few simple components to retrofit the lights to your factory headlight housings, and will cost significantly less as well. Check out TRS's retrofitters page if you want to just pay for the service to be done. Anyone who's comfortable getting the headlights out in the first place is more than competent enough to get the Morimotos installed (aiming is the finest point of it).
 09-26-2014, 01:23 PM
#23
Junior Member
Join Date: Aug 2014
Posts: 22
Likes: 0
Received 0 Likes
on
0 Posts
glk250
Thanks for the feedback Hondafan and for this awesome guide. Your headlights look so sweet man, but I don't feel confident that I can do what looks like very elaborate fitting with the retrofit. I have the same headlights as Showa does above. I just don't see how the Morimotos would fit in the original headlight housing. Any advice? If I went with retrofits do I just need the kit (http://www.theretrofitsource.com/com...-3-kit-h1.html) or are there other parts I will need to order as well?
10-06-2014, 01:58 PM
#24
Junior Member
Thread Starter
Join Date: Nov 2012
Posts: 71
Likes: 0
Received 0 Likes
on
0 Posts
2008 Mercedes C300 4Matic Sport Sedan
You would just need the mini H1 kit with the "CANBUS" harness. It's one of the options to select when ordering through TRS. You'd be able to get them in the stock housings without much trouble, as there looks to be enough clearance. You might want to chat with TRS before ordering as they're really good about helping to figure out if stuff will fit or not. Really the swap is fairly straight forward. The only thing to consider when using the Mini H1's is that you'll want to somehow add some added stability to the projector or they will shake ever so slightly over bumps. I have even used thick gauge (4 ga) wire propped under it and glued in place to stop the vibration.
It looks to me like the projector might just sit a little behind the high beam reflector, but that shouldn't be an issue. I wish I knew someone that had the newer one looking to do this, because I'd be happy to experiment some time.
It looks to me like the projector might just sit a little behind the high beam reflector, but that shouldn't be an issue. I wish I knew someone that had the newer one looking to do this, because I'd be happy to experiment some time.


