When you click on links to various merchants on this site and make a purchase, this can result in this site earning a commission. Affiliate programs and affiliations include, but are not limited to, the eBay Partner Network.
I was trying to use the hose quick connect tool on the rear valve block hose connectors but I wasn't doing it correctly. Finally figured it out and got the connector apart but now I can't reconnect the hose. I tortured the lower part of the sliding sleeve pretty good, but somehow the upper part of the sleeve got damaged when trying to reconnect it and now it will not snap together.
Anyone have any idea's on how to go about fixing or replacing the connector other than replacing the whole line? The whole line looks like a whole lotta work to replace.
2003 E55, 2003 SL55, 2014 CLS63, 2018 q50 Redsport, 1968 Camaro SS, 1999 Trans am Firehawk
which line is it? you may just have a hydraulic shop remake you a new flex part of the hose and permanently connect it to the hard line on one end and use either a welded on flare fitting on the other end or a compression connector. You could also use the welded or compression connector on the end that is messed up now instead of permanently crimping it.
Marko69: Many thanks for the link to the www.helhans.de website. I'm going to bookmark that link. There's an Option tab in the upper right corner of my MacBook Pro screen ... it has an option that automatically translates from German to English. This is a most informative site. The photos included in the link are the best I've ever seen of the ABC system. And as for the hydraulic "quick snap" tools ... I still have no idea how they're used. Your link is a library of good information. Thanks again for posting.
Wow!! This is some great post on all the various parts and hoses in the ABC system! I agree with heatwave this is a great reference source. Thanks a million!
I think I figured out exactly how these connectors come together. There is a metal ring inside the female end and a metal ring on the outside of the male end. When you push the connectors together, the female ring slides up and over the male ring and snaps into a channel on the backside of the male ring and it is then locked in place. You can only see the channel if you pull the sleeve back. To open the connectors, the brass sleeve is slid up with the tool and it pushes the female end ring back up and over the male ring and releases the connection. The action of pushing the tool into the grove pushes the sleeve up. In the begining, I was wrongly using the tool like a lever and chewing up the bottom part of the sleeve.
I've managed to straighten out the top part of the sleeve with a pair of needle nose pliers but still can't get the connectors together. I removed the female end of the connector from the valve block and tried it on the male end of the adjacent hose and it works fine. Problem must be on the male side. I took off the black and white rings and they looked ok. By the way, they are the same as the valve block o-ring and the square cut o-ring just a tad smaller unfortunately. I dunno, I'm gunna take one last look at it tonight. Maybe the sleeve isn't sliding down far enough to allow the female ring to snap in place. If I can't get it to work I guess I'll have to pull out the whole dern line and replace it.
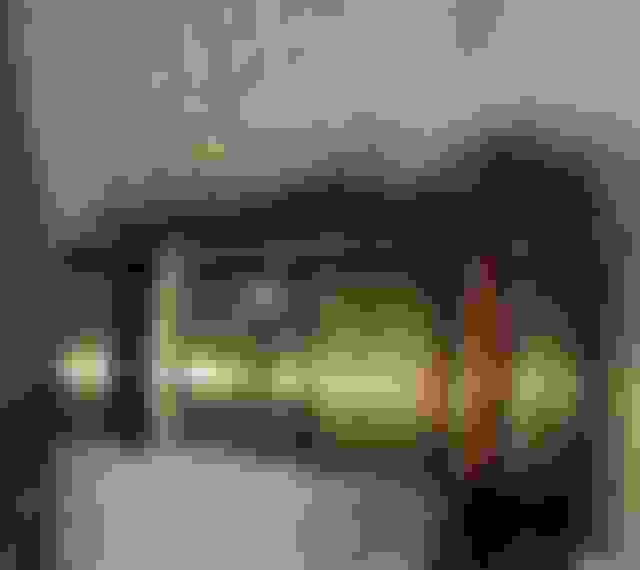
carguyshu: The hose I'm working on is the inside most hose labeled FB1 in the above pic.
Yes, as pictured push down as far as it will go in and keep pushing until the connector separates. HOWEVER, as I was looking for pictures to post with this answer I discovered something terrible. My tool is different than the tool on the above website http://www.hehlhans.de/sl55amg-leitung.htm
Both are the same part numbers but can you see the difference??
My tool
hehlhans tool
My part #
The beveled edges are on the opposite sides!!!!
While I was using the tool it looked more intuitive to have the lever facing up to open the connector, but I saw on more than one post, to have the lever facing down.
With the lever facing down with my tool, the beveled edge puts all the pressure on the bottom of the sleeve. With hehlhans tool it puts the pressure on the hard metal connector side.
I did try the tool with the lever both up and down to open it and I felt I had better success with the lever facing down but I certainly should have began this with the lever up. Whichever tool you have, I would start by having the beveled edge facing away from the sleeve.
Anyway, I was not able to push the connectors together tonight. I removed all the orings but still no go. I put the good male connector side by side with my bad connector and could not see any differences. Something is not right but I just can't see it. Probably take me all weekend to change out this line.
Marko69: Thank you for your great posts and pix. It's curious that the lever end of the Hehlans tool is bent in an opposite direction than yours, and both have the same part number. There must be a reason, but it is over my pay grade.
Just to be clear: your pic showing the FB1 line has the removal tool properly placed, with the handle pointing up. Correct?
And the female coupling is the black part, on top of the coupling. Correct?
Do you simply insert the tool and press it straight onto the coupling and it does the trick of unmating the male and female ends, or do you have to do any prying by lifting or depressing the tool lever?
Imagine that the tool handle was straight ... not bent one way or another. Would simply inserting the tool with the bevel edge at the bottom decouple the connection? ... or is it necessary to apply a bit of lifting force with the handle?
Thank you again for your posts. I hope I never have to face the challenge of servicing my ABC components, but if I do then your posts and pix will be invaluable. And it will be interesting to see whether the decoupling tool I'll have to order is like yours or like Helhans.
I see a difference in the fitting labeled (C)H.Lapp in frame #1, and your own fitting in frame #5. I don't see the "channel for female end ring" and see a smaller diameter ring in the H.Lapp photo. Could there be a redesign of such fittings in the newer R230s? I recall reading something about the quick connect tool not usable in the early models, hence diy valve servicing posts had the lines removed directly from the ABC valve block. Or, am I just confused, and imagining things??
cyglee, you don't see the channel in lapps/hehlhans pic as he is not pulling down the sleeve. In my pic you can see my thumb pulling down the sleeve which exposes the channel.
I don't think the tool works very well, but it does work.
Just to be clear: your pic showing the FB1 line has the removal tool properly placed, with the handle pointing up. Correct?
I probably should not have used that pic, I was only trying to show the valve block and hoses I was working on. Lapps tool is facing up in that pic and in the slot above the sleeve, supposedly to close the connection, but I didn't need the tool to close my good connector. Just push the two ends together and it snaps closed.
This picture shows the correct tool position to open the connector if using Lapps tool. My tool would be the same position but the lever pointing up.
Flat side of tool toward the sleeve, beveled side away from the sleeve.
Not sure why the differences in the tools but his shows 04/03, mine shows 08/15. I can only assume that means 04/2003 and 08/2015. If mine is a later version of the tool I would think it should have a different part #. Lapps mentions another version of the tool, p/n W221589013300. It's only $15.50 at ECStuning, mine was $59.99. Here's a pic.
And the female coupling is the black part, on top of the coupling. Correct?
Yes
Do you simply insert the tool and press it straight onto the coupling and it does the trick of unmating the male and female ends, or do you have to do any prying by lifting or depressing the tool lever?
Yes, push it straight in all the way as far as you can, then push a little more. If it doesn't open then use a little prying action while still pushing in.
When the curved beveled end of the tool meets the beveled edge of the connector, the tool starts to rise which uniformly pushes the sleeve up, which in turn pushes the female end ring back over the male end ring and releases the connection. That's my theory anyway. I also think this would have been easier with a straight handle.
marko, absolutely thank you for sharing your efforts, photos, and especially follow up posts. I did not understand the sliding sleeve component of that connector. Awhile back, I ordered the "quick disconnect" tools (came with 2 pieces) in preparation for future use, but have never found any info on how to use them. Good luck and hope for success on your weekend project!
I had a leaking ABC line on an SL500 and followed this video to disconnect it. No tool needed. I know this is an old post, but I wanted to share since there is not much info on this.
I was trying to use the hose quick connect tool on the rear valve block hose connectors but I wasn't doing it correctly. Finally figured it out and got the connector apart but now I can't reconnect the hose. I tortured the lower part of the sliding sleeve pretty good, but somehow the upper part of the sleeve got damaged when trying to reconnect it and now it will not snap together.
Anyone have any idea's on how to go about fixing or replacing the connector other than replacing the whole line? The whole line looks like a whole lotta work to replace.
For what it's worth, if you managed to locate another second hand hose (It can be a blown hose because you only need the connection bits.) with the same end type and size you can remove the steel spring ring, the o-ring and transplant those parts. I have seen these on Mercedes trucks and also Jungheinrich forklifts. I have never seen these for sale anywhere globally, I hold onto any I can find and have these part in DIN8 (8mm NB port) and some part in DIN12 (12mm NB port) Regards The Hose Monkey.
 12-05-2016, 11:17 PM