Project 190 E: Solving the Stalling Issue By Throwing Parts At It
It’s difficult to diagnose a car that works perfectly fine.
If you’ve been following the history of Project 190 E, you’ll recall I knew there was a fuel issue going into the purchase of the car. I had figured the fix would be rather easy, having read other MBWorld forum posts documenting similar issues with the car. However, the more I researched the issue, the more I found it could be one of literally dozens of causes. It’s like when you try to figure out why you are sick, and after browsing WebMD for ten minutes, you’ll self-diagnose a terminal illness.
Mechanical failures are quite easy to uncover, usually by a simple glance of the eye. I can tell you when a rod had gone through a block, or when a tire is flat or when a suspension bushing is shot. I can’t tell you when a relay is bad, or what’s going on in the mind of a car’s ECU. So, where to start?
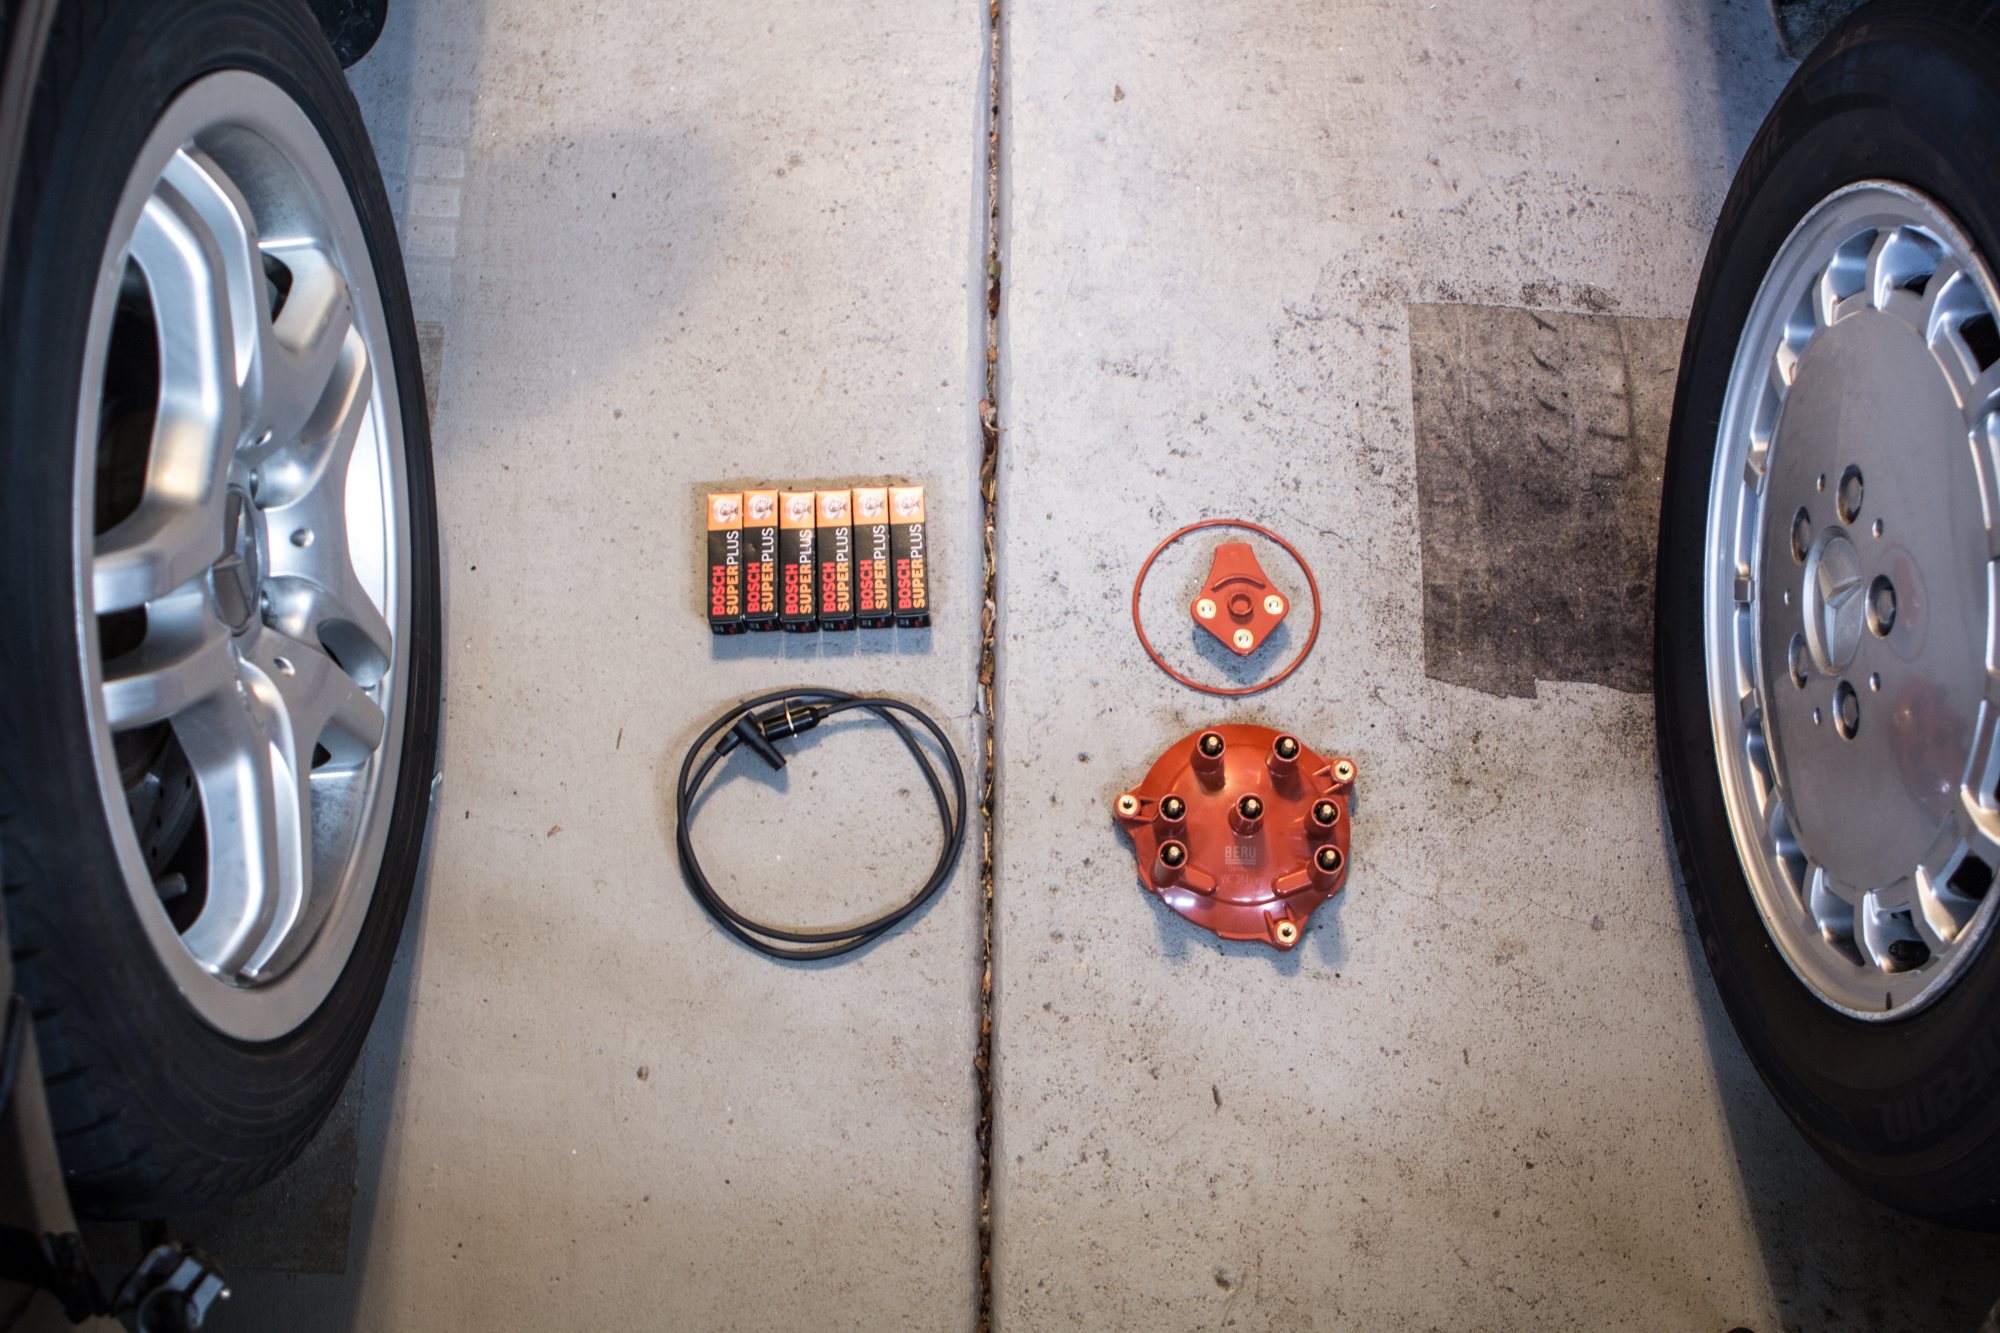
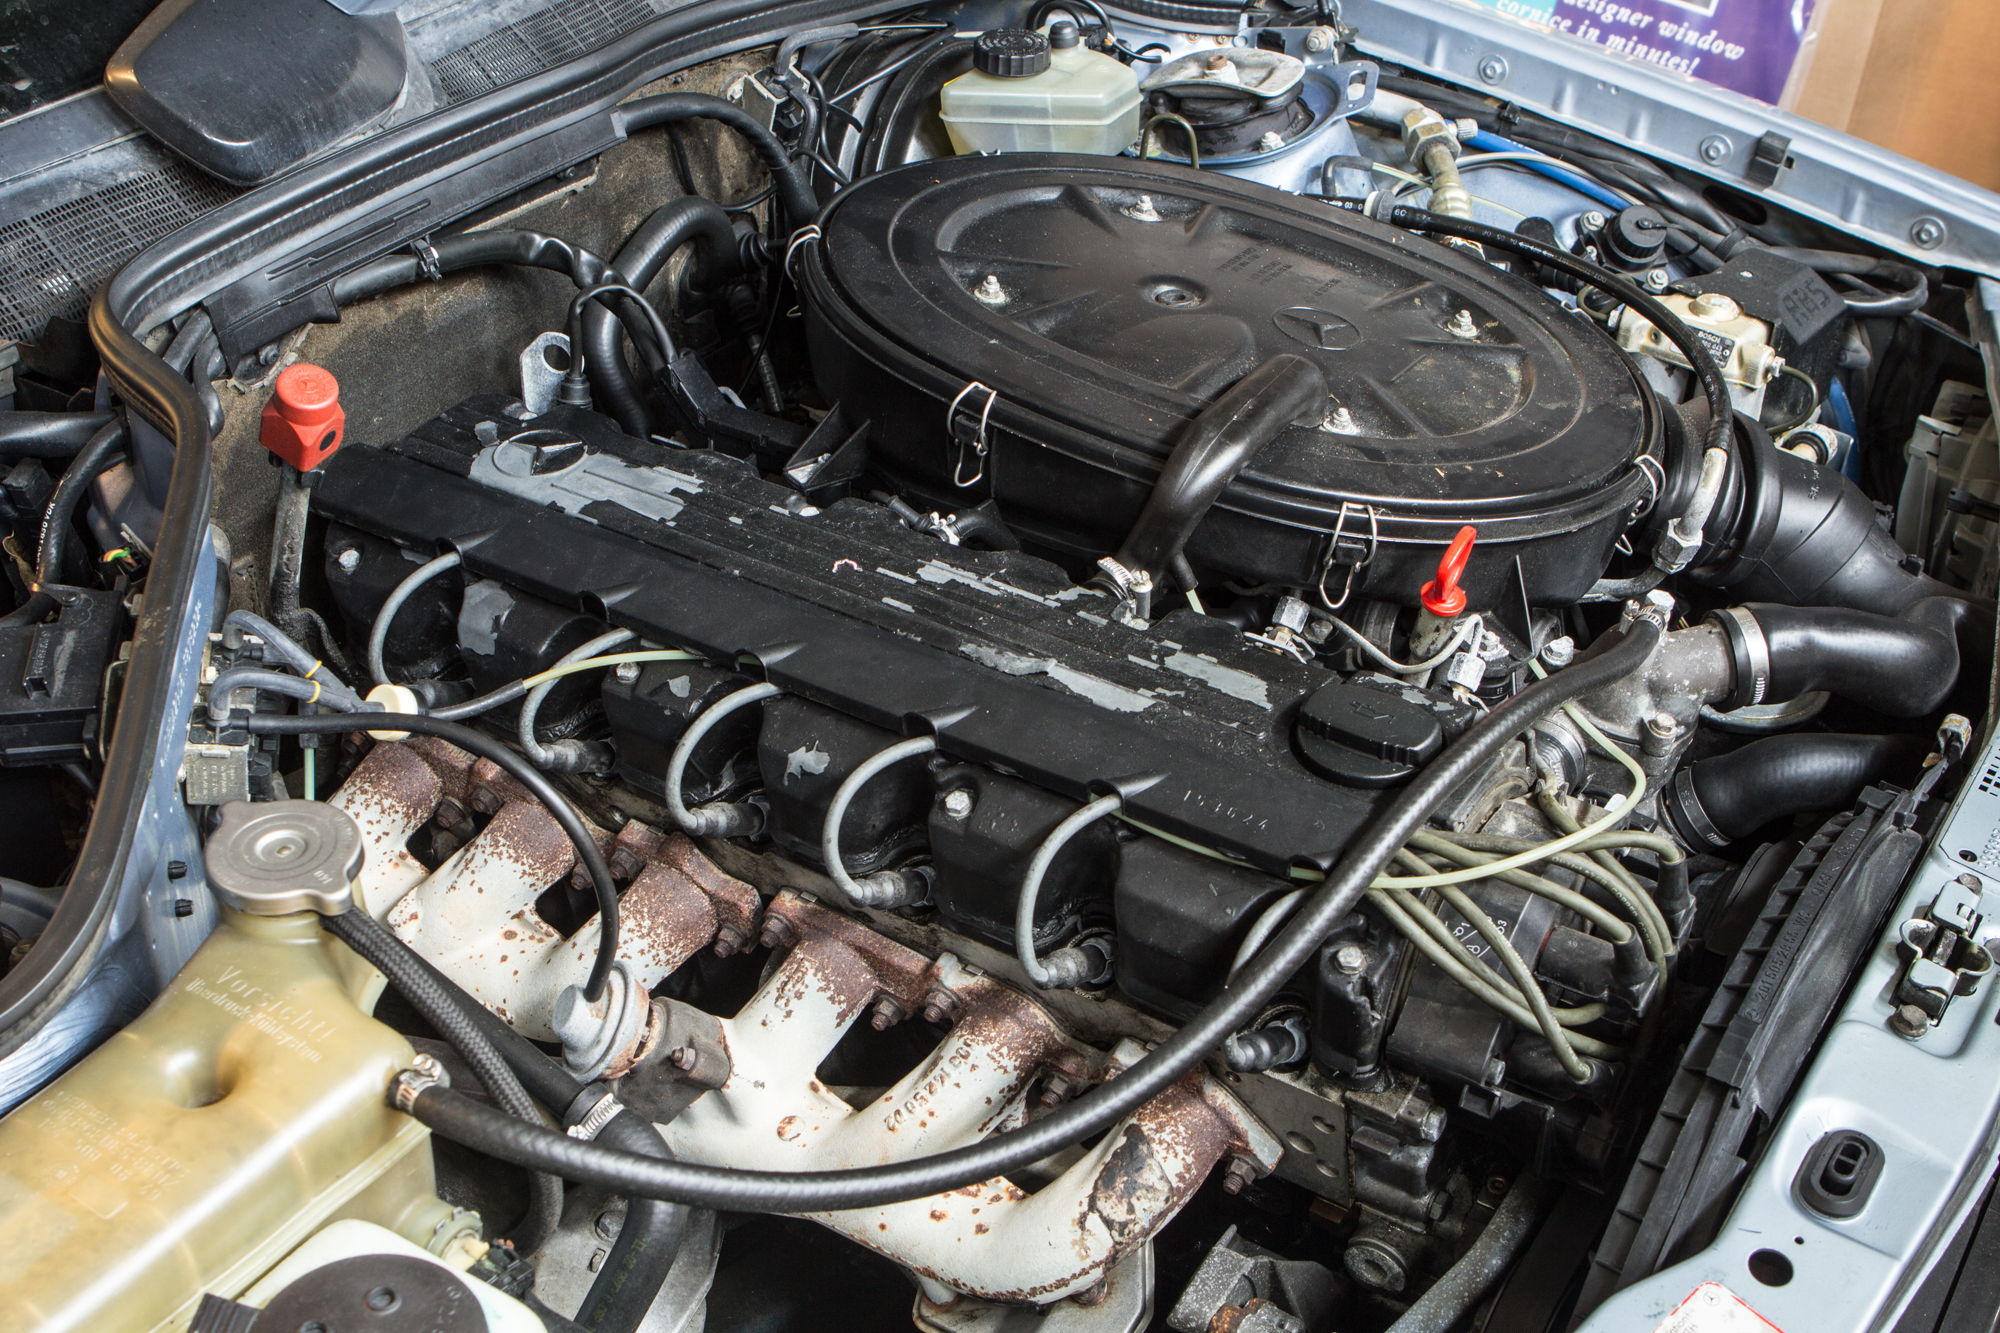
Since the car ran fine – in the few moments that it did – I decided that it wasn’t likely a mechanical issue, but rather something with the ignition. I’d decided to order a cap, rotor, a seal for that cap and rotor, plus new plugs and a crankshaft position sensor. The cheapest parts I could find were through good friends at ECS Tuning.
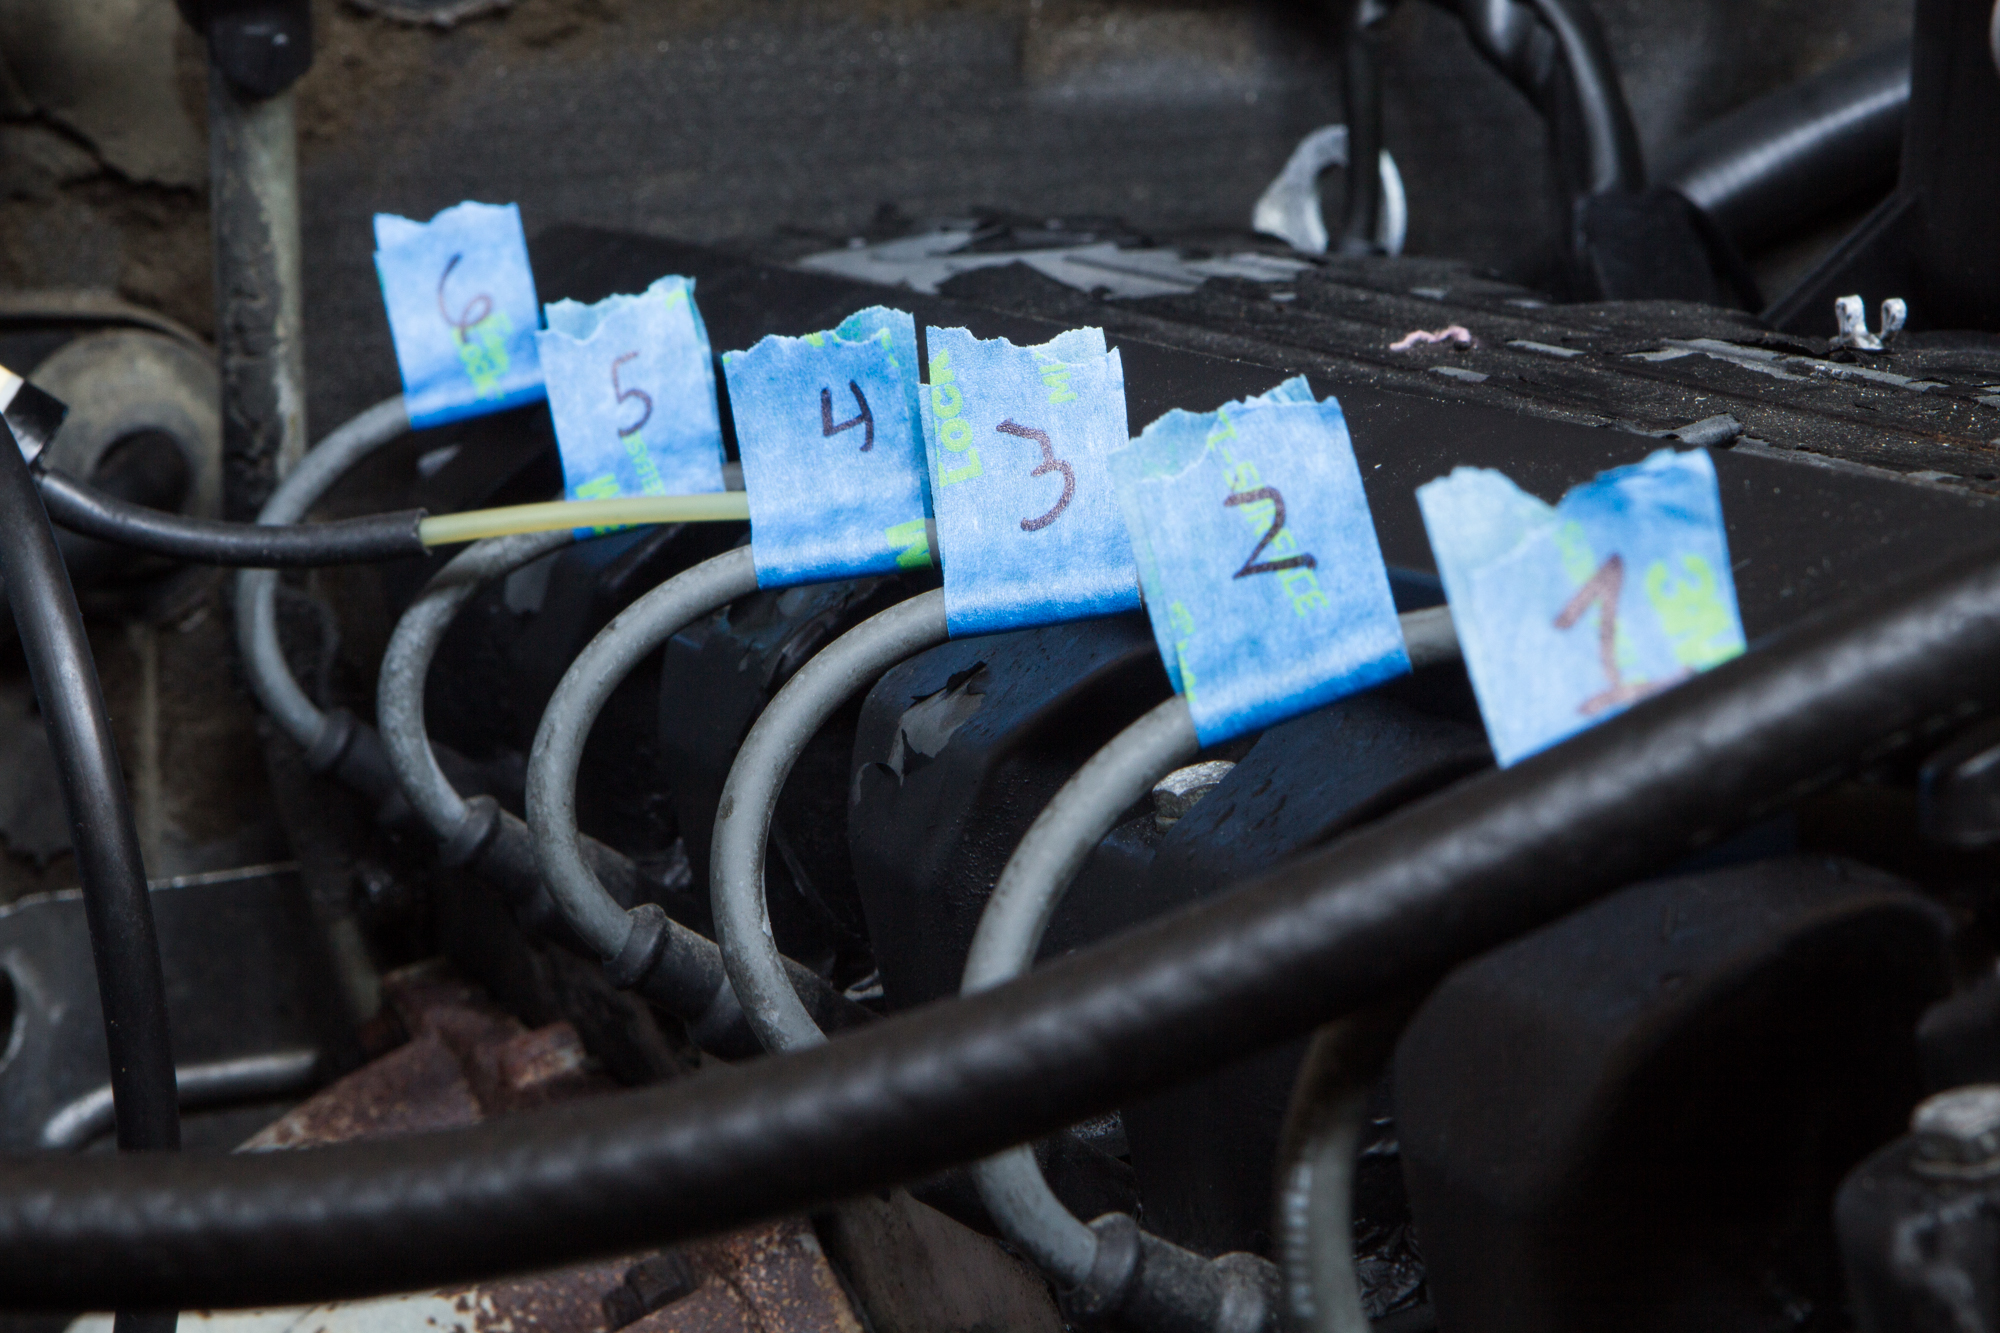
I’m not even going to start a tutorial regarding the spark plugs, because it’s easier to replace them than it is to tie your shoes. So, on to the next part: the plug wires.
Plug wires very rarely go bad, so I hesitated to buy a new set when I placed the order for the other parts. It was time to break out the multimeter just to make sure they were in good shape, however.
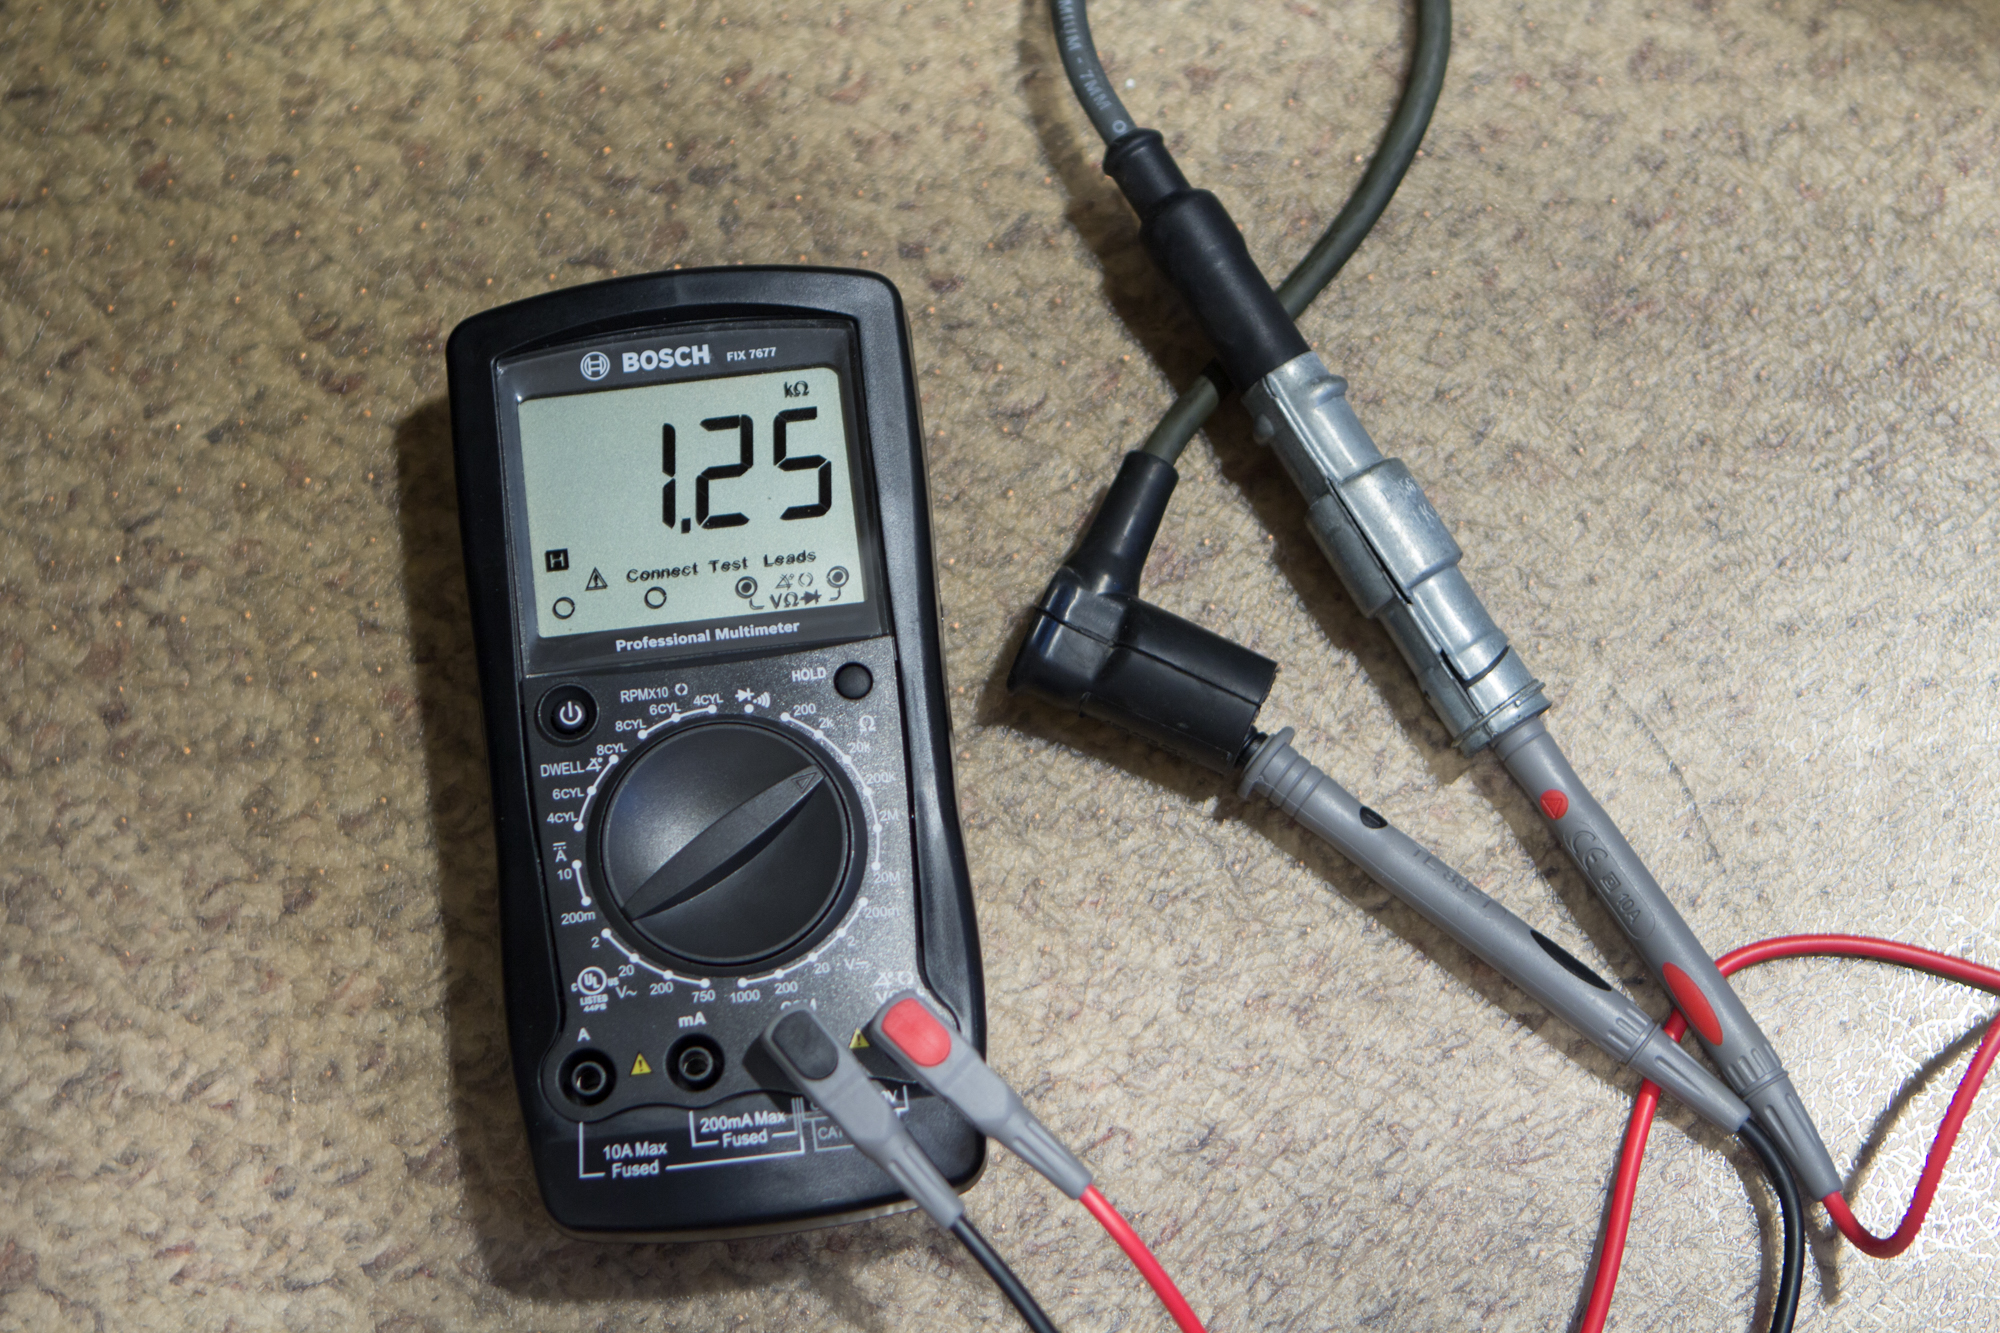
On the metal sheath that covers the spark plug boot, 1,000 ohms of resistance is prescribed. In testing, I saw the following:
- Wire 1 – 1.25K
- Wire 2 – 1.20K
- Wire 3 – 1.20K
- Wire 4 – 1.24K
- Wire 5 – 1.25K
- Wire 6 – 1.23K
Since those measure out decently enough, I tossed them back on the car. As an additional point, the wires have their own resistance built-in, so there is not any need to buy resistance-style spark plugs. On ECS Tuning, I found plugs for less than $2.00 each. Pennies.
Replacing Parts
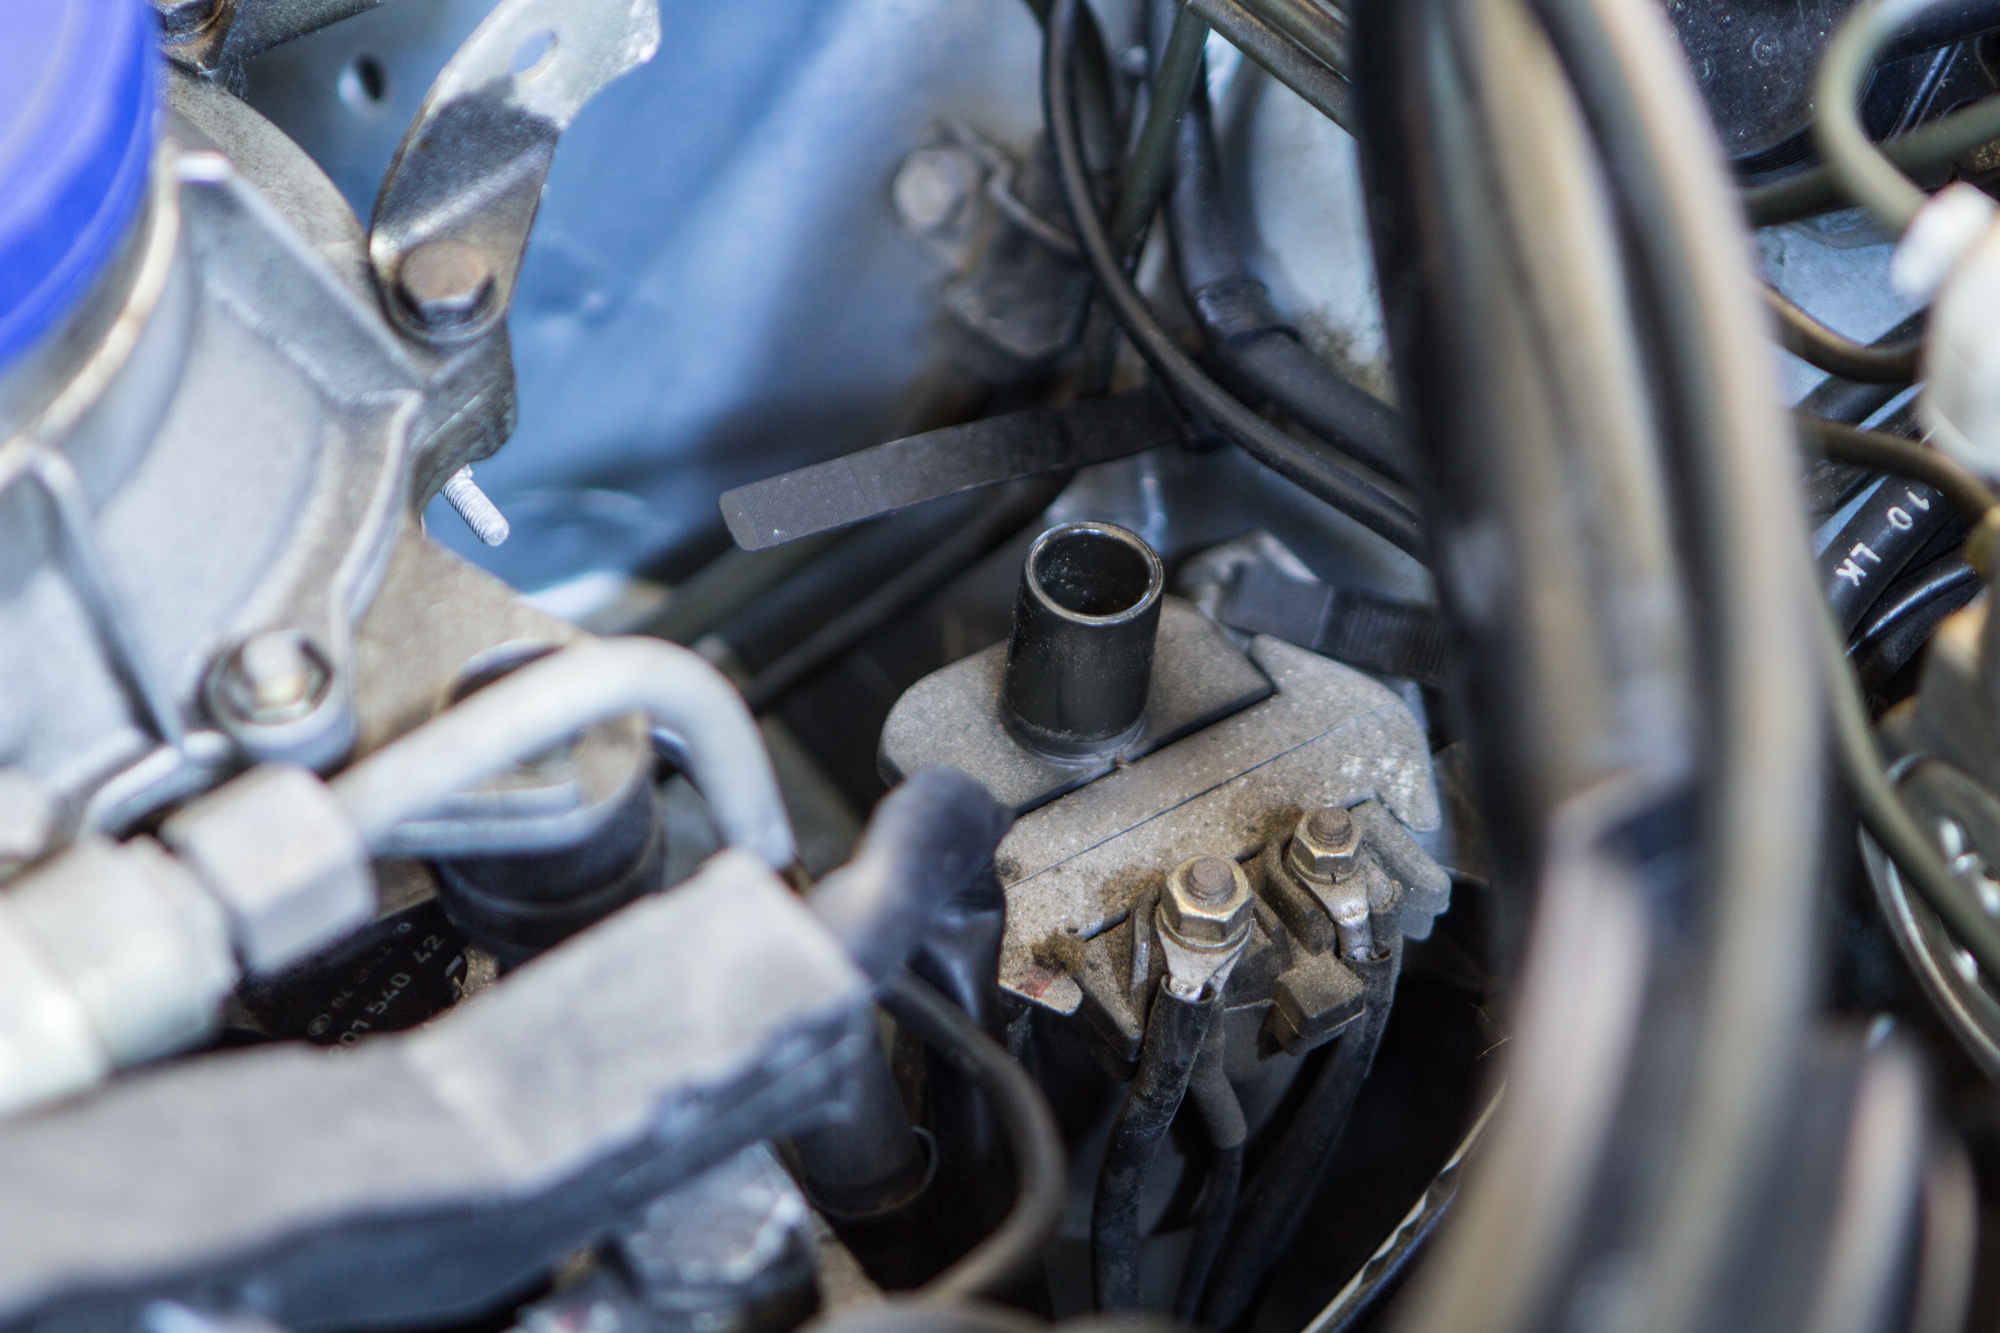
Next up was the distributor cap and rotor. It’s far easier to get access to things with the air filter and filter housing removed. If you’re a fan of peanuts or cashews, this is your lucky day, because the cap from a tub of nuts perfectly covers the air inlet. You’ll want to do that to prevent smaller objects from entering the intake plenum. Cheese puff containers might work as well.
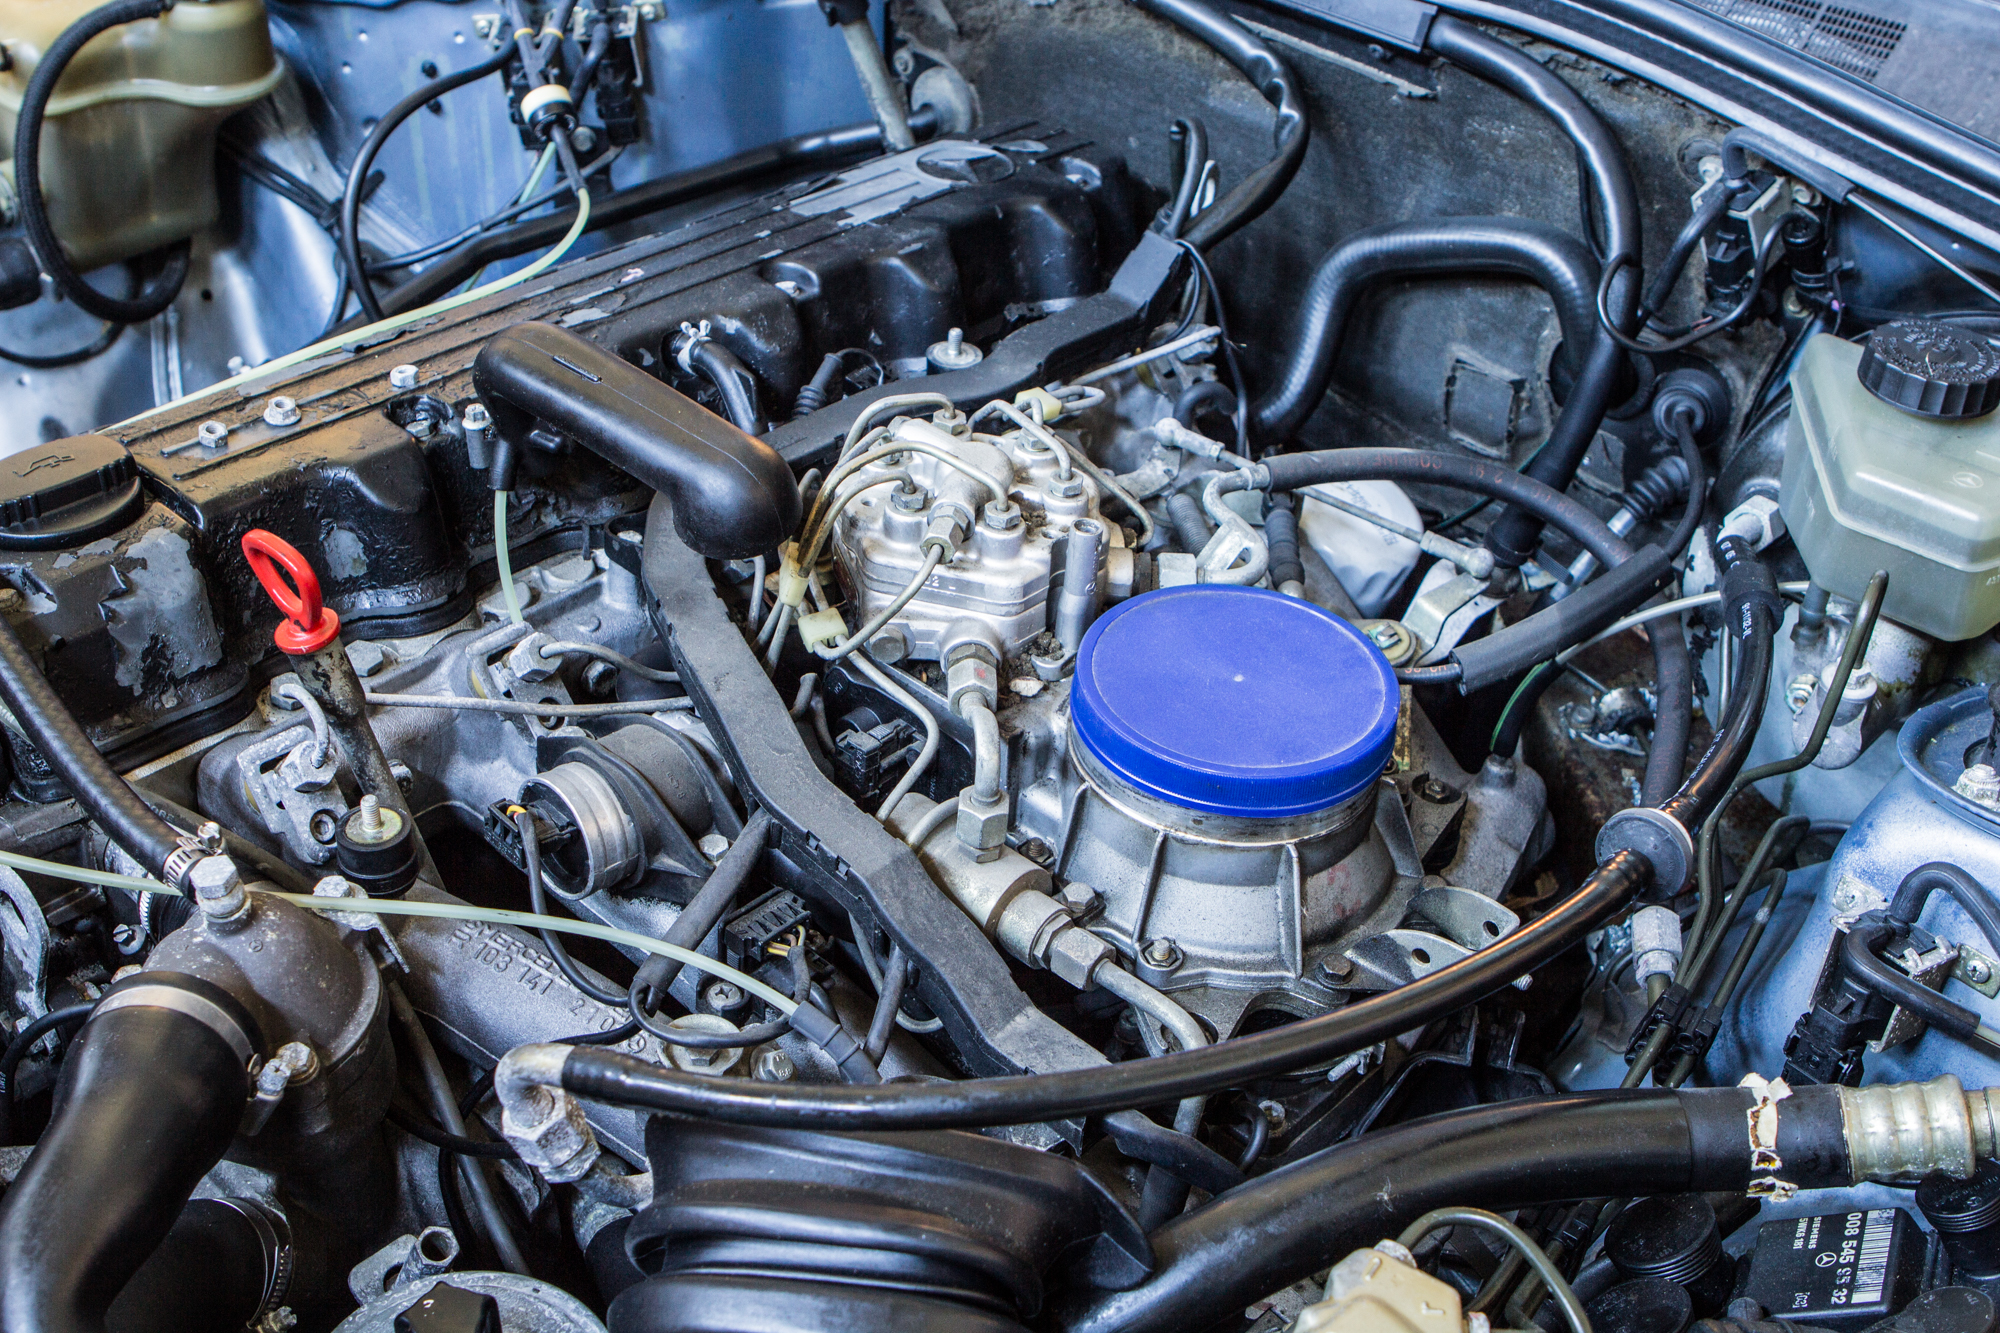
Once you’re working on the cap, don’t even bother trying to remove the fan shroud by the radiator for more space. You only have three bolts to un-do with a 5mm hex key. Unfortunately, the bottom one is quite difficult to get to due to a shroud around the distributor cap.
When I was removing the cap, I’d found the bottom bolt was only hand tightened, which is amazing that anyone’s hand could reach it in the first place. This has led me to believe the loose bolt may have contributed to the stalling issue. And then I saw the condition of the parts.
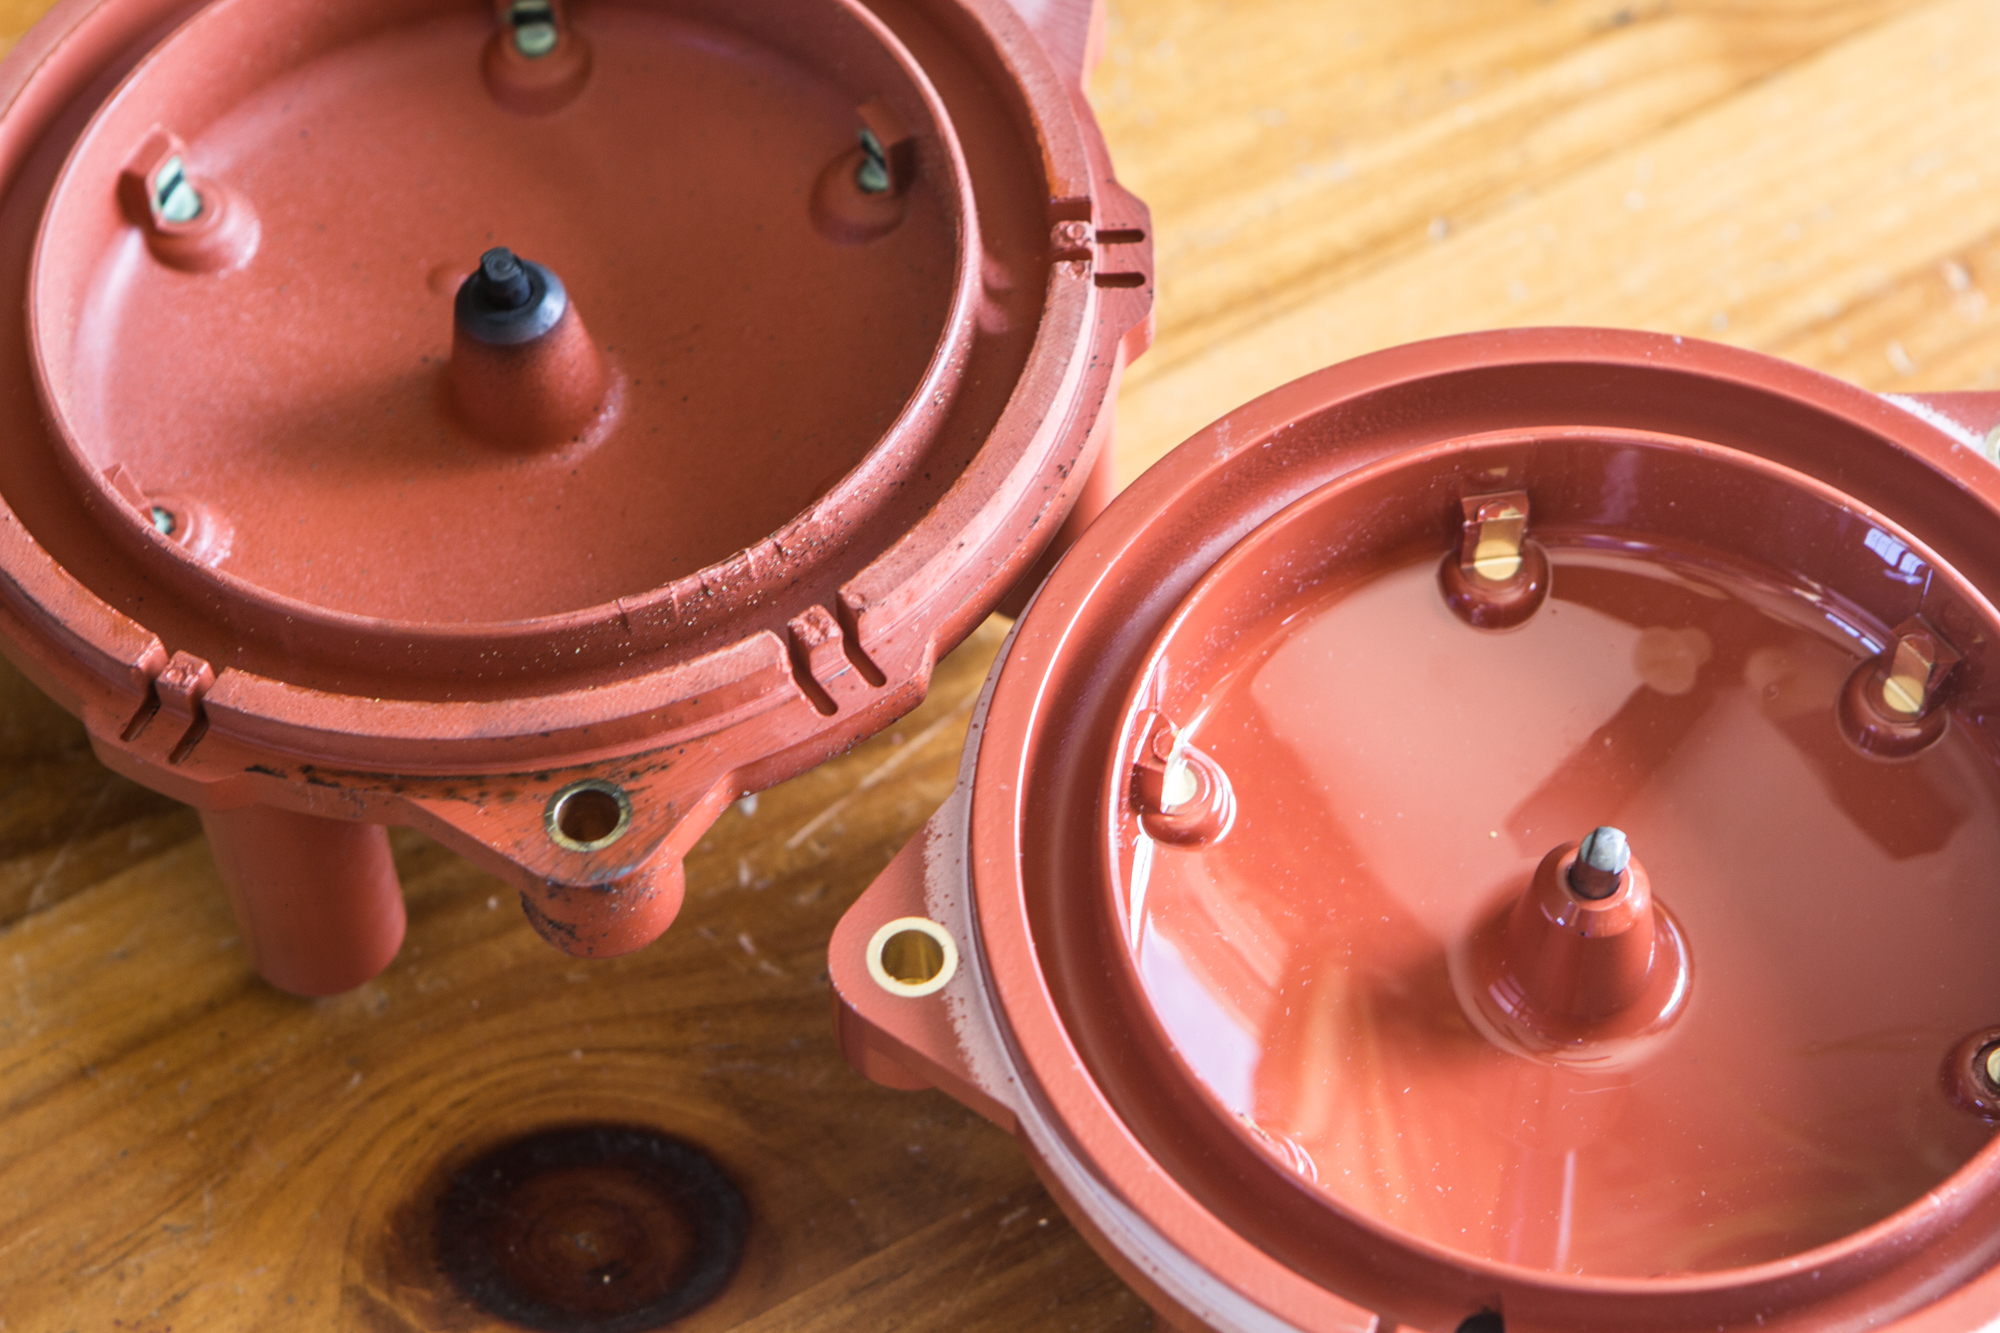
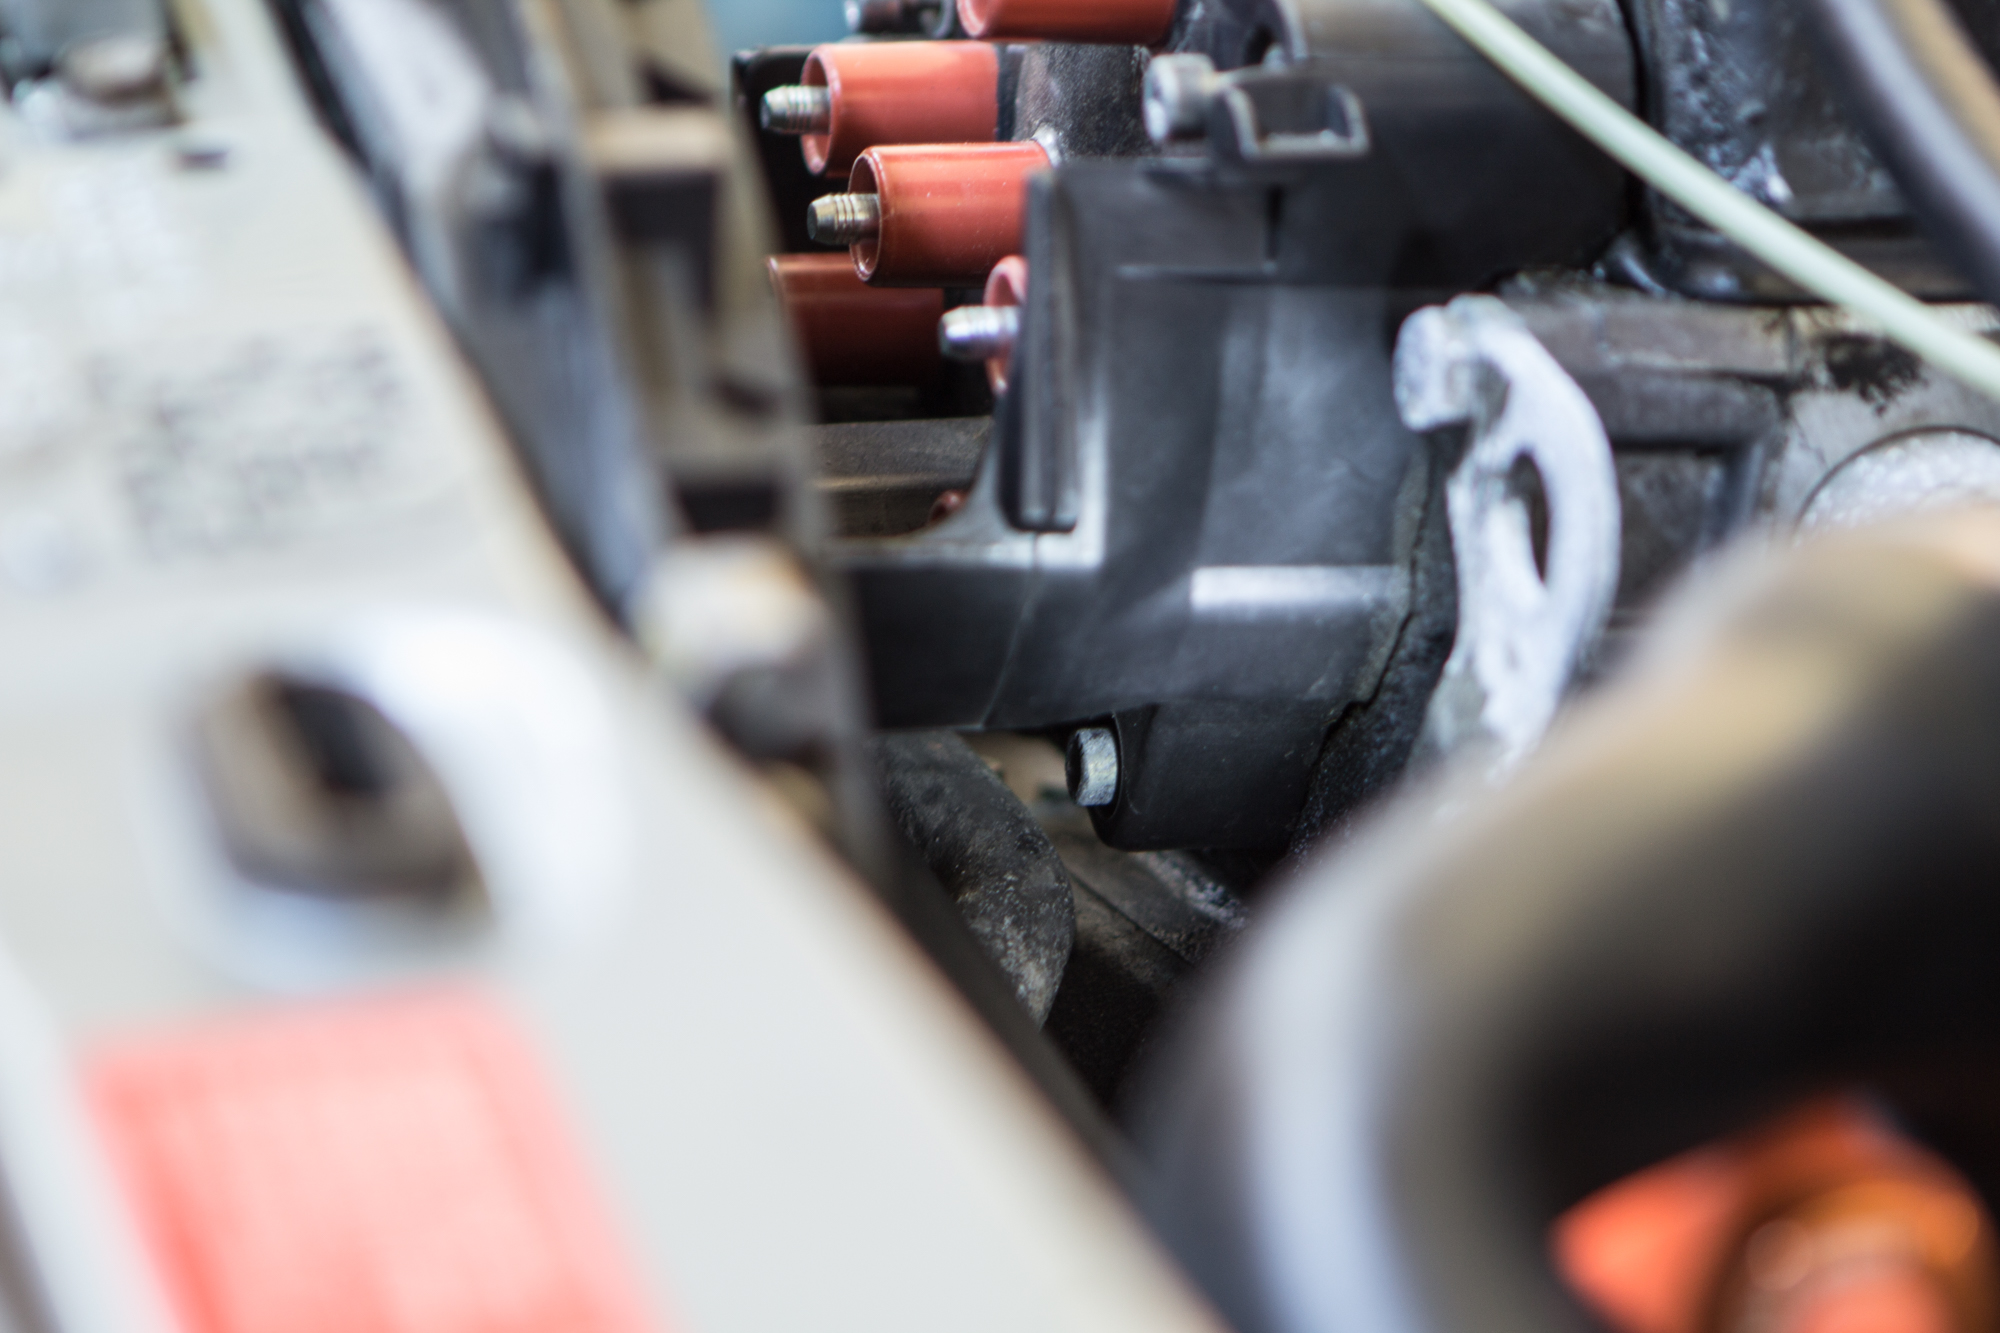
The inside, as you can see, was covered in condensation.
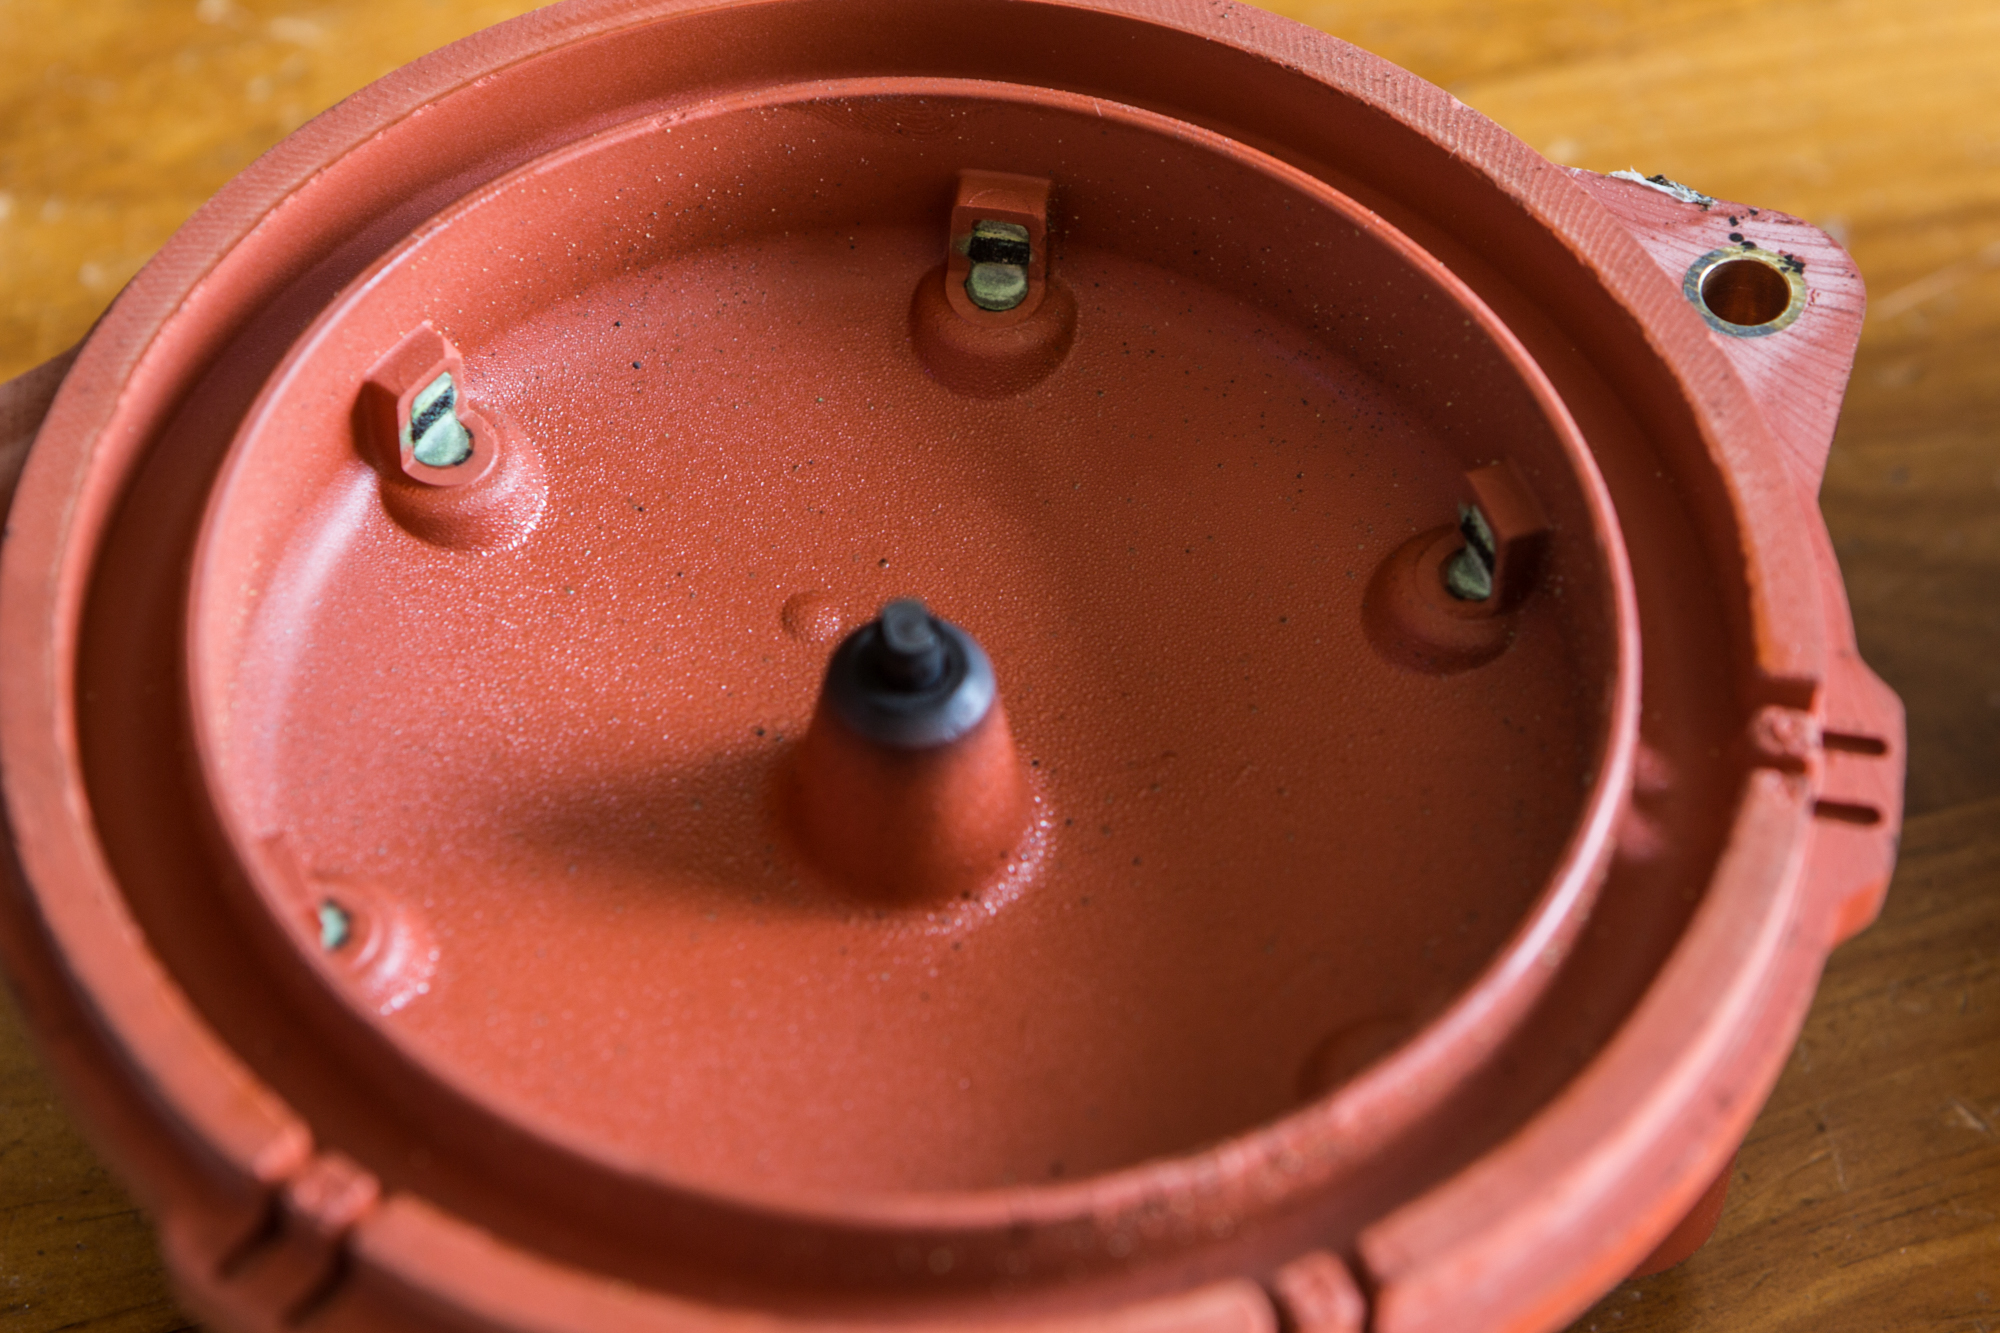
There was no metal showing on the tip of the old rotor, only arcing, and a rusty corrosion.
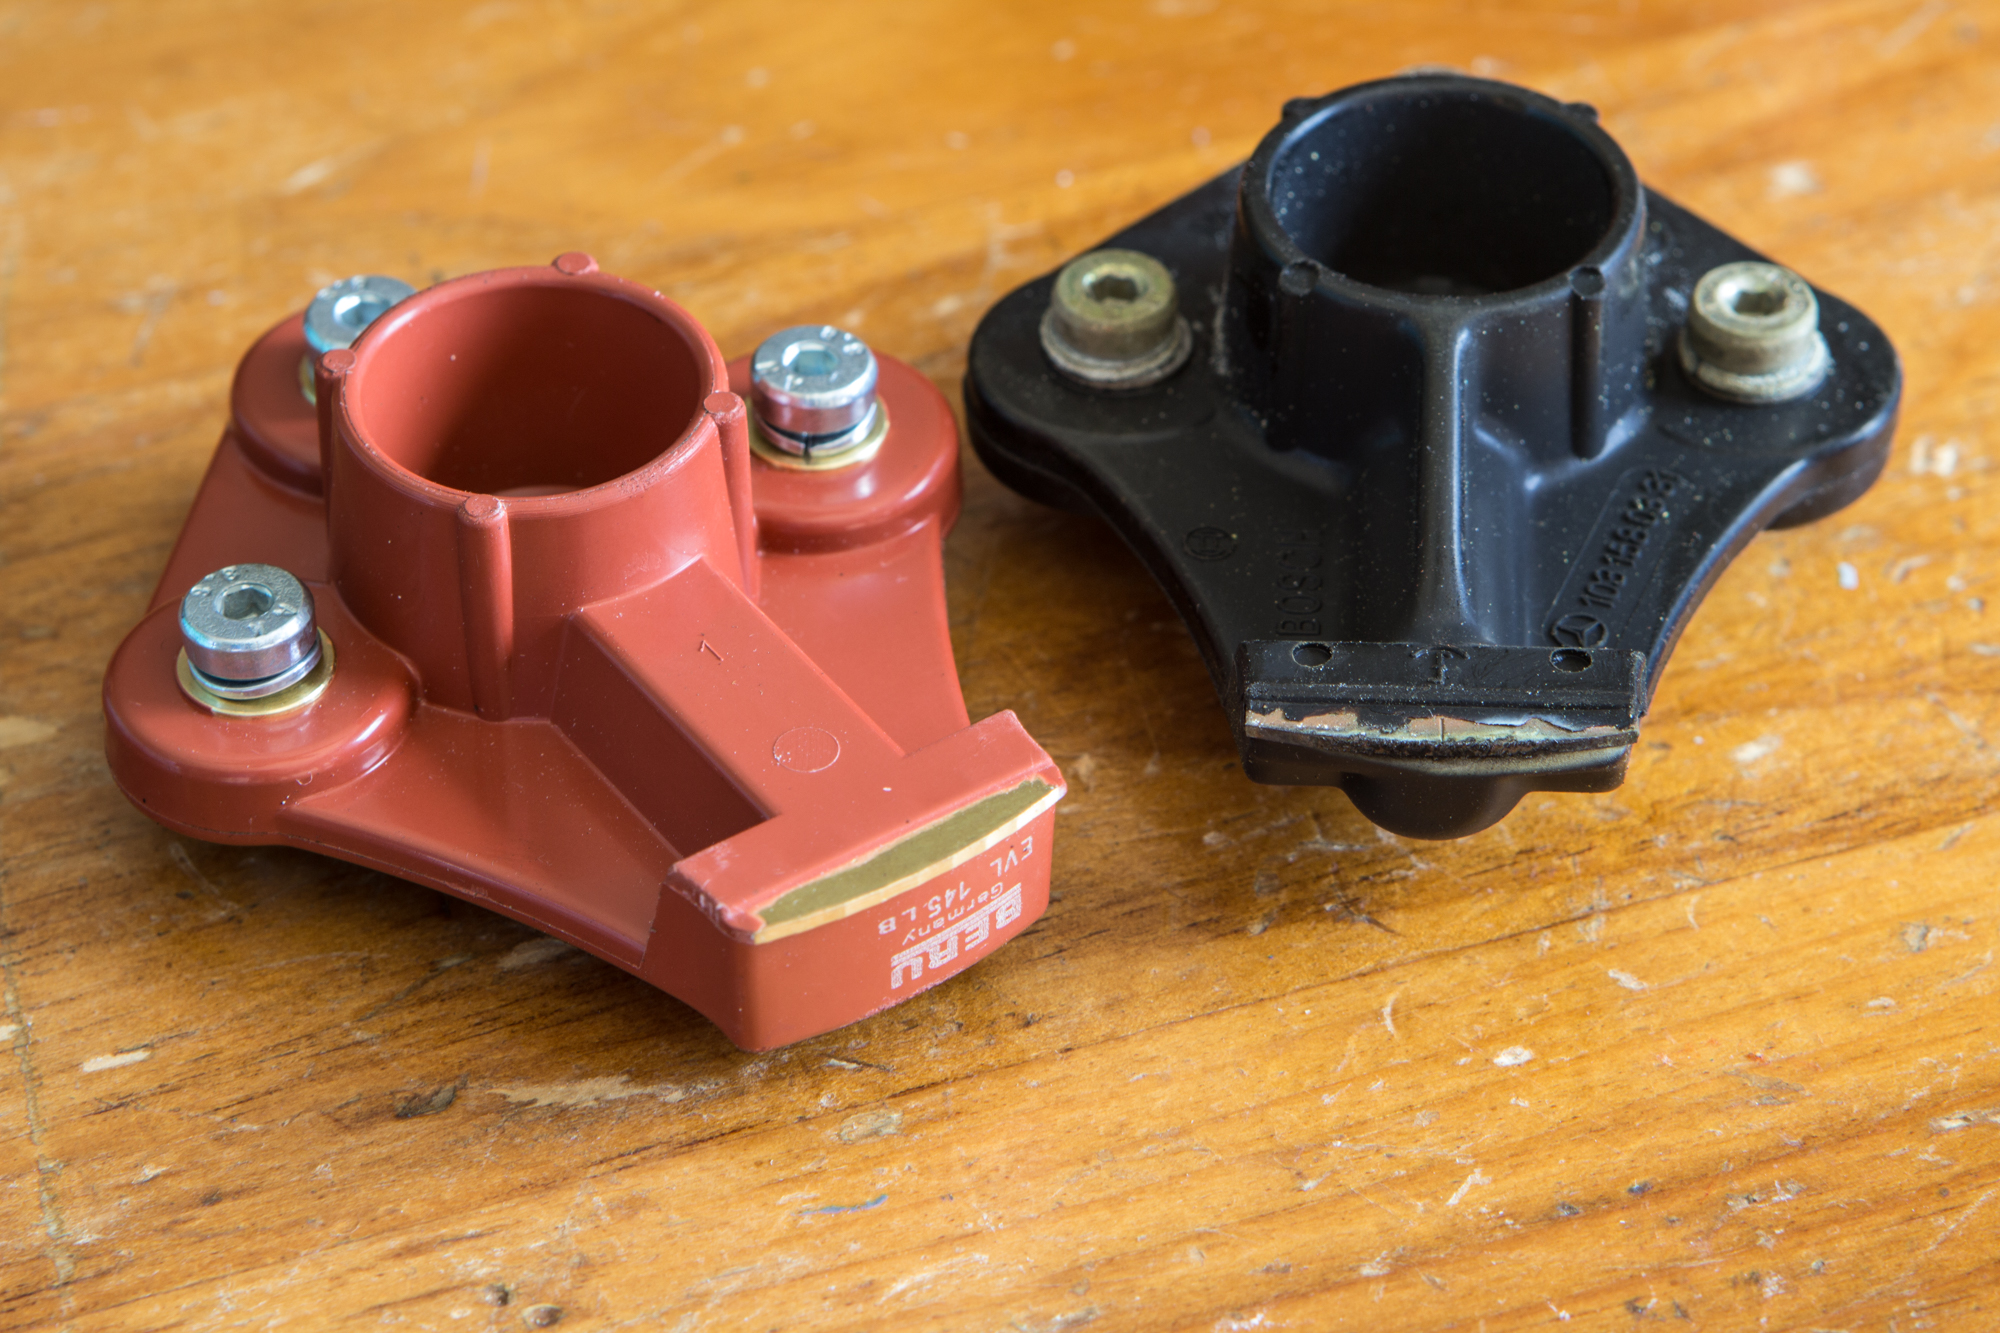
Service history papers had shown the cap and rotor were replaced about 8,000 miles prior, but their condition said otherwise. The loose bolt on the bottom must have let moisture and condensation in, which caused havoc with the points on the inside. It would make sense for this to work when cold, but refuse to fire up when warm.
There was no visible metal on the rotor, as it had all arced and corroded away and the points on the cap were darker than charcoal. After seeing this, however, my thoughts turned to the fact that my coil must be pumping out super-hero levels of zap, and doesn’t really need to be replaced if it could work electricity through that mess.
Additional Work
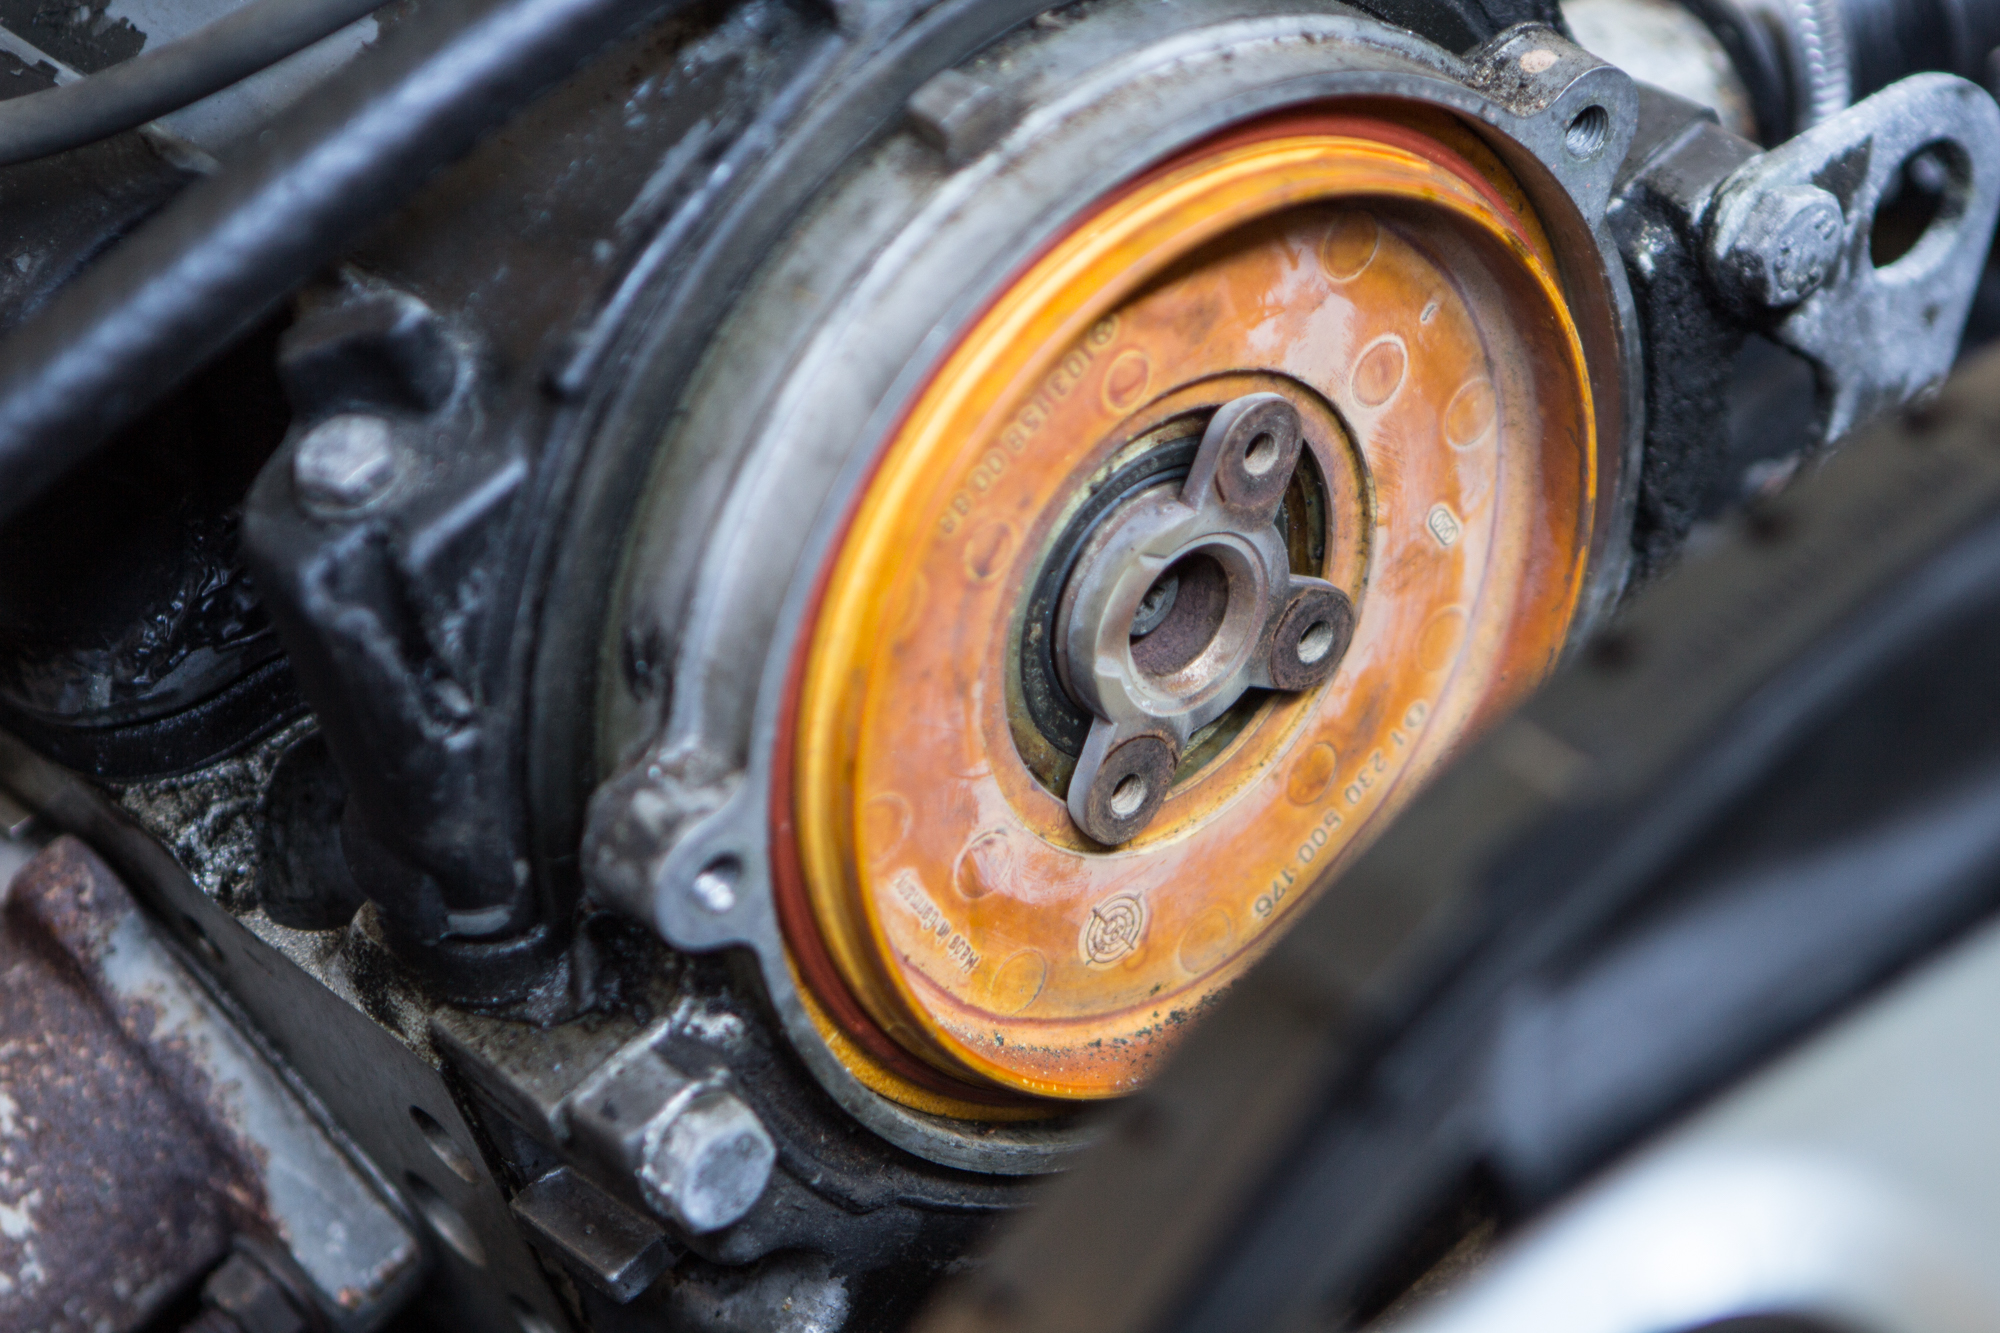
At this time with everything removed, I’d decided that it would be wise to address the crank shaft position sensor. There’s a coolant line that runs directly over the sensor, but since it is metal and has no flex, there’s no use in loosening that. What you will need is a deep 8mm socket plus all of the extensions you have at your disposal.

I thought I’d been clever by positioning an extending magnet next to the socket to keep the nut from falling out of reach upon removal. That part actually worked, but unfortunately upon examining said nut, my own fingers dropped it back into the bowels of the engine bay.
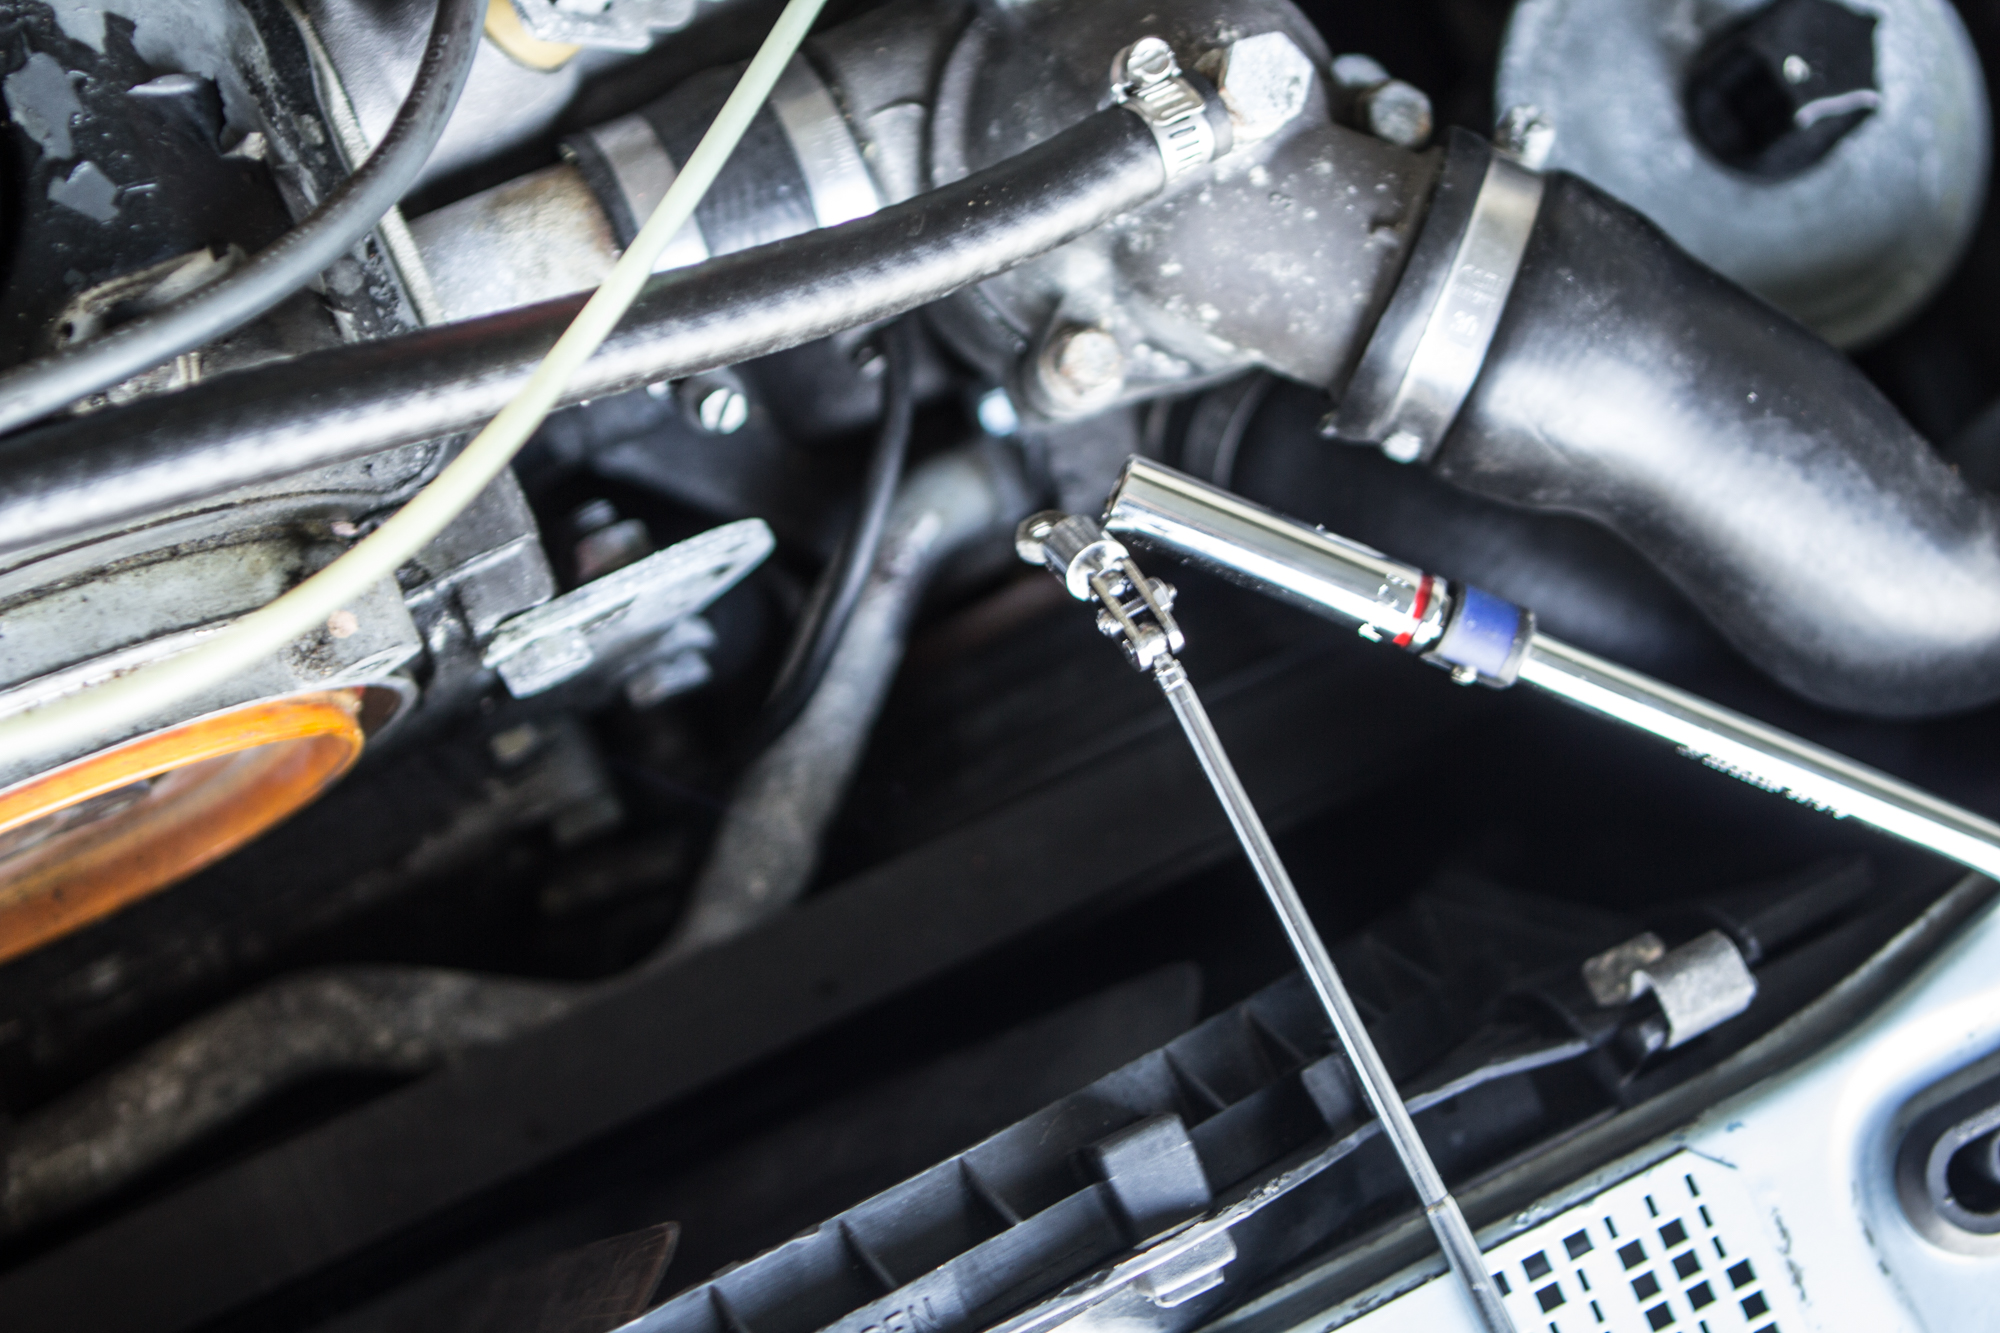
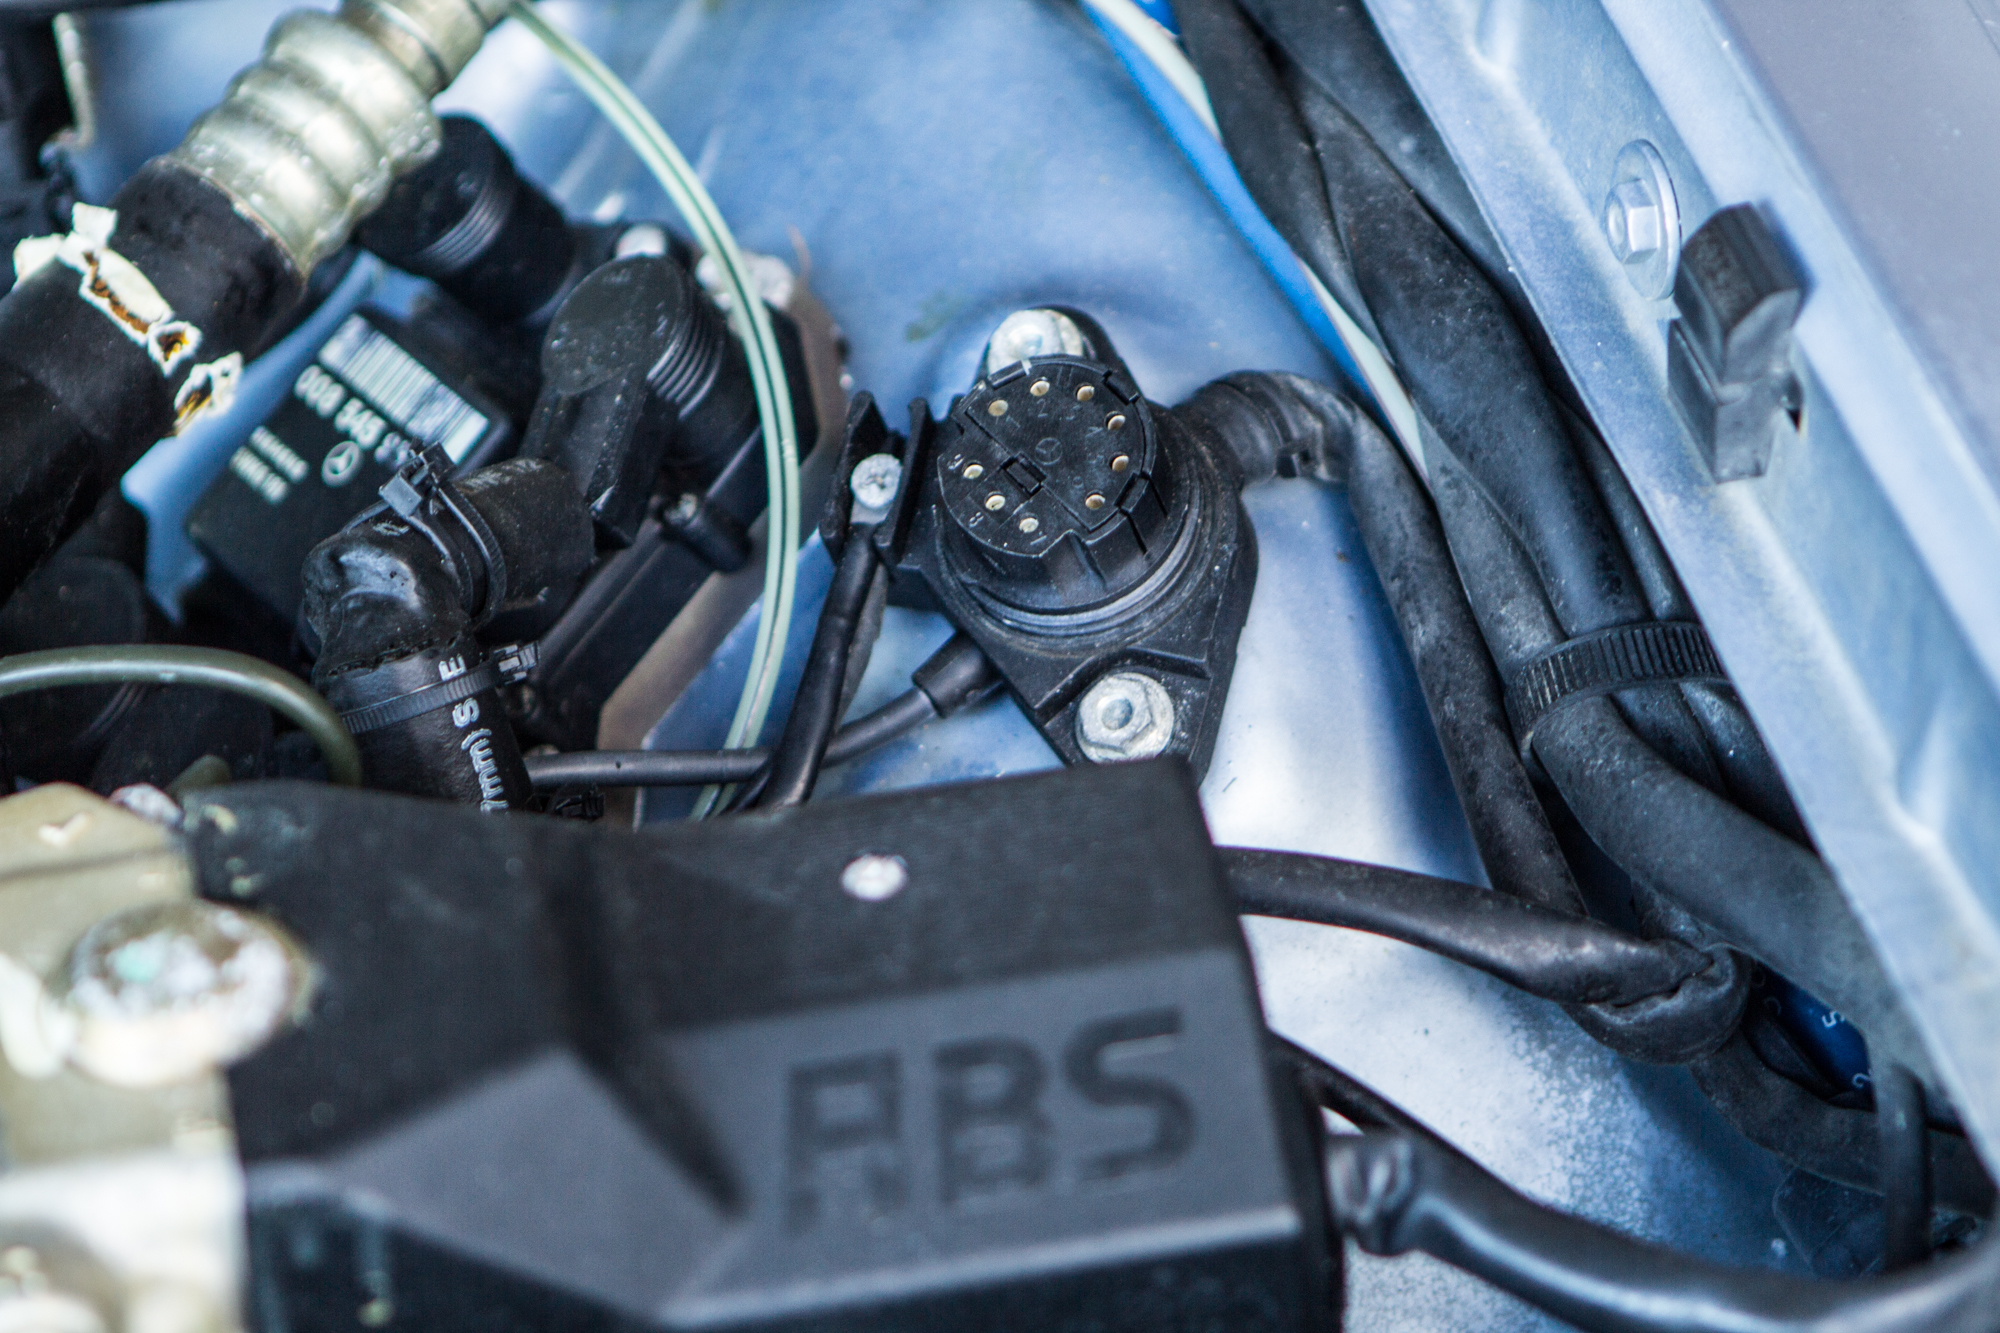
I had a spare nut and decided to get creative when installing it. Curling up a ball of masking tape, and stuffing it in the 8mm socket worked wonders. I was then able to re-trace the path of the crankshaft position sensor wire over to a multi-pin connector on the drivers side wheel well and complete the installation of that part.
With that done, I got back to the cap and rotor. Around the orange thingy shown below, there’s a seal. Since this seal is cheap, just buy it. Installation of the cap, especially that bottom bolt, is made much easier with a 5mm hex driver and a flex-head ratchet, rather than a hex key.
Installation, as Mr. Haynes would say, is reverse of removal.
Once everything was installed, I fired the car back up and as expected it ran just fine. But I don’t really know if I actually fixed anything or not. Since electrical gremlins only rear their ugly heads at the worst of times (like overpasses or at places called “Chihuahua Tire Shop”), I’m still going to have to throw more parts at it before I’m truly satisfied.
You must be logged in to post a comment.