
SUCCESS: DIY HEAD GASKET R/R plus Bonus

Thread Starter
Member
Joined: Jun 2005
Posts: 192
Likes: 9
From: Los Angeles
85 911 Targa
SUCCESS: DIY HEAD GASKET R/R plus Bonus
Here is another contribution to the DIY community.
1st I would like to thank the members here for their guidance assistance, my MBZ Wrench buddy, my Porsche Forum buddies, Engine Machine Service in Ingelwood and my wife's uncle Osvaldo a Master Mechanic.
How I got here:
I had a supposed MBZ shop on San Fernando Mission Blvd replace the radiator but ever since that it always needed fluid replacement, then a little over a year later, radiator went dry and temps went sky high. I can't blame my son, he tried his best to monitor the levels but this was just not normal.
So, 2 months ago I replaced the thermostat and mistakenly used the Green shiznet. I noticed a small puddle at center of where the engine was on the floor but did not think about it too much ( WRONG). Well, one week later, my son was driving on the freeway and the car's temp gauge spiked and she started to lose power, then it stalled.
She was towed home and I found the fluid was empty. I attempted to replaced the fluid and it pissed out the bottom of the engine from the water pump. I checked the plugs and #4 had radiator fluid on it. BLOWN HEAD GASKET and most likely WARPED.
Plan:
Read everything about a Head Job, wow WTF??? Breathed and Drank a lot of Bear to calm down
Remove & Replace (R/R) Head Gasket
R/R Water Pump
Machine Head and R/R damaged components
Supplies and SST:
Head Gasket Kit
Valve Cover Seal
SST: 12 point starred hex socket and 2' breaker bar
SST: Pin Extractor ala Home Depot under $6 bucks
Harbor Freight Gasket 30Degree angled Gasket Remover Tool
MBZ or ZEREX G50 Fluid & water ( chose to use distilled )
Oil & Filter, Some Cheap oil for flush then the final product of choice
ScotchBrite for the Block ( 3 pack, you will use it all )
DeGreaser for flush of Radiator System
Penetrating Oil, I used Kroil
Fix:
Yes, you read correctly it took me 2 months, mostly because I have a job :-) but I think if I had all the parts, supplies ready, I could have completed it in a day, maybe 4-6 hours. It only took me 2 hours to remove the head*** not including the water pump.
God Bless the MBZ Factory Manual for the 201.985 but allot SHIZNET was not really necessary, here is my version:
For Safety: DISCONNECT THE BATTERY, have Jack Stand & chocks ready if you need to get under the car.
Head Removal/Install
1
Drain remaining Radiator Fluid if any
No need to remove the Fan
Loosen the Belt Tensioner ( mine had the Poly Belt )
Remove Alternator and remove Belt and place both aside
Now you have room to reach at those nuts to the Exhaust manifold
Drain the fluid out of the block , 19MM drain bolt + washer
To help keep things in order find something to keep all fitments/components in order so you have no extra items when you are done :-P going from left to right just to keep orderly. ( Okay I have OCD )
2
Remove bolts at pipe, for cars with SMOG loosen large nut on regulator, carefully loose vacuum line ( time and heat make these lines very brittle, so take care ) and pull off the Exhaust Manifold and place to the side to clear the studs of the head.
Discard the gasket, your new kit will have a replacement.
3
Remove Air Filter Box
Remove Head Cover replace seal if not recently replaced, mine was brittle and the main culprit of my cover leaking oil
Again take care when removing hoses and plugs be patient and use tools to help you. I recommend taking a pictures of any wiring looms/vacuum connections to recall where everything goes.
4
Remove Fuel Distributor and Injection lines, I suggest spraying oil on them to help break them loose so as not to damage the soft brass nuts and fuel lines
Remove Intake Manifold nuts and bolts there are seven not including the fuel injector retaining bolts
Remove the bolts and nuts at the penlum and in between intake pipes the V mount and vacuum hoses.
Remove the mount for the Smog pipe underneath and next to the V mount ( this was the one I forgot initially and it made it impossible to move the intake out of the way.
Disconnect the Pre-Heater connector at bottom of intake gasket area. Mine was disconnected by the POS, no wonder she took a long time to warming up in the morning.
Disconnect the accelerator spring in between the intake pipes and disconnect the pivot
Move the accelerator assembly to the side, take care not to damage the transmission kick down cable
Move Intake out of the way to clear the head stud
Again your Head Gasket Kit will have new seals, clean the mating surfaces as needed.
5
Head Removal
Place all Timing to marks TDC, TDC on Cam Sprocket, verified by the distributor mark and Timing Disk @ T/0 (MUST)
Remove Timing Chain Tensioner 30MM, ( it is under load so be prepared )
You MUST use a 12 point Hex aka Multi-Point Hex. Standard Six Point WILL NOT WORK!
Remove in gradual reverse order 10-1 ( gradual is not needed but I wanted make sure to lessen any further warping of the head
Remove Guide Rails pins. I did not want to spend $150 for a simple MBZ pin extractor so I went to Home Depot and got a Brass Pipe fitment and metric bolt, SS washer and nuts for under $6.00. DO NOT Go in too deep it will seize the bolt and may snap it off!
Remove Guide rail carefully. Up and to the side.
Remove the 4 bolts from that area, 3 Allen and 1 standard Hex, that one is next to the sensor cluster on top of the head
Mark the Timing Cam Sprocket and Chain, I used a coat hanger and placed it exactly where it lined up with the sprocket mark.
Remove Bolt and hold with a 24MM wrench in the opposite end of the Cam Shaft
Remove Sprocket
Use a soft mallet to break the head loose from the gasket.
Carefully lift the head off trying not to let the mating surface hit anything, the aluminum is very soft.
If a mallet won't break it loose, use a seal removal tool and place it under the right bottom corner, right about where the alternator was, you will feel a lip and a ledge you can wedge against for leverage. Only to break it loose do not pry up on it more than you need to, Be Patient.
6
With the head removed and sent to the machine shop, at a minimum replace with new seals. If a valve is BURNT/DAMAGED, replace as a set on all cylinders
Be prepared, the shop will need to disassemble to replace the seals or valves so you will need to put it back together and turn the sprocket several times off the car and place back to the exact same TDC mark. Don't forget to add lube to the bearing/moving parts before you rotate.
I placed the head on some wooden blocks and a micro fiber towel as not to allow the valves to touch anything while lifting and dropping
7
Clean the Block Surface thoroughly.
I used a Harbor Freight tool with much success. Absolutely no marring or gouging, it just removed the baked on carbon and burnt on seal.
Finished with ScotchBrite, I used the entire 3 pack.
Blew Compress air to get rid of any hard debris
Sprayed Kroil on the block as not to rust while waiting for the head to be serviced
Thank Goodness MBZ used IRON Block. My 911 with Aluminum is a nightmare when it over heats.
8
Re-assembly:
I used Acetone to clean off all the oil and debris on the mating surface, Including the head bolt holes
Placed the new Head Gasket, no extra sealant needed if OEM type.
New Stretch Bolts and Washer (oiled, using 10w40 SAE motor oil)
Assemble in Reverse Order (sorry)
Torqued the head bolts gradually 50%, 75% then to 55Nm then two 90 degree turns per spec. TAKE YOUR TIME HERE YOU ARE IN NO HURRY. ( the oil really helped and did not make any snapping noises others encountered )
Replace the Cam Sprocket insuring it is at TDC, it is tight but will fit.
Replace Guide Rail, tap in pins gently
Replace Timing Chain Spring 80Nm
Hand Crank several times to make sure there is no binding of the lifters, and touching of the pistons to the valves and that it goes back to TDC every single time. If not you have jumped a tooth when placing the Cam Sprocket back on and you will need to adjust the position of the chain after verifying TDC of the piston #1.
Take a well deserved Bear Break
If you put everything back together properly she will start just make sure battery is fully charged. I had mine on a charger during the final assembly.
9
FLUSH
Place degreaser in radiator, manufacturer recommend 1:1 ratio I did 1degreaser : 2 water. I did not feel like wasting a whole day or two get the degreaser out. I ended up flushing 6 times anyways.
Change the oil with a cheapo brand but leave the old filter, it will be sacrificed
When the engine cools down drain from block, leave it open and use a garden hose to flush it through the radiator
I found a little trick to flush the heater core, loosen the clamps on the hose coming from behind the fire wall to that little electric pump and pivot it up so you can place the end of the water hose to flush backward in through the heater core and out the block.
Now the Degreaser is 99.9% out
Replace Drain Plug, and hoses clamps
Fill with 60/40 proper fluid
Run car until warm with cap off and fill as needed to max level.
If there is no leak, your fluid will be clean car will remain running.
Change the oil and filter, re-tighten belt per spec and you are done!
Bonus, I found my main fan was not kicking in so I bi-passed it to a main 12v source, triggered by the ignition switch and ground via a relay and now it stays on all the time. Will not go over 60c while sitting in the garage and radiator obstructed, after an hour it will just touch 80c. Running on 10w40, SoCali temps.
My plan is to place a 1.0K Ohm � Watt resister on the trigger wire and place the resister near the OEM sensor to allow it to go on around 90c+/-. Yeah I think it is my sensor that is shot but this is much cheaper quicker
I hope this will help those on the fence about doing the infamous Head Gasket Job?
More Pics will be posted shortly,
Jim
1st I would like to thank the members here for their guidance assistance, my MBZ Wrench buddy, my Porsche Forum buddies, Engine Machine Service in Ingelwood and my wife's uncle Osvaldo a Master Mechanic.
How I got here:
I had a supposed MBZ shop on San Fernando Mission Blvd replace the radiator but ever since that it always needed fluid replacement, then a little over a year later, radiator went dry and temps went sky high. I can't blame my son, he tried his best to monitor the levels but this was just not normal.
So, 2 months ago I replaced the thermostat and mistakenly used the Green shiznet. I noticed a small puddle at center of where the engine was on the floor but did not think about it too much ( WRONG). Well, one week later, my son was driving on the freeway and the car's temp gauge spiked and she started to lose power, then it stalled.
She was towed home and I found the fluid was empty. I attempted to replaced the fluid and it pissed out the bottom of the engine from the water pump. I checked the plugs and #4 had radiator fluid on it. BLOWN HEAD GASKET and most likely WARPED.
Plan:
Read everything about a Head Job, wow WTF??? Breathed and Drank a lot of Bear
to calm downRemove & Replace (R/R) Head Gasket
R/R Water Pump
Machine Head and R/R damaged components
Supplies and SST:
Head Gasket Kit
Valve Cover Seal
SST: 12 point starred hex socket and 2' breaker bar
SST: Pin Extractor ala Home Depot under $6 bucks
Harbor Freight Gasket 30Degree angled Gasket Remover Tool
MBZ or ZEREX G50 Fluid & water ( chose to use distilled )
Oil & Filter, Some Cheap oil for flush then the final product of choice
ScotchBrite for the Block ( 3 pack, you will use it all )
DeGreaser for flush of Radiator System
Penetrating Oil, I used Kroil
Fix:
Yes, you read correctly it took me 2 months, mostly because I have a job :-) but I think if I had all the parts, supplies ready, I could have completed it in a day, maybe 4-6 hours. It only took me 2 hours to remove the head*** not including the water pump.
God Bless the MBZ Factory Manual for the 201.985 but allot SHIZNET was not really necessary, here is my version:
For Safety: DISCONNECT THE BATTERY, have Jack Stand & chocks ready if you need to get under the car.
Head Removal/Install
1
Drain remaining Radiator Fluid if any
No need to remove the Fan
Loosen the Belt Tensioner ( mine had the Poly Belt )
Remove Alternator and remove Belt and place both aside
Now you have room to reach at those nuts to the Exhaust manifold
Drain the fluid out of the block , 19MM drain bolt + washer
To help keep things in order find something to keep all fitments/components in order so you have no extra items when you are done :-P going from left to right just to keep orderly. ( Okay I have OCD )
2
Remove bolts at pipe, for cars with SMOG loosen large nut on regulator, carefully loose vacuum line ( time and heat make these lines very brittle, so take care ) and pull off the Exhaust Manifold and place to the side to clear the studs of the head.
Discard the gasket, your new kit will have a replacement.
3
Remove Air Filter Box
Remove Head Cover replace seal if not recently replaced, mine was brittle and the main culprit of my cover leaking oil
Again take care when removing hoses and plugs be patient and use tools to help you. I recommend taking a pictures of any wiring looms/vacuum connections to recall where everything goes.
4
Remove Fuel Distributor and Injection lines, I suggest spraying oil on them to help break them loose so as not to damage the soft brass nuts and fuel lines
Remove Intake Manifold nuts and bolts there are seven not including the fuel injector retaining bolts
Remove the bolts and nuts at the penlum and in between intake pipes the V mount and vacuum hoses.
Remove the mount for the Smog pipe underneath and next to the V mount ( this was the one I forgot initially and it made it impossible to move the intake out of the way.
Disconnect the Pre-Heater connector at bottom of intake gasket area. Mine was disconnected by the POS, no wonder she took a long time to warming up in the morning.
Disconnect the accelerator spring in between the intake pipes and disconnect the pivot
Move the accelerator assembly to the side, take care not to damage the transmission kick down cable
Move Intake out of the way to clear the head stud
Again your Head Gasket Kit will have new seals, clean the mating surfaces as needed.
5
Head Removal
Place all Timing to marks TDC, TDC on Cam Sprocket, verified by the distributor mark and Timing Disk @ T/0 (MUST)
Remove Timing Chain Tensioner 30MM, ( it is under load so be prepared )
You MUST use a 12 point Hex aka Multi-Point Hex. Standard Six Point WILL NOT WORK!
Remove in gradual reverse order 10-1 ( gradual is not needed but I wanted make sure to lessen any further warping of the head
Remove Guide Rails pins. I did not want to spend $150 for a simple MBZ pin extractor so I went to Home Depot and got a Brass Pipe fitment and metric bolt, SS washer and nuts for under $6.00. DO NOT Go in too deep it will seize the bolt and may snap it off!
Remove Guide rail carefully. Up and to the side.
Remove the 4 bolts from that area, 3 Allen and 1 standard Hex, that one is next to the sensor cluster on top of the head
Mark the Timing Cam Sprocket and Chain, I used a coat hanger and placed it exactly where it lined up with the sprocket mark.
Remove Bolt and hold with a 24MM wrench in the opposite end of the Cam Shaft
Remove Sprocket
Use a soft mallet to break the head loose from the gasket.
Carefully lift the head off trying not to let the mating surface hit anything, the aluminum is very soft.
If a mallet won't break it loose, use a seal removal tool and place it under the right bottom corner, right about where the alternator was, you will feel a lip and a ledge you can wedge against for leverage. Only to break it loose do not pry up on it more than you need to, Be Patient.
6
With the head removed and sent to the machine shop, at a minimum replace with new seals. If a valve is BURNT/DAMAGED, replace as a set on all cylinders
Be prepared, the shop will need to disassemble to replace the seals or valves so you will need to put it back together and turn the sprocket several times off the car and place back to the exact same TDC mark. Don't forget to add lube to the bearing/moving parts before you rotate.
I placed the head on some wooden blocks and a micro fiber towel as not to allow the valves to touch anything while lifting and dropping
7
Clean the Block Surface thoroughly.
I used a Harbor Freight tool with much success. Absolutely no marring or gouging, it just removed the baked on carbon and burnt on seal.
Finished with ScotchBrite, I used the entire 3 pack.
Blew Compress air to get rid of any hard debris
Sprayed Kroil on the block as not to rust while waiting for the head to be serviced
Thank Goodness MBZ used IRON Block. My 911 with Aluminum is a nightmare when it over heats.
8
Re-assembly:
I used Acetone to clean off all the oil and debris on the mating surface, Including the head bolt holes
Placed the new Head Gasket, no extra sealant needed if OEM type.
New Stretch Bolts and Washer (oiled, using 10w40 SAE motor oil)
Assemble in Reverse Order (sorry)
Torqued the head bolts gradually 50%, 75% then to 55Nm then two 90 degree turns per spec. TAKE YOUR TIME HERE YOU ARE IN NO HURRY. ( the oil really helped and did not make any snapping noises others encountered )
Replace the Cam Sprocket insuring it is at TDC, it is tight but will fit.
Replace Guide Rail, tap in pins gently
Replace Timing Chain Spring 80Nm
Hand Crank several times to make sure there is no binding of the lifters, and touching of the pistons to the valves and that it goes back to TDC every single time. If not you have jumped a tooth when placing the Cam Sprocket back on and you will need to adjust the position of the chain after verifying TDC of the piston #1.
Take a well deserved Bear Break
If you put everything back together properly she will start
just make sure battery is fully charged. I had mine on a charger during the final assembly.9
FLUSH
Place degreaser in radiator, manufacturer recommend 1:1 ratio I did 1degreaser : 2 water. I did not feel like wasting a whole day or two get the degreaser out. I ended up flushing 6 times anyways.
Change the oil with a cheapo brand but leave the old filter, it will be sacrificed
When the engine cools down drain from block, leave it open and use a garden hose to flush it through the radiator
I found a little trick to flush the heater core, loosen the clamps on the hose coming from behind the fire wall to that little electric pump and pivot it up so you can place the end of the water hose to flush backward in through the heater core and out the block.
Now the Degreaser is 99.9% out
Replace Drain Plug, and hoses clamps
Fill with 60/40 proper fluid
Run car until warm with cap off and fill as needed to max level.
If there is no leak, your fluid will be clean
car will remain running.Change the oil and filter, re-tighten belt per spec and you are done!
Bonus, I found my main fan was not kicking in so I bi-passed it to a main 12v source, triggered by the ignition switch and ground via a relay and now it stays on all the time. Will not go over 60c while sitting in the garage and radiator obstructed, after an hour it will just touch 80c. Running on 10w40, SoCali temps.
My plan is to place a 1.0K Ohm � Watt resister on the trigger wire and place the resister near the OEM sensor to allow it to go on around 90c+/-. Yeah I think it is my sensor that is shot but this is much cheaper quicker
I hope this will help those on the fence about doing the infamous Head Gasket Job?
More Pics will be posted shortly,
Jim
Thread Starter
Member
Joined: Jun 2005
Posts: 192
Likes: 9
From: Los Angeles
85 911 Targa
Sorry had to post pic on the reply due to text limt on OP
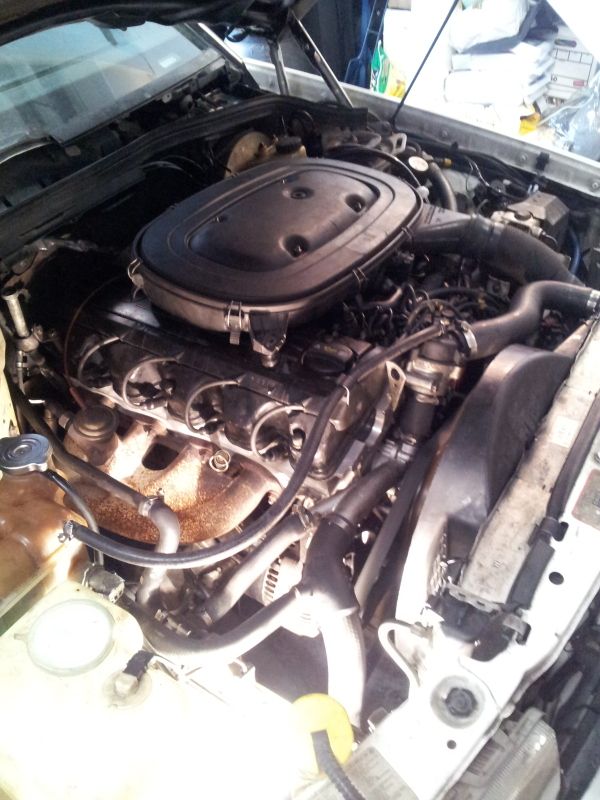
Complete and Running :nod:

SST: Home Depot DIY Pin Extractor under $6.00
Complete and Running :nod:
SST: Home Depot DIY Pin Extractor under $6.00
Last edited by DRACO; Feb 8, 2012 at 05:47 PM.


