When you click on links to various merchants on this site and make a purchase, this can result in this site earning a commission. Affiliate programs and affiliations include, but are not limited to, the eBay Partner Network.
Thanks for the post. I fixed this today on my 2011 C300 4matic Sport.
It took about an hour, and the hardest part for me was getting the lower panel out from driver's side (newbie to DIY, just got tired of spending money at the Stealership and wanted to try fixing stuff on my own).
There is no dogbone device in the 2011. It looks like it has been replaced with a steel cable. Looks like the nut that holds the steel cable overtightened over time and got stuck. I loosened it with a #13 spanner and voila, tilt works!! I have pics and some video if anyone is interested.
This thread was very helpful with helping me understand what was the issue with my driver telescoping steering so I thought I'd contribute photos from the perspective of the newer W204 generation.
Facts: 2012 Mercedes C250.
Problem: Driver steering wheel would adjust forward and aft, but not up and down. I noticed it one day when the "entry/exit" feature stopped moving the steering wheel out of the way when climbing out of the vehicle. I could hear the motor attempt to turn when using manual adjustments but steering wheel would not move. This told me fuses were good and motor was good.
Step 2: Pull panel down to expose plugs & hood release that must be unclipped or removed before panel can be pulled out completely. Hint - The hood latch angles upward and slides through the void & the OBD port has a sliding clip on the back. Slide the clip towards the driver seat and the connector will lift right out of the plastic holder.
Step 3: Lay down and look up towards the passenger side (USA model anyway) of the steering column. You will see the steel "speedometer" style cable linked between the motor (closest to front of vehicle) and the mechanical actuation (closest to driver). Loosen the 13 mm nut at the end near the front. I loosened mine approximately 1 to 2 full rotations.
Step 4: Turn ignition power on (no need to start vehicle) and manually actuate steering column. You should see things move. Mine did not function at first but after bumping the controls up and down a few times it finally broke free and began to move.
Step 5: Put panel back on and enjoy a cold beer to celebrate.
My new one lasted for exactly 5 days. It's broken again and I need to replace the replacement ;(
I almost have to wonder if cutting off some of the connecting point in order to fit the part has made the torque forces worse and thus the snapping more likely.
Think of it this way... If you take a long skinny stick and hold twist at two ends, the odds of it snapping are greater than the same skinny stick that is short and stubby. Same applied force, different torque. There is a direct correlation between torque and length right...it's the same premise as a breaker bar. You can apply X force to a long rod to break free a lug nut. If you apply the same X force to a short rod, the lug nut won't budge. I wonder if the premise is in effect on your new part... by cutting short the length of the threaded end, you've basically increased the length of the dog bone and therefore great torque forces are applied to it's center area.
Is my thinking correct or am I way off (I'm not mechanical engineer so I could be off).
I think the same thing happened. But I just can't see how to bend and twist it to go in with its original length. And it's impossible to compress the rubber to make it go on the two shafts. I might go the long road by taking half the dash board apart this time as I bought two couplings back then.
It's impossible to take both screws out holding the motor in place bc one of the two screws is covered by the steering column lock motor unit. If you could take both screws out it would be a piece of cake and I would believe that some did the fix in 5-15 minutes.
Last edited by Mackhack; Jun 26, 2016 at 11:46 AM.
hello ,
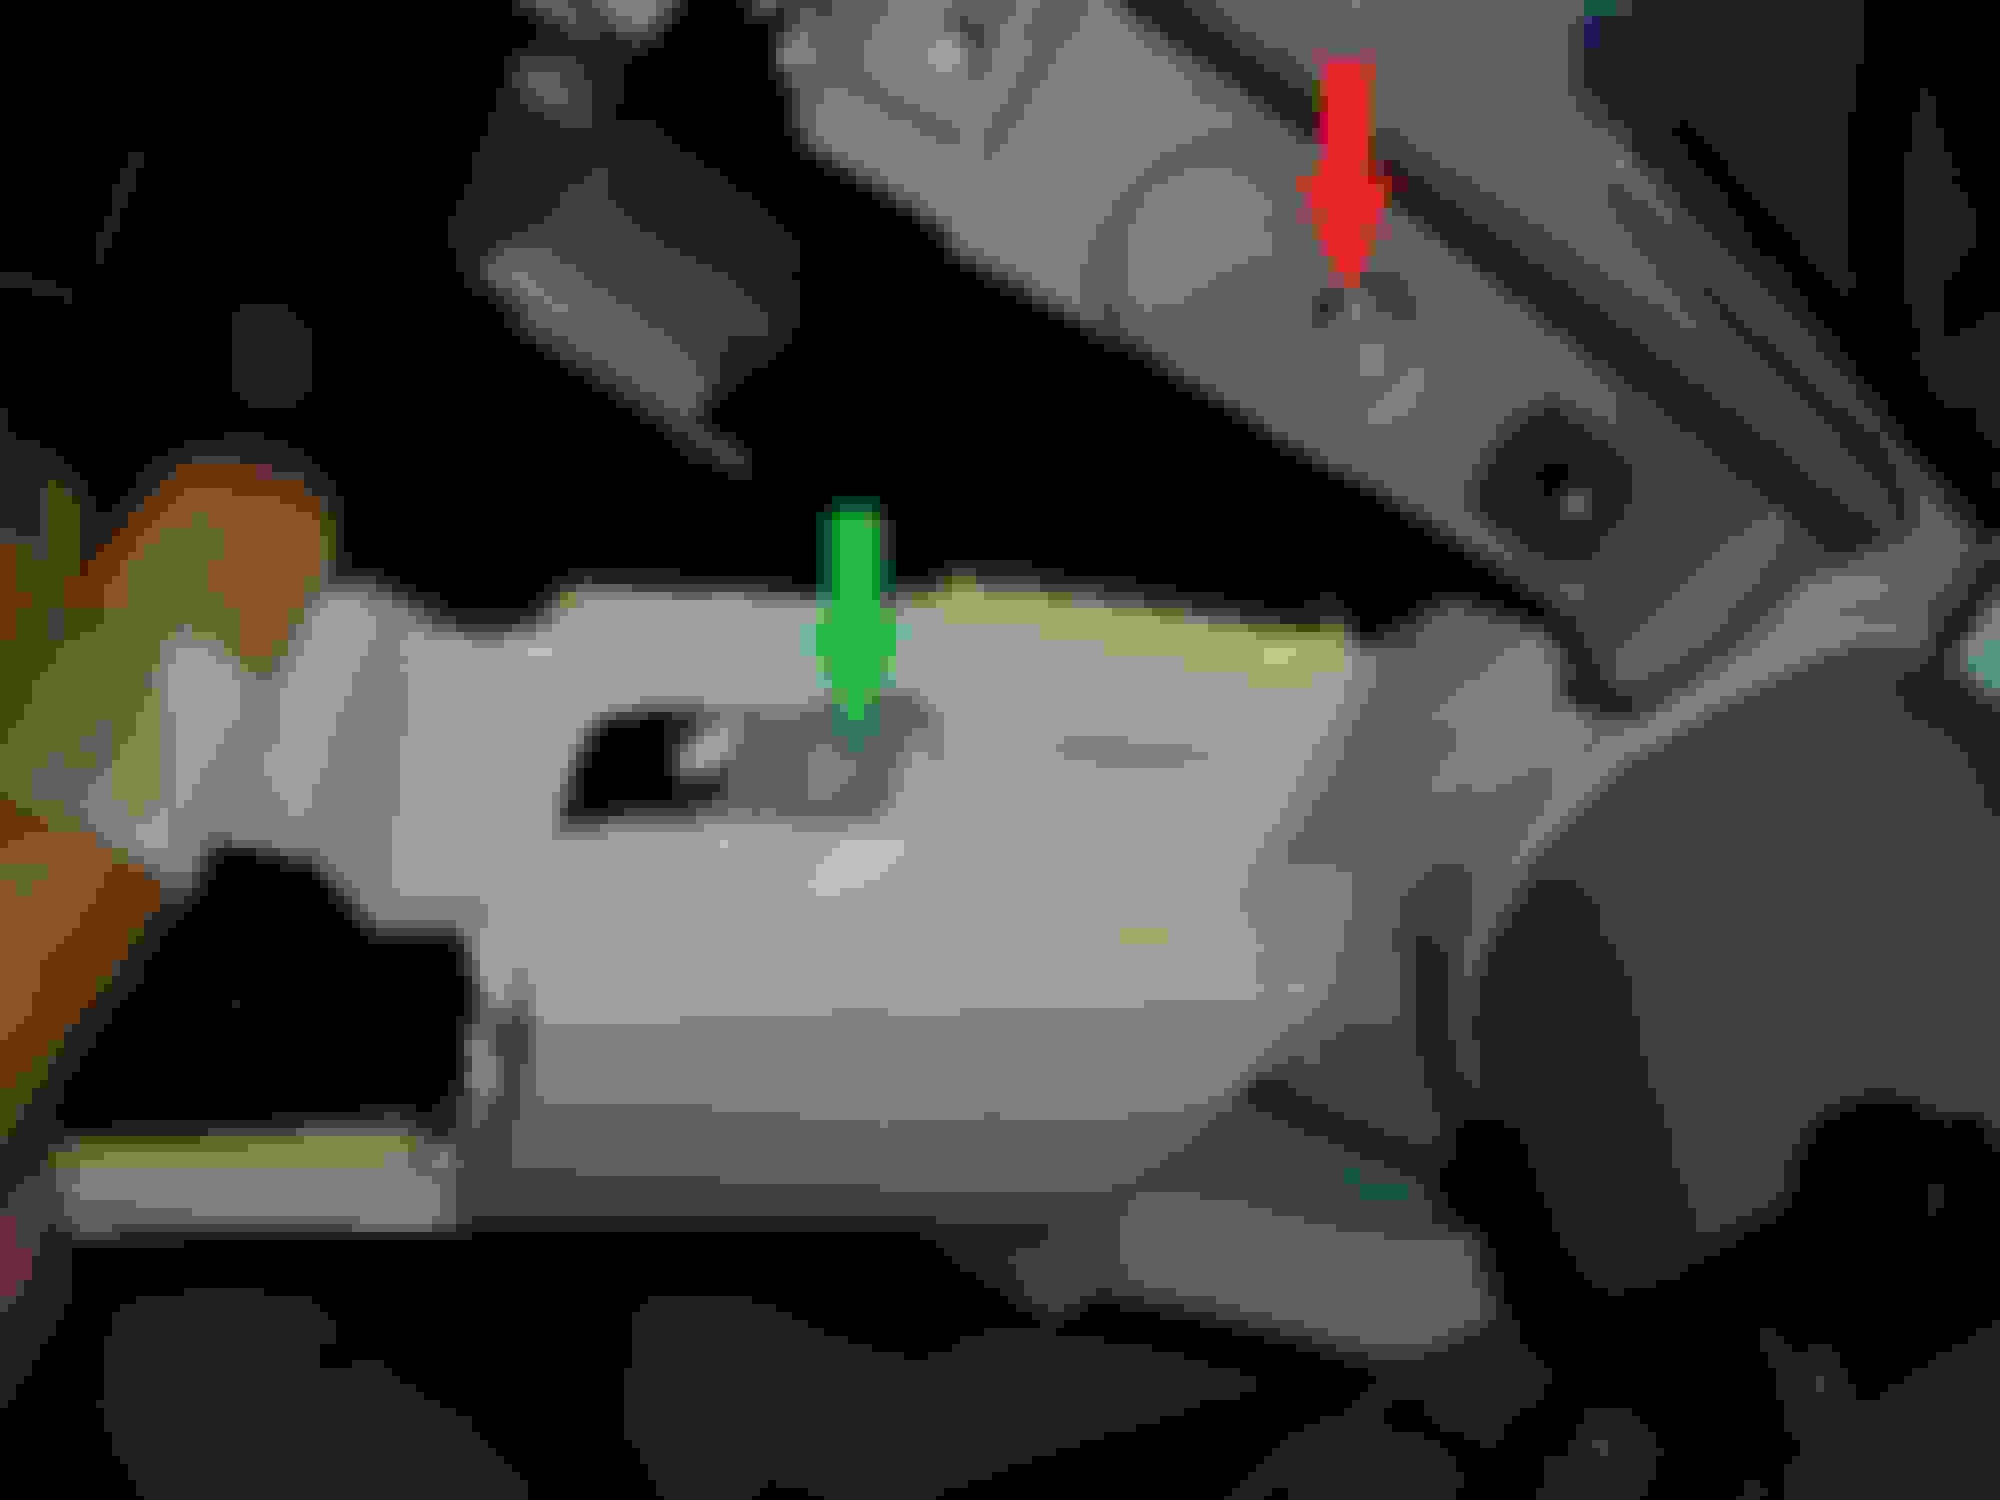
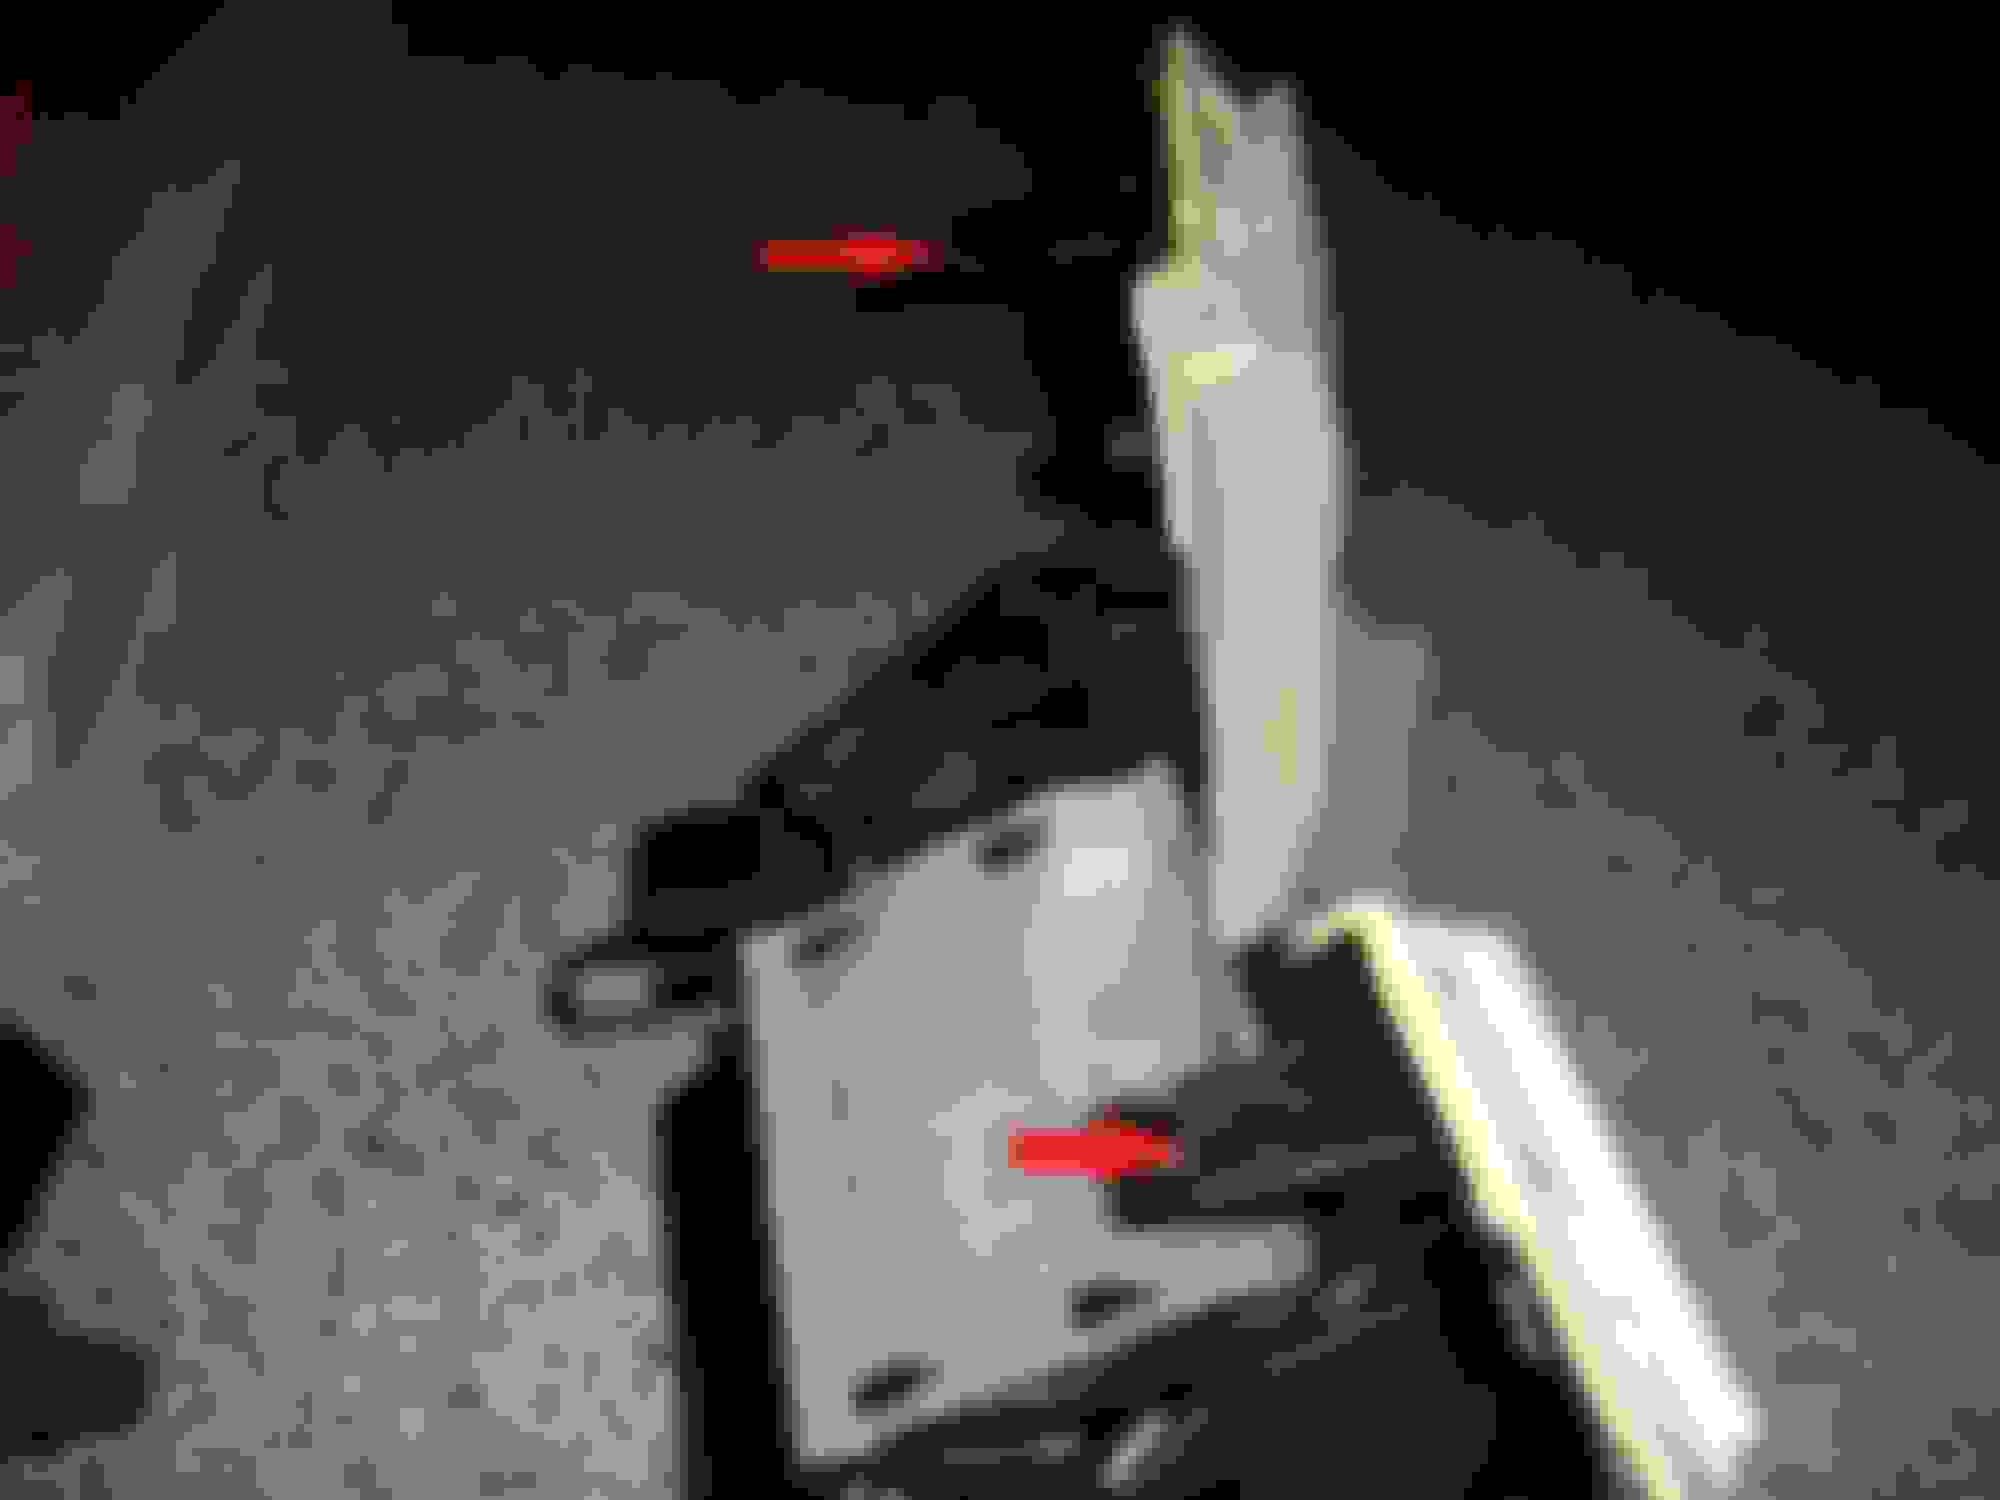
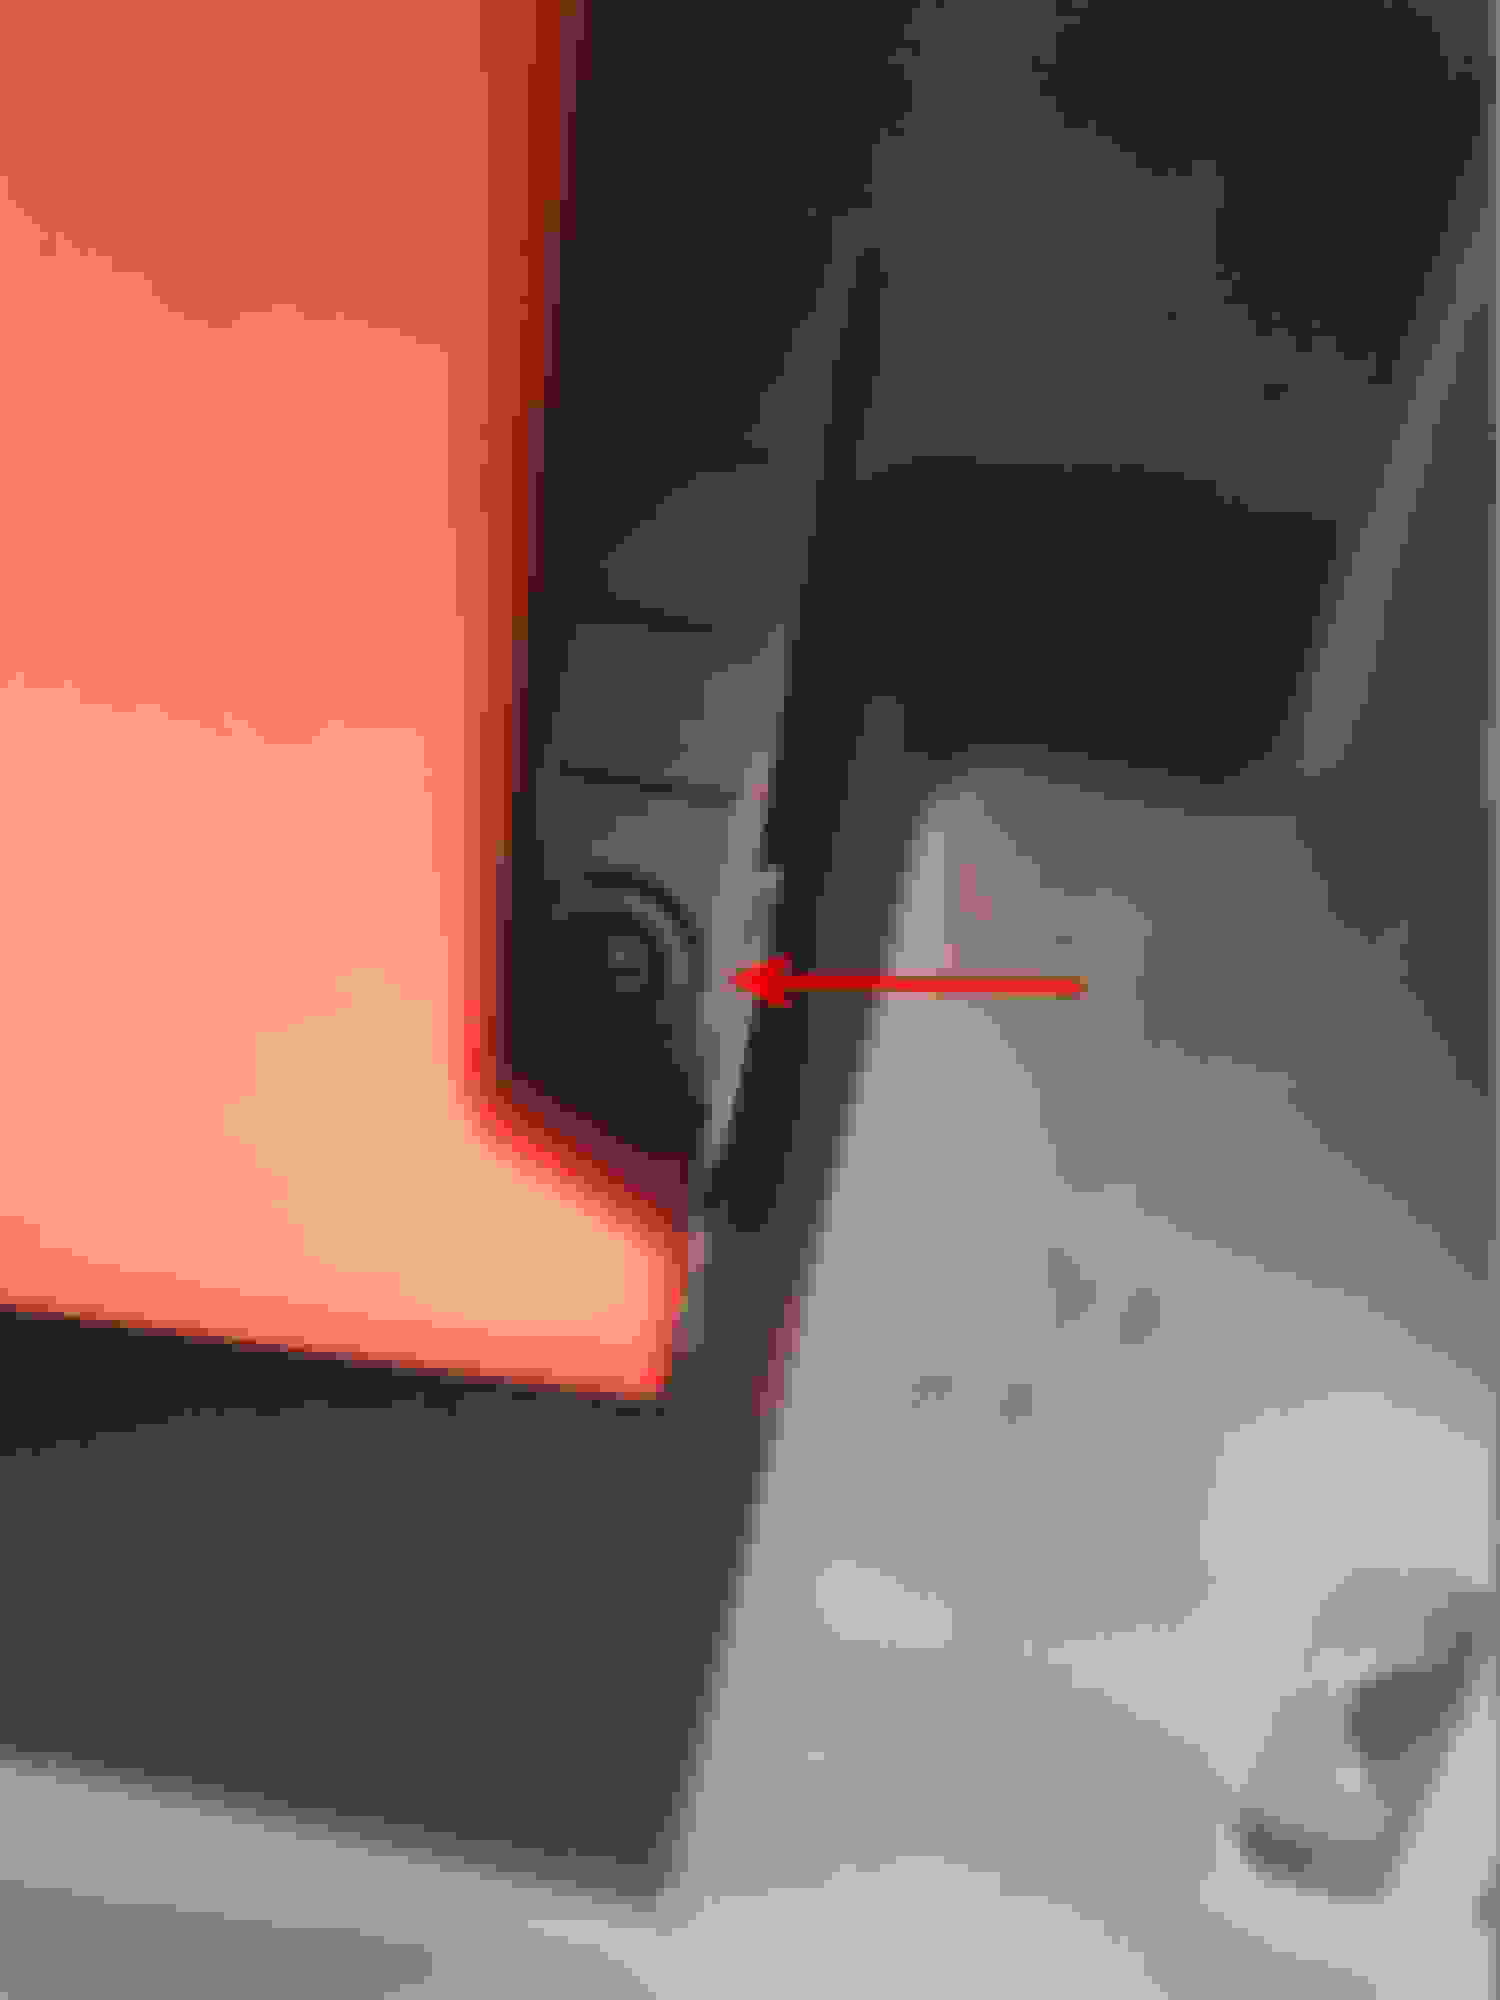
I decided to do this diy using the long route and I'm stuck in removing the plastic bracket around the steering column. That need to be removed so the steering column will completely go down. It seems that this part was missed in the instructions or different models may not have this problem. I attached a pic link of the bracket i'm talking about. please advise thanks!!
Sorry Mackhack it took a while to respond. I've been busy and I actually kinda figured it out how to get that bracket out of the way so I can lower the steering column. I would say there are some steps I could add that was not covered in the original post. I'll post that later with pics. In the meantime here's the pic with the arrow that points to the bracket that I got me stuck in the process.
Hello guys, I did the long route to replace that darn dogbone part. I thought of doing the quick route which is to break/snap the wire holder beside the steering column but I wasn't if I can fit my fingers in there to work on the dogbone part. Anyway, the long route requires quite a lot of items to remove but mostly hard because of unfamiliarity on how the panels get removed. If you are planning to do the long route here are some steps I documented that I believe was not mentioned in the original post.
To remove the lower dash.
1. Remove the trim that goes across the dash. Picture show trim removed already.
2. Unscrew screw shown in red arrow.
3. Not in pic, remove two screws under the brake release lever. You need to pull the lever to see the two screws behind the handle.
4. Remove the screws to lift partly the center console. Once done, you will see a screw holding the lower dash (shown in red arrow). Unscrew this screw.
lift center console partly and remove the screw holding the lower dash
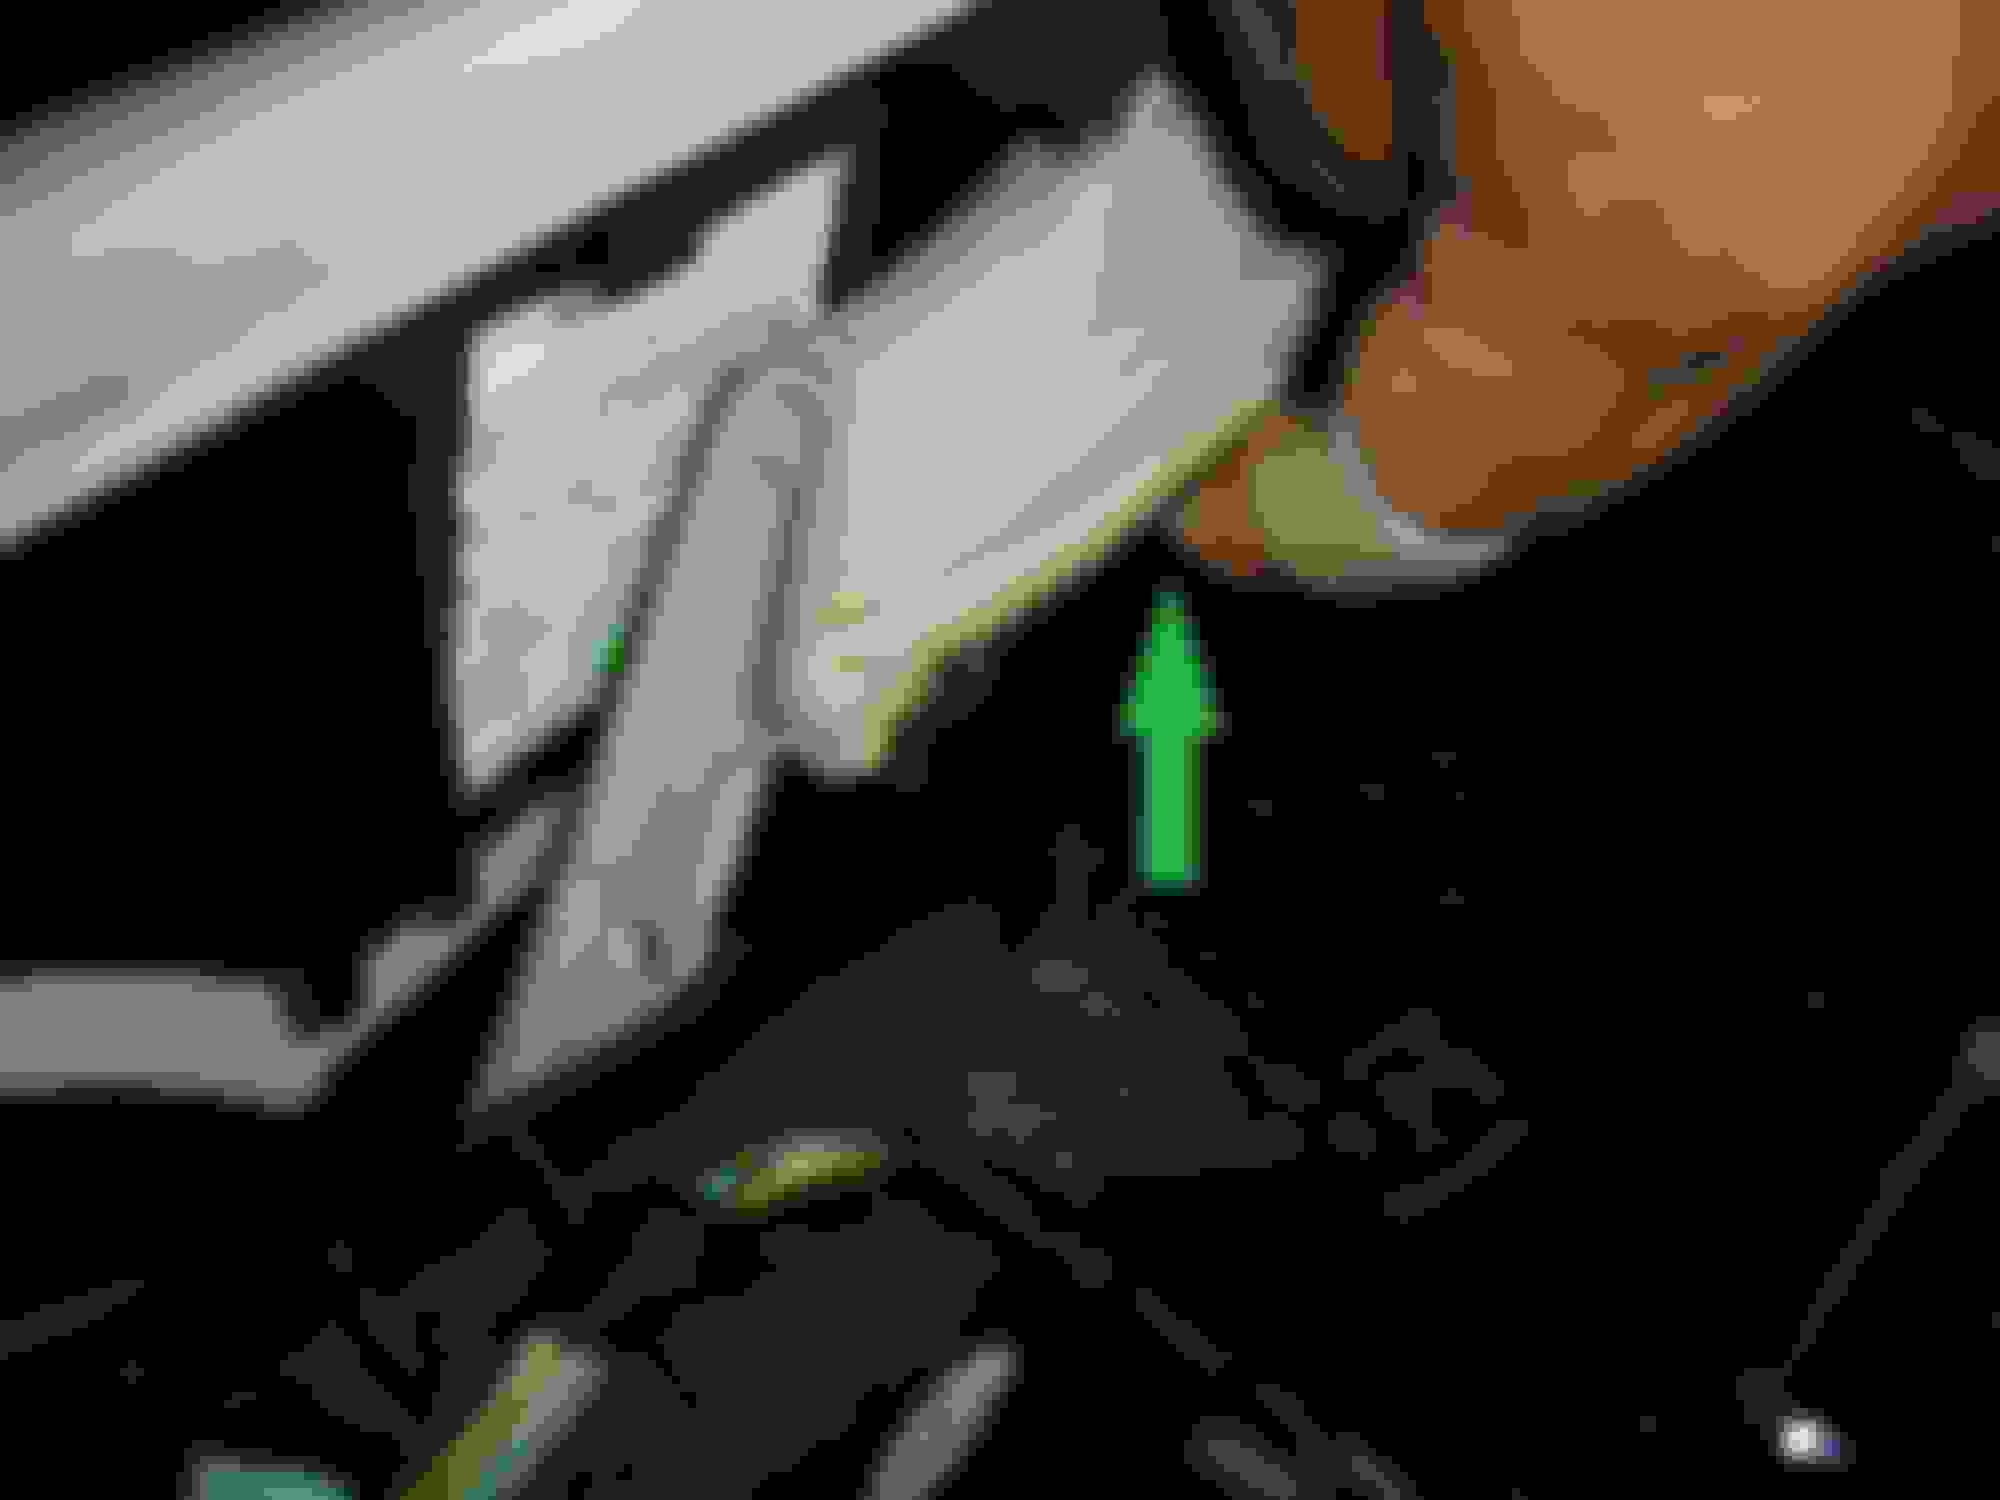
5. Lift the lower dash end upward towards the direction of the green arrow. (this is assuming you removed already the screws behind the command unit.)
pull towards the direction of the green arrow
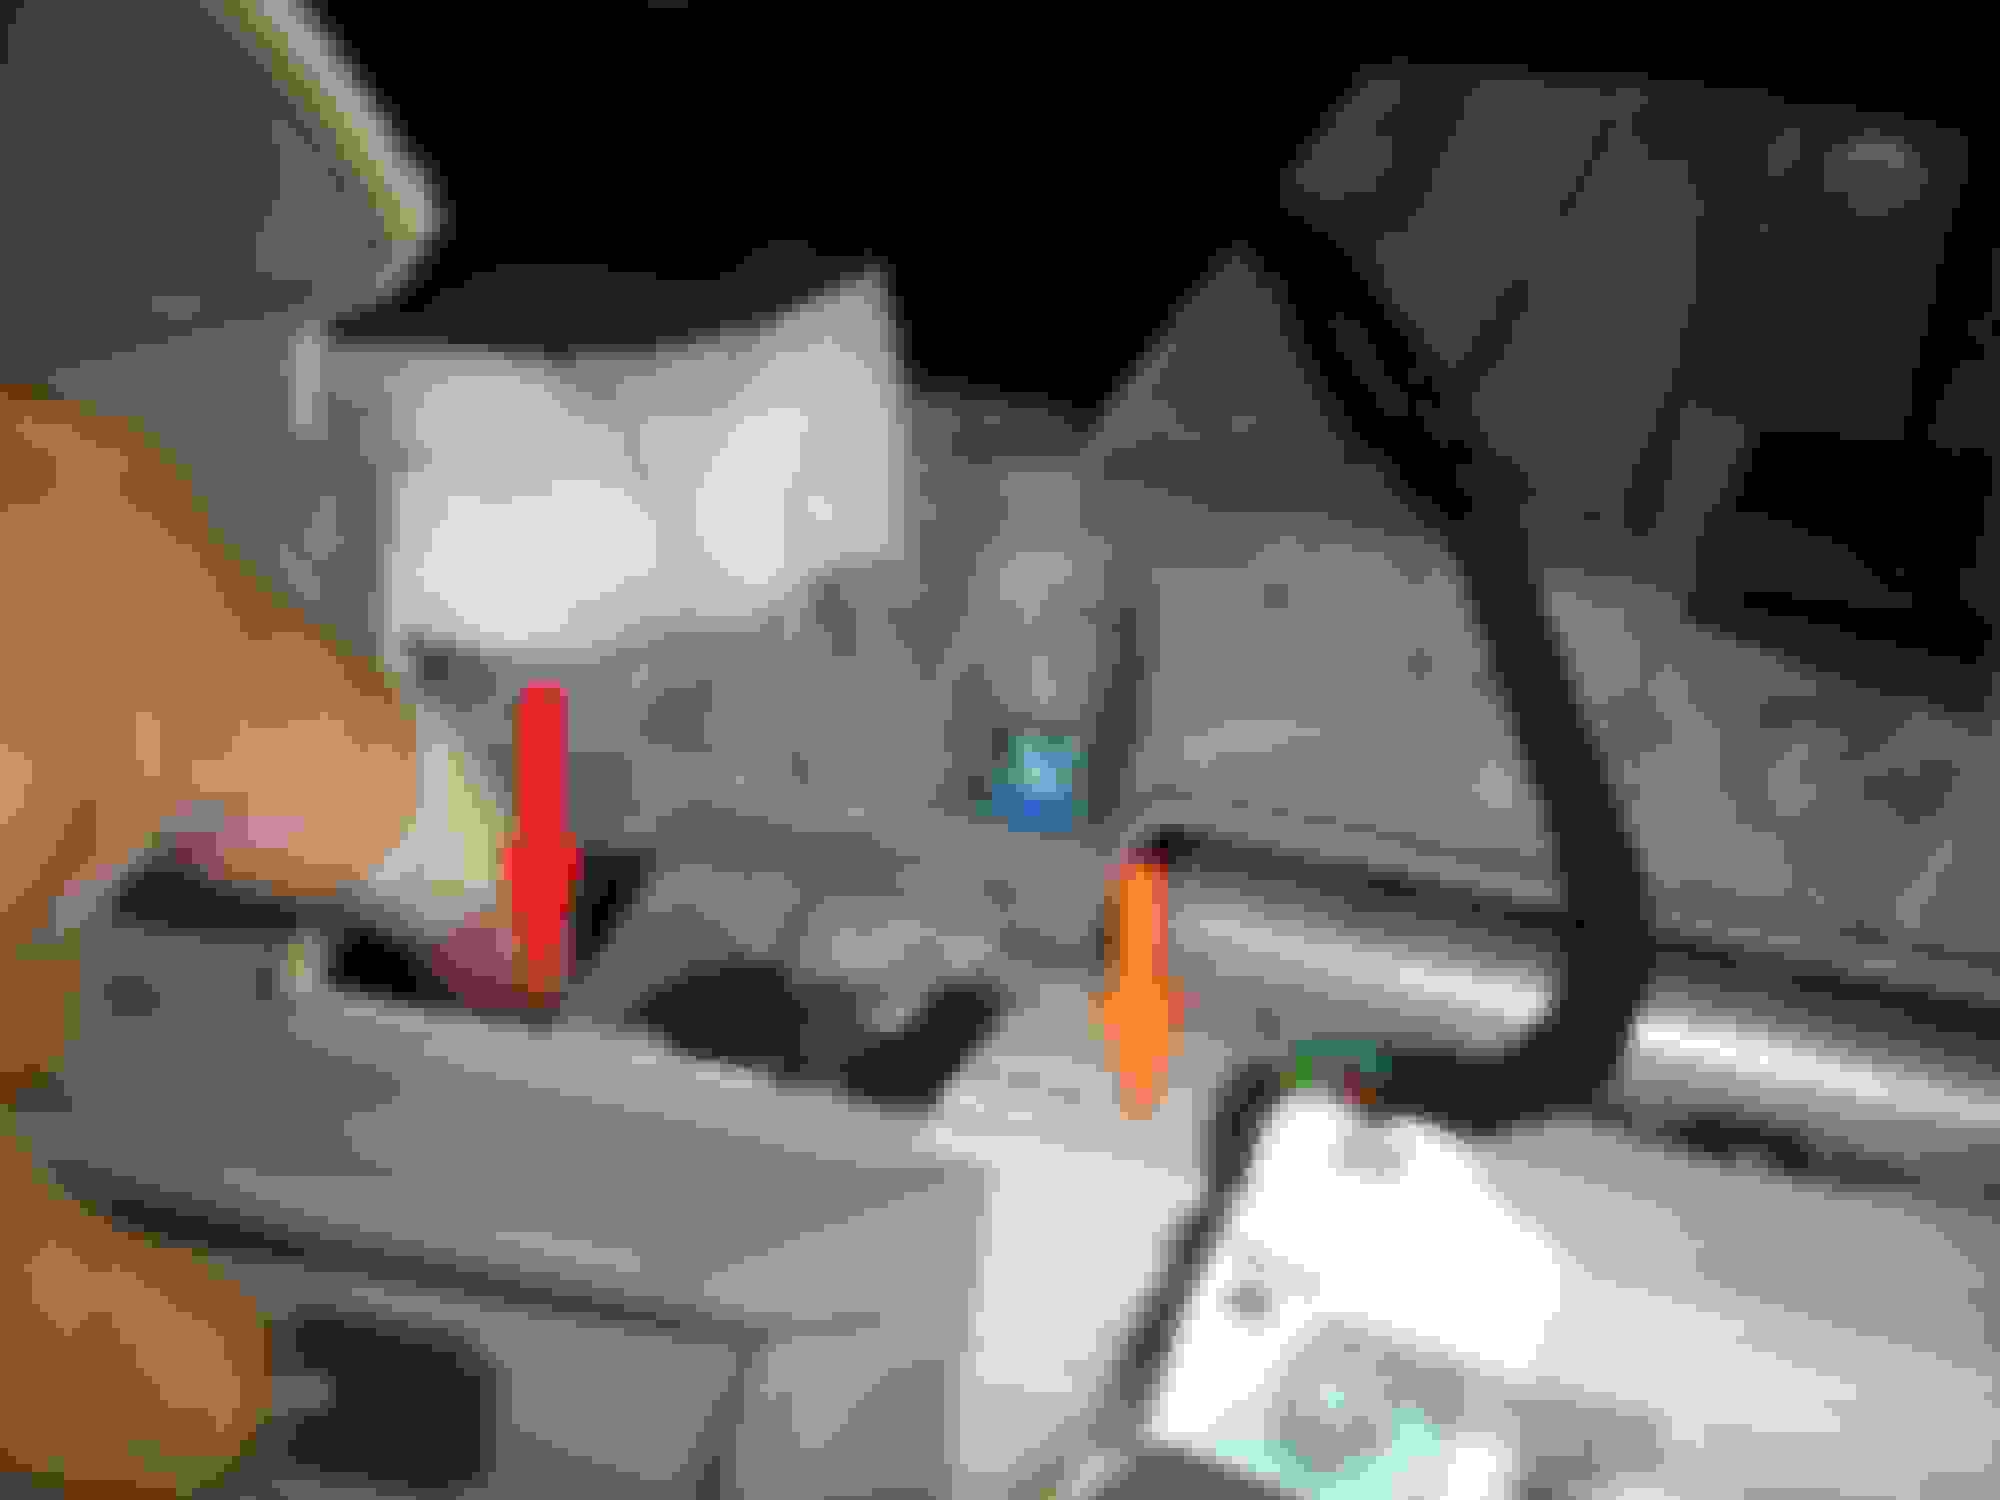
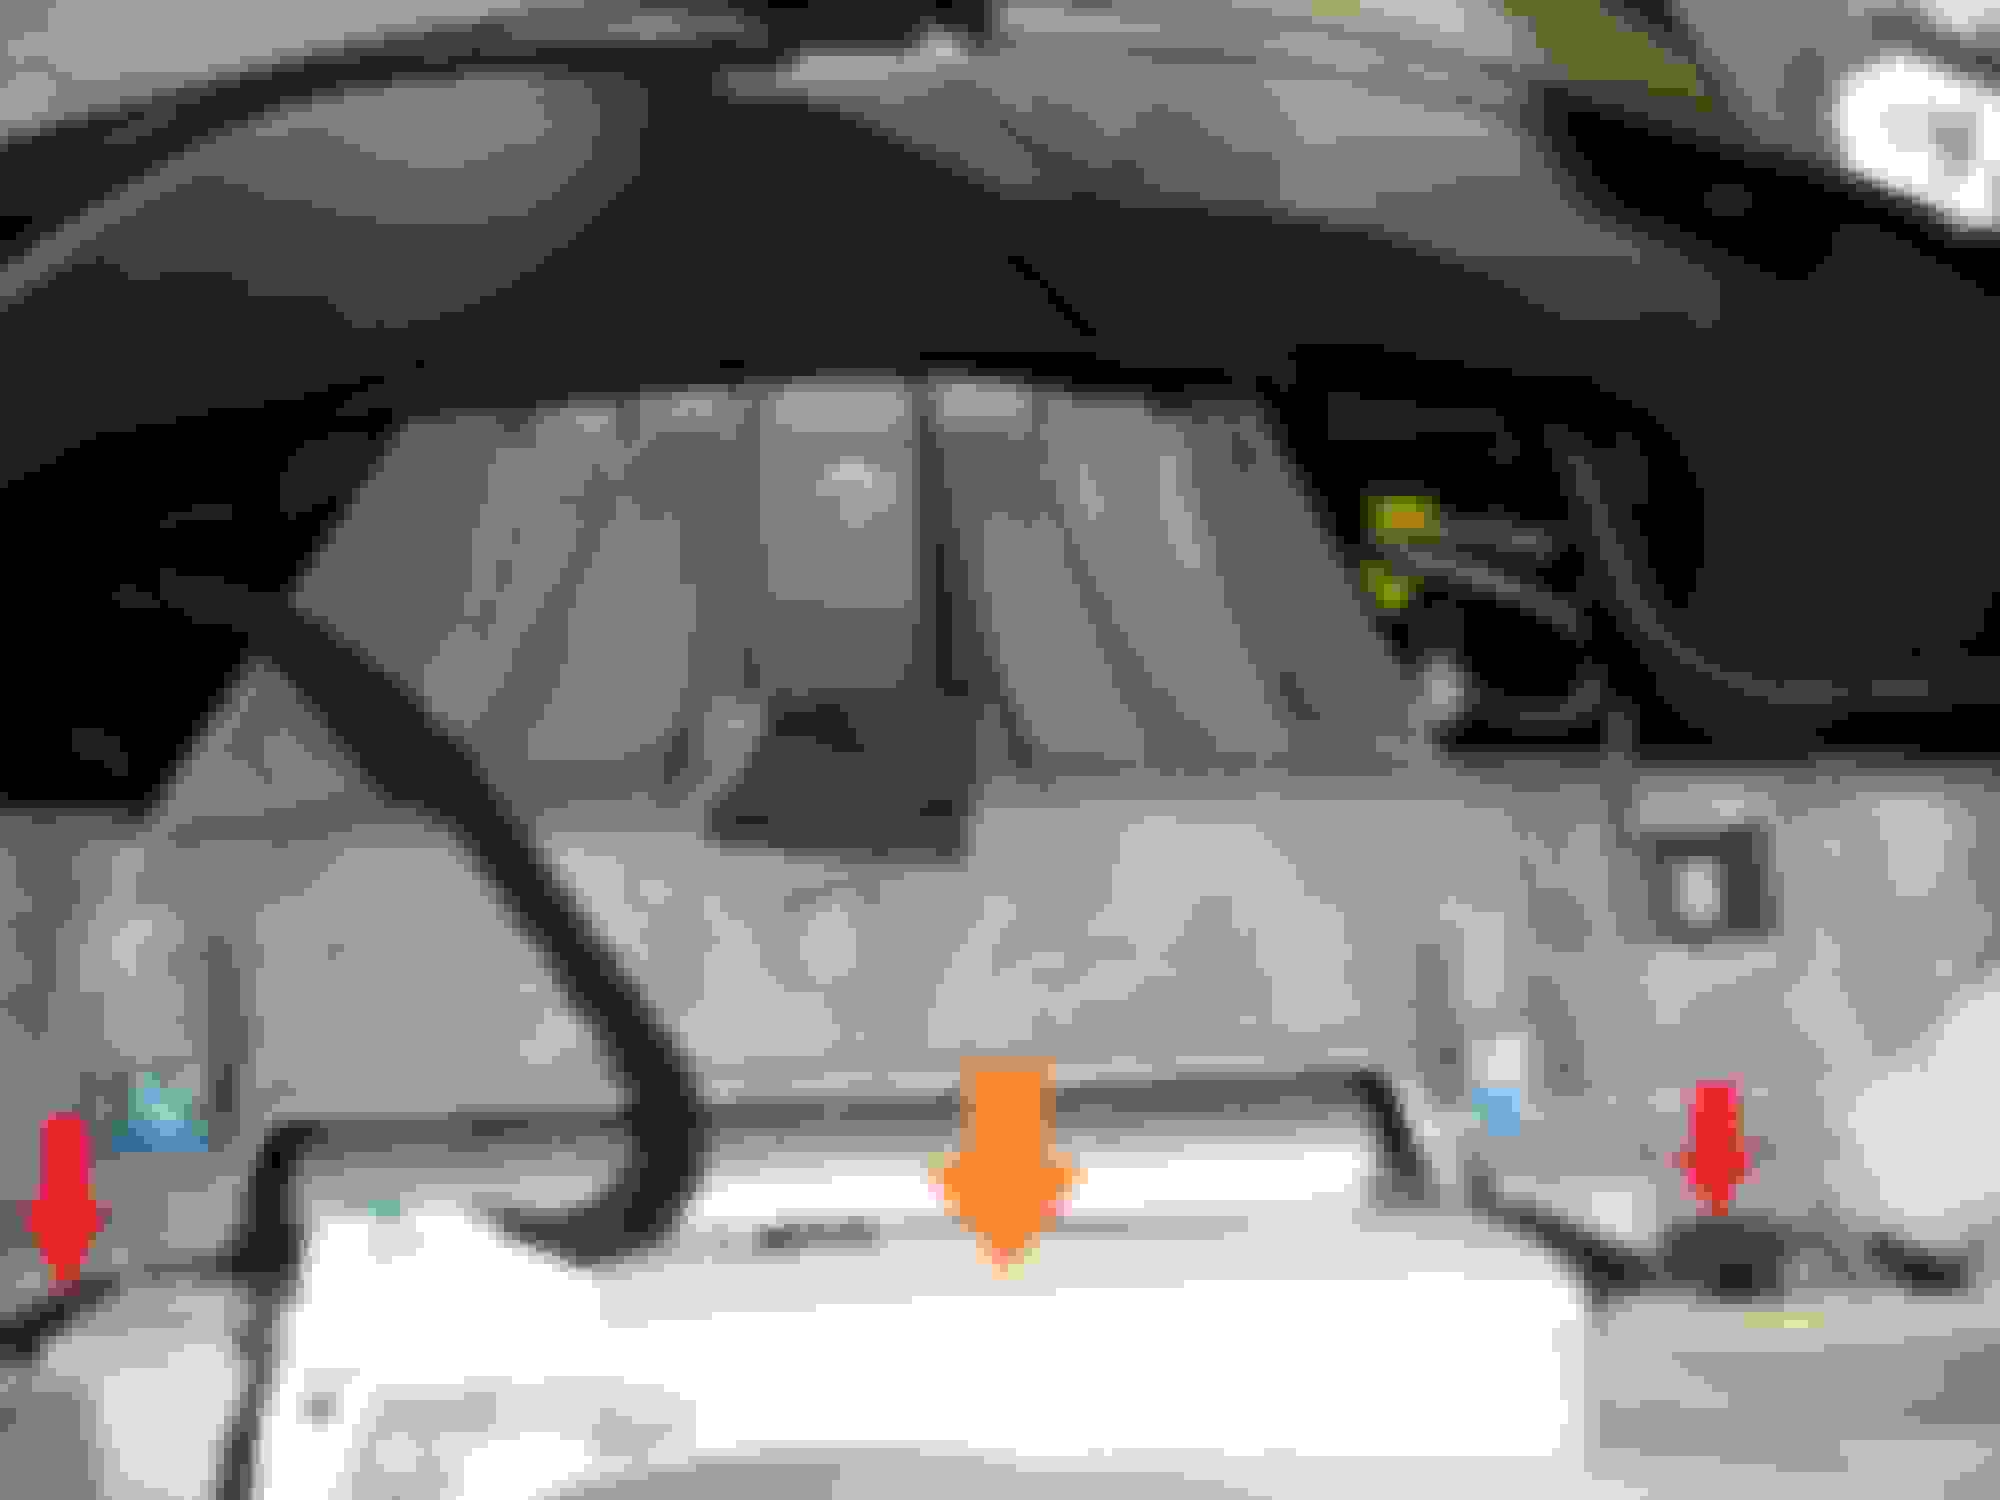
6. The red arrow in the pic is where another screw is located and need to be removed. Unscrew that and one more on the opposite side. The orange arrow shows the part of the bracket that goes around the steering column. this is the bracket that need to be unscrewed later on to be able to lower the steering column.
red arrow shows the screw that need to be removed. Orange arrow is part of the bracket that goes around the steering column
7. This is the lower dash removed. The red arrow shows the part of the lower dash that needs to be unscrewed otherwise you won't be able to pull the lower dash after following the original post instructions.d to be removed. Orange arrow is part of the bracket that goes around the steering column.
Lower dash removed. Red arrow shows the part that needs to be unscrewed too.
8. At this point the, assuming you did all the steps mentioned in the original post, the steering column should be able to go downward. BUT, the bracket that I mentioned in my post earlier and shown here in orange arrow, has two ears (shown in red arrows) that needs to be unscrewed and UNHOOKED from the steel frame under it. In order to do that you need to partly remove/unscrew the TOP dash in order to get the top dash out of the way a little bit in order to UNHOOK the two ears mentioned.
red arrow have four screws that need to be removed. orange arrow need to be moved toward the steering wheel to unhook those red arrows
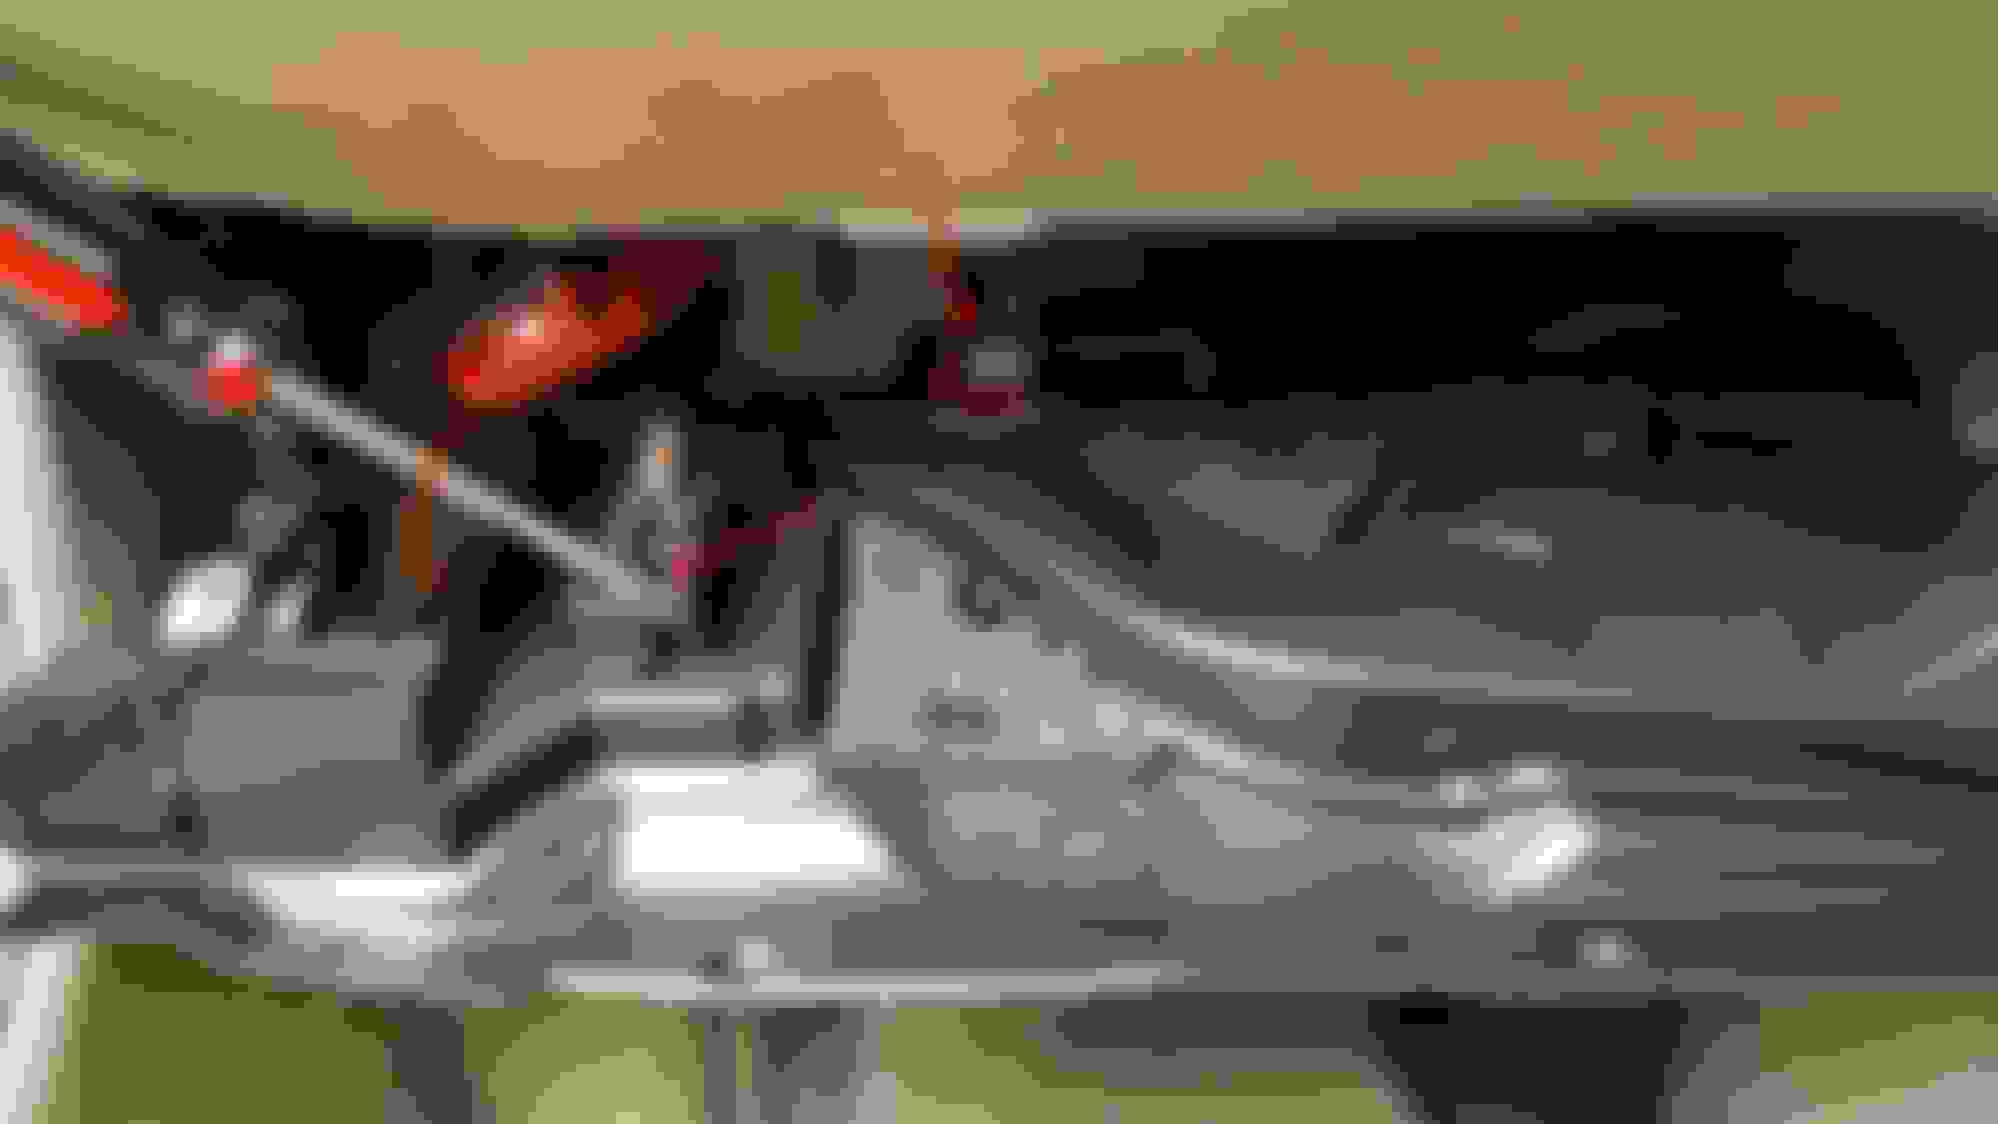
9. I didn't take pictures on this steps, but you need to remove the center speaker grill using a thin flat metal tip on the two o'clock and ten o'clock positions. Unscrew center speaker; remove visible screws. Remove the trim that goes across the dash and screws will be visible under it. Just remove the first three screws from the left. remove the control unit above the command unit (I think its the fan control unit).
10. On the left most side of the dash, you need to remove few more screws holding the dash. You need to remove the left pillar panel. This has the airbag unit under it so be careful. Heres the picture with the panel removed.
Pelicanparts website has complete instructions to do this steps i just mentioned. I cannot remember the number of screws removed on this step.
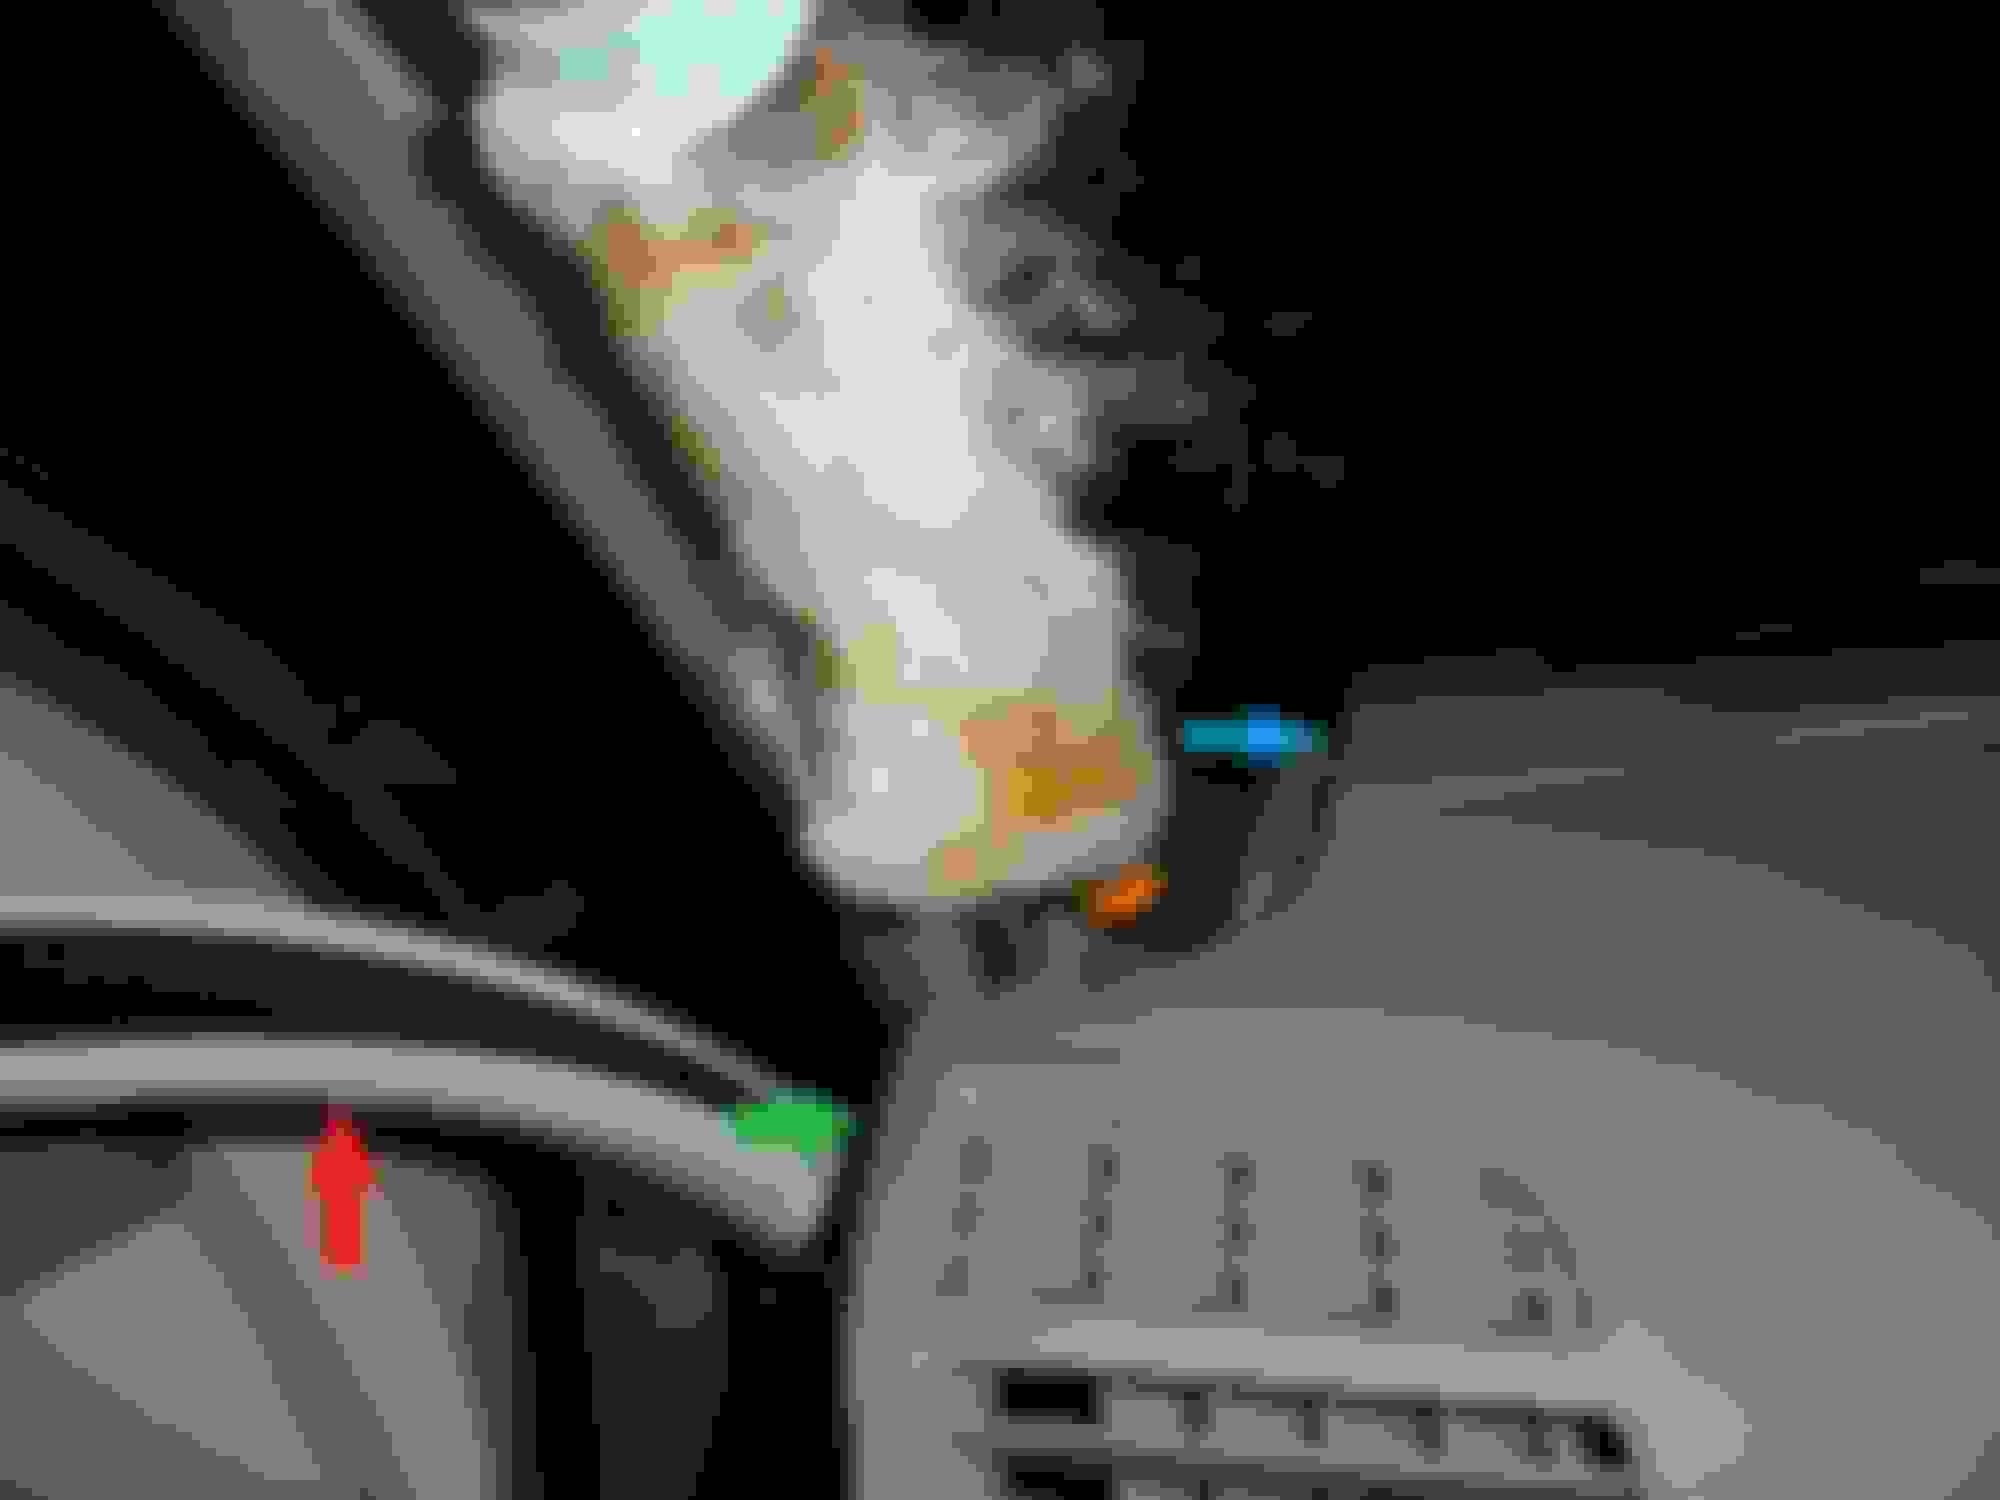
Pull the red arrow part downward. Remove the pillar panel towards the direction of the blue arrow. There are few more screws behind shown by green arrow.
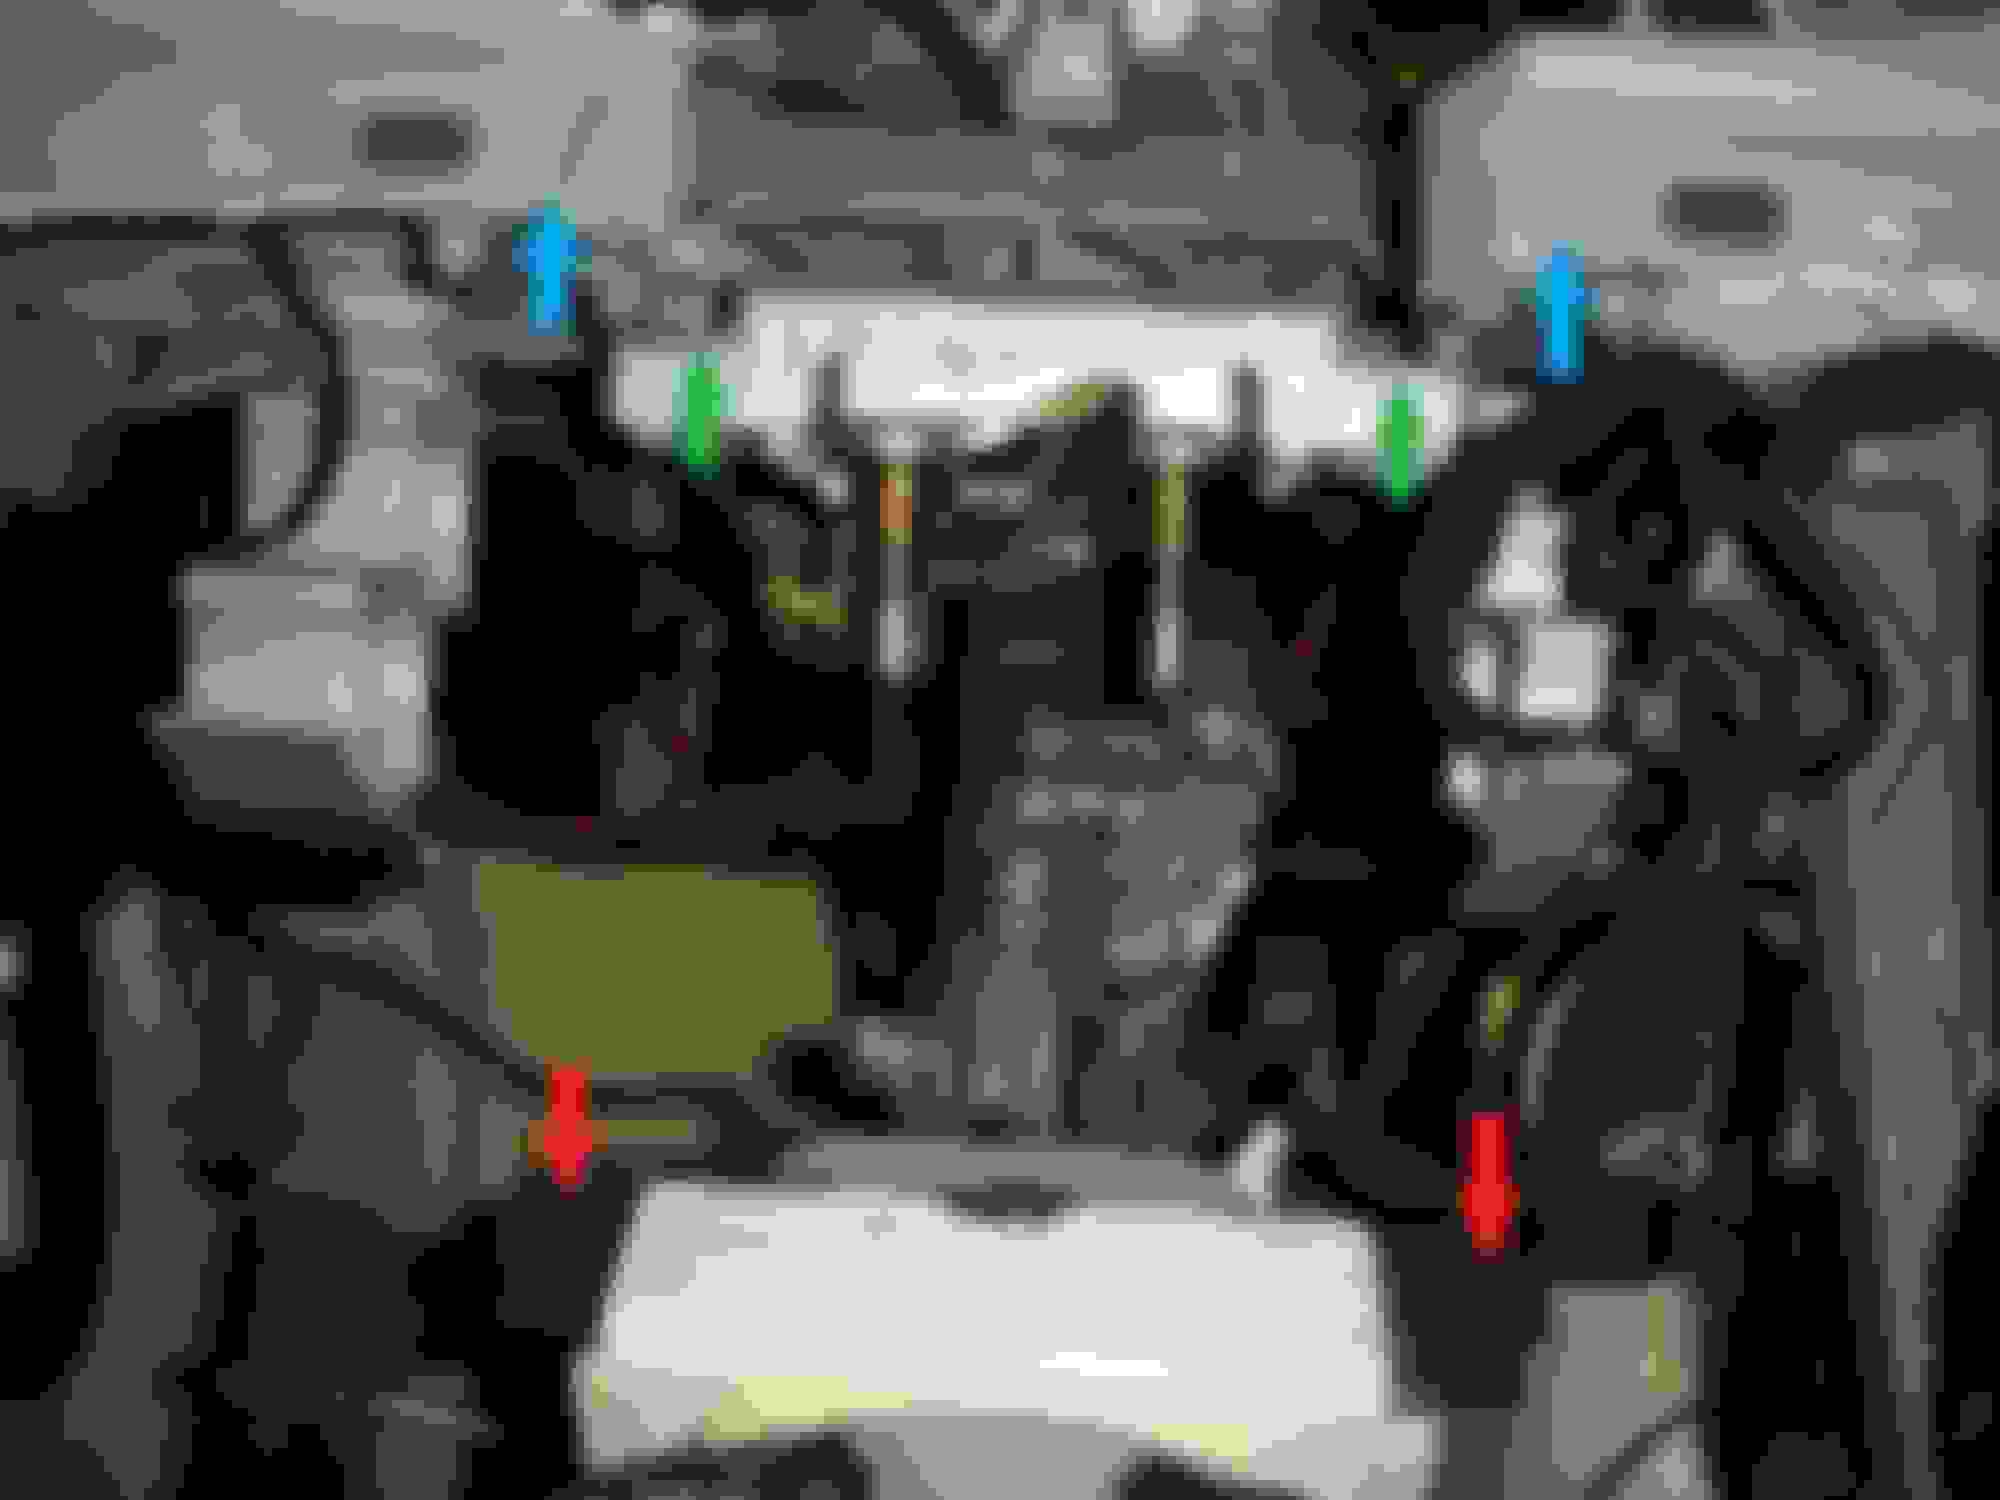
11. Once the upper dash start to be loose, you can unhook the "bracket" by pulling the part of the upper dash shown in blue arrows. Pull the part shown in red arrows away from the part shown in green arrows. You need to put a little force in doing this. If you have done these then YOU CAN NOW LOWER THAT DAMN STEERING COLUMN AND GET TO THAT DARN DOGBONE PART!!!
Pull blue arrows toward you to pull the red arrow away from the green arrow
12. At this point, hey a few more screws to remove would mean nothing anymore... so just remove the screws I'm pointing to and you can pull the part shown by red arrow for ease of installation of the dogbone part.
remove those four screws to pull out the part shown by the red arrow
13. Lastly, normal instructions would say installation is just the reverse. Well I did that but missed some steps... so here are some pics that someone might be able to help me to figure out where it goes. The car is running fine and all... just wanted to put these back to the right places. I hope this instruction will help some of you brave enough to tackle this. Many thanks to benzmodz, mackhack and to all who contributed. Replacing this part would really cost a lot if you done through a shop. God bless
Push it all the way into either side, then you can bend almost in half and it will slide on other side.
In case someone needs this, like what kev1900 mentioned, you just push the aluminum away and this part will just pivot from the red arrow shown. I later on tightened it back from the cluster panel access area. You won't see the bolt from there but you can feel it and just tighten it again.
push this aluminum away and it will just pivot from the red arrow shown. you'll be able to pull the bolt through
A huge thumbs up and thanks to kev1900 for his 07-25-2015, 04:15 PM response to this thread.
I purchased the part from my local MB dealer for $4.75 ...I got 2 just in case and was pleased I did as I too lost the first one "somewhere" up there and never managed to find it!!!! ;-)
The job was a little fiddly, but actually not too bad at all - from start to finish it took me about an hour... and I did have to get in some funny positions to complete the job :-)
Initially I had trouble getting the dog bone replacement part onto the first spline, so I warmed the dog bone replacement in a mug of boiling water for a few minutes and it slid onto the spline much easier after doing this...
This job does need a bit of brute force to get the first part of the dog bone on and then a bit more force to bend the dog bone partially onto the other spline... once you are there you can (as kev1900 suggests) gently move the up/down adjustment lever (up or down, it doesn't matter) and eventually the replacement part will spin into place.
This is a great/cheap fix (that my dealer wanted $950 to do!!!!) and I am really happy to get this back working again for $10 and an hour of my time.
Thanks everyone for the great suggestions here and thanks to kev1900 for a quick way to do it if you don't mind using a bit of brute force; I think the purists here have the proper way to do it figured out, but my SL500 is 14 years old (2003) and I'm happy breaking a plastic bracket to get access and using a bit of brute force to get the job done more quickly as I just don't have the hours to spend doing it all "by the book"! ;-)
Thanks again... as always, mbworld rocks! :-)
We're both splines lined up to each other or did you have an offset? It seems like everyone who was successful had an offset (steering wheel all the way up or down at time of when it snapped). Mine broke in half about a week after I fixed it and it's perfectly lined up so there is like 1/8 of an inch of space between both splines which means I can't even push it on one spline and bend it to place it onto the second one.
@mackhack... my steering wheel was all the way down and I had plenty of space between the splines to get the new piece on... but wasn't aware this would be an issue - I just stuck the new piece onto one side and then got on with it! ;-) I guess I got lucky - fingers crossed the fix holds ;-)
Am trying to get some assistance with repair on my '05 E500 Wagon. My steering column power raise and lower function works but will only go up half way. For whatever reason it stops there like it is made that way. It doesn't jam or anything...just stops like against a hard stop.
If anybody cares to give me some advice, I would definitely appreciate it. I started noticing some issues while turning the steering wheel. It happens mostly when the steering wheel is not pushed all the way in. Once you get the wheel a littler bit out like I normally drive, you start feeling a very faint tick when you turn it to the left at a certain angle. So it happens Everytime the steering wheel reaches that point. And sometimes it sounds like something is loose inside. Also when you use the arm to move the steering when in or out, it makes a tick before it starts moving. It's not something you hear but you sure feel it holding the wheel. It moves just fine but I'm afraid something might break, and it's not comfortable feeling the wheel make these little things while driving.
I have checked the steering wheel fluid and it looks fine at max. I'm thinking it's the mechanism that is right under the steering wheel cause you feel/hear it there. The problem isn't severe but I wanna fix it before it turns severe.
I don't think your problem is in the hydraulics but in the pto shaft that links the steering wheel to the steering assy
it sounds like there is a ball bearing with a flat in one of the UJoints and when it reaches a certain angle it will click over it as pressure is applied and relieved.
Thank you for the help. I appreciate it. That actually makes a lot of sense. Do you have any idea how do I get to that ball bearing or how do I replace it? Or should I just lubricate it? Thank you!
Originally Posted by rstanley3105
I don't think your problem is in the hydraulics but in the pto shaft that links the steering wheel to the steering assy
it sounds like there is a ball bearing with a flat in one of the UJoints and when it reaches a certain angle it will click over it as pressure is applied and relieved.
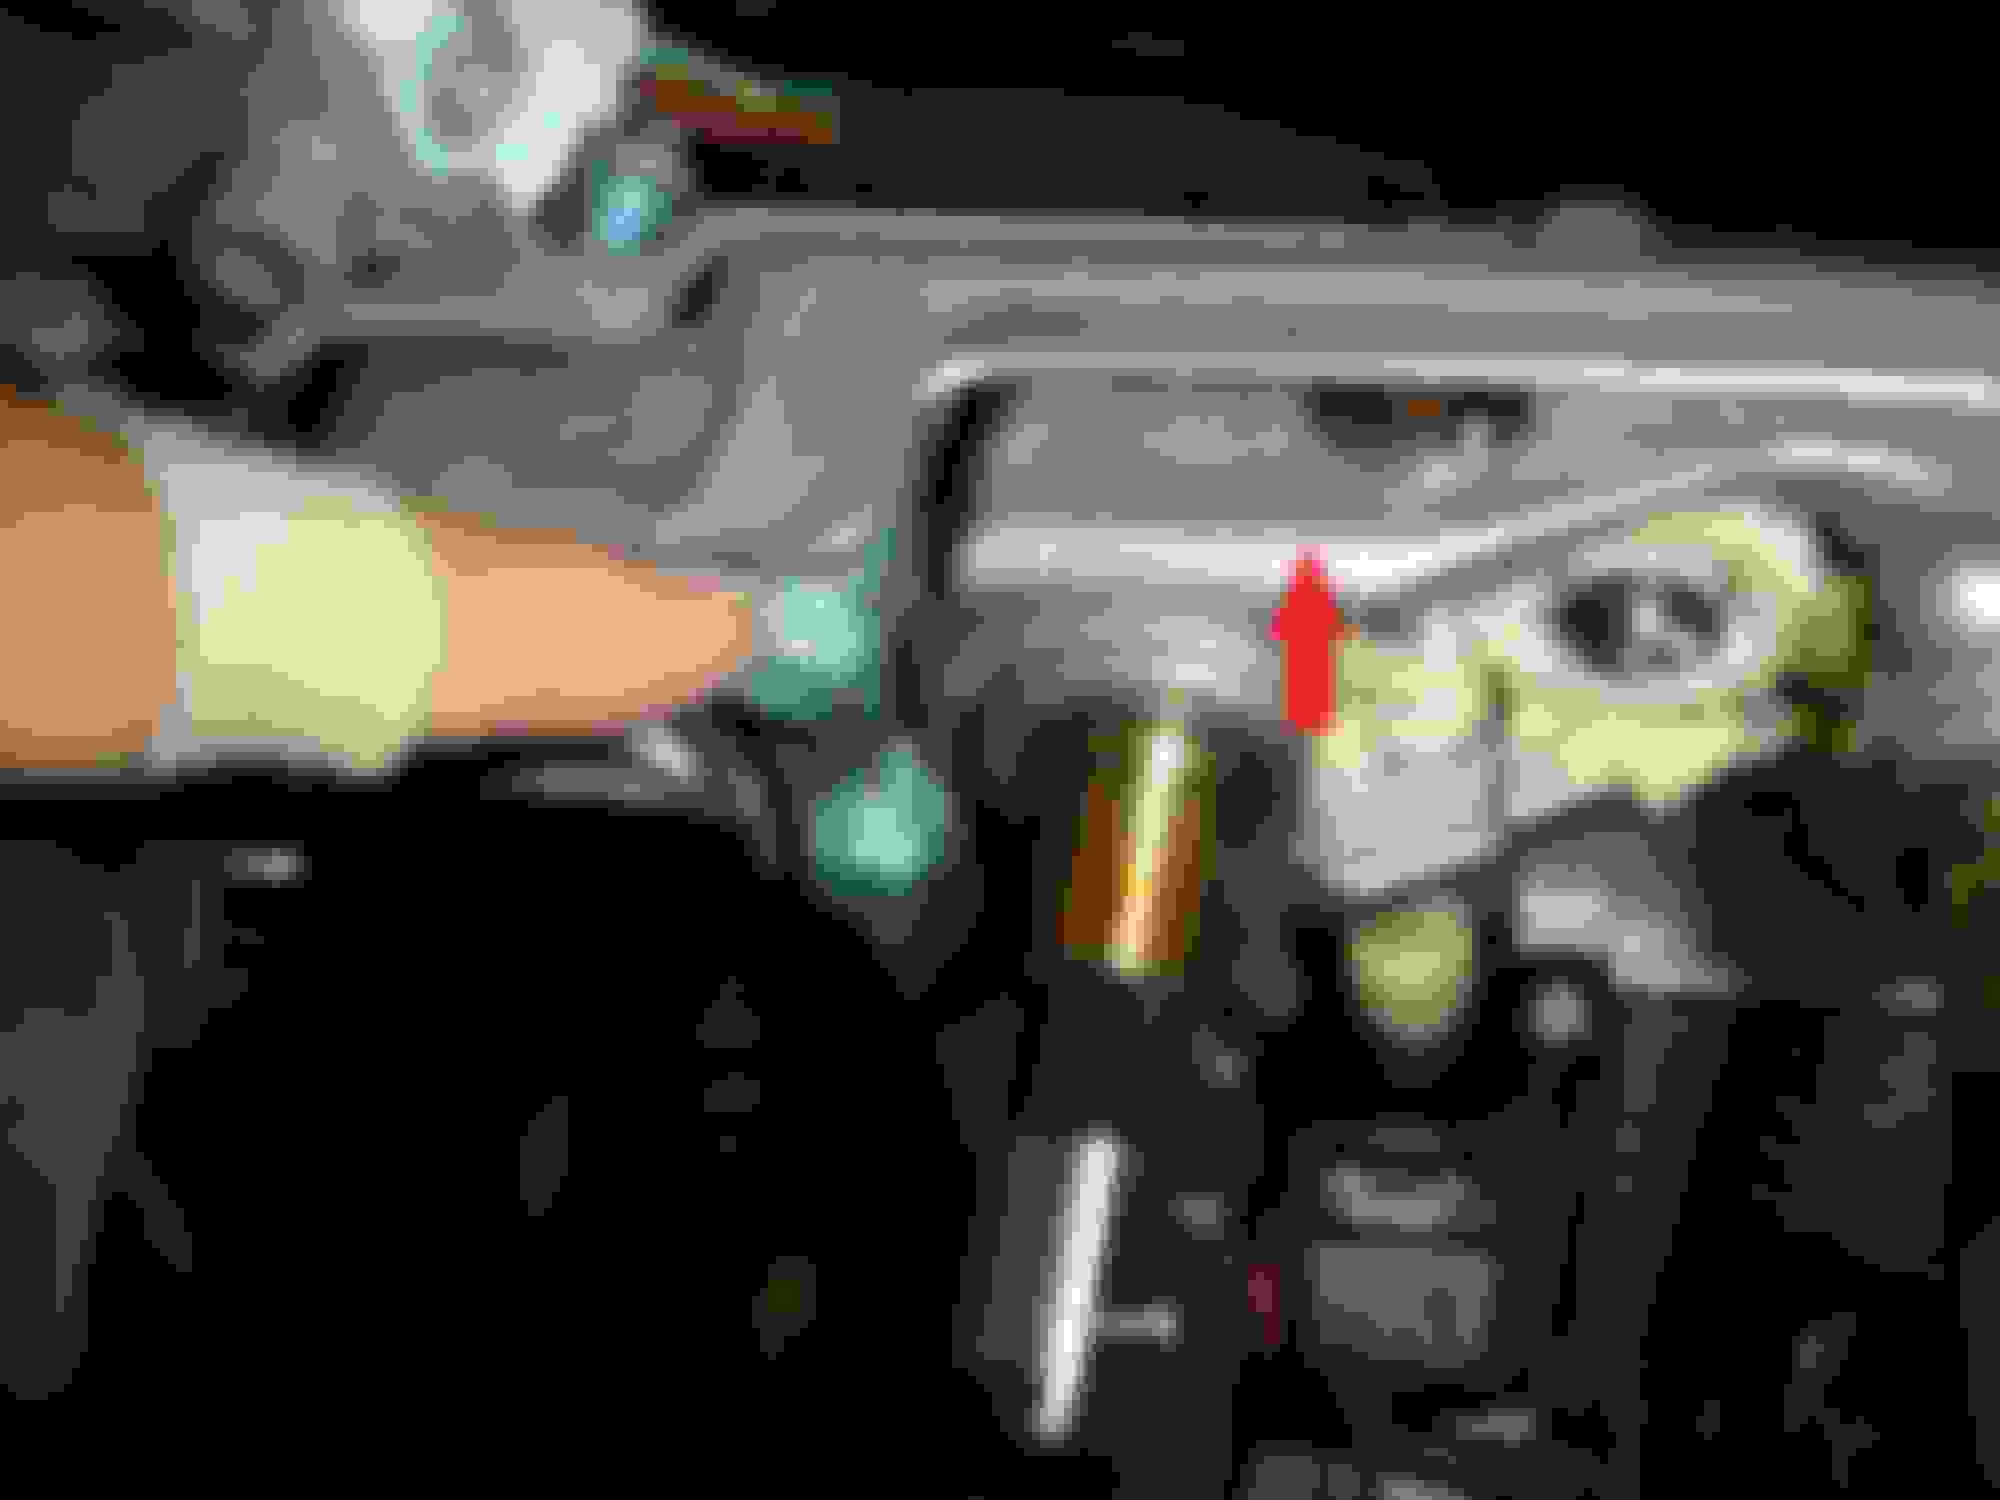
This thread was very helpful with helping me understand what was the issue with my driver telescoping steering so I thought I'd contribute photos from the perspective of the newer W204 generation.
Facts: 2012 Mercedes C250.
Problem: Driver steering wheel would adjust forward and aft, but not up and down. I noticed it one day when the "entry/exit" feature stopped moving the steering wheel out of the way when climbing out of the vehicle. I could hear the motor attempt to turn when using manual adjustments but steering wheel would not move. This told me fuses were good and motor was good.
Step 2: Pull panel down to expose plugs & hood release that must be unclipped or removed before panel can be pulled out completely. Hint - The hood latch angles upward and slides through the void & the OBD port has a sliding clip on the back. Slide the clip towards the driver seat and the connector will lift right out of the plastic holder.
Step 3: Lay down and look up towards the passenger side (USA model anyway) of the steering column. You will see the steel "speedometer" style cable linked between the motor (closest to front of vehicle) and the mechanical actuation (closest to driver). Loosen the 13 mm nut at the end near the front. I loosened mine approximately 1 to 2 full rotations.
Step 4: Turn ignition power on (no need to start vehicle) and manually actuate steering column. You should see things move. Mine did not function at first but after bumping the controls up and down a few times it finally broke free and began to move.
Step 5: Put panel back on and enjoy a cold beer to celebrate.
Well, I got into my car recently and the steering wheel no longer goes up
or down.
I can see the motor attempt to spin for 1 sec and the cable flexes in either direction slightly, but no spin.
I also tried the instructions above with no success. unscrewing the 13mm bolt only make the steering wheel loose because the bolt is now slack.
Sorry Mackhack it took a while to respond. I've been busy and I actually kinda figured it out how to get that bracket out of the way so I can lower the steering column. I would say there are some steps I could add that was not covered in the original post. I'll post that later with pics. In the meantime here's the pic with the arrow that points to the bracket that I got me stuck in the process.
I just replaced the dog bone on my 04E55. I used the �easy� method...
1). I soaked the bone in boiling water for 2 minutes. This helped it slide on easier. Whoever recommended that earlier in the thread, thanks! I couldn�t get it on for 20 minutes, then it slide right on after I heated it up.
2). Slide it on the spindle closest to the firewall first. I used my fingers to line it up, and get it on, then long needle nose pliers to push it all the way.
3). I had a bit of trouble getting the other end on with pliers. So I took a long, thin, flat head screwdriver and wedged it into the open end of the dog bone and was able to easily force it to sit on the motor spindle.
4). Then tap the steering adjustment to spin a little. At the new position you can work the bone on a bit more. I kept doing this, and after 3 or 4 times it went right on.