



Installing Apple CarPlay/Android in W221 and W216

Thread Starter
Member
Joined: Jan 2017
Posts: 131
Likes: 16
1973 280SEL 4.5
Installing Apple CarPlay/Android in W221 and W216
Earlier this year I bought a 2007 W216 CL600 on Bring a Trailer. I absolutely love the car, but I wanted up to date electronics. Particularly, I wanted Apple CarPlay so I could access all my iPhone features. Most important was to always have updated maps available. After looking at various options, I decided on *******. I liked that it was all made in the USA and that it was plug and play using the original radio and screen. So, no major surgery required. During installation and use, I found both negatives and positives to their product. It will install Android as well as CarPlay.
Positives:
1. Prompt delivery
2. All the Apple CarPlay features work
3. Their service department was very responsive via text message for any questions I had
4. When I couldn't get the requisite result via text message, I was able to talk to someone who was very helpful
Negatives:
1. Screen resolution is only OK but not great-Have to keep in mind that we are dealing with 2007 screen resolution technology
2. I wish I could make the screen a bit lighter
3. A little cumbersome entering the CarPlay mode but it is only a few extra steps-
4. Unlike modern systems with CarPlay, it does not automatically recognize that you have plugged in your phone
Overall, I would rate the product as very good. I would rate installation difficulty at a 3 out of 5 with 5 being very difficult.
The first negative was that there were no written instructions. They provided a link to a video they had made showing the installation into a W221.
I had previously watched this video. It is a good video with only a couple points that were not clear to me. But I would have also liked to have had good written instructions as they would have cleared up some of the misunderstandings I had. Below is what I wished I had received as written instructions. Hopefully, it will benefit others who want to make this mod.
Positives:
1. Prompt delivery
2. All the Apple CarPlay features work
3. Their service department was very responsive via text message for any questions I had
4. When I couldn't get the requisite result via text message, I was able to talk to someone who was very helpful
Negatives:
1. Screen resolution is only OK but not great-Have to keep in mind that we are dealing with 2007 screen resolution technology
2. I wish I could make the screen a bit lighter
3. A little cumbersome entering the CarPlay mode but it is only a few extra steps-
4. Unlike modern systems with CarPlay, it does not automatically recognize that you have plugged in your phone
Overall, I would rate the product as very good. I would rate installation difficulty at a 3 out of 5 with 5 being very difficult.
The first negative was that there were no written instructions. They provided a link to a video they had made showing the installation into a W221.
I had previously watched this video. It is a good video with only a couple points that were not clear to me. But I would have also liked to have had good written instructions as they would have cleared up some of the misunderstandings I had. Below is what I wished I had received as written instructions. Hopefully, it will benefit others who want to make this mod.
Thread Starter
Member
Joined: Jan 2017
Posts: 131
Likes: 16
1973 280SEL 4.5
Removing the radio
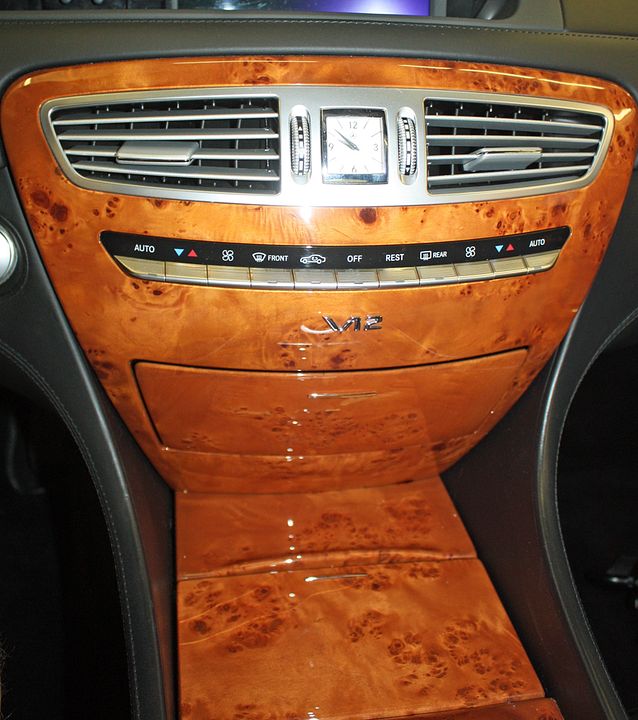
Basically, the W221 and W216 are the same car electronically. However, removing the facia around the radio is different in the two series. The video was done in a W221 and explains how to remove the facia very well. For those of us with W216's, I found this video to be very helpful.
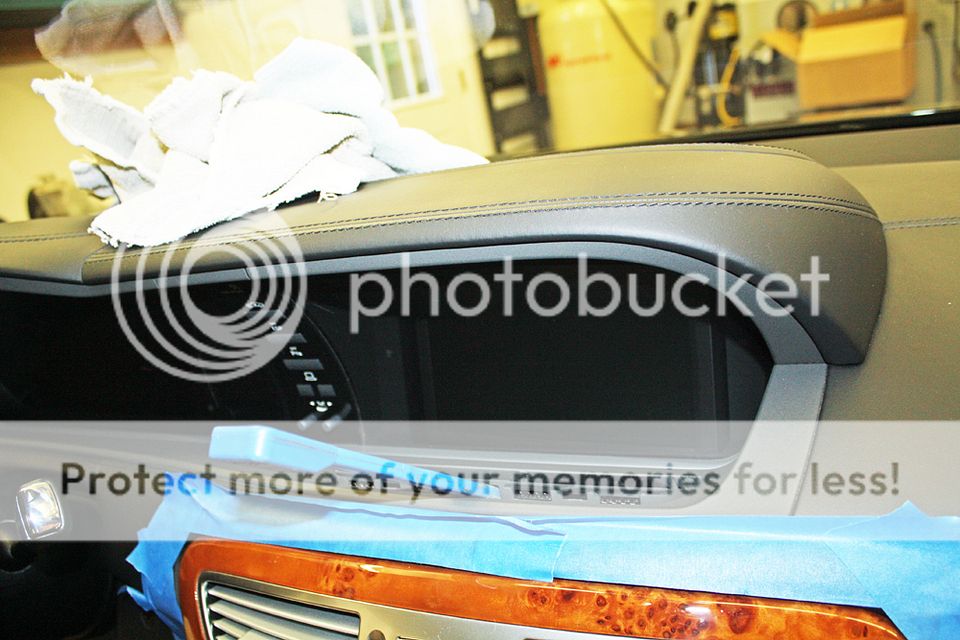
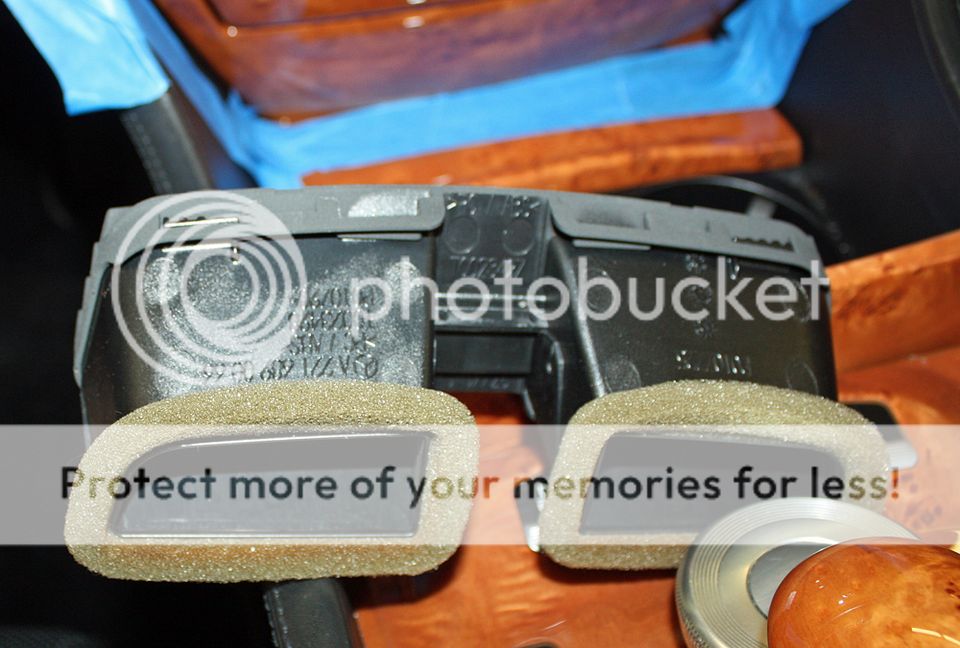
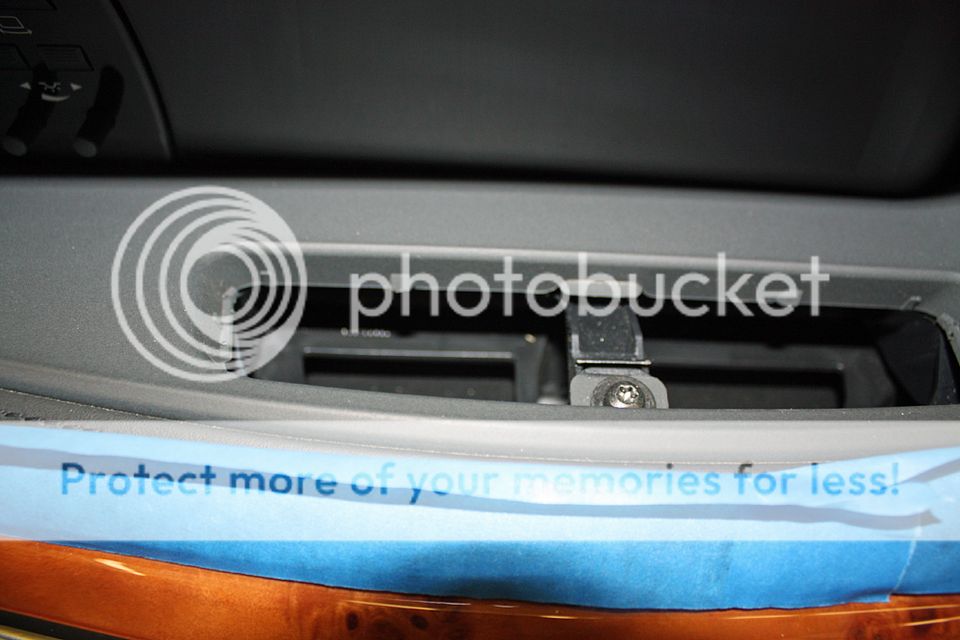
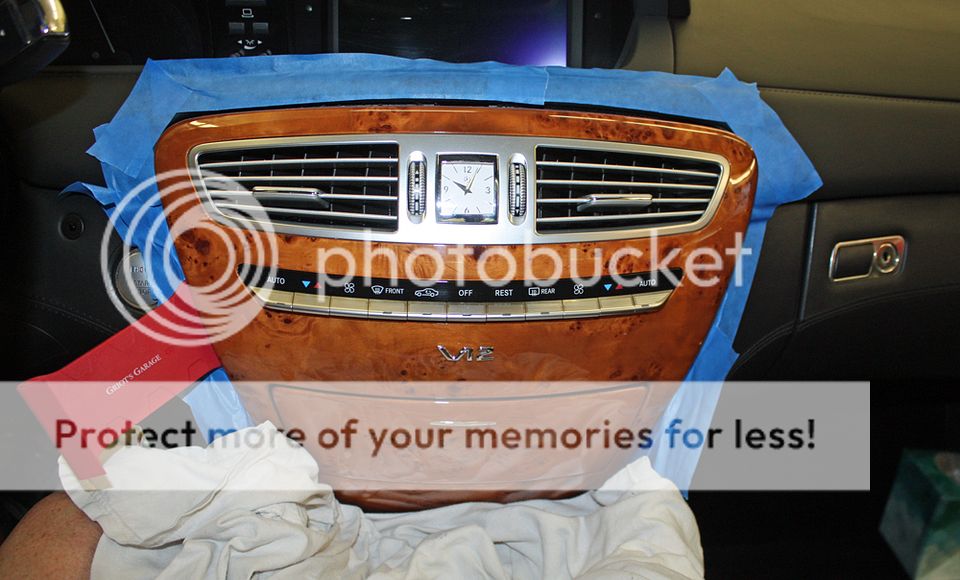
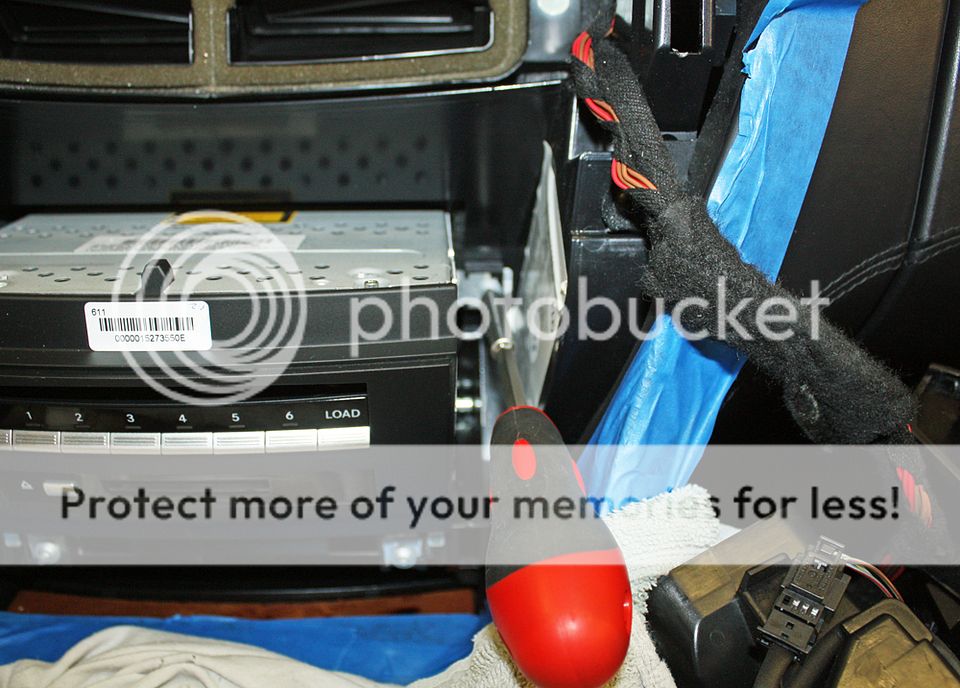
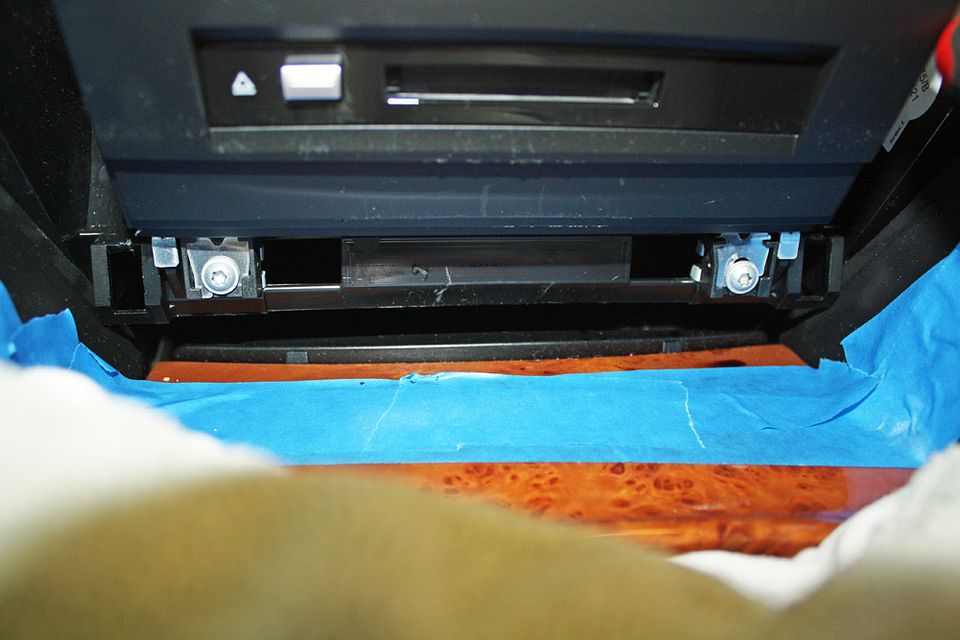
I masked off the leather around the facia and placed a couple towels on the console wood. The screw beneath the top vent is a T20 torx. Once I had it removed, I did not unhook the wiring from the facia and let it hang on the passenger side. Be sure to tape the edges of it and use a towel to protect the glove box leather.

Basically, the W221 and W216 are the same car electronically. However, removing the facia around the radio is different in the two series. The video was done in a W221 and explains how to remove the facia very well. For those of us with W216's, I found this video to be very helpful.
I masked off the leather around the facia and placed a couple towels on the console wood. The screw beneath the top vent is a T20 torx. Once I had it removed, I did not unhook the wiring from the facia and let it hang on the passenger side. Be sure to tape the edges of it and use a towel to protect the glove box leather.
Last edited by jerhofer; Oct 7, 2021 at 09:43 AM.
Thread Starter
Member
Joined: Jan 2017
Posts: 131
Likes: 16
1973 280SEL 4.5
Installing the wiring harness
There are two harnesses supplied. One is a power harness that will connect to the factory wiring harness. The other is the Interface harness. The power harness is the first one we will work with.
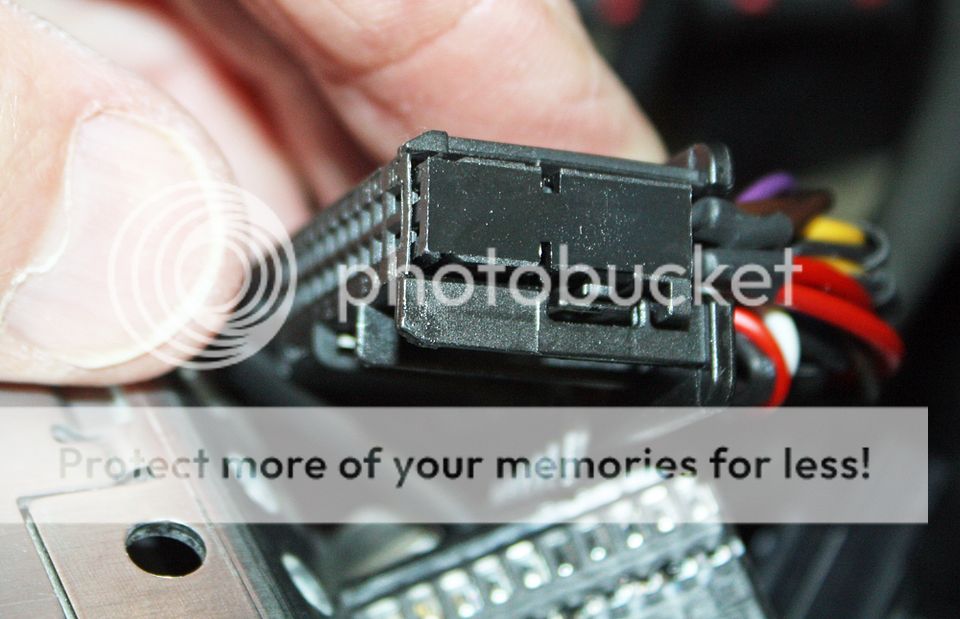
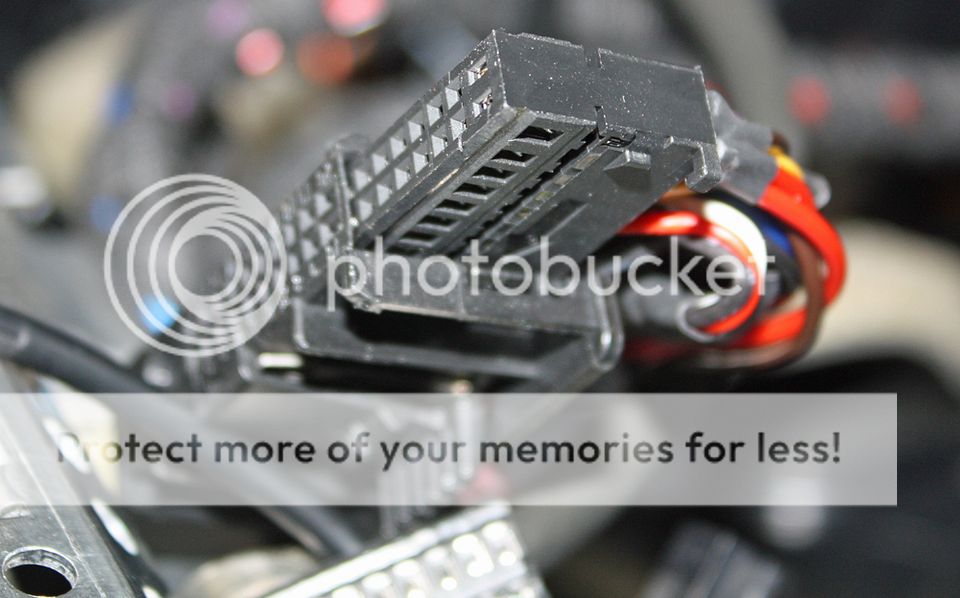
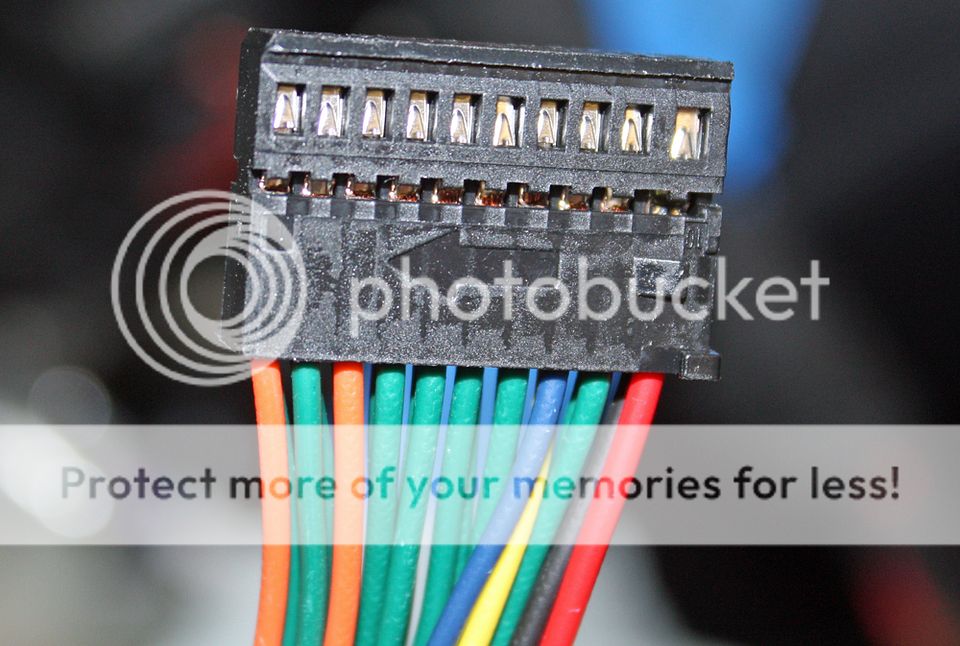
Unplug the main wiring connector on the rear of the radio. On one end, you will see a tab that you can depress. With it depressed, tug on the wires to slide the wiring sideways out of the plug. Once you have it out, you will see a similar plug on the supplied wiring harness. These pieces have an arrow on them. Slide the one on the wiring harness into the factory plug. Then slide the one you removed from the factory harness into the suppled plug. Once you have done this, plug the factory plug into the radio.
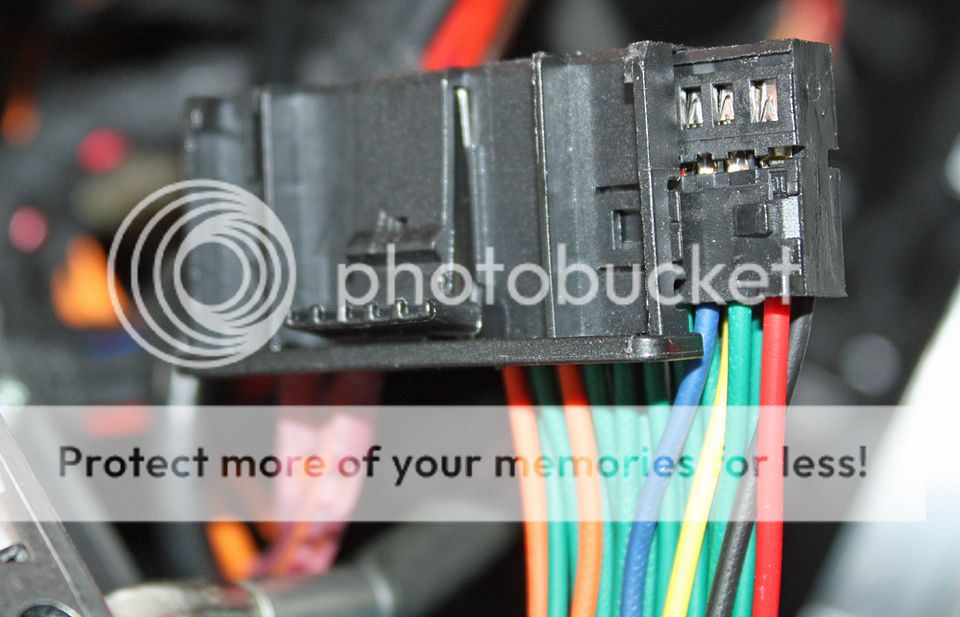
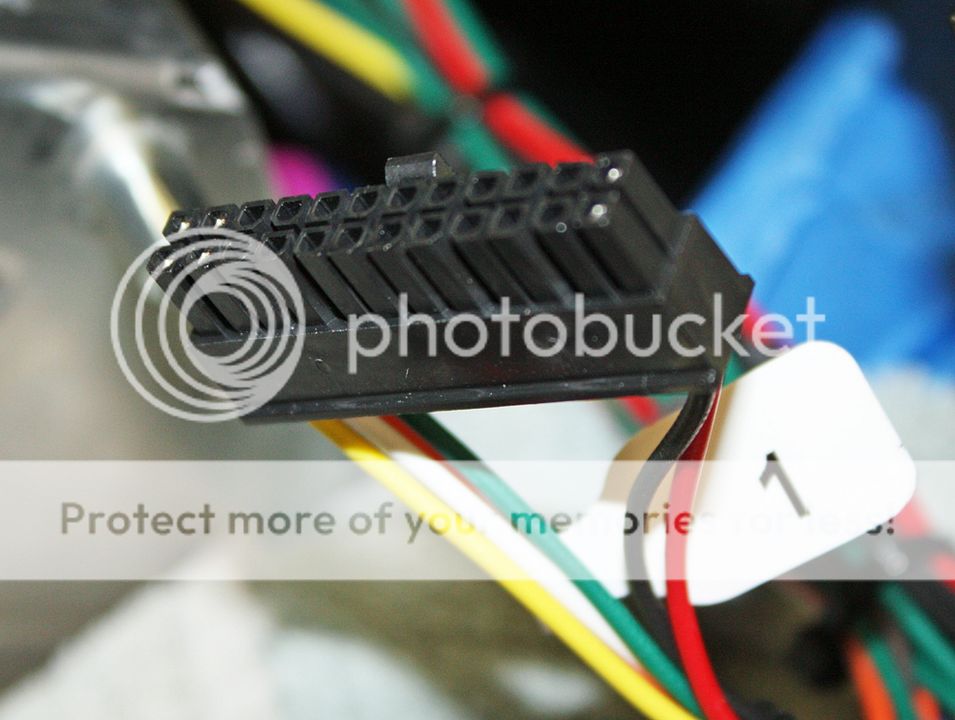
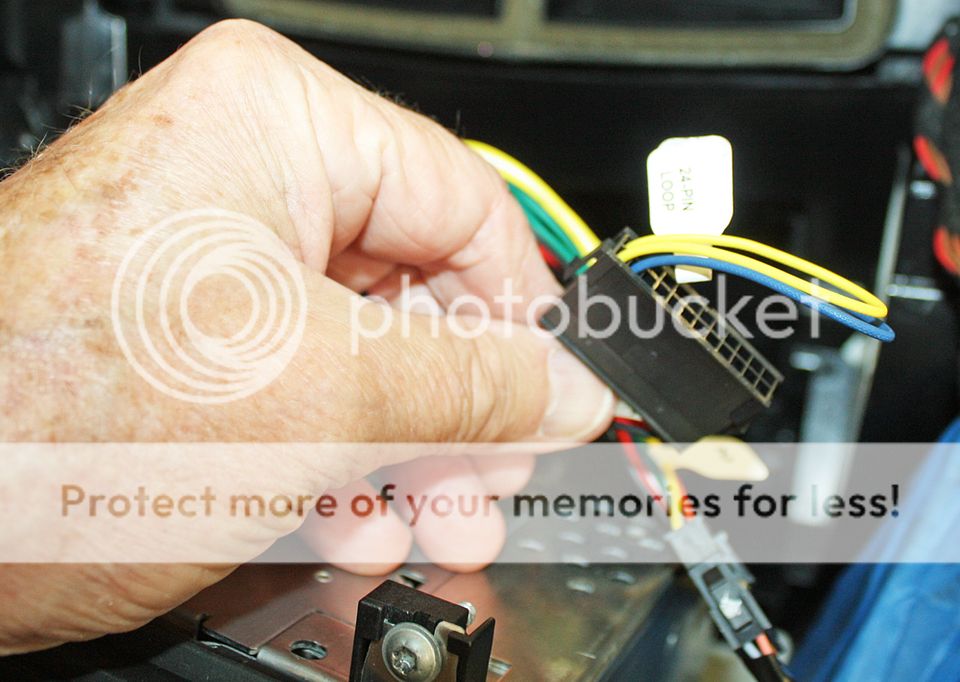
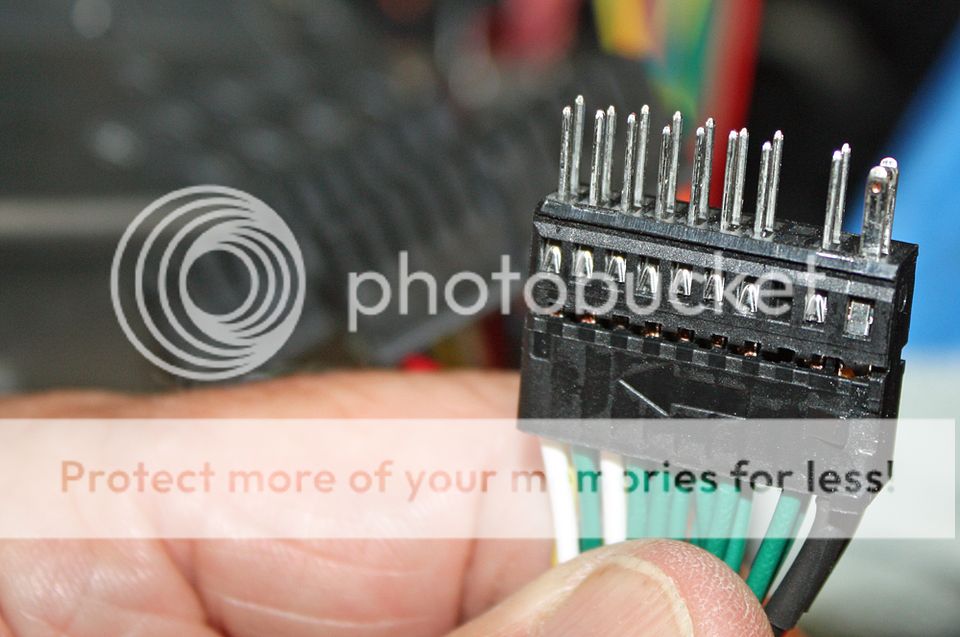
Now we can install the interface harness. You will see two plugs on it numbered one and two. To #1, plug in the plug that you slid the factory wiring harness into. To #2, install the loop plug supplied. You will also see a male plug with multiple pins. On one end you will see four flat blades. It is installed into the corresponding female plug with inserts for the four flat blades on one end. Plugs #1 and #2 lock securely in place but this one does not. Later, after I made sure that everything worked, I taped the two plugs together. There is a gray plug on the interface harness that goes to the interface. Do NOT plug it in at this time.
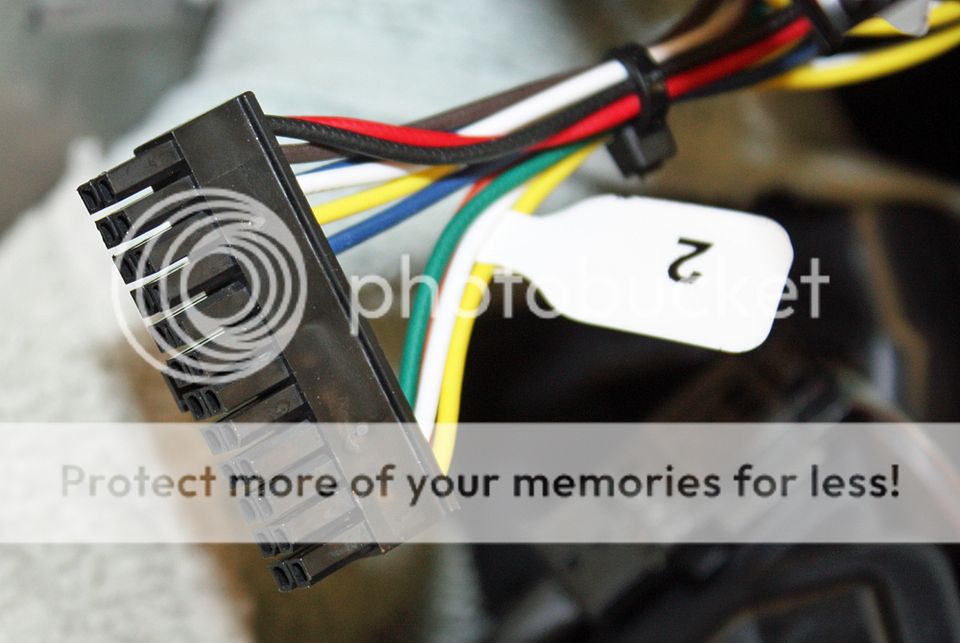
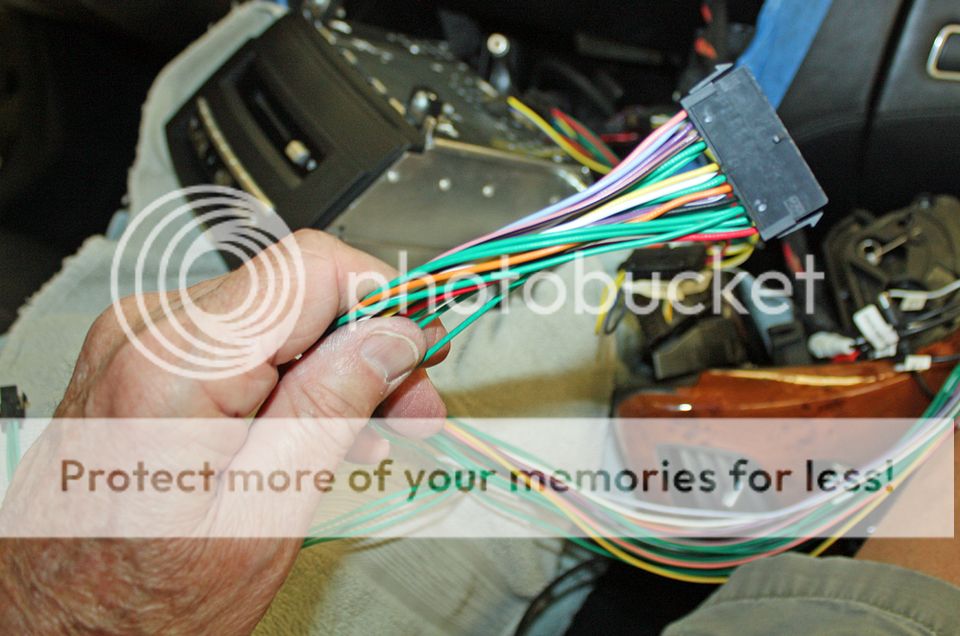
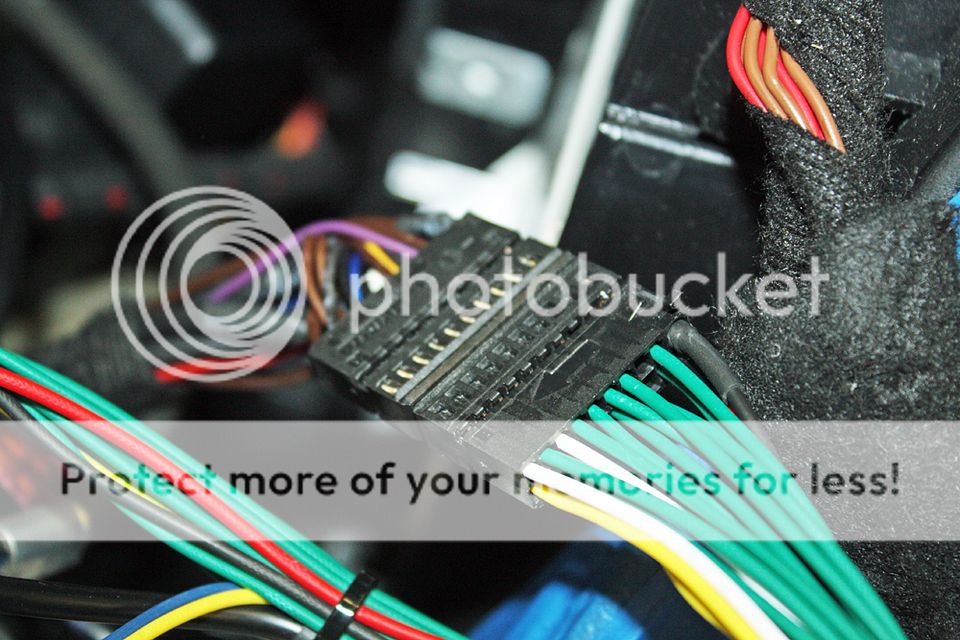
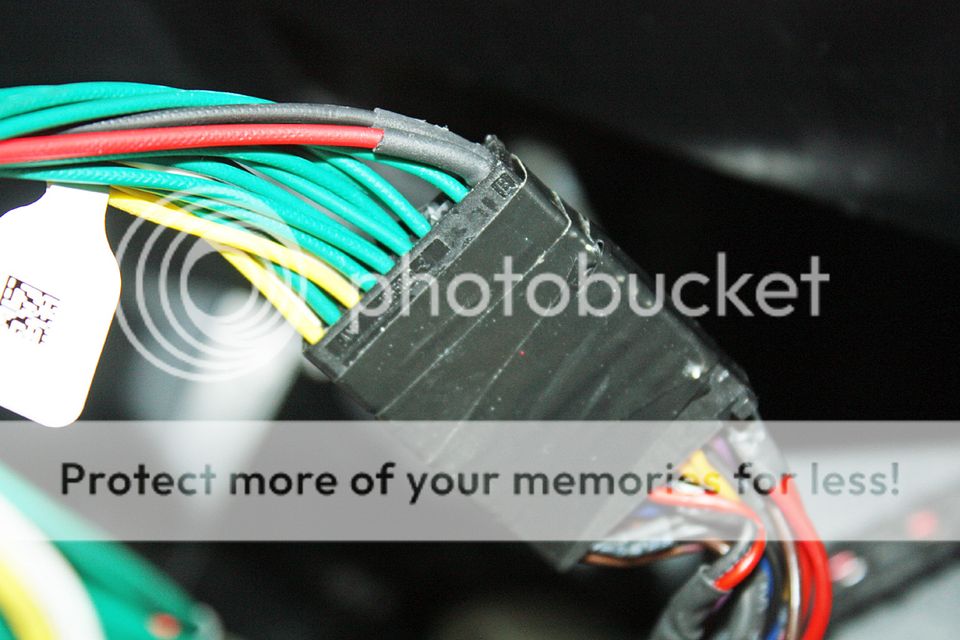
There are two harnesses supplied. One is a power harness that will connect to the factory wiring harness. The other is the Interface harness. The power harness is the first one we will work with.
Unplug the main wiring connector on the rear of the radio. On one end, you will see a tab that you can depress. With it depressed, tug on the wires to slide the wiring sideways out of the plug. Once you have it out, you will see a similar plug on the supplied wiring harness. These pieces have an arrow on them. Slide the one on the wiring harness into the factory plug. Then slide the one you removed from the factory harness into the suppled plug. Once you have done this, plug the factory plug into the radio.
Now we can install the interface harness. You will see two plugs on it numbered one and two. To #1, plug in the plug that you slid the factory wiring harness into. To #2, install the loop plug supplied. You will also see a male plug with multiple pins. On one end you will see four flat blades. It is installed into the corresponding female plug with inserts for the four flat blades on one end. Plugs #1 and #2 lock securely in place but this one does not. Later, after I made sure that everything worked, I taped the two plugs together. There is a gray plug on the interface harness that goes to the interface. Do NOT plug it in at this time.
Last edited by jerhofer; Oct 7, 2021 at 09:45 AM.
Thread Starter
Member
Joined: Jan 2017
Posts: 131
Likes: 16
1973 280SEL 4.5
Programming
Go to *******’s website and download their “Updater” app. It will work on both PC’s and Apple. However, on my Mac, when I clicked on the app, it did not open as Apple had a security problem with it. This was the first text I sent to *******. Soon they advised me to right click on the app in Finder and the click on open. It opened then and all subsequent times.
https://*****************/updates.aspx
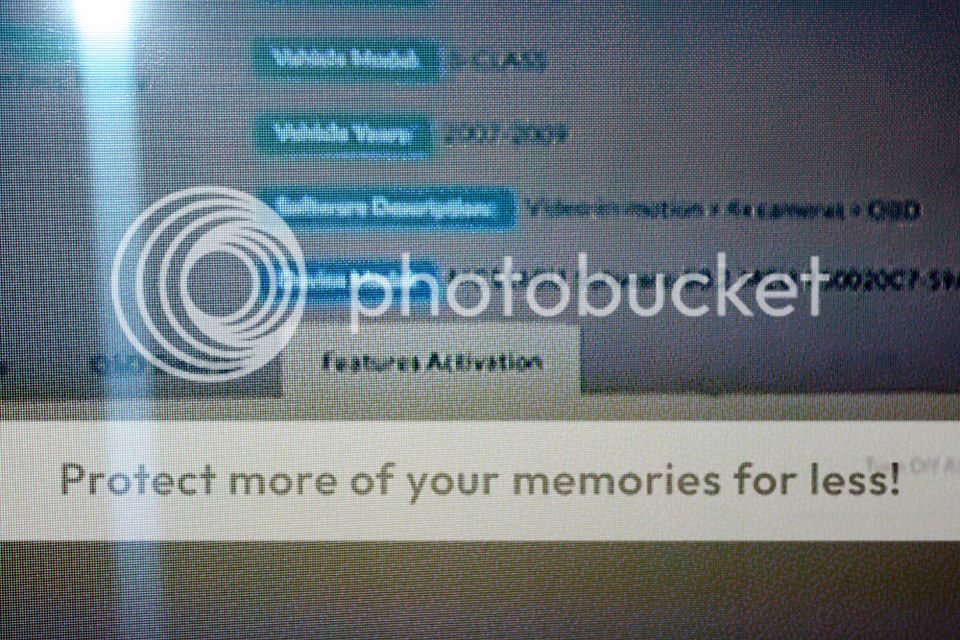
Once you have it opened, use the included USB cable to attach the interface to your computer. Do not have the interface cable plugged into the interface at this time. Once you have the USB cable plugged in, click on “Find Device”. I didn’t take a photo of “Find Device” but you will see it in the gray area on the screen after you connect the interface to the computer. Once the device has been found, you will see a place where you can input the type of car you have. Select Mercedes under “make”, S Class under “model”, and the year of your car. Then click on ‘Search”. Your car will appear in the upper area. On the lower right side, you will see three choices. Step one Activation, and two step twos’, one for Carplay and one for Android. Select Step One and then click on “Install”. After the installation is complete, click on “Close”.
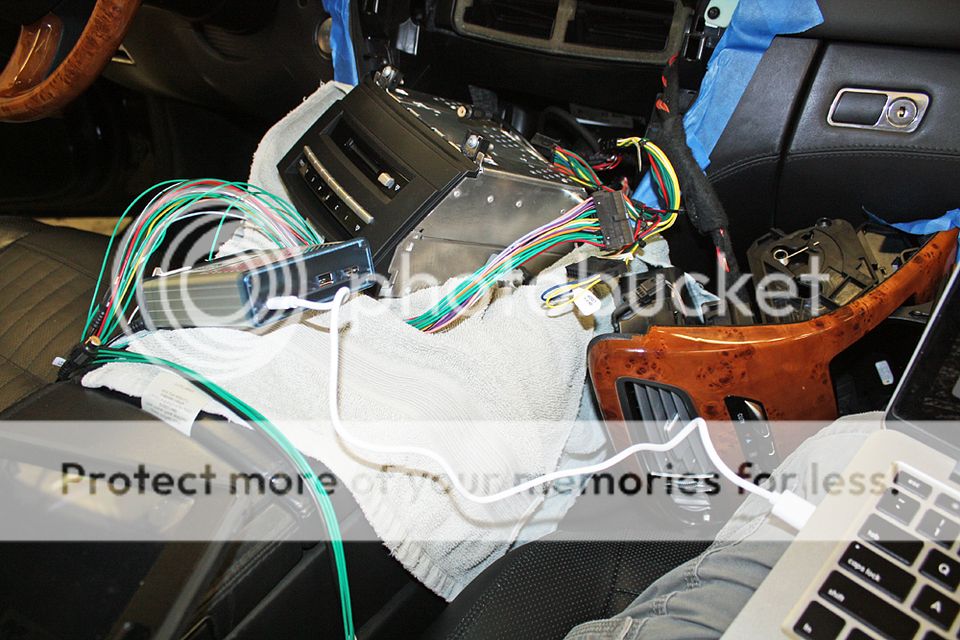
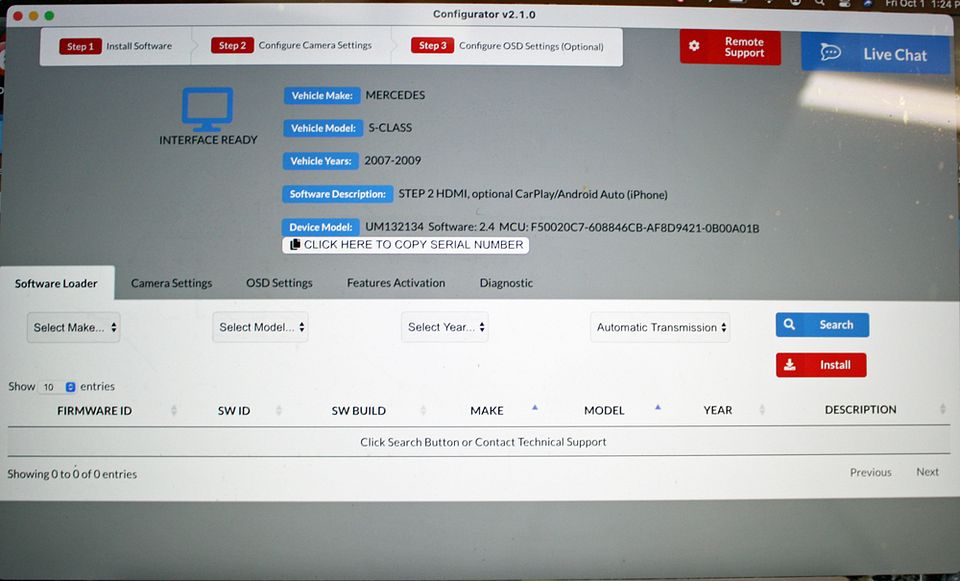
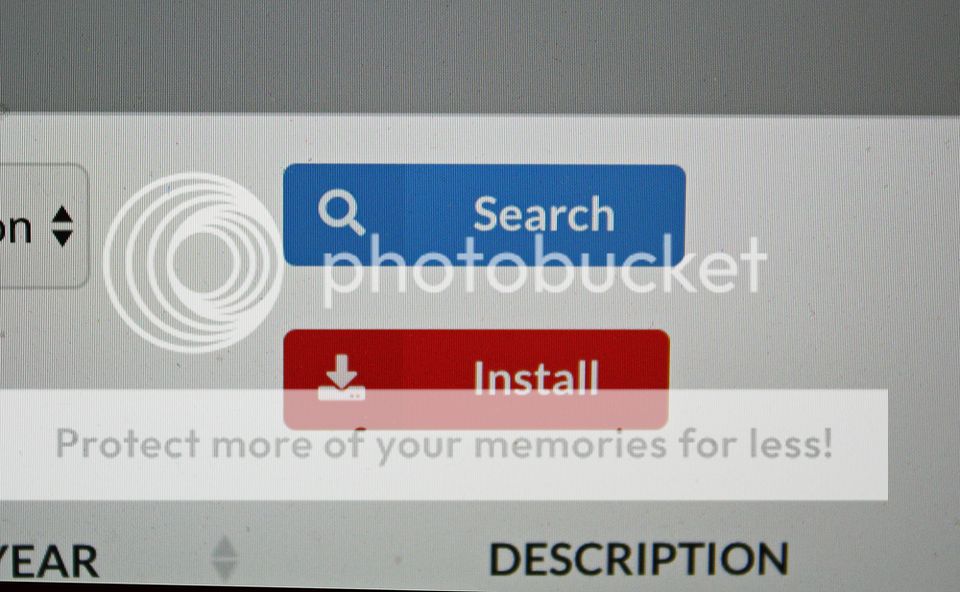
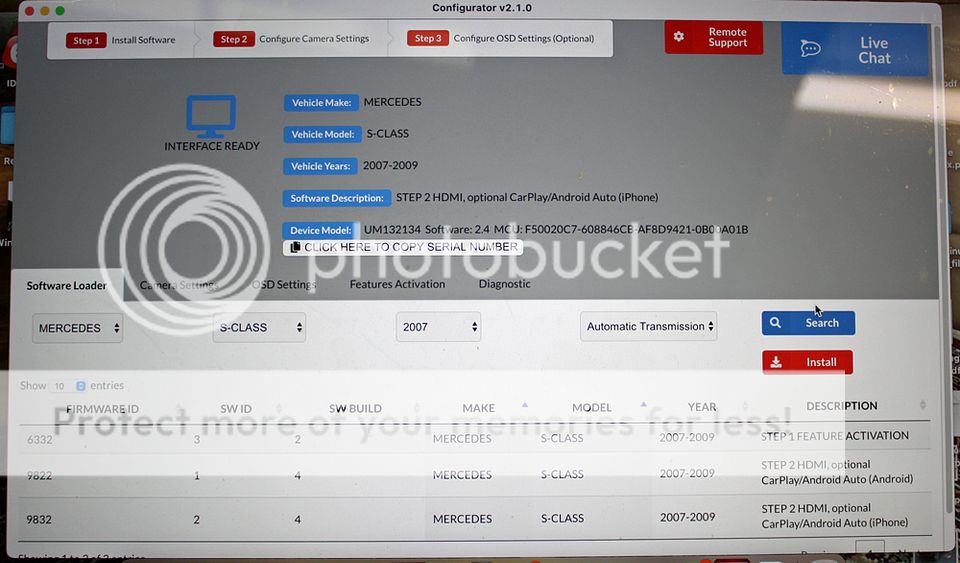
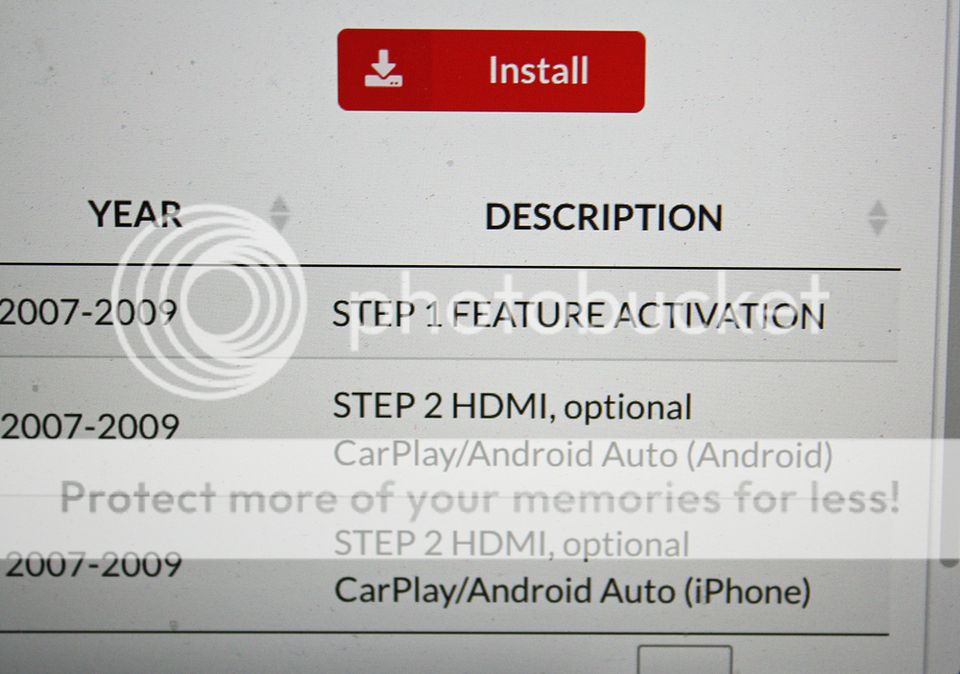
Go to *******’s website and download their “Updater” app. It will work on both PC’s and Apple. However, on my Mac, when I clicked on the app, it did not open as Apple had a security problem with it. This was the first text I sent to *******. Soon they advised me to right click on the app in Finder and the click on open. It opened then and all subsequent times.
https://*****************/updates.aspx
Once you have it opened, use the included USB cable to attach the interface to your computer. Do not have the interface cable plugged into the interface at this time. Once you have the USB cable plugged in, click on “Find Device”. I didn’t take a photo of “Find Device” but you will see it in the gray area on the screen after you connect the interface to the computer. Once the device has been found, you will see a place where you can input the type of car you have. Select Mercedes under “make”, S Class under “model”, and the year of your car. Then click on ‘Search”. Your car will appear in the upper area. On the lower right side, you will see three choices. Step one Activation, and two step twos’, one for Carplay and one for Android. Select Step One and then click on “Install”. After the installation is complete, click on “Close”.
Last edited by jerhofer; Oct 7, 2021 at 09:23 AM.
Thread Starter
Member
Joined: Jan 2017
Posts: 131
Likes: 16
1973 280SEL 4.5
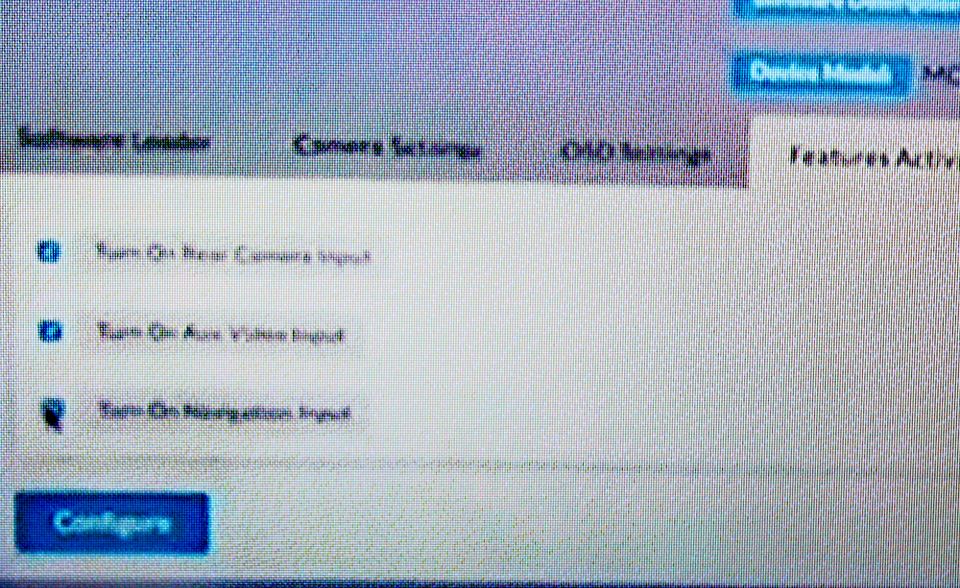
With this step complete, the next step is to configure the screen. To do this, keep the USB cable connected to the computer. Plug the gray plug into the interface. Disconnect the interface harness plug from plug #2 and remove the loop from plug #1. Install the loop on #2 and the interface harness plug on #1. Now go back to the Updater. Select “Activate Features”. On the left side you will see three choices.
Turn on Rear Camera Input
Turn on Video Input
Turn on Navigation Input
You do not have to turn on the rear camera input unless you don’t have a rear camera and are going to add one. You don’t have to add Video input unless you do not have Video as a choice on the screen when you have the radio on. You must turn on the Navigation input regardless of whether you have factory navigation. This input is needed for the CarPlay system to work. The screen will be blank except for the AC controls appearing across the bottom.
Once you have selected the inputs, click on “Configure”. Almost immediately, you will see “Diagnosis” appear on the screen, it will go blank and then the Mercedes star will appear. You are now finished with this step. I apologize for the poor quality of the images below. I forgot to take photos of these on my computer. I took these photos from the ******* video.
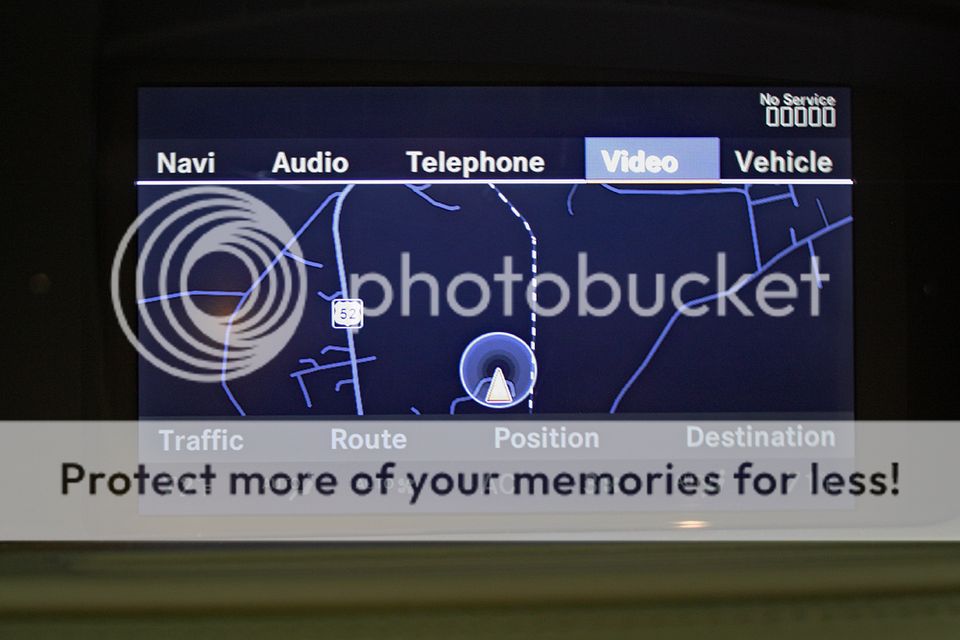
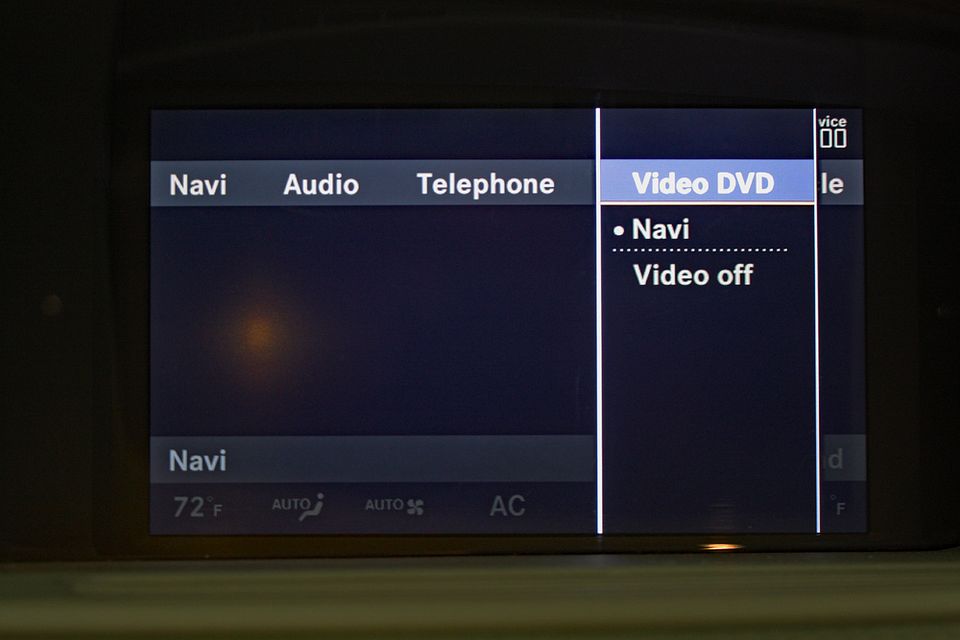
Below are images of the factory screen showing the Video as one selection across the top. If you select video, you will see “Navi” as one of the choices. This is the navigation input you just added to the factory radio. Later, when you want to use CarPlay, you will begin the process by selecting “Navi”.
Turn on Rear Camera Input
Turn on Video Input
Turn on Navigation Input
You do not have to turn on the rear camera input unless you don’t have a rear camera and are going to add one. You don’t have to add Video input unless you do not have Video as a choice on the screen when you have the radio on. You must turn on the Navigation input regardless of whether you have factory navigation. This input is needed for the CarPlay system to work. The screen will be blank except for the AC controls appearing across the bottom.
Once you have selected the inputs, click on “Configure”. Almost immediately, you will see “Diagnosis” appear on the screen, it will go blank and then the Mercedes star will appear. You are now finished with this step. I apologize for the poor quality of the images below. I forgot to take photos of these on my computer. I took these photos from the ******* video.
Below are images of the factory screen showing the Video as one selection across the top. If you select video, you will see “Navi” as one of the choices. This is the navigation input you just added to the factory radio. Later, when you want to use CarPlay, you will begin the process by selecting “Navi”.
Last edited by jerhofer; Oct 7, 2021 at 09:26 AM.
Thread Starter
Member
Joined: Jan 2017
Posts: 131
Likes: 16
1973 280SEL 4.5
There is one more programming step. Unplug the gray interface plug from the interface. Put the loop back into the #1 plug and put the interface connection back in the #2 plug. The USB cable should still be hooked up to the interface. Go back to the “Updater’ screen and select your car again the same way you did for the first step. This time select either Step two Carplay or Step two Android depending on which type of phone you have. Select “Install”. Once the software has been installed, select “Close” and you are finished with the programming. Plug the gray interface plug into the interface and remove the USB cord.
Turn on the radio. You may have to hit the “ON” button on the console. Go to Video and select Navi. The screen will be blank. Open the keypad and press down on the “Clear” button until you hear a beep and see the interface graphics on the screen. The kit has the capabilities to add additional cameras for the side, front and rear. There is also a HDMI port on the interface. Those options appear on the interface graphics that appear on the screen.
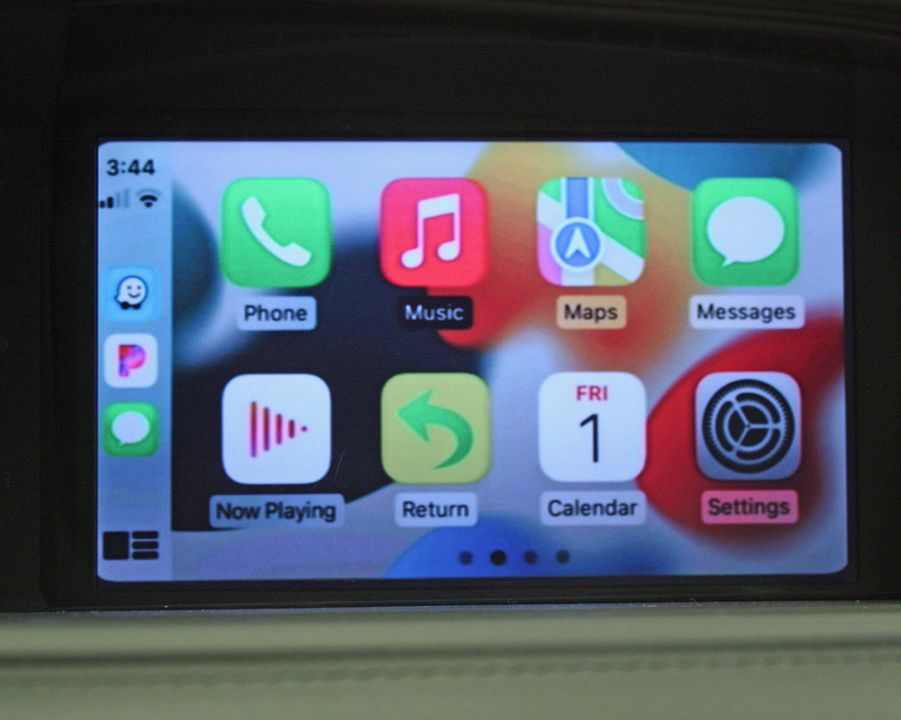
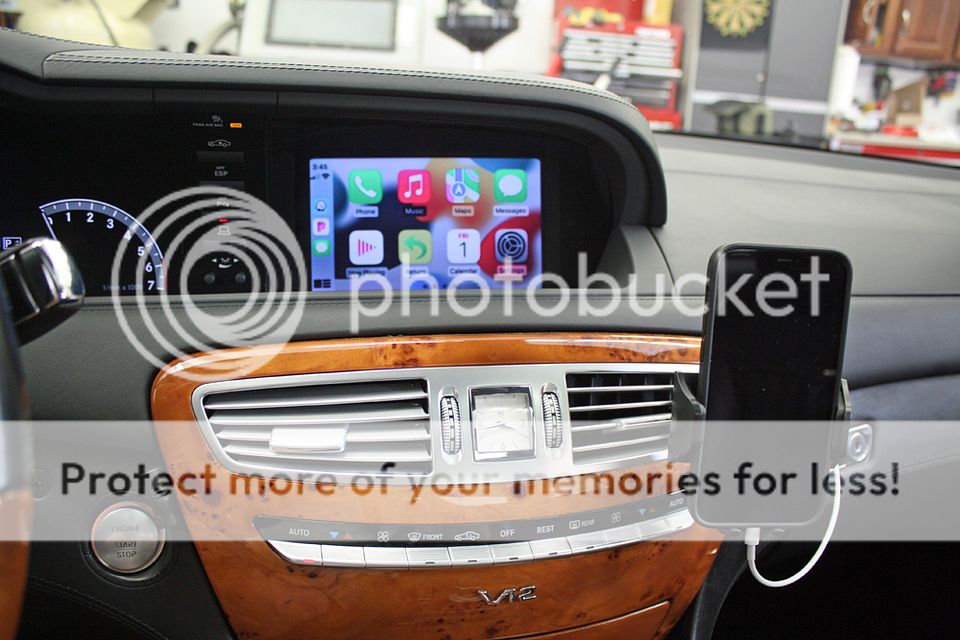
Plug in your phone to the USB port on the interface. Use the factory controller to select either CarPlay or Android Auto. In my case, once I select CarPlay, you will see the familiar CarPlay screen. It works the same as it does in any other car. You use the factory controller on the console just as you would to make selections on the factory radio. To hear sound from your phone, the audio must be set to “AUX”. If you want people on the other end to hear you when you make a phone call, be sure to go to Settings, Bluetooth and select MB. Click on the “I” next to it and, on the page that appears, select “Forget this Device”. To switch back and forth from the CarPlay menu to the Mercedes menu, push the Tel/Navi button on the console.
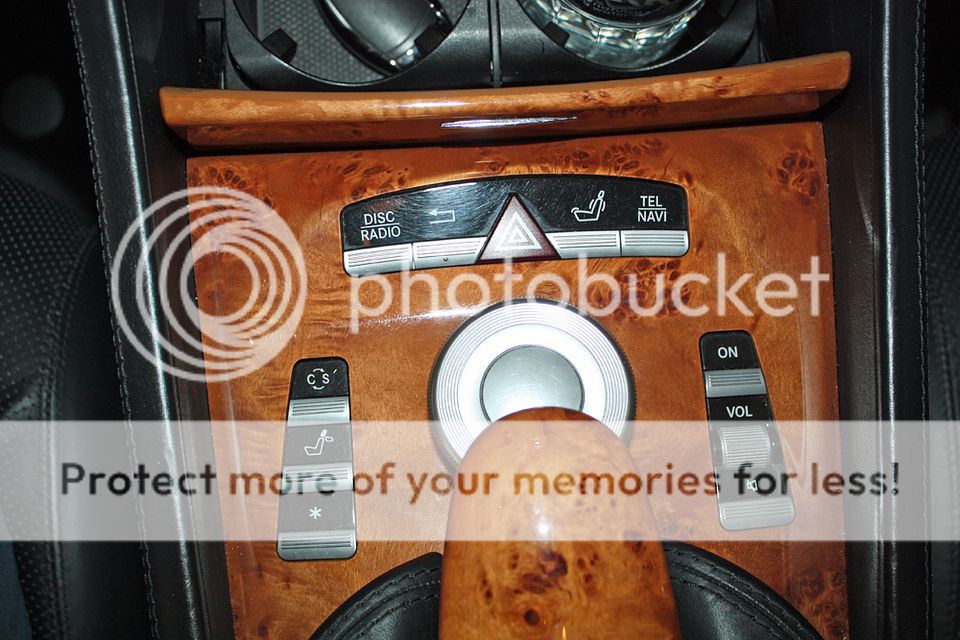
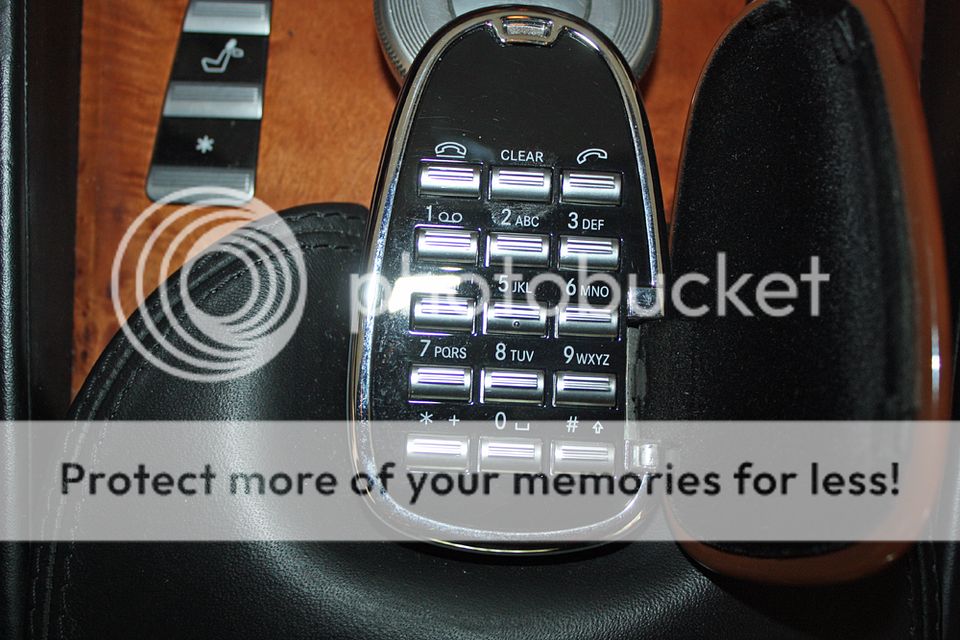
Turn on the radio. You may have to hit the “ON” button on the console. Go to Video and select Navi. The screen will be blank. Open the keypad and press down on the “Clear” button until you hear a beep and see the interface graphics on the screen. The kit has the capabilities to add additional cameras for the side, front and rear. There is also a HDMI port on the interface. Those options appear on the interface graphics that appear on the screen.
Plug in your phone to the USB port on the interface. Use the factory controller to select either CarPlay or Android Auto. In my case, once I select CarPlay, you will see the familiar CarPlay screen. It works the same as it does in any other car. You use the factory controller on the console just as you would to make selections on the factory radio. To hear sound from your phone, the audio must be set to “AUX”. If you want people on the other end to hear you when you make a phone call, be sure to go to Settings, Bluetooth and select MB. Click on the “I” next to it and, on the page that appears, select “Forget this Device”. To switch back and forth from the CarPlay menu to the Mercedes menu, push the Tel/Navi button on the console.
Last edited by jerhofer; Oct 7, 2021 at 09:30 AM.
Thread Starter
Member
Joined: Jan 2017
Posts: 131
Likes: 16
1973 280SEL 4.5
Finishing the Installation
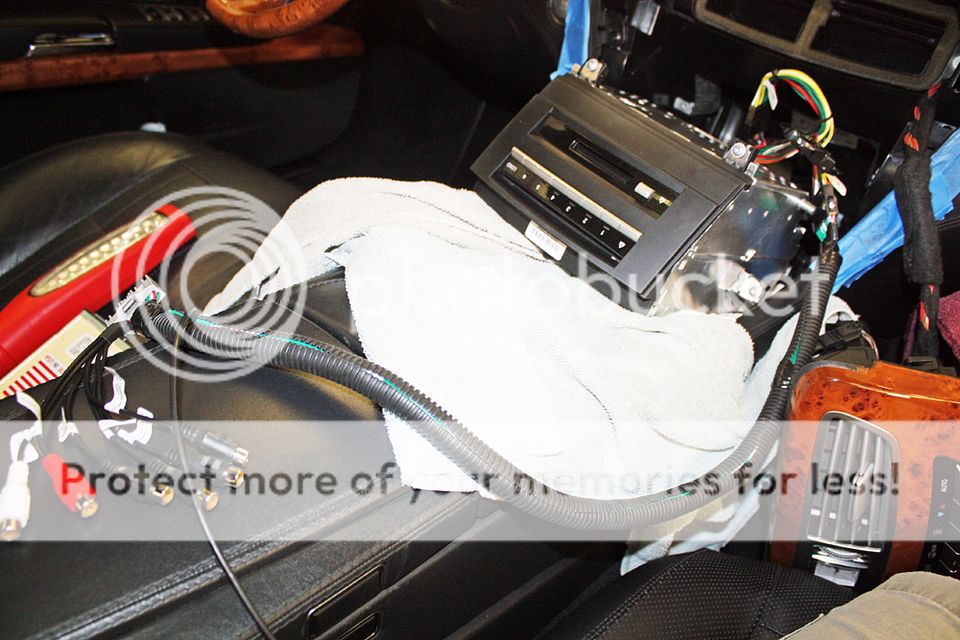
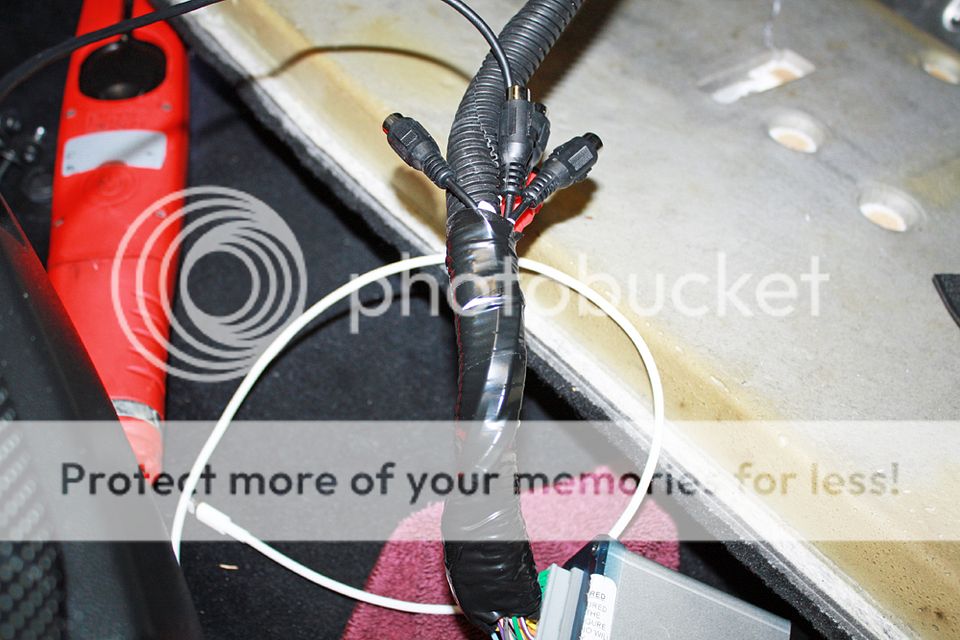
For protection, I placed the interface wires into a plastic sheathing. There are video RCA leads for the optional cameras. Since I wasn’t using any of those, I taped them to the sheathed cable.
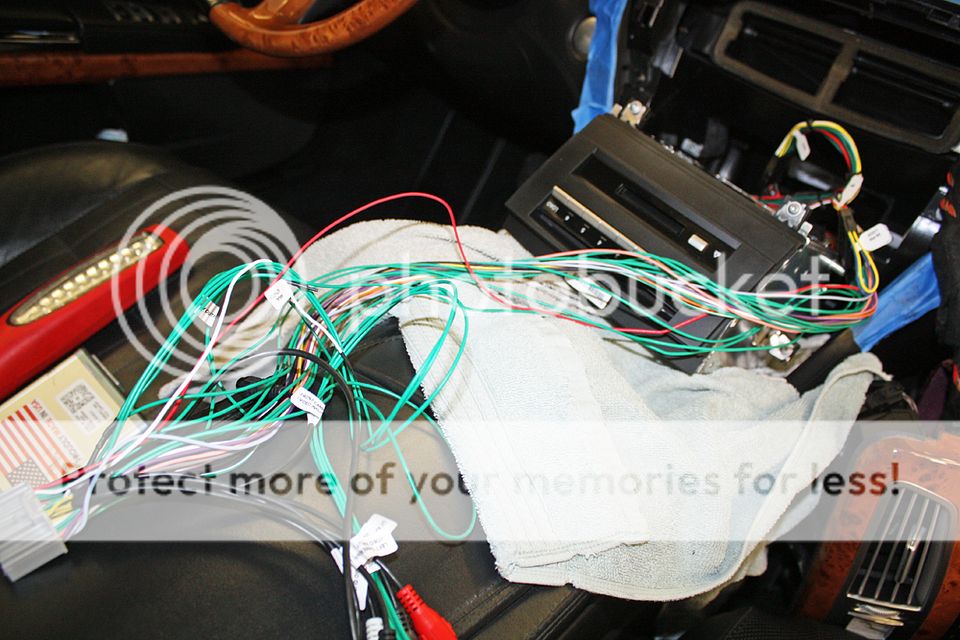
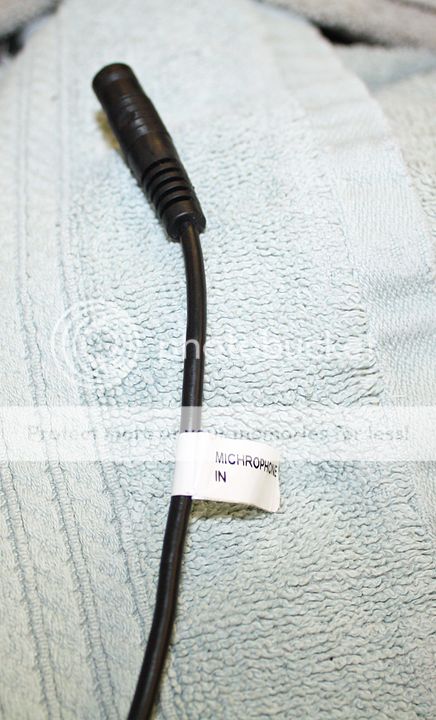
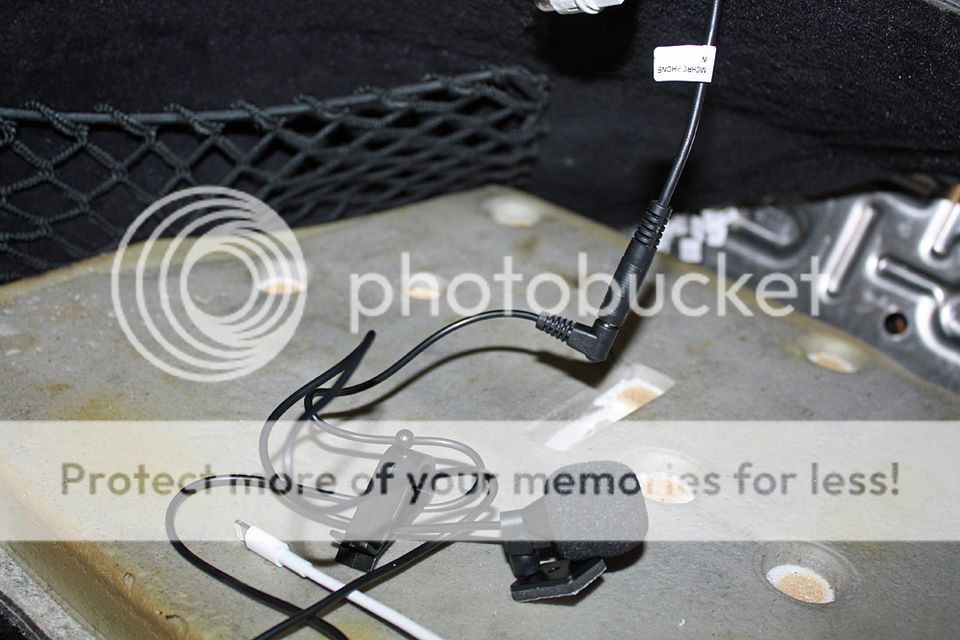
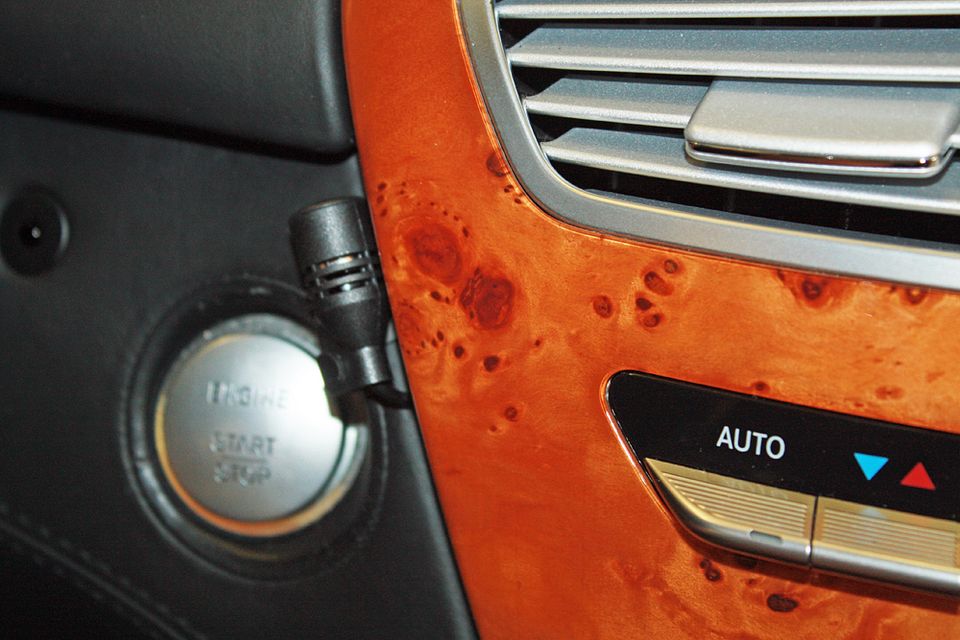
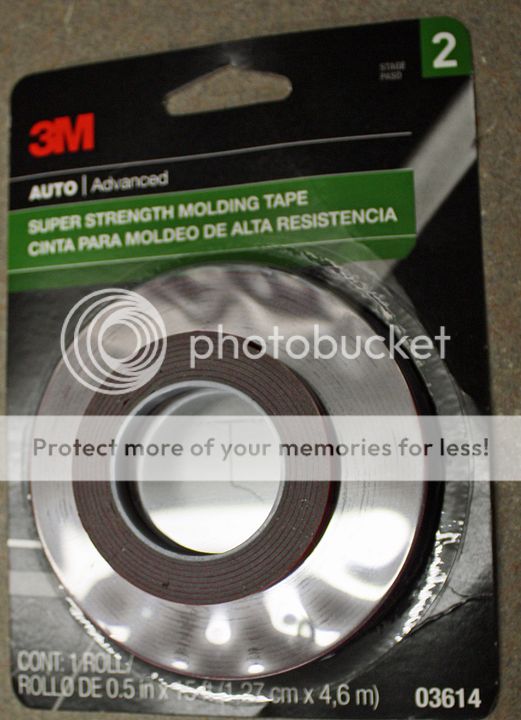
To install the microphone into the lead on the interface harness. I taped this lead to make sure it did not pull apart during installation. I ran the wire behind the facia and brought it out on the left side next to the start button. 3M makes a very thin double sided tape for mounting moldings. I used the very narrowest tape to mount the microphone.

For protection, I placed the interface wires into a plastic sheathing. There are video RCA leads for the optional cameras. Since I wasn’t using any of those, I taped them to the sheathed cable.
To install the microphone into the lead on the interface harness. I taped this lead to make sure it did not pull apart during installation. I ran the wire behind the facia and brought it out on the left side next to the start button. 3M makes a very thin double sided tape for mounting moldings. I used the very narrowest tape to mount the microphone.
Last edited by jerhofer; Oct 7, 2021 at 09:52 AM.
Trending Topics
Thread Starter
Member
Joined: Jan 2017
Posts: 131
Likes: 16
1973 280SEL 4.5
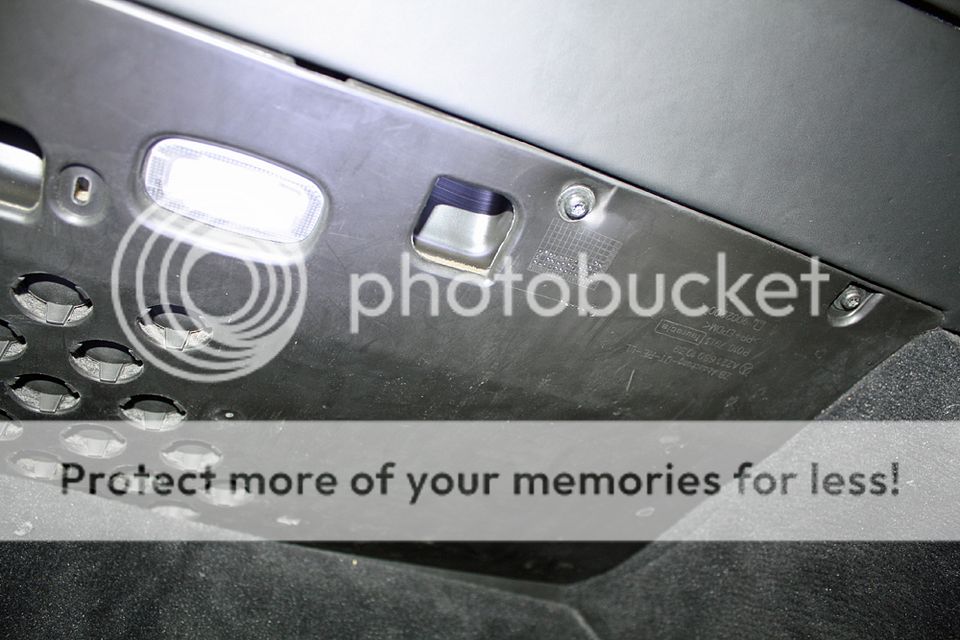
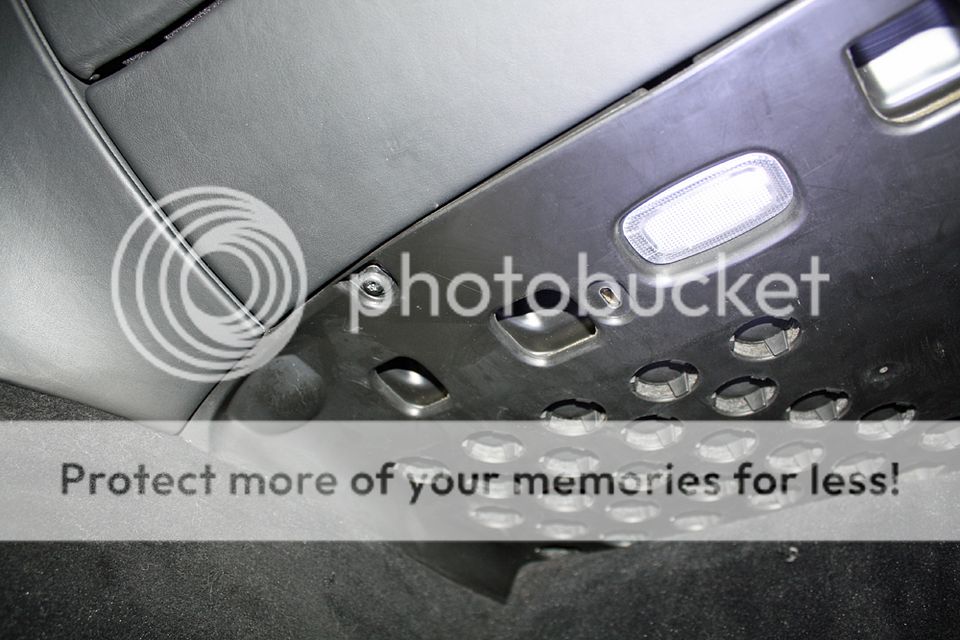
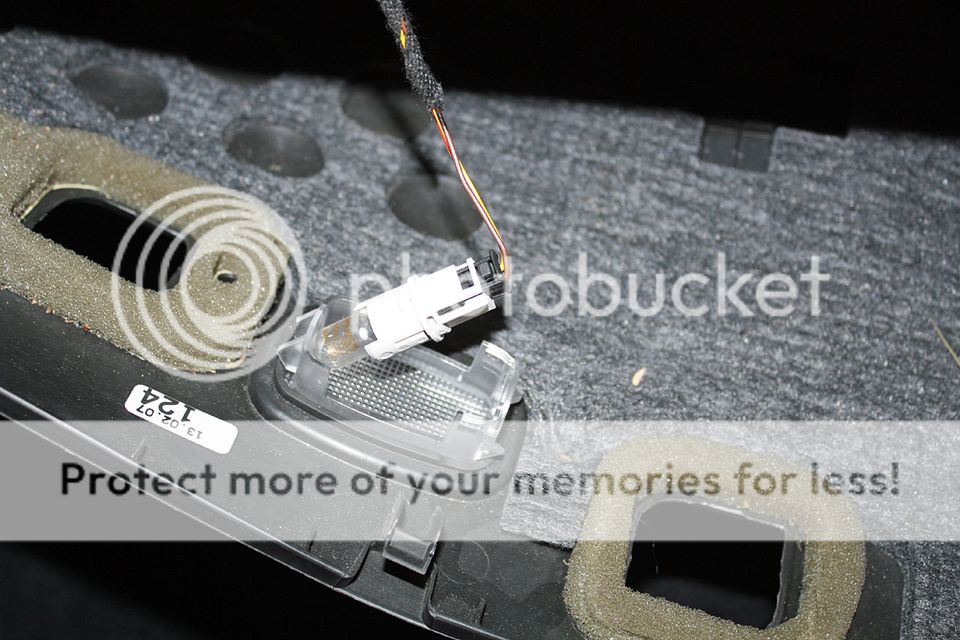
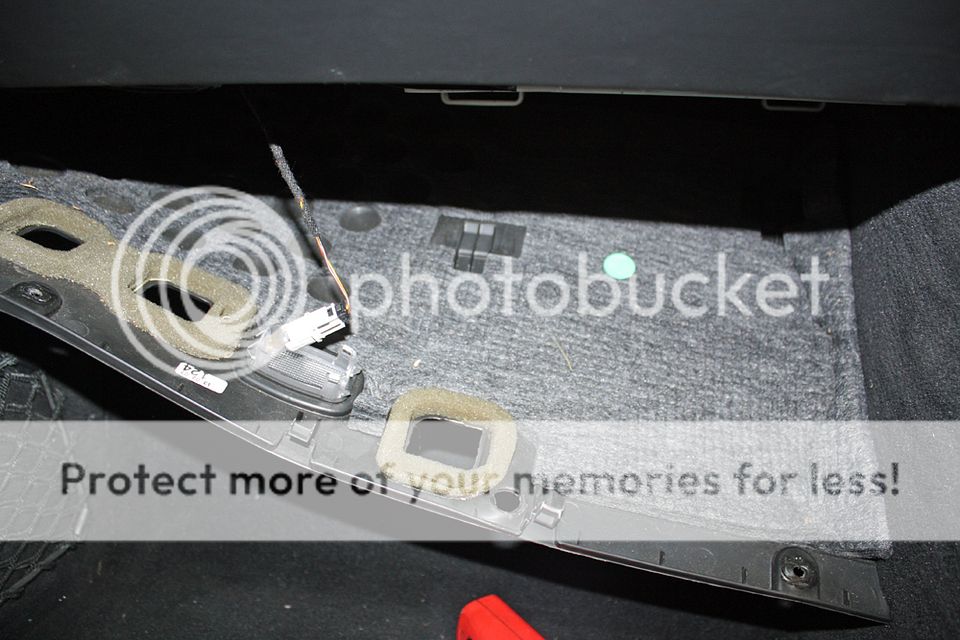
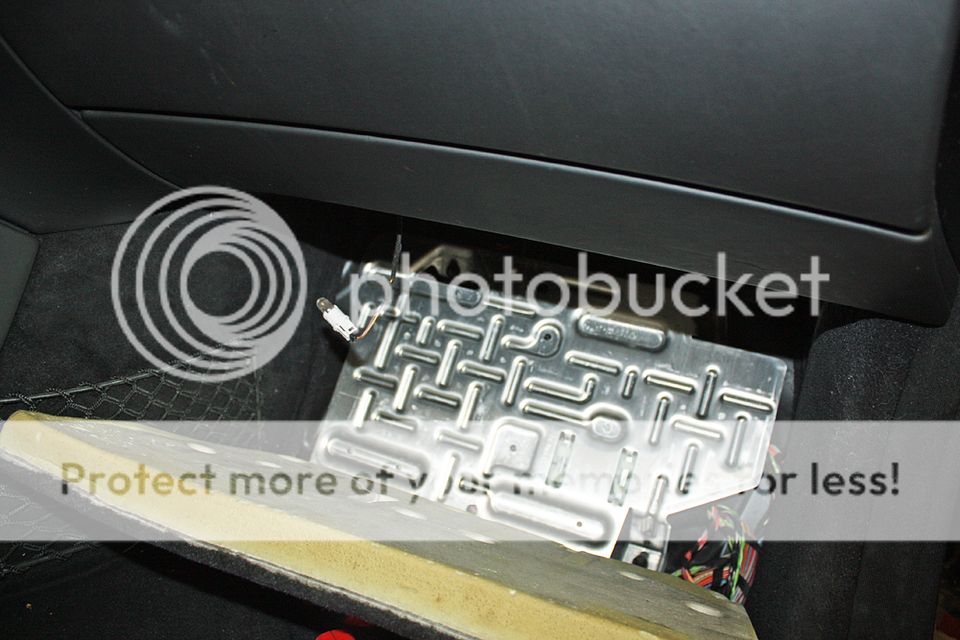
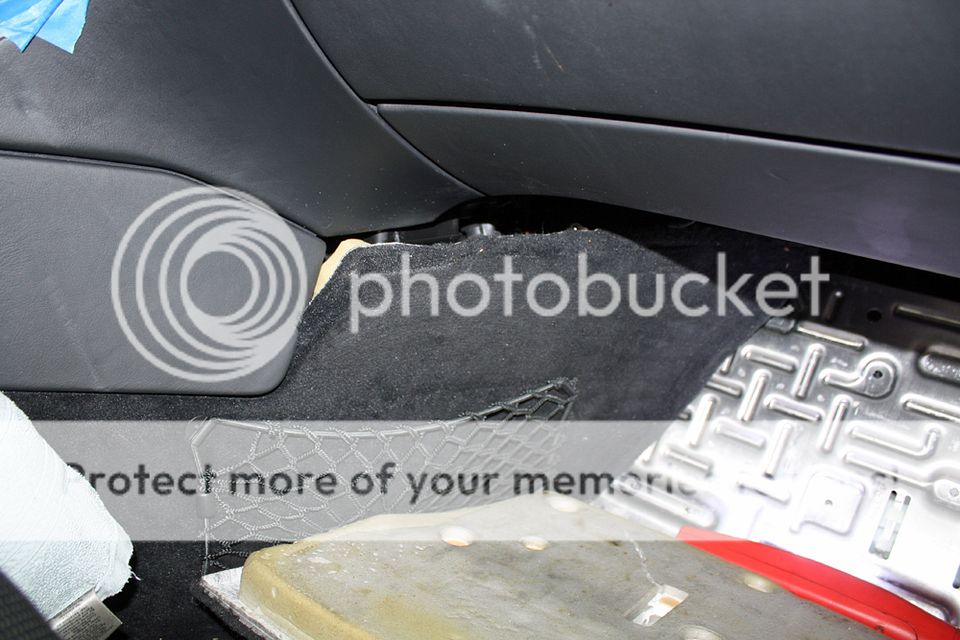
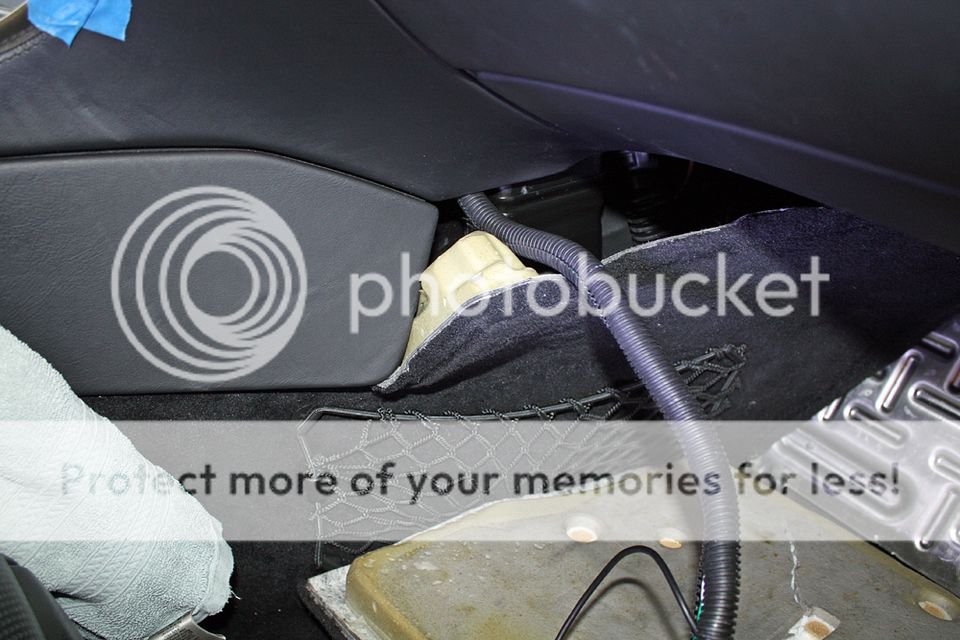
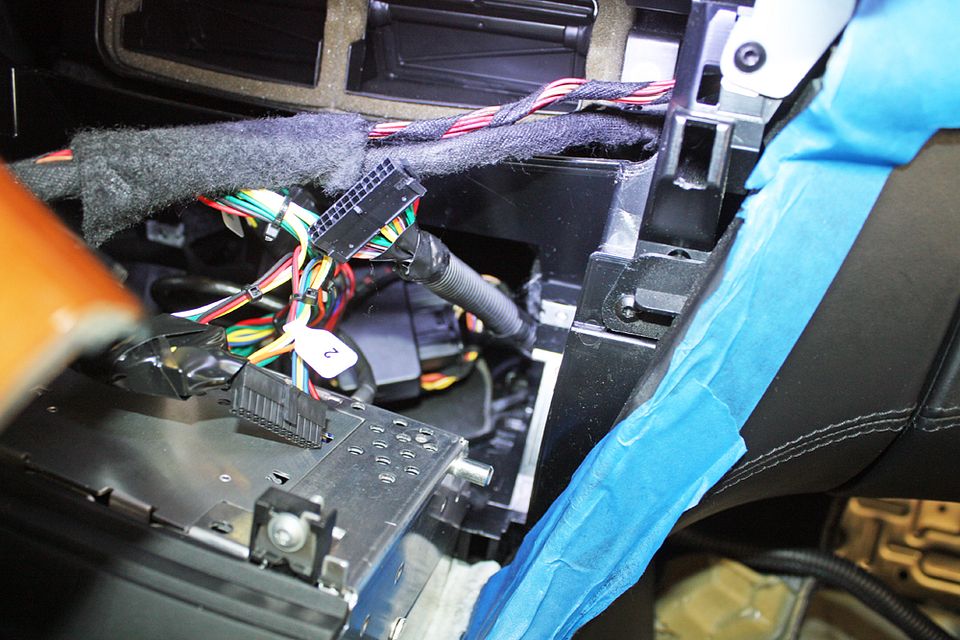
Remove the panel under the glove box using a T20 torx screwdriver. Be sure to release the footwell light by twisting the light fixture. Once the panel has been removed, pull back the footwell carpet. Then pull the tunnel carpet away from the tunnel. This will expose a place on the left side of the footwell as a location for the interface. I unhooked the plug from #2 and fed it up into the area behind the radio from the footwell area. The microphone wire ran along this cable.
Last edited by jerhofer; Oct 7, 2021 at 09:35 AM.
MB World Stories
The Best of Mercedes & AMG

New Electric Mercedes-AMG GT 4-Door Coupe Unveiled: 10 Things You Need to Know
Verdad Gallardo
6 Mercedes Models That Did NOT Age Well (But Are Somehow Still Cool)
Verdad Gallardo
Manual Mercedes? 6 Times Sindelfingen Let Drivers Have All The Fun
Verdad Gallardo
Mercedes SLR McLaren 722 S Is Extremely Rare Example Modified by McLaren
Verdad Gallardo
8 Classic Boxy Mercedes Designs That Have Aged Like Fine Wine
Verdad Gallardo
Flawlessly Restored Mercedes 190E Evo II Heads to Auction
Verdad Gallardo
Electric Mercedes C-Class Unveiled: 11 Things You Need to Know
Verdad Gallardo
Mercedes EQS Gets A Major Update: Everything You Need to Know
Verdad Gallardo
5 Underrated Mercedes-Benz Models That Don't Get the Love They Deserve
Verdad Gallardo
Thread Starter
Member
Joined: Jan 2017
Posts: 131
Likes: 16
1973 280SEL 4.5
Re-install the plug to #2. Run the microphone cable over to the left side of the radio. Carefully push the interface cable back down into the footwell as you slide the radio back into position. Now fasten the radio into the car. Hold the microphone cable outside the facia as you re-install it. Once you have the microphone positioned, you can re-install the facia. As you do these various steps, occasionally turn on the radio to make sure everything is still working.
Place the interface in the left rear corner of the footwell. I placed a piece of rubber between the interface and the metal footboard to prevent damage and rattles. Carefully run the wires behind the tunnel carpet and re-install it.
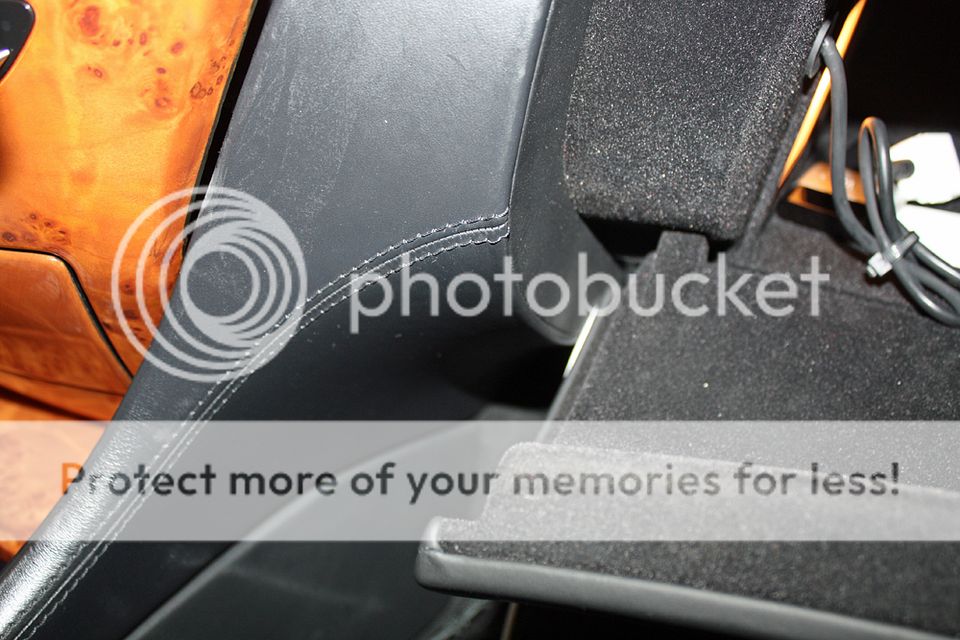
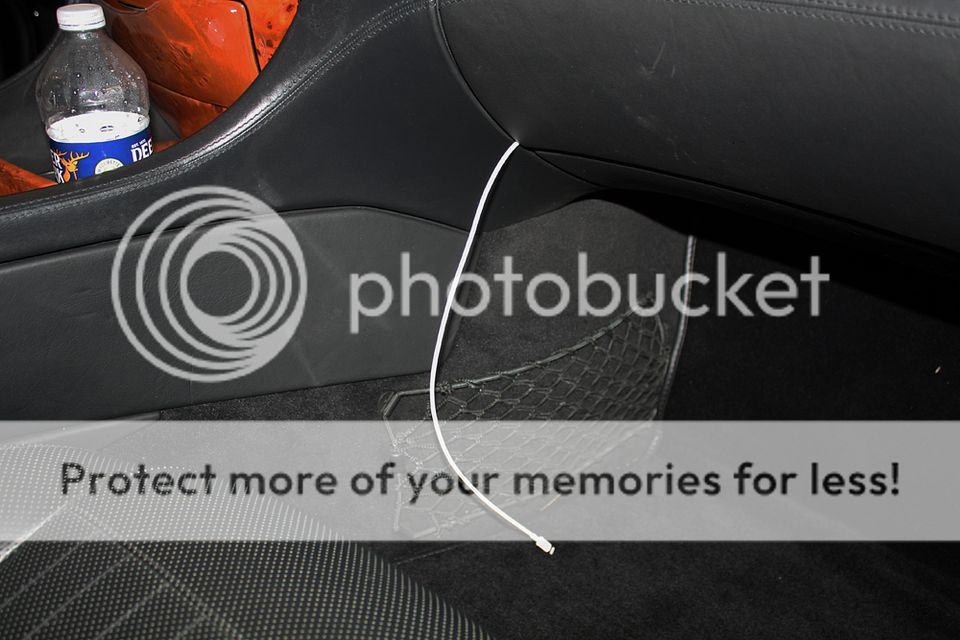
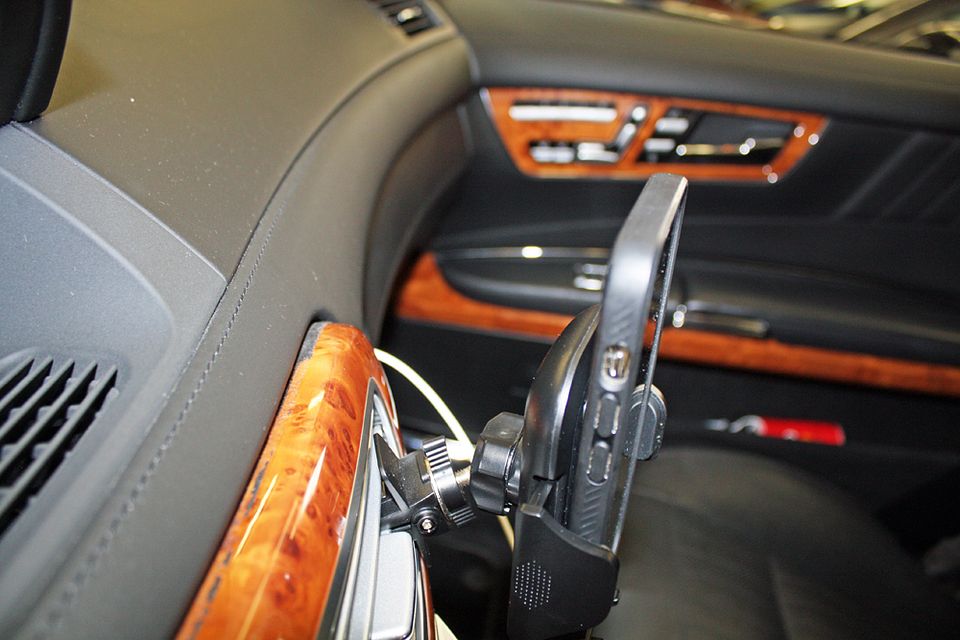
Plug in a USB to lightning cable into the interface. To prevent it from being accidently pulled out of the interface, I taped it to the interface. I placed it into a crack on the left side of the glove box and left enough cable so I could plug it into my phone. When not in use, I can either let it dangle or put it into the glove box. I am using a vent mount for my phone.
Push the carpet back into place. Re-install the panel under the glove box while being sure to put the footwell light back into its holder. You are done!! Enjoy your updated electronics!!
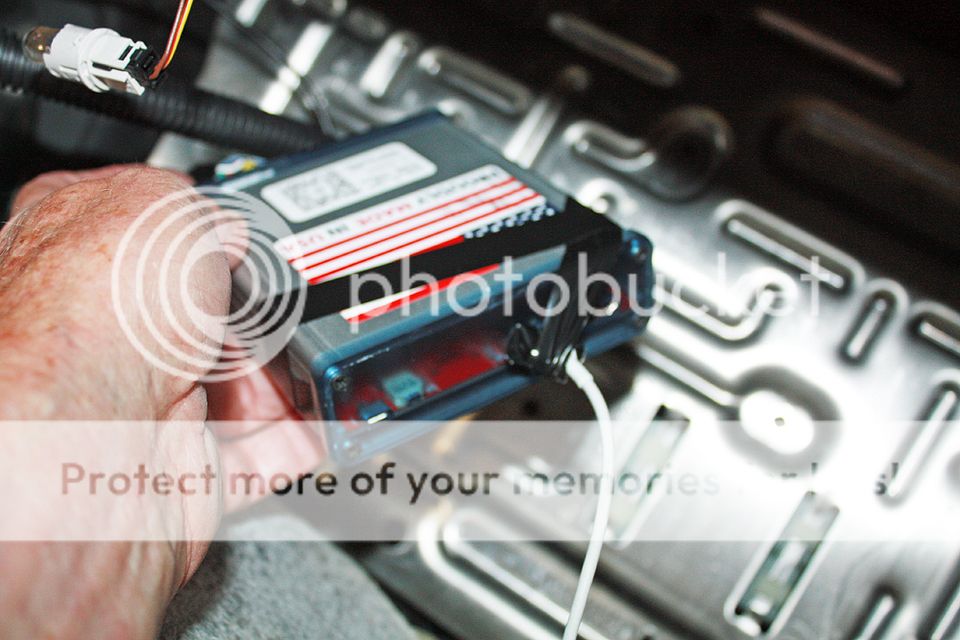
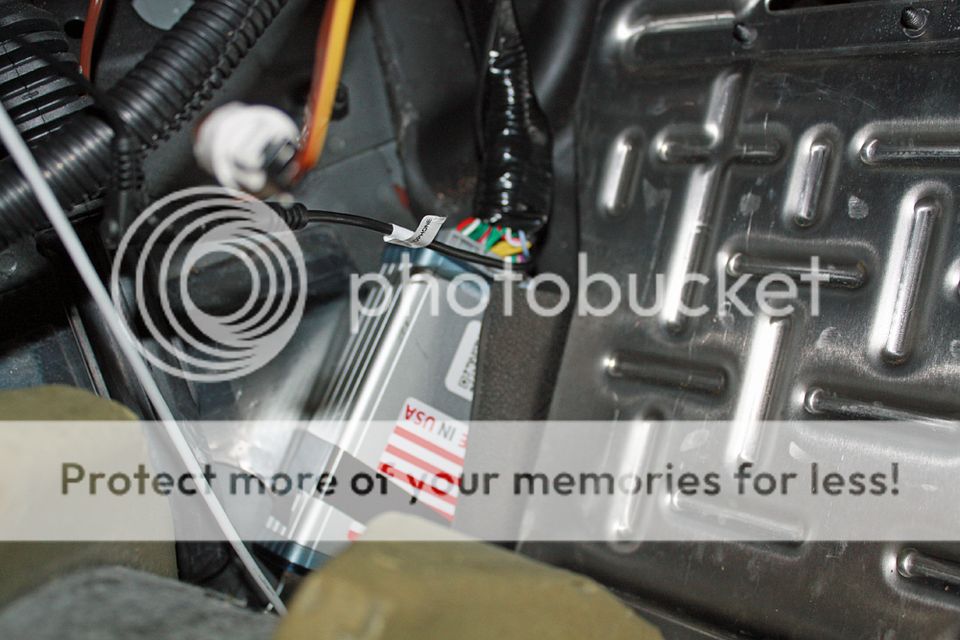
Place the interface in the left rear corner of the footwell. I placed a piece of rubber between the interface and the metal footboard to prevent damage and rattles. Carefully run the wires behind the tunnel carpet and re-install it.
Plug in a USB to lightning cable into the interface. To prevent it from being accidently pulled out of the interface, I taped it to the interface. I placed it into a crack on the left side of the glove box and left enough cable so I could plug it into my phone. When not in use, I can either let it dangle or put it into the glove box. I am using a vent mount for my phone.
Push the carpet back into place. Re-install the panel under the glove box while being sure to put the footwell light back into its holder. You are done!! Enjoy your updated electronics!!
Last edited by jerhofer; Oct 7, 2021 at 09:39 AM.


