
DIY Taillight Bulb Replacement:

Thread Starter
MBWorld Fanatic!
Joined: Sep 2009
Posts: 2,108
Likes: 7
From: Dix Hills, New York
2012 C250 Coupe
DIY Taillight Bulb Replacement:
Ok, so a few of you might be interested in replacing the reverse lights with white LED or the brake lights with red LED's. If so, good news, I documented some pictures of the EXTREMELY easy process! 
First things first, open your trunk and make sure the car is off!
Once your trunk is open, on the right side and left side you will see two easily removable panels. I only documented with pictures of the right (passenger side). But the left (driver side) is the same.
Put your fingers into the gap on the top and push inwards and down. There is a felt tab that inserts into an opening to secure:
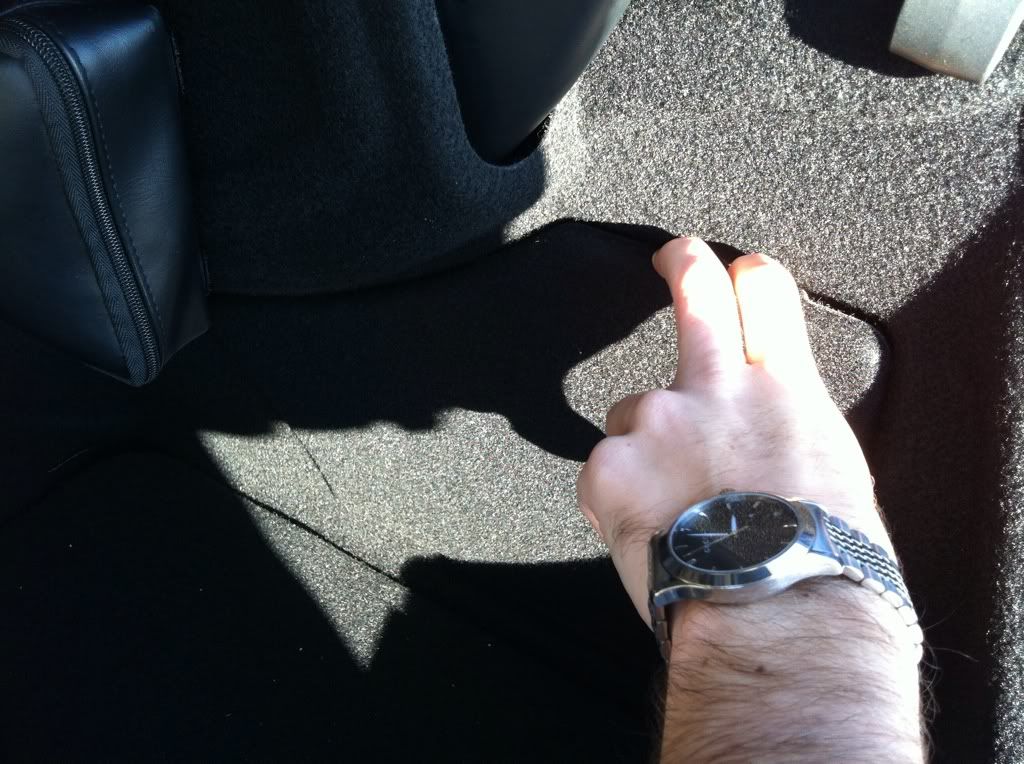
If done correctly, it will come down and look like this:
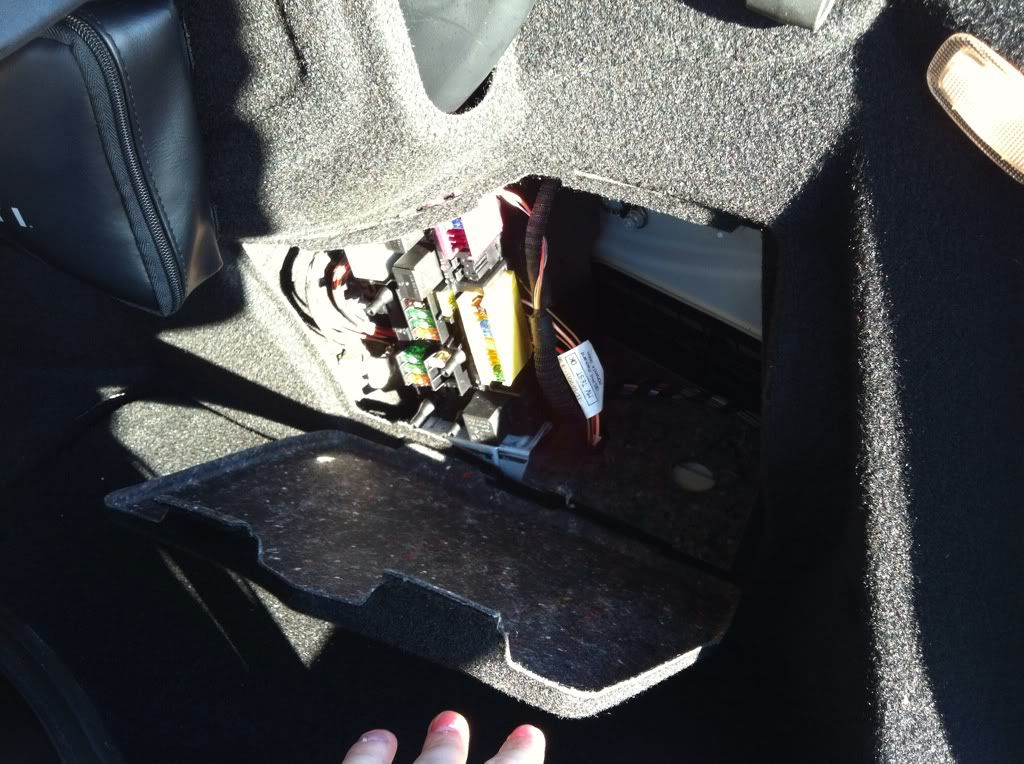
After that, stick your head in the trunk and look at the back of the taillight assembly. You will see this:
Top portion -
Bottom/middle portion -
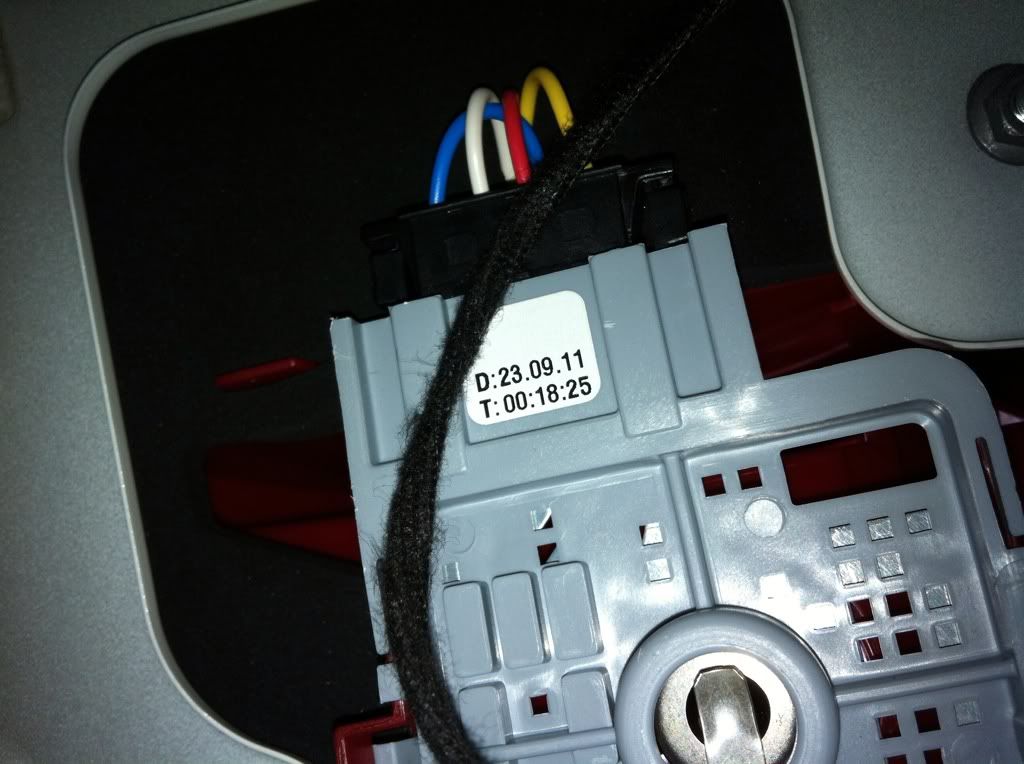
First up, there is a plug at the top of the assembly that you have to unclip. You squeeze in on the two sides and pull upwards to remove, similar to a buckle on a backpack.
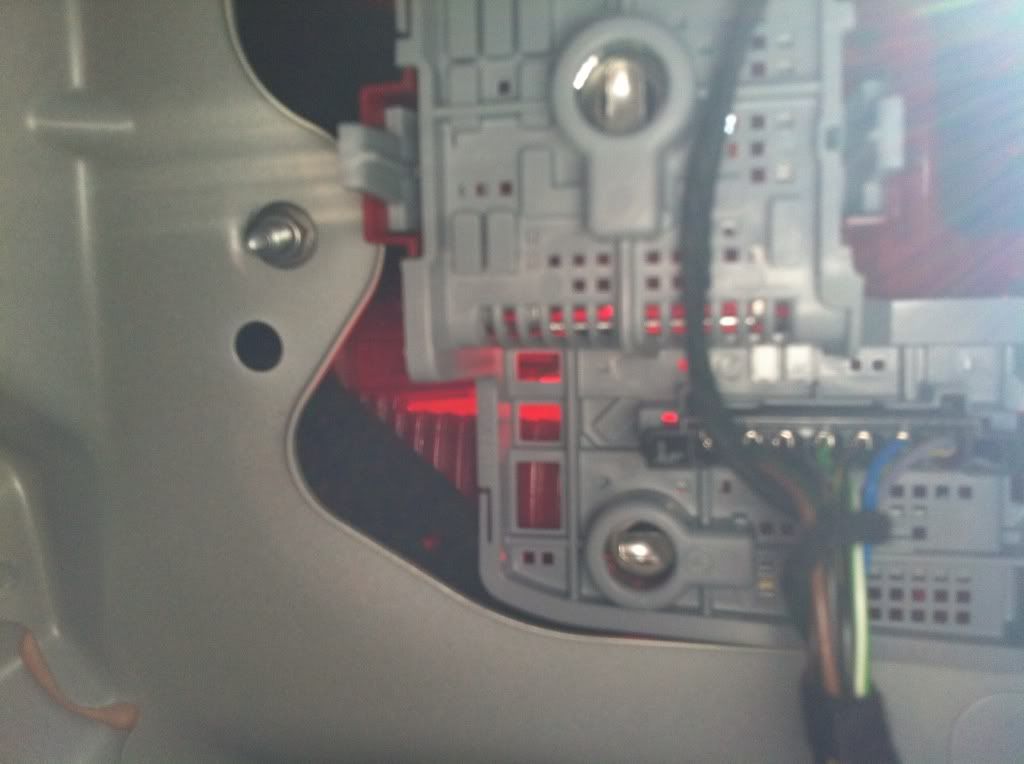
After this, you will see two grey plastic tabs right in the center of the second picture. With your thumb and your pointer or middle finger, push them inwards towards each other and simultaneously pull out the circuit board (toward the front of the vehicle). I don't find in necessary to remove the second bottom plug. You have enough give to easily feed the board through the opening to easily work on it, and helps prevent you from getting the bulbs mixed up and eases in replacement of getting the bulbs to fit back in the holes when putting the board back in to line it up.
You will then see this:
In this picture, I have already replaced the reverse light with an LED. The bulb where the top plug is located is the reverse light bulb. The two bulbs on the bottom (on the right side of the picture) are the two brake light bulbs.
Both the reverse light bulbs and the brake light bulbs are LED bulb type 1156/7506. There are (2) reverse light bulbs total - (1) in each taillight, and (4) brake light bulbs in total - (2) in each taillight.
To remove a bulb, simply push the bulb in towards the circuit board and twist left at the same time. If done right, it will come out easily, like this:
You can see the securing mechanism is a simple "dimple" that moves along a channel and rises to lock in a hole in the circuit board. This is why you must push the bulb inwards first before you twist.
I have used AZNOptics and love the quality and color. Plus, not to mention the price is great (Only $30 per set) so you only need 2 sets for brake light conversion ($60) and one set for reverse light conversion ($30) - well worth it IMO.
They can be found here:
http://aznoptics.com/index.php?main_...ndex&cPath=1_7
I would recommend 1156/7506 LED bayonet in WHITE color for the reverse lights, and for the brake lights, you can do white - but they might be a bit "pink" or you can do red for color while still having a bright light.
Then simply install in the reverse order. HOWEVER - becareful when you go to clip the two tabs of the circuit board back into the car, the plug that you removed may be laying in the way and you don't want to get it stuck, so try to hold the plug out of the way while you clip in the board, then just plug in the plug back to the top, replace the cover, and you are good to go.
I HIGHLY recommend doing the side that I pictured first, as the opening for the driver side taillight is much smaller, and as such, is much harder to see/understand. So after doing the first one it will be much quicker and easier since you know and understand how it works.
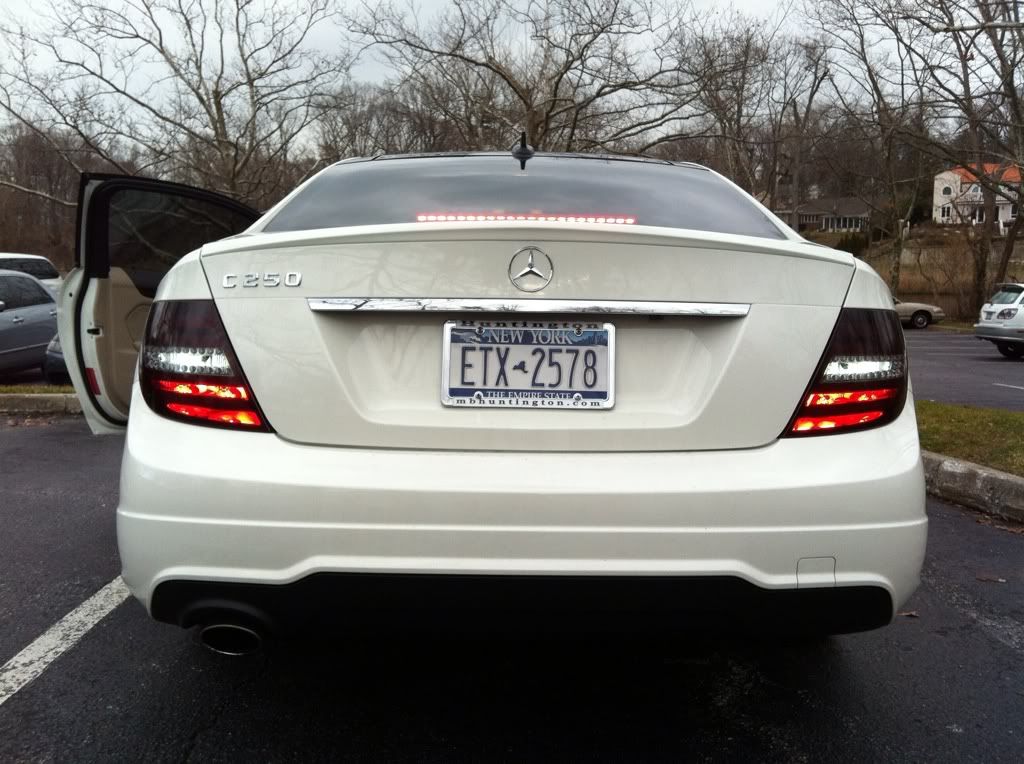
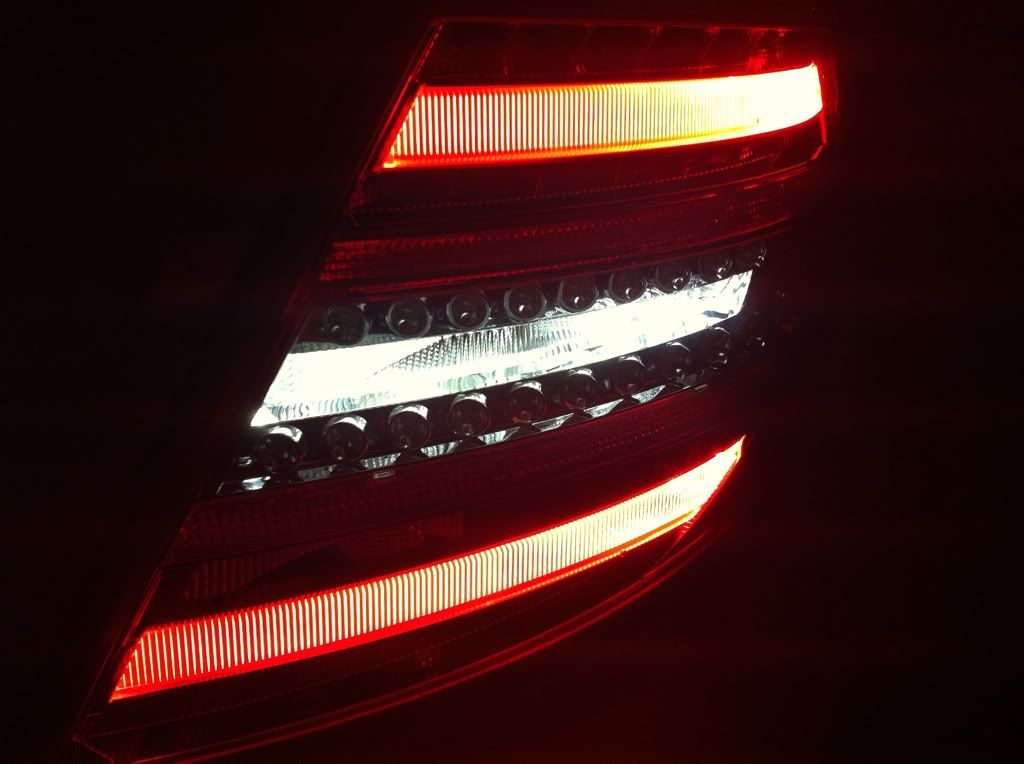
I myself have not yet done the brake lights in LED, only the reverse lights. Here are some pics of what it looks like:
First things first, open your trunk and make sure the car is off!
Once your trunk is open, on the right side and left side you will see two easily removable panels. I only documented with pictures of the right (passenger side). But the left (driver side) is the same.
Put your fingers into the gap on the top and push inwards and down. There is a felt tab that inserts into an opening to secure:
If done correctly, it will come down and look like this:
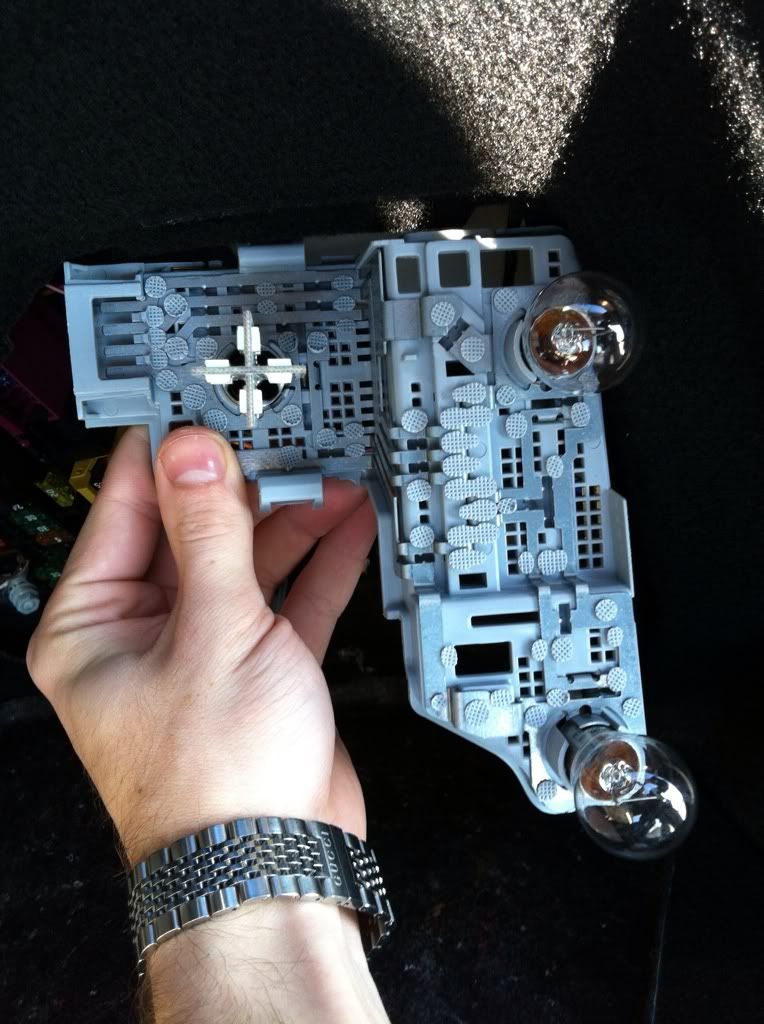
After that, stick your head in the trunk and look at the back of the taillight assembly. You will see this:
Top portion -
Bottom/middle portion -
First up, there is a plug at the top of the assembly that you have to unclip. You squeeze in on the two sides and pull upwards to remove, similar to a buckle on a backpack.
After this, you will see two grey plastic tabs right in the center of the second picture. With your thumb and your pointer or middle finger, push them inwards towards each other and simultaneously pull out the circuit board (toward the front of the vehicle). I don't find in necessary to remove the second bottom plug. You have enough give to easily feed the board through the opening to easily work on it, and helps prevent you from getting the bulbs mixed up and eases in replacement of getting the bulbs to fit back in the holes when putting the board back in to line it up.
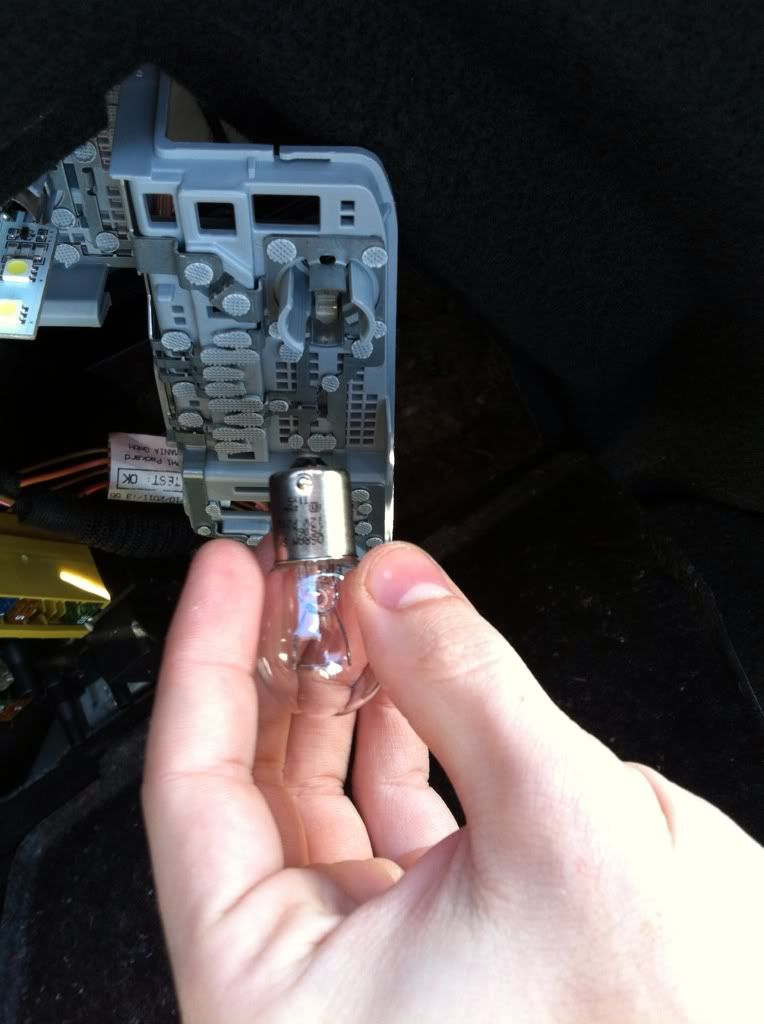
You will then see this:
In this picture, I have already replaced the reverse light with an LED. The bulb where the top plug is located is the reverse light bulb. The two bulbs on the bottom (on the right side of the picture) are the two brake light bulbs.
Both the reverse light bulbs and the brake light bulbs are LED bulb type 1156/7506. There are (2) reverse light bulbs total - (1) in each taillight, and (4) brake light bulbs in total - (2) in each taillight.
To remove a bulb, simply push the bulb in towards the circuit board and twist left at the same time. If done right, it will come out easily, like this:
You can see the securing mechanism is a simple "dimple" that moves along a channel and rises to lock in a hole in the circuit board. This is why you must push the bulb inwards first before you twist.
I have used AZNOptics and love the quality and color. Plus, not to mention the price is great (Only $30 per set) so you only need 2 sets for brake light conversion ($60) and one set for reverse light conversion ($30) - well worth it IMO.
They can be found here:
http://aznoptics.com/index.php?main_...ndex&cPath=1_7
I would recommend 1156/7506 LED bayonet in WHITE color for the reverse lights, and for the brake lights, you can do white - but they might be a bit "pink" or you can do red for color while still having a bright light.
Then simply install in the reverse order. HOWEVER - becareful when you go to clip the two tabs of the circuit board back into the car, the plug that you removed may be laying in the way and you don't want to get it stuck, so try to hold the plug out of the way while you clip in the board, then just plug in the plug back to the top, replace the cover, and you are good to go.
I HIGHLY recommend doing the side that I pictured first, as the opening for the driver side taillight is much smaller, and as such, is much harder to see/understand. So after doing the first one it will be much quicker and easier since you know and understand how it works.
I myself have not yet done the brake lights in LED, only the reverse lights. Here are some pics of what it looks like:
Last edited by jctevere; Feb 6, 2012 at 01:44 AM.


Newbie
Joined: Oct 2013
Posts: 6
Likes: 1
Mercedes C300 2011
Reverse Light Replacement with LED
Thanks for your "how-to." Just ordered the LED's you specified. Found others on Amazon for less, but there were a few dissatisfied customers, so I felt better with these you actually used on a MB. I never feel like my reverse lights are bright enough.


