
C250 Serpentine Belt replacement

Thread Starter
Member
Joined: Sep 2015
Posts: 246
Likes: 25
From: Plymouth, MA
2008 SL550
C250 Serpentine Belt replacement
So I've finally reached the point of replacing my serpentine belt on the 12' C250 (M271 engine) and can't find a DIY for this engine model. I've replaced plenty of belts before but I'm not sure of the appropriate access. Do I go from underneath or what is the best procedure from the top? I appreciate any help, thanks!
Patrick
Patrick

Member


Joined: Dec 2018
Posts: 225
Likes: 21
From: Mid-Atlantic USA
2014 C250 Luxury
Arise, old thread! 
Girlfriend has a '14 C250 sedan. (If the sedan and coupe engine bays are different to the point that any advice from a coupe owner wouldn't apply, let me know.) The W204 forum is 99% C300 stuff, and I haven't found anything about doing the serpentine belt on the C250.
So, other than it's best to do it from the bottom, what do I need to know? I've got the belt, and briefly popped the hood and took a look at the belt. I quickly realized that getting to the belt from above would be a bit of a PITA, but haven't had a chance to jack the front end up or put the car on a lift to take a look from below. Much like pfarah77, I've done belts on other vehicles before, so I'll probably figure it out once I can see what the hell I'm dealing with, but if there are any tricks or special tools I need, please let me know.
Thanks!
Member
Joined: Dec 2018
Posts: 225
Likes: 21
From: Mid-Atlantic USA
2014 C250 Luxury
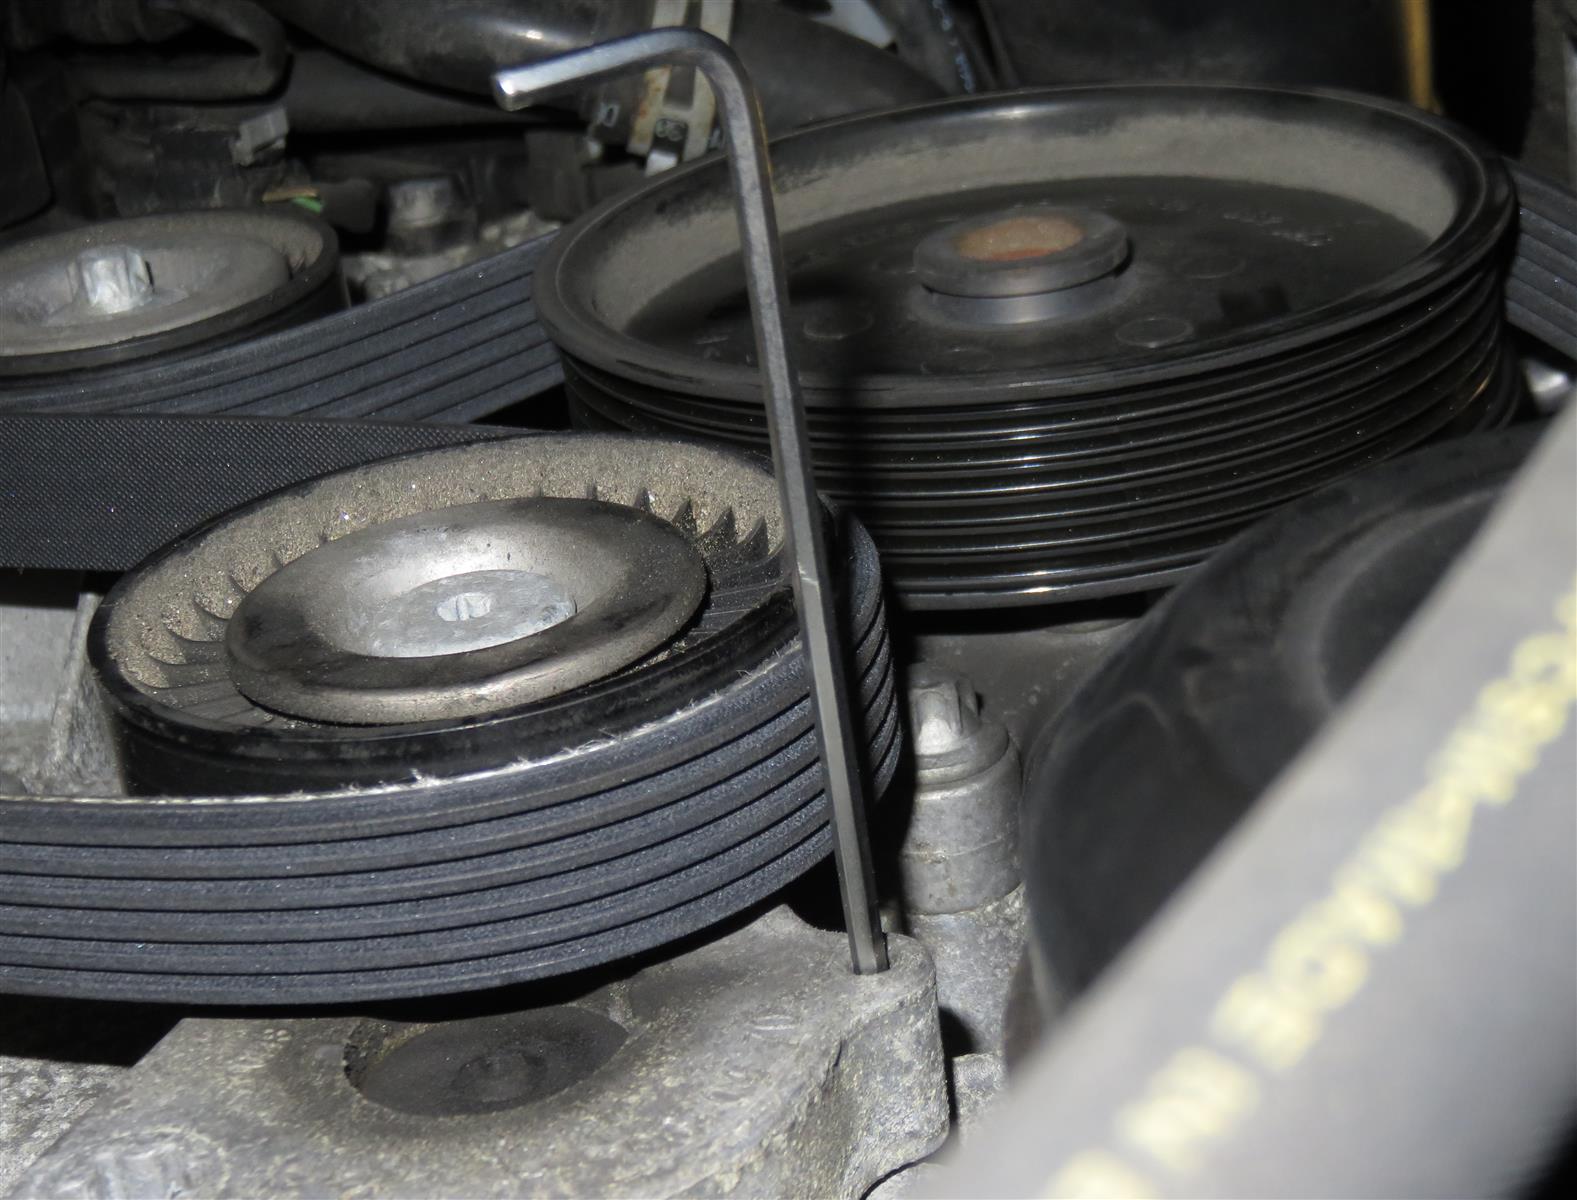
To answer my own question, you need a T60 bit** to take the tension off the tensioner, and then something a couple/few inches long and thin (I used a small allen wrench) to "lock" the tensioner in the untensioned position so you can get the old belt off and the new belt on.
[** - I used a T60, because that's what I had. It fit perfectly fine. However, it looked to me like the star opening [i]may actually be a Torx Plus. Hard to tell, since I obviously couldn't get a straight-on view to clearly see the shape of the star.]
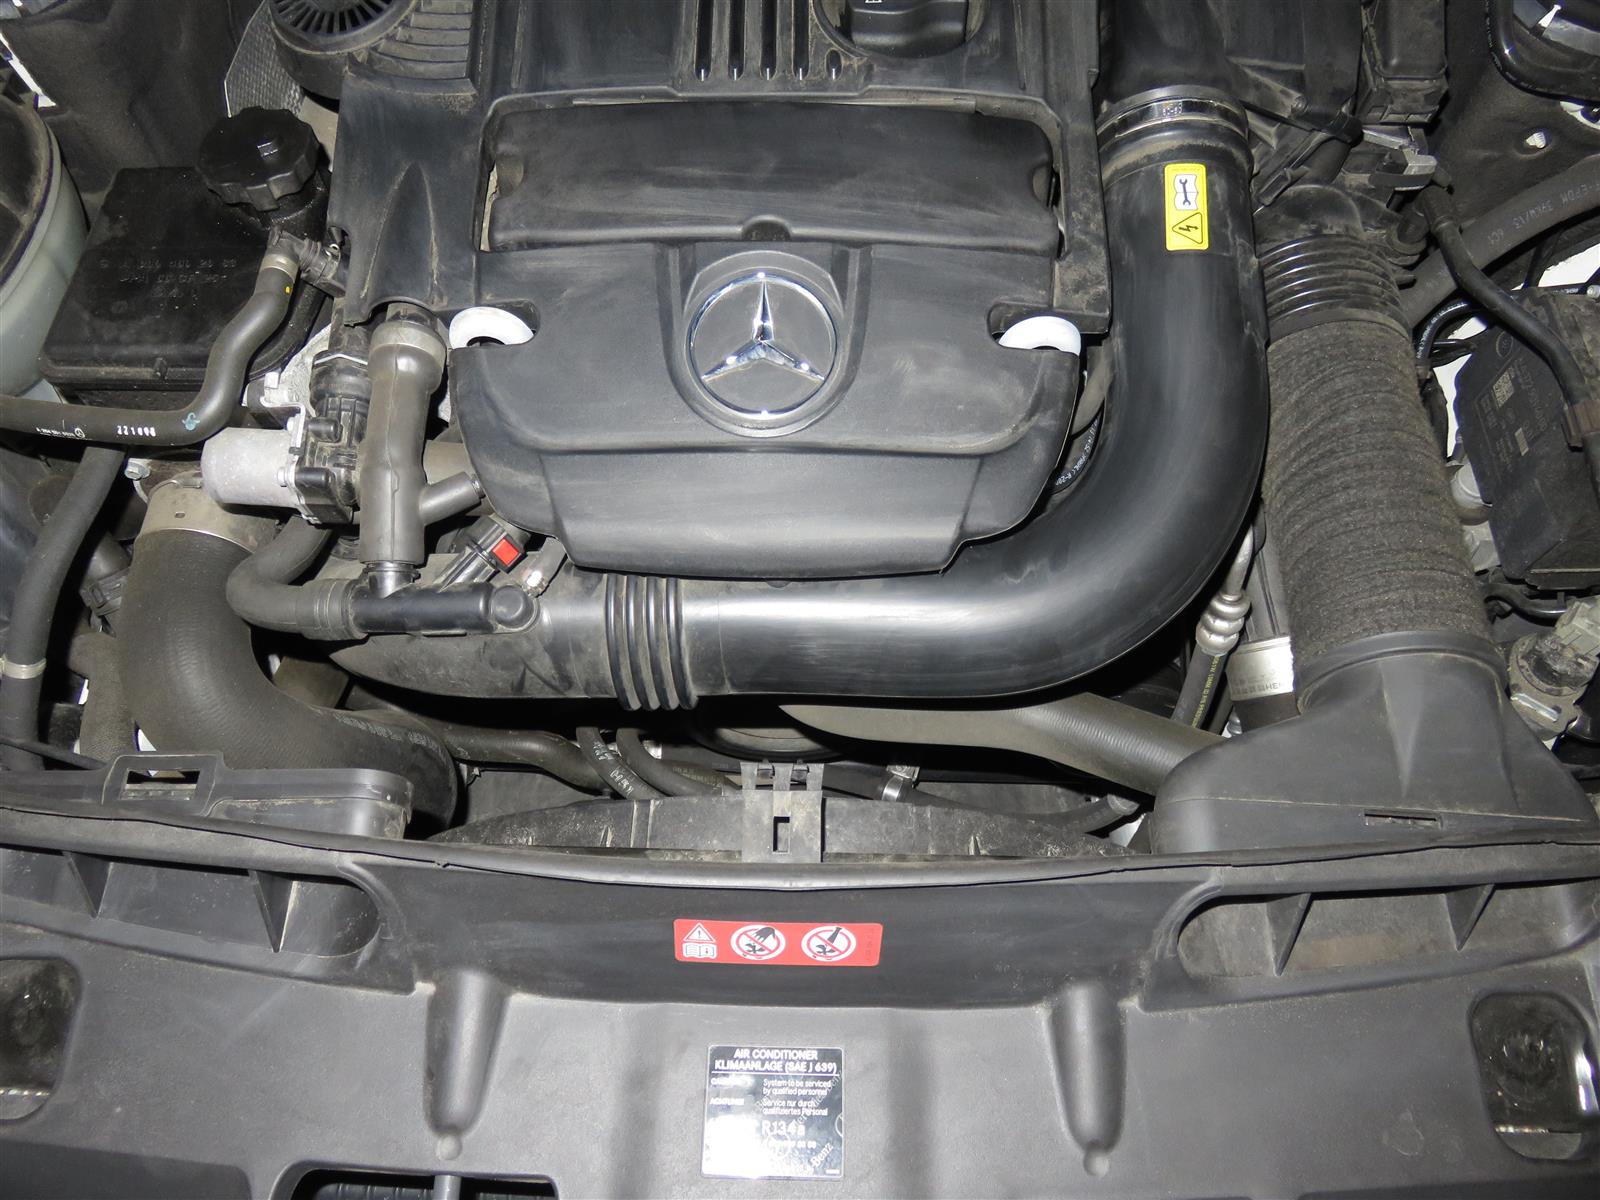
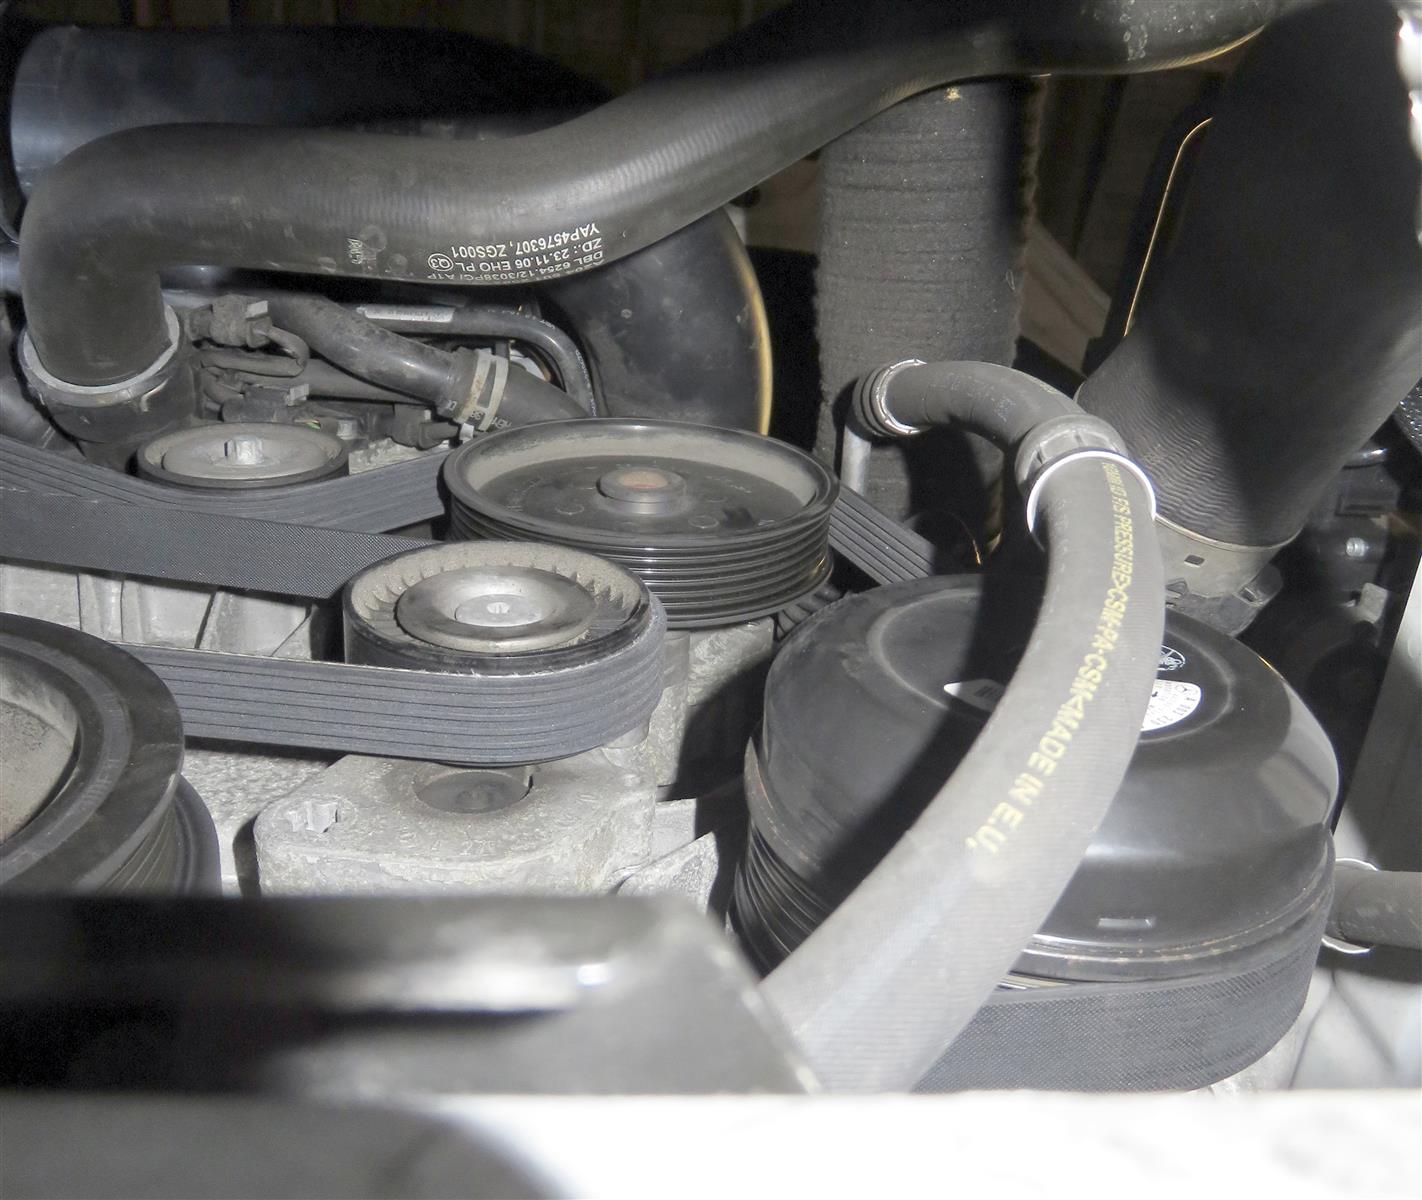
Pic from above. Nope, not getting to the belt from here! The intake tract is very much in the way of getting one's arms down in there, and removing that intake pipe is not a trivial task from what I could see. So, to the lift we go!
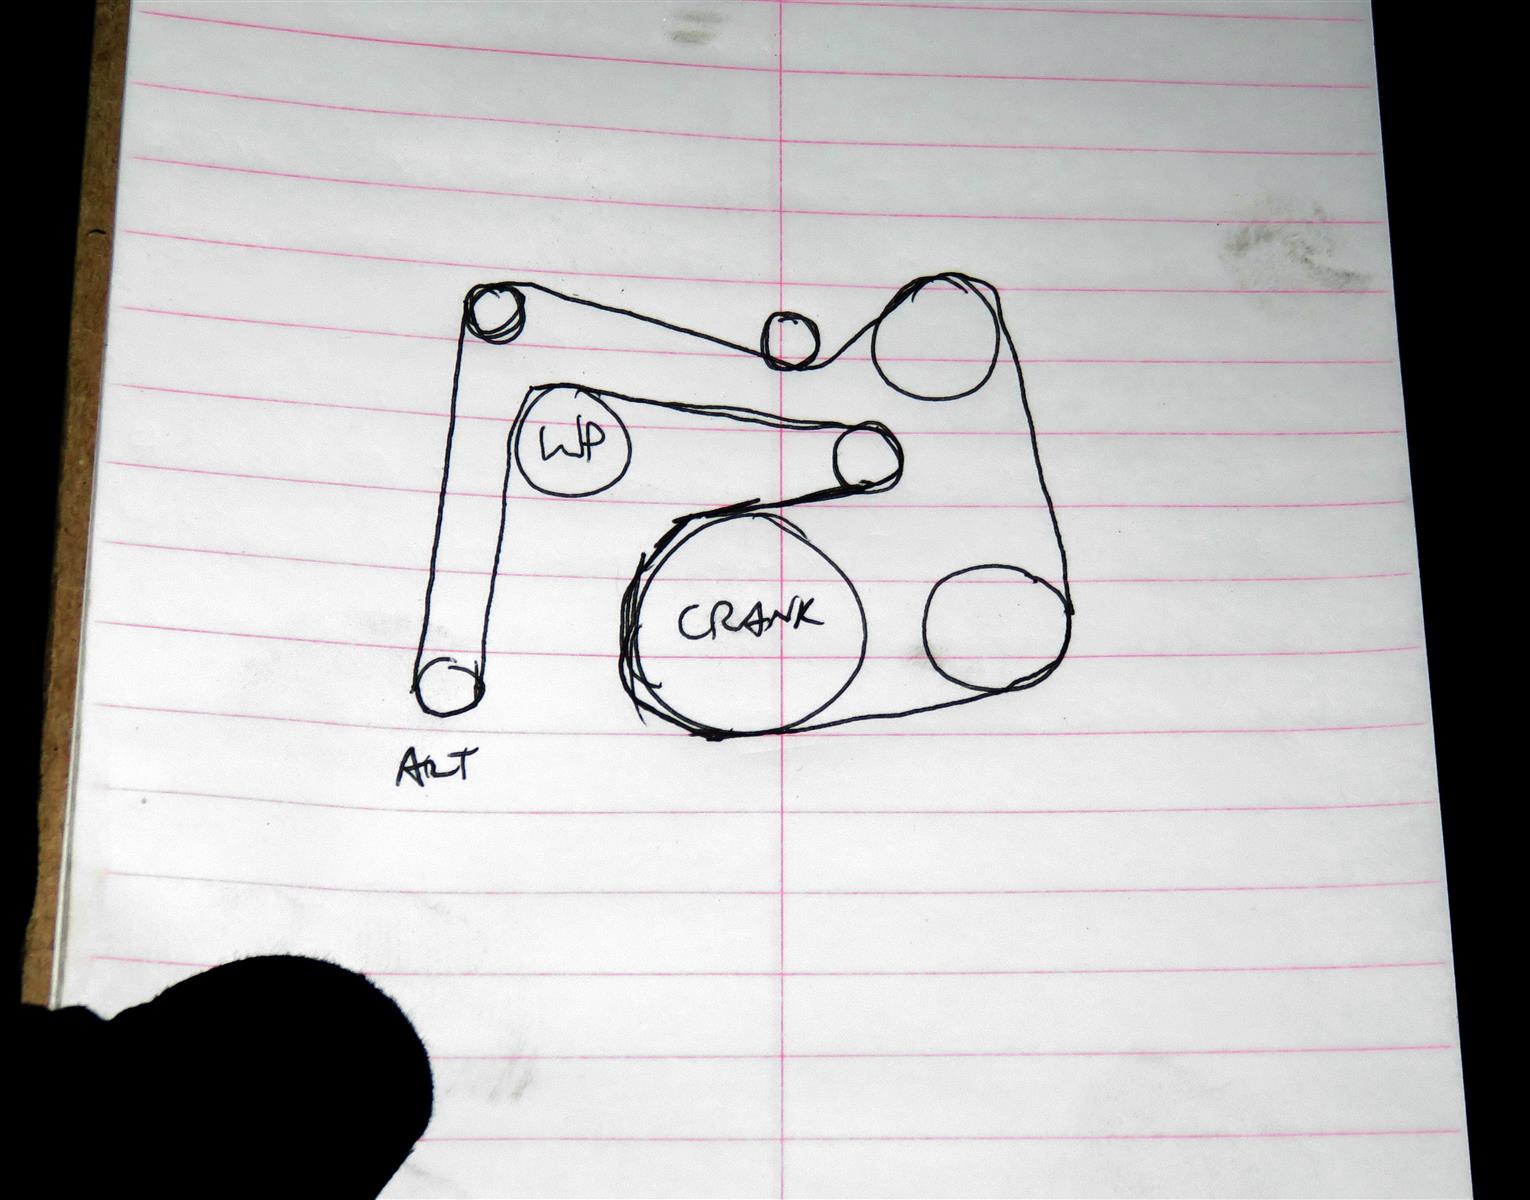
Looking up from underneath I drew myself a diagram so I knew where I needed to route the new belt.
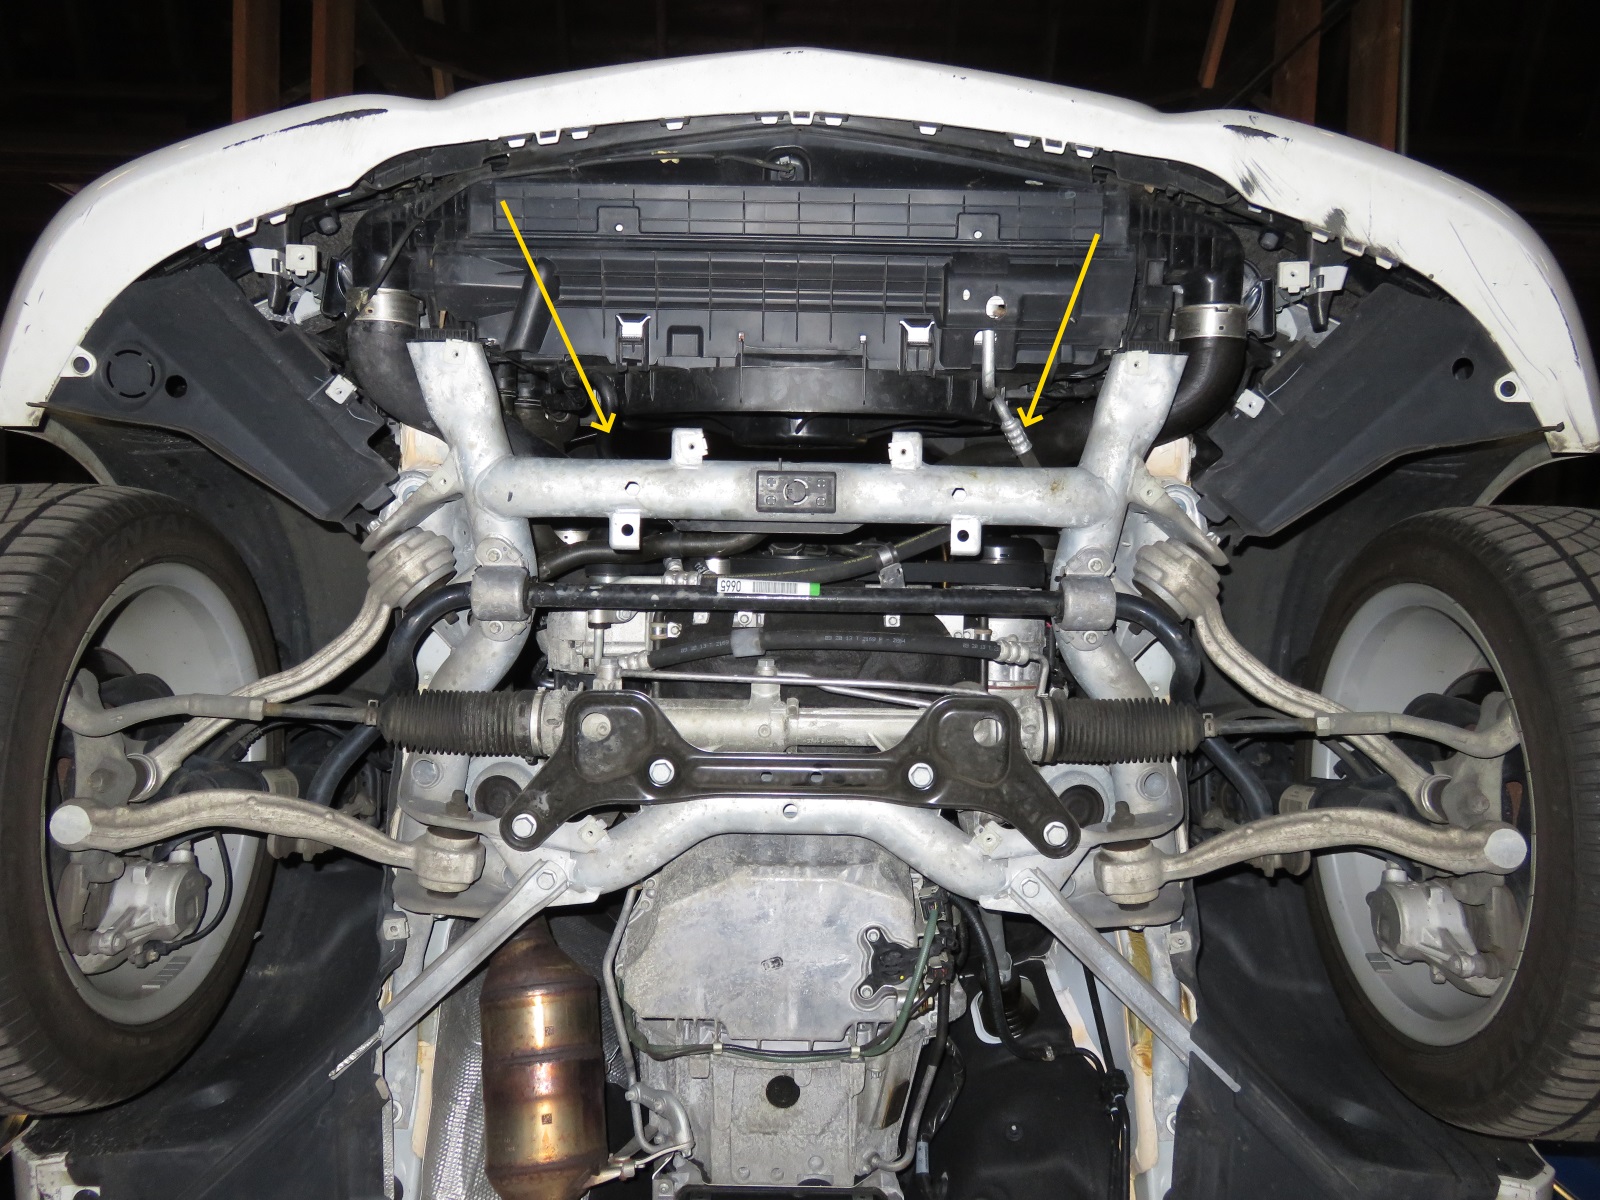
Although access from below is better, it's still not great. If you've got fat or short arms, it's gonna be tough. But there are gaps on both sides (on either side of the cooling fan, yellow arrows) where you can reach in/up to get to the belt.
Looking up on the passenger side. Crank pulley is out of view off the right side of the picture.
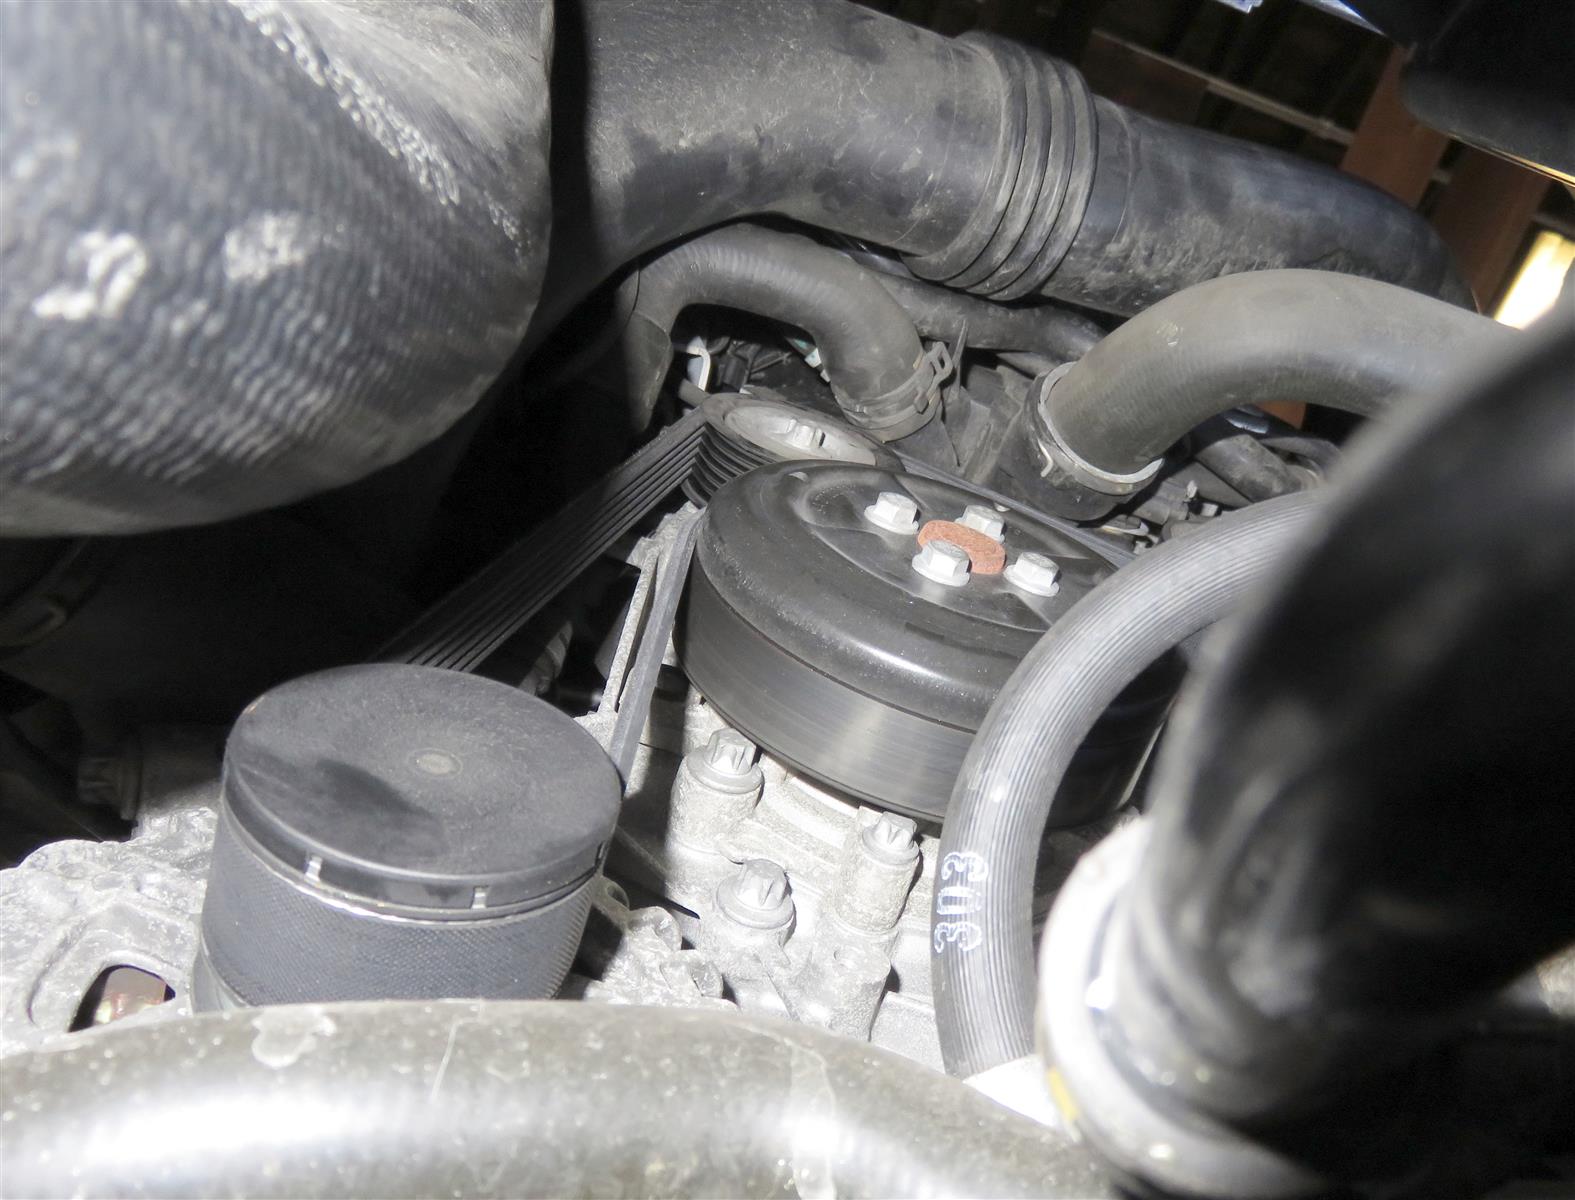
Looking up on the driver side. Crank pulley is in the bottom left of the picture, with the tensioner pretty much in the center of the picture.
I used a T60 Torx bit on a 1/2" ratchet to loosen the tensioner; with the handle of the ratchet pointing towards the passenger side, I pulled down to take tension off the belt. In order to have both hands free to manipulate the new belt into position, I "locked" the tensioner by putting an allen wrench through a small hole on the tensioner so that it would catch on the bracket or whatever was behind the tensioner. I assume that's what that hole is there for; if not, it came in handy anyway!
Once I had the new belt properly routed, I used the wrench and T60 to take tension off the allen wrench, pulled the allen wrench out, then gently let the tensioner put tension on the belt. Good to go!
Bonus picture of the underside of a C250 automatic with the 3 front underpanels removed. (Two pictures pasted together, so there's some mismatch due to parallax.)

[** - I used a T60, because that's what I had. It fit perfectly fine. However, it looked to me like the star opening [i]may actually be a Torx Plus. Hard to tell, since I obviously couldn't get a straight-on view to clearly see the shape of the star.]
Pic from above. Nope, not getting to the belt from here! The intake tract is very much in the way of getting one's arms down in there, and removing that intake pipe is not a trivial task from what I could see. So, to the lift we go!
Looking up from underneath I drew myself a diagram so I knew where I needed to route the new belt.
Although access from below is better, it's still not great. If you've got fat or short arms, it's gonna be tough. But there are gaps on both sides (on either side of the cooling fan, yellow arrows) where you can reach in/up to get to the belt.
Looking up on the passenger side. Crank pulley is out of view off the right side of the picture.
Looking up on the driver side. Crank pulley is in the bottom left of the picture, with the tensioner pretty much in the center of the picture.
I used a T60 Torx bit on a 1/2" ratchet to loosen the tensioner; with the handle of the ratchet pointing towards the passenger side, I pulled down to take tension off the belt. In order to have both hands free to manipulate the new belt into position, I "locked" the tensioner by putting an allen wrench through a small hole on the tensioner so that it would catch on the bracket or whatever was behind the tensioner. I assume that's what that hole is there for; if not, it came in handy anyway!
Once I had the new belt properly routed, I used the wrench and T60 to take tension off the allen wrench, pulled the allen wrench out, then gently let the tensioner put tension on the belt. Good to go!
Bonus picture of the underside of a C250 automatic with the 3 front underpanels removed. (Two pictures pasted together, so there's some mismatch due to parallax.)
Last edited by AAIIIC; Apr 20, 2019 at 05:17 PM.


