


DIY: Interior Motion Sensor (IMS) Install


Newbie
Joined: Jan 2007
Posts: 7
Likes: 0
This connector (blue-brown wire) goes to the rear door. Then it is soldered on a thin tape which is glued on the glass. If the glass brakes it trigers the alram.

Junior Member
Joined: Aug 2016
Posts: 39
Likes: 0
W203 220 cdi
This was not very fun.
I am not a trained professional. I am just sharing my ridiculous experience with you guys. I don't wanna be the reason why someone cuts a hole in their headliner and stuff decides to not work, so follow these instructions at your own risk.
Hardware:
A 203 821 95 51 - Sensor
A 203 540 82 06 - Harness
A 203 822 02 14 - Mounting Bracket
Parts total was less than $280.
Tools required:
6 sided T20 or T25
Small flat headed screw driver
Medium flat headed screw driver
Soft Towel
Optional:
12" ruler
2' useless string
Drinks
Friends
Basic steps:
Pop the front dome light out and let it hang. There are tons of wires to keep it up.
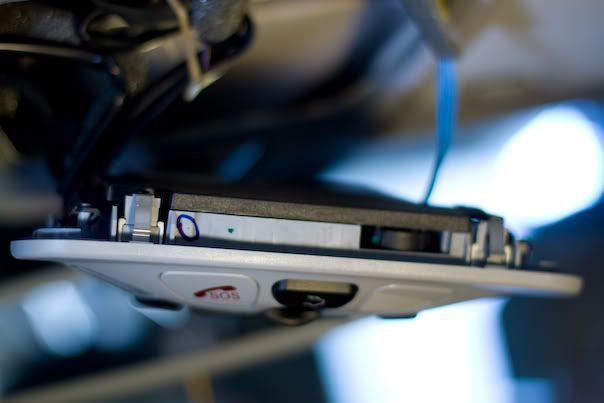
Pop out the sun visor's light.
Remove the driver side sun visor:
This is pretty well documented, but it involves removing three screws. The side that holds the sun visor will come completely off while the other part just comes loose and will stay attached to the head liner.
Remove front and rear driver side grab handles:
This isn't really documented anywhere, but there are two covers on each grab handle where they attach to the ceiling. Under each cover, there are two flat holes that are hidden. Put the small flat head screw driver in the smaller hole and push towards the outside of the car. This will push a part of the big plastic clips holding the grab handles to the ceiling out of the lock position. With your other hand, gently, put the medium sized screwdriver between the headliner and the grab handle mounting point. Pry away w/ the medium sized screw driver. Its in there pretty good, so give it a good prying, but be sure NOT to mess up your headliner in the process.
Pry the srs tab up on the driver side C pillar. Remove the 6 sided bolt in there.
Pry the rear dome light out and let it hang.
At this point, you should have both from and rear dome lights + the driver side sun visor light hanging while the head liner on the driver side is ONLY held up by the interior of each of the A, B, and C pillars.
Before we can loosen the each of the interior portions of the pillars, we have to remove the weather strips that hide how the pillars are held in.
Remove the weather strips around the driver side doors:
Just pry again the body of the car with the medium flat head screw driver, but be sure to place a towel or something soft surface between the screw driver and body.
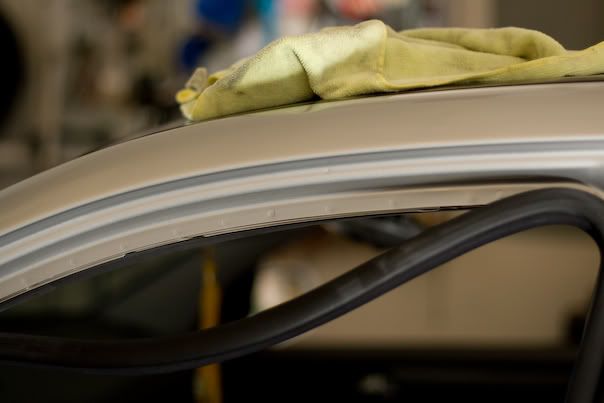
Pull out interior covers of the A pillar:
Gently pull the interior covers down. The clips stubbornly go in and out...
Pull out interior covers of the B pillar:
There are 4 clips that hold this pillar to the frame. Pry them out the against the body with the medium sized screw driver remembering to place a towel between the screw driver. Two of these clips are yellow and two are black. When you remove this cover, the seat belt will still be running through it. Take a look at how the adjustable seat belt mechanism works so when you reinstall it, you wont mess it up multiple times and remove/reinstall it multiple times incorrectly like I did.
Pull out the interior covers of the C pillar:
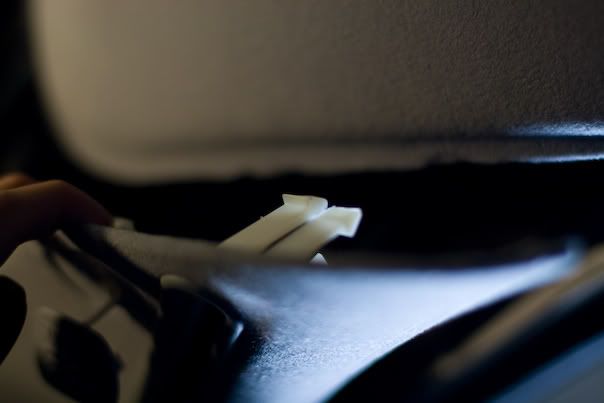
Much like the A pillar, you can just kinda pull. Here are a pic of the clips that hold them in:
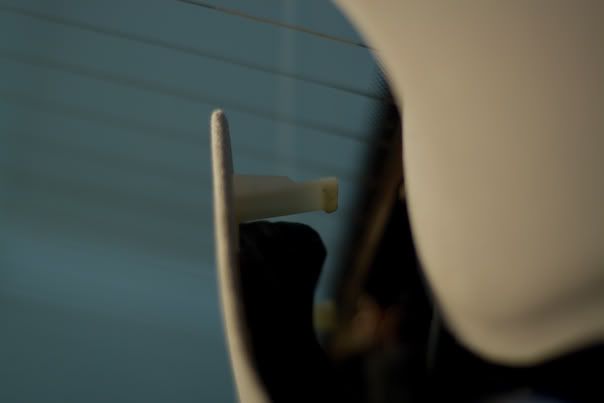
With all three pillars loosely attached to the car, we should have enough space to lay down our wiring from the driver side of the car, but first - we have to cut a hole in the rear portion of the head liner.... Just cut that hole to make the bracket stay. Its pretty self explanatory and sounds scary as shi.., but by the time you've come to this point you'll be ready to rip apart the rest of the car's interior anyways.
Once you've cut the appropriate hole for the bracket, install the bracket into the headliner.
Use the driver side space in between the headliner and the roof to guide your wires from your front dome light to the hole in the ceiling.
I was able to easily run the wire from the driver side door to the dome light, but running the wire to the new hole was the hard part. Here, I taped one end of my useless string onto the end of a ruler, and pushed the ruler through my hole out towards my rear driver side door. As a result, I was able to pull out the ruler from the rear driver side door + grab the end of the string. I tied this string to the wires I wanted to run to the whole, and just pulled them through to the hole.
Plug the harness in at the dome light and at the sensor. Push the sensor into the bracket carefully and it'll stay in place.
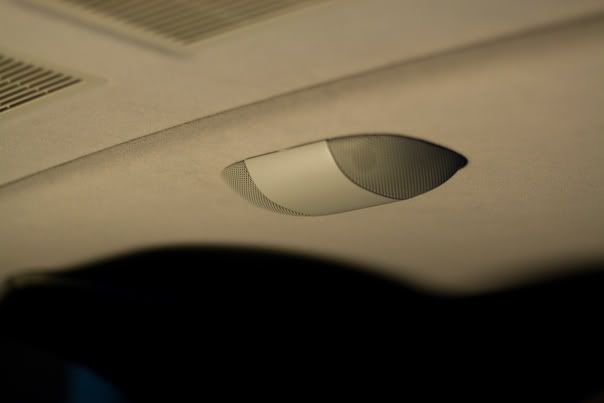
Reassemble in reverse order paying special attention to the B pillar and the mechanism it uses to allow the seat belt to slide up and down! Also make sure that the A and C pillars reattach appropriately - you may end up thumping the pillars a bit to get the clips to lock again.
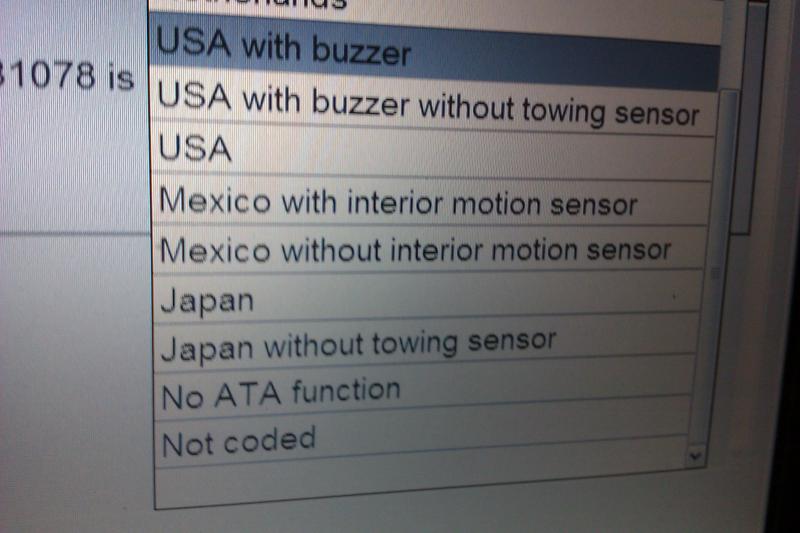
Afterward, take your star diag (cuz we all got like 3 extra, right?) and have the rear SAM set to Mexico w/ IMS. I think. I haven't gotten this far yet, but I know I have to set something in the rear to Mexico + IMS. You're gonna have to vacum out your car too because the headliner is made out of some weird flakey material...
I know this seems a bit ridiculous of a process for a bit "more" security when our cars are already armed w/ a pretty good system. I dont think I should share what I have found w/ our alarm systems publicly, so if you need reasons for installing this - PM me. At this point, I feel its a necessity.
Additionally, I can see why Mercedes has a special "soft plastic wedge tool" now that I've done this process... Everything seems to be clipped on or wedged in place.
Have fun + good luck. I highly suggest a friend / drink (same thing?) for this because its very tedious.
Special thanks to Waveykat for helping guide me through this. If this fails, blame him.
Edit: Pricing info included
I am not a trained professional. I am just sharing my ridiculous experience with you guys. I don't wanna be the reason why someone cuts a hole in their headliner and stuff decides to not work, so follow these instructions at your own risk.
Hardware:
A 203 821 95 51 - Sensor
A 203 540 82 06 - Harness
A 203 822 02 14 - Mounting Bracket
Parts total was less than $280.
Tools required:
6 sided T20 or T25
Small flat headed screw driver
Medium flat headed screw driver
Soft Towel
Optional:
12" ruler
2' useless string
Drinks
Friends
Basic steps:
Pop the front dome light out and let it hang. There are tons of wires to keep it up.
Pop out the sun visor's light.
Remove the driver side sun visor:
This is pretty well documented, but it involves removing three screws. The side that holds the sun visor will come completely off while the other part just comes loose and will stay attached to the head liner.
Remove front and rear driver side grab handles:
This isn't really documented anywhere, but there are two covers on each grab handle where they attach to the ceiling. Under each cover, there are two flat holes that are hidden. Put the small flat head screw driver in the smaller hole and push towards the outside of the car. This will push a part of the big plastic clips holding the grab handles to the ceiling out of the lock position. With your other hand, gently, put the medium sized screwdriver between the headliner and the grab handle mounting point. Pry away w/ the medium sized screw driver. Its in there pretty good, so give it a good prying, but be sure NOT to mess up your headliner in the process.
Pry the srs tab up on the driver side C pillar. Remove the 6 sided bolt in there.
Pry the rear dome light out and let it hang.
At this point, you should have both from and rear dome lights + the driver side sun visor light hanging while the head liner on the driver side is ONLY held up by the interior of each of the A, B, and C pillars.
Before we can loosen the each of the interior portions of the pillars, we have to remove the weather strips that hide how the pillars are held in.
Remove the weather strips around the driver side doors:
Just pry again the body of the car with the medium flat head screw driver, but be sure to place a towel or something soft surface between the screw driver and body.
Pull out interior covers of the A pillar:
Gently pull the interior covers down. The clips stubbornly go in and out...
Pull out interior covers of the B pillar:
There are 4 clips that hold this pillar to the frame. Pry them out the against the body with the medium sized screw driver remembering to place a towel between the screw driver. Two of these clips are yellow and two are black. When you remove this cover, the seat belt will still be running through it. Take a look at how the adjustable seat belt mechanism works so when you reinstall it, you wont mess it up multiple times and remove/reinstall it multiple times incorrectly like I did.
Pull out the interior covers of the C pillar:
Much like the A pillar, you can just kinda pull. Here are a pic of the clips that hold them in:
With all three pillars loosely attached to the car, we should have enough space to lay down our wiring from the driver side of the car, but first - we have to cut a hole in the rear portion of the head liner.... Just cut that hole to make the bracket stay. Its pretty self explanatory and sounds scary as shi.., but by the time you've come to this point you'll be ready to rip apart the rest of the car's interior anyways.
Once you've cut the appropriate hole for the bracket, install the bracket into the headliner.
Use the driver side space in between the headliner and the roof to guide your wires from your front dome light to the hole in the ceiling.
I was able to easily run the wire from the driver side door to the dome light, but running the wire to the new hole was the hard part. Here, I taped one end of my useless string onto the end of a ruler, and pushed the ruler through my hole out towards my rear driver side door. As a result, I was able to pull out the ruler from the rear driver side door + grab the end of the string. I tied this string to the wires I wanted to run to the whole, and just pulled them through to the hole.
Plug the harness in at the dome light and at the sensor. Push the sensor into the bracket carefully and it'll stay in place.
Reassemble in reverse order paying special attention to the B pillar and the mechanism it uses to allow the seat belt to slide up and down! Also make sure that the A and C pillars reattach appropriately - you may end up thumping the pillars a bit to get the clips to lock again.
Afterward, take your star diag (cuz we all got like 3 extra, right?) and have the rear SAM set to Mexico w/ IMS. I think. I haven't gotten this far yet, but I know I have to set something in the rear to Mexico + IMS. You're gonna have to vacum out your car too because the headliner is made out of some weird flakey material...
I know this seems a bit ridiculous of a process for a bit "more" security when our cars are already armed w/ a pretty good system. I dont think I should share what I have found w/ our alarm systems publicly, so if you need reasons for installing this - PM me. At this point, I feel its a necessity.
Additionally, I can see why Mercedes has a special "soft plastic wedge tool" now that I've done this process... Everything seems to be clipped on or wedged in place.
Have fun + good luck. I highly suggest a friend / drink (same thing?) for this because its very tedious.
Special thanks to Waveykat for helping guide me through this. If this fails, blame him.
Edit: Pricing info included
How to engage "Interior Safeguard" on a C220 2004 classic, i have tried yesterday locked the door left driver's window open to simulate some movement inside the vehicle and only the front and mirror indicators turned on, no beep or any sound.
The dealer selling the vehicle had no clue how it works and didnt even know that the vehicle had a motion sensor inside.
So how to engage and why there is no sound can someone tell me how should i proceed to troubleshoot it.
Thanks













