When you click on links to various merchants on this site and make a purchase, this can result in this site earning a commission. Affiliate programs and affiliations include, but are not limited to, the eBay Partner Network.
Looks like my starter decided to give up the ghost at 19 years and 246k km. Starter worked fine just 10 minutes earlier. Turned the key and heard 1 crank. After that, there was simply a clicking sound.
Disclaimer - everything here is to the best of my knowledge, but I can't guarantee 100% accuracy. If something here turns out to be incorrect, please let me know and I will update the posts.
This DIY applies to the M271 engine which is MY2003, 2004, 2005, and models C180K, C200K, and C230K. The instructions should be somewhat similar to the other engines for this platform.
If faced with a "no crank, no start" situation, this would be my troubleshooting procedure in this order:
1) Check battery voltage. This can either be done with a multimeter, or (MY2003-2004) turning the key to position 1 and making sure the cluster display is on the main (odometer) display and pushing the reset button 3 times. The cluster will beep once. There will now be an extra set of menus (push the next/previous menu button, then the up/down buttons on the steering wheel) that show the battery voltage, VIN, oil level, and a menu for dyno mode. A healthy battery will be 12.8V when the engine is shut off after it has been driven for a while. If this is below 12.0V, the battery needs to be replaced. I once had the battery go bad and the car refused to crank below 11V (my understanding is it is a safety feature). The point is that the culprit may actually be a dead battery and not a bad starter in this scenario.
For MY2002, the special menu is (I think) holding the trip/reset button for some 30s while the key is in position 1. Maybe someone can verify this.
2) Check fuses 31, 52, 57. 31 is next to the driver's side front door hinge. A pick tool is best as there is a small hole that is perfect for prying out the side panel. 52 and 57 are in the front SAM which is in the engine compartment. While everything is open, if it hasn't already been done, replace fuse 52 (15A) with a 20A fuse, even if the 15A isn't blown. There is a TSB for this. Maybe someone can post the link.
3) Check the starter relay. The quick and dirty test would be to roll the driver's window down, pop the hood, open the fuse box cover, then turn the key to Position 3 and listen for a click. A failed relay is possible but very unlikely, as these things are very durable. I knew mine wasn't broken so I didn't do this part, but if the SAM has several of the same relay (as in same colour and PN), swap relays and see if the problem goes away.
4) Test the fusible link to the starter, by using continuity mode with a multimeter. I skipped this step personally as I didn't think there were any issues with mine. Can't comment too much but it may be worth looking into.
5) The starter is probably toast. Read on.
Last edited by slammer111; Oct 31, 2022 at 06:04 AM.
Krazy glue or some sort of adhesive/epoxy for gluing a nylon cap to a metal nut. Just need a drop.
Ratchets, extensions, torque wrench
Buddy (recommended) - I found certain parts to be easier with a second set of hands, though I guess this can be optional. Be sure to keep them happy with food and drink.
Cable type hose clamp pliers - for disconnecting air duct between intake box and supercharger muffler. Some people managed to skip this step but I couldn't figure out how for the life of me.
Painter's tape (recommended) for taping up any sharp metal edges. I was banging random parts all over the engine bay and took off some paint. Don't make the same mistake. Specifically I recommend taping up the extreme edges of the starter, the refrigerant line U-pipe joints, and the end of the steering wheel linkage. These were the parts that kept making contact with the body sheet metal. Just note where stuff is contacting and add a piece of tape.
***
As of the time of writing, the dealership PN for the starter is A005-151-39-01-83. Not sure what the 83 means. Most sites will sell the starter with the MB PN A001-151-39-01. My understanding is that this PN applies to both automatic and manual transmissions.
The dealer starter is a (repackaged) Bosch. If going aftermarket, here are the PNs I would recommend.
Bosch 0-001-107-406
Valeo 438493
Denso 2805360
I'm sure there are other quality brands, but these are the ones I am familiar with and trust for something as critical as a starter. Be sure to do your homework. Personally I went with the Valeo.
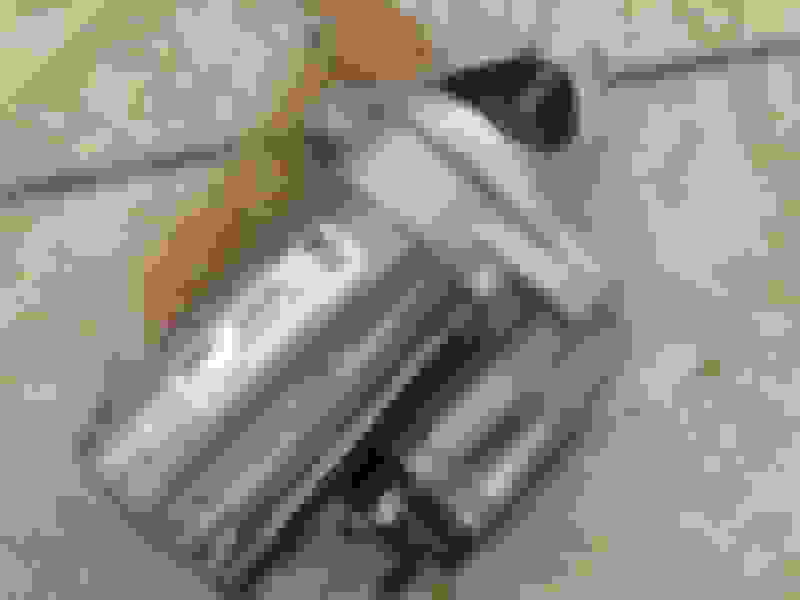
Old (original) MB/Bosch starter, MB PN 005-151-39-01, Bosch PN 0-001-107-406
New (aftermarket Valeo), PN 438493
Differences between Bosch and Valeo:
1) Every Bosch starter I found online (reputable sites) was rebuilt or remanufactured, as the PN is actually discontinued for some reason . I didn't check if this applied to the ones being sold at the dealer. Meanwhile, the Valeo ones are all brand new (ie not rebuilt).
1) The Bosch starter draws 1.1kW, while the Valeo starter draws 1.2kW. Probably not a big deal, but worth mentioning.
2) The Bosch has a clip for securing a cable running through the vicinity. Not sure what this cable does exactly. The Valeo starter does not have an equivalent clip, or an equivalent spot for installing one (I tried to transfer the clip over from the Bosch).
Bosch cable clip
I solved the problem by using a zip tie to secure the cable against a bracket. Not the best, but it moves the cable out of the way into roughly the same location. Time will tell if this works.
Below is an example of where I taped up the car. This line (looks like a 1) was caused by the refrigerant line rubbing repeatedly against the sheet metal before I noticed it and taped the area. The line is actually made of blue paint.
Rub marks on painter's tape
Last edited by slammer111; Oct 9, 2022 at 07:44 AM.
Straighten the wheels and jack the car up. Be sure to use jack stands. Safety first. Next, extend the steering column to its maximum length. Yes, this is required, and applies to both the power and manual adjustment options. If you have power seats or steering adjustment, be sure to do this before the next step.
Step 1 - Disconnect the battery
When disconnecting, disconnect the negative/ground cable first (11mm), then the positive terminal (10mm). When reattaching at the end of the job, reattach positive first, and negative last. Doing this in the wrong order will cook the front SAM. For those with power seats, I hope you extended the steering wheel before unplugging everything.
Step 2 - Secure steering wheel against turning
MB has some weird fancy steering wheel holder tool that probably costs an arm and a leg (PN 129-589-01-21-00 for those who are curious). I just tied a rope connecting the bottom spoke (3 spoke steering wheel) to the brake pedal. This is critical, as the steering column will be disconnected as part of the job. For a 4 spoke (non sport) steering wheel I imagine that securing the bottom of the steering wheel (between the 2 lower spokes) will work as well.
The forward tray (underneath the engine, towards the front of the car and touching the front bumper) does not need to be removed at all. The rearward tray uses 6x 8mm screws in total, 2 of which are shared with said forward panel.
Last edited by slammer111; Oct 9, 2022 at 02:01 AM.
At this point I should mention that my car is LHD, and that all of the subsequent steps were done while lying on my back, with the top of my head pointing towards the R (passenger) side of the car. In all of these photos, the front of the car is towards the R side of the photos.
Step 4 - Move refrigerant line (U-pipe)
The U-pipe is secured to a bracket using 2x short E10 screws. I recommend taping up the connection at the joint, as this part will be rubbing against the bodywork quite a bit. Some people online have mentioned that the line can tied out of the way, but personally I just let it flop around.
Hint - when removing all the other the parts in the next few steps, this U-pipe needs to be pushed towards the L side of the car.
Refrigerant line u-pipe
Last edited by slammer111; Oct 21, 2022 at 07:44 AM.
The official MB procedure involves completely removing the linkage ie removing both bolts. I found that this was unnecessary, though it would probably make the job easier. The bolt that I removed is towards the steering column end (as opposed to the steering rack end) and is 13mm.
The linkage is connected to the steering column by a shaft that slides in and out. After removing the screw, push the rubber boot towards the rear of the car and the inner piece will slide out.
Last edited by slammer111; Oct 7, 2022 at 08:04 AM.
The bracket (from Step 4) is attached to the transmission bell housing by 2 long E14 bolts. These bolts also attach the starter motor to the transmission. A short (2-3in) extension works great here, as there isn't quite enough room in the indents for most ratchets.
Last edited by slammer111; Oct 8, 2022 at 10:55 AM.
Step 7 - Remove cable bracket, transmission cooler line bracket
This bracket has some electrical connector and wires running out of it. I didn't check what the wires did. All I know is that the bracket was in the way.
Both screws are E10 and quite short.
Unscrewing the transmission cable bracket made the cable bracket easier to remove for some reason. Some people like to slide it out of the way (towards the transmission bell housing), but this is optional.
Last edited by slammer111; Oct 8, 2022 at 10:43 AM.
Some people were able to do the entire starter job with the muffler dangling with the side port (output, feeding into supercharger) popped out. Personally I found there wasn't enough room to get the starter out (no idea how people did it in the videos), so I removed it completely out of the car. If removing the muffler, crawl out from under the car and open/loosen the hose clamp connecting the hose (inlet, top port) to the airbox.
The official procedure includes removing the muffler.
The muffler is attached by 2x E10 bolts. I can't really describe the locations, except one is in the vicinity of the steering column bolt (it basically points at the screw removed in Step 3, see photo) and the other is basically located near the diagonally opposite corner.
The muffler is a pain to wiggle out. The best way to describe what to do is to move the bracket (Step 7) towards the R side of the car, the steering linkage towards the R side of the car (but not upwards), and the refrigerant line towards the L side of the car. The muffler may have to be rotated as well when snaking it out. This is an exercise in patience.
Last edited by slammer111; Oct 9, 2022 at 02:06 AM.
At this point the starter can be wiggled out of the spot. Now comes the next challenge - disconnecting the 2 electrical terminals. For the life of me, I cannot figure out how someone can exert enough torque on the terminal nuts without banging the starter all over the place. There is enough slack in the wiring to "point" the pointy end upwards, which gives access to the terminals. However, there isn't enough slack to drop the starter out of the car.
Can't remember exactly, but I think the negative terminal is 11mm, and the positive terminal is 13mm.
The positive terminal has an interesting safety cover/cap (the black thing with the MB logo). It isn't screwed on or snapped on but glued on. When reinstalling, this is where the krazy glue/epoxy comes in. Don't go too crazy with the adhesives - a dab or 2 will do.
Also note that the positive terminal nut is a nylock type.
Before trying to install the new starter, physically check to see that the holes on the new starter are threaded/tapped properly. I'm talking about actually threading the long bolts clean through both holes. Guess who found out the hard way during reinstallation and had to remove the supercharger muffler yet again. Turns out the holes in the Valeo unit were somewhat machined poorly. I had to ghetto tap the holes by forcing the bolts through in the opposite direction.
Last edited by slammer111; Oct 7, 2022 at 10:19 AM.
1) As mentioned in Step 10, verify that the starter motor mounting bolts thread easily into the holes of the new unit. The last thing you want to do is find out there's a problem when half the stuff is reinstalled. This is WAY easier while the replacement starter is still out of the car.
2) As mentioned in step 9, some sort of plastic/metal adhesive is needed to glue the cap back on. No idea what MB uses (the stuff was tea coloured and crusty, so I think it's some epoxy), so I just used krazy glue. My understanding is that threadlocker is a bad idea as it will eat/melt the cap which is made of nylon. I also imagine a dab of RTV sealant would work as well.
3) When reattaching the supercharger muffler hose (top port), this is where having a buddy is helpful. Have them stick the hose clamp back into the gap next to the airbox using the cable hose clamp pliers. Reach up from underneath the car and position the hose clamp in the "correct" position. Have the buddy hold the hose clamp still while you snake the muffler up into the space and pop the hose back in (surprisingly not too difficult). Having an extra set of eyes is very useful at this point to ensure the hose is properly popped onto the airbox outlet. At this point the buddy can release the pliers which tightens the hose clamp and leaves the muffler dangling. The muffler screws then can be reattached.
4) If your new starter is missing the clip mentioned in the intro, I found it was possible to tighten the cable against the bracket (step 6) with a zip tie.
5) As mentioned in step 1, the positive battery terminal must be reconnected before negative. Do not make an expensive mistake.
Total time spent was 10h. 2-3h was wasted because of the hole thread fiasco, which required me to redo steps 5-8. If I wasn't able to rethread the holes from underneath the car, I would've had to redo steps 9-10 as well. If I were to do the job again, it would probably take about 4h not including setup/cleanup.
Total cost for this job $228 CAD. Meanwhile the dealer wanted to supply a OEM starter ($513) with 1.5h labour for diagnostics (mandatory) and 5.0h book time for this job, for a grand total of $1994 after taxes. In other words, in this part of the world the dealer diagnostic often costs more than the entire DIY job, even if DIY time is factored in. Time to drink me some dealership coffees from their fancy machine.
Last edited by slammer111; Jul 17, 2023 at 01:44 PM.
Thanks for this information and is very helpful. I have the same issue but can not find the starter location. Is it at the passenger side? Mine is 2007 C230 2.6L (M271) and a right hand car in Japan.
Hi, I'm pretty sure you have a M272 engine, not M271. The 2.5L variant was sold as a C230 (not to be confused with C230 Kompressor) for MY2007. The starter has to be *somewhere* in the vicinity. Best to look online.
C230 Sport Coup + 2006 W164 ML350 + 99 Ford Escort RIP
Slammer, great job on this post, and you documented the whole process!
Kudos! Too bad, at least so far not that many people have read it.
I hope you don't mind me venting my recent frustration with my M111 starter
"project". I'm sure you can probably understand!
Shouldn't be a project, but I'm getting older, and things are not as easy as they were 21 years ago when I
1st purchased this car. I'm very glad I invested in the new locking jack stands, pads etc.
In the end I have all 4 corners off the ground. And despite my best efforts I still had to
run the extentions to the back of the tranny tunnel for the top bolt (on the starter) .
And my new low profile jack, while very nice, I still had to stack pieces of 2x4 to get it up high enough..
So, to the point of the matter. Once I finally got it up high enough to get my hands on the Gawd dang, mucking frucking thing, the
$%^&*()!@#^&*(!#$^&*()!#$^&* !!!! nut thats hold the main power to the selenoid was frozen!
Also on my car, once you have the starter loose, it's almost impossible to get to that
stupid &*(&*()&^^% nut! And over the years, I seem have lost a whole sheet load of my sockets!
So, westling with that stupid 10mm nut flat on my back, I finally got a good grip in it,
and pulled with everything I have and NADA!!!! Also the wire they use is soooo short.
Even with the starter loose, there is no room. Starter hangs but the wire is on top!
I put some liquid wrench, still no love,
Somewhere along the line my 1/4 10 mmm socket just disappeared at some point, no sign of it anywhere, seriously!
Both my 3/8 and some other spare 10mm were all
6 point, not deep enough, and my 10mm deep socket took a walk, no where to be found.ARRGH!
4 hours and couple hundred tries, I quit for the night.
Went back today and after trying every combination of
rachets and what not with no luck for at least an hour, I FINALLY broke down and opened up my brand new package
of Harbor Freight stuff swivel head sockets and damn if that and the liquid wrench finally got it.
12.99 for 3 of them! I didn't think I'd have enough leverage but with the liquid wrench sitting for a day and some serious
effort, it finally broke loose. https://www.harborfreight.com/flex-h...=rachet+swivel
Anyway, tested the old starter, yup. Dead as a doornail. MAGNETTI MARELLI!!!
I'll post a picture. My new one is Valeo like yours, made in Poland. Which in my mind is better than China.
I seemingly got the last one anywhere, no core and under $130 shipped!
Also discovered my trans pan leaking like a sieve, so need to take a look at that.
Service was done only 15k miles ago, so maybe just swap the gasket if need be.
Well back at it tomorrow. And pray I didn't blow the diodes on the alternator when I was jump starting it at the time
it died back in July and got the wires crossed momentarily. I only just replaced it a few months previous to the starter failing.
That's another hateful repair. Hoping I won't have to do it again!
EDIT- Well it's in! One thing I would add before trying to thread the bolts into the new starter
is to pre-thread them before putting it in place. Be careful not to cross thread.
For me, I put the bottom bolt in, then the top, and then remove the bottom bolt to put in the piece that
holds the refridge line and wires etc. and put it back. To hard to wrestle with it with the bracket there when
1st getting it threaded in.
So, now I just need to reconnect the steering column, determine if i need a new trans pan gasket
(leaking), put the pans back, top of the transmission fluid, and rotate the tires, since it's up on 4 wheels.
Hallelujah!
Last edited by C230 Sport Coup; Sep 6, 2023 at 02:58 PM.
Mercedes SLR McLaren 722 S Is Extremely Rare Example Modified by McLaren
Slideshow: A one-of-one U.S.-spec Mercedes-Benz SLR McLaren Roadster became even rarer after a factory-backed transformation at McLaren's headquarters.


 A healthy battery will be 12.8V when the engine is shut off after it has been driven for a while. If this is below 12.0V, the battery needs to be replaced. I once had the battery go bad and the car refused to crank below 11V (my understanding is it is a safety feature). The point is that the culprit may actually be a dead battery and not a bad starter in this scenario.

 . I didn't check if this applied to the ones being sold at the dealer. Meanwhile, the Valeo ones are all brand new (ie not rebuilt).


 If I were to do the job again, it would probably take about 4h not including setup/cleanup.


